

Results 21 to 35 of 35
Thread: 1973 Firebird Espirit Project
-
11-01-2021 #21
 Registered User
- Join Date
- Jan 2014
- Location
- Texas
- Posts
- 46

Covid happened and with my car being at my buddy's shop in another state, I didn't get back to my car until everyone could get vaccinated.
May 2021:
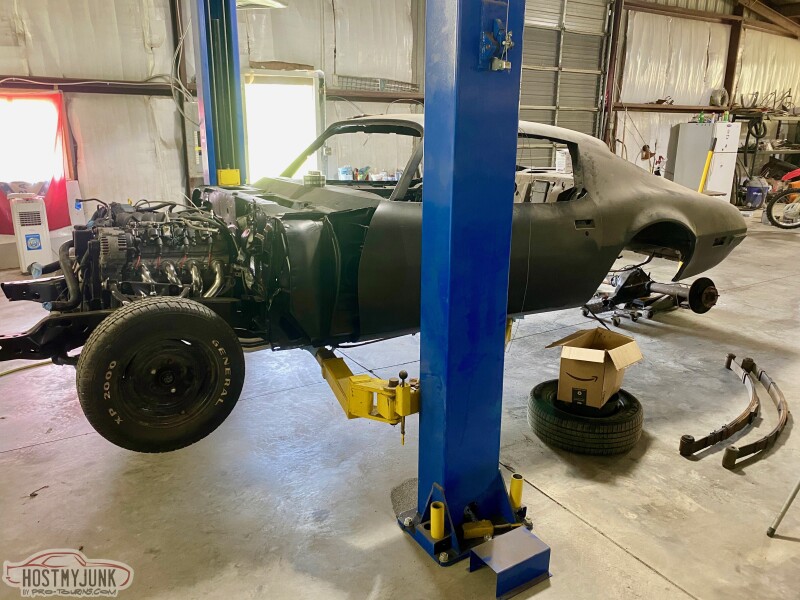
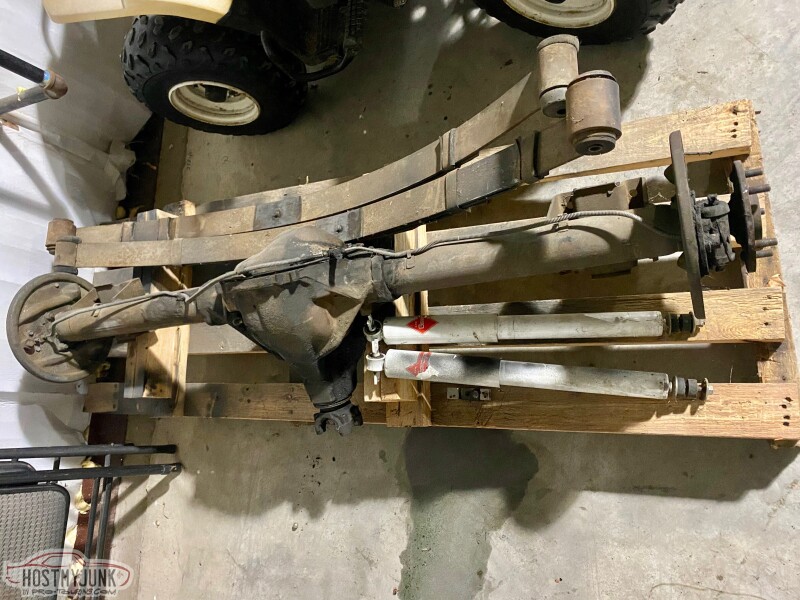
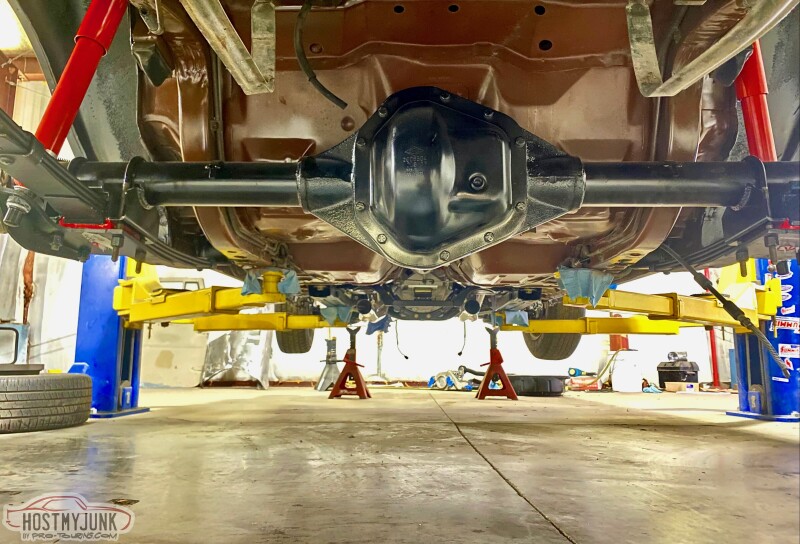
It was time to get my rear suspension sorted. First to take out the old GM 10 bolt (non posi) and factory leafs.
I phosphoric acid dipped, epoxied, and painted the hardware I would reuse.
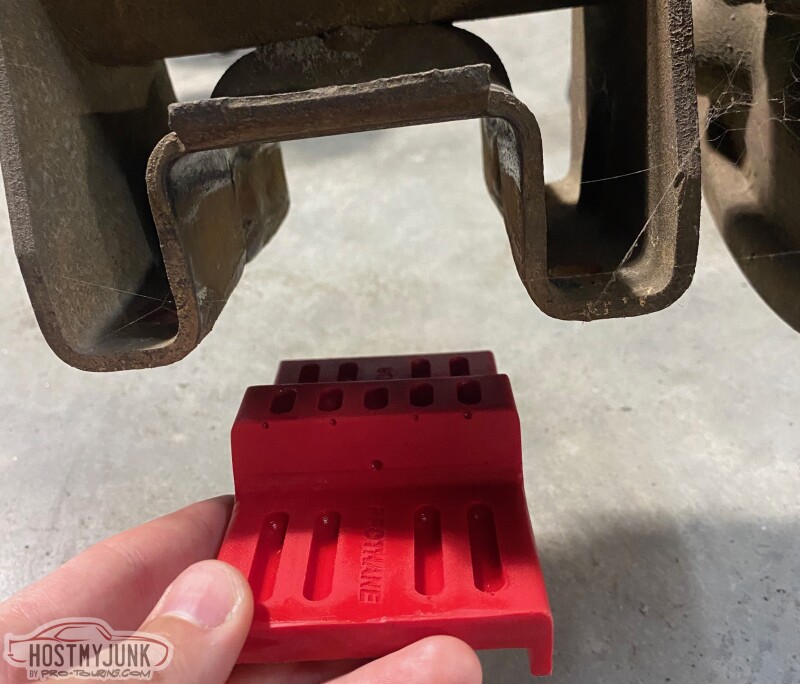
One thing I ran into was that my 73 bird had a hump in the axel perch where it meets the leaf. They used a 2nd gen upper isolator in the same shape like I ordered from Prothane which can be seen below. When I looked at my Strange rear, it had a flat perch. I assumed this must be the style/size of the 1st gen f body.
When I got ahold of a support guy at Strange, he was unhelpful. Even when I sent him pictures, spoke with him over the phone, and asked if maybe the perches were in the 1st gen style and if I should get that style isolator he just repeated "the mounts are the right style for your application". Ok dude... I'm just trying to get this rear end in the car. I will say the original sales specialist I dealt with when I ordered a couple years ago was super knowledgable, and went out of his way to save me some money and get me a better setup than I was even after. I went ahead and bought the 1st gen isolators from Energy Suspension and they did the trick. Maybe this will help someone else in the future.
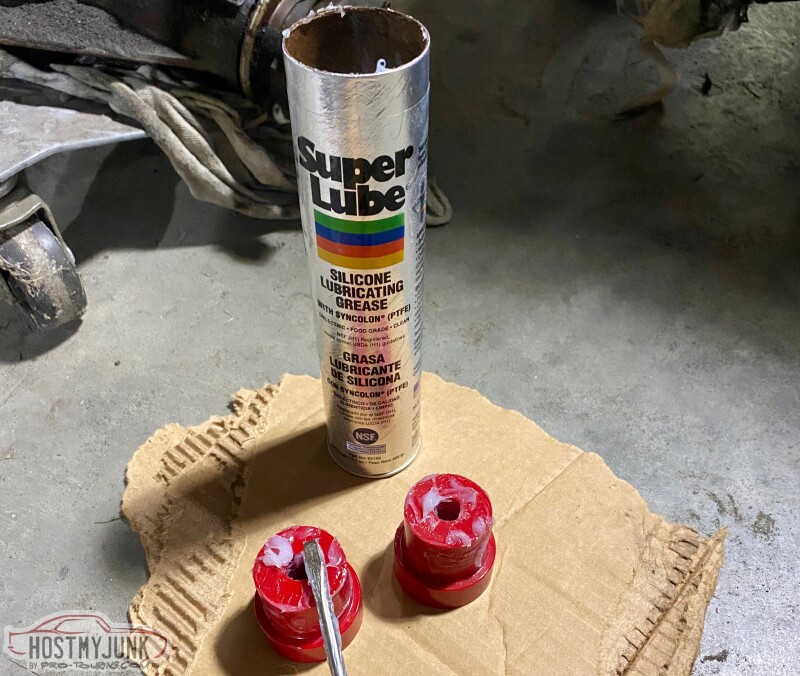
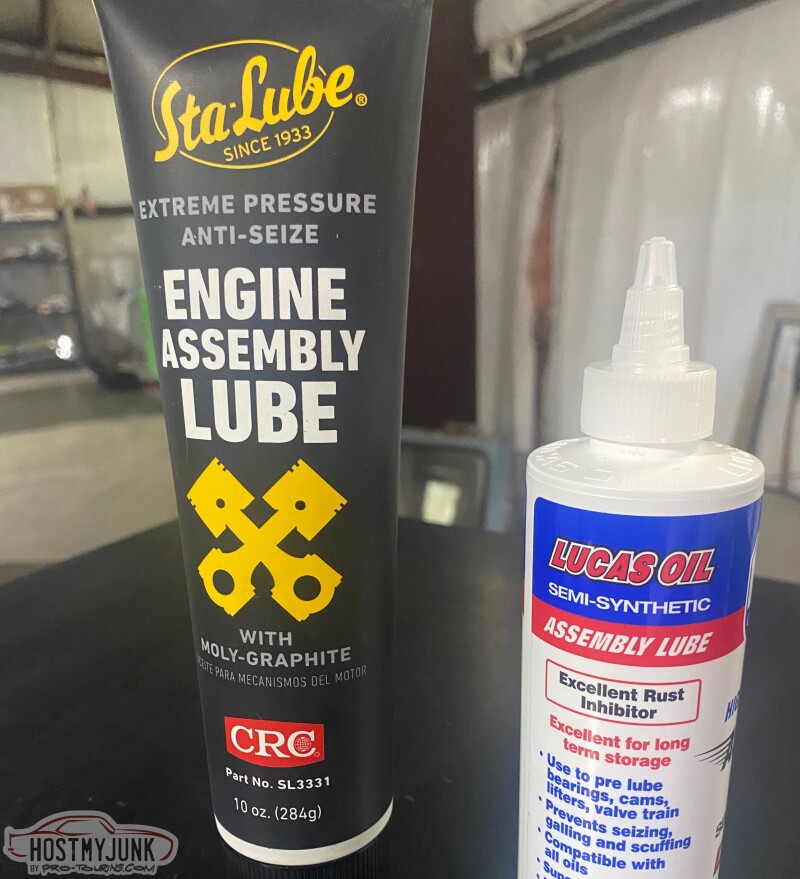
Speaking of isolators, this stuff is the same type of lubricant Prothane and Energy Suspension offer but in a cheaper/bigger tube.
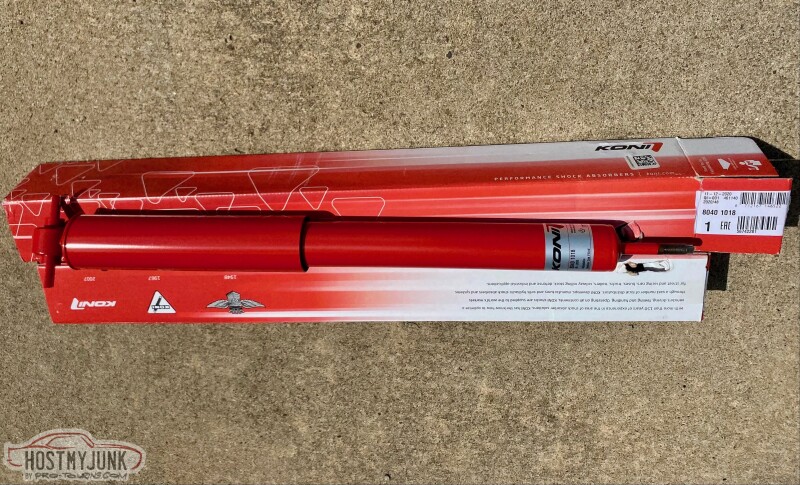
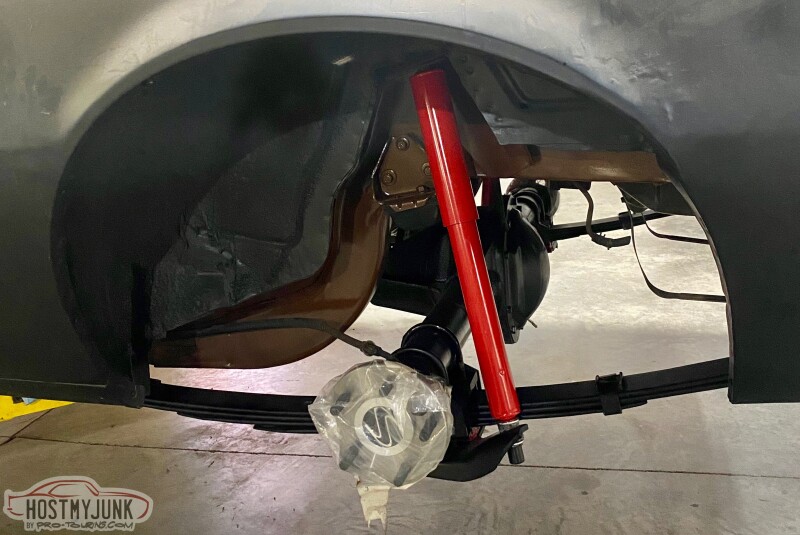
Picked up some Koni Classic Reds 8040 1018 and some Detroit Speed 3" drop Leafs
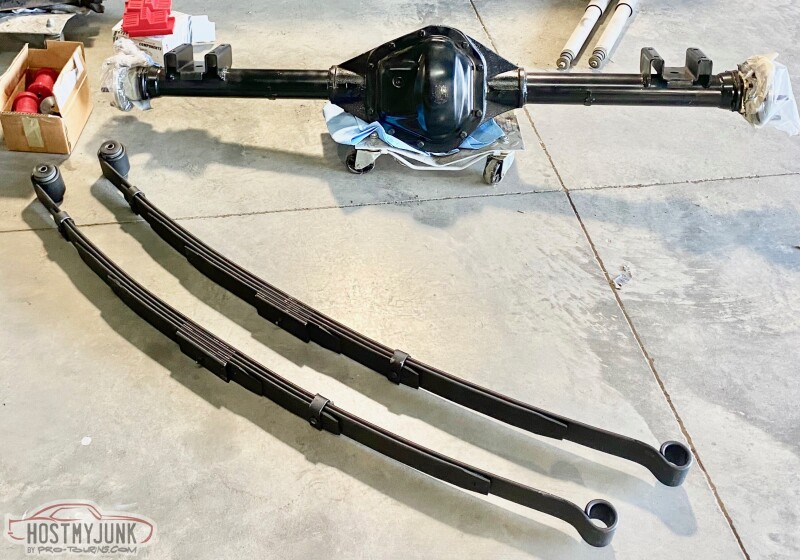
Be sure you order some J clip/u clip or whatever you'd like to call them ahead of time in order to re install your front leaf mounts. Every one of mine broke when removing, which I hear nearly always happens. Eventually we finagled it in!
-
11-01-2021 #22
Registered User
- Join Date
- Jan 2014
- Location
- Texas
- Posts
- 46
June 2021:
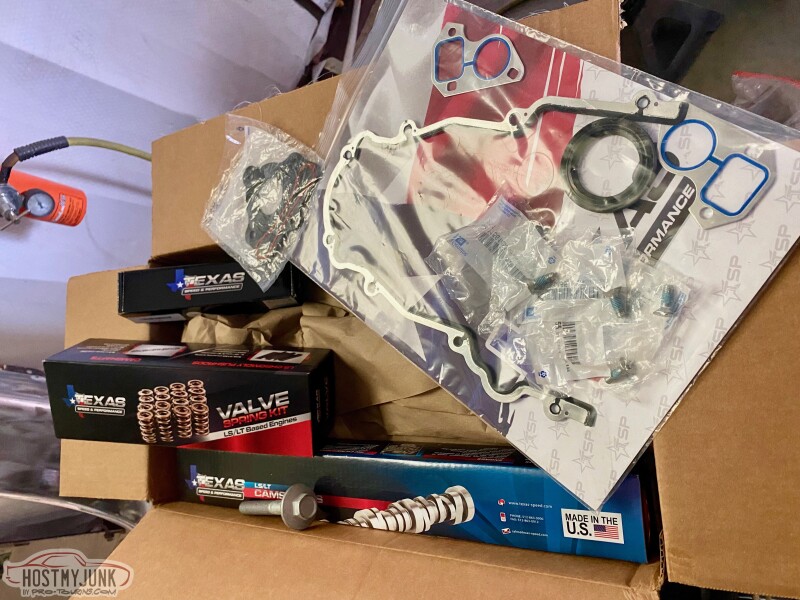
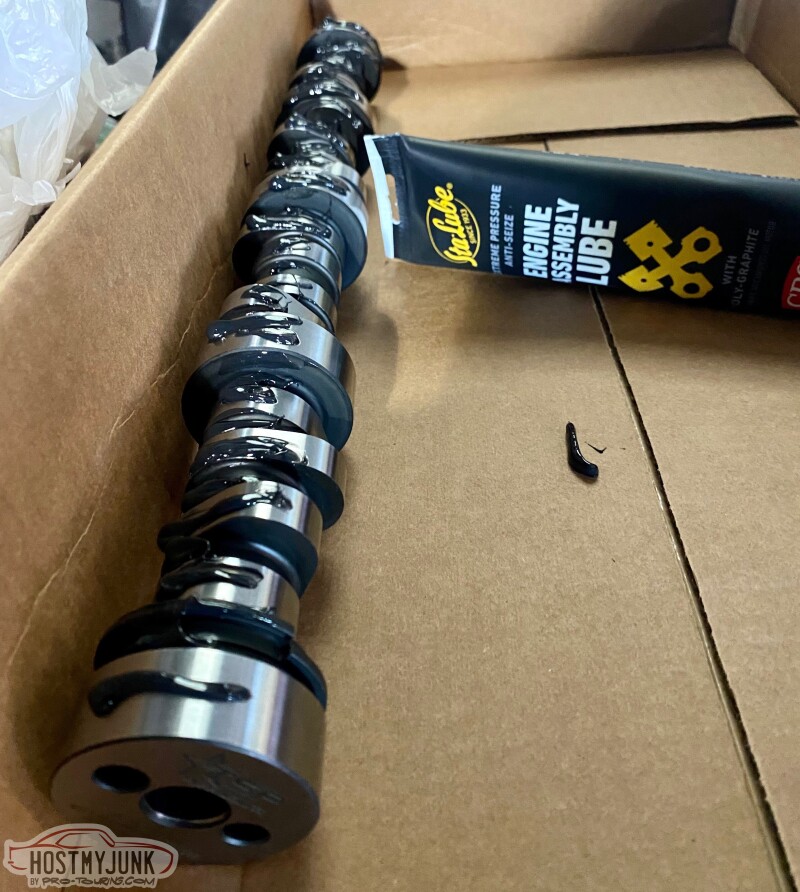
Time to put a cam in the LS2. Ordered:
Texas Speed Camshaft: 228/232,.600"/.600", 112 LSA 110 ICL
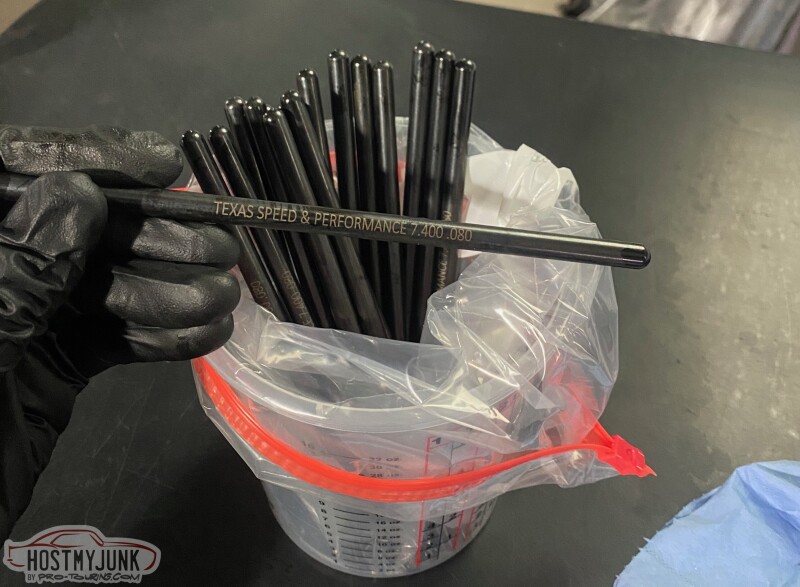
Texas Speed 7.40Chromoly Pushrods
Texas Speed Polished .660" Dual Valve Spring Kit with PAC Valve Springs & PRC Integrated Seat/Seal
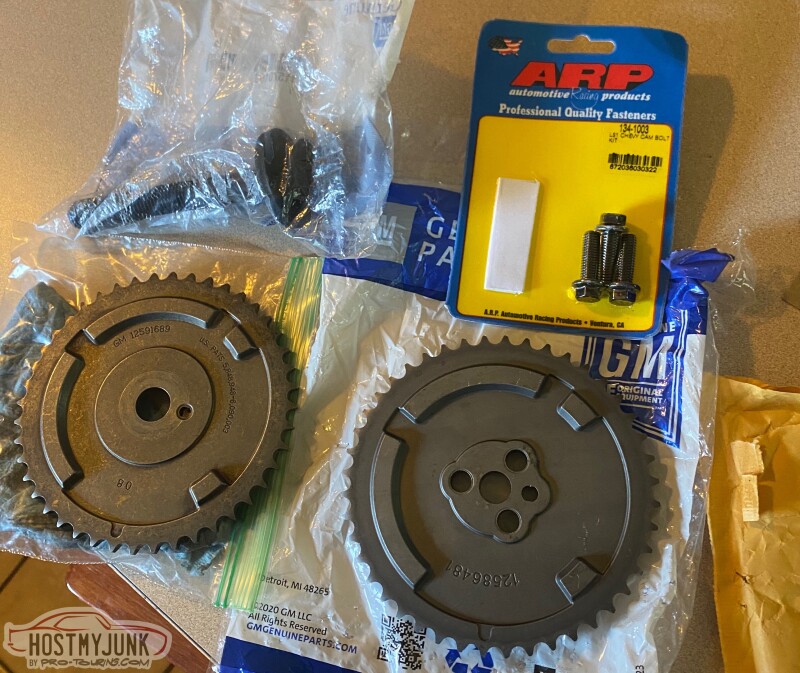
12589016 - GM Camshaft Retainer Plate
11561455 - GM Camshaft Retainer Plate Bolts (Countersunk)
12557840 - GM LS Wet Sump BalancerPulley Bolt
12585673 - GM Front Crank Seal
12630223 - GM Water Pump Gasket
12633904 - GM Timing Cover Gasket
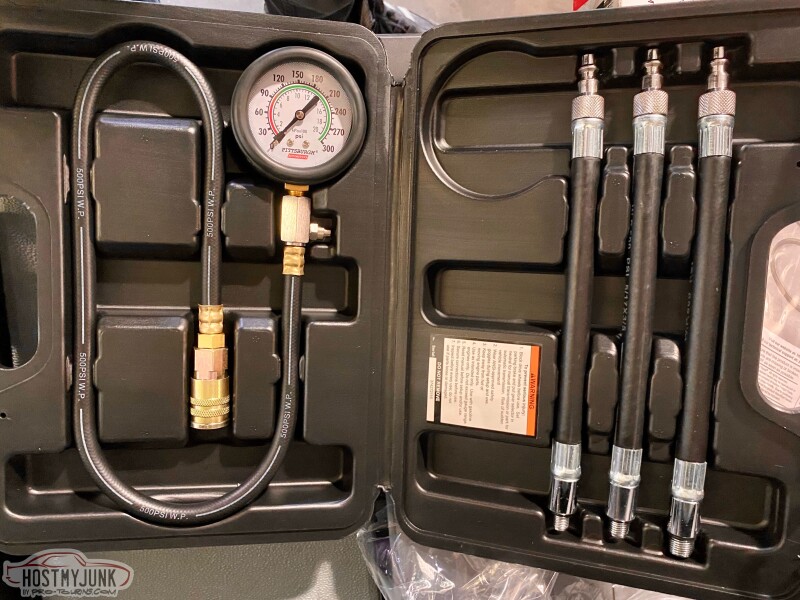
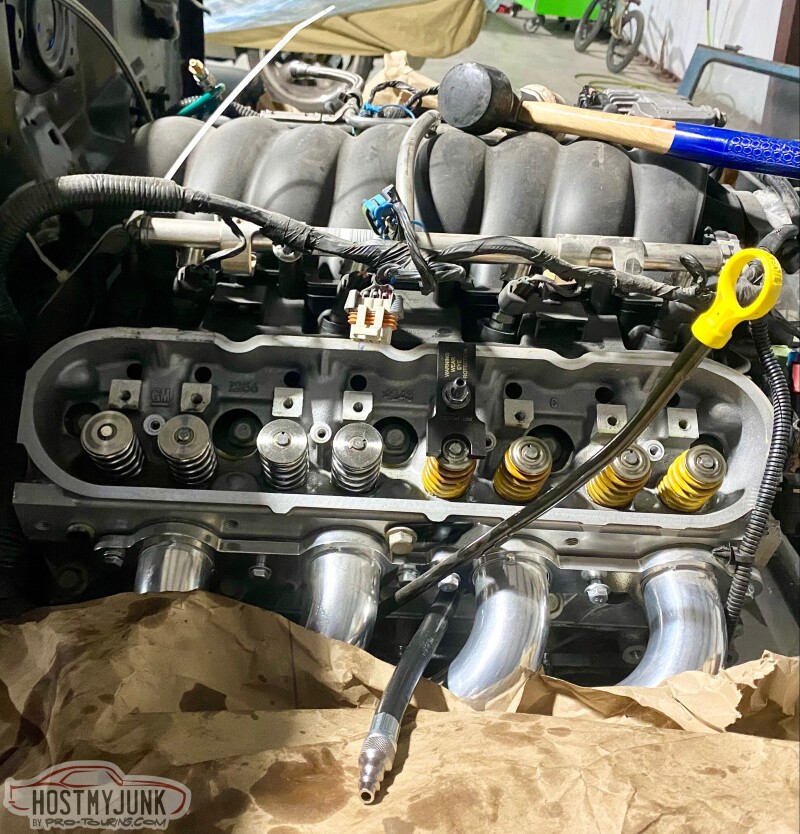
I used a Harbor Freight compression tester to fill the cylinders with air through the spark plug holes. Then I turned the engine to where two cylinders were at top dead center (TDC) and changed those springs and seats. I repeated this process 4 times to swap all 16 springs, rods, and seats for the 8 cylinders.
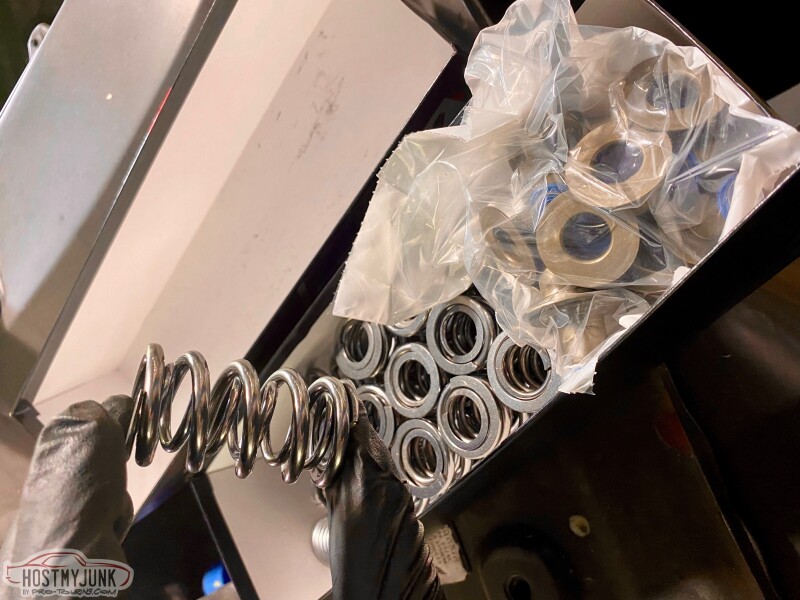
Yellow springs are the stock LS2 corvette springs, silver are the new Texas Speed.
I used the Lucas Assembly Lube for the top end. Because I don't know when I will actually get to crank the engine over, I used the thicker moly graphite CRC stuff on the cam itself.
The borrowed auto parts store puller didn't have a long enough bolt in it, so i had to do some sketchy stacking of washers and a bolt.
I used the greased up wooden dowel rod method to hold the lifters up. I was slow and gentle with the cam to make sure I didn't scratch any bearings, but I did get hung up on the last lifter in the top left (look close), it just barely touched the new cam when I was trying to put it in.
I ended up sticking a pen magnet through the pushrod hole to lift it back higher in the retainer tray and the cam slipped right in. I was pretty scared .
.
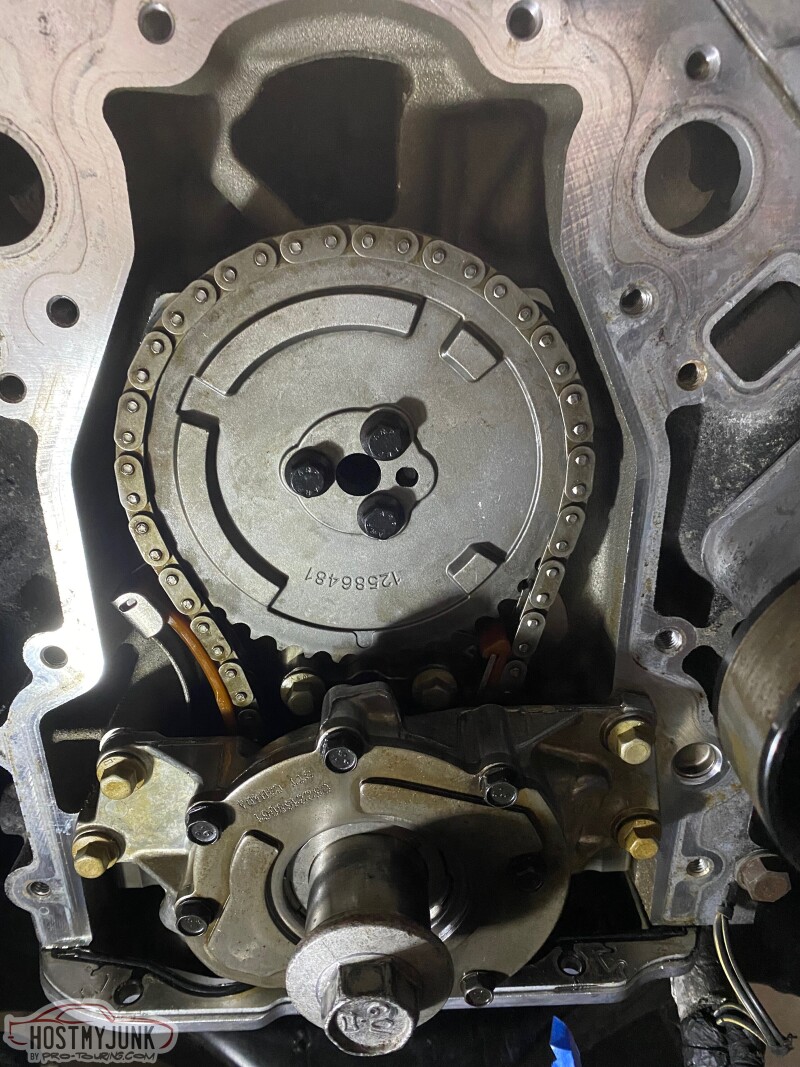
But guess what! I wasn't done ordering parts because it turns out my engine has the single bolt cam and the new cam used three bolts. So I needed new bolts and cam gear.
12586481 - GM Three-Bolt Timing Chain UpperSprocket
134-1003 - ARP LS1/LS2/LS6 Camshaft Bolt Kit
I also picked up a 11570163 - GM Dry Sump Harmonic Balancer Bolt for an LT1 in order to get the Harmonic balancer started on the crank, as this bolt is longer than the correct balancer bolt that cannot start the balancer. This is not the correct way to do it, since the bolt is longer, you can strip your crank if you tried to actually tighten the bolt all the way down. Better to use a tool for this job, but wanted to let you know this is an option if you are very careful.
Cam is in, but I wont be installing the harmonic balancer back on until I have my driveshaft so I can keep the engine from turning while I torque the balancer to the factory setting.
-
11-25-2021 #23
Registered User
- Join Date
- Jan 2014
- Location
- Texas
- Posts
- 46
July 2021:
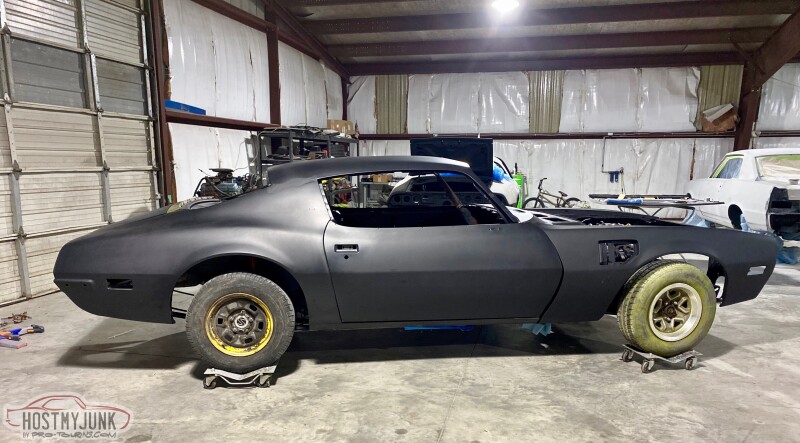
Since I'm hellbent on running trans am fenders and sold my perfect firebird fenders, I dug through a few sets I had on hand and found the ones I think were in the best shape that shouldn't need much if any metal work. I also stripped my radiator housing that has been sitting out back of the shop for a few years and took it all up to the sand blasters.
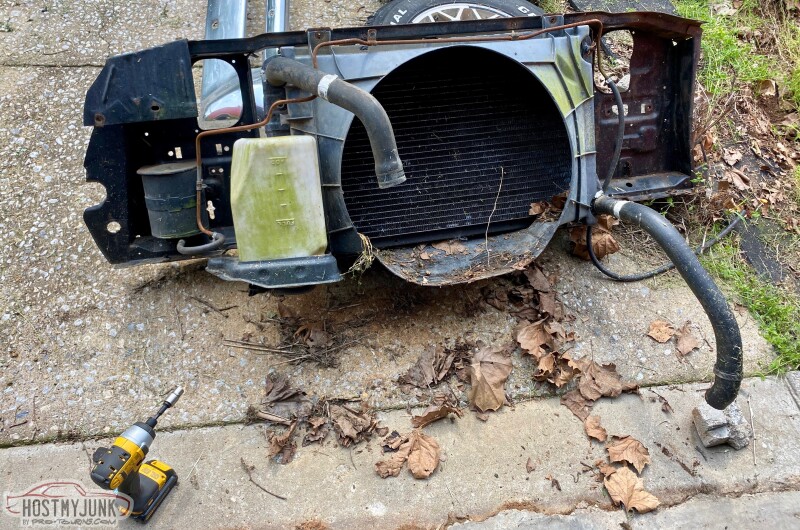
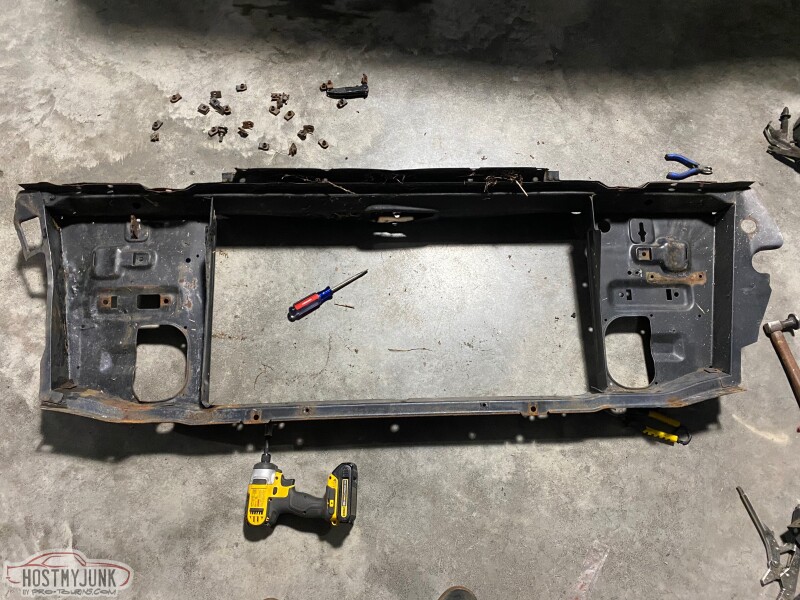
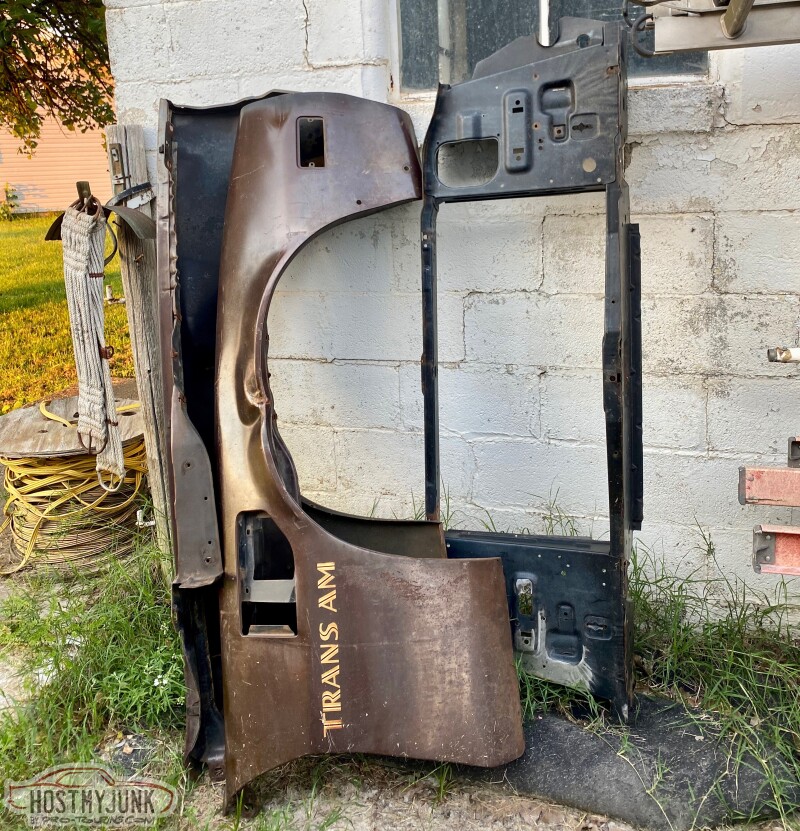
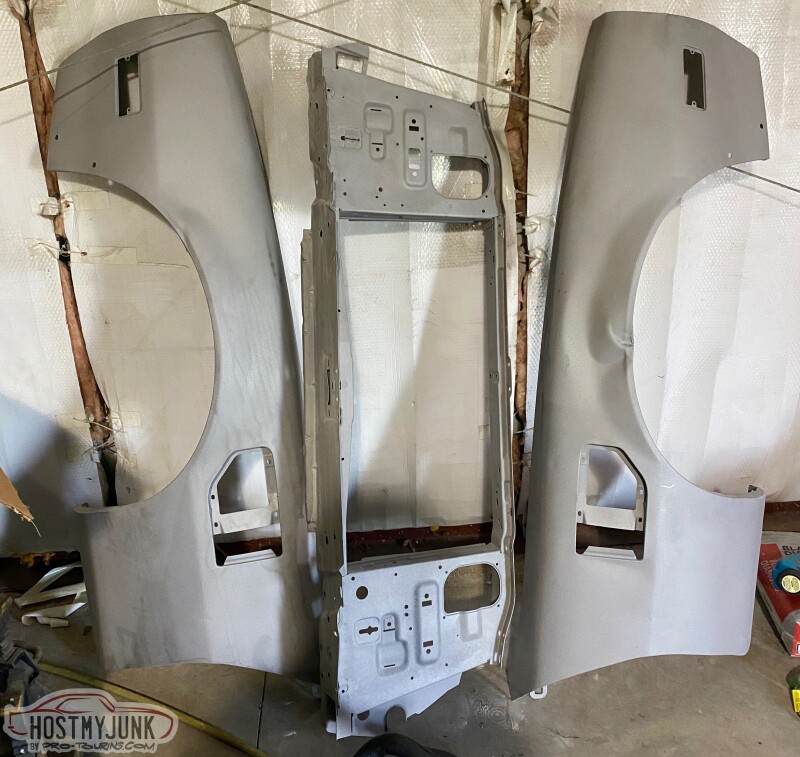
Both the fenders and radiator had some pretty gnarly body damage, but my buddy was nice enough to trade me some other fenders I didn't use to do some rough body work to get them in a decent shape for now. Lots more work will be completed when we massage the whole car prior to paint.
The polyurethane radiator core mount bushings are no where near as forgiving as the stock rubber bushings, so I had to make perfect circles out of the factory imperfect oval holes in the subframe. I had to do the same with the radiator core support as well.
Epoxied the fenders and radiator core mount, then installed the core mount.
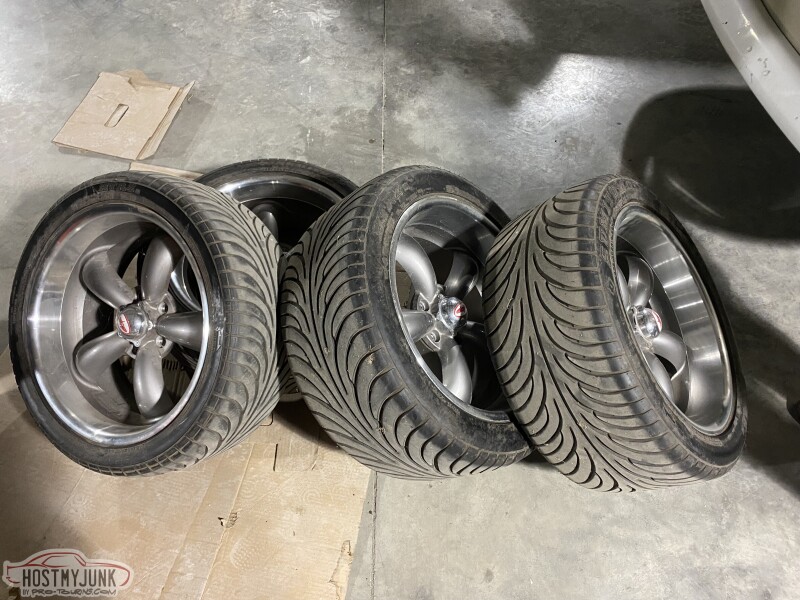
A friend of a friend who bought my old Richmond 4 speed manual trans ended up wanting my old coy's wheels that I wasn't going to use. They look sooo much better on his car than mine.
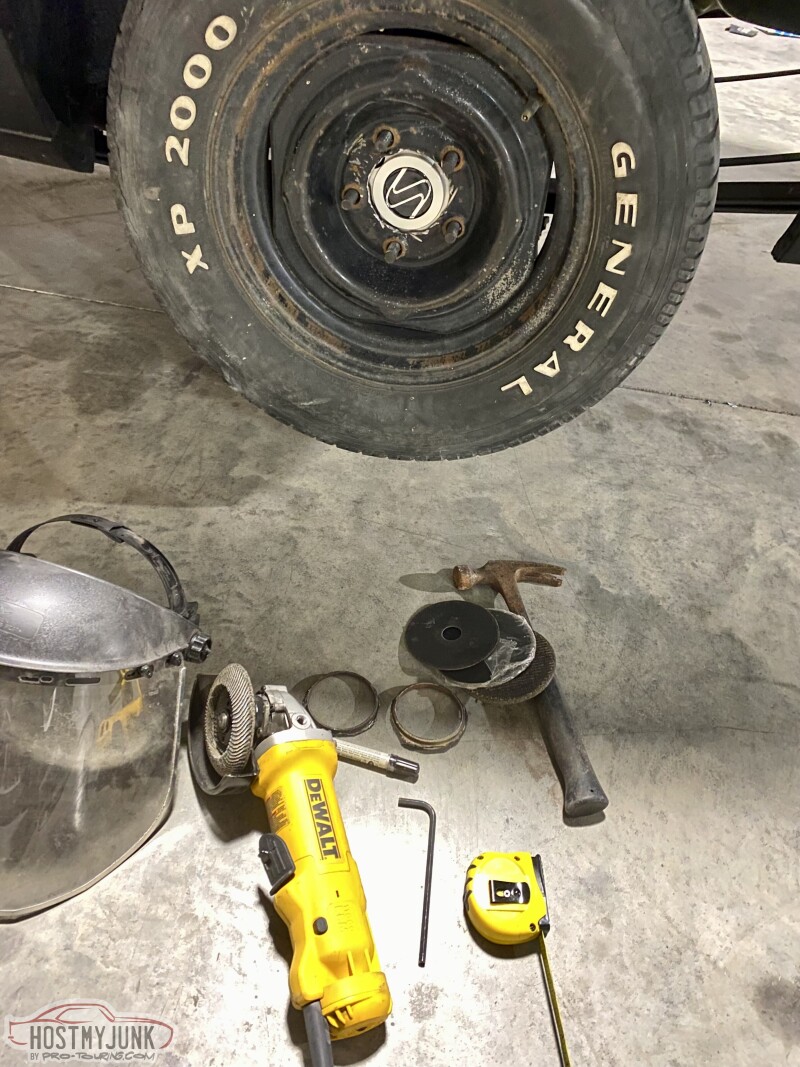
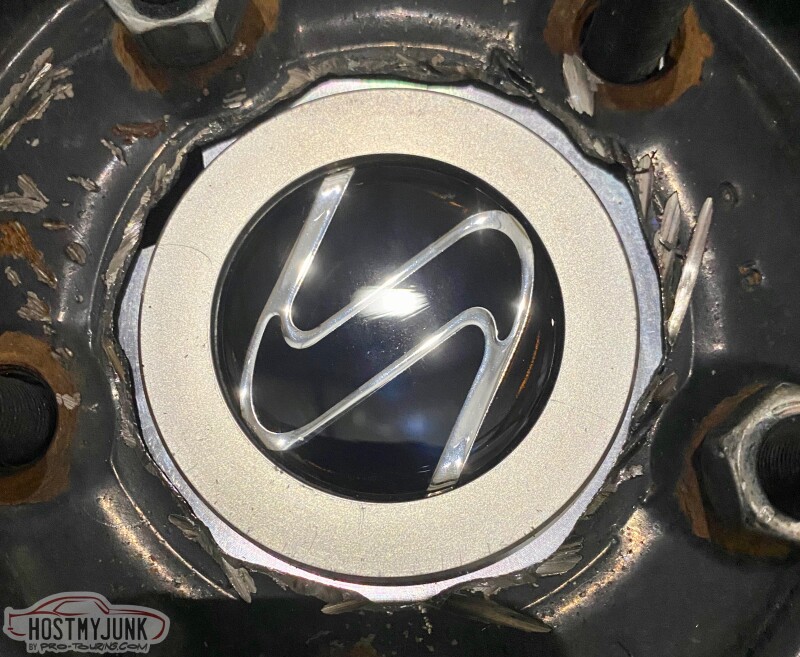
Now I needed to have some roller wheels to push my car around the shop. My buddy loaned me some, but I had to take a cut-off wheel to them and enlarge the center so they would fit my hubs on the new rear end haha.
This teaser pic shows the fenders hung but they are nowhere near functionally fitted/aligned.
-
11-26-2021 #24

 -Moderator/Sponsor-
- Join Date
- Apr 2001
- Location
- The City of Fountains
- Posts
- 15,975
Nice progress. Is that a Strange S60 car end?
Andrew1970 GTO Version 3.0
1967 Cougar build
GM High-Tech Performance feature
My YouTube Channel Please Subscribe!
Instagram @projectgattago
Dr. EFI
I deliver what EFI promises.
Remote Holley EFI tuning.
Please get in touch if I can be of service.
"You were the gun, your voice was the trigger, your bravery was the barrel, your eyes were the bullets." ~ Her
-
11-26-2021 #25
 Registered User
- Join Date
- Oct 2004
- Location
- IL/TN
- Posts
- 909
quick suggestion, on the leaf spring pads, I would use rubber and hope there is no lub on them, they will cause the rear end to shift.
https://www.protouringf-body.com "doing what they say can't be done"
-
11-26-2021 #26
Registered User
- Join Date
- Jan 2014
- Location
- Texas
- Posts
- 46
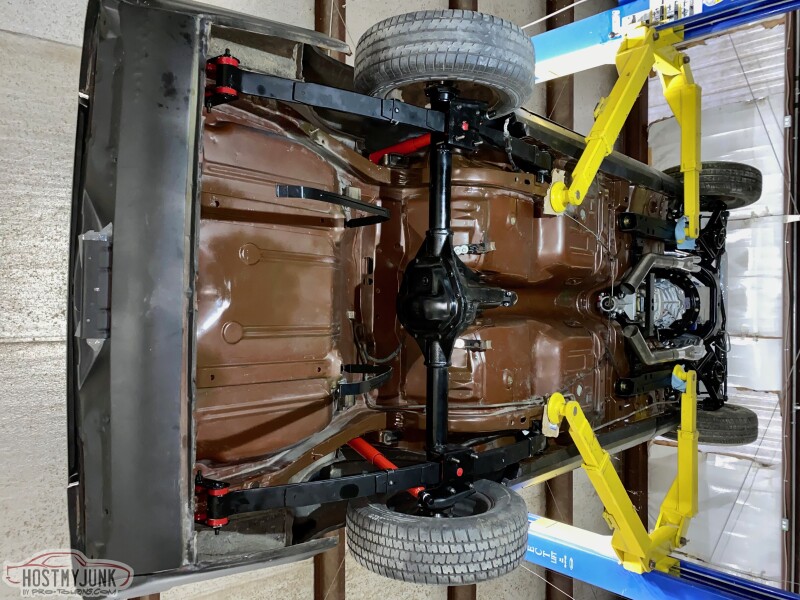
andrewb70, Thank you! And as for the rear, sure is a Strange S60. With the 35 spline, I'm hoping it is overkill for the mild power and likely a few missed shifts that I'll be throwing at it.
79T/Aman, Thank you for the feedback. I will definitely keep a close eye on them once I get it moving around under its own power and can test out quite a few other things for bugs.
November 2021:
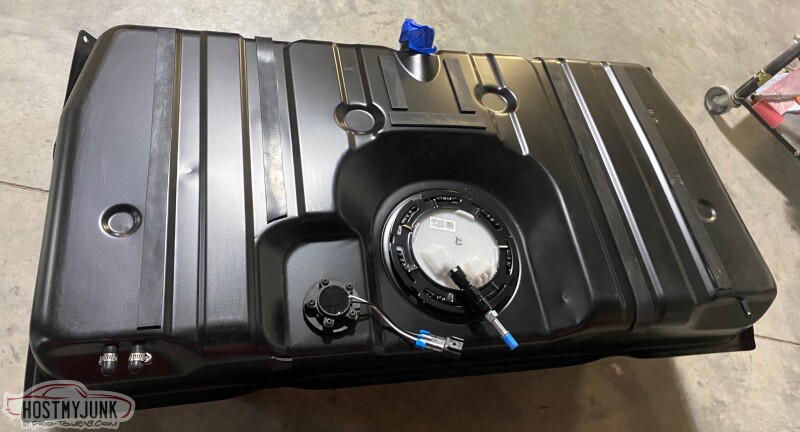
I decided it was time to tackle the fuel injection conversion and assumed I'd go with one of the Holley in tank conversion fuel pump solutions. After doing quite a bit of research and realizing the shortcomings of the factory tank (sloshing when cornering/accelerating) combined with a conventional fuel pickup, I removed the old tank while I mapped out exactly how I planned to manage the fuel delivery.
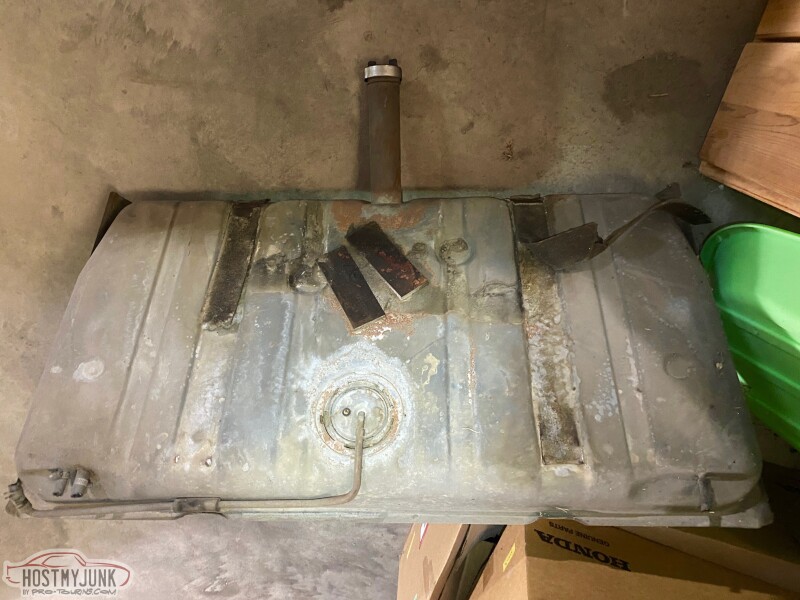
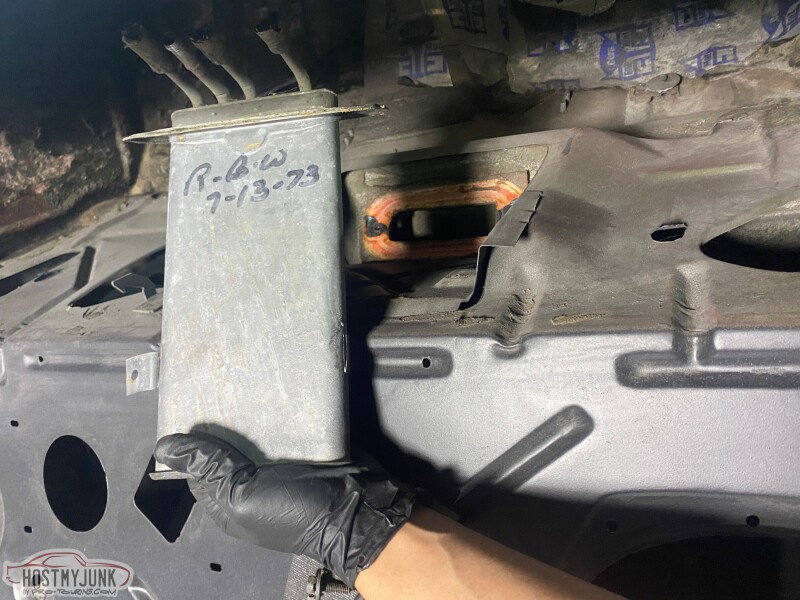
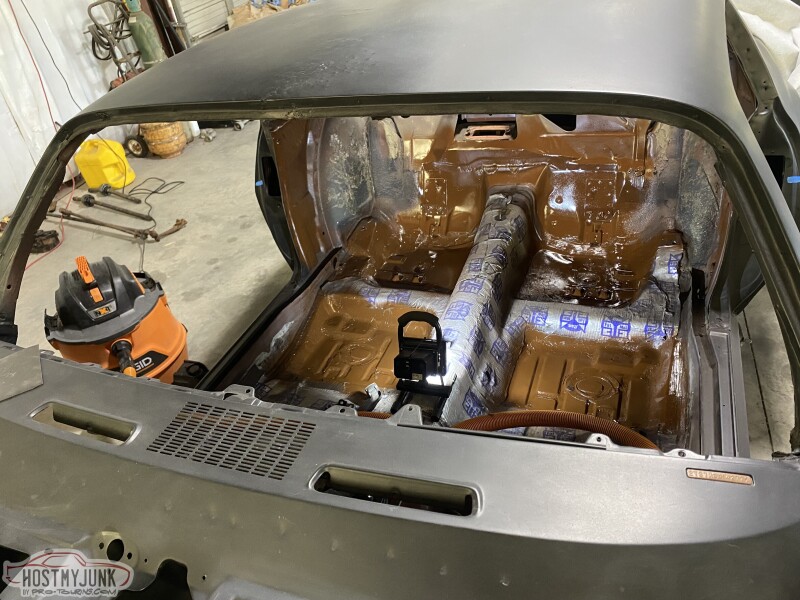
I was also pretty happy to toss the old fuel emissions canister from behind the rear seat. Blows my mind they put this thing INSIDE the passenger compartment.
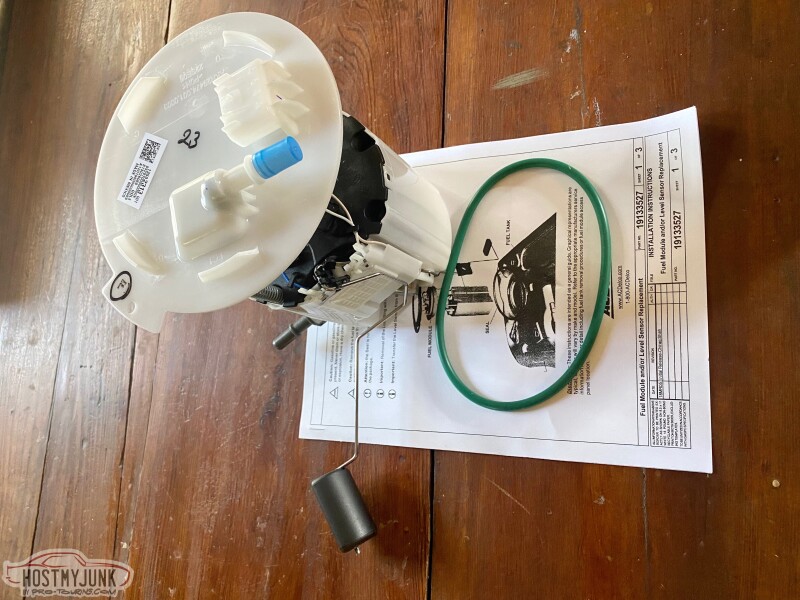
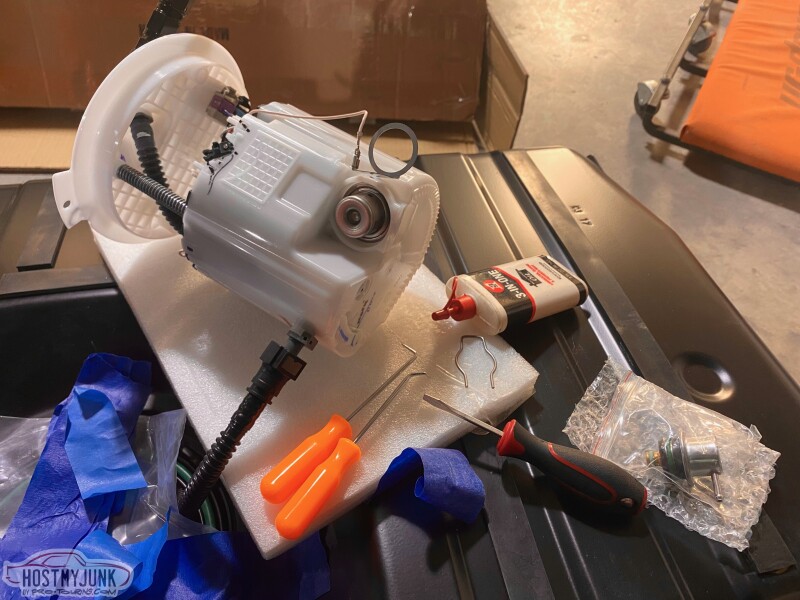
Researching, I saw those pickup pad things Holley sells that seem really cool/effective, but ultimately I decided I'd rather just use a Gen 6 Camaro SS Fuel Pump Module MU1959. This allowed me to run a single line to the fuel injector rail, no return line. This fuel pump module has a bucket to surrounding the pump so it stays submerged in cool fuel.
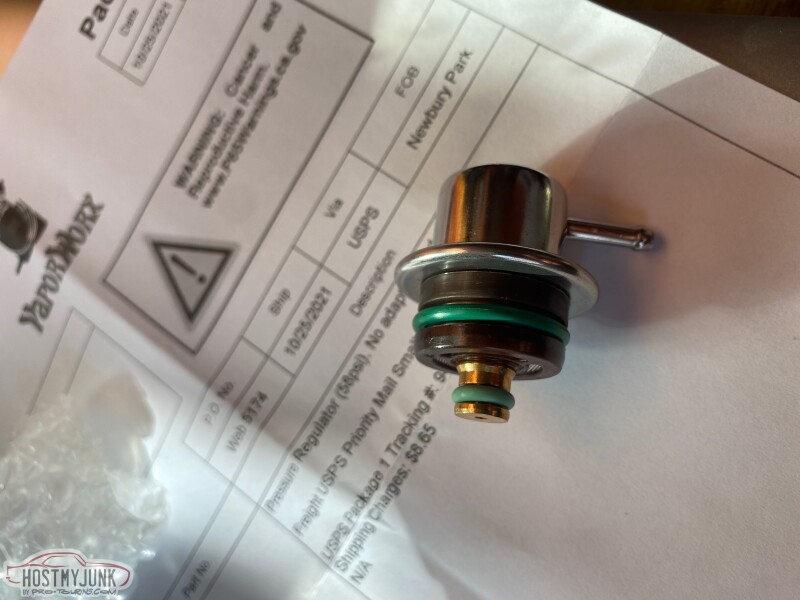
I was able to use a conventional fuel pressure regulator/governor in tank. I got the 60psi regulator to fit the gen 6 camaro module from vaporworx. They were super helpful very nice answering all of my questions and even giving some helpful tips and tricks I hadn't thought of asking about.
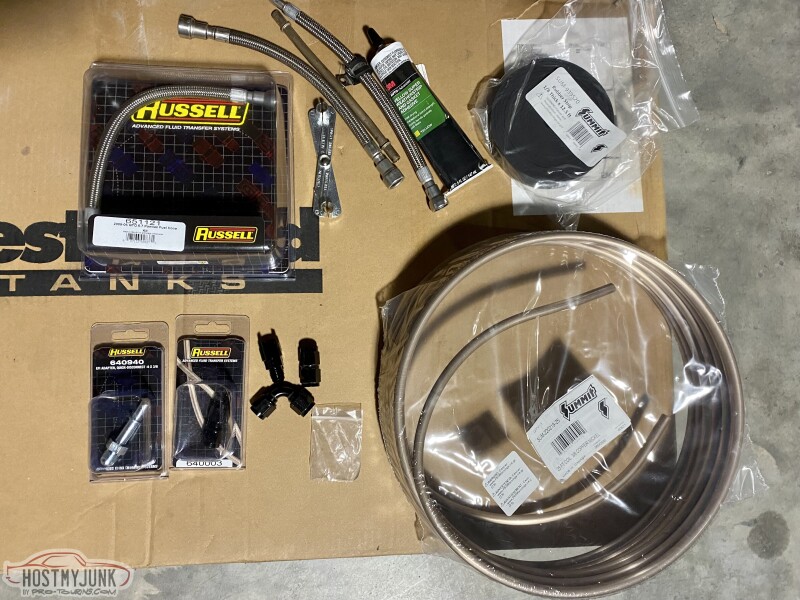
Decided to go with a Ricks RestoMod Tank, which gave me the ability to easily run corner pickups to make it about impossible to starve the pump of fuel due to sloshing.
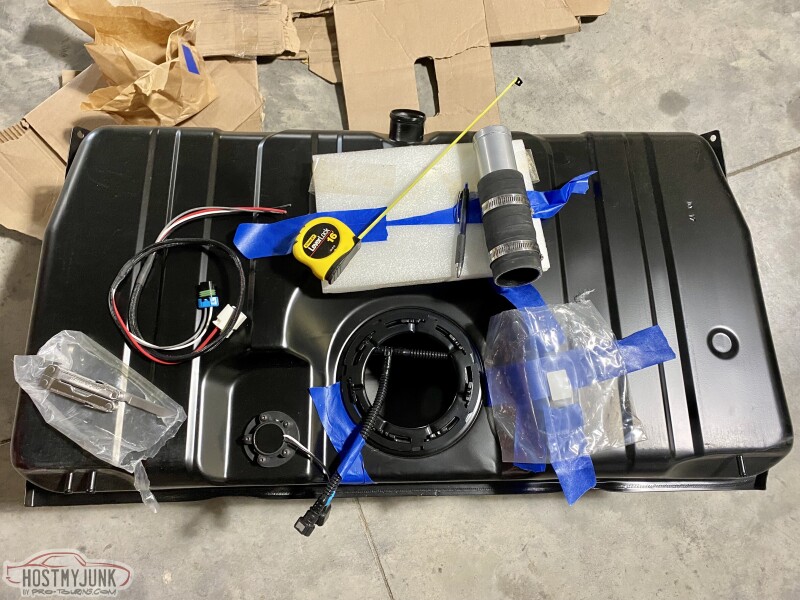
I picked up some odds and ends to support the tank install. Of note, some tank pad stripping and some weather stripping adhesive. Holley had the Earls NiCopp tubing on backorder so I picked up the Summit branded stuff that says its made in Canada and hoped for the best. Turns out it is much harder to bend by hand compared to the spare Earls stuff my friend had sitting on his shelf. So hopefully this doesn't contribute to me having forming nightmares once I get to that step.
I replaced the factory pressure regulator and removed the fuel gauge sending unit float arm. I could have left the arm on and used it later as a back up if the better sending unit I had were to ever go out... but removing it let me turn the pump to an angle that will help me better run my fuel lines under the car.
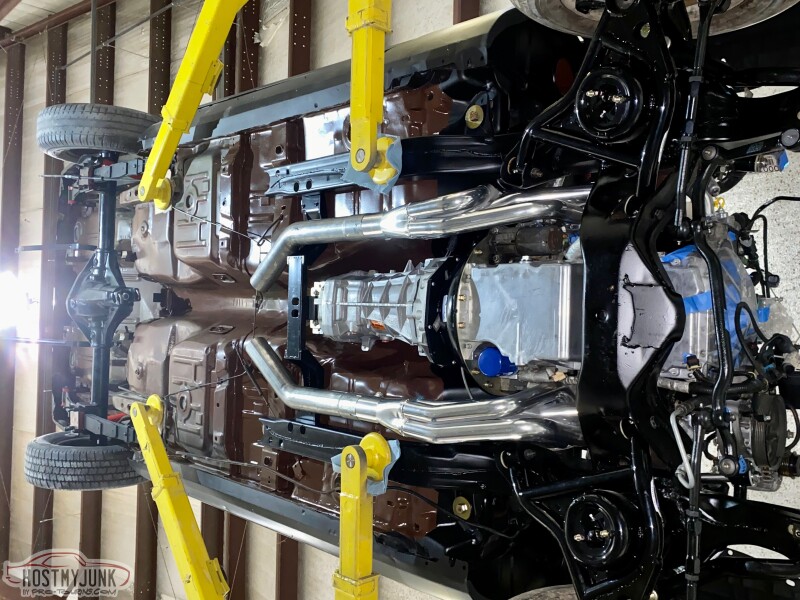
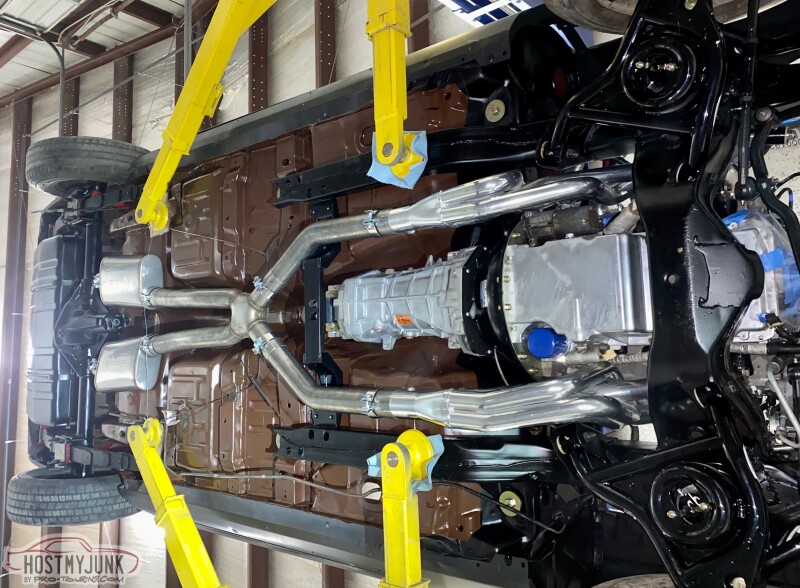
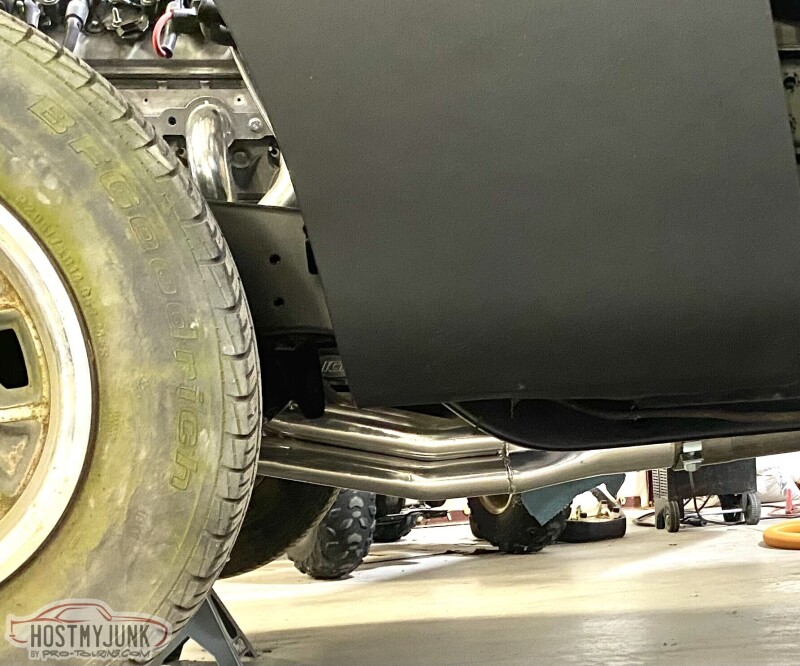
Pulled the Stainless HOOKER BLACKHEART LS SWAP HEADER-BACK EXHAUST I had waiting in storage so I could mock up and make sure the tank, exhaust, and lines would all work together.

The carriage bolts that came with the Ricks tank are way too short to actually install the straps around the tank with padding strips. Luckily Lowes had about every size you could imagine and the first pair I took home from them worked perfect lengthwise.
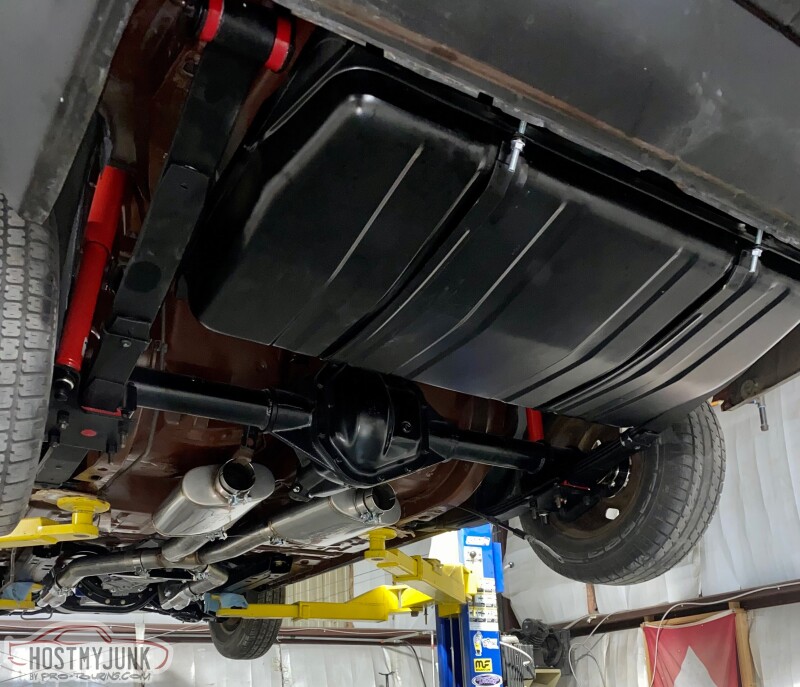
Still need to run fuel lines, install the exhaust hangers, and button all the clamps up, but its looking pretty good I think.
-
11-27-2021 #27
-Moderator/Sponsor-
- Join Date
- Apr 2001
- Location
- The City of Fountains
- Posts
- 15,975
Please tell me you still have that canister! I've been looking for one for a long time.
1970 GTO Version 3.0
1967 Cougar build
GM High-Tech Performance feature
My YouTube Channel Please Subscribe!
Instagram @projectgattago
Dr. EFI
I deliver what EFI promises.
Remote Holley EFI tuning.
Please get in touch if I can be of service.
"You were the gun, your voice was the trigger, your bravery was the barrel, your eyes were the bullets." ~ Her
11-27-2021 #28 Registered User
- Join Date
- Aug 2005
- Location
- Hamilton, NJ
- Posts
- 4,295
Looking forward to watching this build.
S60? I thought you were watching weight! Scott from NJ.
Vent Windows Forever! ...
Feather-light suspension, Konis just couldn't hold
I'm so glad I took a look inside your showroom doors
11-27-2021 #29
Registered User
- Join Date
- Jan 2014
- Location
- Texas
- Posts
- 46
Hey Andrew, are you looking for the cali Fuel Vapor Separator behind the seat or the Charcoal Canister that was connected to the radiator core support? If I remember, the charcoal canister was FULL of ants after the radiator assembly sat, I can check here in a few days if I have it still but not super likely. The vapor separator I was just thinking to toss on ebay incase there were folks doing correct restos on cali cars. Let me know.
BonzoHansen, haha I know right! Well supposedly the new aftermarket Danas like the S60 is a ton lighter than the original equipment Dana 60 rears from back in the day. Should only be about 20-40 lbs heavier than the 12inch depending on setup. I was pretty set on fitting a 35 spline non clutch posi so I'm excited to (one day) try out this S60 under some hard driving!
11-28-2021 #30
-Moderator/Sponsor-
- Join Date
- Apr 2001
- Location
- The City of Fountains
- Posts
- 15,975
I'm looking for the vapor separator. Sending PM.
Andrew1970 GTO Version 3.0
1967 Cougar build
GM High-Tech Performance feature
My YouTube Channel Please Subscribe!
Instagram @projectgattago
Dr. EFI
I deliver what EFI promises.
Remote Holley EFI tuning.
Please get in touch if I can be of service.
"You were the gun, your voice was the trigger, your bravery was the barrel, your eyes were the bullets." ~ Her
02-06-2022 #31
Registered User
- Join Date
- Jan 2014
- Location
- Texas
- Posts
- 46
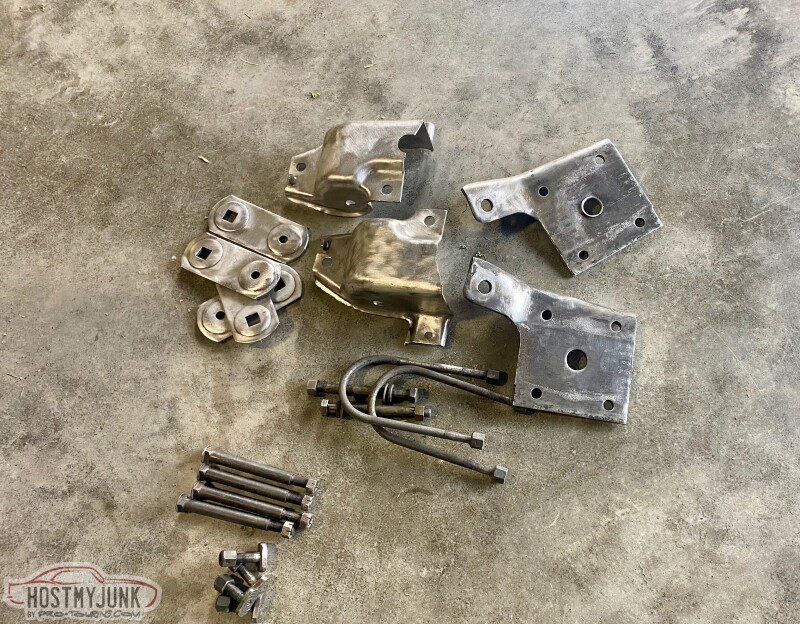
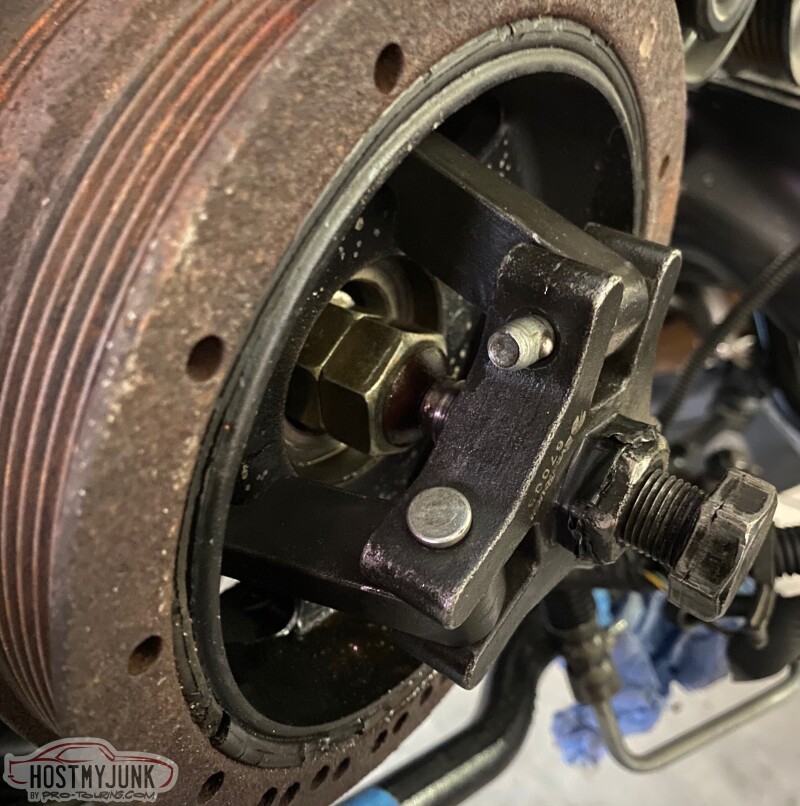
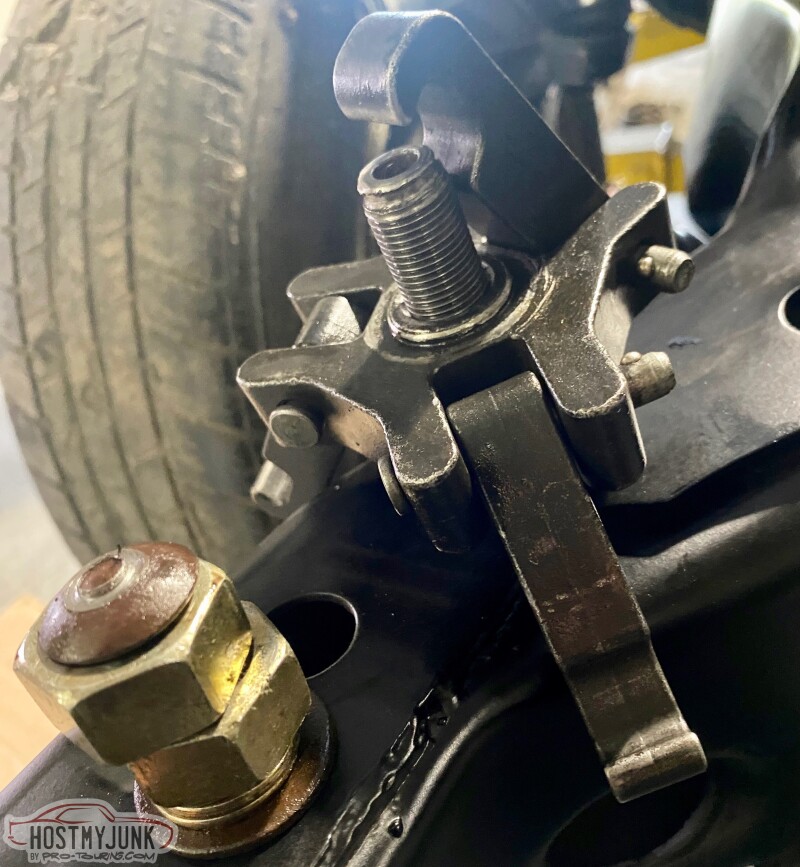
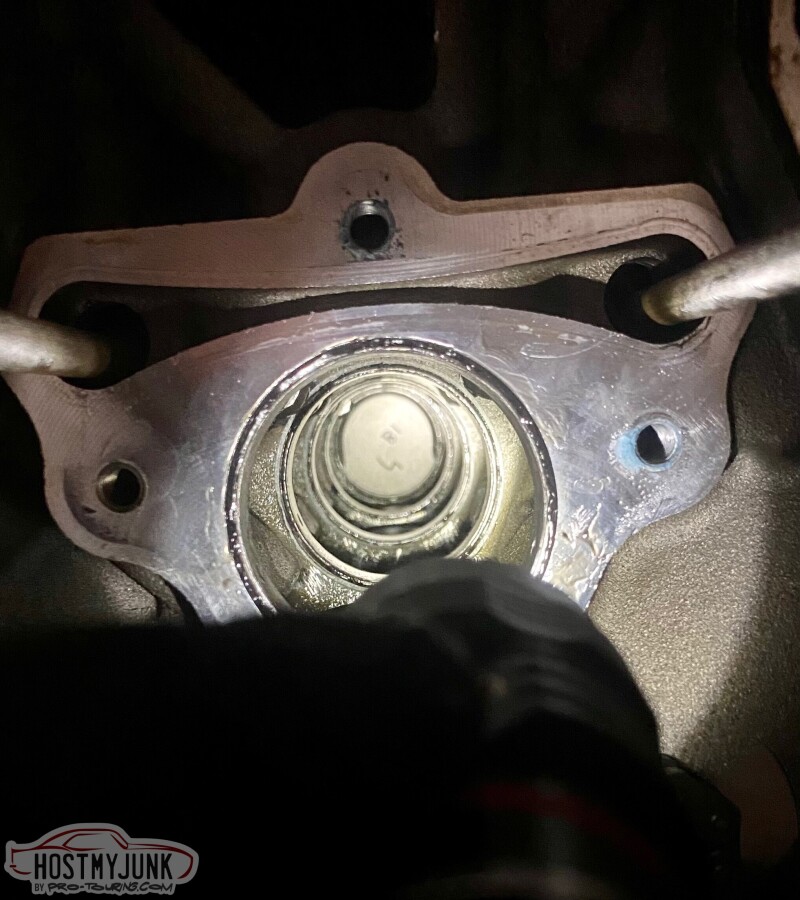
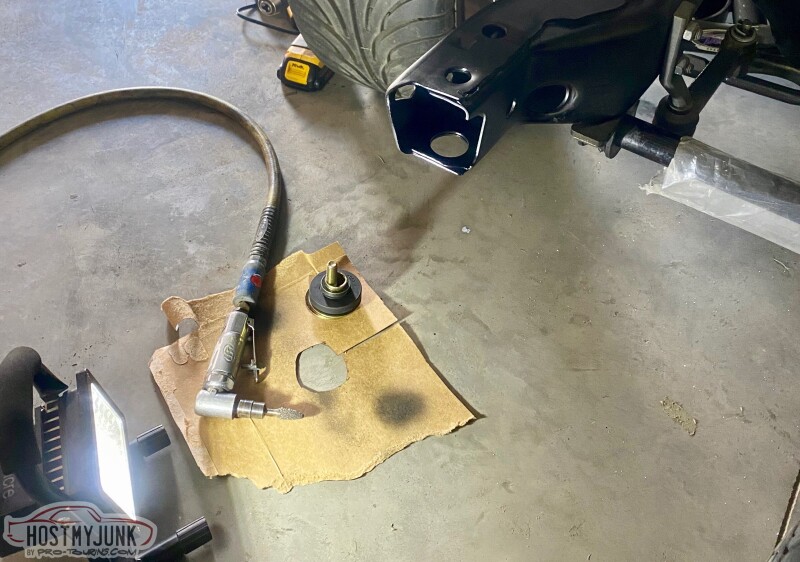
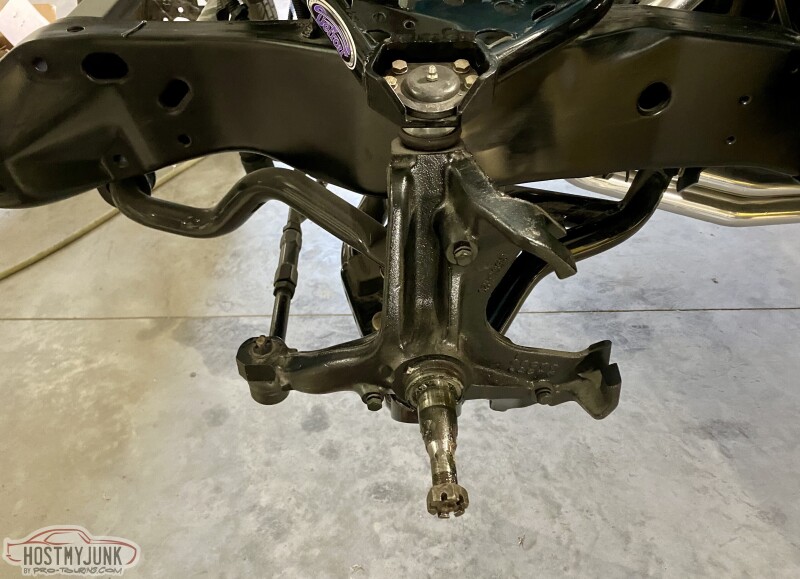
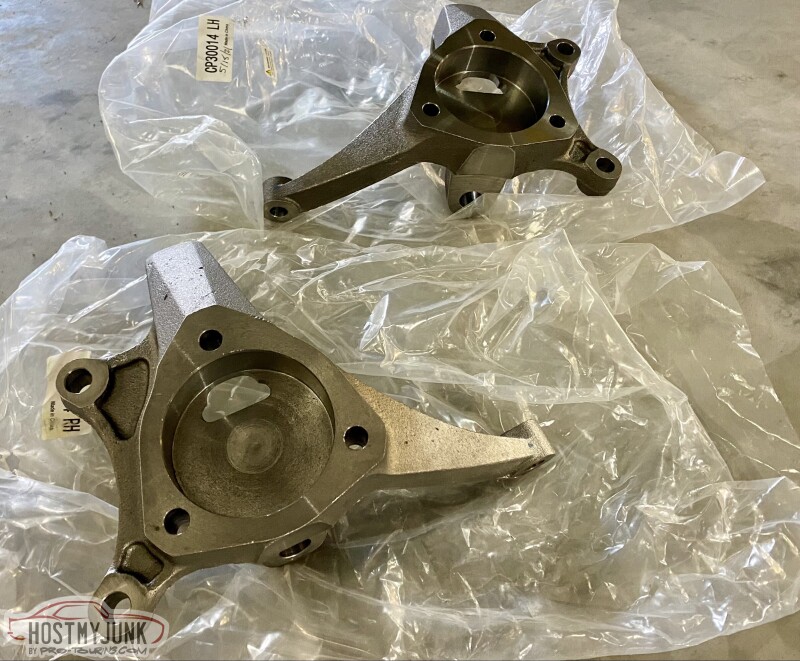
I decided to remove my stock spindles and use CCP Corvette style conversion spindles in order to increase my brake options and move to the C7 style SKF bearing hub.
This will go in the save for later box.
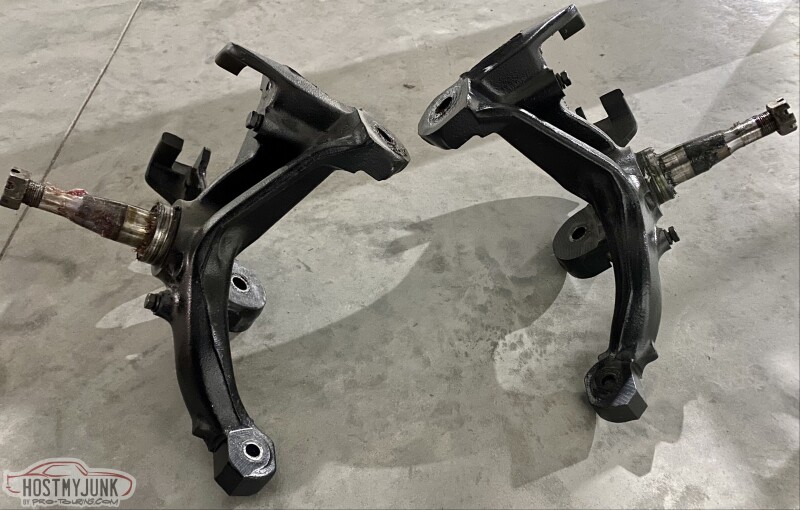
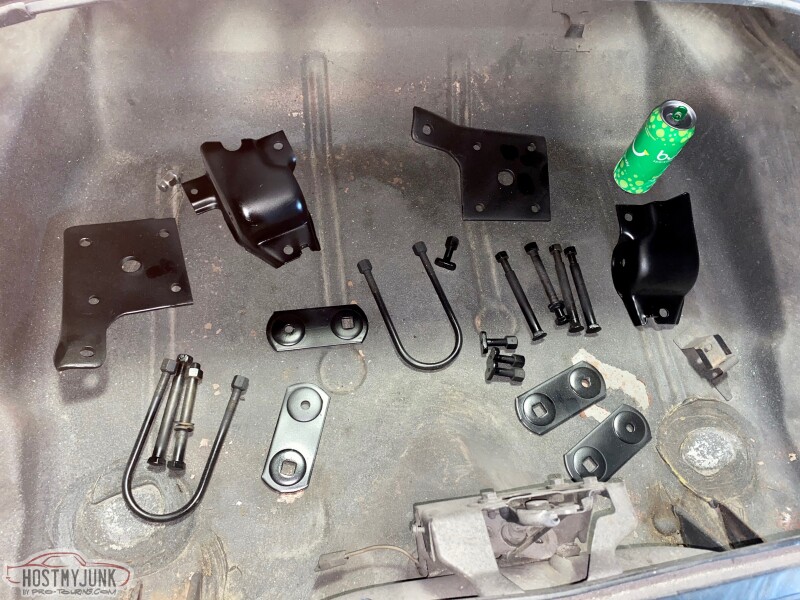
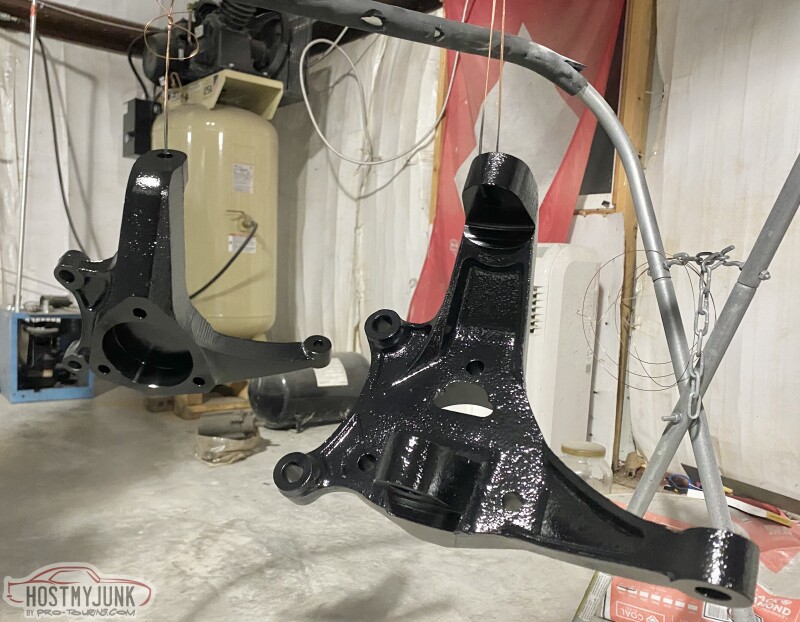
Time to clean these up and prep for epoxy and paint.
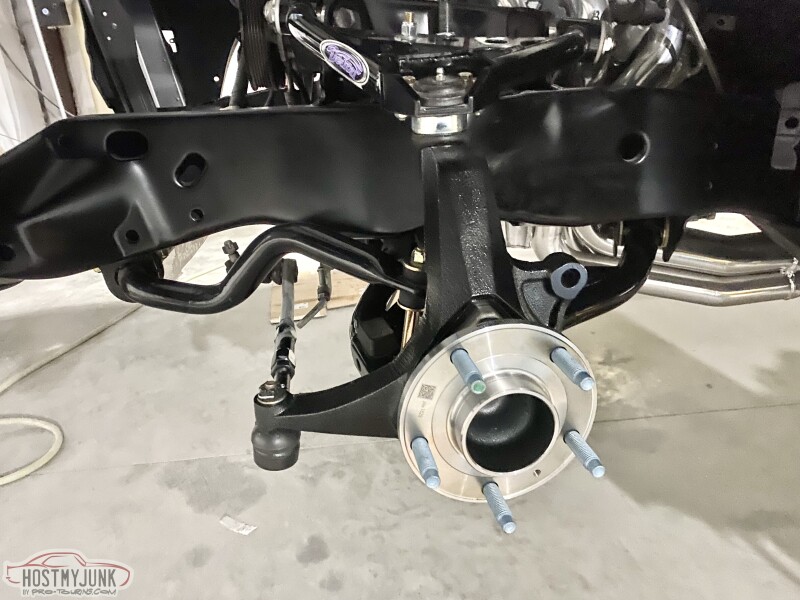
Ready to install bearings and put on the car.
C7 SKF - GM replacement part.

All connected and torqued up in the car.
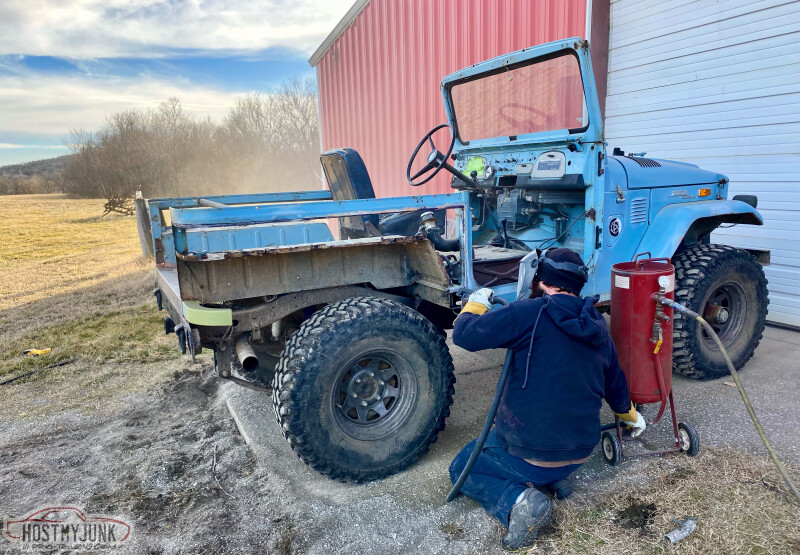
Meanwhile my buddy was doing some cutting and blasting on his FJ to fix some not so hot historical repairs.
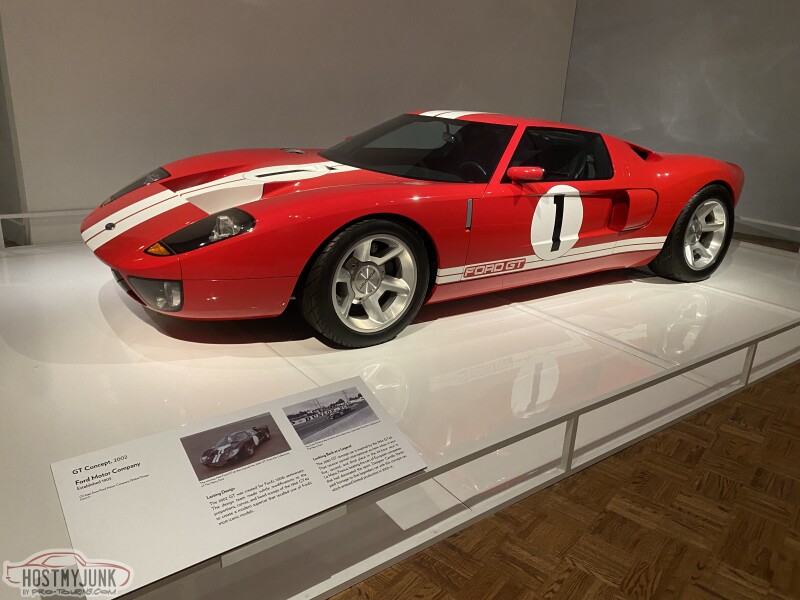
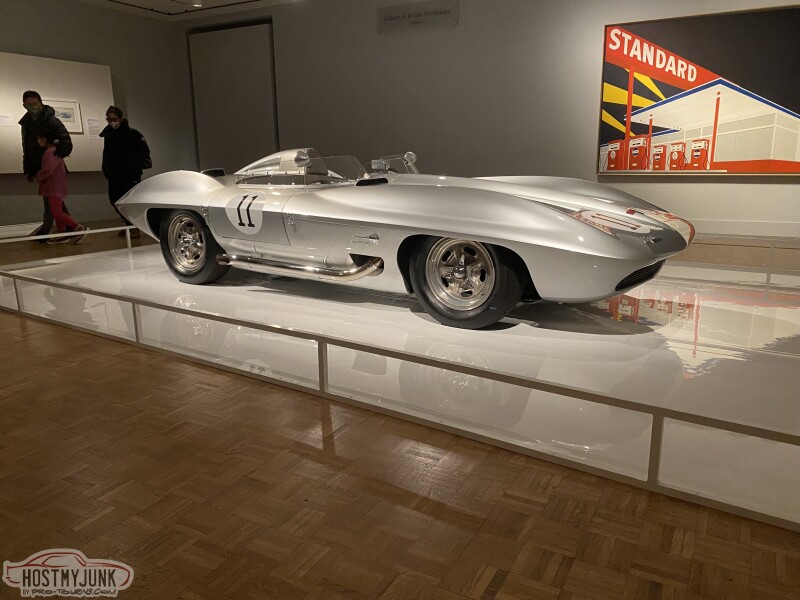
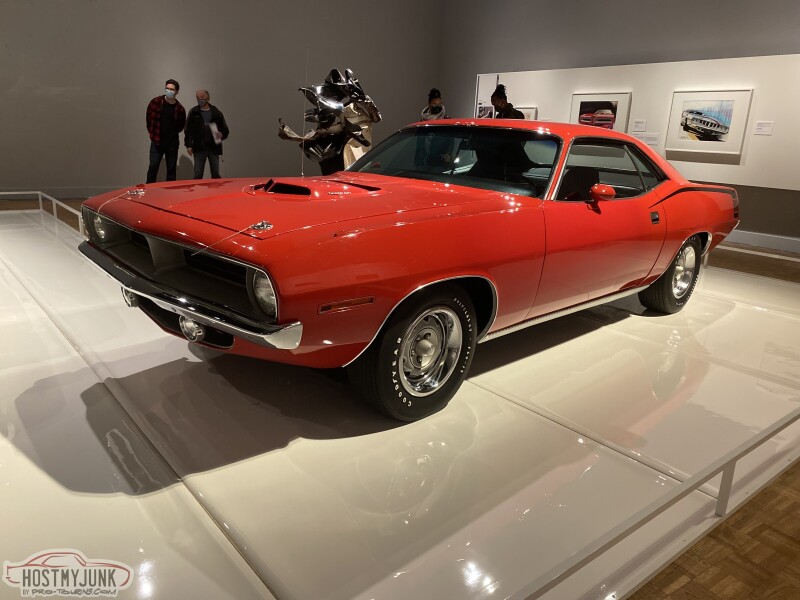
Headed to Detroit for a few weeks to see some friends/fam and went to the Detroit Institute of Arts for the first time despite traveling to that city for the past 8 or so years.
Awesome Firebird II prototype among others.
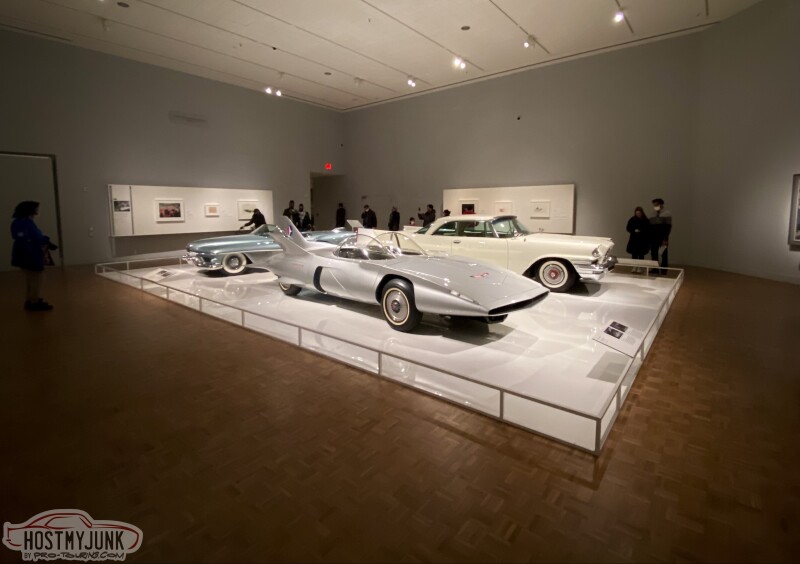
Some more cool cars.
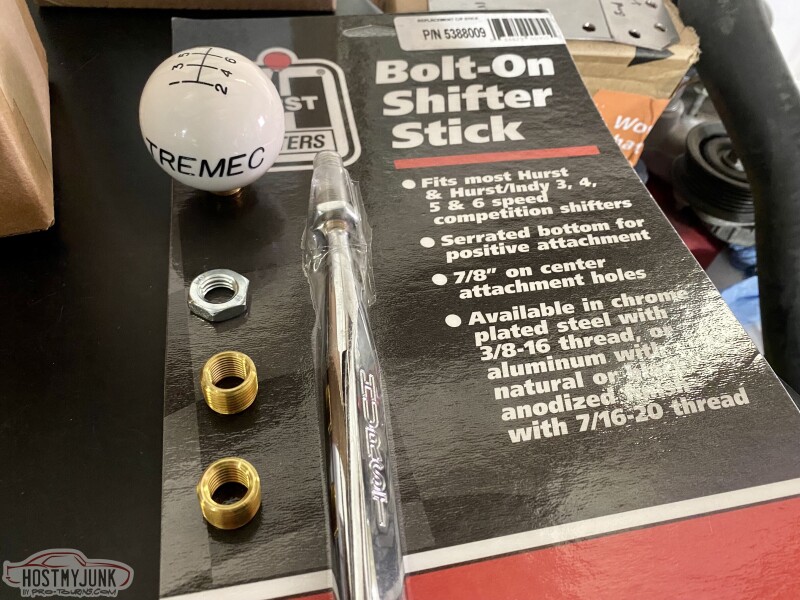
Got back from Detroit and some shifter goodies arrived, but the parts I really need are on back order.
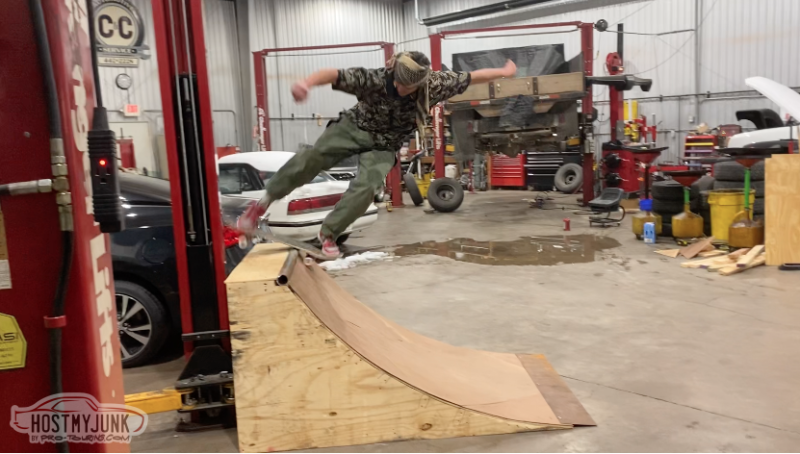
Meanwhile, I got to have a non car related goof around a buddy's service shop while they built a skate ramp.
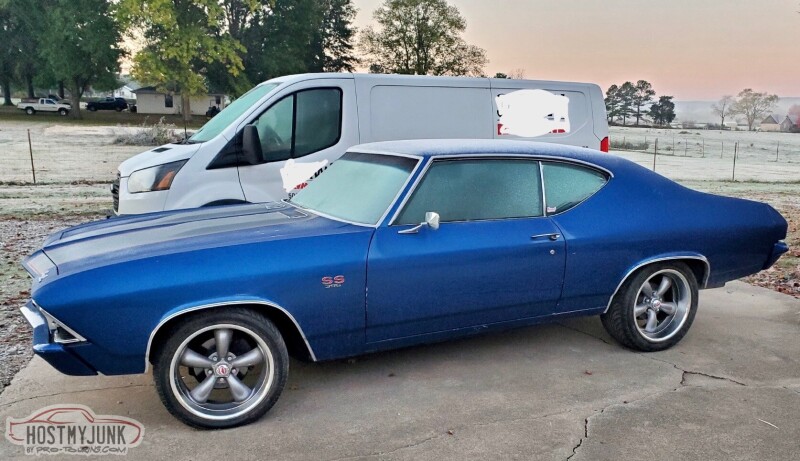
 My 1973 Firebird Build:
https://www.pro-touring.com/threads/130290-1973-Firebird-Espirit-Project
08-24-2022 #32
Registered User
- Join Date
- Jan 2014
- Location
- Texas
- Posts
- 46
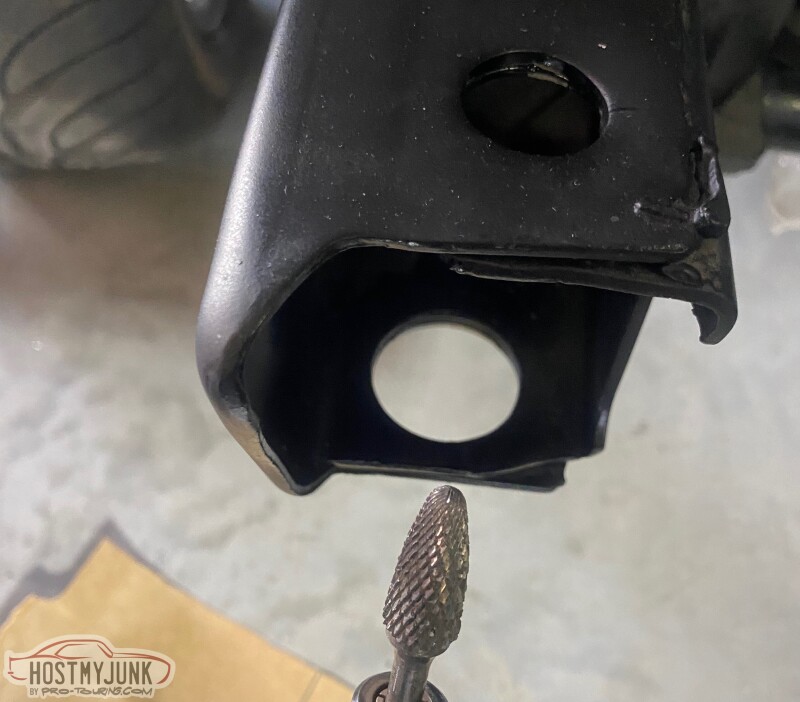
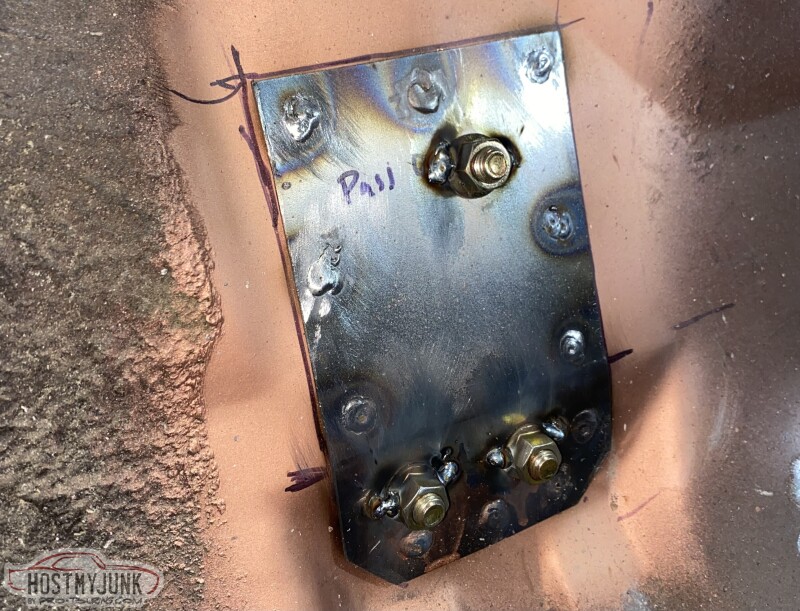
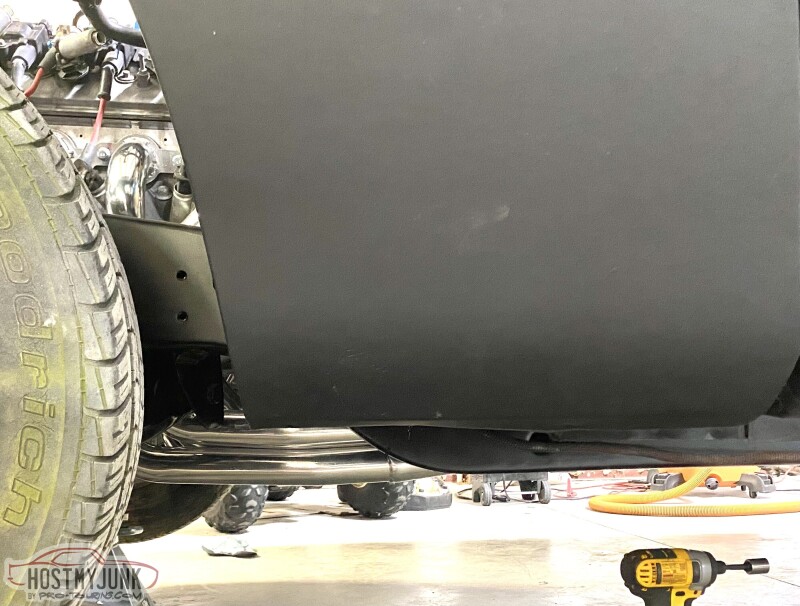
The old aftermarket exhaust was hung in the back by drilling sheet metal screws to the sheet metal behind the rear seats. Vibration enlarged the holes over time. My buddy and I welded and repaired those holes and he suggested that I make some brackets to strengthen the sheet metal in the area rather than just using body washers.
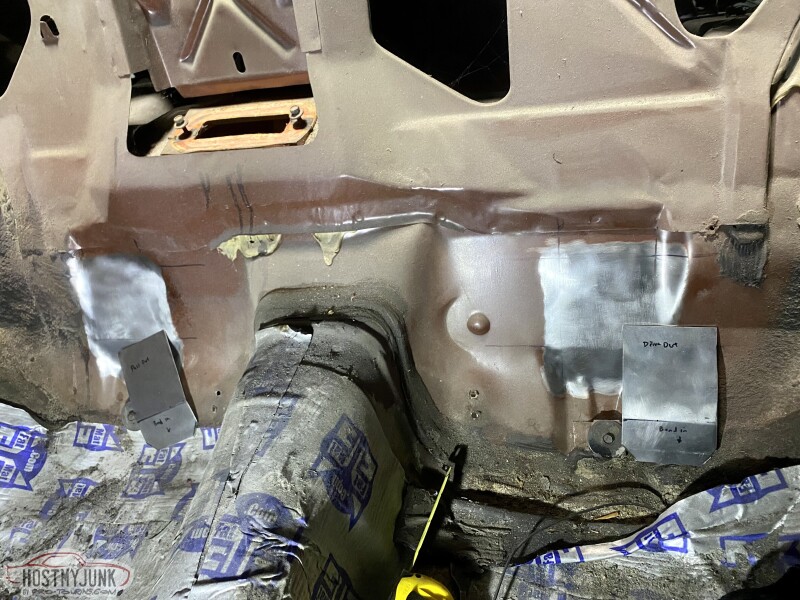

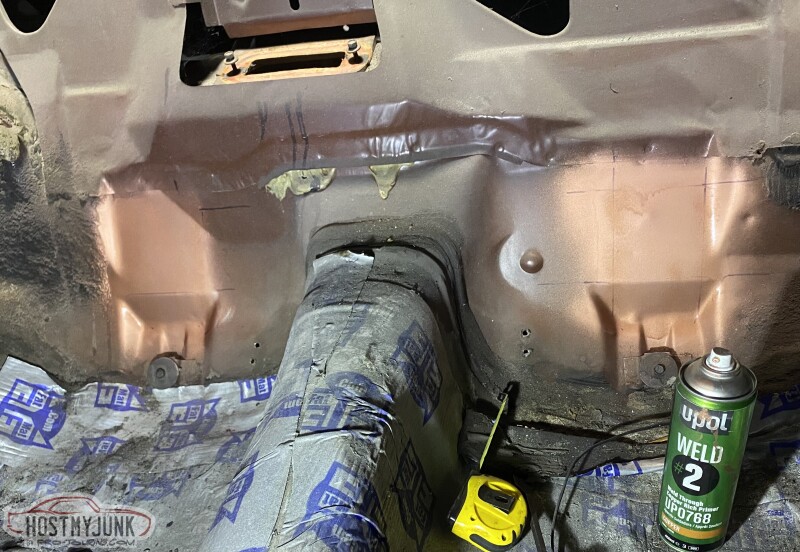
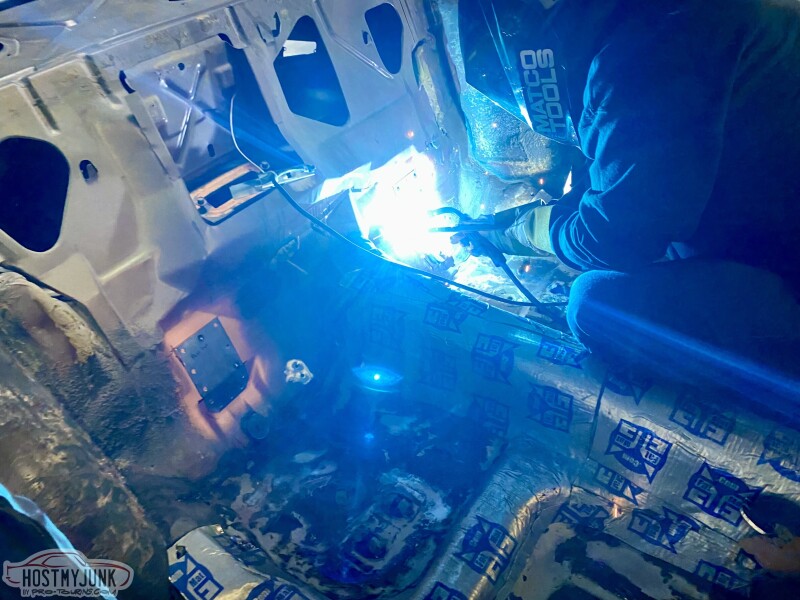

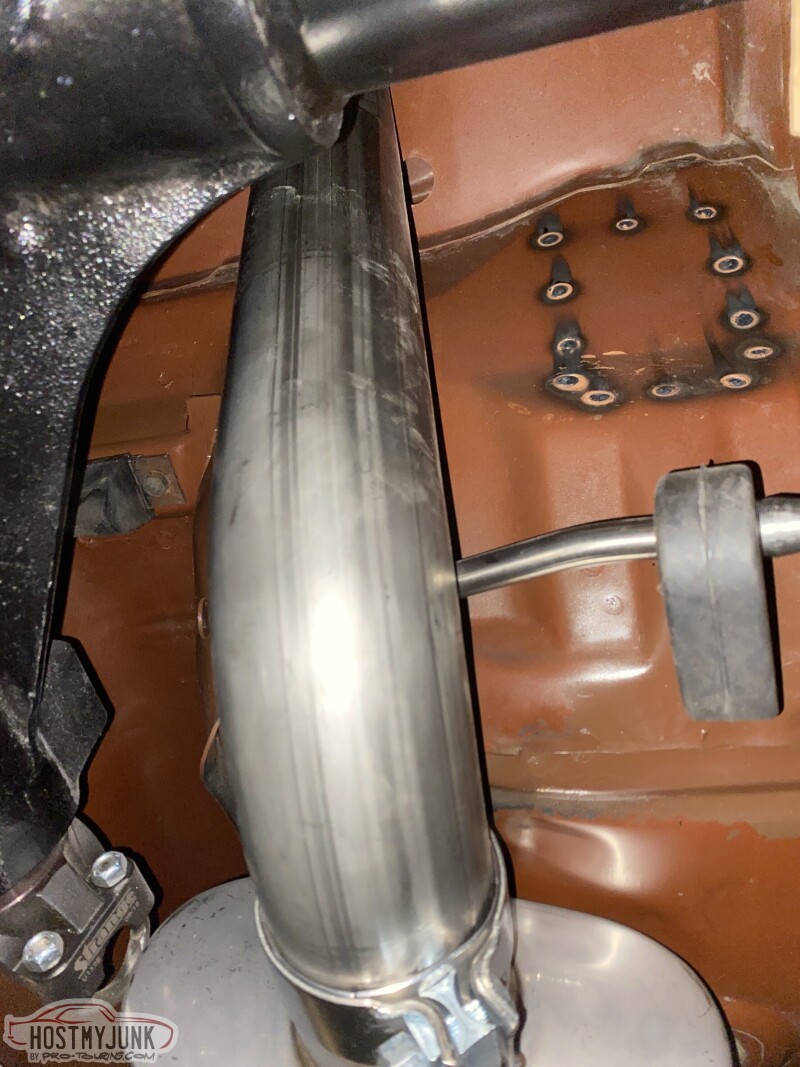
While I was at it, I went ahead and welded some nuts to the brackets to allow me to remove the exhaust from under the car in the future without removing the seats. I forgot to take pics of under the car to show how the exhaust mounts, but I'll get them posted later when I'm totally done with the exhaust system.
Then I cleaned up some surface rust scale that was in the floor, epoxied, then painted.
I had a huge bummer with a Holley / Hooker product... First let me say that they offer parts that work to address some pretty specific applications (like putting an LS into a 73 bird), for that I am very grateful and have a lot of respect. I am very happy with the products that are well designed. You have to know you will need to modify a lot of their stuff, but I think thats fairly reasonable and I can deal with it. Whats was more frustrating to me is when something just isn't designed well, which was my experience with how low the headers I ordered from them fit. I posted questions about this years ago in a forum where a Hooker tech was introducing these headers for an early 2nd gen. I went back to that post recently and saw that other folks experienced this problem and they figured out that the headers they market for the bandit era 2nd gens actually fit an early second gen very well and don't hang down in such a sketchy way. As annoying as it was, I determined my best/easiest course of action was to pay Holley AGAIN by ordering another set of headers... None of this is a dig at anyone and I KNOW there are tons of amazing folks that work for that company. I obviously still buy the stuff and couldn't fabricate the stuff I buy from them if I tried. I also make mistakes myself all the time.
The below pics are of my car on jack stands but when the car was on the ground, the headers hung sketchily low at that bottom "V" section before the collector with my 2inch dropped suspension. May work fine for someone with stock ride height, but there's probably not a ton of folks that are putting 1 7/8th" primary long tube headers on their car and running stock height.
Early 2nd Gen headers on my Early 2nd Gen
Later 2nd Gen headers on my Early 2nd Gen
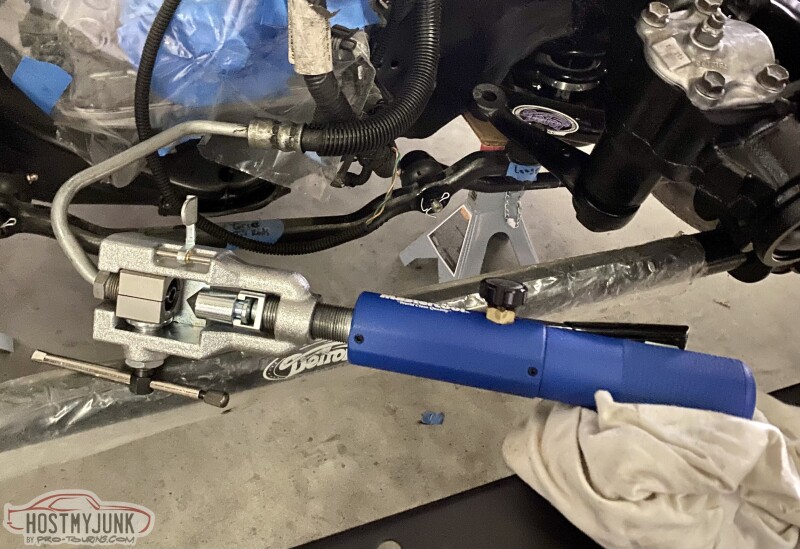
On a happier note, I left my quick ratio steering box out after flushing it with new fluid and when I came back I found that my awesome buddy had sandblasted it for me!
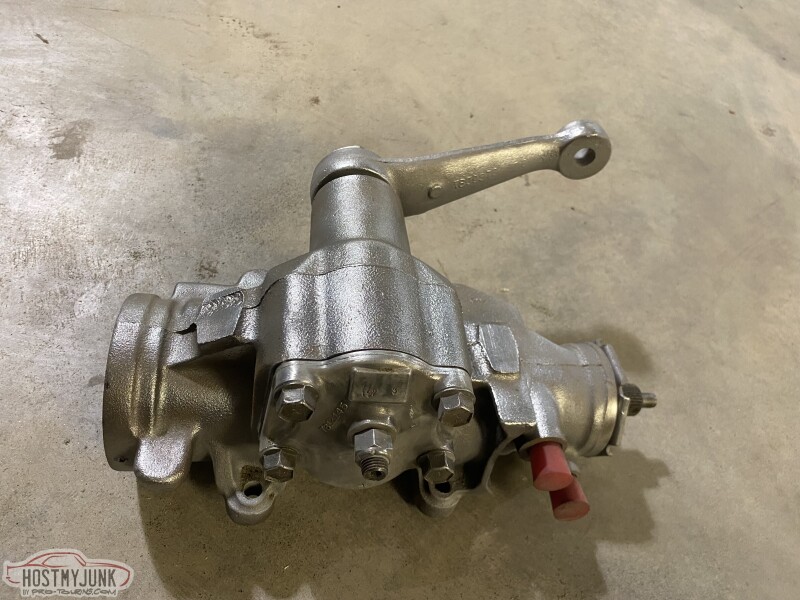
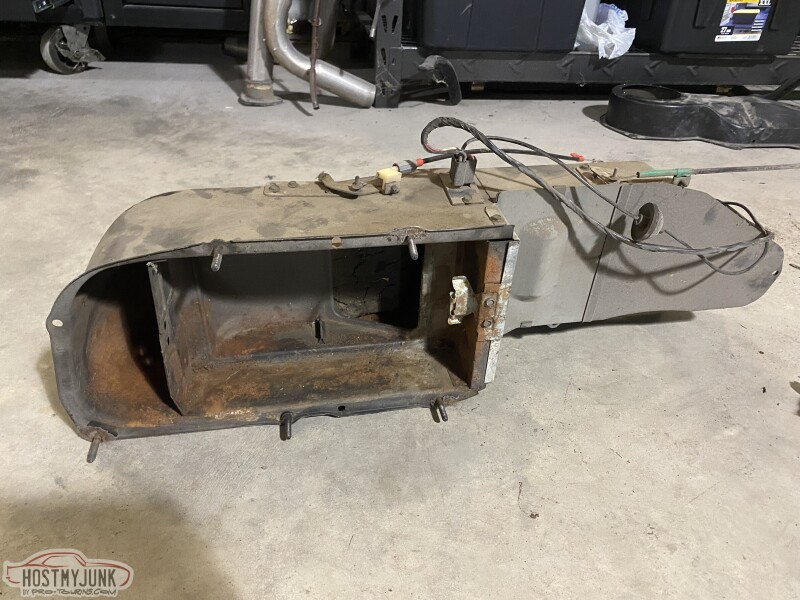
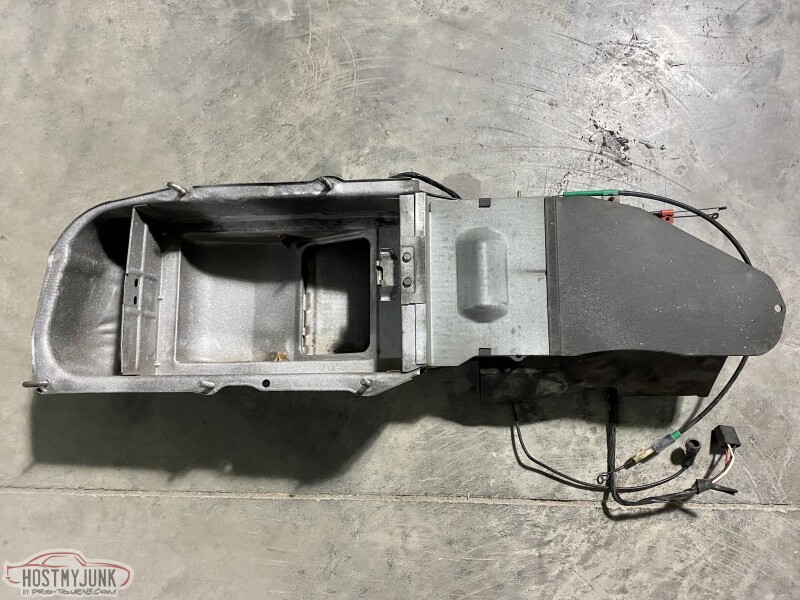
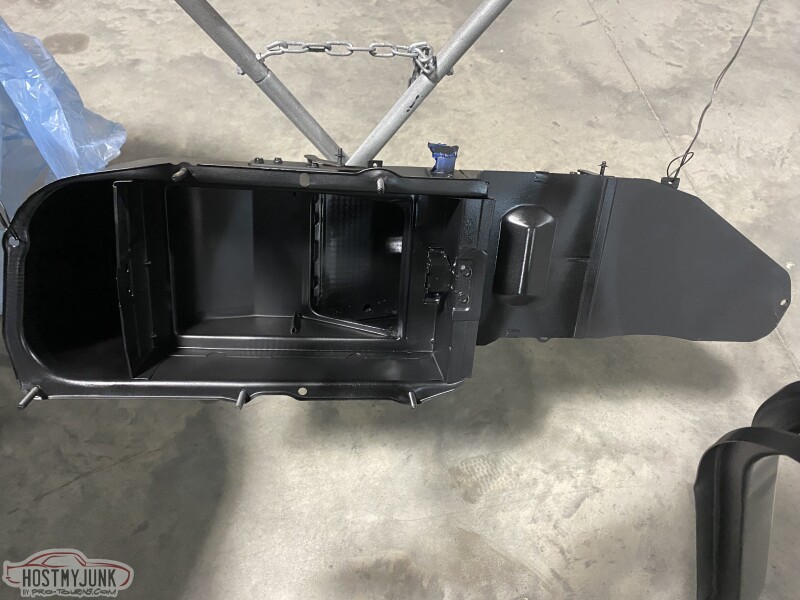
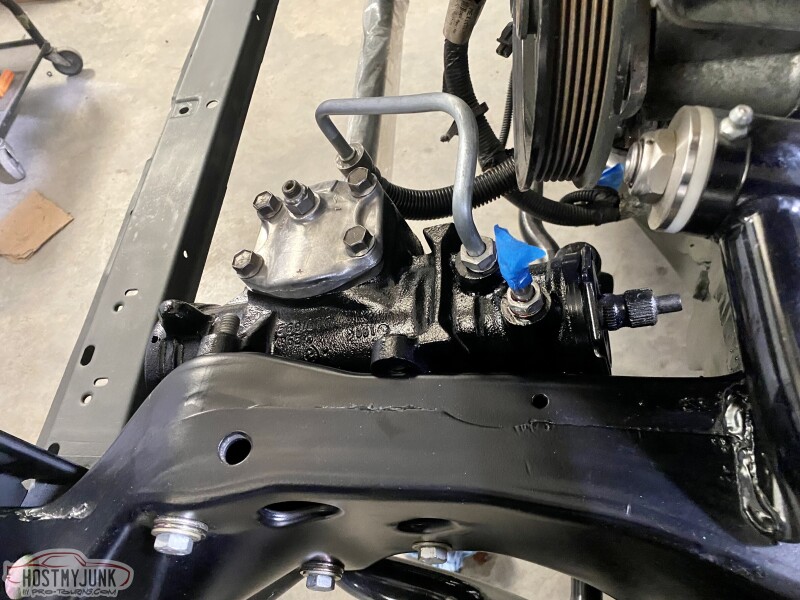
I blasted my old heater box and then epoxied/painted it and my steering box.

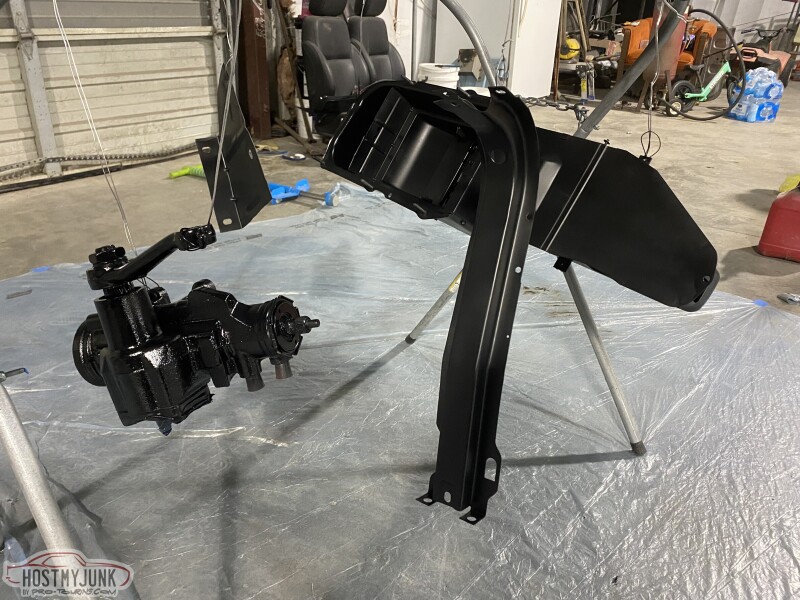

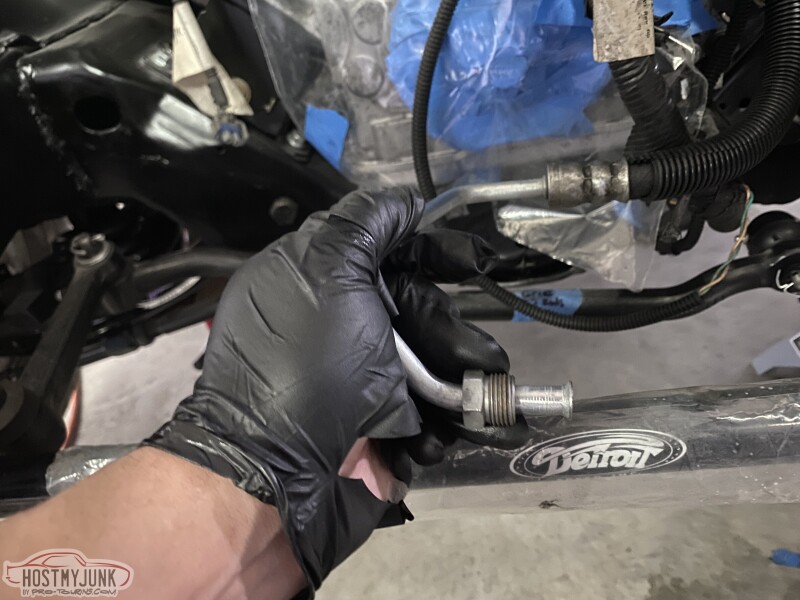
Borrowed my buddy's nice flare tool to put my old steering box fitting and an inverted flare on the Corvette steering pump. After that I finished connecting my steering linkage/pitman arm.

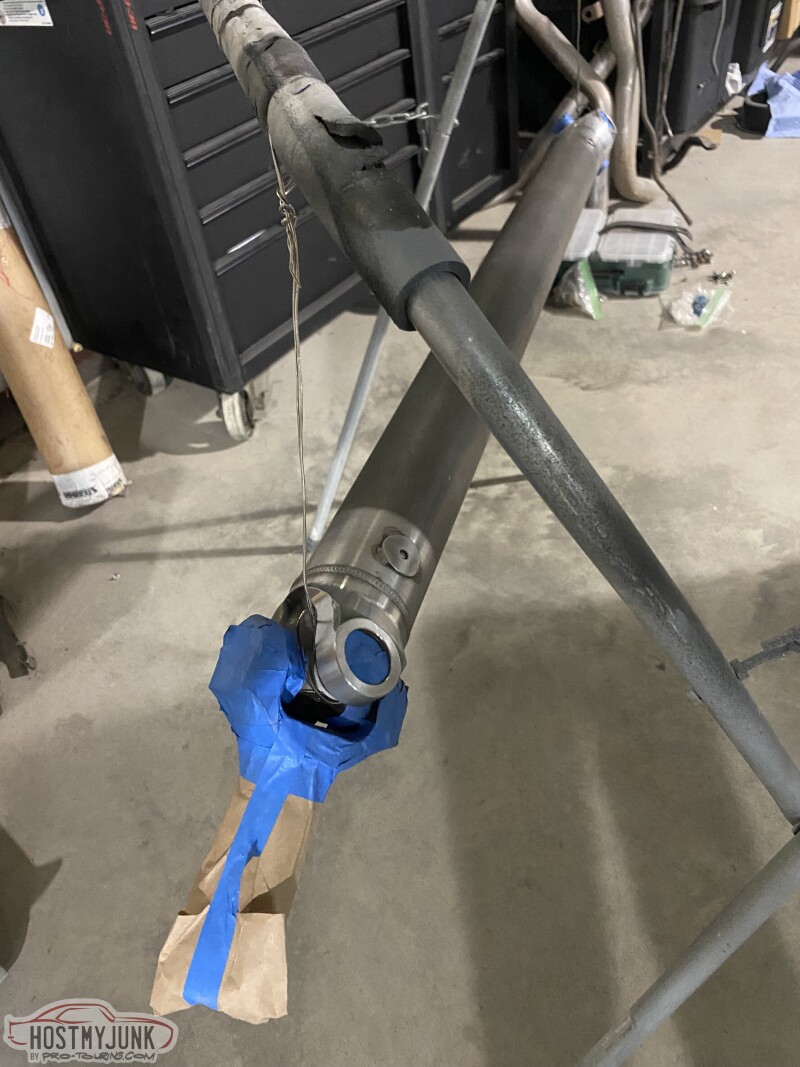
My drive shaft came in from Strange. So I test fitted it up and everything fit perfect with the right amount of play on the slip yoke.
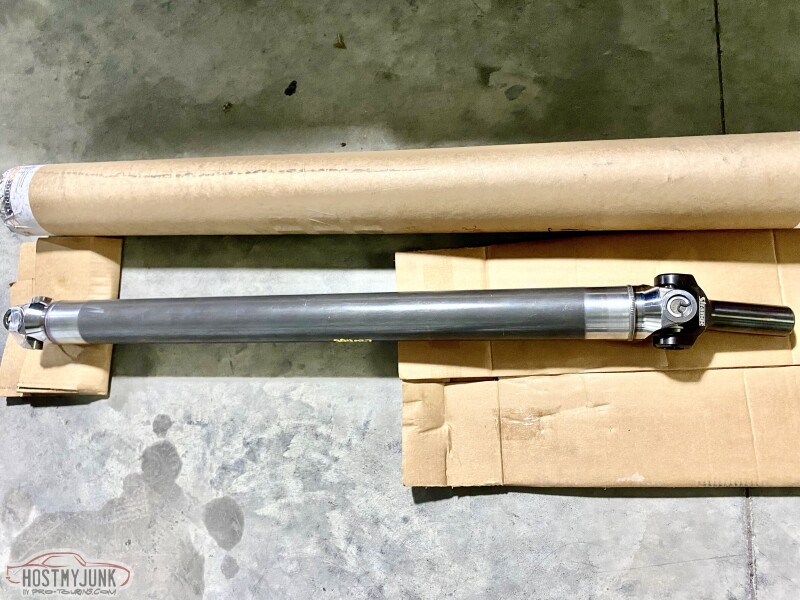
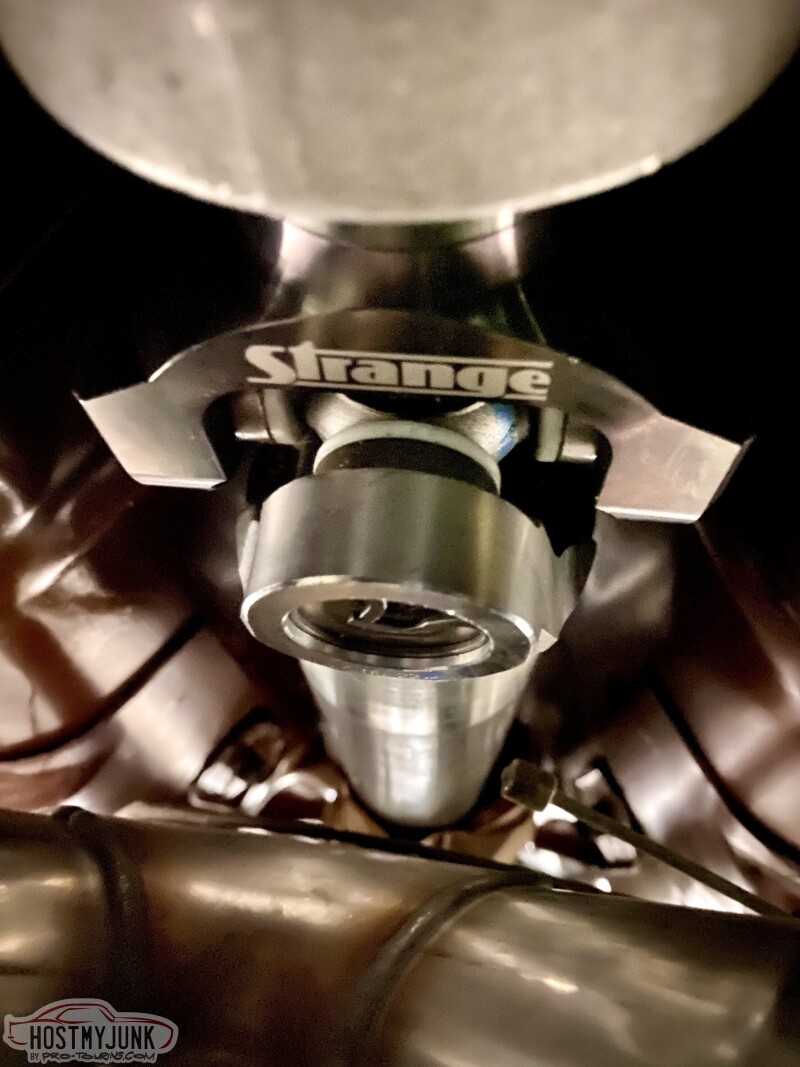
Prepped the shaft and epoxied.
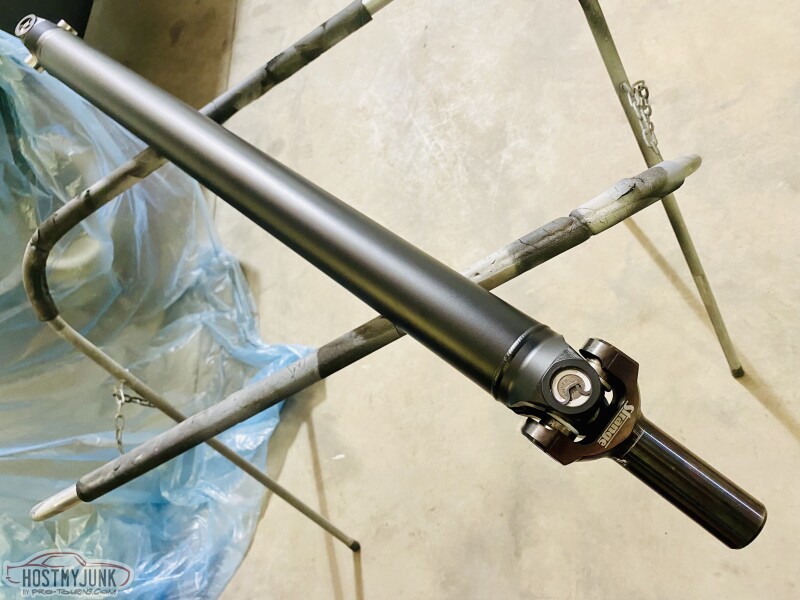
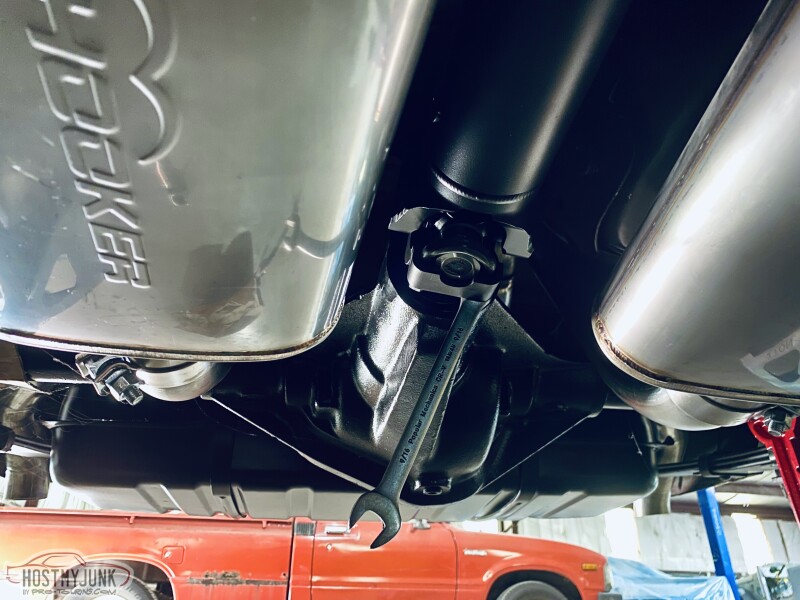
Managed to install it without scratching it all up.
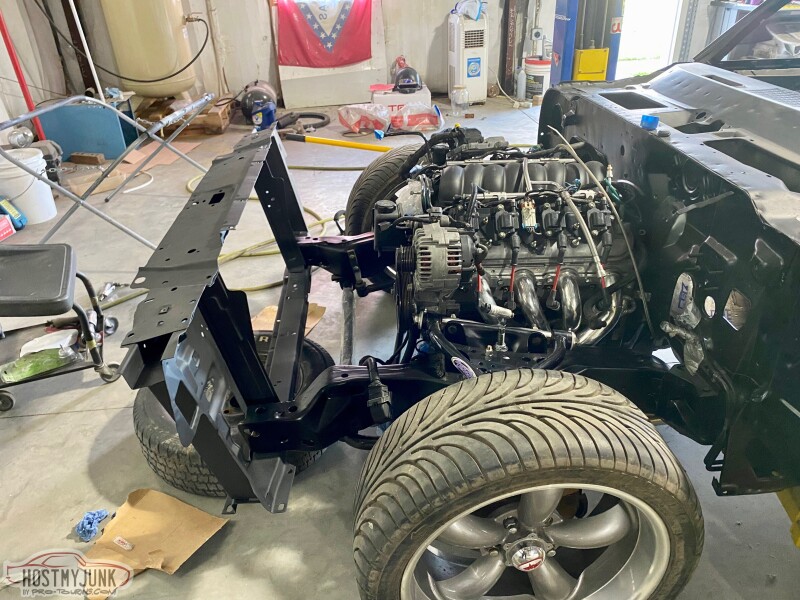
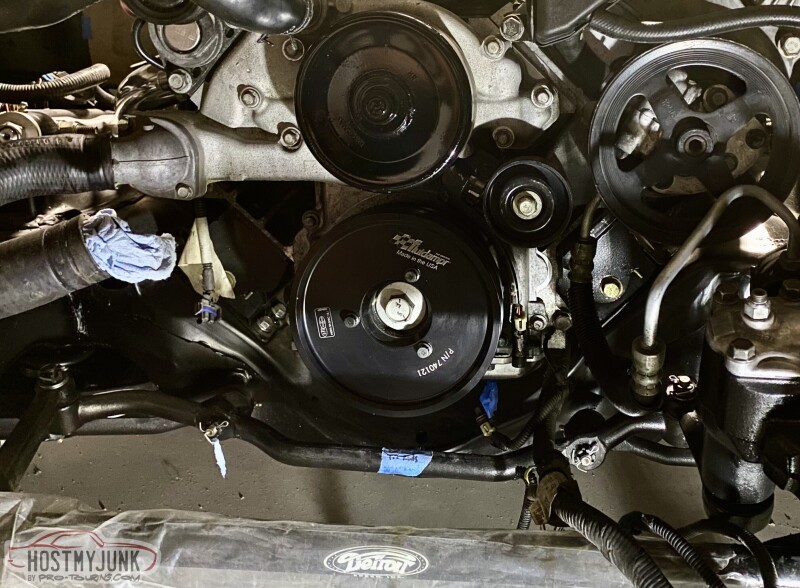
Now that I have a full drivetrain, I can finally button up the front of the engine after the cam install!
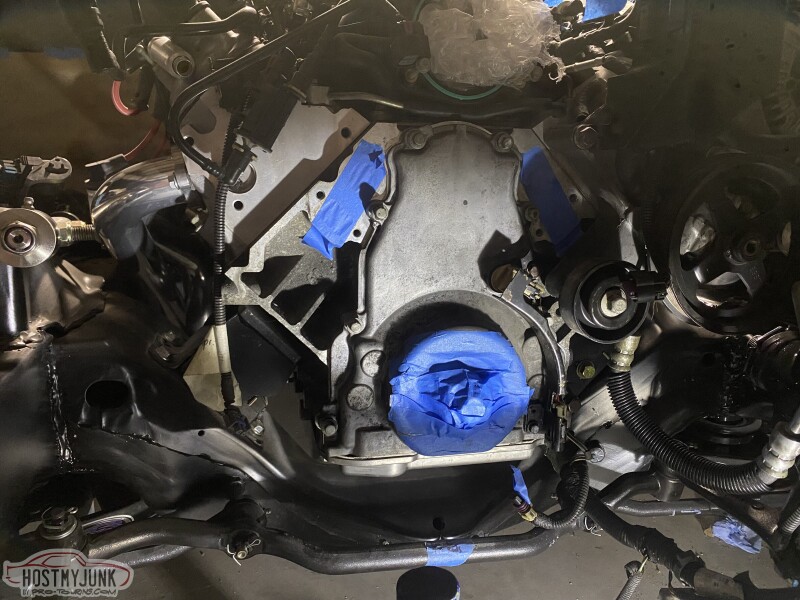
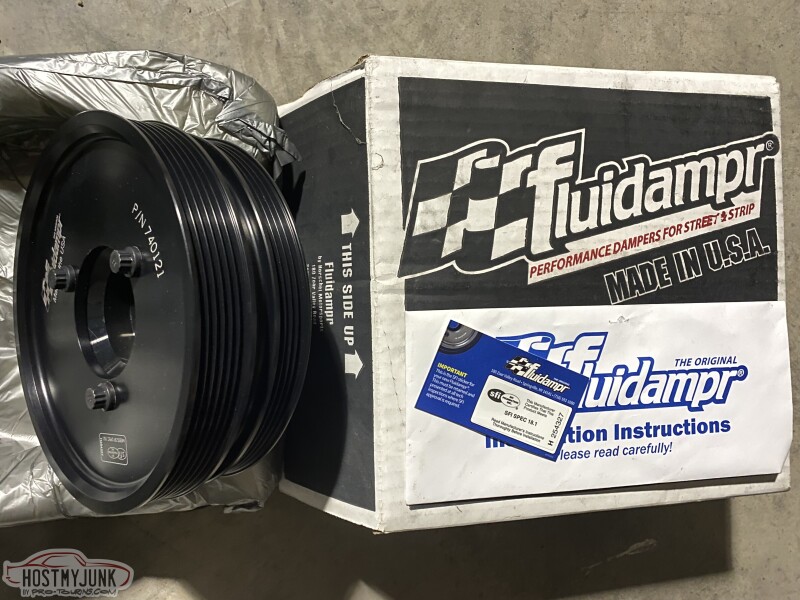
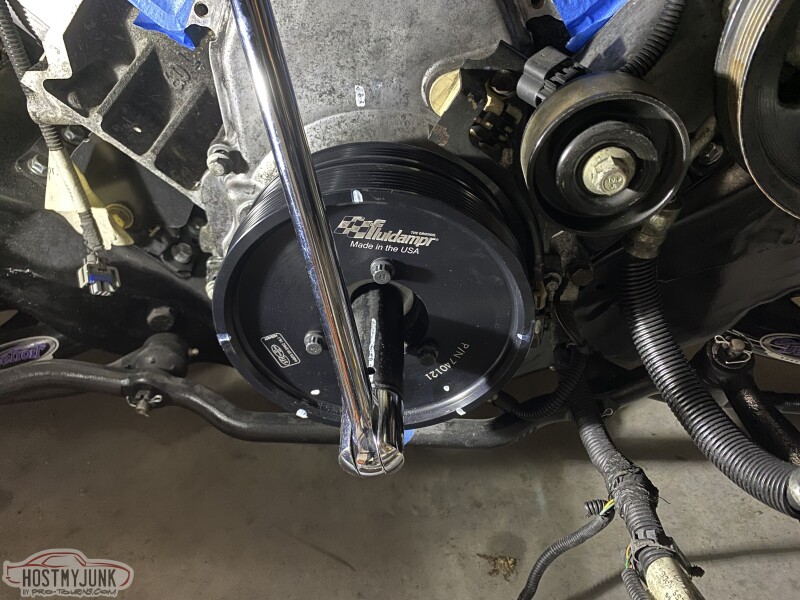
Water pump and damper installed. I didn't decide to index. Who knows, if I get a wild hair, I may order another crank bolt and do the index job. We will see.
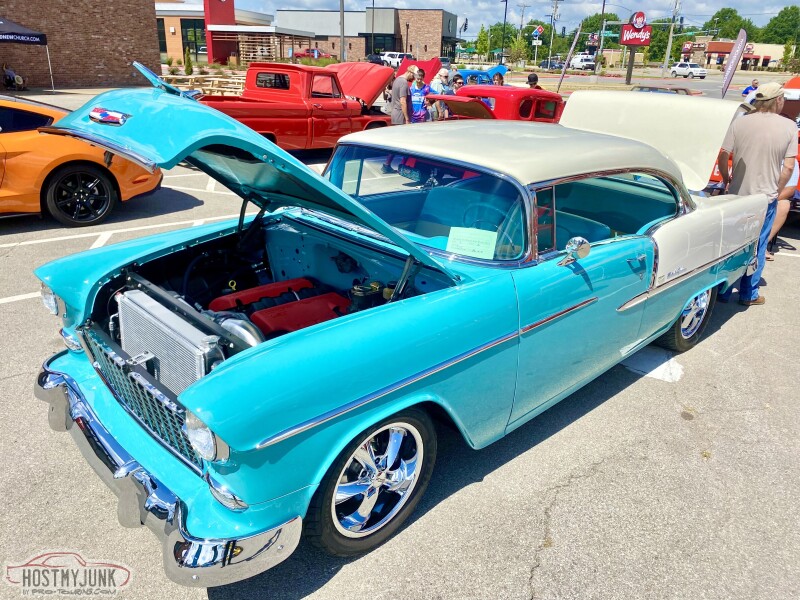
I didn't take a nice closing pic of the whole car last time I was in the shop, so here is a pic of an awesome LS swap I saw at a small church car show in Northwest Arkansas. It's a one-man build by the owner who's a retired NHRA Alcohol Funny Car racer and pilot living there locally. Super cool guy who has some really extreme BMW and Mini builds as well.
 My 1973 Firebird Build:
https://www.pro-touring.com/threads/130290-1973-Firebird-Espirit-Project
08-25-2022 #33
-Moderator/Sponsor-
- Join Date
- Apr 2001
- Location
- The City of Fountains
- Posts
- 15,975
That's a lot of great progress!
Andrew1970 GTO Version 3.0
1967 Cougar build
GM High-Tech Performance feature
My YouTube Channel Please Subscribe!
Instagram @projectgattago
Dr. EFI
I deliver what EFI promises.
Remote Holley EFI tuning.
Please get in touch if I can be of service.
"You were the gun, your voice was the trigger, your bravery was the barrel, your eyes were the bullets." ~ Her
08-26-2022 #34
Registered User
- Join Date
- Jan 2014
- Location
- Texas
- Posts
- 46
Thanks Andrew! Im keeping the momentum, but like you, wish I was getting more done haha. Who knows, I'd probably be making a lot more mistakes if I was going faster though.
My 1973 Firebird Build:
https://www.pro-touring.com/threads/130290-1973-Firebird-Espirit-Project
08-27-2022 #35
Registered User
- Join Date
- Dec 2015
- Posts
- 194
Coming along nicely!

 Reply With Quote


