

Results 1 to 13 of 13
-
09-12-2018 #1
 Registered User
- Join Date
- Sep 2018
- Posts
- 10
TERMINATOR Camaro Build. An American Supercar by Fast Lane Performance ATL.
I am excited to be the owner of this build. I think the car is going to be a lot of fun! I will post the build pictures and all the information in this thread hopefully frequently!
Background:
I am a Mechanical Engineer and I have wanted to do a pro touring 2nd gen for quite some time. However, almost every nice one I see is a 70-73. Well I like challenges, therefore I decided to go with a 1975 Camaro. Which in my opinion is the “grandma” style 2nd gen that not many people want. Big heavy awkward metal bumpers, awkward rear panel, etc. This allows me to be a little different and build a car with more ideas that have not been done before. Things like the MEAN rear diffuser and custom 75 Camaro tail lights that I have in mind, and the center mount exhaust to name a few.
Purpose/Goal:
I want this car to be an American Supercar. Maybe even a Hypercar. Something that is built to go fast, and handle like its on rails, but still have street manners and a touch of luxury too. Something with amazing engineering features. Huge cooling ducts, amazing suspension, airlift jacks, etc. However, I want to retain the key features of the 70’s Camaro body. It will be powered by a compound boost LSX setup. (Twin Turbos and Supercharger). I also want the car to be extremely competitive in autocross and road course.
Shop:
The shop doing the work is Fast Lane Performance. They are located in Atlanta, Georgia. They do a lot of Late Model American Muscle performance work. They also have a fab shop within the facility that does chassis, cages, etc. If you are looking for camshaft, supercharger, or a full car restoration they are the go to guys. Great group of people to work with.
Now For the fun stuff!
I found the car at a storage unit. Here it had an old sbc motor in it held in place by a 2x4 piece of wood. There was no transmission. And the car had no rust with the exception of the floors, which wasn’t a concern.
-
09-12-2018 #2
Registered User
- Join Date
- Sep 2018
- Posts
- 10
Quick Google Sketchup CAD model of the end game.
Time for tear down!
Next is to strip every thing else and make it basically a shell. So out comes the floors, tank, interior, etc.
-
09-12-2018 #3
Registered User
- Join Date
- Sep 2018
- Posts
- 10
Next Phase.
Tear down is now complete. The Body will be media blasted, then final floor pan cuts will be made.
Now its Chassis Design Time. Fast Lane Performance used Google Sketchup for quick CAD Models. Solid Works was later used for the actual engineering drawings. I wanted something very strong, but still looks good. We chose round tubing since round tubing generally has less flex than square tube. They are going to put these chassis in production for 70-81 Camaro and Trans am.
Here is the start of the chassis on the frame table
Now It is time for to create the rear main hoop! Here is the rear main hoop test fitted to the body Nice tight fit!
Hoop fits. Lets keep it moving!
-
09-12-2018 #4
Registered User
- Join Date
- Sep 2018
- Posts
- 10
Time to start mocking up the engine cradle and engine placement.
1. We want the engine to sit back pretty far to get the weight towards the middle of the car.
2. We want the engine to be offset to the driver for a better balance.
3. The location of the motor plays a big role in radiator, turbo, and external cooler location.
-
09-13-2018 #5
Registered User
- Join Date
- Sep 2011
- Location
- Southern Ontario
- Posts
- 640

Wow! This is going to be over the top. No worries of mocking up the motor before the front suspension? And any chance of more details on the suspension? Thanks
-
09-14-2018 #6
Registered User
- Join Date
- Sep 2018
- Posts
- 10
The suspension has all been created in cad.
Details on Suspension
Cantilever Suspension for front and rear.
Its going to be setup so we can quickly change cantilever ratios
In house made Control Arms. They will be on the longer side, similar to an F1 Car.
C6 Z06 6 piston Brakes on all four corners.
-
09-15-2018 #7
 Registered User
- Join Date
- Aug 2010
- Location
- now In Dandridge, Tn.
- Posts
- 1,301

I love it! very similar to a build we have going. The Next Generation. 3G T.A. Hope it all goes well.
-
09-17-2018 #8
Registered User
- Join Date
- Sep 2018
- Posts
- 10
Very nice build you have going on there Rob.
Update
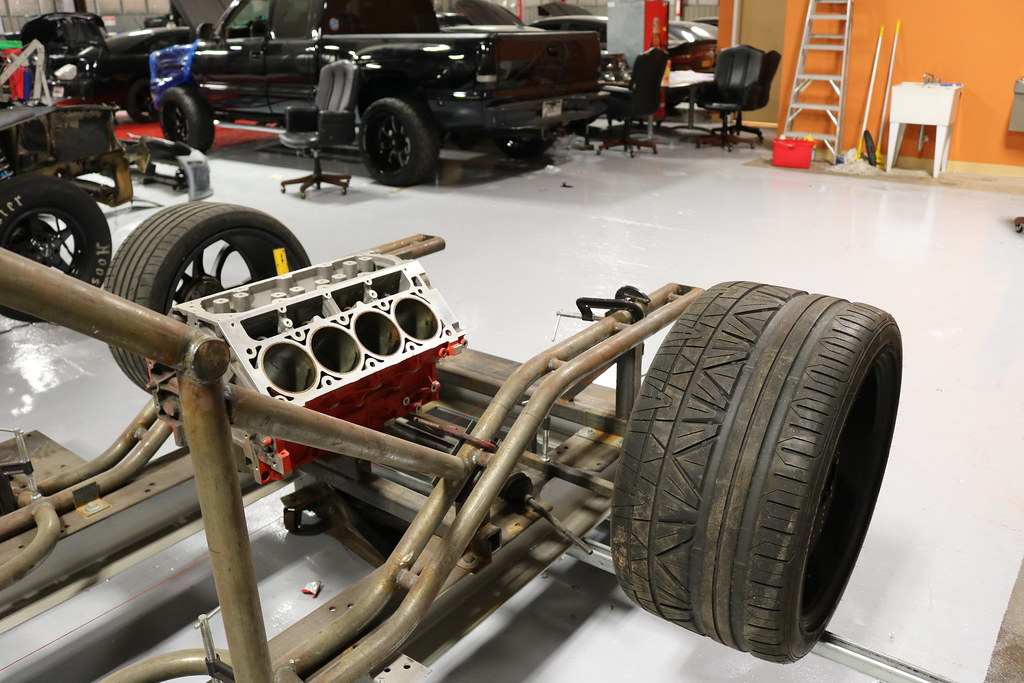
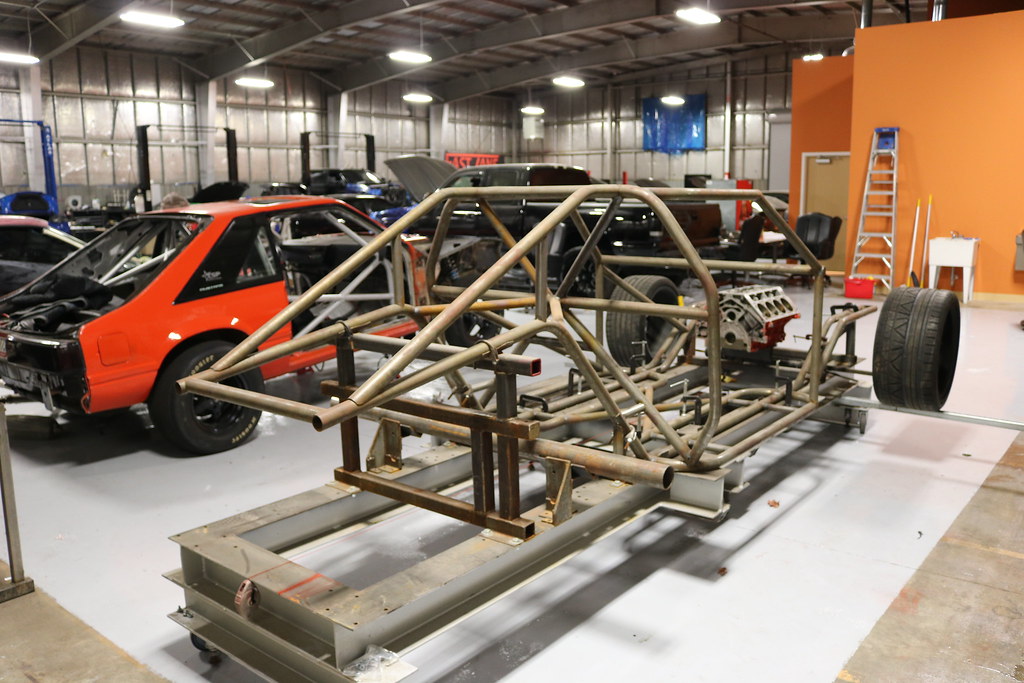
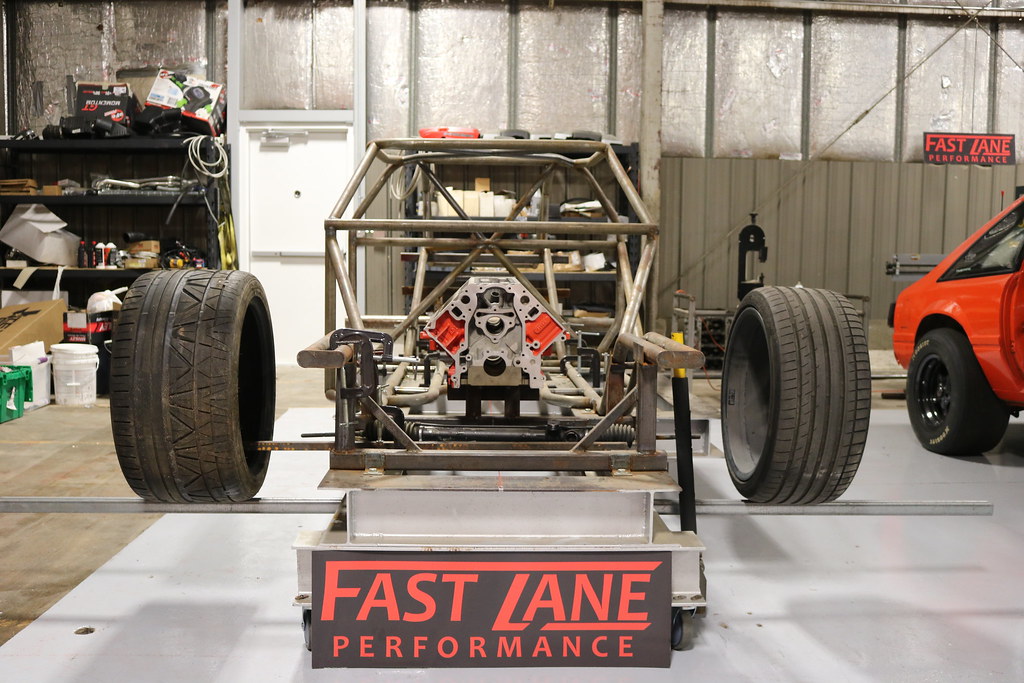
We started mapping out front suspension and geometry in person based off of the CAD models. So out came the chalk line and plum bobs. We are starting to map out the wheel base and the ball joint center lines. Tomorrow the spindles and brakes should be here, so we can start building upper and lower control arms. The motor sits pretty in board, which is nice. Gives plenty of room for the turbos and all the really neat cooling we have in mind.
-
09-24-2018 #9
Registered User
- Join Date
- Sep 2018
- Posts
- 10
Waiting on some more tubes to come in for the control arms. Right now we are finishing the roof halo and door bars as we wait. Pictures incoming soon!
09-27-2018 #10
Registered User
- Join Date
- Aug 2005
- Location
- Bellevue, NE
- Posts
- 14
Looking great. I'm a big fan of the big bumper cars. Always loved the old 74-77 IROC Camaros.
Question: Has the chassis shop been in touch with the local SCCA or NASA Tech guys? If they are planning to produce this chassis, it would be great if it was compliant with the usual groups' rules. They typically like to see the A-pillar bar in one piece, from the Halo to the Rocker area.
Would just hate for someone to be turned away unexpectedly at a track tech inspection.DaveZ
Updated CP Camaro
No such thing as too much power or too much traction
11-30-2019 #11
Registered User
- Join Date
- Sep 2018
- Posts
- 10
The shop moved locations, so the build was put on hold for spring/summer. Here are some pictures of the new location. The warehouse was a storage place for Pepsi. So there was basically electricity, plumbing, offices, etc. There was a ton of construction, which is why the build was put on hold for a few months. New facility looks great.
The fab area is getting setup this week. So we should be full steam ahead shortly!
z28cp The A pillar is somewhat of a place holder up until the body goes back on the car. The 74-77 IROC Camaros are really cool race cars!
More pictures coming soon.
11-30-2019 #12
Registered User
- Join Date
- Sep 2018
- Posts
- 10
Here is where we left off. The next step is to start creating the suspension and engine cradle.
12-12-2019 #13
Registered User
- Join Date
- Sep 2018
- Posts
- 10
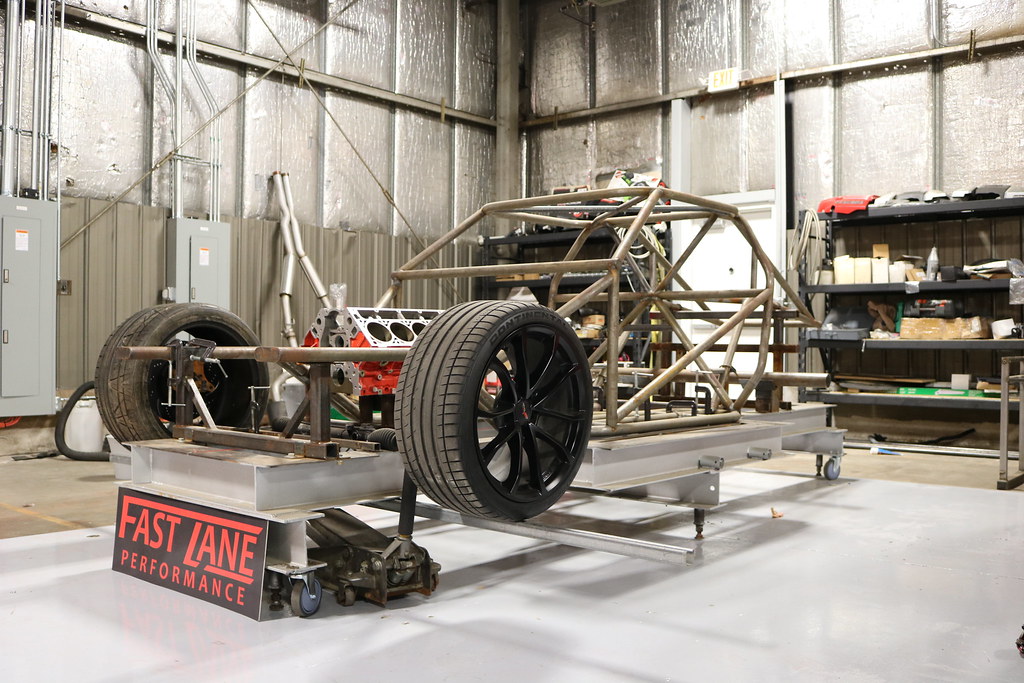
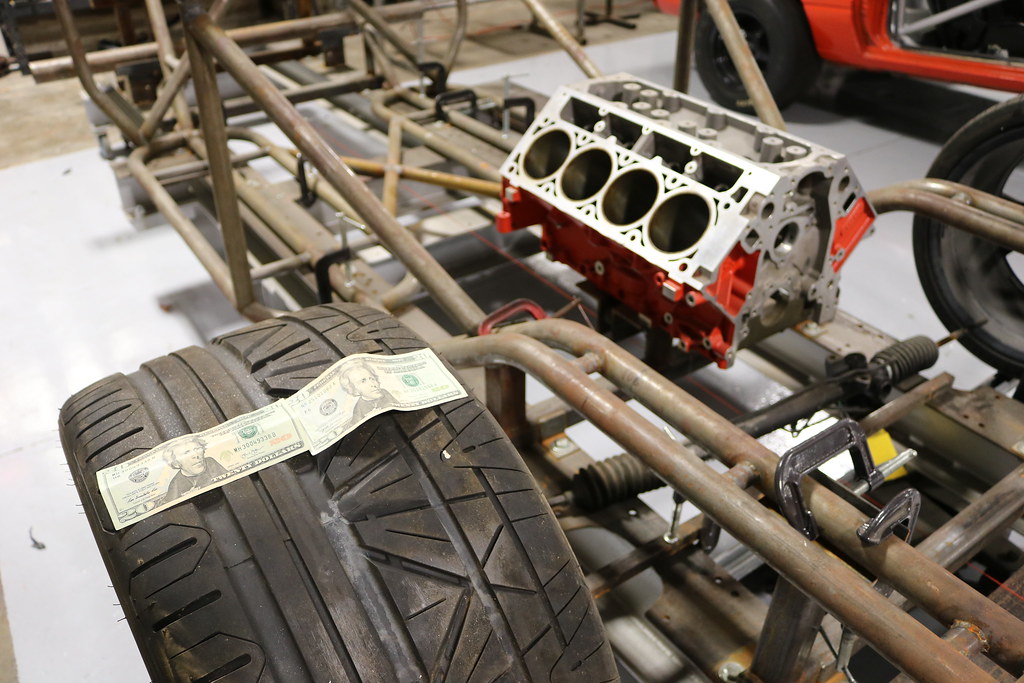
Fab side to the shop isn't complete, but it is back up and running! At the moment we are going to focus on the front suspension, then move to the rear suspension. We have the front suspension designed and CAD, but I'm sure the final design will change when actually building it.
Track width. I want this thing wide. Alot of high end sports cars/super cars seem to have a track width of 60-70inches. For example the viper ACR comes in at a 62.9", while the corvette zo6 comes in a tad over 63". Aventador is 67". Koenigsegg is 66.9 Keep in mind track width is center of tire, to center of tire. So that gives an additional 5-6" of "meat" per side to add to get a complete width. We are going to be around 78-80" in complete width. From my understanding is just wider than an Aventador.
Here is a quick mockup. The passenger side is a 345. The driver side is a 275. I Would love to run atleast a 315 up front and a 345 in the rear. But would really love to run a 345 on all fours. It may not be ideal, but I'd like to play around with the 345 on all fours to see if it can be dialed in. After all, the car is being made from scratch right. lol. Once we nail down the track width, we will start fabbing the A arms and cantilever suspension.
 IMG_6504 by Parker Bowen, on Flickr
 IMG_6506 by Parker Bowen, on Flickr
 IMG_6507 by Parker Bowen, on Flickr
 IMG_6510 by Parker Bowen, on Flickr
And the "money shot" lol
 IMG_6508 by Parker Bowen, on Flickr

 Reply With Quote


