

Results 21 to 40 of 48
Thread: 1967 Pontiac LeMans
-
10-27-2018 #21

 Registered User
- Join Date
- Mar 2015
- Location
- Seattle, WA
- Posts
- 34

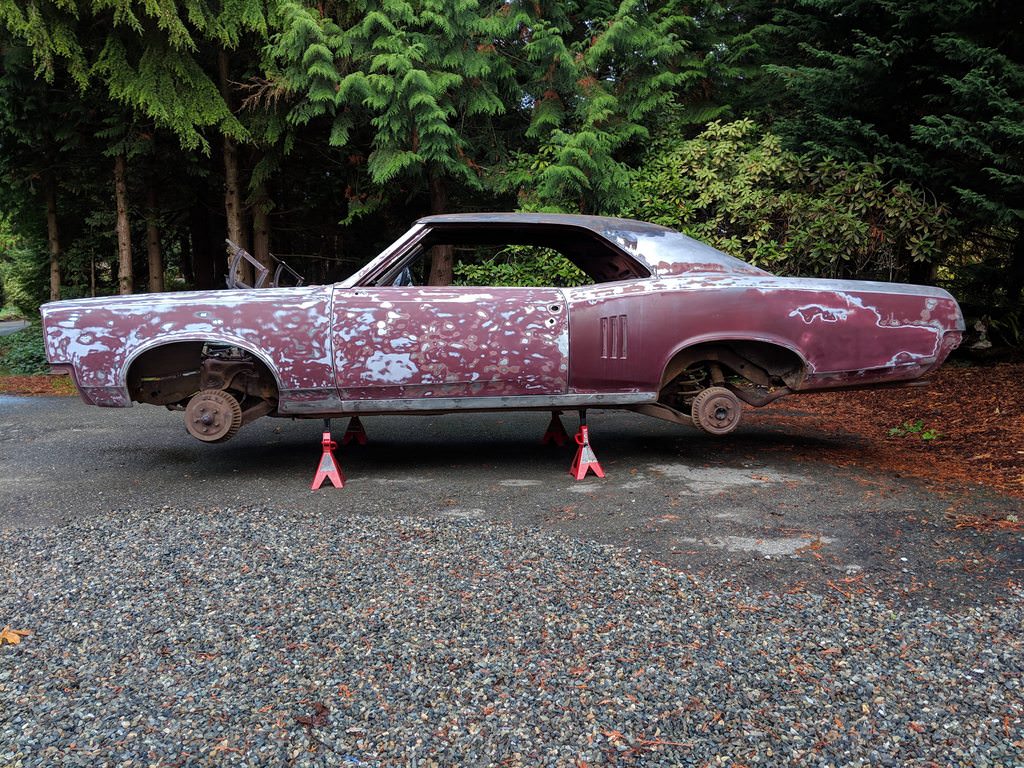
Made some progress
-
11-03-2018 #22
Registered User
- Join Date
- Mar 2015
- Location
- Seattle, WA
- Posts
- 34
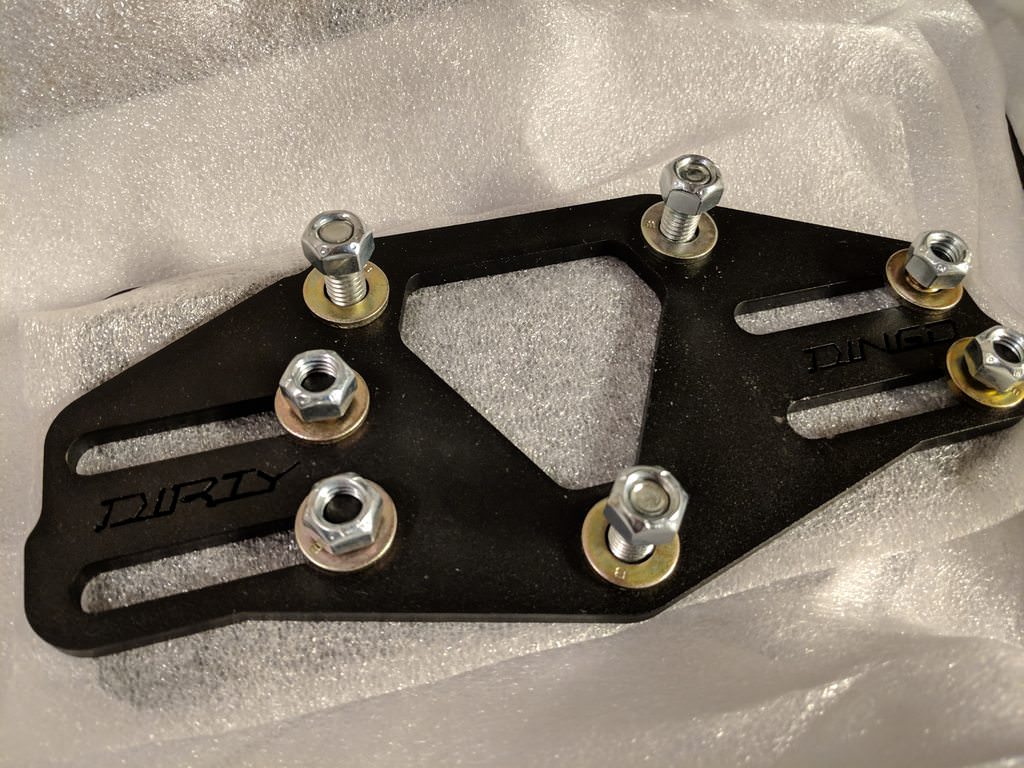
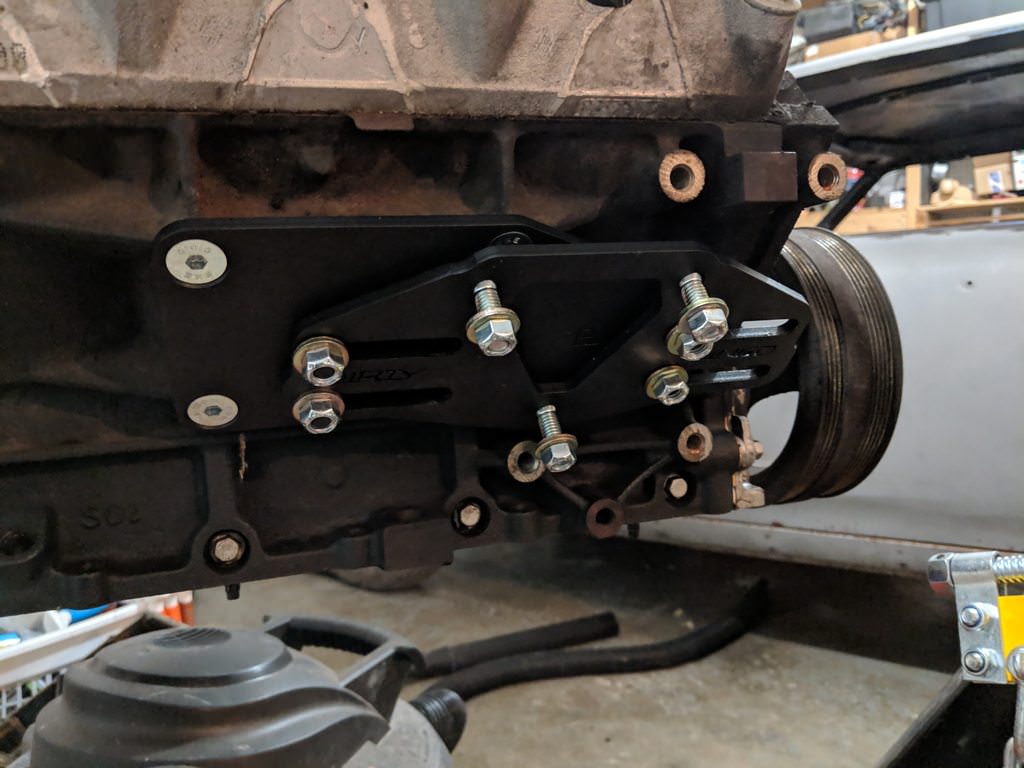
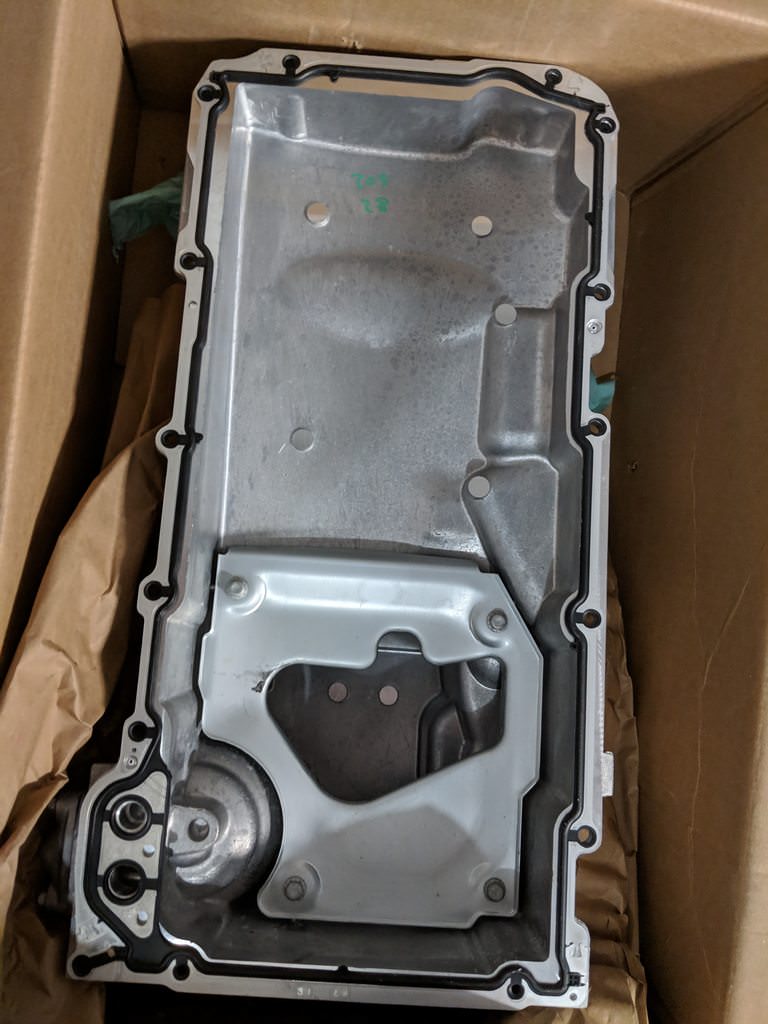
Got some stuff in the mail.
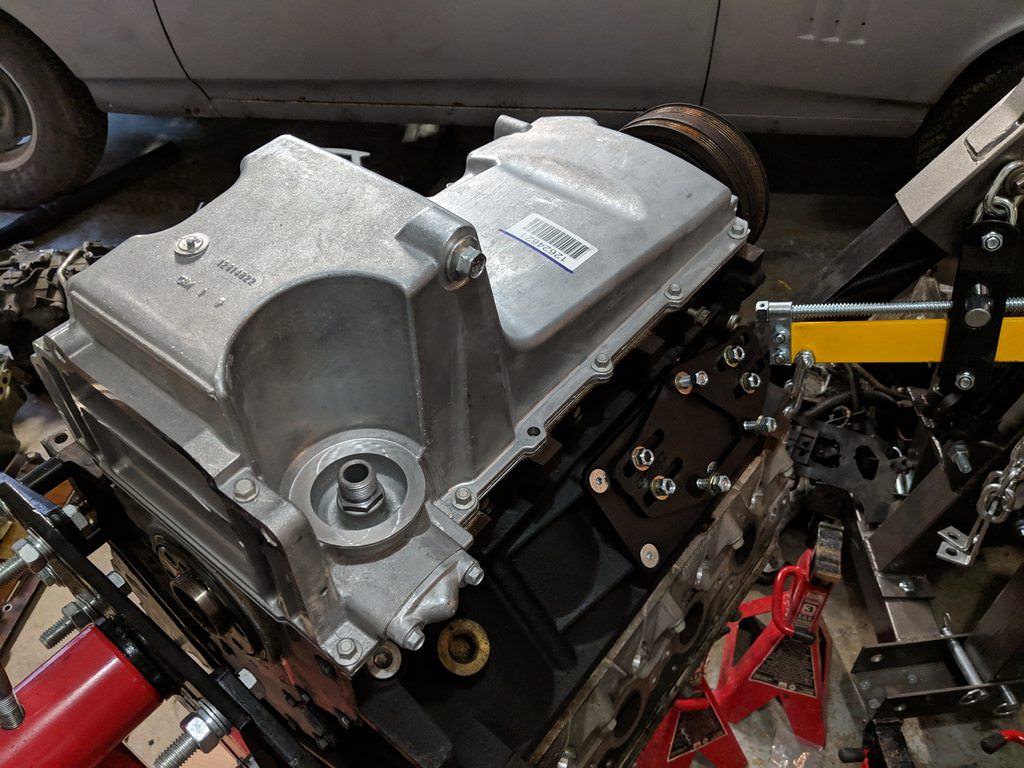
Dirty Dingo sliders. I'm pretty happy with the quality of these. They seem to have a large range of adjustment which I hope helps in fitting accessories and/or transmissions.
Also received the GM Muscle car pan
-
11-03-2018 #23
 -Moderator/Sponsor-
- Join Date
- Apr 2001
- Location
- The City of Fountains
- Posts
- 15,975
I don't mean to poopoo on your build, but I don't think that you will be very happy with that pan or with the engine mount sliders.
For many reason, you want to keep the engine as low as possible, and the best way to do that is to use the Holley swap components and 302-3 oil pan.
Andrew1970 GTO Version 3.0
1967 Cougar build
GM High-Tech Performance feature
My YouTube Channel Please Subscribe!
Instagram @projectgattago
Dr. EFI
I deliver what EFI promises.
Remote Holley EFI tuning.
Please get in touch if I can be of service.
"You were the gun, your voice was the trigger, your bravery was the barrel, your eyes were the bullets." ~ Her
-
11-04-2018 #24
Registered User
- Join Date
- Mar 2015
- Location
- Seattle, WA
- Posts
- 34
I appreciate the input. I try to do as much research before buying parts, but it seems like for every recommendation out there someone else says the opposite.
Aside from CG, do these brackets cause clearance issues? Either with the hood or trans tunnel/firewall? I was told that these brackets will make the engine sit lower and some find that they need to shim the engine mounts to get better clearance. But perhaps I was lead astray.
-
11-05-2018 #25
-Moderator/Sponsor-
- Join Date
- Apr 2001
- Location
- The City of Fountains
- Posts
- 15,975
Putting the engine low is not a matter of center of gravity. It has to do with driveline angles. Lower is also better for transmission clearance. That pan will hang 2" lower than the front crossmember.
Andrew1970 GTO Version 3.0
1967 Cougar build
GM High-Tech Performance feature
My YouTube Channel Please Subscribe!
Instagram @projectgattago
Dr. EFI
I deliver what EFI promises.
Remote Holley EFI tuning.
Please get in touch if I can be of service.
"You were the gun, your voice was the trigger, your bravery was the barrel, your eyes were the bullets." ~ Her
-
11-05-2018 #26
Registered User
- Join Date
- Apr 2016
- Posts
- 68
I have the Holley stuff on my 67 malibu, with no issues... Originally Posted by andrewb70

-
11-24-2018 #27
 Registered User
- Join Date
- Mar 2013
- Posts
- 67
Nice build! It breaks my heart a little bit to see the Pontiac engine come out, but its going to be an awesome build!
-
06-01-2019 #28
Registered User
- Join Date
- Mar 2015
- Location
- Seattle, WA
- Posts
- 34
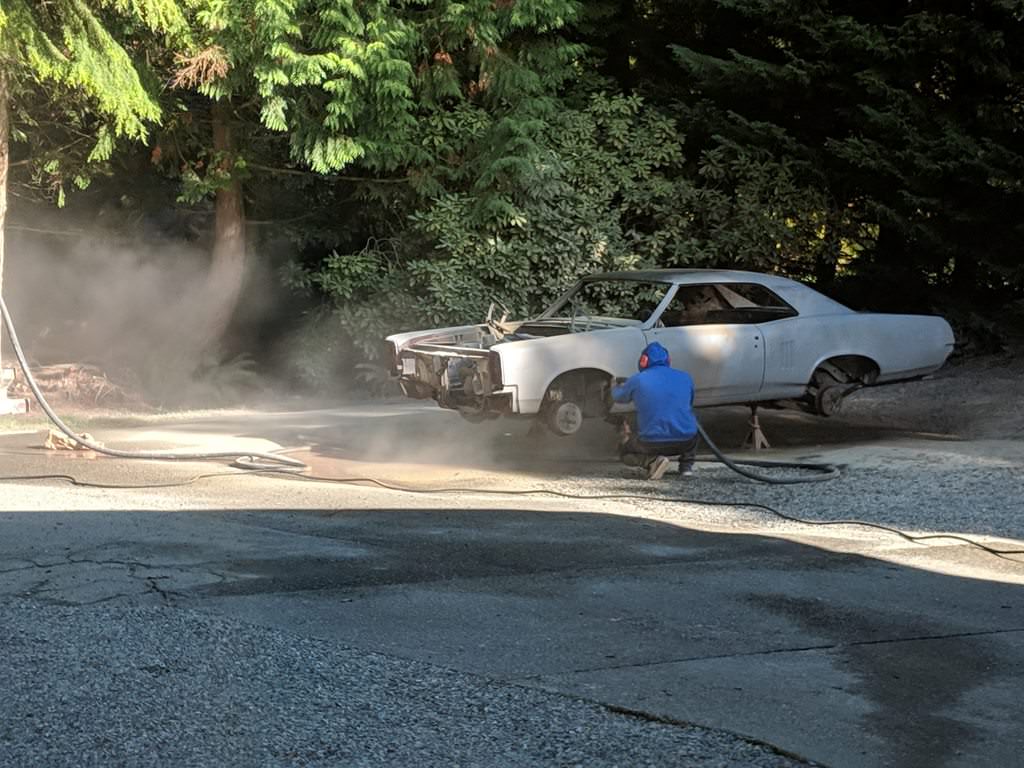
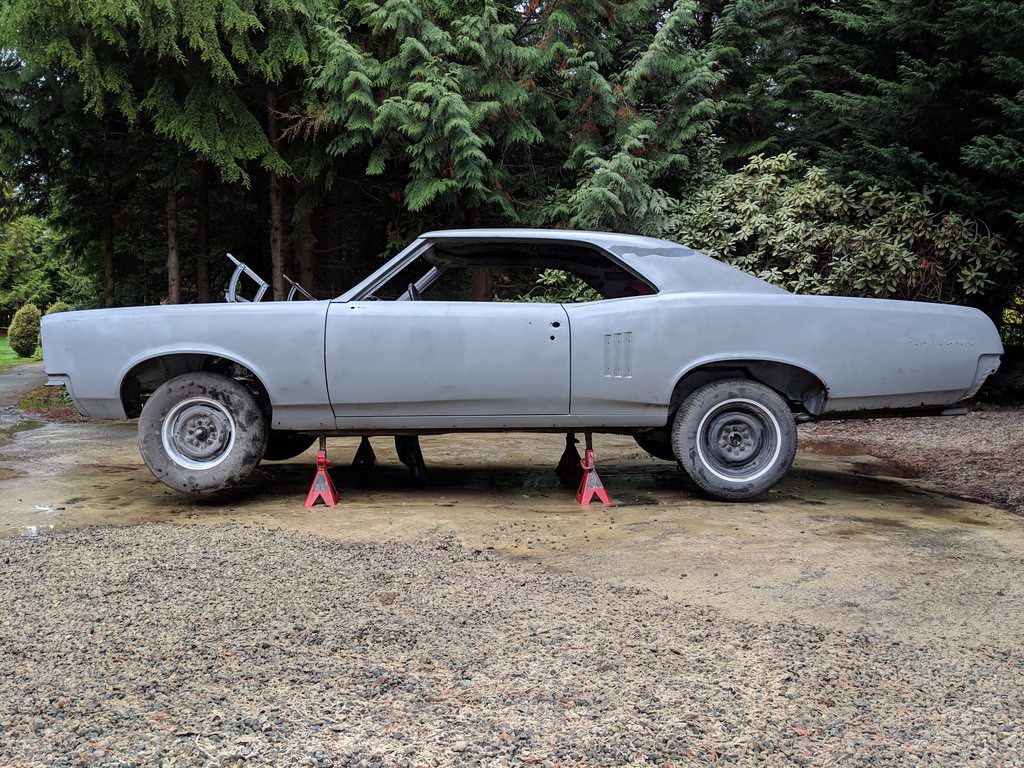
It's time for an update.
Nearly the entire car is now in SPI epoxy primer. The only thing that is left to be addressed is the underside, engine bay, and parts of the frame. Those will get taken care of when I replace the trunk pan.
-
06-01-2019 #29
Registered User
- Join Date
- Mar 2015
- Location
- Seattle, WA
- Posts
- 34
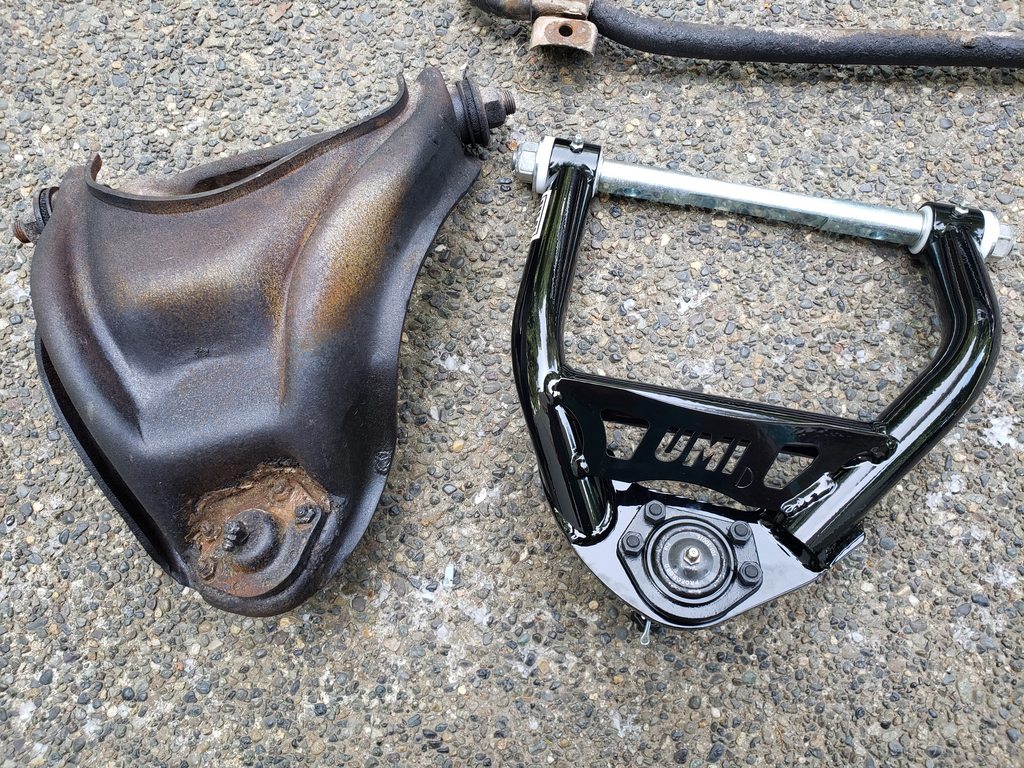
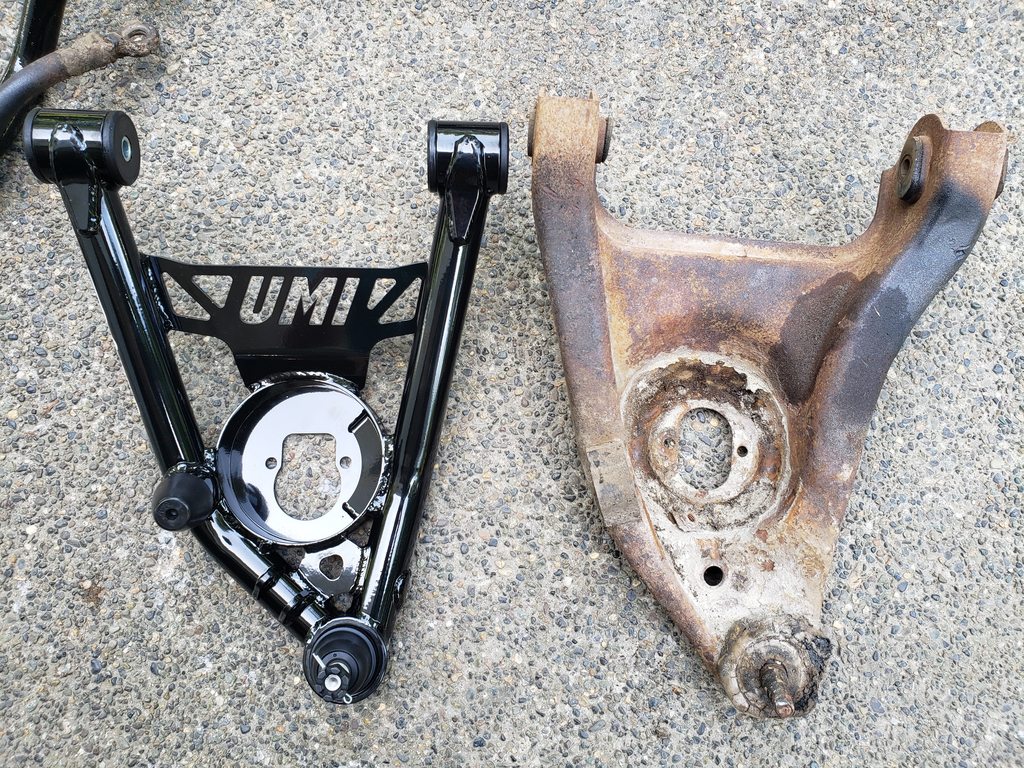
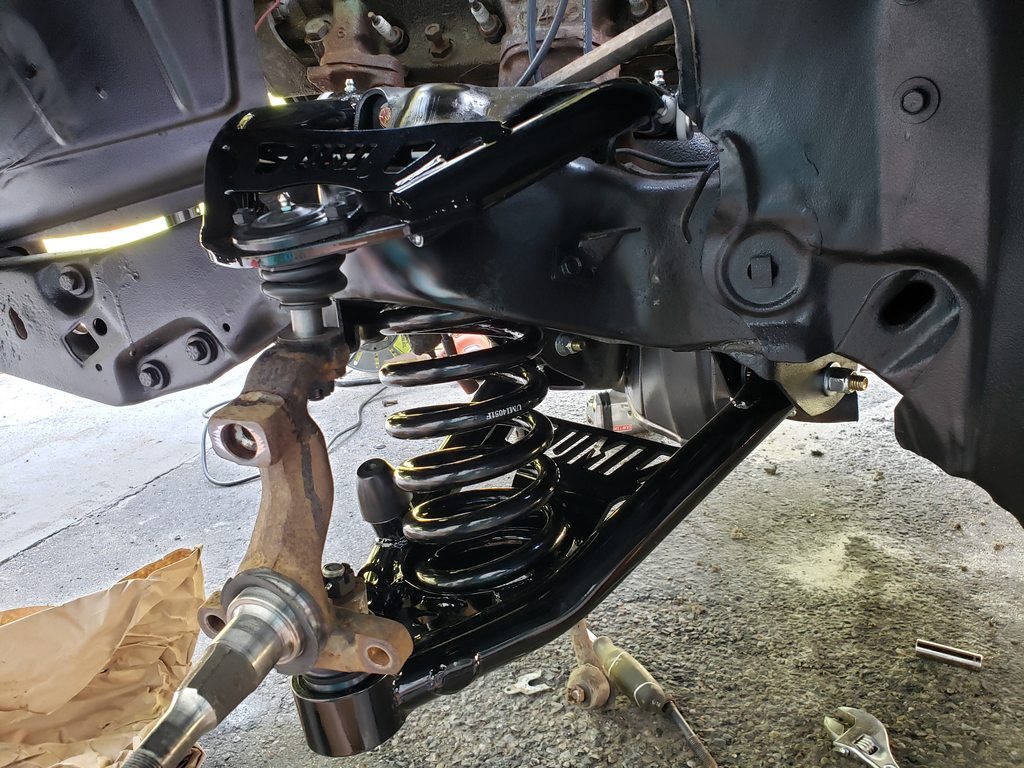
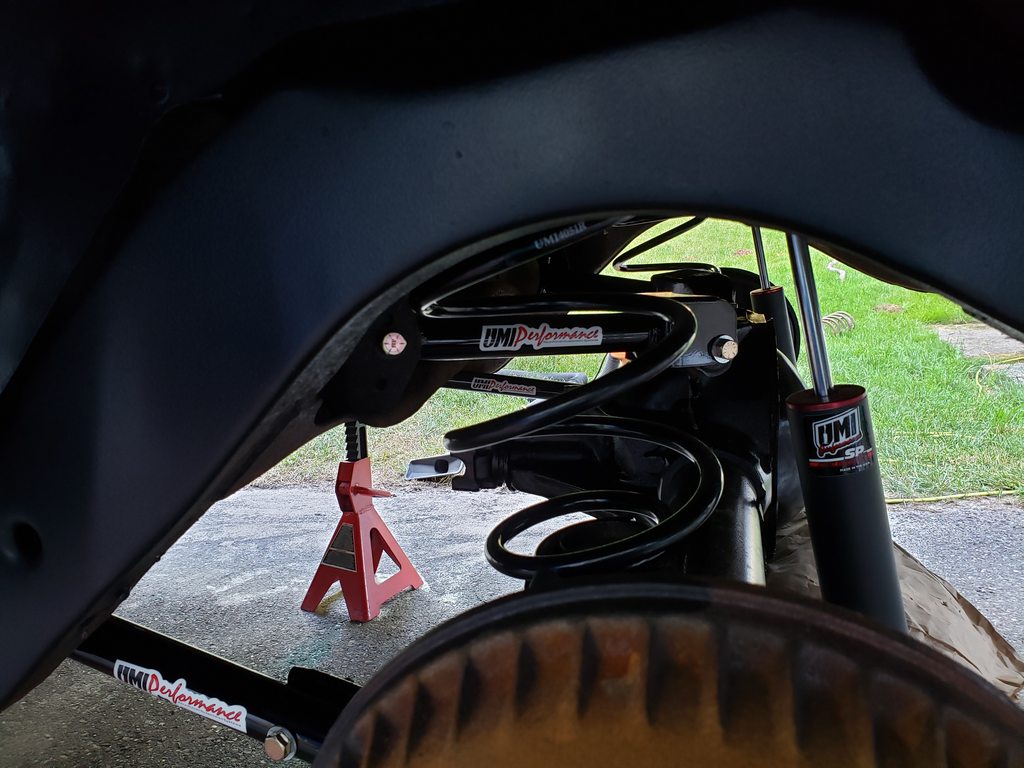
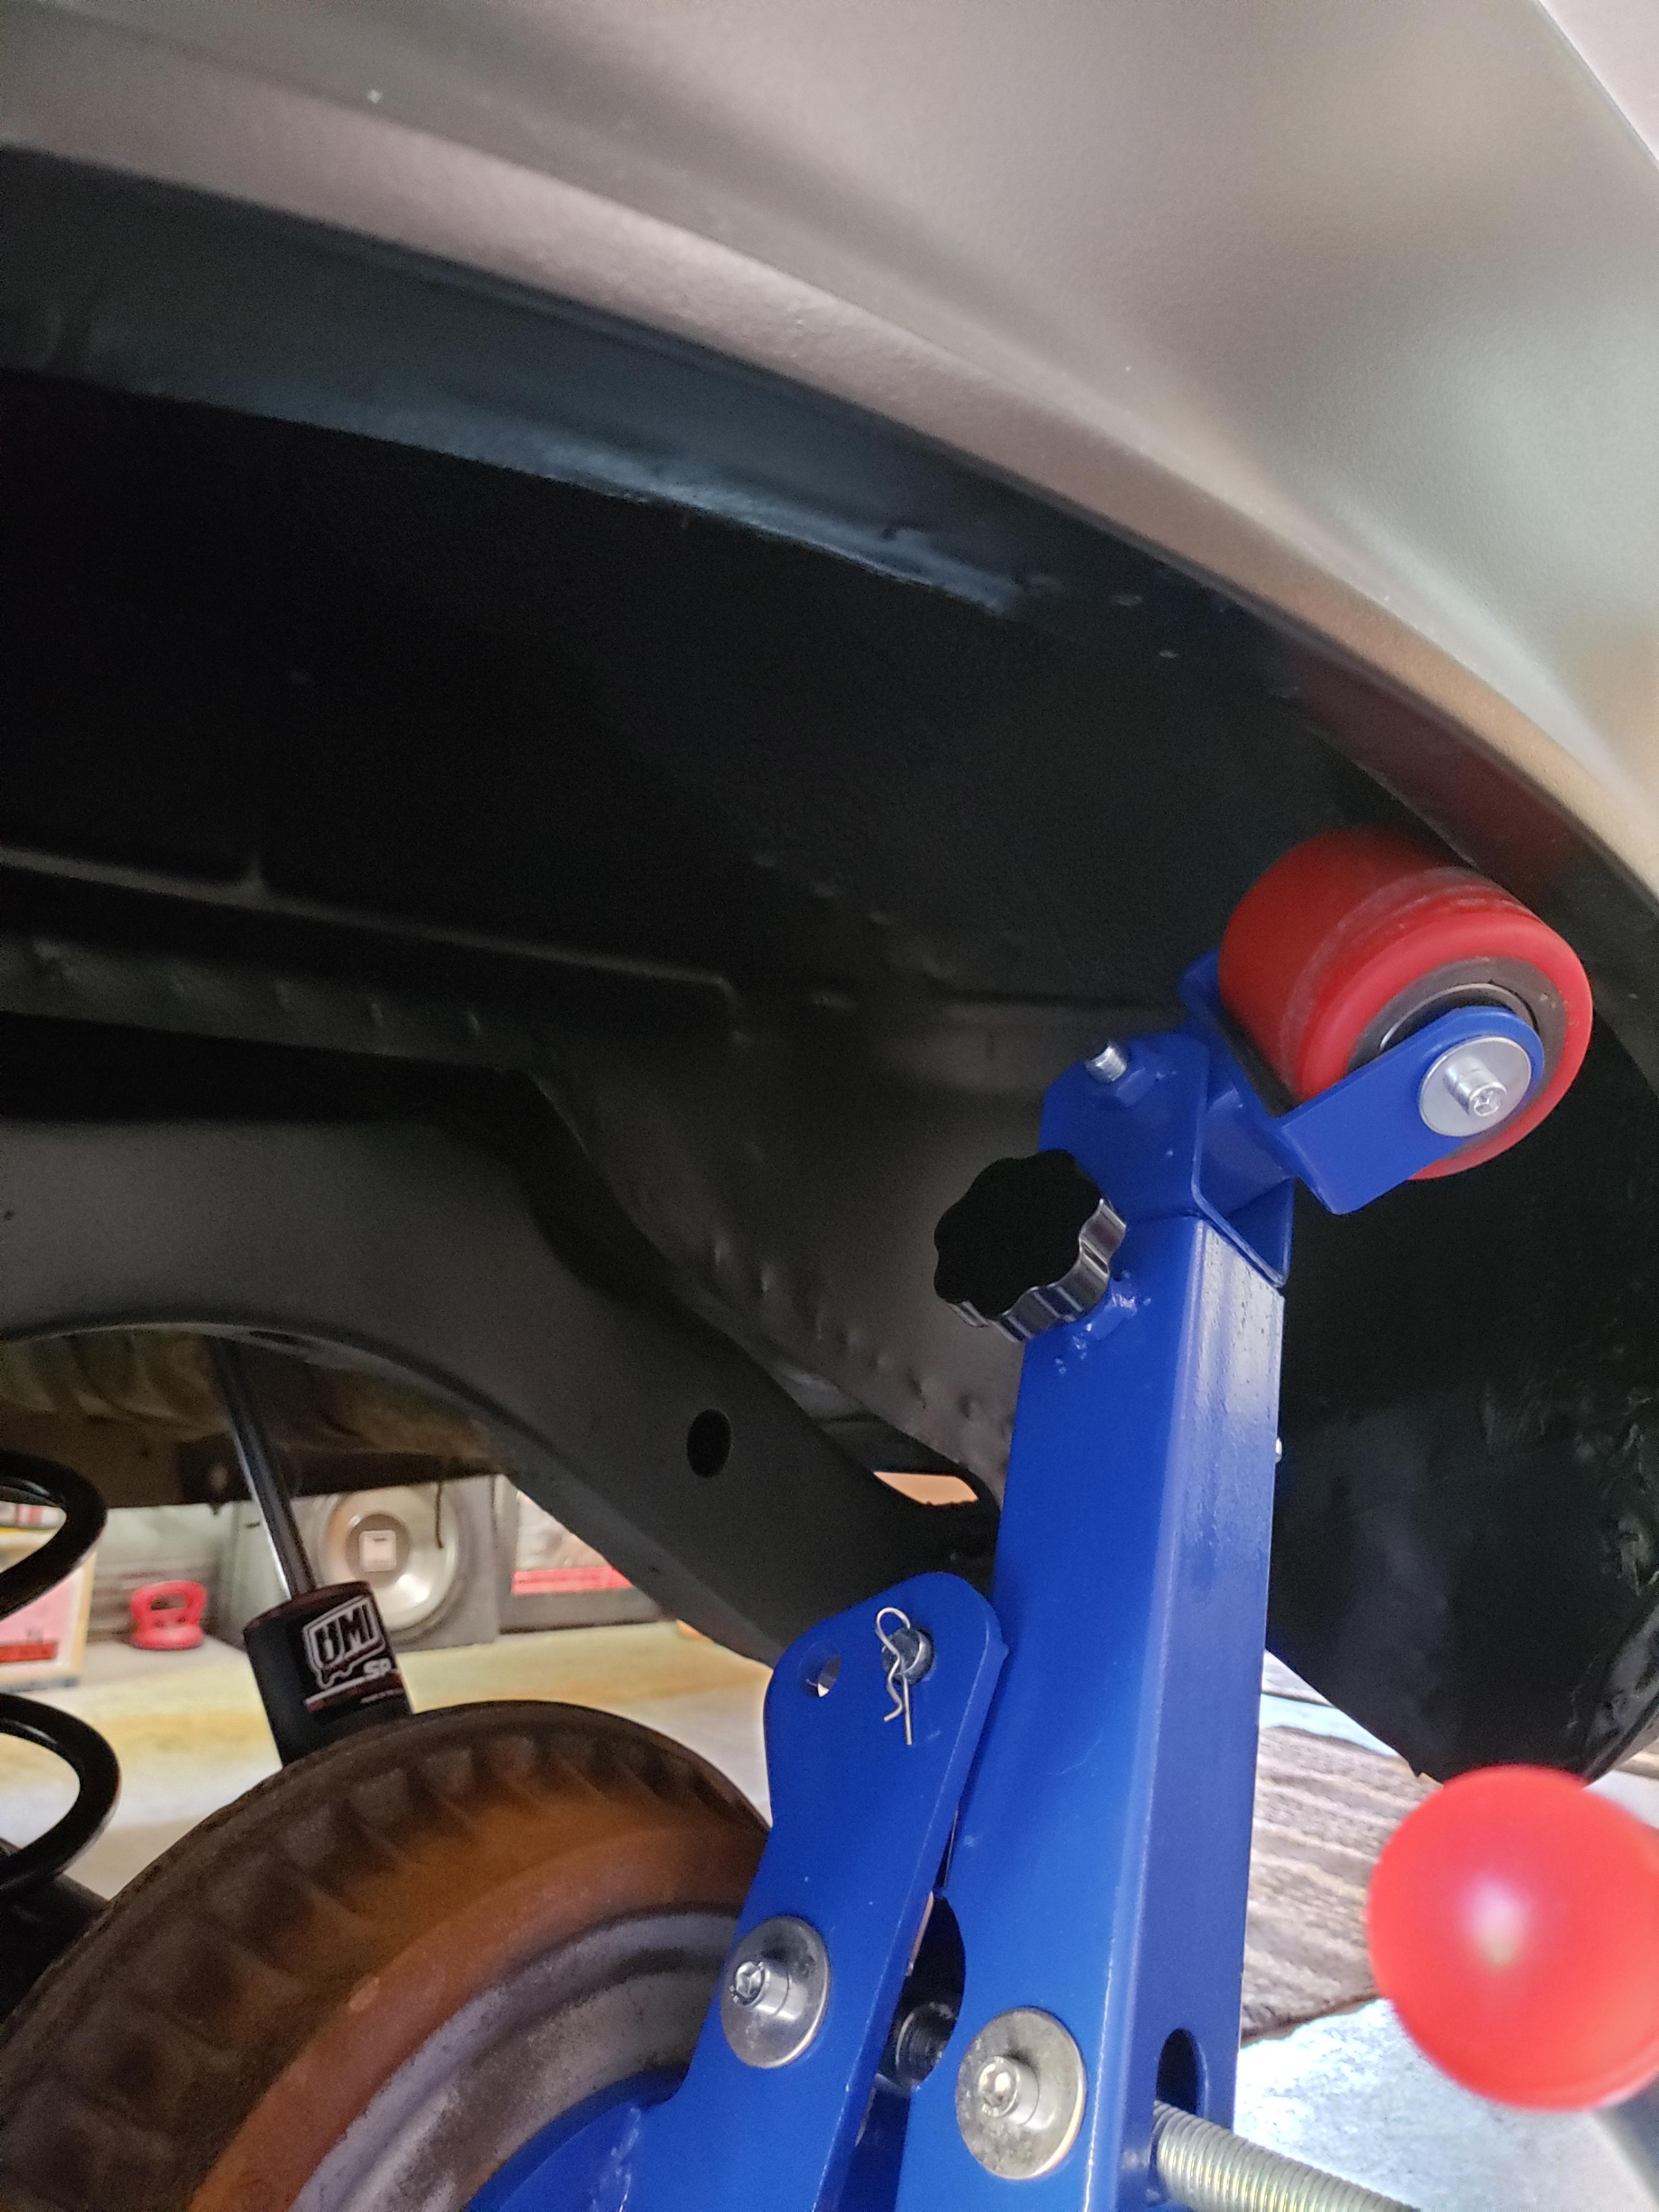
I've been running out of room in the garage for more parts so I figured now is as good of time as any to see if this UMI stage 2 kit fits.
The quality of the welds, bushings, and ball joints all seem nice.
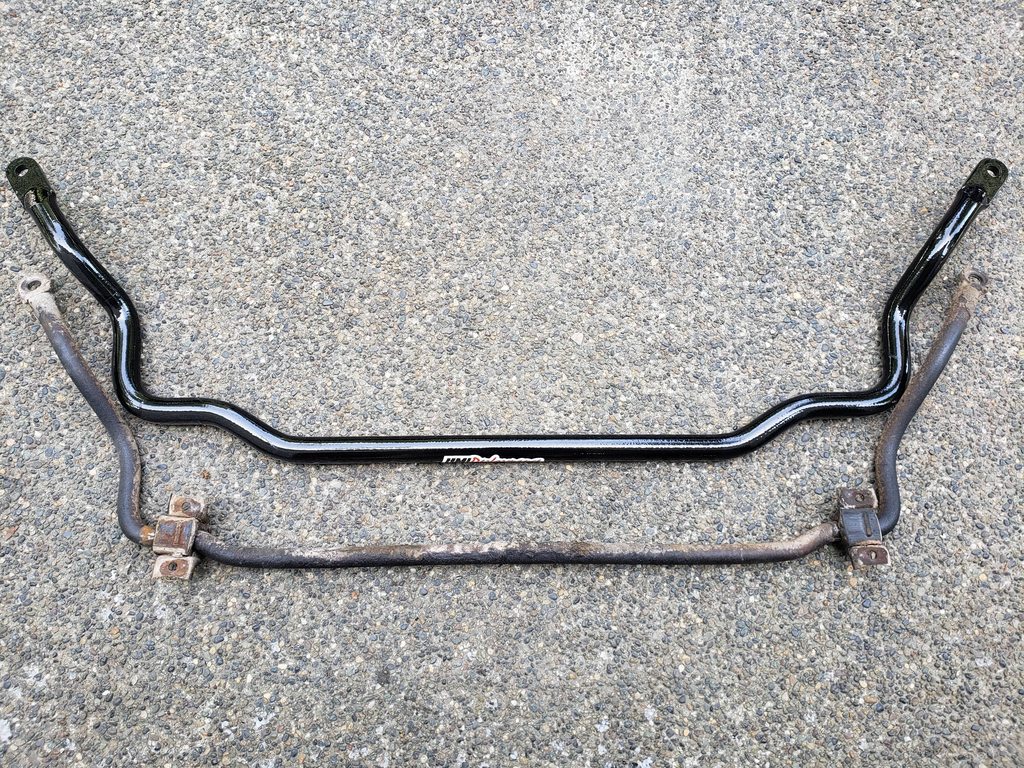
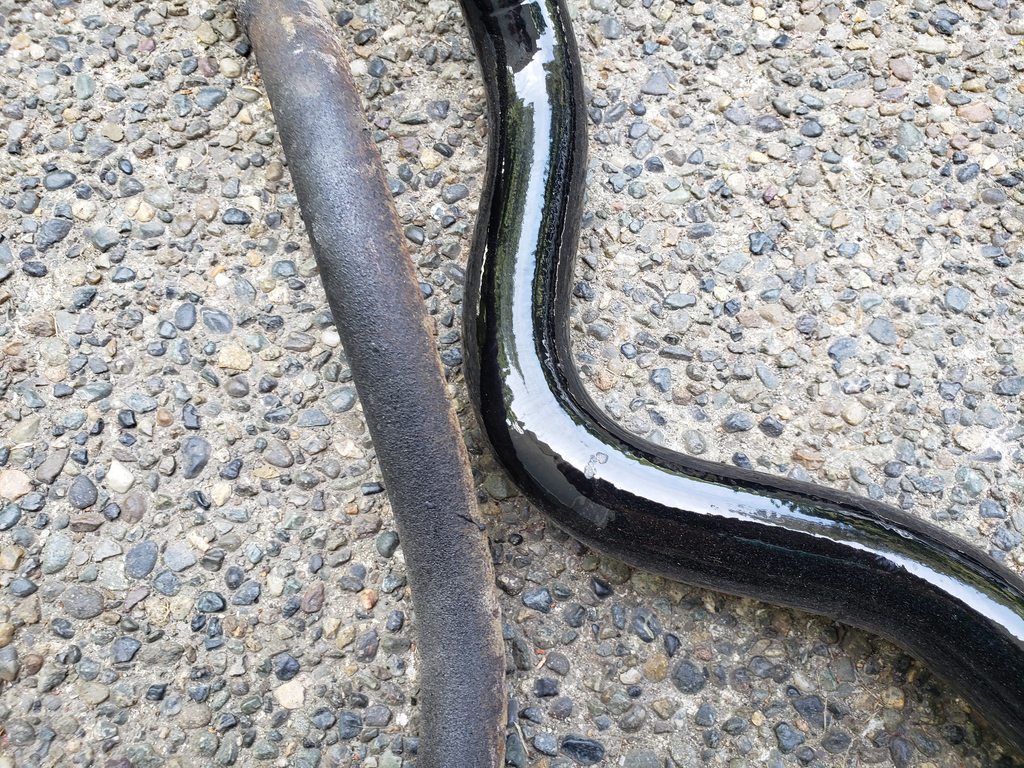
The front sway bar is thick compared to the stock one.
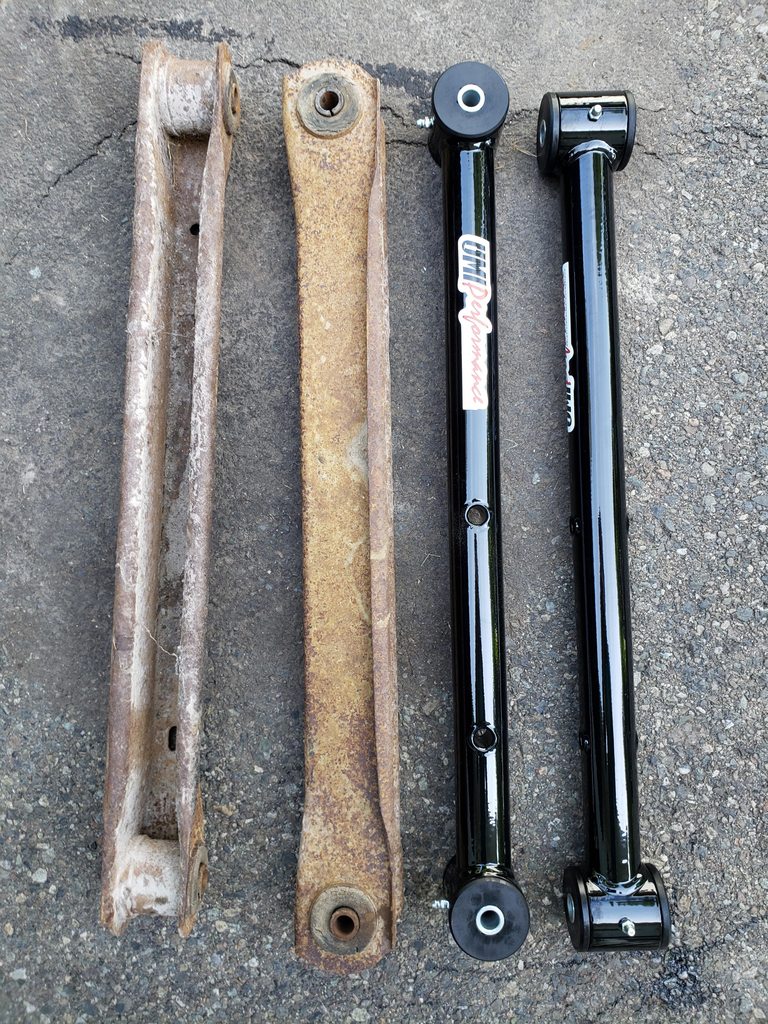
These new A arms look a lot nicer than the old ones
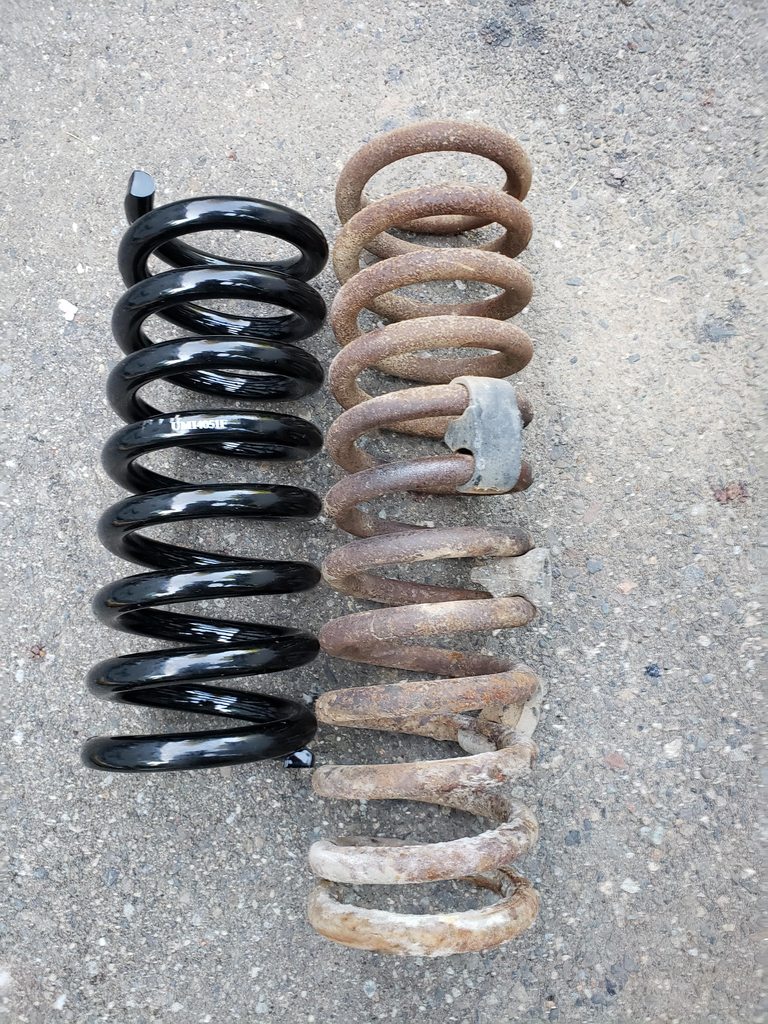
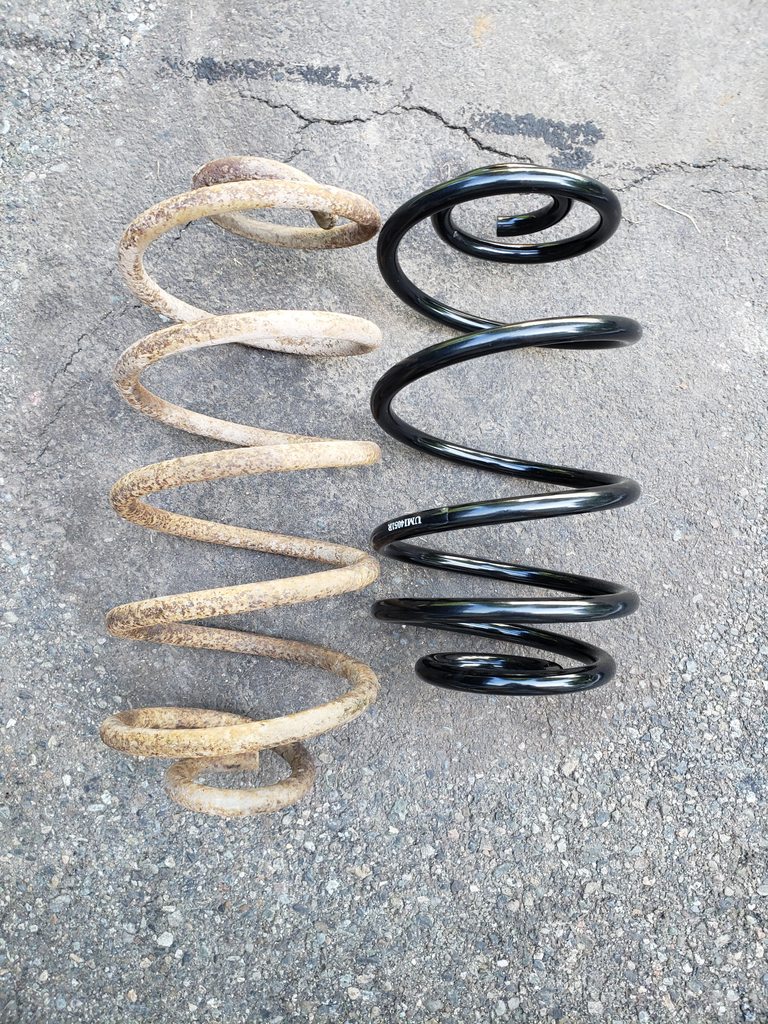
I went with the 2" lowering option and the new springs are considerably shorter than the old ones. Putting them in was a breeze
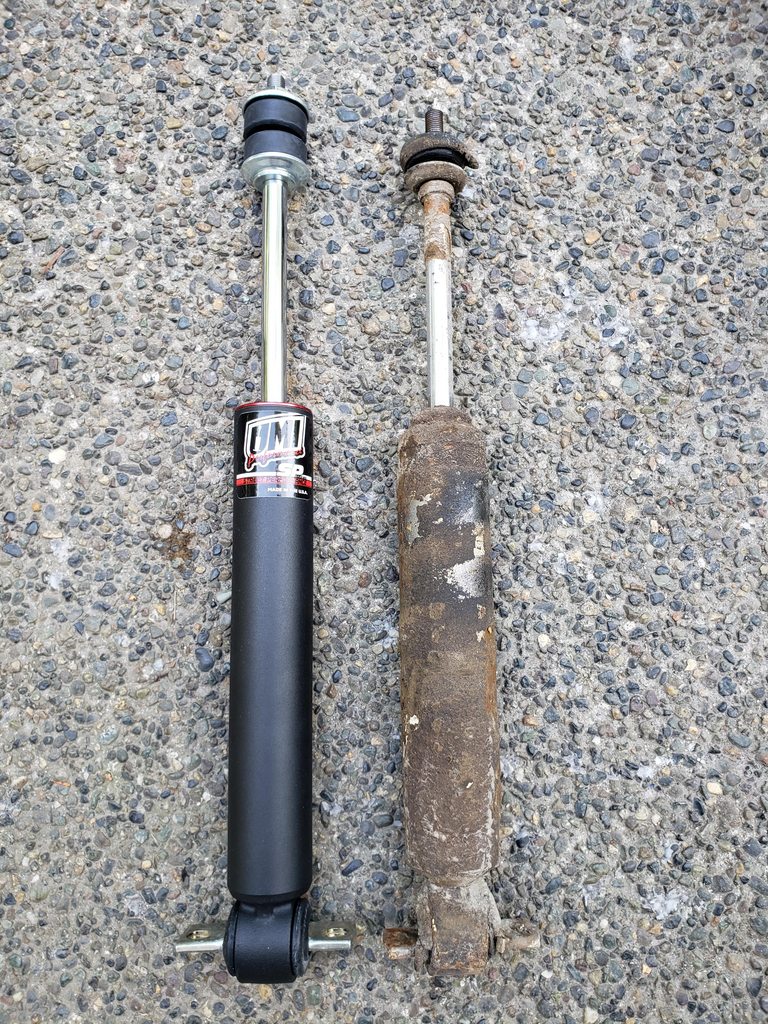
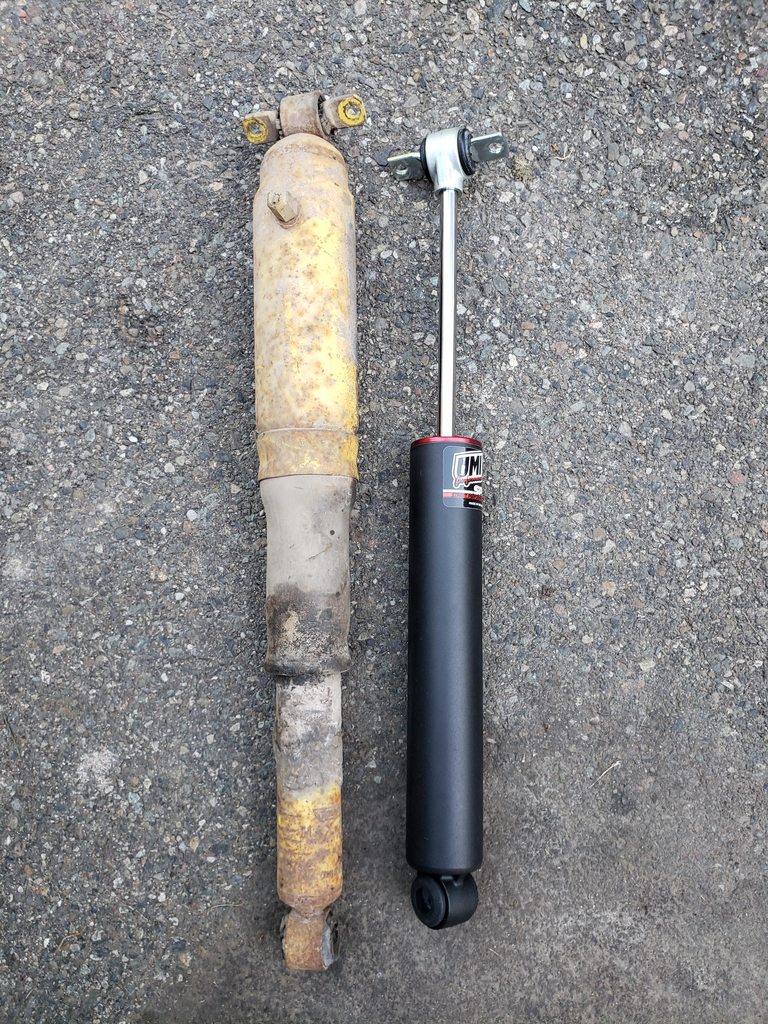
I think the old shocks have seen better days
Everything all situated nicely in the wheel well
-
06-01-2019 #30
Registered User
- Join Date
- Mar 2015
- Location
- Seattle, WA
- Posts
- 34
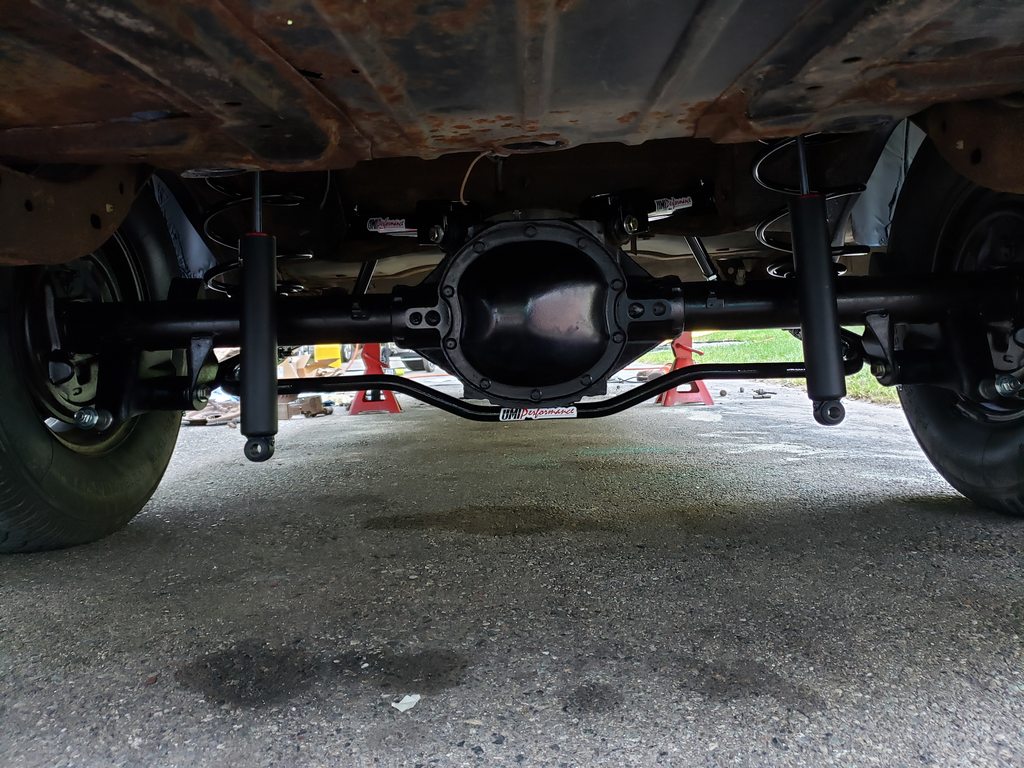
The axle was due for some freshening up as well. It was pretty crusty and as you can see, the media blasting left it and the underside of the car a complete mess.
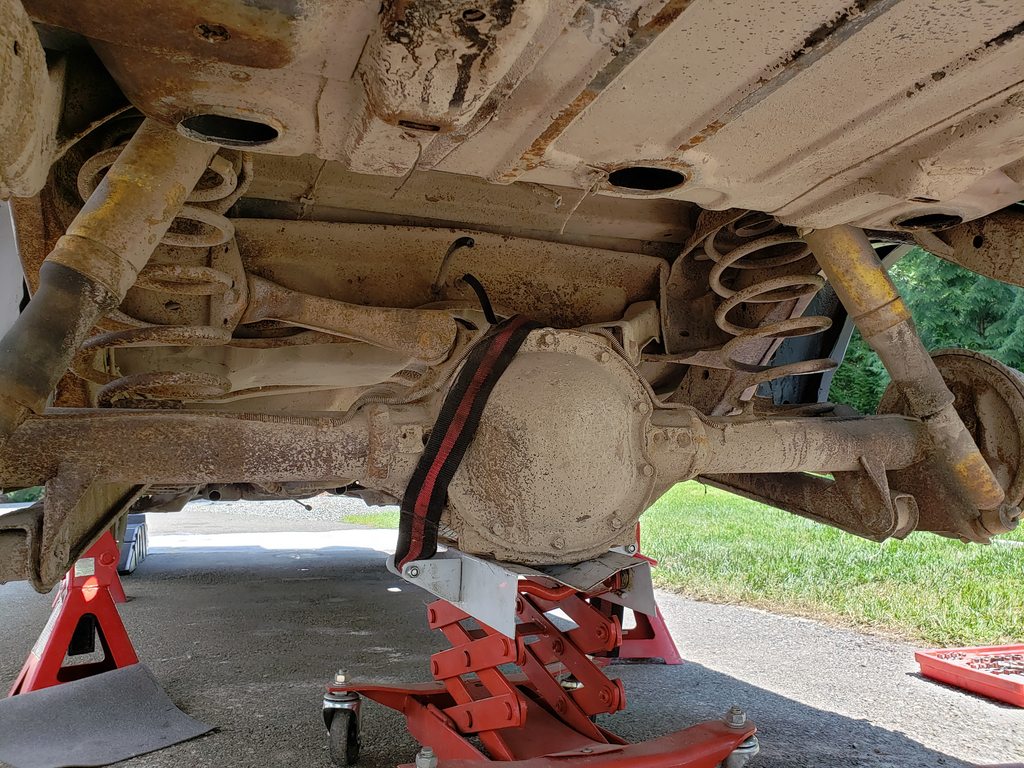
So I pulled it out to strip it down. A transmission jack worked great to cart for R&R.
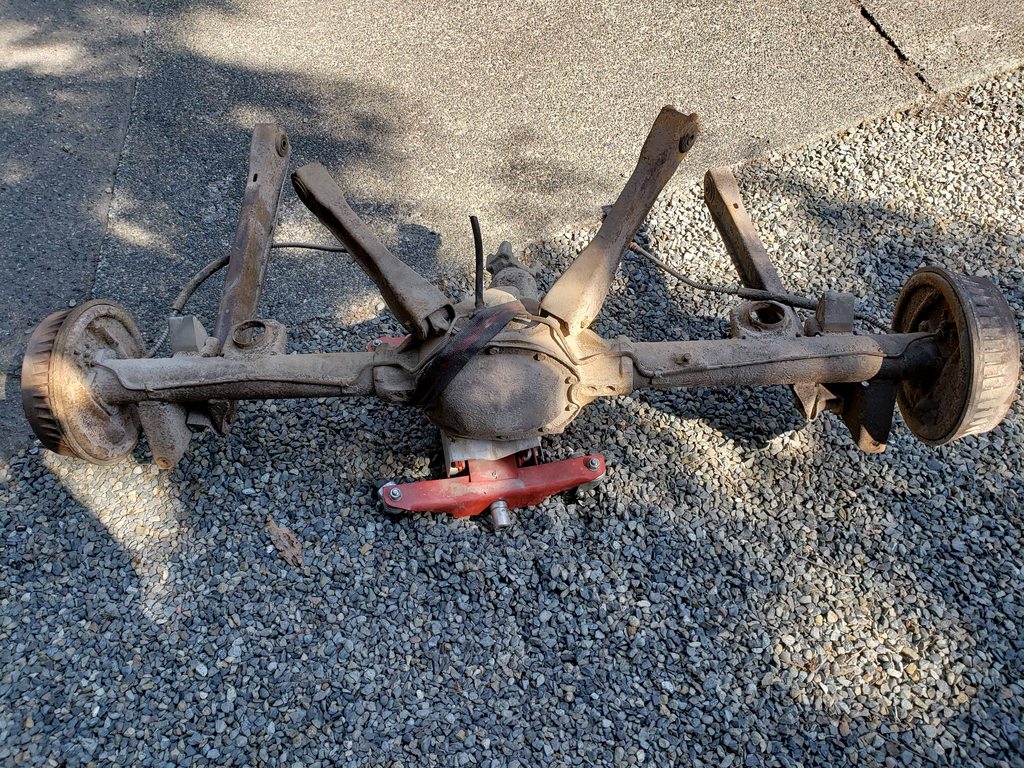
I cleaned off a lot of the grease, stripped off a lot of the surface rust, and shot it was a rust inhibitor. I didn't invest a lot of time into as I still don't know exactly what I'm going to do with it yet. But at least it's clean
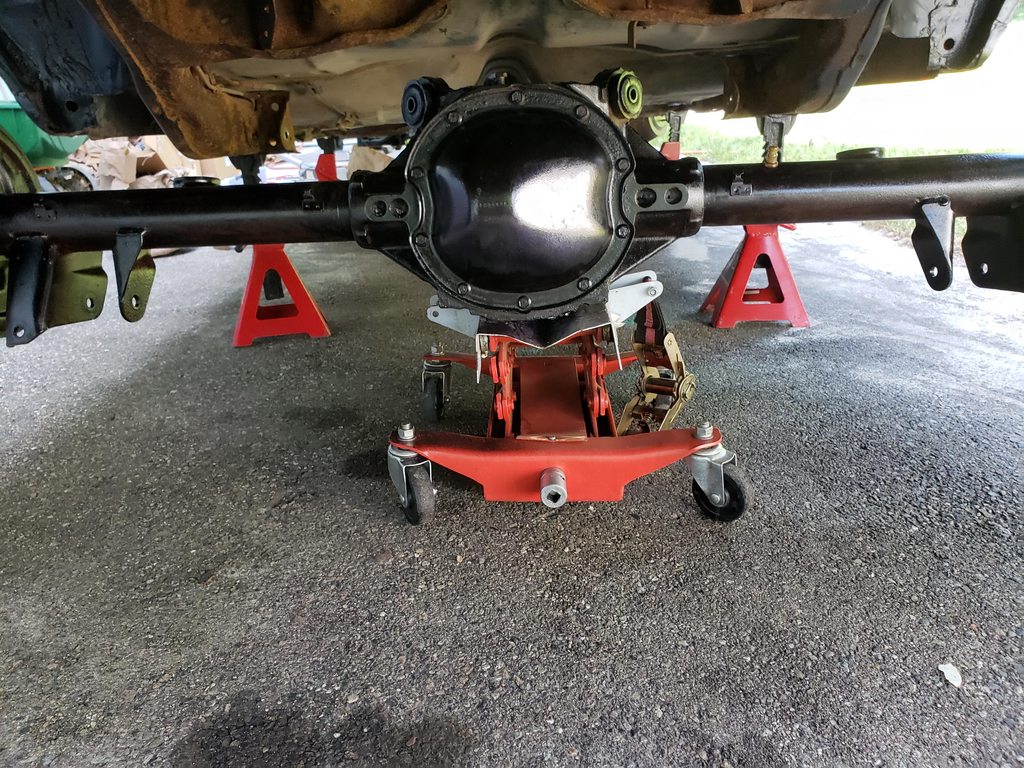
The UMI stage 2 kit comes with tubular upper control arms, lower control arms, and control arm braces (uppers and braces not pictured). The new rear shocks are a bit more compact than the air shocks that were on there
It's starting to look much better down there
-
06-01-2019 #31
Registered User
- Join Date
- Mar 2015
- Location
- Seattle, WA
- Posts
- 34
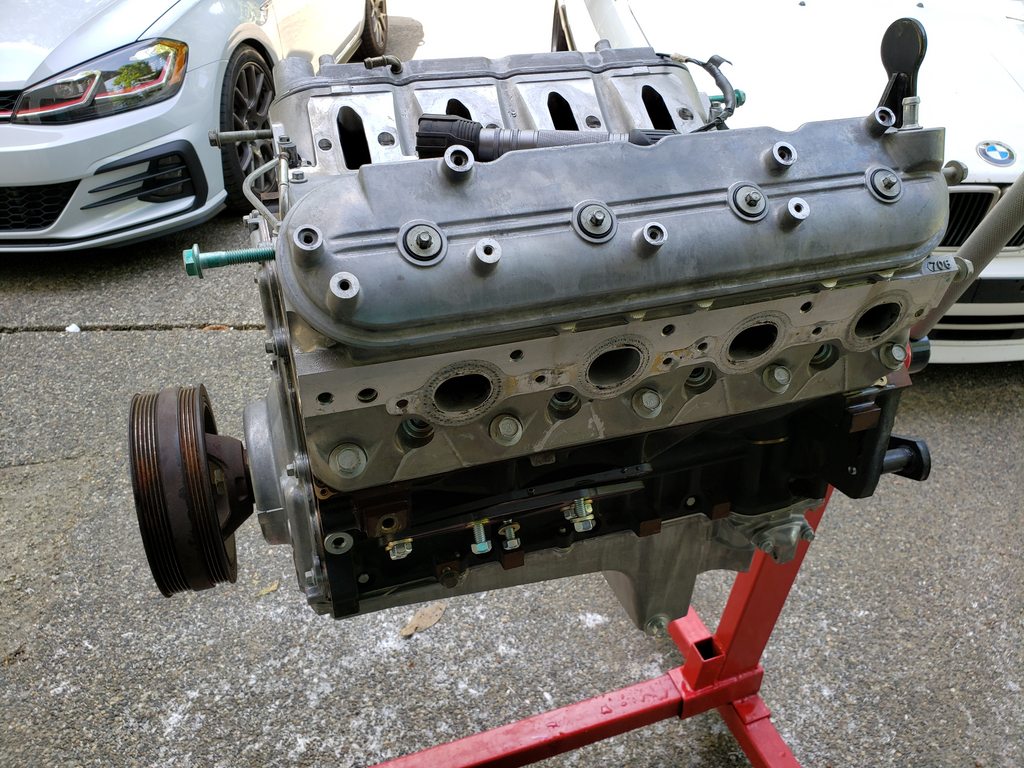
Up next I'll pull the 326 and test fit the 5.3. I also picked up some C6 Z51 calipers to replace the drums.
-
06-04-2019 #32
Registered User
- Join Date
- Mar 2015
- Location
- Seattle, WA
- Posts
- 34
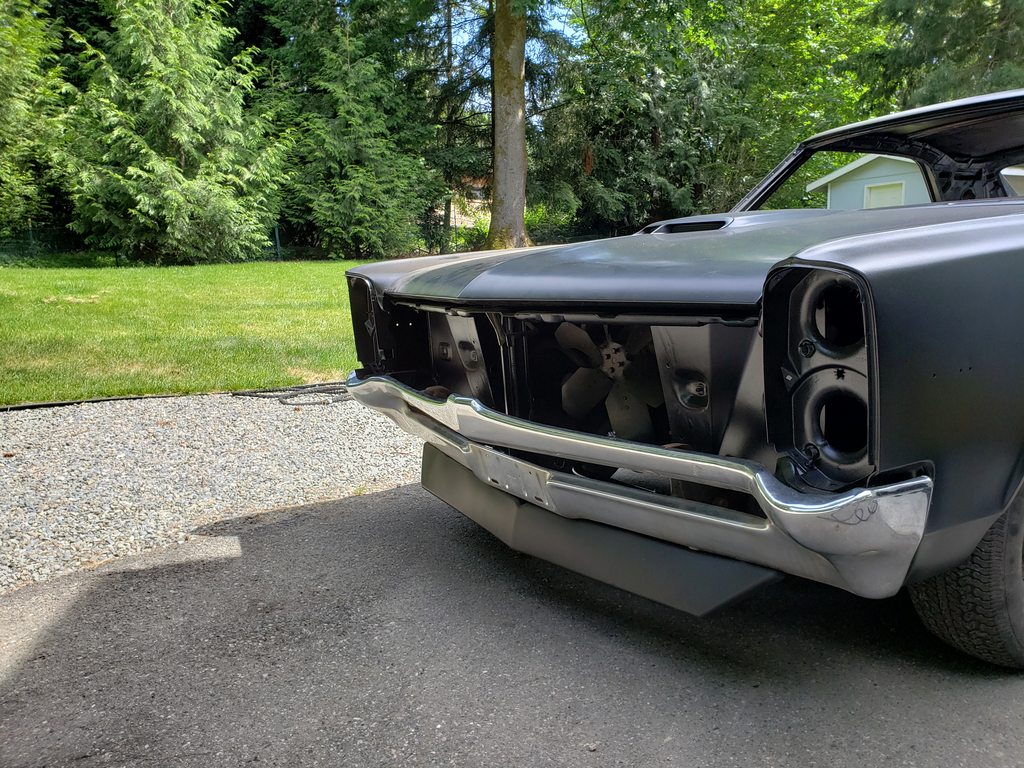
I decided to throw the bumpers on to see how low the front is, and how well the camaro chin spoiler looks. It needs some tweaking but I don't think it's bad for ~$20
-
06-09-2019 #33
Registered User
- Join Date
- Mar 2015
- Location
- Seattle, WA
- Posts
- 34
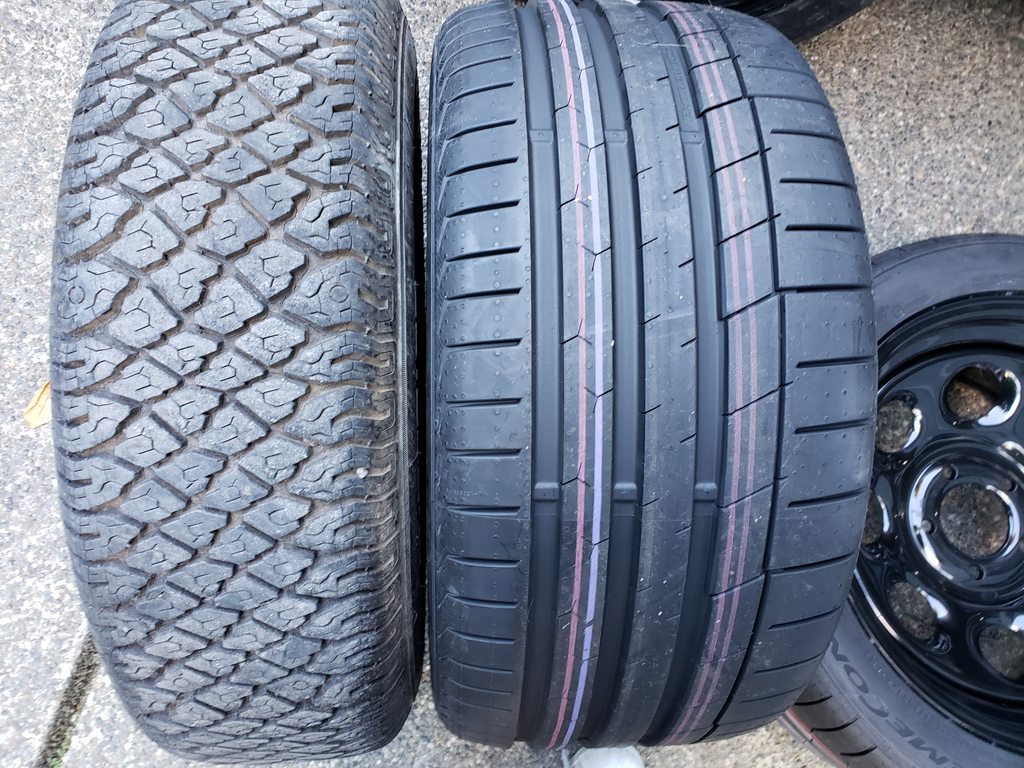
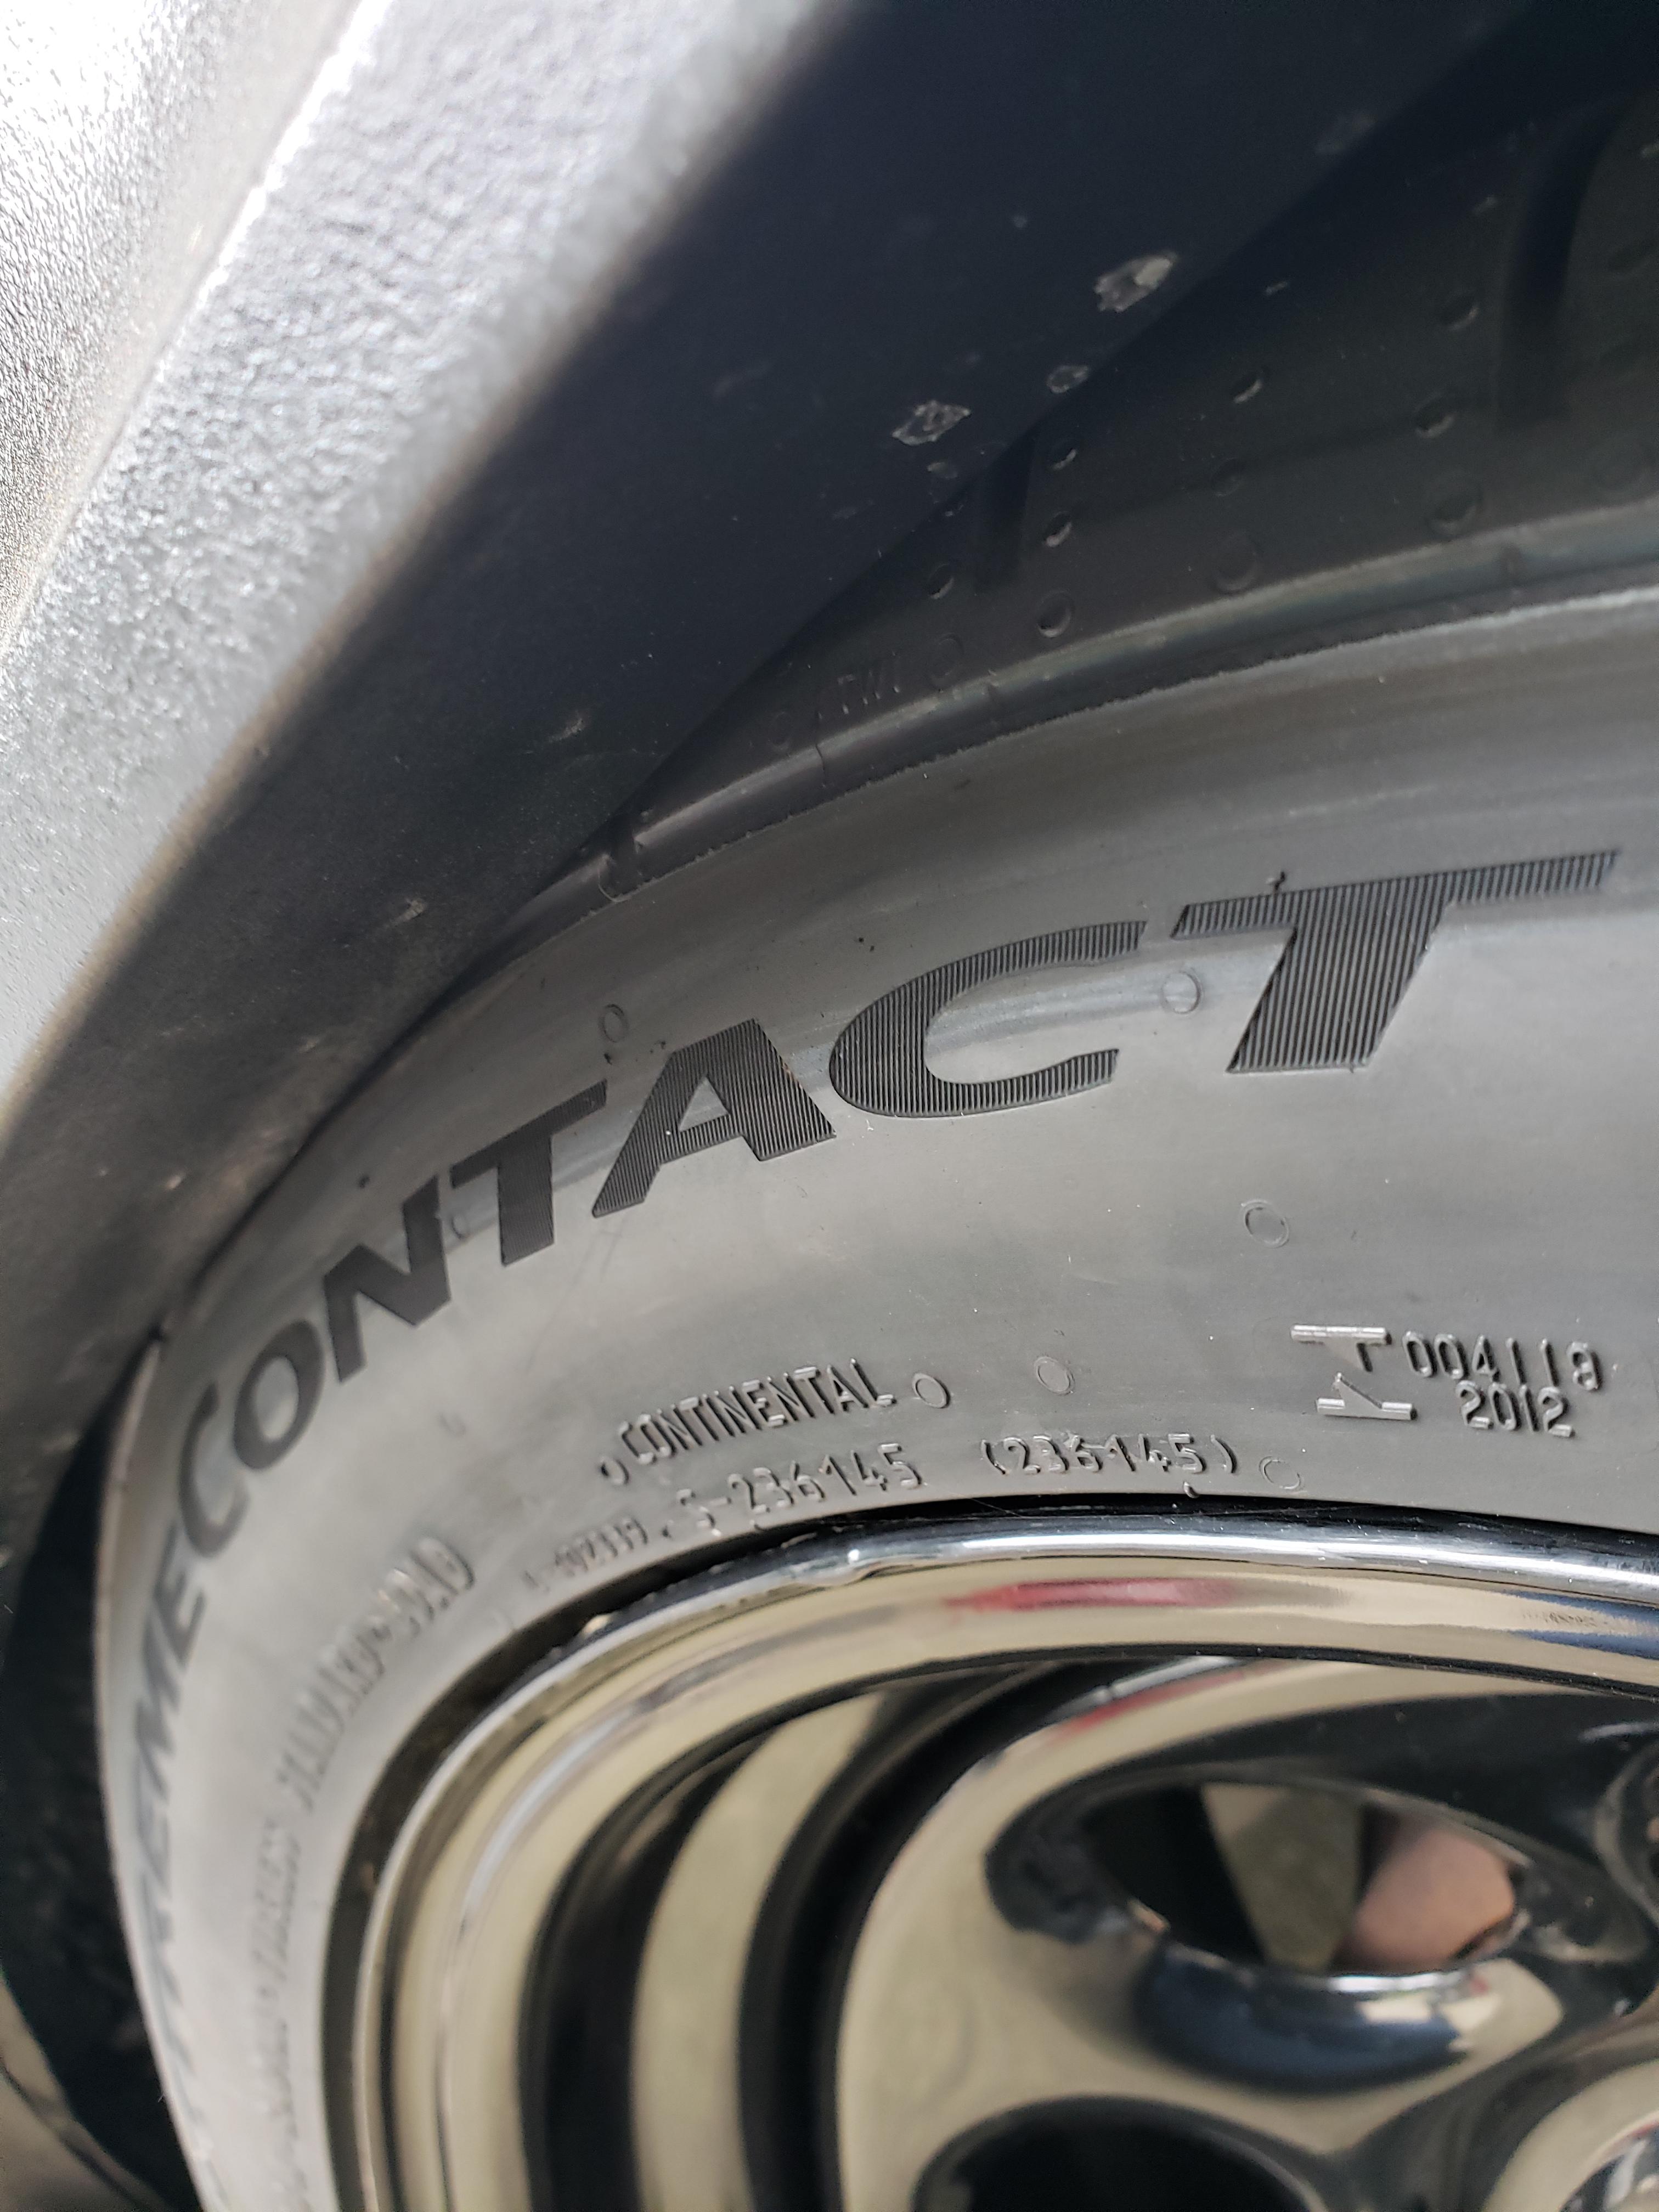
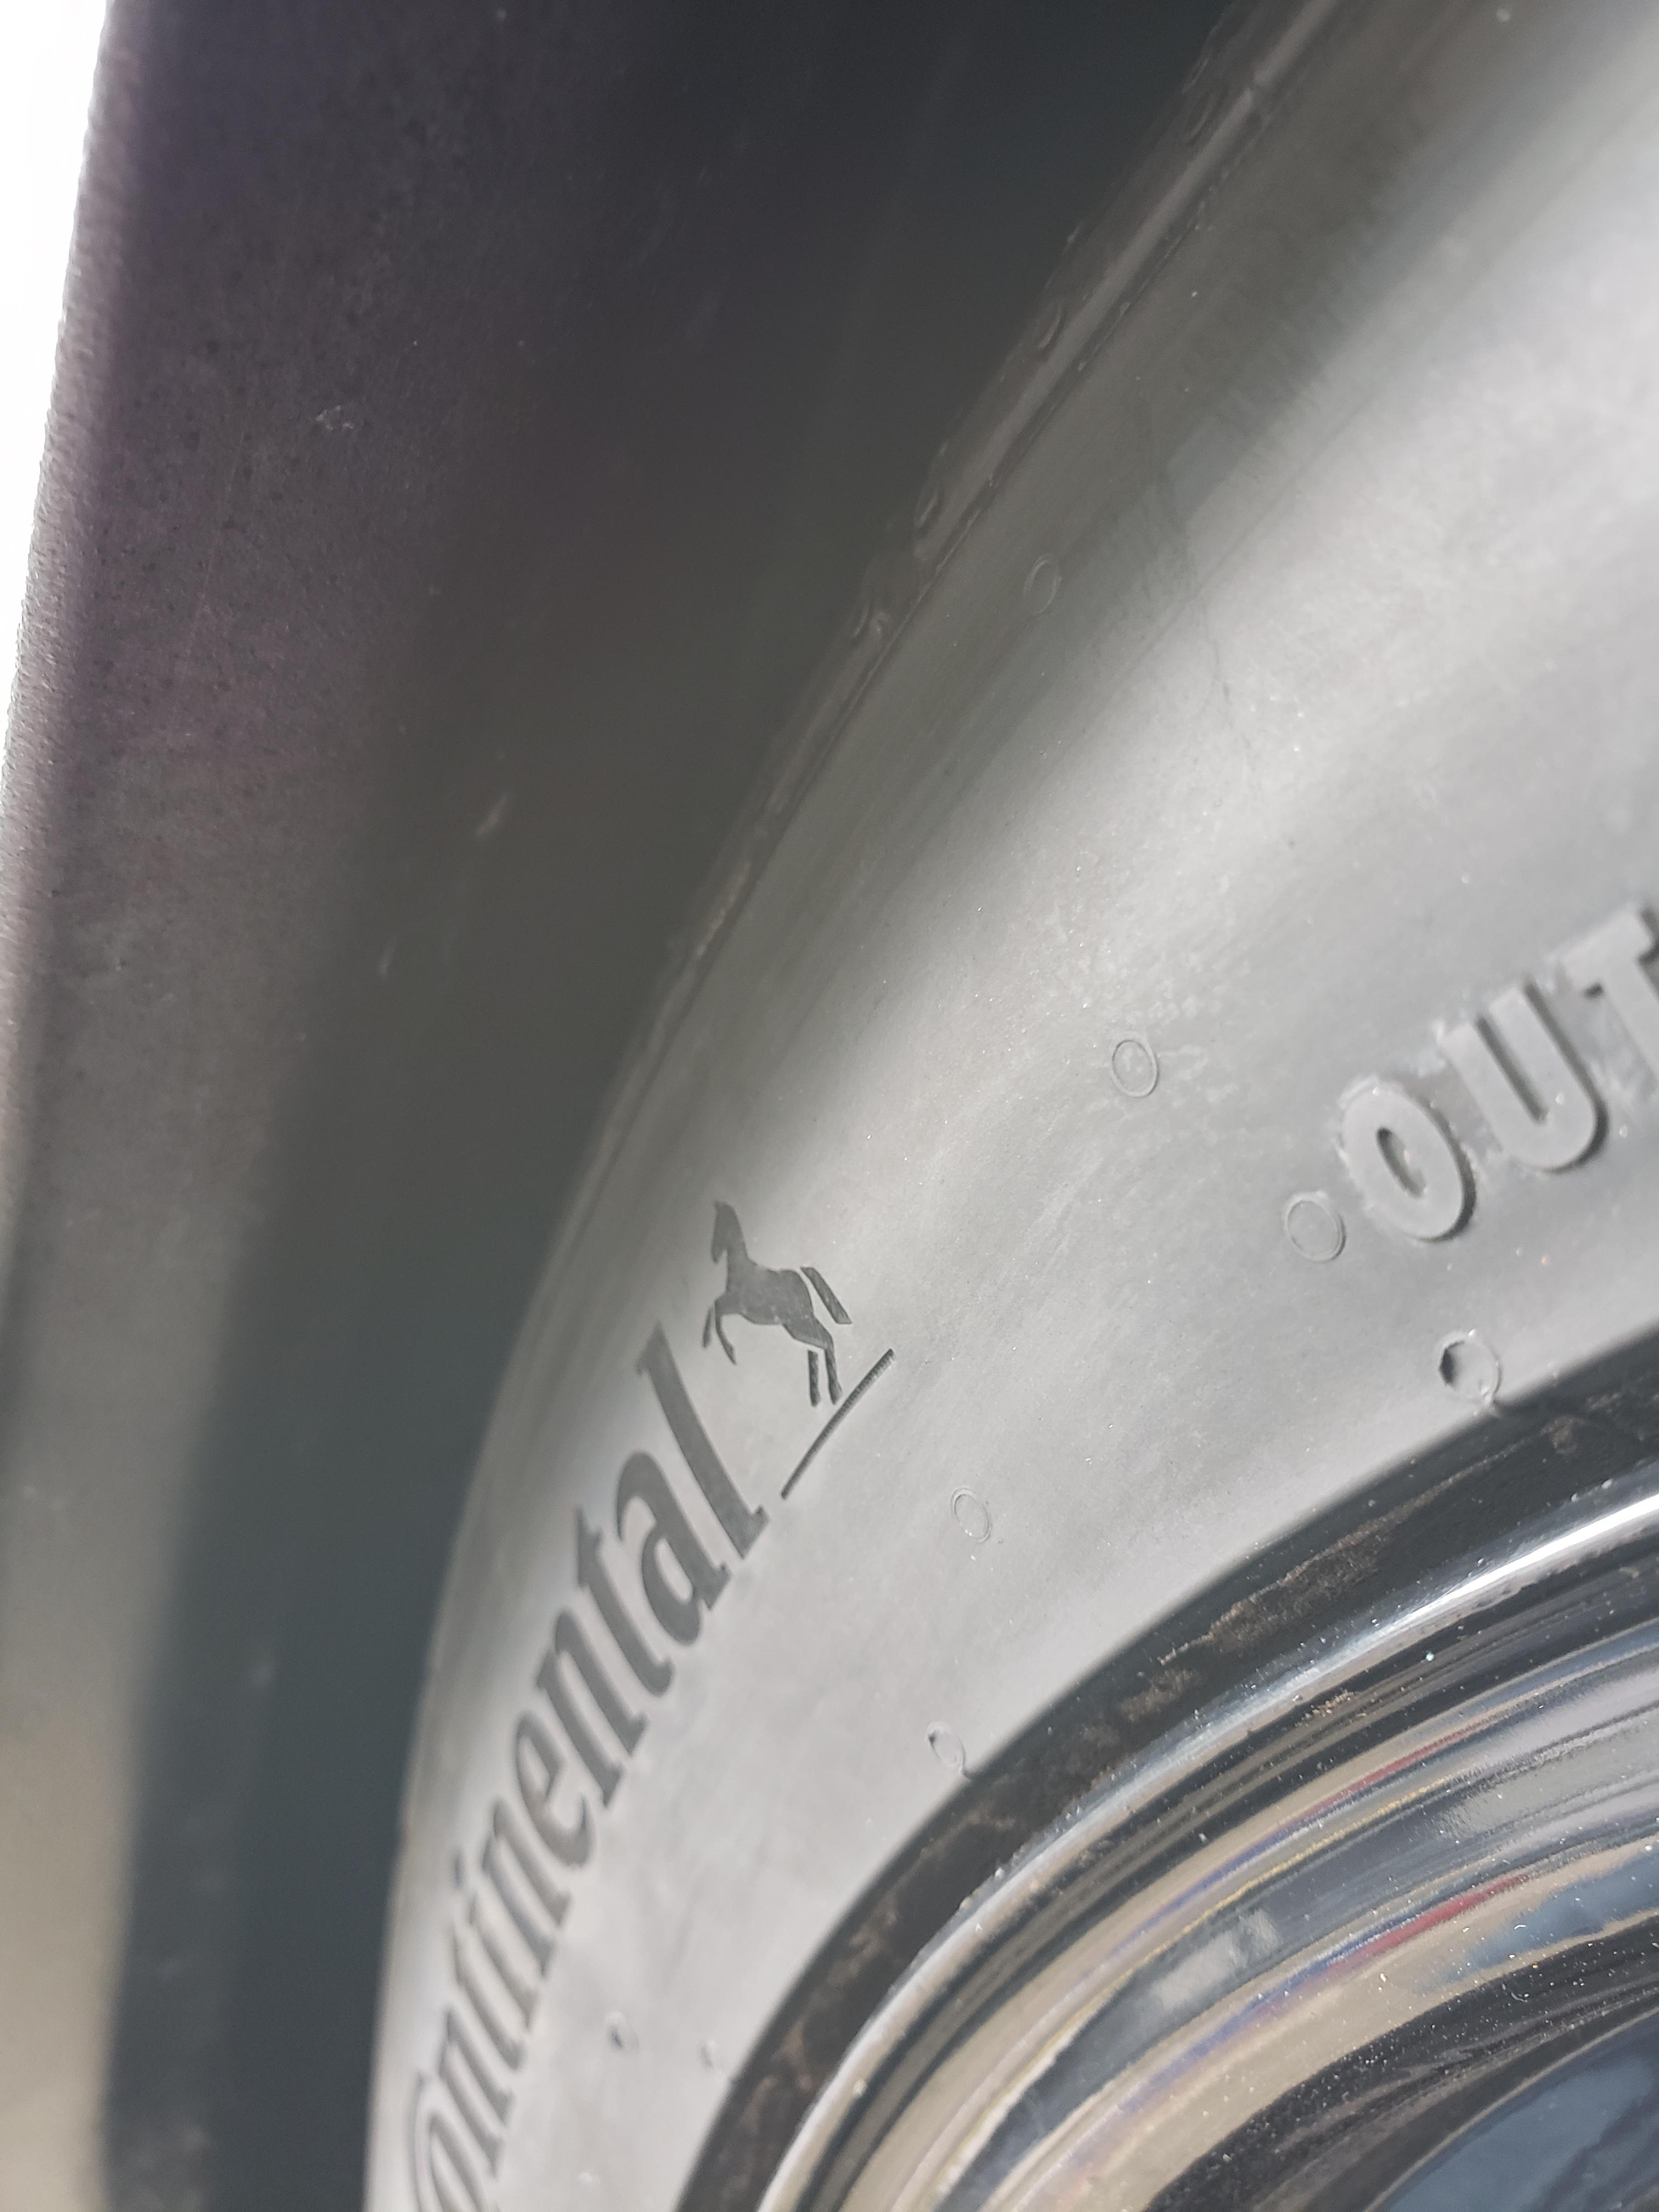
Time to make way for the C6 brakes so I ditched the 14'' wheels for a set of 17x9 Cragar Soft 8s (5'' backspace) with a set of 275/40/17 Continental ExtremeContact Sports. I'm pretty happy with the fitment. The rear quarters are going to need to be rolled, trimmed, or both.
-
06-11-2019 #34
 Registered User
- Join Date
- Jan 2016
- Location
- Torrance, CA
- Posts
- 39
Looks great!
I have a '66 Tempest with UMI suspension and Kore3 brakes, too! I daily-drive mine, commuting across LA every day. The suspension is wonderful.
I'm running 275/40r18's in front and 275/40r19's in back. Niche Misanos with Nitto nt555 g2's. I wound up taking out my front wheelwells, not sure if that was really necessary or not. In the back, I'm often having to tweak the rear control arms length and 'massage' the wheel wells to avoid rubbing.
Hopefully you can get it on the road soon!1966 Pontiac Tempest
Two-door, no post. Fixing things one-by-one. Daily driven when it's not up on jackstands.
UMI Stage 4 suspension. Manual Z06 brakes from Kore3. 275/40r18 and 275/40r19 rear. Currently building a Pontiac 400 stroker.
-
06-12-2019 #35
Registered User
- Join Date
- Mar 2015
- Location
- Seattle, WA
- Posts
- 34
Thank you! That's great to hear. I am really looking forward to it. I also plan to drive it (a lot). I'm shooting for LS Fest West 2020.
-
06-13-2019 #36
Registered User
- Join Date
- May 2009
- Location
- Minnesota
- Posts
- 615
Car is coming along nicely. It's amazing how having the car in one color of primer helps so much. Keep up the great work.
-
07-30-2020 #37
Registered User
- Join Date
- Mar 2015
- Location
- Seattle, WA
- Posts
- 34
It's been awhile since the last update. Life has been busy but I've acquired a few more parts and done a little bit more work in the past year.
SUSPENSION & BRAKES
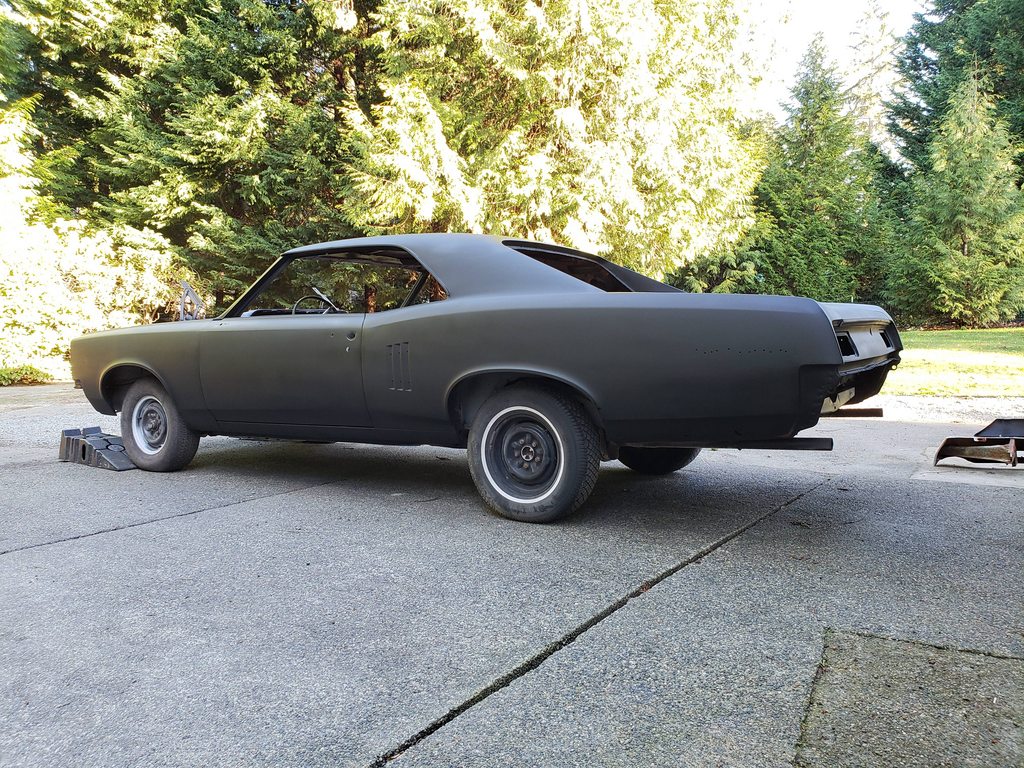
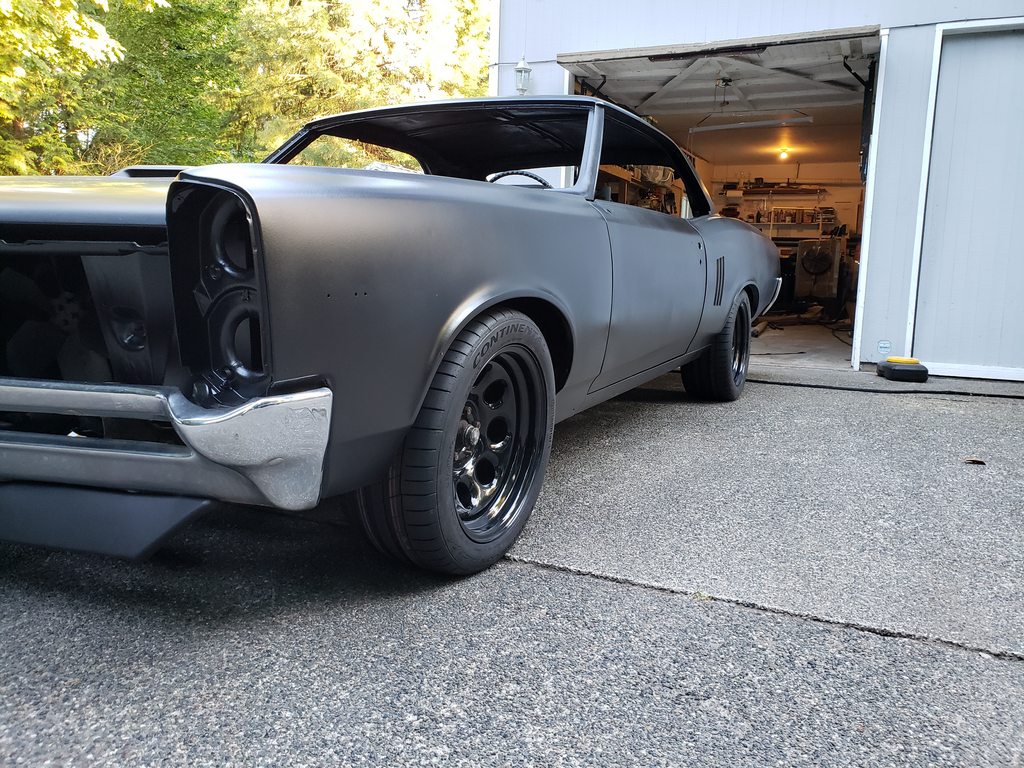
The suspension settled quite a bit. I left some parts in it to help get it closer to the weight of when it's reassembled and that allowed the suspension to compress a fair amount. I am pretty happy with the ride height and fitment. In person is looks really aggressive with the meaty tires. It's just begging to be driven
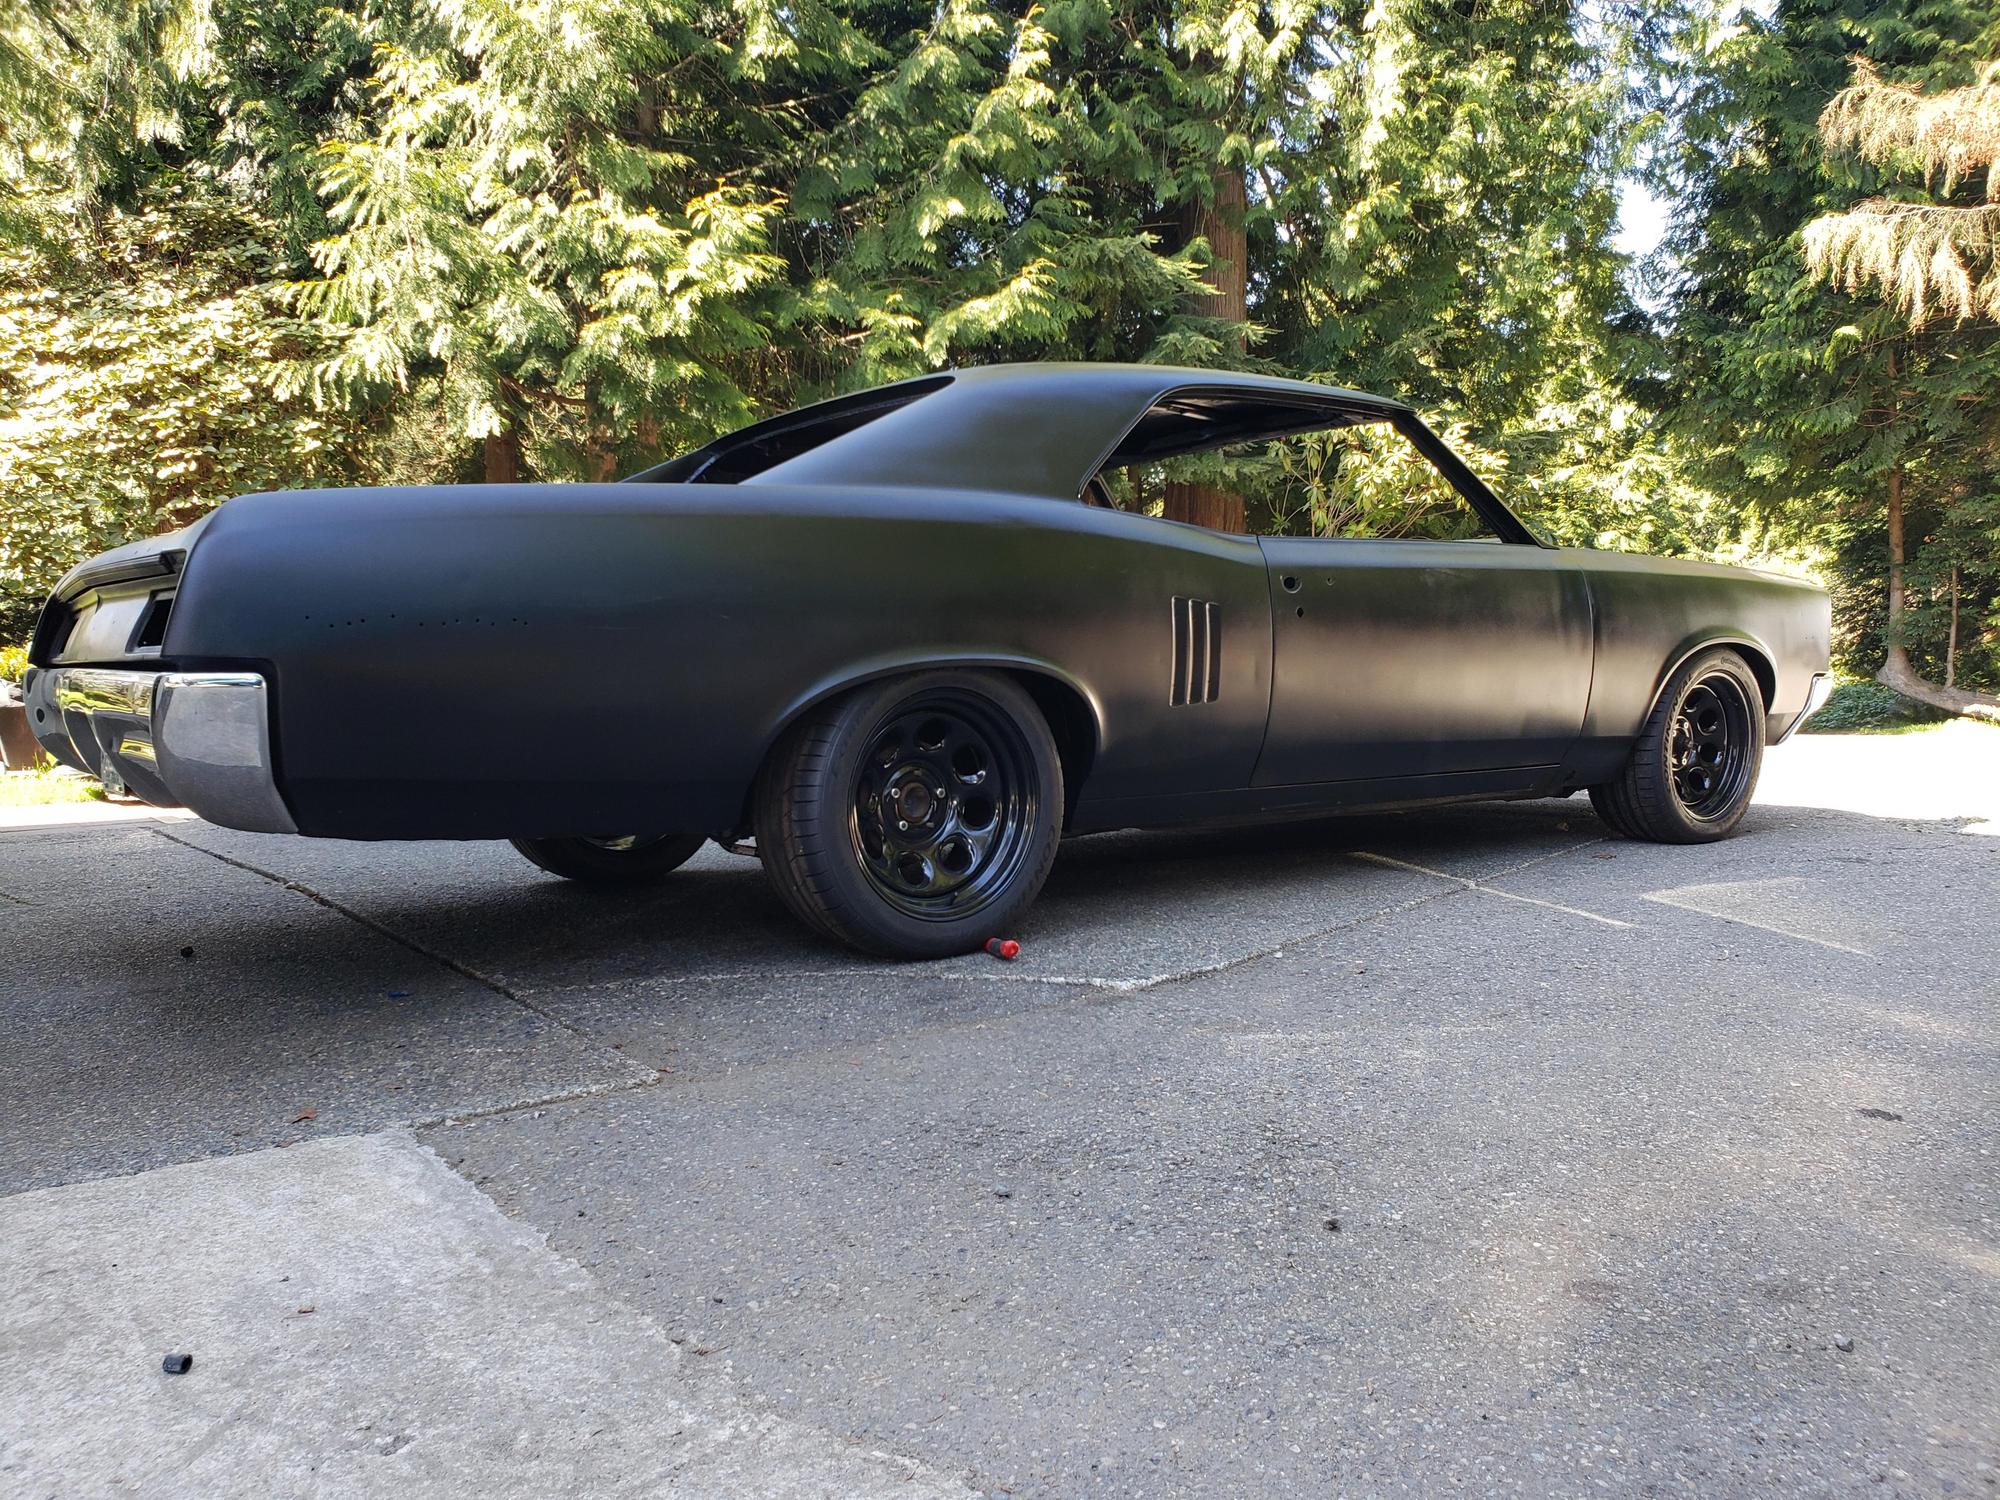
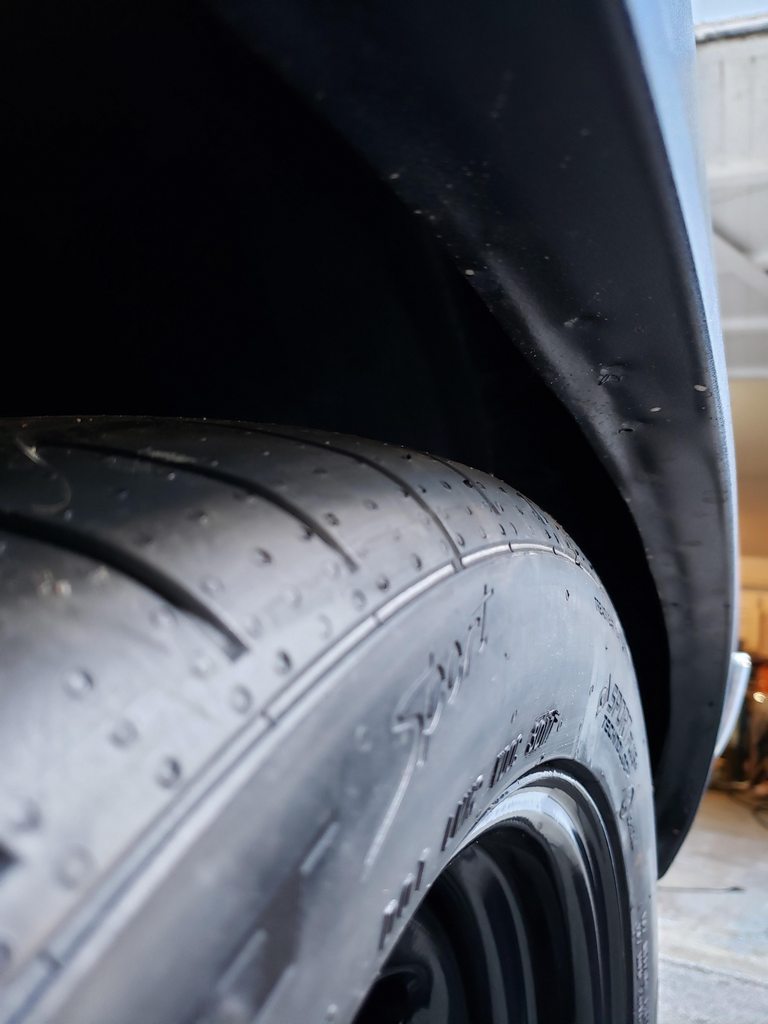
The rear quarters ended up settling onto the tires, which was to be expected. I did not want to cut as some people have had issues with the integrity of the fender afterwards. I did a light roll which moved the material enough away from the tire while not impacting the outside of the fender. I can always roll it more in the future if need be as there is a ton of material right there to work with.
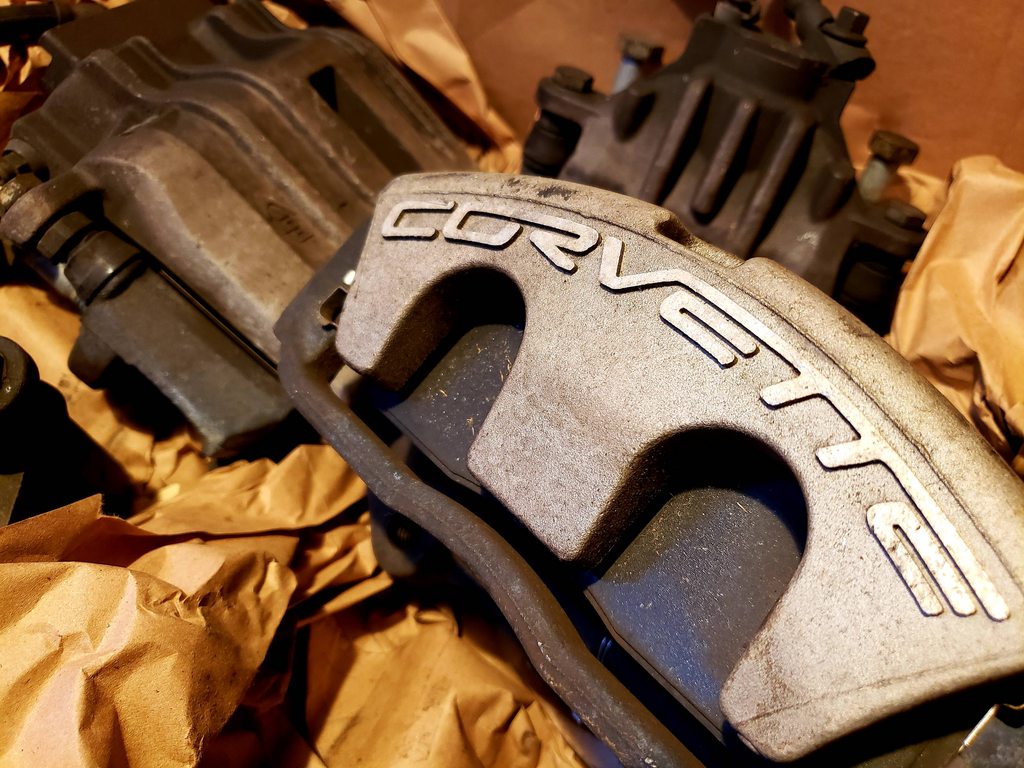
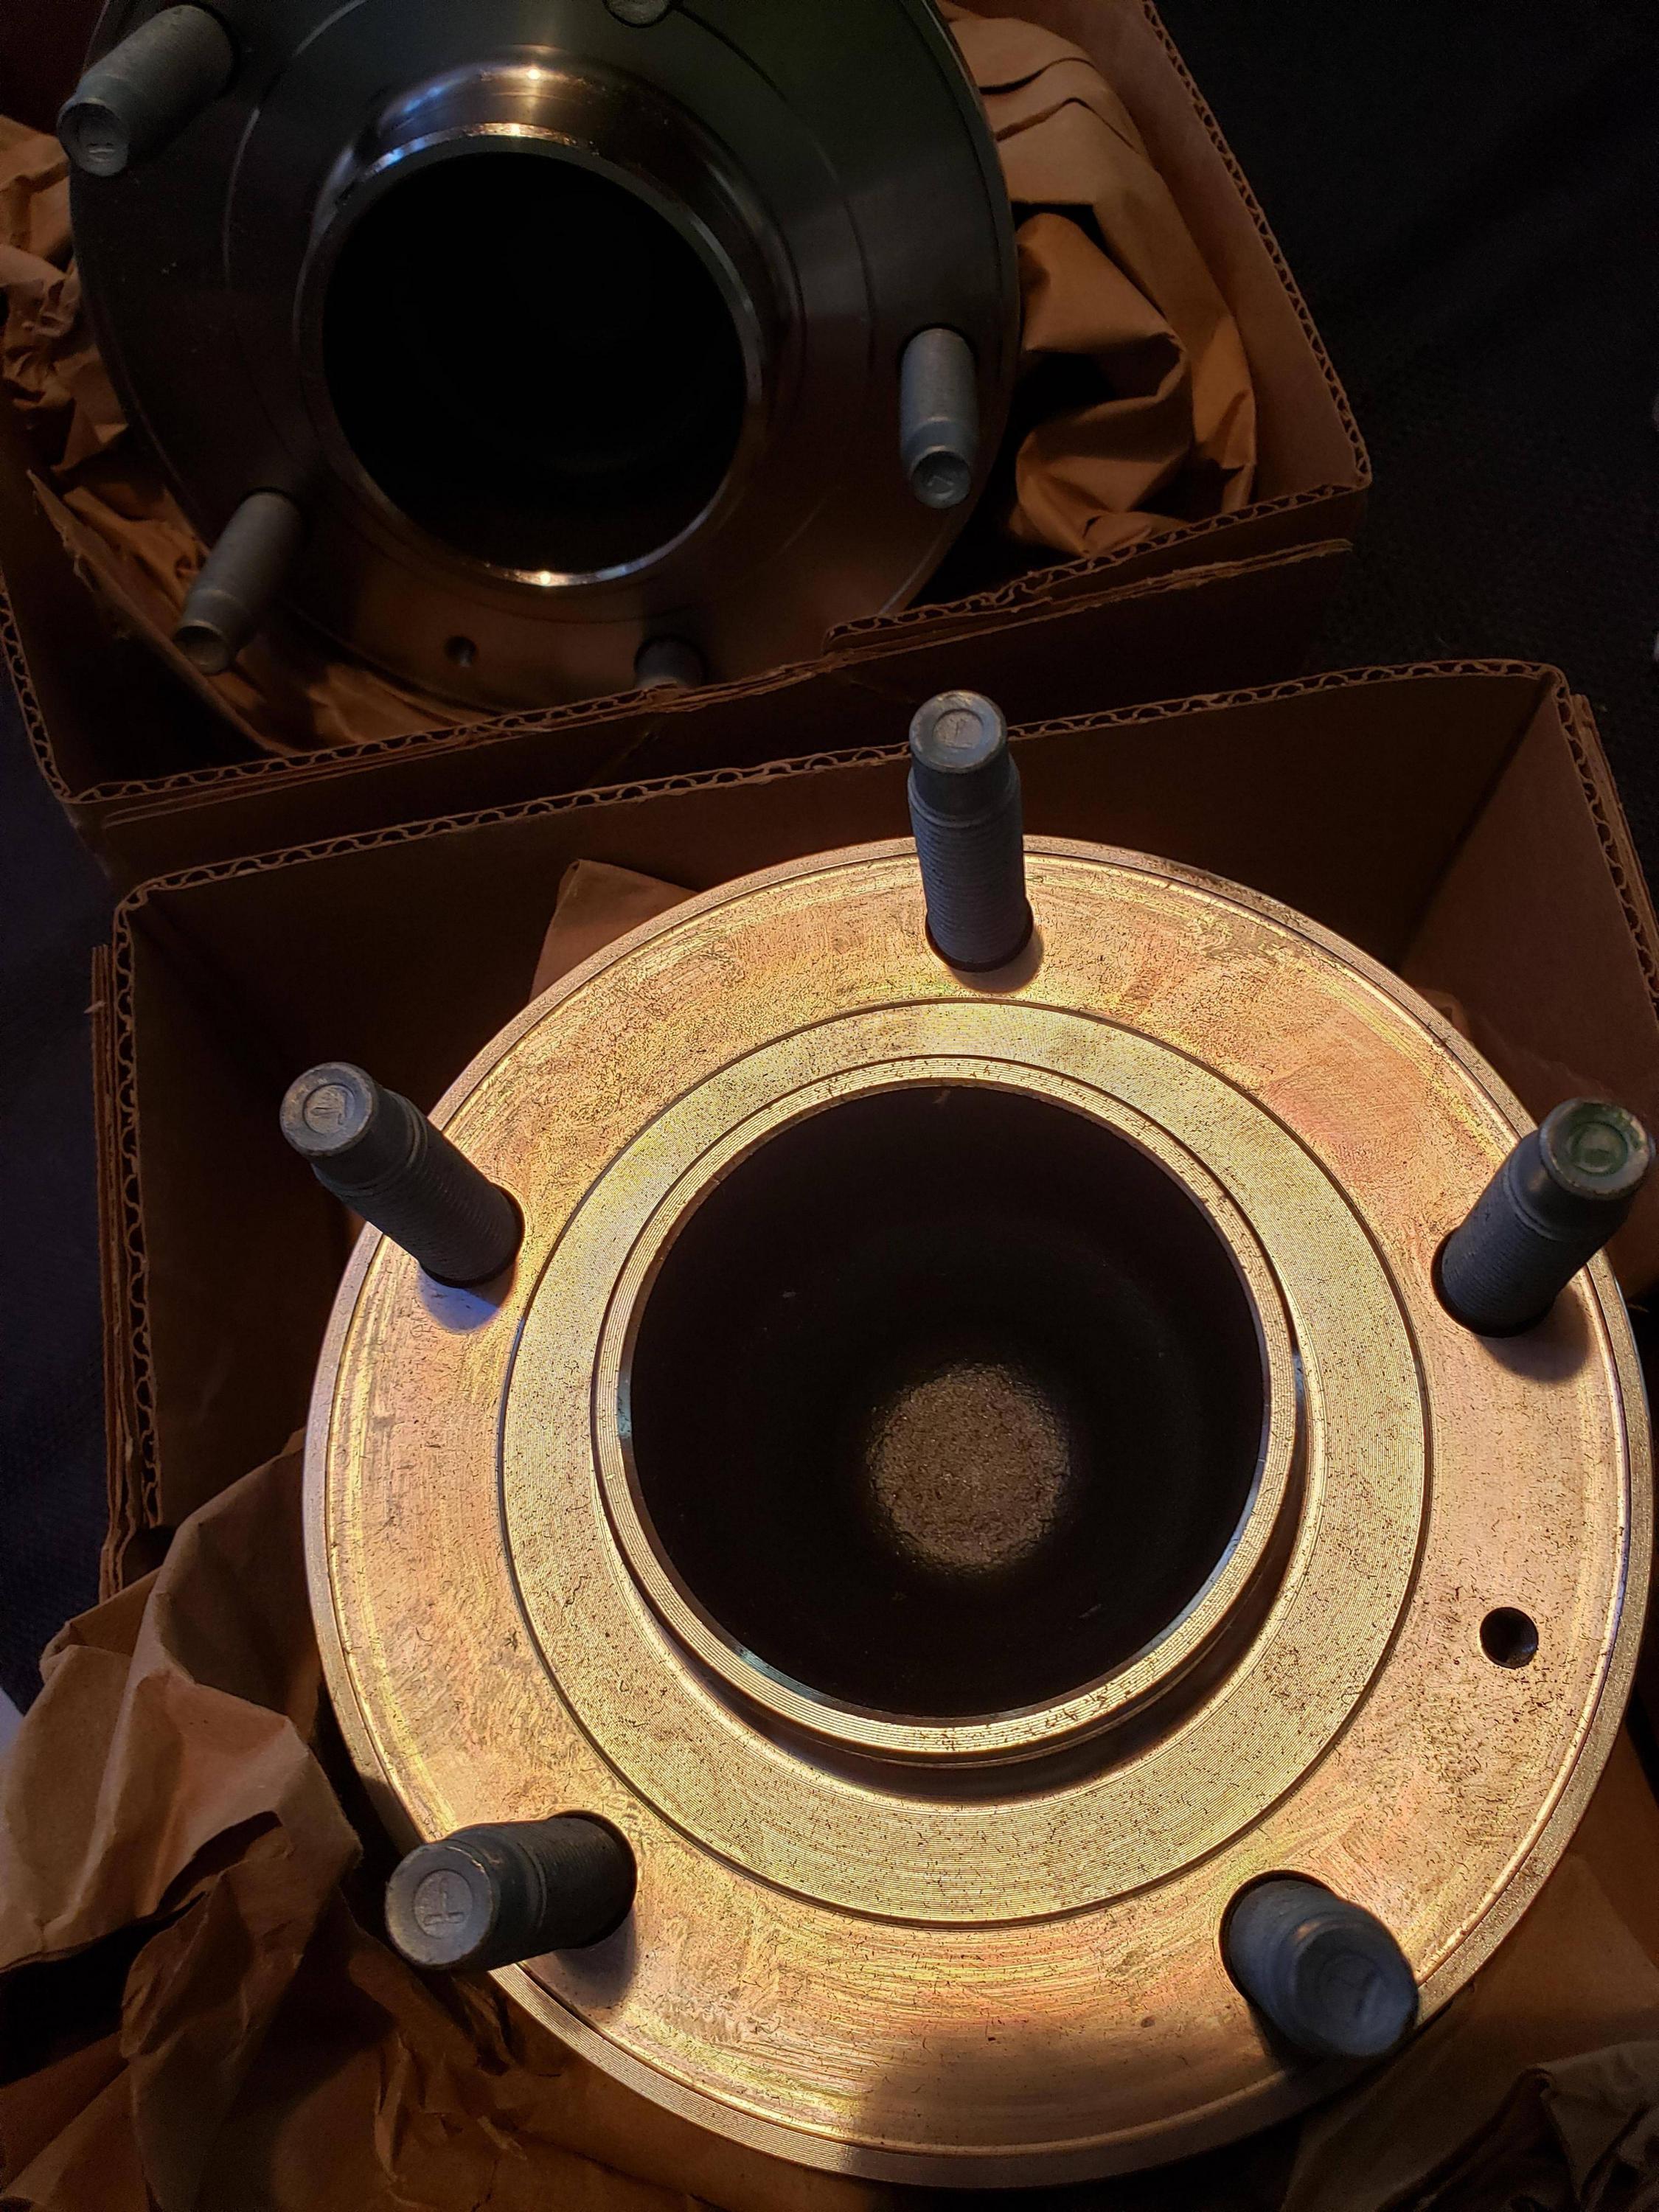
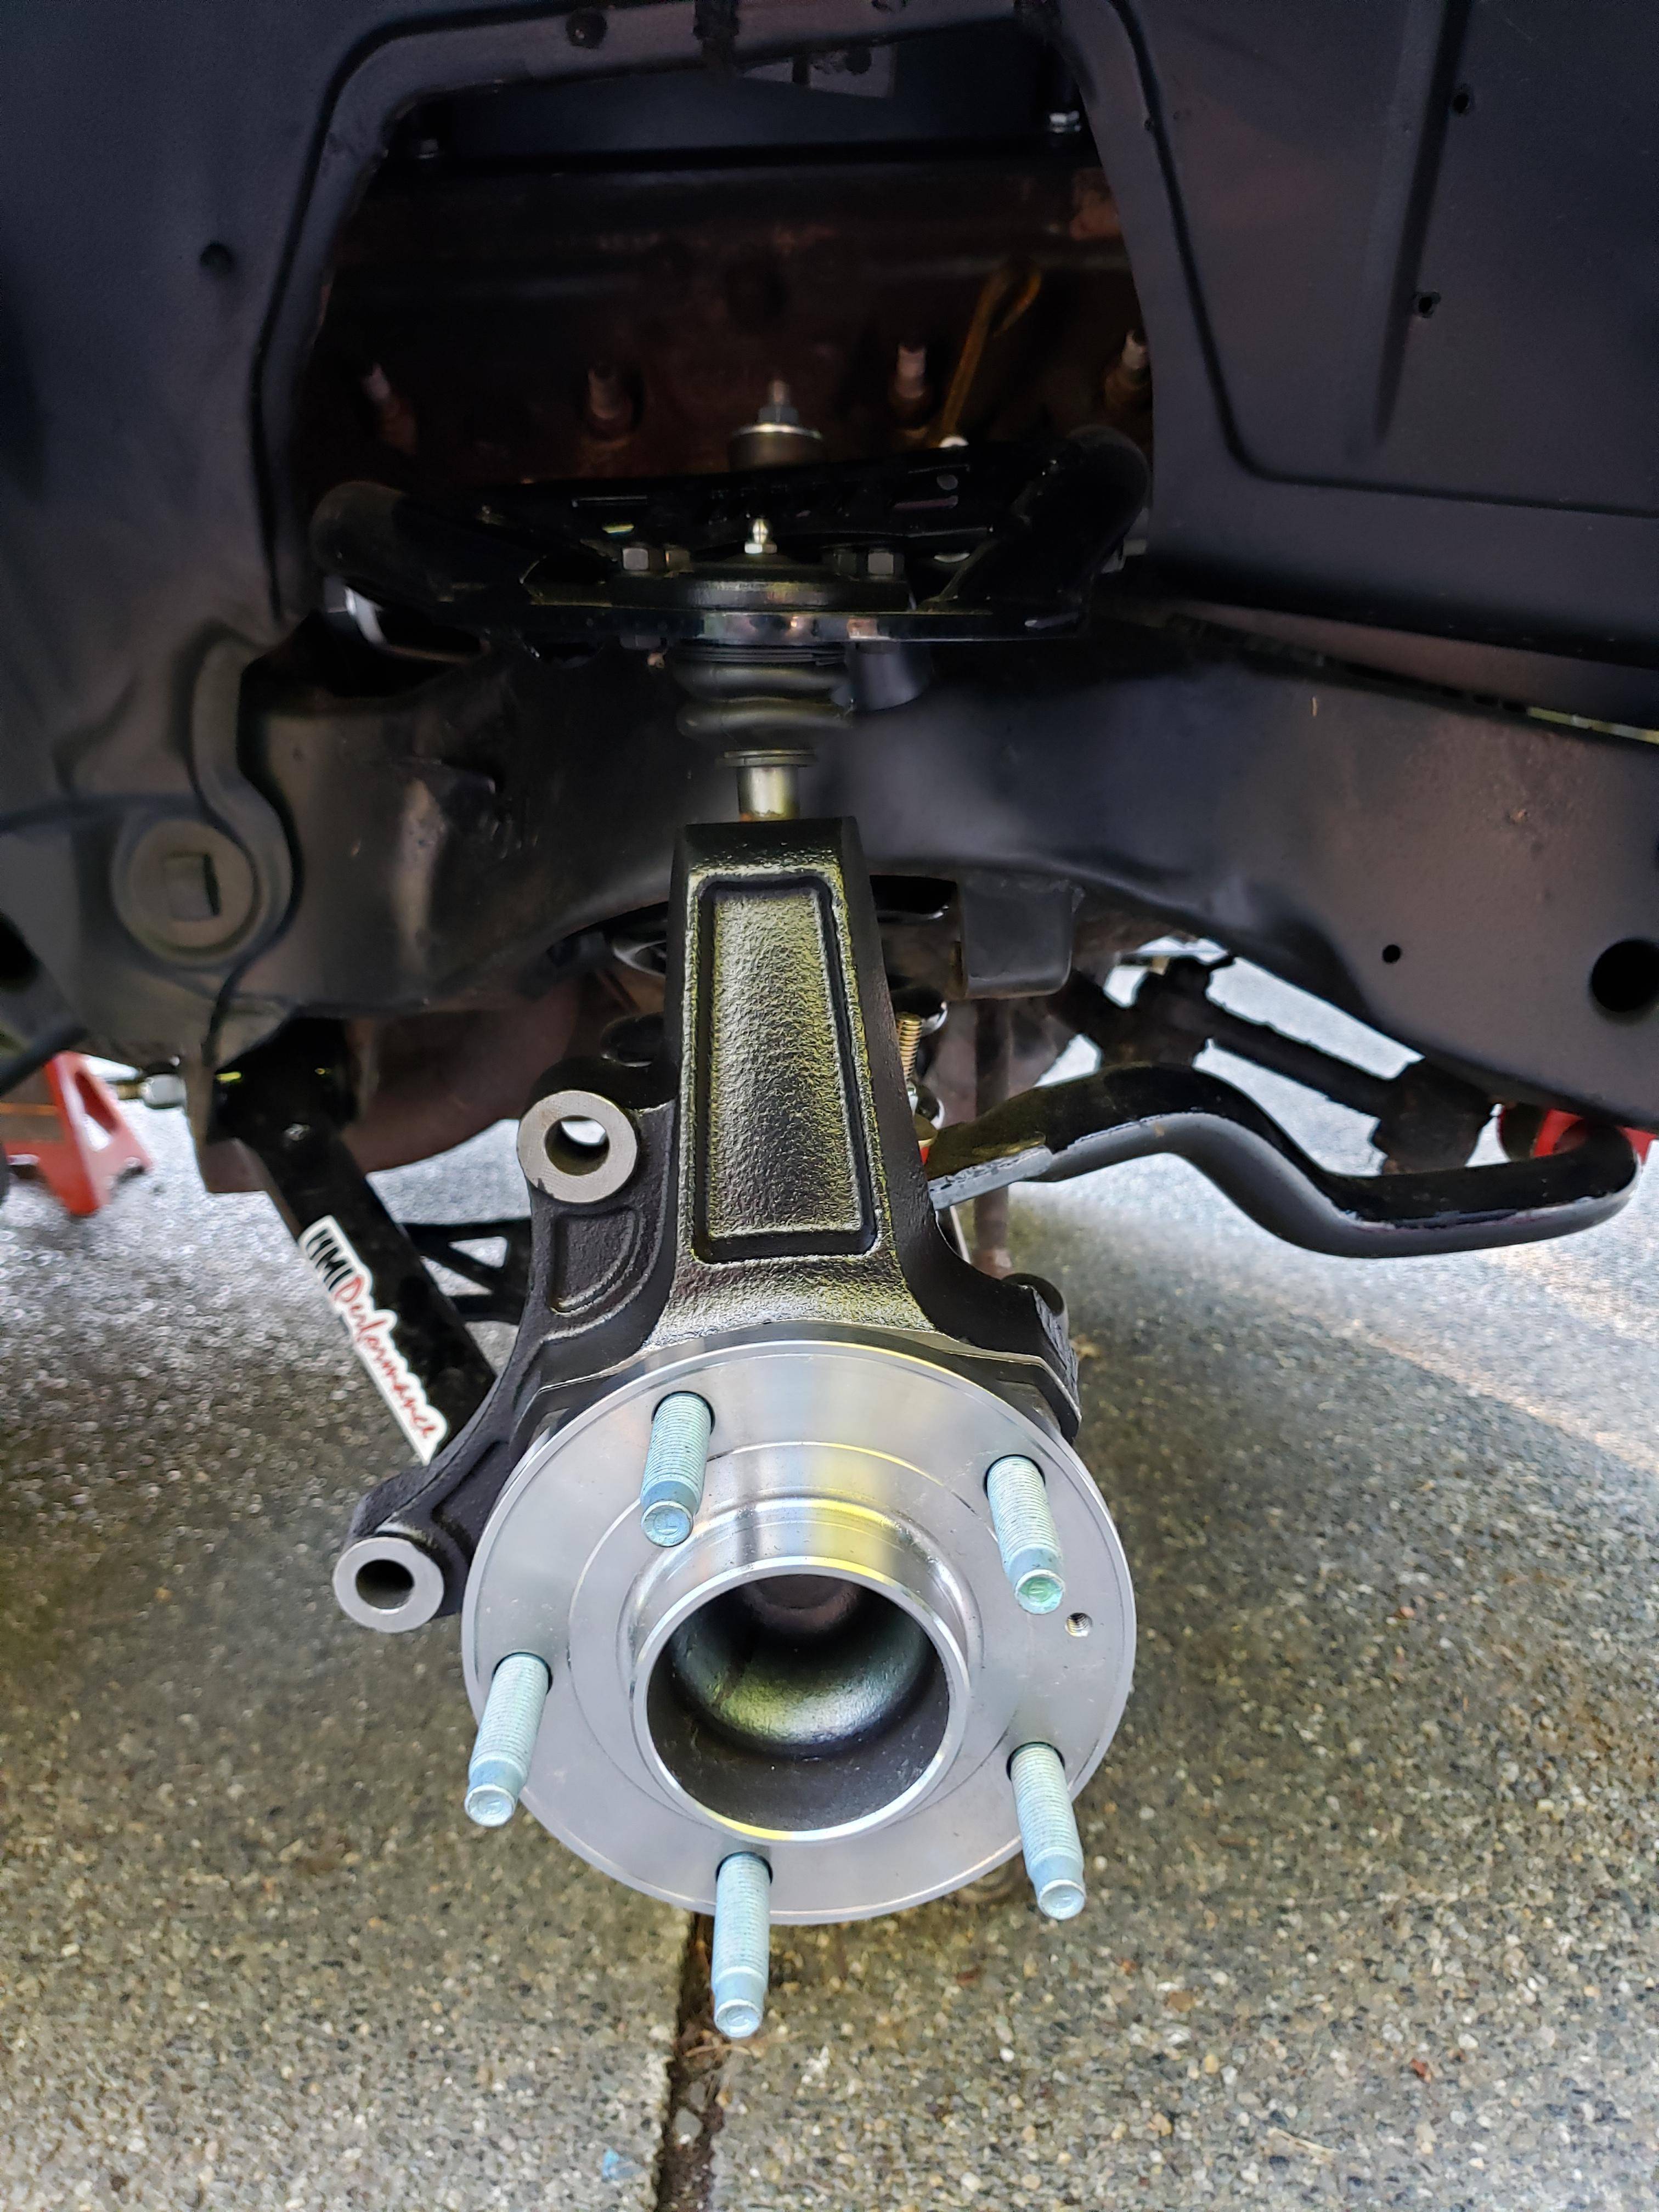
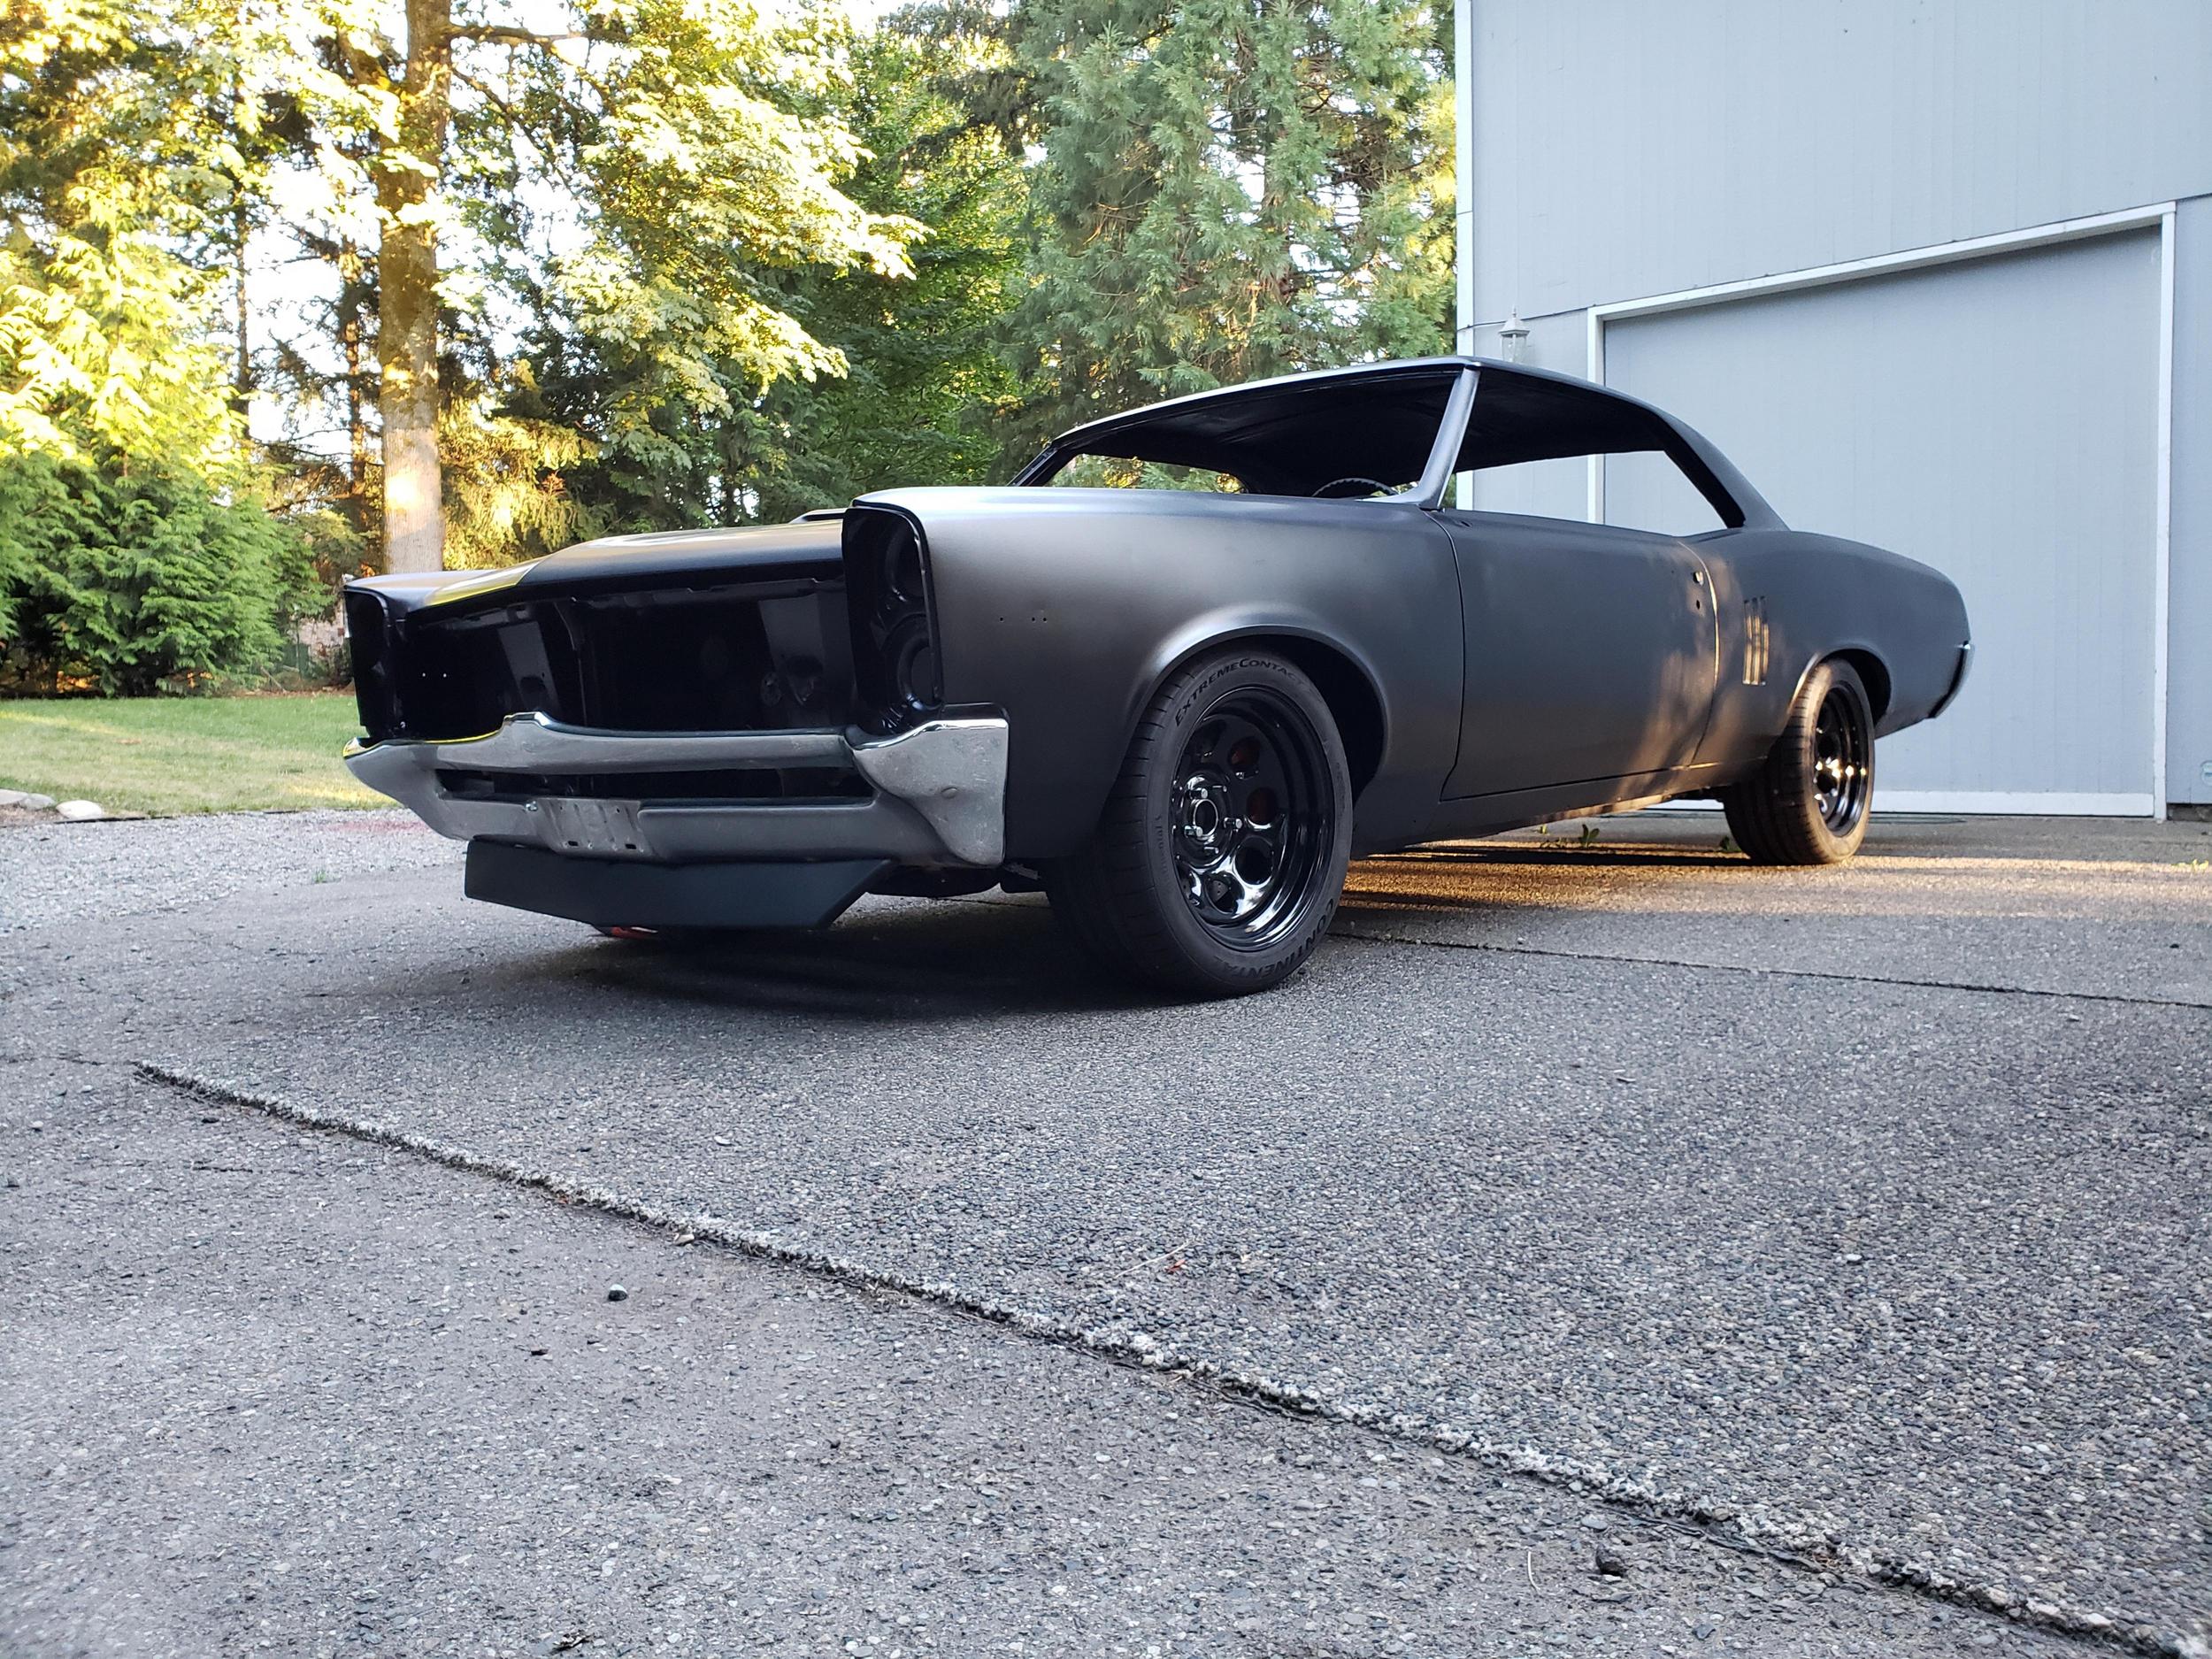
I also picked up some CPP stock height C5/C6 spindles so that I can run the C6 Z51/J55 calipers and hub assemblies. For the hubs I went with C7 hubs. They do not have the ABS sensor like the C5/C6 and they have the thicker ZR1 bearings. These are really nice units and spin like butter.
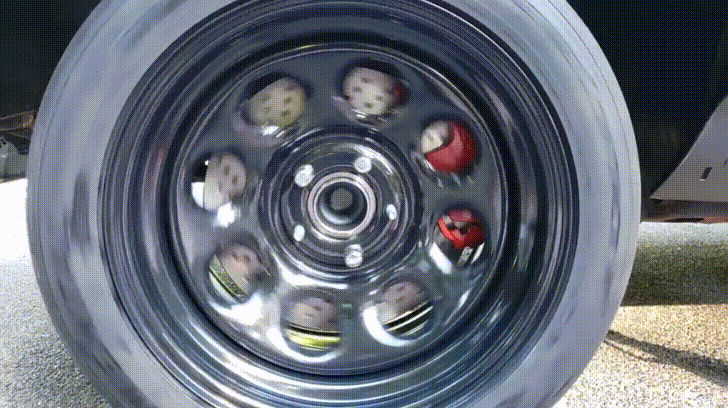
The Z51 brakes are absolutely massive at 13.4 inches. At this point I was a little worried about fitment with my 17s. I purchased a single Z51 rotor on closeout from rockauto for $10 for mock-up purposes. I didn't see the point in nice brakes until I knew that everything was going to fit.
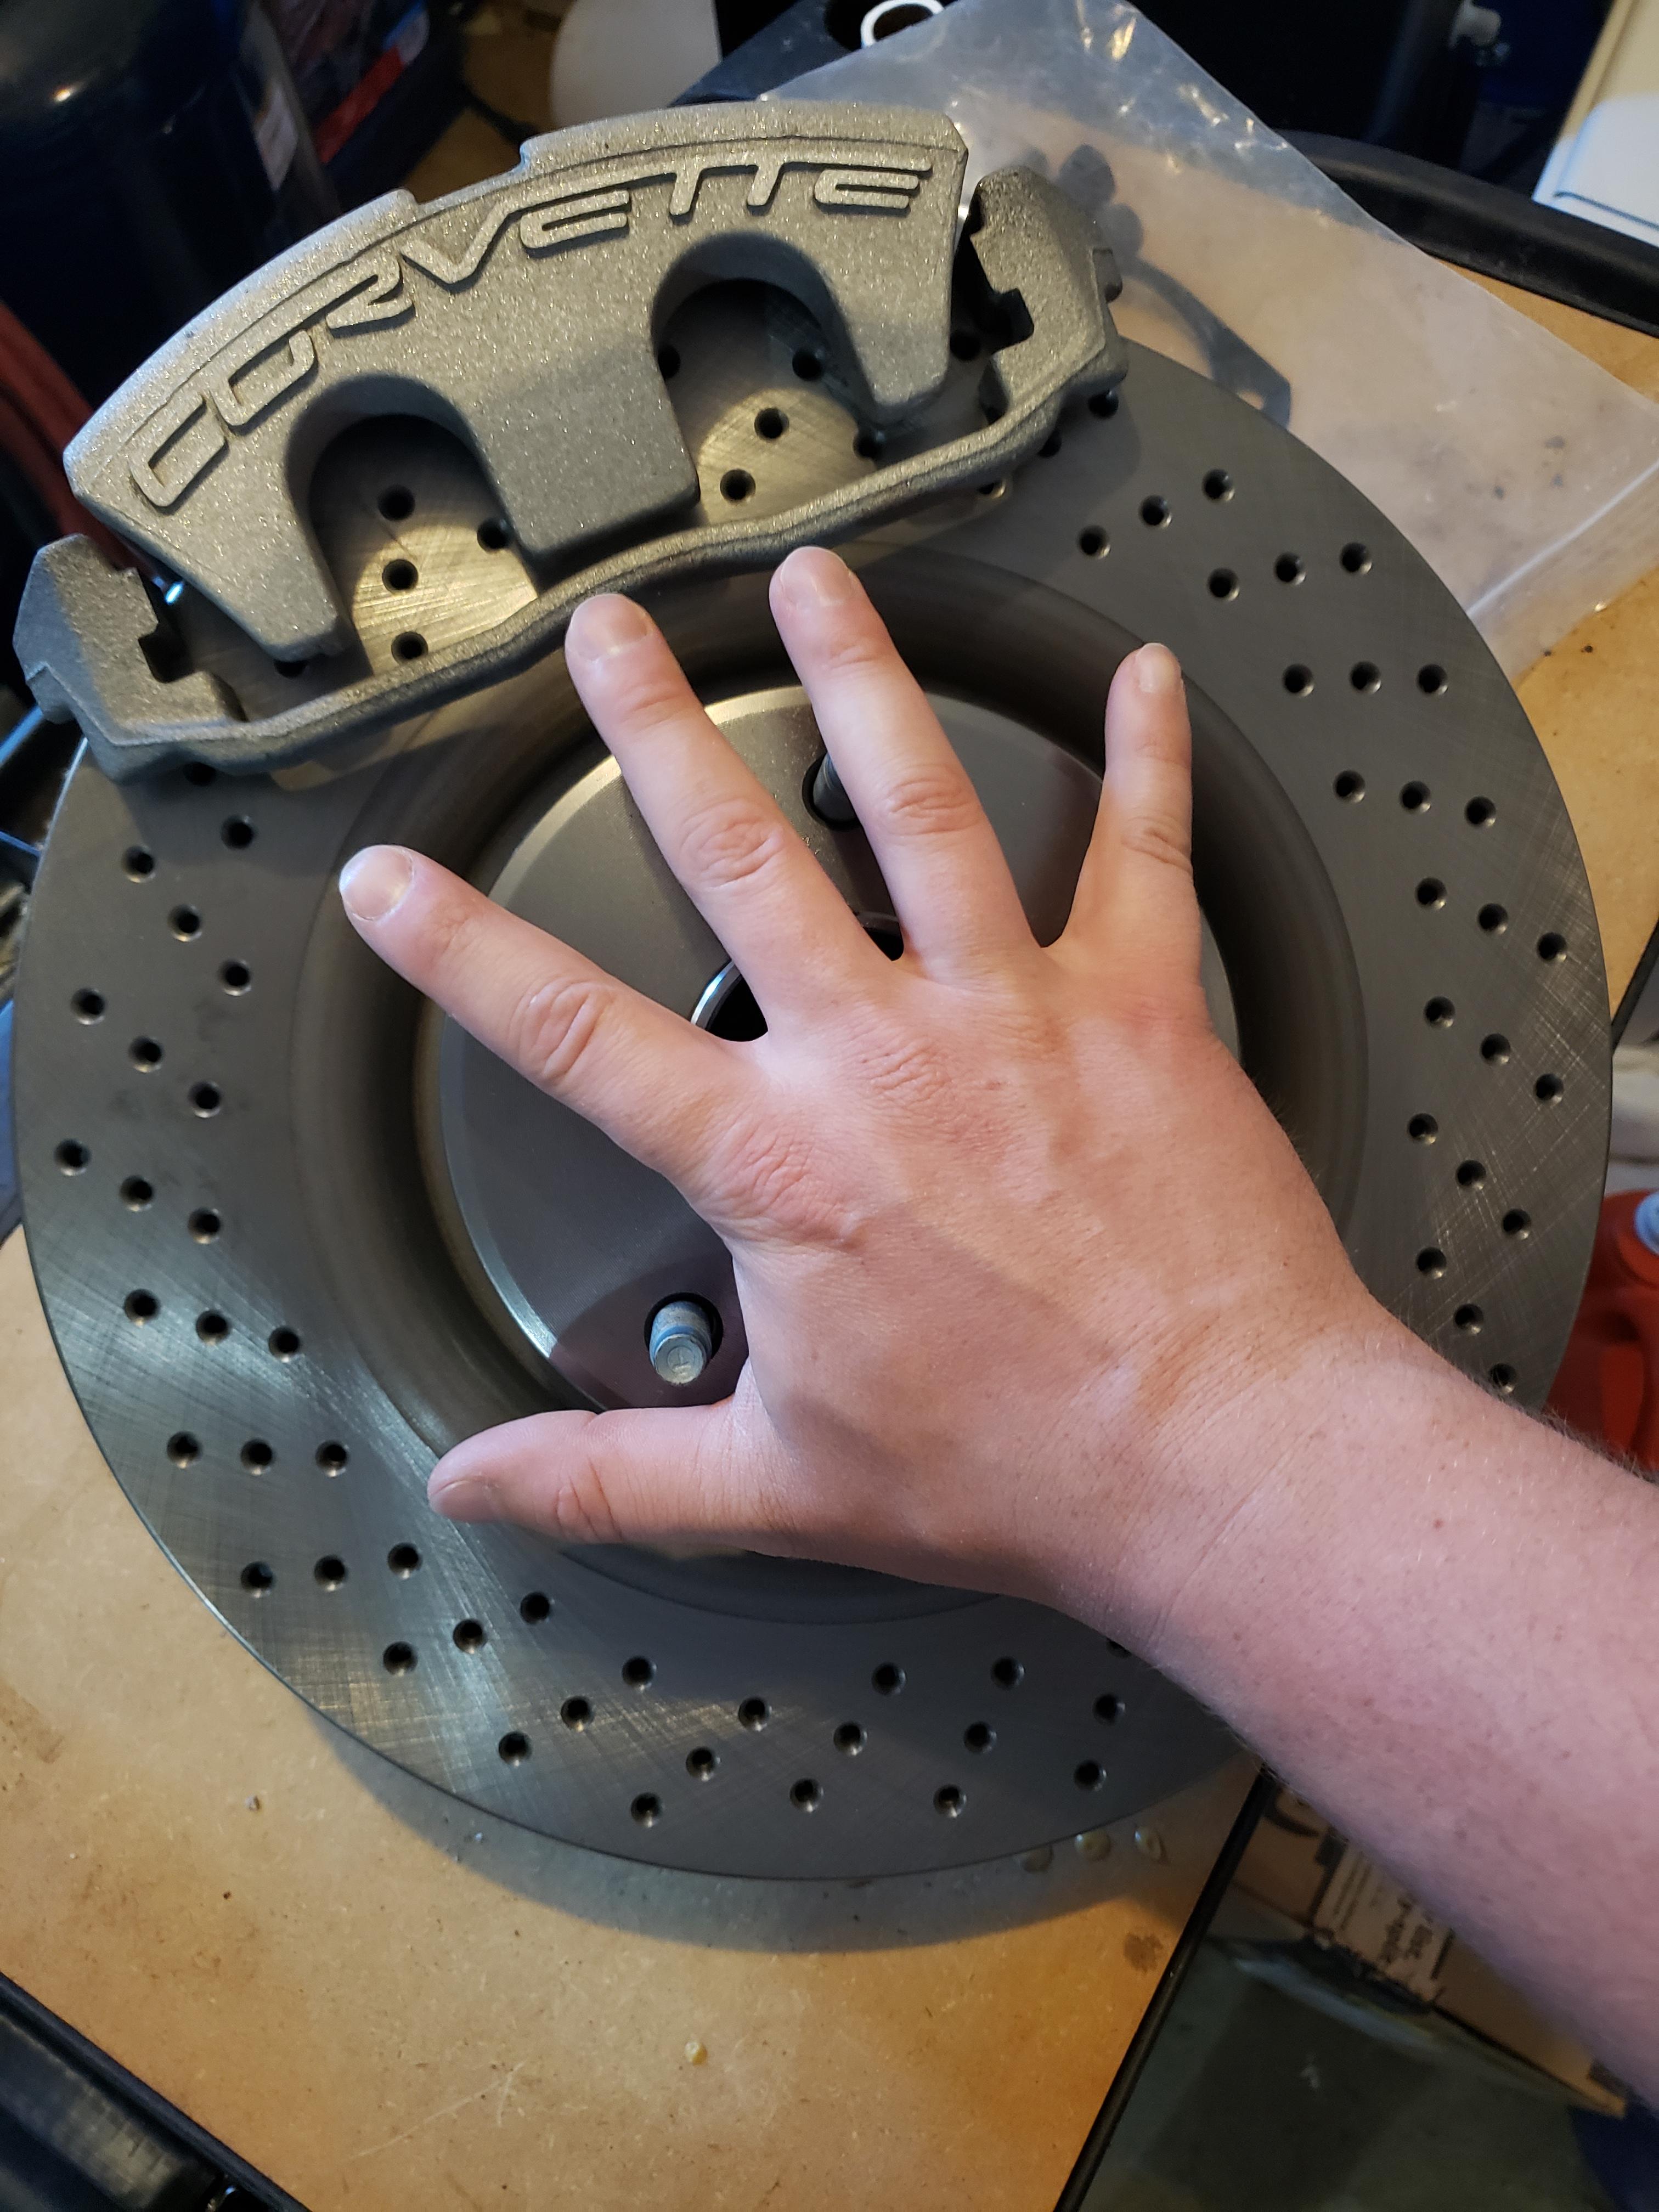
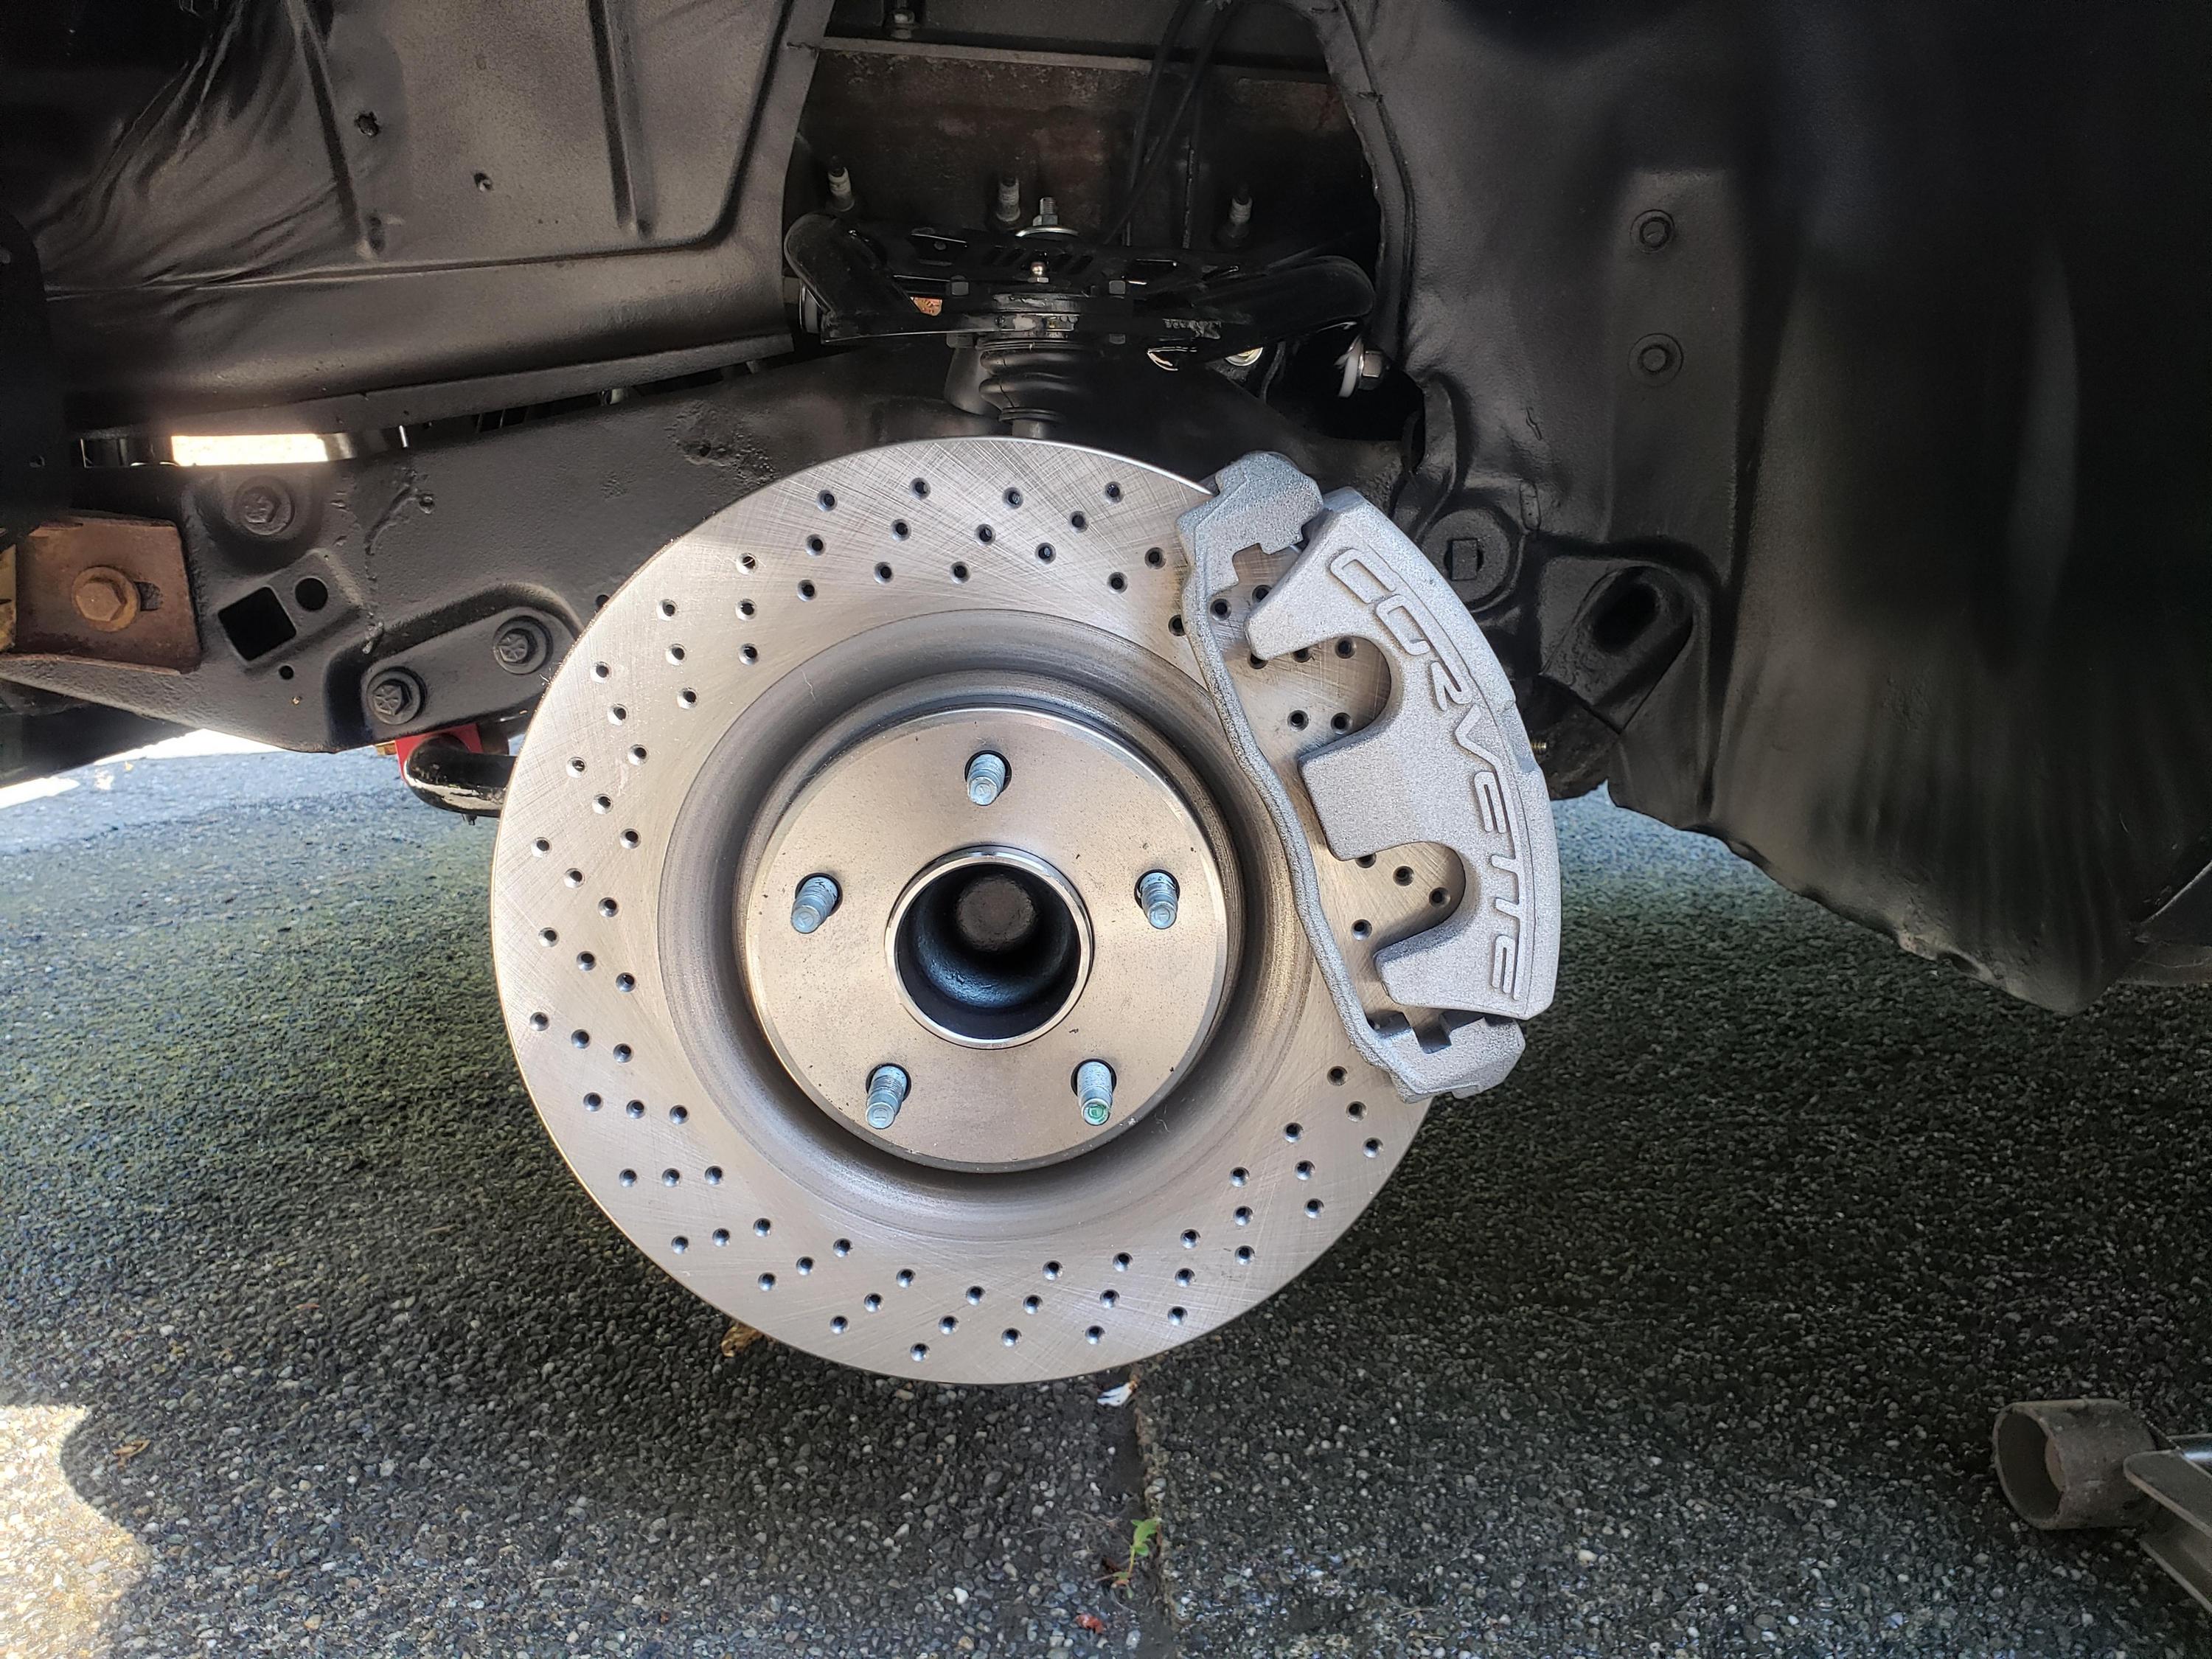
Good news! It's tight but everything fits. Due to the spoke design on the wheels you can basically only see rotor, which I think is pretty cool. (I also painted the calipers red)
DRIVETRAIN
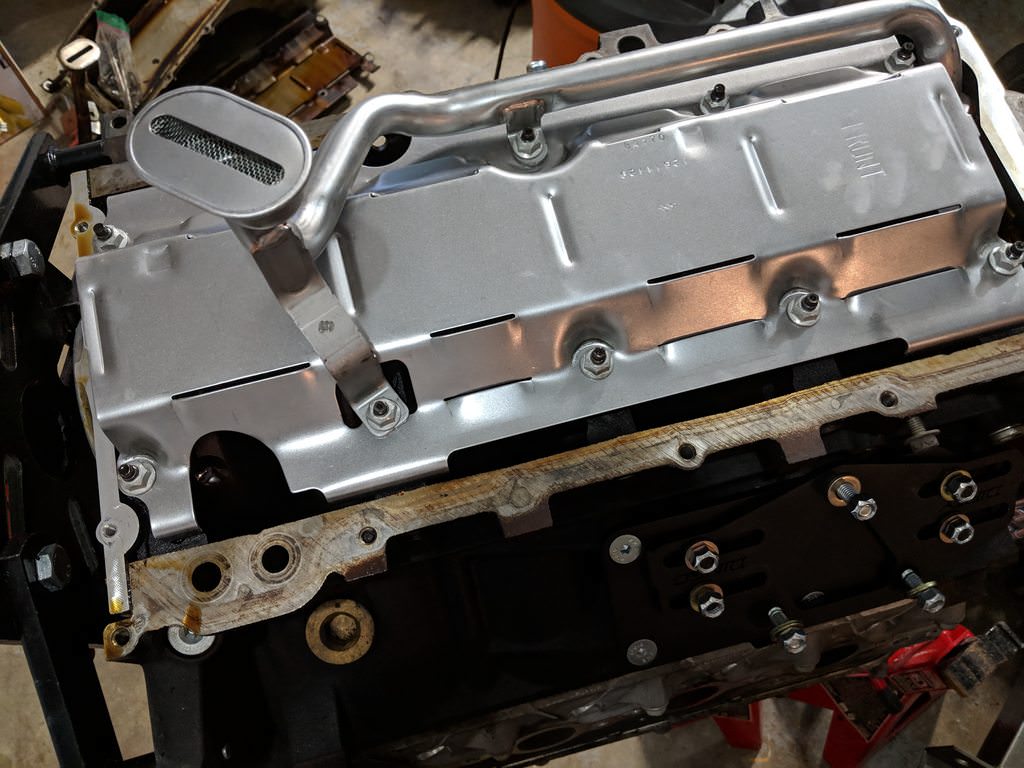
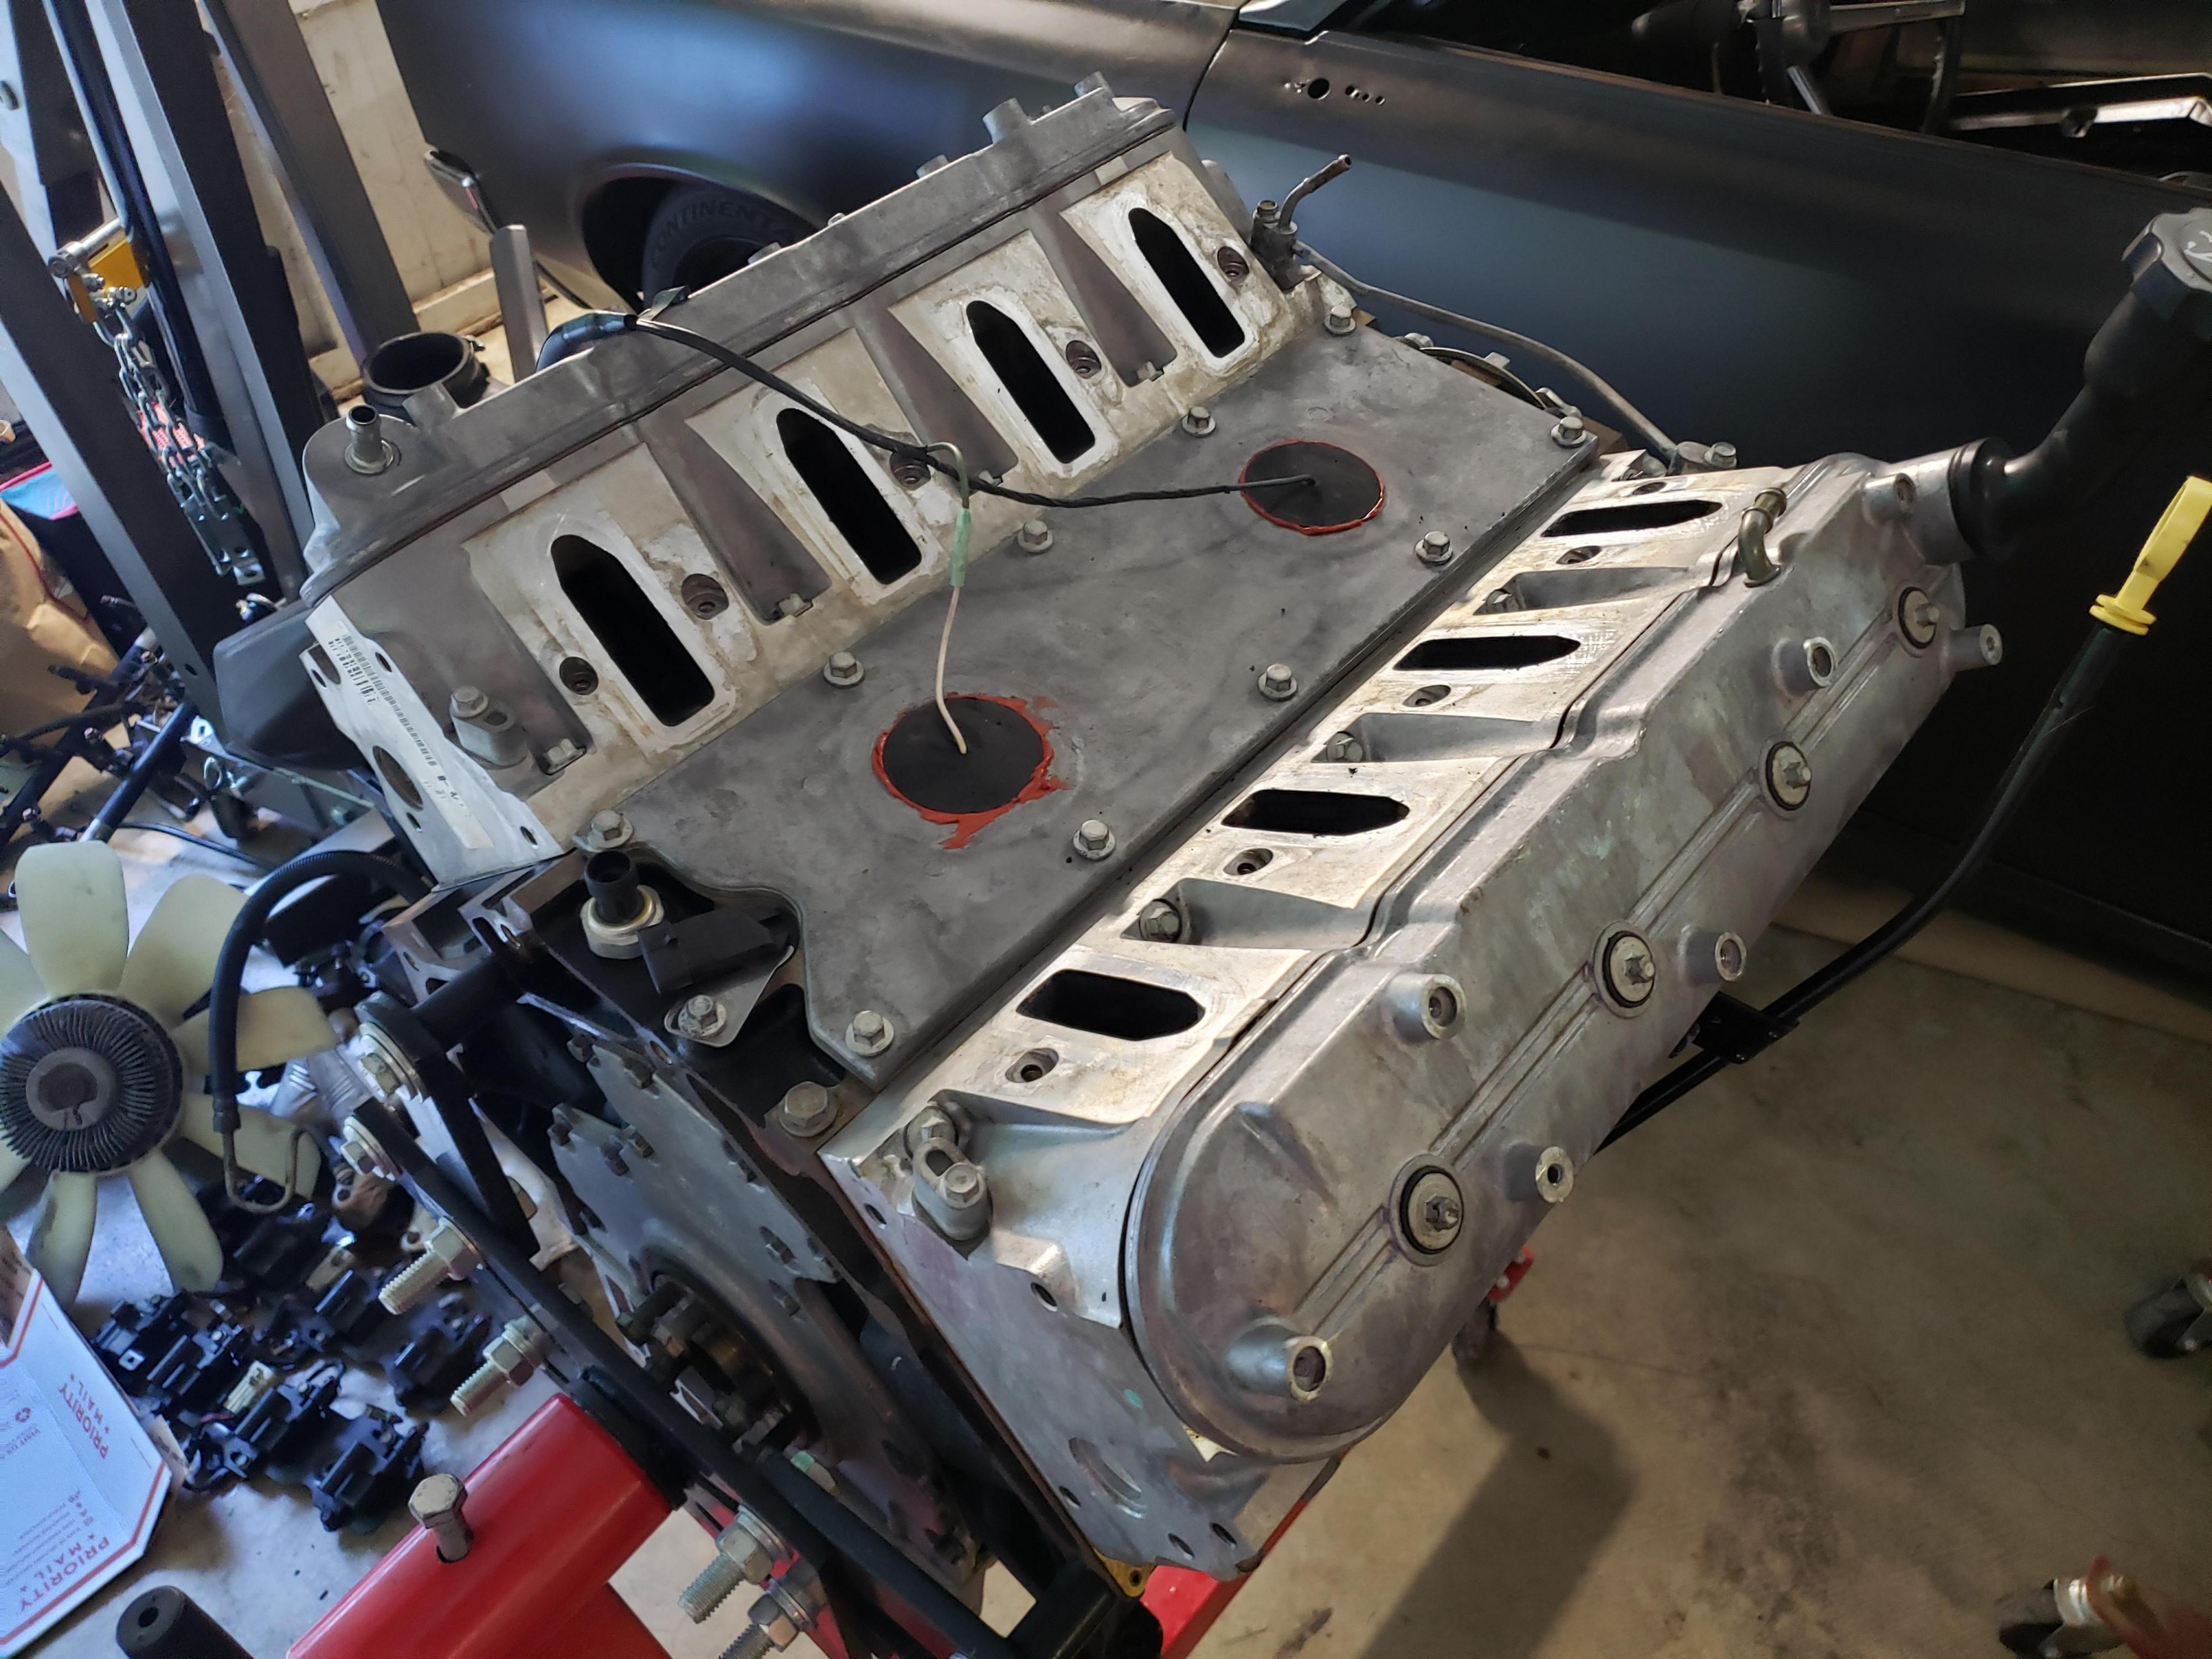
I found a complete running and driving 5.3 from a 2004 suburban. It included absolutely everything, from accessories to wiring/PCM and even the gas pedal. All for what it would have cost me to get accessories for the mystery 5.3. I decided to jump on the deal since I could see the engine run and was able to grab nearly everything I needed for my swap. This way I am throwing money at an engine I know runs well with good oil pressure and no smoke or sounds. Having all the brackets and accessories gives me the ability to see what fits and sell/trade for whatever else I need to swap out.
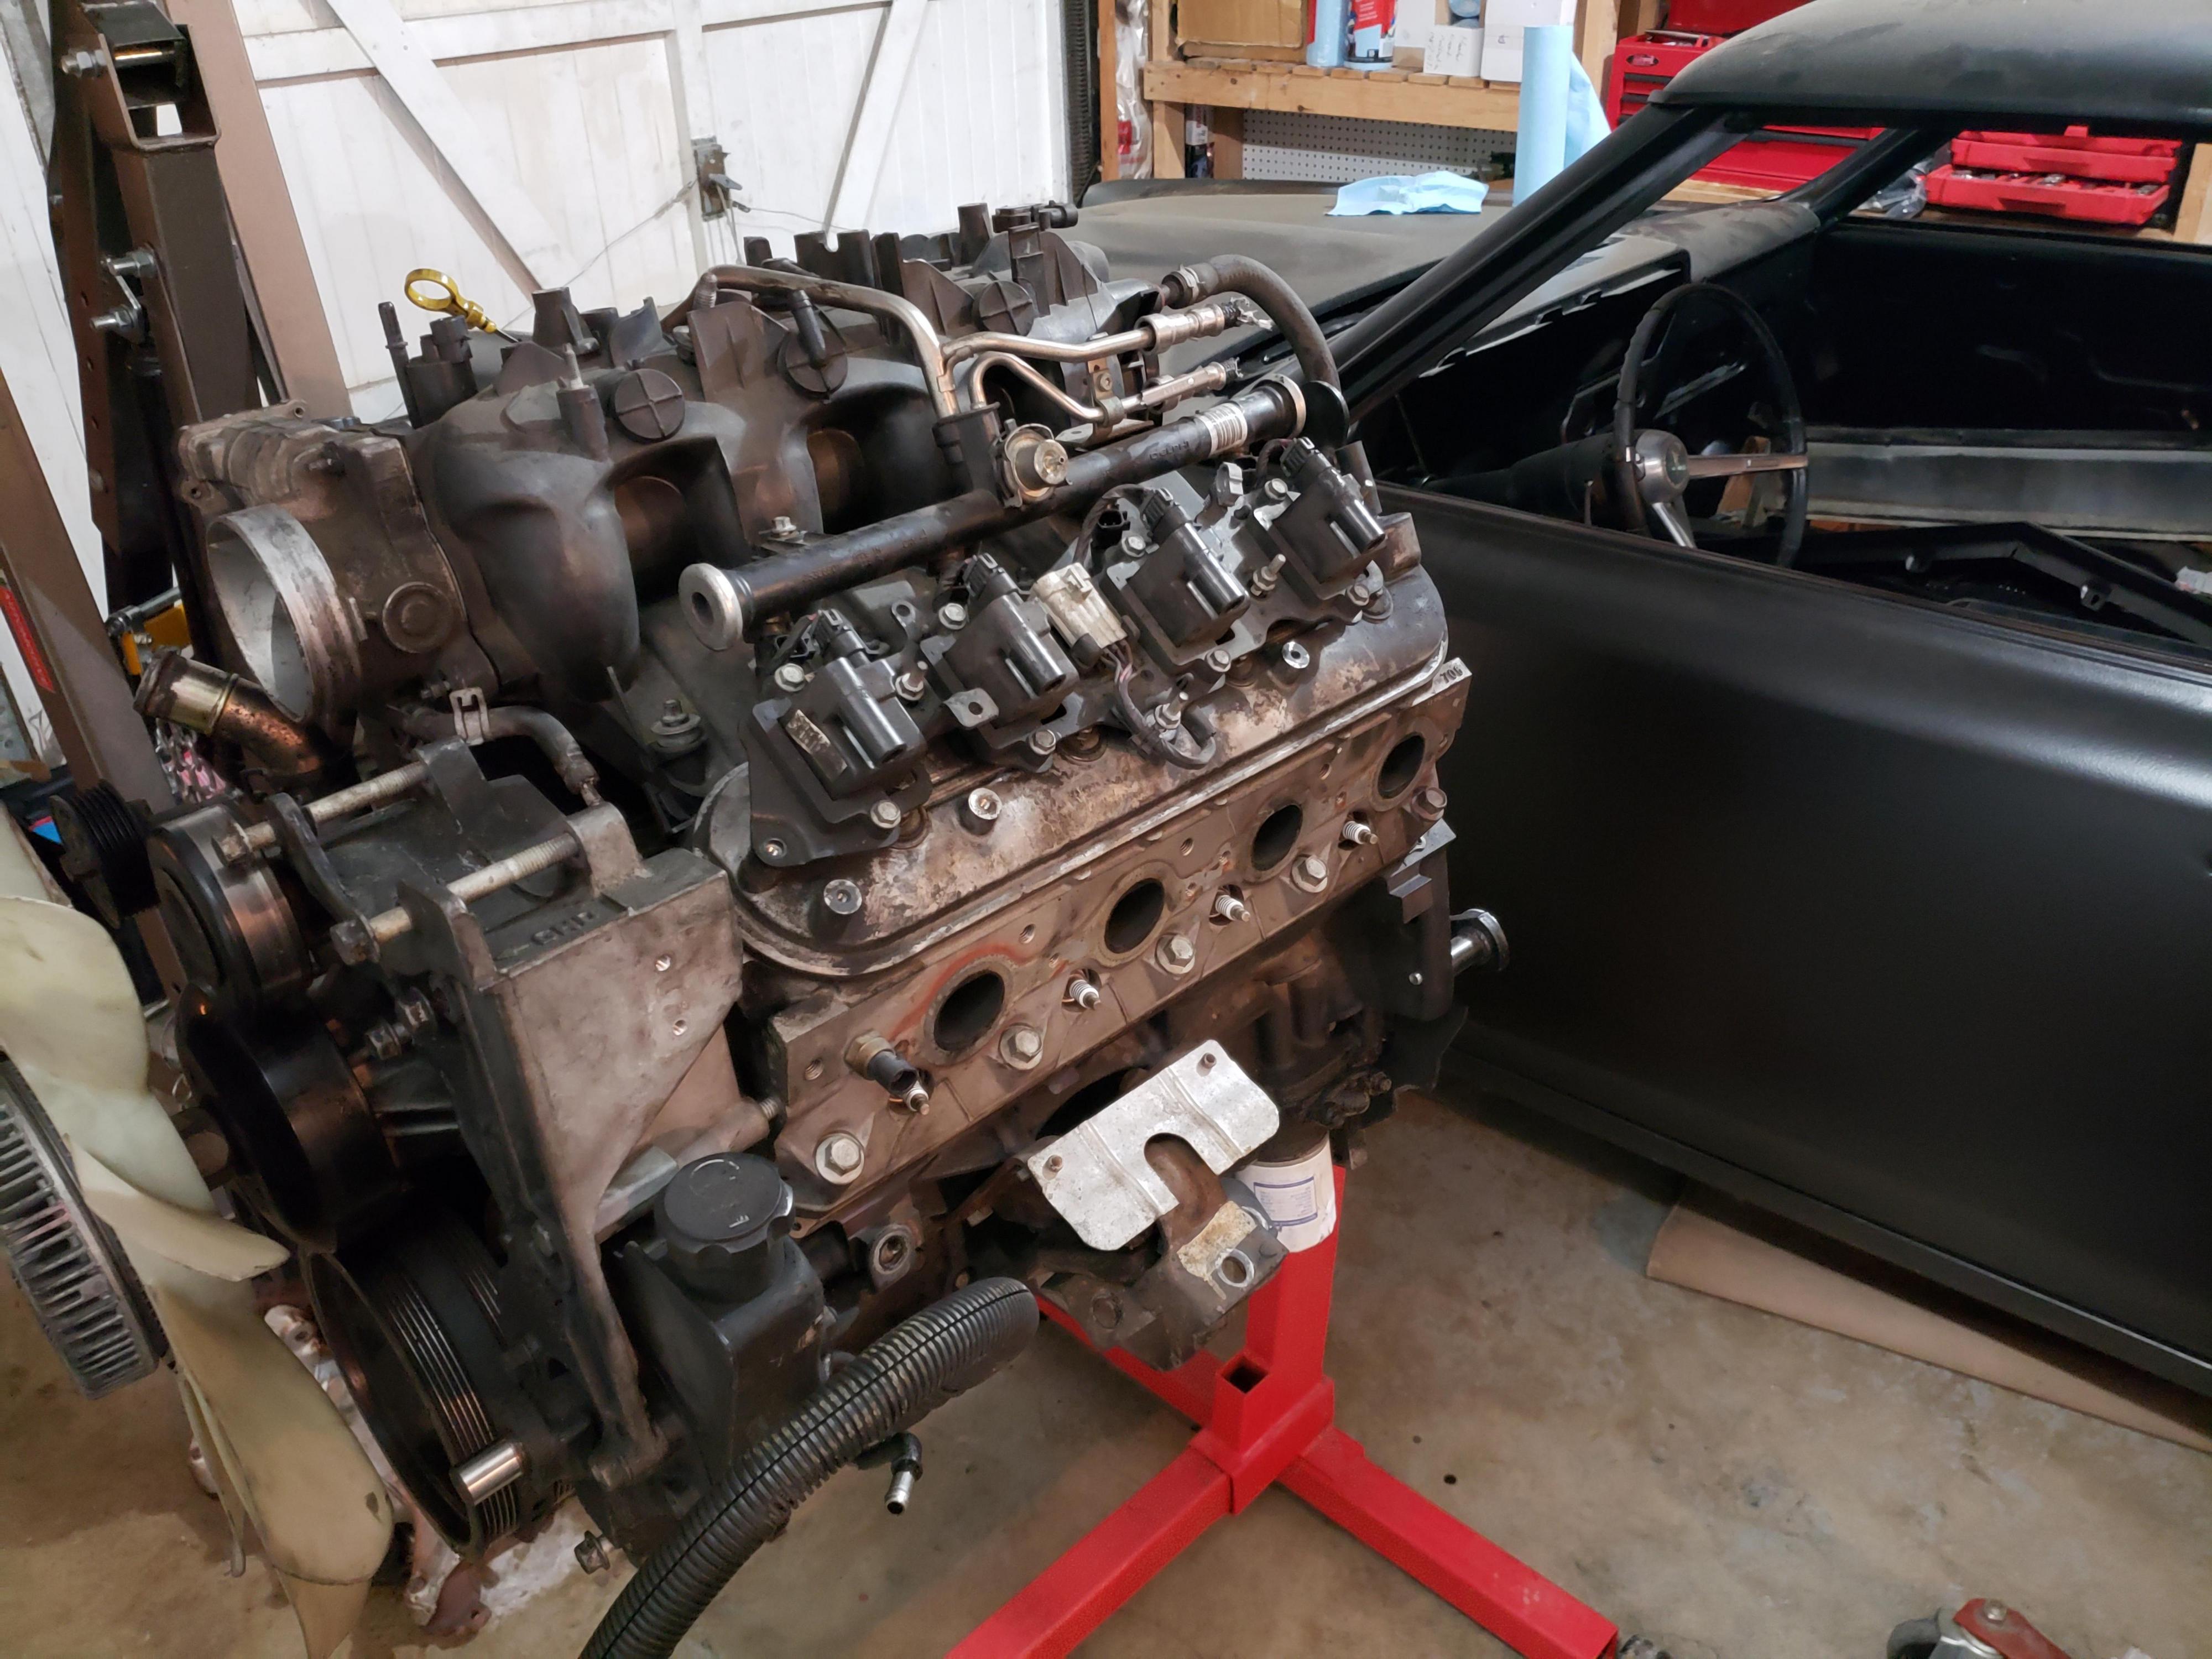
A little elbow grease and it is nice and shiny. I am going to paint the engine block before it goes in for good. But for now its nice being able to work on none-greasy engine.
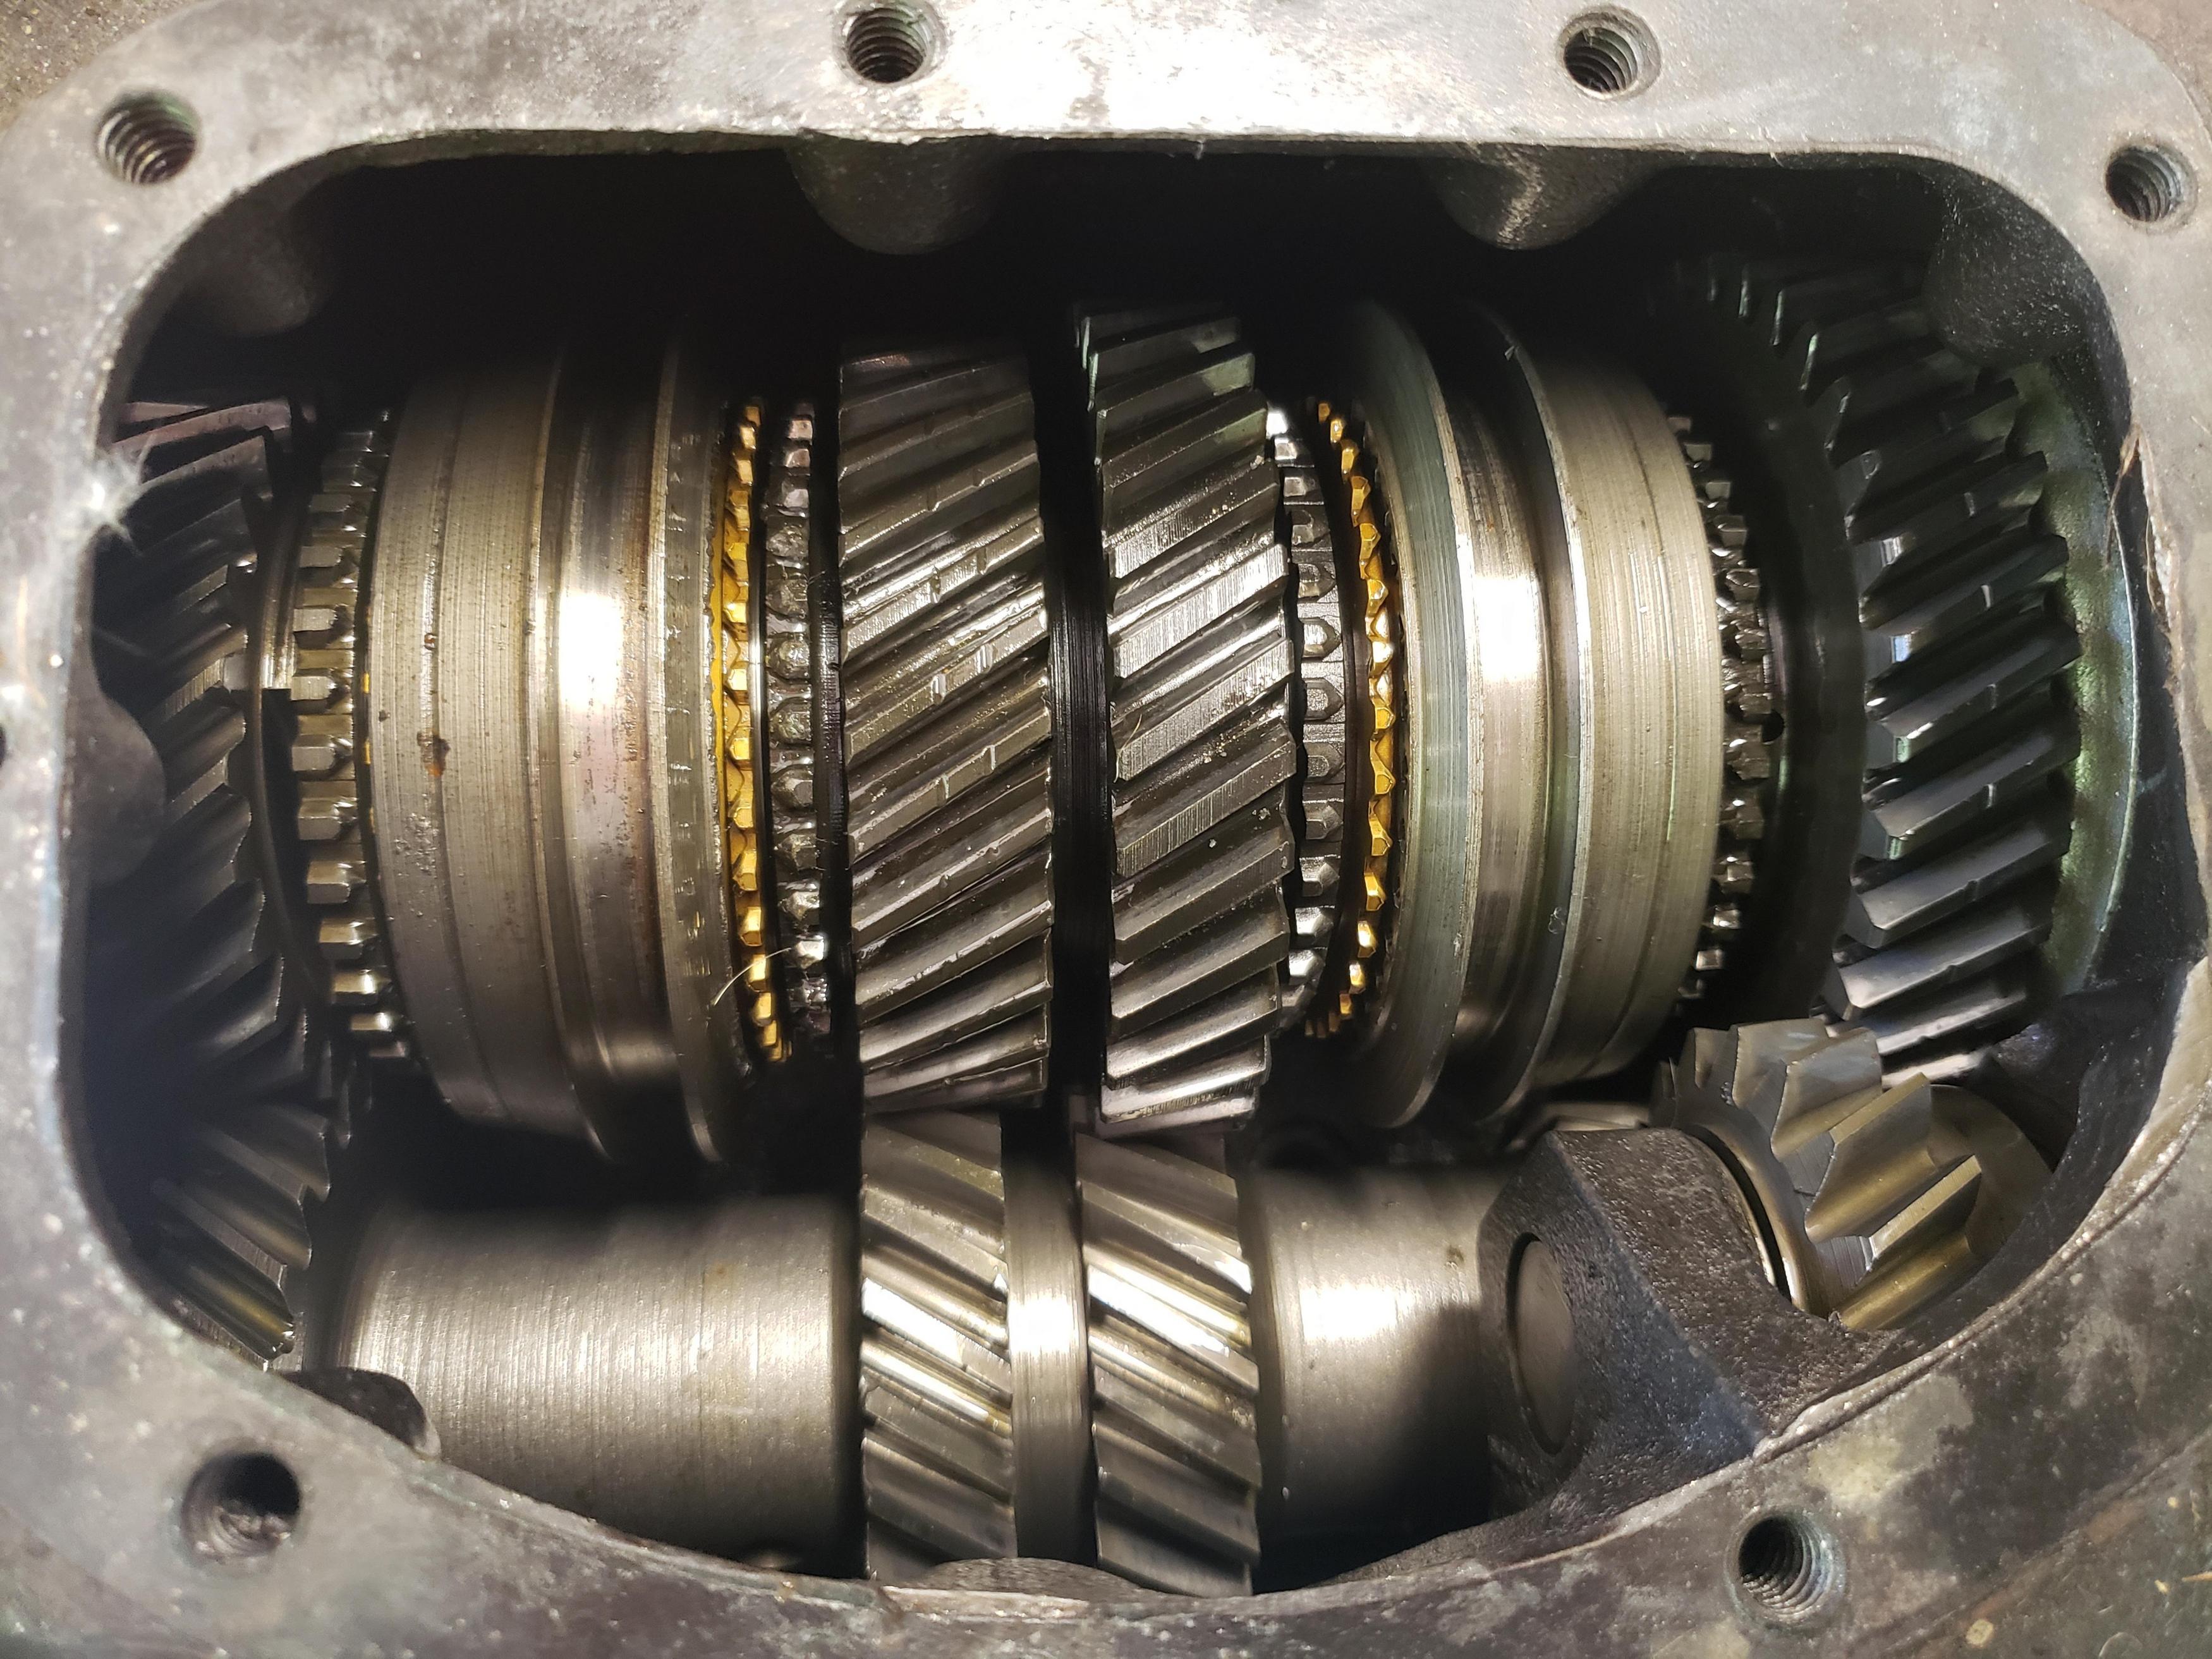
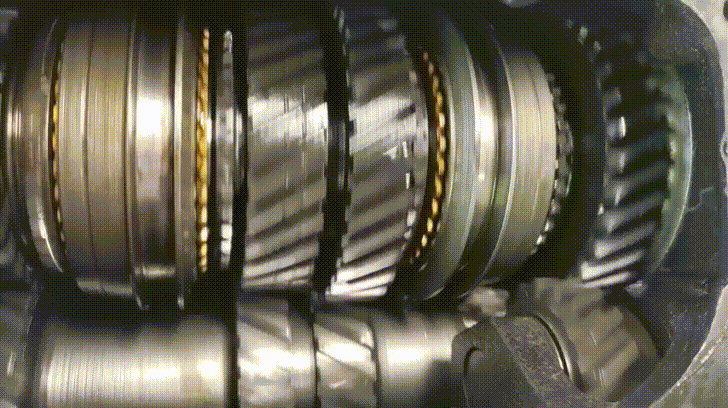
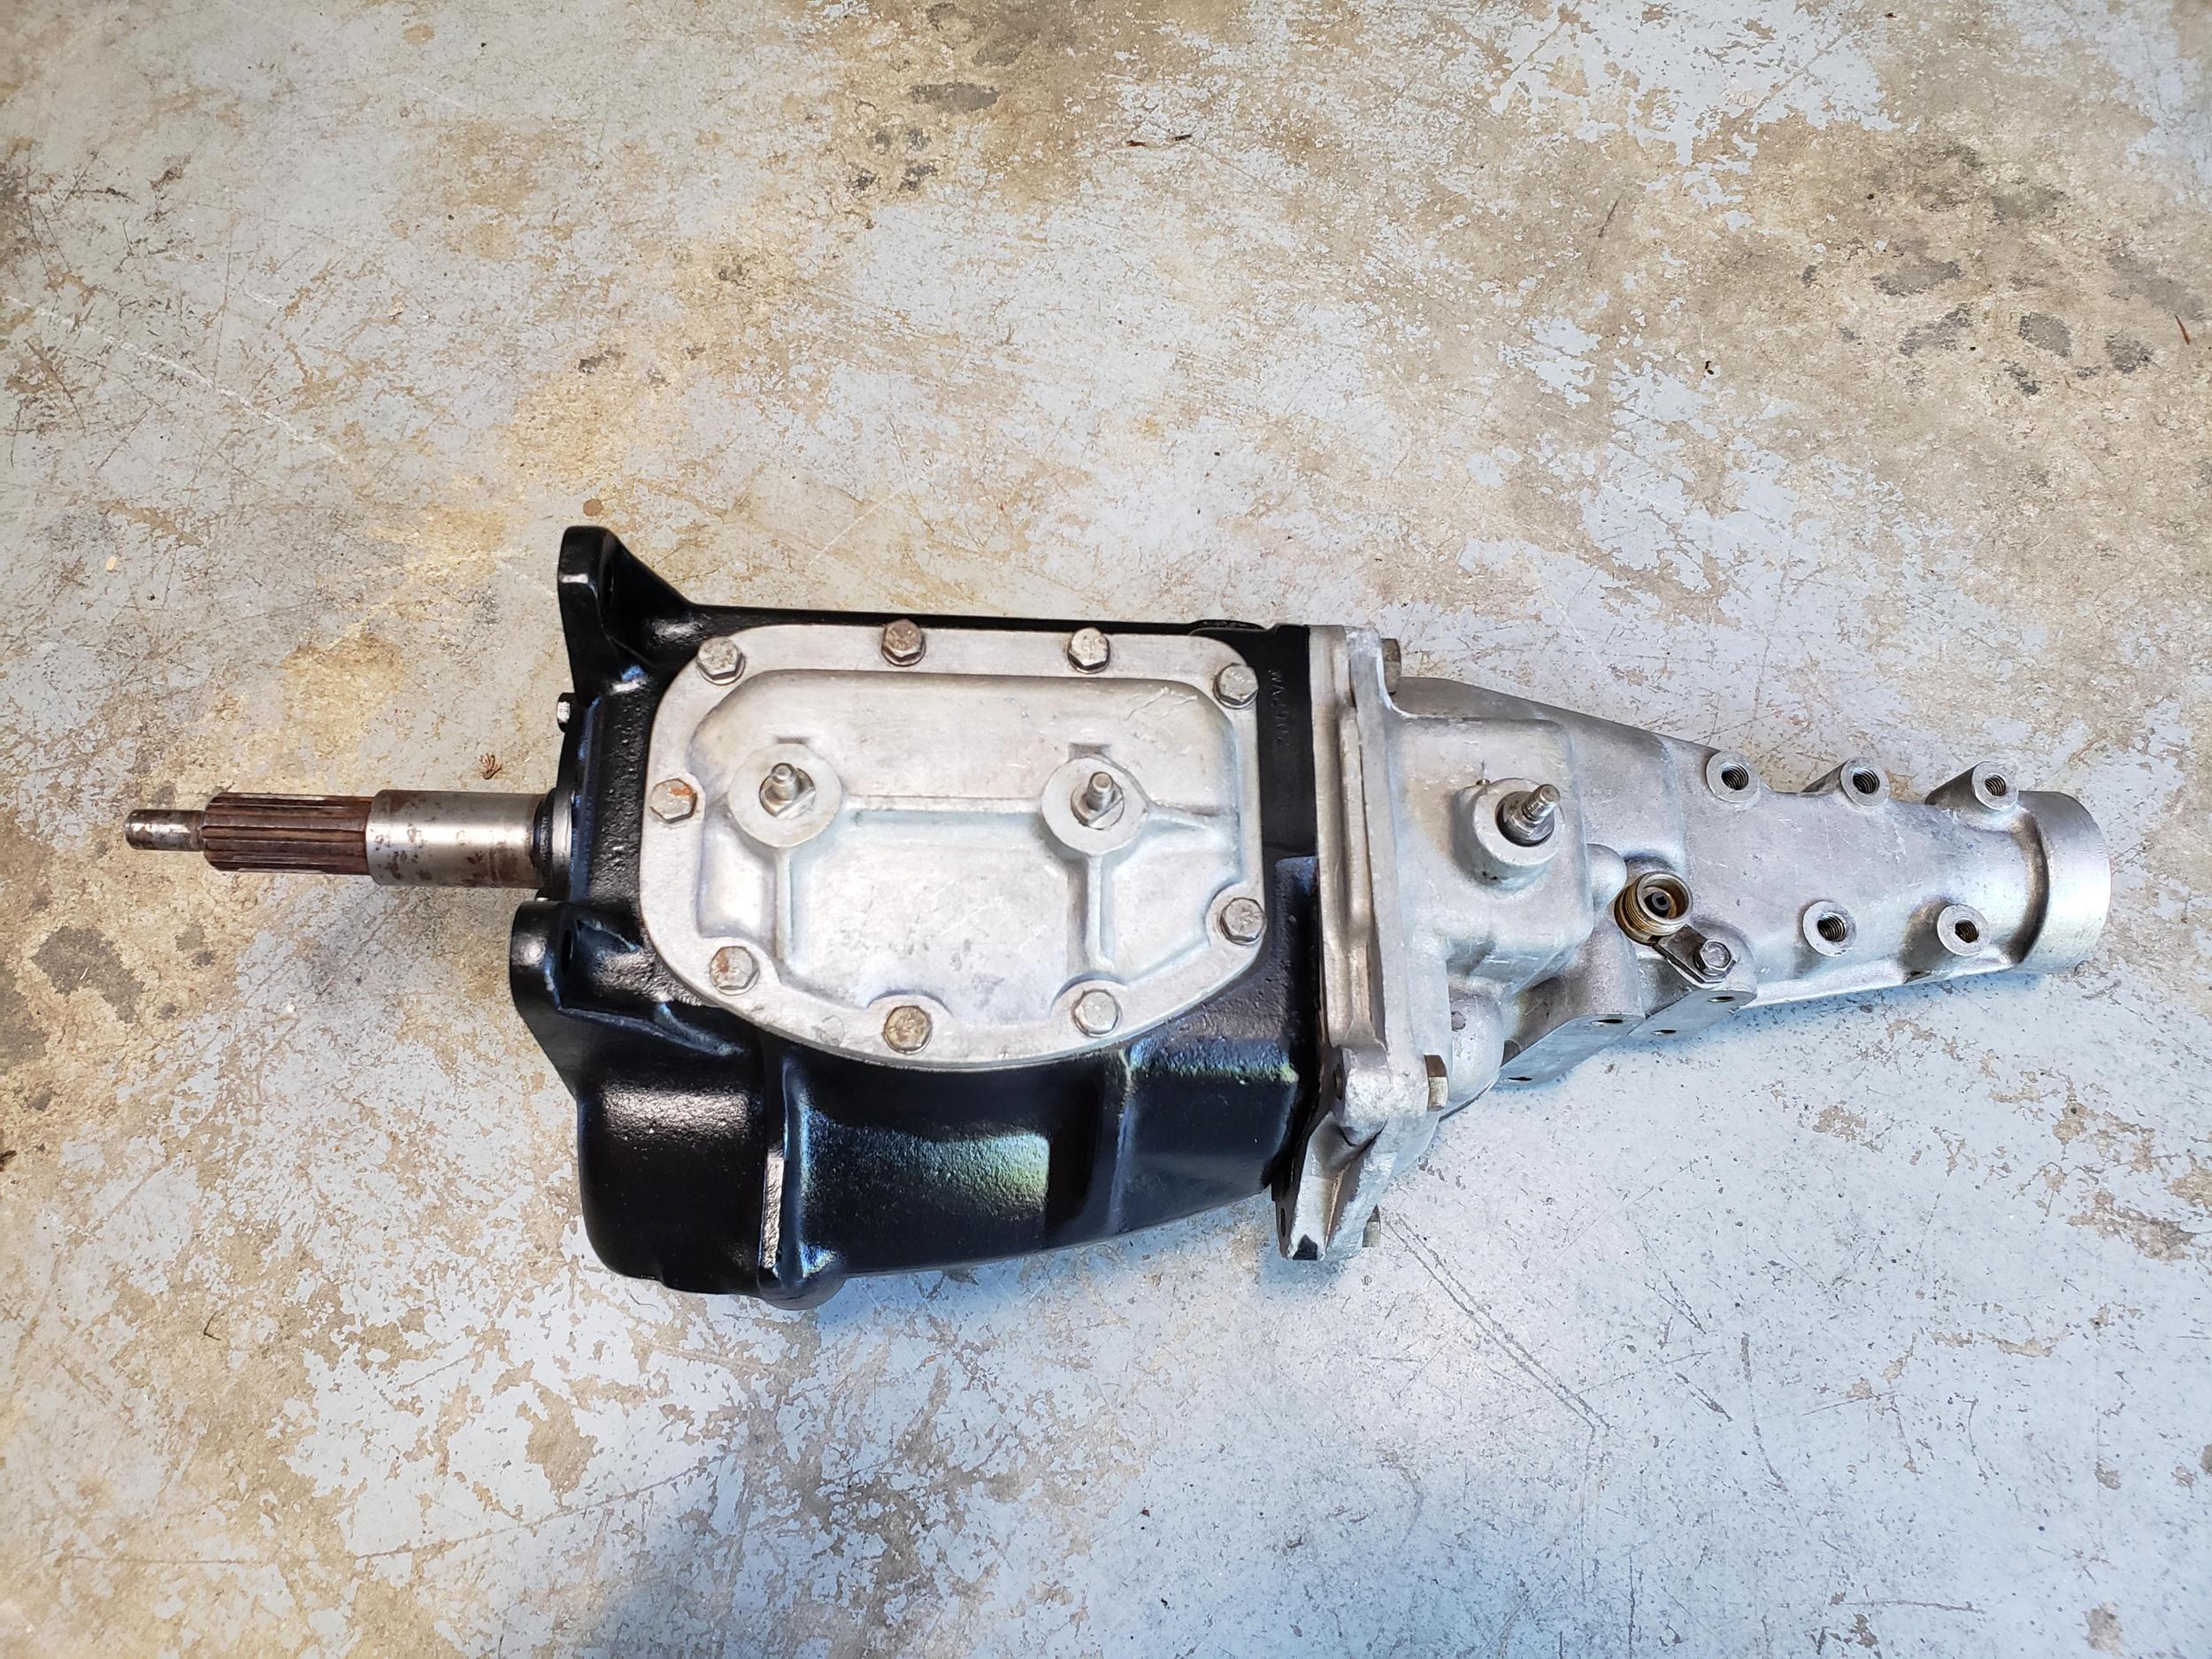
While I was on a cleaning kick I decided to give my old T10 a good look over. I believe I found the reason for the "missing first gear". If I had to bet, I'd wager that when they swapped out the factory 3 speed for the 4 speed they only had 3 speed linkage and had to "make it work".
I am also sure that this shifter wasn't doing anyone any favors. It is incredibly sloppy with play in every aspect. It may even be missing parts internally.
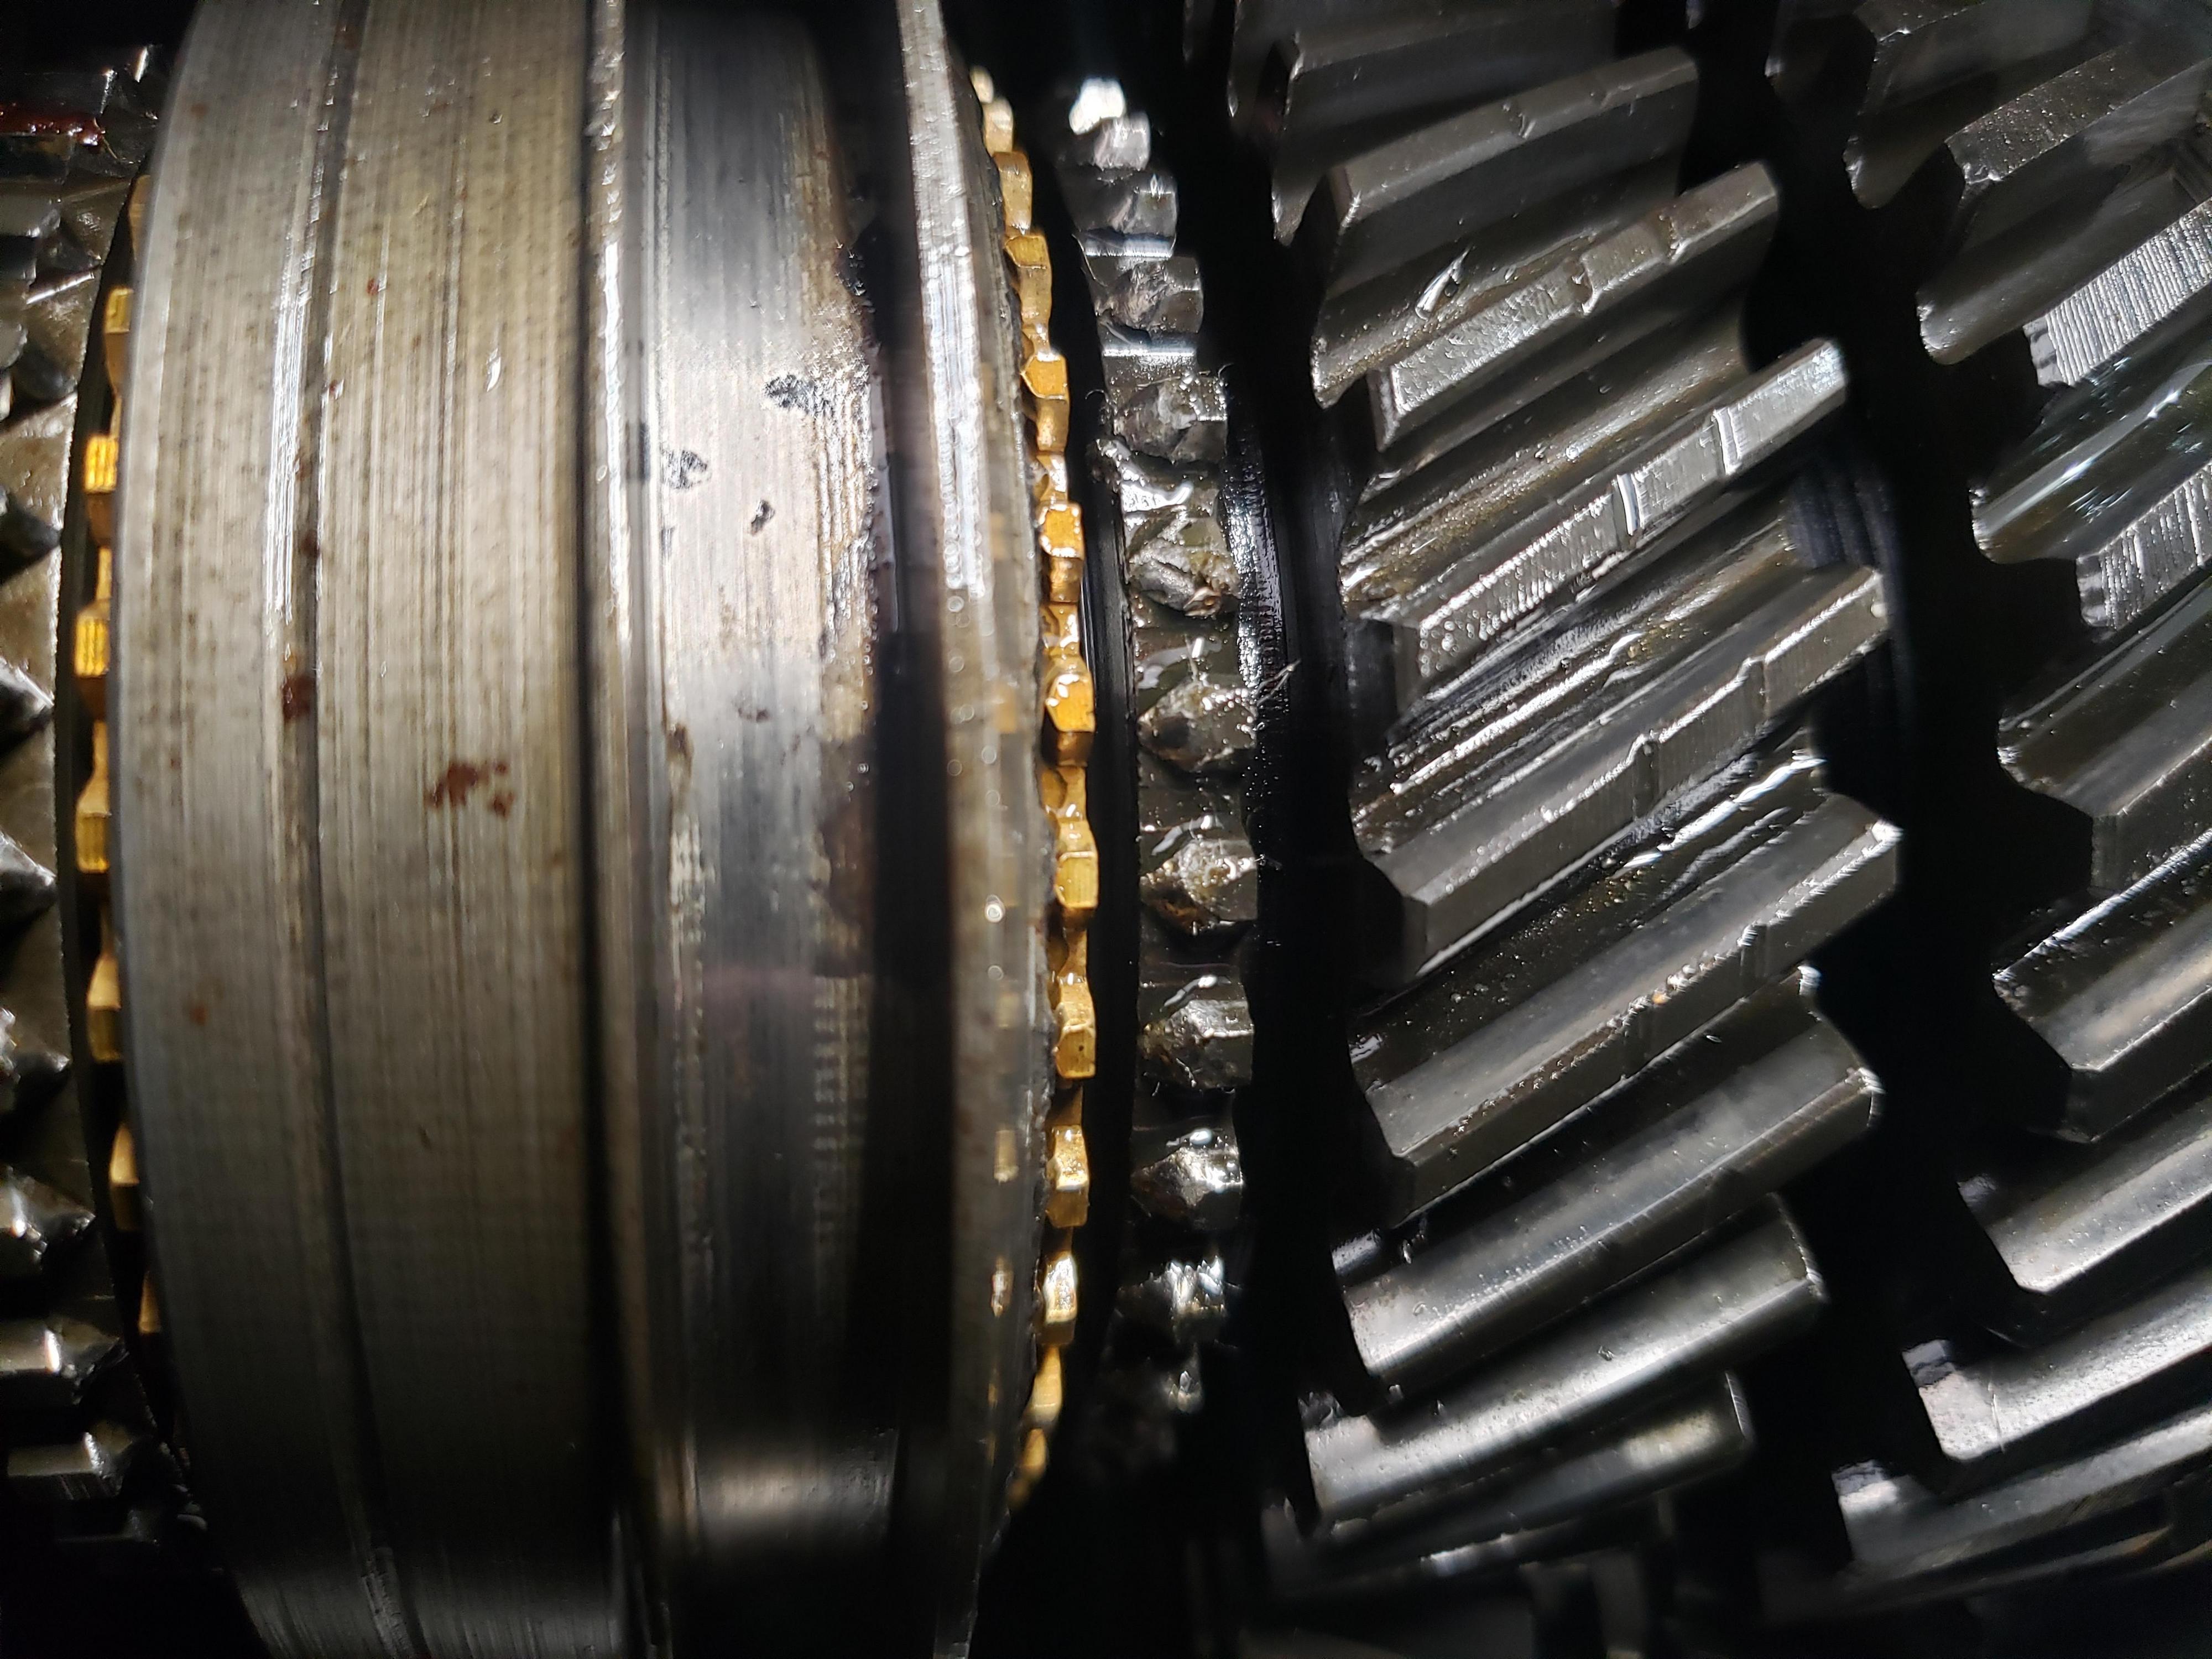
Opening the case shows that first gear looks fine. The syncro teeth show little wear, similar to 2nd the 4th. The transmission drove fine aside from the missing 1st gear. However upon closer inspection about 1/3rd of the syncro teeth on 3rd have seen better days. I will probably replace 3rd, the bearings, and seal it back up. Then run it for awhile until I save up for a more powerful drivetrain at a later date.
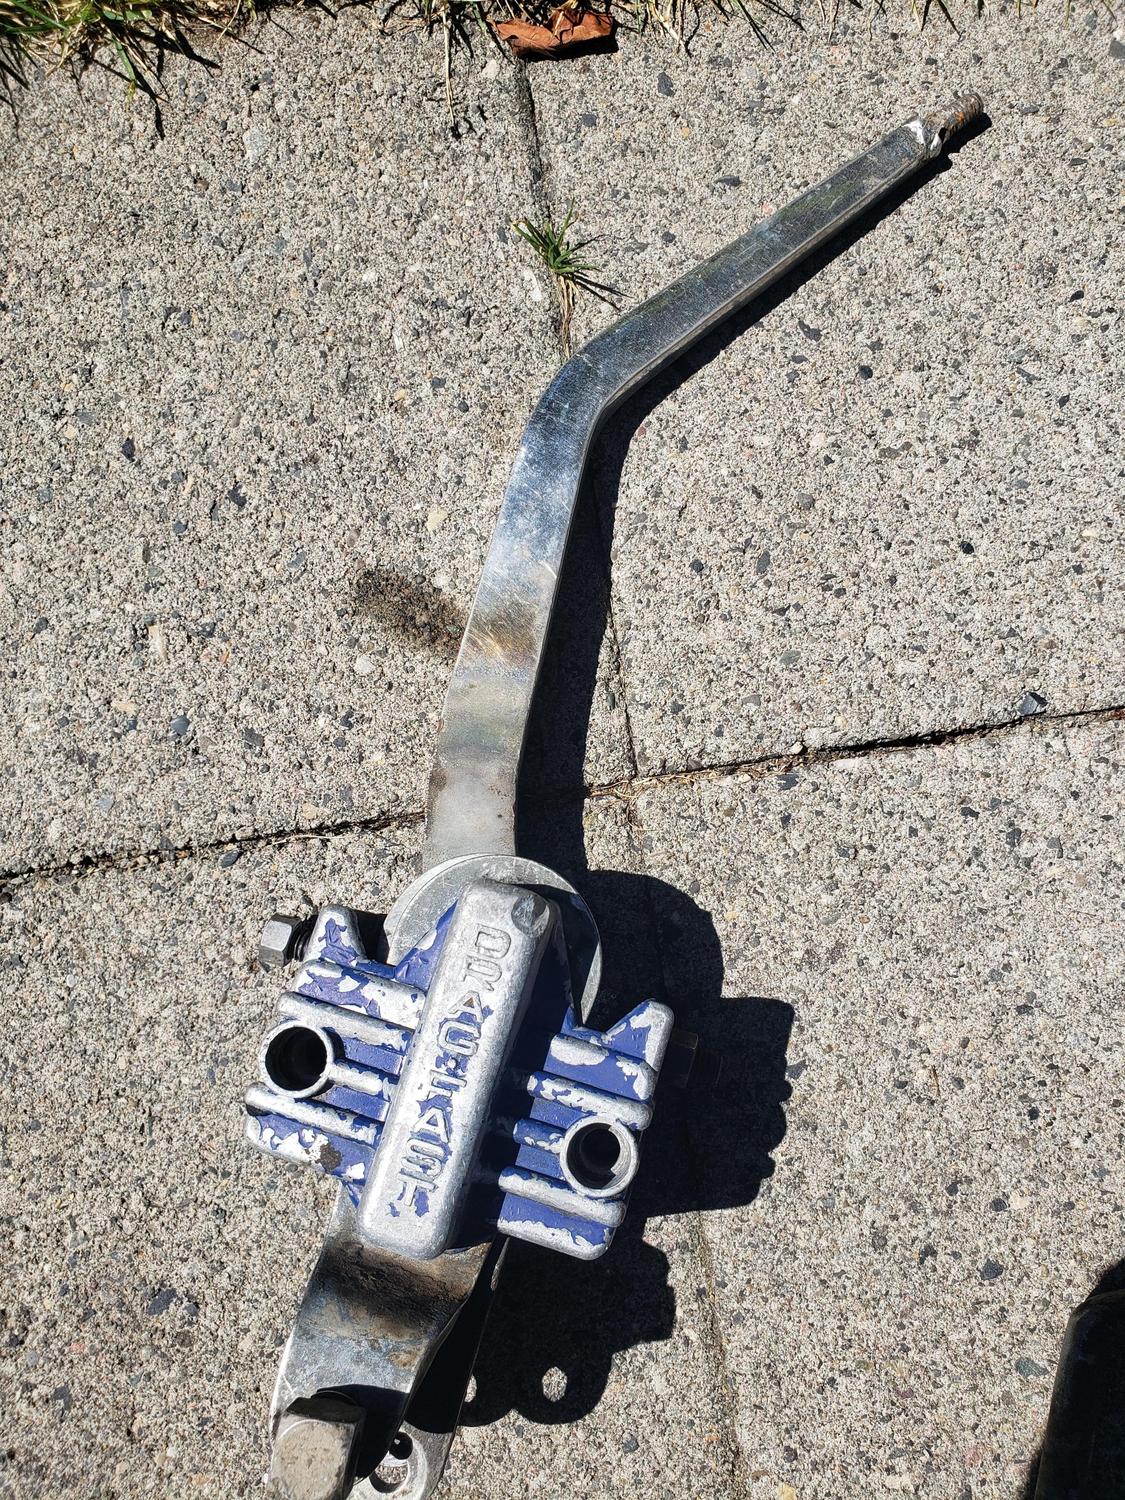
So I cleaned up the case, painted the cast main case, and left the aluminum raw. I have a hurst competition plus shifter to go with it but need the brackets and linkage. Then i'll be nearly set.
BONUS
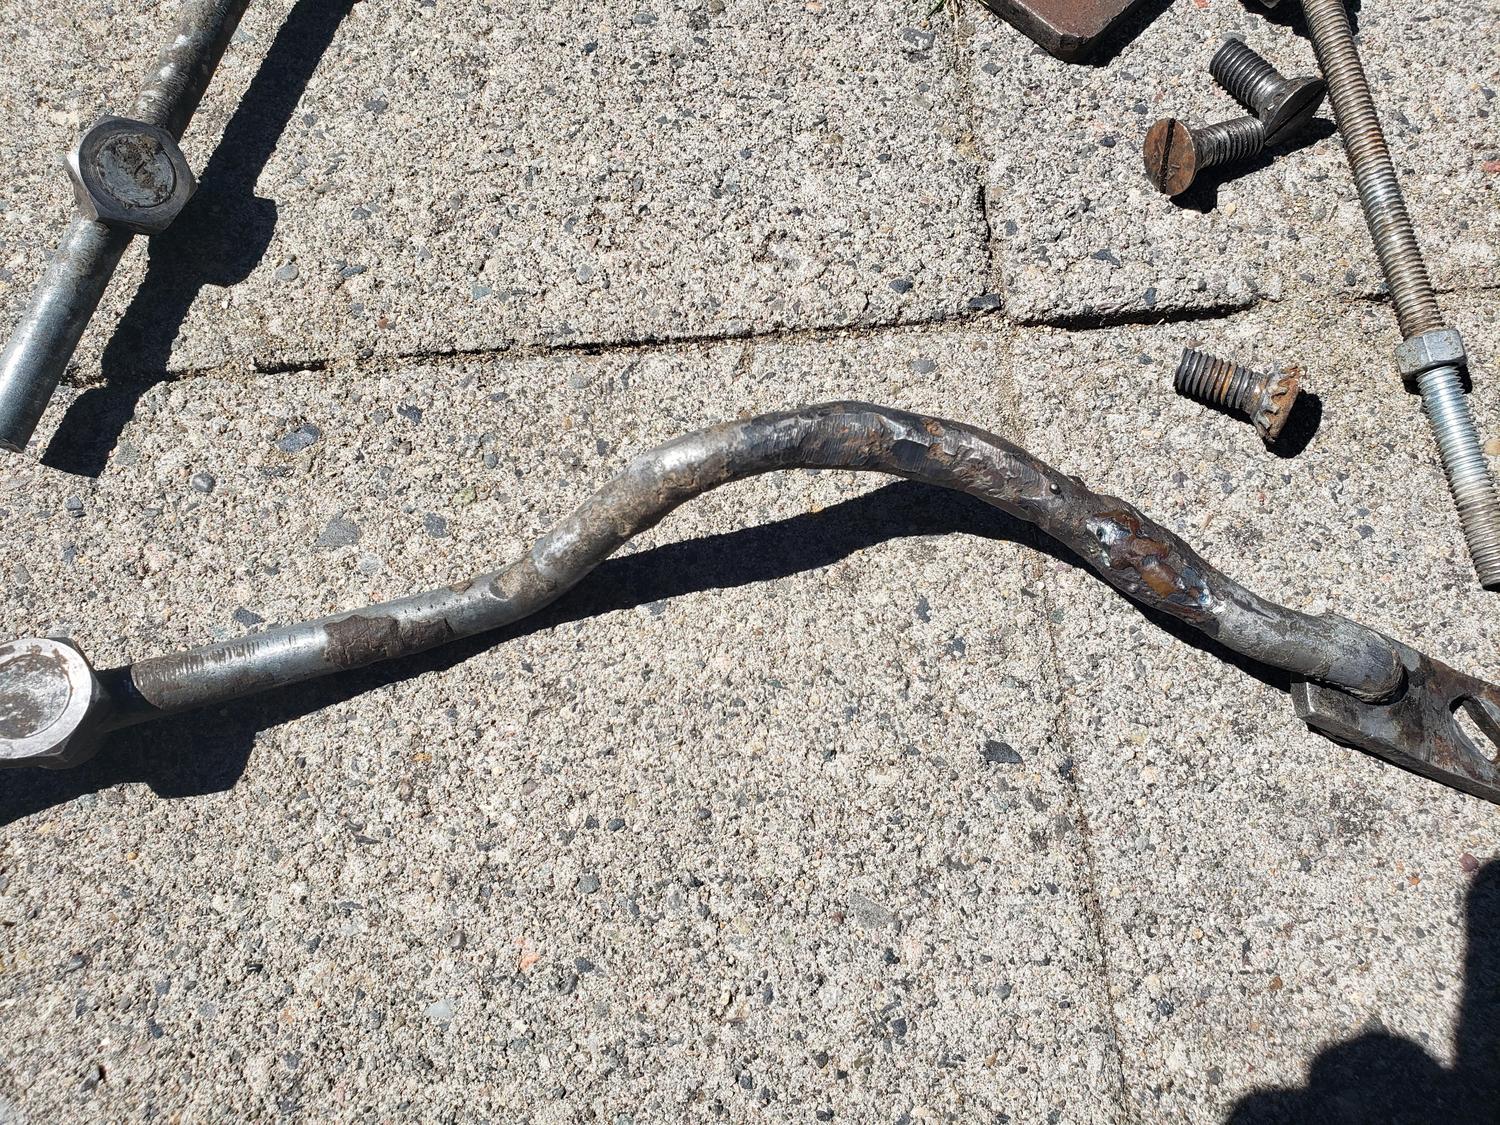
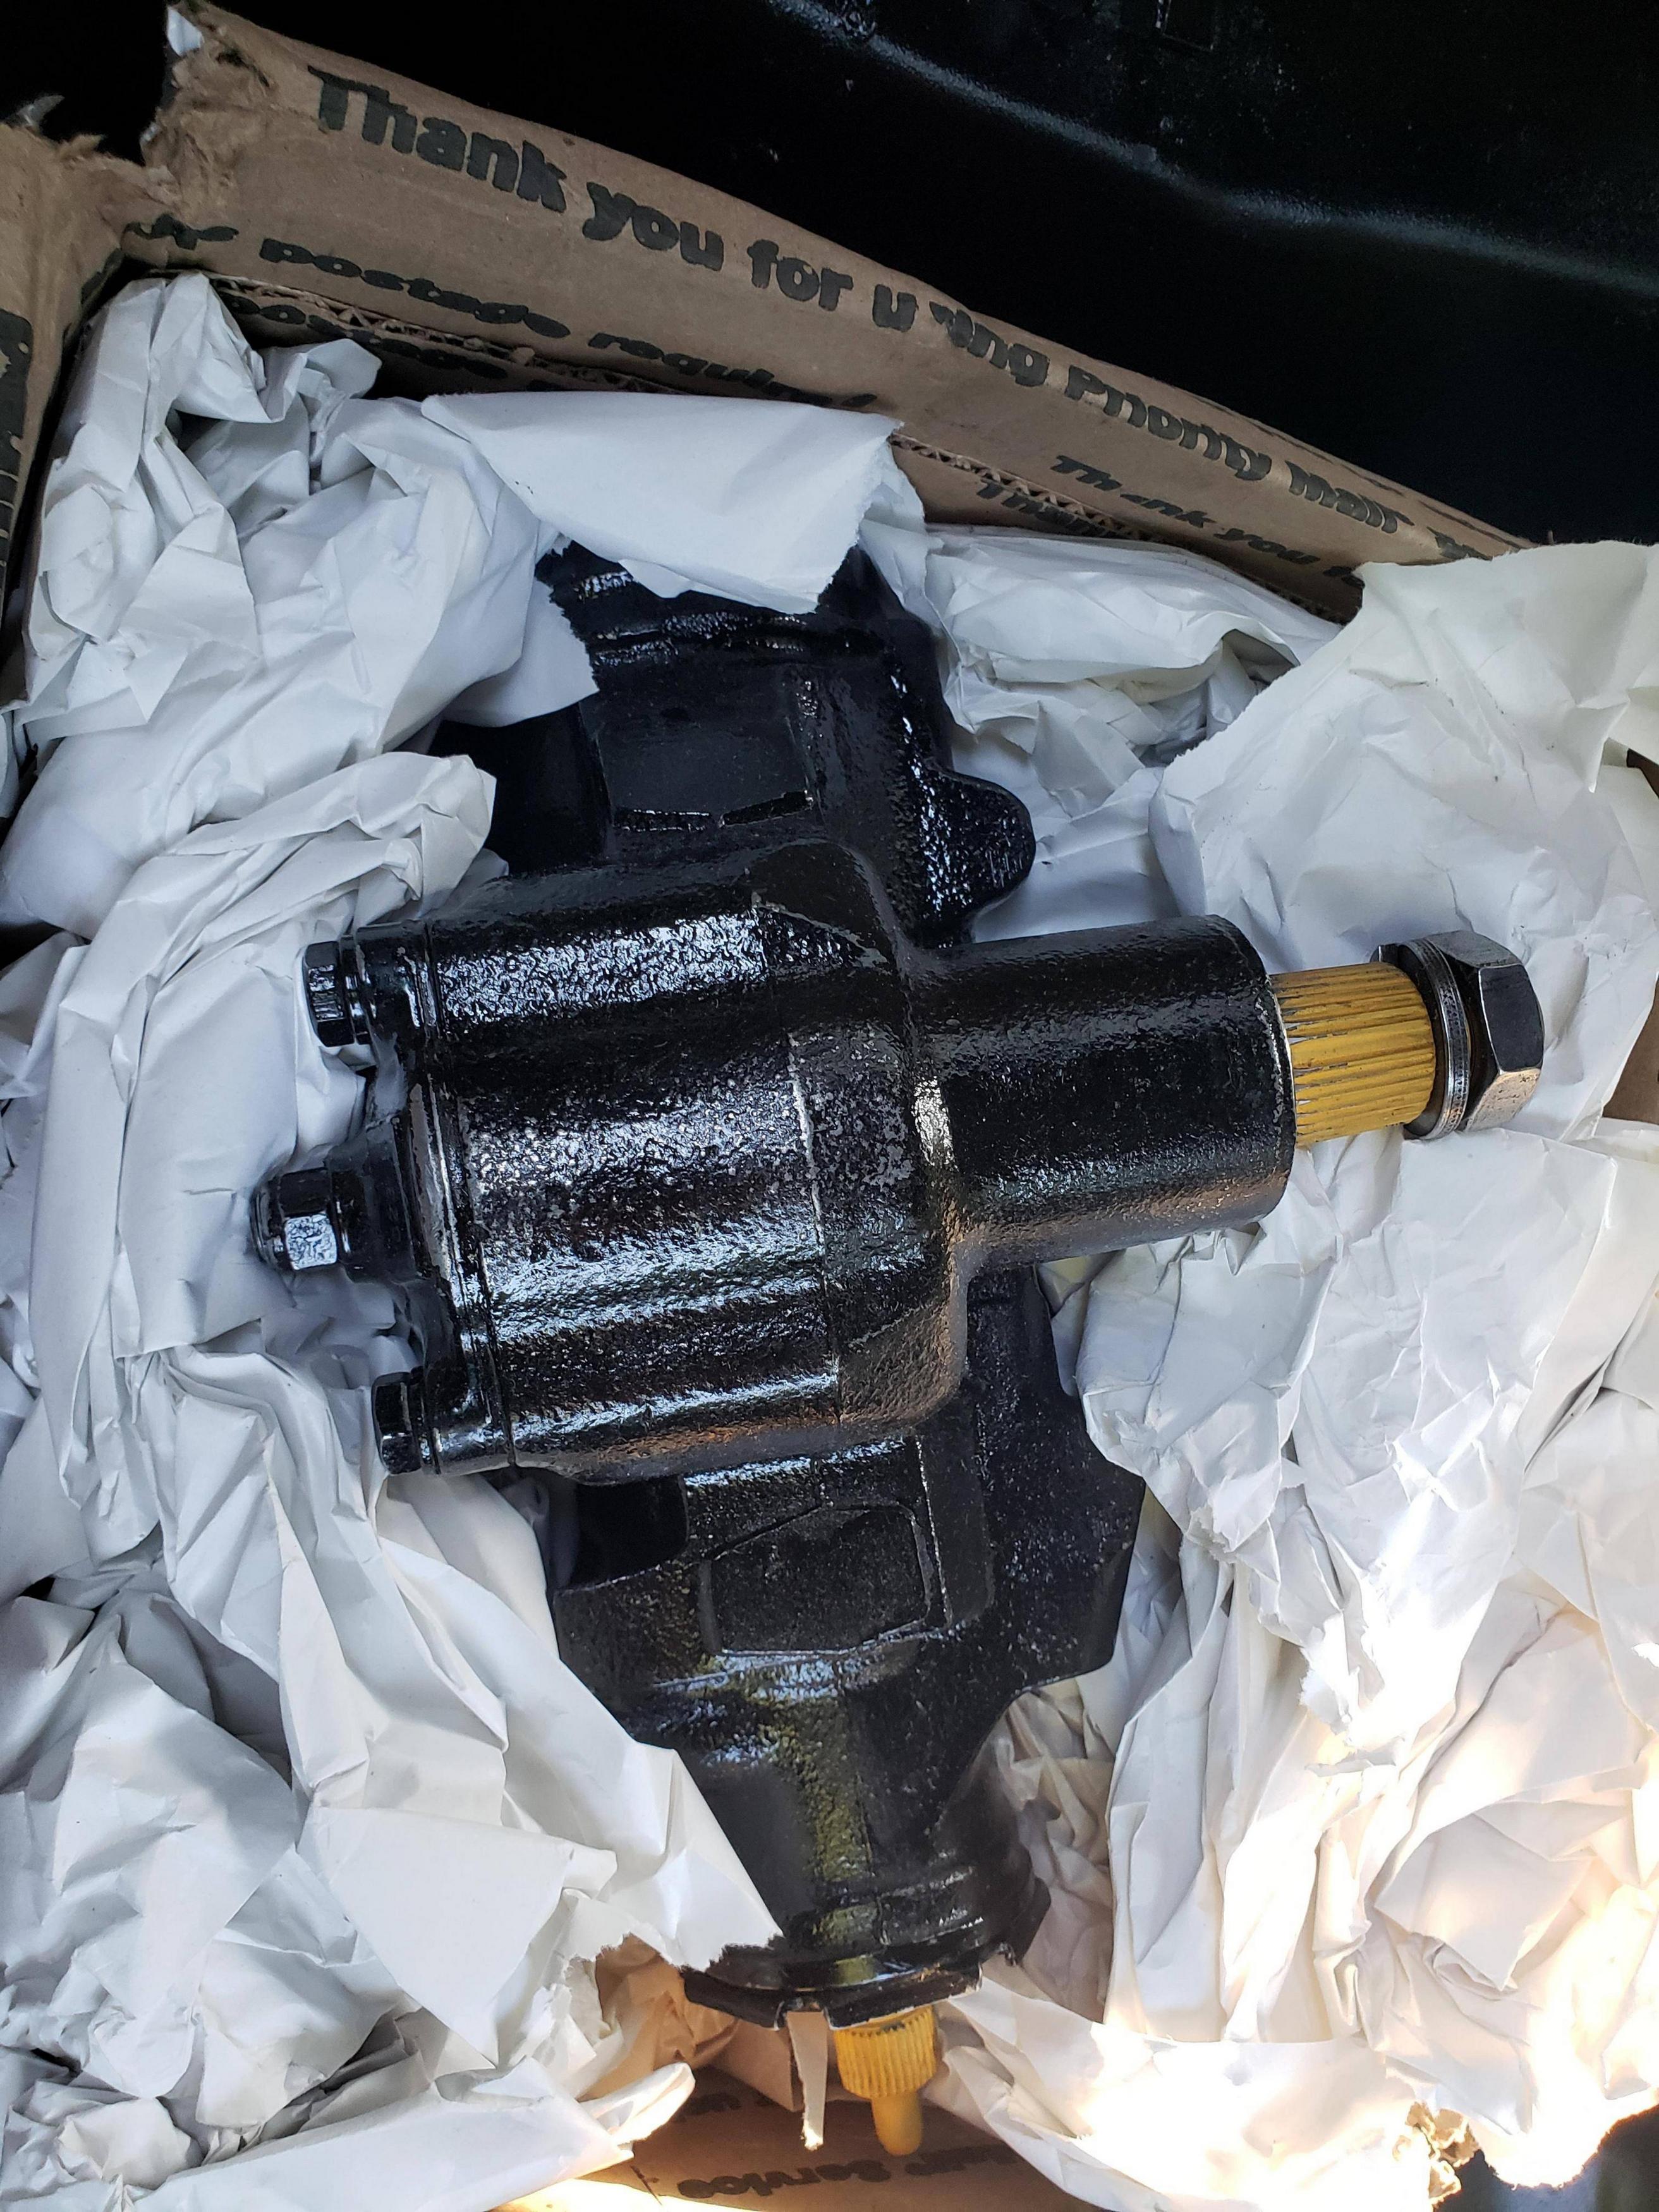
Shortly before lock-down I purchased a rebuilt quick-ratio (12.7:1) steering box from Carhex. I'll go with pro-foraged linkage when the time comes.
In this picture you can see the brake rotors in the front filling the entire wheel. I also am debating on keeping the front engine displacement badge (but with 325 instead of the original 326).
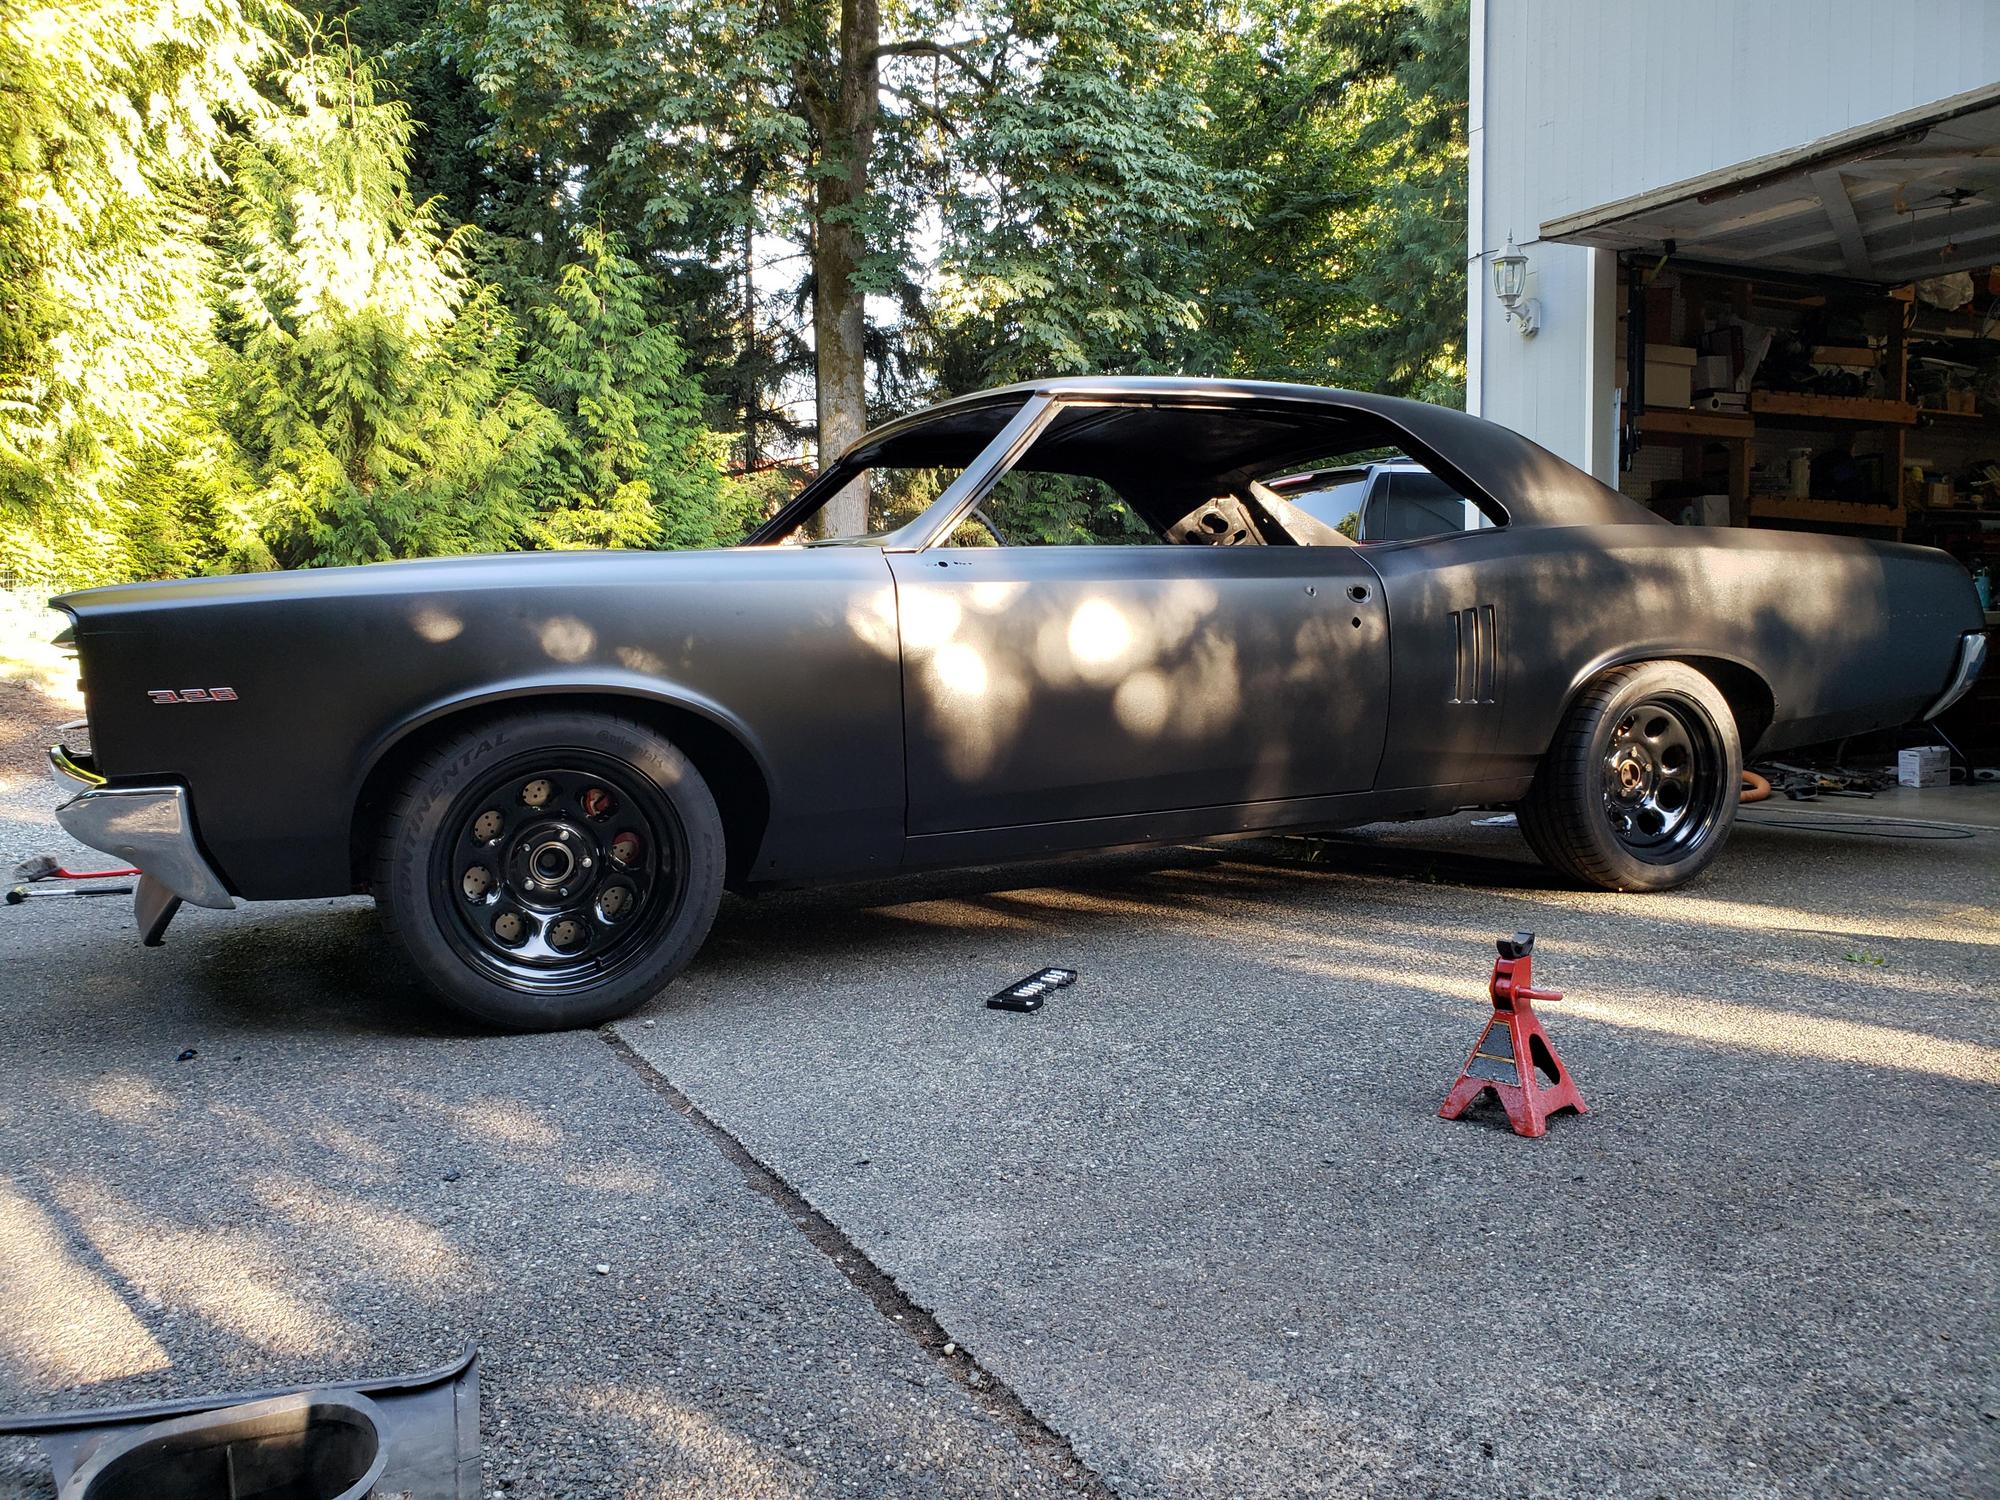
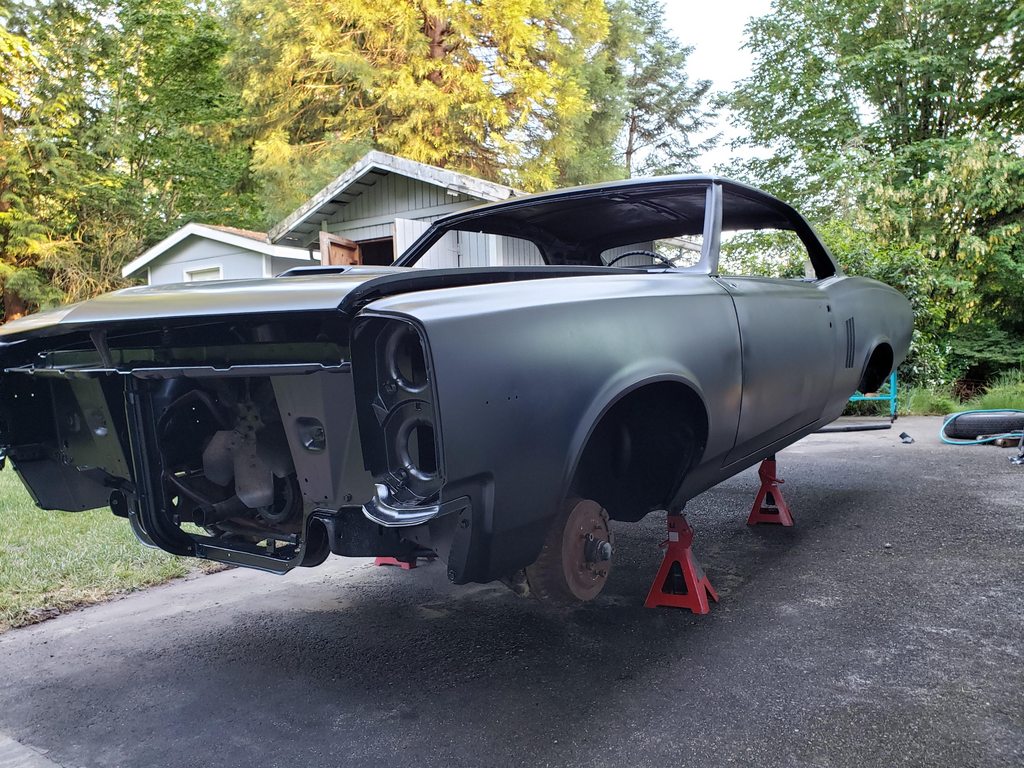
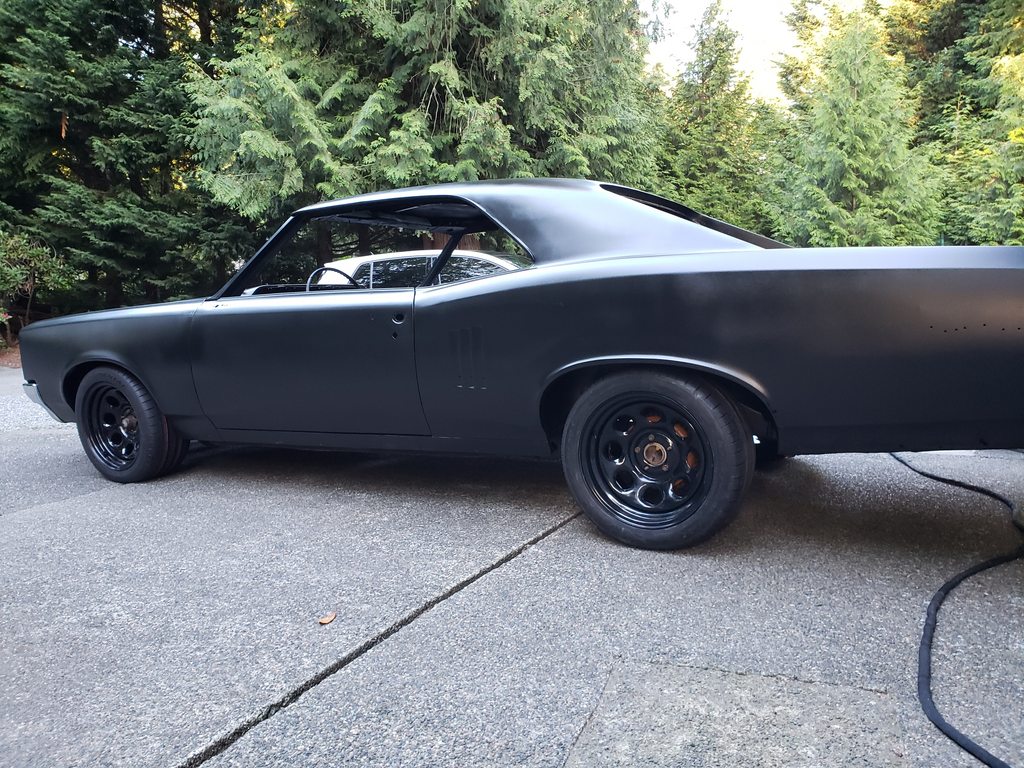
And here is the car as it sits today. I am really happy with how its coming along. It's not a high dollar or professional build by any means. Definitely a driveway hodgepodge but I'm really looking forward to finally getting it back on the road soon.
07-30-2020 #38 Registered User
- Join Date
- Oct 2015
- Posts
- 362
Great project, everything looks great I really like the stance but I don’t think you are going to like that muscle car pan. I would definitely get the Holley 302-2 or 302-3. I have the 2 in my 67 and it fits like oem and doesn’t hang below the cross member and it clears the tie rods. Neither of which the pan you have will do. I’m not sure what muscle car that the GM muscle car pan fits but it’s not an A body. Just trying to save you some grief.
My half a$$ed build thread.https://www.pro-touring.com/threads/...elle-6-0-4L60E
Tighten it till it strips & back it off a quarter turn.
07-30-2020 #39
Registered User
- Join Date
- Oct 2015
- Posts
- 362
Fits perfectly around the cross member.
My half a$$ed build thread.https://www.pro-touring.com/threads/...elle-6-0-4L60E
Tighten it till it strips & back it off a quarter turn.
07-30-2020 #40
Registered User
- Join Date
- Mar 2015
- Location
- Seattle, WA
- Posts
- 34
Thanks for the pictures. I'll probably end up getting the holly pan. I was originally told that the muscle pan would work for my application and thats why I got it. Evidently thats not the case.

 Reply With Quote


