

Results 21 to 33 of 33
-
08-05-2019 #21

 Registered User
- Join Date
- Mar 2011
- Location
- Portland OR
- Posts
- 26
I moved the wheel openings up 2.25". It will let me tuck a 265/35R18 into them, but it's hard to say more than that as the track is a bit wider than stock and much lower due to the C5 suspension. Originally Posted by windows

-
08-05-2019 #22
Registered User
- Join Date
- Apr 2006
- Location
- Huntington Beach, CA
- Posts
- 2,415

This build looks incredible! Love all the fabrication. Subscribing to this one for sure.
Please Subscribe to the AutoXandTrack YouTube Channel
Autocross and track blog about running autocross and track events with pro touring cars
-
08-10-2019 #23
 Registered User
- Join Date
- Oct 2015
- Posts
- 122
 Originally Posted by nickcornilsen
Thanks for the info. I used a C6 Z06 front suspension in my 56 Chevy pu and Im using 285s. Its a bit tight so I think I ought to do something similar to what you did in order to get a bit more clearance. Take care.
-
08-27-2019 #24
Registered User
- Join Date
- Mar 2011
- Location
- Portland OR
- Posts
- 26
Quick update
My how fast the summer goes! Around the first of this month, I got the quarter panels welded in, and the welds ground down. After this, I fabricated the inner wheel wells to clear my tires.
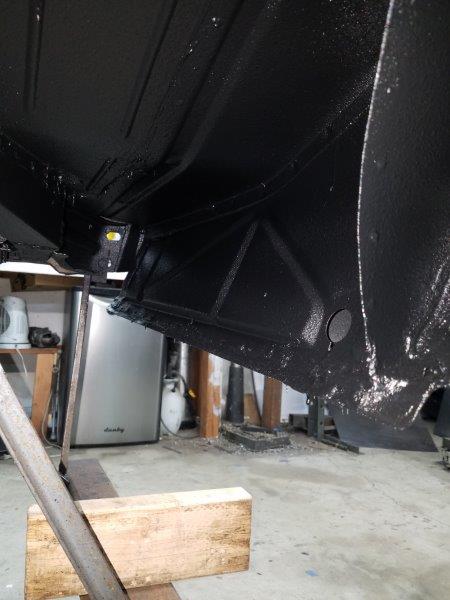
I then epoxy primered the inside of the trunk, the underside of the back of the car, and the wheel wells, and did the seam sealer. I also applied a layer of uPol Raptor liner to the trunk and the wheel wells.
It's stupid how much time went into those wheel wells, but I can clear a 315 tire if I want, and it won't be tucked so far under the car that it looks funny.
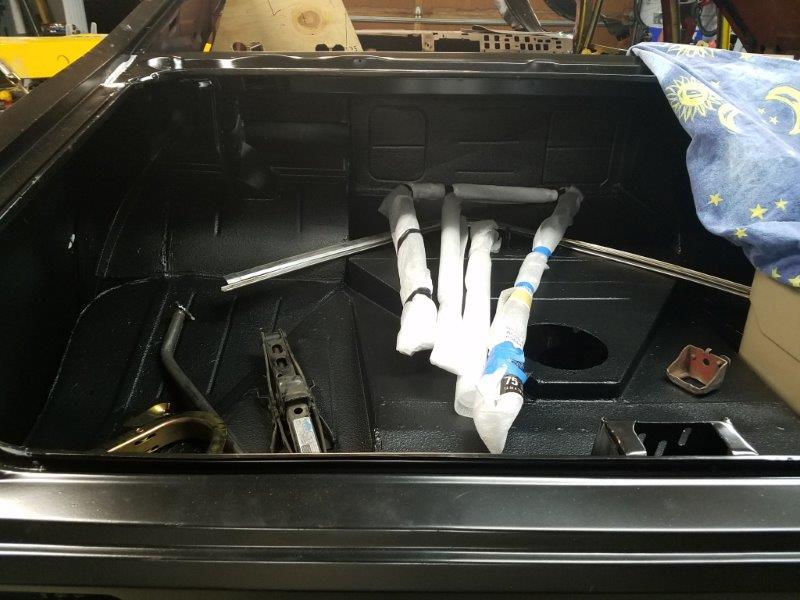
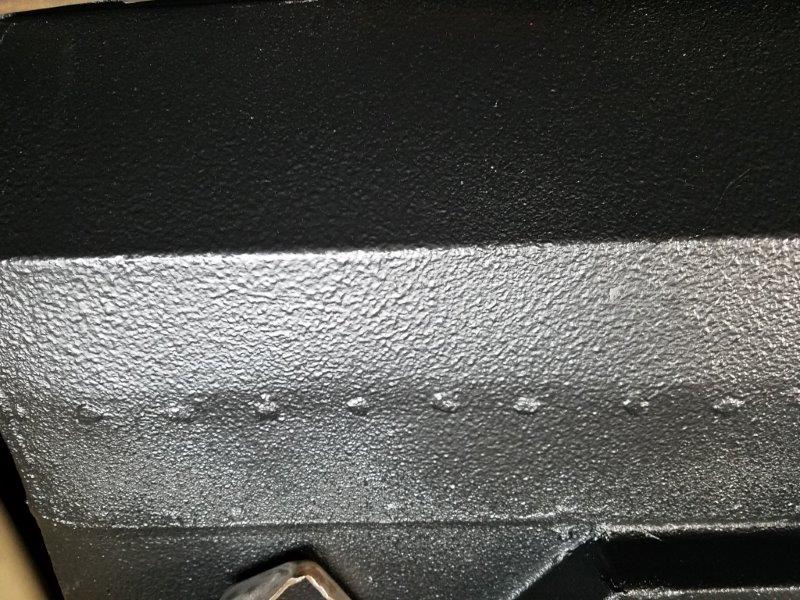
The raptor liner doesn't hide the spotwelds and such as well as I'd hoped, but it still looks good. If I'm worried I'll make a carpet for the trunk.
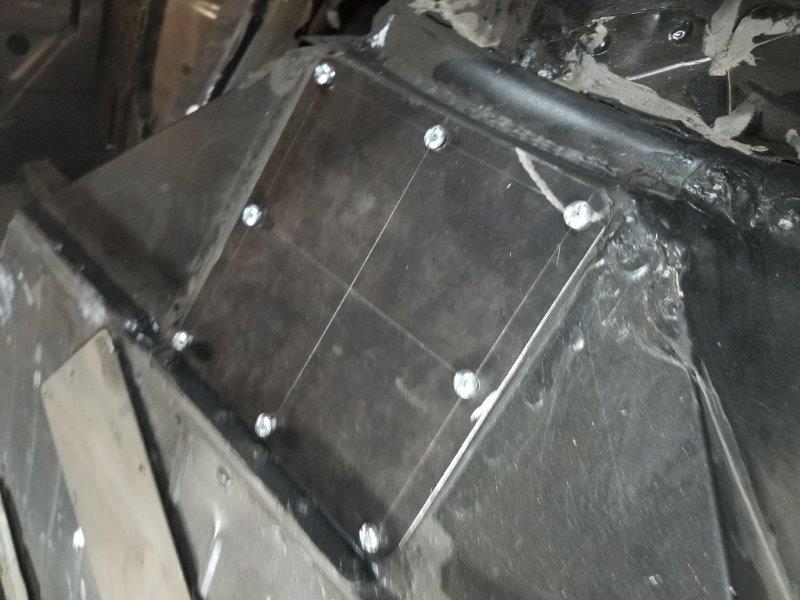
Made a cover for the shifter linkage access plate... I lost the one I made before. Thank god I keep a journal of my hand sketches for parts made like this.
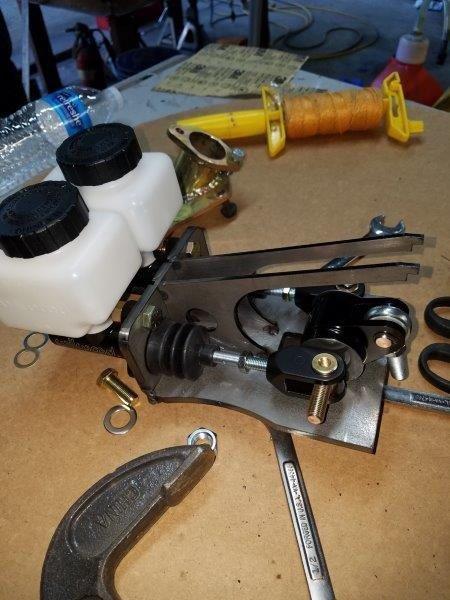
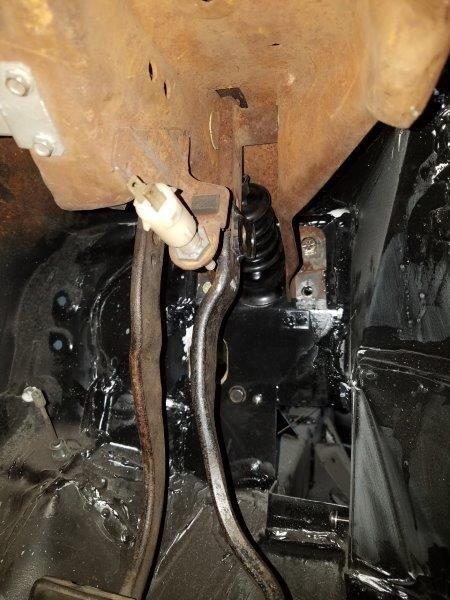
I decided I didn't like the brake booster setup I had. So I bought a Wilwood 60 degree Master Cylinder mount. Turns out I don't like how that fits either. So I made my own housing for the MCs and the bias bar pivot, which puts them somewhere I can live with. I spent a bunch of time changing the design, and ended up with something cool - the pedal ratio is 5.5:1 for the first 1/8-3/16" of MC stroke, so any slack gets taken up quickly. Then the ratio increases to about 6.35:1 at 1/2" of cylinder stroke, and sort of levels off there. I'll be interesting to see how that feels in practice.
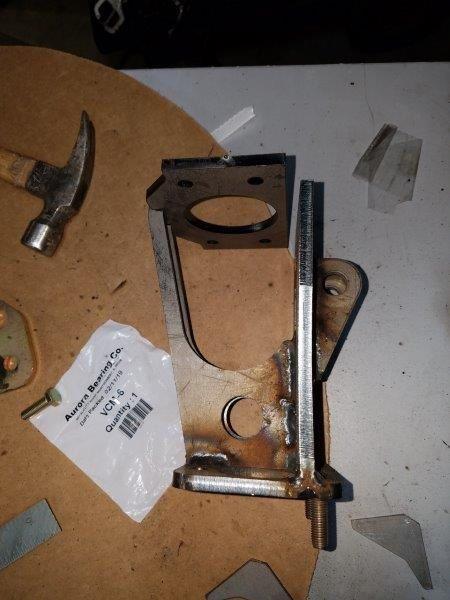
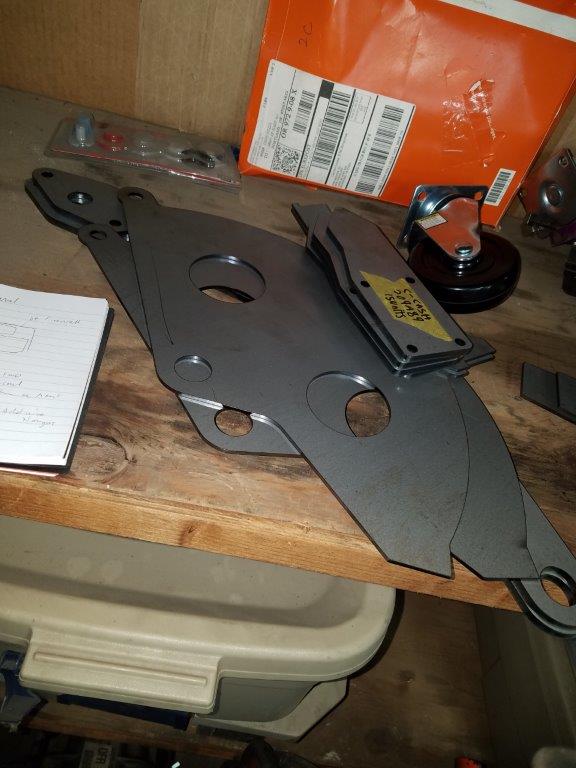
All of the parts are at a shop being laser cut now. If you look carefully, you can see little tabs and other interlocking features, that will make fixturing it much easier. I'll take some pics of the finished thing!
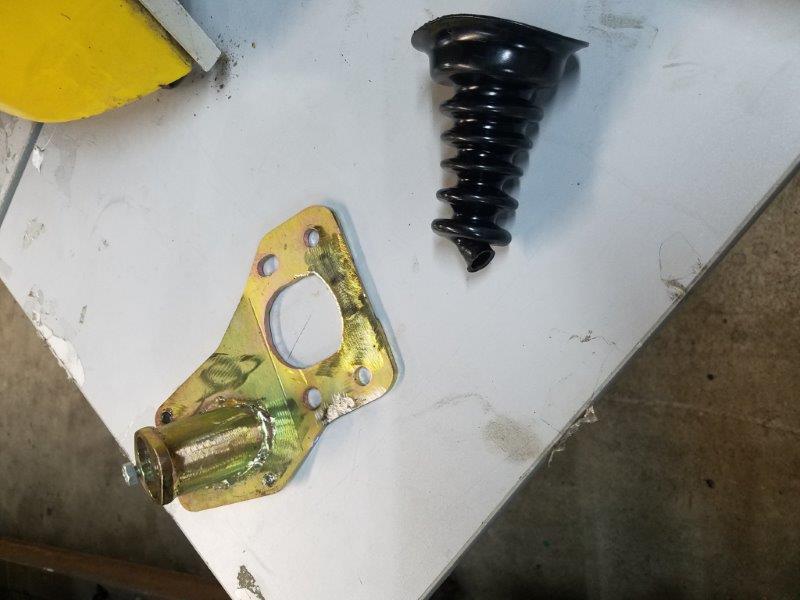
I wanted to keep the noise and engine smell out of the cabin, so I found this rubber bellows after scouring every catalog I could find. Next to it is a DSE bracket I modified to hold a Tilton 75 series master cyl for the clutch.

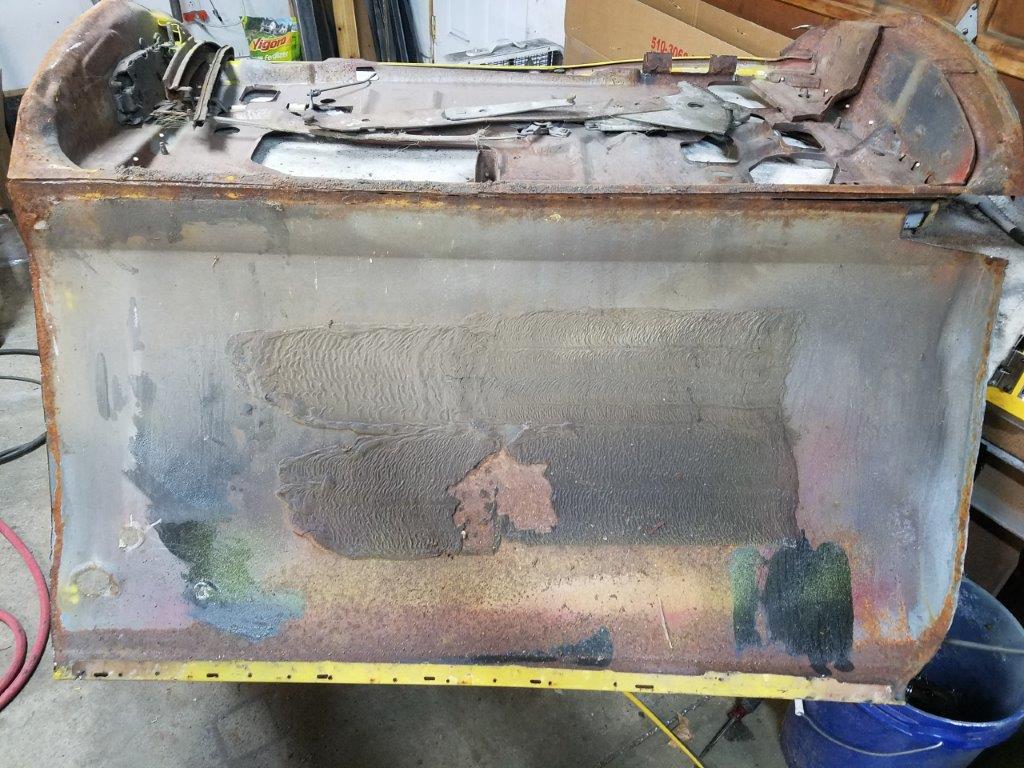
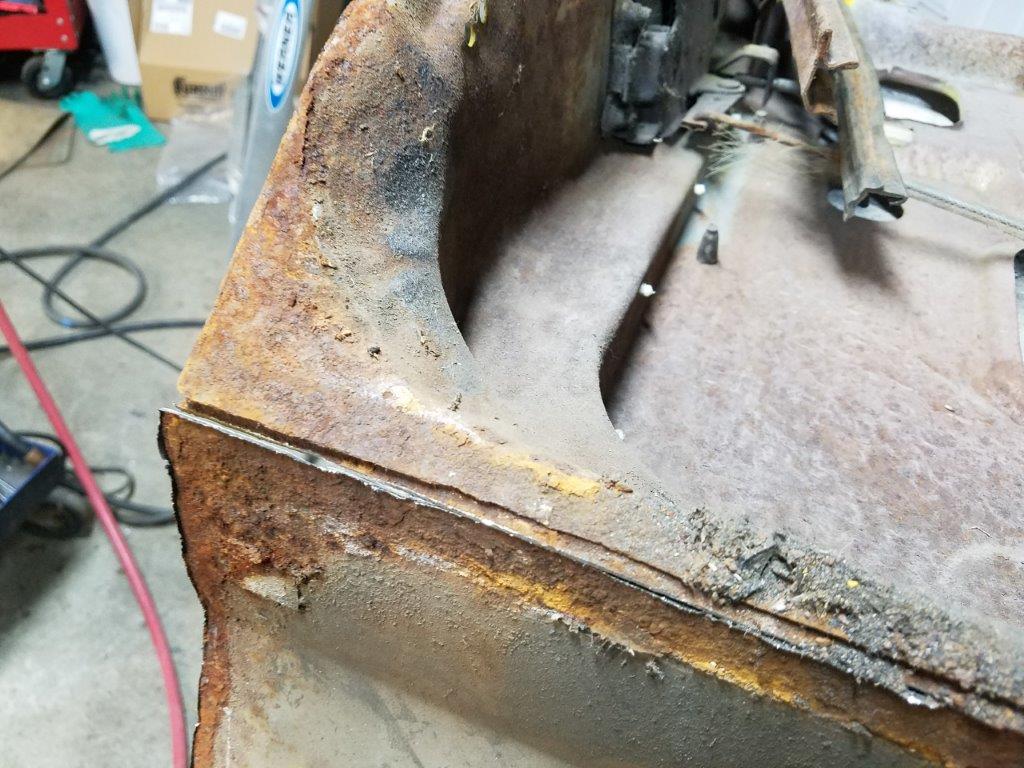
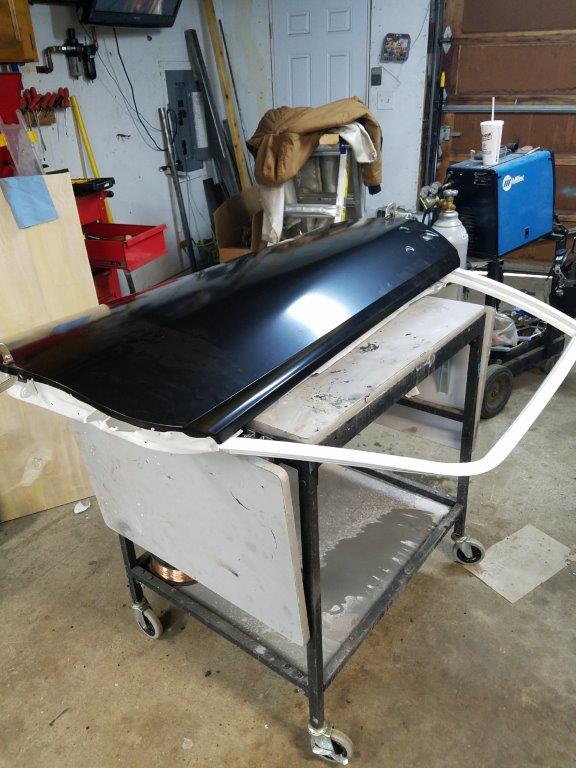
I decided to work on the front fenders, and finish the metal work with them. My plan is to do the front fenders, the door shells, and trunk lid... then send them for sandblasting. This will reduce my time spent getting them that far.
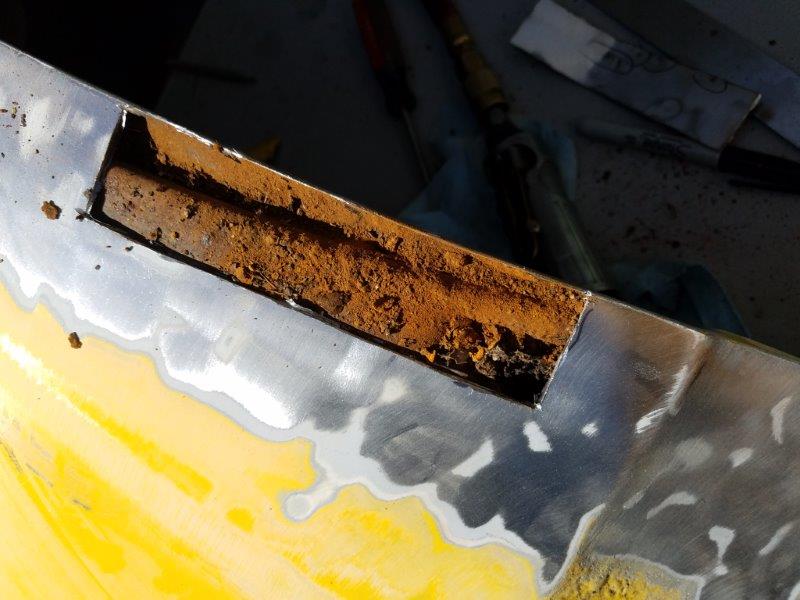
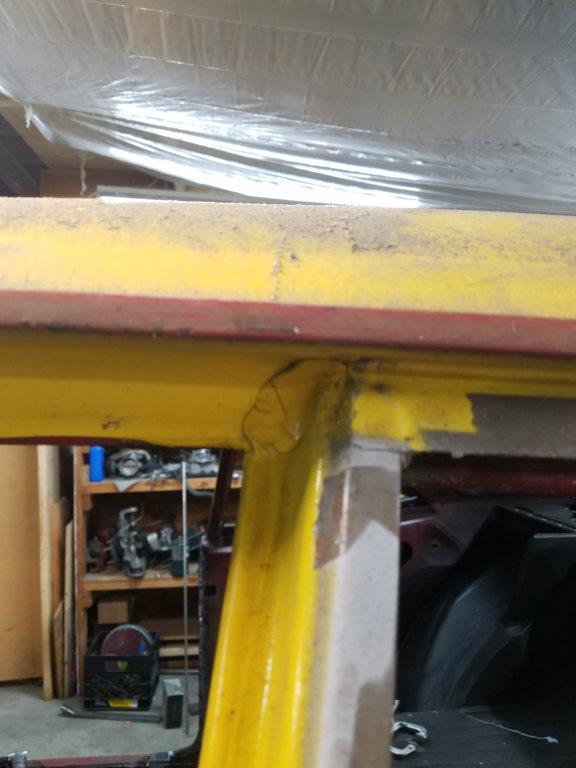
I did NOT expect to find any rust, but figured I should look in the common places. Loand behold! You can see where I welded up some pin holes back in 2003 when I first painted this car. I couldn't tell this was present under the 3M rock chip guard stuff I had along the bottom of the car.
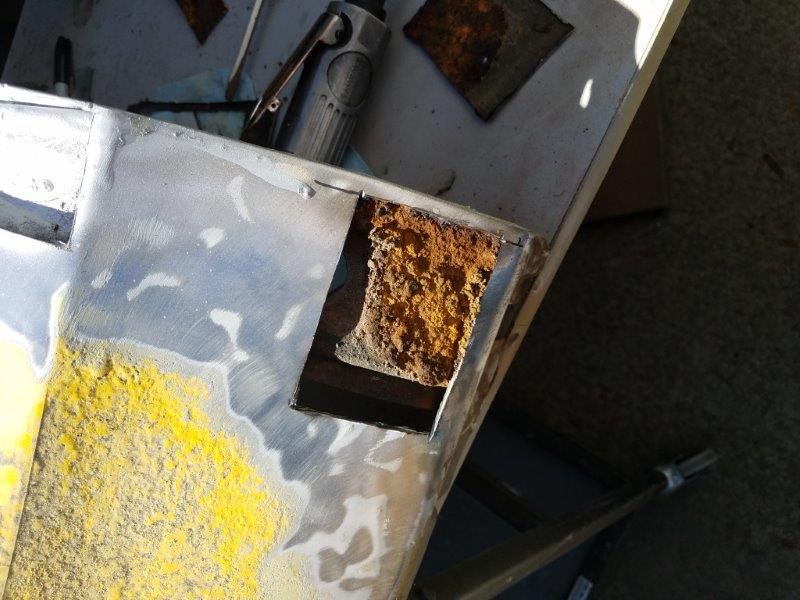
I found some more along the door opening. I had welded up individual pinholes instead of sectioning out the bad metal. Luckily, a wire wheel took the rust off the inside structure, and I was able to primer it.
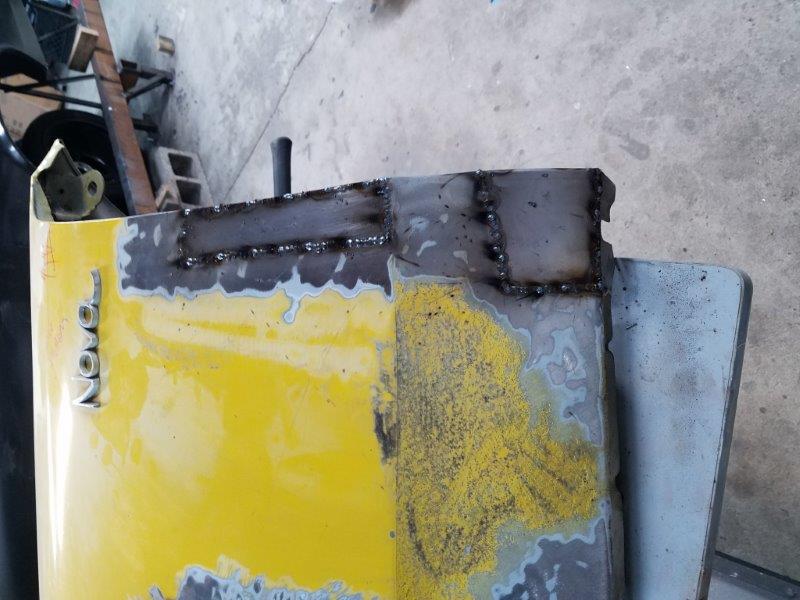
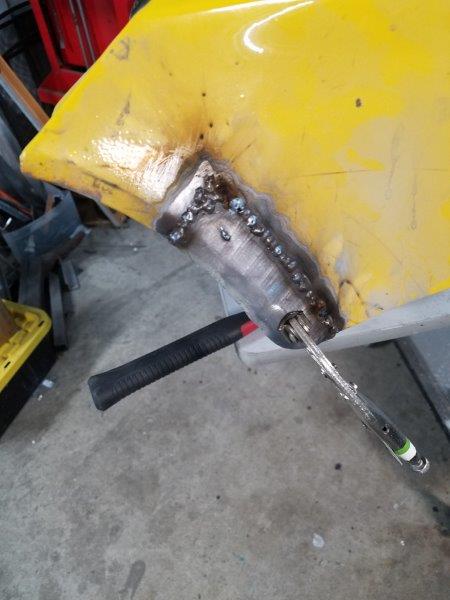
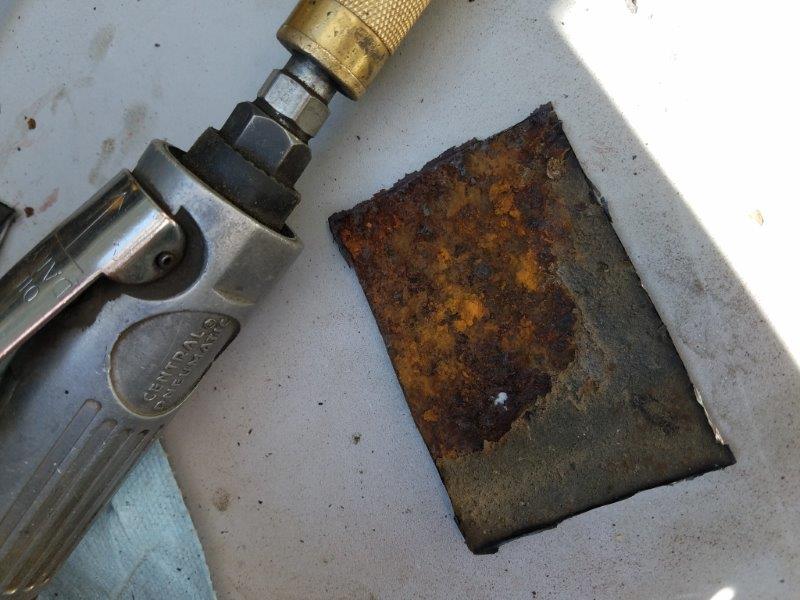
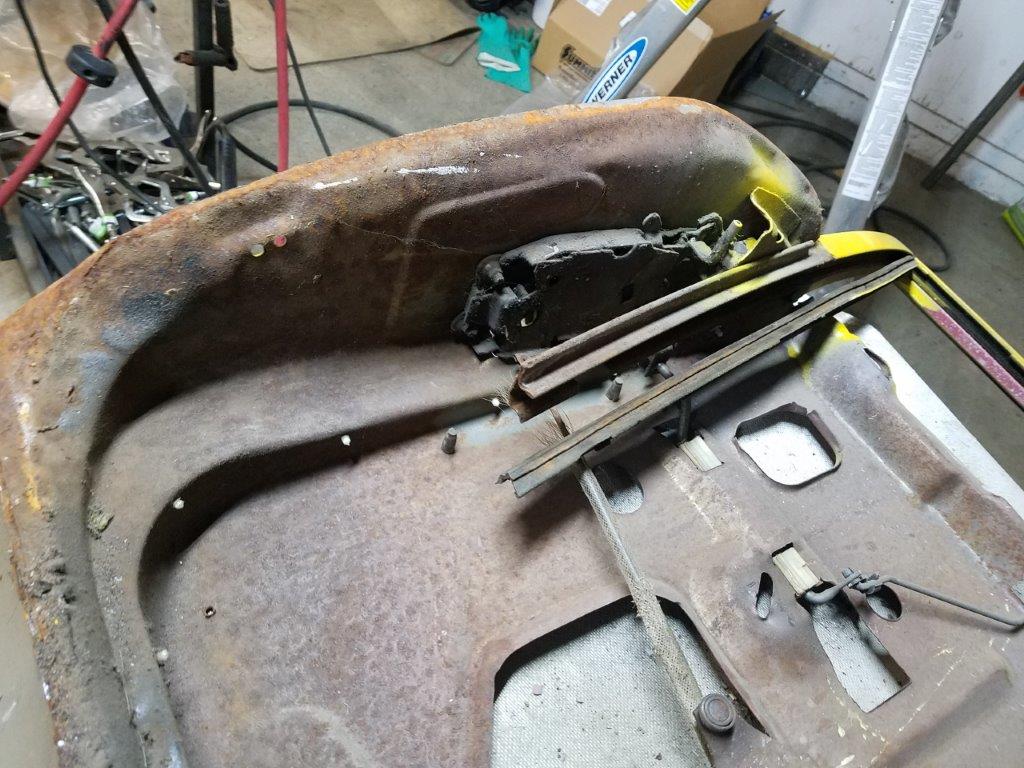
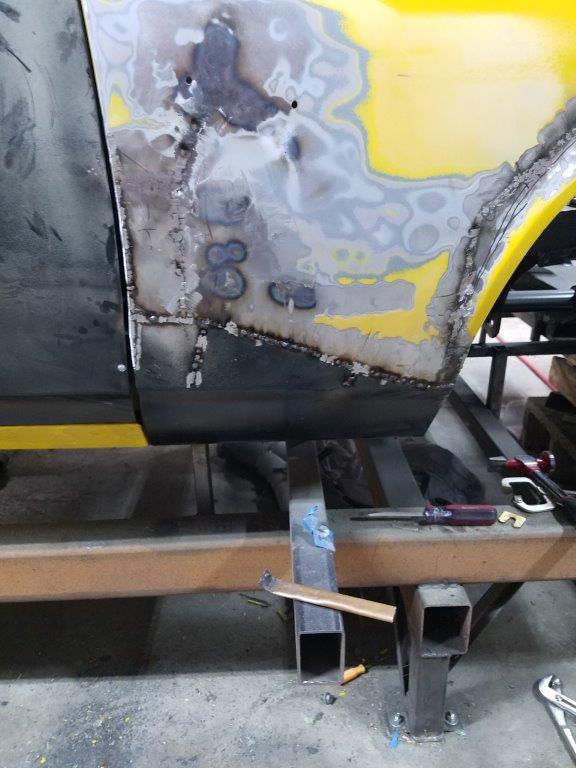
Patches are welded up. Just need to grind them down! I think these fenders spent some time leaned up against a tree with the top in the mud, as the folded over area at the very top of the panel was a bit soggy. I cut the rust out and made a patch for this. I need to tweak the welds a bit, then I'll fold it over the inner structure, just like new.
Next update: Other fender, doors, trunk lid!
-
08-27-2019 #25
 Registered User
- Join Date
- Sep 2010
- Location
- Beach Park IL
- Posts
- 2,849
Nice work on the pedal assembly but the last thing I would want is for the brake pedal to get softer as it travels.
Donny
Support your local hot rod shop!
-
08-28-2019 #26
Registered User
- Join Date
- Mar 2011
- Location
- Portland OR
- Posts
- 26
Originally Posted by dontlifttoshift
It won't get softer... the effort needed to press the brake pedal further and further will increase steadily... but a 10% increase in effort might yield 11% more brake line pressure.
We'll see I suppose!
-
09-10-2019 #27
Registered User
- Join Date
- Mar 2011
- Location
- Portland OR
- Posts
- 26
Another quick update!

The shop got the laser cutting done pretty quick for me. So I assembled it. I tacked it all together before fully welding to make sure the fitment was good.
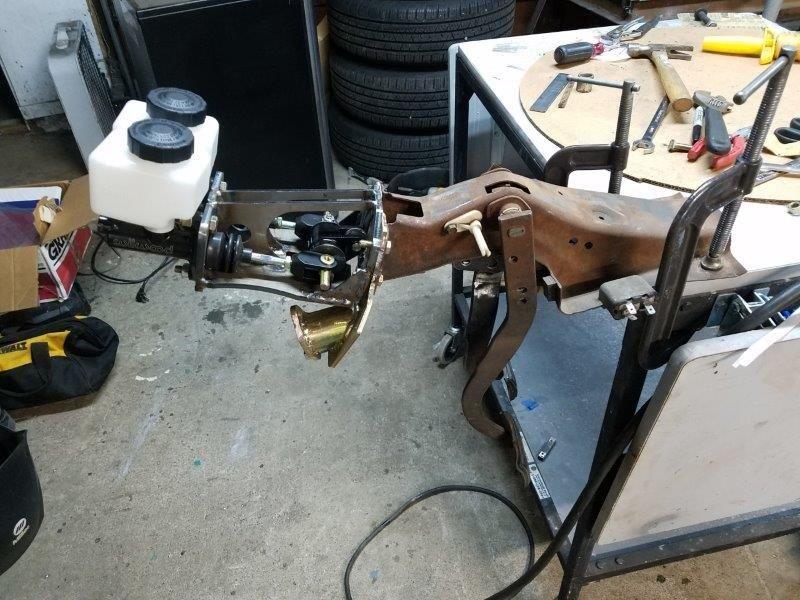
Here it is mocked up to the pedal, so I could build the link to the pedal.
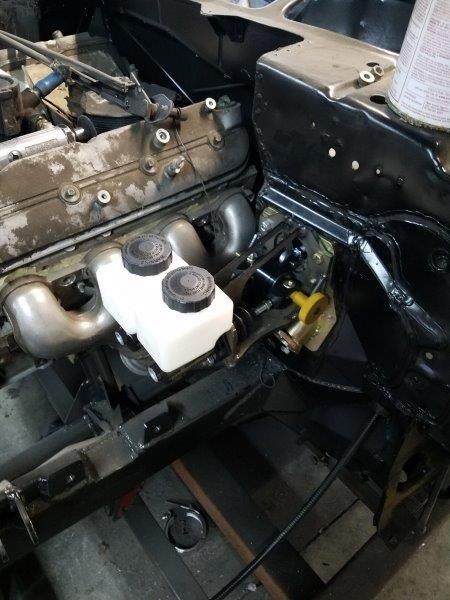
And now it's mocked up on the firewall. The pic from inside the car shows the bellows for the brake rod, hopefully that'll keep the interior nice and fume free! Now that I know it all works, I have some finish welding and grinding to do before paint.
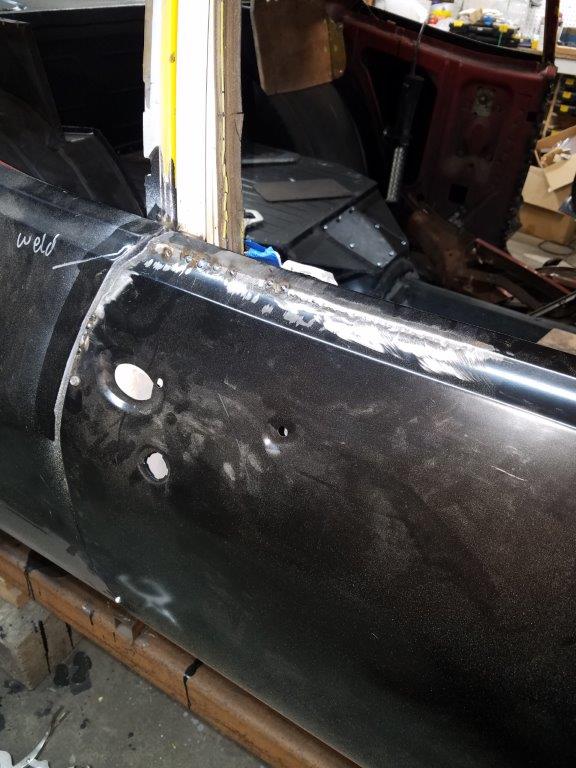
I got the driver fender welded up. I need to work on it a bit so it fits the contour of the new door... then I have some rework to do to the rear of the door and the quarter panel... panel gaps to adjust, a trunk lid to fit... on and on it goes!
-
09-11-2019 #28
Registered User
- Join Date
- Sep 2010
- Location
- Beach Park IL
- Posts
- 2,849
Help me understand. You said this: Originally Posted by nickcornilsen
I took that to mean that as the pedal travels you will get more leverage at the master cylinder.the pedal ratio is 5.5:1 for the first 1/8-3/16" of MC stroke, so any slack gets taken up quickly. Then the ratio increases to about 6.35:1 at 1/2" of cylinderDonny
Support your local hot rod shop!
-
09-11-2019 #29
Registered User
- Join Date
- Mar 2011
- Location
- Portland OR
- Posts
- 26
As the pedal travels, the leverage (pedal ratio) does increase. But, the pedal won't get "softer." the amount of force needed to push the pedal further against the brake line pressure will always increase, and will increase linearly. I don't think this will create any weirdness in brake response. Originally Posted by dontlifttoshift
I there isn't a point where the amount of pedal force will reduce as it's pushed further, which is what I thought you meant.
-
01-16-2020 #30
Registered User
- Join Date
- Mar 2011
- Location
- Portland OR
- Posts
- 26
Update Time!
After getting the brake system bias bar completed above, I moved on to the fenders and doors.
Removing the door skin was easy - take a angle grinder to the folded over edge, make long sweeping passes until I broke through the door skin. After that, it folded right off! Once the skin was off, I had the shell sandblasted and epoxy primered.
Here's the skin going on the shell. the AMD Skin fit decently, but I did have some issues where the door handle attaches.
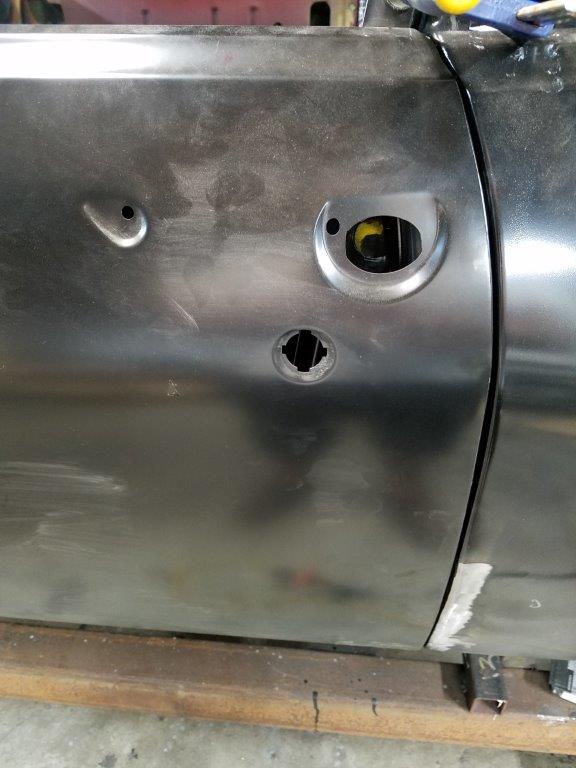
Does anyone know what kind of sealer to use in the corner of the door opening?

Passenger fender patch. This turned into a bit of a debacle. I had to chase high spots, low spots, the door gap started changing... I had to step away for a few days to reset on it. In the end I got it decent enough where I don't need more than 1/8" of filler anywhere, and the gap is good.
I had to slice along this body line and move it up to make the contour work right.

The driver door fit decently, except that the arc between the upper body line and lower line is too long relative to the quarter panel. I'll have to add a little metal to the top of the quarter panel line and the bottom line using some round rod.
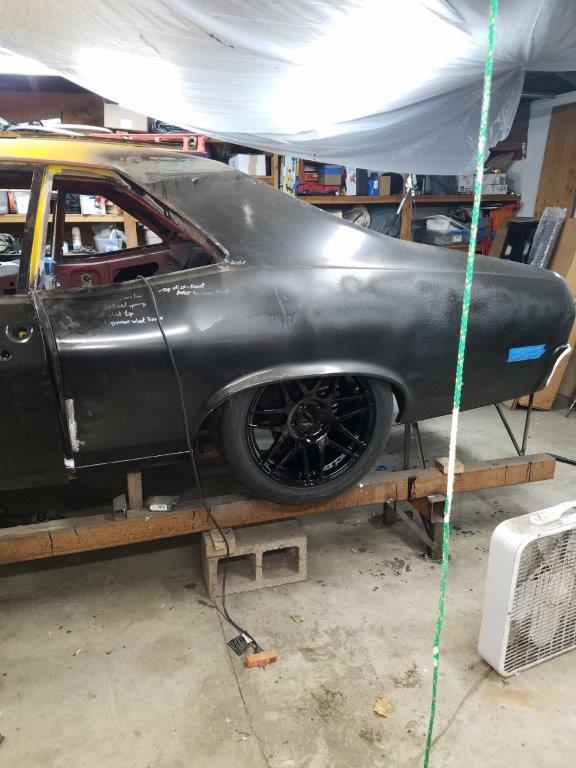

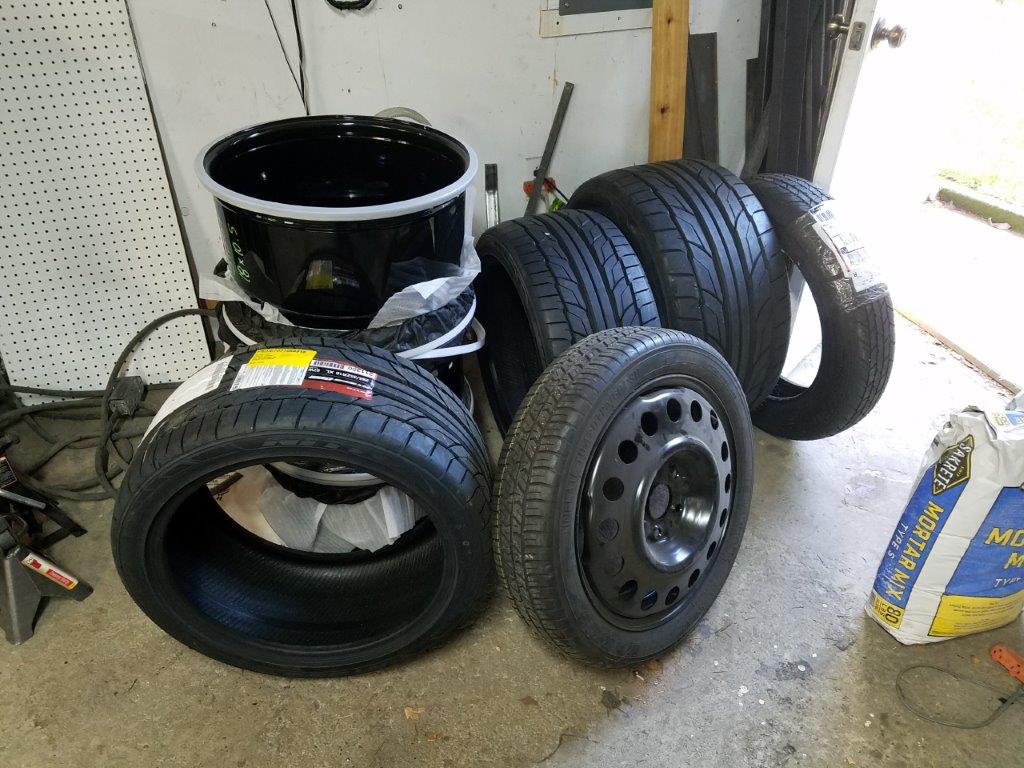
Got the shop relatively cleaned up, so it's time to step back and take it all in! You can see I made a wheel change - got some Forgestar wheels with a custom offset to tuck under the car another 1/4".
Not shown is having the fenders sandblasted and primered.
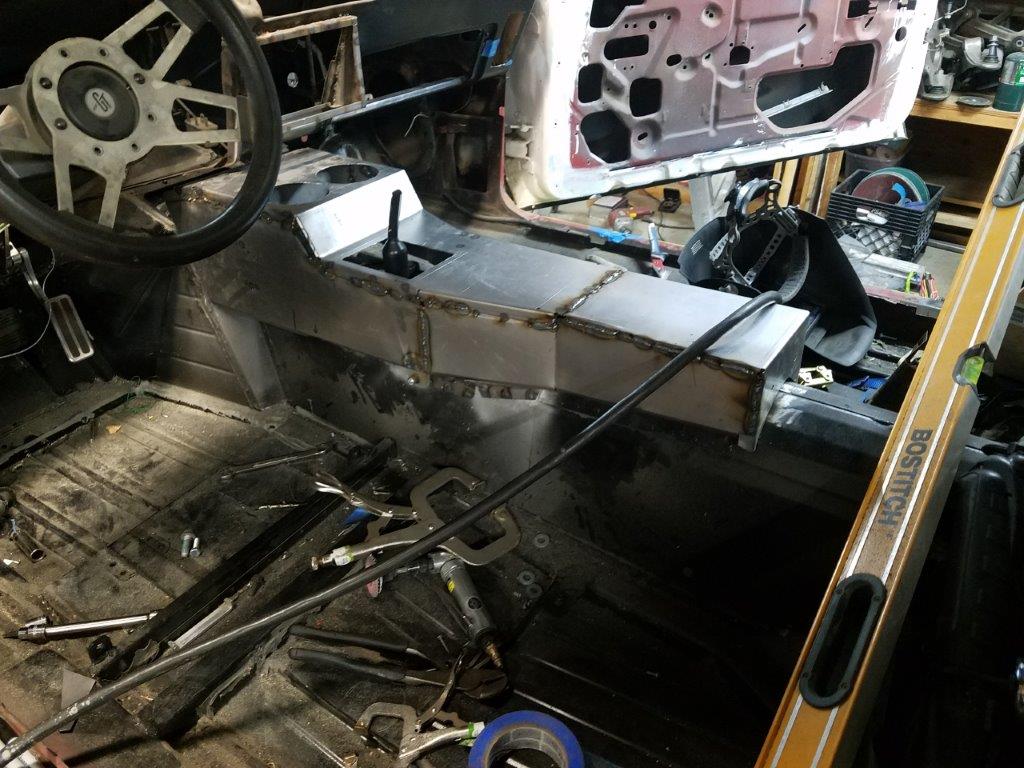
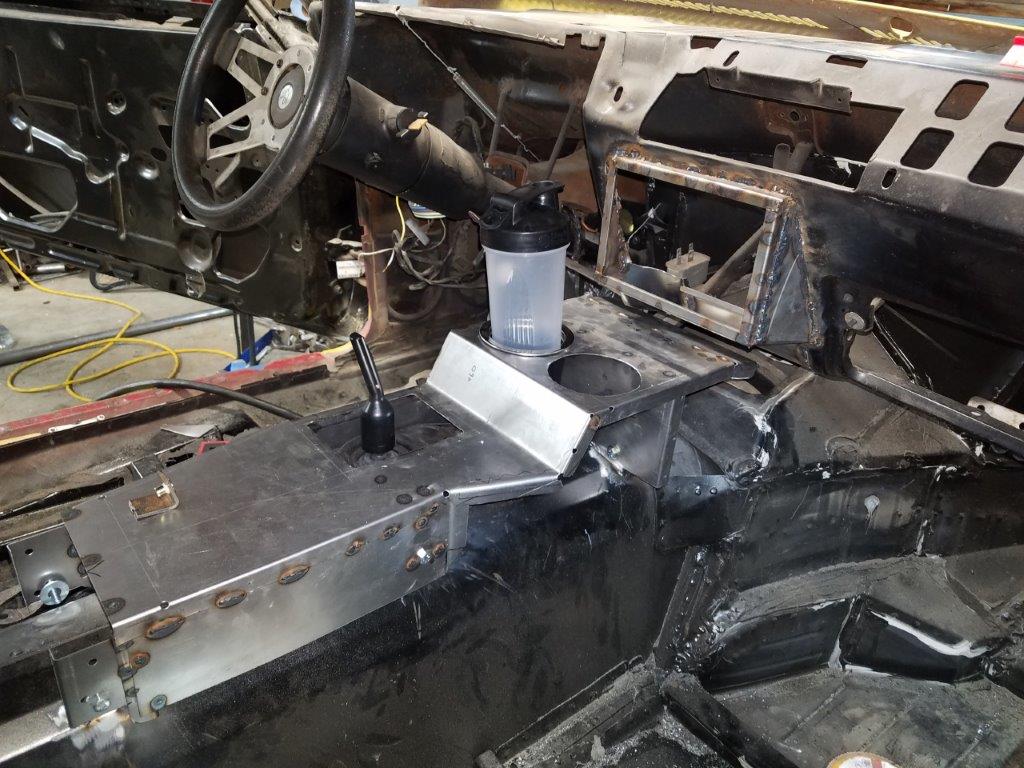
Shifting gears, I decided I needed to complete all heavy metal work in the interior. That really just means the radio bezel, center console mounts, and making sure the dash fits.
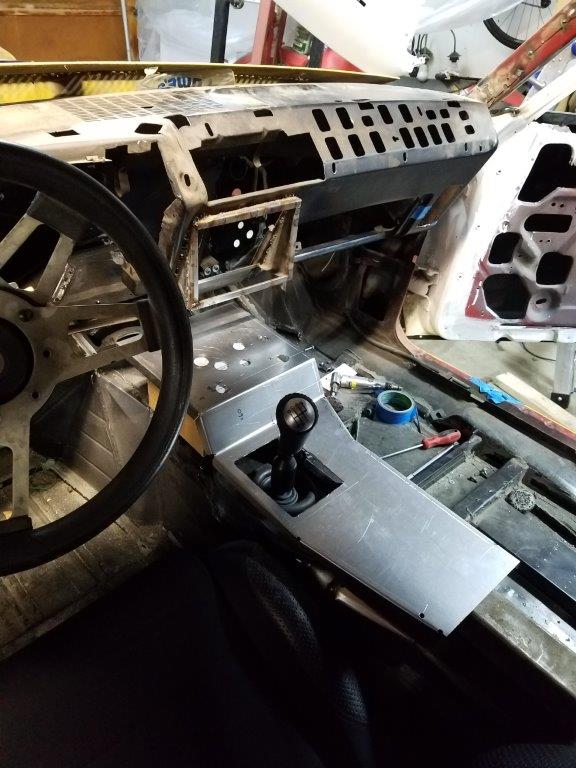
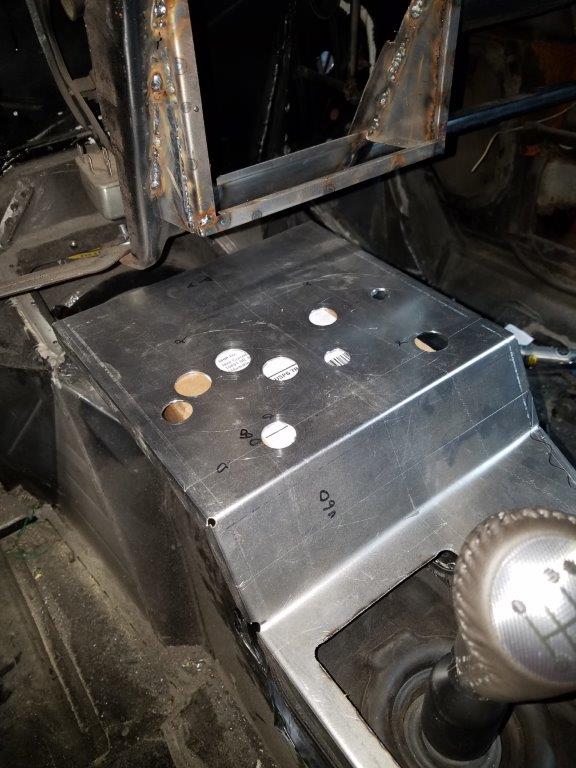
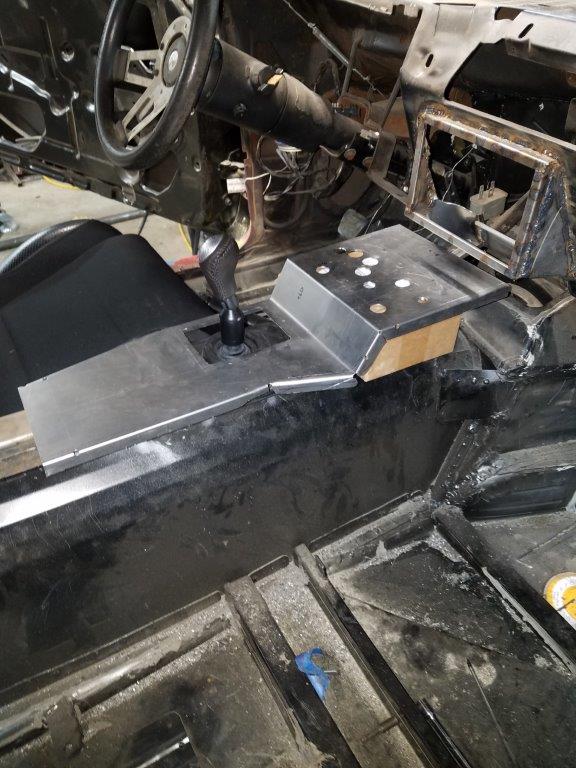
I decided to make the console from sheet metal. I may live to regret it... but I think it came out pretty well. I'll use some filler to smooth it, then put a layer of foam and vinyl over it.
- - - Updated - - -
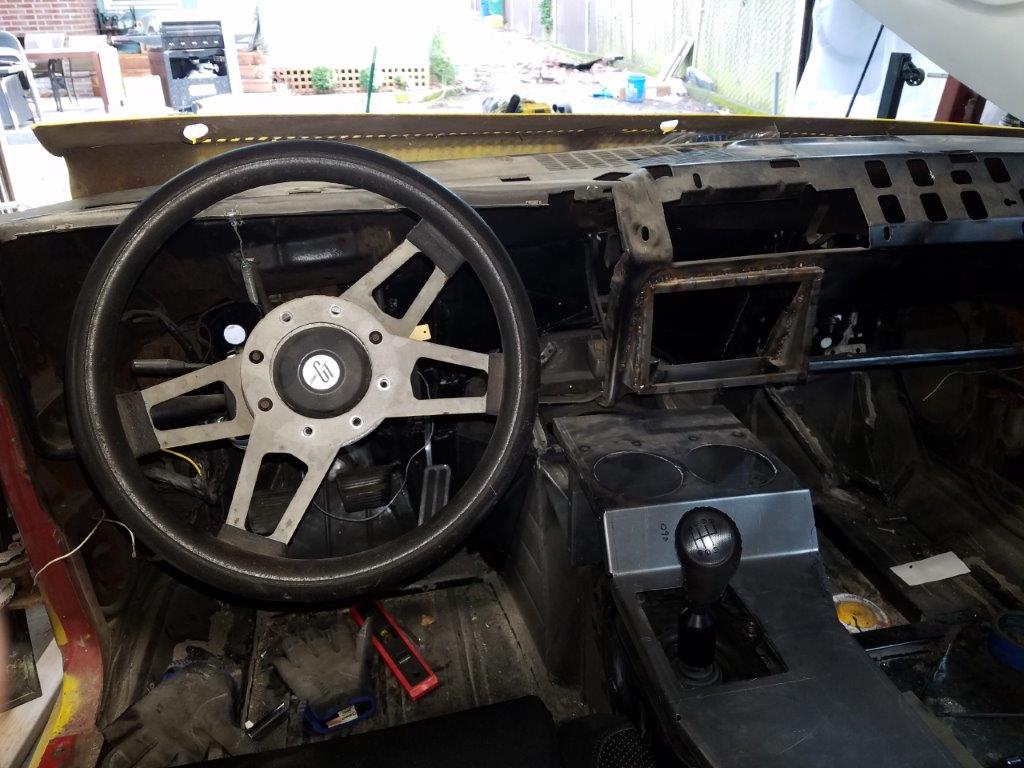
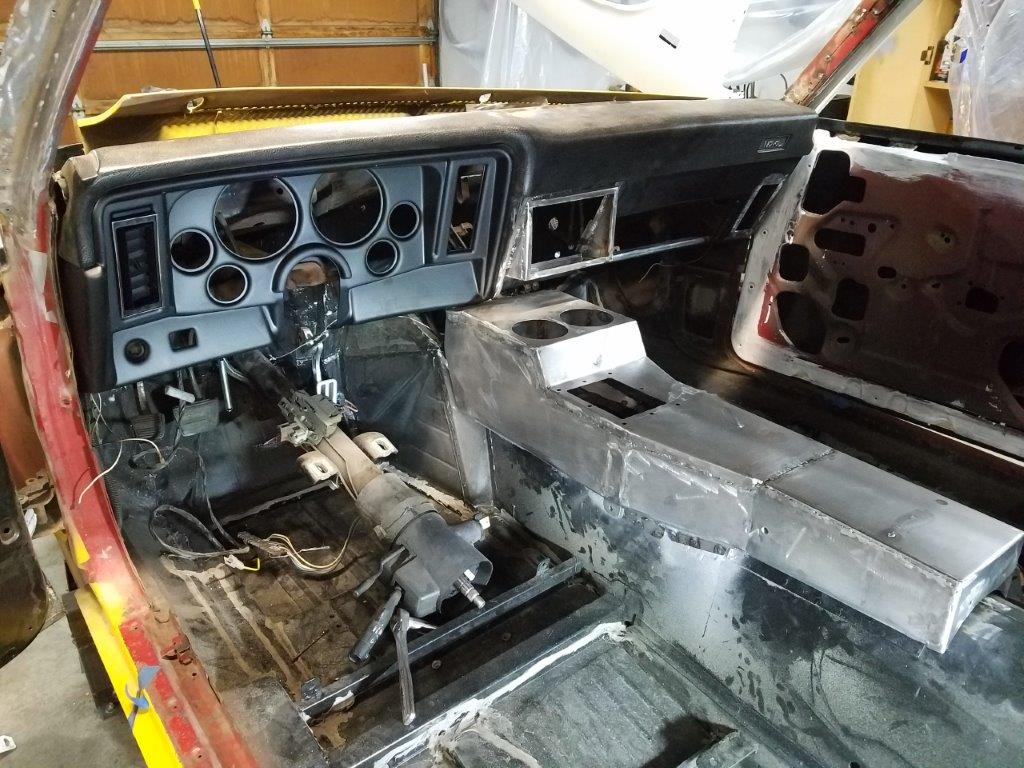
Dash panel test fitted!
At this point, I decided to cut the car off the frame jig, for the first time in 8 years, 10 months. I decided to get the tires mounted up so I could roll it around when I get a little further.
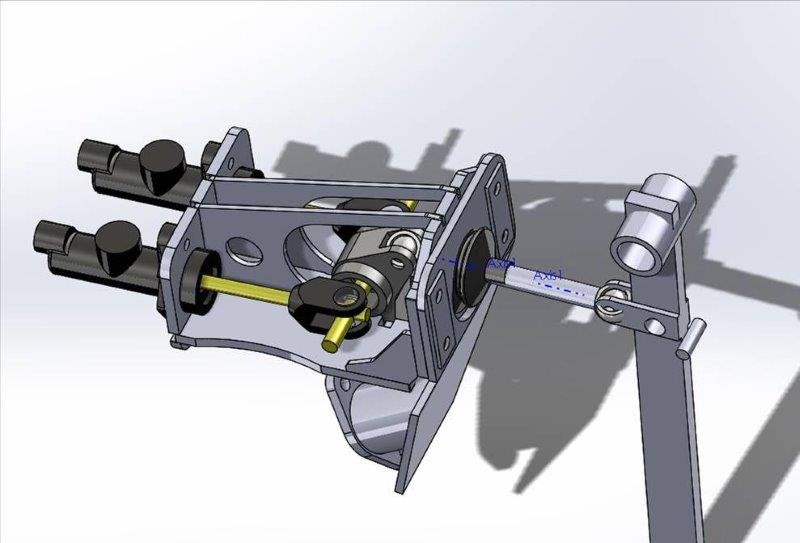
Things were slow at work, so I designed something to make my life easier for installing and removing the transmission.
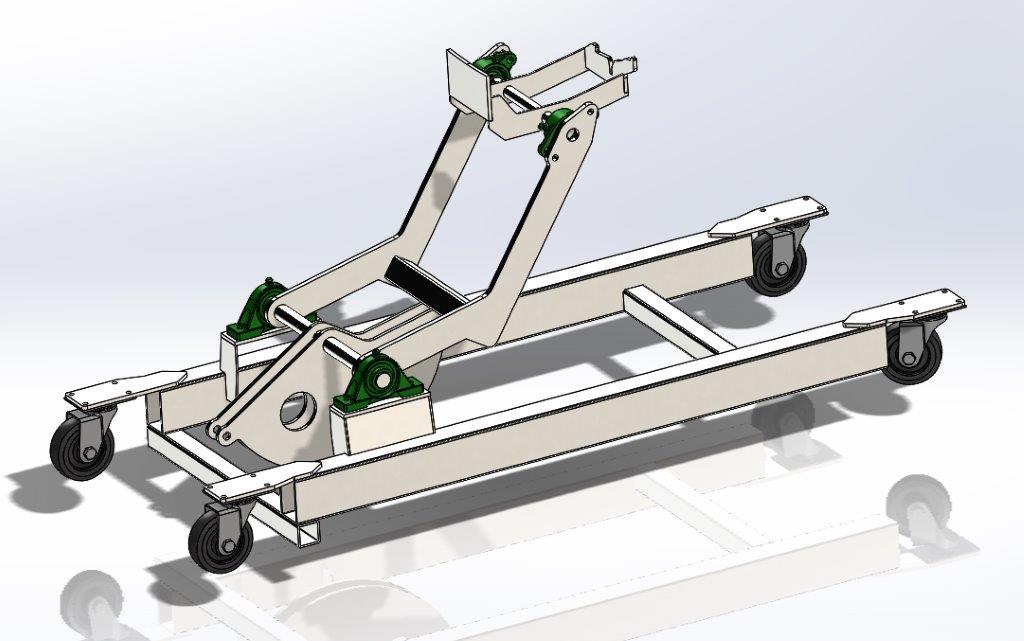
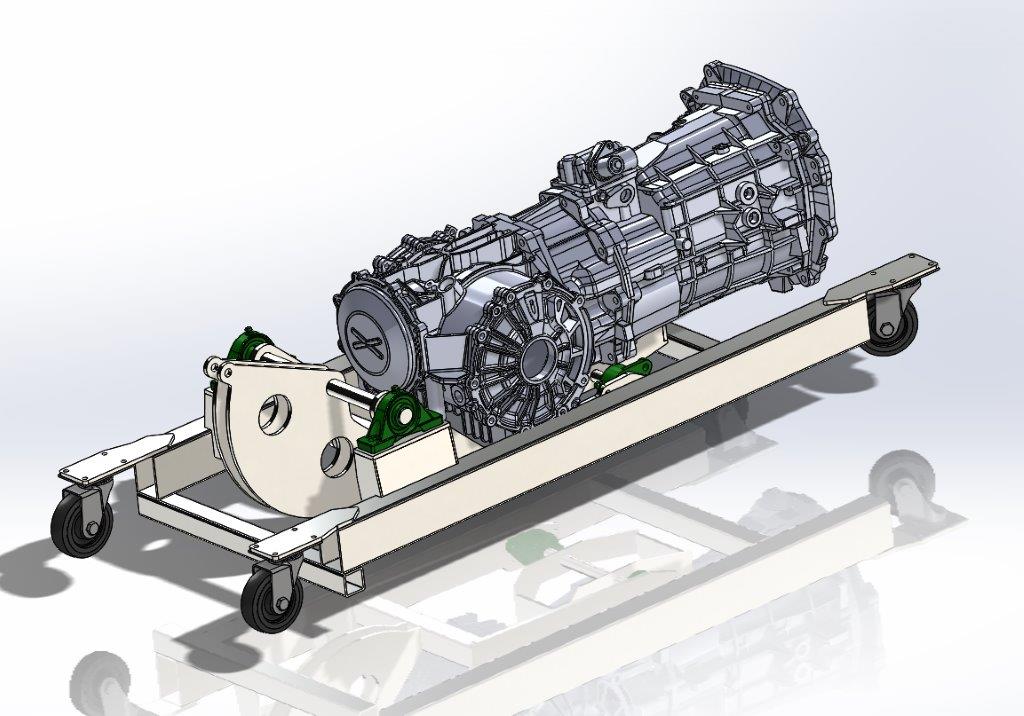
I have not yet welded this all together. I'll use a powered winch to raise and lower it.
-
02-01-2020 #31 Registered User
- Join Date
- Dec 2010
- Location
- Germany
- Posts
- 68

I like your work and the transaxle-design in the Nova and subscribe.
How much is the engine set back ?
Keep up the good work !
You have more CAD-Work in your "transremovingtool" than i in all of my cars, lol.
12-02-2021 #32
Registered User
- Join Date
- Feb 2013
- Posts
- 1

Awesome build!!
12-26-2022 #33
Registered User
- Join Date
- Dec 2022
- Location
- Italy
- Posts
- 4

Amazing build, congratulations! I'm loving the sheetmetal and CAD work (also the side projects). Are there updates by any chance?
Tags for this Thread

 Reply With Quote


