

Results 181 to 200 of 220
Thread: Project Bike Truck
-
06-21-2019 #181

 Registered User
- Join Date
- Mar 2018
- Location
- la mesa, CA
- Posts
- 237
I need a vacation like no other so I would say yes. But sadly not a time I could get away from my family. Originally Posted by Sbeck09

-
06-21-2019 #182
 Registered User
- Join Date
- May 2010
- Location
- British Columbia
- Posts
- 508
Looks great ! Nice to get back in the shop isn't it ?
-
06-25-2019 #183
Registered User
- Join Date
- Jan 2016
- Location
- Chino Valley, AZ
- Posts
- 134
 i support the PBT Southwestern Traveling Road Show! Originally Posted by Project Bike Truck
-
09-30-2019 #184
Registered User
- Join Date
- Mar 2018
- Location
- la mesa, CA
- Posts
- 237
Hey guys im still here. Its been a wild ride for me and the family around here. We had a little boy, now 6 weeks old, named Fletcher James. He came into the world quickly, they say the second one comes faster. Its true. Almost had an ambulance baby.


But with that being said, I have been away from my project and my life for that matter. Holding onto relationships is hard right now. And the one relationship thats suffering is my project. I have not had a moment of time to get into the garage other than to grab a screwdriver to put batteries in a kids toy.
I ordered a shed so I could make some more room in the garage for tools. Maybe once I get that organized Ill get some motivation to get up at 3am on the weekends to work in the garage.
Thanks for your patience and some more updates will be coming soon.
-the management
-
09-30-2019 #185
 Registered User
- Join Date
- Jun 2007
- Location
- vallejo,ca
- Posts
- 261
Congrats on the kiddo
-
09-30-2019 #186
Registered User
- Join Date
- May 2010
- Location
- British Columbia
- Posts
- 508
Congrats ! Family comes first ...
-
10-16-2019 #187
Registered User
- Join Date
- Mar 2018
- Location
- la mesa, CA
- Posts
- 237
Thanks! Originally Posted by jc70chevy
-
10-16-2019 #188
Registered User
- Join Date
- Mar 2018
- Location
- la mesa, CA
- Posts
- 237
Thank you very much! Originally Posted by langleylad
-
10-16-2019 #189
Registered User
- Join Date
- Mar 2018
- Location
- la mesa, CA
- Posts
- 237
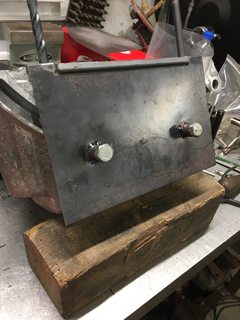
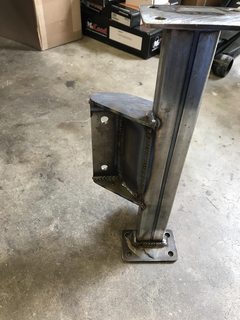
If you know me, you know i'm a bit OCD. Full Custom Fab soothes my soul with their bitchin jack stand holders. I went a step further and had them powdercoated at Swift Powder Coat in wrinkle black, and swapped out the hardware to stainless steel (I can't leave anything stock). I got the holders for the large jack stands as well, for motivation to get my project on its wheels.
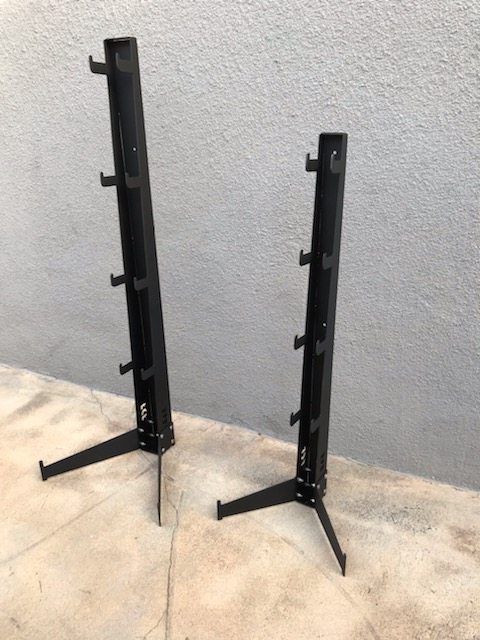
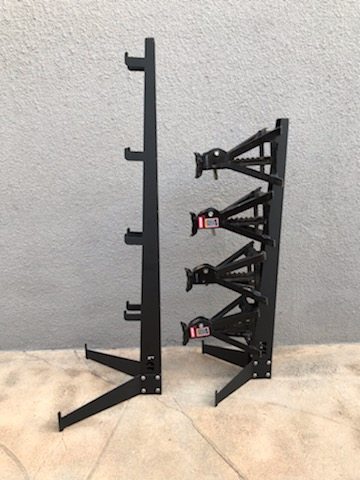

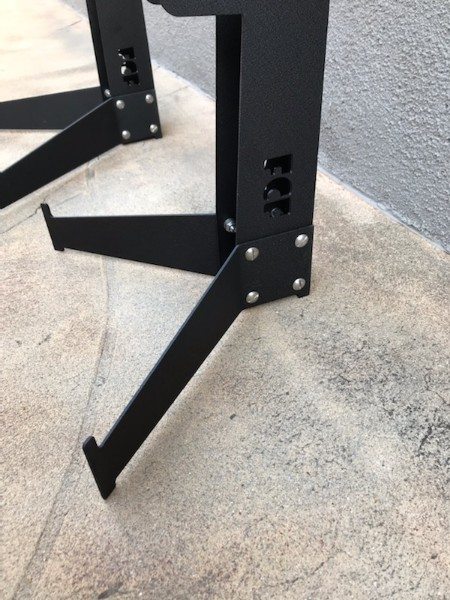
They take up the same floor space as one jack stand, or you can wall mount them. If you wall mount them, the legs can be used as cord holders. They come in bare metal so you can paint or powdercoat them however you want.
I seriously cant say enough about what a great idea these are and perfectly executed they are. If you order some let them know that you heard it from me.
Disclaimer: This is not a paid advertisement just sharing a product I am stoked with. Anyone on here that has a home shop or even a business needs to invest in these. Seriously, money well spent!
-
04-27-2020 #190
Registered User
- Join Date
- Mar 2018
- Location
- la mesa, CA
- Posts
- 237
Every now and then someone does something that totally blows your mind. This is one of those moments.
My friend Danny aka @dfied_designs did something so amazing for me. He completely modified a Hot Wheels car; including custom paint, 3D printed wheels (exact specs of the wheels I have), proper stance, and even a bicycle in the back. To say Im blown away would be an understatement.
I have compiled a large collection of parts to make some serious progress on the car but have not been able to touch it due to the kids and life just getting the best of me. But I have some serious motivation now seeing how much effort this good friend put into doing this for me.
Thank you very much @bigboyevo I am honored to call you my friend and I have nothing but love in my heart and tears in my eyes for this awesome gift.
05-06-2020 #191 Registered User
- Join Date
- Apr 2005
- Location
- Chicago
- Posts
- 2,787
Your friend Danny is an awesome guy and that hot wheels is pretty darn cool.
So when my girls where little I had them out in the garage working on the truck "Kinda". I put them inside the pick up bed on blanket with a bunch of toys and it was there giant playpen and they loved it. I even hung a baby swing from the rafters so i could but them in it when they got tired. Every so often I would walk by whomever was in the swing give them a kiss and a push on the swing. Most of the time they would fall asleep which allowed me to stay out longer. I even had the pack and play in the garage.
Still the best baby containment thing was a Giant Pumpkin box also known as a gaylord container and a box of markers and crayons. They girls would be in the box for hours upon hours. Just make sure you have a bunch of blankets in it for them fall asleep on.
Originally Posted by Project Bike Truck
marty-mj
GarageScene.net High Speed Welding KDHotrods RecoveryRoomInteriors WegnerAutomotive Autometer Ride-Tech
05-06-2020 #192
Registered User
- Join Date
- May 2010
- Location
- British Columbia
- Posts
- 508
Very cool !
05-06-2020 #193
Registered User
- Join Date
- May 2013
- Location
- SE Michigan
- Posts
- 149
Projects are tough when little ones show up, but tiny humans are pretty dang neat.
05-08-2020 #194
Registered User
- Join Date
- Sep 2013
- Location
- sw Kansas
- Posts
- 1,644
Nice update.

08-20-2020 #195
Registered User
- Join Date
- Mar 2018
- Location
- la mesa, CA
- Posts
- 237
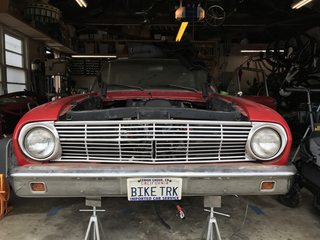
Well It had been a while and life has been crazy, to say the least. I had been off work from March through August, watching my kids and losing was what was left of my mind. The first couple months really got to me, but I worked out a little break with my mother-in-law.
I have no clue where I left off, or even where to begin on what's been going on in the project.
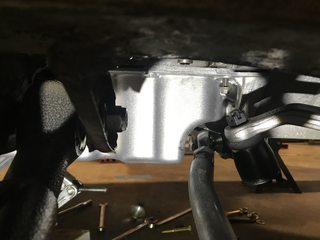
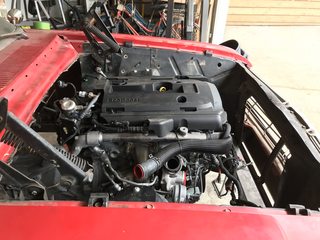
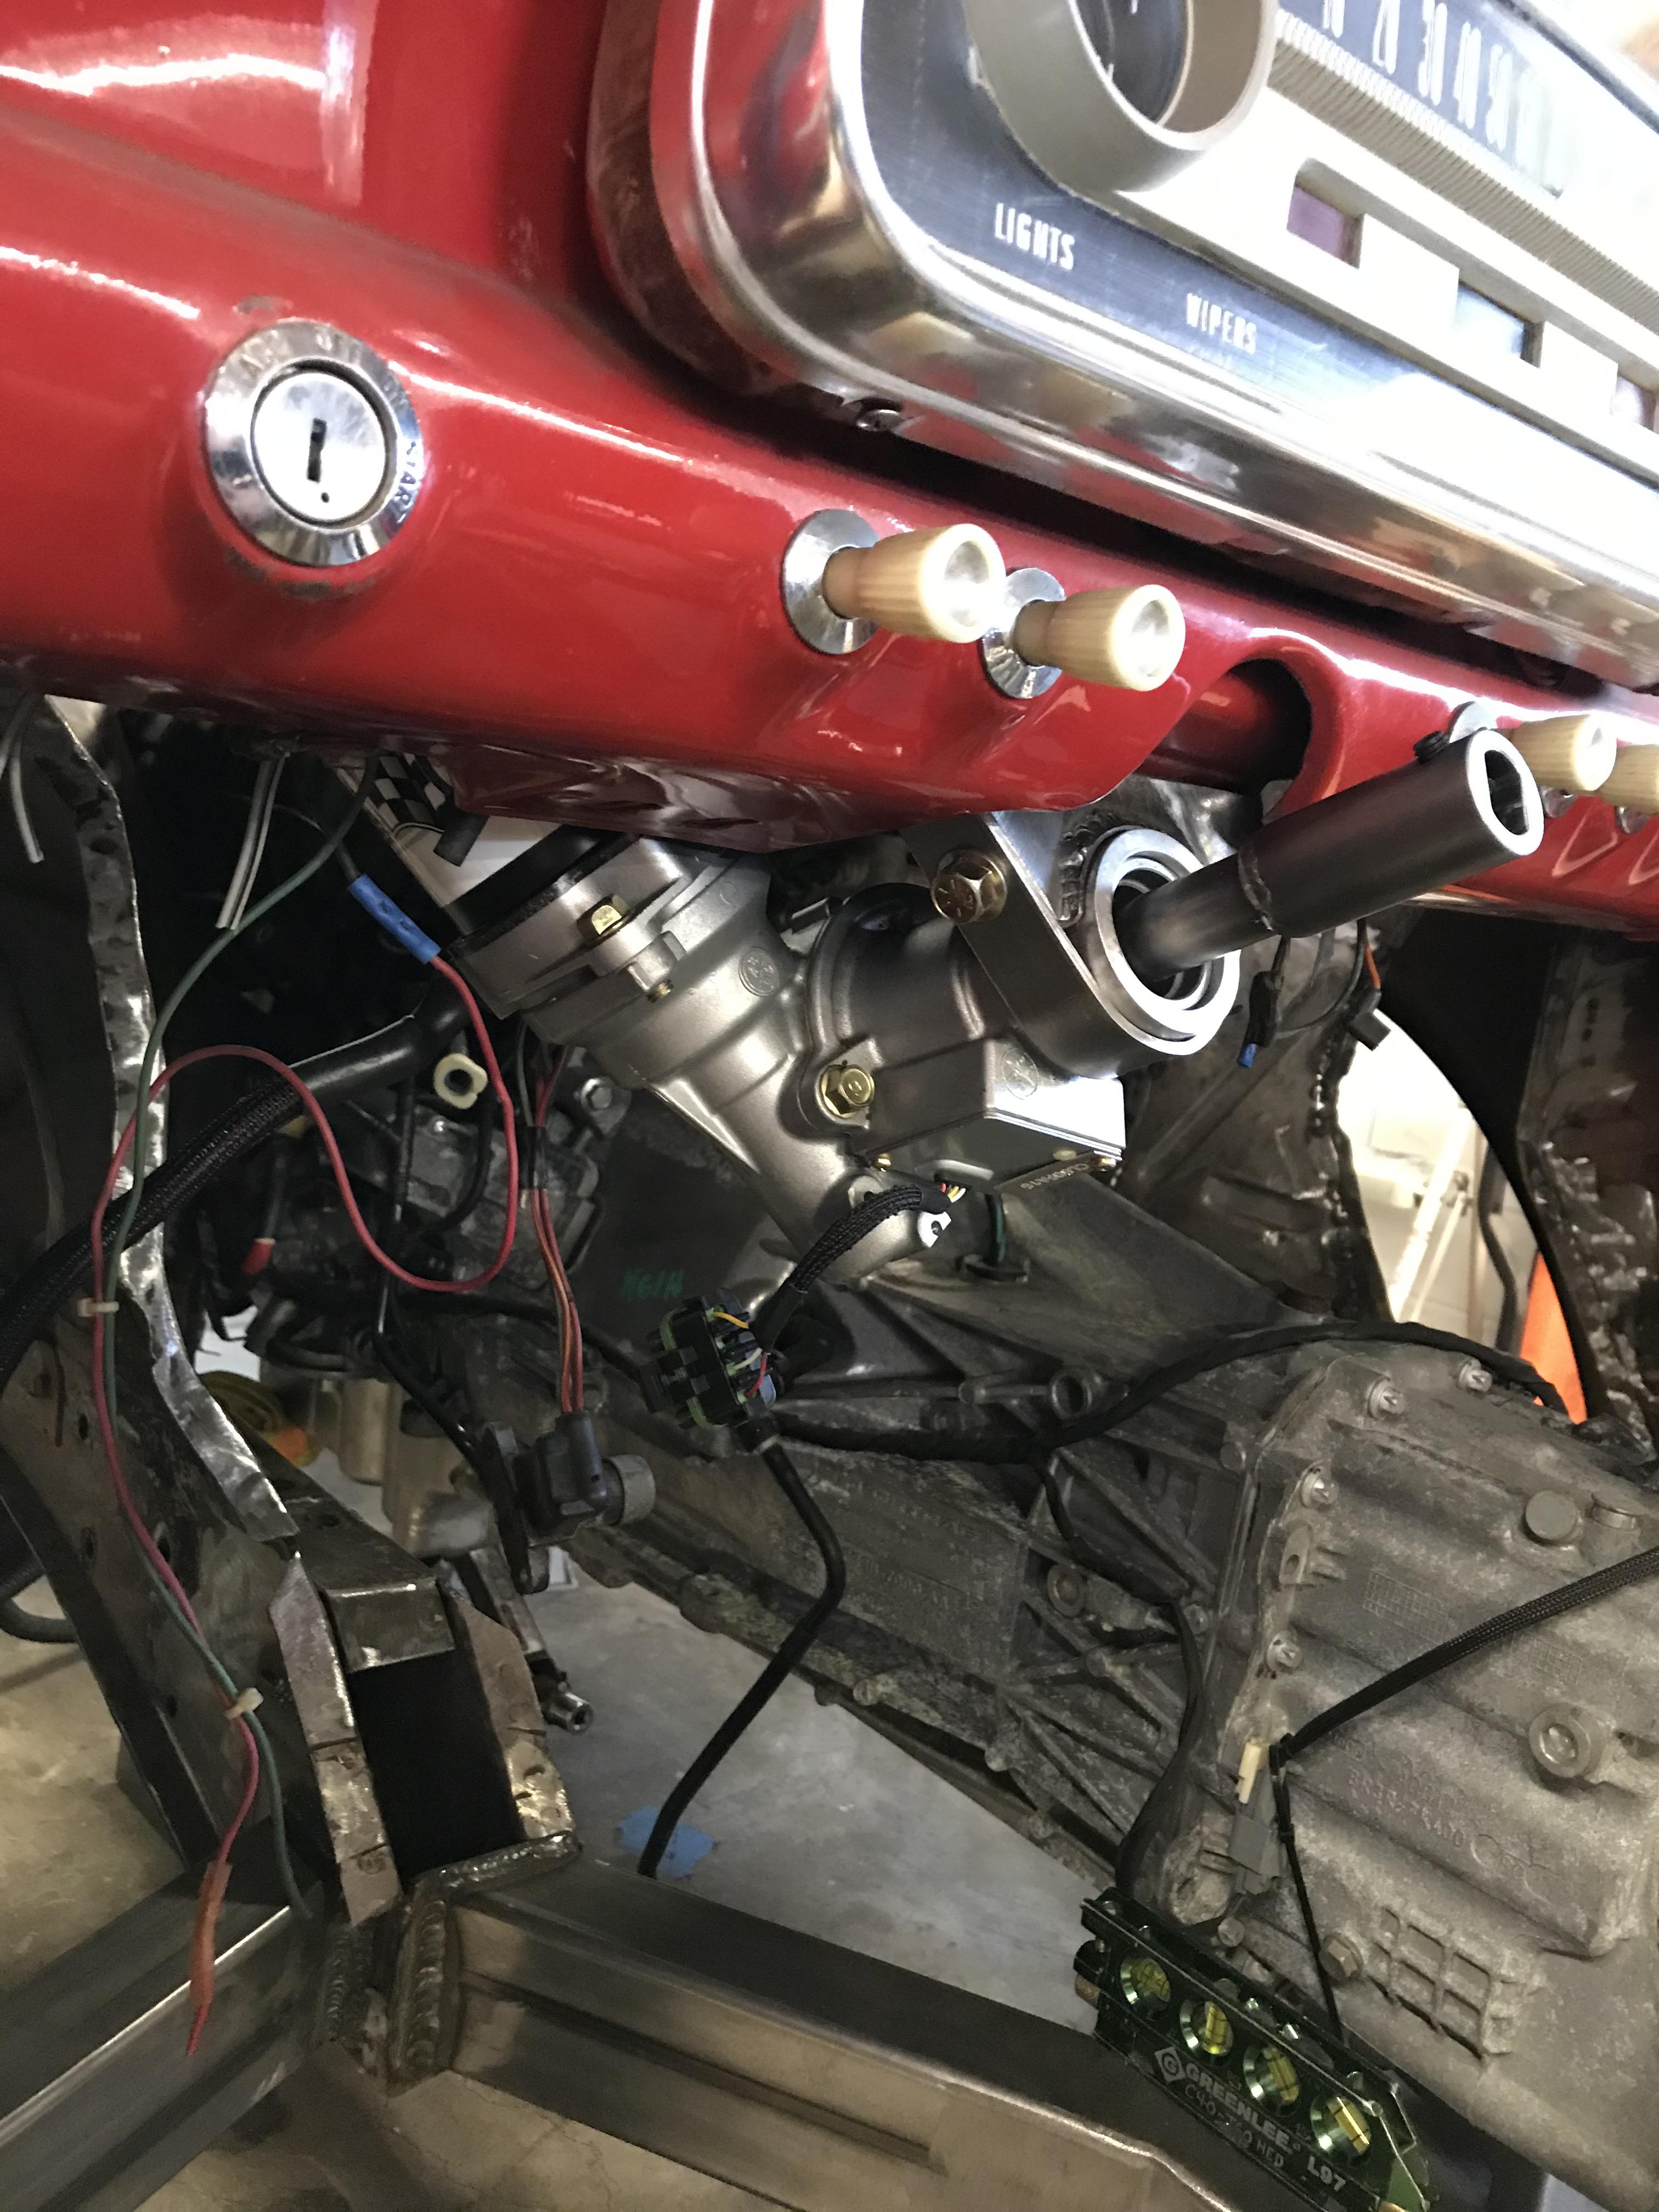
I had said before that I was stubborn and wanted to keep the front suspension with the rear steer, I was committed to that. I spent a long time trying to figure out how to make the oil pan work with all that. After a metric **** ton of drama and 1/16th of an inch here and there, I ended up with an Focus ST/RS oil pan and baffle system. Oddly enough, the pan has a weird notch in it that faces the rear on my car. This pan however was not meant to match up to the RWD transmission. So off to a good friend and he welded on some bosses and performed some drilling and tapping. I'm sure it would have been fine without the two bottom bolts.
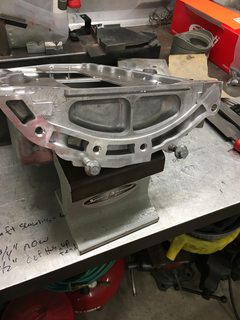
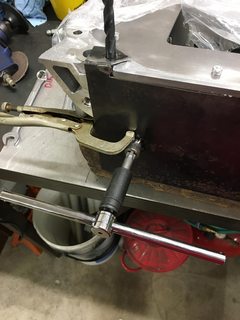

That's where the fun began. That rad notched area in the oil pan seemed to be a good place to run the crossover for the steering. Oh joy that was fun, not! I wanted to have the engine far back and low. But after looking at the engine in its place it became clear that the notch was perfect and it would be major fab to clear the alternator and the turbo. I figured with the fact the engine only weighs 385 lbs there wouldn't be a huge downside. I know every little bit helps in weight distribution. But I figured it was way better than stock and way better than a stock location V8.
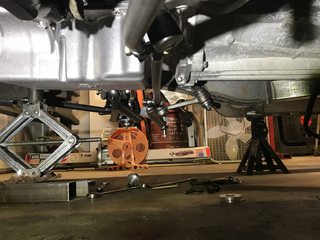
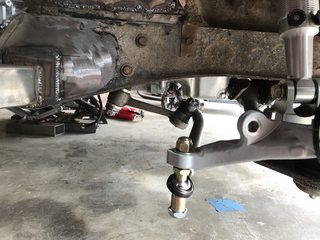
Off I went trying to get the link to swing between that notch. What a mother trucker that was. I got things pretty close but found that the stock tie rod end was way too big. So I got some heims and misalignment spacers. I kept trimming and machining the set up down til it worked. Sweet on paper and in my head it worked, until I added the tube and found the offset was too close to the stock Pitman arm. So back to my friend Jeff’s shop (he builds and preps the Parkhouse Racing winning class one car and prerunners) to eyeball about how much bend I think I would need. I already scraped some of the tubbing. All said and done only had .250 to spare and trim off. But it all seemed to fit.
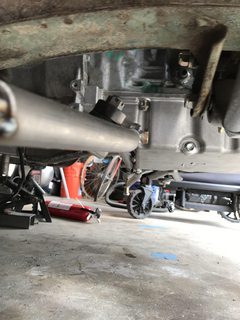
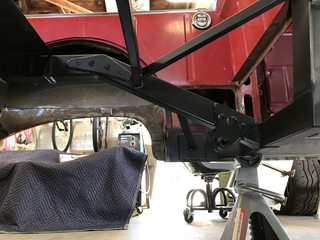
After getting all that dialed I set off to make the engine and transmission mounts. Minus the lack of space it wasn't that bad. I did spend an ass ton of time trying to get the hardware in and out. What a PITA that is. I had made the plates that go to the block a while ago and they seemed to work out well. I had to trim the bushings down and the sleeves. My lathe sucks so it was all cut by hand and then tried to smooth things out on the lathe.
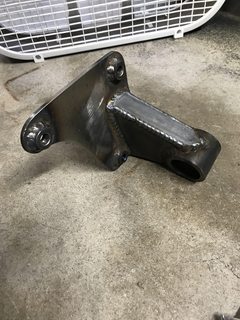
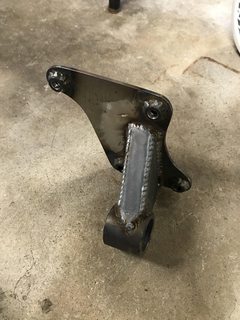
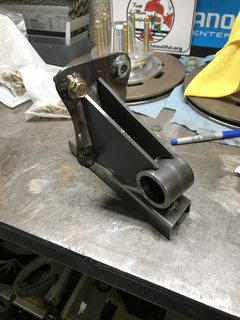
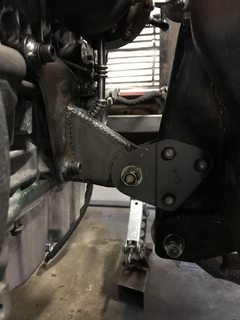
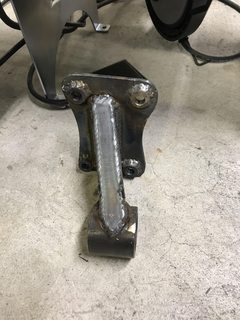
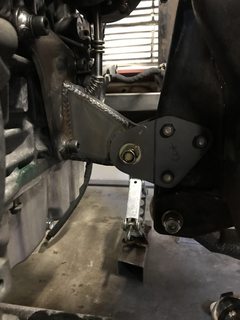
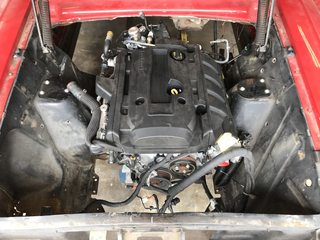
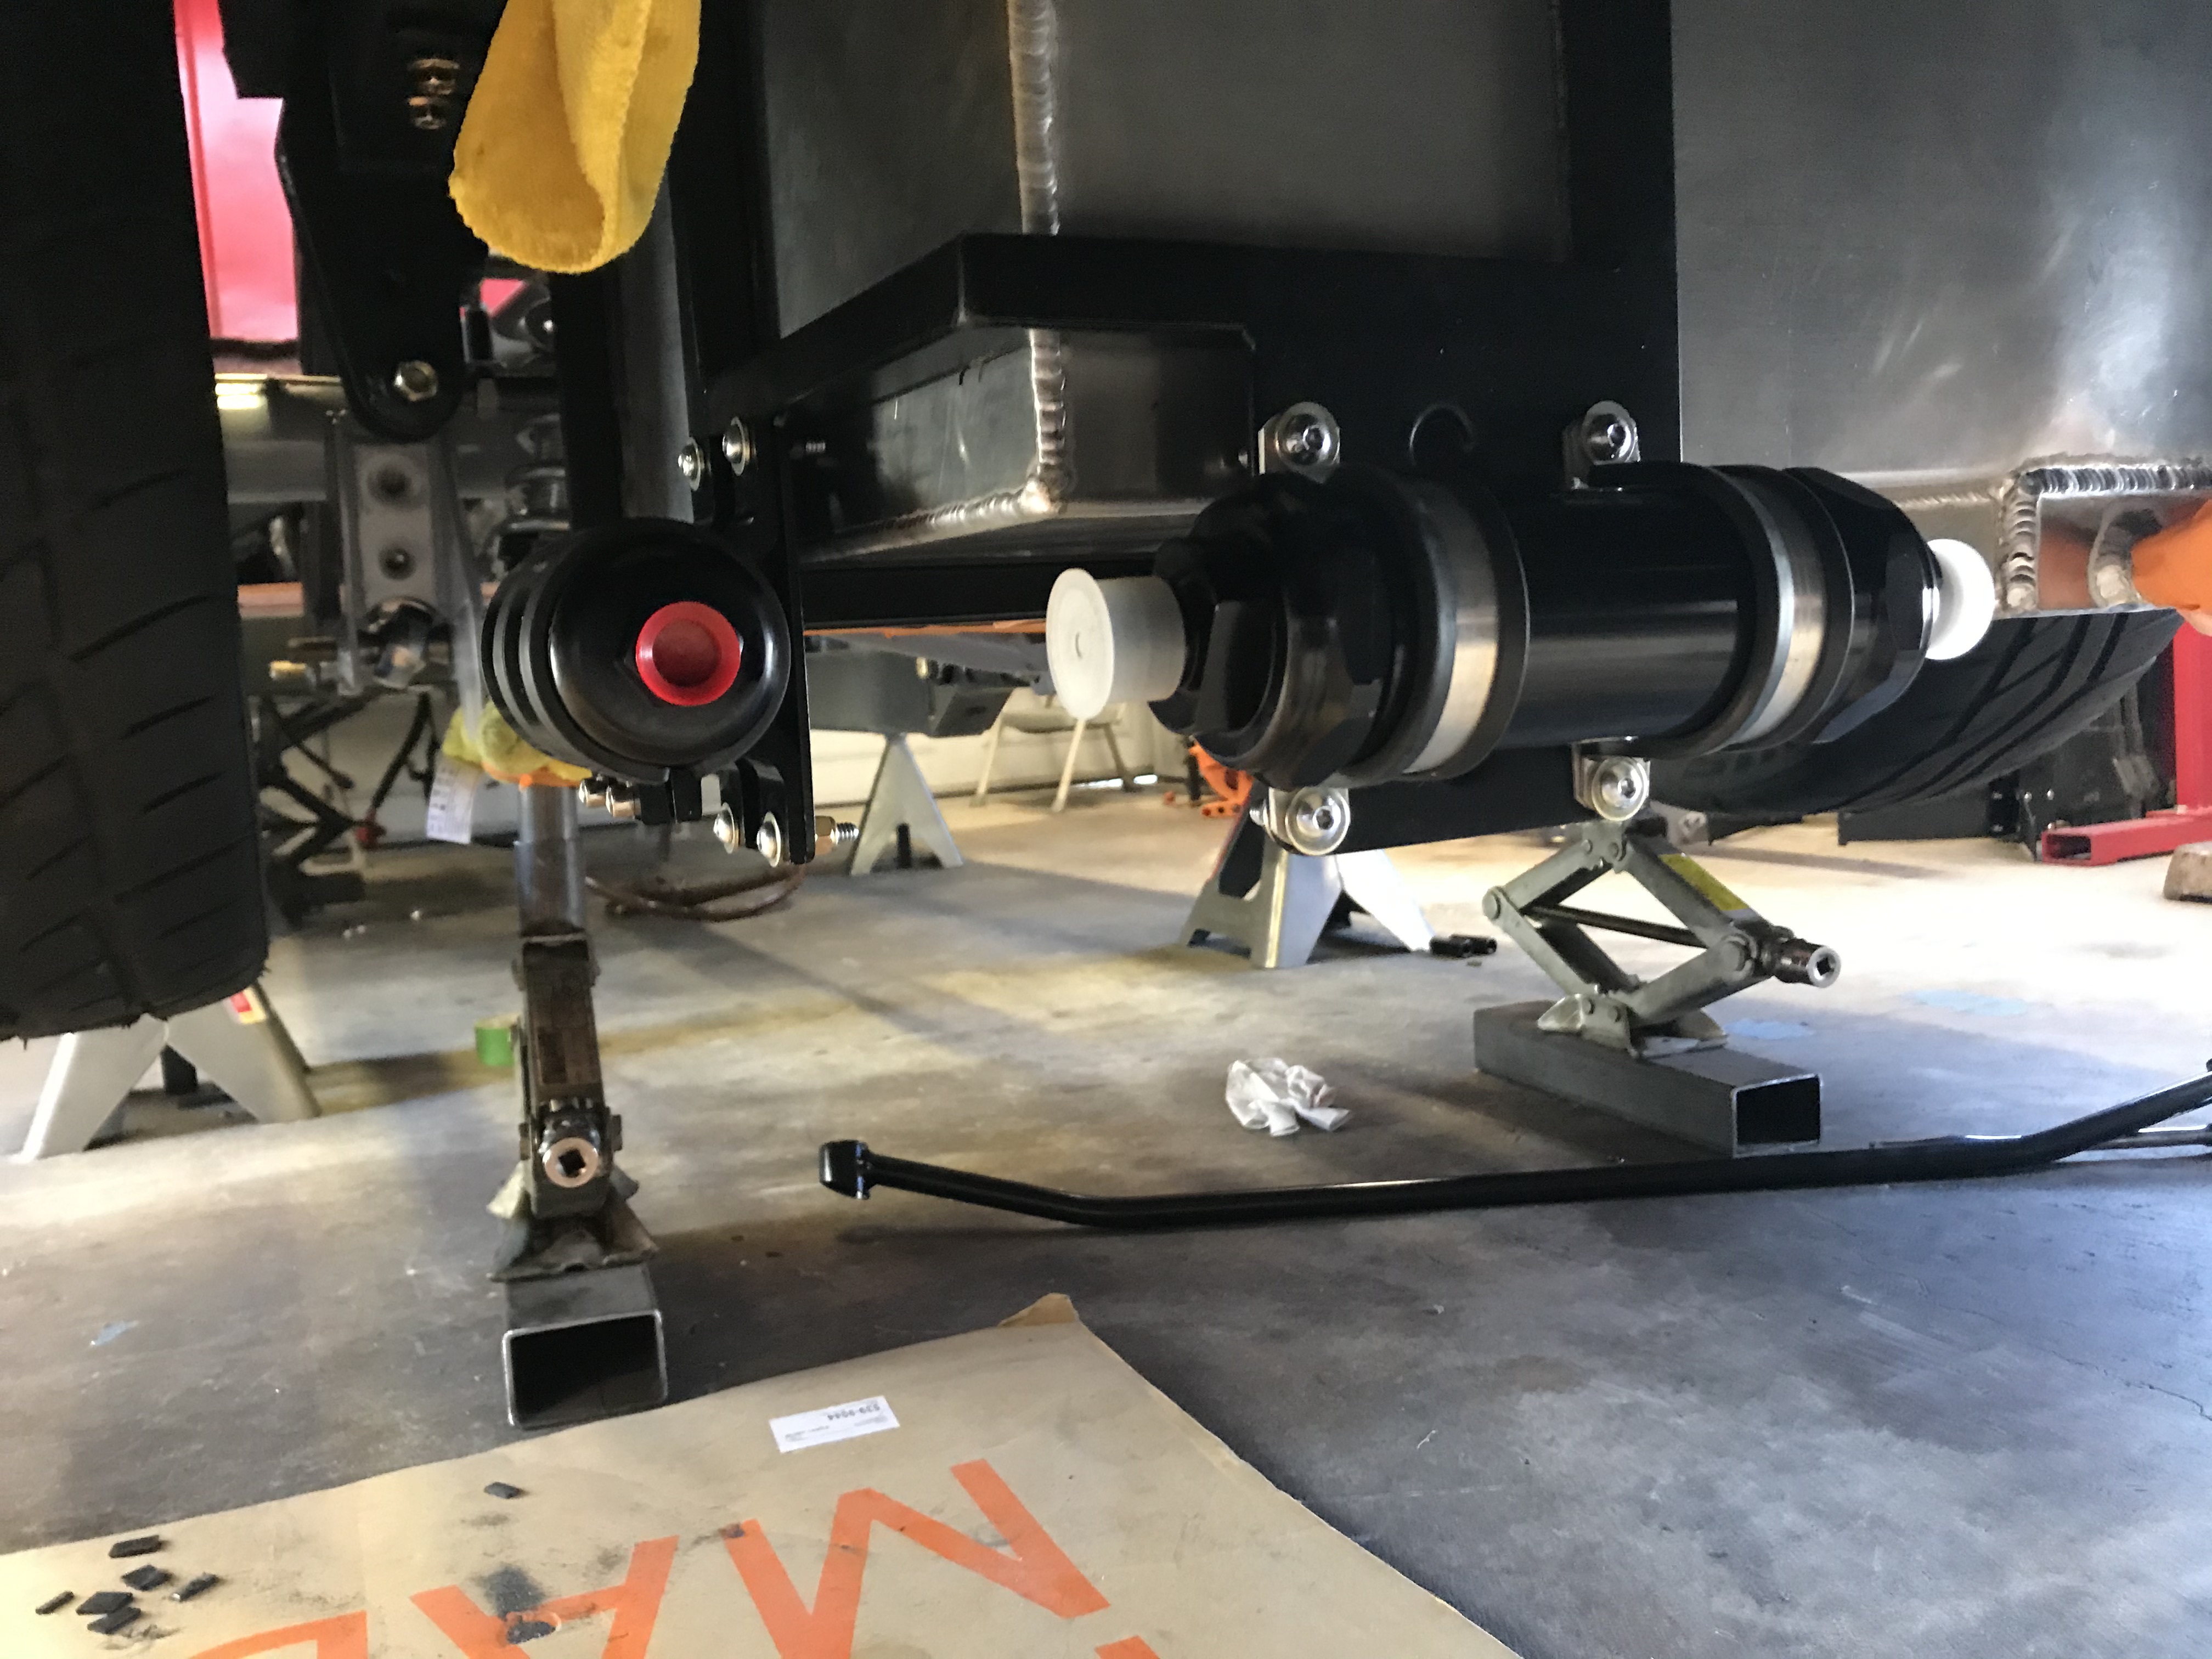
The transmission crossmember I had started on when I had the other engine. It always kind of pissed me off and fit super snug. So I cut it apart and made it better. One of the goals was to use stock parts to keep it simple and easier to repair. I was going to make a rear mount using a bushing like the engine mounts but I felt it would deflect with the torque and twist of the engine. So I found this cool billet replacement one from Bomba Racing and figured I would give it a try. One of the issues of placing the engine so low and far back was the pan and components would hang too low into the path of driveways and stuff (remember the ride height is 6” from rocker to asphalt). So where the transmission mount and the TA mount end up, they hang a bit into no-mans land. That gives me some worries, we shall see what happens. I went with some different ideas to help the TA to driveline angles, and move the CG around. We shall see how that plays out as well being everything and every step of the way is a guess.
I sent everything I had at this point to https://www.swiftpowdercoatelcajon.com/”]Swift Powder Coating[/URL] to get coated, I had some other parts to recoated and the rear end coated as well. If you are in socal these guys do the best damn job and have a good turn around.
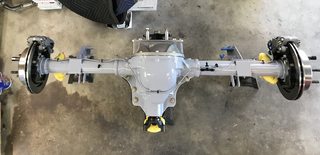
I sent the rear end to Bryant over at http://currentautoperformance.com/”]Current Auto Performance[/URL] to be assembled, we go way back to the street racing days in the 90’s here in San Diego. The read end got a little crazy like everything else. It has 31 spline axles, Eaton True-Trac diff, Ford Performance 3.55 gears and capped off with some Wilwood brakes.

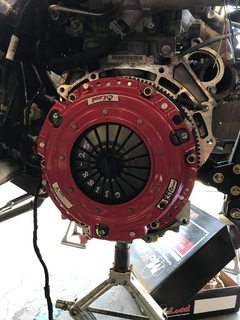
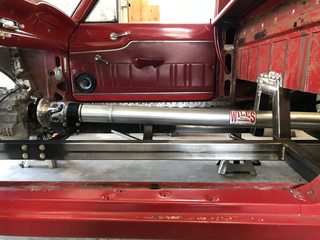
While I was writing all this out I got notification that my driveshaft was on its way so I figured it was time to get the Mcleod RST twin disk clutch and hydraulic throw out bearing installed. I'm not one to do some math so ordering the drive shaft and the setting up the throwout bearing was a mind F@#k to say the least. Fingers crossed the throw out bearing is set right and I didn't mess that up when installing.
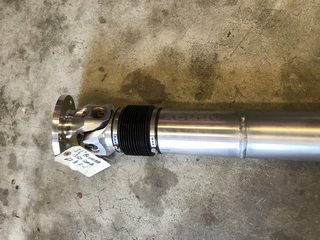
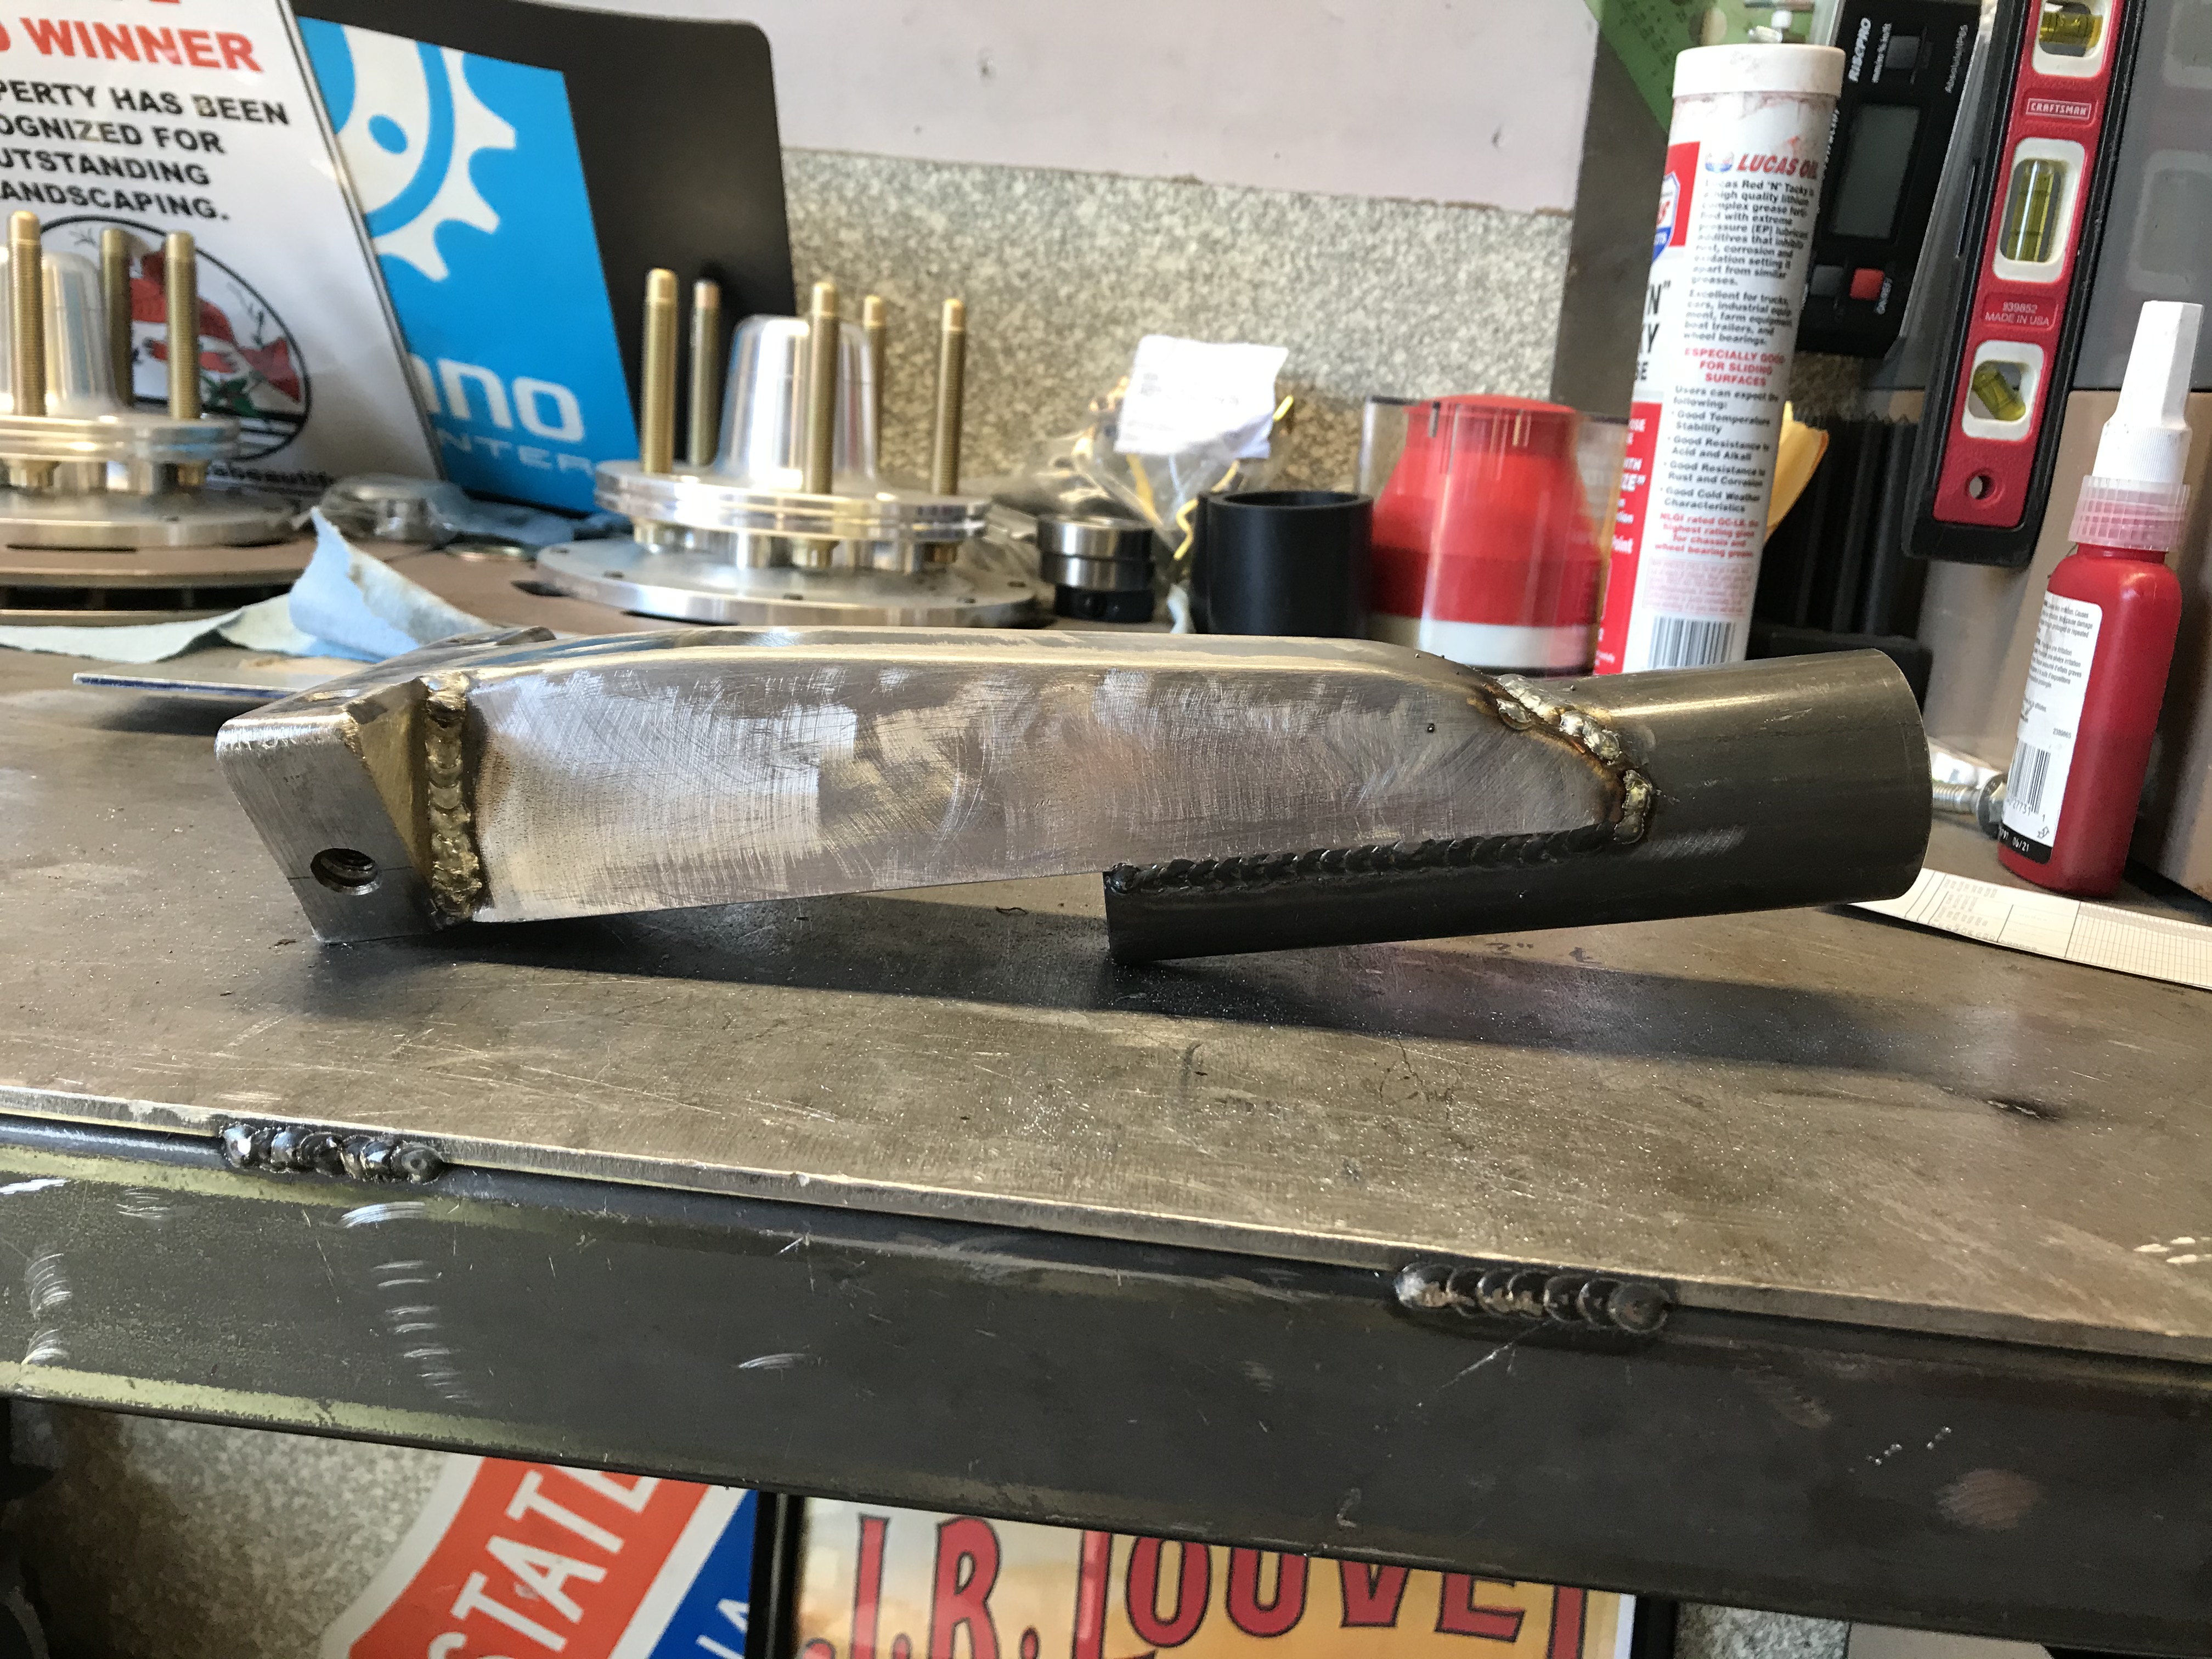
I had Ralph over at https://wilesdriveshaft.com/”]Wiles Driveshafts[/URL] make the shaft for me. I spoke to a lot of local shops and some of the big names and no one wanted to touch my setup. Really not that hard just not that normal due to the IRS transmission to solid axle swap. We ended up with a 3.5 inch DS with a Sonex adapter and slip joint. Should handle what I throw at it.


Are you still following along?
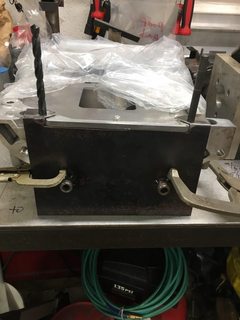
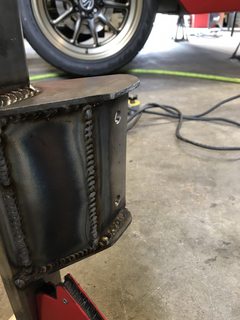
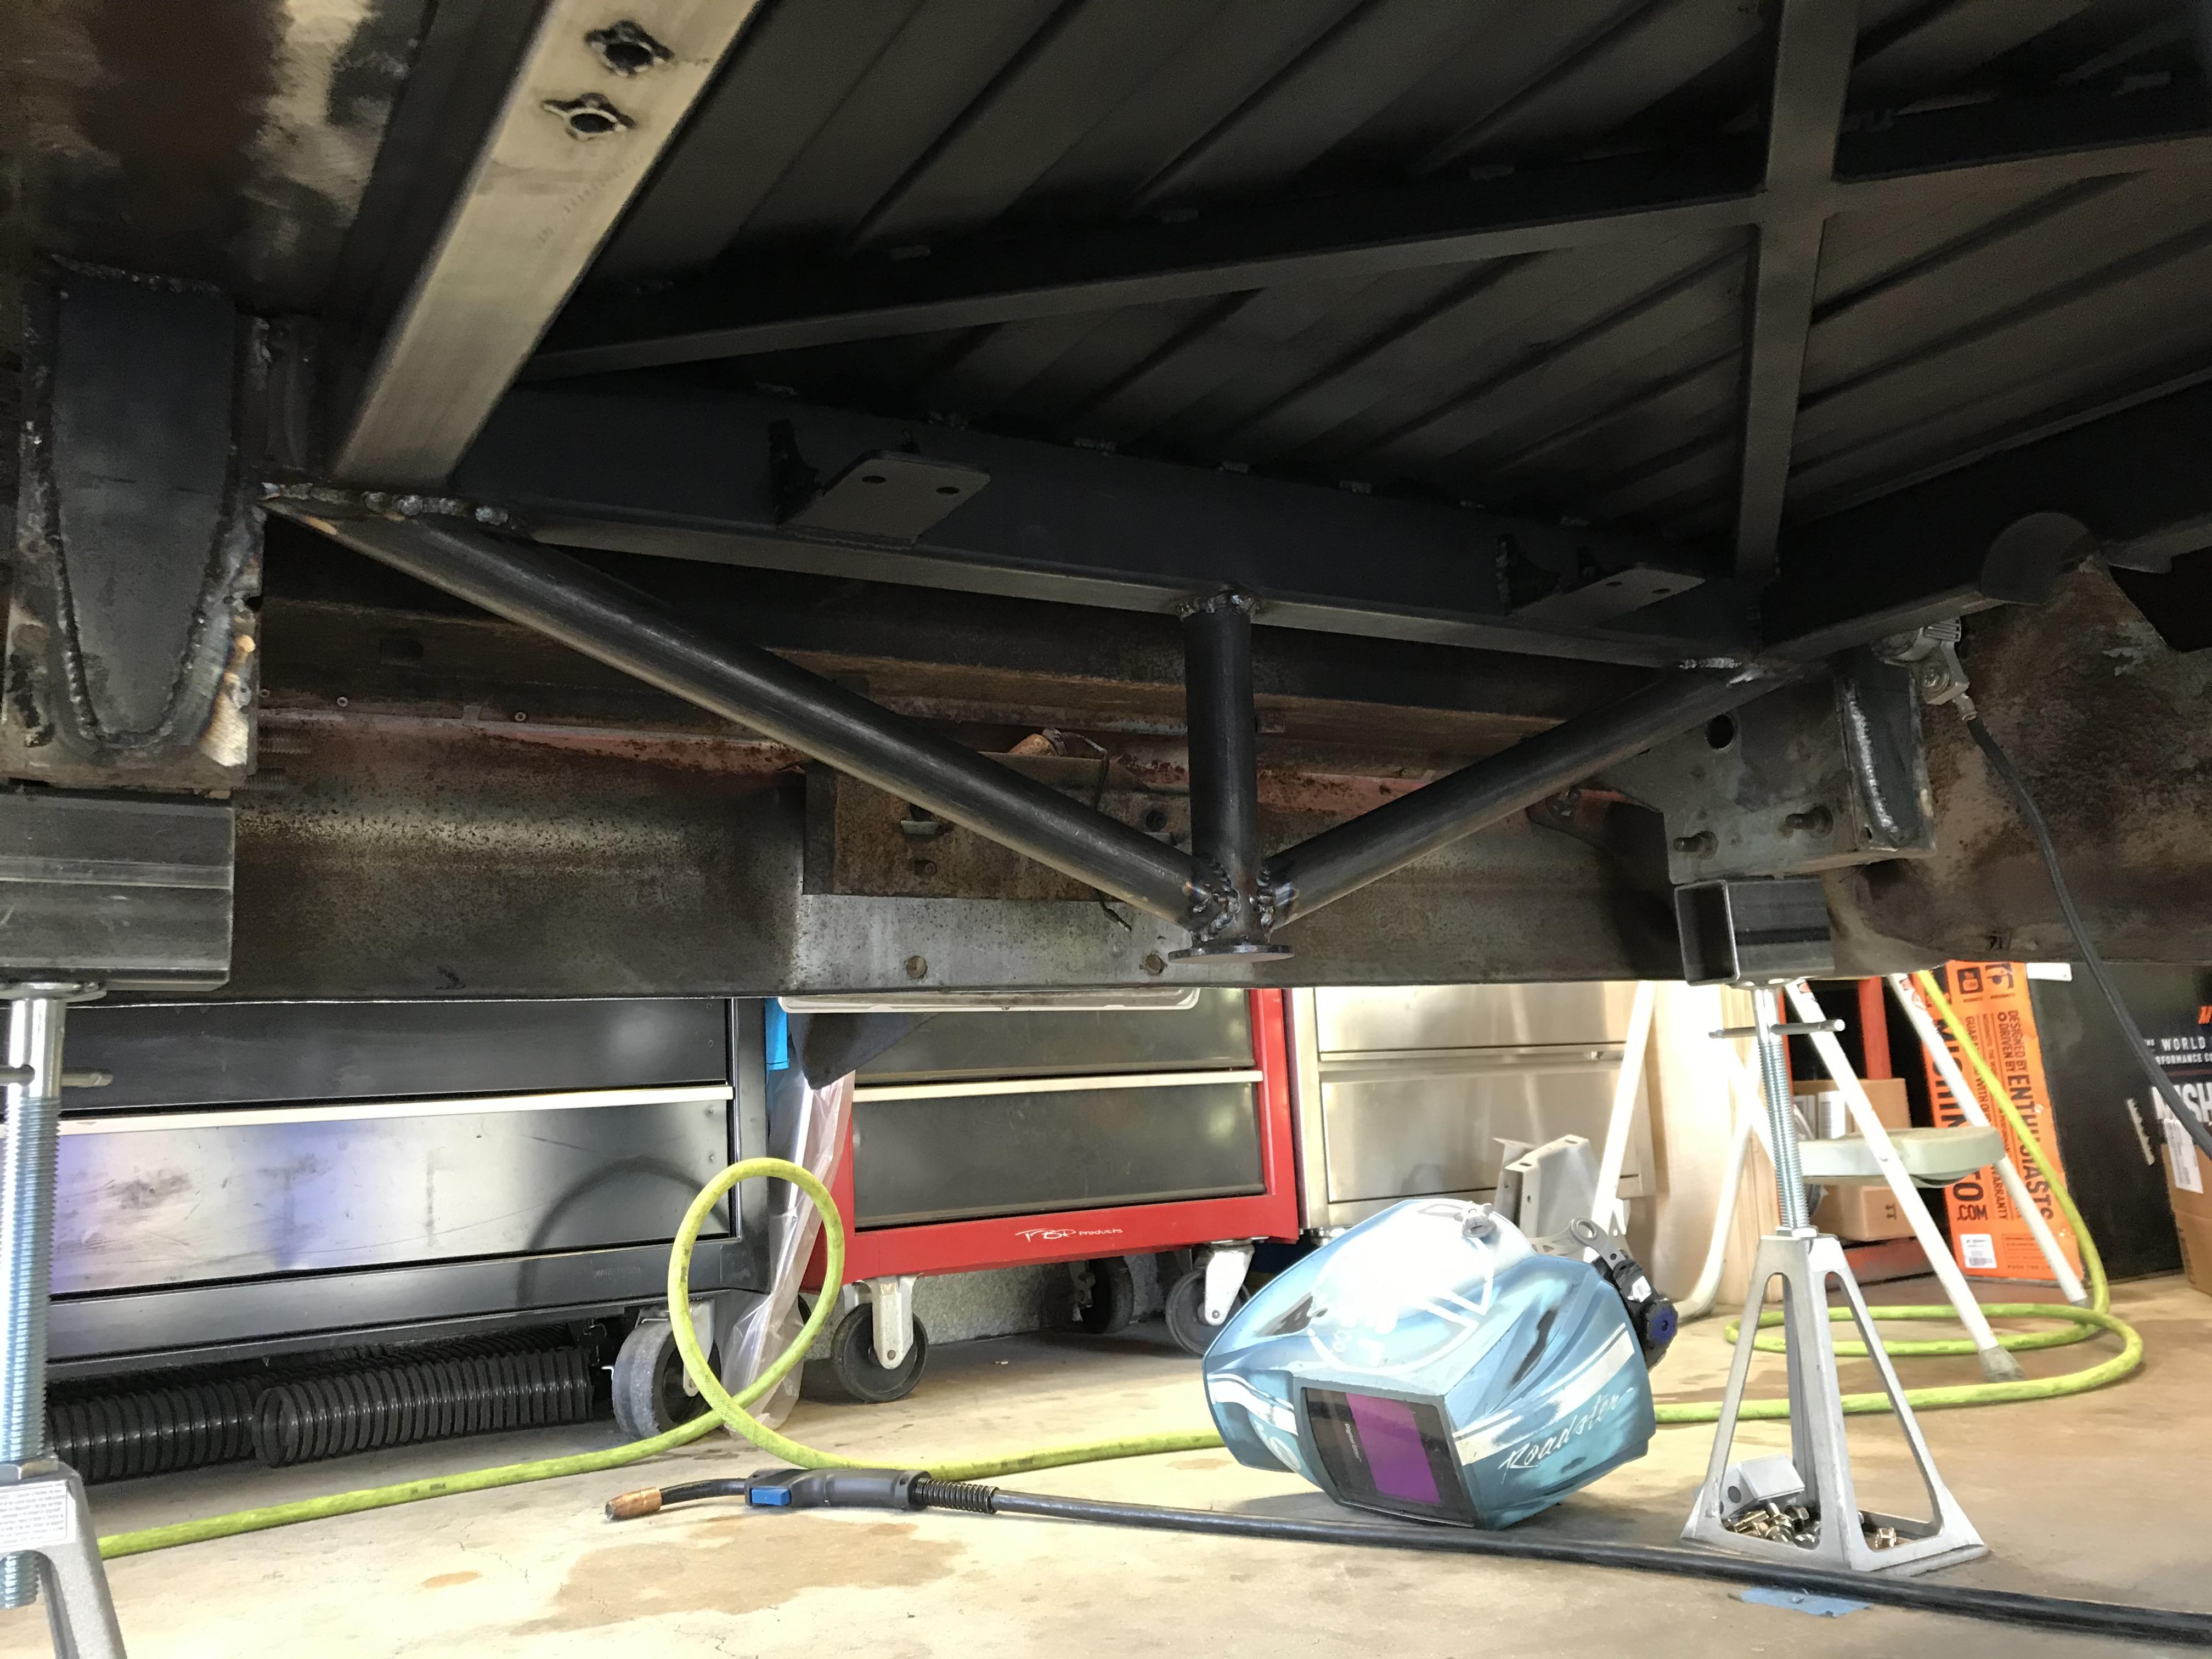
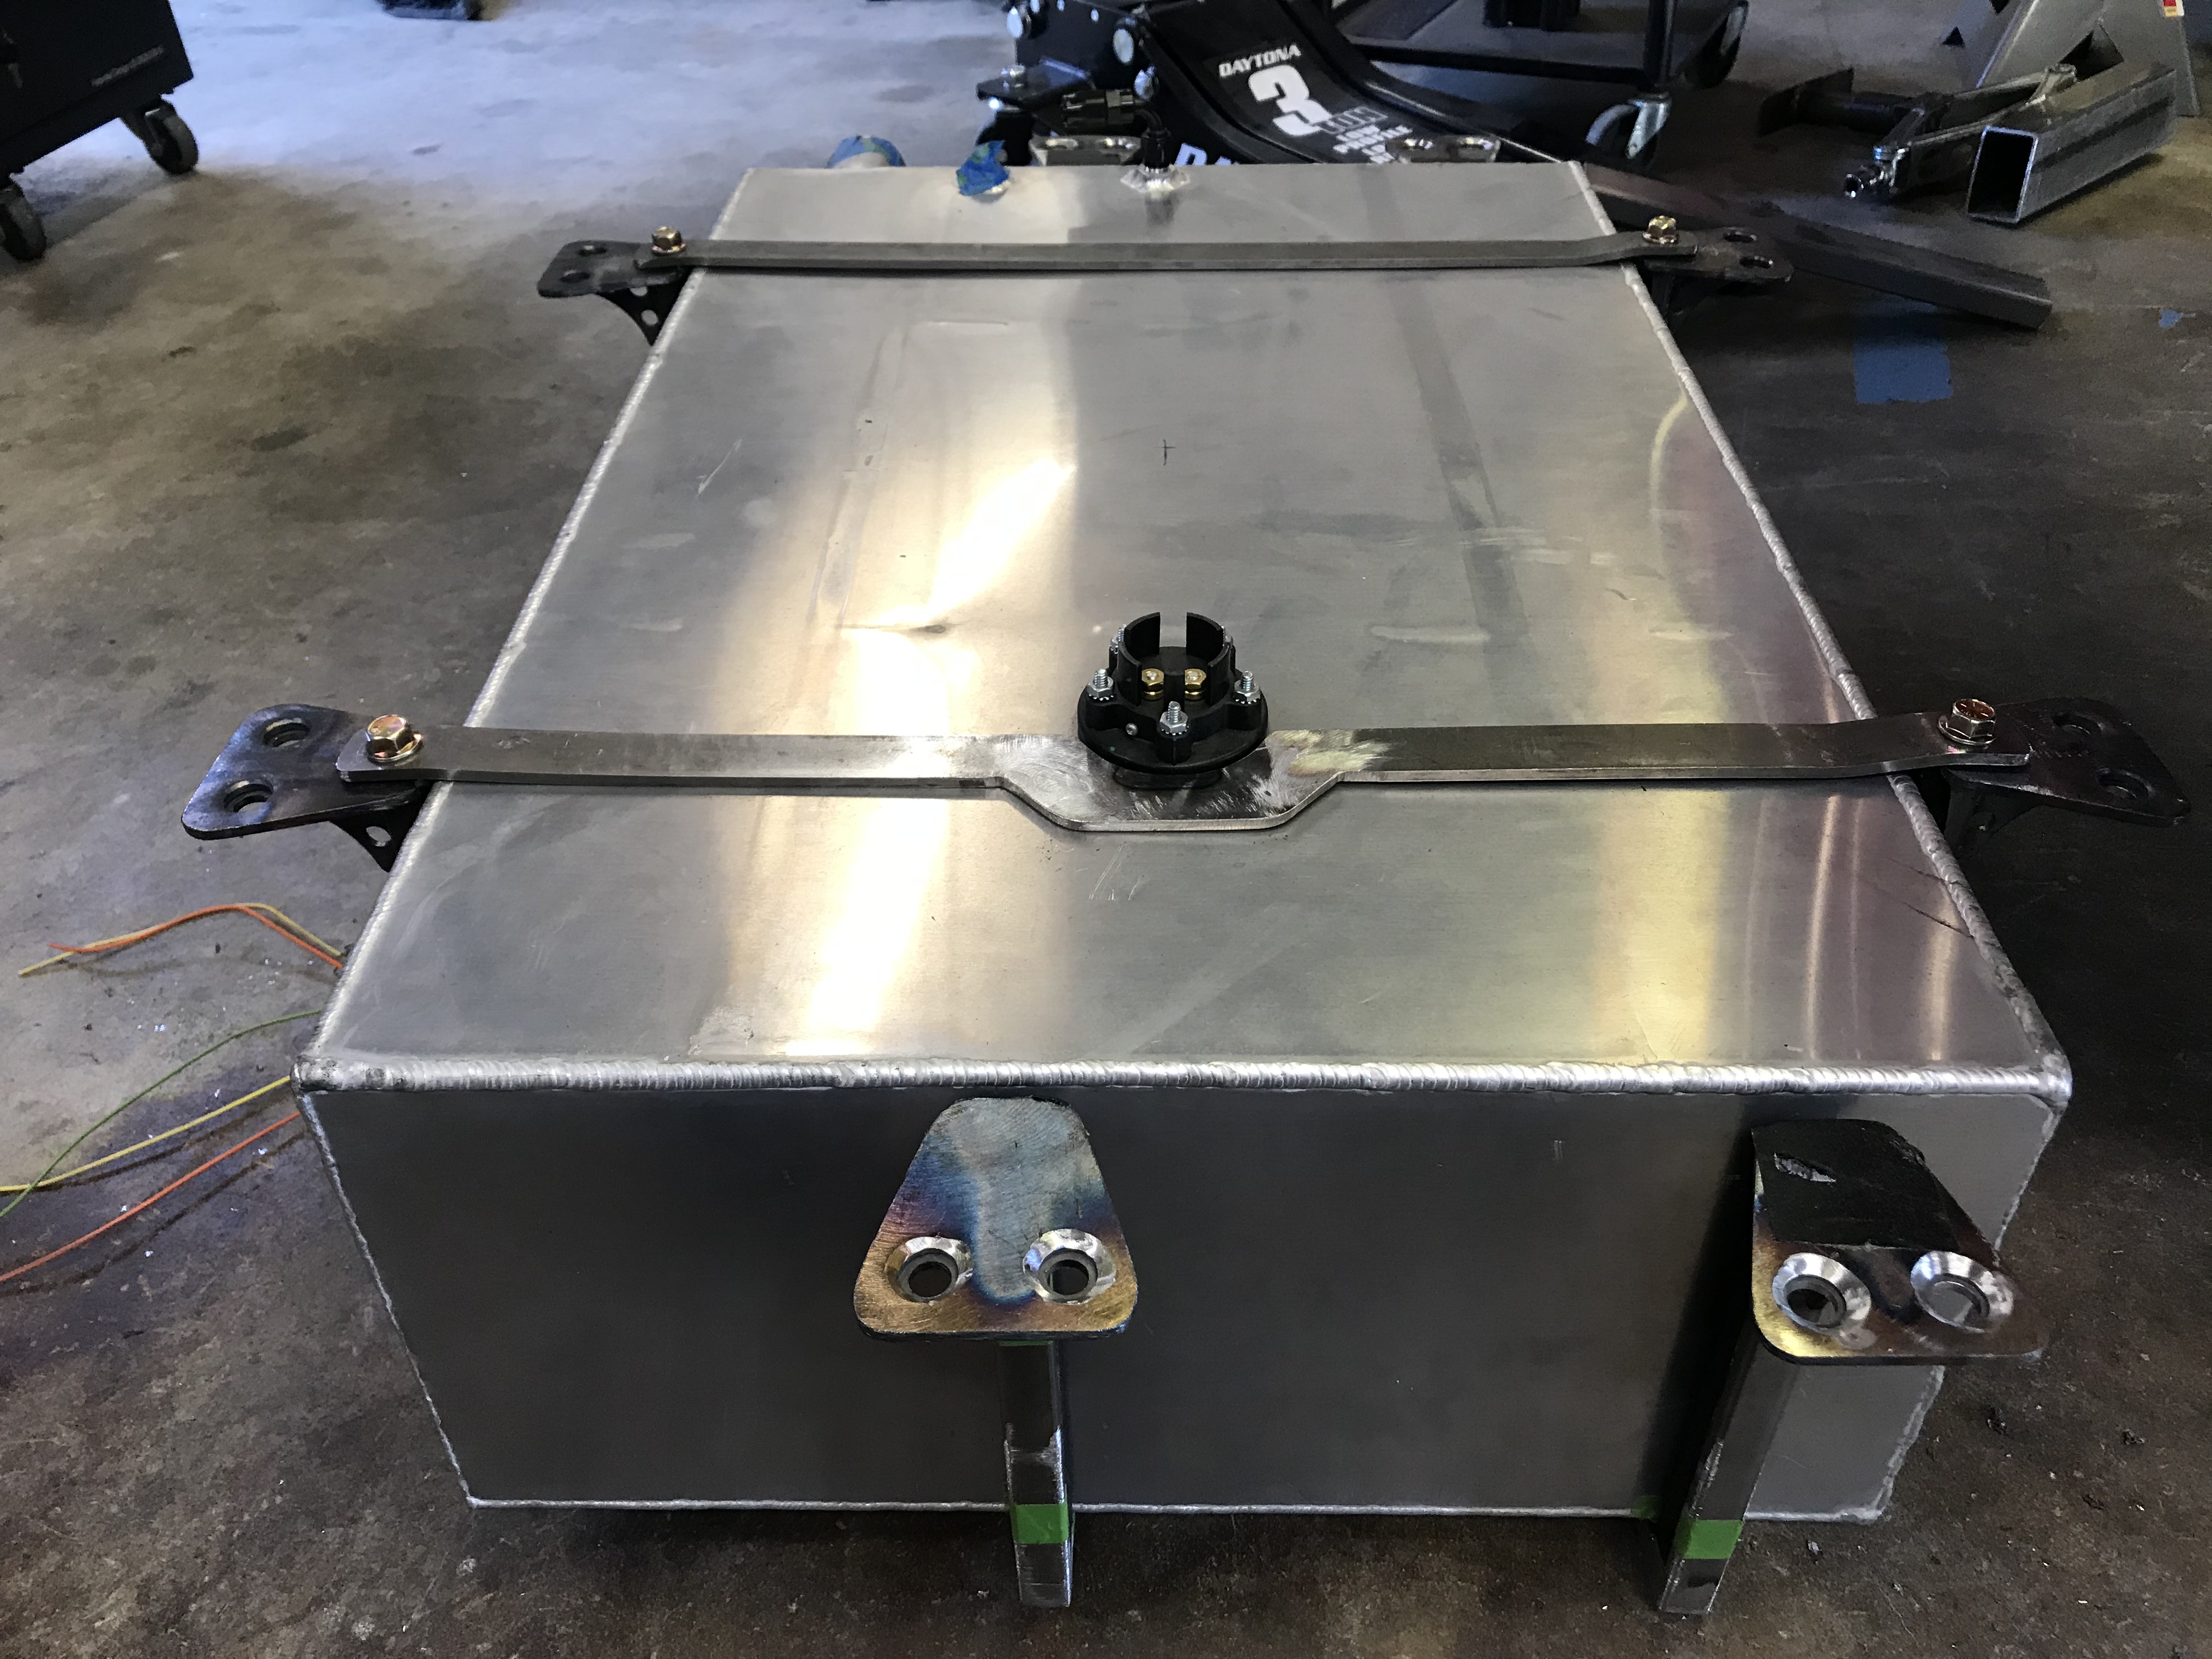
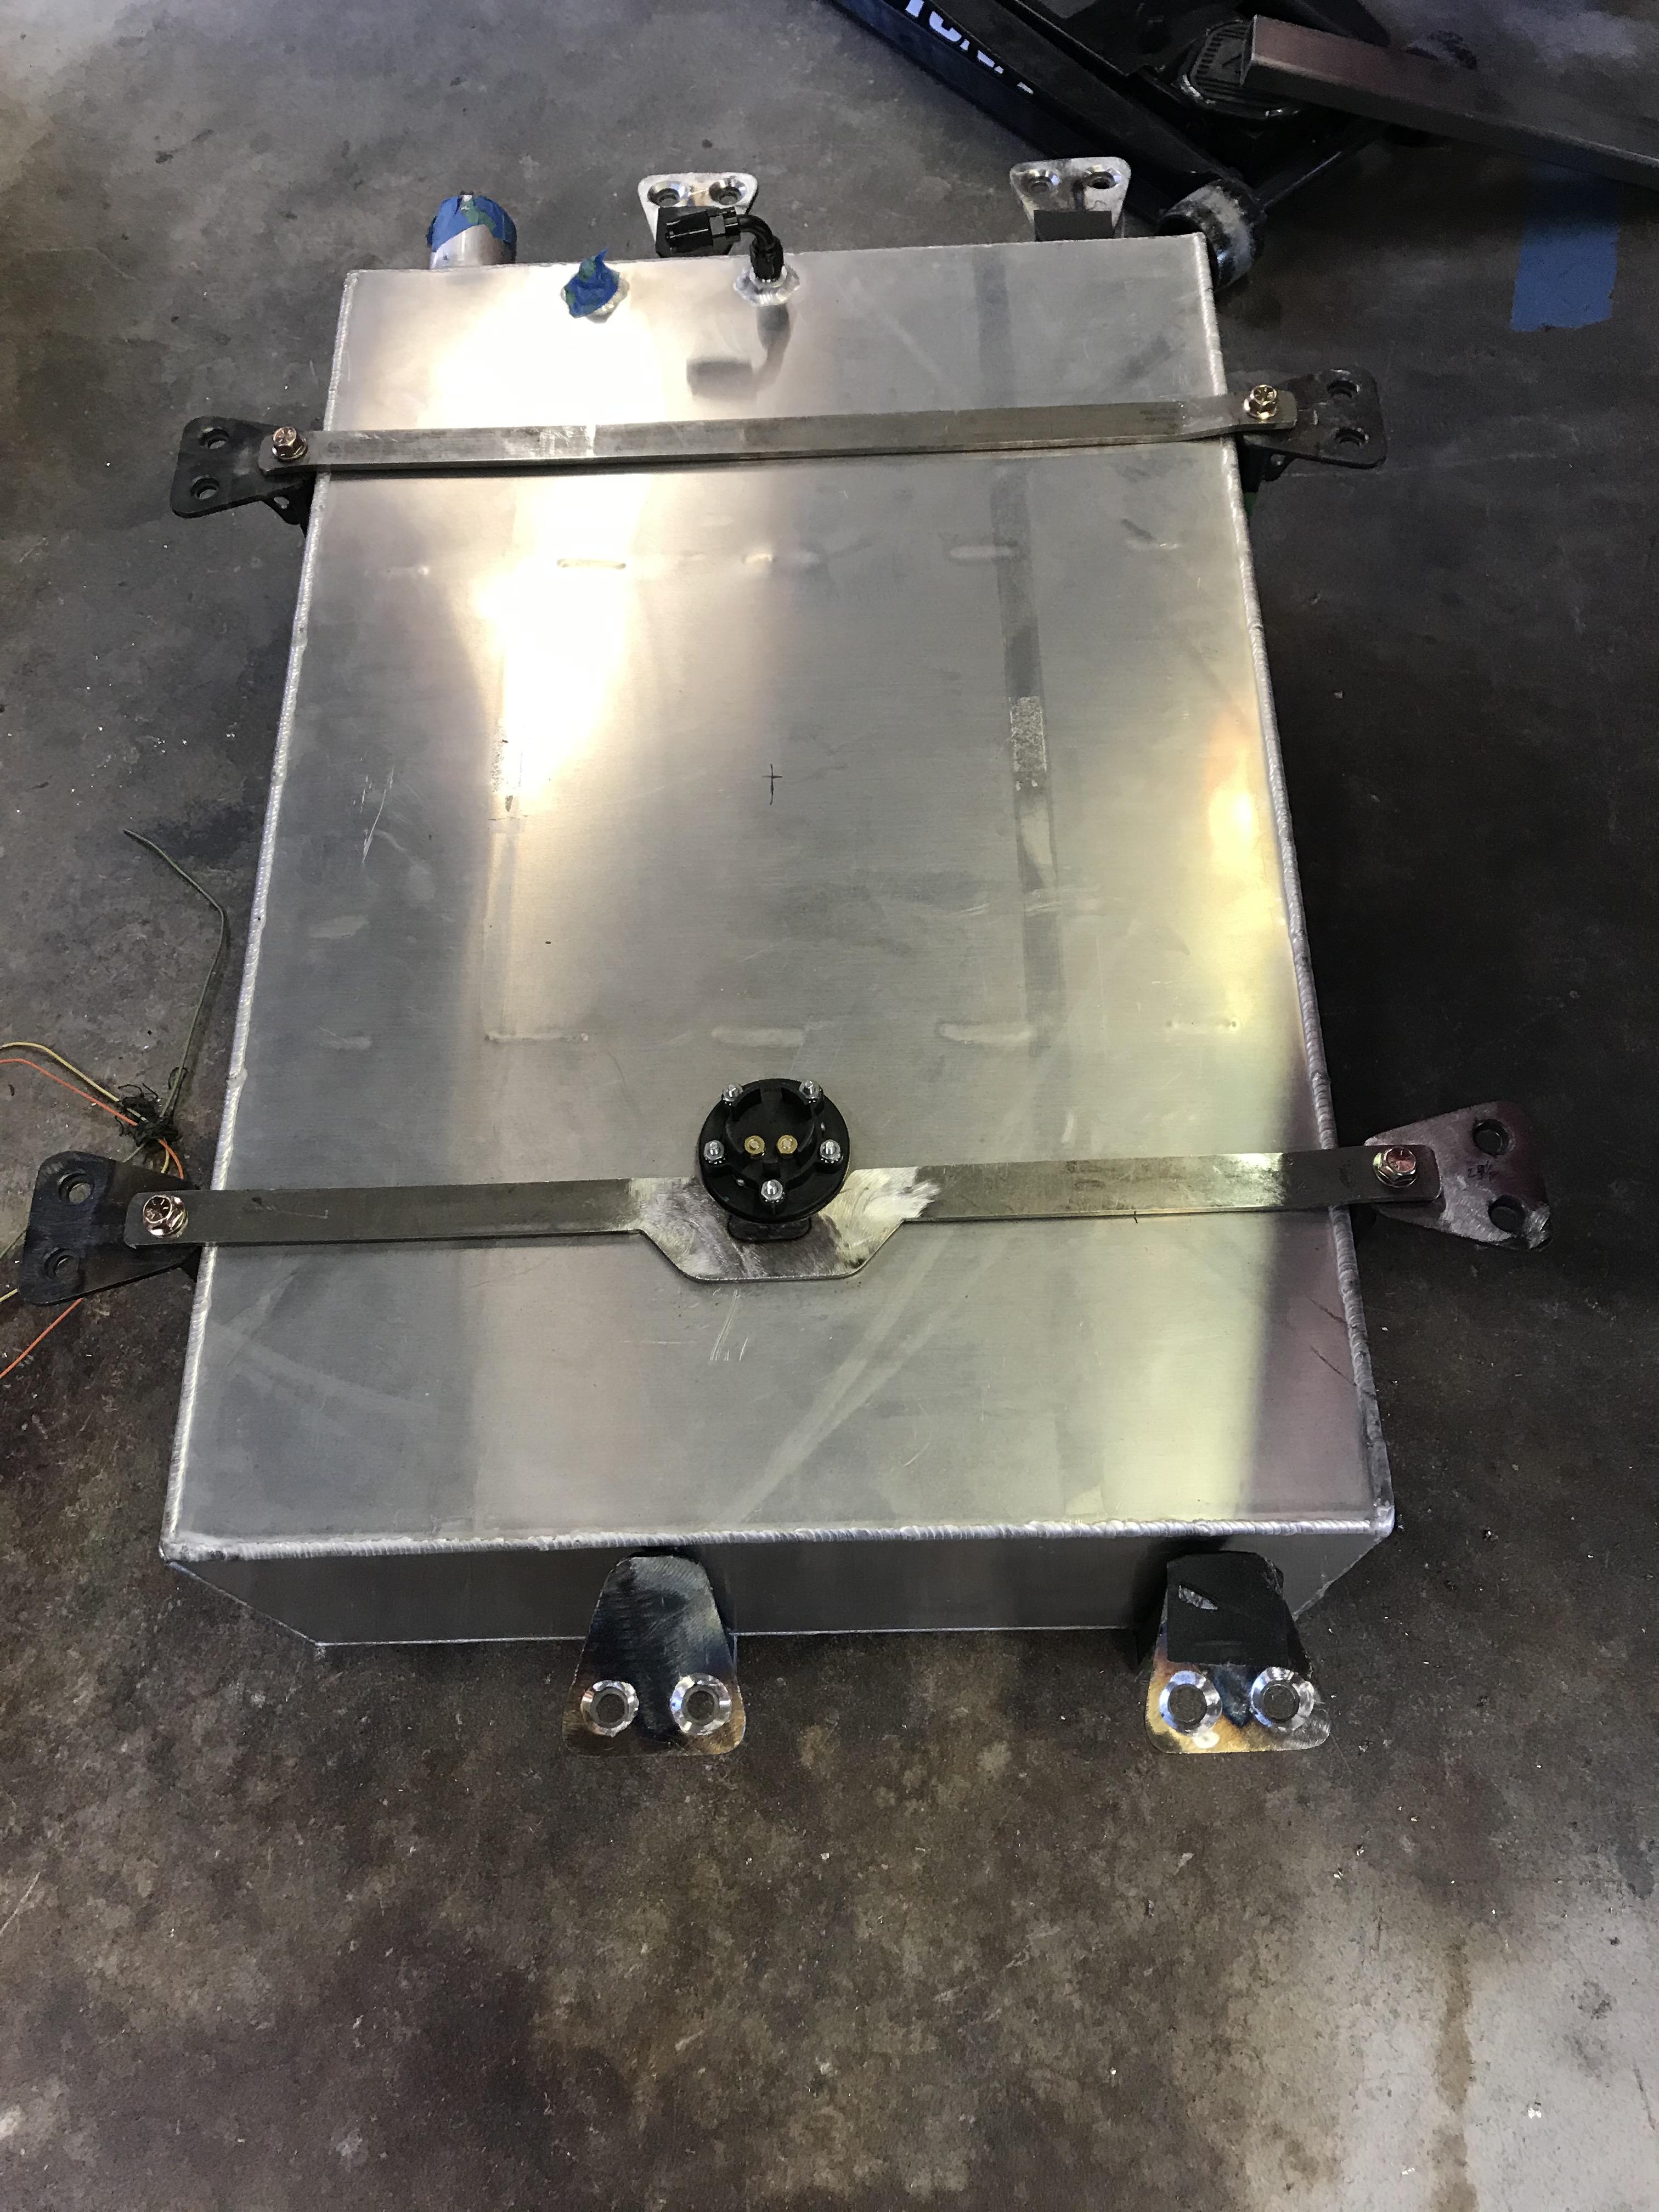
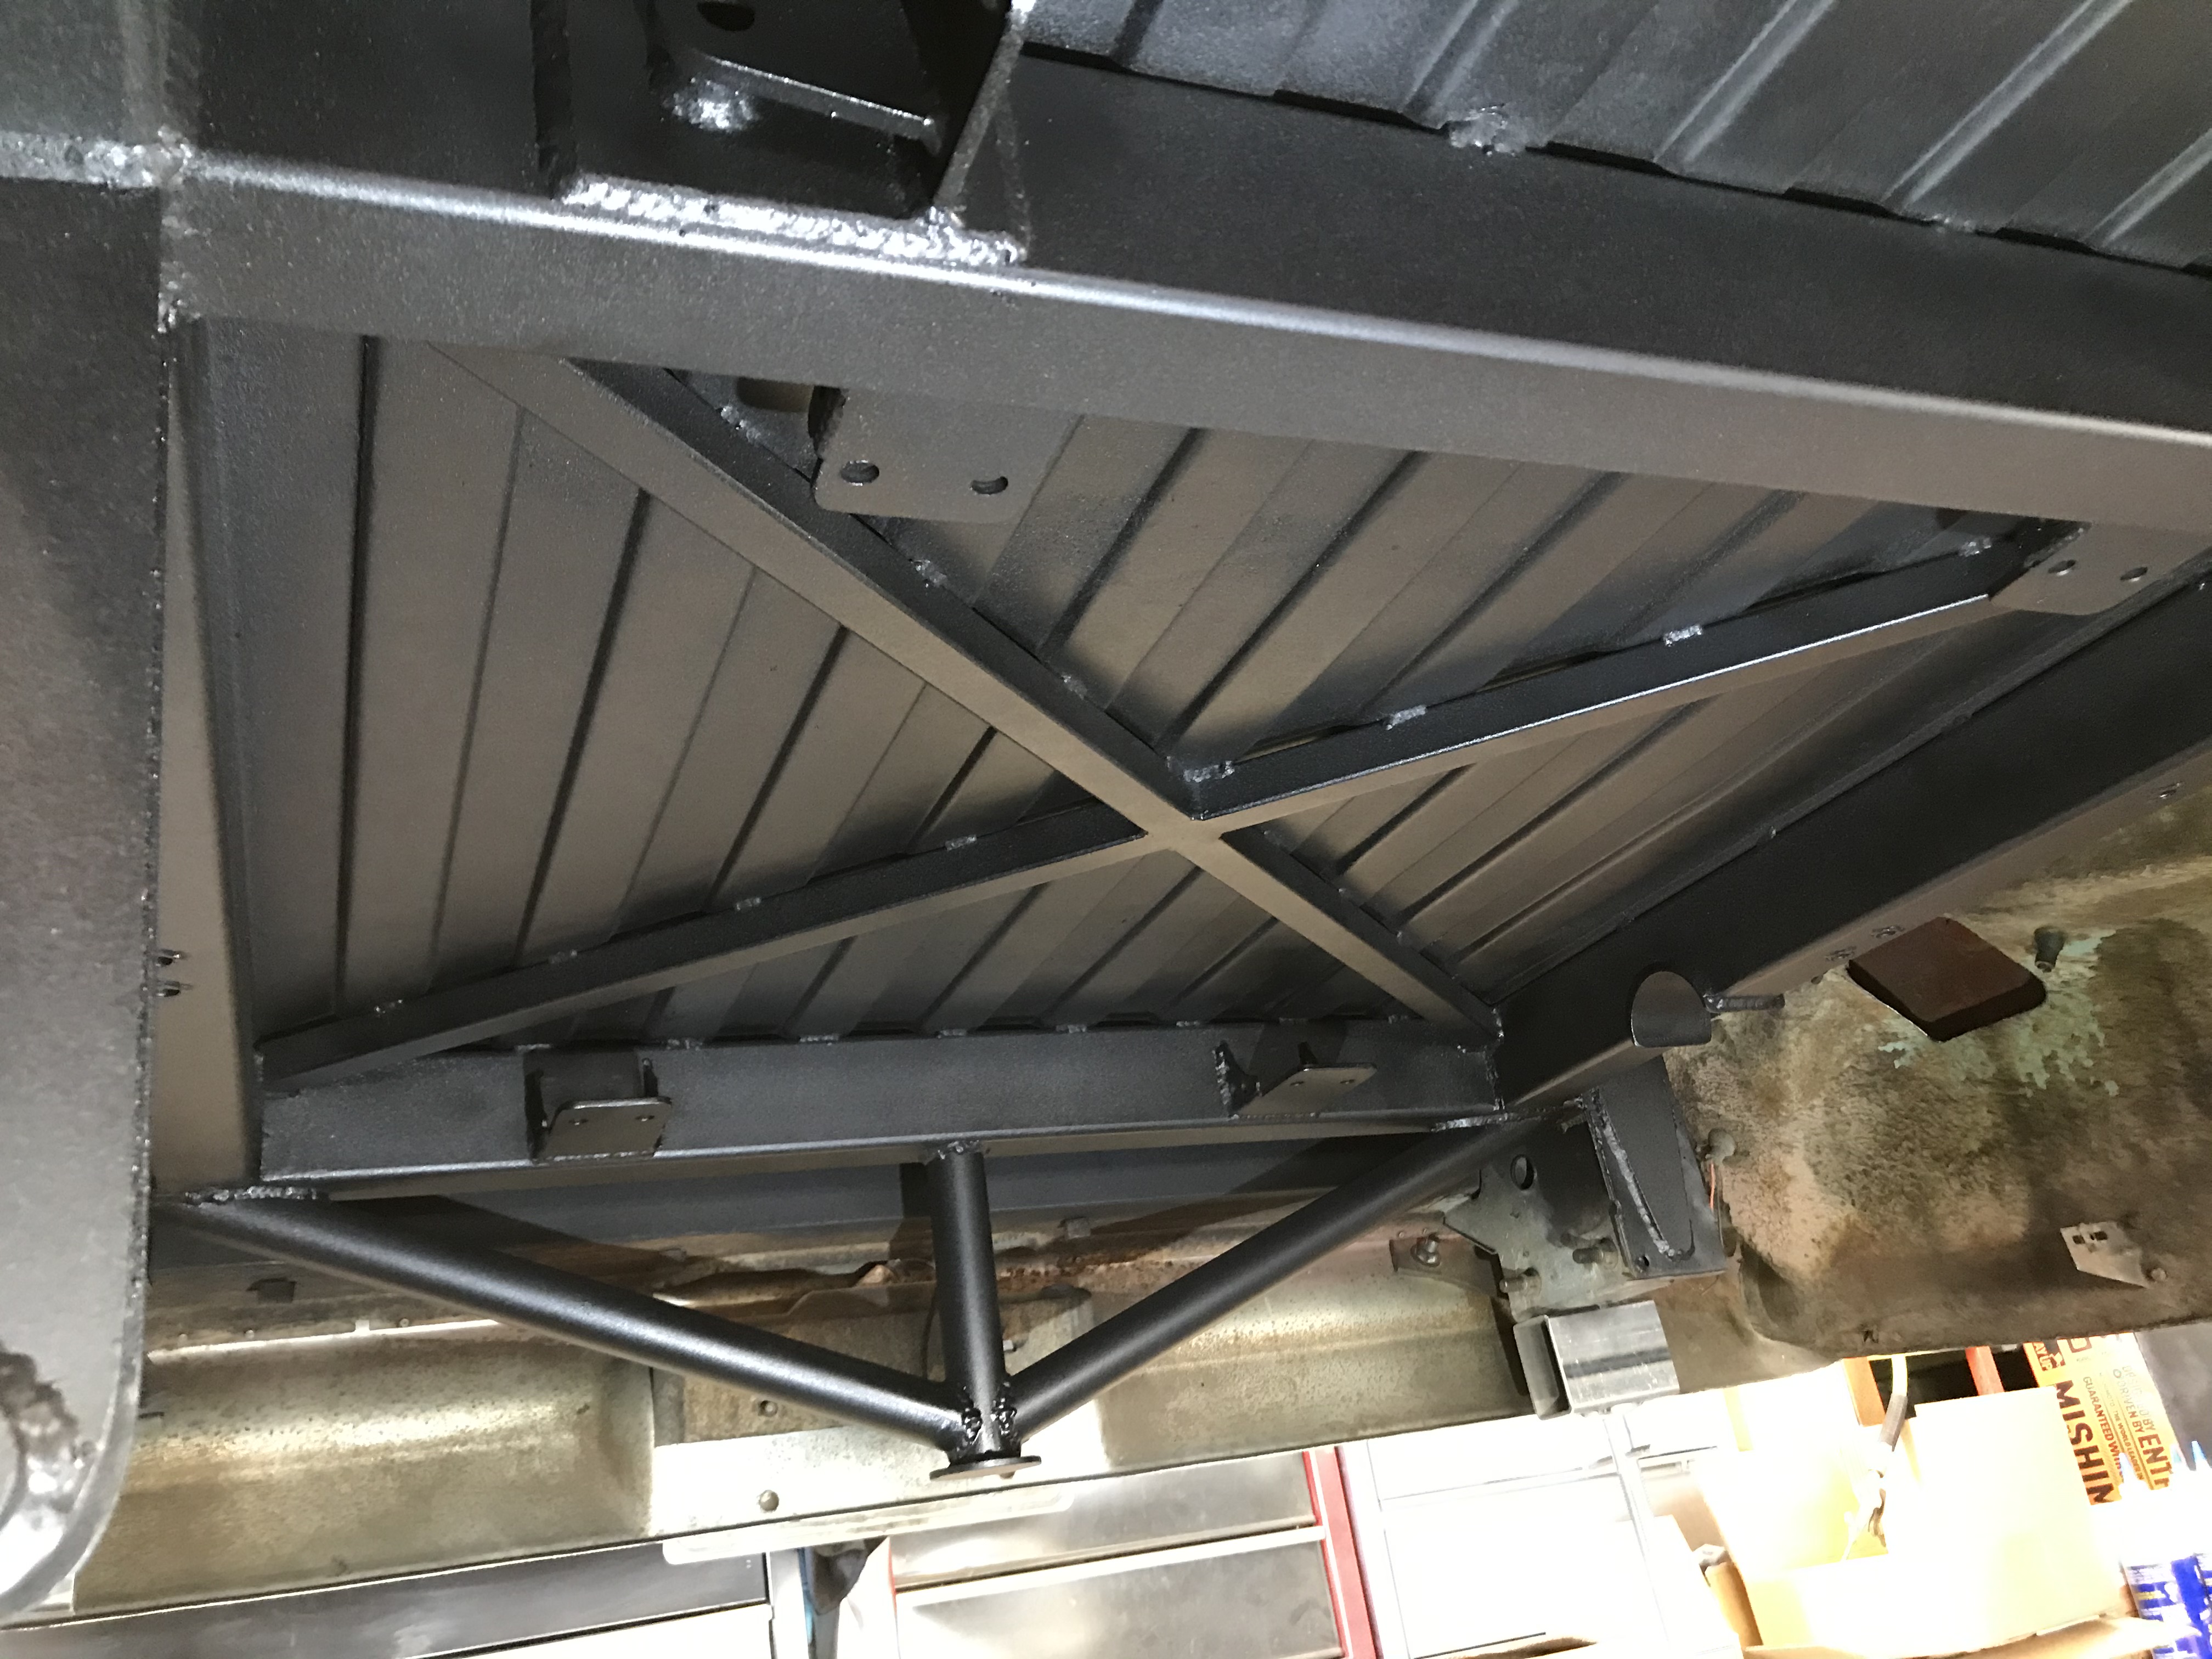
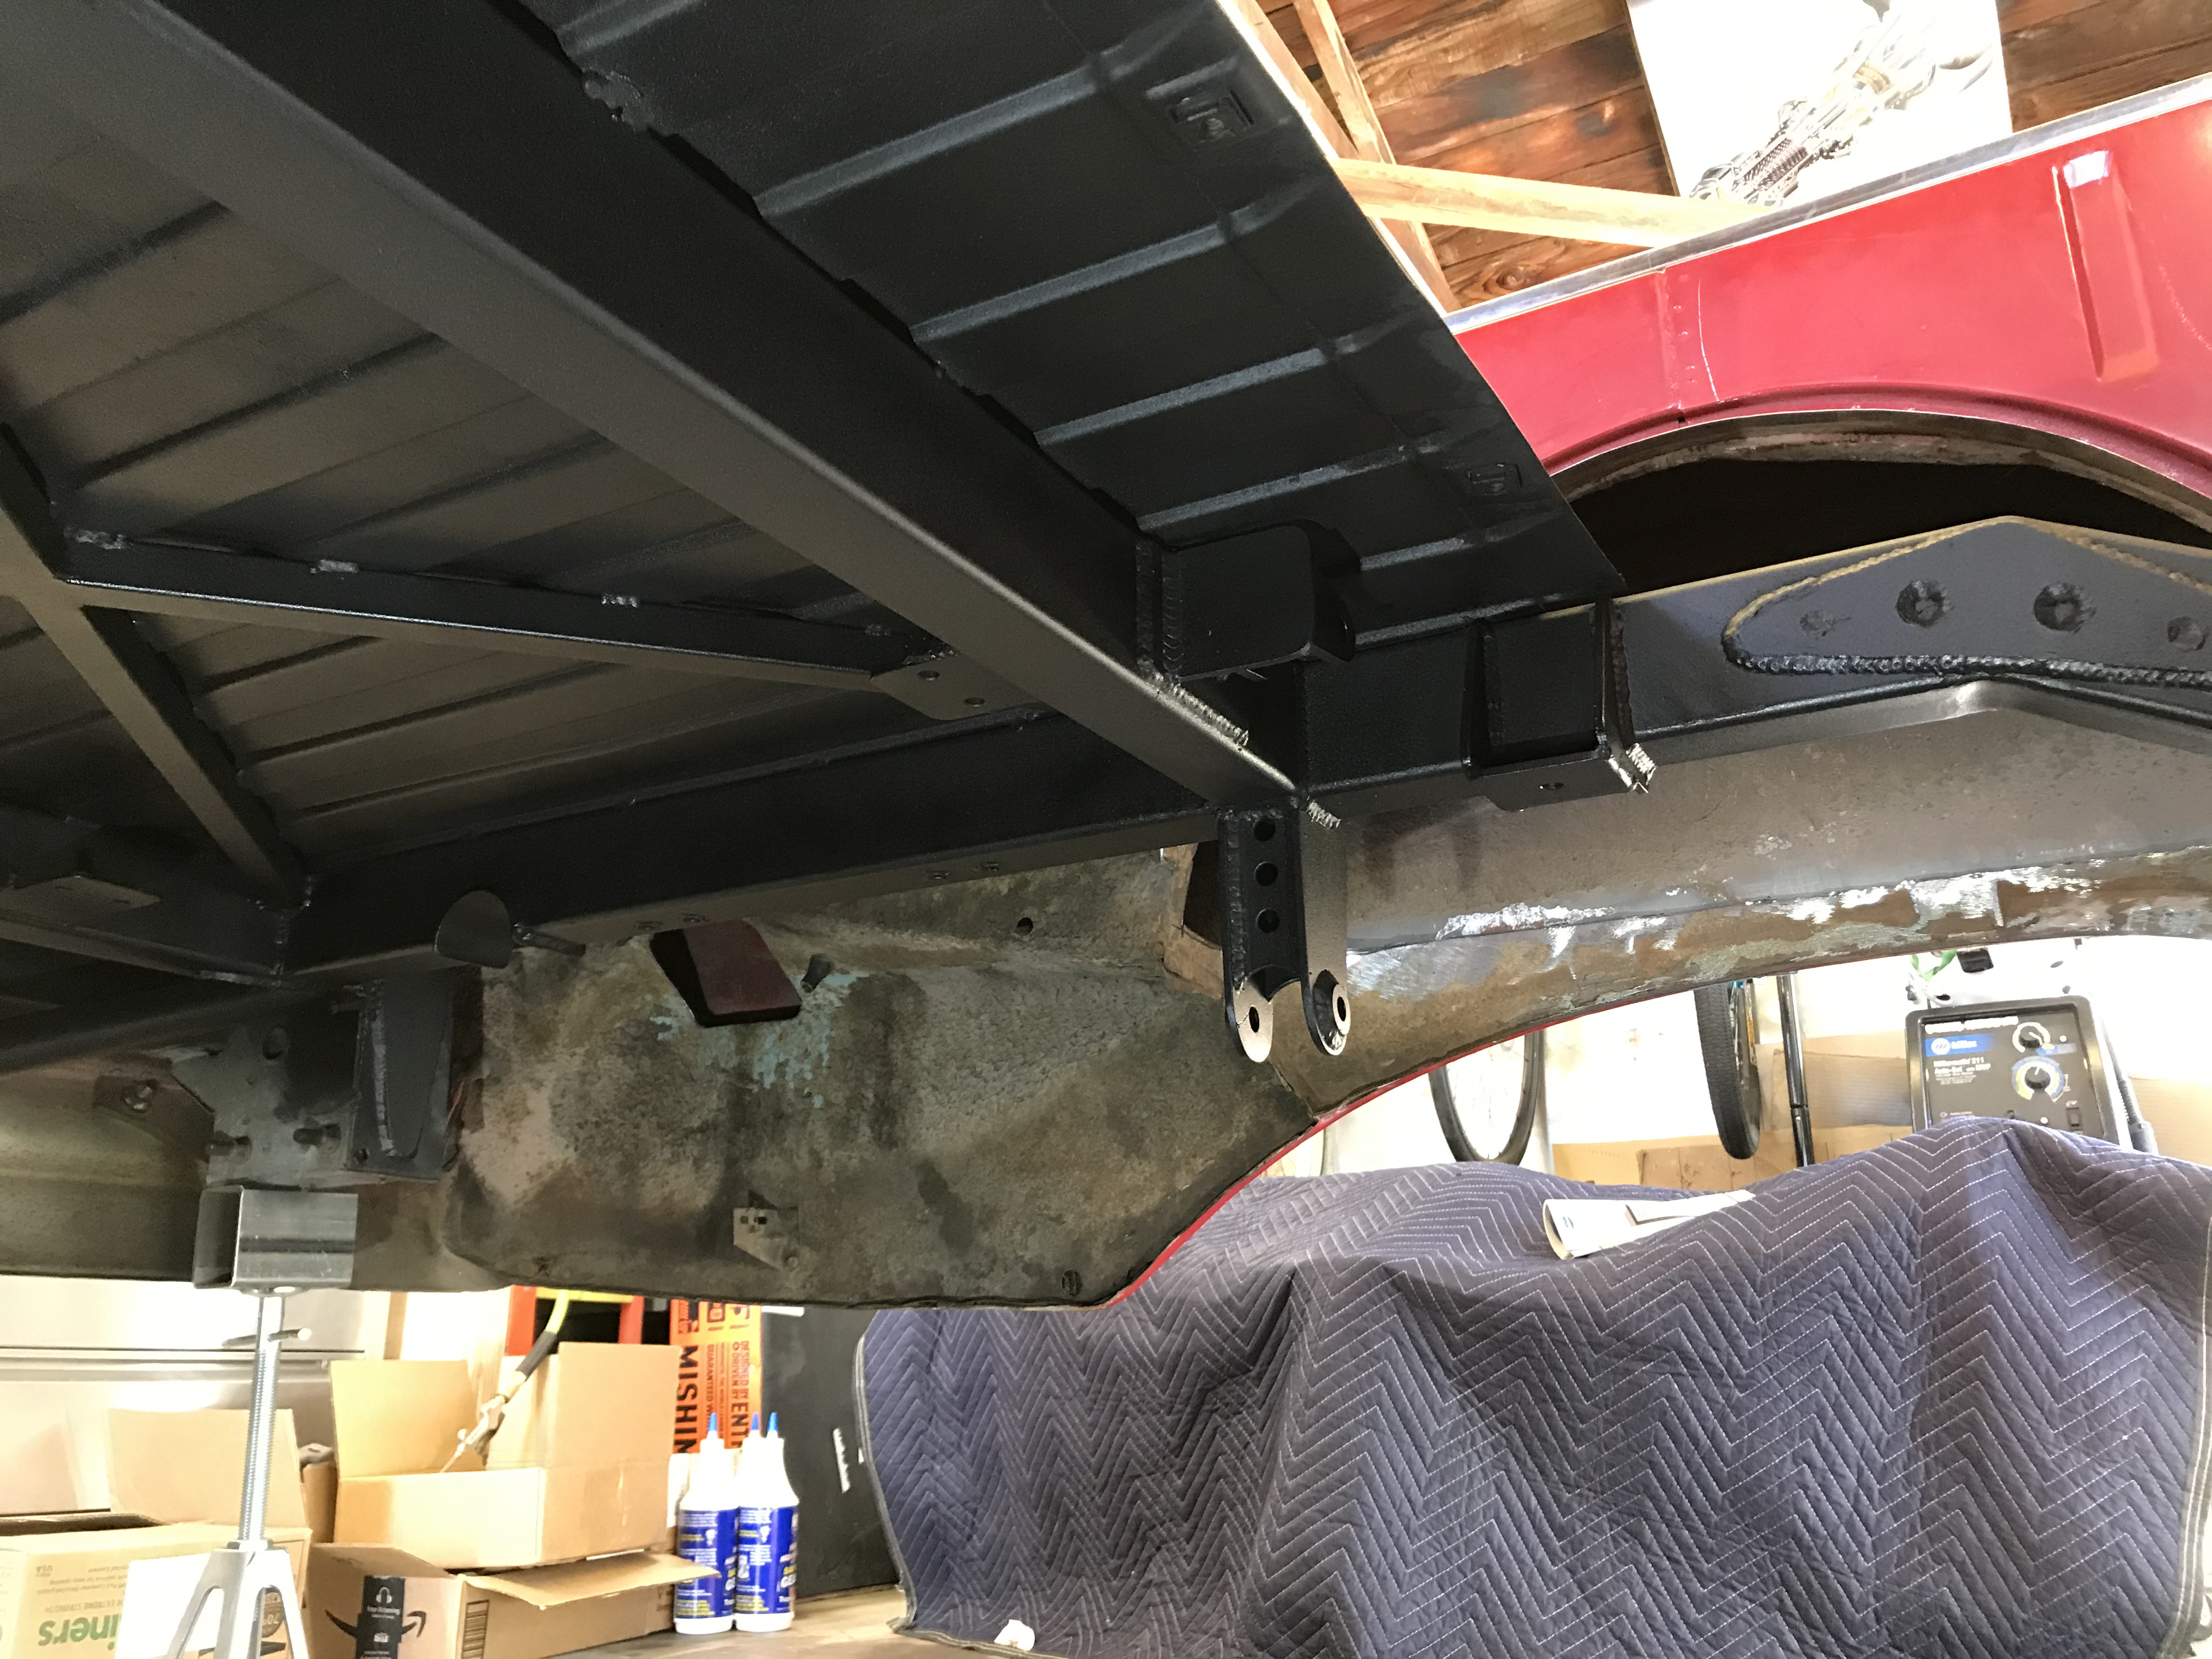
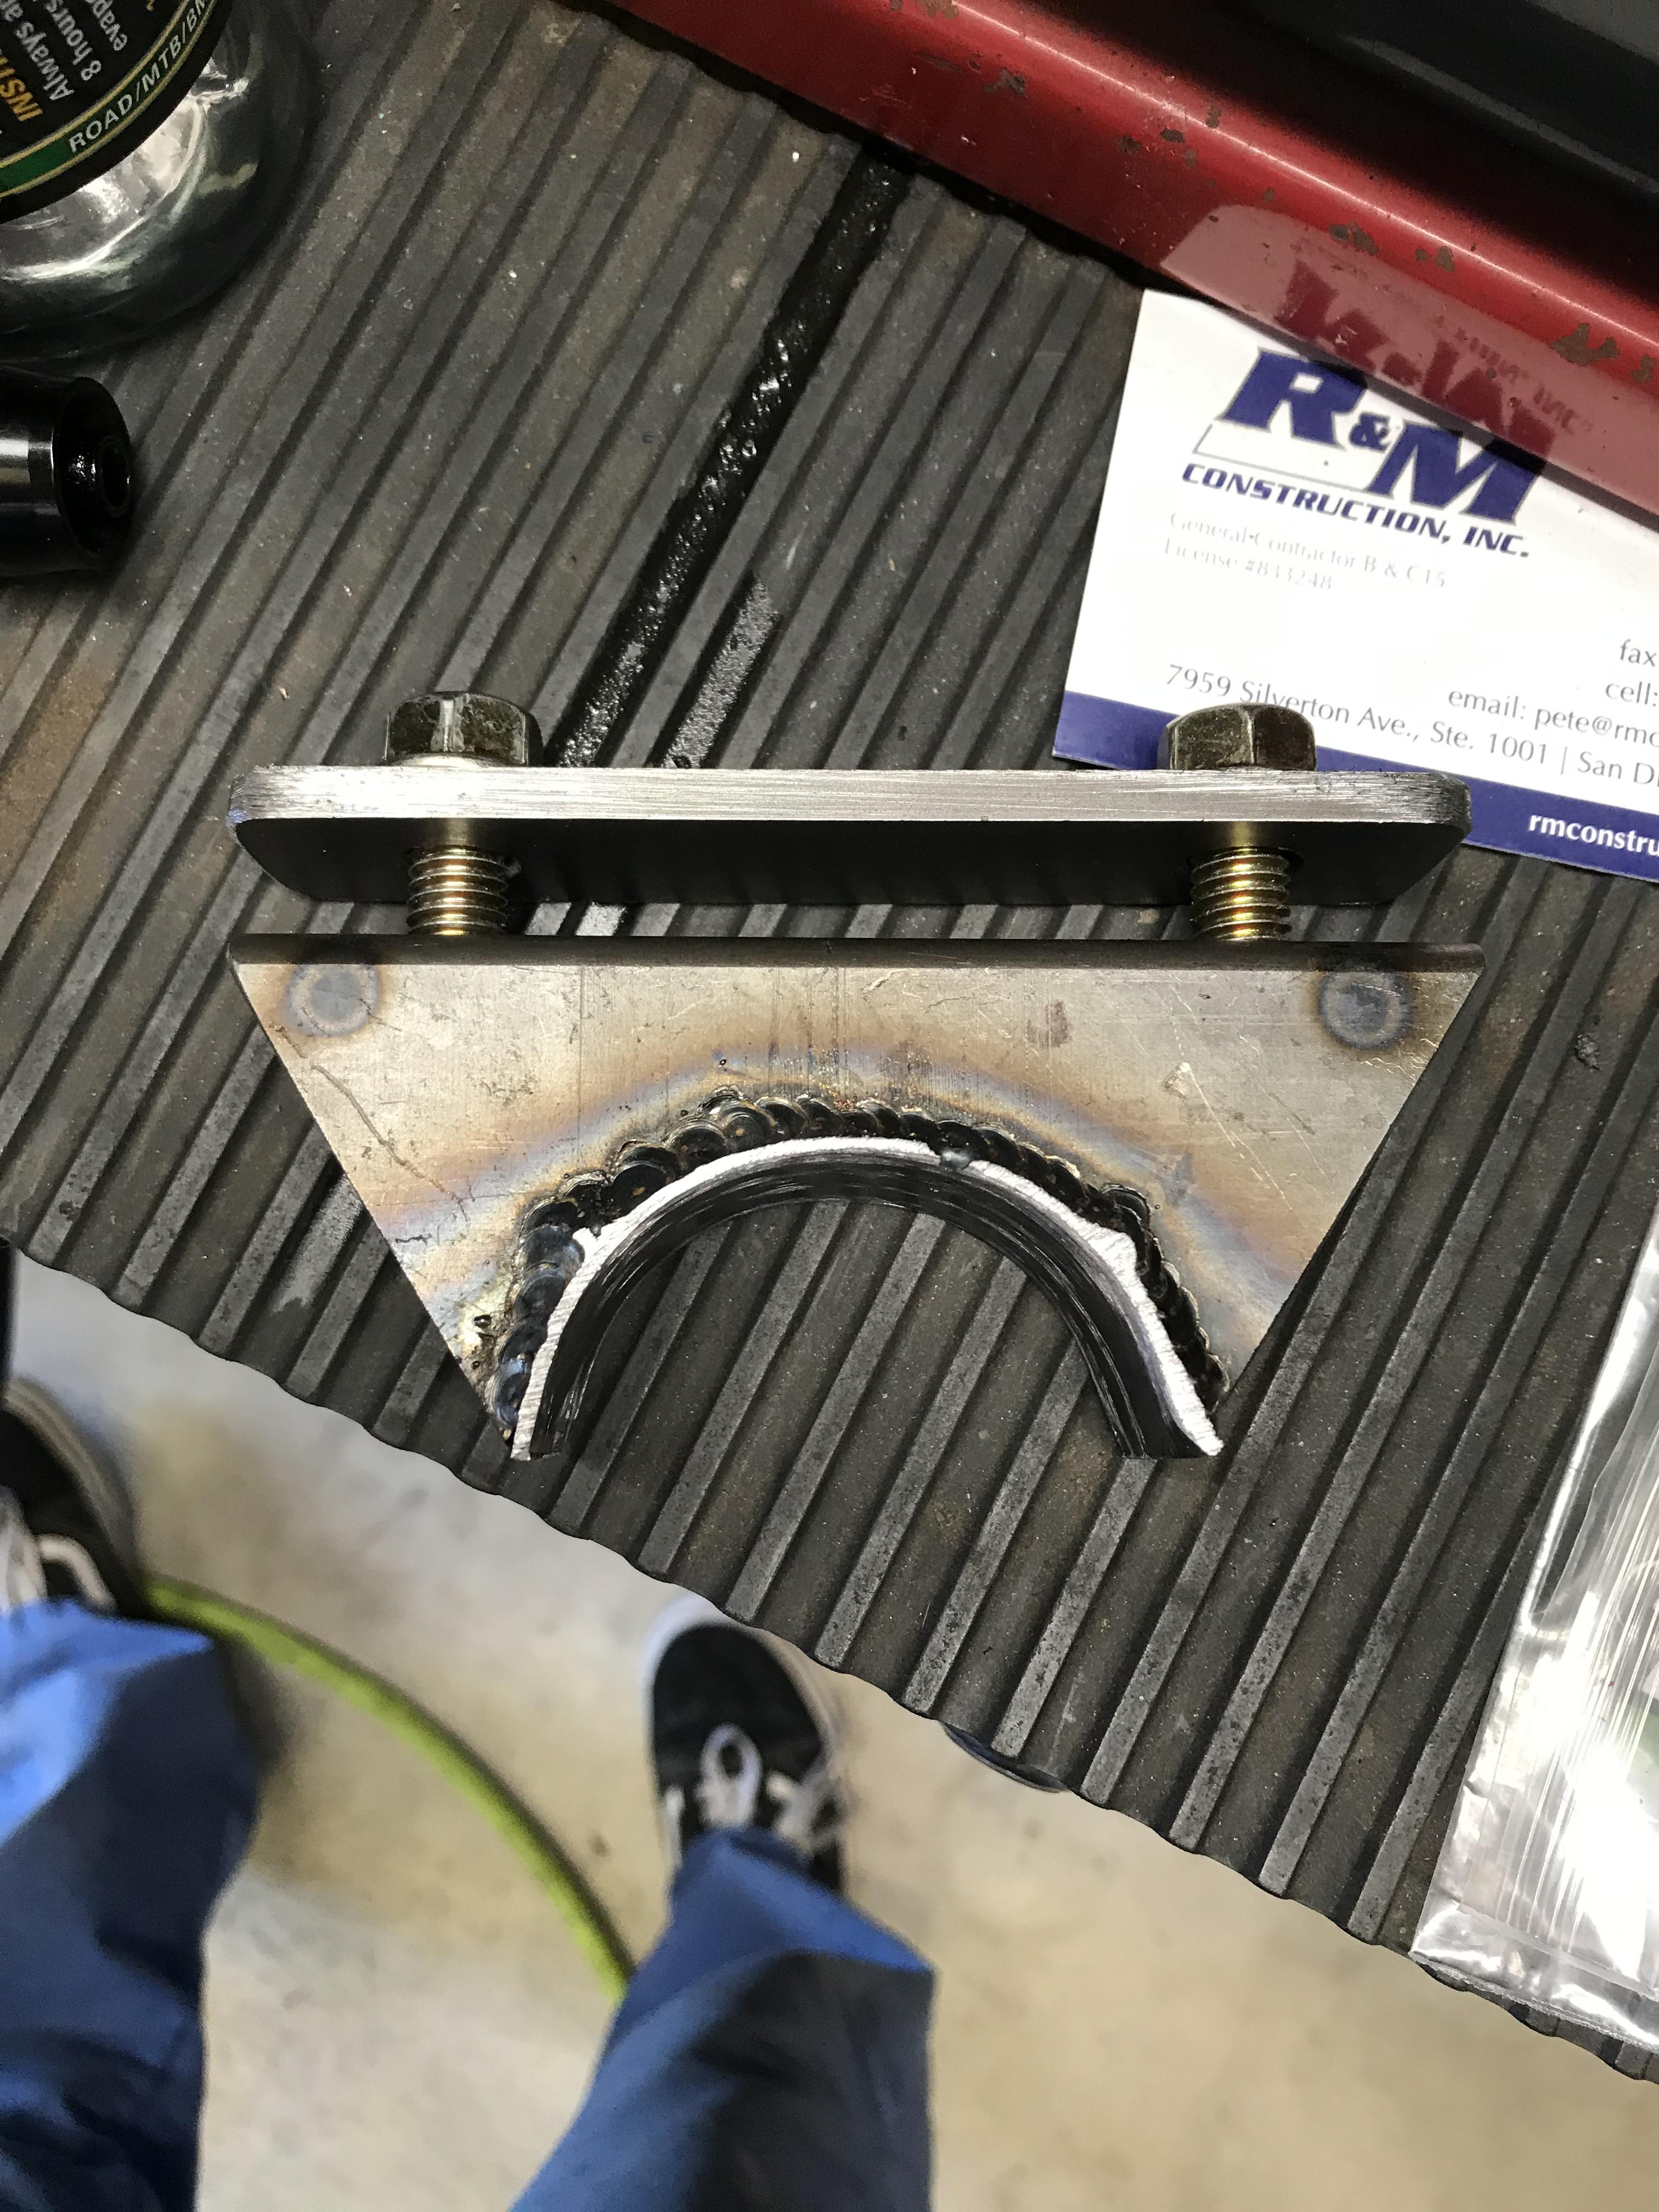
When I had parts at powder, I figured I would try and get some stuff done in the back. I wanted to add some bracing and gussets and get the fuel tank mounts sorted out. I added some bracking and plated to the front frame sections to help support any loads I feared. I also added a giant X brace under the bed floor above the cell. I always hated what I had done for the cell before so I remade my horribly over thought crap I made before. I’m very satisfied now. I also added the mounts for the pump and filter. I guess there was a bit of miscommunication and I mounted them a little lower than maybe visually is okay and it might hang down to catch some road debris. The bummer is I had it all powder coated. So if we decide to rework it I have to get it all redone. I was under the impression that it needed to be level with the outlet of the tank. As my 3 year old says, “oh well it's okay we can fix it.” After I get it all mocked up and fixed (if I do) I’ll be adding a simple surge tank and another pump just to keep everything safe and sound.
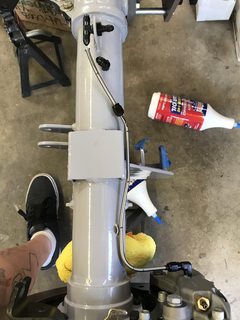
As always, I got scope creep in the steering too. I was adding the https://epasperformance.com/”]EPAS Performance[/URL] but wasn't going to use a standard steering column so back to fabricating all my own mounts. I wanted to keep the stock angle and didn't want the motor to get loaded and try to move so I made some brackets that come off the back of the motor and connect to the dash in a couple places. I also made the mount for the motor to the dash. I used my press and some scrap metal to bend it up. I hid some hardware inside the main part of the mount. I then used an off road steering column and fit it all together. I wanted to keep it race inspired but also with a finished look, as everyone would see it as they looked in the car. After it's all said and done I'll send the stuff off to Swift to get coated.
My plan was to get this a rolling chassis but as always things get out of control. I have gone back to work for a week and got laid off for another week. All and all I've been off for 6 months. Some have been slightly paid and some have not. I look forward to returning to work but I also want to finish this thing. I have a couple more days so I’m going to try and get the seat mounts made and maybe mounted into the car. Once they are in I can figure out the pedal placement and the final location of the steering wheel.
Thanks for reading all of this. I am grateful for this community and keeping all of us going.
08-25-2020 #196 Registered User
- Join Date
- Dec 2006
- Location
- SF Bay Area
- Posts
- 456
You do great fab work! Keep it up!
Always nice to see another Ranchero on here.chunger
'68 Ranchero 500
'70 Cougar XR-7 Convertible
'98 Mustang GT Convertible
08-25-2020 #197
Registered User
- Join Date
- Mar 2018
- Location
- la mesa, CA
- Posts
- 237
Thanks man! Im trying my hardest to build something cool that will be fun for my family and I. Originally Posted by chunger
Is there a build thread on your Ranchero?
08-26-2020 #198
Registered User
- Join Date
- Dec 2006
- Location
- SF Bay Area
- Posts
- 456
Nah, it's more of a 21 year long project. Since it's my daily, I tend to just fix it enough to keep it on the road. Also, I use it quite a bit. Lots scruff's and scratches, not like all the nice stuff that gets built on here. It runs a 393 / T5 combo. Originally Posted by Project Bike Truck
I also tend to haul lots of stuff in it. You know, use it like a truck.chunger
'68 Ranchero 500
'70 Cougar XR-7 Convertible
'98 Mustang GT Convertible
08-27-2020 #199
Registered User
- Join Date
- Mar 2018
- Location
- la mesa, CA
- Posts
- 237
Thats a bad ass Ranchero my friend. Originally Posted by chunger
08-27-2020 #200
Registered User
- Join Date
- May 2017
- Posts
- 118
Nice, I could use one just like it.

 Reply With Quote


