Results 1 to 20 of 21
Thread: 1968 Impala (Was a 1968 Impala)
-
04-08-2018 #1
 Registered User
- Join Date
- Apr 2018
- Location
- Kalamazoo Michigan
- Posts
- 9

The Build: 1968 Impala
Hello all,
To start, I want to thank everybody on here as I have been keeping track of this forum for a very long time. You guys have all given me the motivation to get this build going. It is going to be a very lengthy process, with a TON of custom metal work to do. I am hoping you will follow along and continue to motivate me down this extremely long journey. My GOAL is 4 years from now to have this thing running and driving.
I go to college a hour and 30 minutes away from my parents where my car is, so during the week my car will remain untouched. When the weekend comes, I always come home and have goals I plan to maintain weekly when it comes to the car to keep the 4 year time frame within reach. When the summer comes, I have an internship out of state as well, so again, work on the car will not be as quick as it could be.
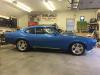
My name is Jordan, I am 22 years old and I am a college student by day, fabricator by night. This is my 1968 Impala I bought as a graduation present to myself when I graduated high school in 2014. Now being 2018, I've had my enjoyment and it's time to take it up a notch.
A list of what I plan to do are as follows -
- Shave drip rails
- Flush mount windshield
- Flush mount backglass
- Cutout floor and firewall to build all custom
- Swap the fenders to incorporate 1966 GTO fenders for the fender flair
- Build a Custom dash and steering column
- Build a complete tube chassis with Corvette C4 suspension front and rear IRS
- Roll cage
- Twin turbo ls with Tremec 6 speed (already own lm7 out of 2004 rolled silverado)
- A lot of bead rolled and riveted panels
I'm not just in this for the final product, I am in this for the build. I know it's a ton of work, but I know what I am capable of and I'm hoping I can help motivate other people who would like to take their builds to the next level to do so as well, just like all of you have done for me.
Thanks for checking this out! Updates will be posted weekly!
-
04-08-2018 #2
Registered User
- Join Date
- Apr 2018
- Location
- Kalamazoo Michigan
- Posts
- 9
My first photo is just of the roof as I took my paint stripping disk and wrote out "The Build" because this is how I plan on referring to this entire process.
This is my first weekend of working on the car. I removed the ugly drip rails because I plan on running no trim on the car.
I was going to add a 1/4" rod across to keep a distinct line above the doors, but after cutting off the drip rail, it left a very nice body line about a half inch above the roof line.
Here it is all finished up in a nice days work.
Finally I had enough time tonight that I put the rear glass back in and started to raise it up to give me an idea of how it will look flush. Next weekend I will buy a shrinker/stretcher and go to town making a new channel for the glass to sit in keeping a 3/16" gap all around as well as fixing all rust around the bottom of where the backglass sits. (The aluminum angle in the picture is giving a 1/4" gap)
Please feel free to ask any questions along the way and I'll do my best to get back to you as soon as possible. Any concerns or advice would also be extremely helpful!
Thanks!
-
04-09-2018 #3
Registered User
- Join Date
- Apr 2018
- Location
- Kalamazoo Michigan
- Posts
- 9
This morning before heading up to Ferris, I stopped in the barn and took some picture of all the rust for you guys to see so you can get an idea of what needs to happen.
Here are both quarter panels. I just removed paint in random spots to see how much body filler has been used. Some spots are easily pushing 3/8". Using my tinners hammer, I smacked the fender around the wheel well and found that there was literally no metal behind it... It was all bondo.
Around the front windshield on both A pillars is rust as well as the top of the cowl.
The at the bottom of the rear back glass is very bad. Good thing I am flush mounting it so all that metal will be replaced.
Around the back is where the decklid seals. I was messing with a hammer hitting areas I thought needed work done. My hammer went straight through back here. What I found was foil tape used as a backer, and completely filled with bondo.
-
04-09-2018 #4
 Registered User
- Join Date
- Sep 2006
- Posts
- 273
Looks like fun.
-
04-09-2018 #5
Registered User
- Join Date
- Apr 2010
- Location
- Portland, OR
- Posts
- 357
Subscribing!
1973 Firebird 466 Pontiac, T56, C5 Brakes, PTFB and Hotchkis suspension
2011 Camaro SS Supercharged, ZL1 body and brakes, Z28 suspension.
-
04-09-2018 #6
Registered User
- Join Date
- Sep 2006
- Posts
- 273
Dig the drip rail and flush glass.... trying to envision the fenders. Do you have a sketch of what you are trying to accomplish?
-
04-10-2018 #7
Registered User
- Join Date
- Apr 2018
- Location
- Kalamazoo Michigan
- Posts
- 9
Thanks guys!
I have been doing some research on how to flush mount it. It's really hard to find anything because everyone just buys the kits. No one does it the old school way and builds the frame for the original glass to sit in. Luckily I have a cousin pretty high up at Safeflite who is a glass connoisseur who can help me out. What I would like to do is have it completely flush by bringing it up a half inch for the glass to sit on with no trim or anything, just a 3/16" gap between the glass and the metal. The hard thing is, I am not sure what kind of gasket I would need under the window to get it in place or how big the gasket would be or anything. Or if I could go the entire half inch up and just use a special glue and not even run a gasket underneath.
And for the fenders, This is what 1966 GTO fenders are shaped like. You can see the flare around the wheel well that I am going after.
Here is what my Impalas rear wheel well is shaped like originally.
Unfortunately I do not have any drawings. I have attempted to make drawings, but man, I am the furthest thing from an artists when it comes to pen and paper. It's horrendous. I vision what I want in my head, and build to that. Seems to always work out pretty good. I would love to have a rendering eventually, but man they can get expensive.
-
04-10-2018 #8

 Registered User
- Join Date
- Feb 2013
- Posts
- 799
Very interested to see where you go with rear quarters. I've not heard good feedback about the replacements for my '69 and body work is definitely on the list one of these seasons.
-
04-10-2018 #9
Registered User
- Join Date
- Aug 2014
- Posts
- 435
Gotta love living in Michigan. lol
Jay
-
04-11-2018 #10
 Registered User
- Join Date
- Sep 2009
- Posts
- 2,706
Looks like a great start to your project! Stick to your goal and you will have it done before you know it.

1955 Nomad project LC9, 4L80e, C5 brakes, Vision wheels
1968 Camaro 6.2 w/ LSA, TR6060-Magnum hybrid and etc SOLD
1976 T/A LS1 6 Speed, and etc. SOLD
Follow me on Instagram: ryeguy2006a
-
04-13-2018 #11
Registered User
- Join Date
- Apr 2018
- Location
- Kalamazoo Michigan
- Posts
- 9
Well this morning I was in the barn by 5:30. I have been so anxious to get back to work on the car after being in class all week.
I started by bringing up the panel that goes from the rear window to trunk, and filling the gap with silicon bronze. I left the top by the window unfinished because I am still debating on how I am going to place the windows as well as how I want to fix the rust.
After I was done with this I ran to Praxair to get a new tank of Argon since I just ran out.
NOW.. here's where I have to go back to the drawing boards. The dang window (which I thought might happen) bows differently than the window opening in the car. So when I have it flush in the middle, it dives in over a 1/16" on the ends and looks horrible. Being there's only about 16" of window there, there is no where near the flex it needs to be flush everywhere.
So this throws out my flush window idea. My cousin from Safeflite is coming over Sunday to help me come up with a solution. If we don't come up with anything clever, I guess it's a good thing I never ruined the original trim.
And tomorrow morning I'm heading to Troy Ohio to look for places to stay over the summer as well as tour the Hobart Brothers facility I will be interning at over the summer.
Ill keep you guys updated on what's going to happen with the glass as soon as I find out what's going on.
-
04-21-2018 #12
Registered User
- Join Date
- Apr 2018
- Location
- Kalamazoo Michigan
- Posts
- 9
Well last weekend I didn't do too much because of my trip to Ohio, but I did get the metal cut out along the bottom of the rear glass to replace it this weekend.
After this, I needed a shrinker/stretcher so I went to good ole harbor freight and bought el cheapo just because I have used it before and it is plenty good enough for what I need. I then proceeded to remake the angle that goes from the glass to the rear filler piece. I slowly shrunk the one side and stretched the other to give it a nice bow/complex curve until it fell into place nicely.
Since flush mounting was out of the equation, I got the trim back out and built the bottom corners to match them perfectly.
Before putting the corners in, I fully welded and ground the first piece I made in. I then welded the corners in... well the hard to reach spots. Oh and my girlfriend was over, so I made her get under the hood so I could sit back and relax
After a little welding and blending, I was extremely happy with the end result.
One last double check with the trim to make sure it'll fit nicely.
Next week I'll be doing the same thing except with the front. Hopefully it goes as smoothly as this weekend!
-
04-22-2018 #13
 Registered User
- Join Date
- Oct 2009
- Location
- CT.
- Posts
- 738
Cool project, I look forward to following along. Great seeing the younger crowd not only owning, but actually building a classic car!
When you said you were changing out the fenders, in my mind it was the front end, not the rear. Must be a geographical thing, in the northeast those are rear quarter panels not fenders. Funny how different areas call the same thing by a different name.
As for the rear glass area, you are doing a great job. Had that been me and I wanted the flush glass, I would have mounted the glass so it was 100% flush top and bottom and then built up and changed the arc in the middle to match the glass. It would have blended in and looked just fine since it was only a 1/16" in the middle of the sail panels. At least I think so.........
Great job, keep it up. I have a daughter that is a freshman in college, so I know how busy it can get. Slow and steady and you will do fine on this project.
Glenn
1955 Chevy BelAir
1951 Chevy 3100
1987 Chevy Silverado
My last project....
https://www.pro-touring.com/threads/...my-72-Maverick!!
-
04-22-2018 #14
Registered User
- Join Date
- Apr 2018
- Location
- Kalamazoo Michigan
- Posts
- 9
Thank you! I was also thinking about doing that with the glass to flush mount it, but I actually looked the trim over and realized it was in a lot better condition then I excepted. So at this point, I figured I’d save myself some hours and headache and just fix the rust and put it back to how it was. I will probably paint or powder coat it a very contrasting color to give it a cool slick look.
And as the for the fenders and quarters, I was sort of just generalizing for the whole car, I didn’t even realize I was doing it. On a ramcharger I worked on recently I called them rear quarters the whole time because I was only working on the rear. But I will be doing the front fenders as well as the rear quarters.
As for age, I’ve always loved old cars. It’s sort of a bummer when I go to car shows with 300-500 cars and see one other kid my age who actually owns a car, and the other 99% are considerably older then me. It also works out because I thoroughly enjoy talking to the older crowd and learning from them. They are also all very encouraging with everything, so it’s great motivation.
-
04-22-2018 #15
Registered User
- Join Date
- Aug 2014
- Posts
- 435
GF that can TIG weld = keeper. lol
The fender opening shape between your impala and the GTO looks very similar. It will be one of those subtle mods most
people won't notice.
I do car audio, and when I build something, and someone doesn't notice it, and after I point it out, they're like "That looks stock!"
That's what I enjoy. Subtle is where it's at.
Jay
-
04-22-2018 #16
Registered User
- Join Date
- Nov 2002
- Location
- Georgetown,TX
- Posts
- 2,557
Jordan, where did you learn your metal-working skills?
-
04-22-2018 #17
Registered User
- Join Date
- Apr 2018
- Location
- Kalamazoo Michigan
- Posts
- 9
When I was 15 I was lucky enough to get a job at a local fab shop sweeping and cleaning machinery. Not long after that I made my first weld and was hooked ever since. I’d eat, sleep, and breath metal fab. I probably watched every video on YouTube about it. Haha I’m honestly more into this car for the project then the end result because everything about metal work intrigues me.
-
04-22-2018 #18
 -Moderator/Sponsor-
- Join Date
- Apr 2001
- Location
- The City of Fountains
- Posts
- 15,975
Looking forward to updates!
Andrew1970 GTO Version 3.0
1967 Cougar build
GM High-Tech Performance feature
My YouTube Channel Please Subscribe!
Instagram @projectgattago
Dr. EFI
I deliver what EFI promises.
Remote Holley EFI tuning.
Please get in touch if I can be of service.
"You were the gun, your voice was the trigger, your bravery was the barrel, your eyes were the bullets." ~ Her
-
08-21-2018 #19
Registered User
- Join Date
- Apr 2018
- Location
- Kalamazoo Michigan
- Posts
- 9
Wow, I was wayyy busier then I ever imagined this summer. I was on the road traveling to end users and distributors probably 50% of the time. The other 50% I was located in Troy, Ohio. Being 4 hours from home, it was a lot harder to make it home and work on my car then I thought. Usually when I made it home, other plans got in the way. This week I have off before heading back up to college has been very productive.
To start, that spot I welded sil-bronze, I cut out to remake with a patch panel and just tig it in. With a flange in the way, there was no way to get under the weld with a dolly. Cutting it entirely out, made it much easier to work and get most of the warpage out. I did this on both sides.
After this, I moved back to the trunk area where the seal goes. This was a big pain as I had to cut then entire piece out at the bottom, and remade the whole thing. Waiting to go to Alro in the morning to get some more steel to finish this area out. Mostly done as it sits now. Just need to put a 1/2" lip all the way around to hold the seal in place. There was a couple other areas up higher in this area that I fixed along the way.
Tomorrow, I will start working on the A-pillars, and taking care of all that rust. Just working my way from top to bottom.
This project is will easily be all of 5 years to complete. The more I have read on other builds, and the amount of money people have put into their cars while doing all the work themselves, I need to get me another job Nah I'll be fine.. Just need to make it through these last couple years of college while doing all the dirty metal work before I can start really putting money into the build.
-
08-23-2018 #20 Registered User
- Join Date
- Feb 2013
- Posts
- 1,413
Good work man. Your day is definitely full when you're going to college during the day and trying to build a car at night. It's worth it though, keep it up!

 Reply With Quote