Results 21 to 40 of 108
Thread: 1984 "Rustang" GT (Slow Build)
-
04-19-2018 #21

 Registered User
- Join Date
- Mar 2014
- Location
- Yuma, AZ
- Posts
- 635
 Thanks! So far this is turning out to be a stout little engine. I figured when I built it there would be two outcomes, it would either run good or run like **** from the big cam.
 Originally Posted by 1tuff68

I gave the 40Ps a mild port job before I installed them, but probably not enough to do anything major. That being said, this engine is running off the cam. That big TFS Stage 2 makes the bottom end below 2K non existent, but it is still pulling strong at 6400 when it hits the rev limiter. Part of me wants to spin it higher, but I'm afraid something bad might happen if I push it closer to 7K since it has a hydraulic cam.
My plan in the future is to eventually build a 363 for the car, but that's a long ways down the road from now. The Chassis & Suspension are up next!Nelson
1969 Chevelle "Cone Smasher" Family Project
https://www.pro-touring.com/threads/...uot?highlight=
1984 "Rustang" GT, 5.0, 5 Speed Project
https://www.pro-touring.com/threads/...T-(Slow-Build)
-
04-19-2018 #22 Registered User
- Join Date
- Jan 2006
- Location
- McKinney, TX
- Posts
- 1,625
Loving it man, coming along nicely.
66 Mustang "Project: Ballin on a budget"
89 Mustang "Box Wine"
04-27-2018 #23
Registered User
- Join Date
- Mar 2014
- Location
- Yuma, AZ
- Posts
- 635
Phase 1 & Unexpected Purchase
Thanks! Originally Posted by Z06killinSBF
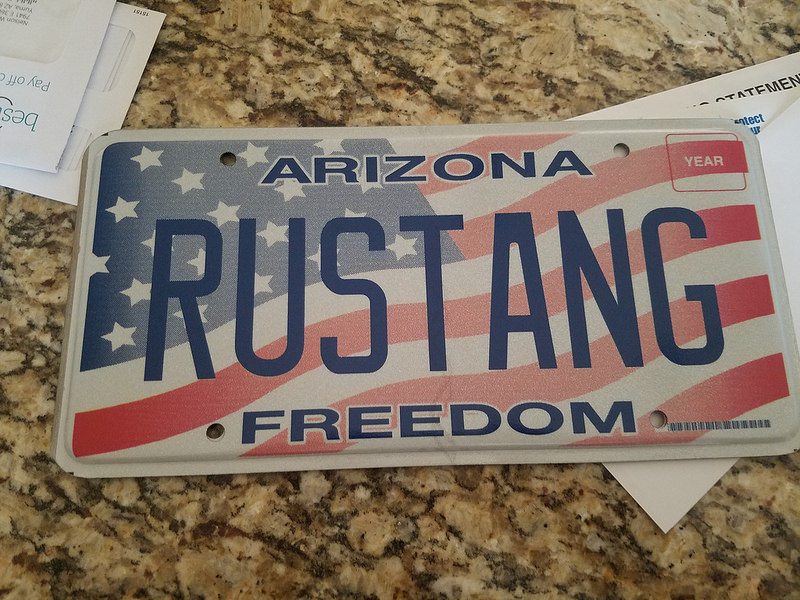
I've still been picking away at things on the Rustang as budget allows. Just for laughs, I had to get this:
 20180423_170944 by Nelson Wallace, on Flickr
 20180423_194918 by Nelson Wallace, on Flickr
It's perfect!
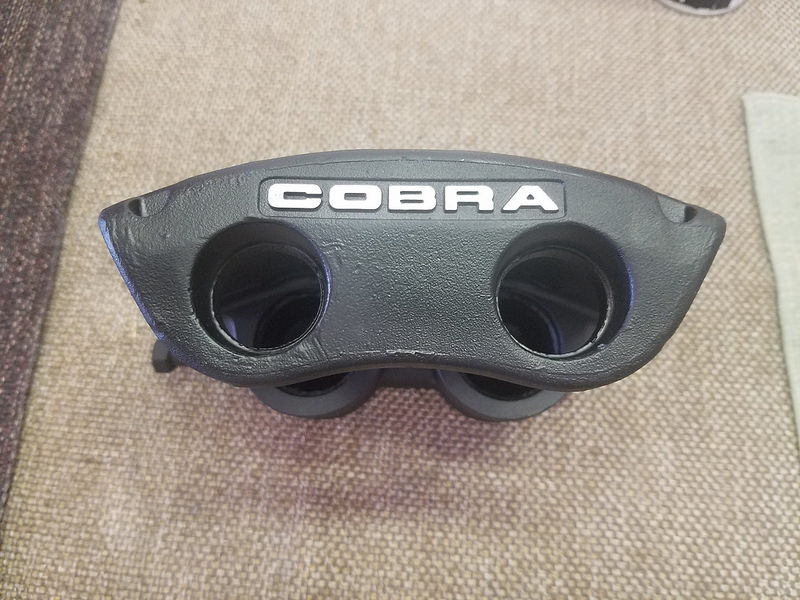
I've been working on the brakes lately. I completely disassembled the calipers to powder coat them, and purchased rebuild kits. I don't have many pictures, but the rear calipers are a pain in the ass due to having the ebrake built in. I had to buy a special set of snap ring pliers to get them apart. I powdercoated them black, I will most likely paint them body color in the future when I paint the car.
 20180422_161721 by Nelson Wallace, on Flickr
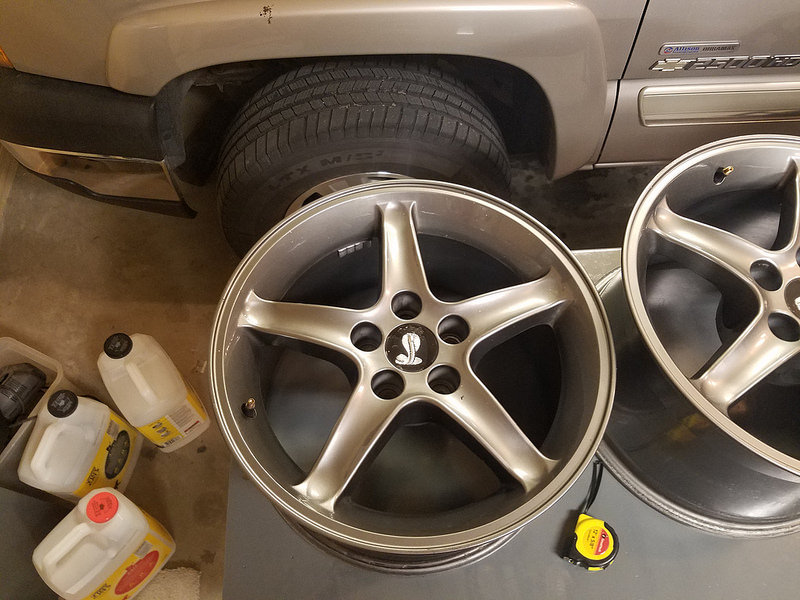
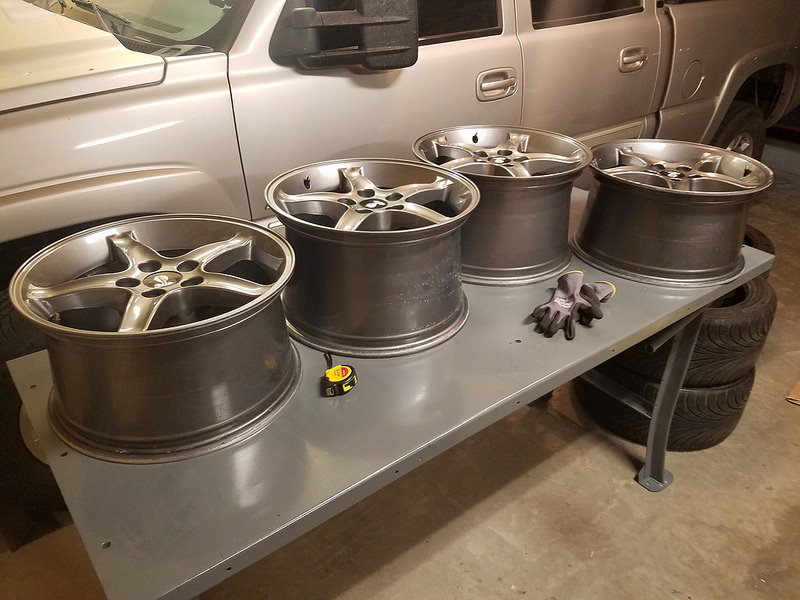
Up to this point, that was the extent of the progress. Until a random search on Craigslist ended up with these coming to me!
 20180424_203438 by Nelson Wallace, on Flickr
 20180424_203431 by Nelson Wallace, on Flickr
 20180424_203444 by Nelson Wallace, on Flickr
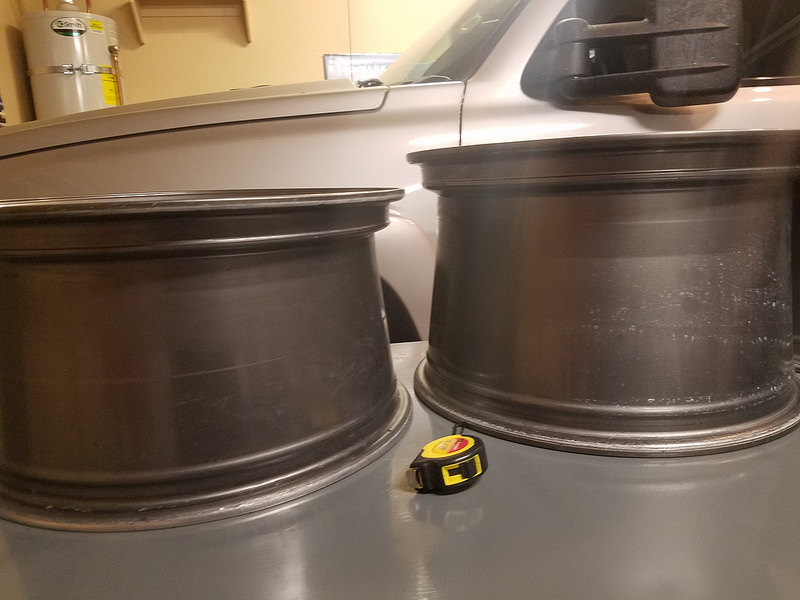
They're a set of 95 Cobra R replica wheels in 17" x 9" for the front and 17" x 10.5" in the rear. These are the style of wheel I wanted, but I was just going to settle for 17" x 9" on all corners. I'll have to roll the fenders and probably massage the inner wheel well to make the rears fit, but it will be worth it! The wheels also came with tires to my delight, a set of 255/40R17 for the front that are brand new, and 275/40R17 for the rear that have about 75% life left. The fronts are Nankangs which I don't care for, but the rears are Nexxen which will be fine, they're both 340 TW. That will get me by until I can afford some better tires down the road.
Now to gather the rest of the parts I need to do the 5 lug swap!Nelson
1969 Chevelle "Cone Smasher" Family Project
https://www.pro-touring.com/threads/...uot?highlight=
1984 "Rustang" GT, 5.0, 5 Speed Project
https://www.pro-touring.com/threads/...T-(Slow-Build)
04-27-2018 #24
Registered User
- Join Date
- Apr 2018
- Location
- San Diego
- Posts
- 17
Awesome story and Nice work! I love fox bodies. Subscribing....
06-18-2018 #25
Registered User
- Join Date
- Mar 2014
- Location
- Yuma, AZ
- Posts
- 635
Phase 1 Continued
All,
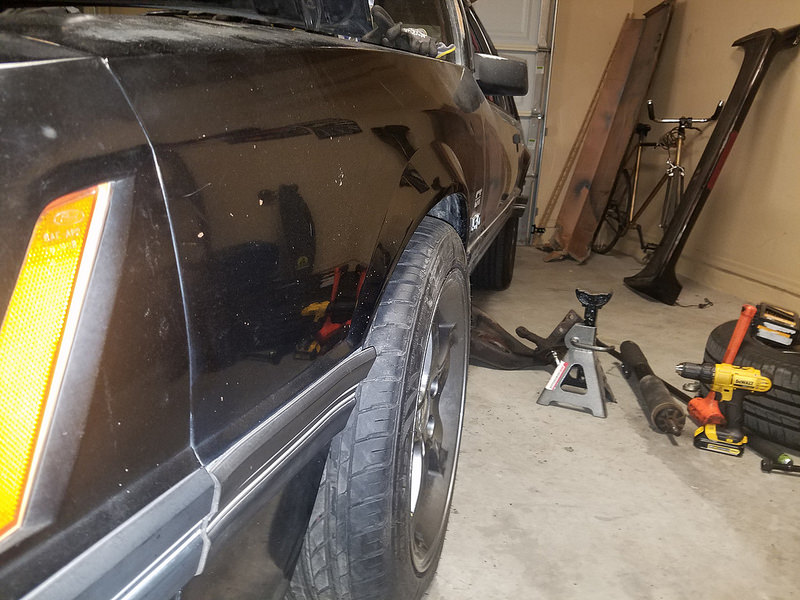
I've been picking away at the Rustang lately. I decided that it was too hot to drive the car without A/C, so I should use the time to see how all my suspension parts fit. I started on the front, peeling out all the original parts and fitting the SN95 Cobra parts. On the driver side I installed the SN95 control arm, and on the passenger side I left the Fox control arm to see how much it affected the front end fit. to simulate lowering springs I chopped about 1/2 of a coil from the originals and put them in. I'll get real springs later.
For those that don't know, there has been a lot of variation in Mustangs over the years. From 79-87 all V8 & I4 cars had the same K member and front suspension. Sometime around the 88 model year they changed the front K member for V8 cars to improve the geometry by increasing track width by 1". The SN95 Mustangs then used the same later V8 K member, but with 1.33" longer control arms for ~2.66" total track width increase over 88-93 Fox cars.. So, with my car being an early Fox with the 1" narrower K member, I should be able to run the longer SN95 control arms and only increase the track width by about 1.66" over a "Standard" Fox. This is what I plan to do pending wheel fitment.
Here's some pictures:
 20180605_212241 by Nelson Wallace, on Flickr
 20180605_212245 by Nelson Wallace, on Flickr
 20180605_212304 by Nelson Wallace, on Flickr
 20180613_210102 by Nelson Wallace, on Flickr
 20180613_210053 by Nelson Wallace, on Flickr
 20180613_203257 by Nelson Wallace, on Flickr
Keep in mind, these pictures were taken before I started messing with camber adjustments. I still need to order CC plates, but that is another reason to change the arms. General consensus on the Mustang forums is that if I keep the stock arms I will only be able to get about 2* camber max, most people run at least 2.5* for track setups. With the SN95 arms I should be able to get much more, as well as helping front end grip with the wider track. I also plan on swapping the Cobra rack into my car to get better steering feel, and using the SN95 arms will help since I can just buy matching tie rods to connect the spindles.
Based on what I'm seeing, I think I will have enough wheel clearance to run the SN95 arms without issues. With the Fox arm the wheel is very close to rubbing the K member at lock, I would probably need to run at least a 1/4" spacer to fix that. I've been thinking about flaring the fenders, which would make the wheel clearance even better. But it's going to be a while before I would do that unless I had major rubbing issues.
I just received my new rear axle shafts and caliper mounts, so I need to get those in the car to see how the rears fit, I think it will be a bigger fight back there. Time will tell.
Thanks for stopping by! And if anybody has used Fox suspension parts let me know! There's still lots I need lol.Nelson
1969 Chevelle "Cone Smasher" Family Project
https://www.pro-touring.com/threads/...uot?highlight=
1984 "Rustang" GT, 5.0, 5 Speed Project
https://www.pro-touring.com/threads/...T-(Slow-Build)
06-20-2018 #26
Registered User
- Join Date
- Jan 2016
- Location
- Chino Valley, AZ
- Posts
- 134
Nice build! I'll drop you a line with any spare parts I end up with, with my 88. Originally Posted by WallaceMFG
06-21-2018 #27
Registered User
- Join Date
- Oct 2012
- Posts
- 118
Nice build, I like what you have done so far. I have an 85 that is in about the same shape as your car, I have owned it since 1990.
Eddie
06-22-2018 #28
Registered User
- Join Date
- Mar 2014
- Location
- Yuma, AZ
- Posts
- 635
Thanks! Your car looks good too, and I'm sure it drives good with all those MM goodies on it. I'm jealous of the Torque Arm & Panhard you're getting, I'm going to need those in the future. And I'd appreciate that! Originally Posted by frink84
Thanks! Truthfully, I wish mine was an 85, I like the front end much more on those. I've contemplated swapping to an 85-6 nose, but not sure if I'll go through with it or not. My nose piece is in really good shape, so there's not really a reason to get rid of it. Originally Posted by blade
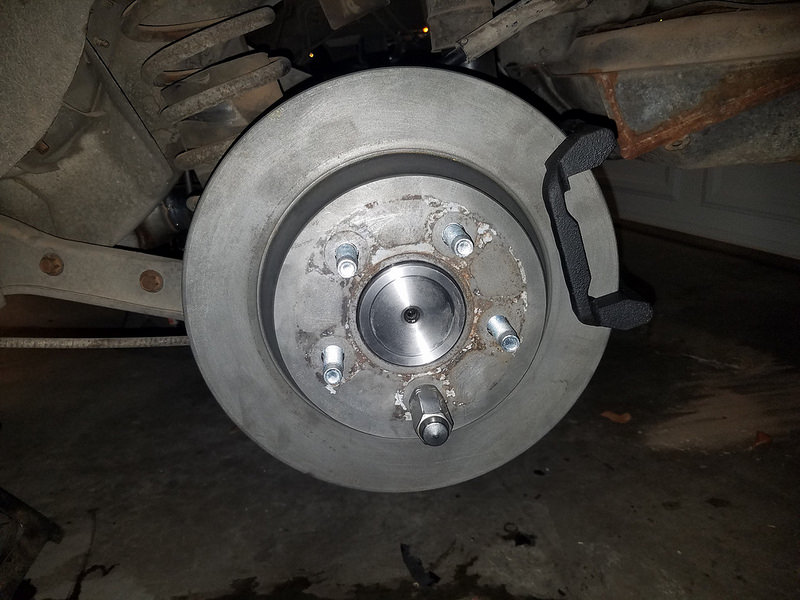
I've made some small progress the past few nights. I pulled the rear axles and got rid of all the drum brake components. I borrowed a ball joint press and got the lug studs pressed into the new 5 lug axles. These are special axles that are the correct length for a Fox Body, but have the SN95 flange for the 5 lugs and they are hub-centric with the SN95 brake rotor.
Once those were in I got them installed with the new brake caliper mounts I got from North Racecars. These allow me to run the Cobra brakes while retaining the Fox track width in the back. If I had used the SN95 axles and brackets the rear wheels would be pushed out .75" per side, and I'd have no chance of fitting those 10.5" wide wheels out back.
 20180621_213525 by Nelson Wallace, on Flickr
 20180621_213531 by Nelson Wallace, on Flickr
 20180621_213541 by Nelson Wallace, on Flickr
 20180621_213546 by Nelson Wallace, on Flickr
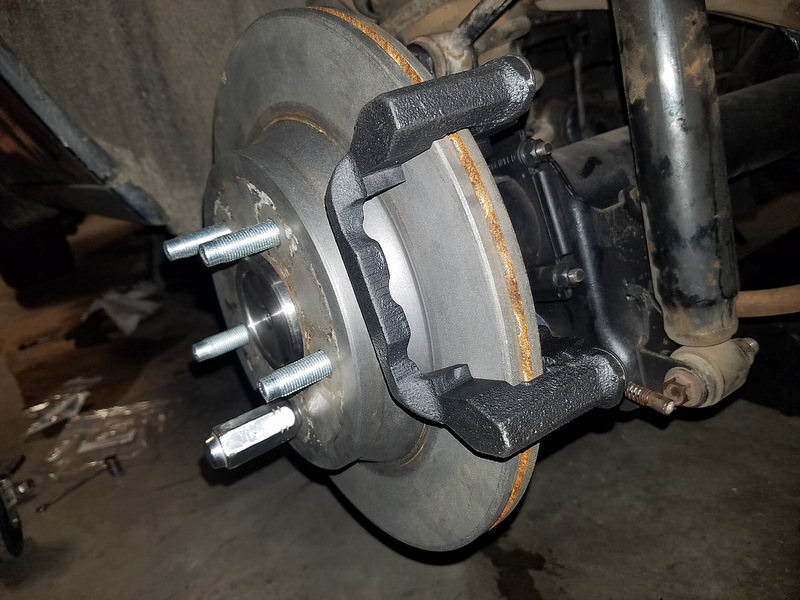
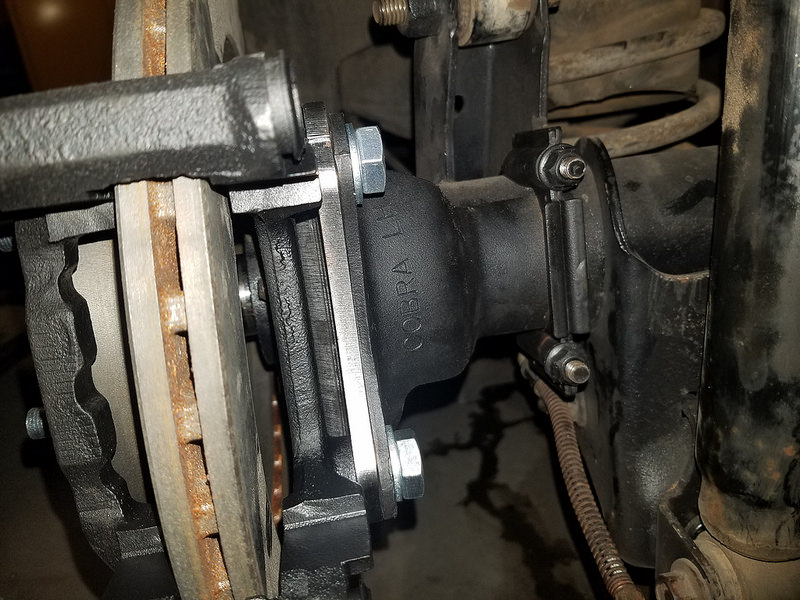
Everything bolted up great, even the Ford Anti-Moan braces. Those are hard to find, I'm lucky the rear end I bought had them on it still. They keep the rear brakes from making moaning sounds when turning.
With the rotors being 11.65" out back, I now have larger rear brakes than the original front discs were. Easy to see why it was a little sketchy slowing down from 100+ mph at the drag strip lol.
I'm going to try to fit the wheels with the quad shocks in place first even though I'm sure they'll hit. I have also not cut the rear spring yet, I'm going to see what sort of clearances I have, then cut them and see where I end up. Rolling the fender lip is going to be required. I'll either cough up the money and buy the tool, or do it the ghetto way by cutting and hitting with a hammer. Time will tell.
More to come!Nelson
1969 Chevelle "Cone Smasher" Family Project
https://www.pro-touring.com/threads/...uot?highlight=
1984 "Rustang" GT, 5.0, 5 Speed Project
https://www.pro-touring.com/threads/...T-(Slow-Build)
06-25-2018 #29
Registered User
- Join Date
- Mar 2014
- Location
- Yuma, AZ
- Posts
- 635
Phase 1 Continued
All,
Back with more updates!
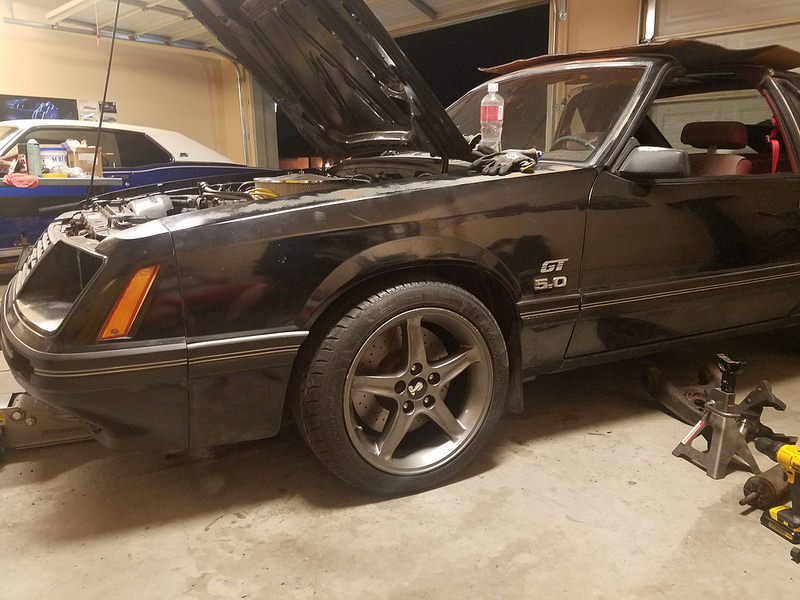
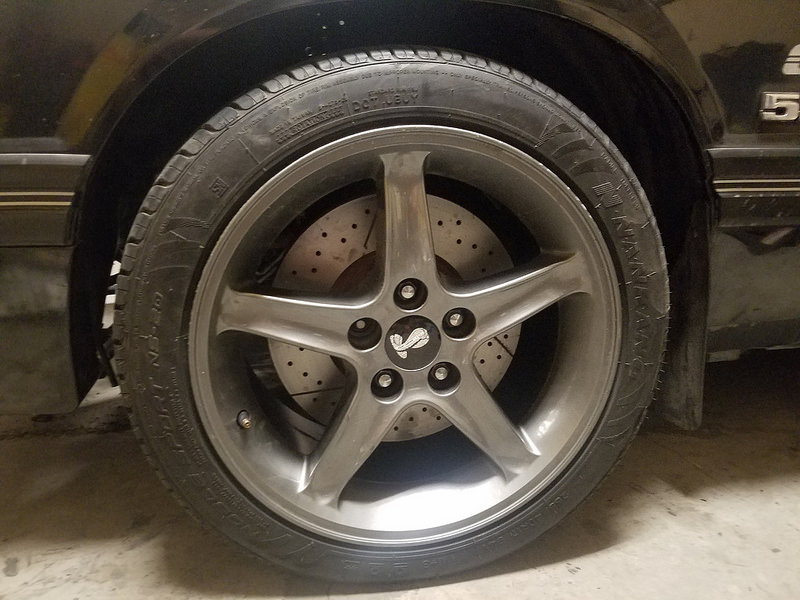
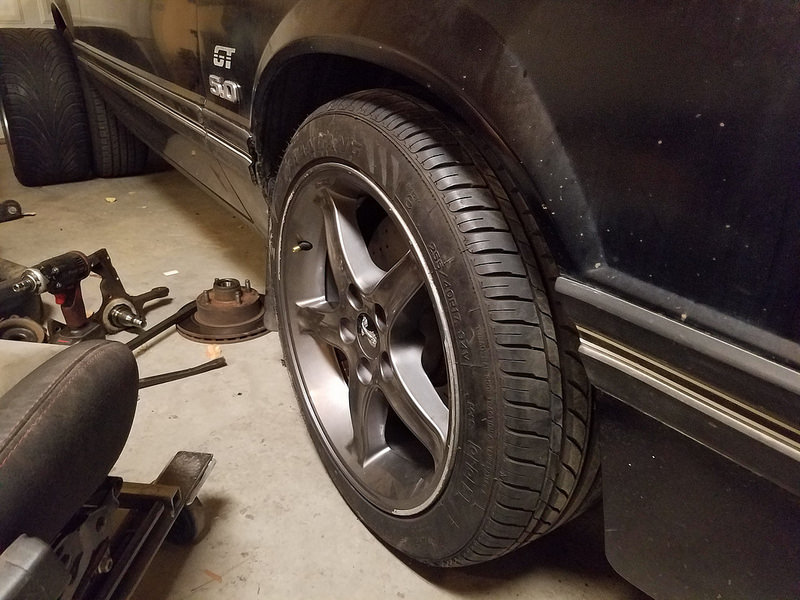
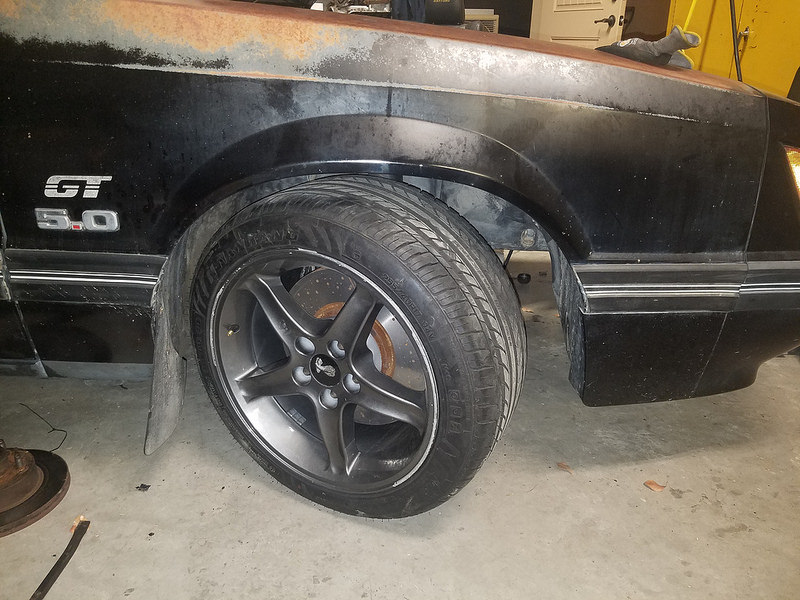
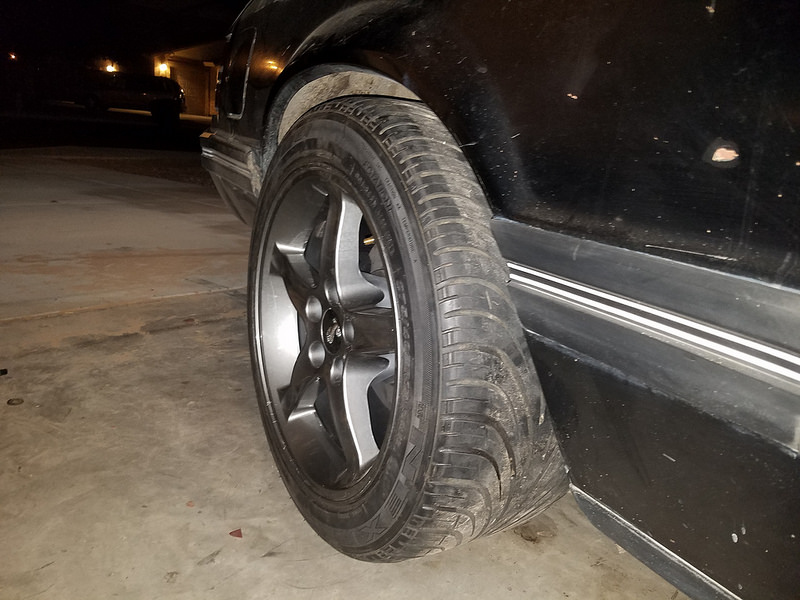
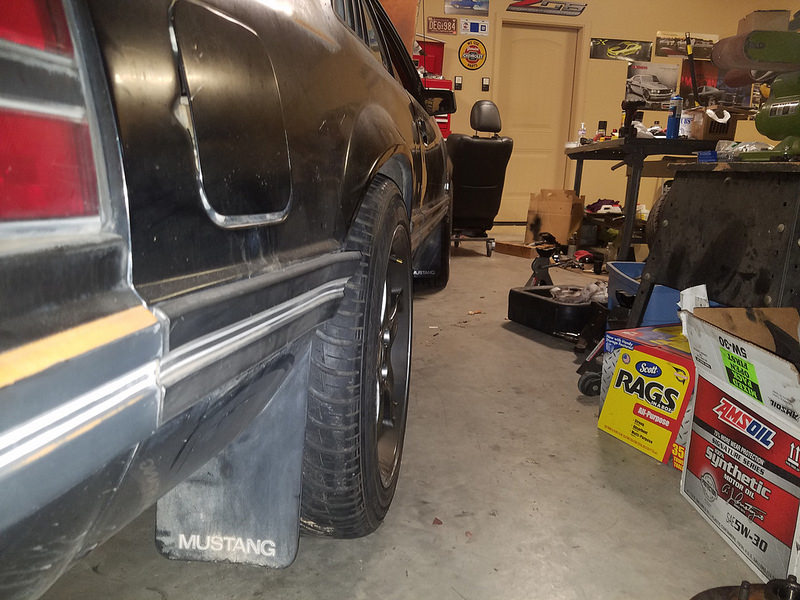
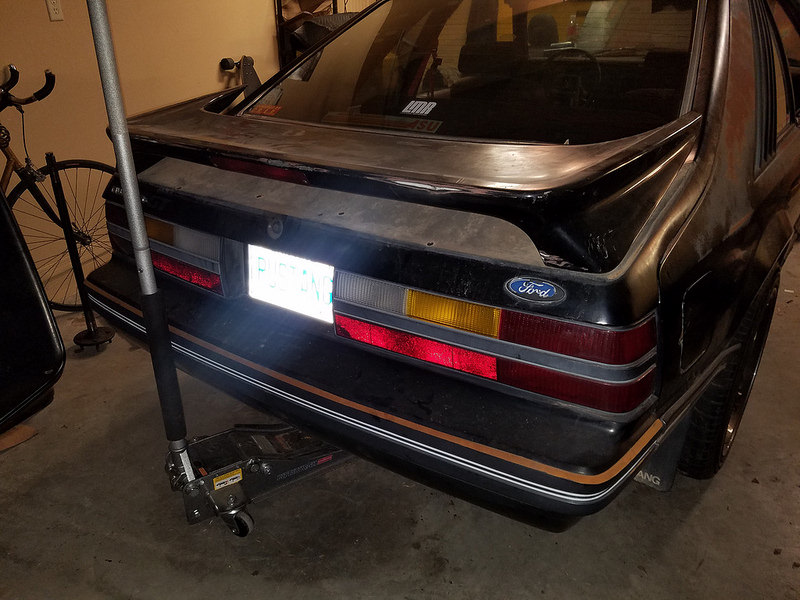
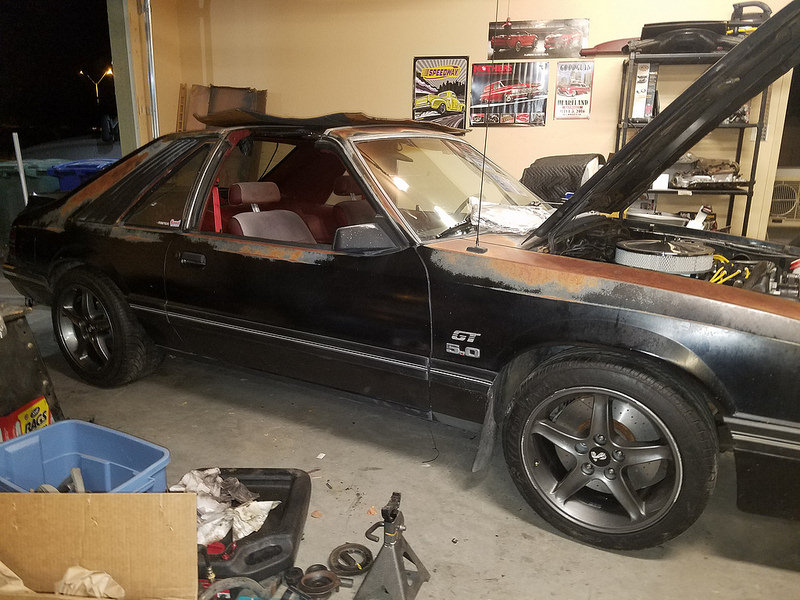
I was able to get my wheels bolted up to see what I was up against to make the rear wheels fit. The first hurdle was the quad shocks, they would not fit either way so they had to go. That was the only hurdle! Other than the quad shocks, I have no interference to make the wheels fit. When I first bolted them on I left the rear springs alone, and the rear was jacked way up as I expected. I chopped 1.5 coils out of the rear springs for mock up and this is how it sits.
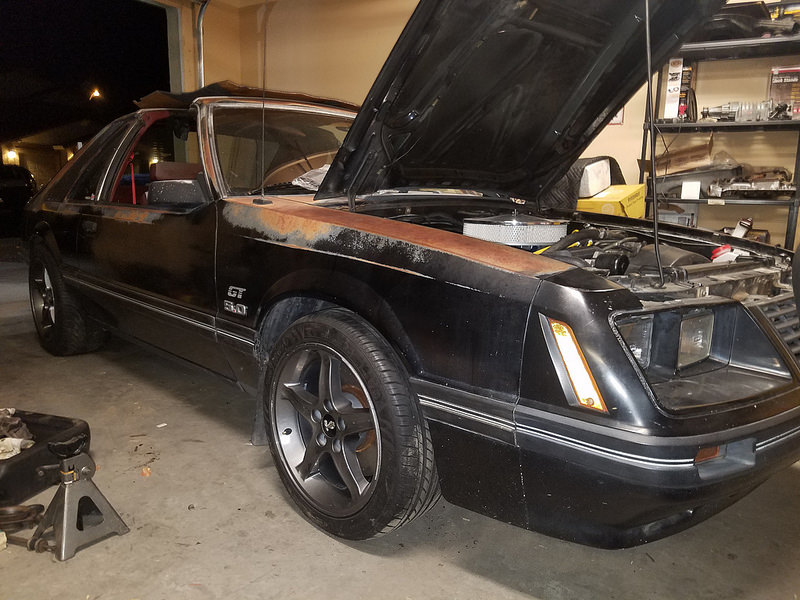 20180624_204738 by Nelson Wallace, on Flickr
 20180624_204749 by Nelson Wallace, on Flickr
 20180624_204756 by Nelson Wallace, on Flickr
 20180624_204813 by Nelson Wallace, on Flickr
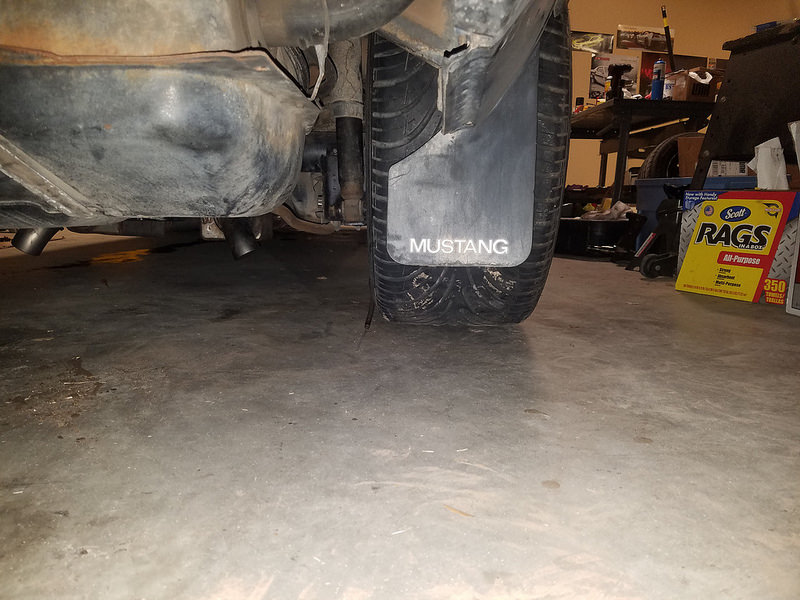
Rear mud flap is no longer functional lol
 20180624_204817 by Nelson Wallace, on Flickr
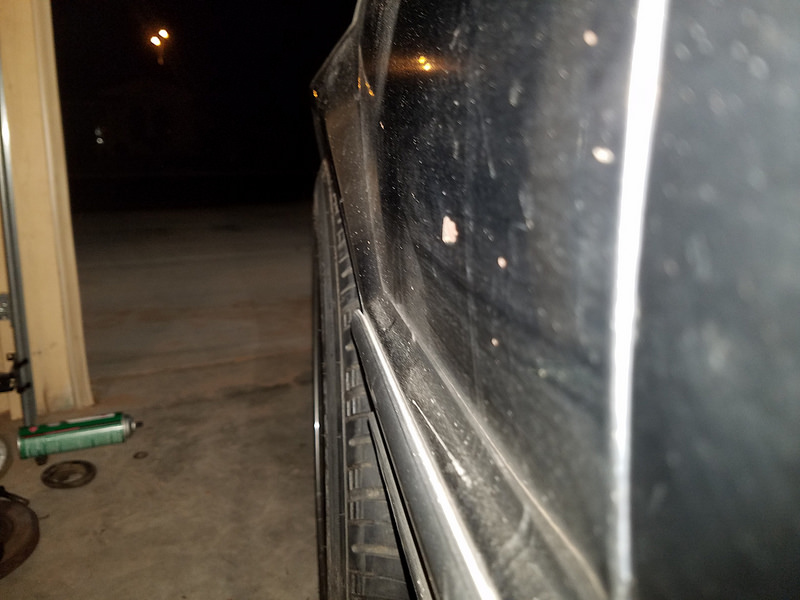
I'm very happy with how things are looking. The tires are in the prefect spot in the wheel well for clearance. I still need the fender lip rolled and a small spot massaged to make me feel better, but other wise it is good. Both fender lips are sitting at 26" from the ground, I think the car could go a little lower and I'd be ok. Getting excited to drive it!
I also started swapping my rear wing. I grabbed a wing off a 91 GT for cheap, it looks much better to me than the stock wing. Will need a few holes drilled to fit right.
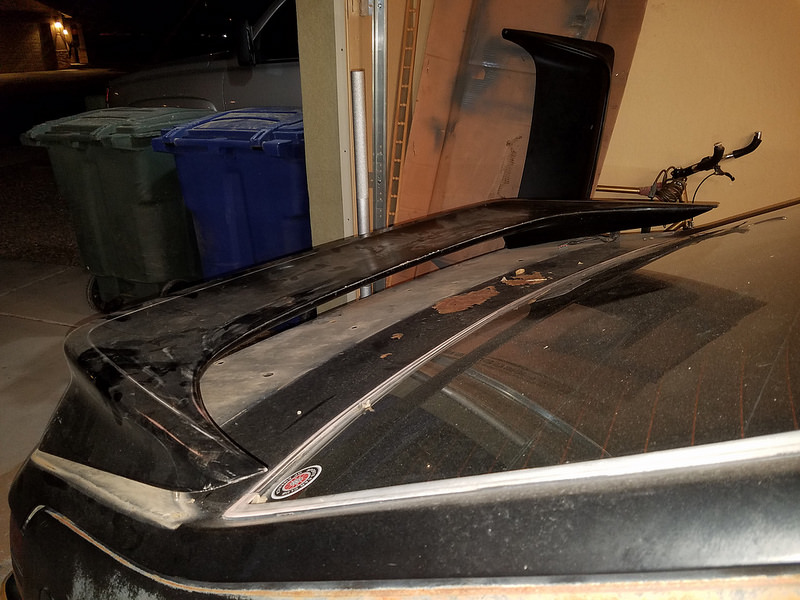 20180624_210346 by Nelson Wallace, on Flickr
 20180624_210338 by Nelson Wallace, on Flickr
Love how it's looking!
 20180624_204720 by Nelson Wallace, on Flickr
More updates to come!Nelson
1969 Chevelle "Cone Smasher" Family Project
https://www.pro-touring.com/threads/...uot?highlight=
1984 "Rustang" GT, 5.0, 5 Speed Project
https://www.pro-touring.com/threads/...T-(Slow-Build)
06-25-2018 #30
Registered User
- Join Date
- Jan 2016
- Location
- Chino Valley, AZ
- Posts
- 134
be prepared to do some massaging of the inner fender, and rolling of the outer fenders to live with the 10.5's out back. i ran 17x10.5 bullitts for a while and it rubbed on driveways and anything that would flex the rear, but i was running lower than you at the time.
06-26-2018 #31
Registered User
- Join Date
- Mar 2014
- Location
- Yuma, AZ
- Posts
- 635
I've planned on rolling the fender lips ever since I started looking for new wheels. I originally planned on just putting 17 x 9 out back, but I couldn't pass these ones up. I'm going to order a fender roller soon and give them the treatment. I'll go around with the BFH and make sure everywhere else is good too. I don't think I'll go much lower, maybe 1/2". Roads in Yuma can be a little rough, I'd like to keep a bit of extra wheel travel available for that. Originally Posted by frink84
Nelson
1969 Chevelle "Cone Smasher" Family Project
https://www.pro-touring.com/threads/...uot?highlight=
1984 "Rustang" GT, 5.0, 5 Speed Project
https://www.pro-touring.com/threads/...T-(Slow-Build)
06-26-2018 #32
Registered User
- Join Date
- Oct 2012
- Posts
- 118
I don't know if you have changed out the bushing or replaced the rear arms yet, with the factory parts and no quad shocks wheel hop was horrible on my 85.
Eddie
06-26-2018 #33 Registered User
- Join Date
- Nov 2006
- Location
- Hildebran, NC
- Posts
- 992
I'm no Ford guy....But if I was, I would have a Four Eyed Fox!!

06-26-2018 #34
Registered User
- Join Date
- Mar 2014
- Location
- Yuma, AZ
- Posts
- 635
I have not replaced them yet, but they are on the list to be replaced. Keeping my eye out for sales so I can grab a set of tubular arms for a good price. Originally Posted by blade
Nelson
1969 Chevelle "Cone Smasher" Family Project
https://www.pro-touring.com/threads/...uot?highlight=
1984 "Rustang" GT, 5.0, 5 Speed Project
https://www.pro-touring.com/threads/...T-(Slow-Build)
08-07-2018 #35
Registered User
- Join Date
- Mar 2014
- Location
- Yuma, AZ
- Posts
- 635
Updates Continued
Not much progress has been made lately. It is the middle of the monsoon season here in AZ, which means it has been in the 110* range with 30-50% humidity every day. I've been picking away at the Rustang, but this weather takes a toll on you.
I went with a Summit brand proportioning valve. Purely a penny pinching decision, but it will work just fine. I've had really good luck with Summit branded parts before.
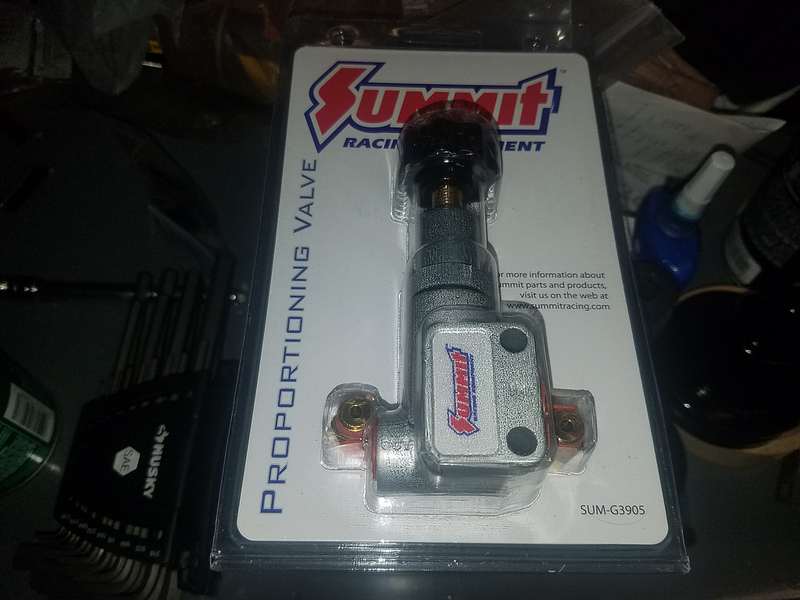 20180730_190231 by Nelson Wallace, on Flickr
I got my Maximum Motorsport Caster/Camber plates. I had purchased a set of SVE plates that were cheaper, but due to poor quality control they were junk and I exchanged them for these. The only reason I went with the SVE parts in the first place is they came in a kit with my lowering springs. The MM plates are better in every single way possible.
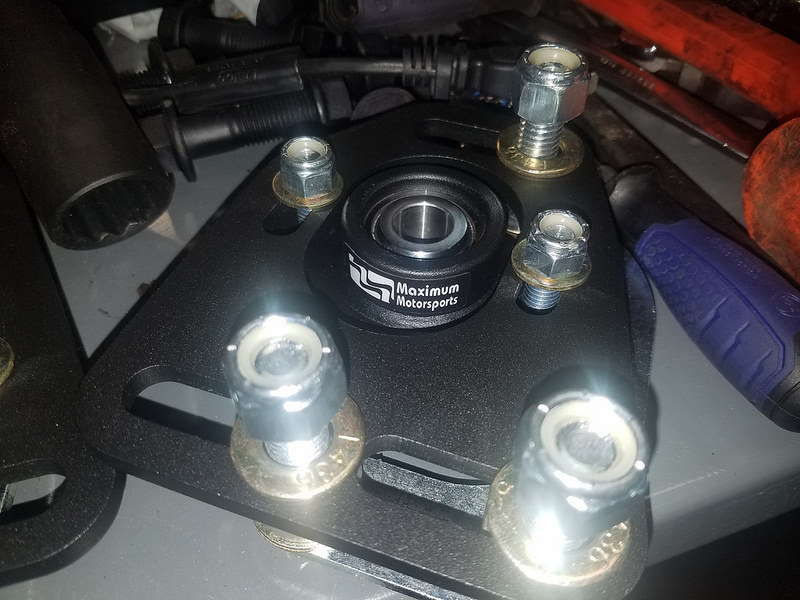 20180730_190225 by Nelson Wallace, on Flickr
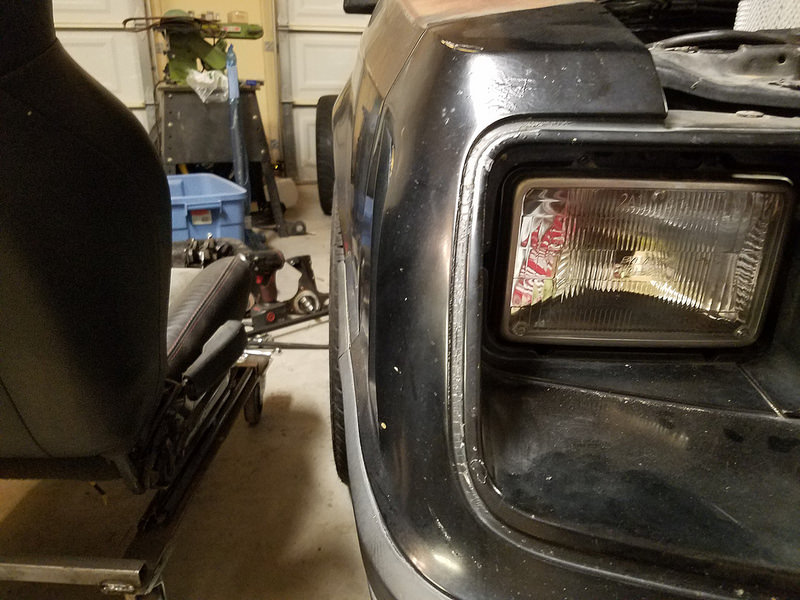
More Craigslist trolling came across this as well. It is a factory hood from a 1983 Fox GT. It is exactly the same as mine, except for the obvious power bulge. I had always wanted the hood bulge, but never thought I would find one, they seem to be more rare than diamond. The one I got is in great shape, the hood is nearly perfect. This will most likely not go onto the car until I paint it down the road. I plan to make it functional to allow heat to escape from under hood.
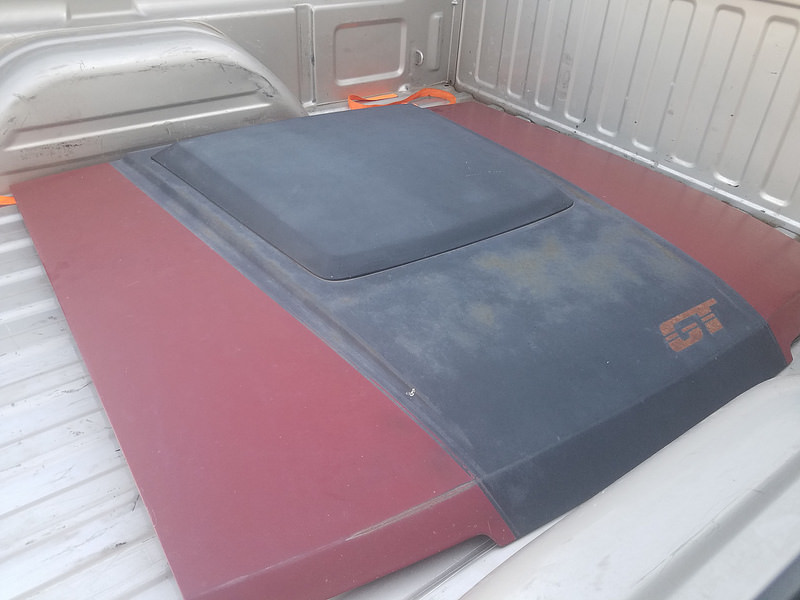 20180722_184920 by Nelson Wallace, on Flickr
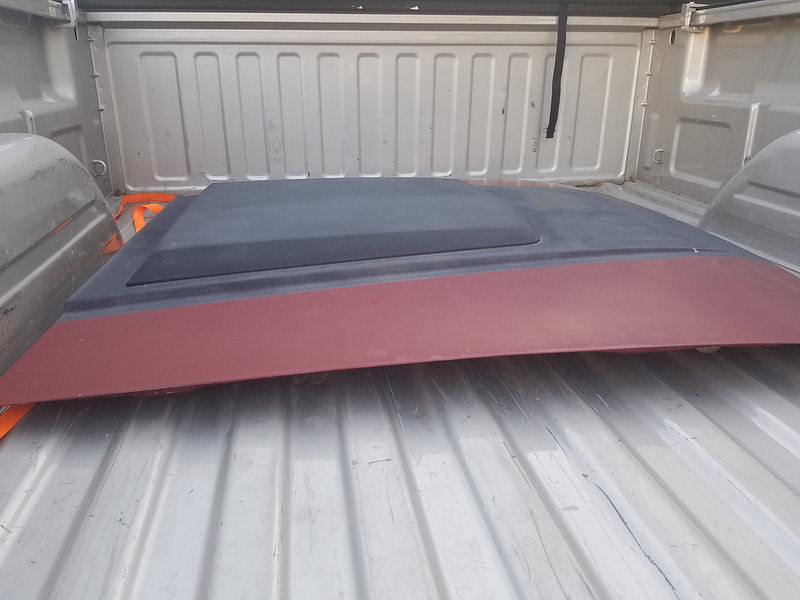 20180722_184915 by Nelson Wallace, on Flickr
For other progress, I now have the lowering springs that can be installed. I have been working on the front control arms replacing the bushings and ball joints. I had a bit of a hold up, the control arms I got were from an 04 Mustang and had the "Hydro" bushings, and I had purchased the non-Hydro bushings. Simple fix, the new bushings should be here at the end of the week. Once I have those, the car is ready to be put back on the ground aside from the rear control arms that need changed.
I also ordered a u-joint for the steering shaft to get rid of the rag joint. I also needed to change the end of the shaft to match the Sn95 Cobra rack, so it was an easy decision.
As usual, I will keep posting progress as it happens. Hopefully the hot weather will break soon and I can do more outside.Nelson
1969 Chevelle "Cone Smasher" Family Project
https://www.pro-touring.com/threads/...uot?highlight=
1984 "Rustang" GT, 5.0, 5 Speed Project
https://www.pro-touring.com/threads/...T-(Slow-Build)
08-07-2018 #36
Registered User
- Join Date
- Oct 2009
- Posts
- 44
Great project! My son and I are doing the same things to the '86 GT T-Top we are restoring for his high school car. We are in Mesa
08-07-2018 #37
Registered User
- Join Date
- Mar 2014
- Location
- Yuma, AZ
- Posts
- 635
Thanks! I'm jealous of your 86, except for the EFI. I'm glad I don't have to deal with Ford EFI on mine lol Originally Posted by 1tuff68
Where in Mesa are you at? I grew up on Lindsay & McKellips. I'm in Mesa pretty often still, it would be fun to meet up sometime!Nelson
1969 Chevelle "Cone Smasher" Family Project
https://www.pro-touring.com/threads/...uot?highlight=
1984 "Rustang" GT, 5.0, 5 Speed Project
https://www.pro-touring.com/threads/...T-(Slow-Build)
08-16-2018 #38
Registered User
- Join Date
- Mar 2014
- Location
- Yuma, AZ
- Posts
- 635
Hello all,
No major updates today. A combination of weather and work hasn't let me make much progress on the Rustang for a while. We are currently in the process of tearing down the shop at my parents house to modify and rebuild it, so I've been going back to Mesa a lot to work on that. Also, it is still monsoon season so the humidity makes it miserable to be outside.
I did get the control arms rebuilt. They just got a quick sand blast, fresh paint, new ball joints, and Ploy bushings. I took the time to trim the bushings, out of the box the Polyt insert is too long and would cause binding if installed. I got them trimmed down to the proper length and installed them. Should pick up at least 8 HP for them being red.
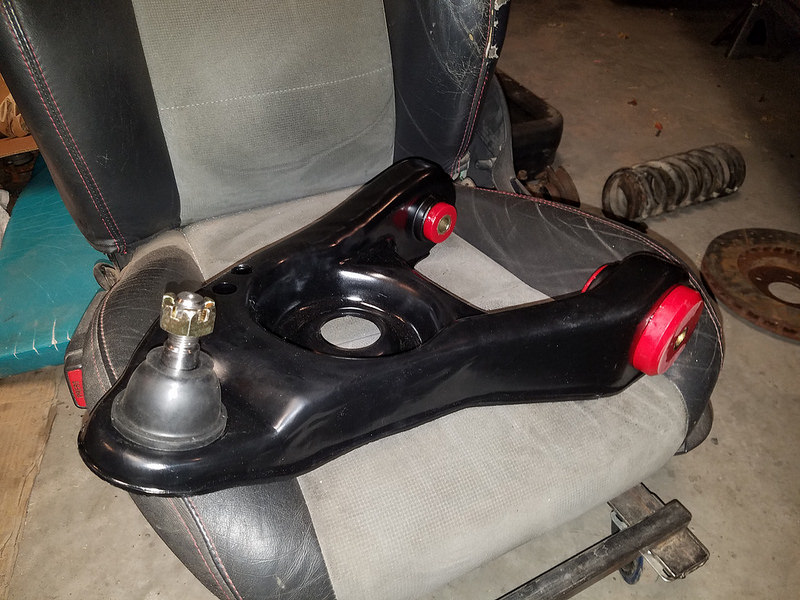 20180815_204213 by Nelson Wallace, on Flickr
Other than that, I was changing out the steering rack. I need to get the steering shaft out and mocked up with the new U Joint for final welding. Pictures of that process to come once I get it out.
Thanks for stopping by!Nelson
1969 Chevelle "Cone Smasher" Family Project
https://www.pro-touring.com/threads/...uot?highlight=
1984 "Rustang" GT, 5.0, 5 Speed Project
https://www.pro-touring.com/threads/...T-(Slow-Build)
09-25-2018 #39
Registered User
- Join Date
- Mar 2014
- Location
- Yuma, AZ
- Posts
- 635
Finally, Progress
Been away for a while, had a lot going on in life and had to devote time/funds to other aspects of life. Now that the weather has cooled and things have settled a bit I was able to devote time to the Rustang.
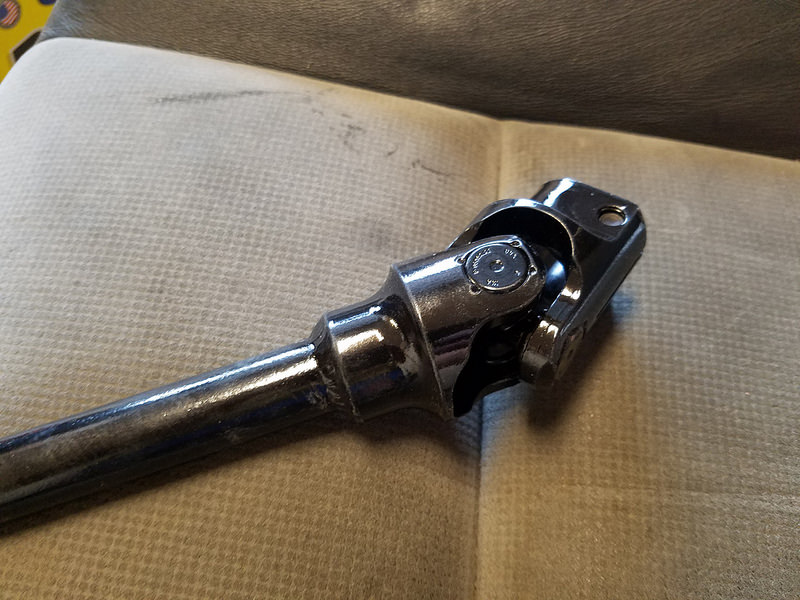
I got the steering shaft modified. Don't have any before pictures, but here's a short rundown of what was done. Removed old shaft, cut off adapter for the rag joint, shorten shaft ~3/8". Mock up in car with new joint and make sure rack & steering wheel are centered. Tack weld, then give to missile welder friend to make sure it won't fail. Add some paint, and here's the result. Now I can run any SN95 rack in the car, I may upgrade to an 03/04 Cobra rack down the road, it is generally held to be the best rack for a Fox/SN95 cars.
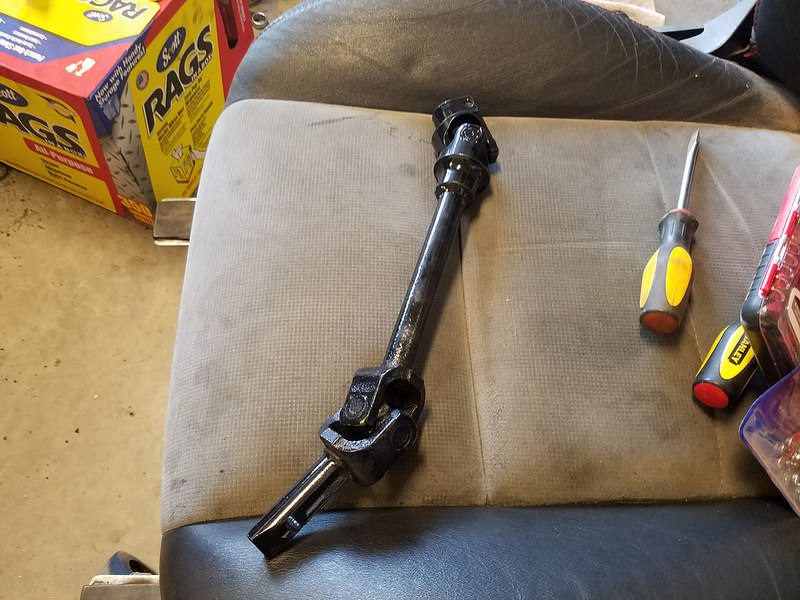 20180924_181535 by Nelson Wallace, on Flickr
 20180924_181539 by Nelson Wallace, on Flickr
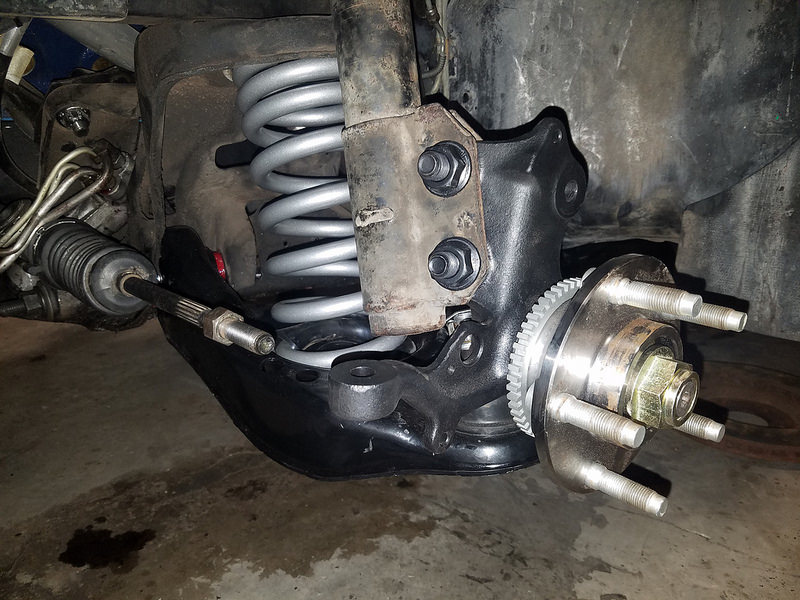
I got back to work last night and started getting the front end together. I got the SN95 rack installed, which is a tricky job by yourself to line everything up. Got it torqued down, then remembered the LCAs have to be put in first since the rack blocks the front bolts. Oops. I was able to just loosen the rack and it moved enough to get the arms in and torqued. I'm glad I took the time to trim the bushings, the arms move freely with no binding.
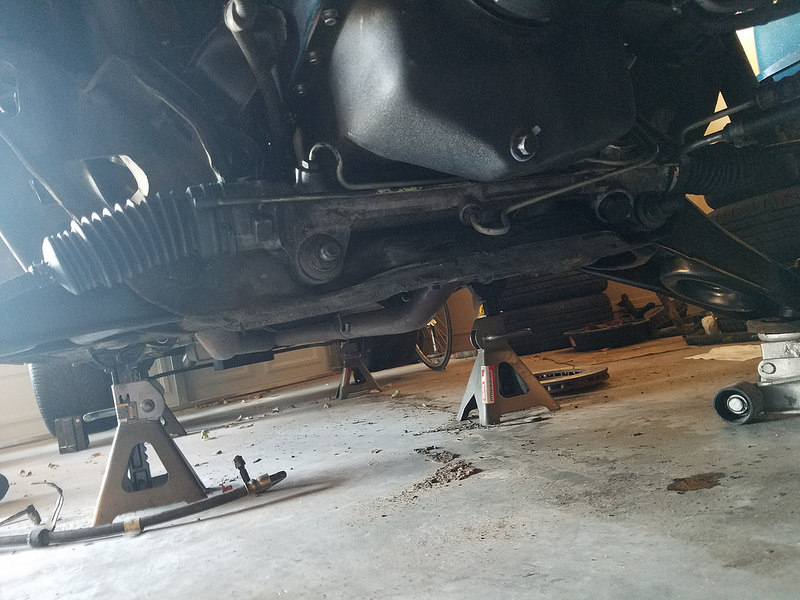 20180925_072828 by Nelson Wallace, on Flickr
 20180925_072817 by Nelson Wallace, on Flickr
I got sidelined here, I went to install the spindles and don't have the correct size socket for the nuts. I don't have a crescent wrench large enough either, so I was stuck. I took the time to hook the power steering lines back up and got the car to run for the first time in several months. It felt good to hear it rumbling again.
I'm going to run by the store tonight and get a few supplies, then I should be able to make more progress. Finally getting close to being driveable.
More on it's way!Nelson
1969 Chevelle "Cone Smasher" Family Project
https://www.pro-touring.com/threads/...uot?highlight=
1984 "Rustang" GT, 5.0, 5 Speed Project
https://www.pro-touring.com/threads/...T-(Slow-Build)
09-26-2018 #40
Registered User
- Join Date
- Mar 2014
- Location
- Yuma, AZ
- Posts
- 635
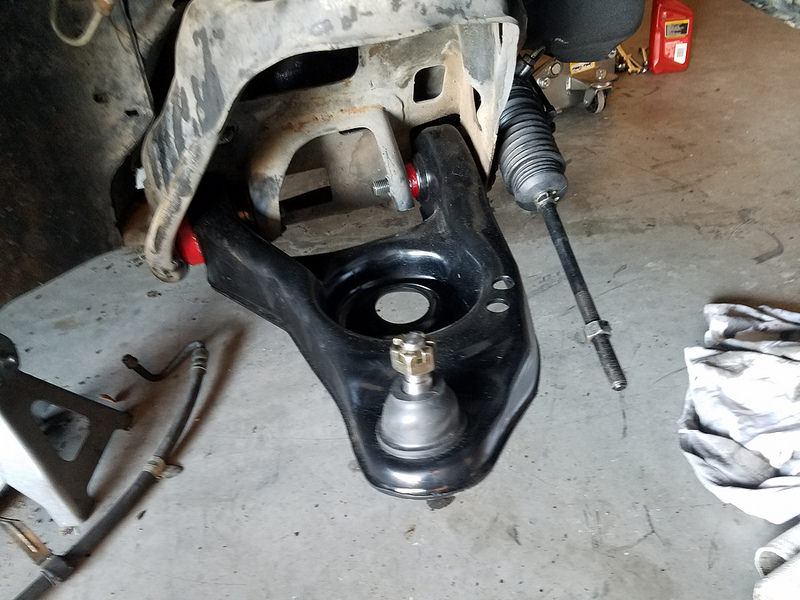
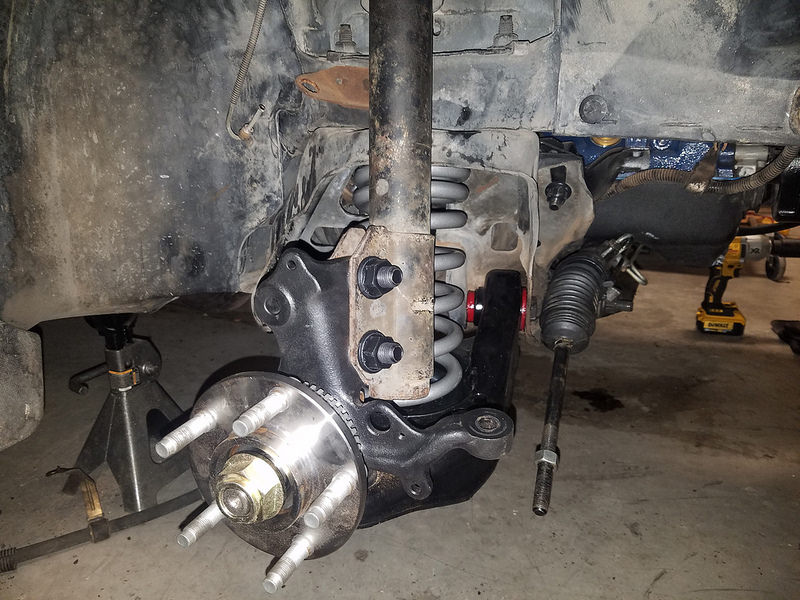
Nothing major to show today. Got the front end assembled minus the tie rods. Turns out the SN95 tie rods were too long for me because of the narrow K member. It is an easy fix, the tie rods for a 93 Taurus are the same thread as the SN95 ones, just shorter. So a pair of those are on the way and the front end will be close to done.
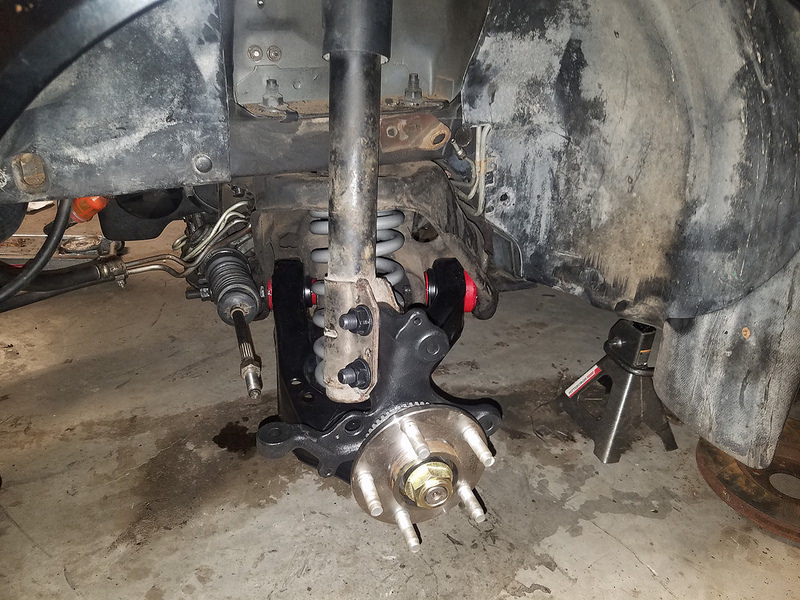 20180925_211137 by Nelson Wallace, on Flickr
 20180925_211141 by Nelson Wallace, on Flickr
 20180925_211153 by Nelson Wallace, on Flickr
I've got everything else I need to put the front together. My steering rack has a small leak from one of the fittings, I'm going to pull it off and put a new seal on it. I should have done that when it was out but they looked ok so I left them. I also have a fender roller on the way so I can get the lips rolled to clear the tires. Fun stuff!
Thanks for stopping by!Nelson
1969 Chevelle "Cone Smasher" Family Project
https://www.pro-touring.com/threads/...uot?highlight=
1984 "Rustang" GT, 5.0, 5 Speed Project
https://www.pro-touring.com/threads/...T-(Slow-Build)

 Reply With Quote