

Results 1 to 20 of 63
-
02-01-2018 #1

 Registered User
- Join Date
- Dec 2004
- Location
- Midwest
- Posts
- 2,261

1969 Camaro Transforms From Big Block to Supercharged LT4 V8 at V8 Speed & Resto Shop
1969 Camaro Transforms From Big Block to Supercharged LT4 V8 at V8 Speed & Resto Shop

This is the next chapter of the 1969 Camaro we modified in the V8 Speed & Resto Shop with all new Detroit Speed suspension, Forgeline Wheels, Baer Brakes, Toyo Tires, Holley EFI, and more go-fast and handling goodies. Heres the original forum thread telling that part of the story:
ProTouring.com: https://goo.gl/m9eL6v
And the video from that experience:
https://youtu.be/LlJ3yb0MqR8
Well, remember how we said that some cars are never finished, and are on a constant evolution to improve? WELL, this 69 is back in the shop for some upgrades once again!
This time, the owner wanted to change the personality of the car a bit and move from the angry 540 Big Block Chevy into an LT4 supercharged power plant for a more refined - but still powerful - driving experience.
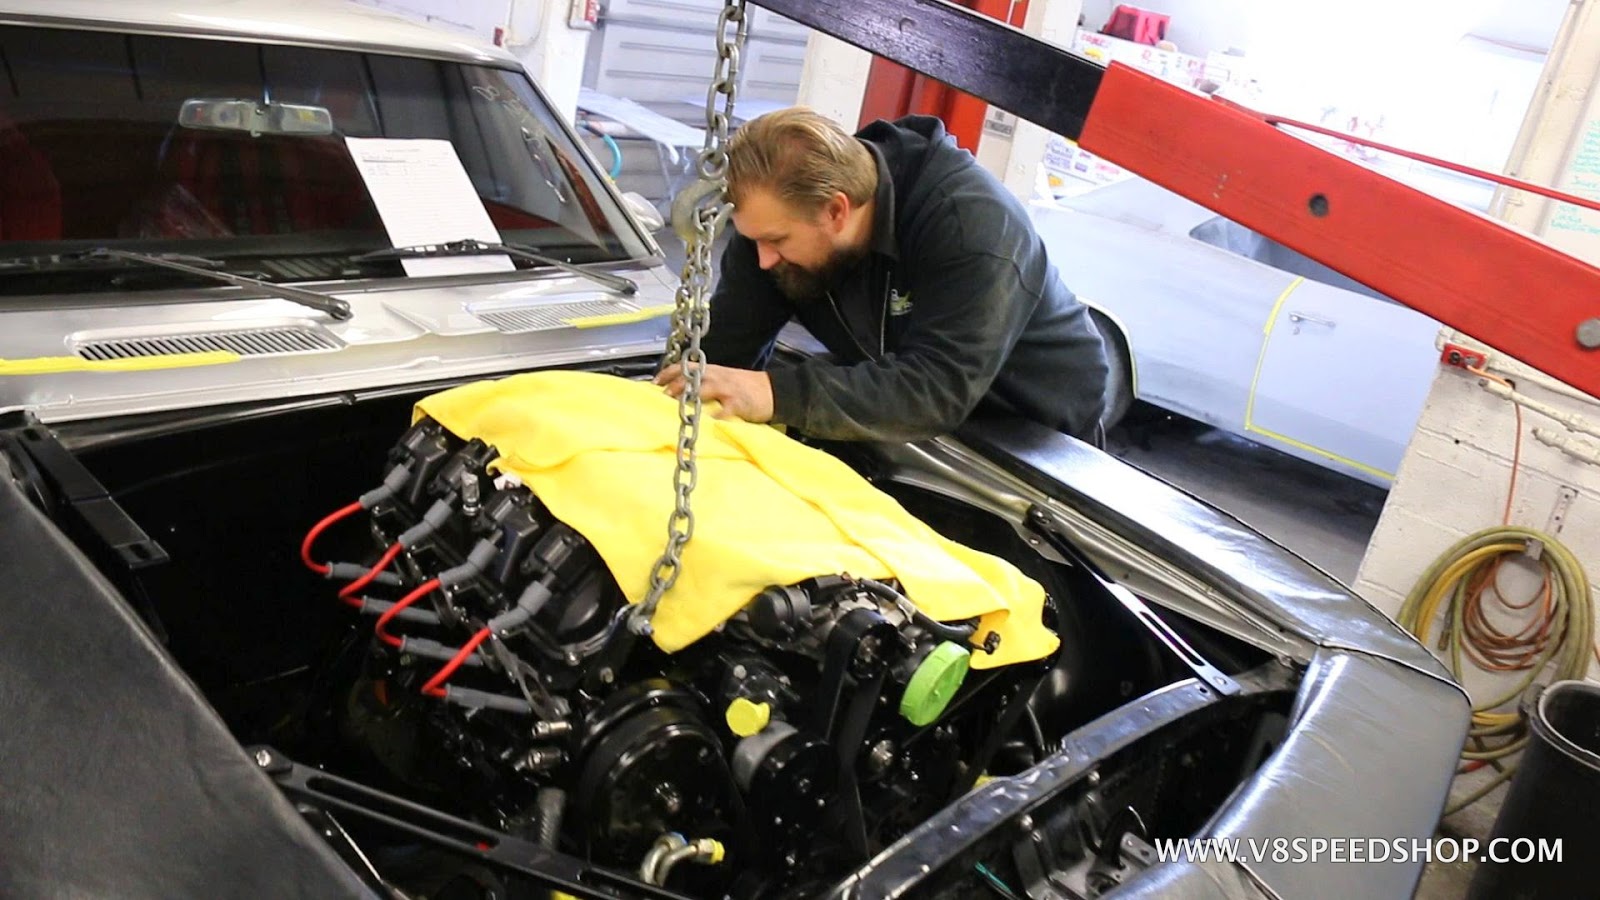
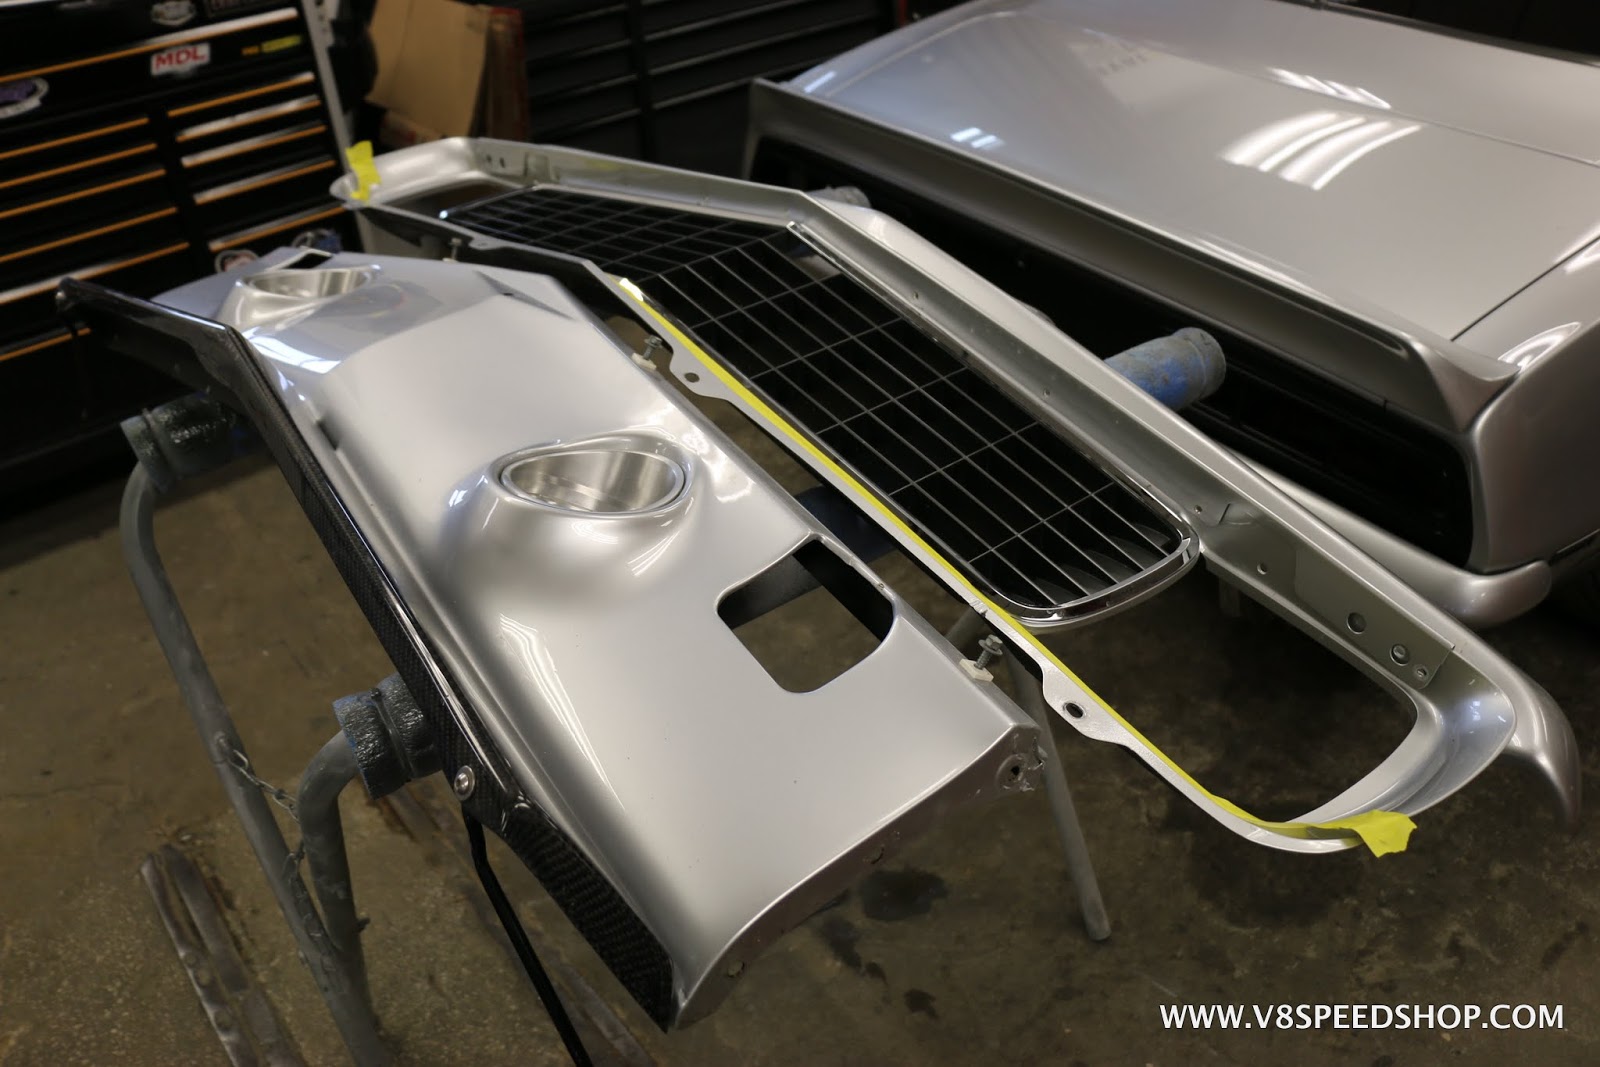
We started the engine removal process by protecting the car with a Badass Fender Cover which should be called a nose cone, to be honest.

We measured the spacing on the hood to fenders and valance for reference, and then removed the hood. All the engine fluids were drained, exhaust was disconnected, wiring harnesses disconnected all the usual items required for engine removal. Out came the big Chevy engine.
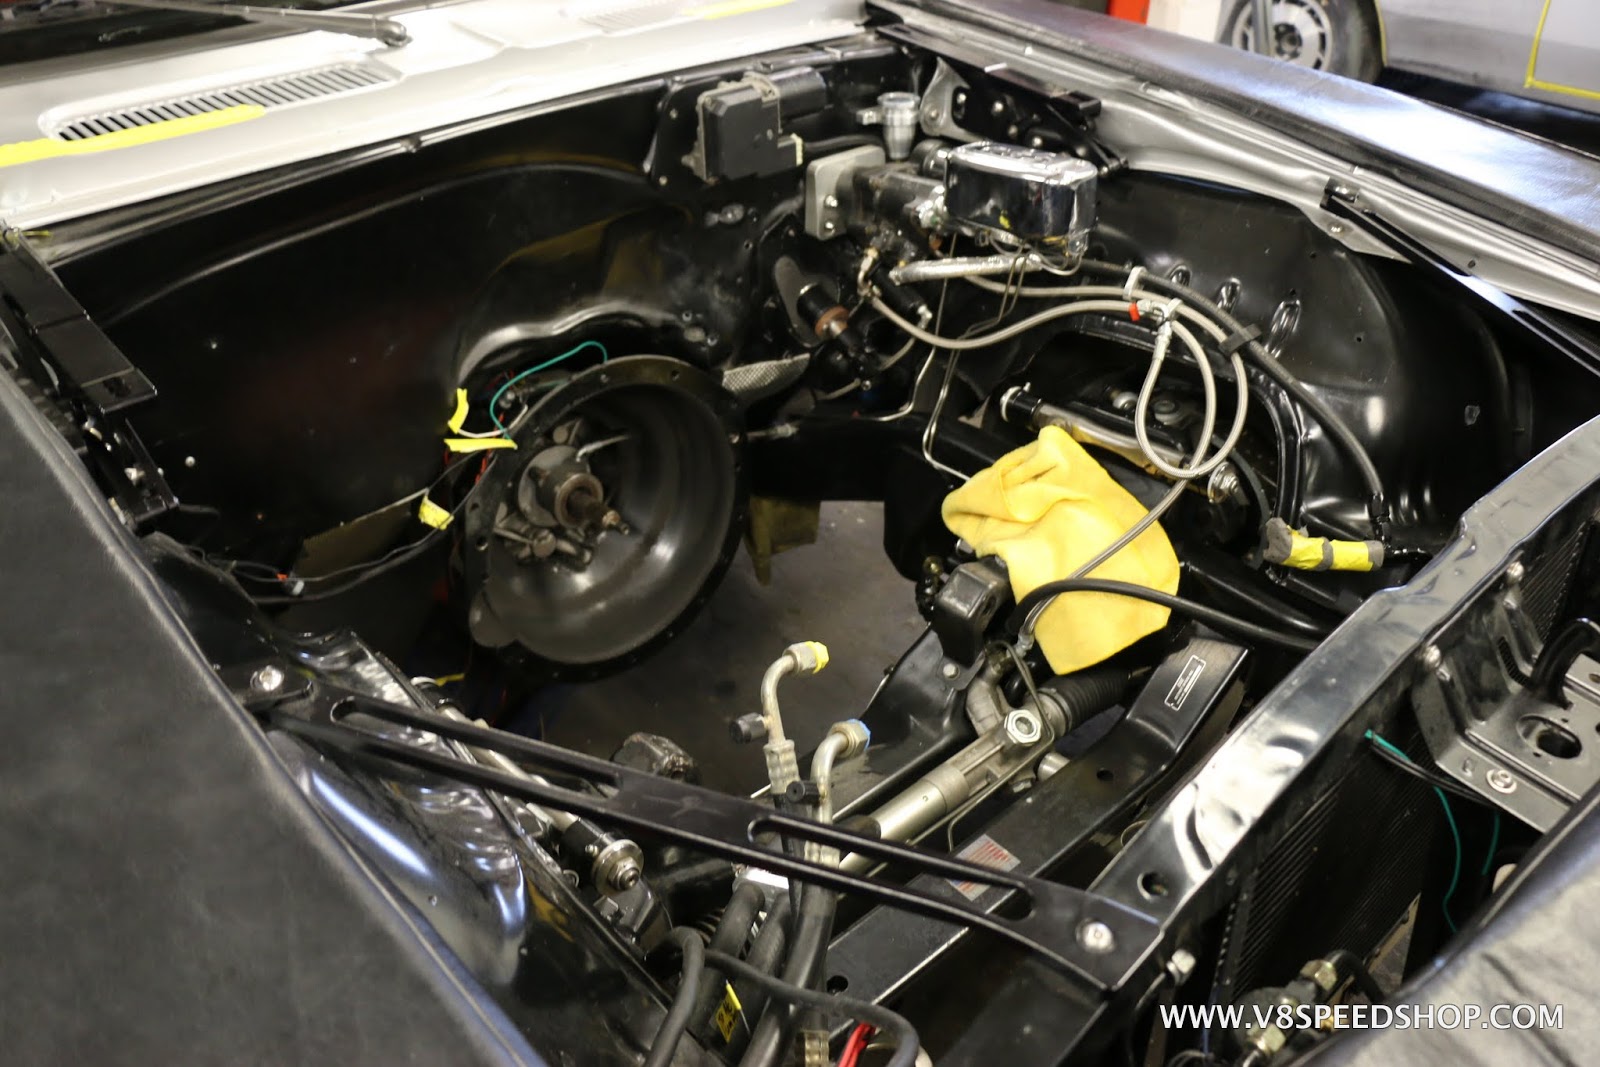
Tyler experiences DejaVu on this car, recalling the first time the engine came out of the car before the big suspension overhaul!
 Kevin Oeste
V8 Speed and Resto Shop
V8TV
Muscle Car Of The Week
V8 Radio Podcast
All about us:
https://www.v8speedshop.com
-
02-01-2018 #2
Registered User
- Join Date
- Dec 2004
- Location
- Midwest
- Posts
- 2,261
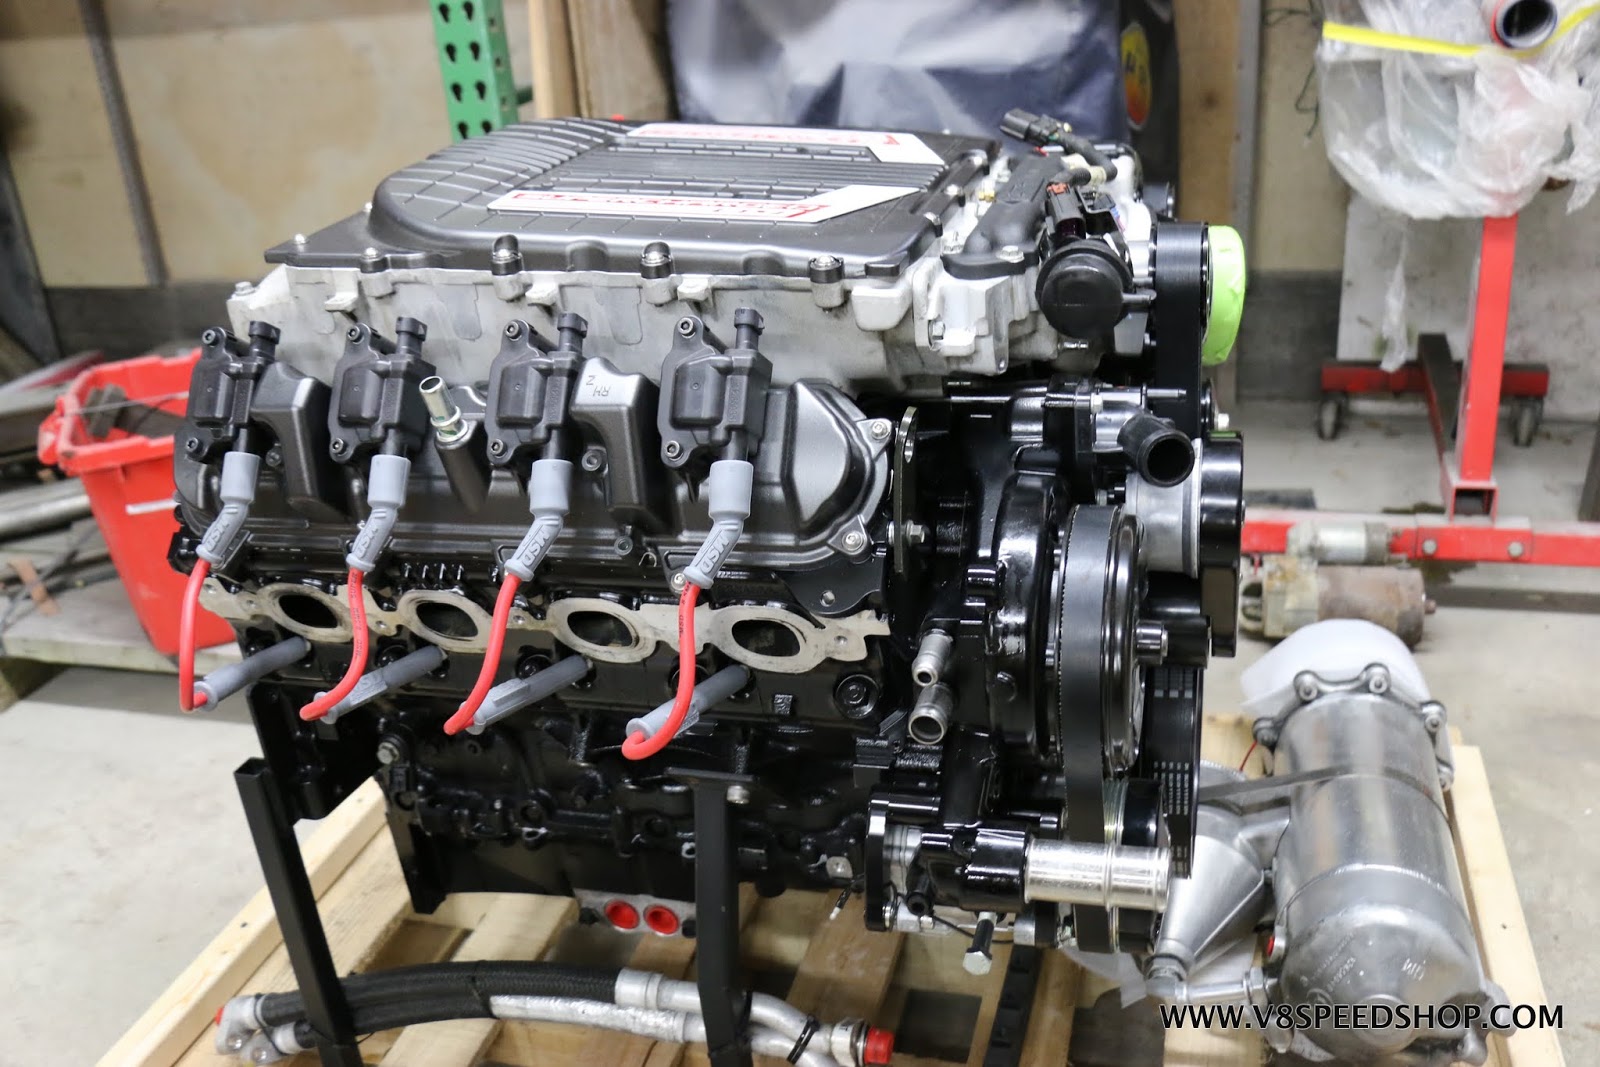
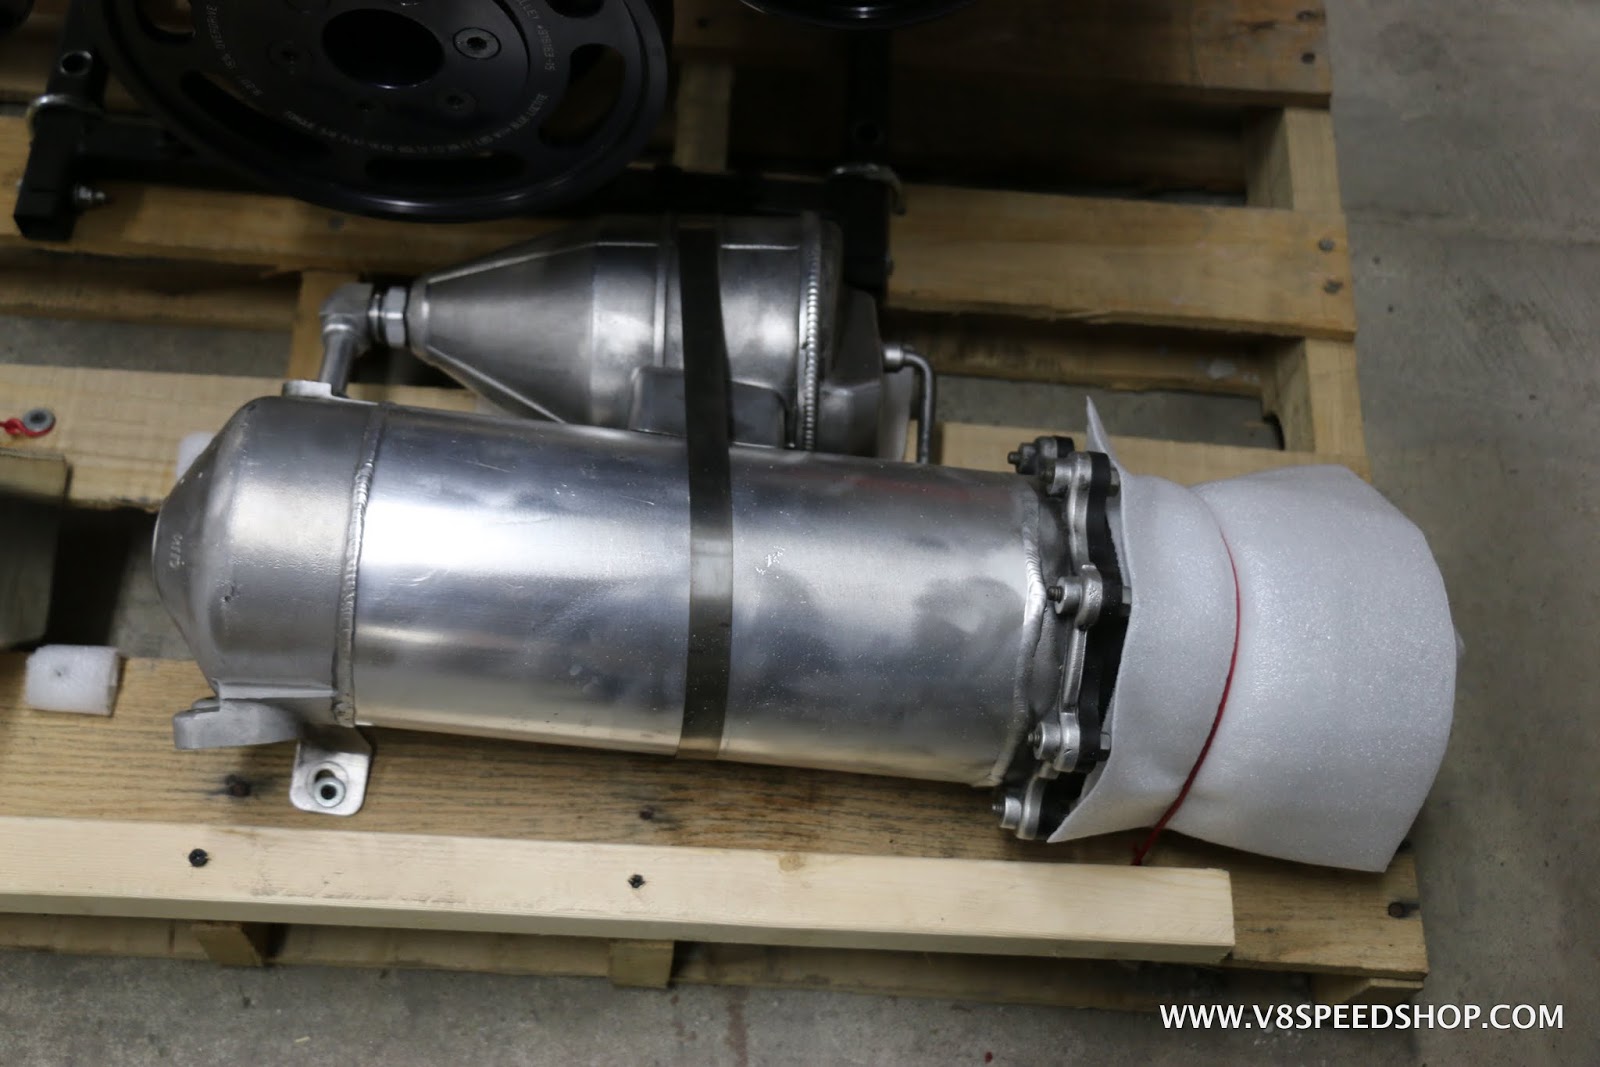
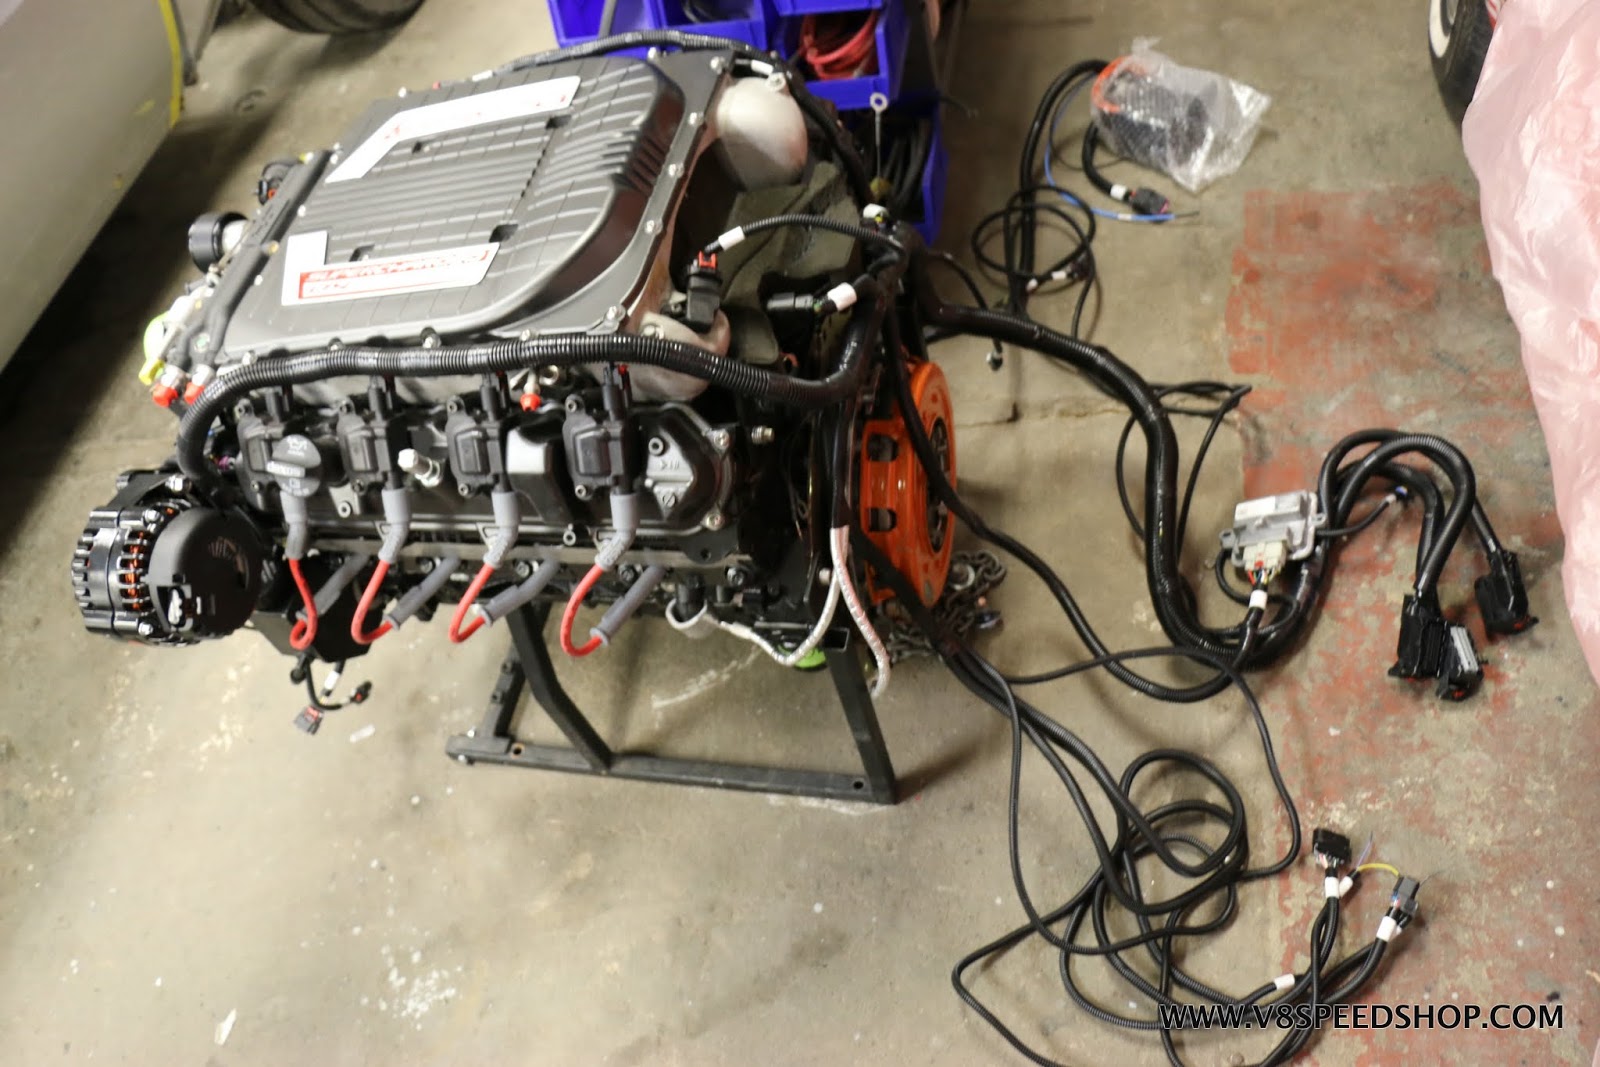
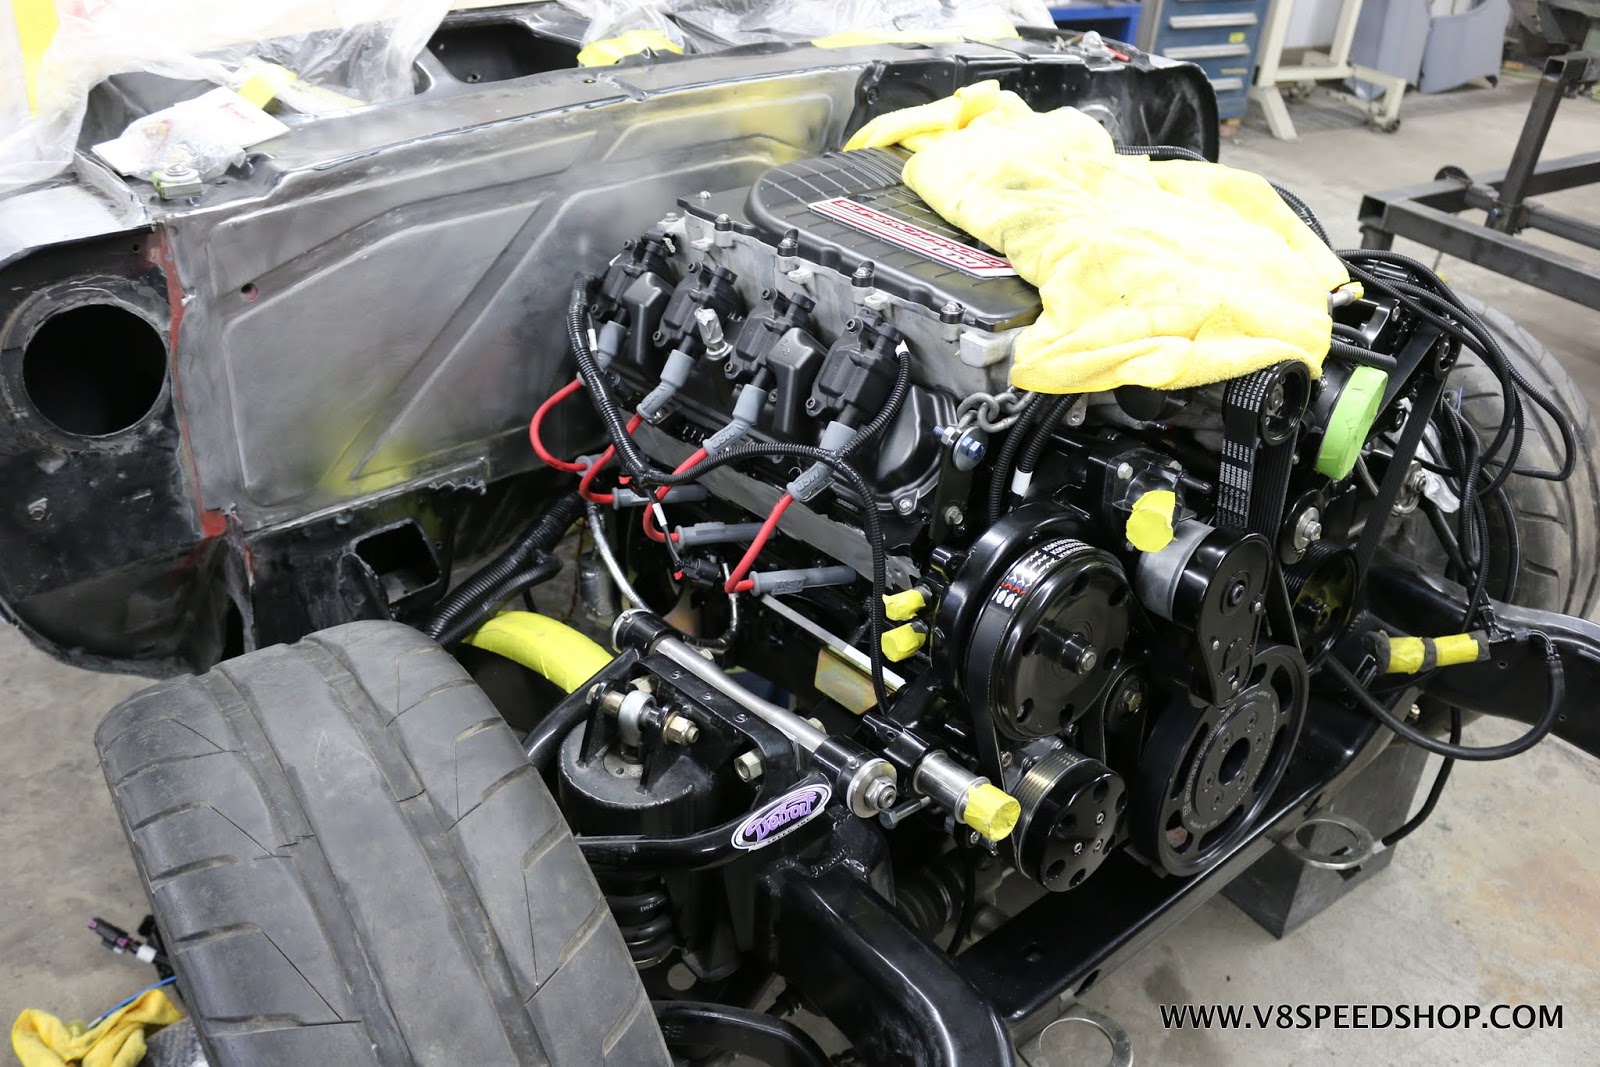
The Chevrolet Performance LT4 V8 engine arrived on a pallet from another shop, where it had been painted black and upfitted with an underdrive pulley system to generate more supercharger boost pressure. The dry sump oil system tank is also visible on the pallet in this shot.
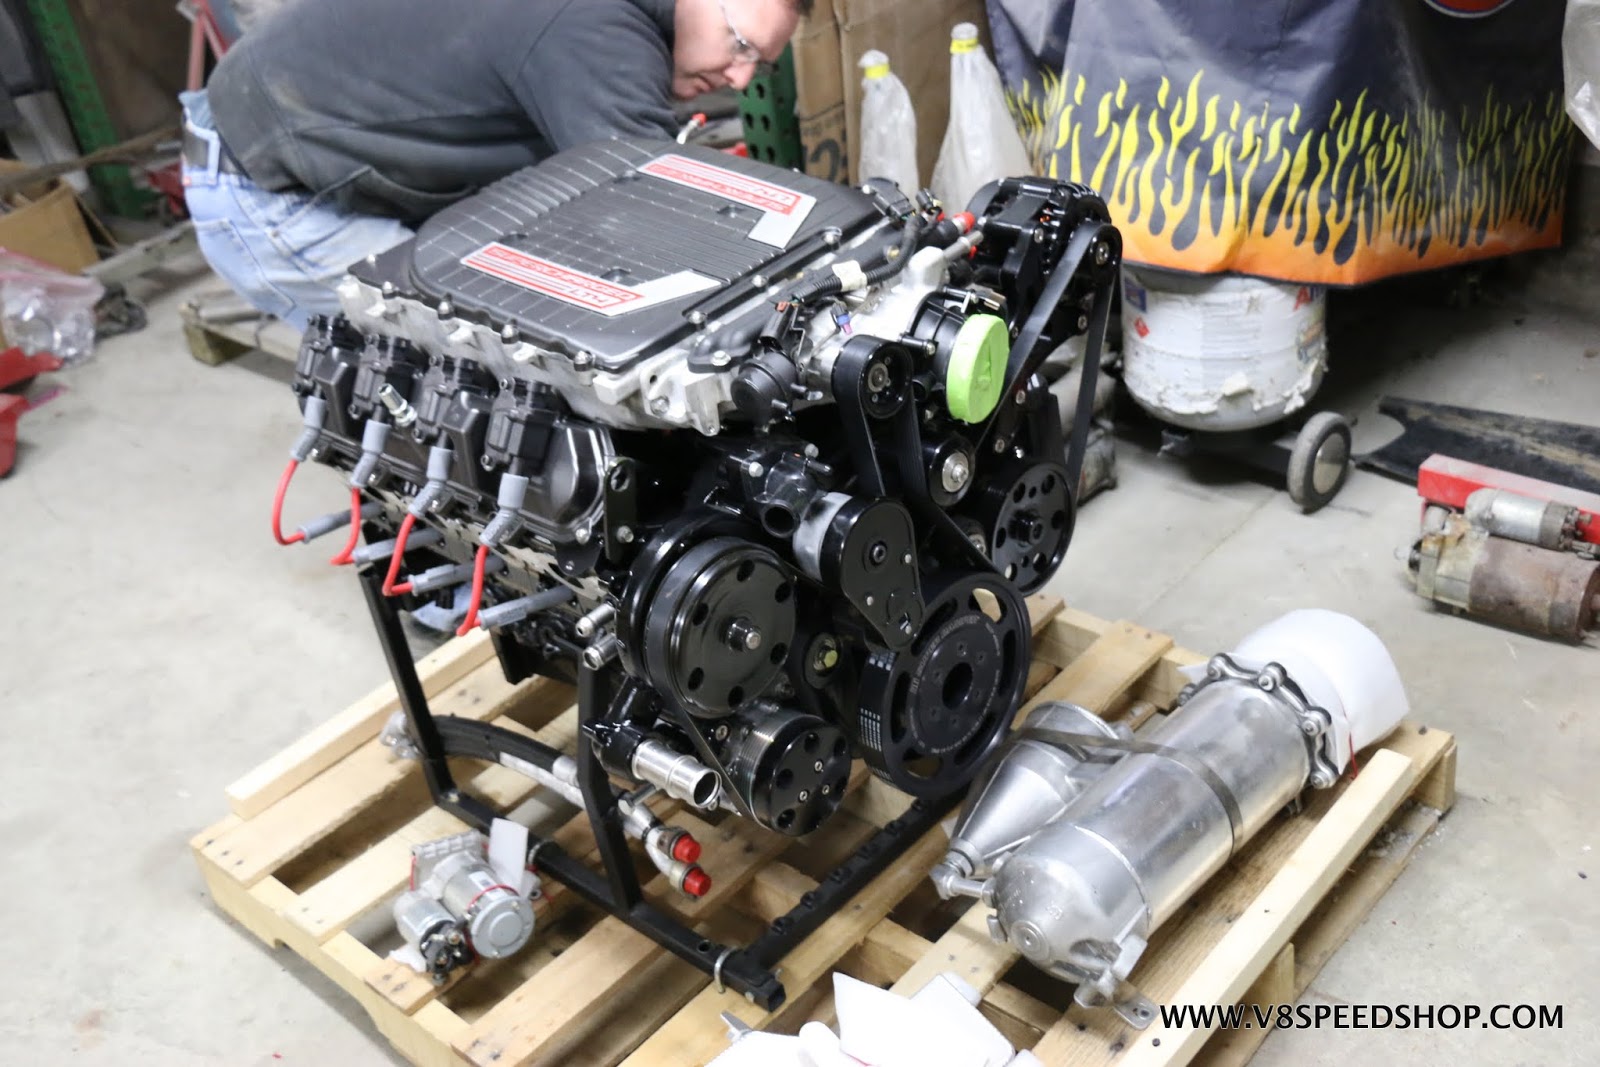
These generate around 640 horsepower and 630 lb. ft. of torque, but the mods on this one will ensure more oomph than that.
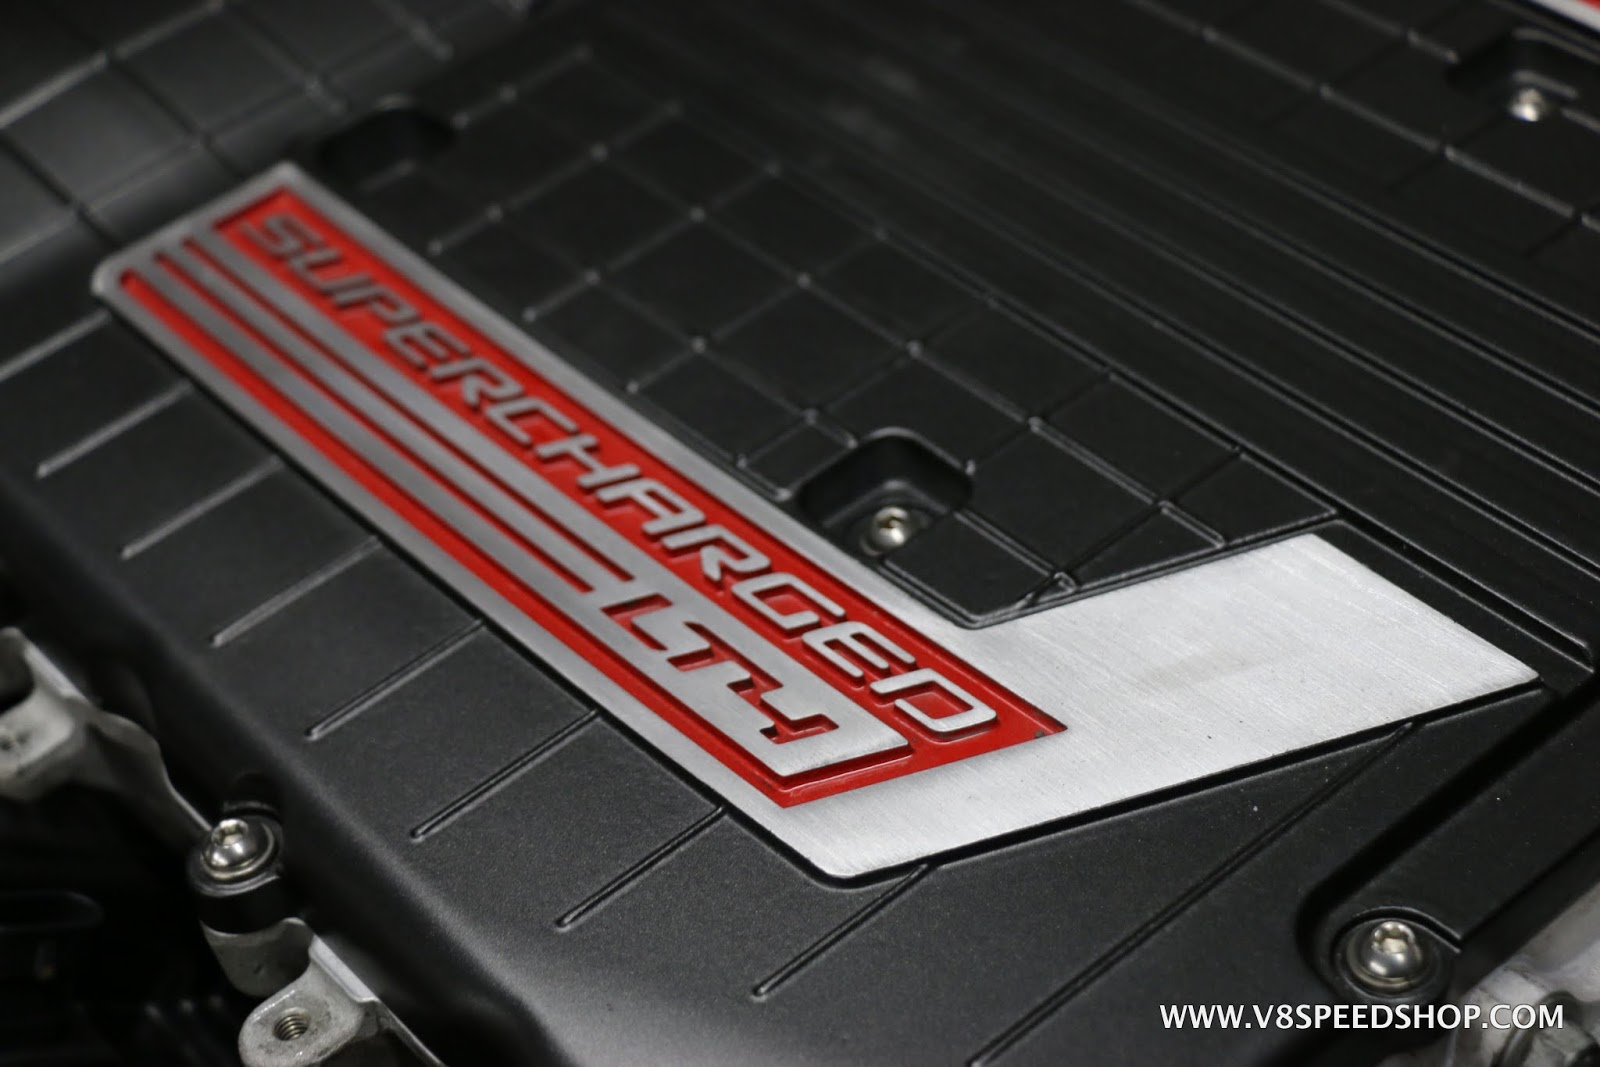
The LT4 features direct-injection, and it comes in the Z06 Corvette in regular production trim.
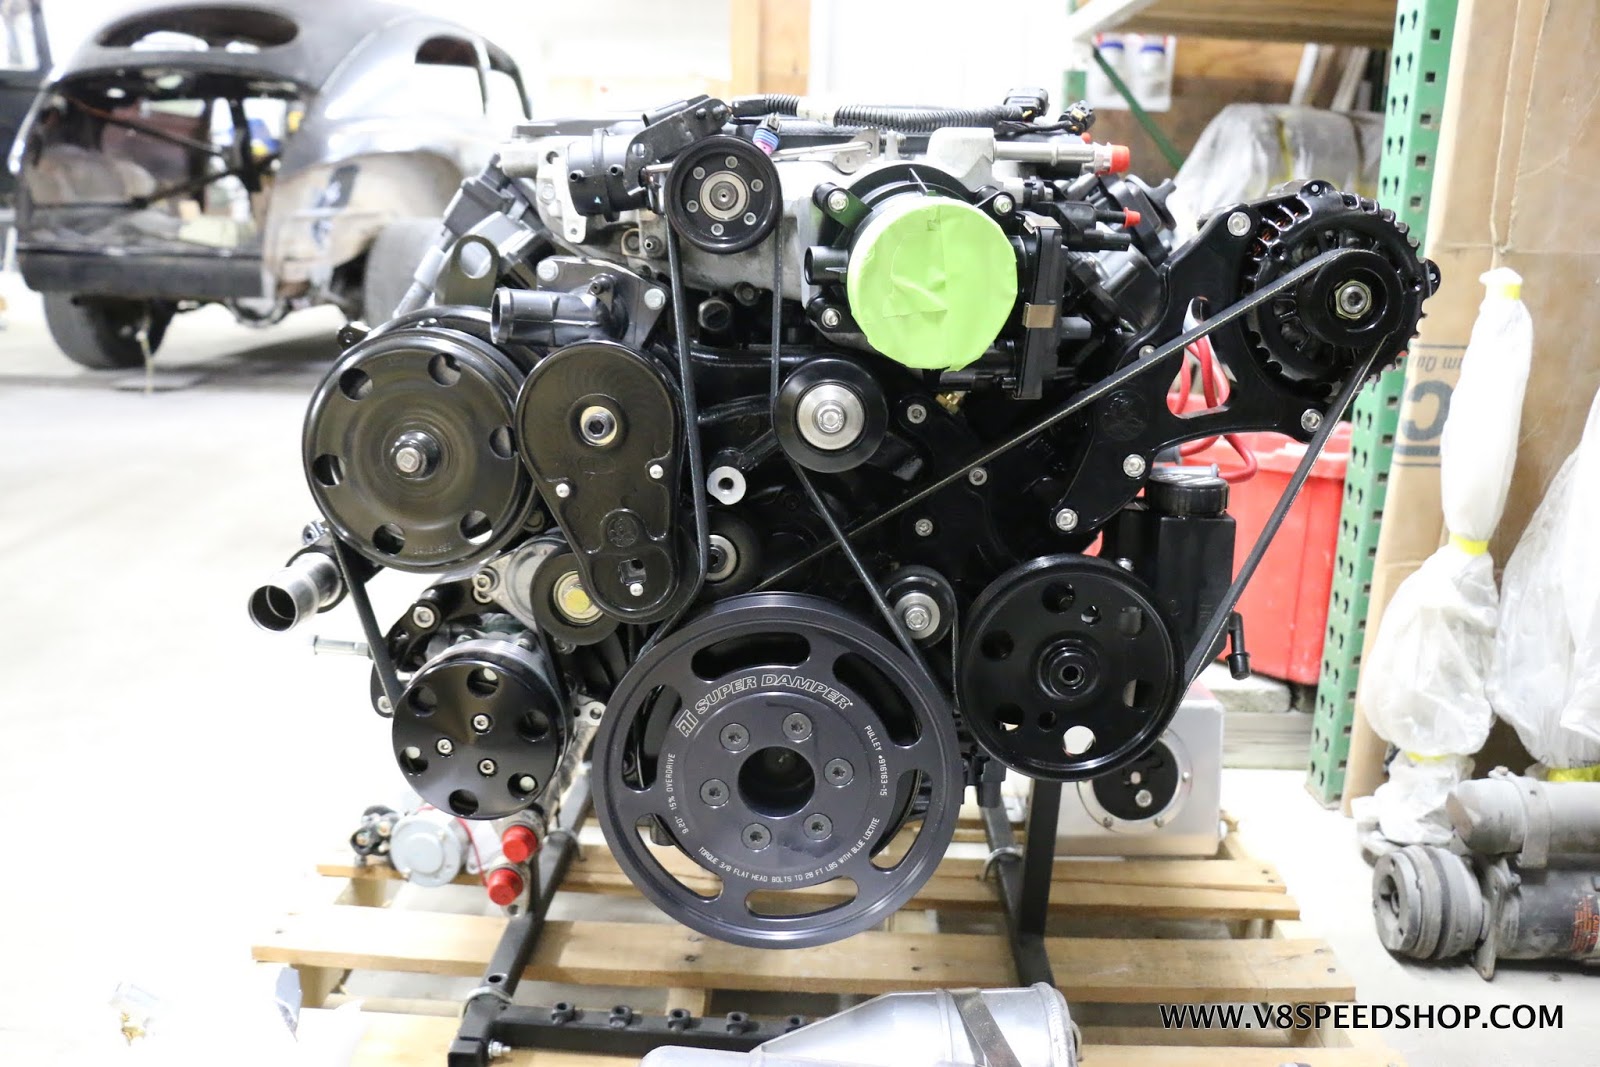
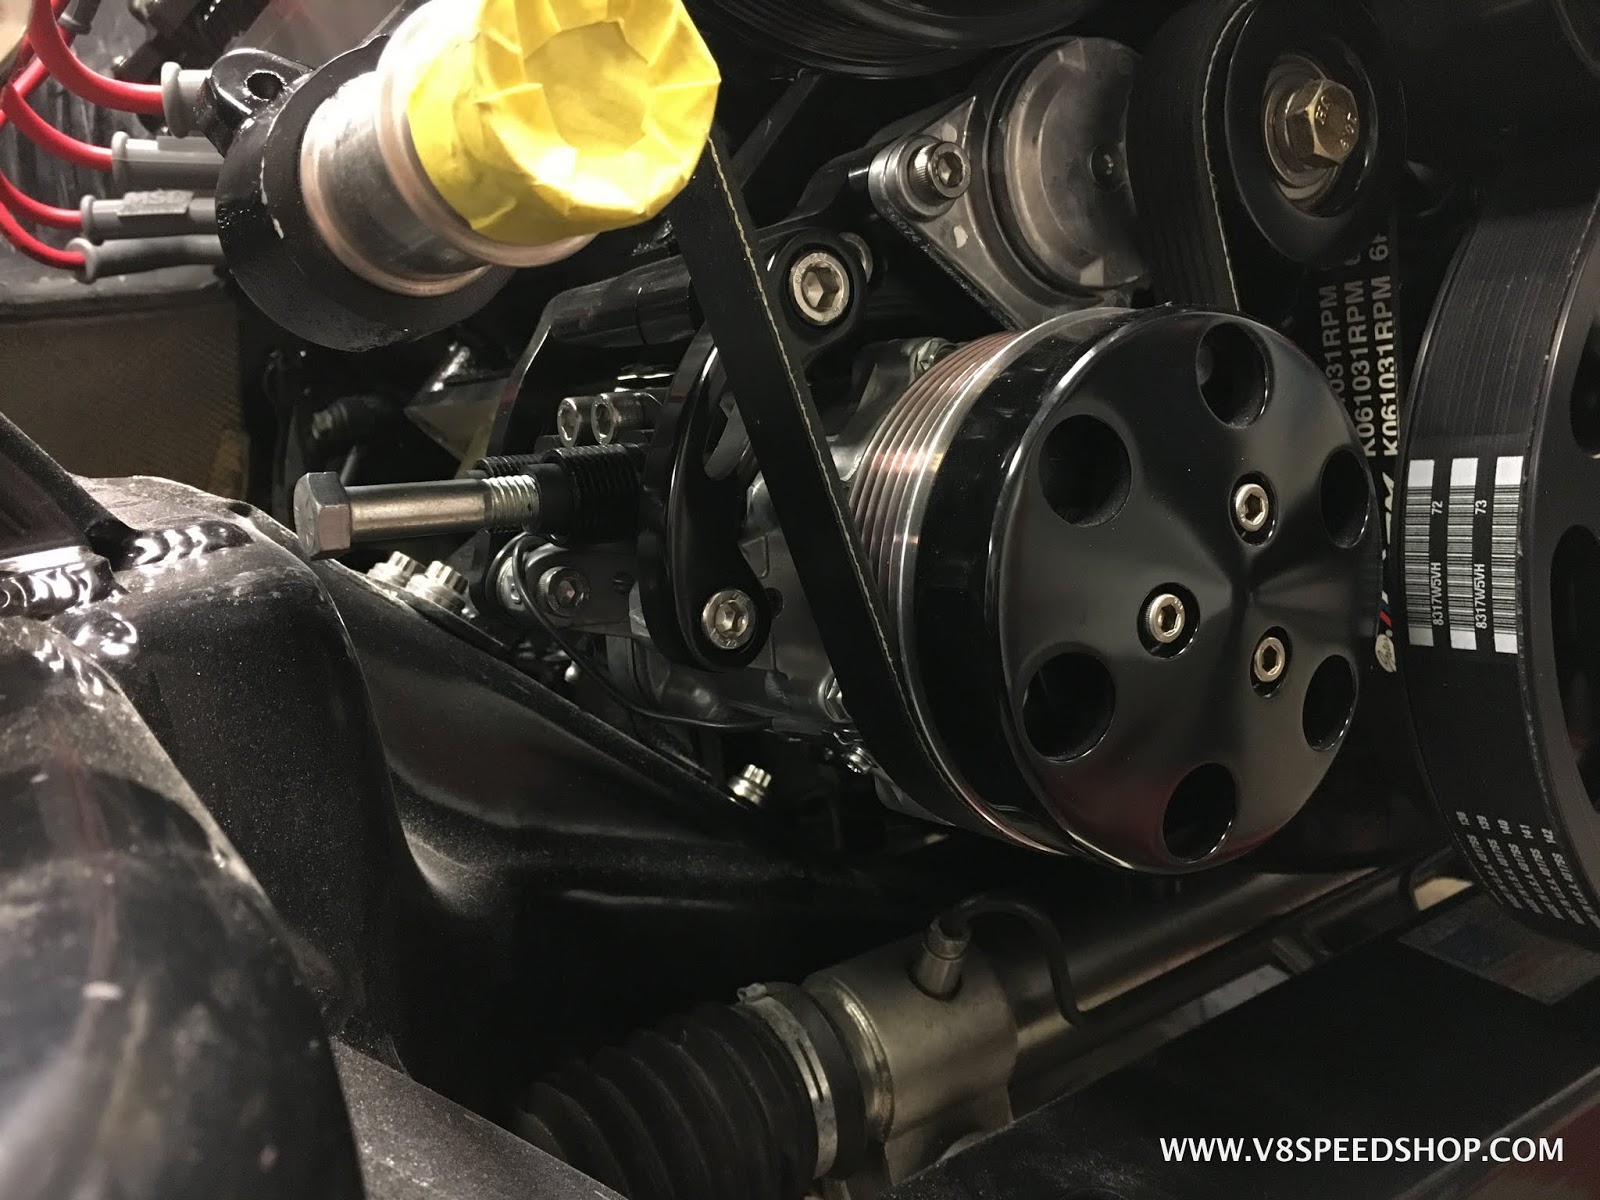
Here the Drive Junky LT4 front accessory system is visible.
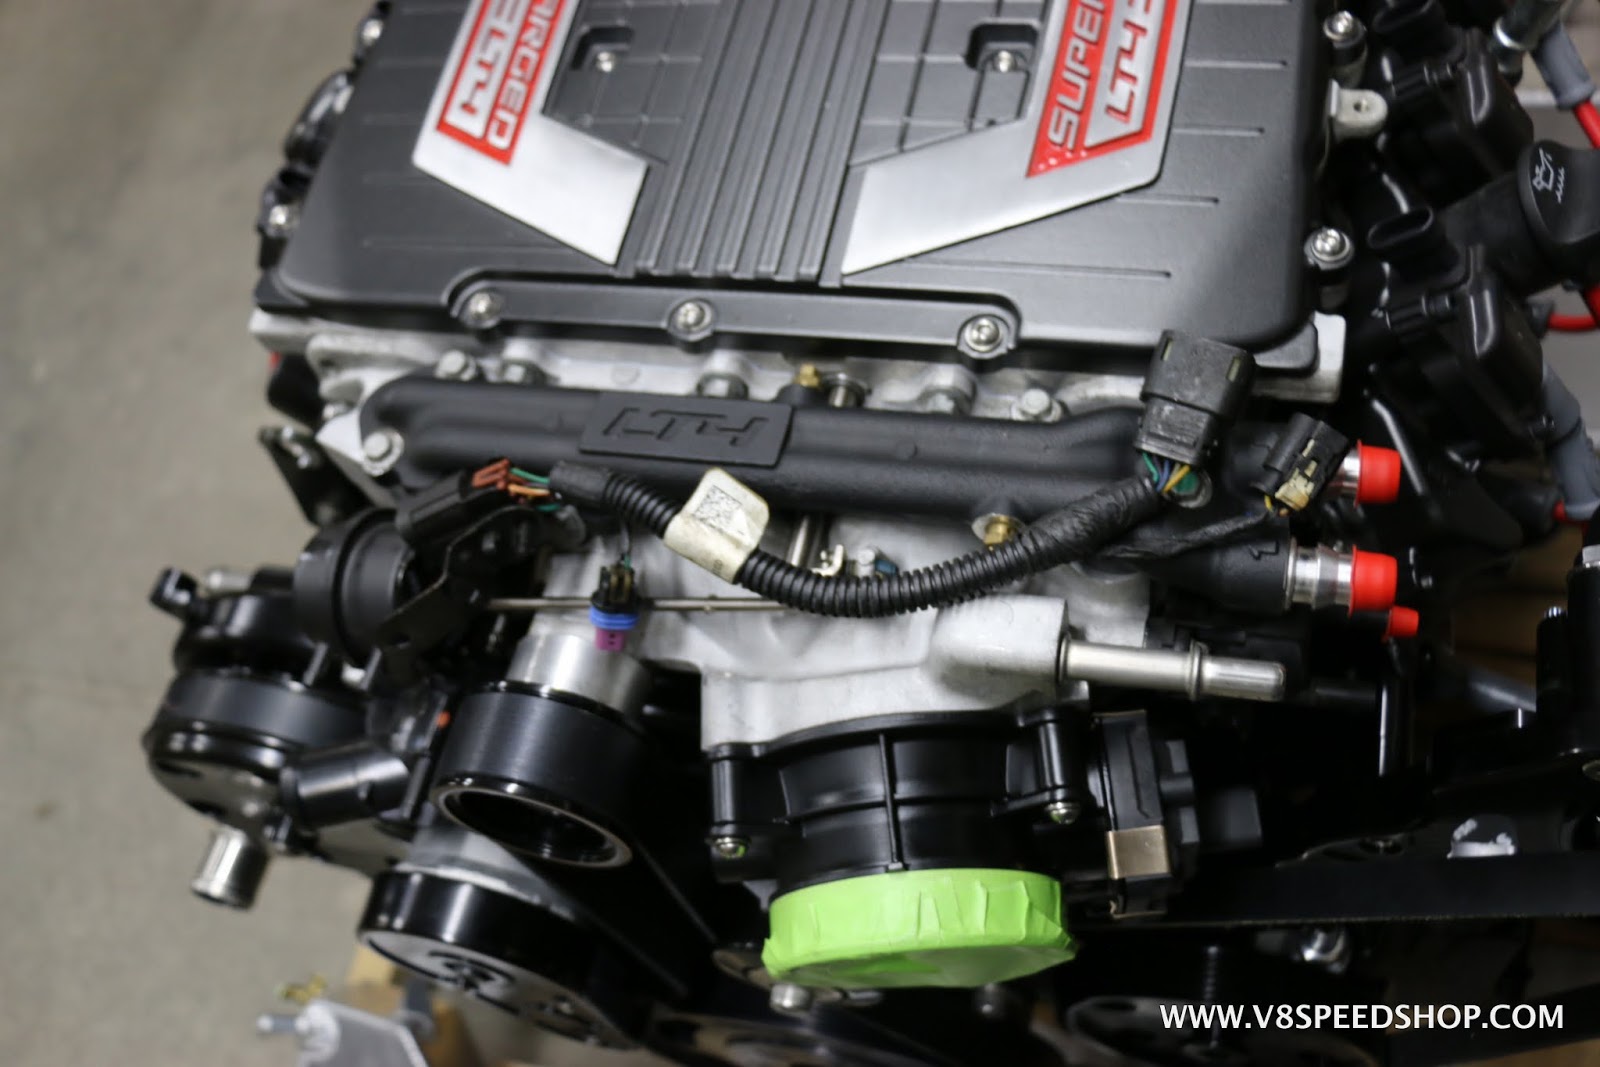
Dry sump oiling system tank
Last edited by oestek; 02-02-2018 at 03:16 PM.
Kevin Oeste
V8 Speed and Resto Shop
V8TV
Muscle Car Of The Week
V8 Radio Podcast
All about us:
https://www.v8speedshop.com
02-02-2018 #3 Registered User
- Join Date
- Sep 2009
- Posts
- 2,706
Wow, that is a beautiful car and an awesome powerplant! Going with a manual or auto trans?

1955 Nomad project LC9, 4L80e, C5 brakes, Vision wheels
1968 Camaro 6.2 w/ LSA, TR6060-Magnum hybrid and etc SOLD
1976 T/A LS1 6 Speed, and etc. SOLD
Follow me on Instagram: ryeguy2006a
02-02-2018 #4
Registered User
- Join Date
- Dec 2004
- Location
- Midwest
- Posts
- 2,261
Thanks! It's a T56 Magnum 6-speed in the car. You can see more of it in our previous thread here: https://goo.gl/m9eL6v Originally Posted by ryeguy2006a
 Kevin Oeste
V8 Speed and Resto Shop
V8TV
Muscle Car Of The Week
V8 Radio Podcast
All about us:
https://www.v8speedshop.com
02-04-2018 #5
Registered User
- Join Date
- Dec 2004
- Location
- Midwest
- Posts
- 2,261
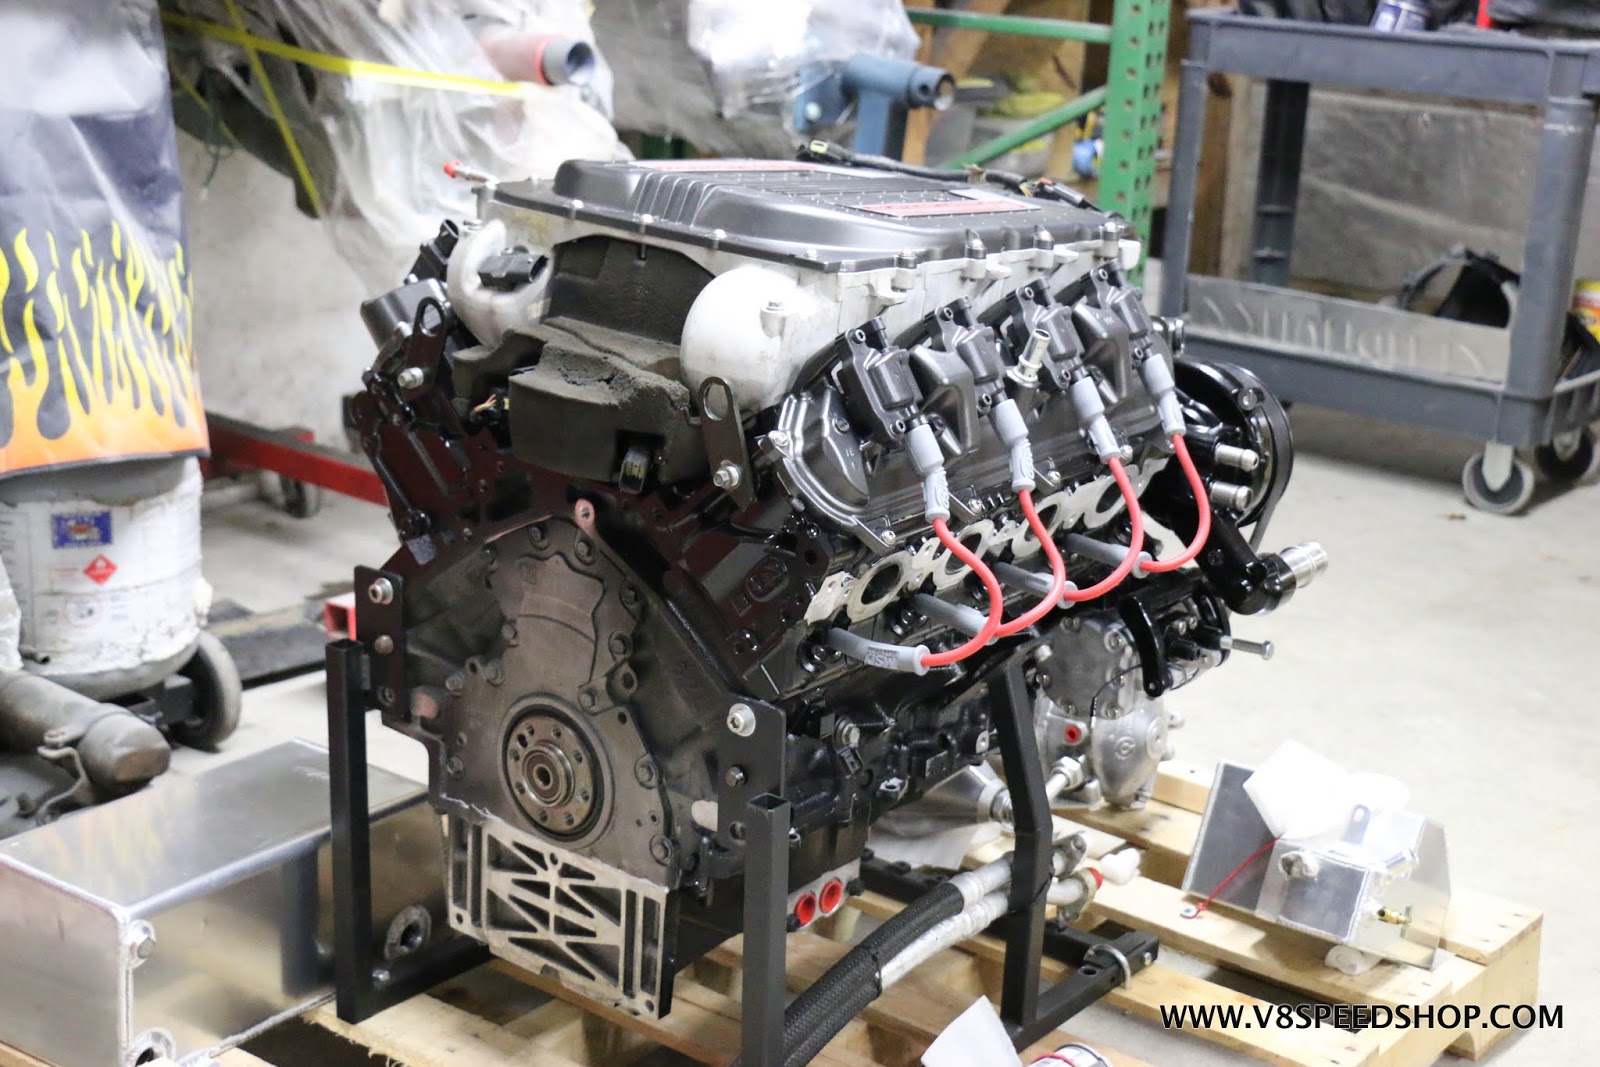
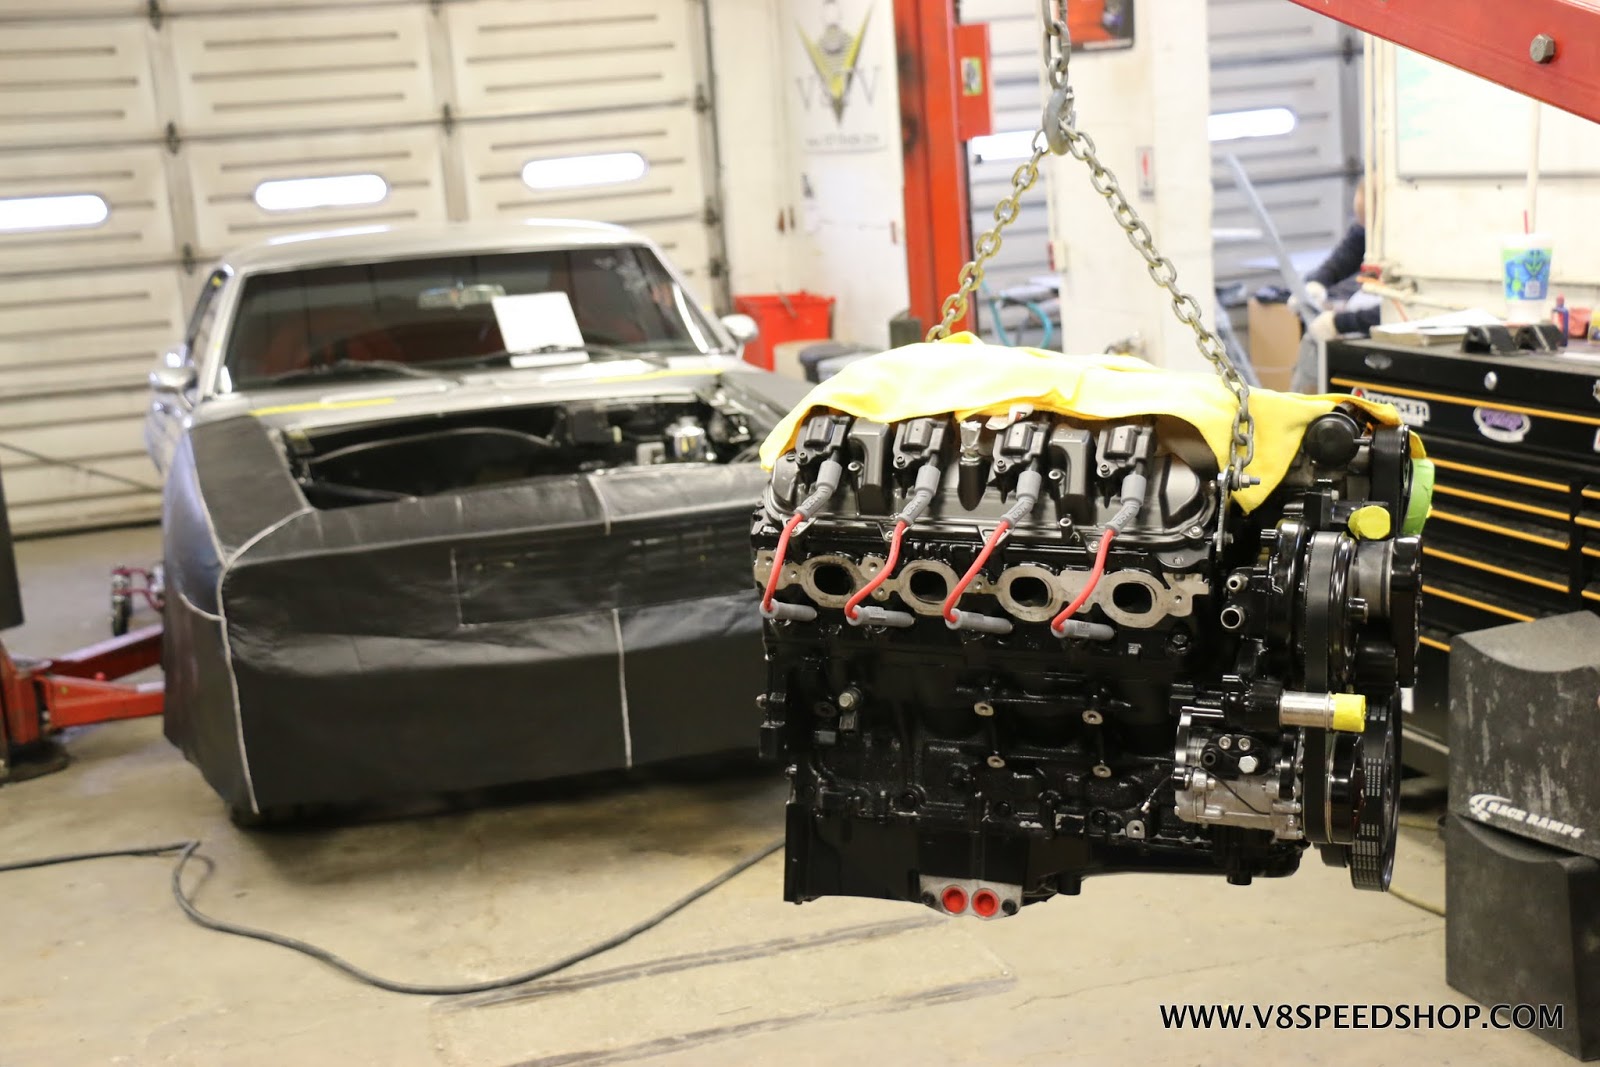
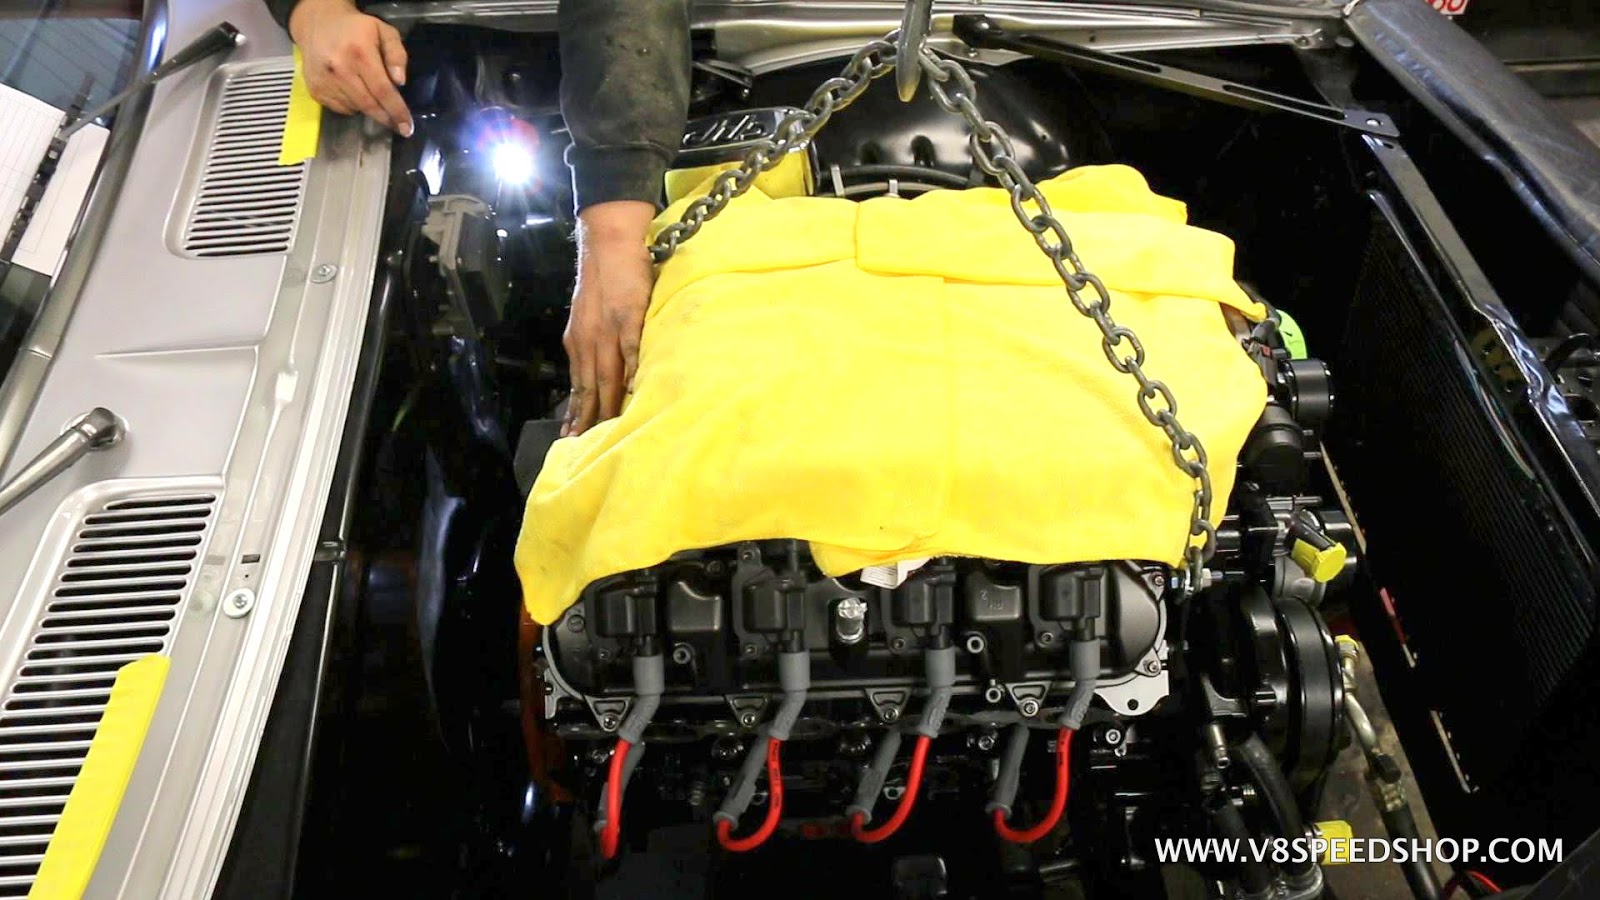
Time for a quick test-fit of the LT4.
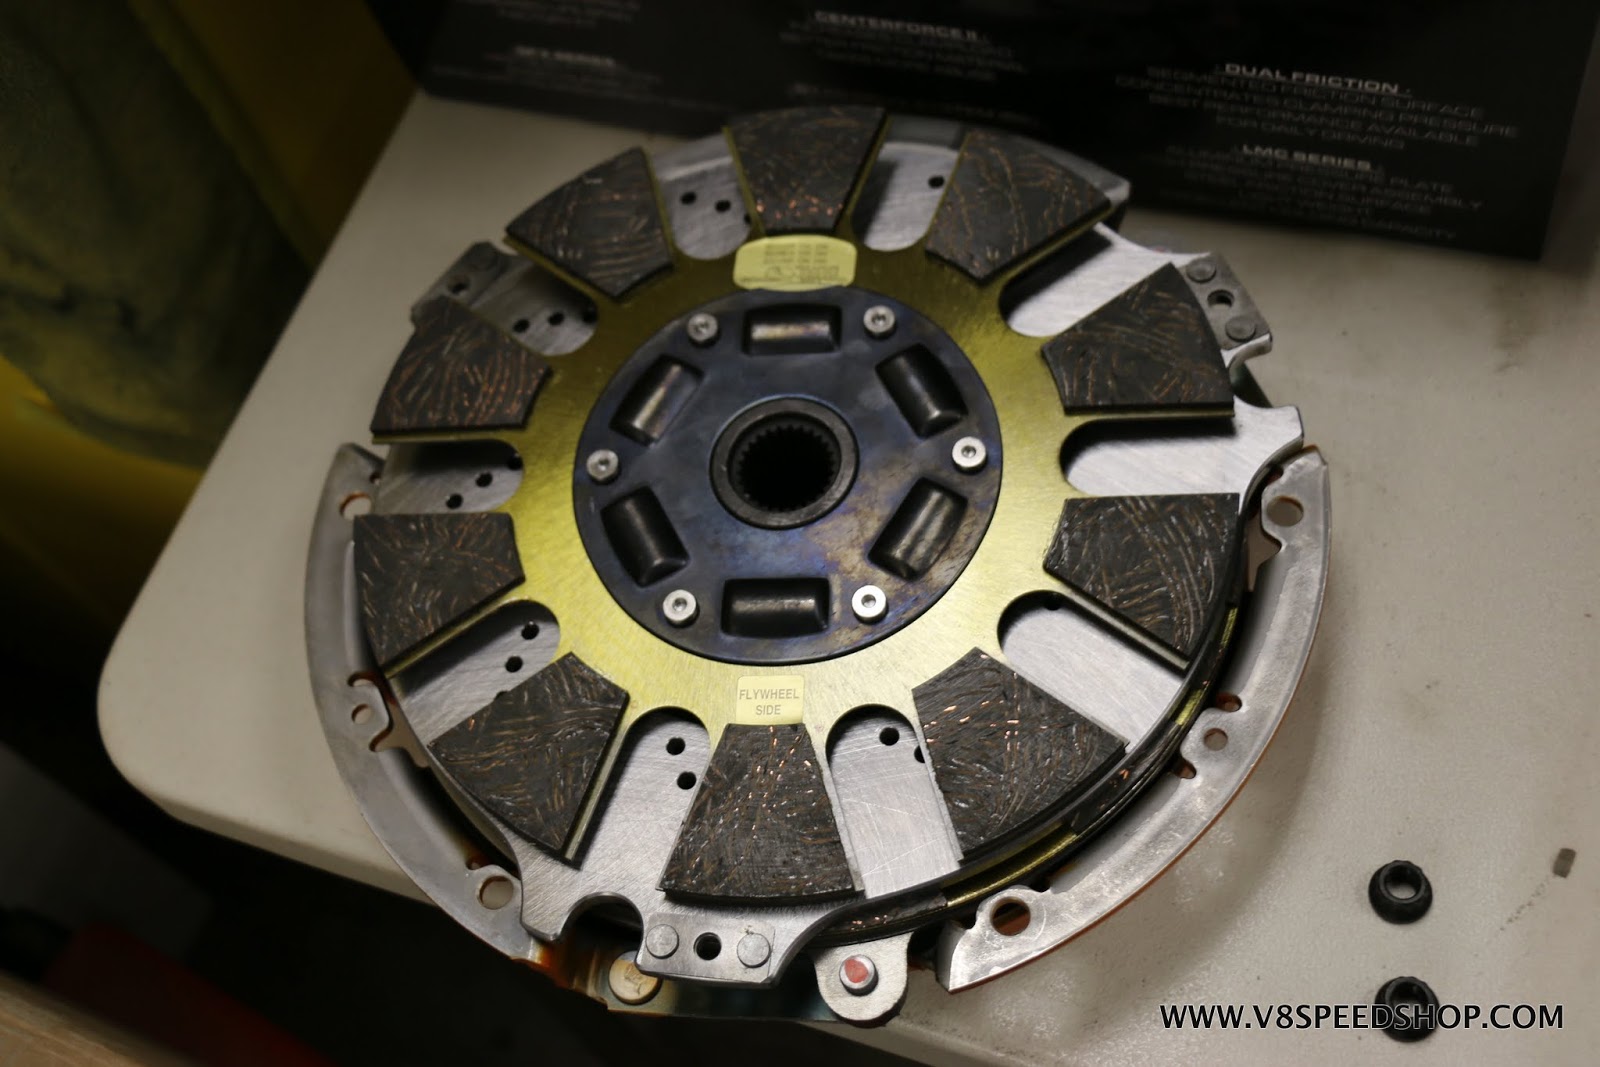
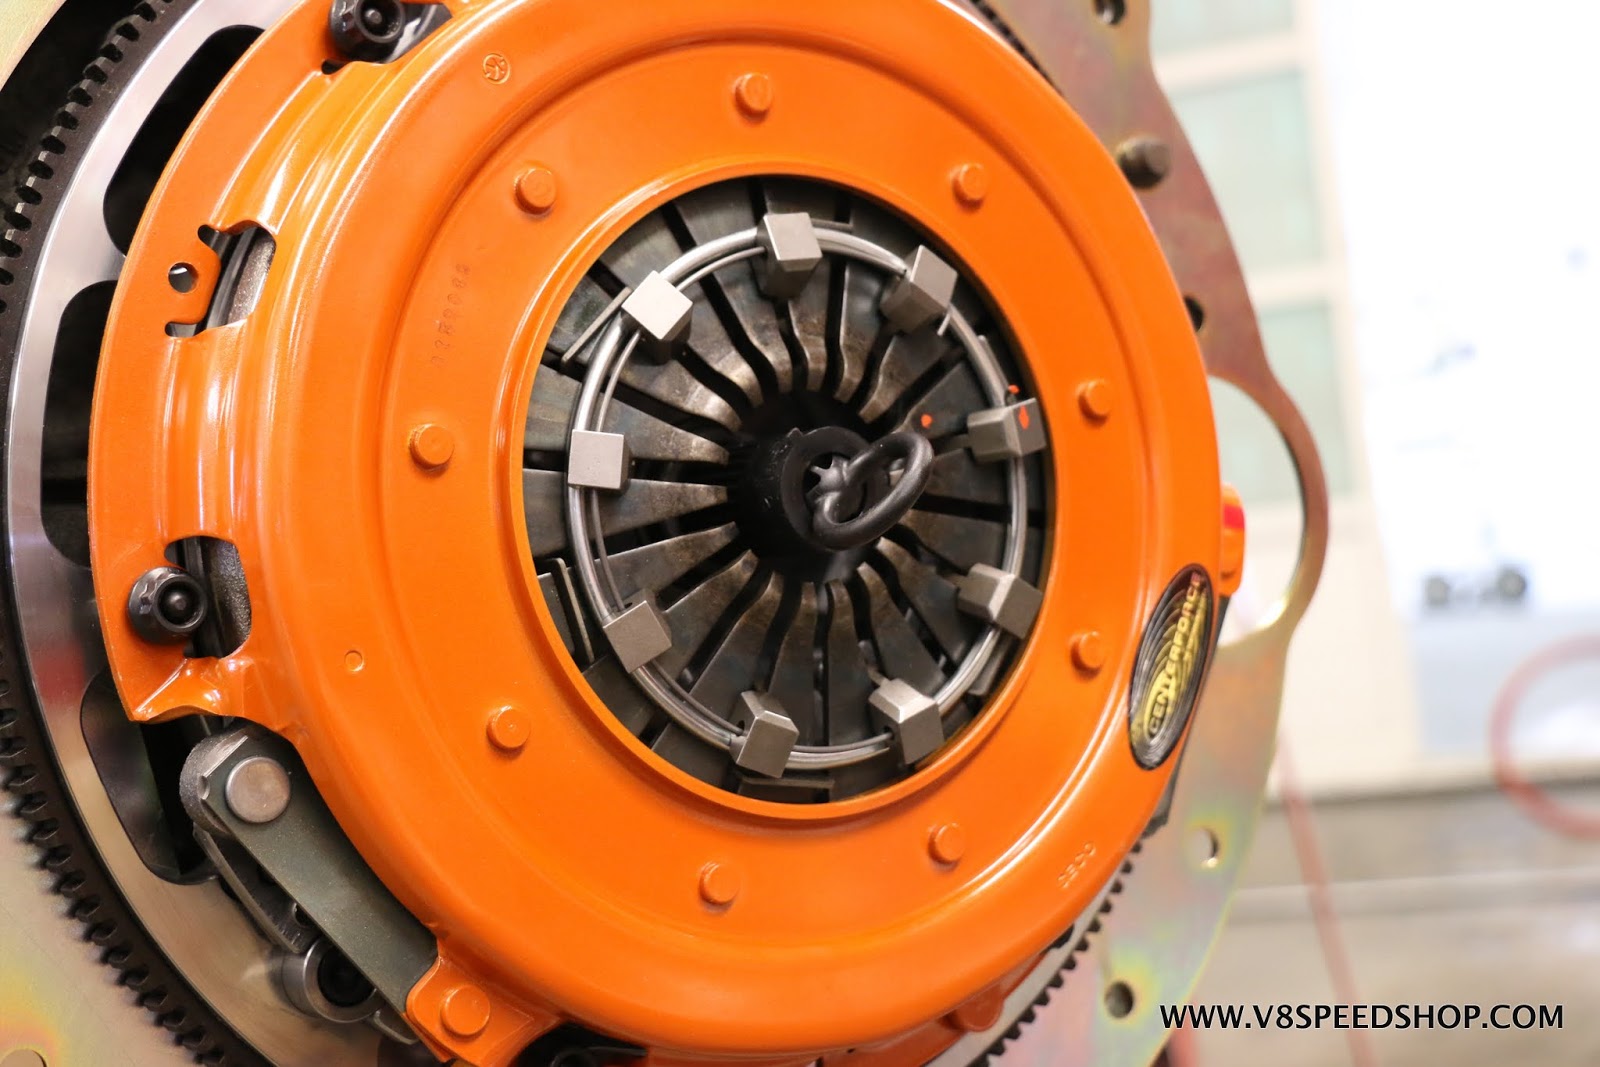
We had recently installed a new Centerforce DYAD clutch and flywheel on our 540 big block Chevy engine but we wanted to run a Centerforce DYAD clutch with the LT engine as well. However, the LT flywheel would be different. Rather than install the new flywheel with a used clutch and split up the set, we elected to obtain a new flywheel and DYAD DS clutch from Centerforce for the LT engine, and offer the matched clutch and flywheel from the big block for sale.
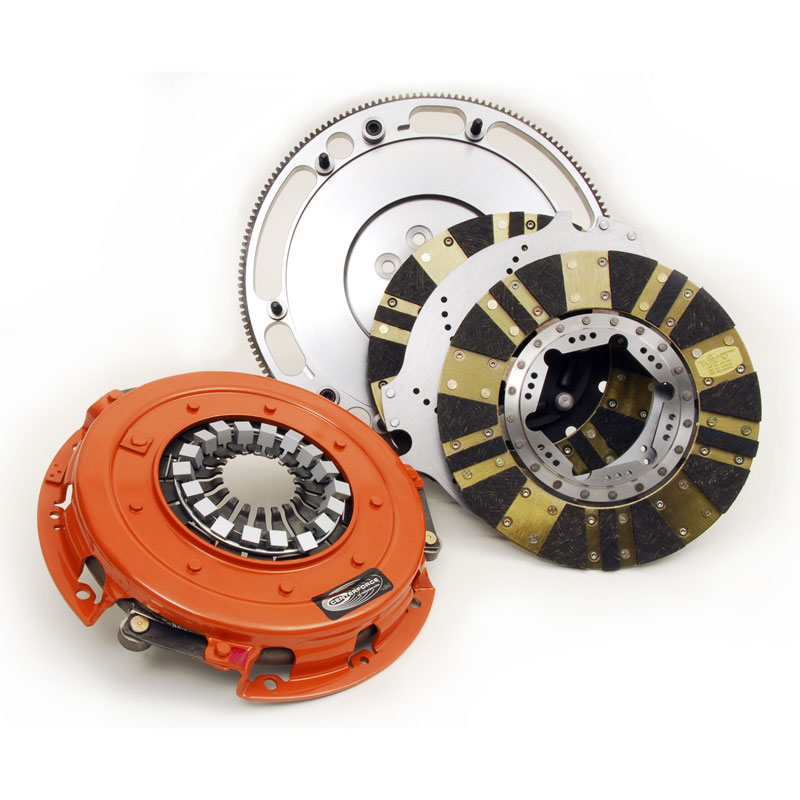
The Centerforce DYAD DS is a thing of mechanical beauty. The machined flywheel is nearly too nice to hide inside a bellhousing!
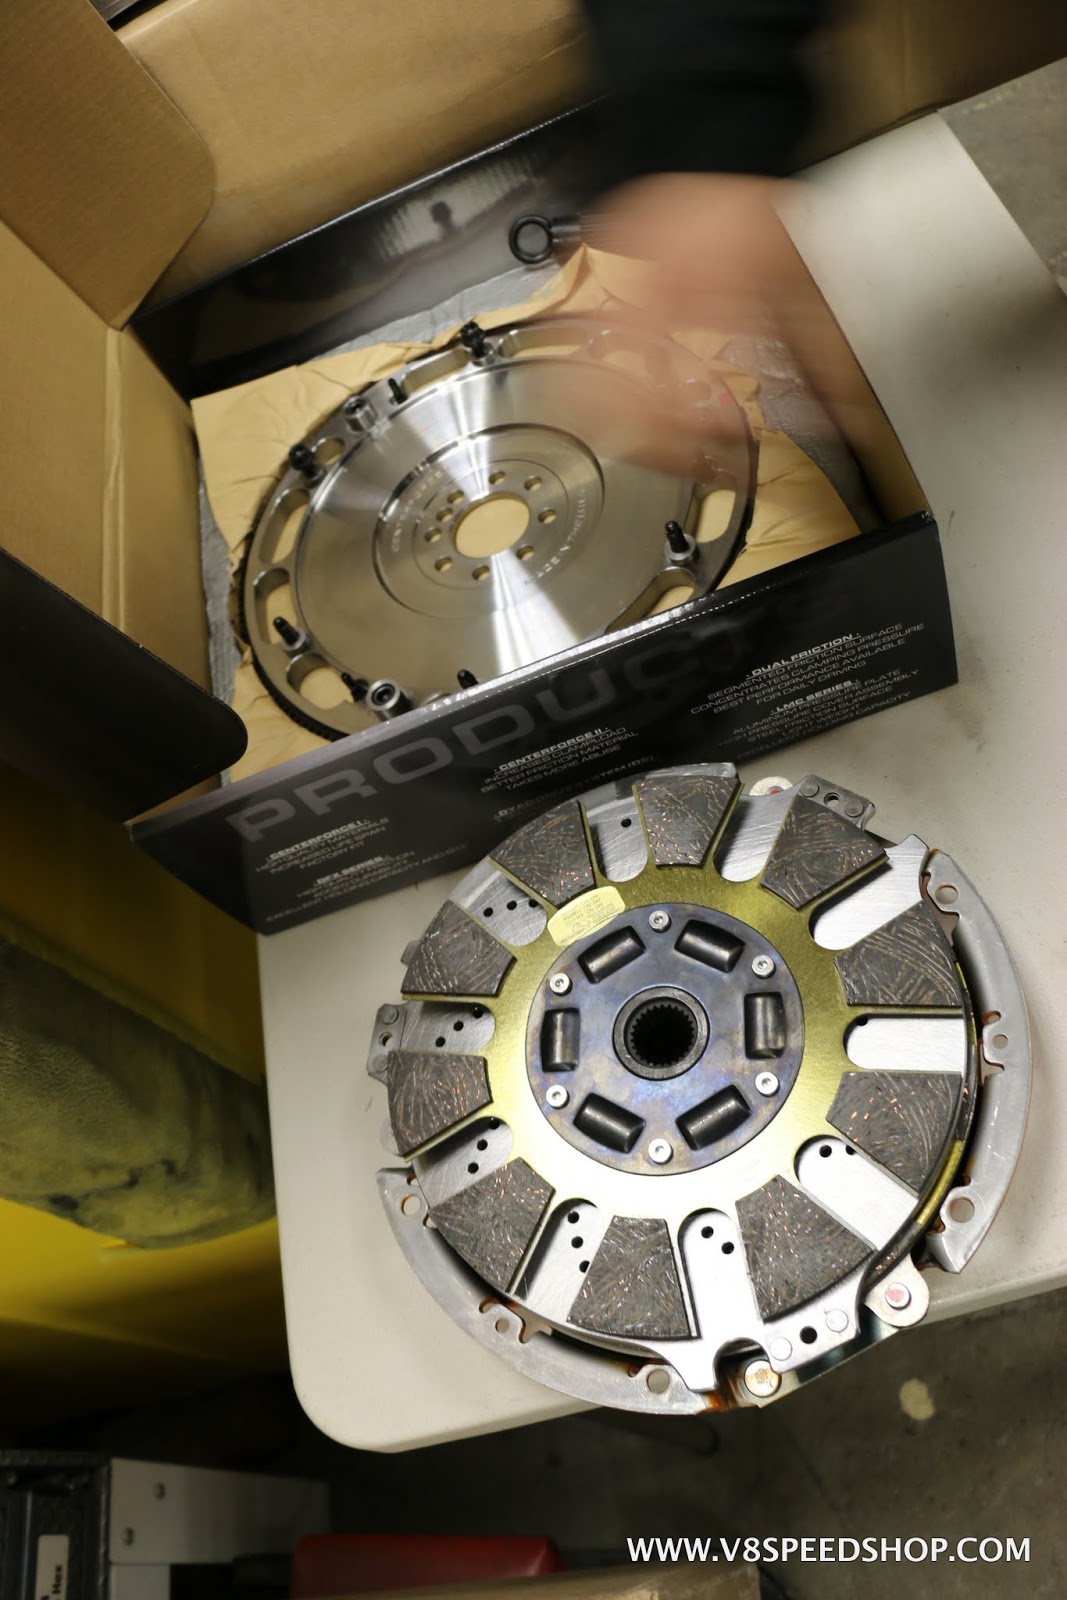
BUT it wouldnt do much good on the bench! ARP hardware holds it to the LT4 crank.
Youll notice some pink / red dots on the components these are alignment markings provided by Centerforce. This system was balanced at the factory, and they are kind enough to place the parts in the box all ready to go. However, if you seperate them, you can realign the parts using the dots to during installation so they remain in balance.
The DYAD part the 11 clutch disc and the floater dual disc assembly. Centerforce claims these will hang on to up to 1300 lb. ft. of torque while still being able to drive comfortably. Weve found the driveablility claim to be true in several high-hp cars, including this one with the 540. These units provide predictable grab with smooth engagement and a pedal you can live with.
 Kevin Oeste
V8 Speed and Resto Shop
V8TV
Muscle Car Of The Week
V8 Radio Podcast
All about us:
https://www.v8speedshop.com
02-04-2018 #6
Registered User
- Join Date
- Dec 2004
- Location
- Midwest
- Posts
- 2,261
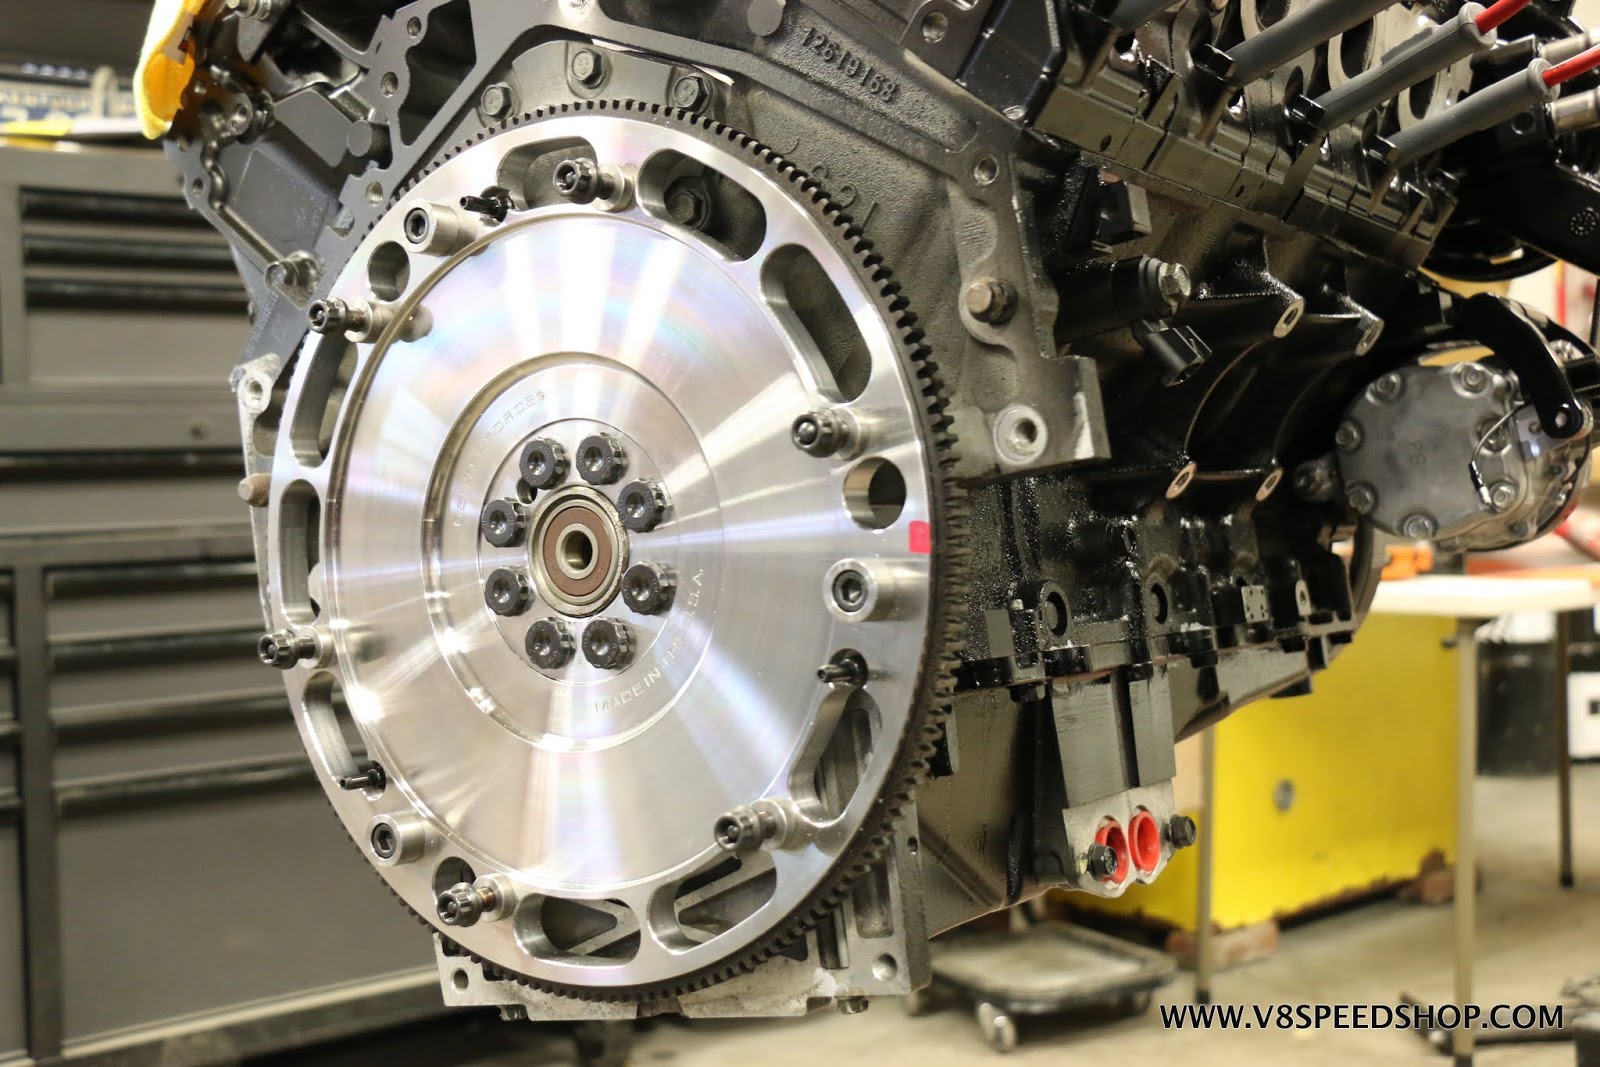
The pressure plate and clutch plates mounted to the LT4 with ARP studs. The alignment tool is still in place in this shot. The pink dots correspond with the dot on the flywheel. The cad-plated ring is the front half of the explosion-proof scattershield.
Hydraulic throw-out bearing on the input shaft of the T56 Magnum 6-speed transmission.
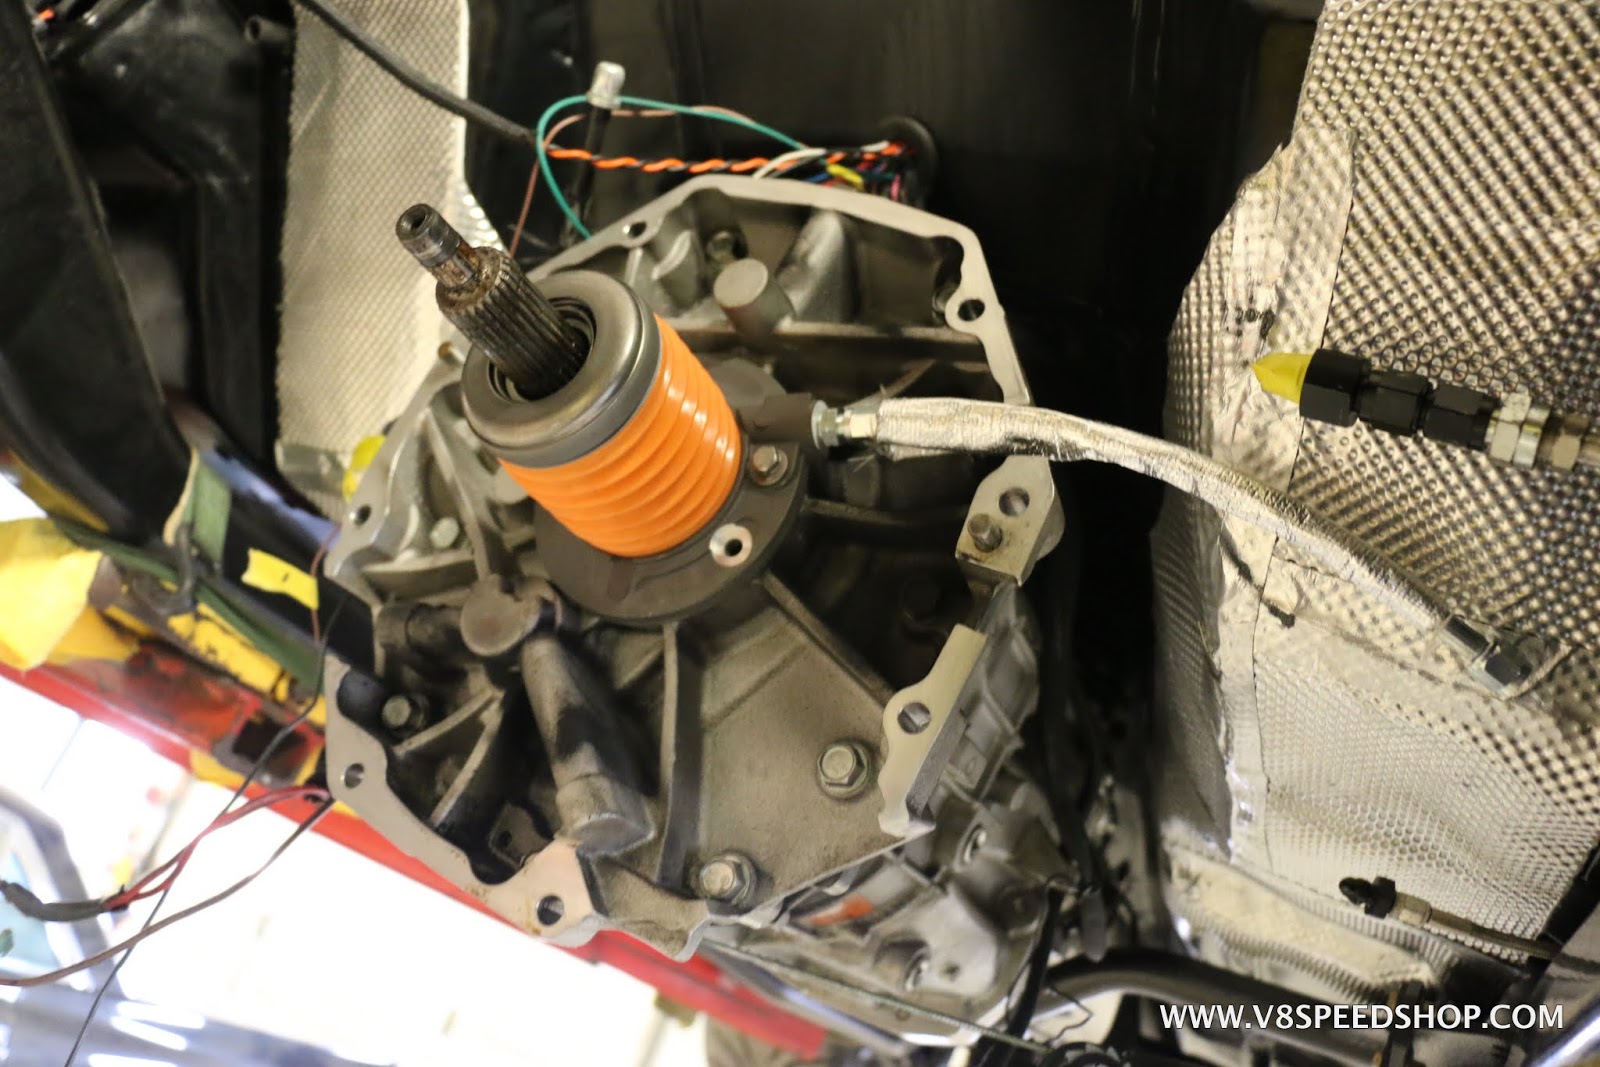
The SFI spec bellhousing attached to the front of the transmission.
We lowered the LT4 into the nose of the Camaro and shot a quick video. Excuse the quality, this is from a V8TV Minute To Winnit Live video we streamed on our Facebook page.
Pics of the fit and some new surprises next time!Kevin Oeste
V8 Speed and Resto Shop
V8TV
Muscle Car Of The Week
V8 Radio Podcast
All about us:
https://www.v8speedshop.com
02-05-2018 #7 Registered User
- Join Date
- Aug 2007
- Location
- Jonesboro, Arkansas
- Posts
- 2,506
Nice! Man, I'd like to have that motor and trans setup.
Carl Wilson
1968 Camaro - T-56 6 speed - 383 Stroker, 2014 Mustang GT seats. FiTech EFI, Tanks Inc. Tank with Deutschwerks fuel pump.
02-07-2018 #8
Registered User
- Join Date
- Dec 2004
- Location
- Midwest
- Posts
- 2,261
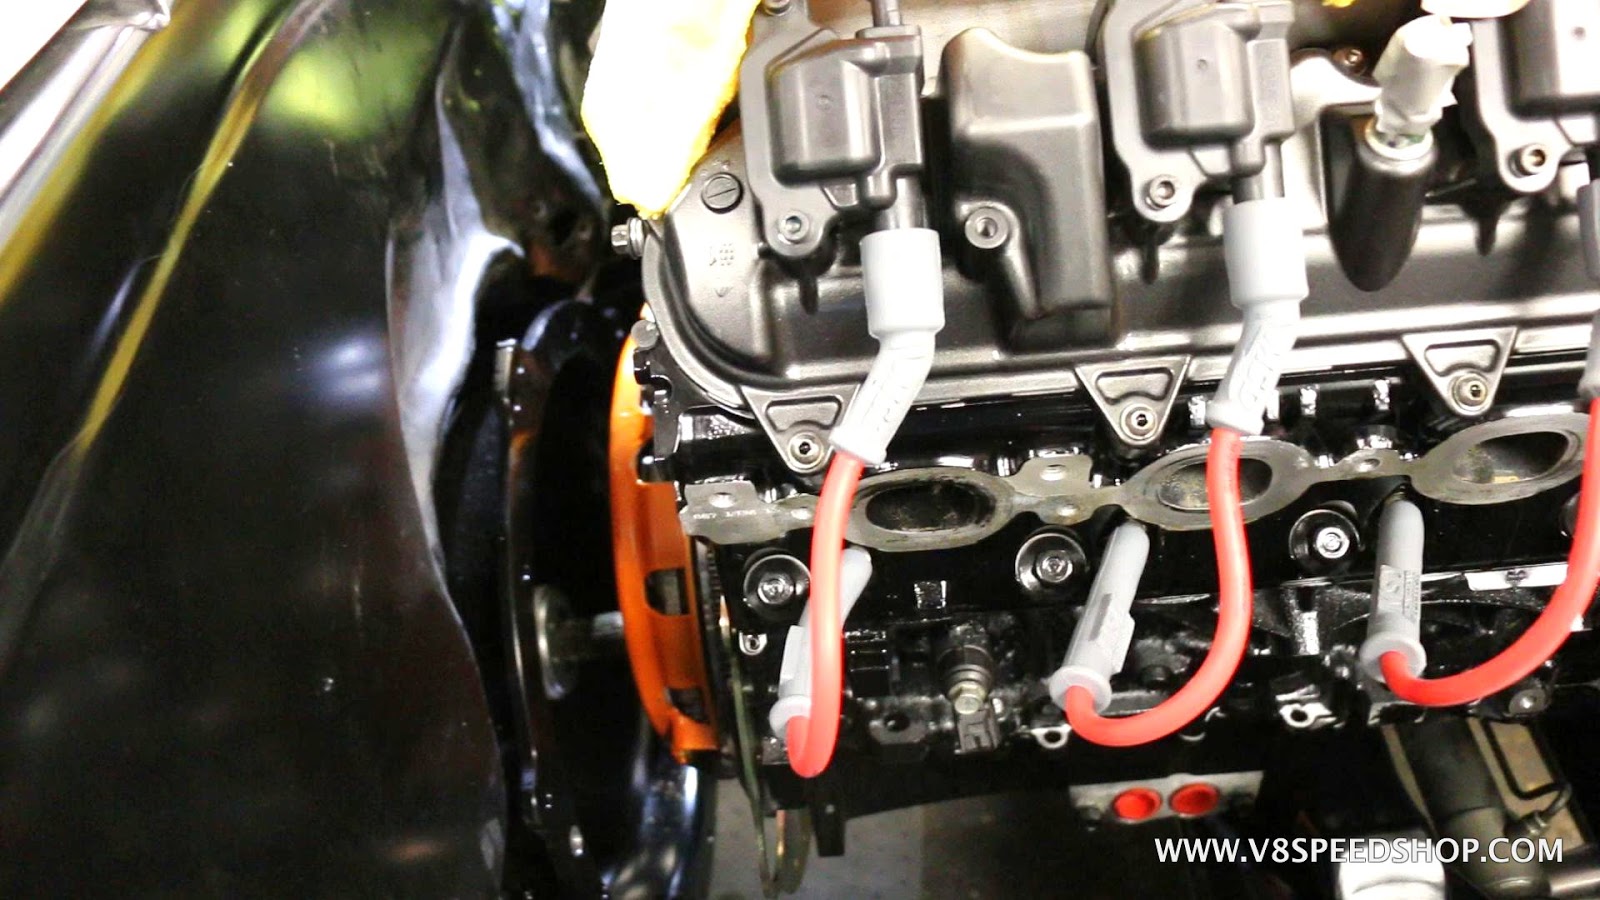
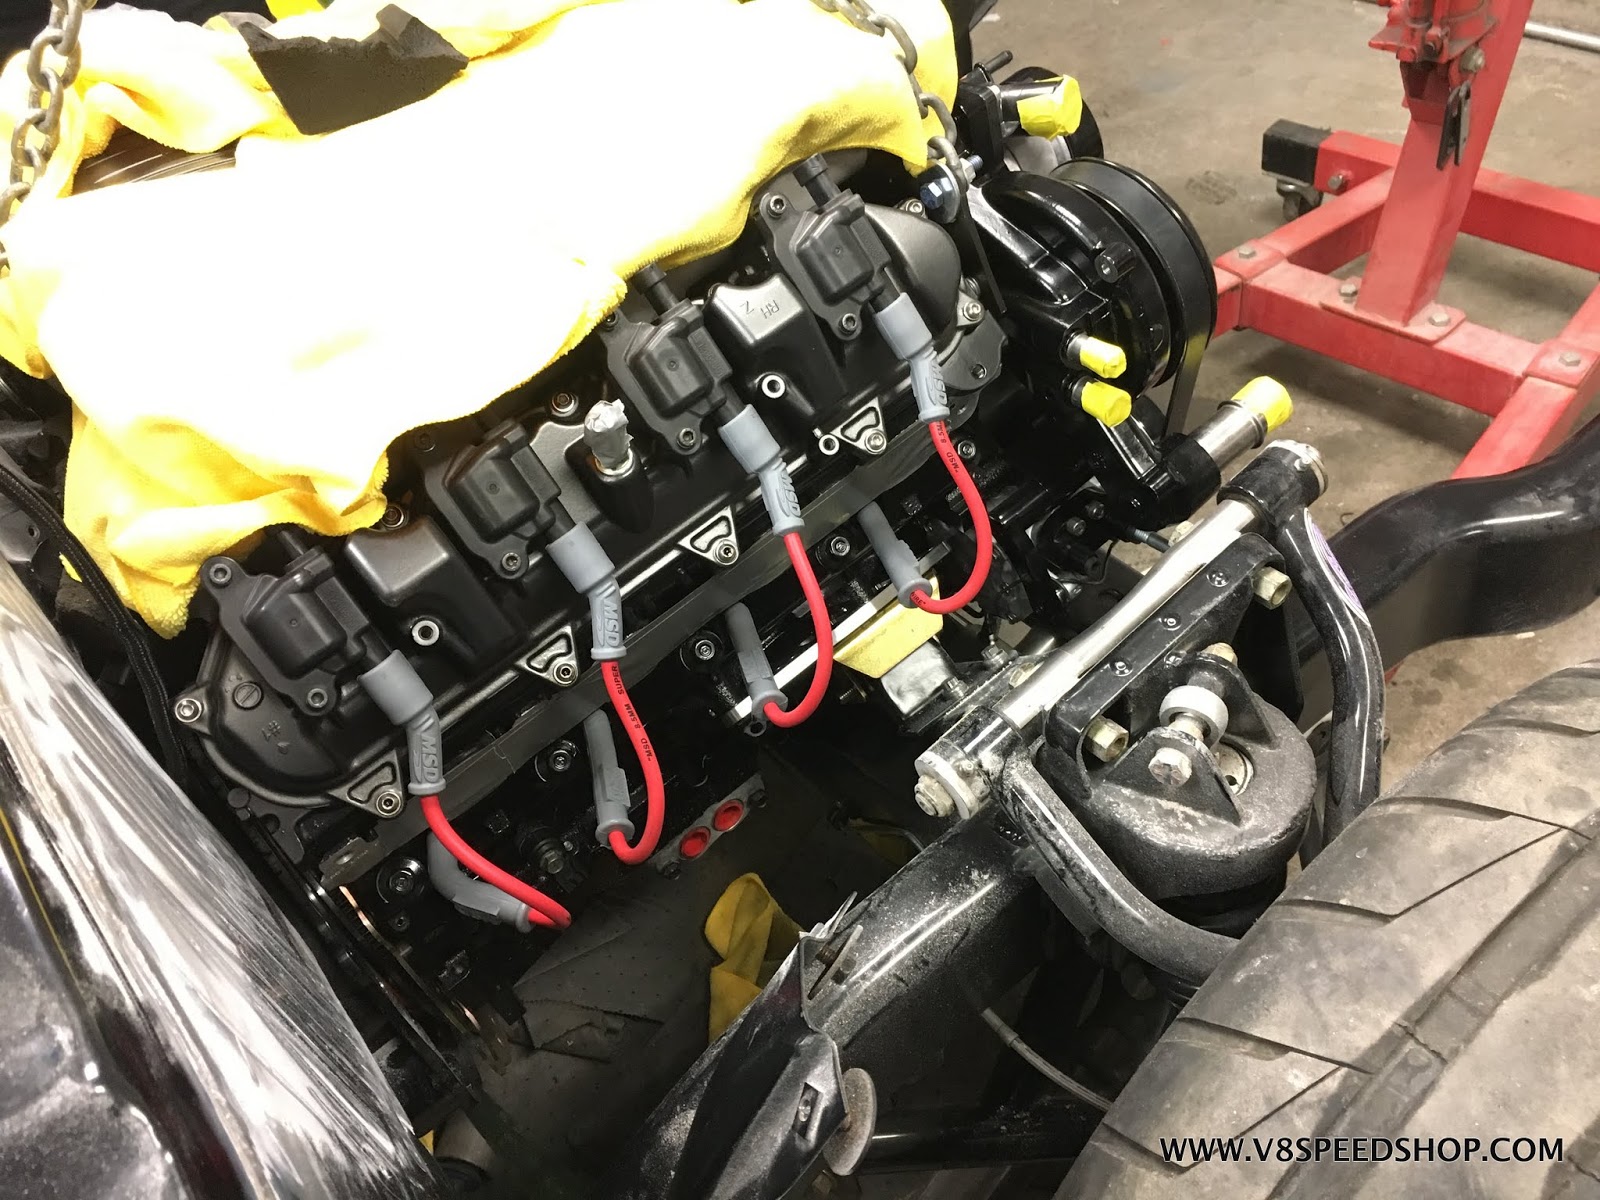
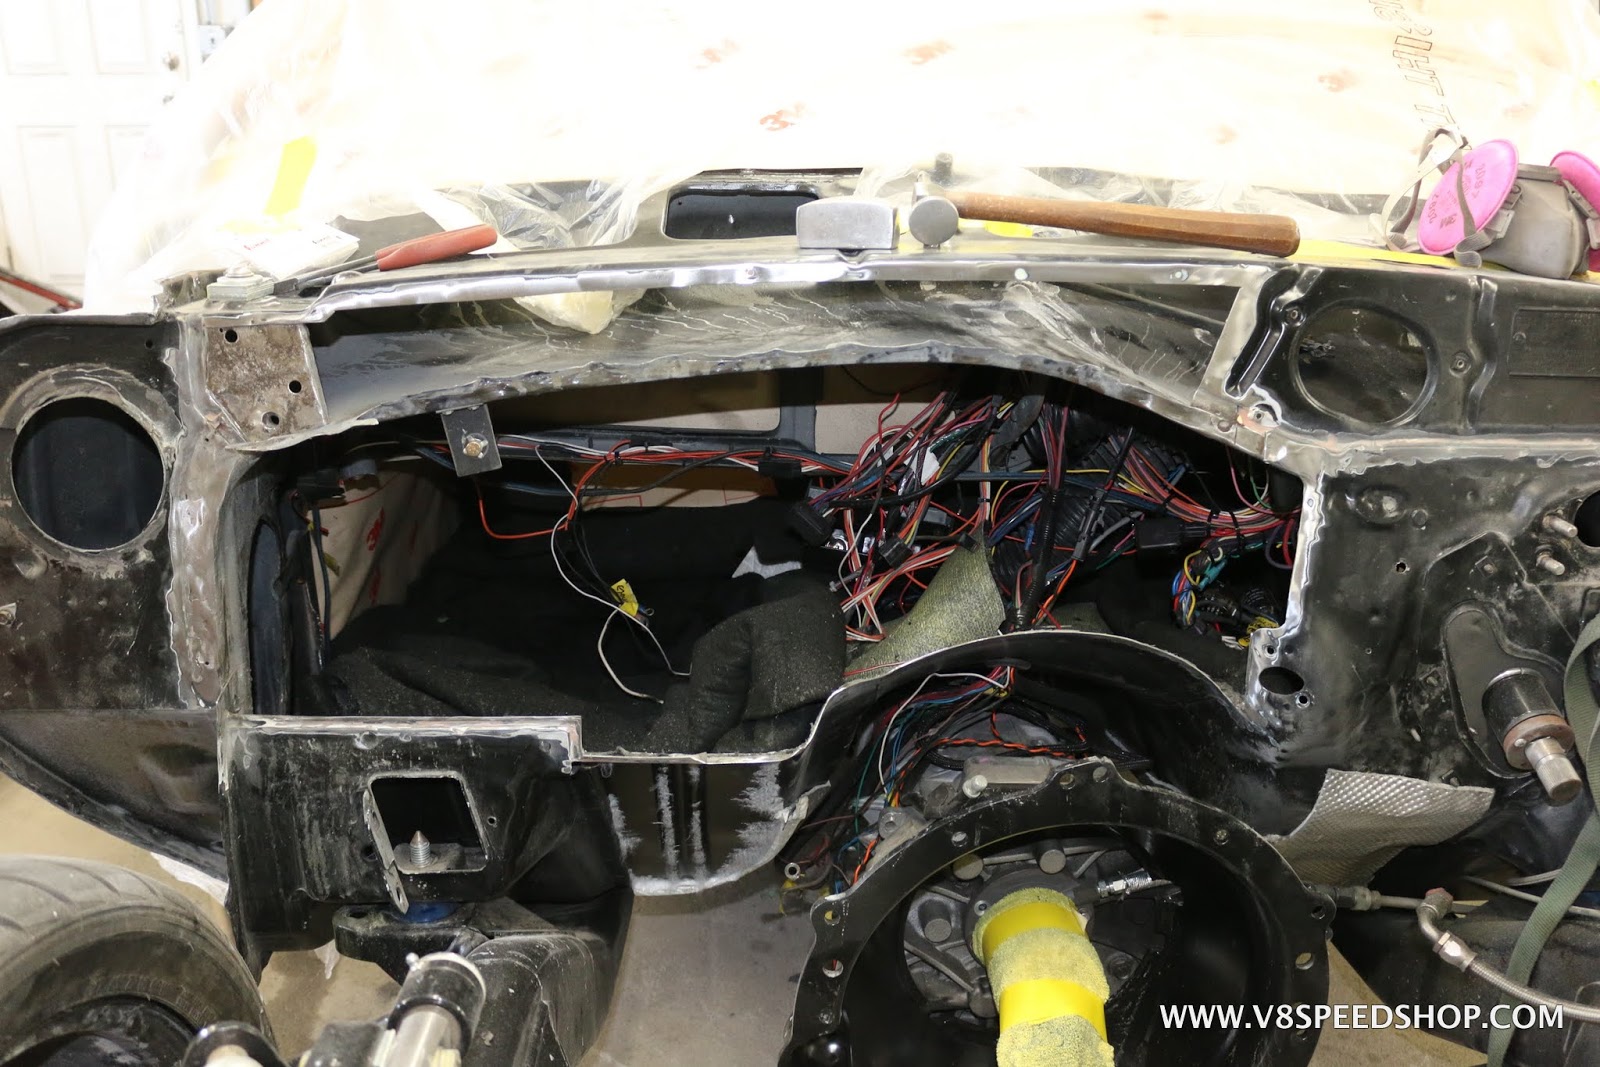
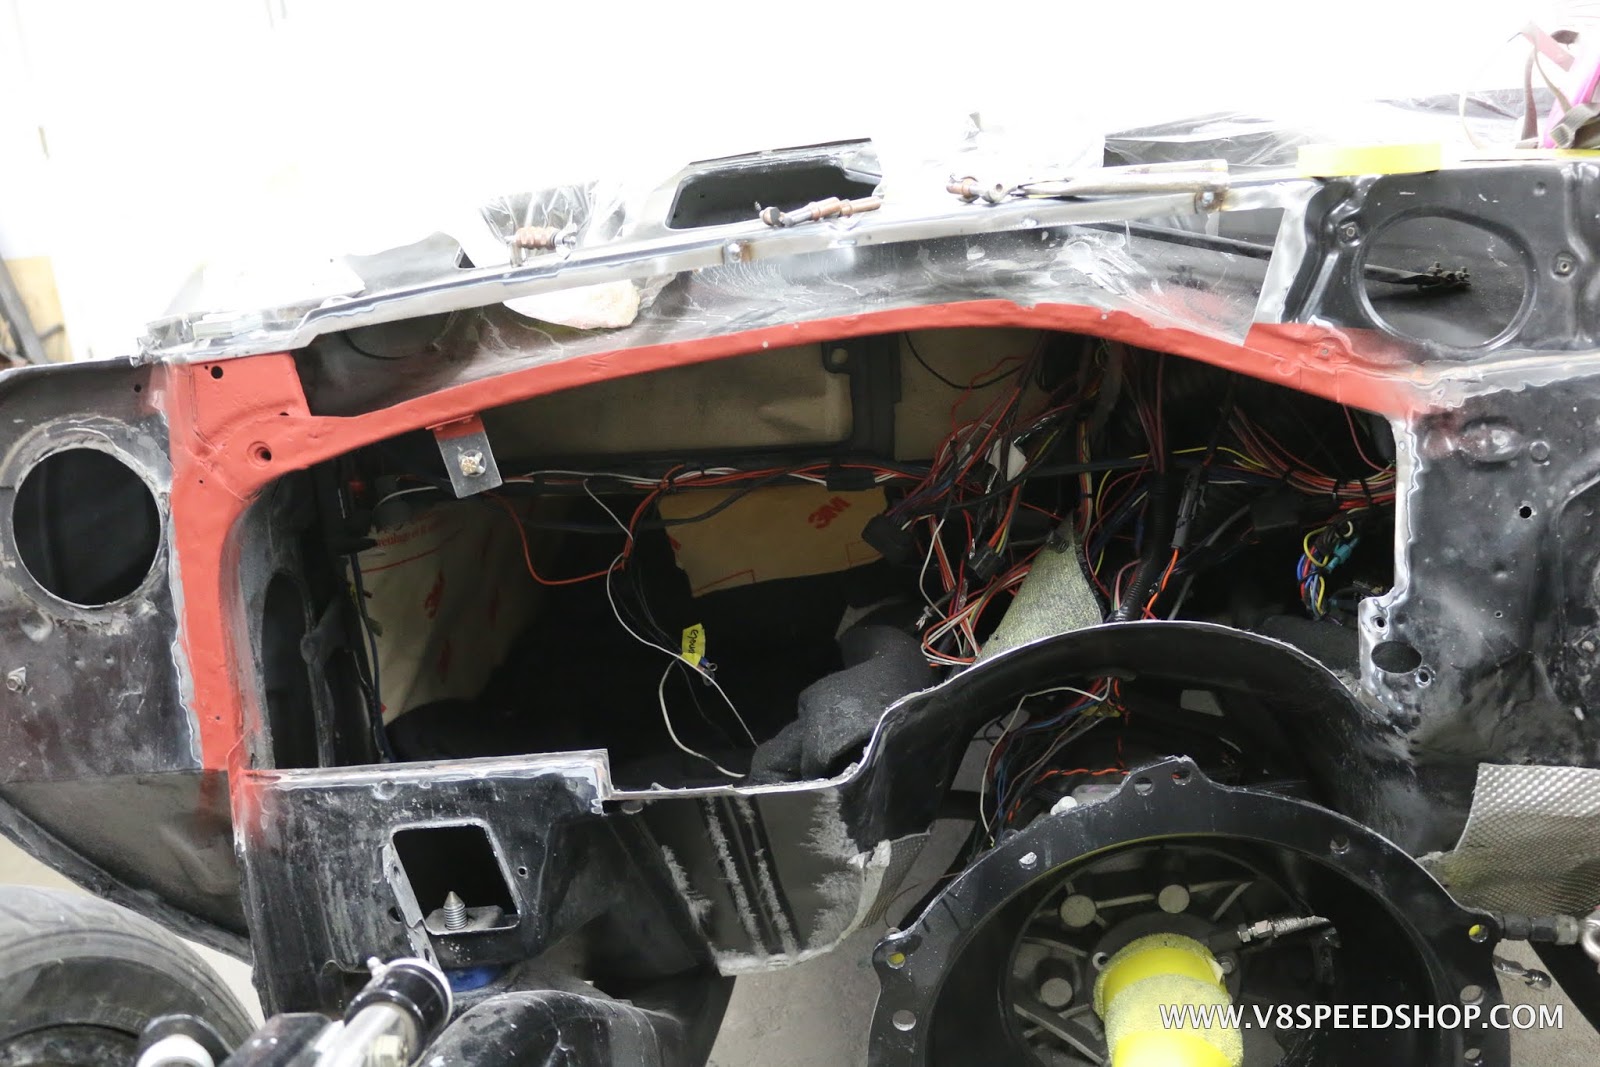
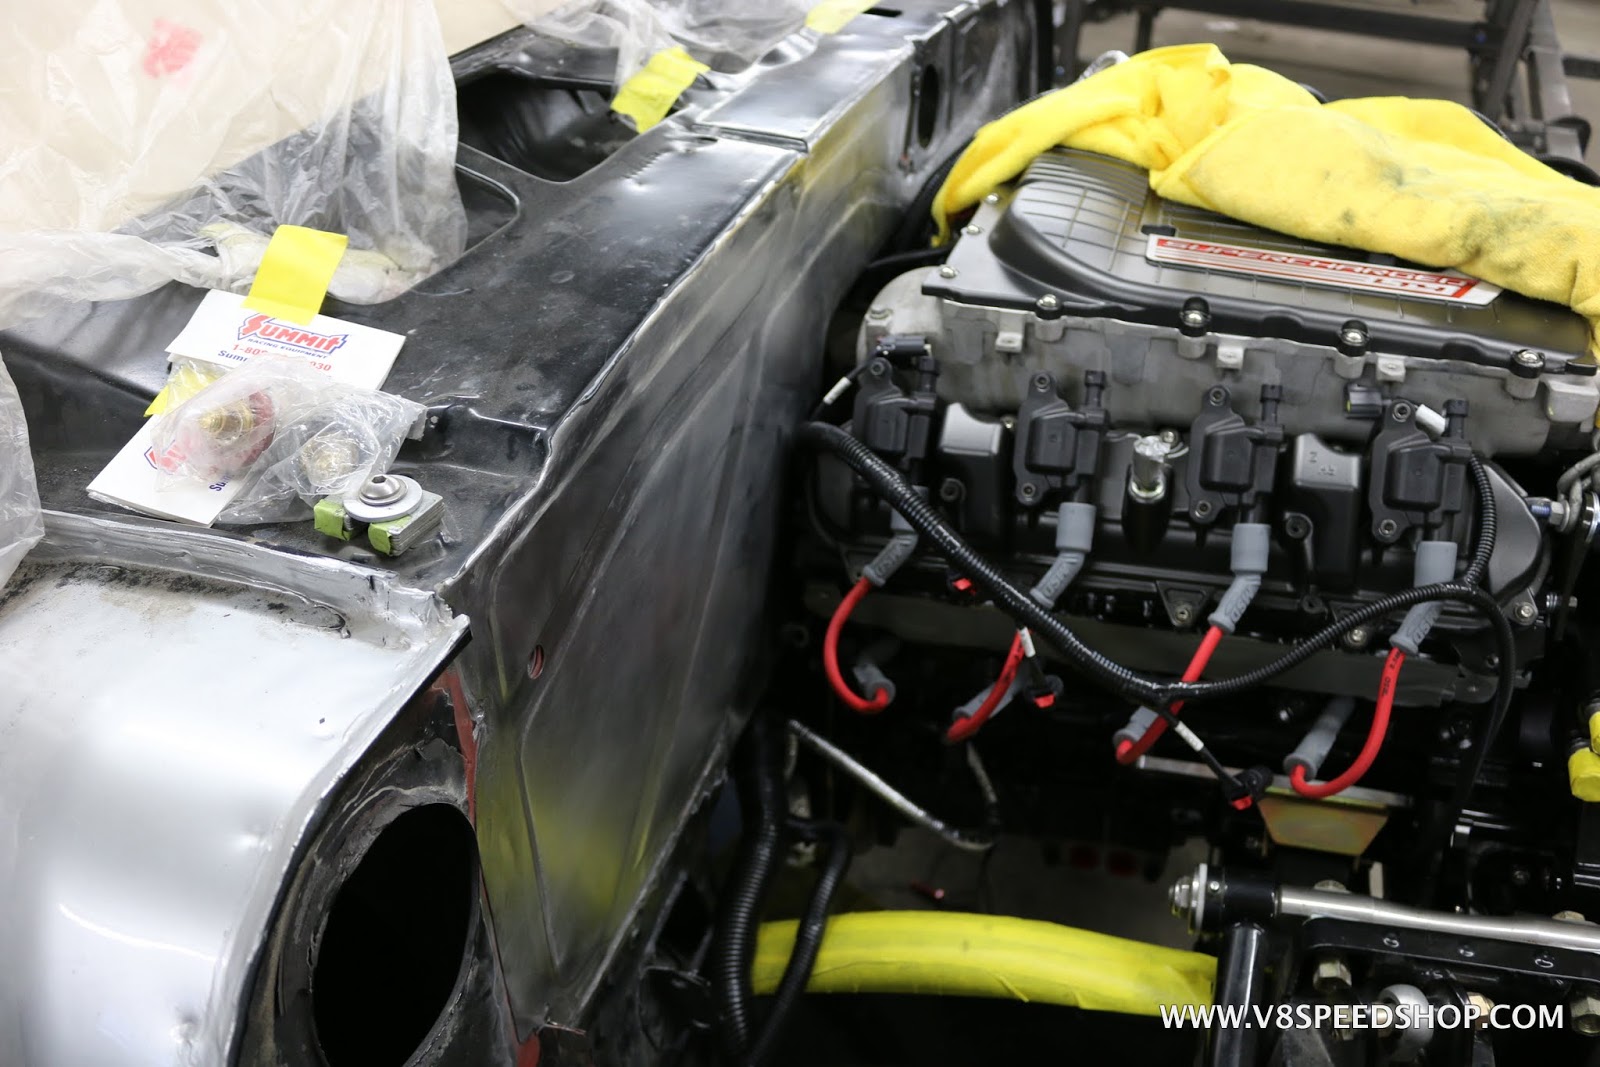
There are numerous connections off the back of the LT4 that require some space to access and make them look clean, as well as for serviceability.
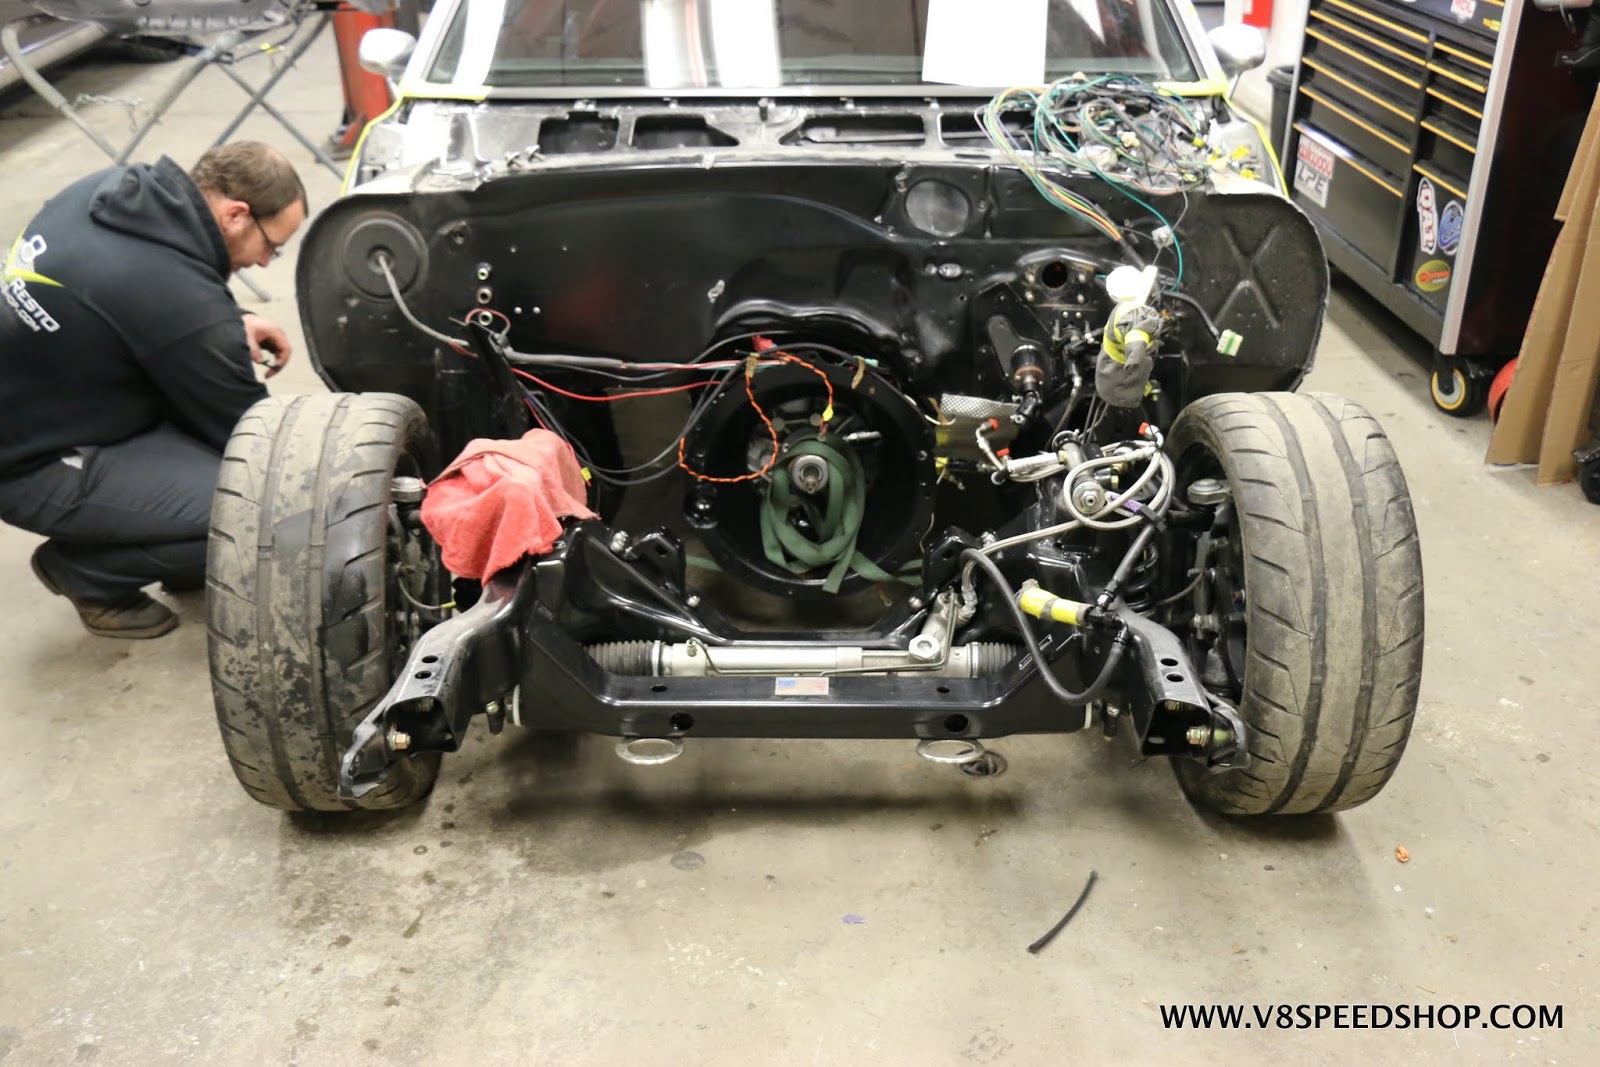
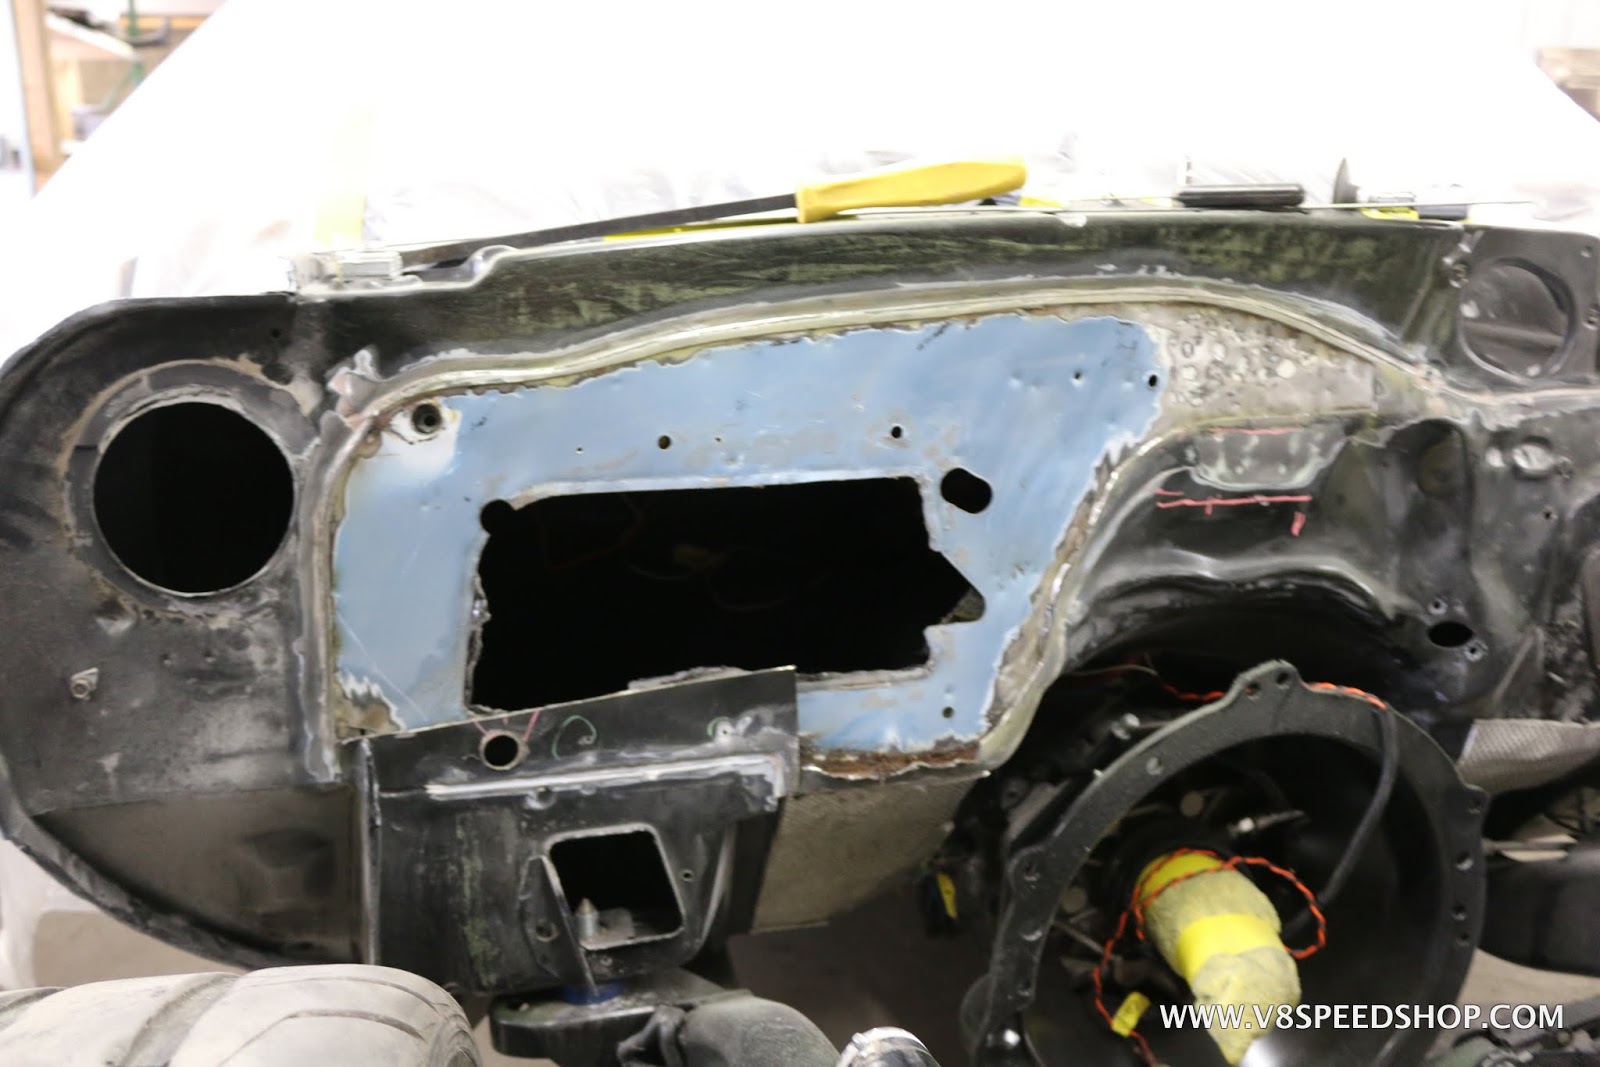
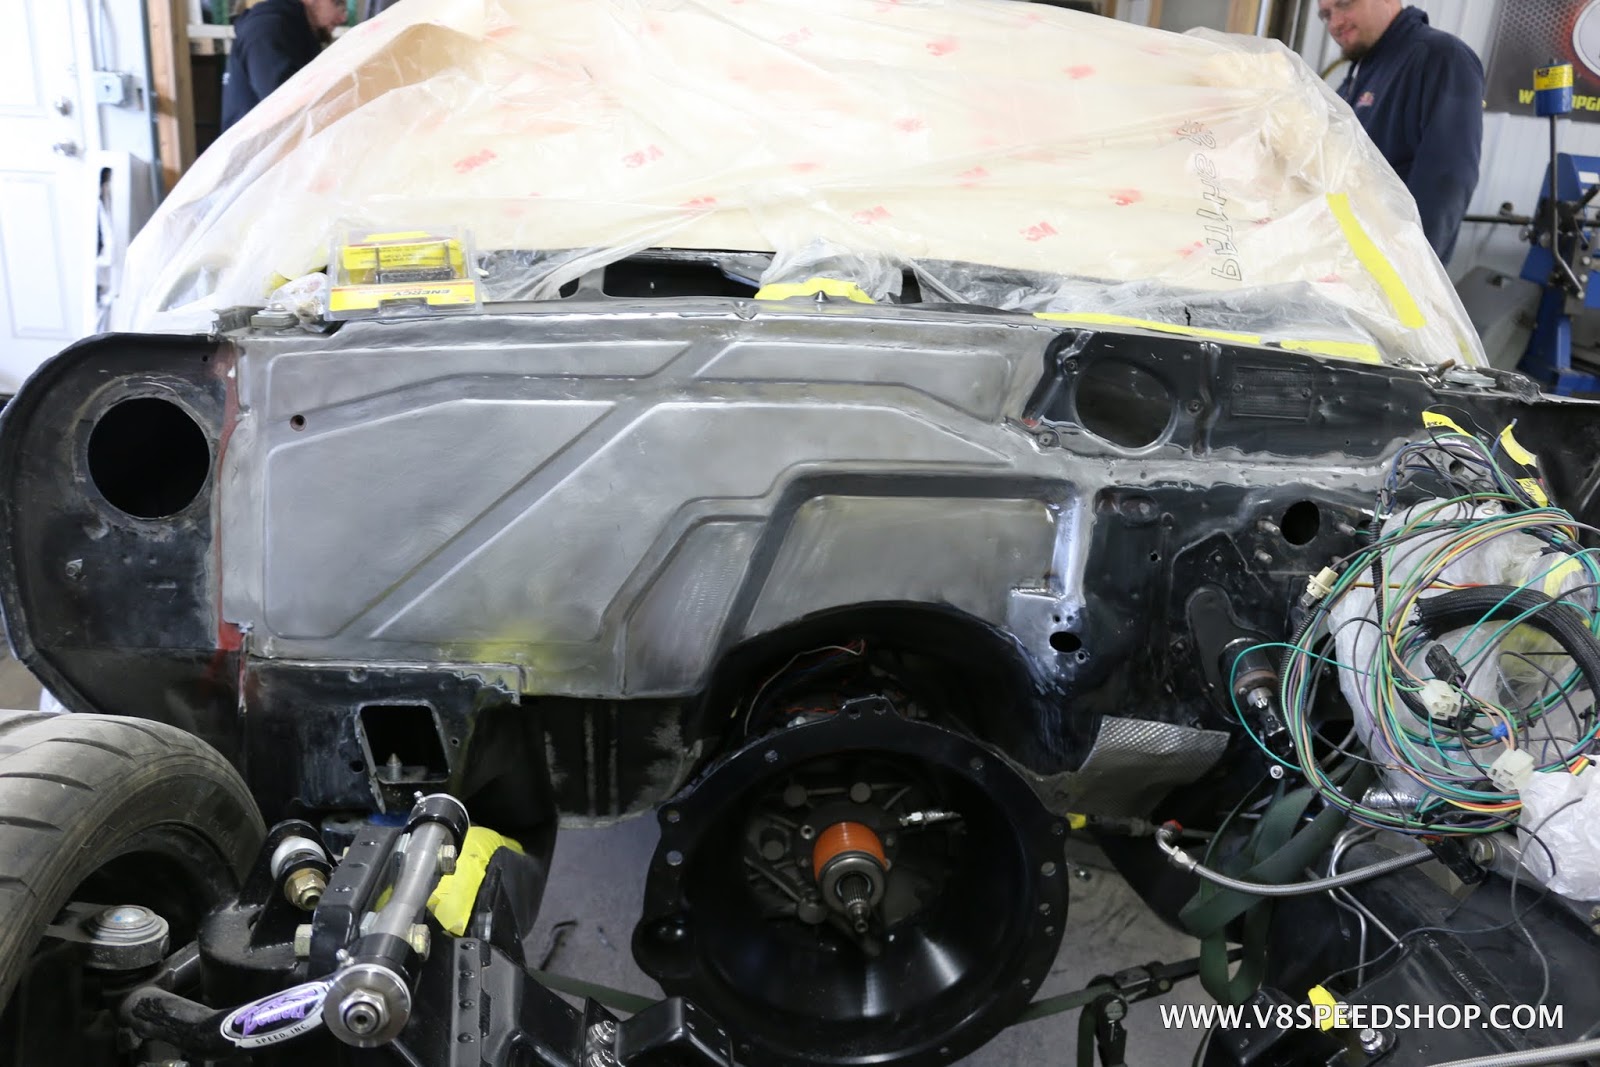
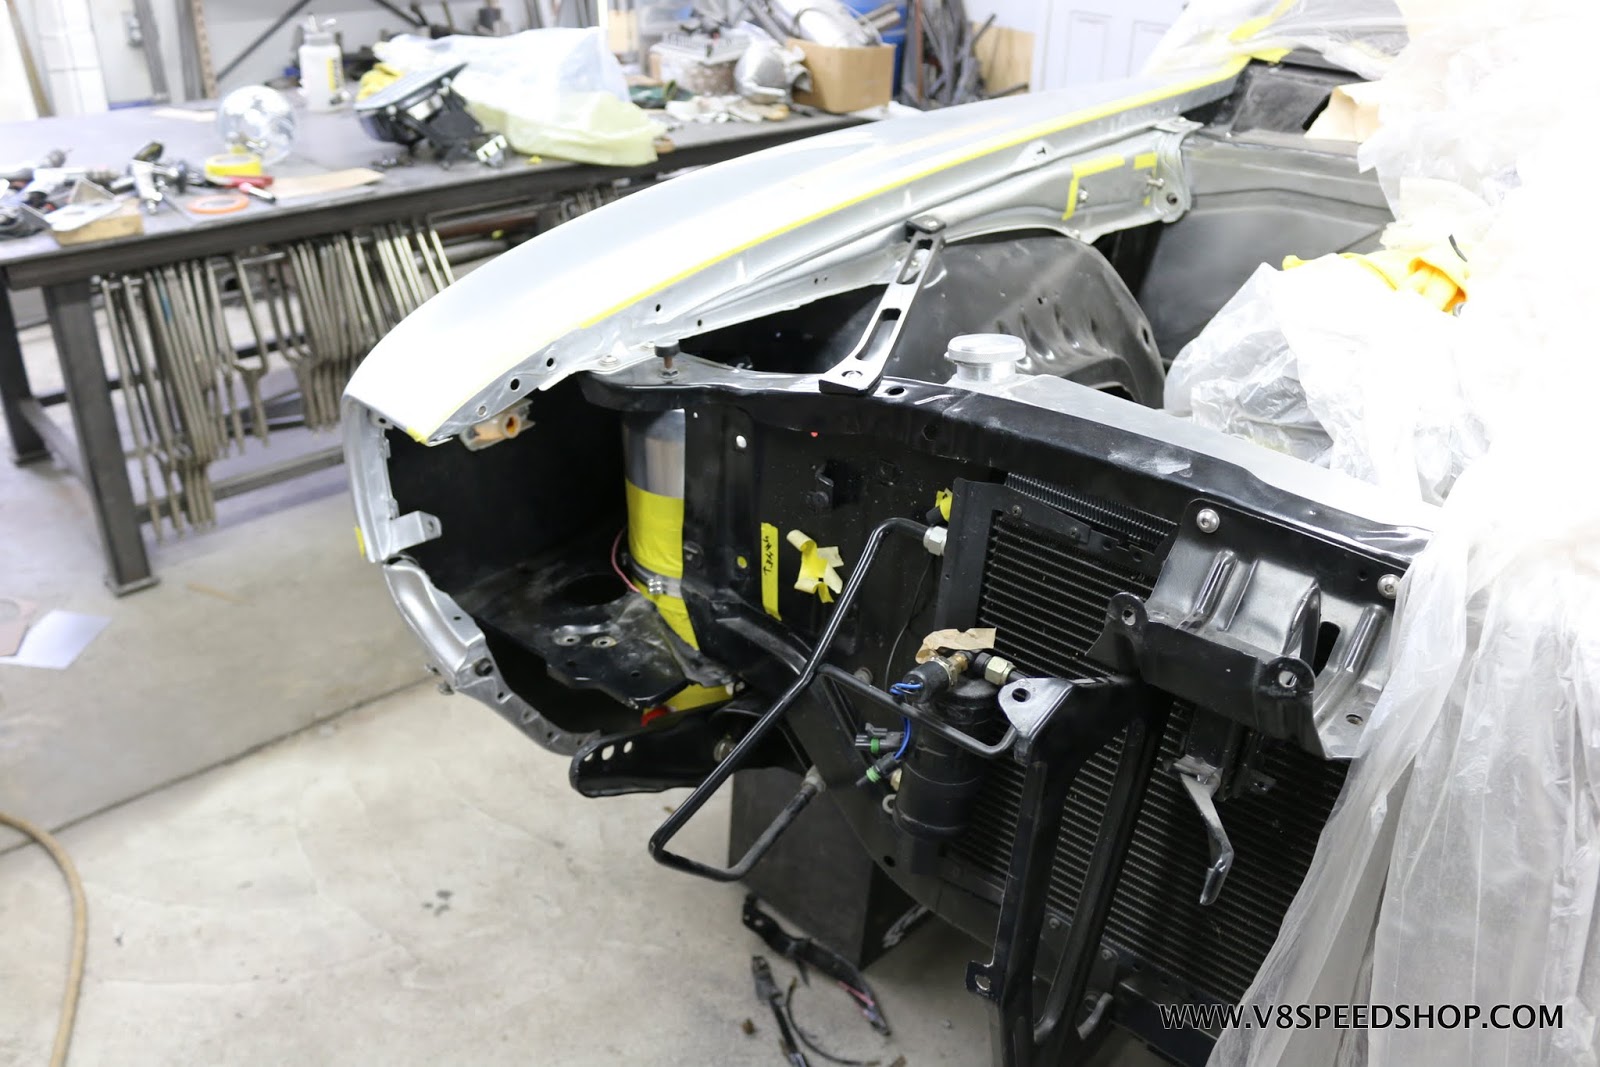
The V8 crew lowered the engine into the bay just to get a visual of how things were going to fit. This car had a smoothed firewall, and A/C bulkhead fittings down on the passenger side. The motor mounts had not yet been chosen, this was just to get a birds eye view of any potential challenges.
It was obvious that there would be some clearance issues on the back side of engine as the assembly moved closer to the transmission.
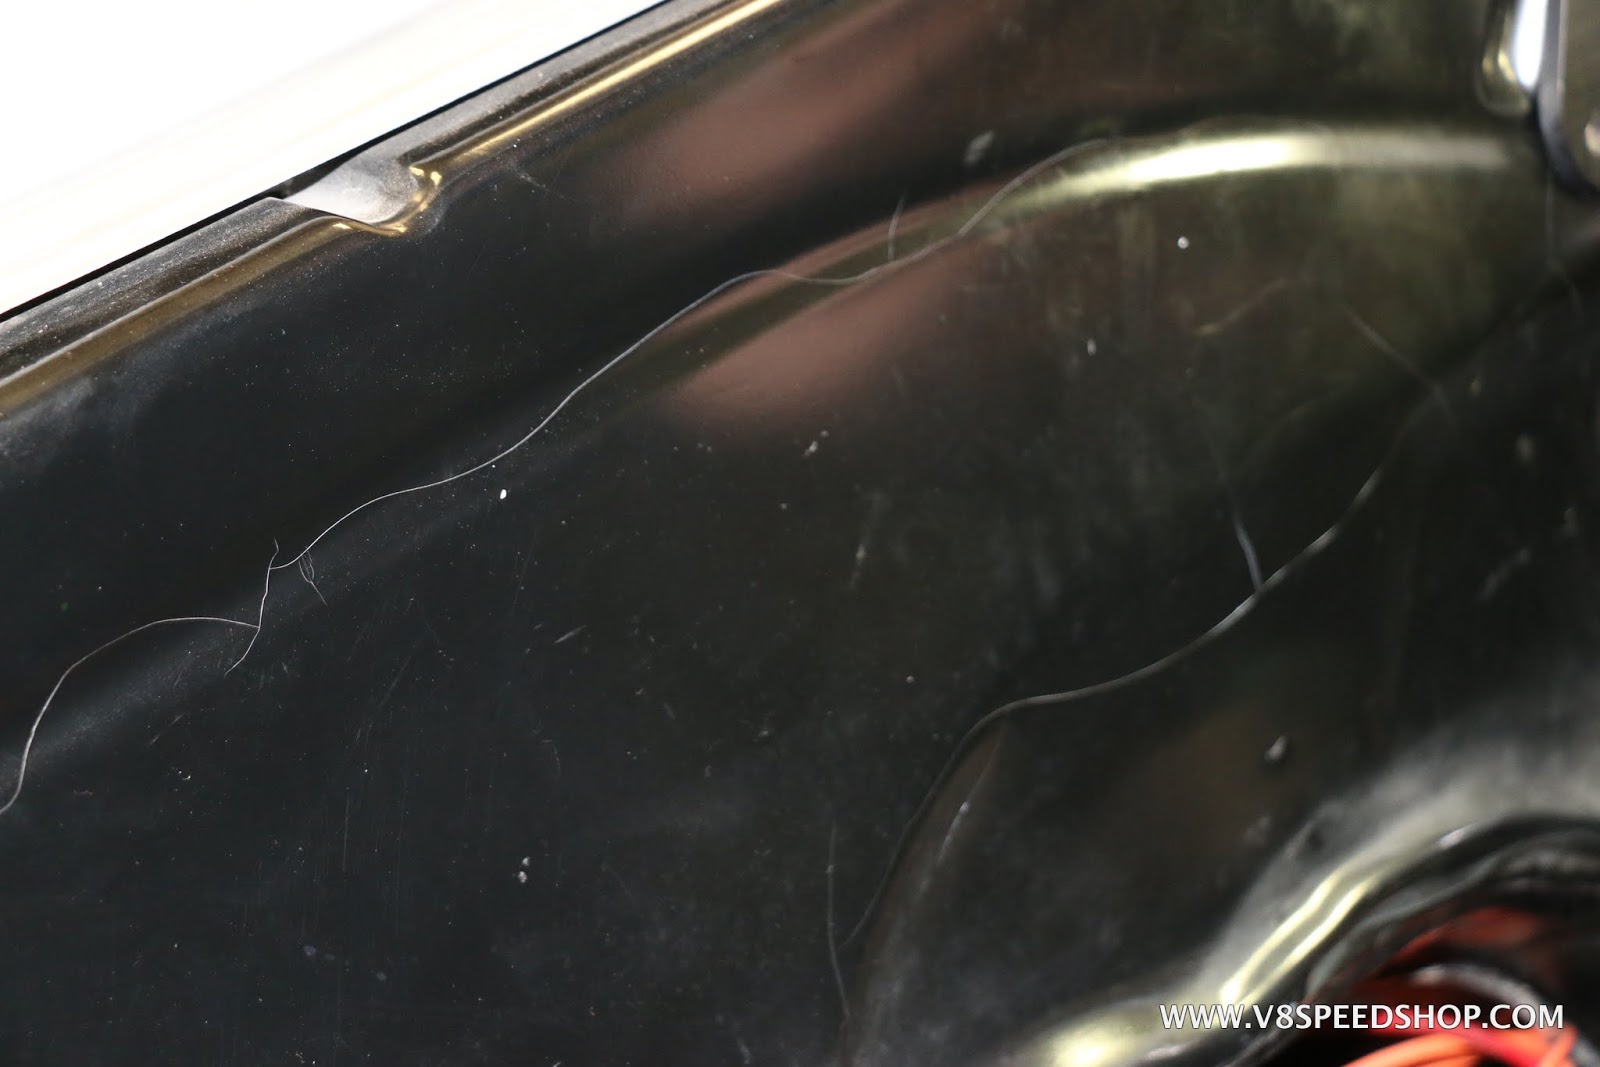
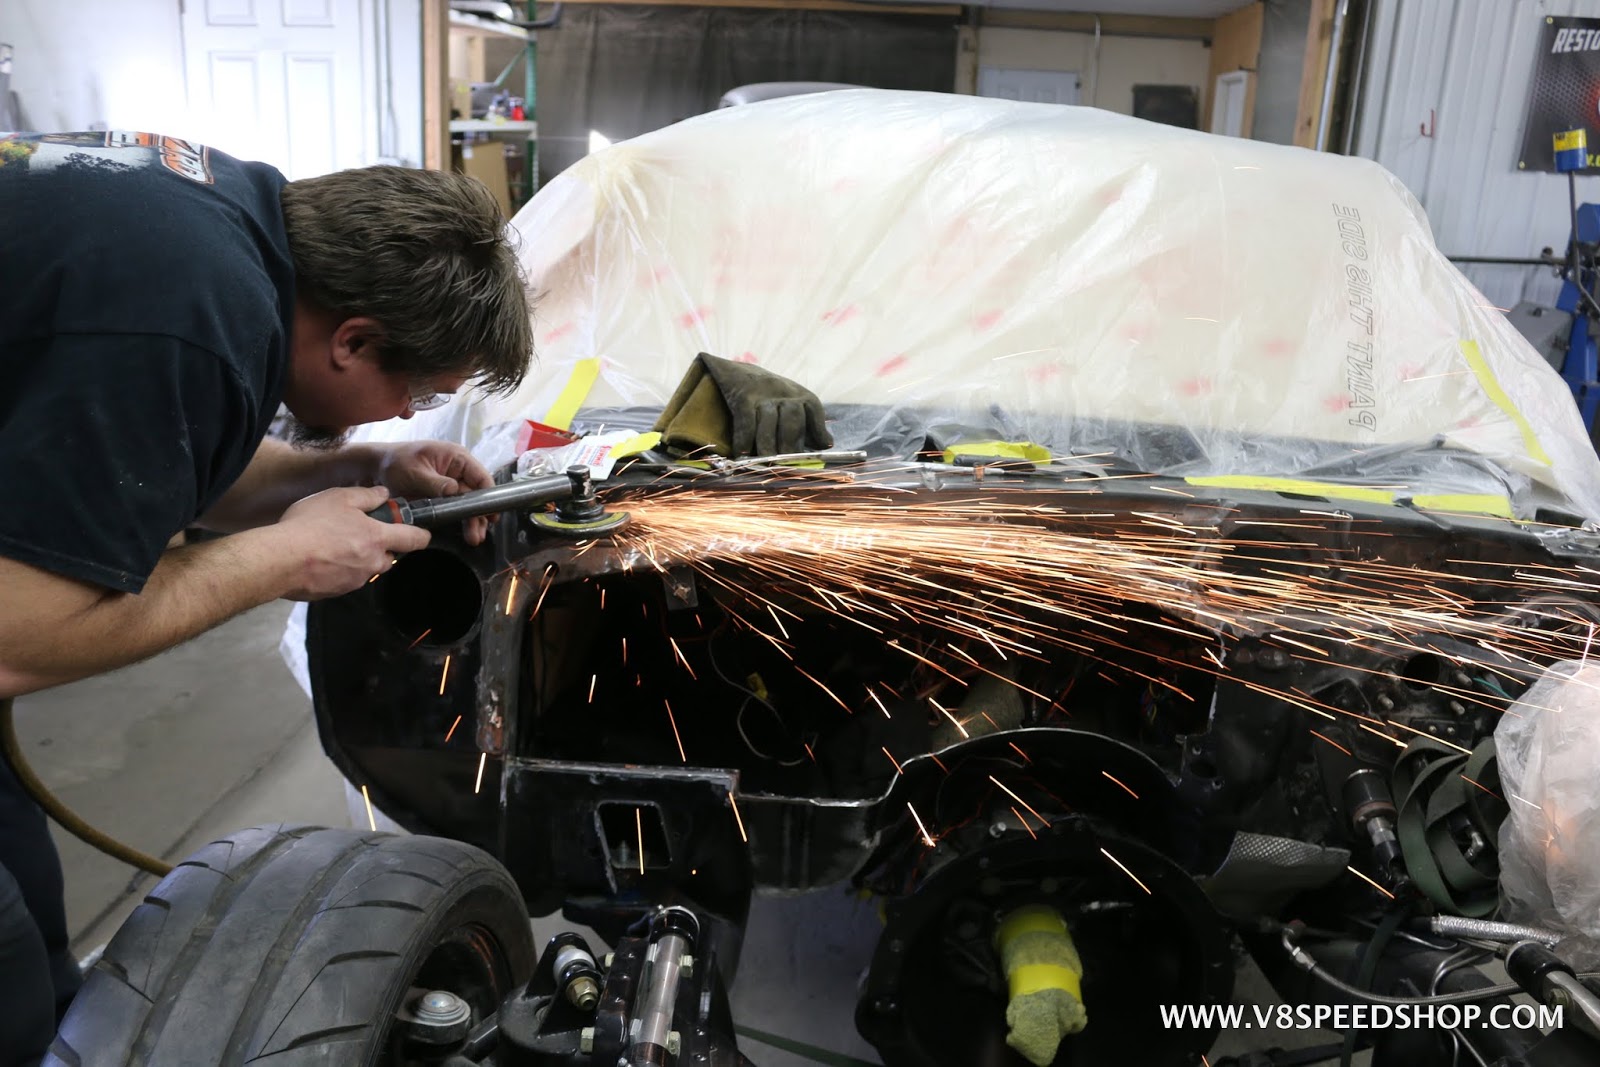
The engine was lifted out, and the firewall was examined. At this point, the team noticed that the existing firewall was showing some cracking bodywork and would require a fix and repaint regardless.
The decision was made to modify the firewall to better accommodate the new engine and fix the surface issues. In order to do this, the front sheetmetal was to be removed.
- - - Updated - - -
The team carefully measured and recorded the gaps, spacing, and fitment of the panels and the alignment so that everything would go back together properly.
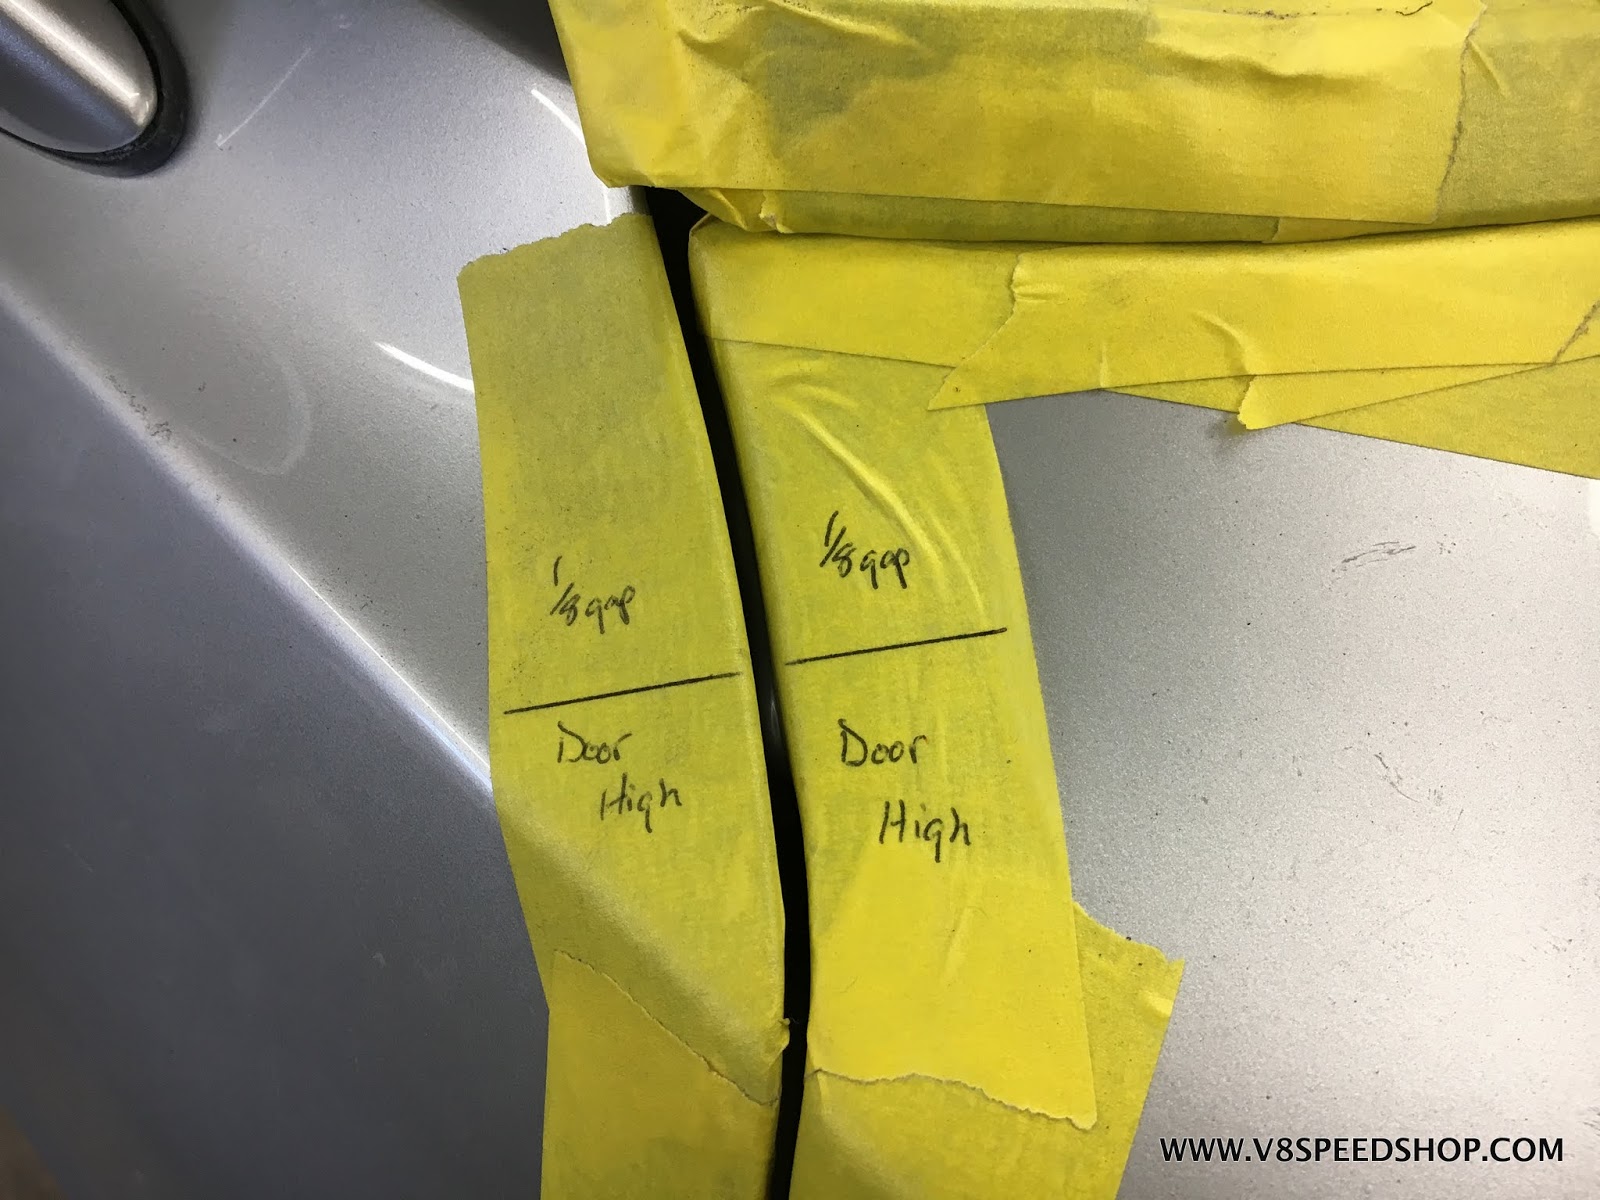
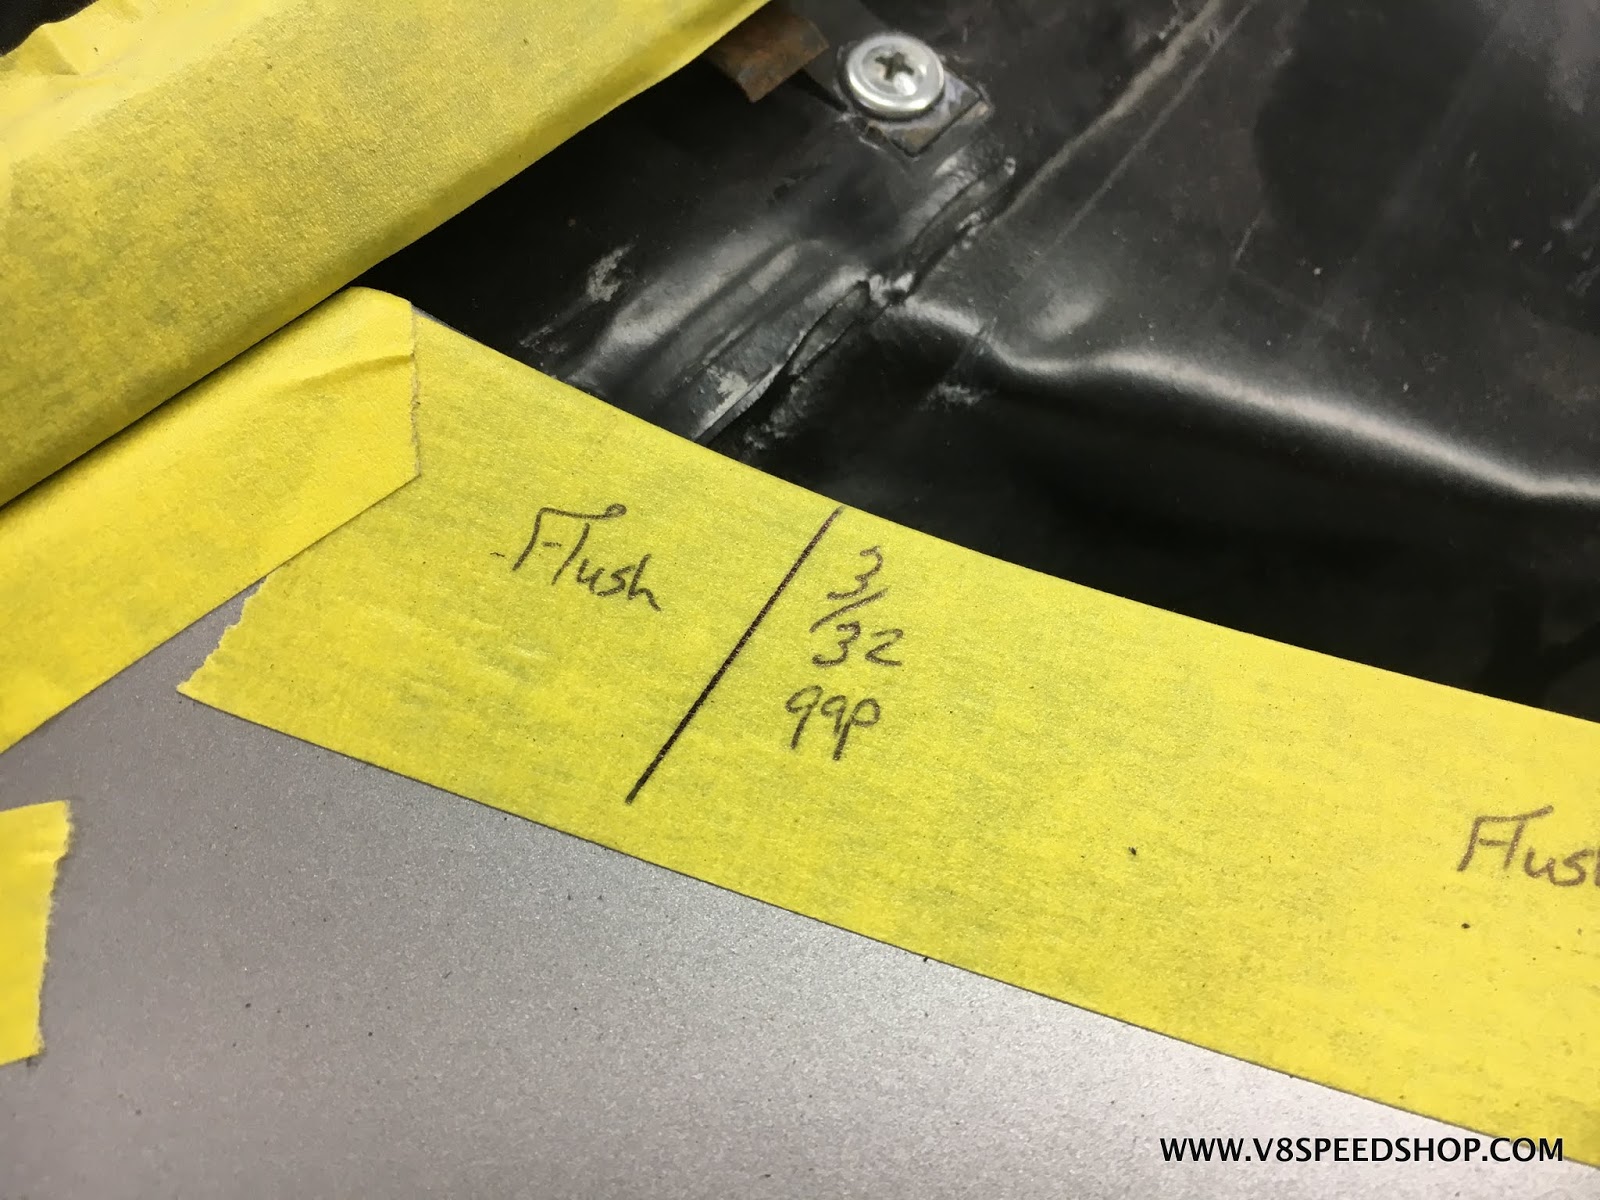
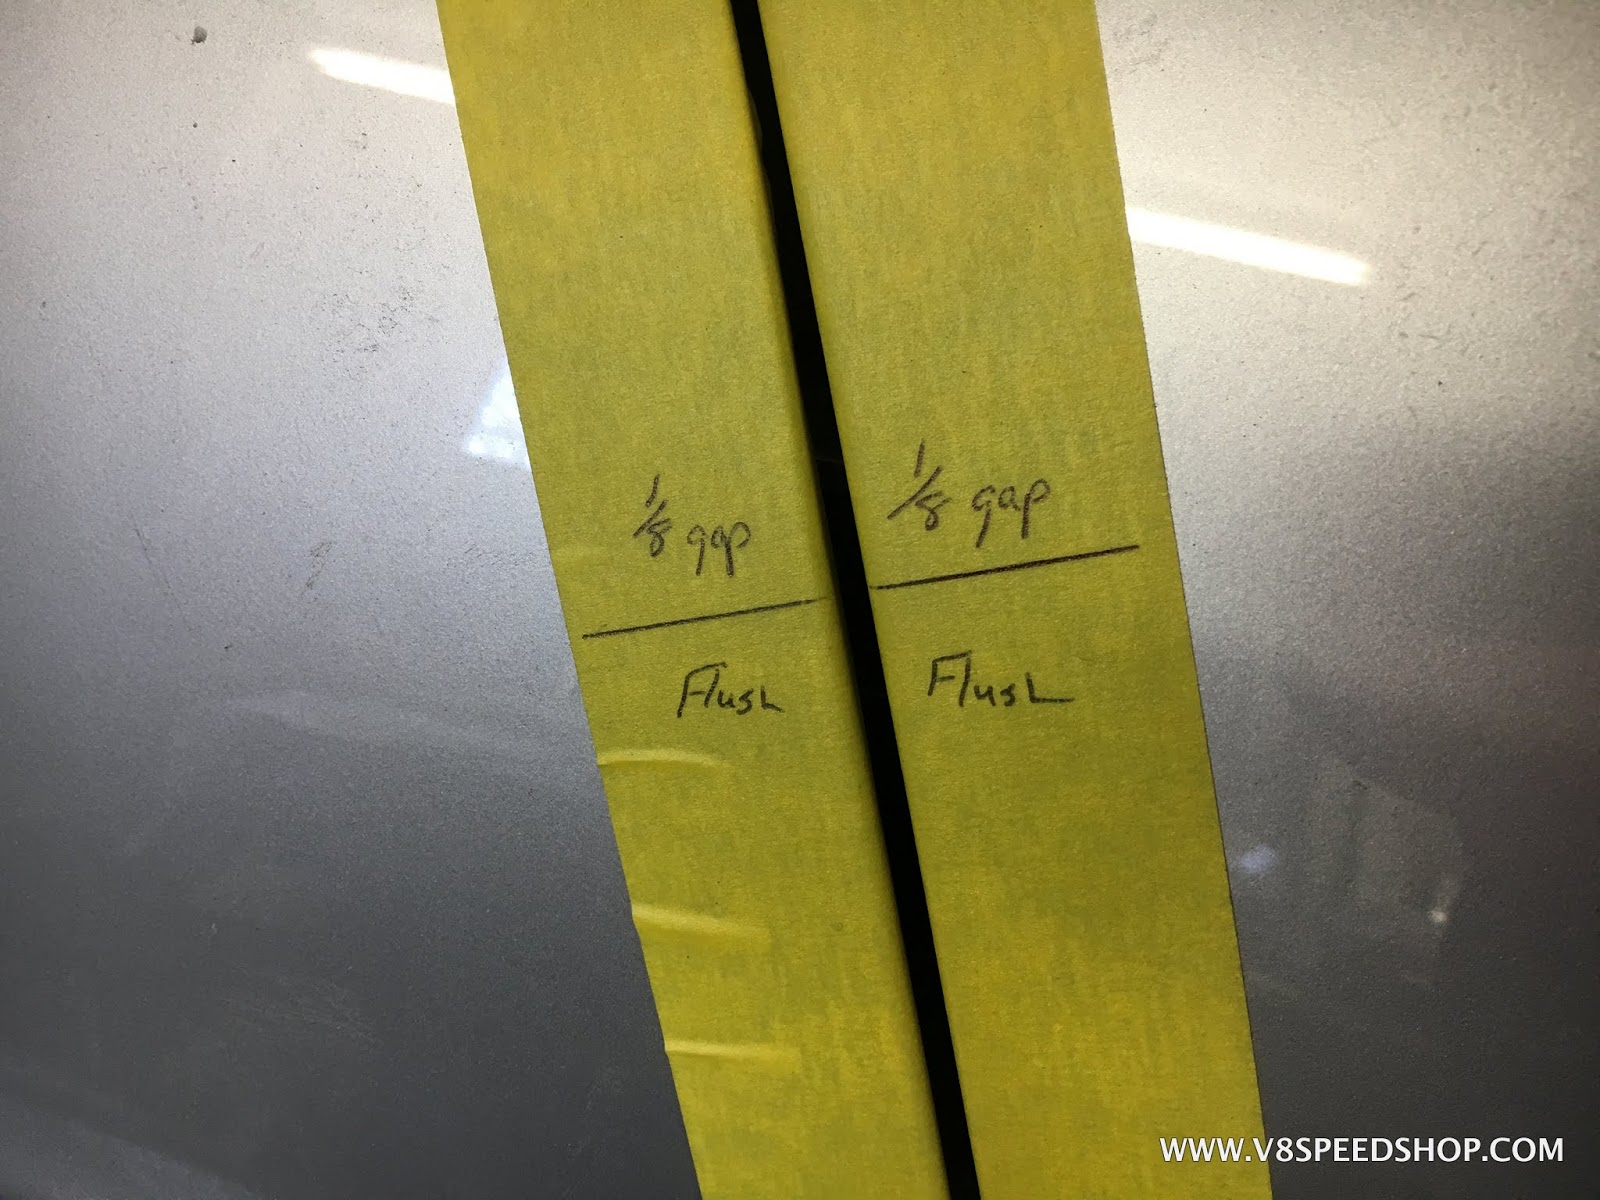

 Kevin Oeste
V8 Speed and Resto Shop
V8TV
Muscle Car Of The Week
V8 Radio Podcast
All about us:
https://www.v8speedshop.com
02-07-2018 #9
Registered User
- Join Date
- Dec 2004
- Location
- Midwest
- Posts
- 2,261
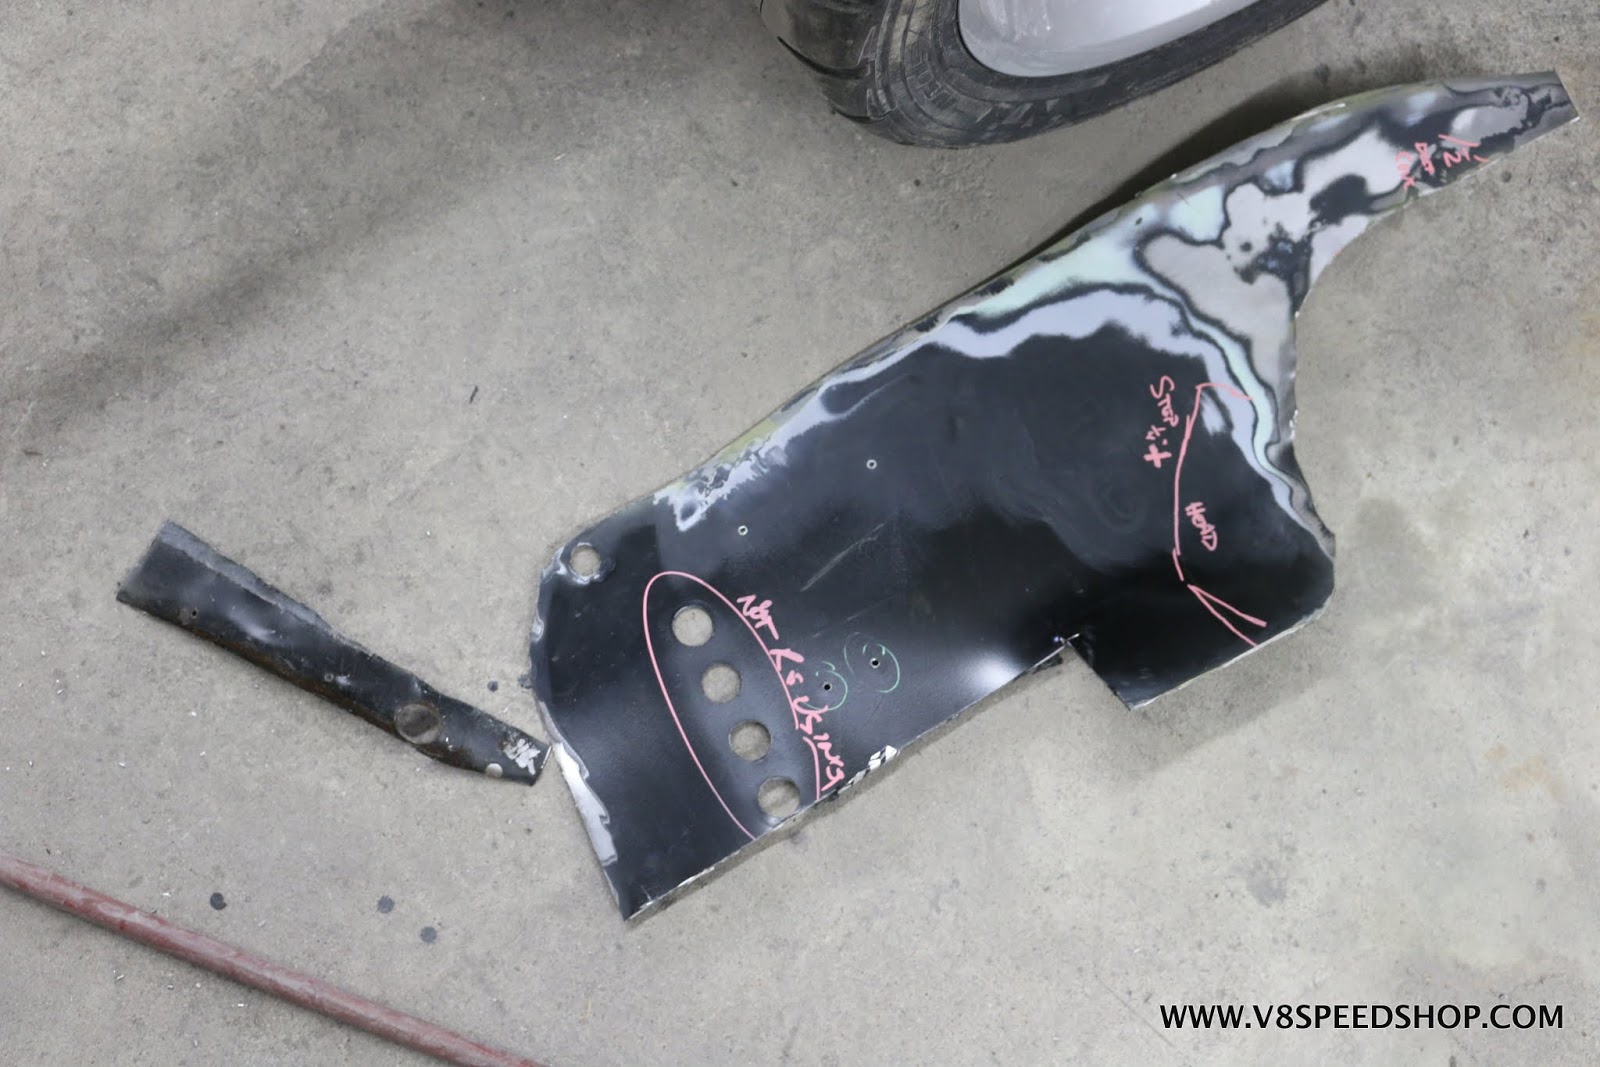
Front body panels removed.
Here you can see the bruised firewall. We decided to investigate further.
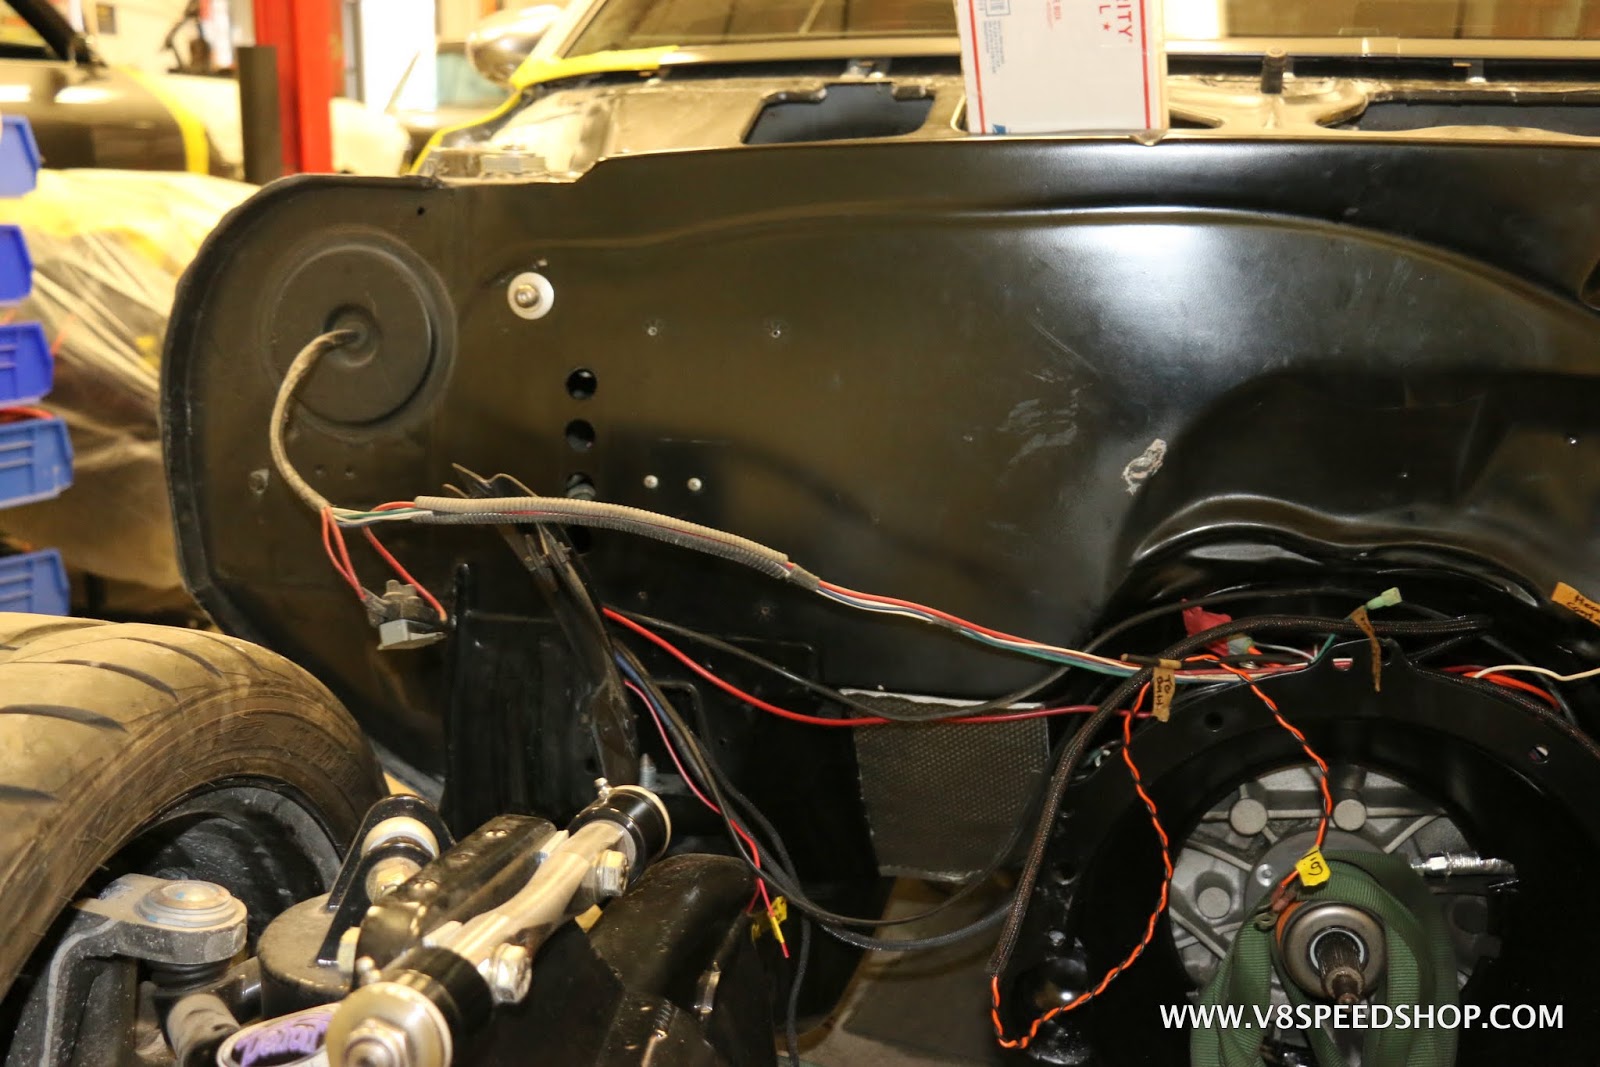
Hmm
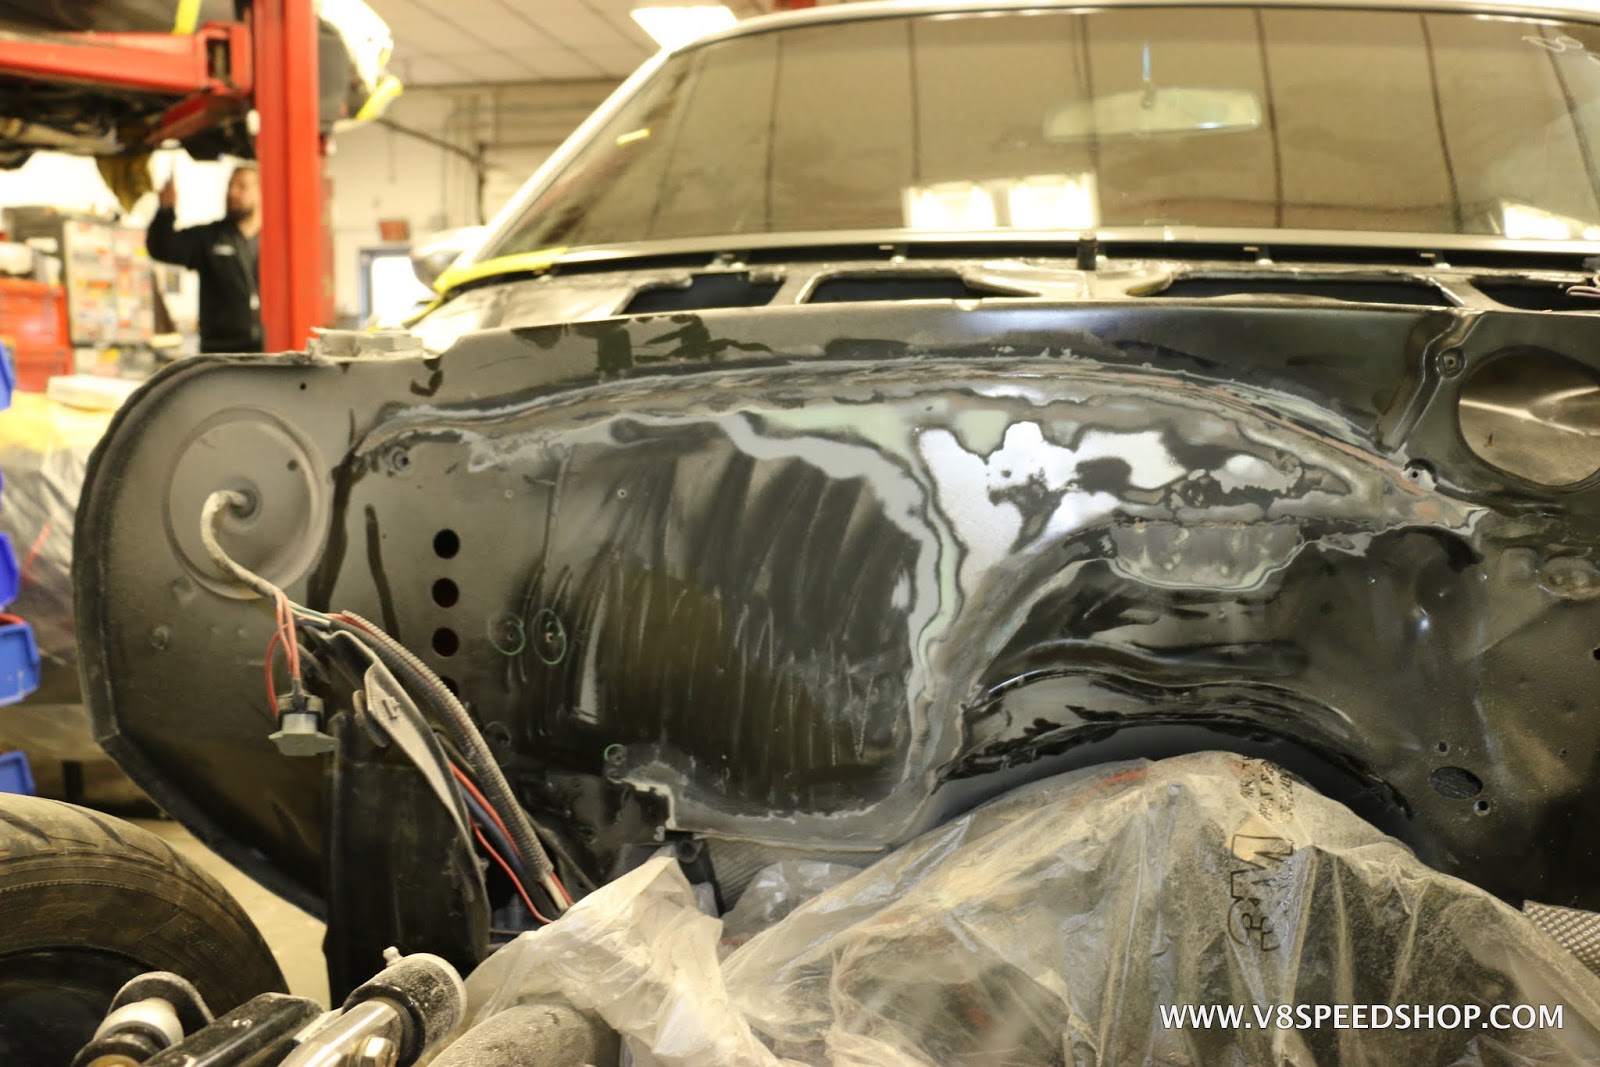
Lots of cracks and filler are lurking below
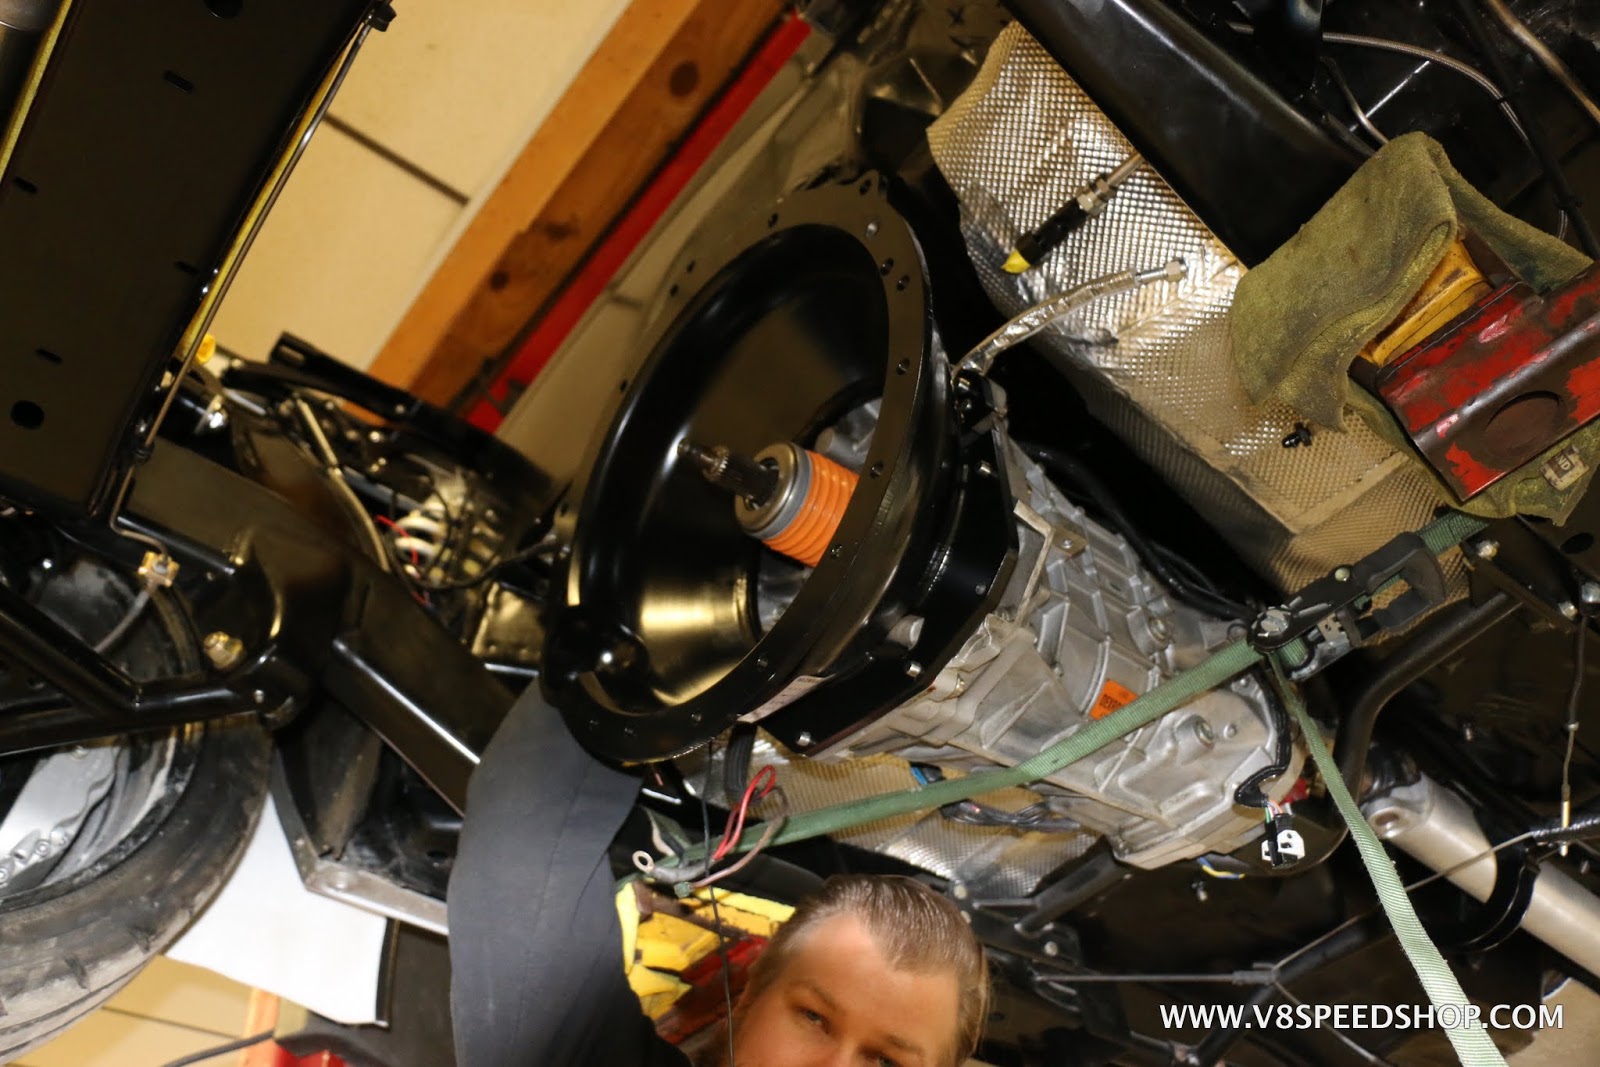
Putting the engine back in place on Dirty Dingo mounts in the Detroit Speed subframe, we could see the clearance from the head to firewall was a bight tight.
The accessory drive seemed to fit well, even with the increased diameter crank pulley.
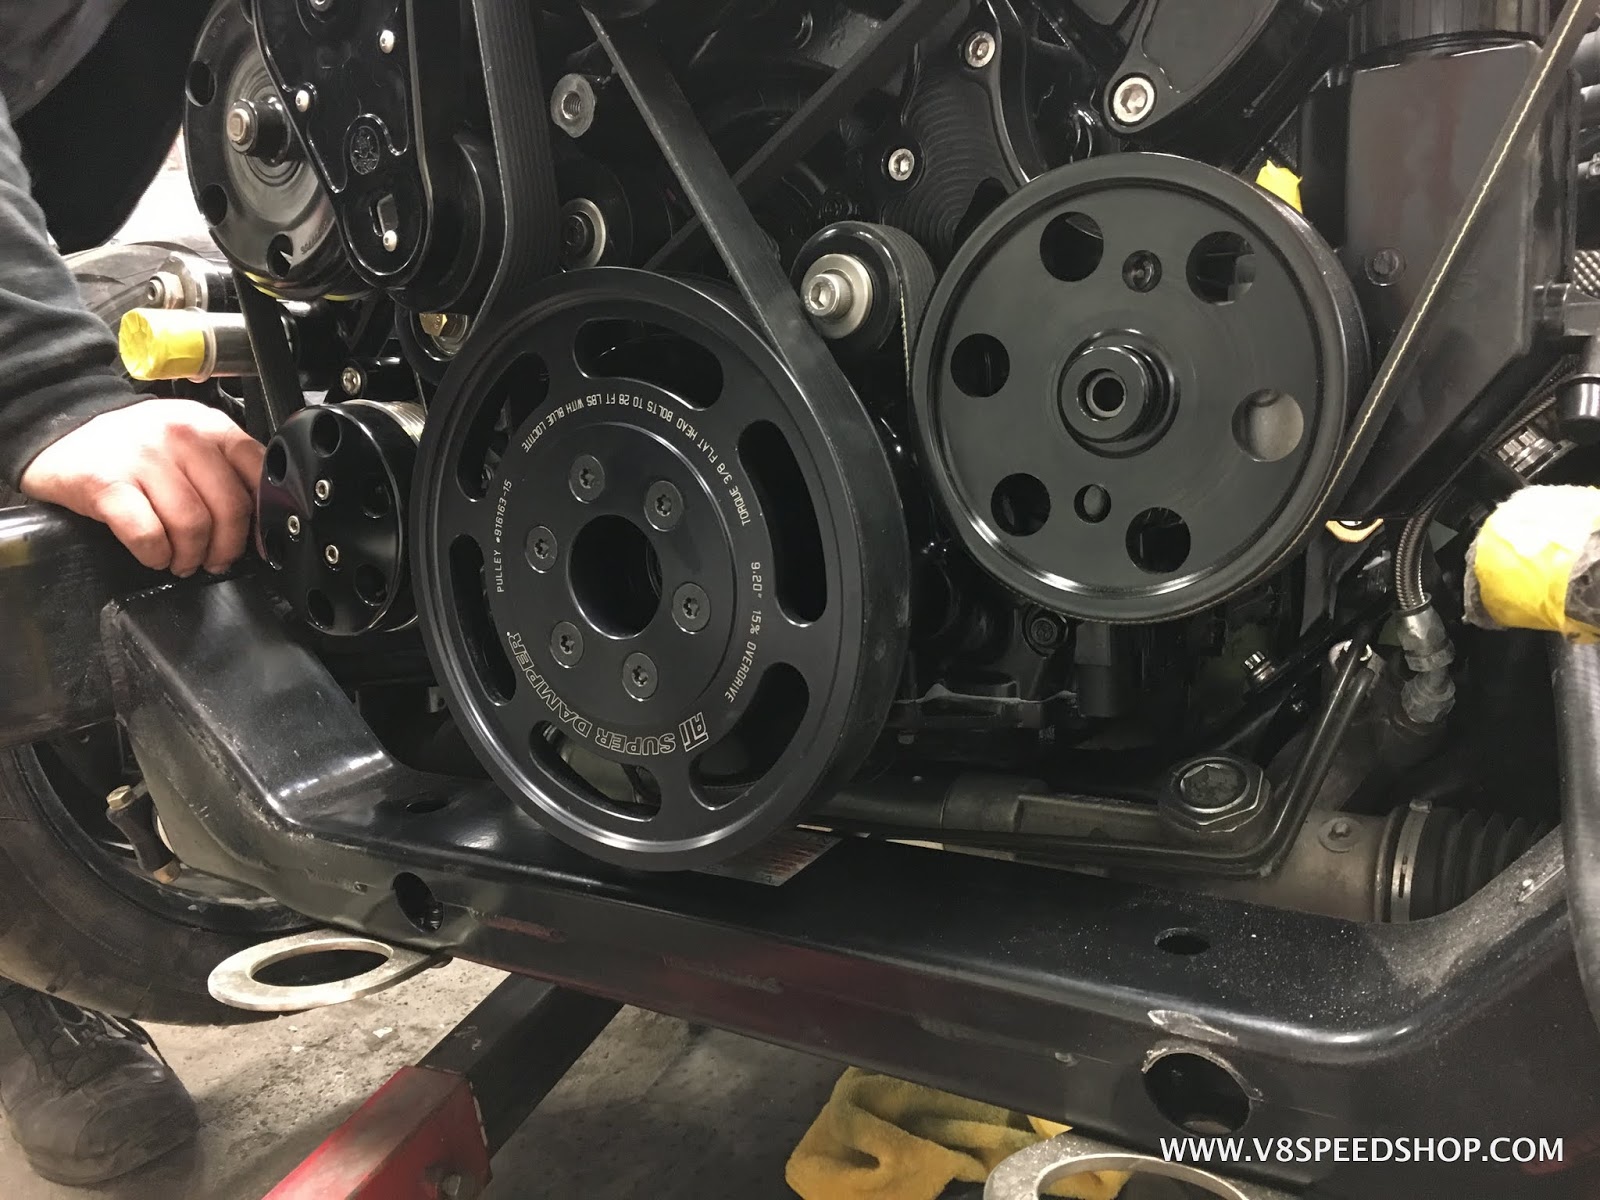
Theres room for the A/C compressor as well.
But the decision was made to do some work on the firewall to repair the damage and make a bit more room for the engine, as well as to clean up the A/C bulkhead fitting holes.Kevin Oeste
V8 Speed and Resto Shop
V8TV
Muscle Car Of The Week
V8 Radio Podcast
All about us:
https://www.v8speedshop.com
02-15-2018 #10
Registered User
- Join Date
- Dec 2004
- Location
- Midwest
- Posts
- 2,261
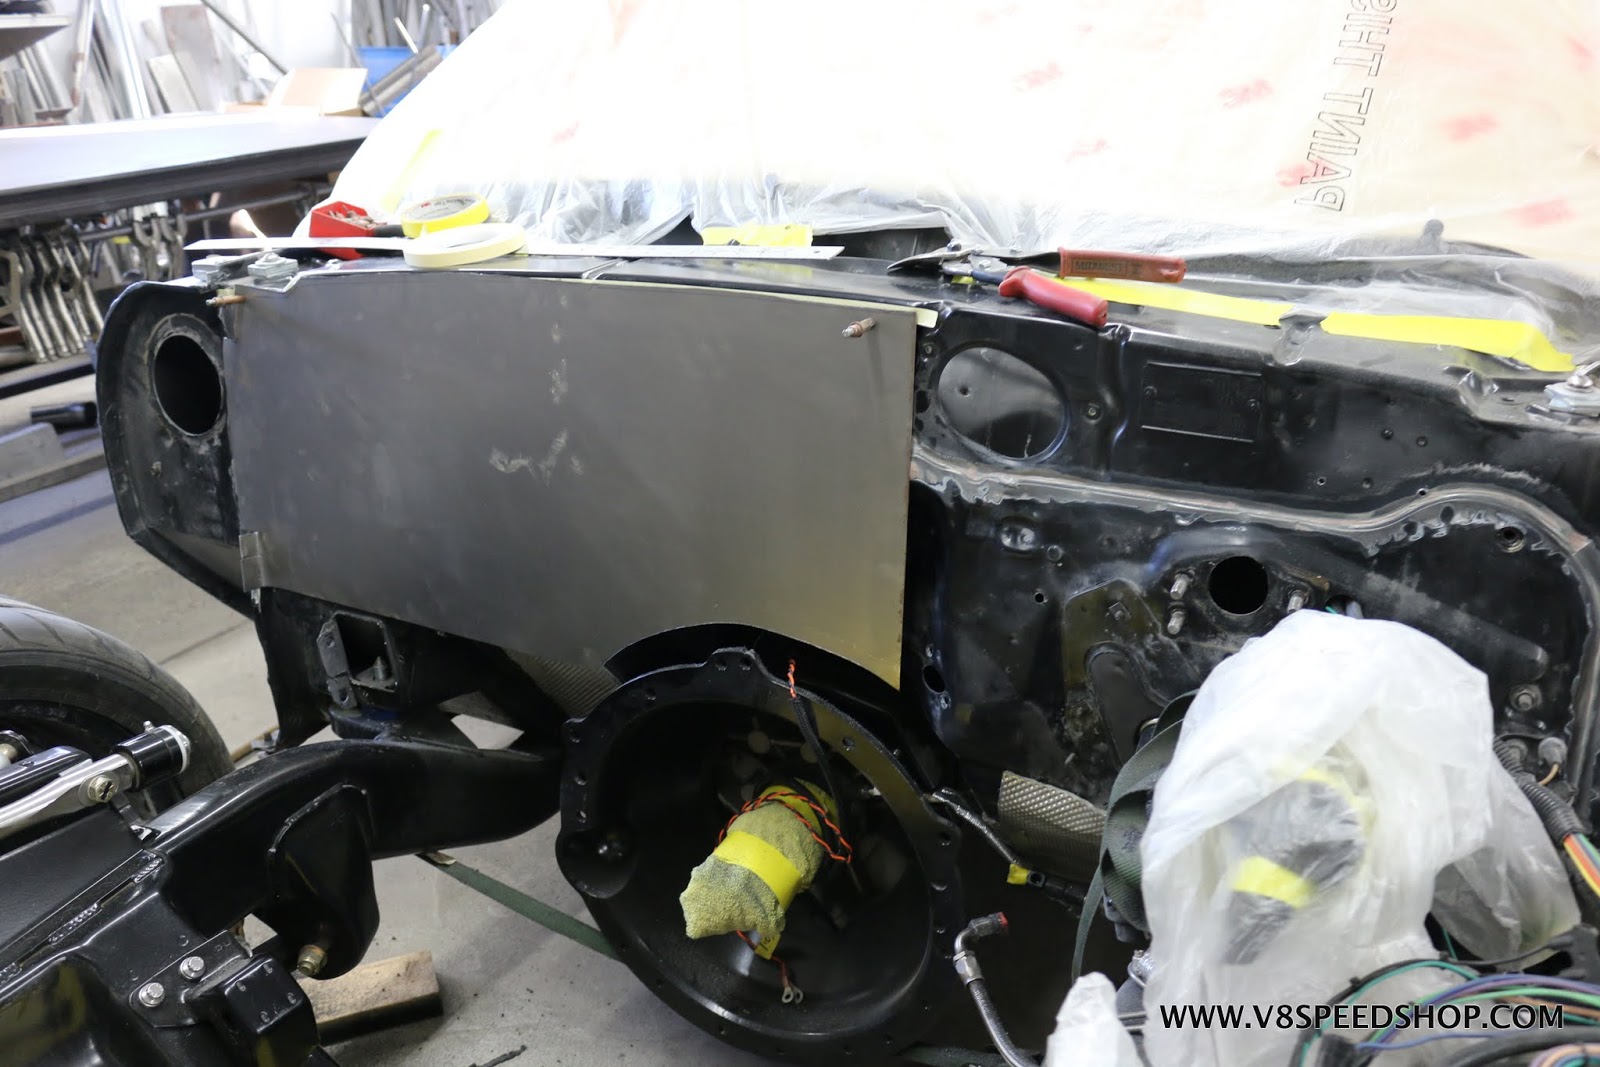
The Camaro was moved to the metal fabrication shop where the new firewall would be created.
Once the heater block off panel was removed, it became obvious that this car was originally painted blue. It was also obvious that because of the cracks and previous finish work, the heater block off panel was holding water and rusting the bottom of the firewall. Water literally ran out when we removed the panel.


The opening was ground smooth of rust and corrosion and a plan was made for the new firewall.
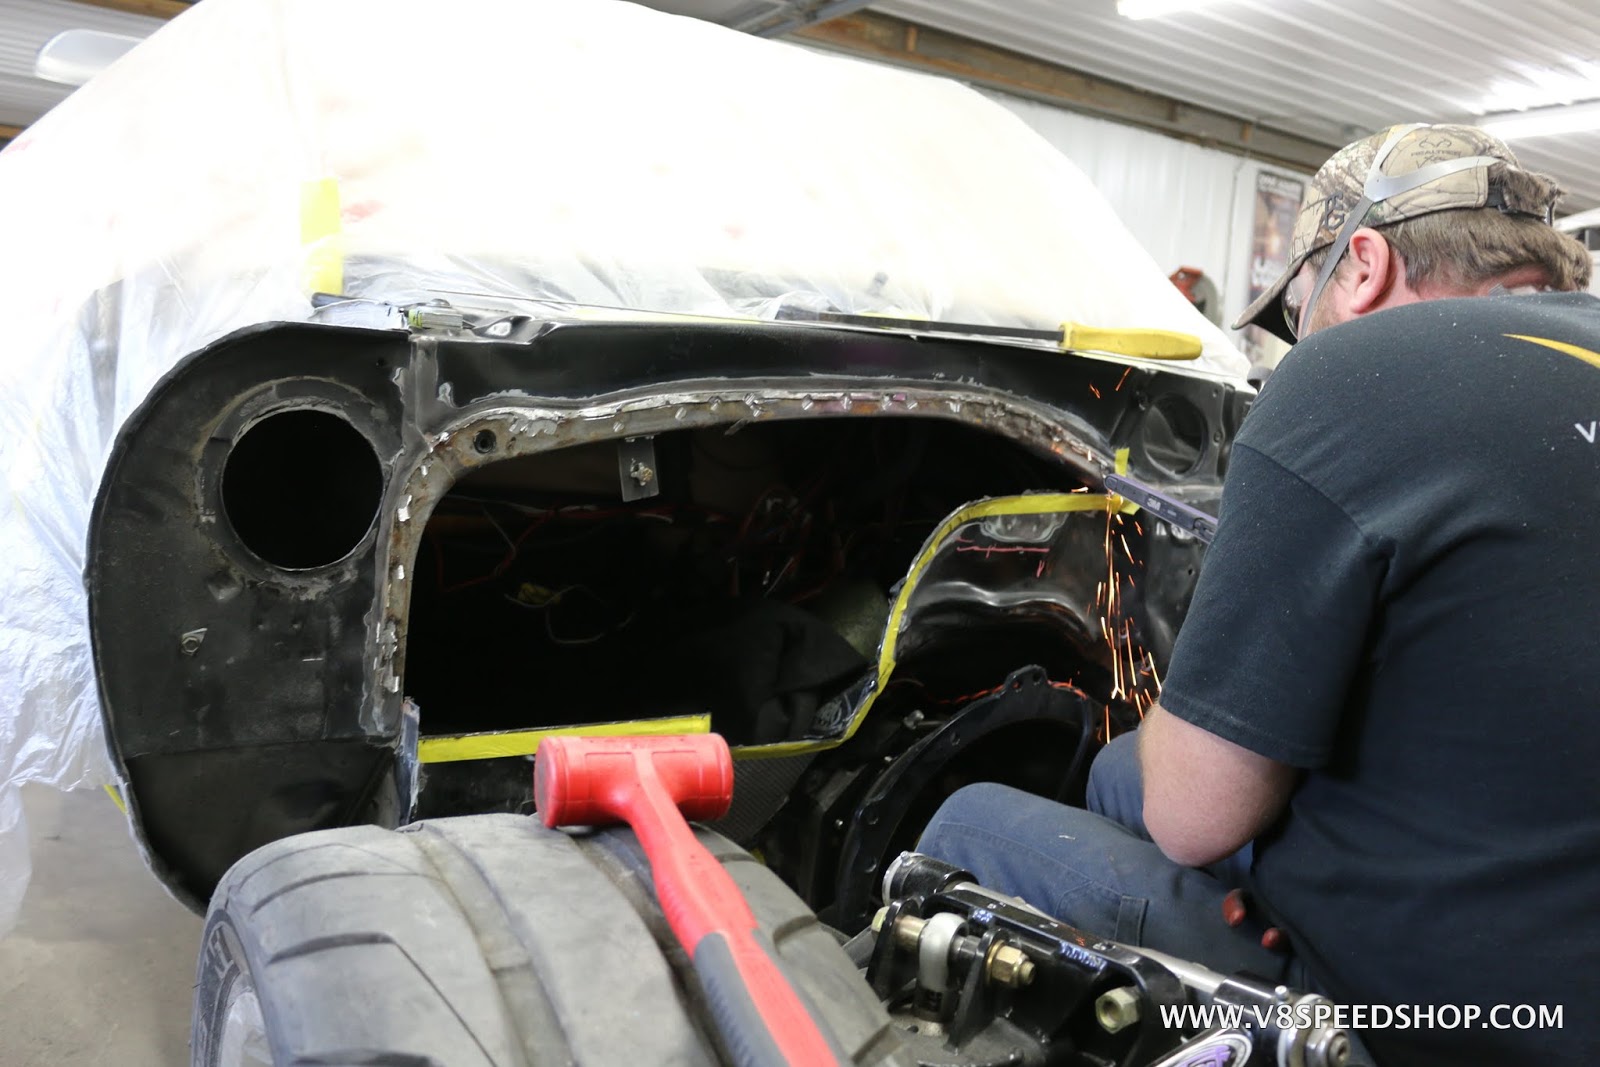
Fabricator John felt a large piece would allow him to start over cleanly.
 Kevin Oeste
V8 Speed and Resto Shop
V8TV
Muscle Car Of The Week
V8 Radio Podcast
All about us:
https://www.v8speedshop.com
02-15-2018 #11
Registered User
- Join Date
- Dec 2004
- Location
- Midwest
- Posts
- 2,261
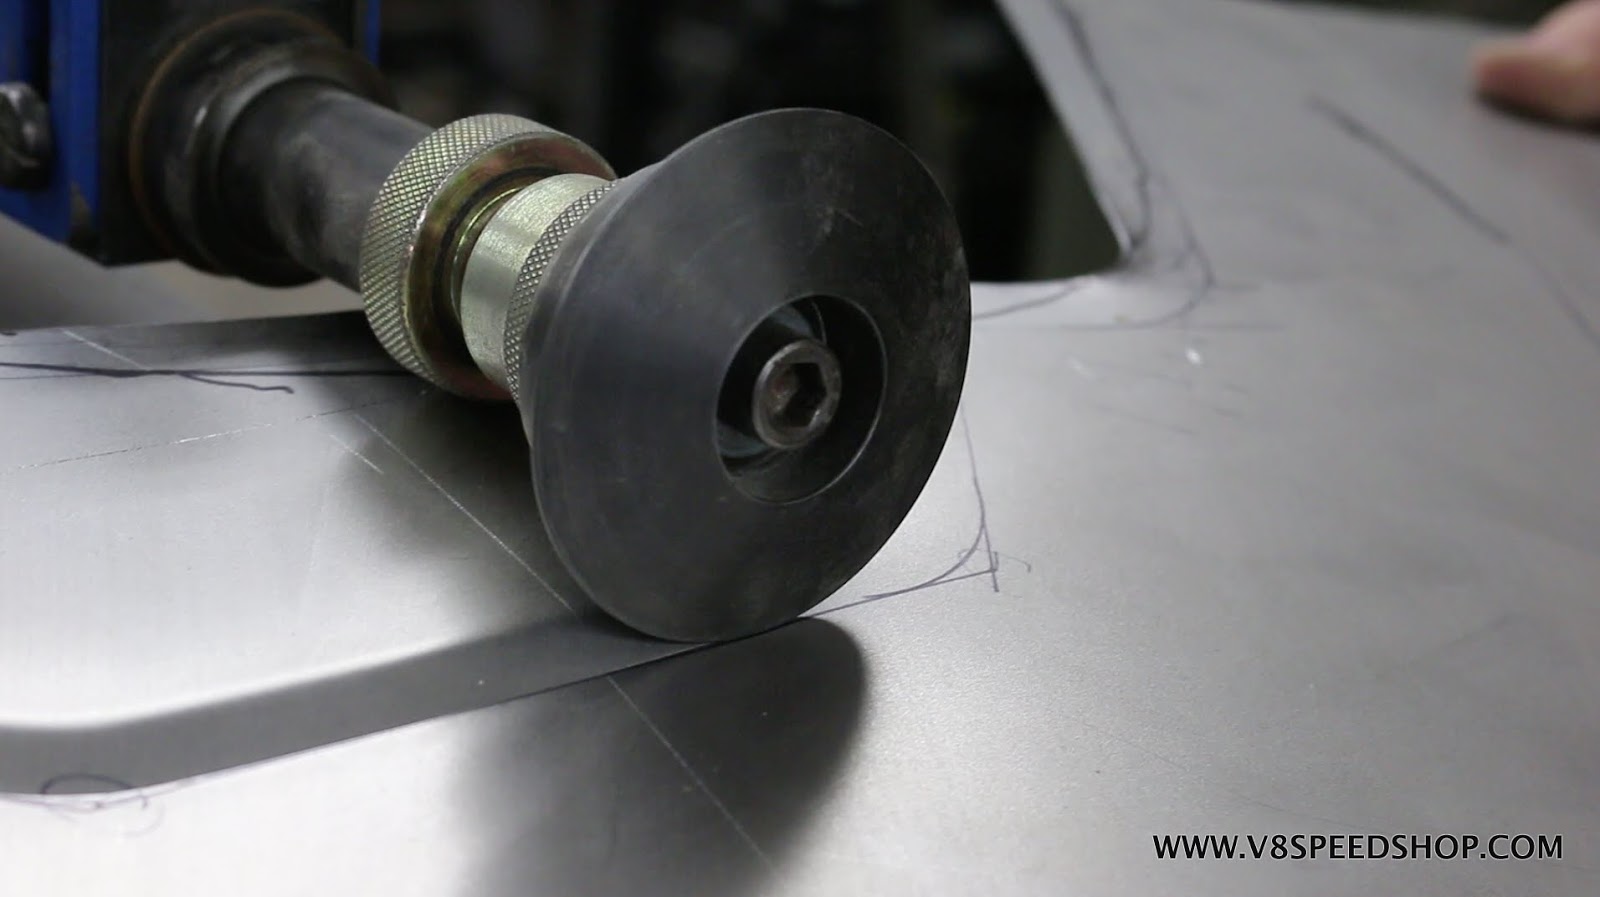
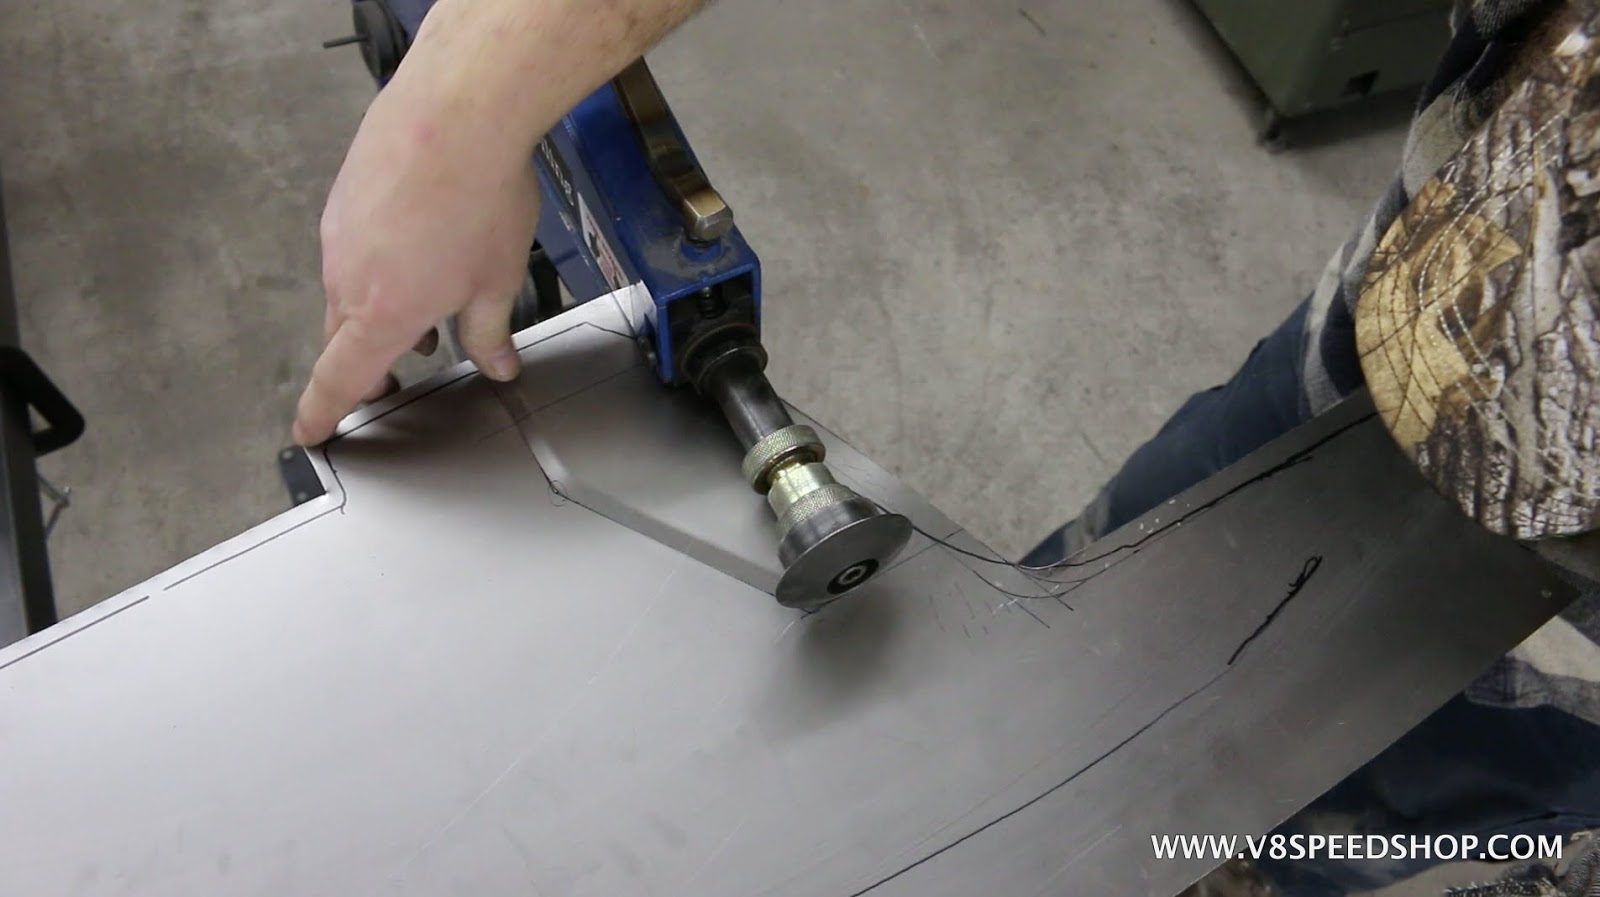
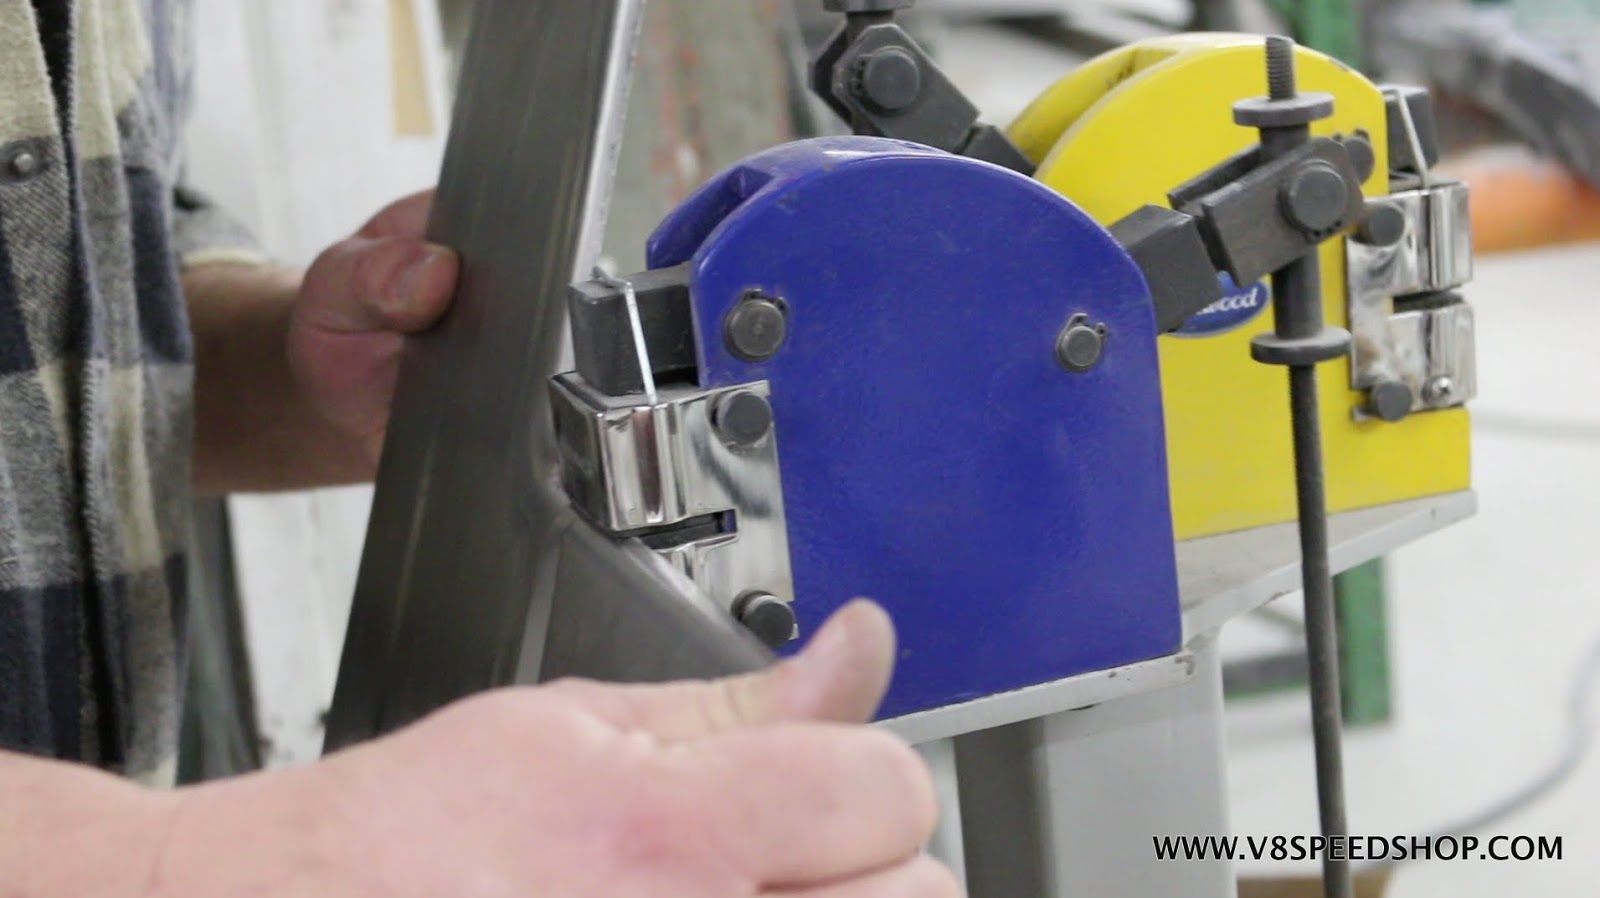
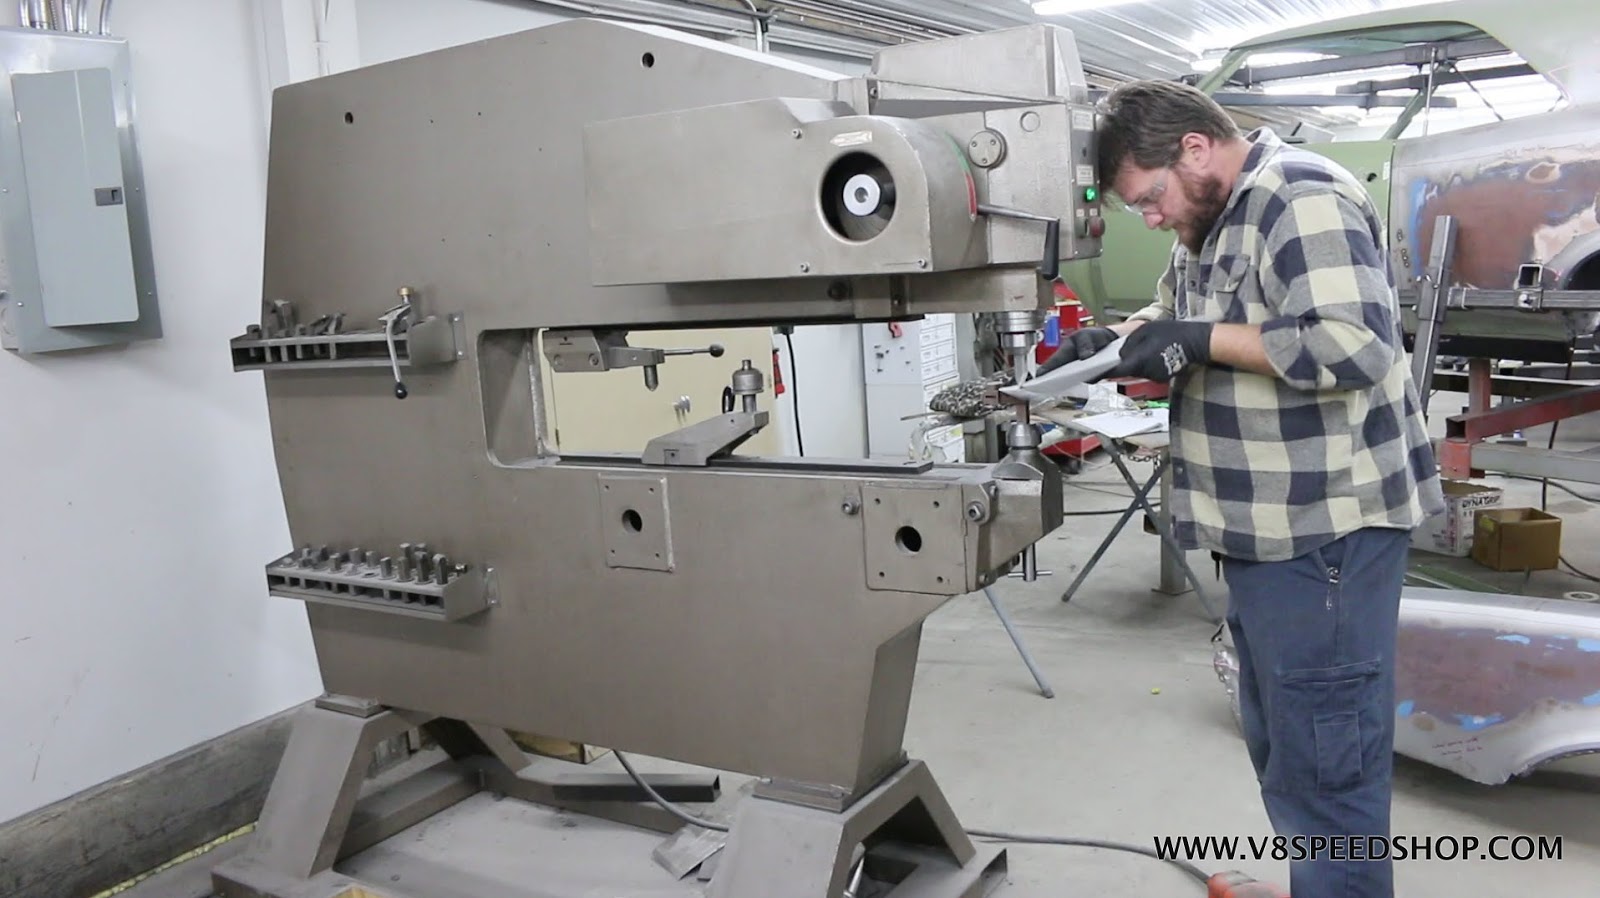
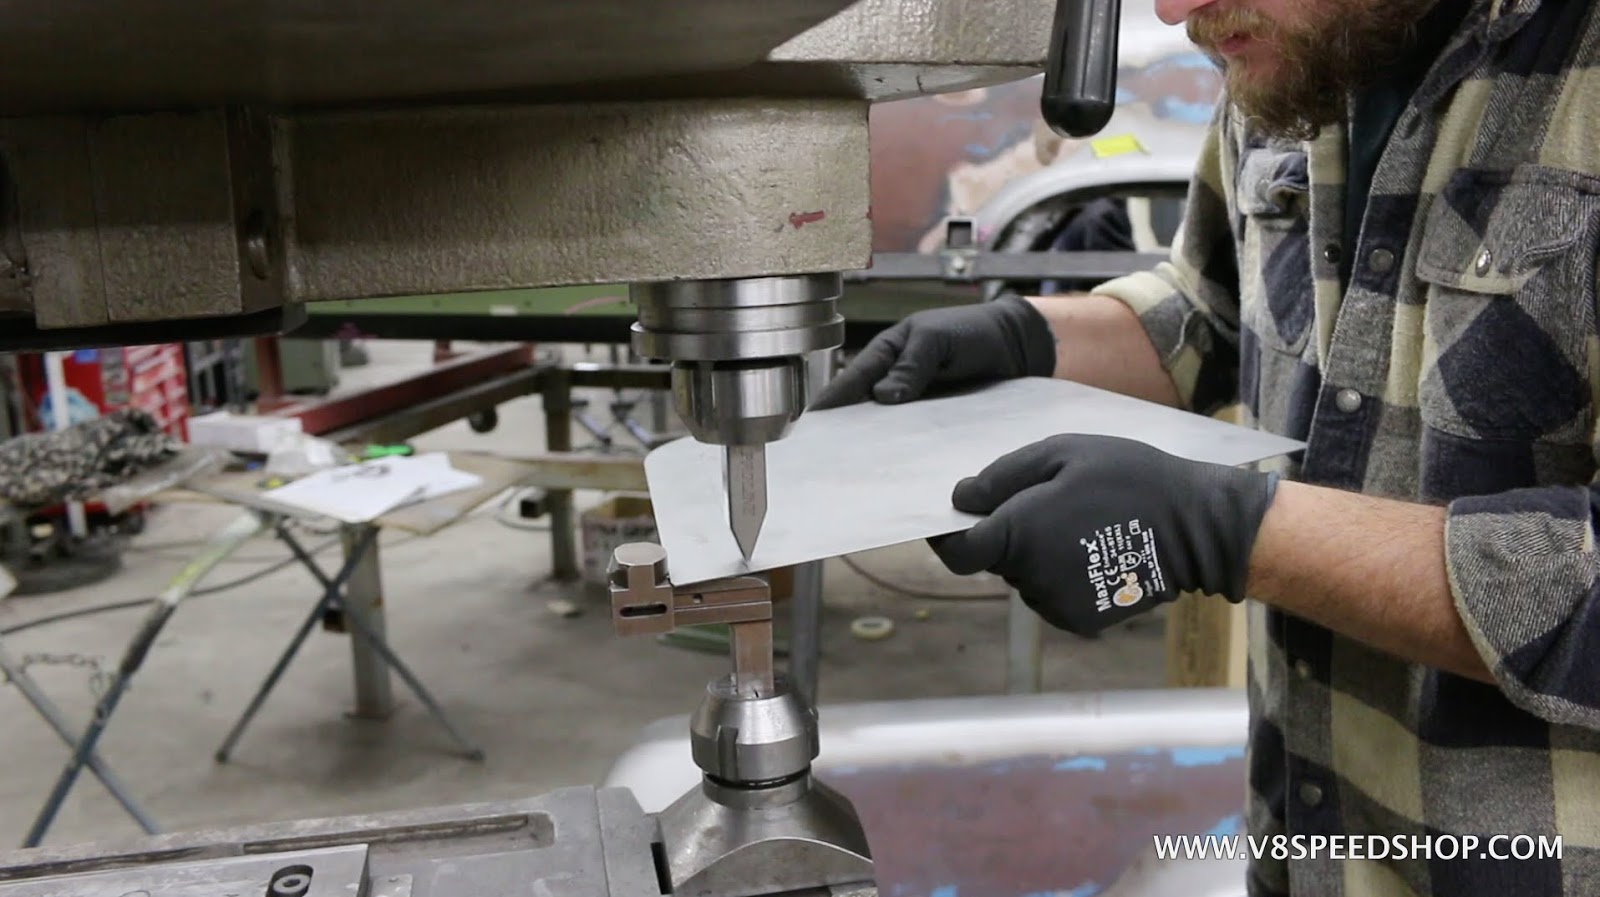
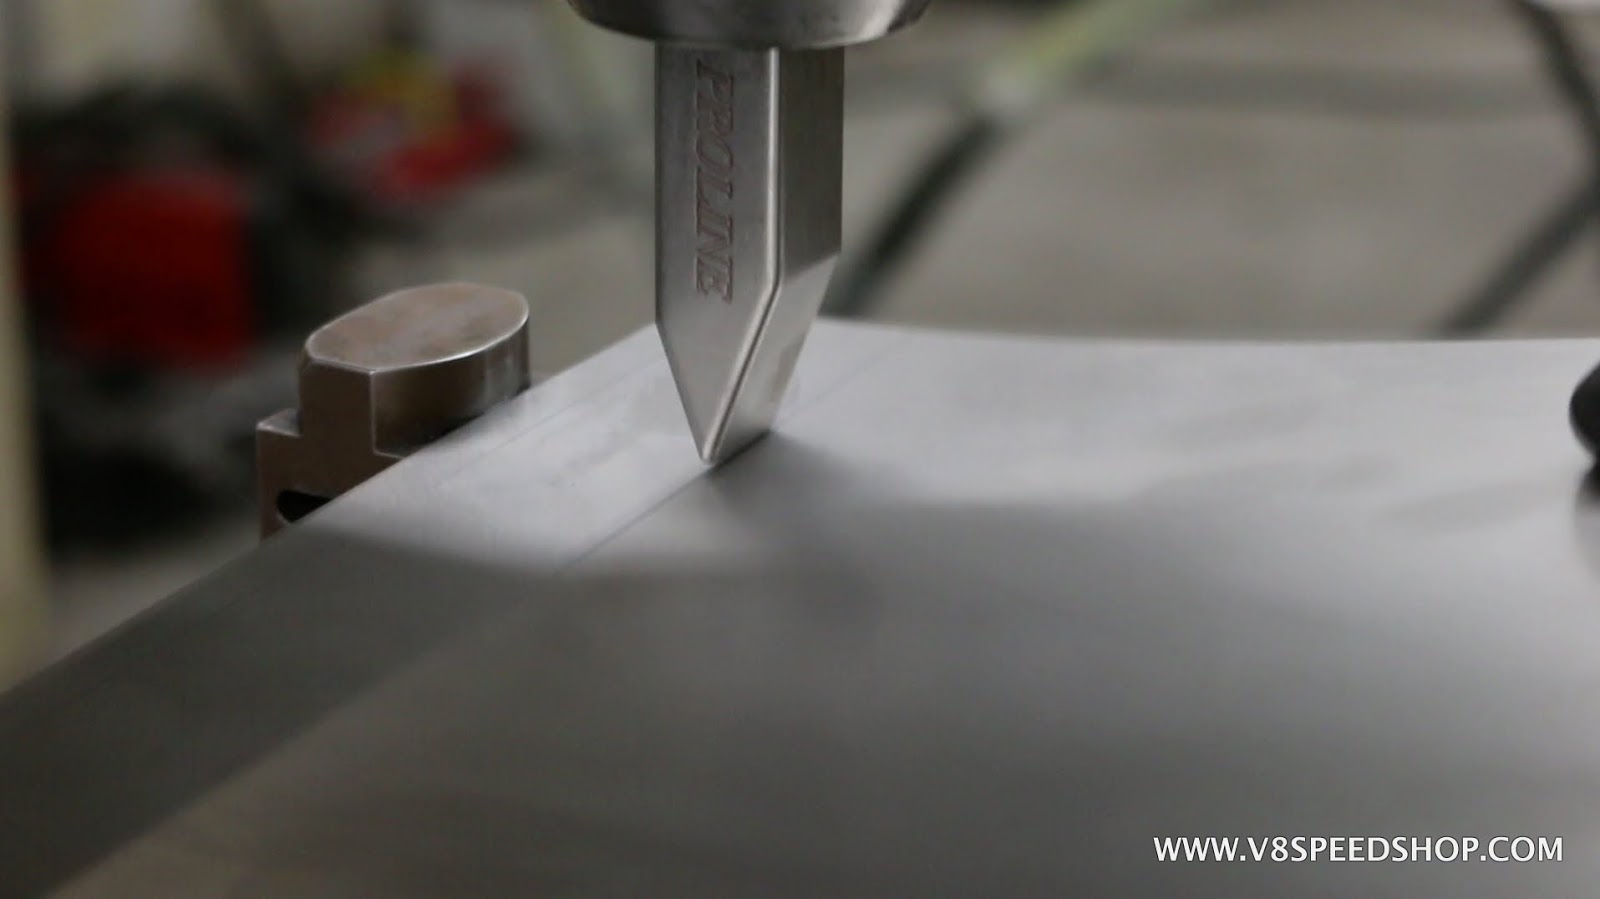
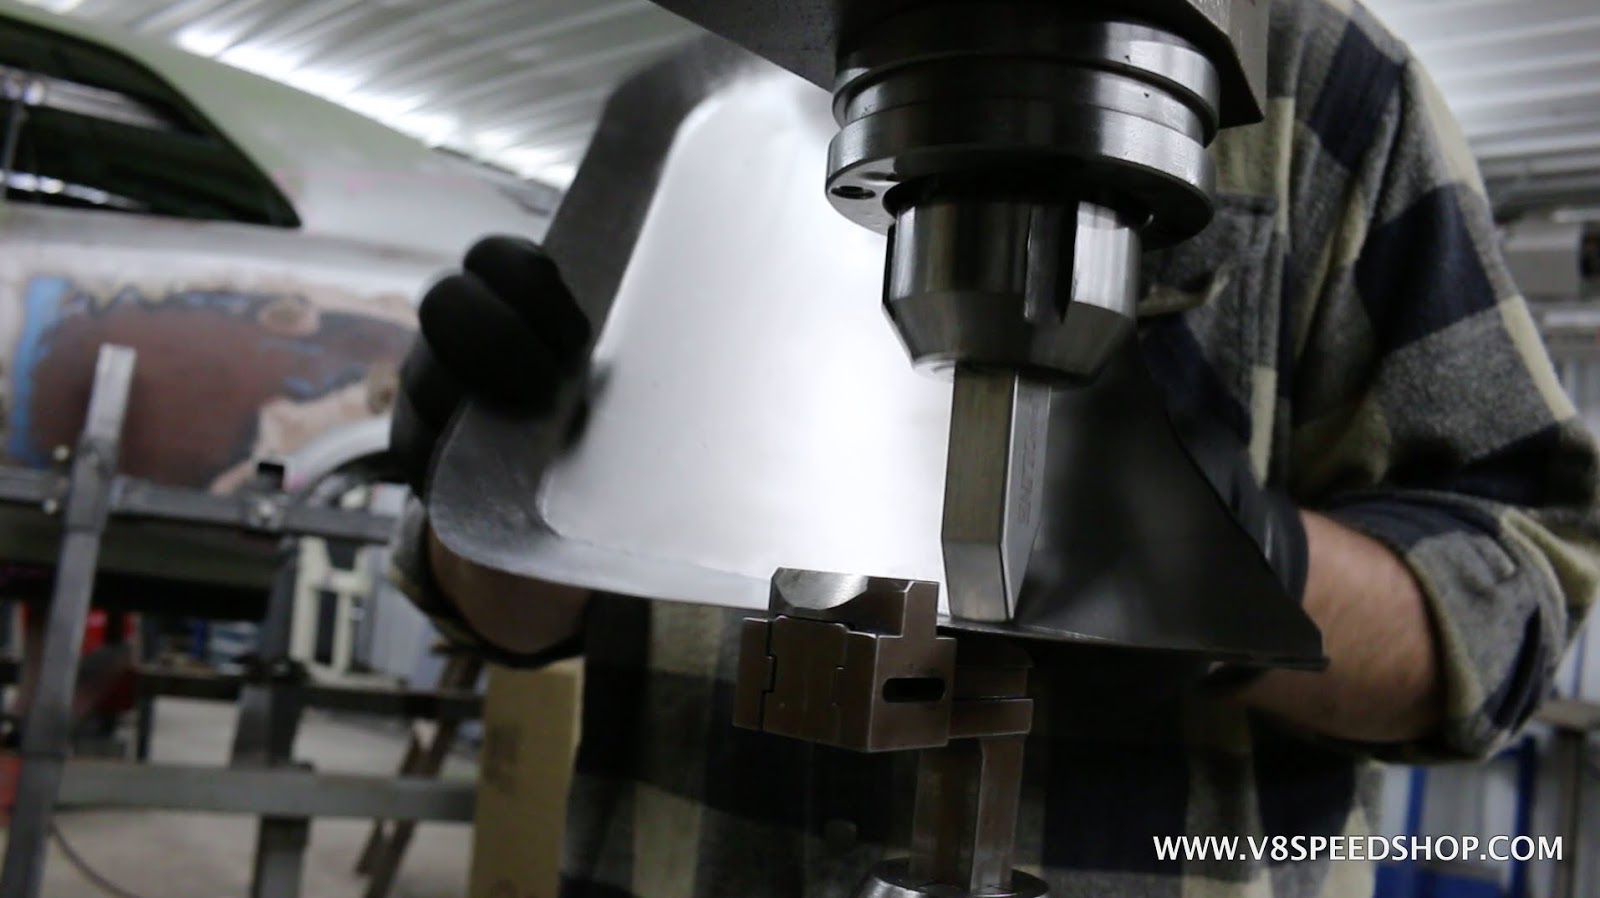
Stomping the steel on the Mittler Brothers shear
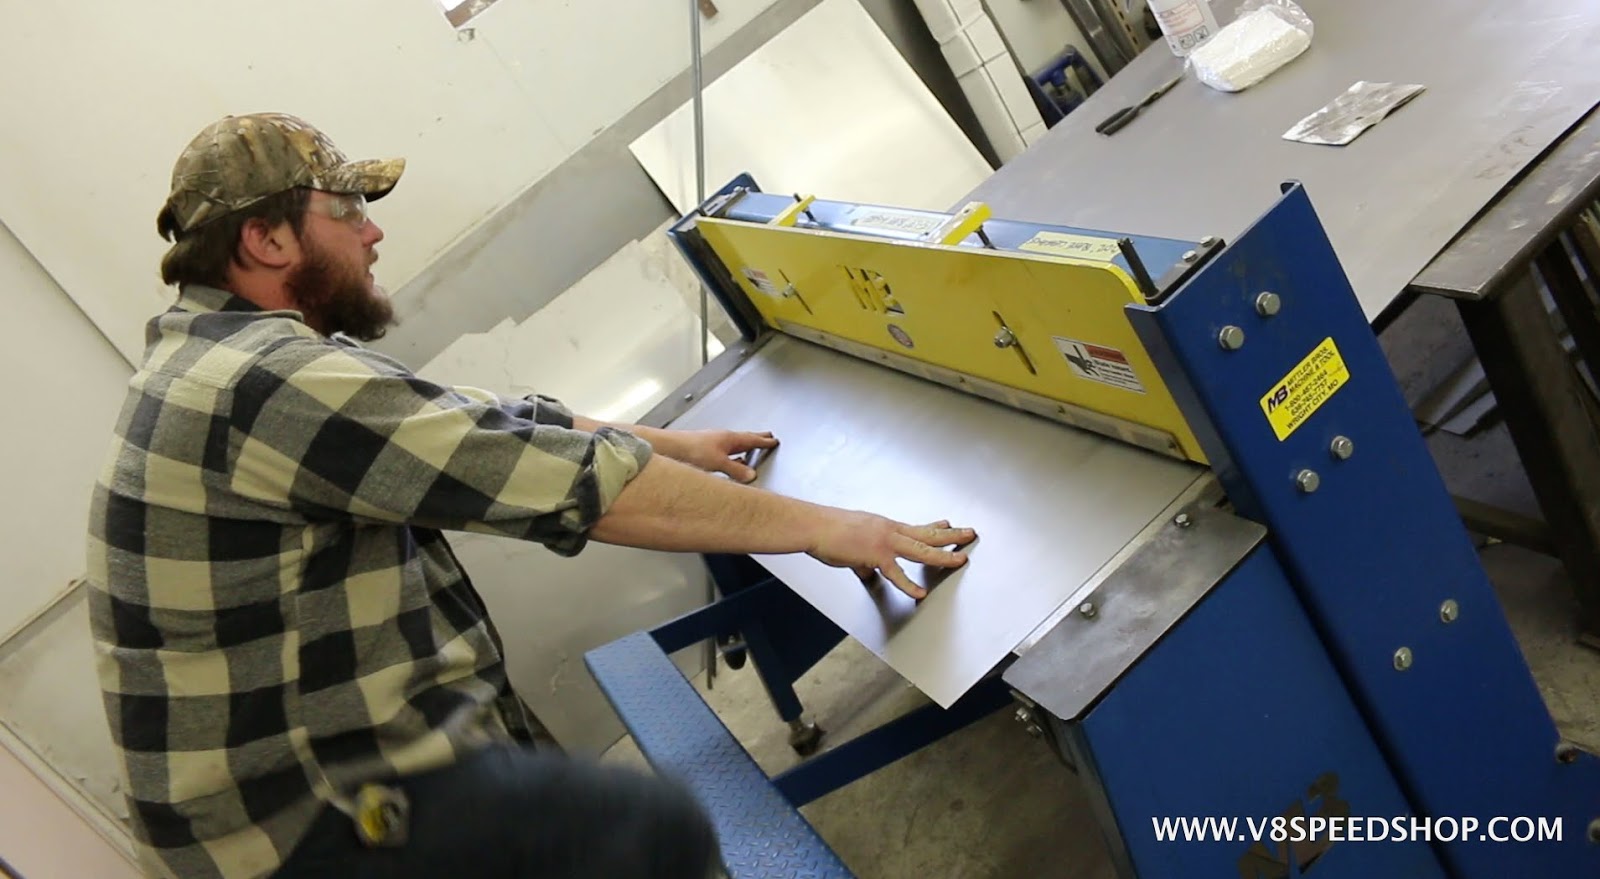
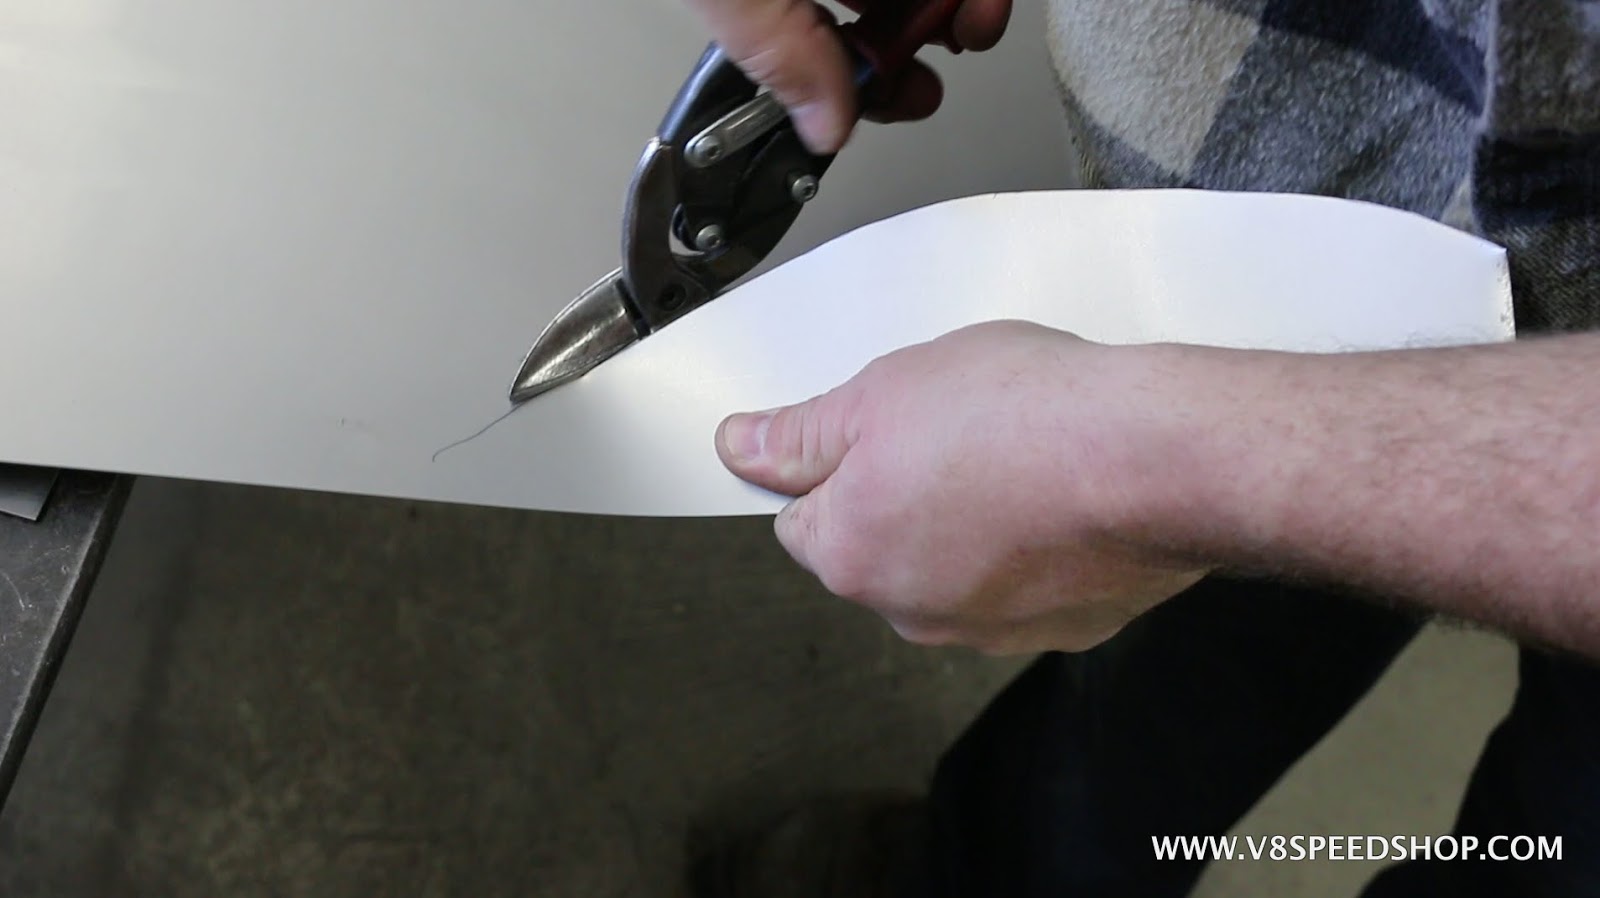
A little trim to bring it to the firewall
And off to the Mittler Brothers bead roller to add some strength and interest to the panel. John likes to draw out the pattern with a sharpie marker and trace it with the roller.
Keep in mind that with each contour, the panels overall size shrinks, so careful consideration needs to be given to the size along the way.
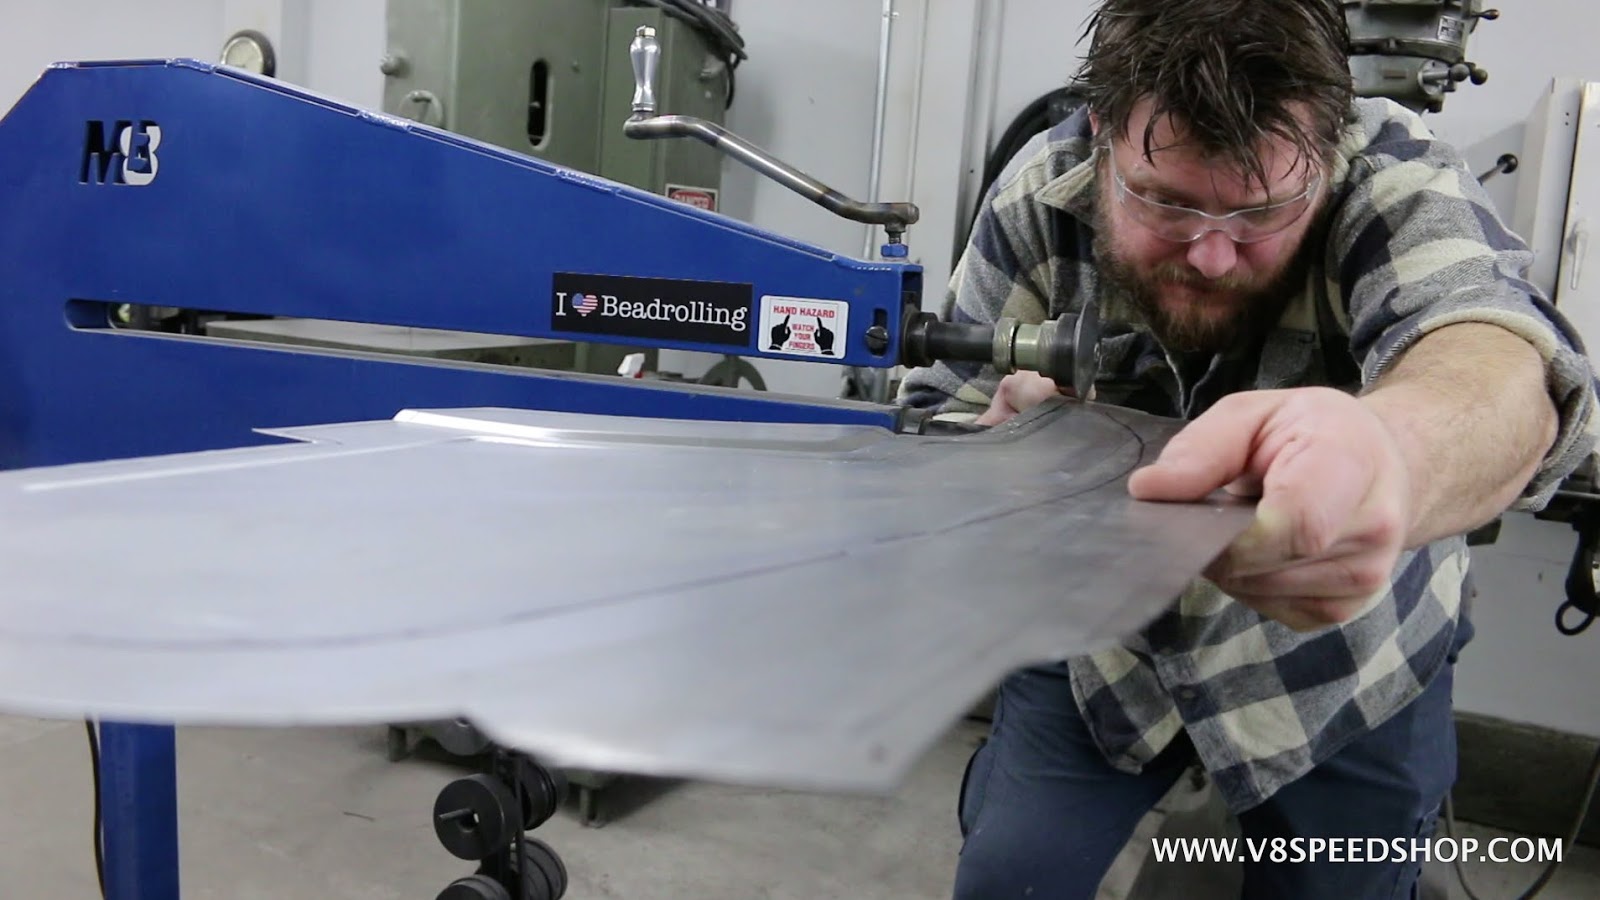
Quick test looking good!
 Kevin Oeste
V8 Speed and Resto Shop
V8TV
Muscle Car Of The Week
V8 Radio Podcast
All about us:
https://www.v8speedshop.com
02-15-2018 #12
Registered User
- Join Date
- Dec 2004
- Location
- Midwest
- Posts
- 2,261
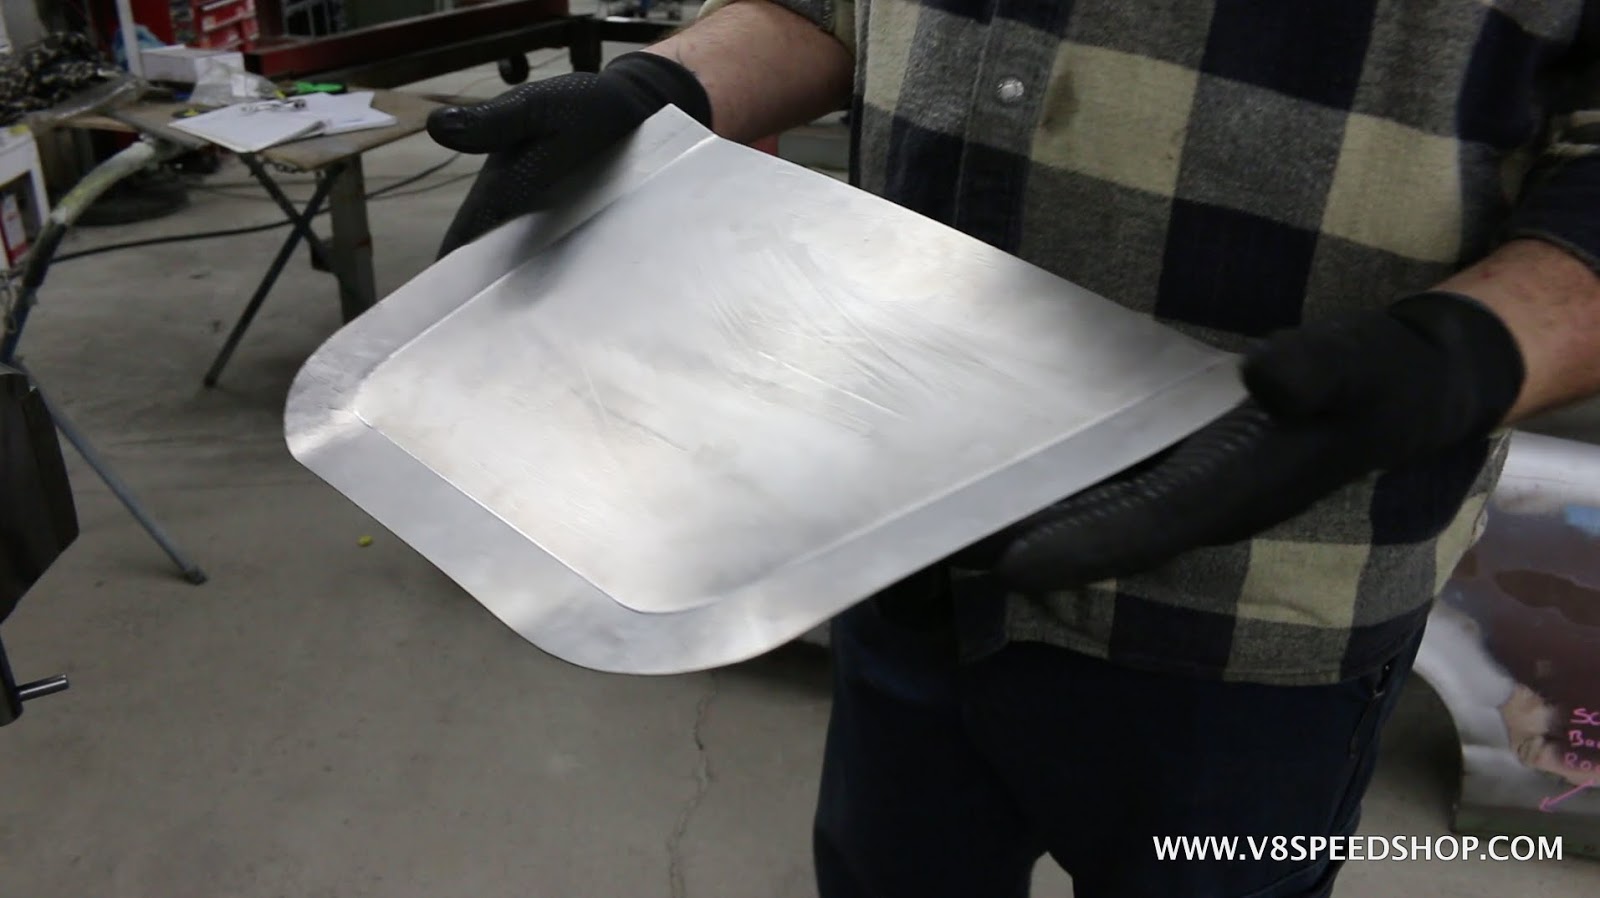
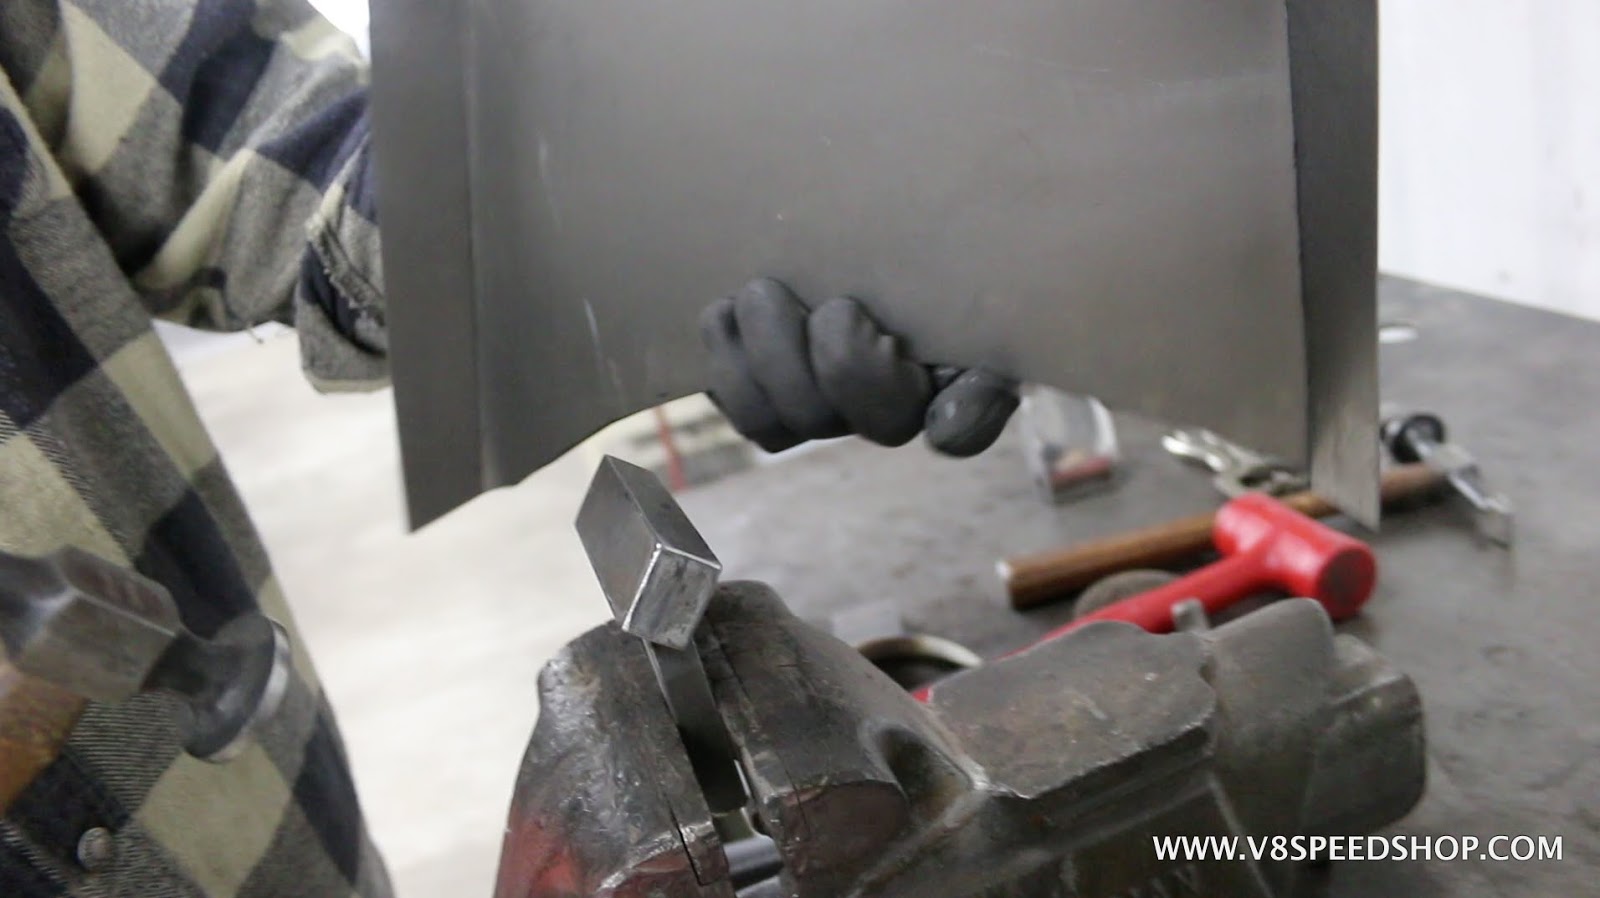
The edges are tapped over with a tee-shaped rounding dolley.
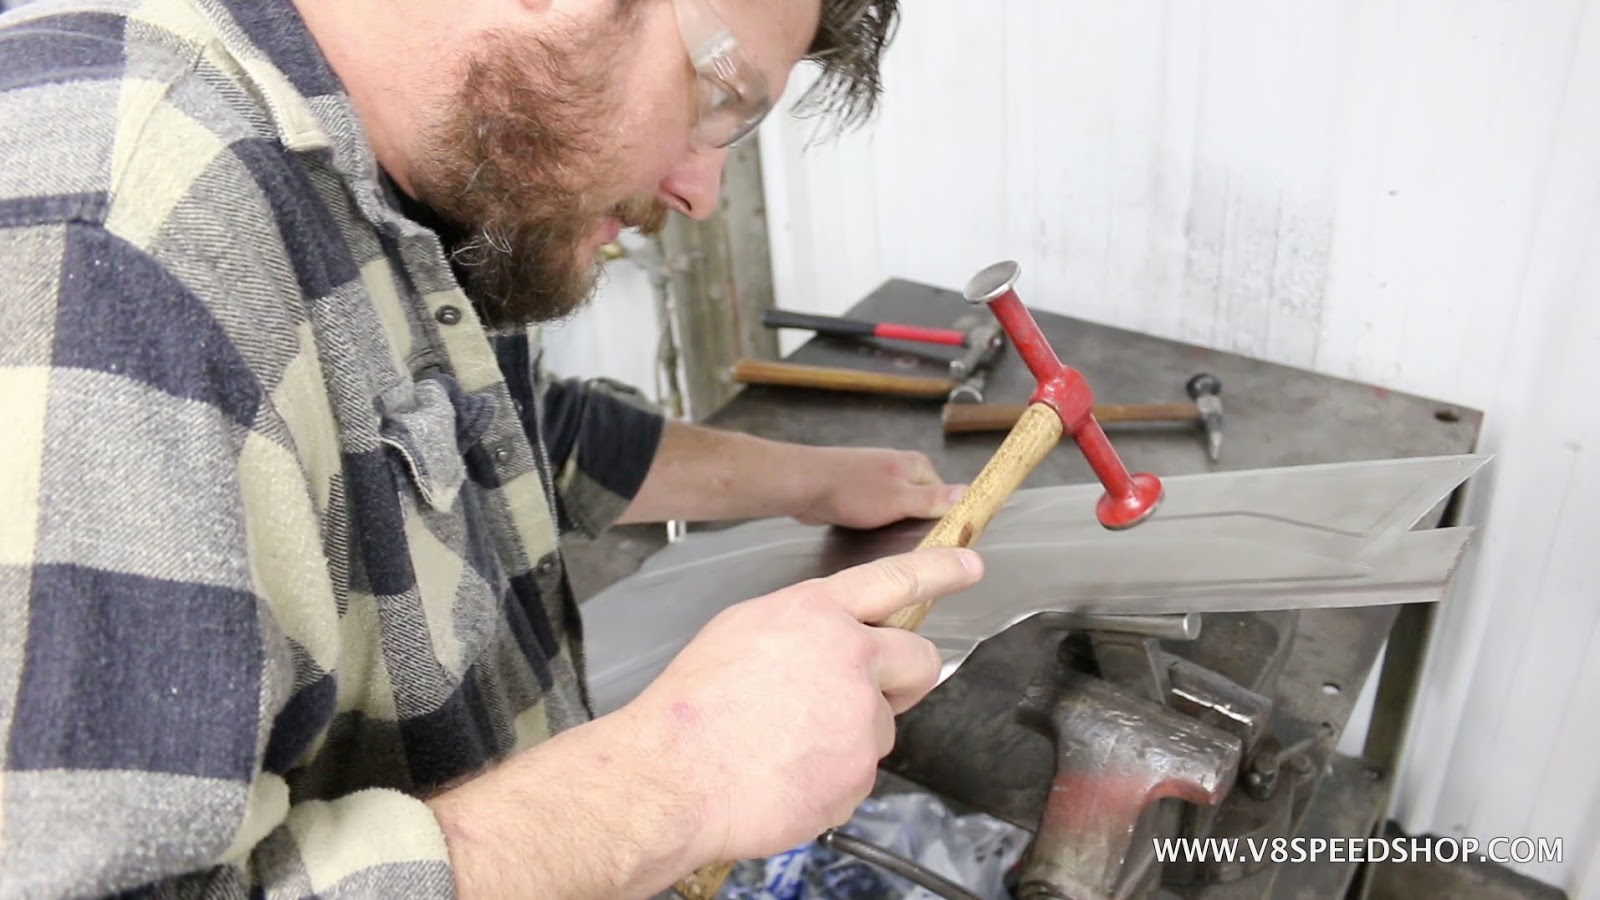
Some shrinking helps tighten up the edges
The main piece seems to fit pretty well. Next, the tunnel portion is marked for an extension piece on the firewall. This will allow more clearance for the LT4.
A trip to the Pullmax starts the tunnel housing extension. A pointed die begins to fold a flat section.
The shape is roughed in.
 Kevin Oeste
V8 Speed and Resto Shop
V8TV
Muscle Car Of The Week
V8 Radio Podcast
All about us:
https://www.v8speedshop.com
02-15-2018 #13
Registered User
- Join Date
- Dec 2004
- Location
- Midwest
- Posts
- 2,261
Some shrinking on the Mittler Brothers shrinker helps form the curves
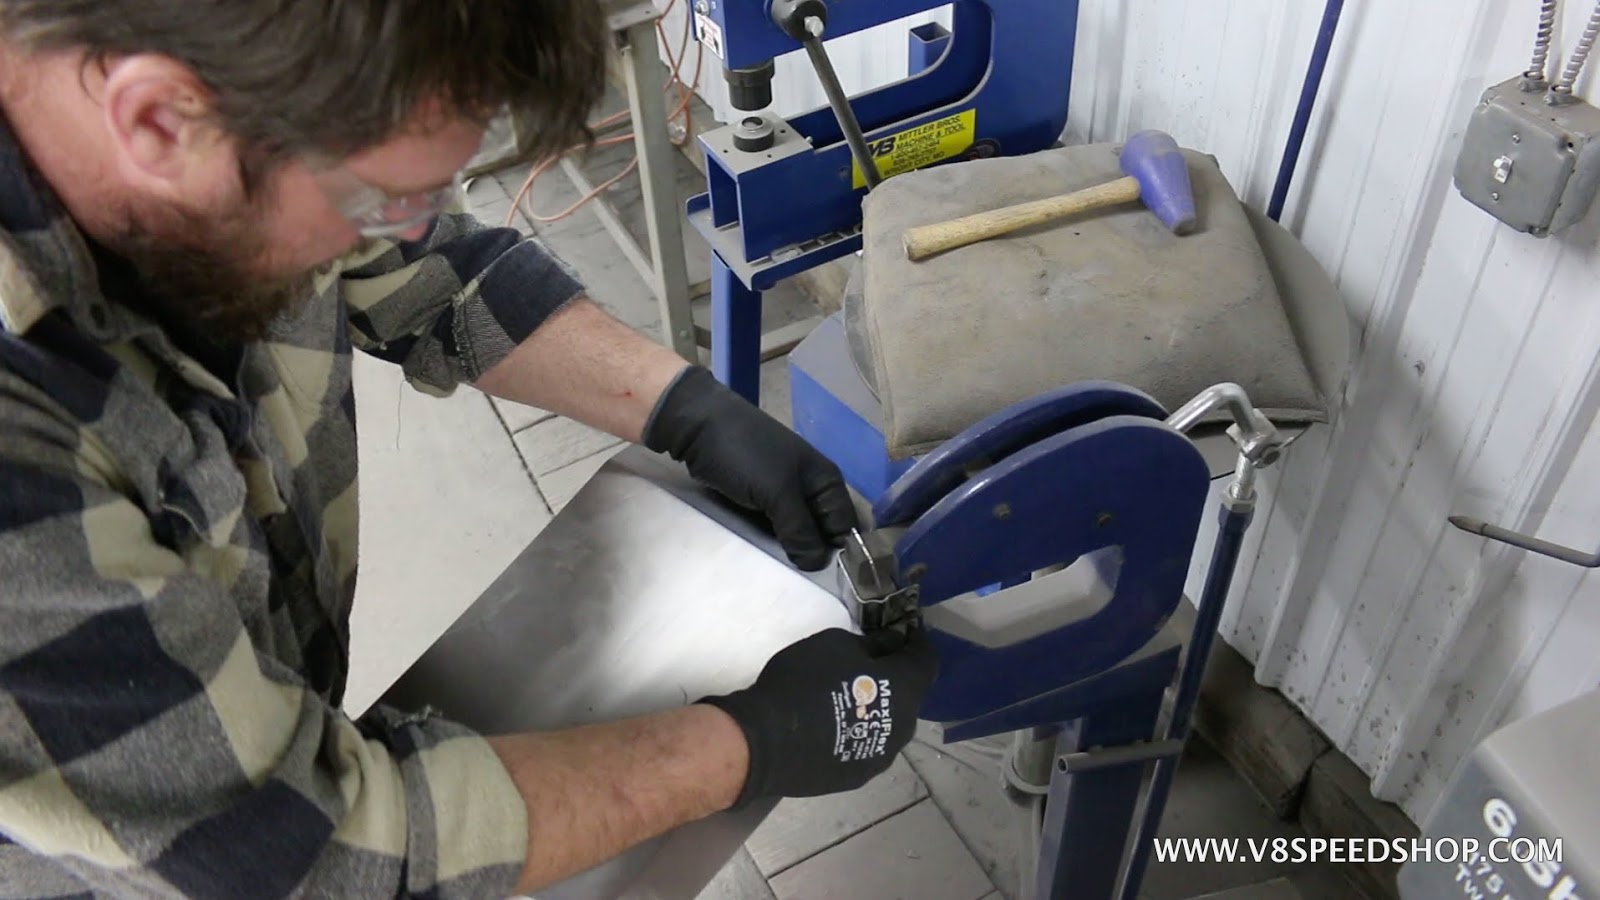
And a bit more on the Pullmax to make the contours deeper.
And the corners are tightened up with a sharp-edged dolley.
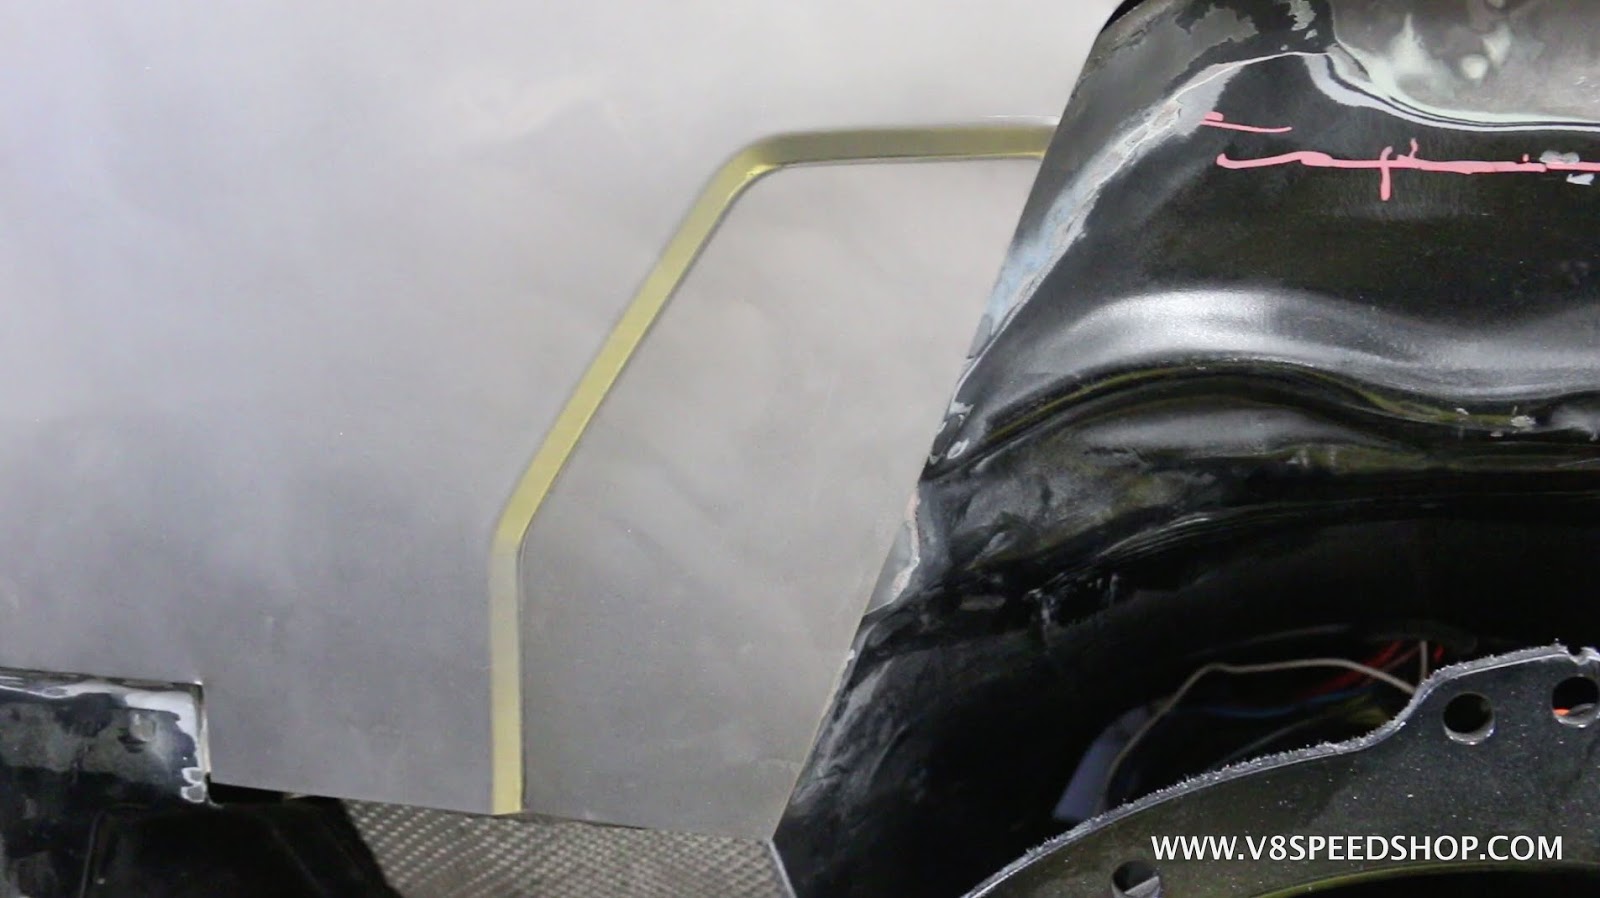
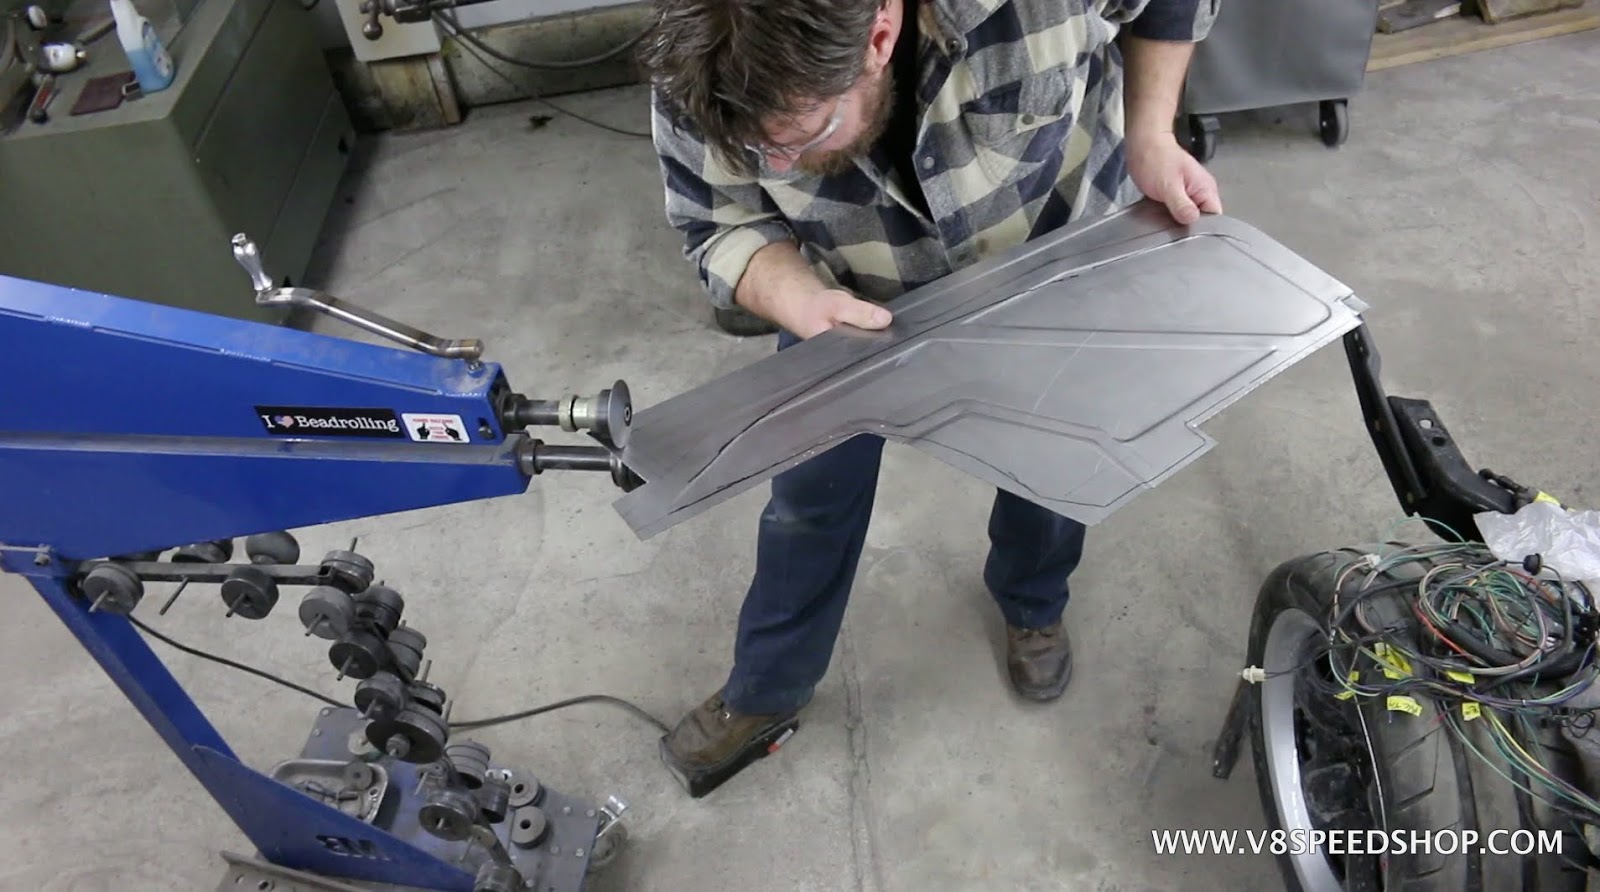
A test fit with magnets and cleco clamps, things are looking good!
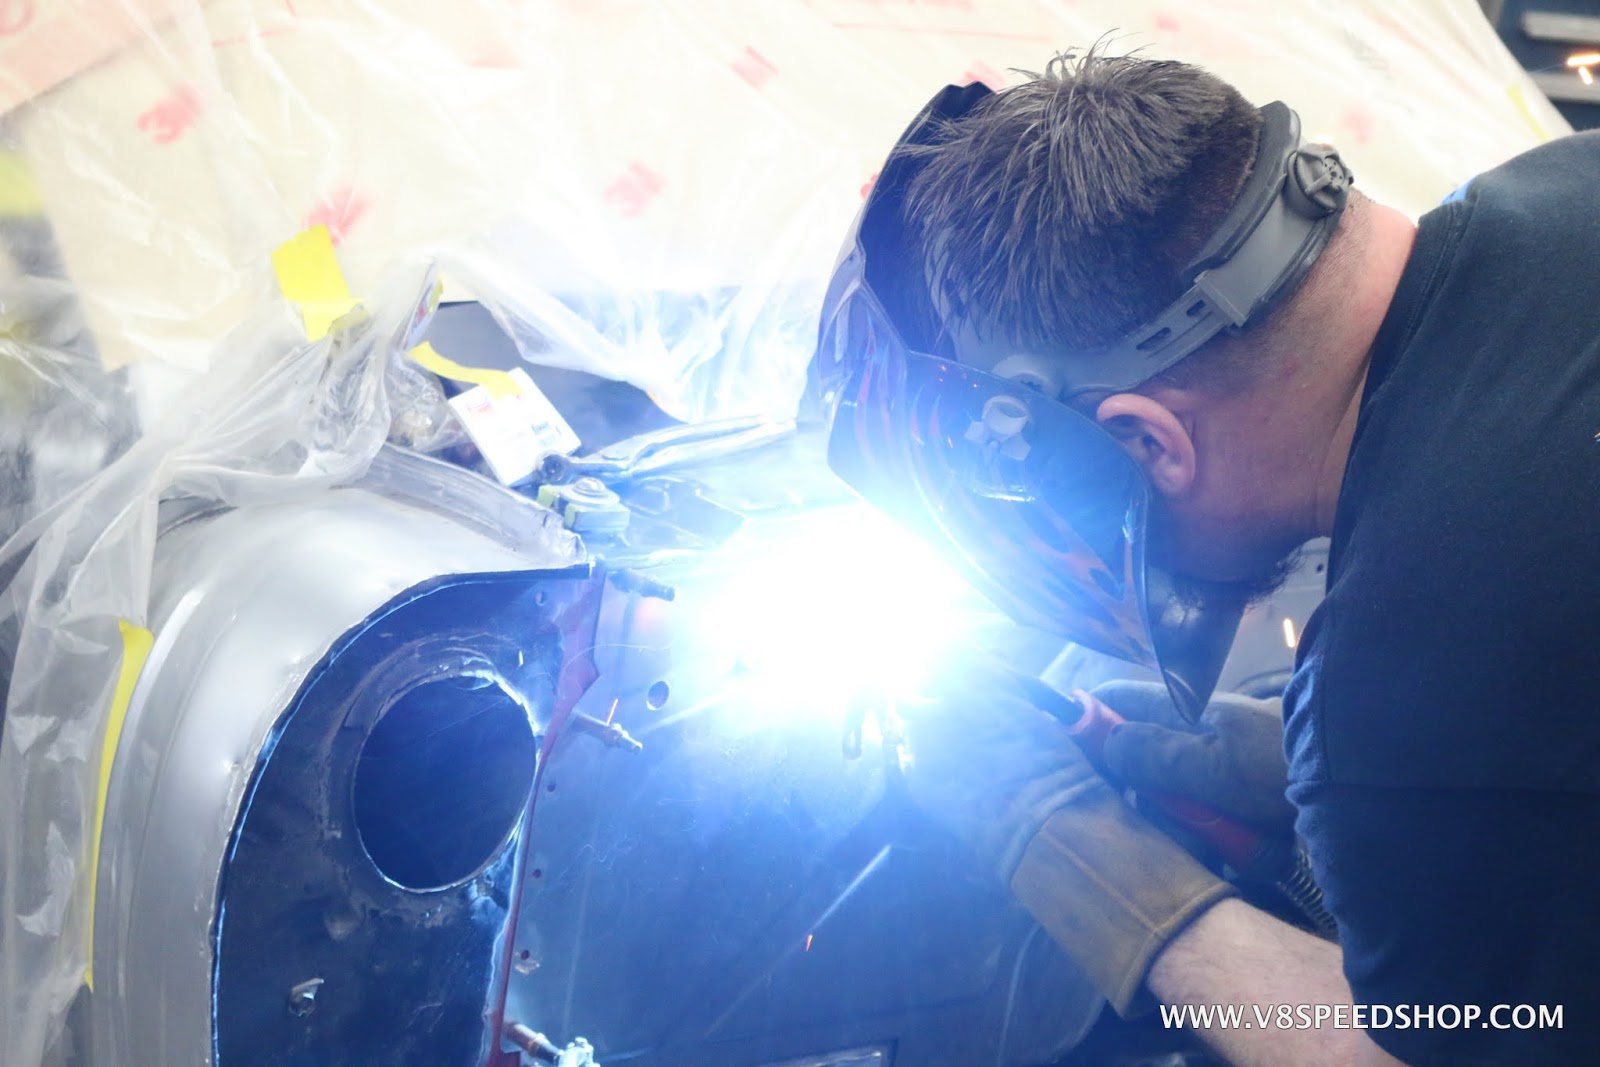
The section is tack welded to the firewall with the HTP Mig 200 welder, then test fit in the car.
- - - Updated - - -
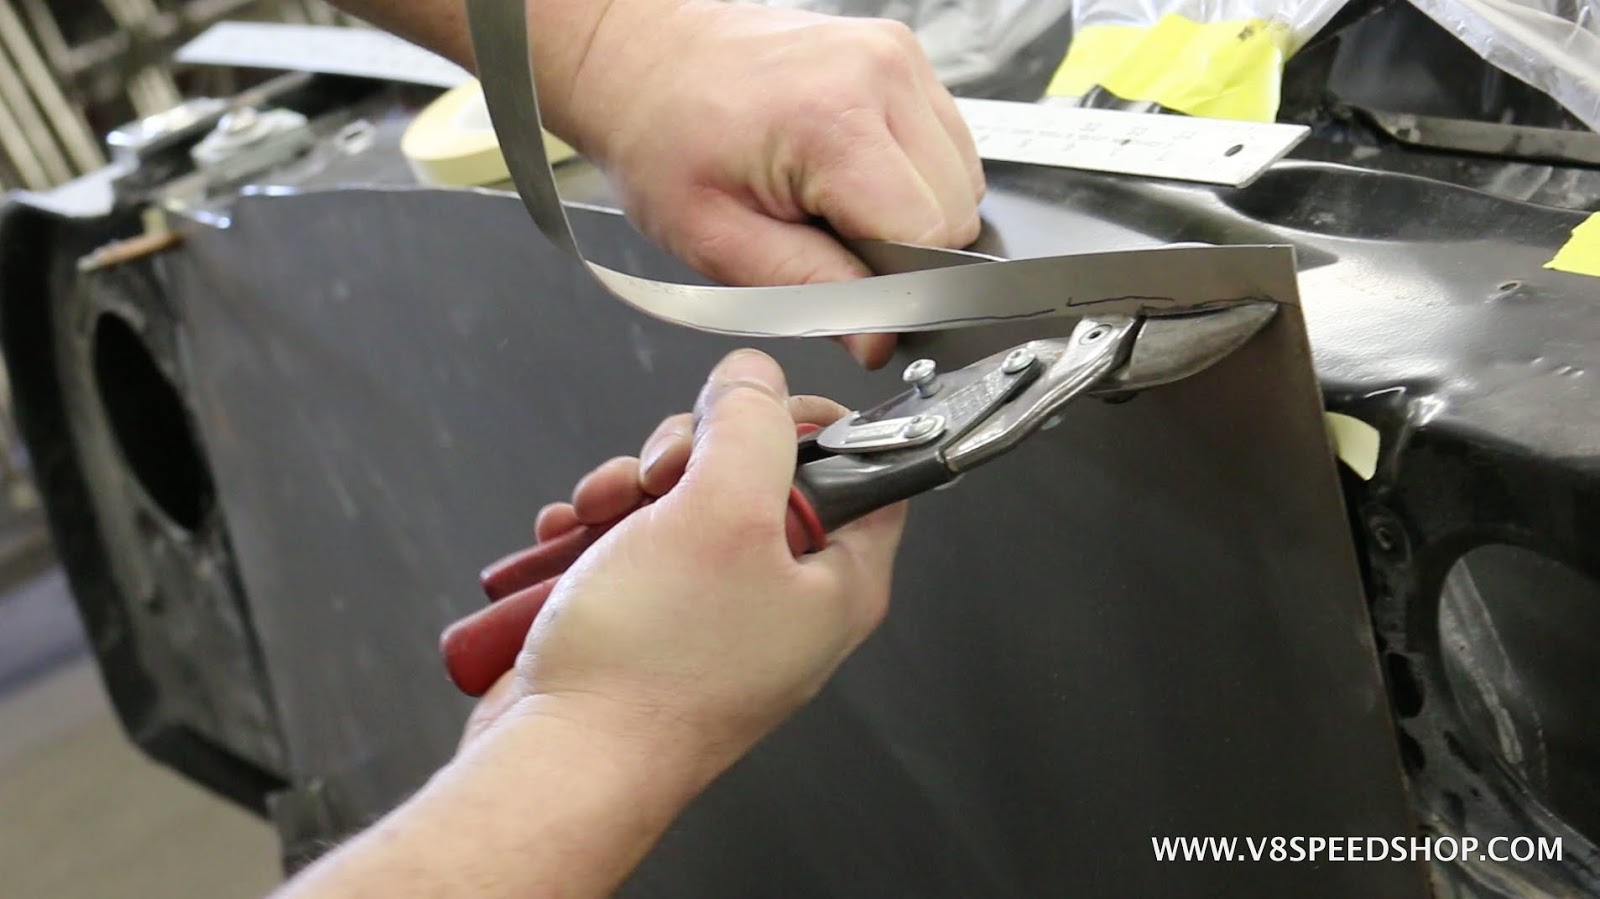
The firewall is cut back a bit to facilitate the install of the new panel.
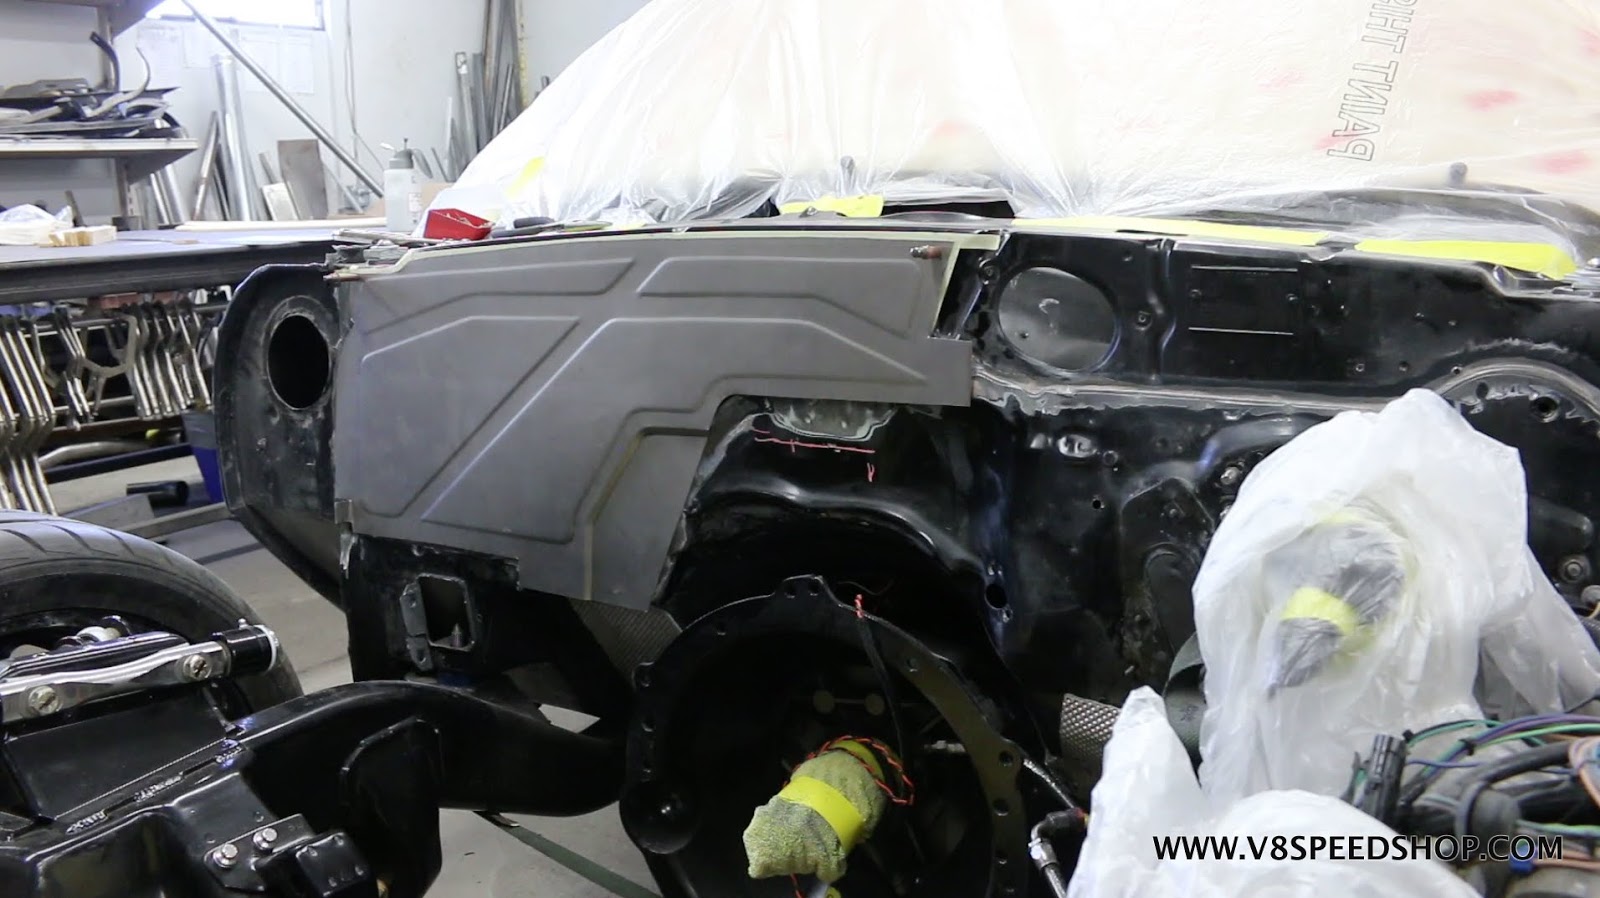
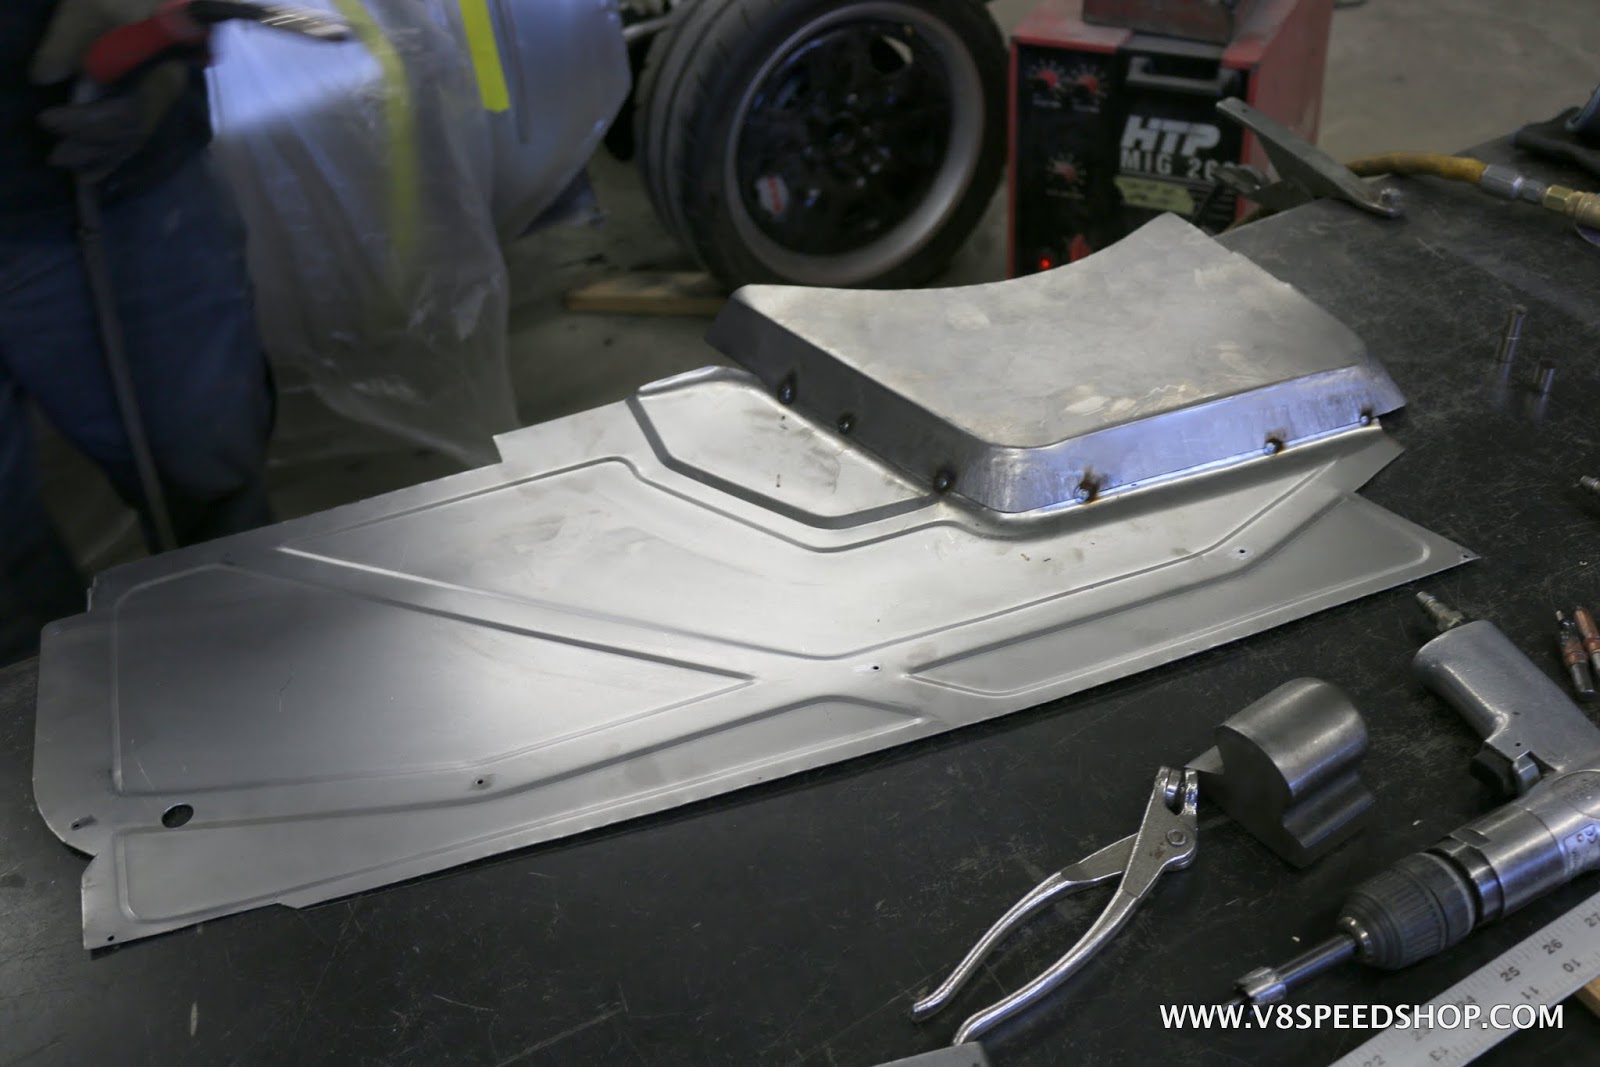
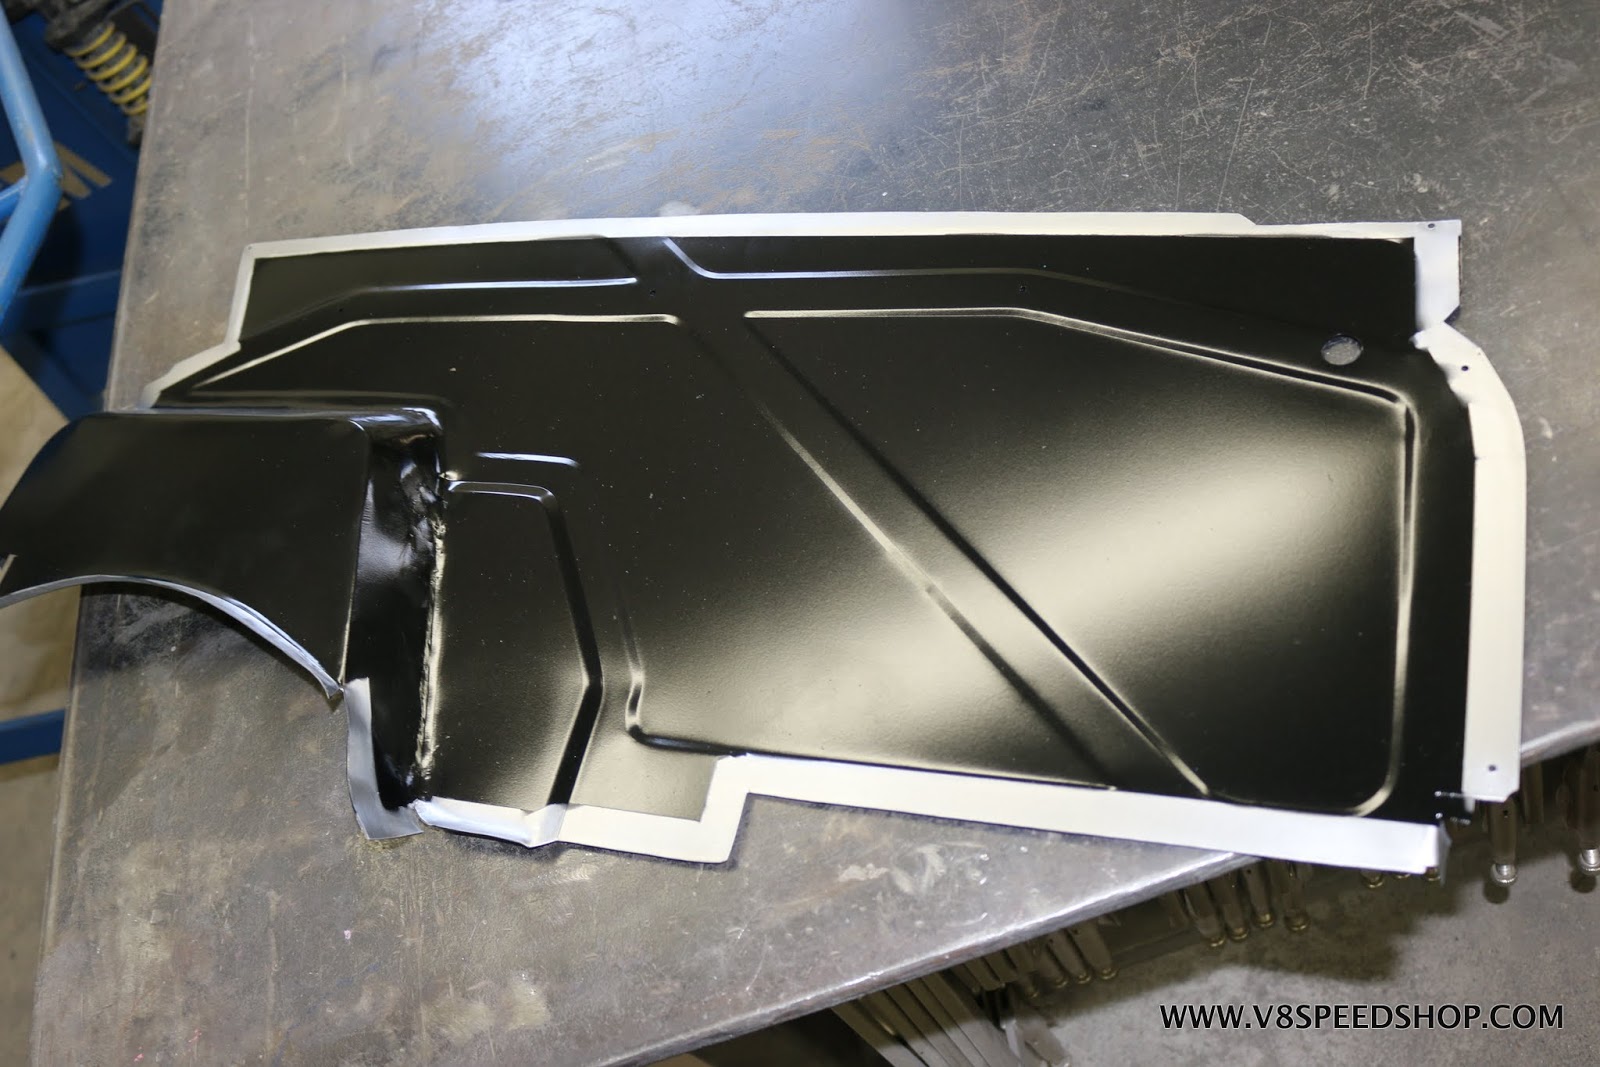
The welding is completed and metal-finished, then the panel is cleaned and treated with an epoxy primer on the inside.
Any corrosion is removed from the firewall, and weld-through primer is applied before the new panel is welded in place.
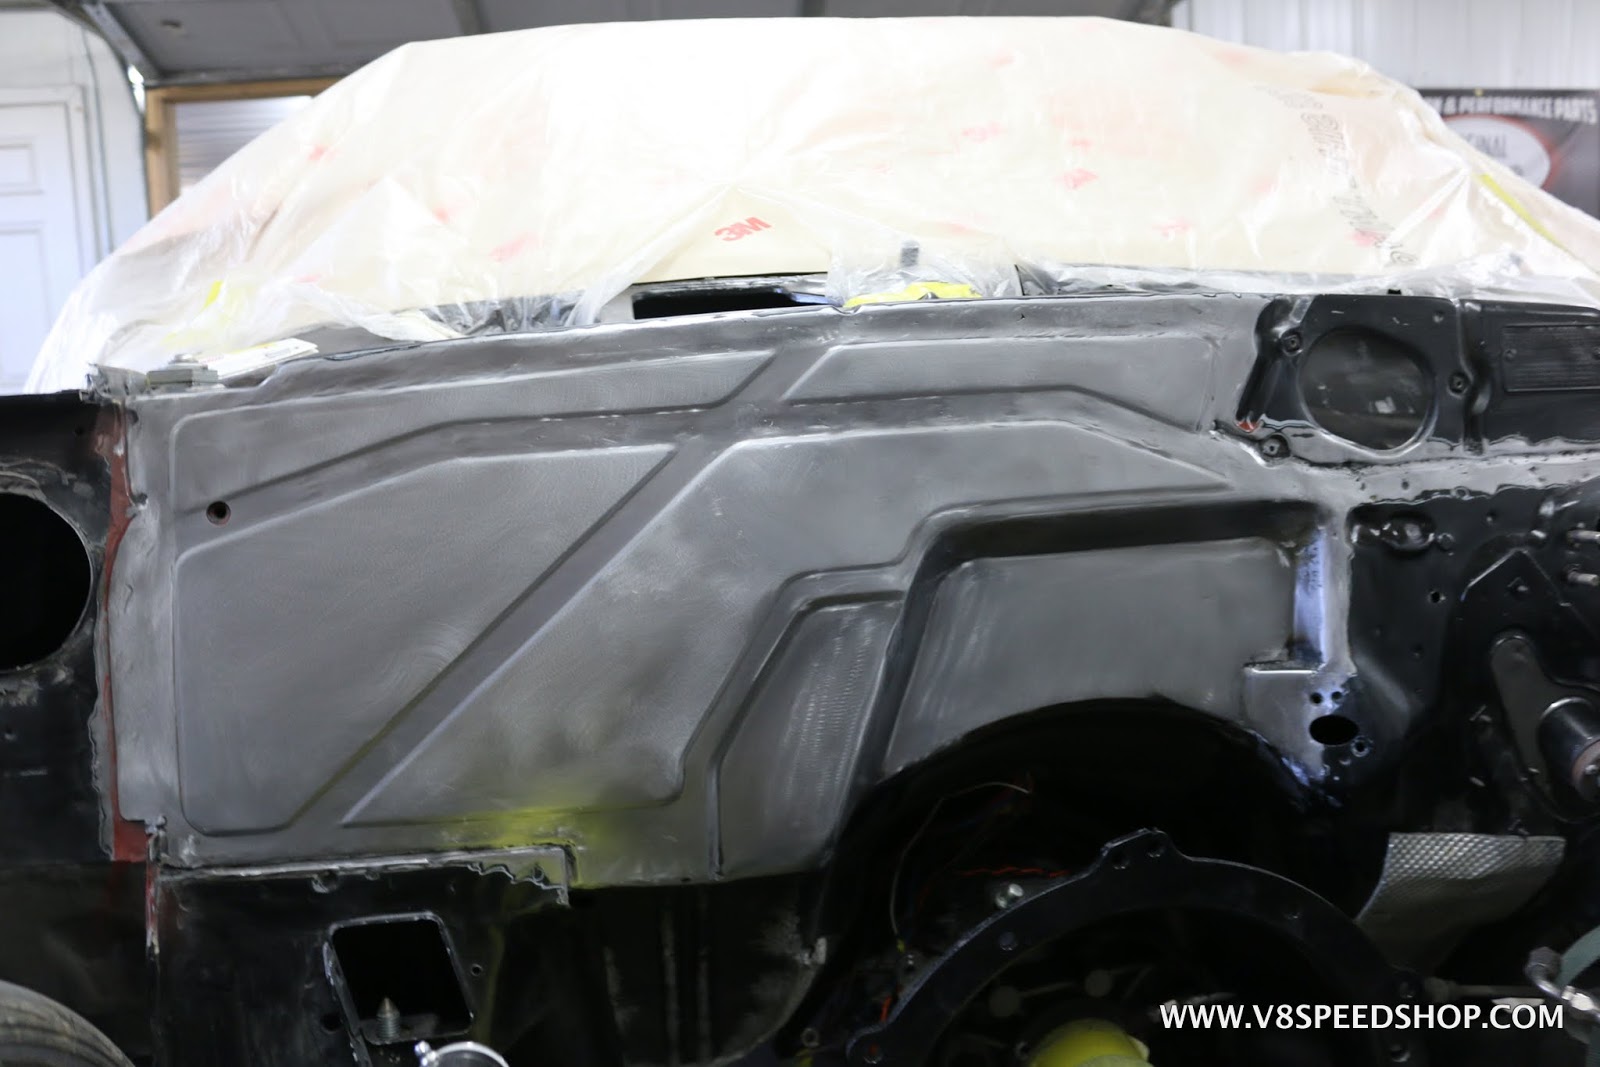
The firewall is then welded to the car, and all welds are finished.

- - - Updated - - -
This little corner requires a small piece to “connect the dots”.

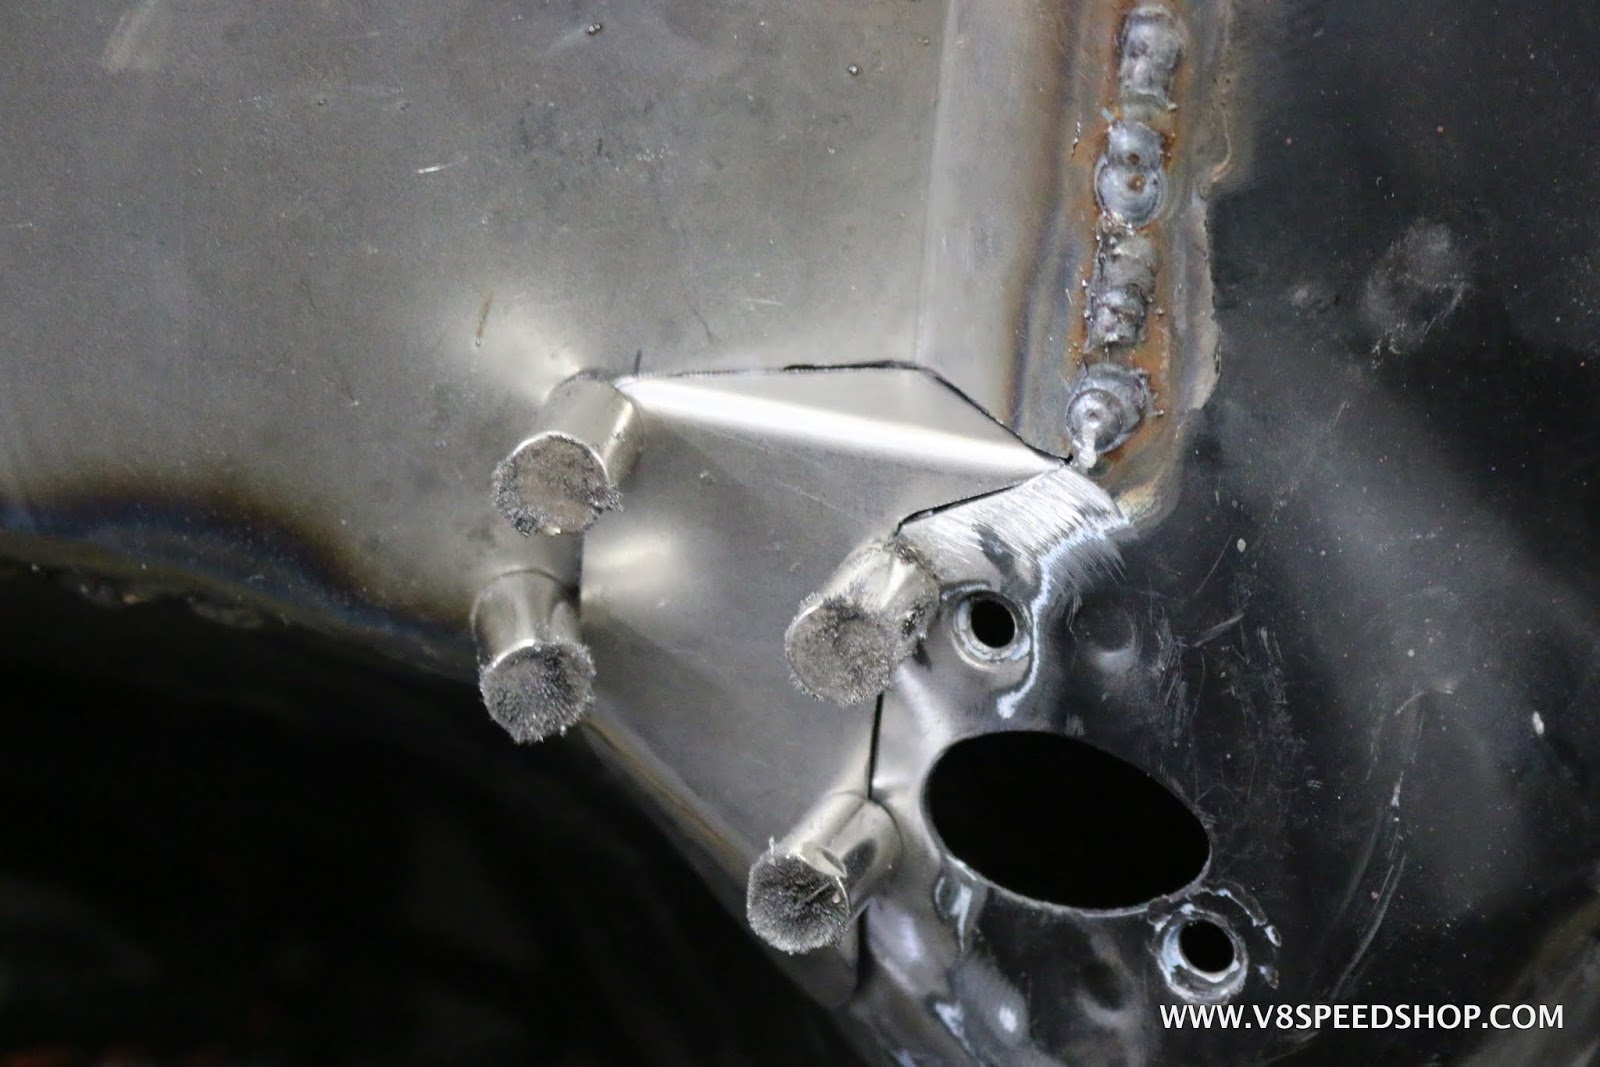
Welds are all ground and metal finished.
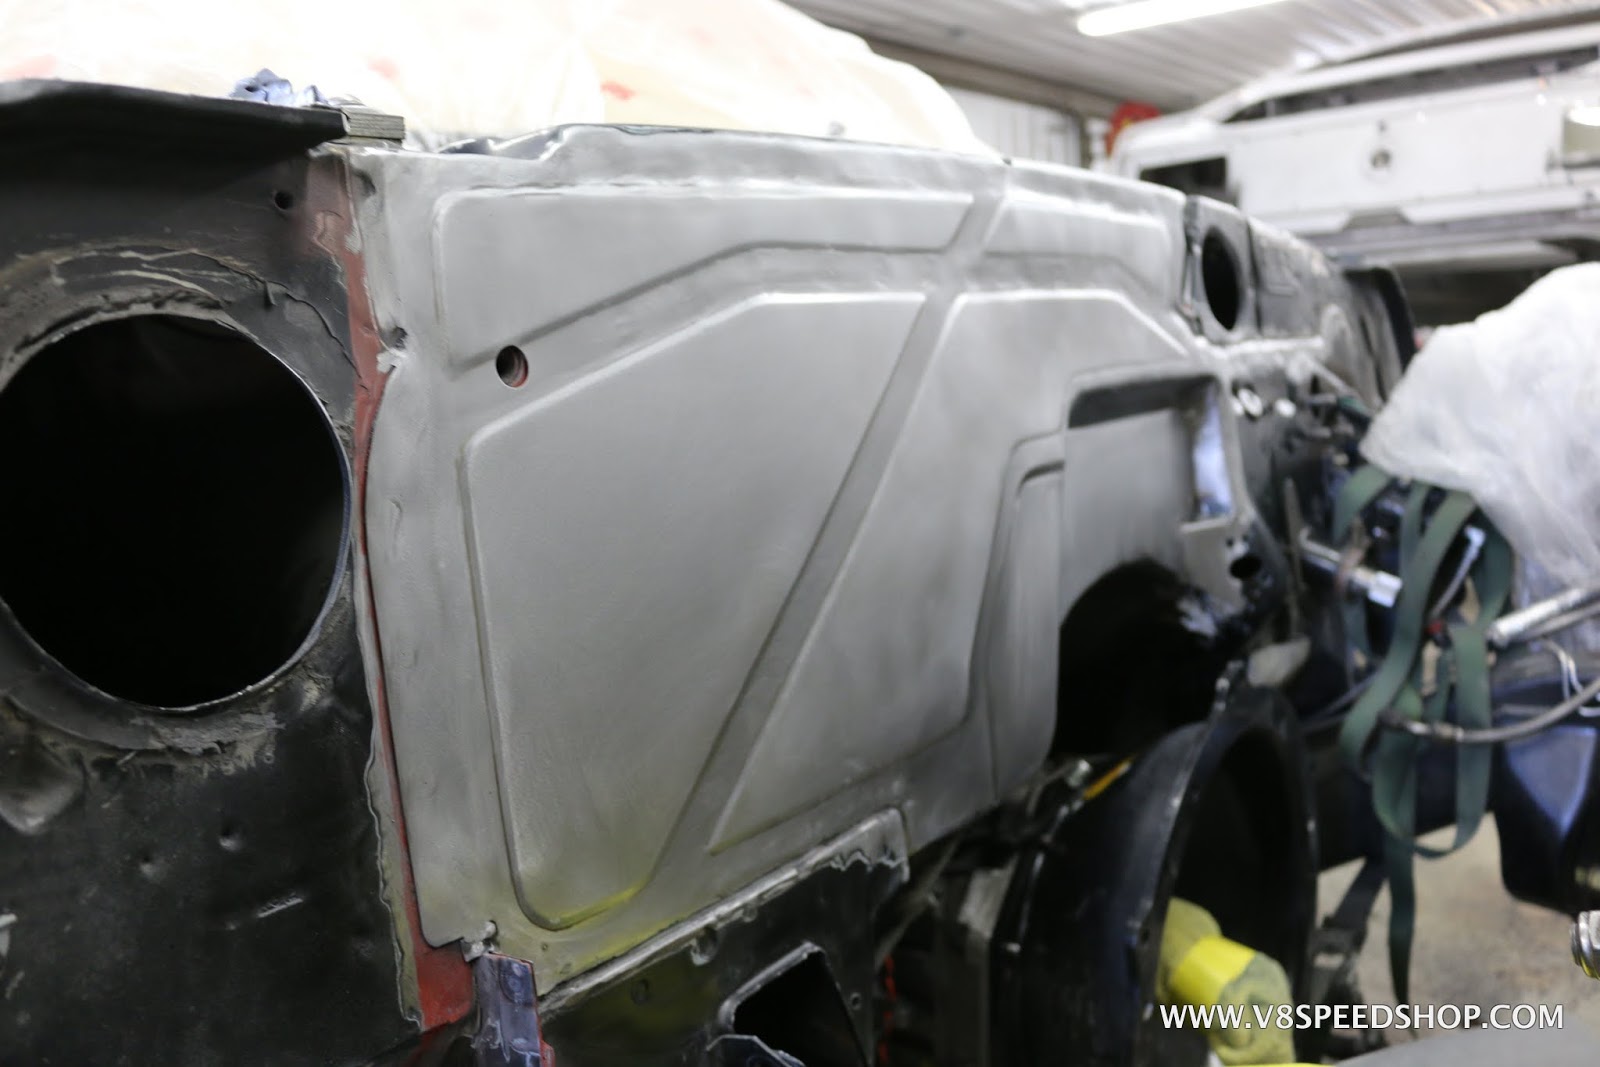
The finished firewall will only require a touch of filler before epoxy and paint.

- - - Updated - - -
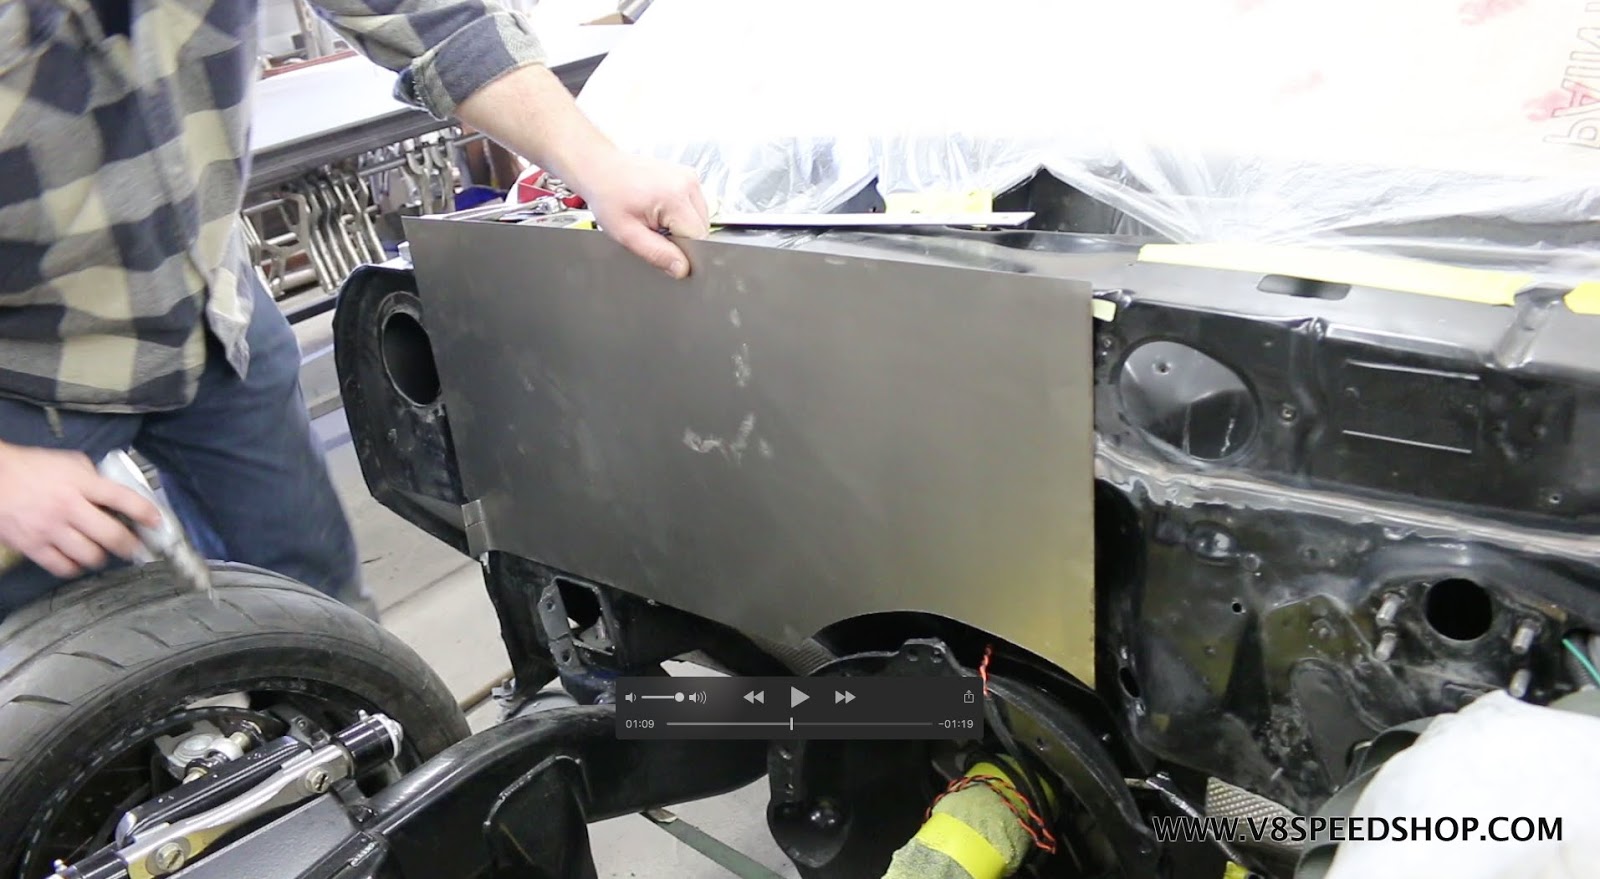
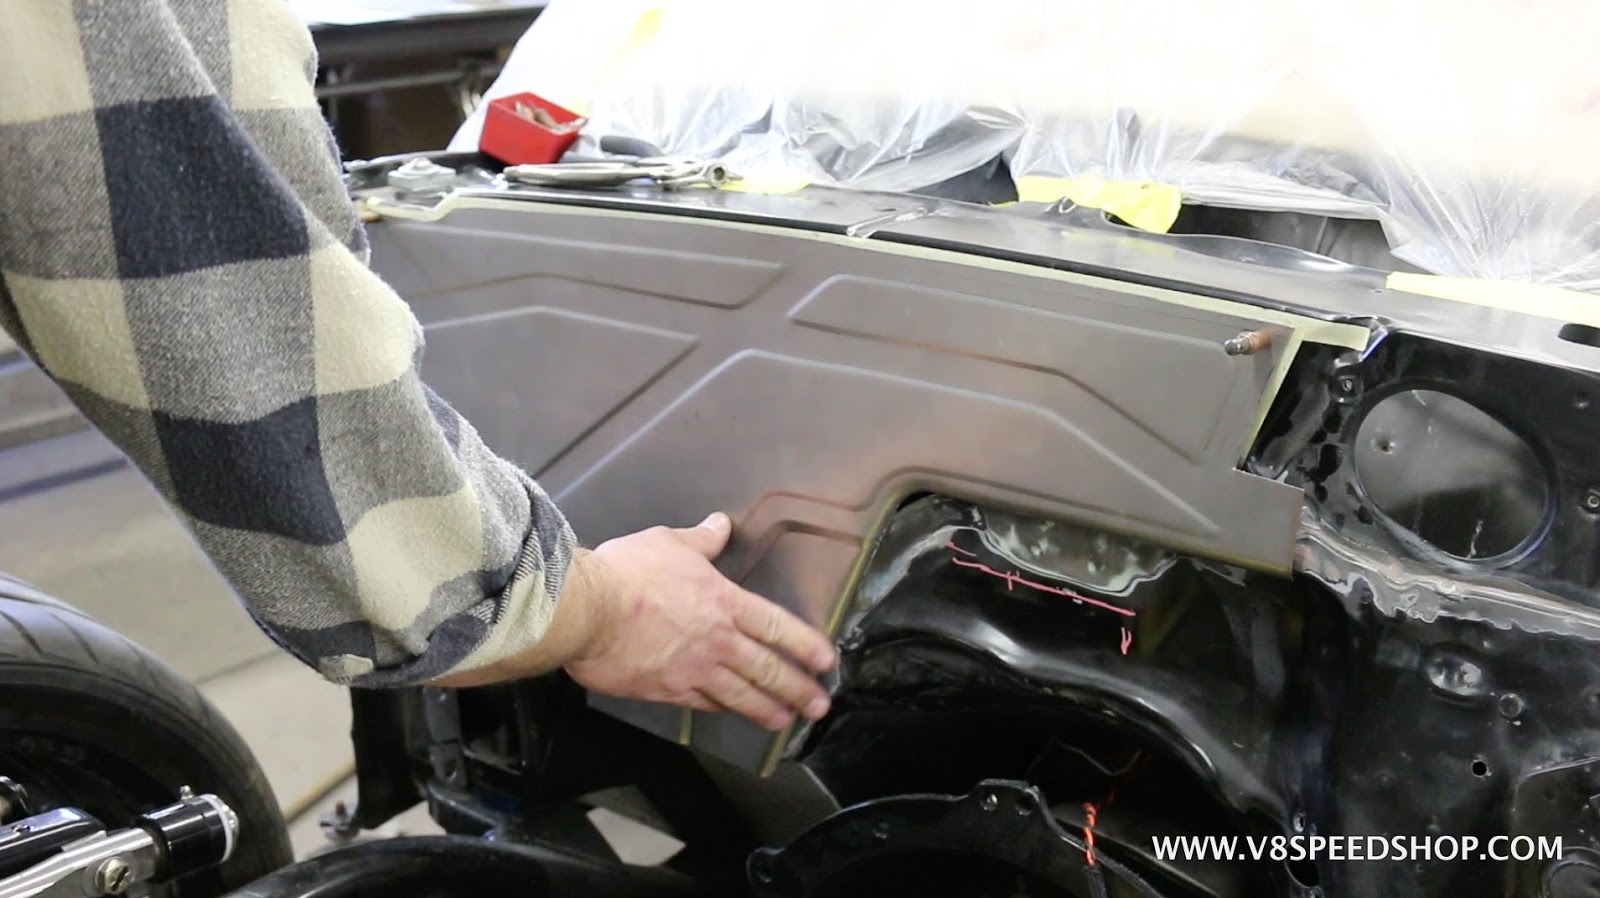
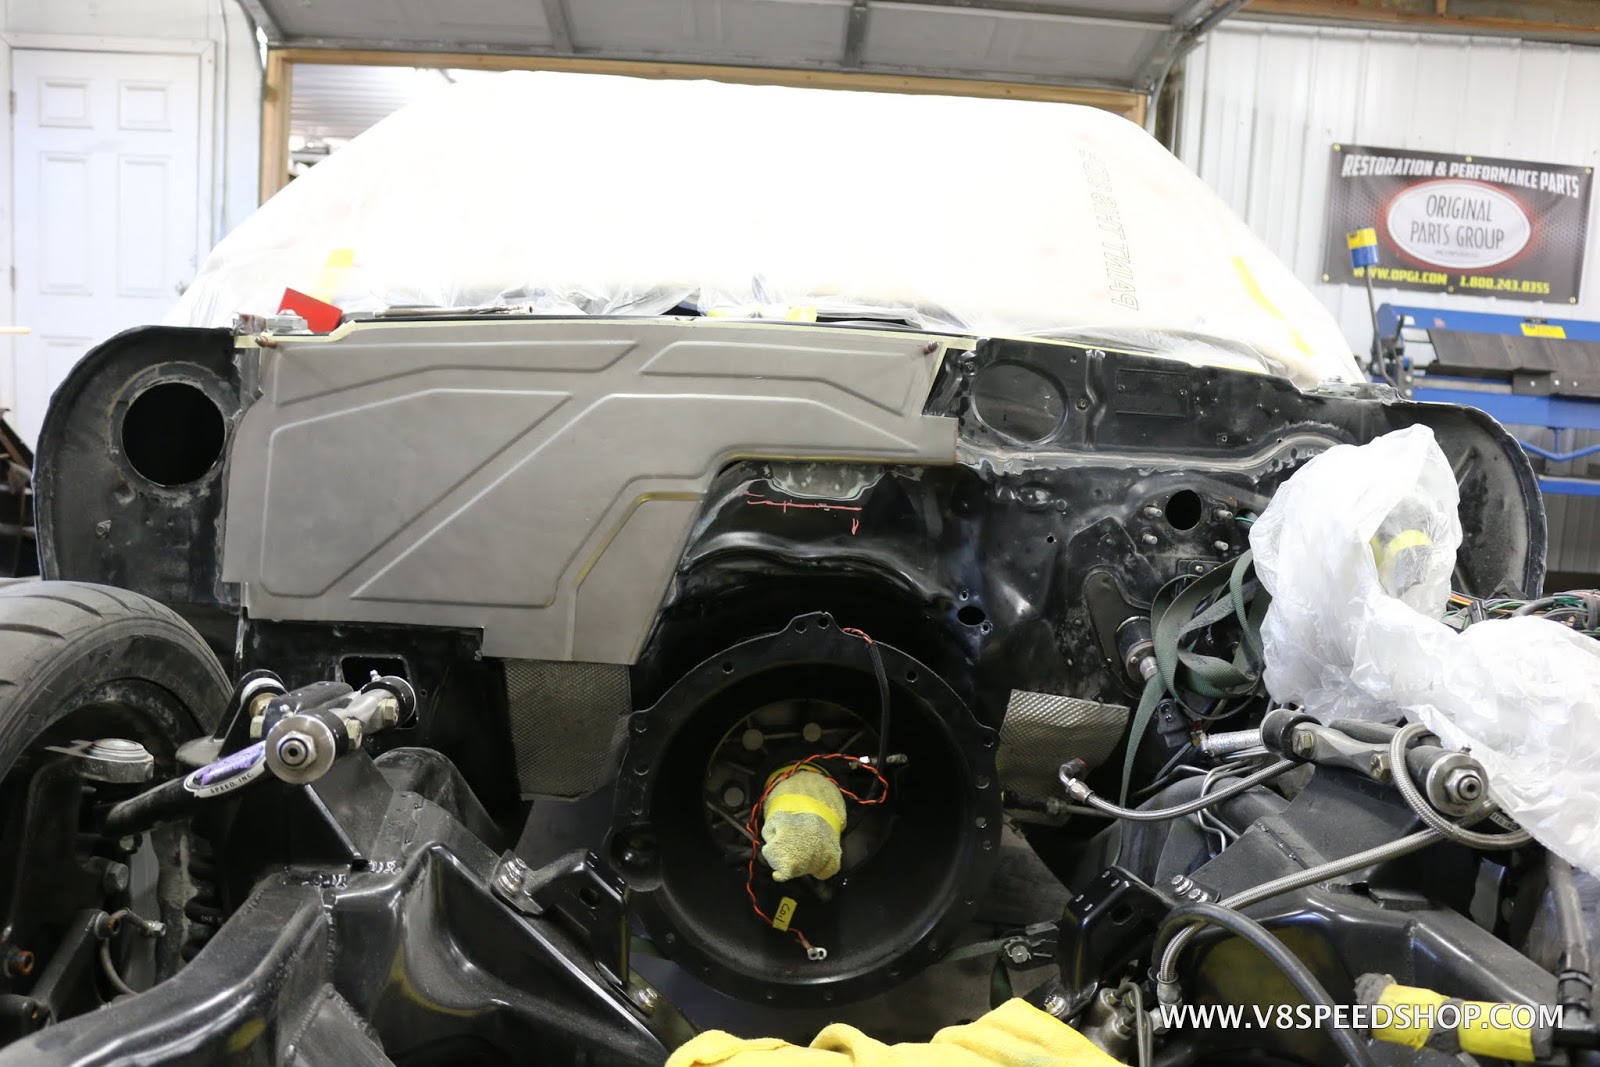
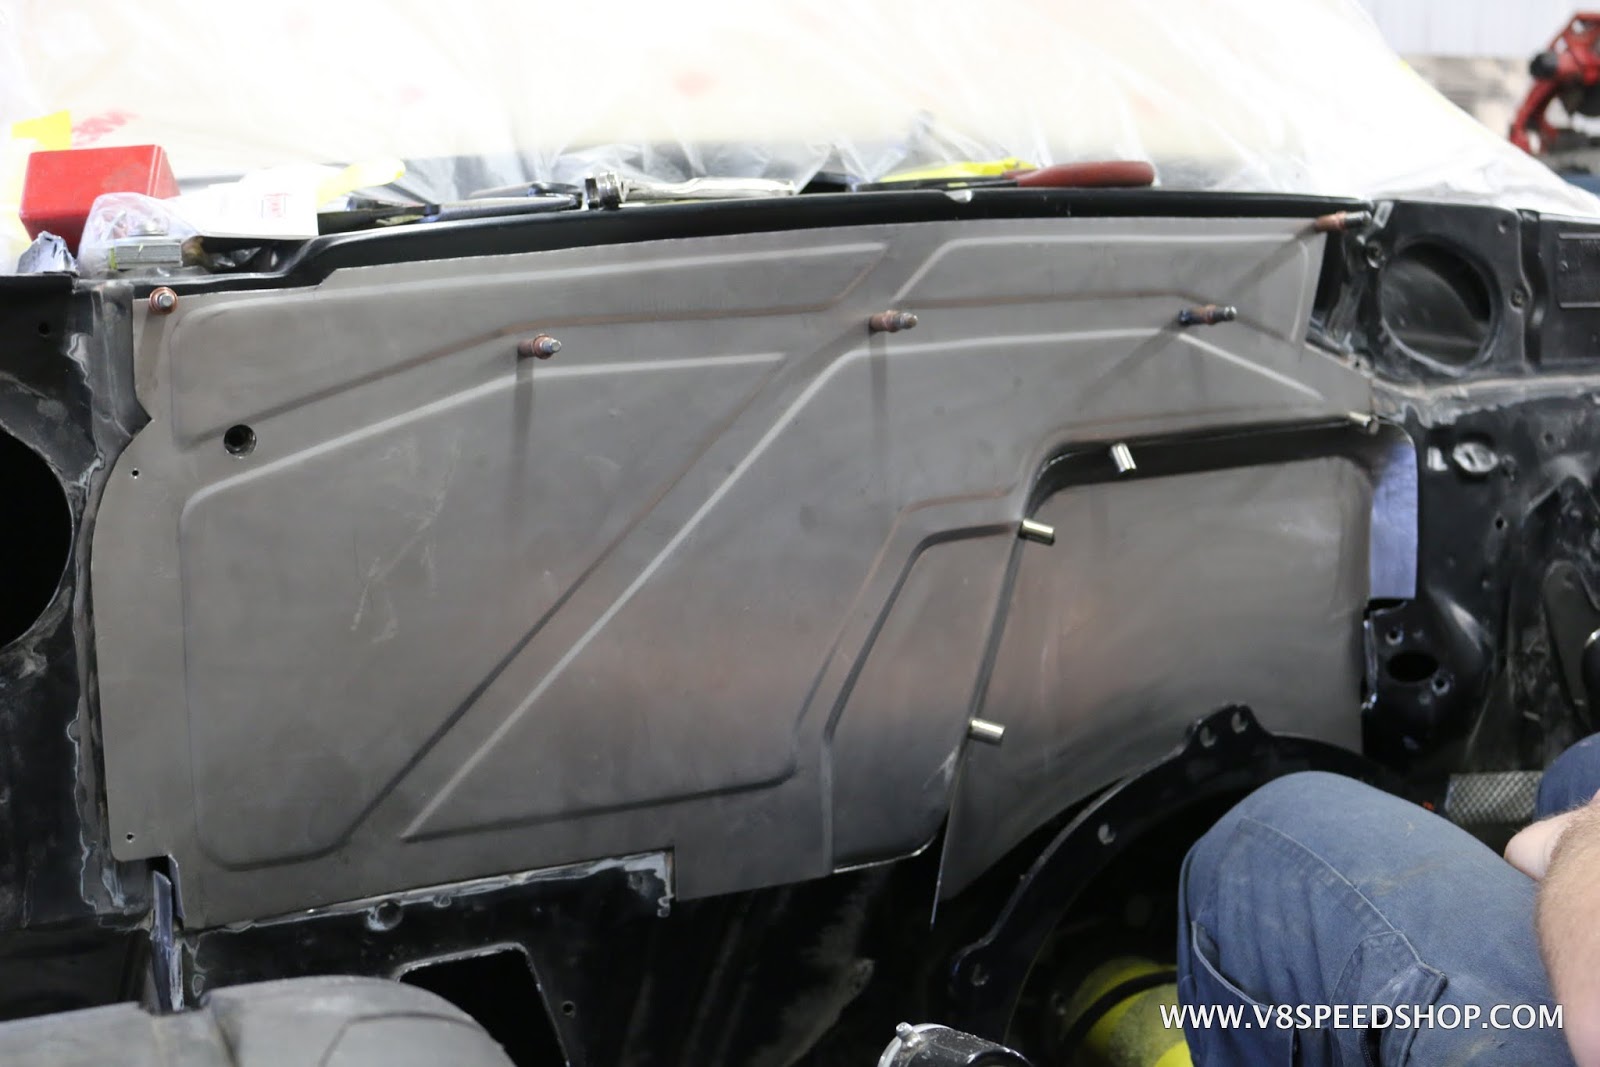
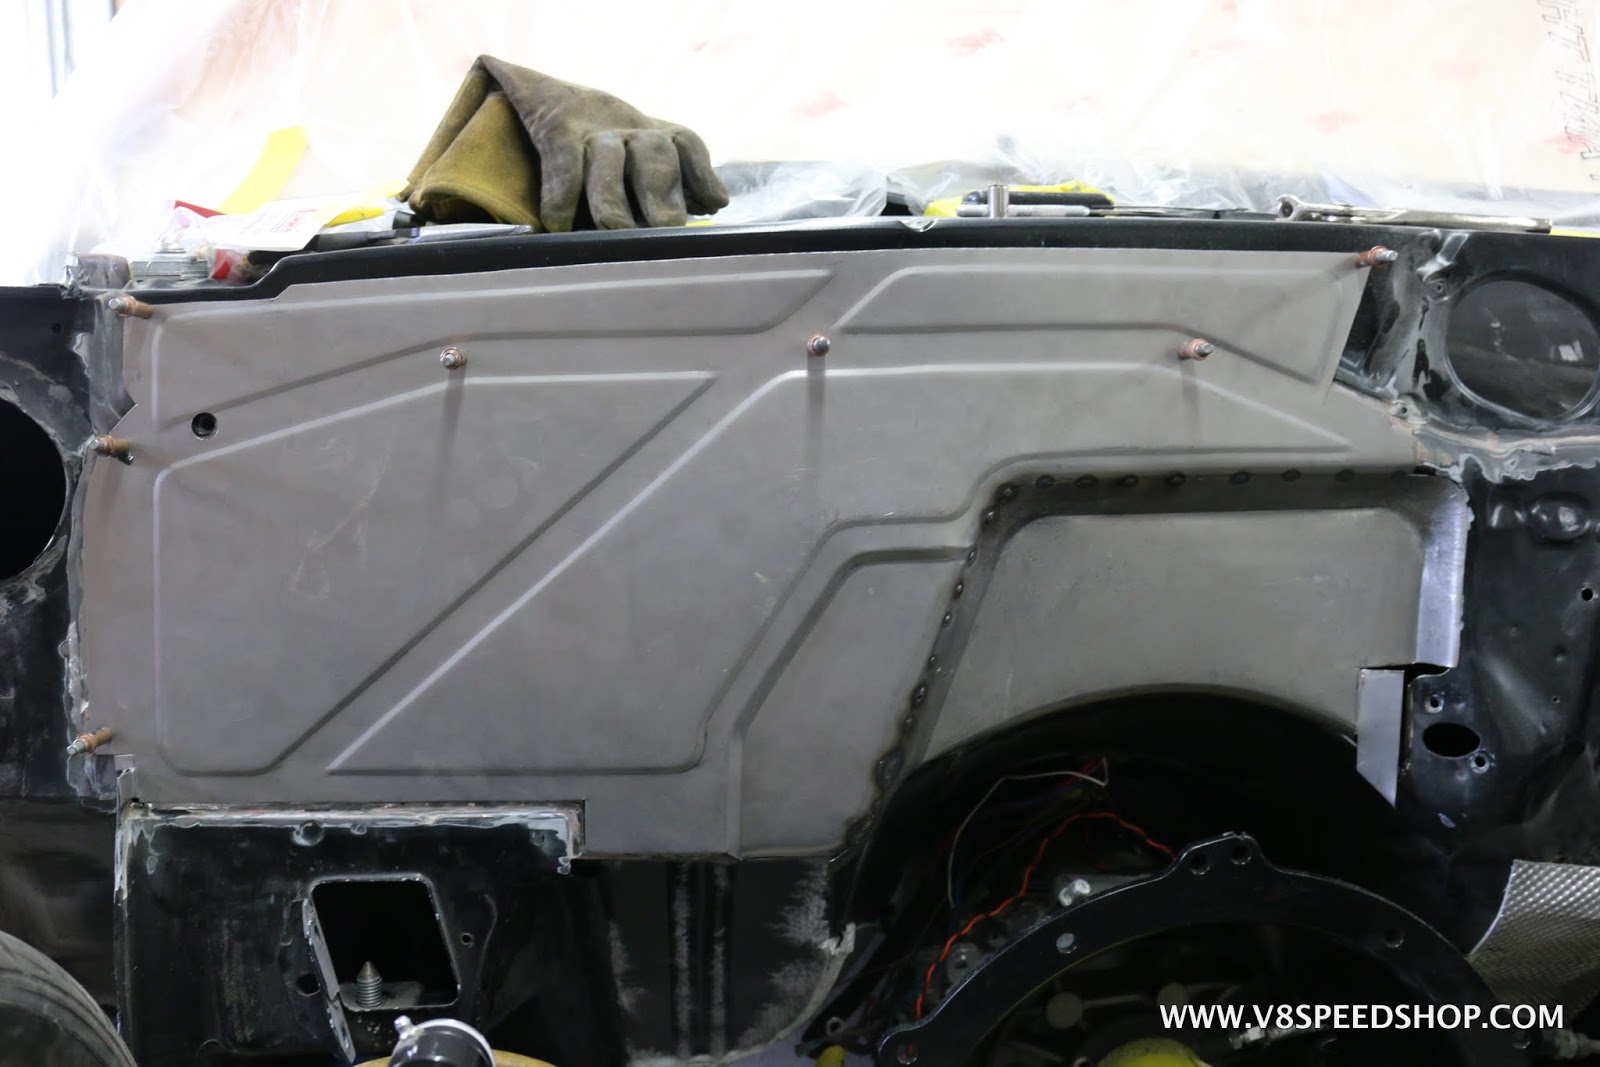
The LT4 is lowered back in place, and the fit is verified. Its still a bit tight, and the harness will need to be held upward during install to fit cleanly in the new panels recess.

 Kevin Oeste
V8 Speed and Resto Shop
V8TV
Muscle Car Of The Week
V8 Radio Podcast
All about us:
https://www.v8speedshop.com
02-15-2018 #14 Registered User
- Join Date
- Dec 2016
- Location
- Montgomery County PA
- Posts
- 59
Skills!!!!
02-16-2018 #15 Registered User
- Join Date
- Oct 2004
- Posts
- 419
That's some impressive metalworking right there. I've done enough little fab projects to know how much time and effort goes into something like that. I am also still amazed at the high dollar "parts" cars that still have what appears to be cut corners.
02-16-2018 #16
Registered User
- Join Date
- Sep 2009
- Posts
- 2,706
Wow, that firewall is awesome!!
1955 Nomad project LC9, 4L80e, C5 brakes, Vision wheels
1968 Camaro 6.2 w/ LSA, TR6060-Magnum hybrid and etc SOLD
1976 T/A LS1 6 Speed, and etc. SOLD
Follow me on Instagram: ryeguy2006a
02-16-2018 #17
Registered User
- Join Date
- Dec 2004
- Location
- Midwest
- Posts
- 2,261
Thanks! Yeah, Fabricator John Moss has 'em! Originally Posted by 1stgenchop
You never really know what's under the paint until you strip the whole thing, that's for sure! Originally Posted by alocker
Thanks! We think it's more fitting for a car like this. Originally Posted by ryeguy2006a
Kevin Oeste
V8 Speed and Resto Shop
V8TV
Muscle Car Of The Week
V8 Radio Podcast
All about us:
https://www.v8speedshop.com
02-17-2018 #18 Registered User
- Join Date
- Apr 2010
- Location
- Central Alberta
- Posts
- 24
The Drive Junkie is a sweet set up.
67 RS Camaro vert
Mark Jones 496
Liberty TKO 600
Holley HP mpfi
02-21-2018 #19
Registered User
- Join Date
- Sep 2010
- Posts
- 56
I learned a whole bunch buying a "Finished" Car. There is truly a difference between a "Body" man and a "Fabricator". Having everything metal finished is the way to go. Some of the things we found just made you shake your head in disbelief. Fortunately, I got into the car at a reasonable price and had some room to work. The folks at V8SR have done an outstanding job with my car and I am looking forward to the finished product. Originally Posted by alocker
02-27-2018 #20
Registered User
- Join Date
- Dec 2004
- Location
- Midwest
- Posts
- 2,261
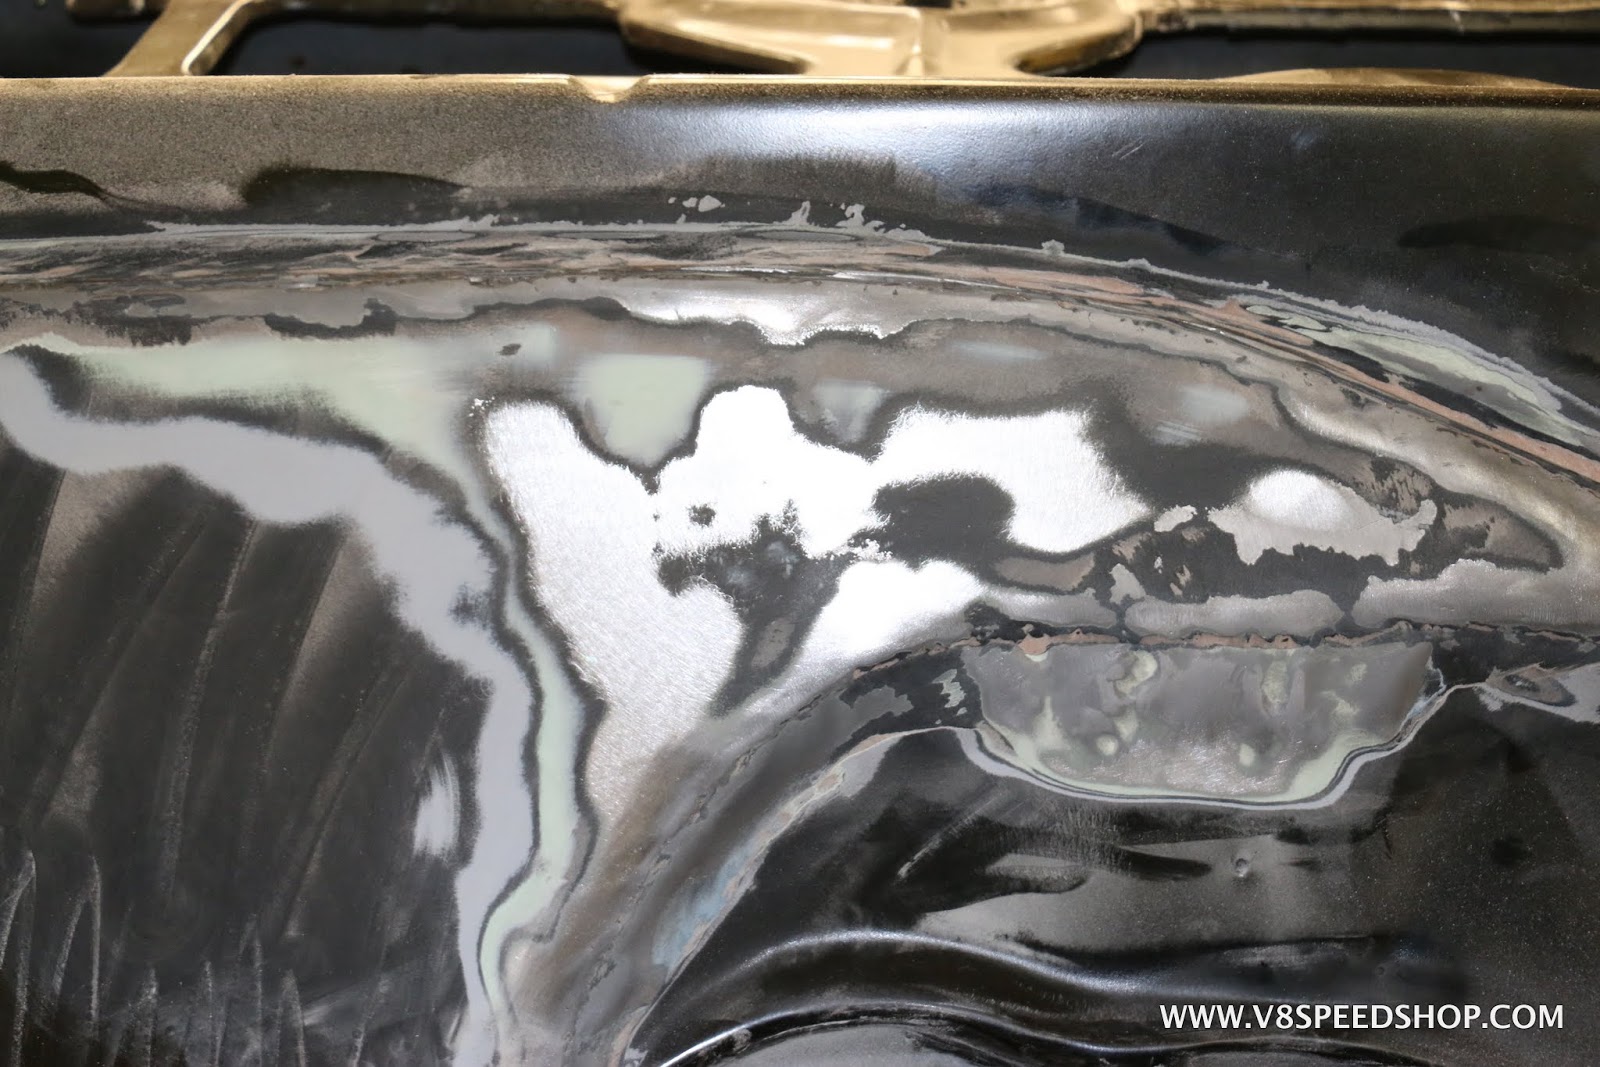
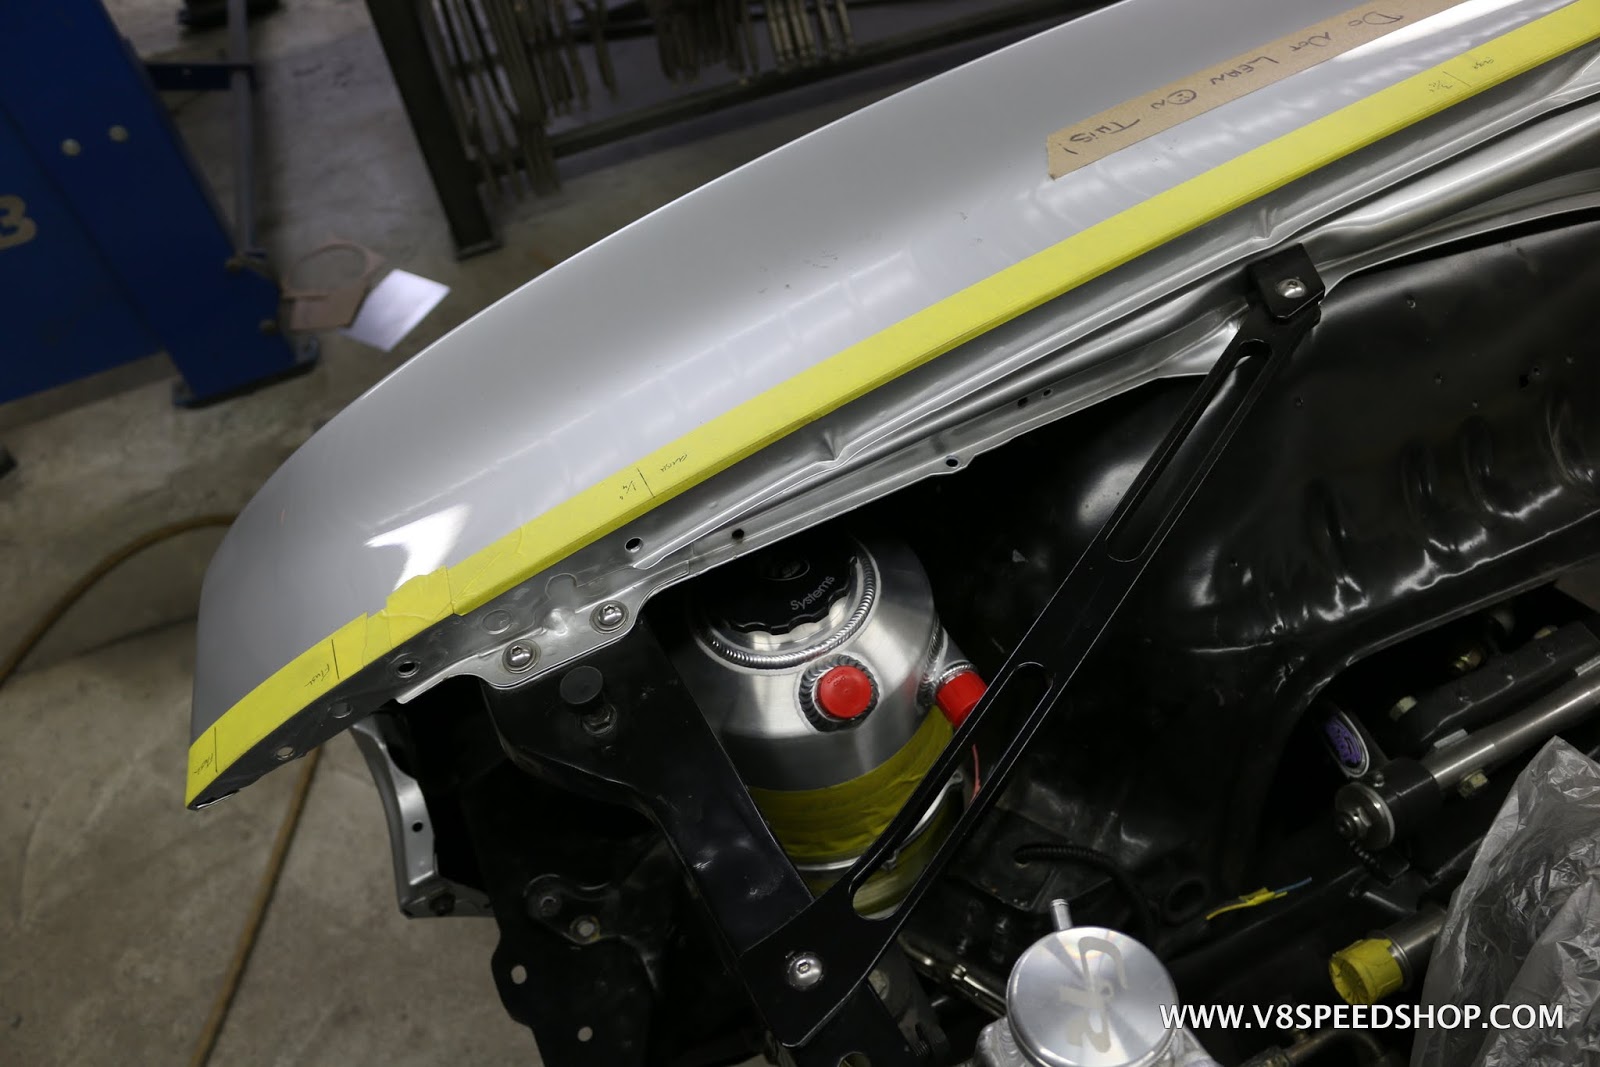
The LT4 runs a dry sump oiling system, meaning it does not have traditional oil pan holding the engine oil supply. Instead, the oil is stored in a seperate tank outside the engine and is pumped through the engine. The benefit is more consistent oil delivery during high speed turns and increased oil cooling and capacity. Also, the pump is more efficient and easier to service than a traditional oil pump.
The down side is the need for complex plumbing and an oil reservoir tank under the hood. Also, it can be challenging to bring the engine oil up to operating temperature in daily-driving conditions thanks to the higher capacity and cooling effects of remote tanks and plumbing.
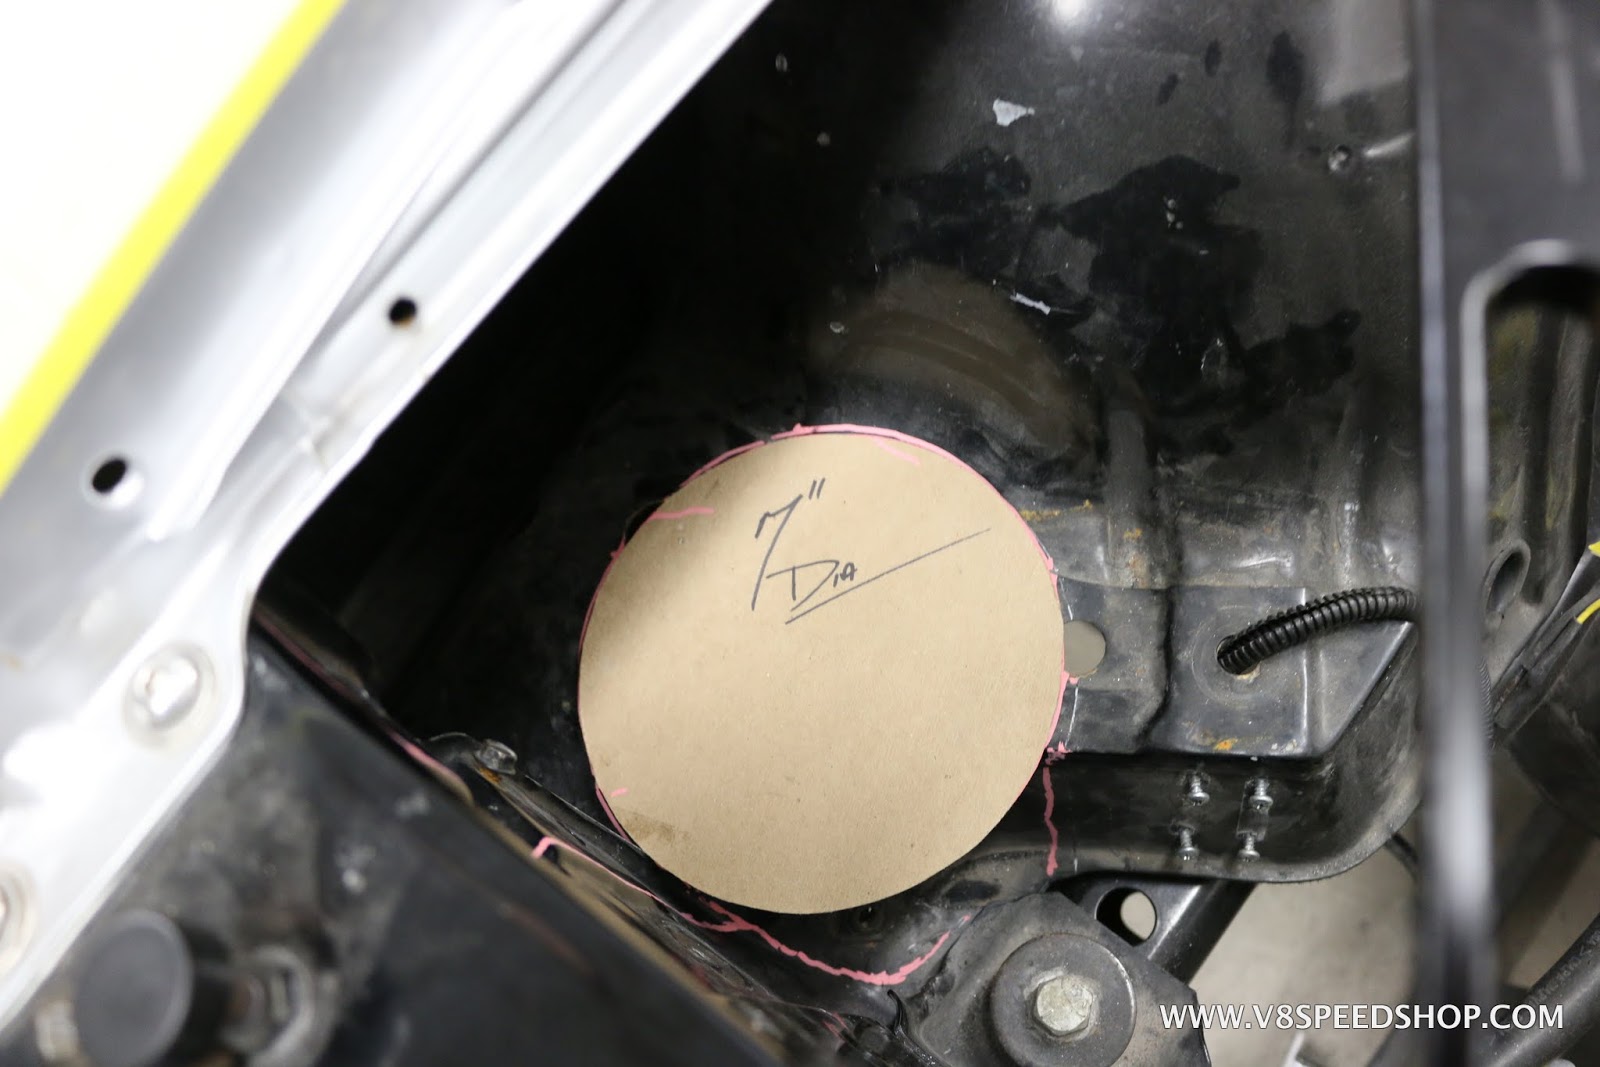
Locating the tank can be tricky, as one must consider packaging under the hood. In a race car, you ideally want the tank to be inside the wheelbase of the car where you can place it to compliment the vehicles balance. However, packaging compromises can dictate otherwise.
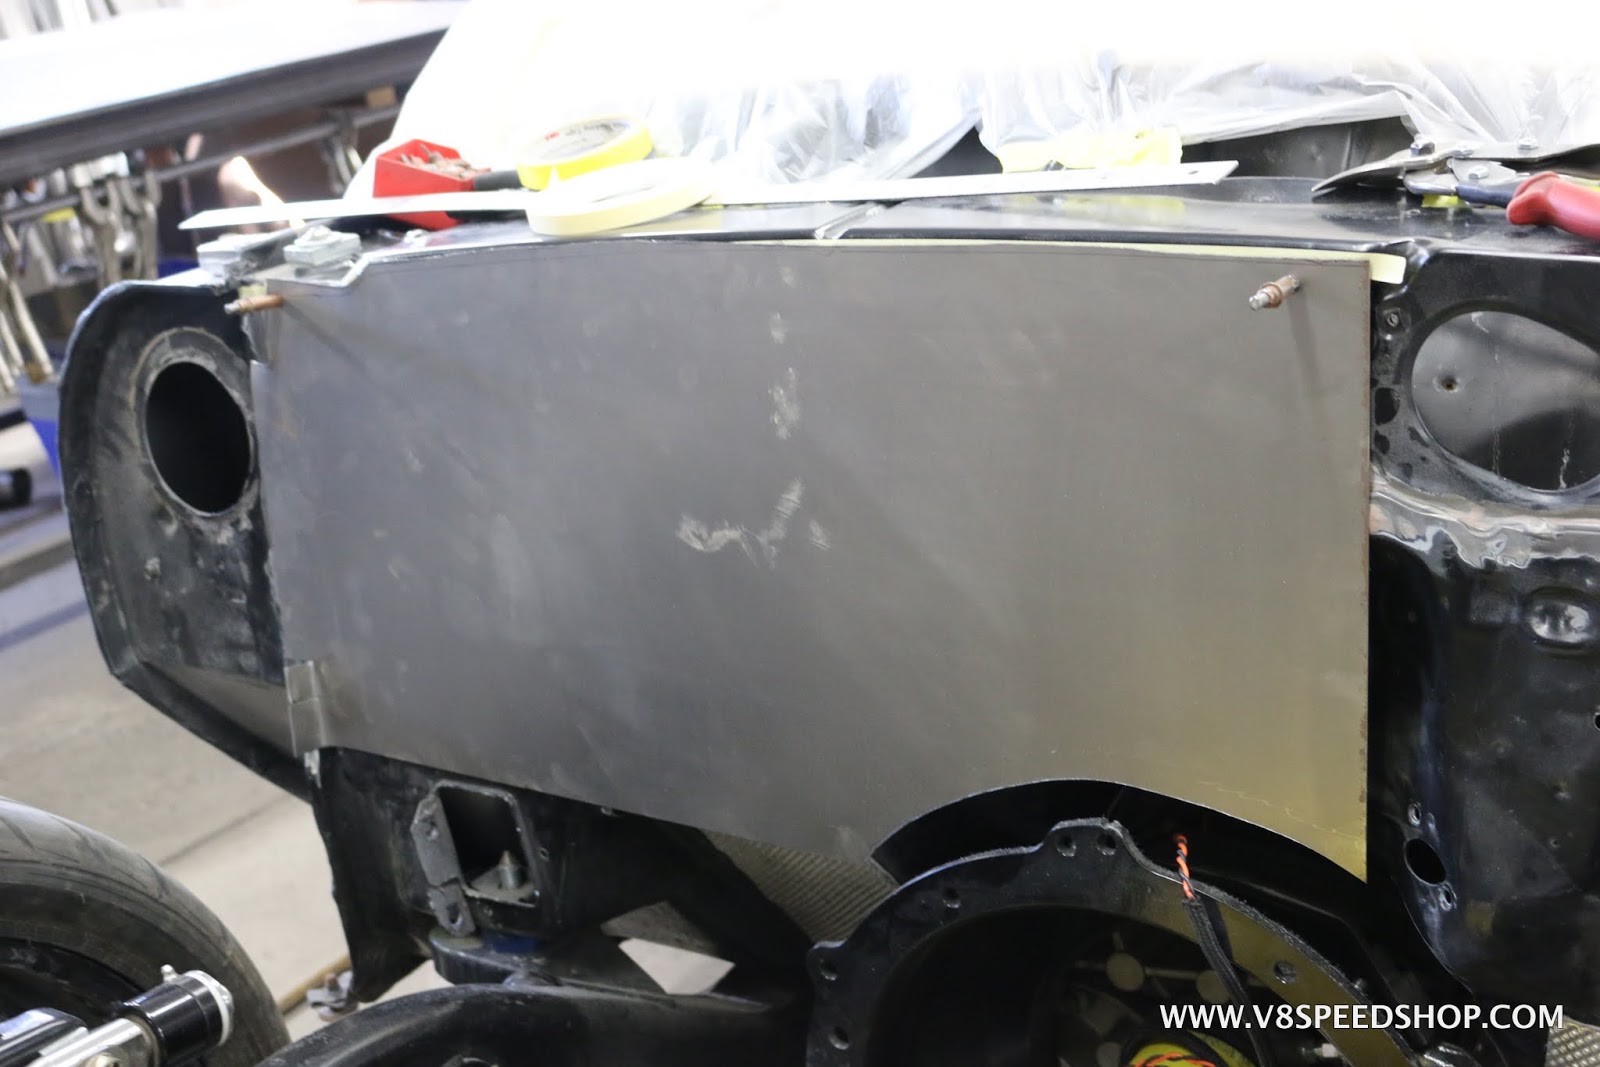
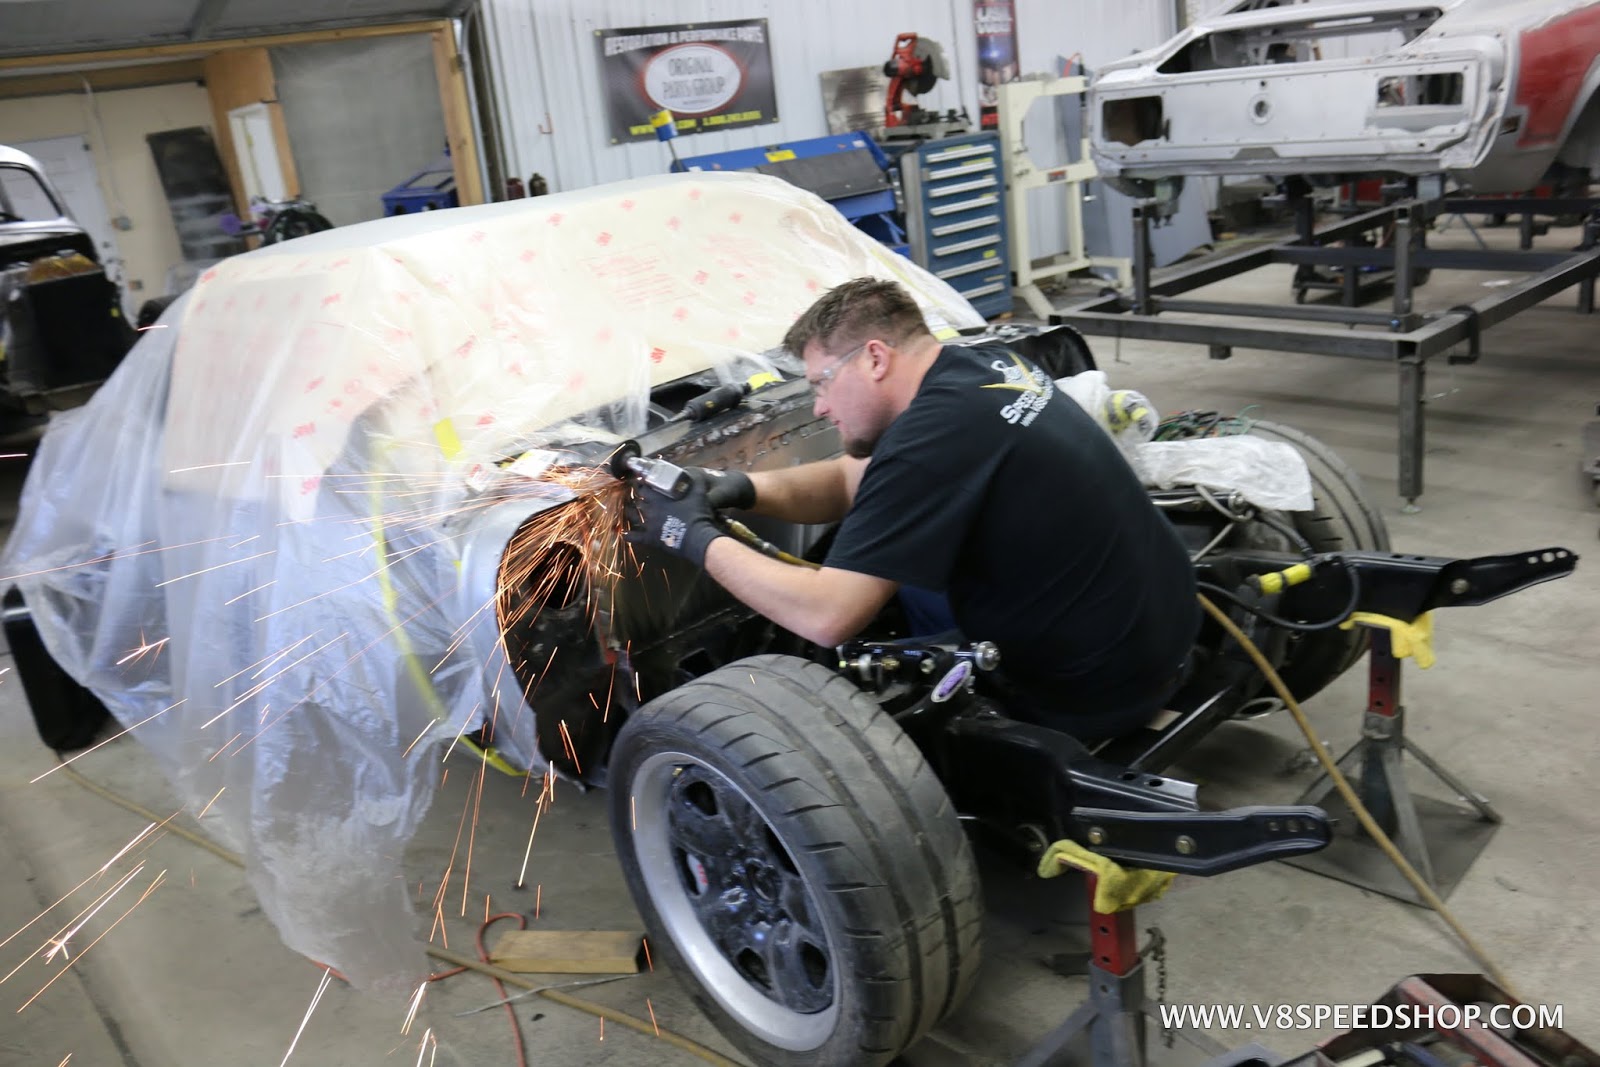
In our case, we elected to install the custom Peterson Fluid Systems tank in the forward part of the passenger fender.
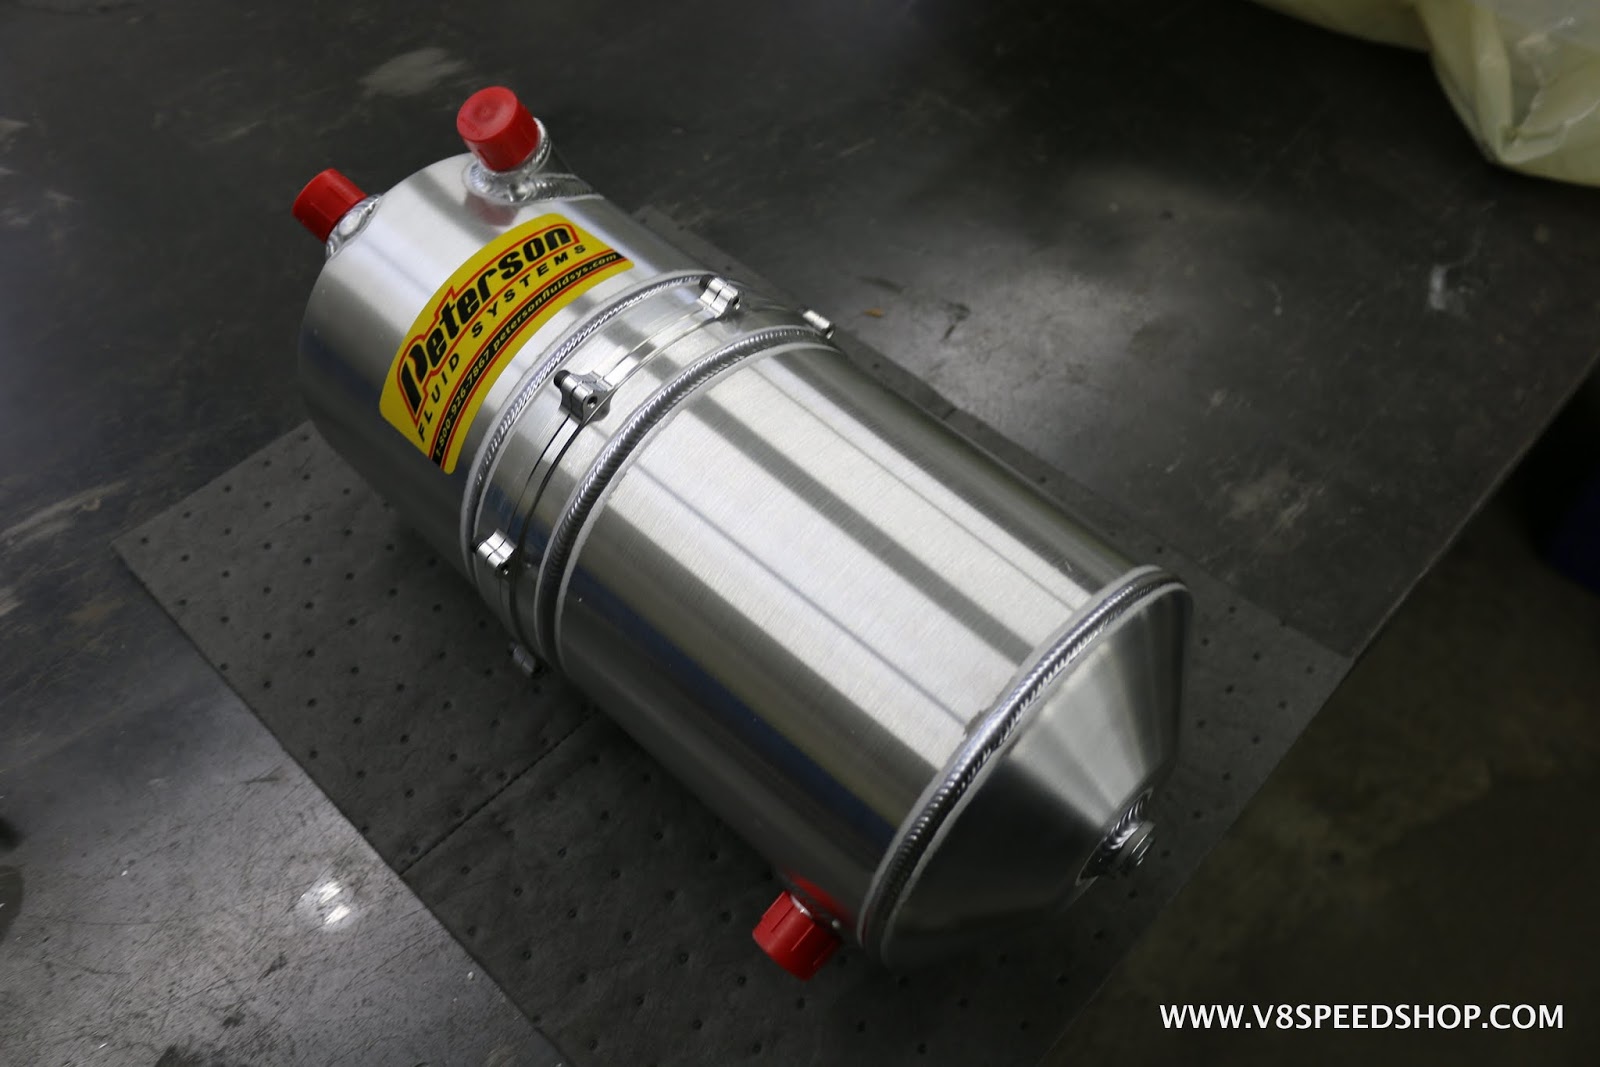
Baffle in the tank
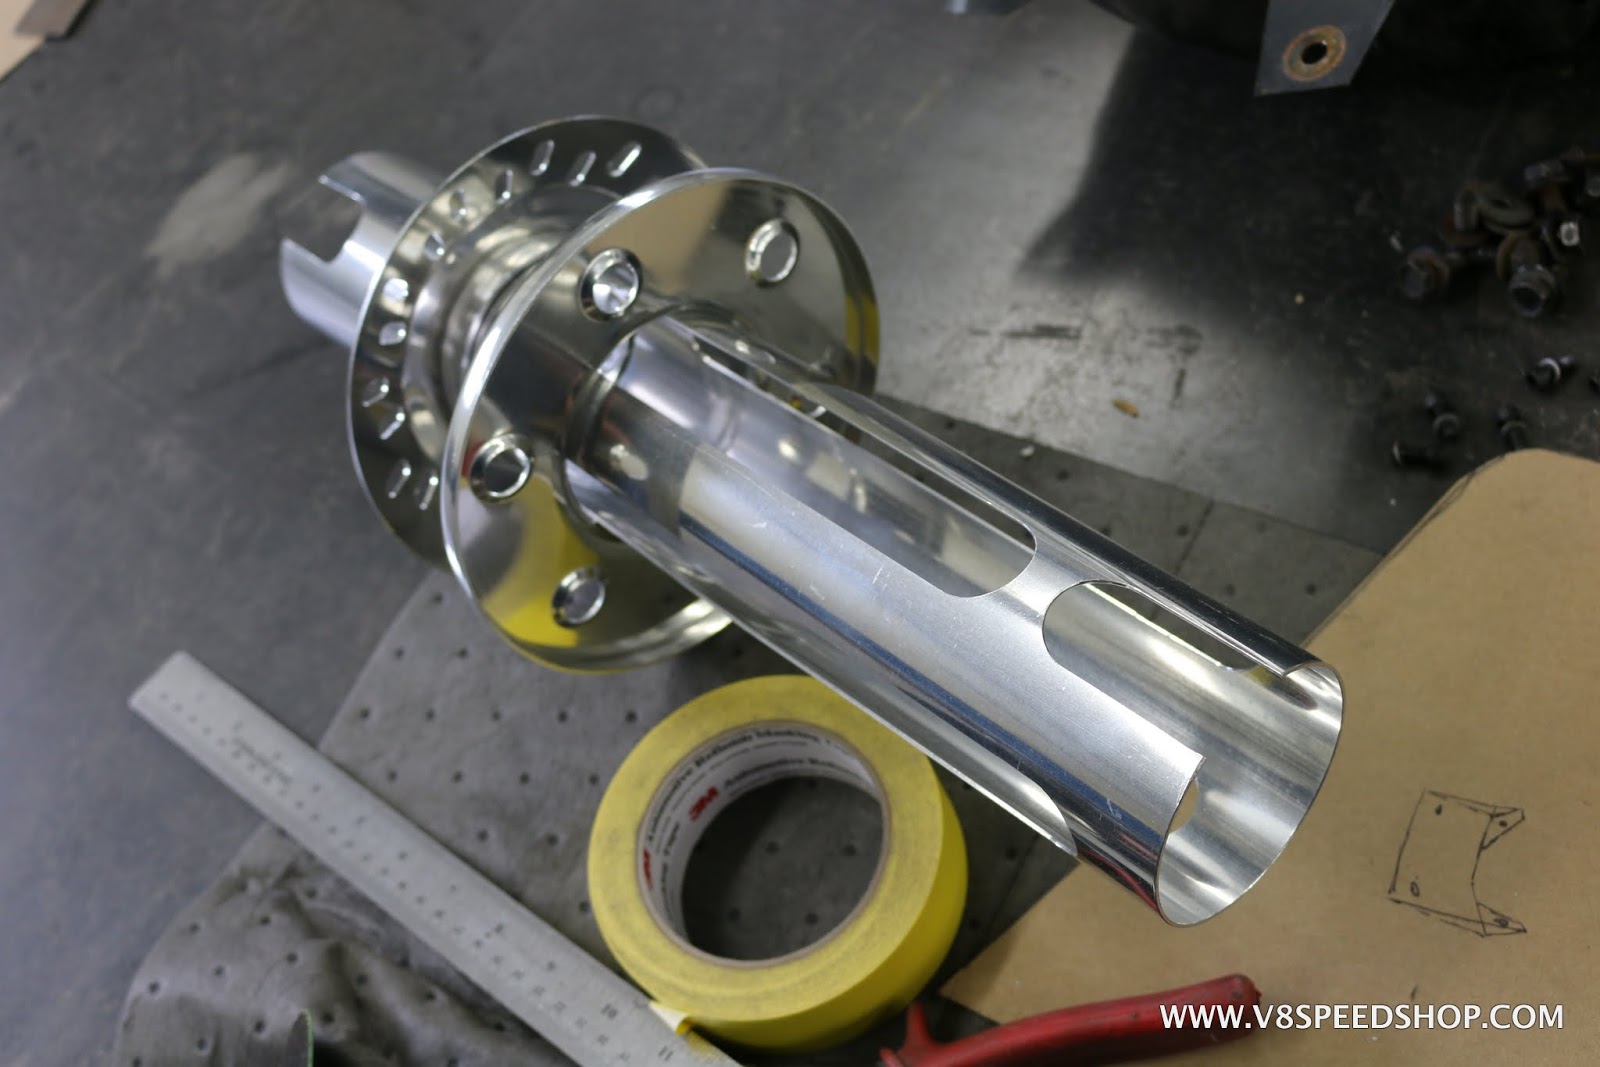
The footprint of our tank is 7 in diameter. We cut a hole in the inner fender to accommodate the tank.
 Kevin Oeste
V8 Speed and Resto Shop
V8TV
Muscle Car Of The Week
V8 Radio Podcast
All about us:
https://www.v8speedshop.com

 Reply With Quote


