

Results 81 to 100 of 100
-
12-27-2018 #81

 Registered User
- Join Date
- May 2017
- Location
- Spokane, WA
- Posts
- 88
I have not seen any examples of modified 1964/65 Skylark hoods that added to the look of the car.
Although I had fit everything as low as possible I was afraid that I would not get the big block to fit under a hood with an Air-Gap manifold.
I trimmed 1/4" off the air cleaner base and shimmed the rear of the hood up slightly for clearance.
Its tight but it fits, I used all poly motor and trans mounts so hopefully it wont lift enough to dent the hood.
One more thing off the list, hood fits without cutting it up.
Ignore the wetness from cleaning off the dust.
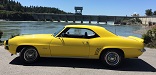
1969 Camaro
1964 Skylark w.i.p.
1971 Chevelle w.i.p.
-
01-02-2019 #82
Registered User
- Join Date
- May 2017
- Location
- Spokane, WA
- Posts
- 88
Managed to get a little bit of work done on the car over the holidays.
Pulled the body off the frame to do a little work on the frame and run the brake lines.
You can see the 3/8" rubber cushion clamps I have been using for the fuel and brake lines.
I just pinched them down for the smaller brake lines with pliers.
Just so I feel better about it I will move the fuel line a bit further from the exhaust, it is about 1" from the pipe above the axle.
I think it is safe to say my rear cross member will not fail again, here you can see
1. plating at the ends of the cross member to the frame
2. box channel between the shock towers
3. the "V" bracing between the box channel and the cross member
4. UMI performance control arm reinforcement braces
1969 Camaro
1964 Skylark w.i.p.
1971 Chevelle w.i.p.
-
01-04-2019 #83
Registered User
- Join Date
- May 2017
- Location
- Spokane, WA
- Posts
- 88
One last thing I wanted to do to improve frame stiffness.
I am running a tube from the lower control arm frame brackets to the transmission cross member.
There will be smaller tubes from this tube connected to the frame box channel I added previously.
I have fitted and welded the main tube and some pads to bolt to the cross member.
I will work on the smaller tubes that connect this tube to the frame rails
I have the driveshaft at the shop to be shortened and the rear U-joint changed, and I took out the X-pipe to TIG weld.
Hoping to get the body back on in the next week or two so I can begin re-wiring with the painless wiring kit.
1969 Camaro
1964 Skylark w.i.p.
1971 Chevelle w.i.p.
-
01-07-2019 #84
Registered User
- Join Date
- May 2017
- Location
- Spokane, WA
- Posts
- 88
My tig welder was not available so I tig welded the exhaust x-pipe, and I am not the greatest when the gaps are not tight.
I grount the high spots off the welds and used scotch brite "brown" cloth to bring back the matte tube finish.
When I welded the pipes I made the exit parallel and had to "clearance" the mufflers for the UMI reinforcement braces.
I also got started welding in the support tubes to the frame reinforcement under the interior, I may only add 1 more per side.
On Saturday I went to the Pull-and-Save yard and scored an Astro van Hydroboost for $13 that I need to start planning for.
1969 Camaro
1964 Skylark w.i.p.
1971 Chevelle w.i.p.
-
01-09-2019 #85
Registered User
- Join Date
- May 2017
- Location
- Spokane, WA
- Posts
- 88
Small Update
Driveshaft installed, 3" tube clears the Pypes 3" exhaust by appox 1/8" under full droop
Frame reinforcement bracing is completed and painted.
Current state:
When it started:
1969 Camaro
1964 Skylark w.i.p.
1971 Chevelle w.i.p.
-
01-09-2019 #86
 Registered User
- Join Date
- Jan 2016
- Posts
- 121

Man, you have done some awesome upgrades to this A-body. I have been thinking a lot about what bracing I'd like to do to mine as well. Just got the body up in the air this week. Nice to see someone else has gone the DIY approach, too. All of those bracing kits can really add up the $$$! I'd rather save that money for things I can't do myself too with some cutting and welding. Great job!!! Can't wait to see how it drives for you.
Chris Johnson
'66 Chevelle Malibu
-
01-09-2019 #87
Registered User
- Join Date
- May 2017
- Location
- Spokane, WA
- Posts
- 88
Wild Cherry - Looking forward to some driving impressions of the Sniper kit on the BBC in your '66, that may be on my list after I get some drive miles on the Skylark.
I have to get this thing running first!
1969 Camaro
1964 Skylark w.i.p.
1971 Chevelle w.i.p.
-
01-14-2019 #88
Registered User
- Join Date
- May 2017
- Location
- Spokane, WA
- Posts
- 88
I have been working on the firewall and all the associated bits.
The insulation behind the dash has been worked over in some areas by mice and needs to go.
Radiator core is shot as well as the squirrel fan and the housing is fairly rusted.
This car was also equipped with column shift that wont be going back in.
Easiest solution might be to yard everything out of the car and go from there.
I got busy friday night prepping the engine bay side:
1969 Camaro
1964 Skylark w.i.p.
1971 Chevelle w.i.p.
-
01-17-2019 #89
Registered User
- Join Date
- May 2017
- Location
- Spokane, WA
- Posts
- 88
Started to patch up some of the many holes on the firewall last night.
I just used a straight edge, cut the pieces out whole, traced to good metal and went to town.
All the original heater equipment was non functional or rusty, so I wont be going back to it.
I haven't settled on the final unit I will be installing but it wont use the original firewall cut outs.
1969 Camaro
1964 Skylark w.i.p.
1971 Chevelle w.i.p.
-
04-01-2019 #90
Registered User
- Join Date
- May 2017
- Location
- Spokane, WA
- Posts
- 88
This project is still going, I have been working on the underside and learning some sheetmetal repair.
After the welding on the firewall I began the rough bodywork in that area.
To "shave" the ugly joint across the firewall I began with Short strand fiberglass body filler to fill the deep recess:
1969 Camaro
1964 Skylark w.i.p.
1971 Chevelle w.i.p.
-
04-02-2019 #91
Registered User
- Join Date
- May 2017
- Location
- Spokane, WA
- Posts
- 88
I have about 5 coats on the passenger side and the base coat of filler on the drivers side.
Not a fan of body filler dust but I find the dust is bearable if I run a couple box fans with household hepa furnace filters right next to me.
1969 Camaro
1964 Skylark w.i.p.
1971 Chevelle w.i.p.
-
04-03-2019 #92
Registered User
- Join Date
- May 2017
- Location
- Spokane, WA
- Posts
- 88
I used a brass wire wheel on an angle grinder to clean off the underside of the floorpans.
This was exhausting work, and not very fun when you are laying under the car.
While I was at it I repaired any defects I could find.
I could only bring myself to do about 2 hours at a time, the work spanned about 8 days LOL
1969 Camaro
1964 Skylark w.i.p.
1971 Chevelle w.i.p.
-
04-03-2019 #93
Registered User
- Join Date
- May 2017
- Location
- Spokane, WA
- Posts
- 88
Once I got the floor pans reasonably cleaned I wiped them down thoroughly with paint thinner.
I custom mixed some tractor paint to a blue that is reasonably close to what I will use on the exterior.
I wanted a good paint thickness so I used a foam roller and did not thin the paint.
Lots of people just undercoat the bottom side but I prefer paint for this particular car given the intended use (not an all seasons car)
Paint is still wet in this picture but you get the idea:
1969 Camaro
1964 Skylark w.i.p.
1971 Chevelle w.i.p.
-
04-03-2019 #94
Registered User
- Join Date
- Jan 2016
- Posts
- 121
Looking great! I am right behind you on all of that stuff. That brass wire wheel looks like it did a heck of a good job cleaning up the floors. I may have to try that. I was trying one of those paint/rust removing wheels but it wasn't doing much. There are almost too many contours for a flap disk too.
I am also thinking about trying to copy the Hellwig Frame FX kit myself using some more leftover steel from another project. I plan to mock it up in cardboard based on pictures of that design and then trace the pieces onto metal, cut them out, and then starting tacking away.Chris Johnson
'66 Chevelle Malibu
-
04-08-2019 #95
Registered User
- Join Date
- May 2017
- Location
- Spokane, WA
- Posts
- 88
I got the firewall where I wanted it as far as smoothing out the rough areas.
It really helped to block sand with a durablock hand sander
this was my final result before painting:
1969 Camaro
1964 Skylark w.i.p.
1971 Chevelle w.i.p.
-
04-10-2019 #96
Registered User
- Join Date
- May 2017
- Location
- Spokane, WA
- Posts
- 88
Struggled a bit with my harbor freight paint gun painting the firewall.
The gun paints ok, but is impossible to clean and the last time it was used there must have been some area with a bit of paint remaining.
After fighting with the gun for 30 minutes I finally got a decent pattern out of it and shot some blue on the firewall.
This paint was blended to be satin or semi gloss but laid down fairly glossy out of the gun.
I hope that it flattens out quite a bit as it cures.
Excited to go back to assembling the car, I will have to cut some new holes in the firewall for wiring and such later.
1969 Camaro
1964 Skylark w.i.p.
1971 Chevelle w.i.p.
-
04-10-2019 #97
 Registered User
- Join Date
- Nov 2016
- Location
- Sulphur, La
- Posts
- 599
I kind of feel bad doing it but with the coupon it is cheaper to buy new HF guns than to clean them. I keep a couple around all the time
-
04-11-2019 #98
Registered User
- Join Date
- May 2017
- Location
- Spokane, WA
- Posts
- 88
While I had the body apart I cleaned out all the body mount captive nuts with a tap.
From the factory they had rubber bumpers on a 4ea without a bolt and they were full of crud.
I added bolts to all those spots, 2 over the axle and the 2 just in front of the axle.
There are now 16 bolts holding down the body plus the 2 under the core support.
1969 Camaro
1964 Skylark w.i.p.
1971 Chevelle w.i.p.
-
04-12-2019 #99
Registered User
- Join Date
- May 2017
- Location
- Spokane, WA
- Posts
- 88
I robbed the rallys off the back of my 68 camaro project to check for tire clearance.
The 275's are known to fit these cars if your wheels have perfect backspacing, but the rally wheel backspacing was wrong.
I recently bought one of those super sweet dewalt quick clamps that also works as a spreader. (just flip the jaws)
The one I have is rated for 600lbs force, more than enough to "push" the quarter panels out a smidge
I worked my way back and forth inside the wheel tub and moved the outer tub out just enough to clear the 275 tires.
I think I pushed each side out about 3/4" or so?
Probably only took me 15 minutes per side and you wouldn't notice unless it was pointed out.
There is still nearly an inch on the inside of the tire, I should be able to stuff a 295 or 305 now with the correct offset without mini-tubs
1969 Camaro
1964 Skylark w.i.p.
1971 Chevelle w.i.p.
-
04-15-2019 #100
Registered User
- Join Date
- May 2017
- Location
- Spokane, WA
- Posts
- 88
I hung the nose back on the car and I am having some trouble getting the side body line to be straight.
To be honest Im not sure how straight it ever was, but it sure is not straight now.
I added extra shims under the core support, but it is still out of whack
The front of this car has a bit of sag if it is not riding on the front suspension
I have to be careful how the car is supported when lining up the fenders to the doors.
Not to mention the passenger fender is chock full of a horrid bondo repair from the early 80's
On the bright side the flared rear wheel wells are hard to see but look good if you happen to notice
1969 Camaro
1964 Skylark w.i.p.
1971 Chevelle w.i.p.
-

 Reply With Quote


