

Results 41 to 60 of 141
Thread: Mom's '66 Chevelle Malibu
-
06-02-2017 #41

 Registered User
- Join Date
- Jan 2016
- Posts
- 121

Beginning of summer update!
Well the car came together just in time to be able to drive it to my wedding and use it for the getaway car (literally the day before!) Got exhaust finished, choke kit installed, new windshield to replace cracked one, new trunk weatherstrip, and new rear package tray. It was an interesting couple of days up until the wedding weekend as we got 4" of snow on the ground the day before I had the windshield appointment and found out the wrong windshield had been ordered after they had already removed the old one, but luckily another shop in town had one in stock!!! The weather ended up improving dramatically to melt the snow and green up the grass so we had a fantastic time and were able to enjoy the car through all of it without any issues. Even burned 'em for the first time leaving the church.
 Video as promised - props to the great work and customer service from Shane Bruns at Bruns Radiator & Muffler in Fargo, ND for the exhaust installation; Amazing!!!) Love everything about how the car has turned out so far from the stance, to the sound, to the ride quality and handling improvements; It is soooo fun to drive and has been getting a lot of attention and compliments every time I stop. Plan to spend as much time as we can putting some miles on it this year! I feel very lucky and blessed to have such a great wife, family, friends (and car) to enjoy!
Well that's about all we are planning on doing to the car for this year, but there is big want list yet so maybe next winter we will tackle some more of the items and I will be back to post more on here. Have a good summer everybody and run 'em if you got 'em!
Finished exhaust - lots of care was taken to cut and weld and fit this kit up tight into the car and change the outlets so that they were tucked up along each side of the tank with turn-down tips instead of the side exits behind the rear tires. Turned out great and really woke up the car.
Was getting some exhaust in the cabin so did a bunch of work to seal it up - replaced trunk weatherstrip with new from Metro Moulding (made in Minnesota!), installed OEM trunk divider and package tray with both OEM jute backers that were missed from the car and taped up the seams really well, and patched up some holes in the trunk pan with some weatherproof sealer for now (the trunk pan is definitely the panel in the worst shape on the car and will be replaced down the road when the body comes off the frame). Fixed the issue with fumes though! Also helped with some of the cabin noise at freeway speeds with the new exhaust.
Snow on the morning I had to drive 1.5 hours to windshield appointment. Luckily roads were clear already!
Done just in time to get hitched!
The getaway - Turn up your speakers:
https://www.youtube.com/watch?v=vZHMMyPcPvMChris Johnson
'66 Chevelle Malibu
-
06-02-2017 #42 Registered User
- Join Date
- Nov 2006
- Location
- Ma.
- Posts
- 5,567
Congratulation's ! You guys look great! I'm glad it ended up working out for you, even if it was an adventure with the wind shield. Enjoy the new life and the car.
Wayne
Car FINALLY home !!!!!! lol
Project FNQUIK https://www.pro-touring.com/showthre...ghlight=FNQUIK
06-02-2017 #43
Registered User
- Join Date
- Jan 2016
- Posts
- 121
Thanks Wayne! We are enjoying it all! Originally Posted by Motown 454
 Chris Johnson
'66 Chevelle Malibu
06-02-2017 #44
Registered User
- Join Date
- Nov 2002
- Location
- Georgetown,TX
- Posts
- 2,557
May I add my congratulations as well, Chris. Hope you have a long and happy life,together.
I really like your exhaust system. That's the same way I want to do my car's outlets, with larger diameter resonator turndowns.
09-15-2017 #45
Registered User
- Join Date
- Jan 2016
- Posts
- 121
End of summer update
Hey guys hopefully everyone has had a good summer! It has been a busy one for us here as well as everyone else I know. I have a couple updates to the car I have been working on recently. Had some issues to take care of - leaking valve covers, leaking header gasket, and transmission dipstick tube too close to header that the fluid was burning and smoking out of the tube. I ended up replacing the chrome stamped steel valve covers with some cast aluminum ones from Summit Racing which are actually really nice. The rails are actually flat now and with some nice quality Fel-Pro steel-core silicone gaskets, they are solid and leak free now. Only problem I had with the valve covers (and I am not alone per the reviews) is the hardware that is sent with them is junk. I was going to try using it since I didn't think the valve covers would take enough torque for the hardware to matter but ended up snapping one of the bolts off during installation. Replaced it all with a nice ARP tall aluminum valve cover stud and nut kit instead which is great. Since I had the headers loose to replace those gaskets, I decided to pull them out, clean them up, and paint them with some VHT flat black which turned out good. Lastly I replaced the rigid transmission dipstick and tube with a Lokar flexible dipstick assembly that I was able to route away from the headers and is working great. Just took it out for wing night at the local joint the other night and it is running great!
Chris Johnson
'66 Chevelle Malibu
09-15-2017 #46
Registered User
- Join Date
- Nov 2006
- Location
- Ma.
- Posts
- 5,567
The headers look good, nice job. Nice valve covers.
Wayne
Car FINALLY home !!!!!! lol
Project FNQUIK https://www.pro-touring.com/showthre...ghlight=FNQUIK
09-21-2018 #47
Registered User
- Join Date
- Jan 2016
- Posts
- 121
2018 progress update!
Hello everyone! Can't believe its been a year already since my last post. Thought I would put up the latest updates to the car. This summer we have been working on upgrading the steering. I got a donor Saginaw power gear box from a mid-90's Grand Cherokee at a local salvage yard and send it and the power steering pump off to Lee's Power Steering for rebuilds and valving upgrades. We started with 35# valving. I got new hoses to connect those two pieces. Oddly enough, the only pressure hose we could find at the parts store that had the correct fittings was for a 69 Camaro SS. We looked at a lot of different hoses. New Proforged pitman arm replaced a poorly cut and welded together one that was in the car when we got it.
I noticed there was slop in the output shaft from the steering column so decided to replace that with a new Ididit tilt column. Topped it with a Grant 13.5" wheel which feels nice and was pretty cheap compared to others. Same classic spoke style that was on the 12.5" foam grip wheel it replaced.
The steering is slop-free now and feels precise. I would like less power-assist for a firmer and more connected road feel which I may try to improve down the road with different front upper arms so we are able to get more positive caster in the alignment. Otherwise Lee's said we could try 45 # valving in the gear box too.
Chris Johnson
'66 Chevelle Malibu
09-21-2018 #48
Registered User
- Join Date
- Nov 2006
- Location
- Ma.
- Posts
- 5,567
Nice to see an update. There should be better feel all ready with your swap.
Wayne
Car FINALLY home !!!!!! lol
Project FNQUIK https://www.pro-touring.com/showthre...ghlight=FNQUIK
09-21-2018 #49
Registered User
- Join Date
- Jan 2016
- Posts
- 121
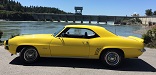
I've got high standards now that I picked up this track toy/daily driver last fall. Originally Posted by Motown 454
These are from a Road America HPDE in July:
Steering on the R56 MINI Cooper S feels amazing and is now my benchmark. The car addiction is real. hahaChris Johnson
'66 Chevelle Malibu
10-30-2018 #50
Registered User
- Join Date
- Jan 2016
- Posts
- 121
I ordered up a new set of rubber body mount bushings and hardware from OPGI to start working on. The car still has the originals it it which are pretty dry-rotted now.
Chris Johnson
'66 Chevelle Malibu
12-04-2018 #51
Registered User
- Join Date
- Jan 2016
- Posts
- 121
I decided to make some more BIG upgrades to the car this winter and take advantage of some deals from MCB. All to upgrade electronics and add some more reliability, control, and understanding to how the car is running. Here's what I got:
Holley Sniper EFI kit
Holley Sniper Hyperspark Ignition Kit (new ignition box, coil, and distributor)
Tanks Inc. EFI fuel tank with Walbro GPA-4 in tank fuel pump
'66 Chevelle-specific Dakota Digital RTX series gauge cluster (these look awesome, perfect blend of old and new like the new Challenger gauges - can't wait to get them lit up)
All-new fuel line plumbing with 3/8" Ni-copp hard tubing and Earl's Vapor Guard hose for connection points
American Autowire Classic Update wiring harness kit
Going to be a lot of learning. I did a lot of research before these purchases and even more after to prep for the installation.
Update on the body mount bushing replacement as well: most of the body mounts were nothing but rust as expected. Got them all out and now getting the rest of the frame to body pieces disconnected so I can lift the body off of the frame with 4x4's on the lift. Plan then is to get a thick washer and nut held loosely in place with the bolt above a patch piece of sheet metal with a little bit larger hole in it and then weld the patch in place. That way there is still X and Y movement available to align with the frame as there was with the original caged nut.Will have to cut some access holes from the top side so the nut can be held with a wrench. Hopefully the plan can work out like I am hoping too. Would be easier to take apart in the future without having to trust the nut cage.Chris Johnson
'66 Chevelle Malibu
12-04-2018 #52
Registered User
- Join Date
- Jan 2016
- Posts
- 121
EFI, ignition, and electrical upgrade parts
Sniper EFI throttle body
Hyperspark ignition module
Hyperspark distributor
Dakota Digital RTX 66 Chevelle gauge cluster - Front
Dakota Digital RTX 66 Chevelle gauge cluster - Back
Tank and other new components laid out for wiring
Chris Johnson
'66 Chevelle Malibu
12-04-2018 #53
Registered User
- Join Date
- Nov 2006
- Location
- Ma.
- Posts
- 5,567
Nice! those are some nice upgrades. That should give it some great drivability. Nice winter project. I'll be looking for your updates.
Wayne
Car FINALLY home !!!!!! lol
Project FNQUIK https://www.pro-touring.com/showthre...ghlight=FNQUIK
12-04-2018 #54 Registered User
- Join Date
- Nov 2012
- Posts
- 341
Sweet updates on the Chevelle. I’m doing a bunch to your cousin, my 66 Buick Special. Almost enjoying working on it more than my 70 Camaro. Need to get one of them rolling soon though! Stay warm!!
70 Camaro 383/700r4 no place to hide
1966 Buick Special cheaper than a Chevelle but just as fun!
2019 ZL1/1LE track day missile
12-05-2018 #55
Registered User
- Join Date
- Jan 2016
- Posts
- 121
Thanks! Can't wait to fire it up. Originally Posted by Motown 454
Chris Johnson
'66 Chevelle Malibu
12-05-2018 #56
Registered User
- Join Date
- Jan 2016
- Posts
- 121
Thanks! Yeah I'm enjoying all of the new releases for the A-Body's recently. It's like owning a new car with make/model/year-specific accessories and parts coming out constantly for them! Also been so nice having all of the forum support for them that a person can learn so much from and save a lot of time and money by not going down a wrong path with parts. Originally Posted by Bygblok
Chris Johnson
'66 Chevelle Malibu
12-05-2018 #57 -Moderator/Sponsor-
- Join Date
- Apr 2001
- Location
- The City of Fountains
- Posts
- 15,975
Great project and workmanship!
Andrew1970 GTO Version 3.0
1967 Cougar build
GM High-Tech Performance feature
My YouTube Channel Please Subscribe!
Instagram @projectgattago
Dr. EFI
I deliver what EFI promises.
Remote Holley EFI tuning.
Please get in touch if I can be of service.
"You were the gun, your voice was the trigger, your bravery was the barrel, your eyes were the bullets." ~ Her
12-11-2018 #58
Registered User
- Join Date
- Jan 2016
- Posts
- 121
Thanks! Originally Posted by andrewb70
Chris Johnson
'66 Chevelle Malibu
01-08-2019 #59
Registered User
- Join Date
- Jan 2016
- Posts
- 121
Rust repair update
Well as it usually goes with 50 year old drivers, I've found more rust the deeper I've gone. The floors inside had enough good metal left that I decided to just cut rectangular sections out where it was rusted through and weld in new steel. We had some extra 14 gauge sitting around from a different project that I used which worked really well. Ended up making the floor much stiffer than before. The trunk was way past saving and had been filled with fiberglass resin and fiberglass by a previous owner many years back. I ordered up a new one-piece trunk floor for that from Auto Metal Direct that already has the braces welded on so hopefully should make for a fairly easy replacement compared to multi-piece. I got the body lifted off of the frame last night and found more rust in rocker areas that will get cut out and new steel welded in next. Getting better at metalworking again! (hope you like my body brace - all I could find to do the job, but worked out great! :-) )
Chris Johnson
'66 Chevelle Malibu
01-09-2019 #60 Registered User
- Join Date
- May 2017
- Location
- Spokane, WA
- Posts
- 88
Im looking forward to hearing how the one piece trunk pan works for you, I did the three piece trunk pan kit and it allowed some adjustment so Im not sure what is the easier path?
1969 Camaro
1964 Skylark w.i.p.
1971 Chevelle w.i.p.
Tags for this Thread

 Reply With Quote


