
Results 41 to 60 of 112
Thread: '89 rcsb s-10 lq4/4l80e
-
11-24-2017 #41
 Registered User
- Join Date
- Aug 2014
- Posts
- 435
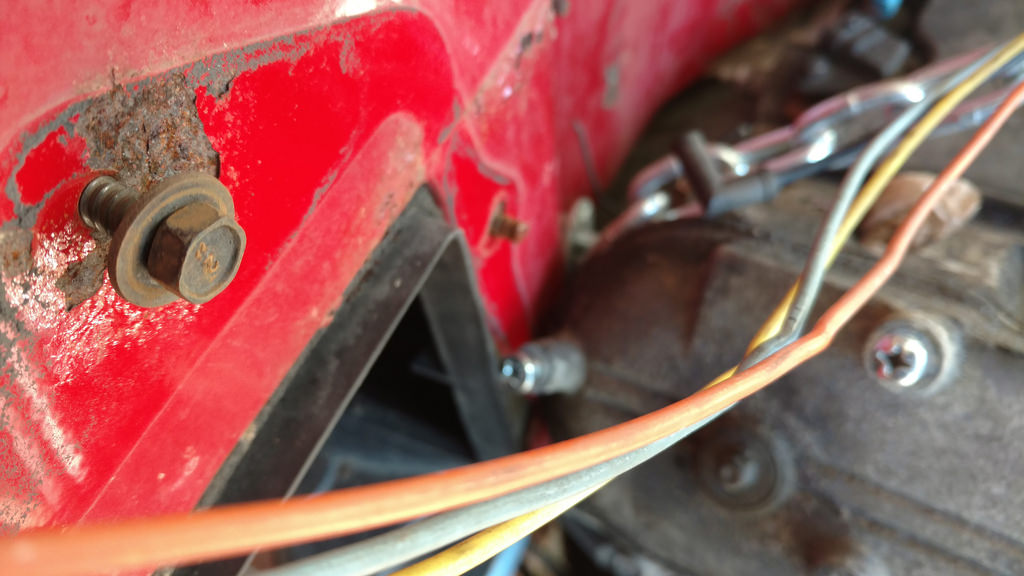
 That's been the plan for some time. I already downloaded the diagrams...now, the fun part: when I gutted the donor, I also took the BCM, cluster, etc. and want to use it. Retain RAP, have it shut the dome lights off if they're on too long, etc.
 Originally Posted by Mtrhd329

Jay
-
11-29-2017 #42
Registered User
- Join Date
- Aug 2014
- Posts
- 435
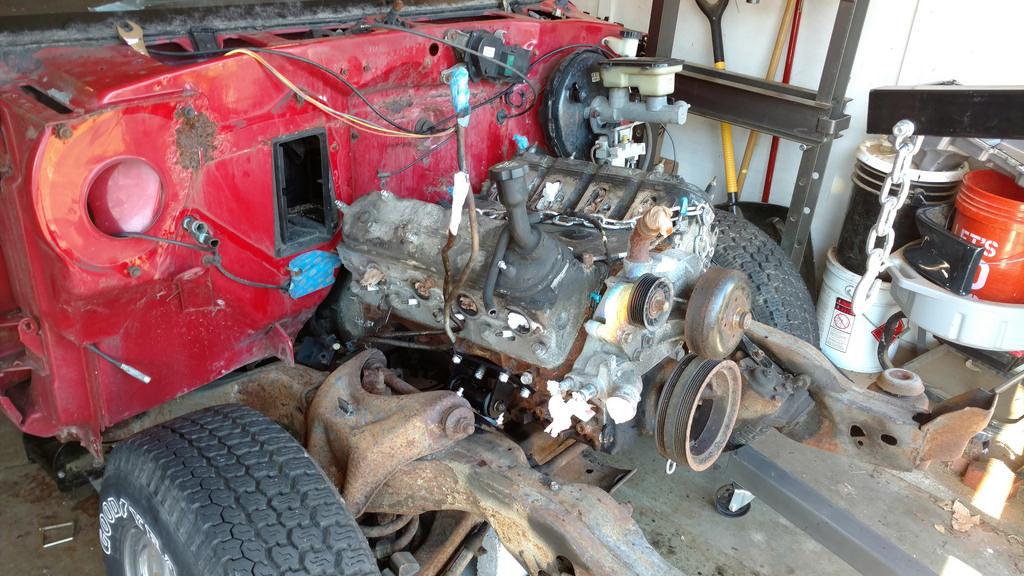
OK. I fought with this thing for a couple of days. Clearly, the Current Performance mounts were NOT mean to be used when the trans is still attached. lol
I tried lifting and lowering the transmission, adjusting where the hook for my engine hoist was on my chains, etc.
My GF tried to help, but her descriptions "The top thing is about an inch from lining up with the bottom thingie" made it difficult. lol
All in all, I had to remove the transmission dipstick, use shorter bolts on the back of the head where I had my chain attached, remove 3 brackets, and remove the bolts that hold the gas pedal on to the firewall....then there was a lot of rocking and prying. But it's in (sans oilpan/pickup tube) for mockup.
 IMG_20171129_144937757 by Jay McGraw, on Flickr
Bolt on the back of the head stuck out about an inch too far. Kinda blurry, obviously auto focus picked the bolt higher on the firewall focus on. lol
 IMG_20171129_130018975 by Jay McGraw, on Flickr
Heads are touching the gas pedal mounting bolts.
 IMG_20171129_130106058 by Jay McGraw, on Flickr
So, after I got it in. I have the trans supported, the pan is sitting about 5/8" below the frame. Since I don't know exactly where things need to sit for proper driveline angles, I figured that's a good start, because I can always raise it.
So, then I removed the old trans mount...
 IMG_20171129_152440435 by Jay McGraw, on Flickr
Then replaced it with a urethane Energy Suspension mount.
 IMG_20171129_151443568 by Jay McGraw, on Flickr
So I could bolt on the main part of my transmission crossmember. My truck didn't have a driveline in it when I bought this one, so I needed to mod a stock one or fab one or a combination. So I picked up a Stiffler's crossmember for a Mustang (I think it was -04 Cobra, but I can't remember for sure.) for it's clean look and exhaust clearance. So, I'll need to fab mounts that go from the frame to it. It was also reasonably priced at around $138 at the time.
Jay
12-03-2017 #43
Registered User
- Join Date
- Aug 2014
- Posts
- 435
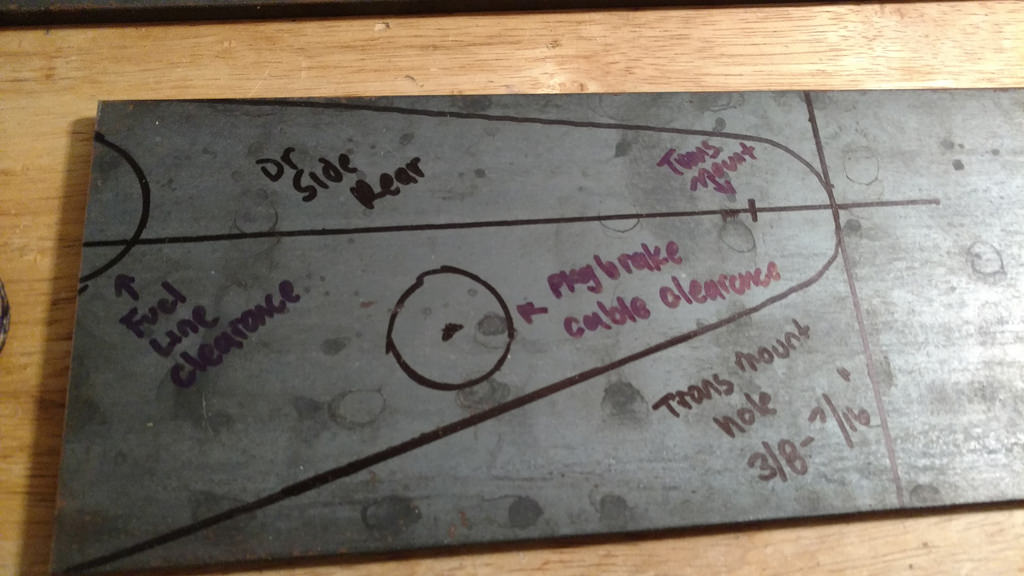
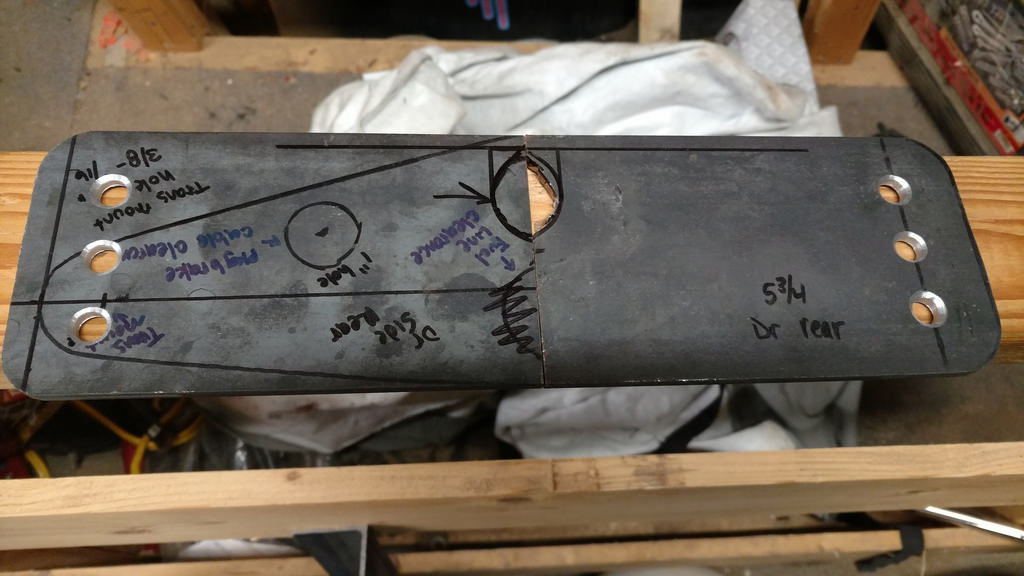
I worked on my trans crossmember mounts today. I think I got them figured out.
They're going to be 1/4" steel, and then I'm going to use some 3/16" to connect/reinforce them.
A little Carboard Aided Design helped verify my measurements.
 IMG_20171203_132817926 by Jay McGraw, on Flickr
 IMG_20171203_190758975 by Jay McGraw, on Flickr
Probably going to cut them and weld them up on Wednesday.
Once I verify they fit, I plan to weld these directly to the frame. The Stiffler's 94-98 Mustang crossmember will bolt right up and drop out as needed. It has humps to allow for the exhaust to pass through.
Jay
12-04-2017 #44
Registered User
- Join Date
- Jun 2017
- Location
- Edgewater Co.
- Posts
- 150
I like how that's working out for you, I think I'll have to steal your idea for Frankenstine when the new engine goes in... Originally Posted by JayinMI
Joe
12-06-2017 #45
Registered User
- Join Date
- Aug 2014
- Posts
- 435
Was fighting a bad (possibly caffeine withdrawal) headache all day, but I made some progress.
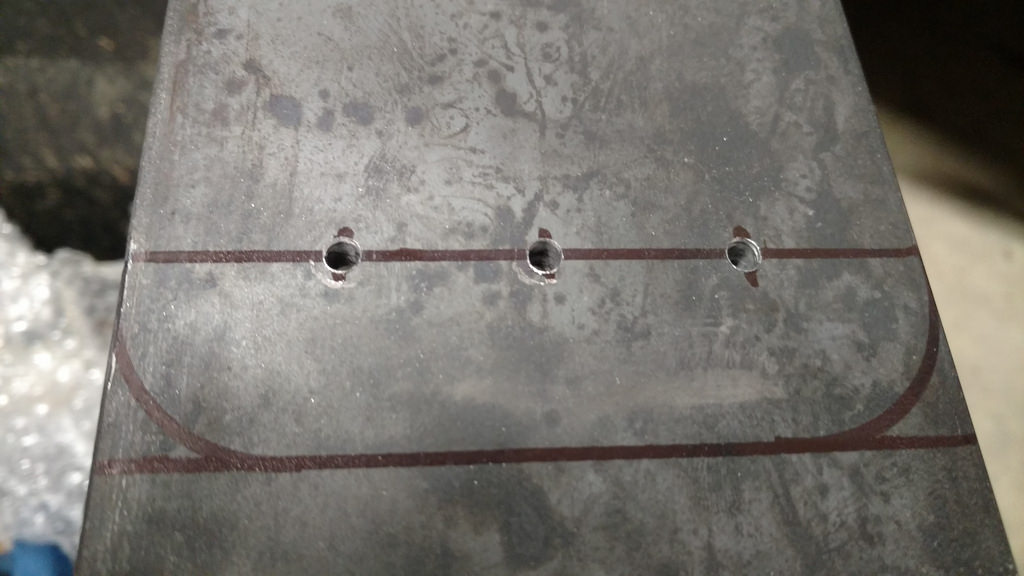
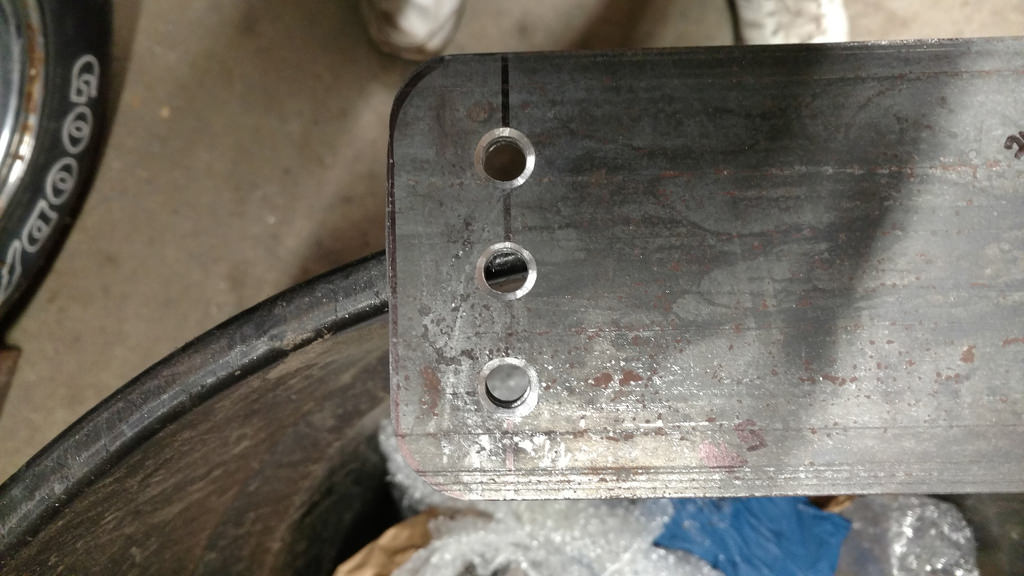
I updated my crossmember mount design to be height adjustable, and drew them out on the 4" wide, 1/4" thick plate I had. I was at home depot in the morning, and was considering buying an 20V Dewalt drill for this, because I didn't know if my little 12v Milwaukee Hammer Drill would be able to cut it, but it worked like a champ.
Passenger side went off (so far) without a hitch. Driver side, not so much. lol
 IMG_20171206_140409223 by Jay McGraw, on Flickr
 IMG_20171206_200441717 by Jay McGraw, on Flickr
 IMG_20171206_150527633 by Jay McGraw, on Flickr
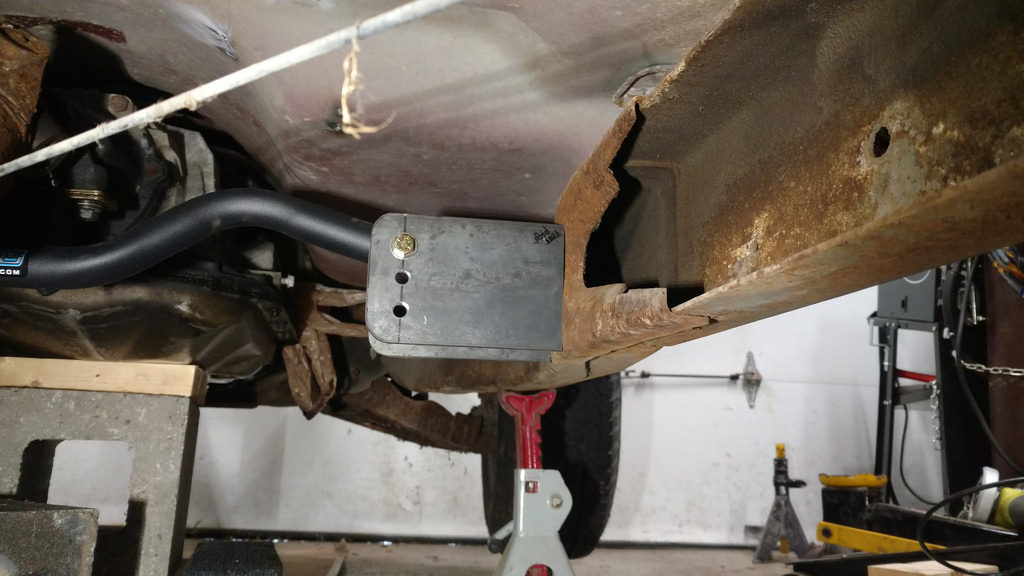
On the driver's side, someone ran a rubber hose of some kind (that's kinda in the way) and there's a fuel or brake line that sticks out of the fram right about where I DON'T need it to. I had to leave a spot for it in the mount, and the other issue is the parking brake cable is in the way.
 IMG_20171206_204838397 by Jay McGraw, on Flickr
With it rough cut, it touches the line, but sits flat agains the frame, so I just need to shape the opening different for clearance.
With the parking brake cable, my issue was when I tried to take the slack out of the cable so I could disconnect them, is that if I tighten the bolt it gives me some slack (but not enough) and if I loosen it, the cable get tighter.
The bolt you need to turn seems to be frozen on. Let it soak most of the day in penetrating oil, but it still held fast.
So I think my next option is to cut the intermediate cable that attached the left and right cables, I think. That's the cheapest part to replace. I realized the cables won't go anywhere near the trans crossmember mounts after I set up my hand brake handle, so I'll have to find shorter cables to use later on. Much shorter.
Anyway, I'm doing this as a hobby and I'm not in a hurry, so I don't push it. I don't want to get frustrated and quit. That's happened before. lol
Jay
12-06-2017 #46
Registered User
- Join Date
- Aug 2014
- Posts
- 435
Oh, btw, here's the area I have to work in.
 IMG_20171206_200500951 by Jay McGraw, on Flickr
About 3 feet on the passenger side, and
 IMG_20171206_200514218_TOP by Jay McGraw, on Flickr
and about 18" on the driver's side...at least until I get the transmission supported, then I can push it out and move it over. Then I'll have about 2.5 feet on either side! lol
Jay
01-16-2018 #47
Registered User
- Join Date
- Aug 2014
- Posts
- 435
As I was getting close to welding up my trans crossmember mounts, the temperatures took a nose dive.
I don't think it's been above 25F in my garage in over a month. So, that hasn't happened yet.
In the meantime, I've been researching and ordering parts since I can do that inside. lol
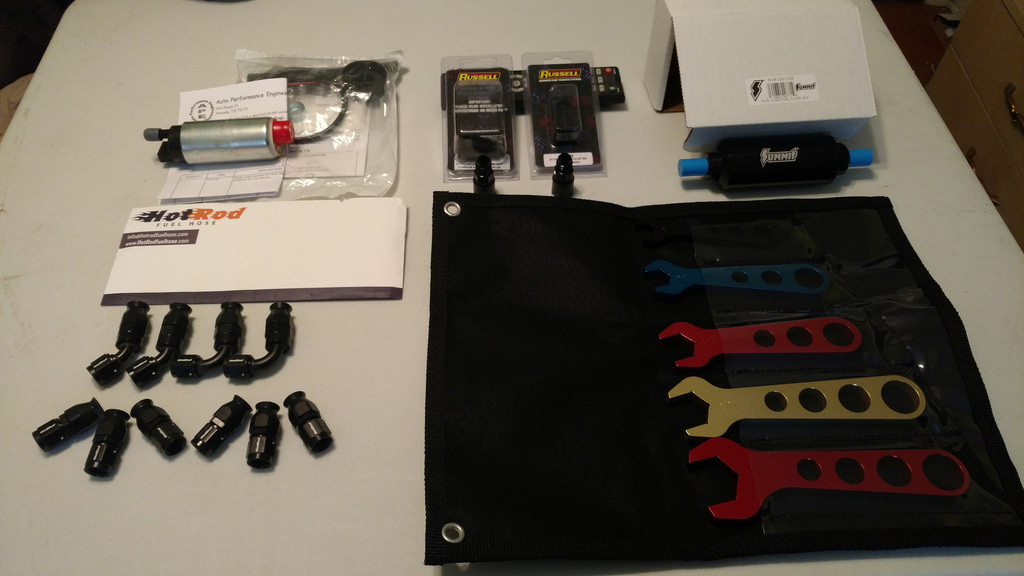
I ordered my main parts for my fuel system.
 IMG_20180116_145619026 by Jay McGraw, on Flickr
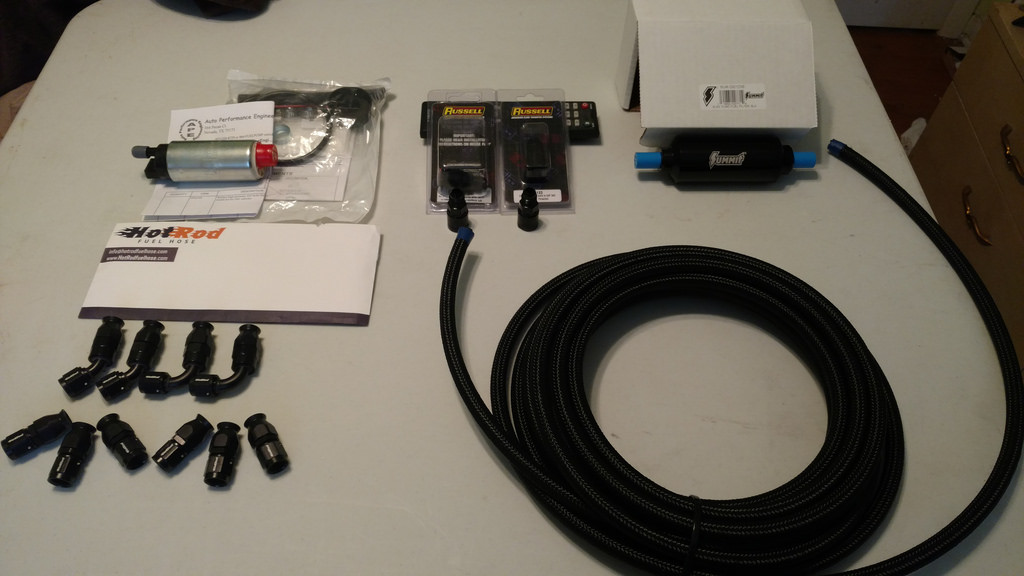 IMG_20180116_145702938 by Jay McGraw, on Flickr
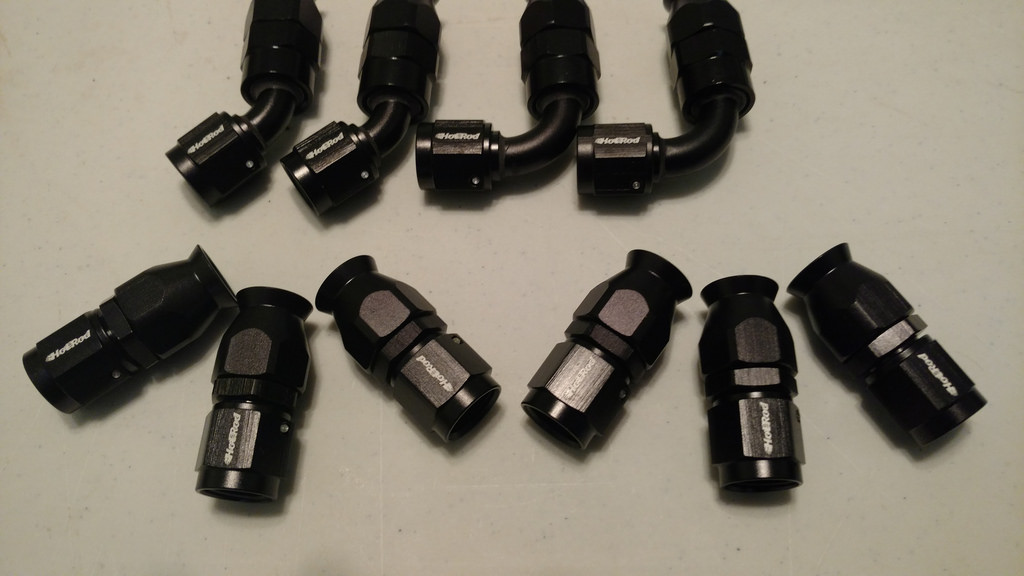
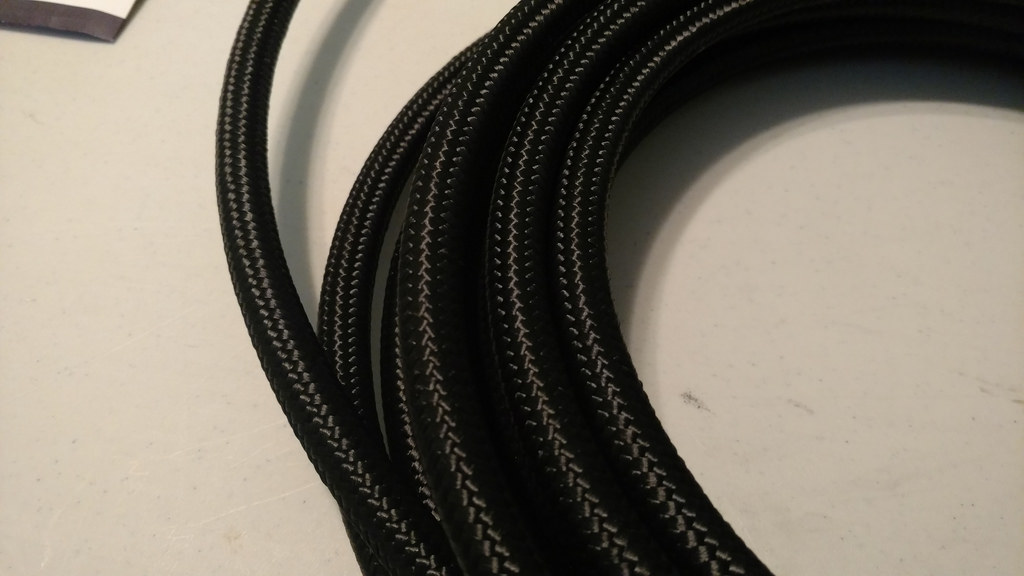
Which consists of a Walbro 255 pump and install kit from APE, Russel fuel line adapters (not the ones with the plastic clips), Summit racing 10 Micron fuel filter and AN wrenches, and PTFE -6AN nylon braided hose (and hose ends) from HotRod Fuel Hose.
 IMG_20180116_145720292 by Jay McGraw, on Flickr
 IMG_20180116_145709926 by Jay McGraw, on Flickr
Justin at Hot Rod Fuel Hose was great to work with. Great communication and even refunded a little of my money because of a shipping SNAFU on his end.
I ordered 30ft of hose so I can use some of it for the trans cooler as well.
Future plans are Sweet Performance Banjo ends for the 4L80E to clear the trans tunnel.
Currently debating on using the Superior Radiator I planned on using (No trans cooler) or a 4.3HD/Corvette radiator.
A lot of people have good luck with the latter, and I don't plan to have ridiculous HP and I don't live where it's stupid hot. But I DO want to retain A/C.
I've also been looking at Restomod Air stuff. But that's a ways off.
I've also been trying to find a crimping tool that will do all the ends I need to do, if possible.
It looks like GM uses Weatherpack, Metripack and possible open end barrel connectors on a typical LS harness.
My current thought was to depin from the PCM, route everything and repin the PCM side. Not 100% sure what connectors they use in those, tho.
Jay
03-14-2018 #48
Registered User
- Join Date
- Aug 2014
- Posts
- 435
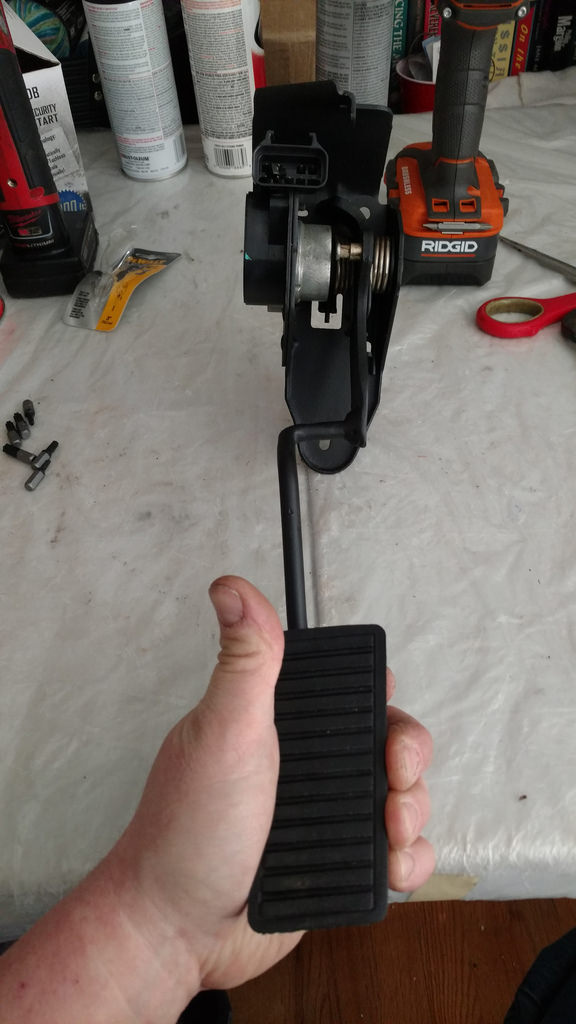
OK, over the past few days, after work, I've been working on adapting my '03 Truck DBW gas pedal to my S10. I started working on making a bracket that would bolt in, hold the pedal in the right orientation, and then planned to chop off the factory pedal and weld my S-10 pedal on to it.
https://flic.kr/p/Fwtipk
Then I transferred it to graph paper over a piece of non-corrugated cardboard.
https://flic.kr/p/22qEpXC
But then I watched YouTube...and simplified the whole thing!
I found a guy named "Pmoore" and he did a Gbody swap. And he just cut off the pedal, drilled a 3/8" hole in the top part of the pedal arm, and then put the factory pedal arm through the hole and welded it up.
So, I did basically the same thing...
DBW pedal:
https://flic.kr/p/H3YYPs
S-10 pedal (which I cut):
https://flic.kr/p/FwthE4
And tacked it together to test throw and stuff.
https://flic.kr/p/Fwti5n
I used the factory S-10 bottom hole, and drilled a new top hole that uses the factory bolts. I need to pull it out to finish welding it, paint it and I might add a triangle shaped brace for reinforcement. Probably.
The level of the pedal is about even (height-wise) with the brake pedal and goes down to just above the floor (I tried to account for future sound deadening and carpet). Seems pretty good to me.
Probably took me about half an hour.
Jay
03-14-2018 #49
Registered User
- Join Date
- Aug 2014
- Posts
- 435
Having issues with IMG tags not working with Flickr at the moment. On LS1tech, they just randomly started working. I'll look into it tomorrow, or this weekend.
03-16-2018 #50 Registered User
- Join Date
- Feb 2016
- Location
- Lawrenceville, IL
- Posts
- 348
Jay, I'm looking forward to seeing how this project turns out! I've been a fan of the s10 for a long time and I think they're going to make a comeback.
 visit us on the web at www.bowlertransmissions.com
03-17-2018 #51
Registered User
- Join Date
- Aug 2014
- Posts
- 435
Thanks, Craig. I've been trying to malke (at least) incremental progress every week (weather dependent).
There are a lot of S-10's popping up with LS swaps lately.
I got my '03 truck DBW throttle pedal mated with my S10 pedal, and I'm hoping to combine a manual steering column with a tilt auto column shift one, to get a tilt/manual trans column that I can use with my Trailblazer shifter.
Jay
03-18-2018 #52
Registered User
- Join Date
- Jun 2017
- Location
- Edgewater Co.
- Posts
- 150
Good to see progress on your truck.
Joe
03-18-2018 #53
Registered User
- Join Date
- Aug 2014
- Posts
- 435
Thanks, yours as well. I'd be interested to see the back-halfed truck frame swap! Originally Posted by Motoracer838
So, I got my '03 Truck DBW gas pedal and my S-10 gas pedal to mate. lol
I cut off a bunch of the factory truck pedal, drilled a hole in it and put the S-10 pedal in the hole, weld, clean, prime, paint.
I ground off as much rust as possible, used one of those rust-converting primers and then painted it flat black.
 by Jay McGraw, on Flickr
I have 3 steering columns for my S10. One came in the original green truck (manual, non tilt, lo/hi wipers), a second similar column in the red truck currently, and a column shift/tilt/delay wiper/cruise out of the cab that came with the green truck. I decided to take them apart and see if I could put them together into a manual/tilt/delay/cruise column to work with my Trailblazer floor shifter.
Looks like it should be doable. The plastic housing from the manual column will need to be trimmed about 5/8" and I'll have to figure out mounting it. I got the shift linkage out from the inside of the column today. Hoping to clean and paint everything over the next couple of days. Might order a new wiper stalk, turn signal switch and I already picked up a new ignition cylinder. Figured if I was going to go through the trouble, I might as well do it right.
I figure this is way easier than trying to find a Syclone or Typhoon tilt column. lol
 by Jay McGraw, on Flickr
Jay
03-25-2018 #54
Registered User
- Join Date
- Aug 2014
- Posts
- 435
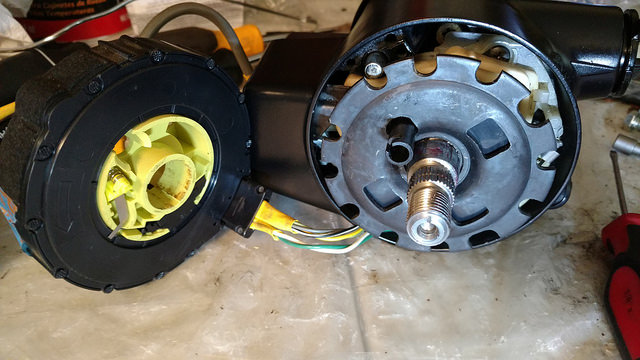
Well, I was looking at my options for eliminating the column shift. I could cut a section out of one of the other shift bowls I have and JB Weld it in the spot where I'd have to cut the column shift mount off. But I didn't like that idea. Decided to save that for last resorts.
I also saw a video on Camaro Rick's YouTube channel where he adapted a C6 steering wheel to his 4th gen Camaro column. That got me thinking...
His video involved using a newer upper steering shaft to get the right splines for the newer steering wheel. I Googled the part number and it came up around $150 (!) new. But the site I was on listed a bunch of other vehicles that used the same part. Decided to head to the junkyard...
So, today I spent 4 hours poking around the yard and got a 1981 Firebird floor shift auto tilt column, a 2008'ish Cobalt leather wrapped steering wheel with airbag/clock spring/steering wheel audio and cruise controls, a dome light out of a Saturn Vue with Homelink buttons, and some random plastic trim pieces for about $80.
I'm off Tuesday and Wednesday, so I'll post some pics up then.
But I'm hoping to use a lot of the F-body parts on the base of my S-10 tilt column and then top it with the clockspring and Cobalt wheel to modernize the interior a little.
On a side note, I've been thinking of colors/wheels/etc. that I might want to use, and right now I'm considering Michigan State Police blue, with black Soft 8's and a front push bar. GMC Sonoma grill with custom mesh insert and maybe smoothing out the tail lights to help modernize the lines a little. If I change my mind and run the old school grill, It will be blacked out and I'll have someone 3d print me a new badge for under the headlight. Instead of "2.5L fuel injection" it will say "6.0L Fuel Injection." in the same font. I have plenty of time to change my mind, but I kinda like the idea...plus the wheels I really want are WAY more money. lol
Jay
03-27-2018 #55
Registered User
- Join Date
- Aug 2014
- Posts
- 435
OK, so my original idea to use manual column parts and column shift parts to make a non column shift tilt column wasn't going to work the way I wanted. It appears the "linkage" for the auto trans keeps the retainer plate centered. So I headed over to my favorite junkyard on Sunday and picked up some stuff.
Mainly, I found a Tilt/floor shift column in an '81 Firebird.

I also picked up a leather steering wheel with radio and cruise control buttons out of an '09 Cobalt. Got the clock spring and wiring pigtails too. No plan to integrate the airbag. lol
I was watching a video on YouTube by Camaro Rick where he updates his early 4th Gen Camaro with a C6 Corvette Steering wheel. It requires an upper shaft from a late model GM product. He mentions 2002+ Express/Savanna vans...and list the part number, which is $150 (!) new. I found a website that lists other cars/trucks that use the same part. I grabbed one out of an '09 Buick Lucerne. $10.
I also grabbed a dome light with HomeLink buttons. Next time I go, I'm going to look for a compass mirror (maybe with the screen for a backup camera...but at least a compass)
I picked up some random small plastic trim pieces, a turn signal cancellation cam (not broke like mine all seem to be) and a spring I needed inside the column. Not sure what it's called. It's kind of linked to the mechanical part of the ignition cylinder.
Whole trip cost me about $80.
Today I was disassembling the column and when I tried to pull the tilt pins, the first one went fine. Second one, the tool broke off flush in the pin. I tried welding to it several times and finally just cut the housing apart. I figured I'd be same with the cheap tool for 3 or 4 columns, but I guess not. Oh well. I have the parts from the S-10 Tilt column I have.
Hope fully I can get it primed and painted tomorrow and give it til Sunday to dry. Then reassembly.
For anyone else considering it, the shaft if the same length between the 2nd Gen Fbody and the S10, so I think it would be easier to separate the plate where it bolts to the firewall and swap it for one from an S10.
Jay
04-01-2018 #56
Registered User
- Join Date
- Aug 2014
- Posts
- 435
Well, didn't work on the column today. Had planned on hitting up the junkyard to pick up a clock spring (the one I have doesn't have a hole for the cancellation cam/horn contacts.) But apparently, it's Easter for normal people. My GF's family is Russian Orthodox and for them, Easter is NEXT weekend this year. I'm agnostic. Easter is an inconvenience for me. lol
Anyway, I've been looking at various clock springs so I have some idea what car I need to grab them out of.
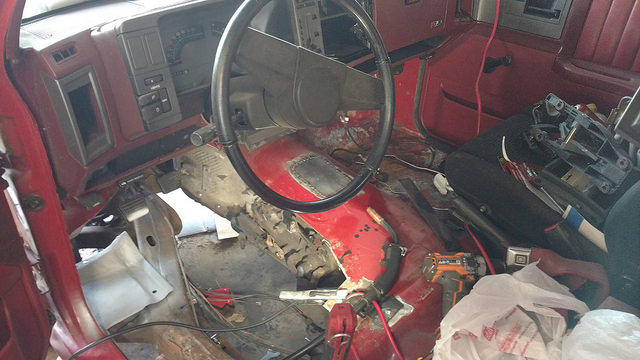
I ordered my driver's side floor pan replacement from LMC. Should be here early this week.
Got everything painted for the column with VHT Chassis and Roll Bar paint in Satin Black. Reasonably happy with the finish except for a couple of runs. Might assemble most of it and wet sand out the runs and shoot another couple of coats on it after it's to that point. I want to get it in the truck and see if they're even visible.
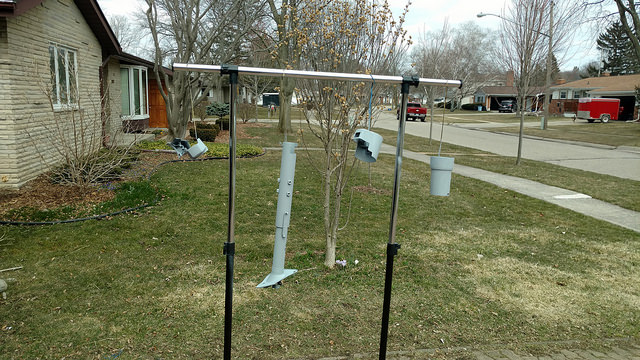
I bought a cheap wardrobe organizer at Target to hang parts from.
The shift bowl thing from the Firebird needed some body work.
I also drilled out the spot welds and removed the shift arm, since I won't need it.
One less thing to potentially be in the way.
Think I'll need to shrink the diameter of this retainer plate to make room for the wiring for
the steering wheel controls, but when I grab my clock spring, the car I grab it out of might have a smaller one.
Also planning to replace the turn signal/wiper, high beam and ignition switch (electrical side) Since I don't want to have to take this apart again. Ever. lol
Jay
04-13-2018 #57
Registered User
- Join Date
- Aug 2014
- Posts
- 435
So, last Friday I went to the Junkyard and grabbed the clock spring and lock plate out of a '95 Grand Prix with steering wheel controls and a few other things (unrelated to my truck.) The lock plate has a smaller diameter to clear the wiring for the steering wheel controls inside the column.
Saturday, I was sick. Like sick enough to call in to work for the first time in over 10 years. Spent 24 hours in bed, then managed to move to the couch for Sunday.
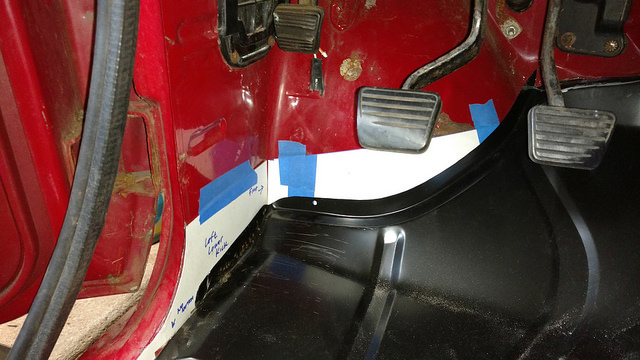
Took this weekend (Th-Sun) off to work on the truck. Goal? Get the driver's side floor in.
The before pics:

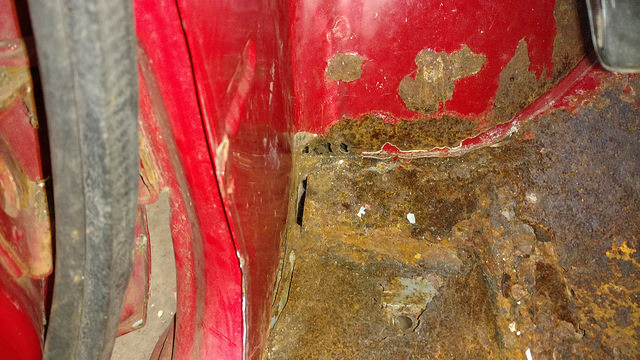
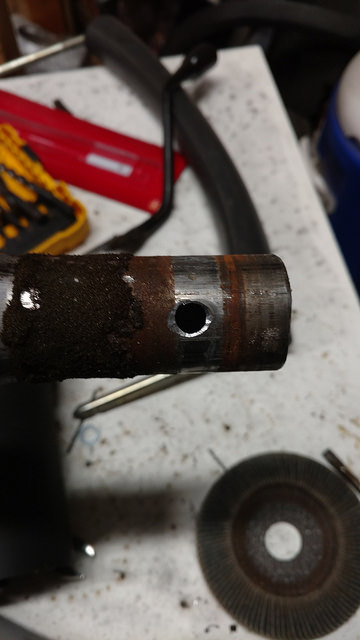
The holes at the bottom are from me, with a screwdriver. Sigh.
That lead me to find some more soft metal that I could poke through, or other rust severe enough to require
replacing metal.
Like the top of the body mount plate. The body mount itself looks fine...but I only know that because I can see into it.
So I cut a 4.5" square hole in the top of it (since I needed to fix it and make sure the captive nut was usable) and cleaned it out and sprayed the inside with Rustoleum Rust Reformer. Probably won't do anything, but I feel better about it.
So, here's what else needs to be replaced/repaired:
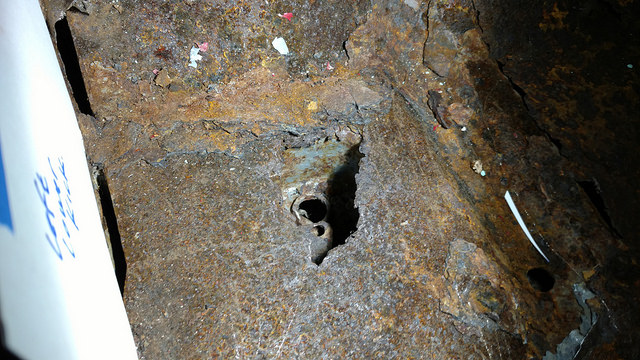
While I had the bottom of the kick panel removed, I figured I could vacuum out the inside and check it out.
Looks perfect on the outside. Not so much on the inside. Then I stuck a screwdriver through that too.
Looks like I'll be replacing the rocker panel as well. Joy. :|
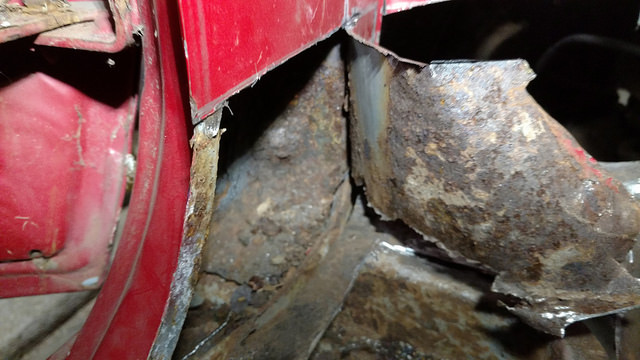
Below the hinge is where I came through with the screwdriver.
While disappointing, not totally unexpected. The rockers both have minor rust bubbles, and I haven't felt out
of my comfort zone (even tho I've never really replaced floors...well, I did a VW Bug like 15 years ago, but those are pretty easy.) So, I guess I'll keep plugging away.
The passenger side has some rust but isn't as bad, but I'm going to get into it before I order any parts....it's solid enough it can wait for a while.
Jay
04-15-2018 #58
Registered User
- Join Date
- Aug 2014
- Posts
- 435
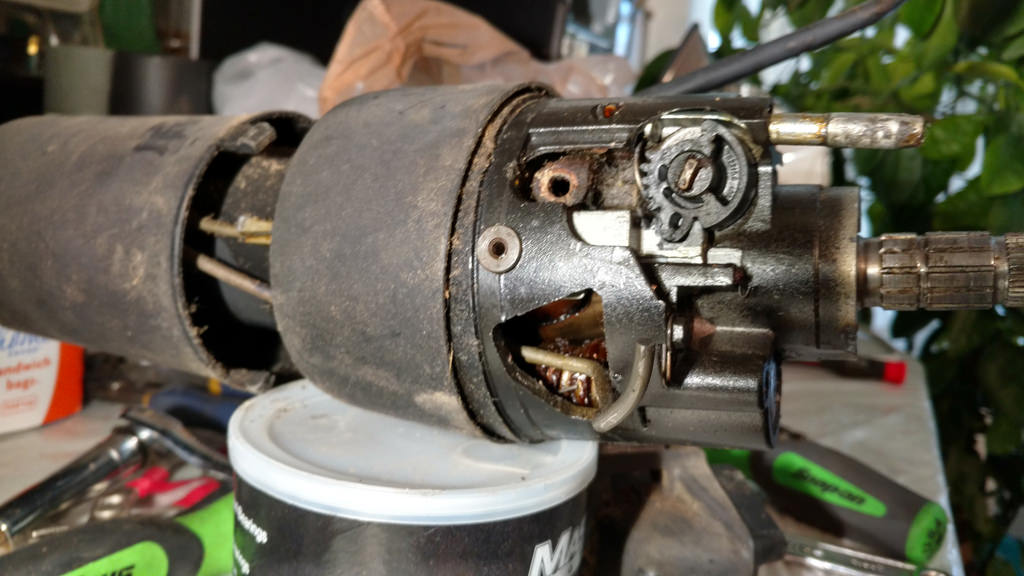
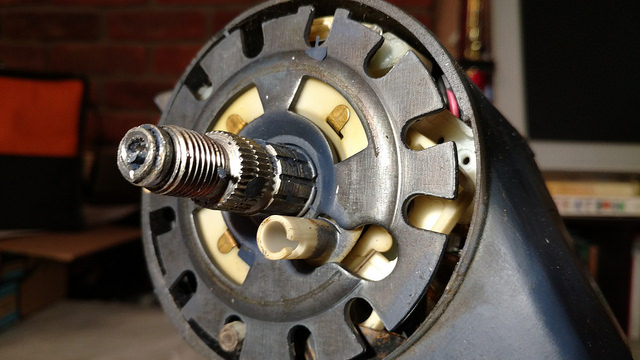
OK. Got the column assembled.
Basically it would be all stock from the lower section down to the firewall.
The upper shaft came out of an '09 Lucerne (fits many other cars and trucks as well. GM P/N 26074286)
It has the later spline pattern for newer steering wheels.
I also used the spring loaded plastic ball from the Buick instead of the older style one with the clip.
The lower shift bowl (I think that's what it's called...the part the column shift would normally attach to) is from
a 1981 Firebird with floorshift automatic. I'm sure others would work as well...was originally thinking 3rd gen F-body, but the only 3rd gen at the yard I go to was a stick. I've also seen people cut off the column shift and tig up the hole.
Clock Spring and lock plate are from a 1995 Grand Prix with steering wheel controls.
The clock spring has the extra wires for the SWC's, and the lock plate is 1/4" smaller around to allow room for the wires and the part of the clock spring that they come out of. I also used the turn signal cancellation cam from the Grand Prix.
Steering wheel is a leather wrapped unit from a 2007 Cobalt LT with cruise and SWC buttons.
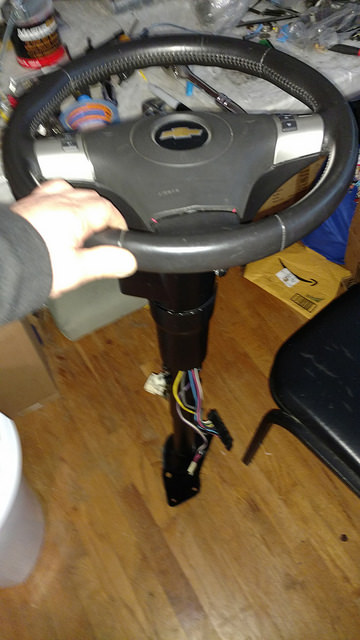
Everything is basically assembled, except the bracket that bolts the column to the truck body and the Steering Wheel will have to come back off. And I need to order a turn signal lever.
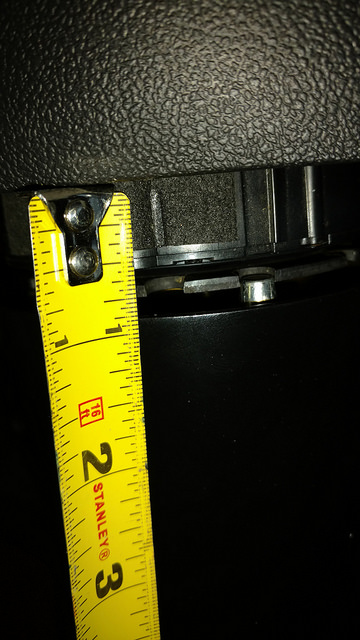
With the clockspring and everything assembled, there is a 7/8" gap from the back of the wheel to the upper column piece. I'm planning to order some 1" acrylic and fashion a cover and then paint it to match. But I needed it all together to measure.
I also removed the shift lever from the engine compartment side of the column because I won't need it. I had to use the inner tube/shift linkage to center the lower shift bowl, however.
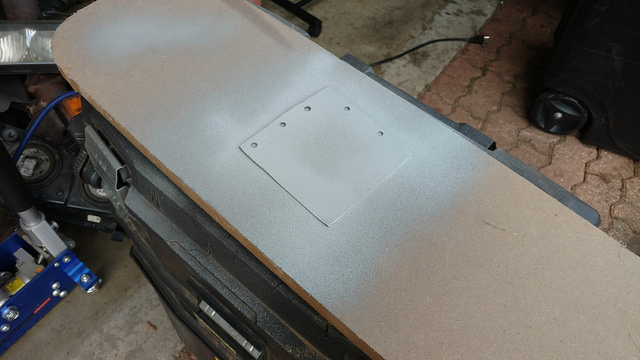
I'm going to be using a Trailblazer floor shifter. But I need to fill in the hole where the factory stick shift came in.
Not sure if I want to weld it up, or make a panel to screw in, in case I switch to a manual later.
Jay
04-25-2018 #59
Registered User
- Join Date
- Aug 2014
- Posts
- 435
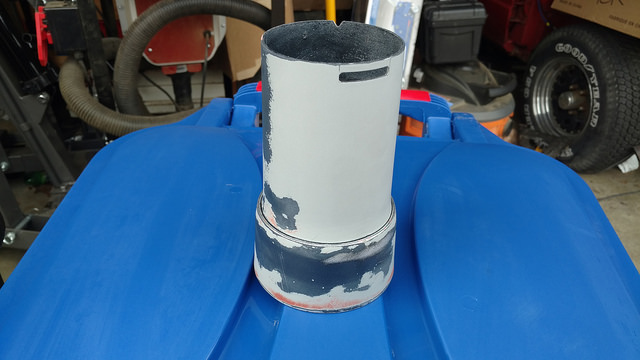
Got the top of the body mount patched up, and started filling in the hole for the shifter.
Cut out my patch:

treated the back side with weld through primer. Also, I ground down the spots where I
was going to rosette weld the patch to the mount. Also treated with 3M weld through primer.
Welded up:
Shifter hole:
Jay
05-09-2018 #60
Registered User
- Join Date
- Aug 2014
- Posts
- 435
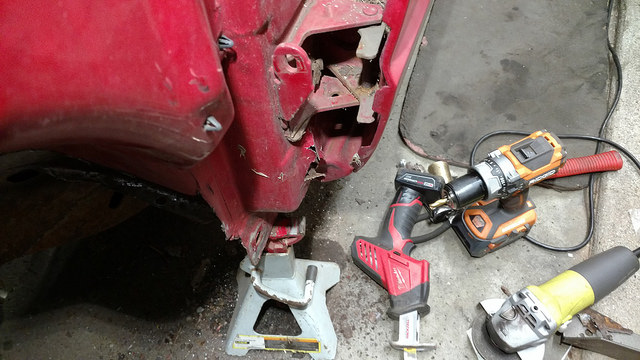
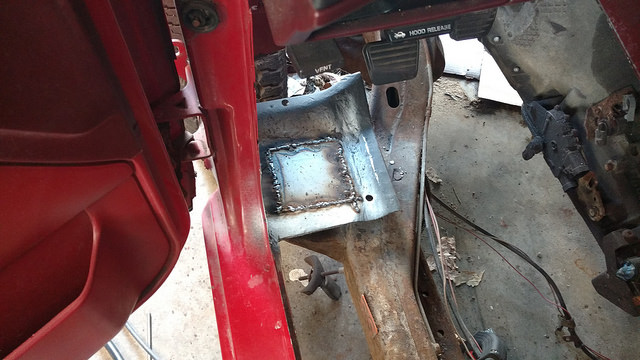
Well, when I was looking in the kick panel area it was rustier than I suspected, and had to wait until I could get a look inside.
From where I could reach, it seemed pretty rusty. Rusty enough that the structural integrity of the bottom hinge is questionable.
So, first thing I did was build a jig that locates both hinges to a point on the a pillar.
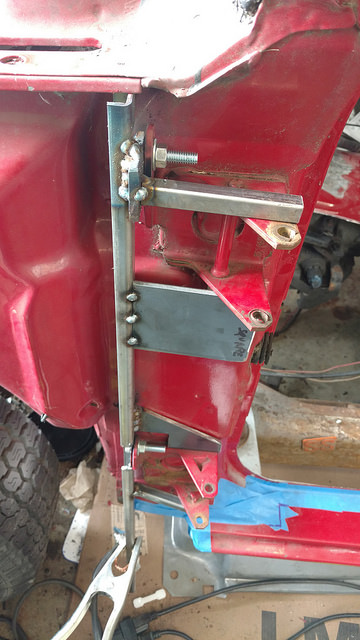
I made it from scrap pieces I had lying around. It bolts to the two front hinge mounts where the fender bolts on, and has a
third locator where I drilled a hole (centered where the door boot would be). As long as I keep the top hinge in place and the 3rd locator, the bottom hinge should go right back to it's stock location.
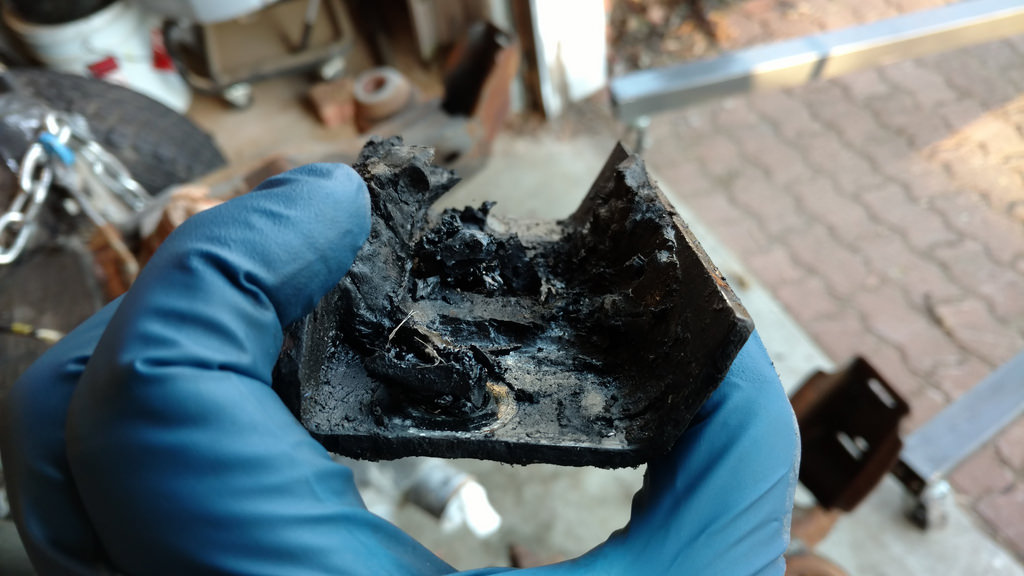
Then I removed most of the rocker panel, and found this:
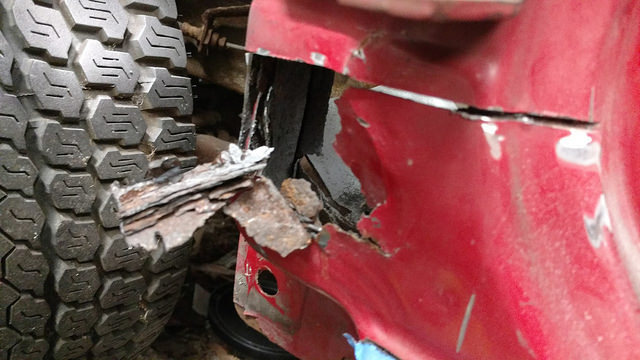
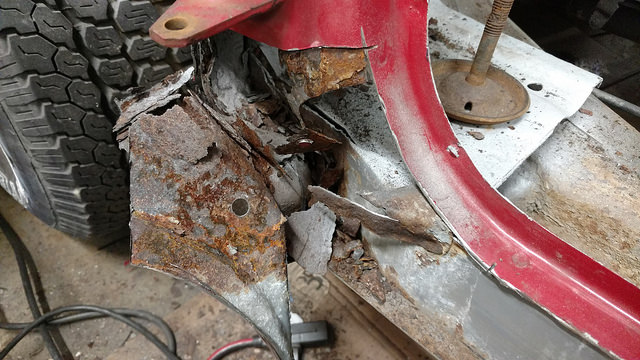
]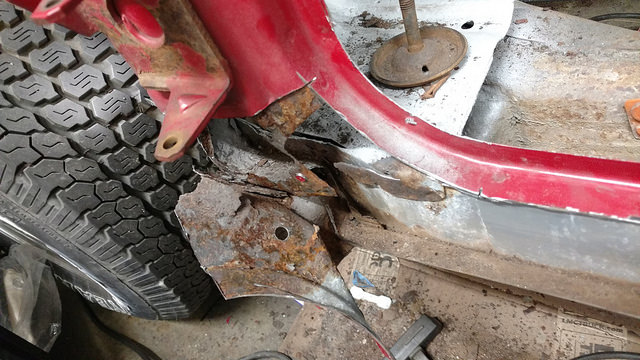
It looks like the inner structure is pretty bad. The outer rocker goes up to just below the hinge, but it looks like there are some inner structure pieces I'll need.
Maybe I'll start looking for someone that can cut the lower a-pillar out of a rust free donor.
The lower rocker is lightly rusty back to the middle of the seat. After that, it's pretty clean.
There are a couple of minor spots on the inner rocker I can patch easily enough.
Jay

 Reply With Quote


