

Results 21 to 40 of 78
Thread: 1963 AMC Rambler Classic
-
05-02-2016 #21
 Registered User
- Join Date
- Apr 2016
- Posts
- 27
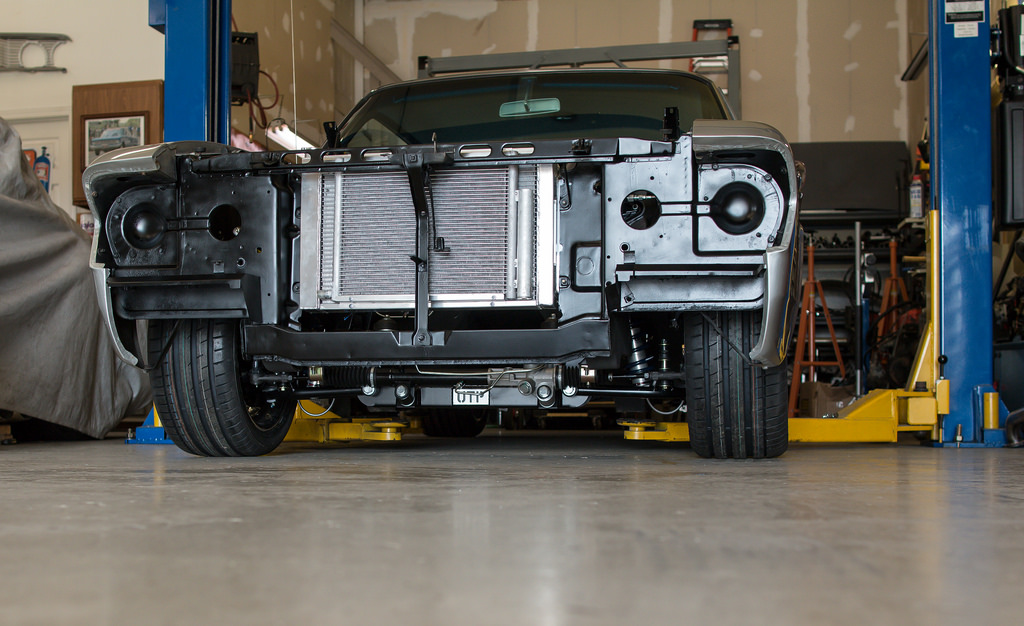
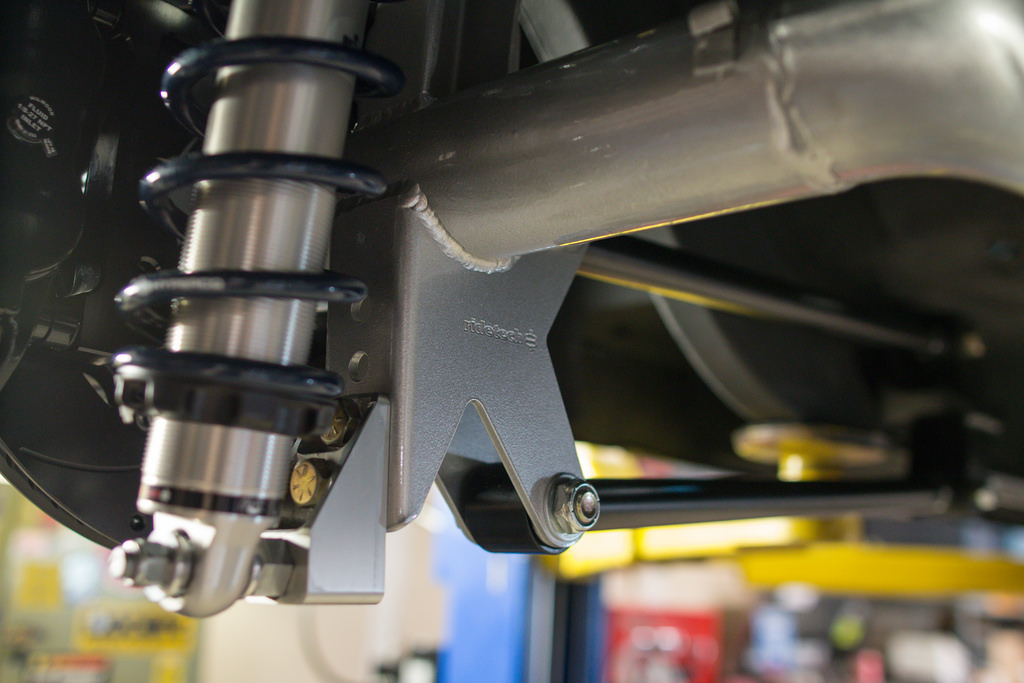
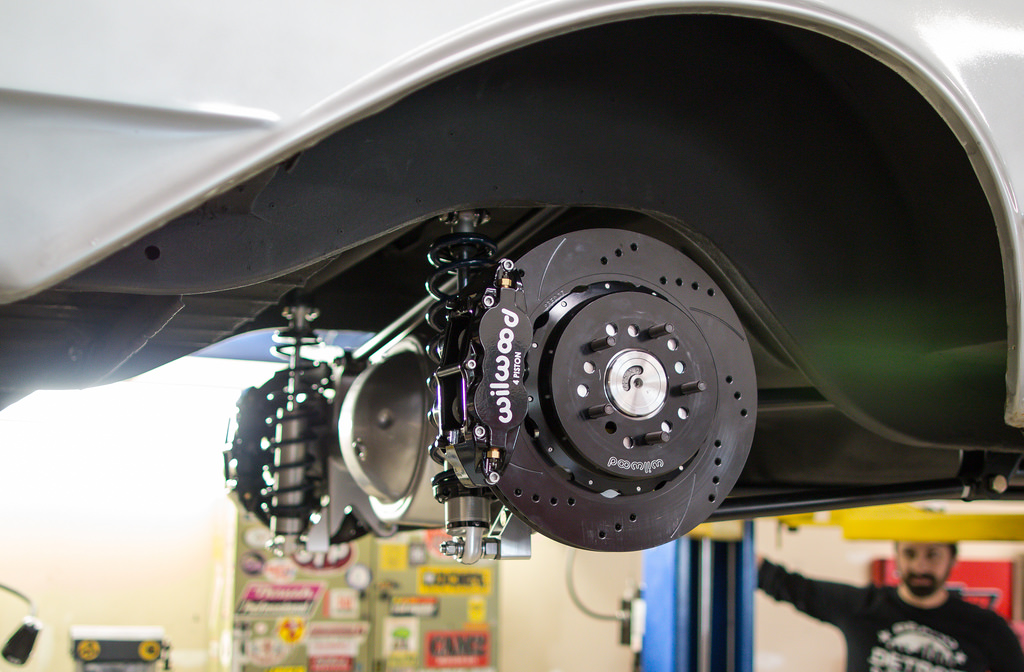
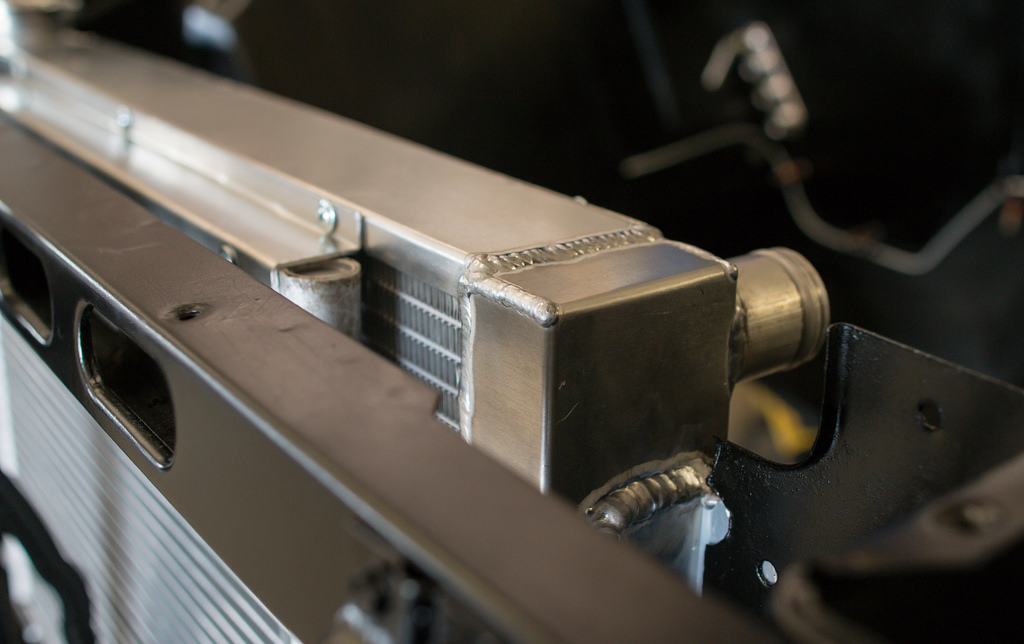
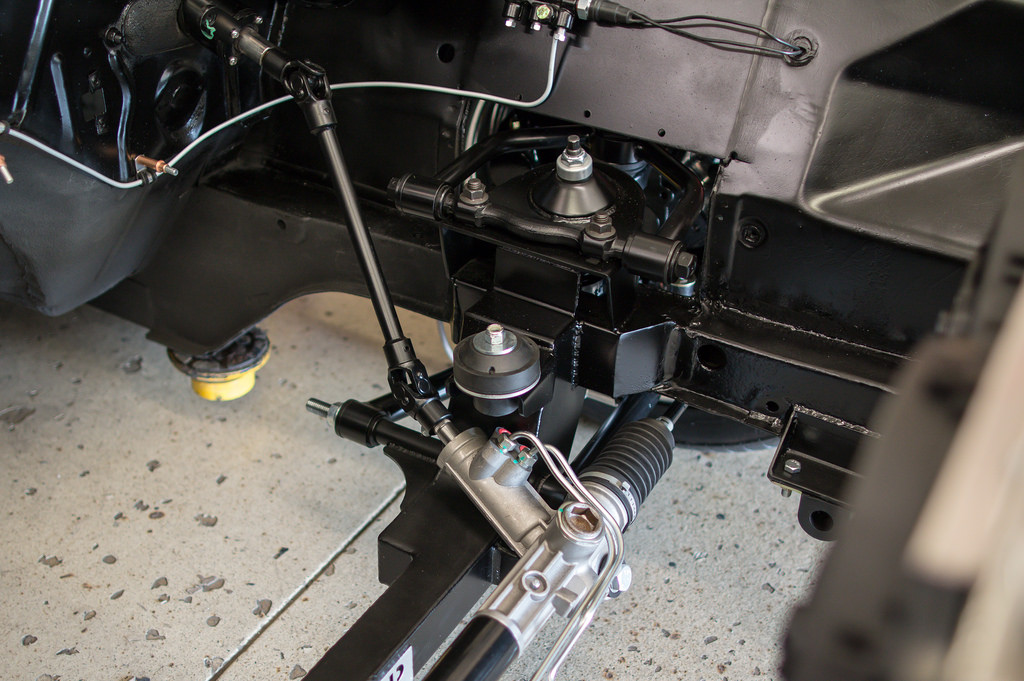
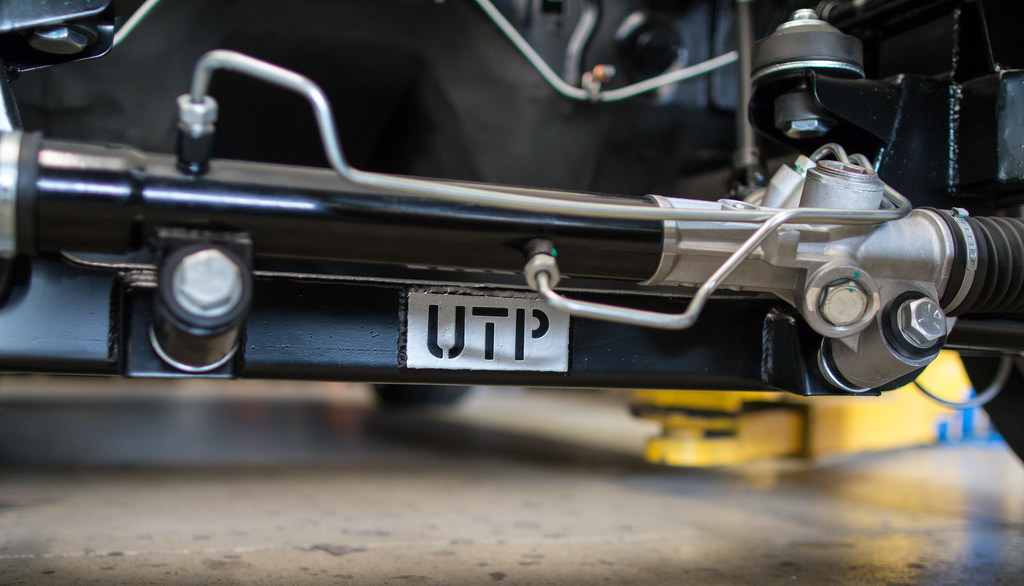
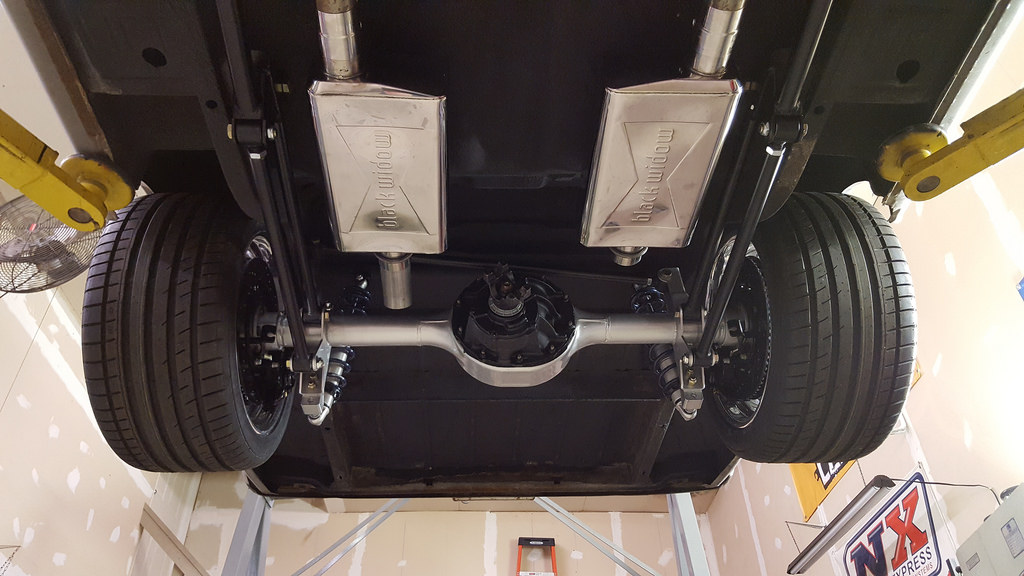
We were back at it again this weekend. The undercoating and engine bay paint completely dried. That allowed us to final assemble the suspension, start running brake lines, and get the car on the ground. We started to bang out the bumper dings one by one and Brian mocked up a front valance. Brian replaced the front floor due to a couple rust holes and also put in a larger trans tunnel for the 4l60e. That got sealed/painted also. The seat frame mounts have been started and should be in by tonight. Engine is arriving midweek.
Walk-around videos:
https://www.instagram.com/p/BE1FP5tK...coxphoto&hl=en
https://www.instagram.com/p/BE1Jx8Lq...coxphoto&hl=en
https://www.instagram.com/p/BE1QalLq...coxphoto&hl=en
 IMG_3582 by kcoxphoto, on Flickr
 IMG_3516 by kcoxphoto, on Flickr
 IMG_3519 by kcoxphoto, on Flickr
 IMG_3522 by kcoxphoto, on Flickr
 IMG_3525 by kcoxphoto, on Flickr
 IMG_3535 by kcoxphoto, on Flickr
 IMG_3540 by kcoxphoto, on Flickr
 IMG_3553 by kcoxphoto, on Flickr
 IMG_3550 by kcoxphoto, on Flickr
 IMG_3554 by kcoxphoto, on Flickr
 IMG_3563 by kcoxphoto, on Flickr
IMG_3582 by kcoxphoto, on Flickr
 IMG_3592 by kcoxphoto, on Flickr
 IMG_3601 by kcoxphoto, on Flickr
 IMG_3512 by kcoxphoto, on Flickr
-
05-02-2016 #22
Registered User
- Join Date
- May 2011
- Location
- Brisbane, Australia
- Posts
- 453

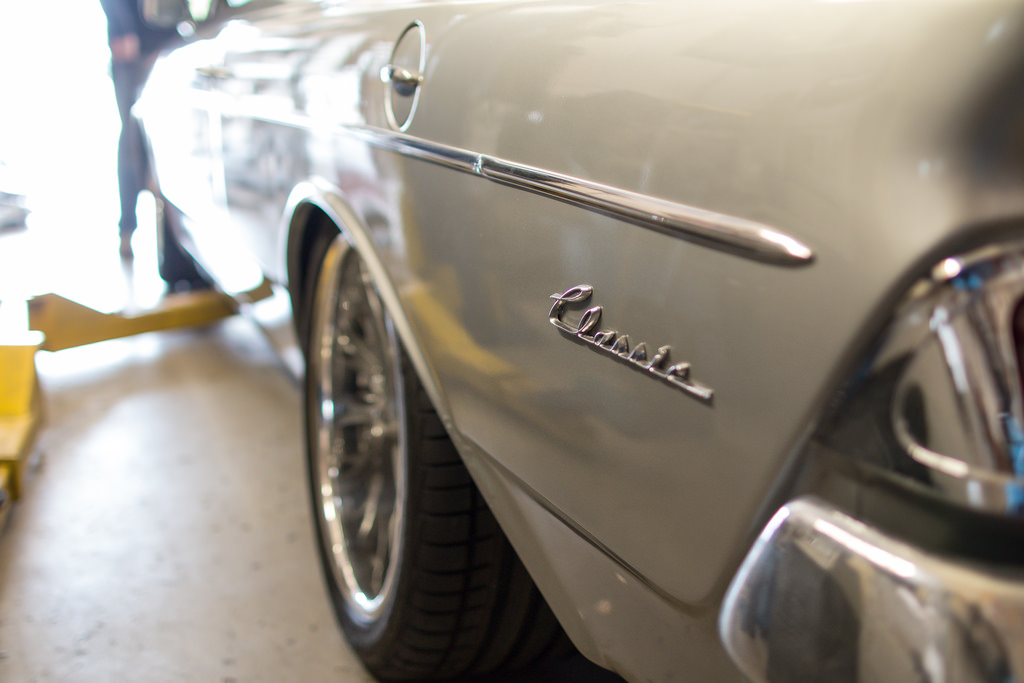
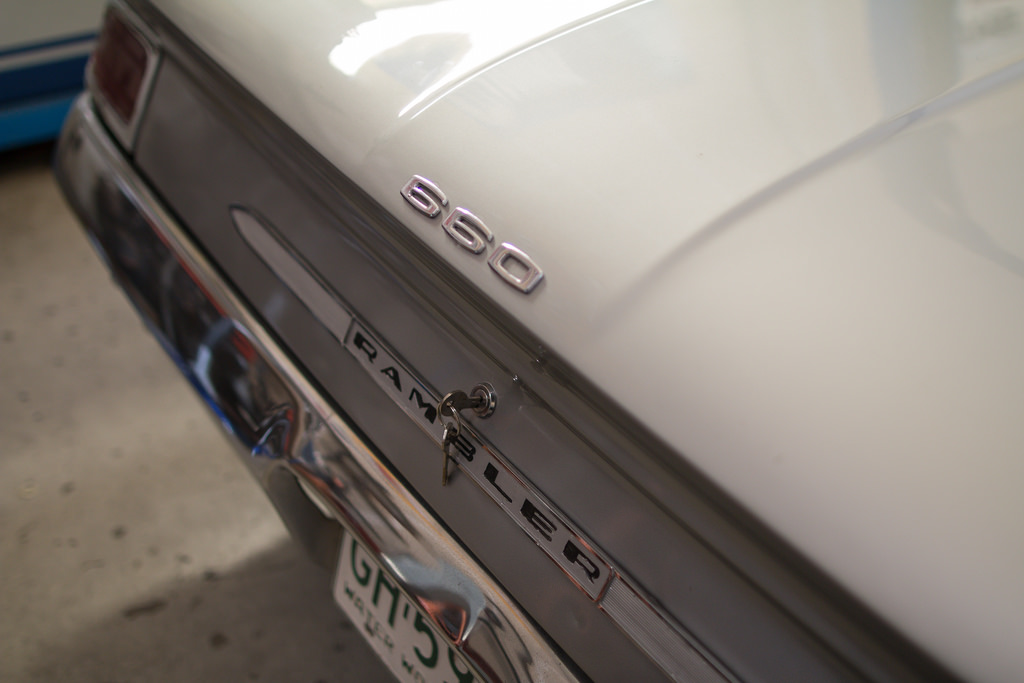
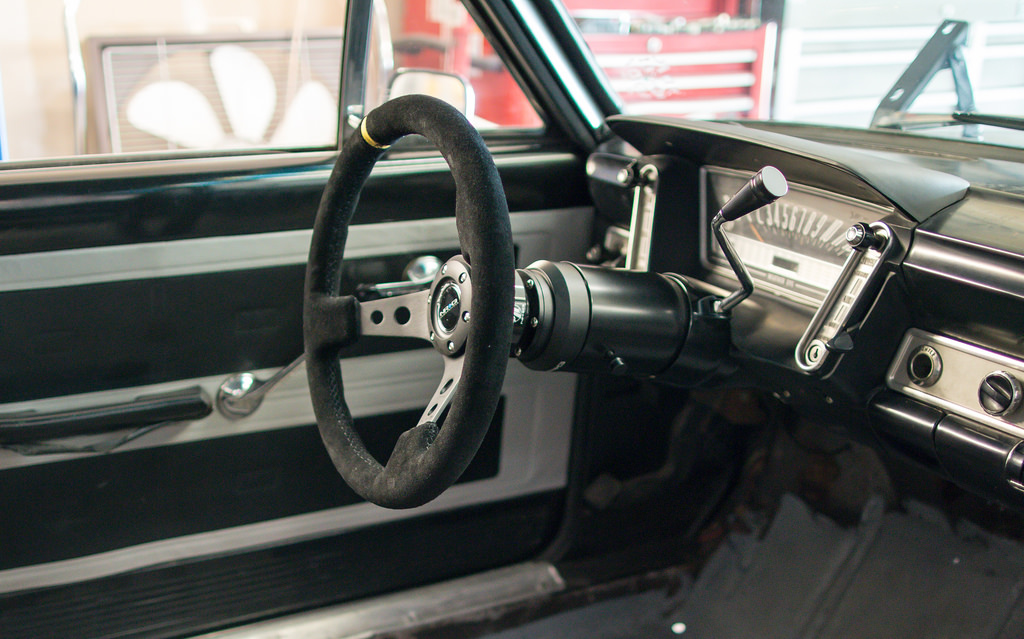
I really like the rear of this car. The lines on it look fantastic. Are you keeping the dash?
1967 Mustang Fastback - widebody https://www.pro-touring.com/threads/...stang-Fastback
1966 Plymouth Fury III
1961 Oldsmobile 88 "bubbletop" = next project
05-03-2016 #23
Registered User
- Join Date
- Apr 2016
- Posts
- 27
Yes, the dash is staying. I like the simplicity of it. I'd like to try and get the speedo working again, possibly with GPS.
05-03-2016 #24 Registered User
- Join Date
- Oct 2004
- Posts
- 2,548
 Good choice
 Originally Posted by 63RamblerClassic
 Red Forman: "The Mustang's front end is problematic; get yourself a Firebird."
05-03-2016 #25
Registered User
- Join Date
- May 2011
- Location
- Brisbane, Australia
- Posts
- 453
Originally Posted by 63RamblerClassic
It looks awesome. Glad it's staying.1967 Mustang Fastback - widebody https://www.pro-touring.com/threads/...stang-Fastback
1966 Plymouth Fury III
1961 Oldsmobile 88 "bubbletop" = next project
05-03-2016 #26
Registered User
- Join Date
- Mar 2015
- Location
- Phx,AZ
- Posts
- 25
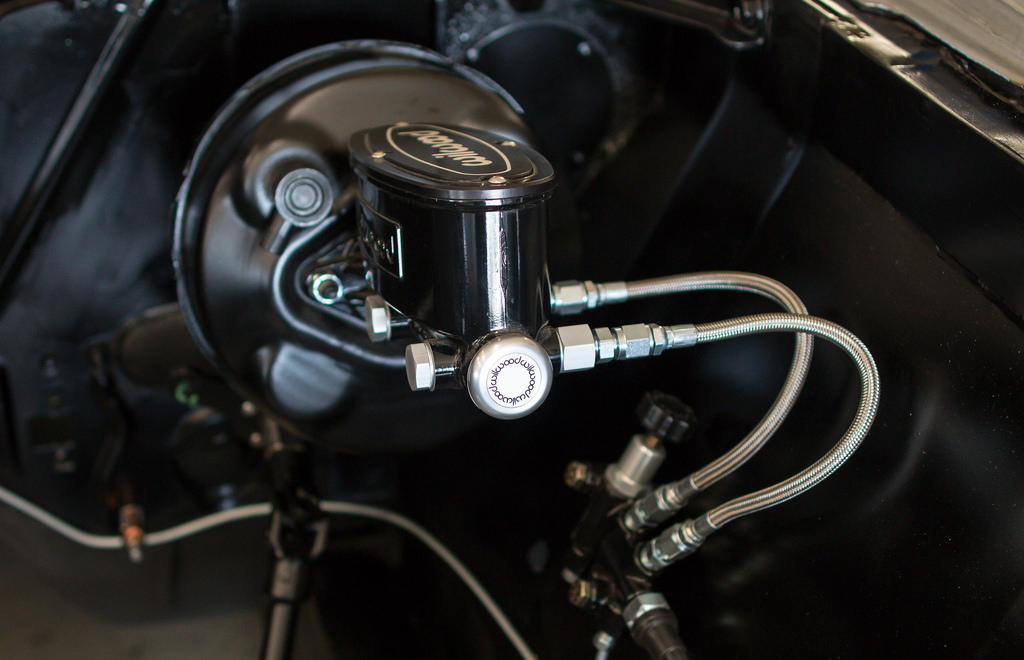
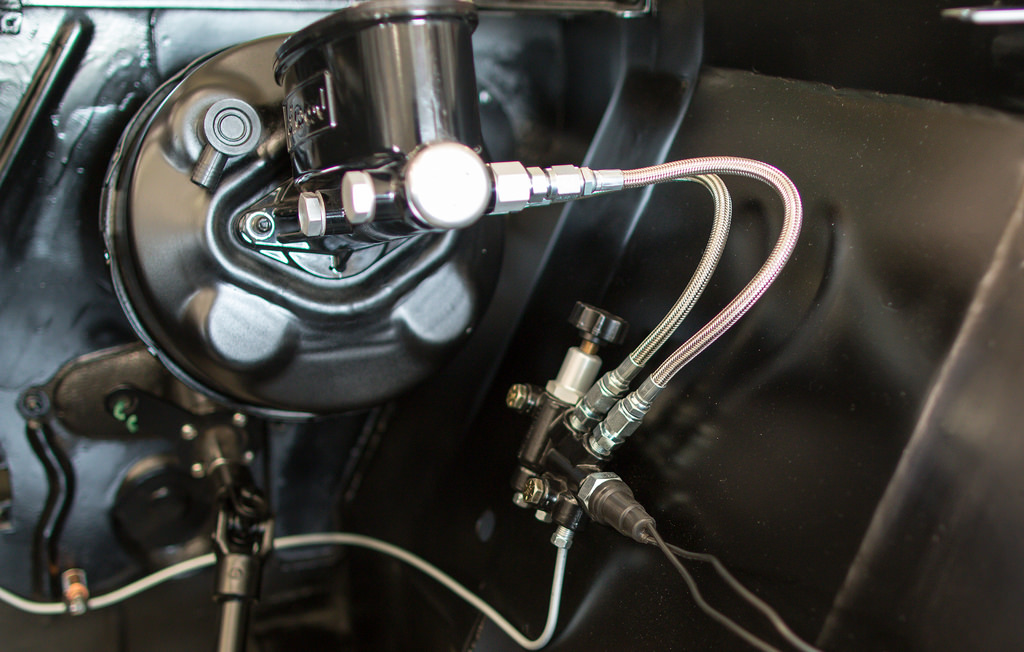
So maybe I missed it but any info on those brake lines at the master? That looks fantastic!
05-04-2016 #27
Registered User
- Join Date
- Nov 2012
- Posts
- 346
Just a heads up about the GPS speedo - you don't get an odometer function with those. Originally Posted by 63RamblerClassic
_______________
1969 Camaro
1966 Skylark
1964 Lemans
1960 Biscayne
Steve
05-04-2016 #28
Registered User
- Join Date
- Apr 2016
- Posts
- 27
those are Earl's Teflon AN brake hoses Originally Posted by Bigwex
05-04-2016 #29 Registered User
- Join Date
- Jan 2006
- Location
- Cornettsville, ky
- Posts
- 880
love this thing
05-09-2016 #30 Registered User
- Join Date
- Sep 2011
- Location
- Southlake, TX
- Posts
- 96
The speedhut GPS Speedo in my 2+2 has an ODO on it. Acquires sats quickly and is very accurate. Originally Posted by Zoomin
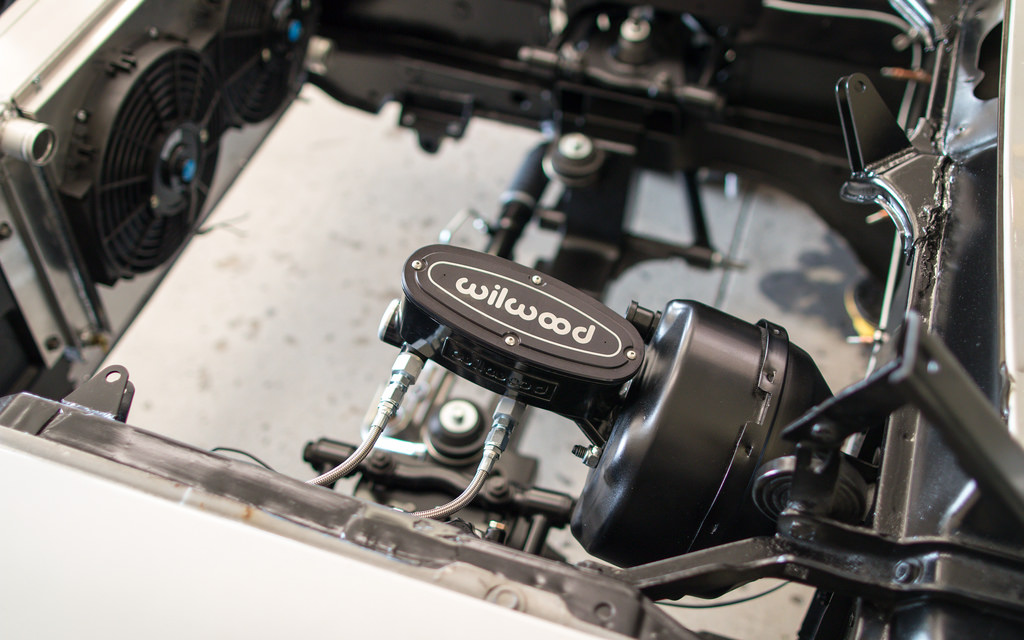
Greeat looking Rambler! The welds are some of the best I've seen.Chris BischofMy G-body homepage
'86 Pontiac 2+2 ORR car, '86 Regal T-type, '86 GN, '89 TTA, '13 GTHIG 5.0
SORC 115 mph Class Winner '07, '10, '11, '13, '15
05-09-2016 #31
Registered User
- Join Date
- Nov 2012
- Posts
- 346
Figures. Must be a function of size? I didn't get one with mine. :( Originally Posted by UNGN
So I'll modify my statement to say be sure to make sure the gauge you decide on comes with an odo. I didn't notice until after the install it wasn't there._______________
1969 Camaro
1966 Skylark
1964 Lemans
1960 Biscayne
Steve
05-10-2016 #32
Registered User
- Join Date
- Apr 2016
- Posts
- 27
Thanks guys. I will definitely look at the speedhut GPS gauges.
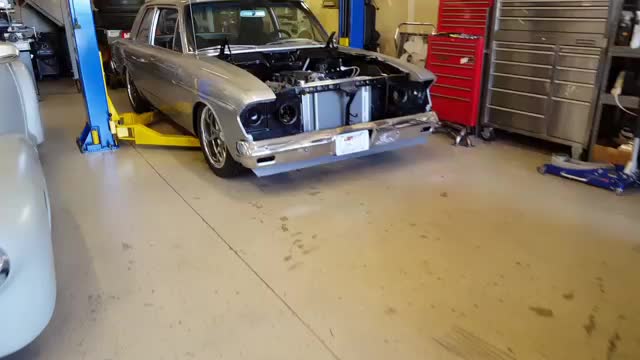
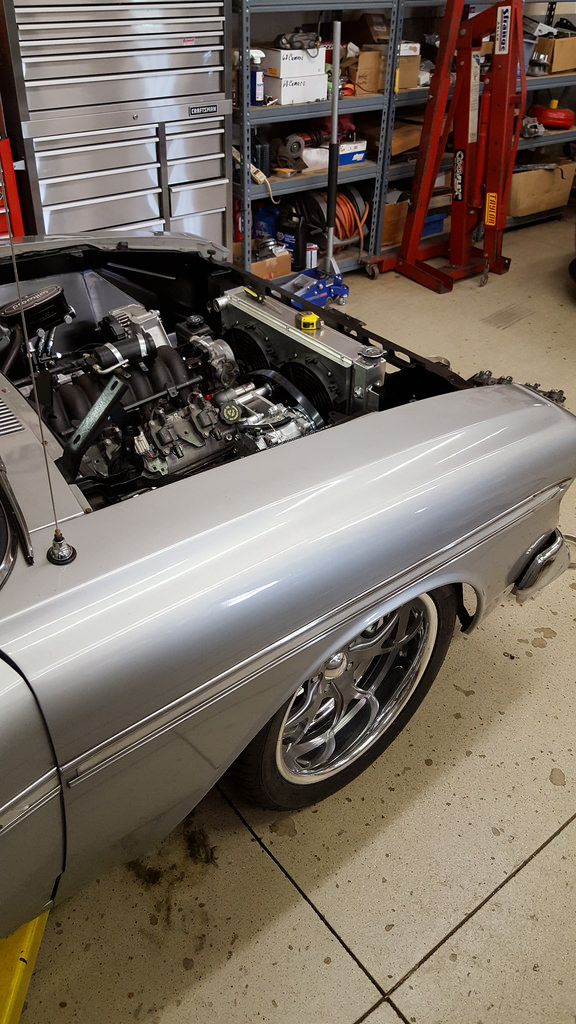
Here are some updates from the weekend.
The LS is installed!
 ramblurwalkaround by kcoxphoto, on Flickr
 engine by kcoxphoto, on Flickr
05-11-2016 #33 Registered User
- Join Date
- Jan 2011
- Location
- Jefferson City, MO
- Posts
- 240
Fantastic build!
05-16-2016 #34
Registered User
- Join Date
- Apr 2016
- Posts
- 27
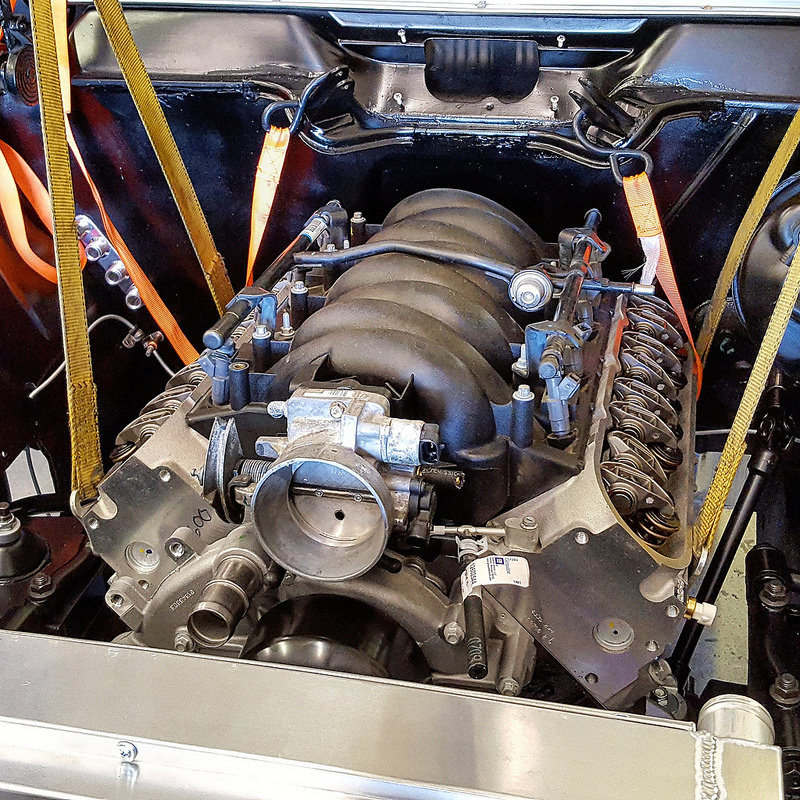
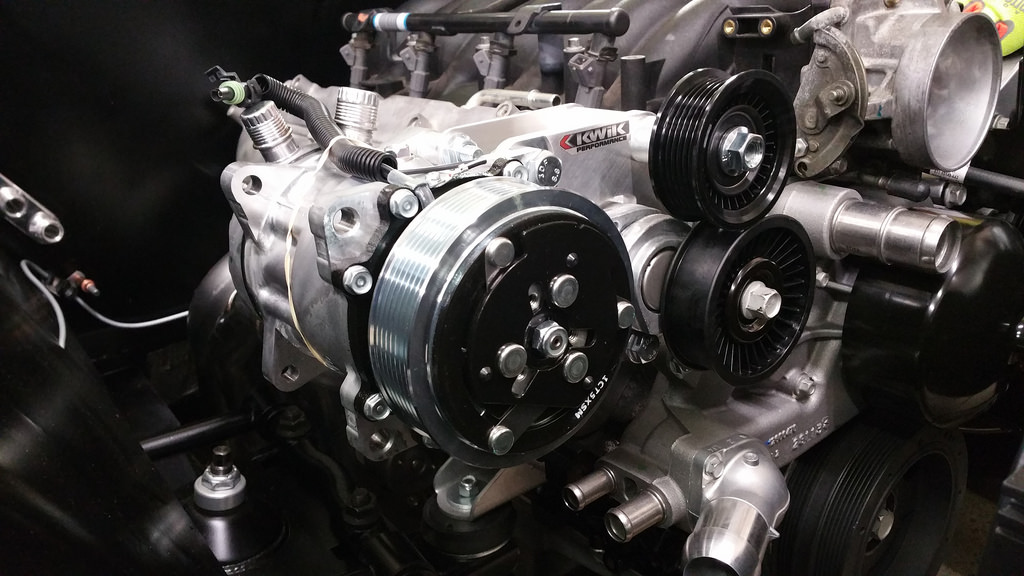
LS3 valve covers installed
Kwik A/C bracket and Sanden Compressor installed
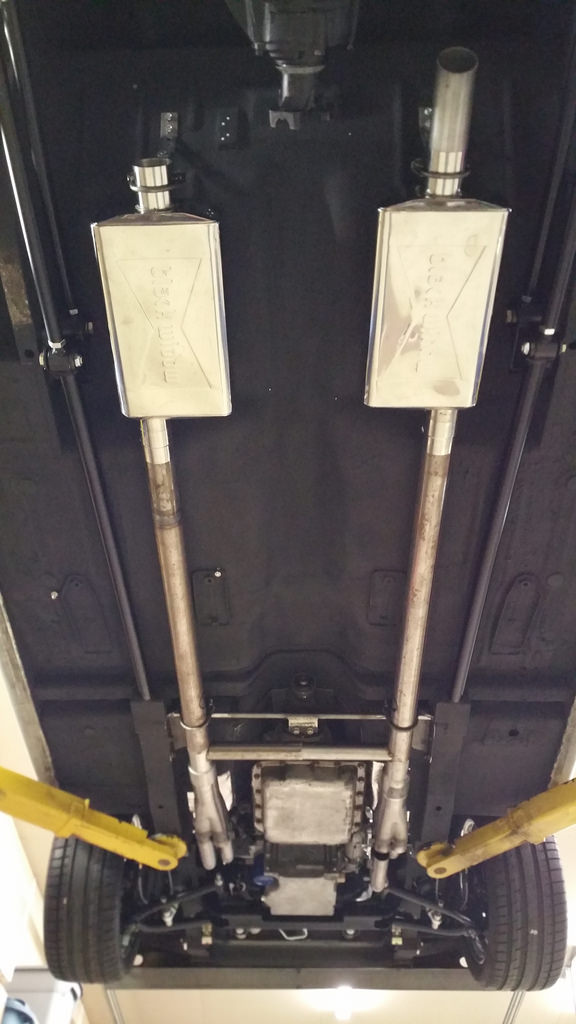
Exhaust is almost complete using Black Widow Mufflers (headers still in process, ran out of tubing)
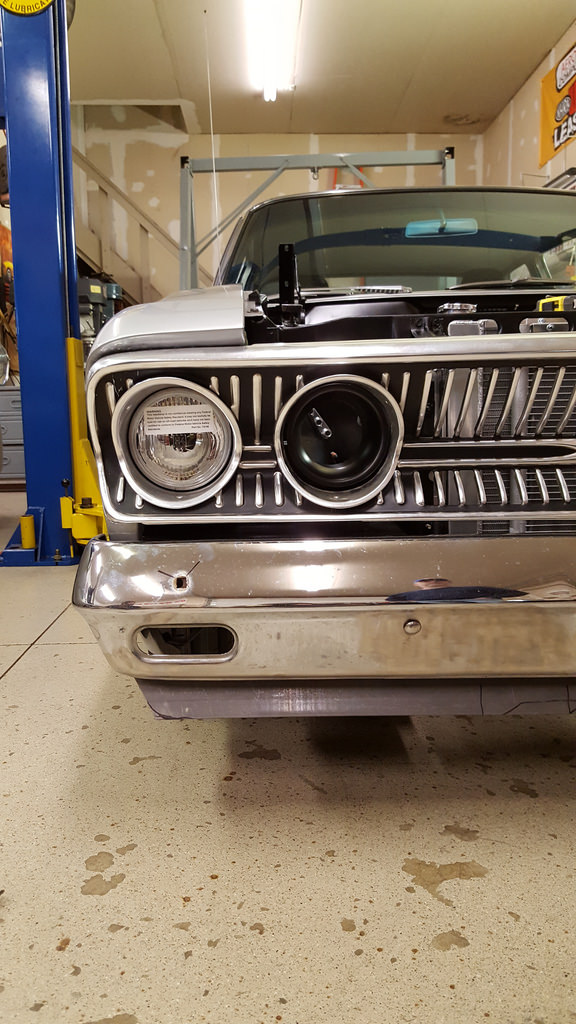
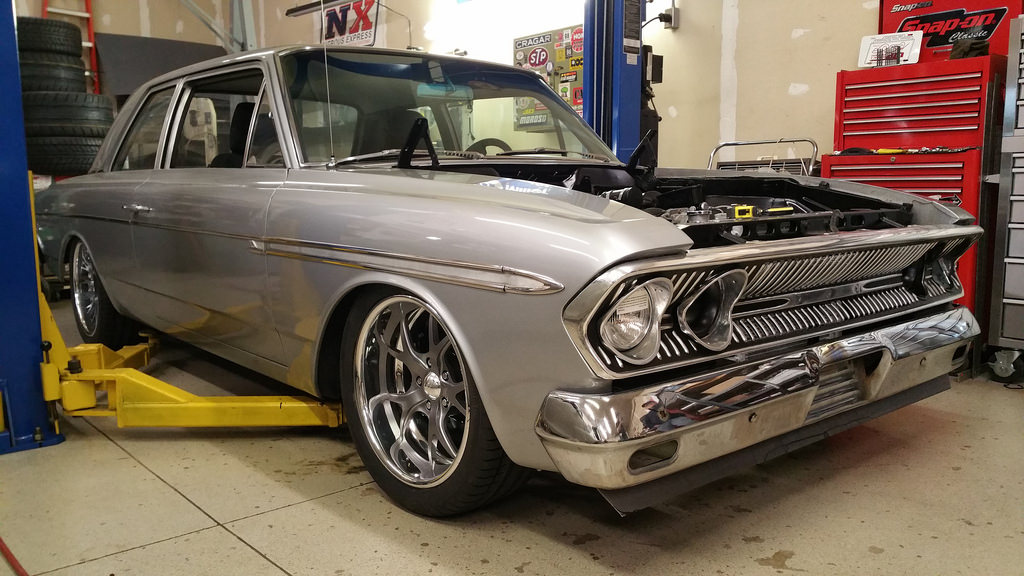
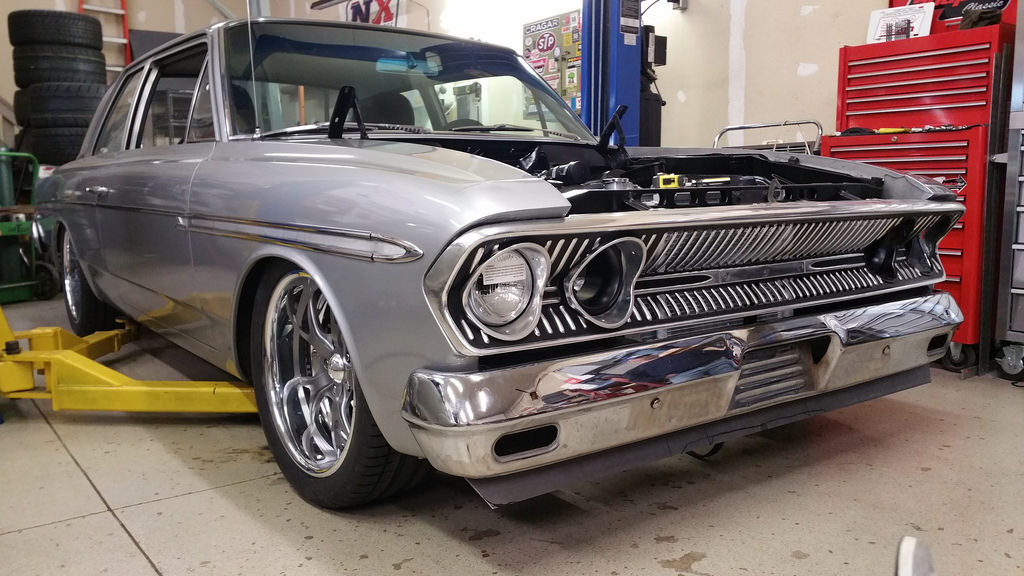
Test-fit N.O.S. Grille with Hella headlamp and Spectre intake funnel
 20160514_134453 by kcoxphoto, on Flickr
 20160514_141826 by kcoxphoto, on Flickr
 20160514_151227 by kcoxphoto, on Flickr
 Ramblur by Matt, on Flickr
 Ramblur by Matt, on Flickr
 Ramblur by Matt, on Flickr
 Ramblur by Matt, on Flickr
05-16-2016 #35
Registered User
- Join Date
- Nov 2012
- Posts
- 346
Making great progress!
Please show some more pix of the intake funnel, I'm curious to see how that works. What are you doing on the driver side?_______________
1969 Camaro
1966 Skylark
1964 Lemans
1960 Biscayne
Steve
05-16-2016 #36
Registered User
- Join Date
- Apr 2016
- Posts
- 27
The driver's side is also getting the same treatment. Both inner lights are going to be converted to air inlets. Only one will actually feed the intake directly, the other for general cooling purposes. Originally Posted by Zoomin
05-16-2016 #37
Registered User
- Join Date
- Nov 2012
- Posts
- 346
I'm curious to know how the air gets filtered. I guess you use an adapter which connects the intake funnel to the top of the cone filter, and from there on the filter connects to your intake tubing as usual? Are you building a box for the filter? Any water concerns?
Thanks for the info._______________
1969 Camaro
1966 Skylark
1964 Lemans
1960 Biscayne
Steve
05-17-2016 #38
Registered User
- Join Date
- Apr 2016
- Posts
- 27
I don't plan on driving it in the rain. The system will be a typical cold air intake setup; there will not be a direct tube feed from the funnel to the intake/TB. It's going to be a K&N tube and filter assembly that ends near the funnel. That will allow for a "ram air" type effect. Originally Posted by Zoomin
05-17-2016 #39
Registered User
- Join Date
- Mar 2015
- Posts
- 30
I am loving this build.
05-22-2016 #40
Registered User
- Join Date
- May 2015
- Location
- North central Montana
- Posts
- 83
As has been stated many times, this is way cool build. When i first looked at theoriginal pic and thought why would someone work on something like that. I have always thought they were some of the ugliest cars ever built. But I stand corrected, it is one of the coolest things i have seen. Never in a million years would i have believed it would look so awesome. Kinda goes from the ugly duckling to the swan thing here. excellent choice on the wheels, they really make the car!!! That is going to be so much fun for you and hope you drive the wheels off of it.
Bruce Jeppesen
"RANGERS LEAD THE WAY"
1966 Chevelle
1978 Ford F-150 4x4
1930 Model
https://www.pro-touring.com/threads/1...e-PT-Challenge
Need more time, more money and more ambition!!!

 Reply With Quote


