

Results 101 to 120 of 808
-
10-13-2016 #101
 Registered User
- Join Date
- Oct 2015
- Posts
- 2

Great build. Very similar to mine. I'm curious what vehicle your power steering hoses came from? I have an Fbody PS pump and hoses, but I don't think I'm going to be able to get the high pressure hose re-bent enough to reach the box without destroying it.
-
10-15-2016 #102 Registered User
- Join Date
- Sep 2009
- Posts
- 2,707
Thank you. Those hoses are from the Jeep Grand Cherokee as well as the steering box. When I pulled the box, I kept the lines that were on the vehicle.

1955 Nomad project LC9, 4L80e, C5 brakes, Vision wheels
1968 Camaro 6.2 w/ LSA, TR6060-Magnum hybrid and etc SOLD
1976 T/A LS1 6 Speed, and etc. SOLD
Follow me on Instagram: ryeguy2006a
10-15-2016 #103
Registered User
- Join Date
- Sep 2009
- Posts
- 2,707
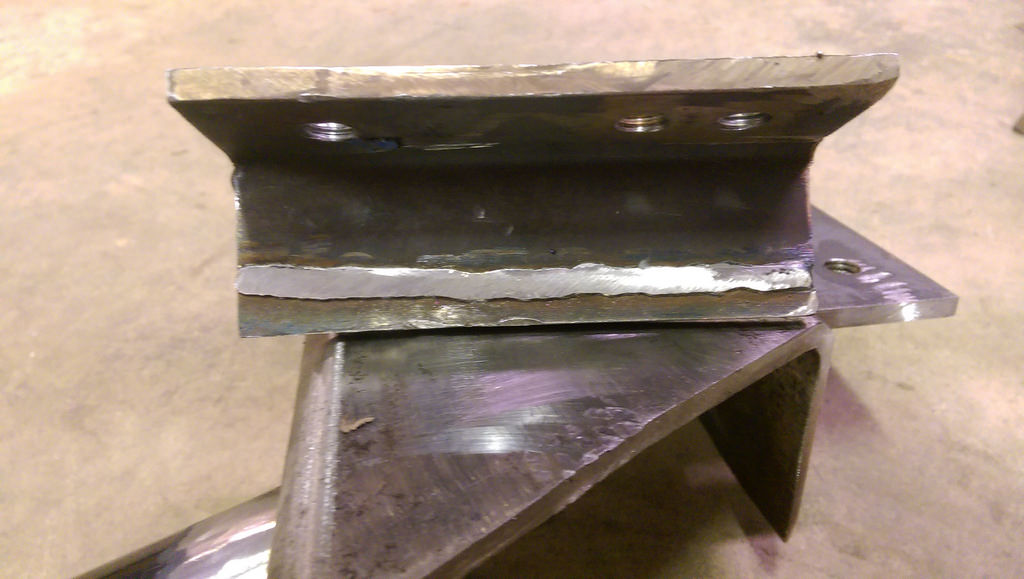
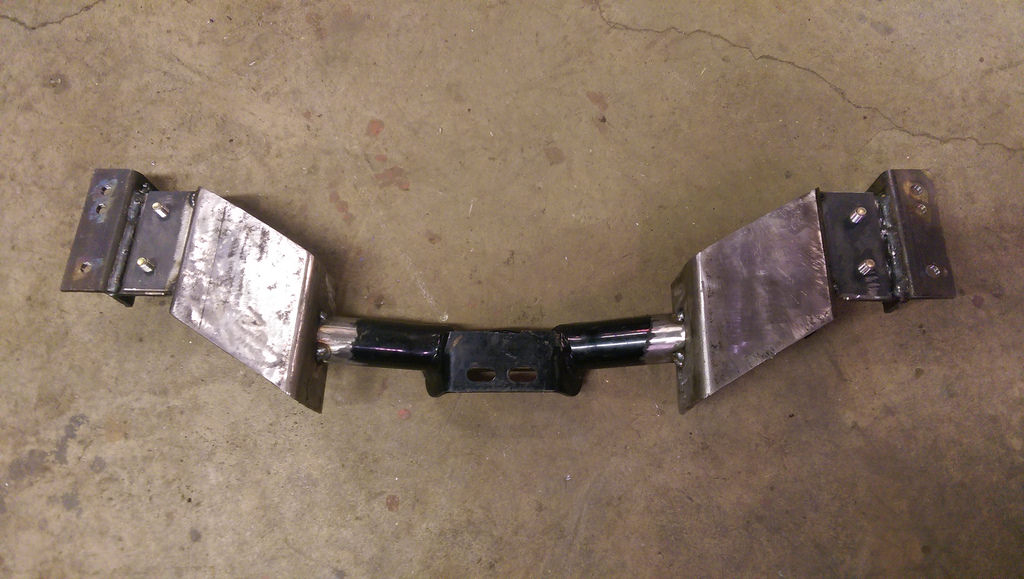
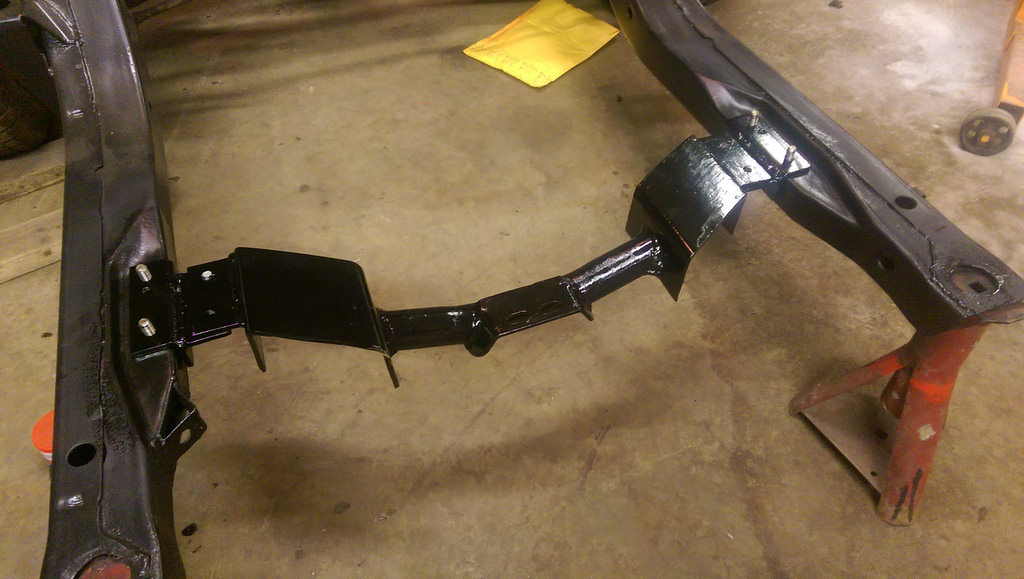
Due to fitment issues, I have had to revise the original design. Although I was disappointed with the fitment of my original design, I am really pleased with Version 2.0. After some feedback and test fitting, I realized it would make a lot more sense to make the crossmember in three pieces rather than one. The other issue with the original is that there was much more flex than I liked. After a lot of thought, I decided to add a bead of weld along the bottom side of the angled iron that bolts to the original frame. This reduced the flex substantially.

And here is what I came up with for the bolt on design.
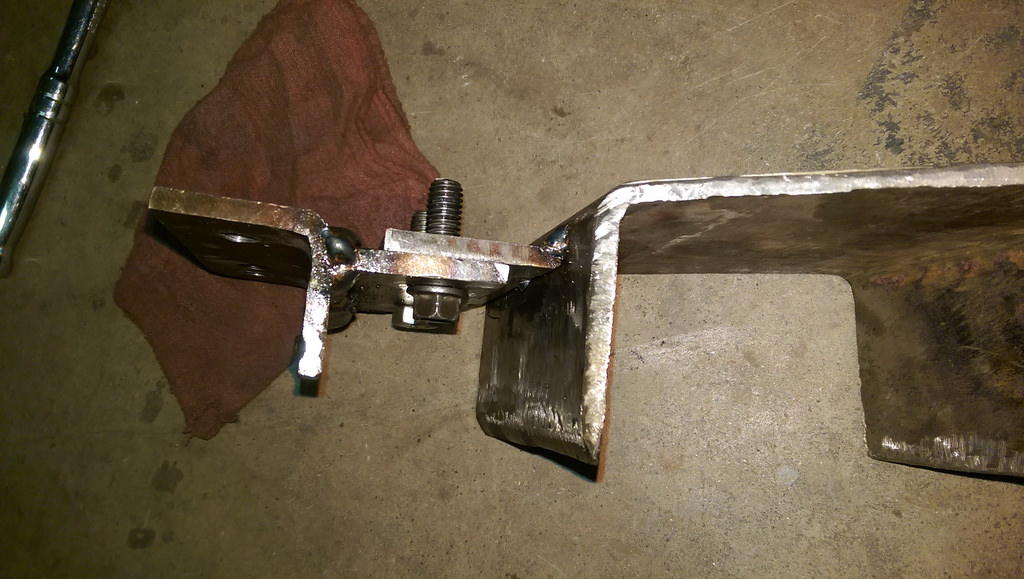
The trans mount put together with the new center section. All the flex is gone and the crossmember can be removed with just 6 bolts.
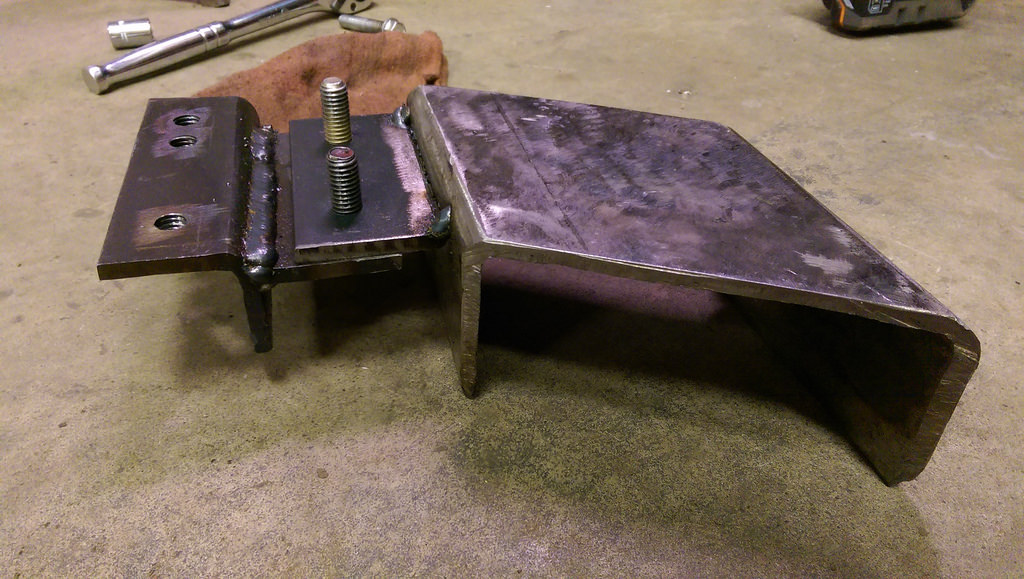
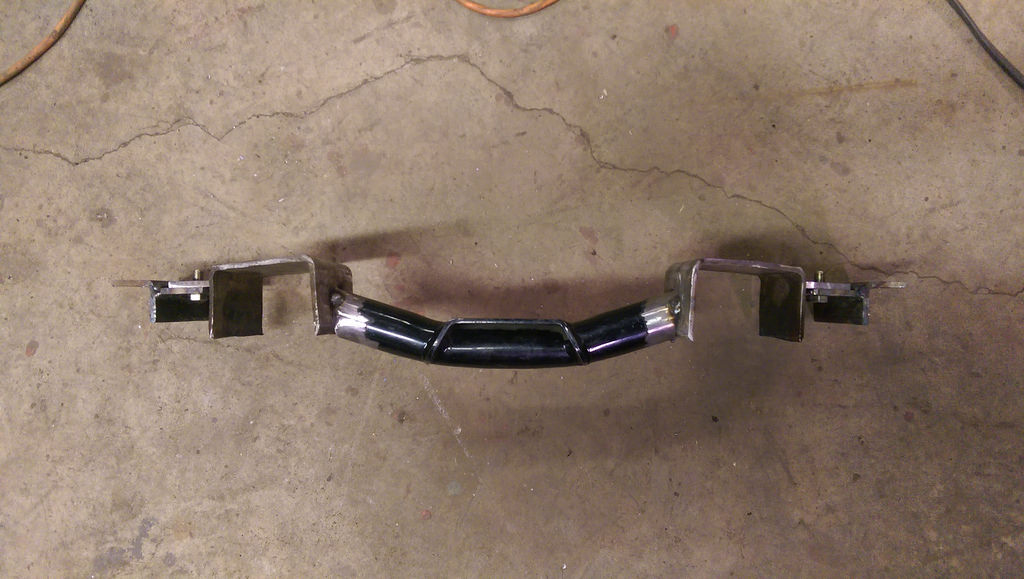
Final test fit. The picture makes it look crooked, but it is within a 1/16" on both sides. Just the way I was laying under the car...
Complete and all tacked together.
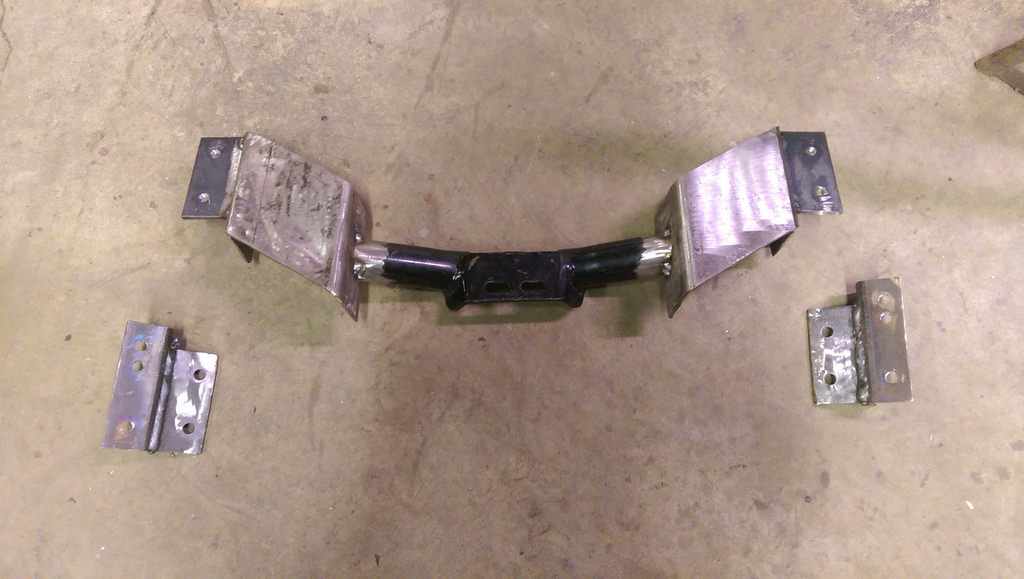
Once again, over to my Dad's to do a final weld to bond it all together. I'm sure glad that he is understanding.
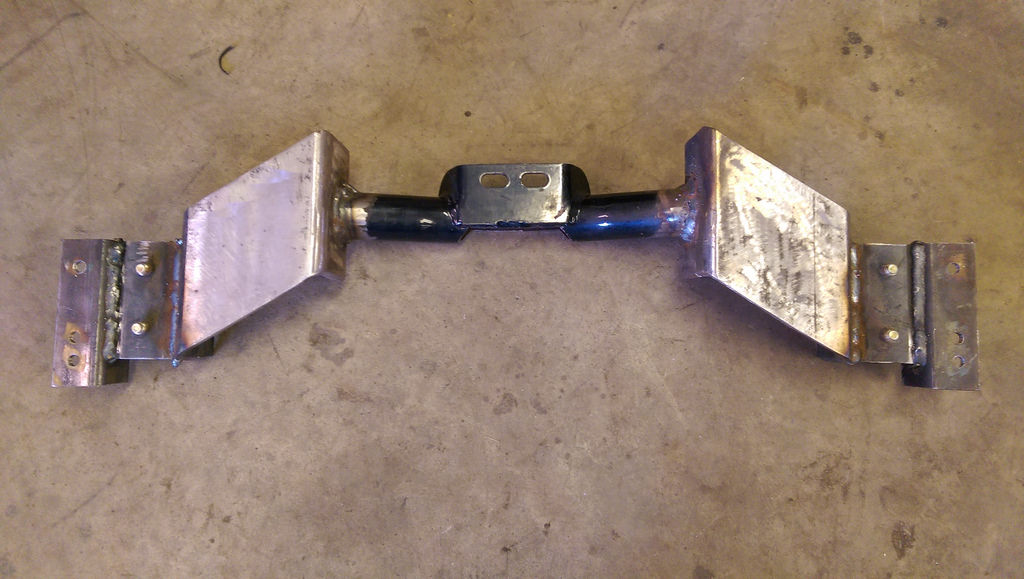
Now that it is finally welded up solid, I need to do a final clean up with the flap disk to clean up the welding spatter and any sharp edges. After that it will get painted and I will do a final install.
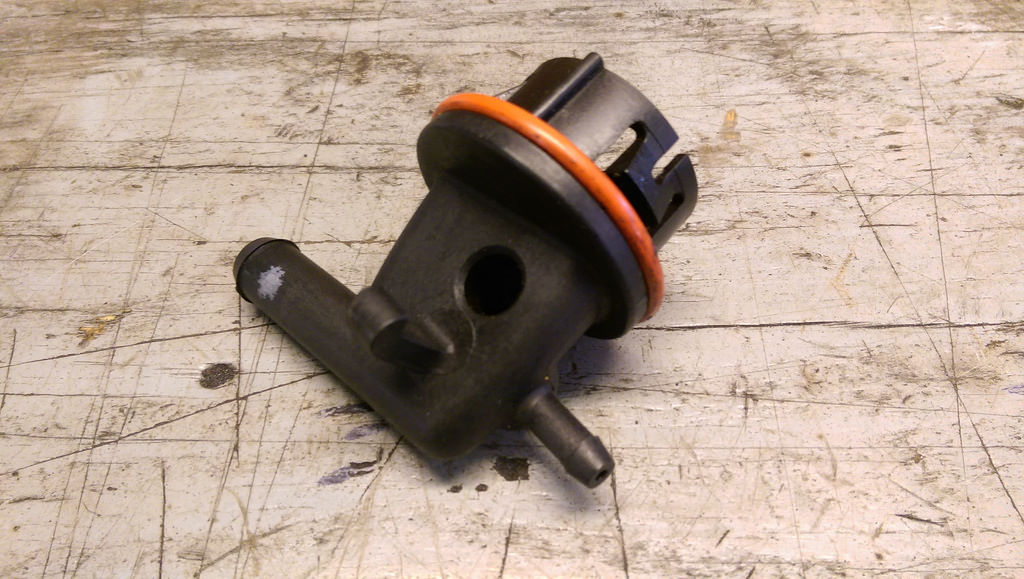
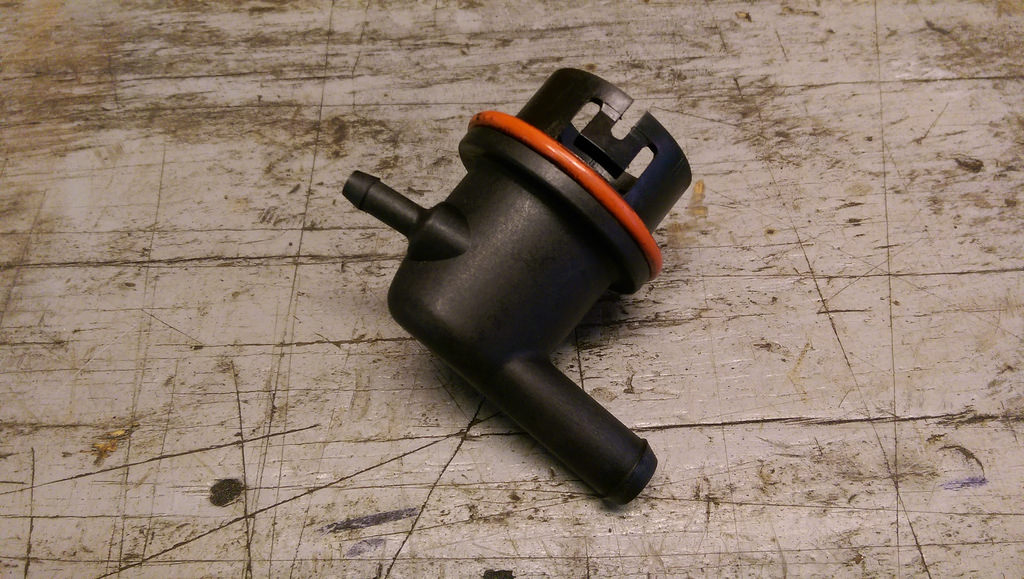
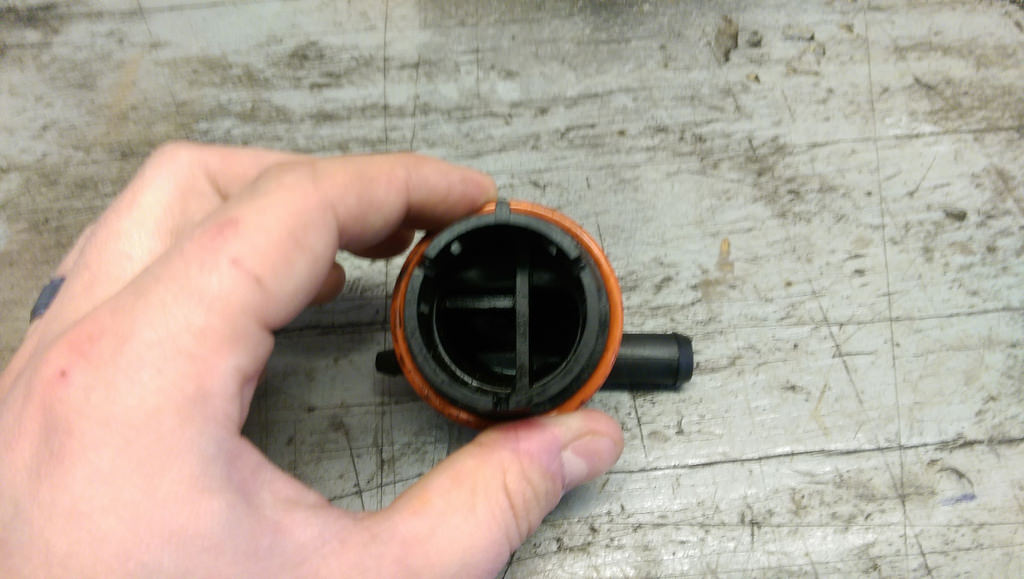
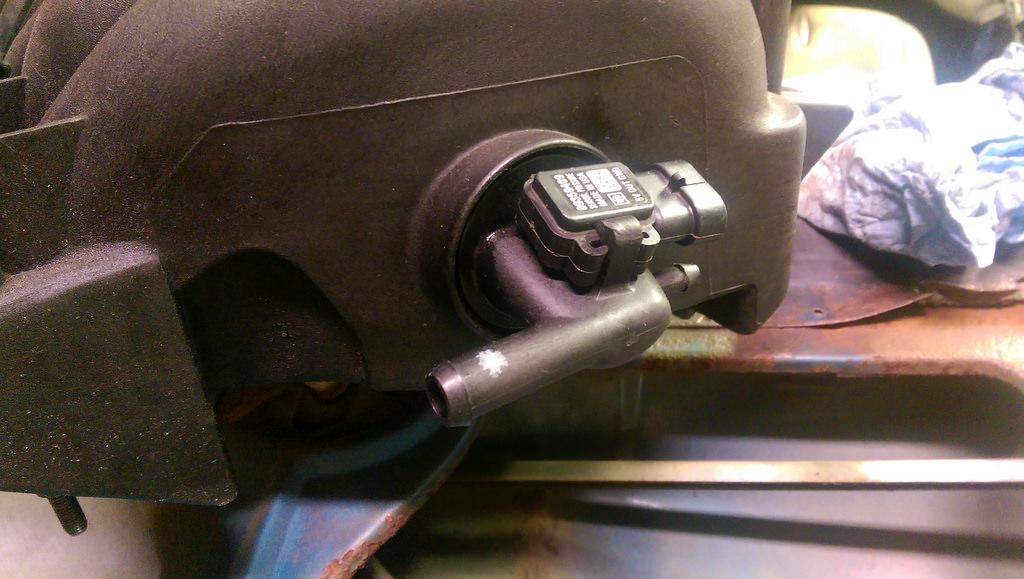
I also was able to finally track down someone that had a MAP sensor plug for my LS1 intake. When I bought my engine, it had the rear map plug missing. After a little research I realized that that particular part isn't sold separately from the intakes. So that means that I had to find someone that had one that they removed from an intake. Luckily, Last of the Breed was able to pull through for me and had one that was in mint condition.
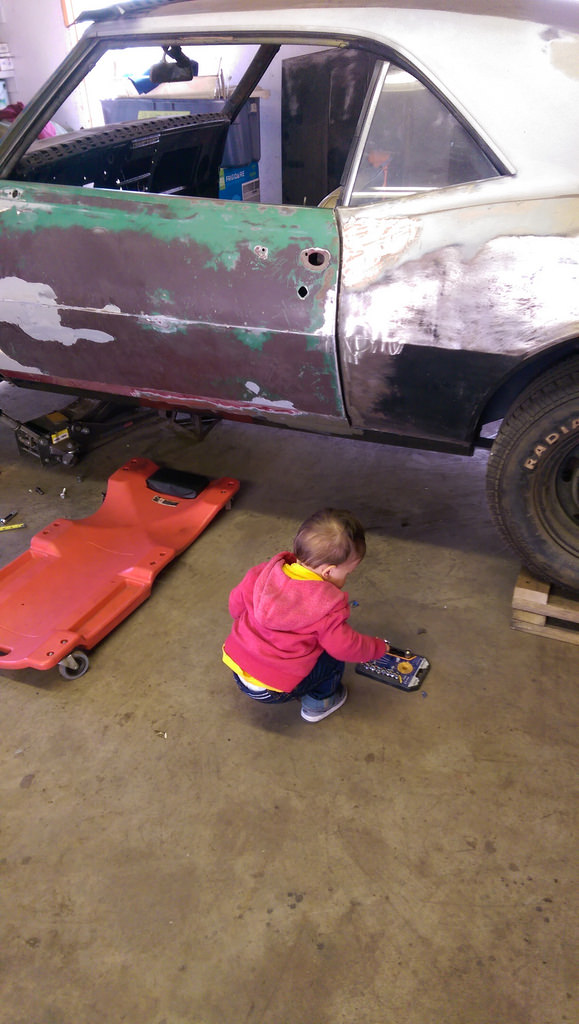
My Pa came over to get the LT1 engine and take that home with him for his next project. While I was helping him to load up the engine, I had my little helper out in the garage.
I am very happy to have that crossmember fabrication done. Just a little grinder work, paint and it will look killer. Glad to have some good news for this update.
1955 Nomad project LC9, 4L80e, C5 brakes, Vision wheels
1968 Camaro 6.2 w/ LSA, TR6060-Magnum hybrid and etc SOLD
1976 T/A LS1 6 Speed, and etc. SOLD
Follow me on Instagram: ryeguy2006a
10-17-2016 #104
Registered User
- Join Date
- Oct 2015
- Posts
- 2
Thanks. Does the pump fitting on the pressure hose fit your pump? Originally Posted by ryeguy2006a

10-17-2016 #105
Registered User
- Join Date
- Aug 2014
- Posts
- 435
I'm swapping an LQ4 into my S-10 with a 4L80e. I looked at several crossmember options ranging from modding a stock one (truck didn't come with one), the one Current Performance offers (about $259!) as well as Summit racings knock down kit (which looks similar to your first one)...then I came across Stiffler's performance tubular crossmembers designed for 96-98 Mustangs. $137 shipped to my door from LMR. I will need to make frame-side mounts, but it has humps to clear the exhaust on both sides and is adjustable forward and back. Just a thought for anyone else looking at options. I need to pull my cab so I can make my mounts, but it's coming soon.
Mounts will be made from 1/4" thick 4" wide steel plate and some 3/16x3" plate.
Jay
10-18-2016 #106
Registered User
- Join Date
- Sep 2009
- Posts
- 2,707
I haven't tried to thread it in, but it may work. I can try sometime soon. Originally Posted by tracetrimble
1955 Nomad project LC9, 4L80e, C5 brakes, Vision wheels
1968 Camaro 6.2 w/ LSA, TR6060-Magnum hybrid and etc SOLD
1976 T/A LS1 6 Speed, and etc. SOLD
Follow me on Instagram: ryeguy2006a
10-19-2016 #107
Registered User
- Join Date
- Sep 2009
- Posts
- 2,707
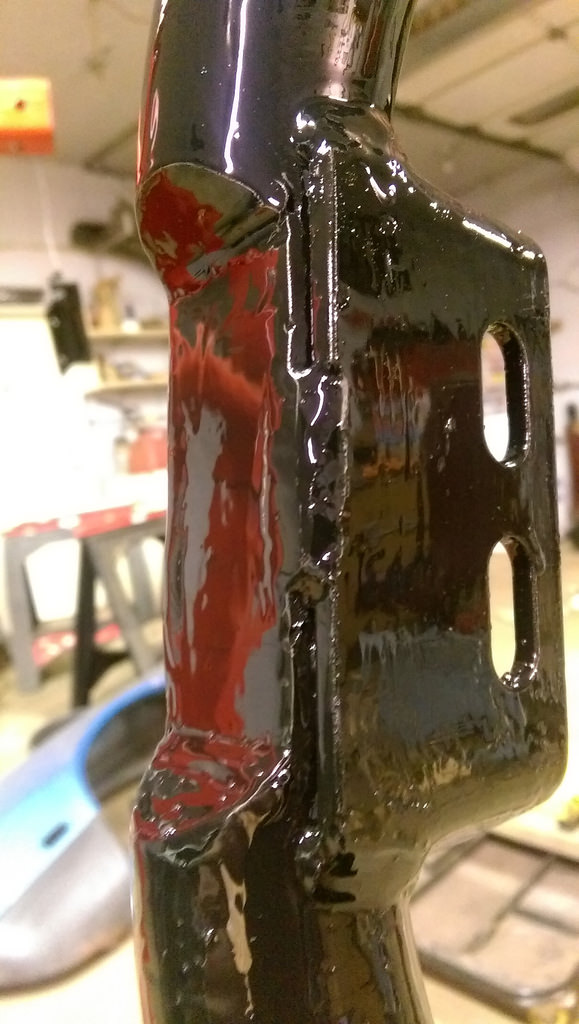
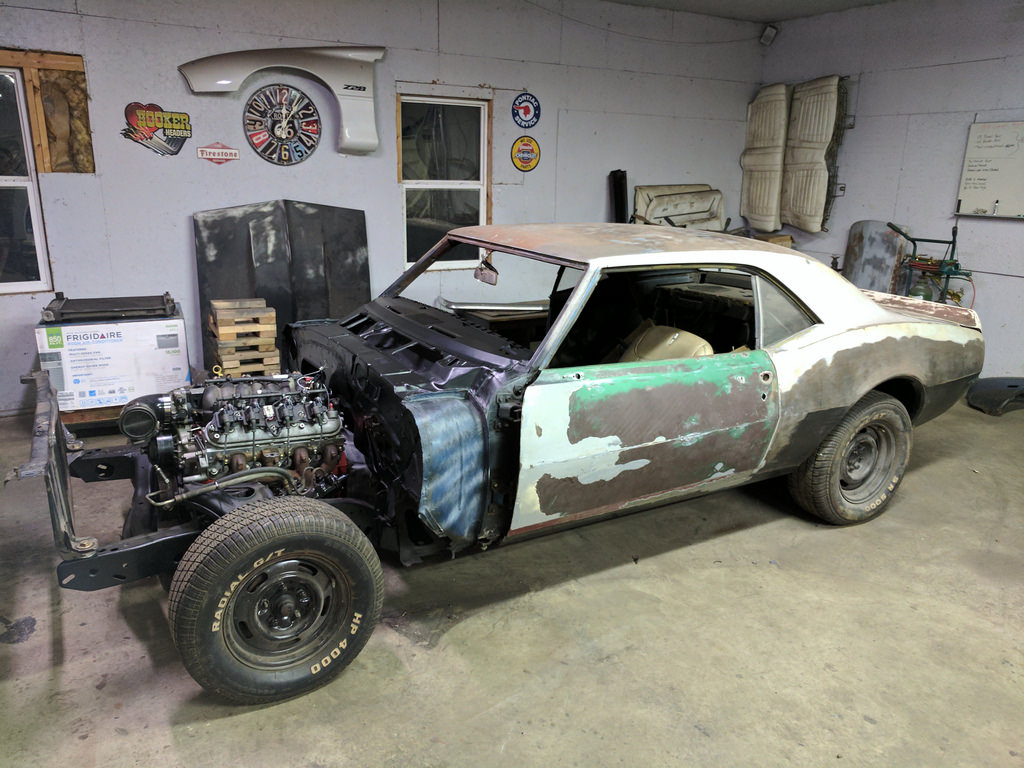
I got a few hours in the garage last night, and got to work finishing up the crossmember. I used my flap disk to smooth off the welding spatter, sharp edges and smooth out any uneven welds. I also needed to add in a plate to seal off the section that I had to clearance for the T56 tail shaft. Once that was done, I painted everything with Rustoleum and topped with a gloss black enamel paint. They turned out really good, and I have been very happy with the results from the oil based paint. Time will tell how durable it is though. I hope to get some better pictures once it drys.
Notch for the 6 speed.
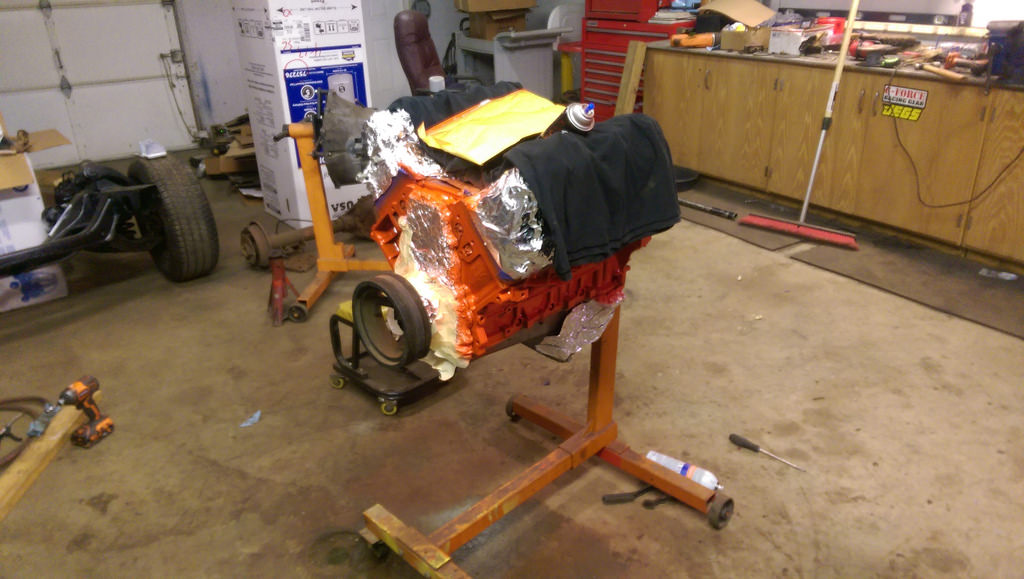
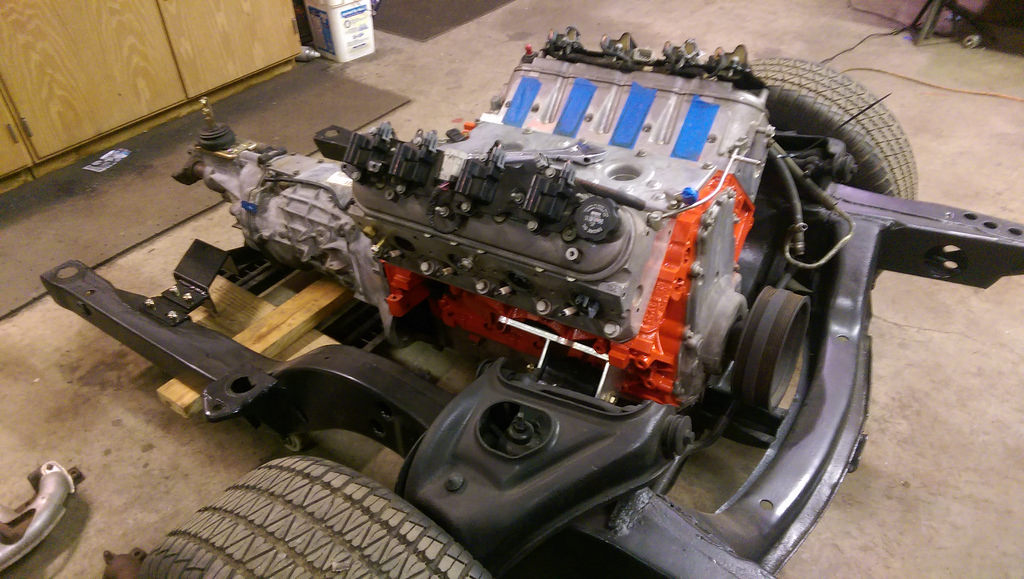
Moving on, I pulled the motor and trans to get one step closer to final installation. I cleaned up the engine block with Purple Power, and brake clean as it was really clean to begin with. Topped it off with a fresh coat of VHT Chevy Orange. I didn't want to paint the whole motor, but I thought the engine block would give a little throwback for the Camaro.
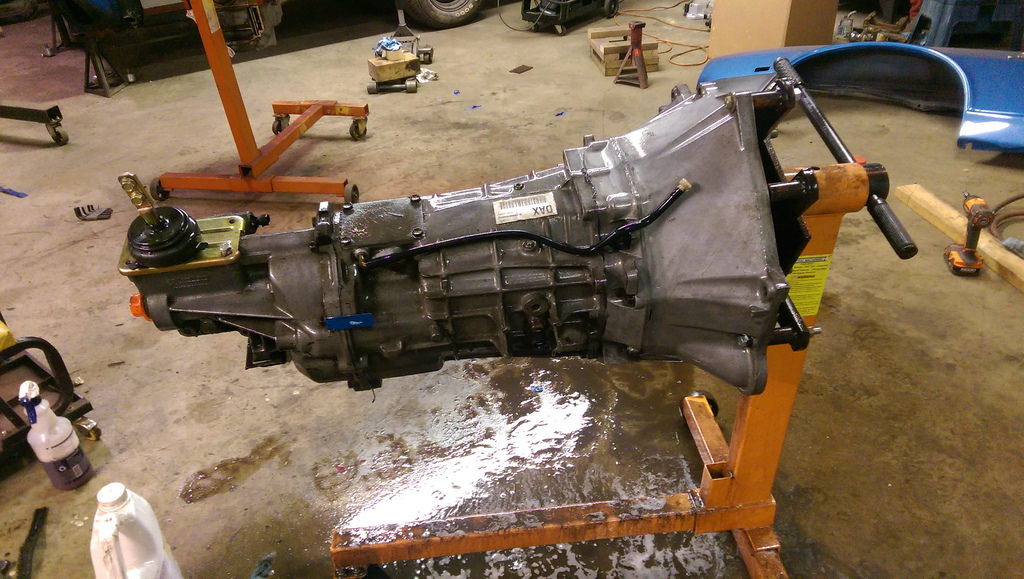
The T56 had a lot more grime on it. I sprayed it down with the purple power and gave it a good scrubbing, but still had some grease in tough to get areas. Going to wait and power wash it this week sometime, then give it a fresh coat of paint.

I'm almost done with all of the major metal work, and I am going to try my best to get it finished up and bolted back together before we sell our house. Once we sell it will likely be going into storage at my Dad's house and although he has a garage, I won't be able to just go out and work on it for a few hours after everyone goes to sleep like I do now. Hopefully the new place will have a garage.
Cheers,
Ryan
1955 Nomad project LC9, 4L80e, C5 brakes, Vision wheels
1968 Camaro 6.2 w/ LSA, TR6060-Magnum hybrid and etc SOLD
1976 T/A LS1 6 Speed, and etc. SOLD
Follow me on Instagram: ryeguy2006a
10-20-2016 #108
Registered User
- Join Date
- Sep 2009
- Posts
- 2,707
Real quick update. I couldn't help but unwrap my freshly painted motor and bolt some stuff on.
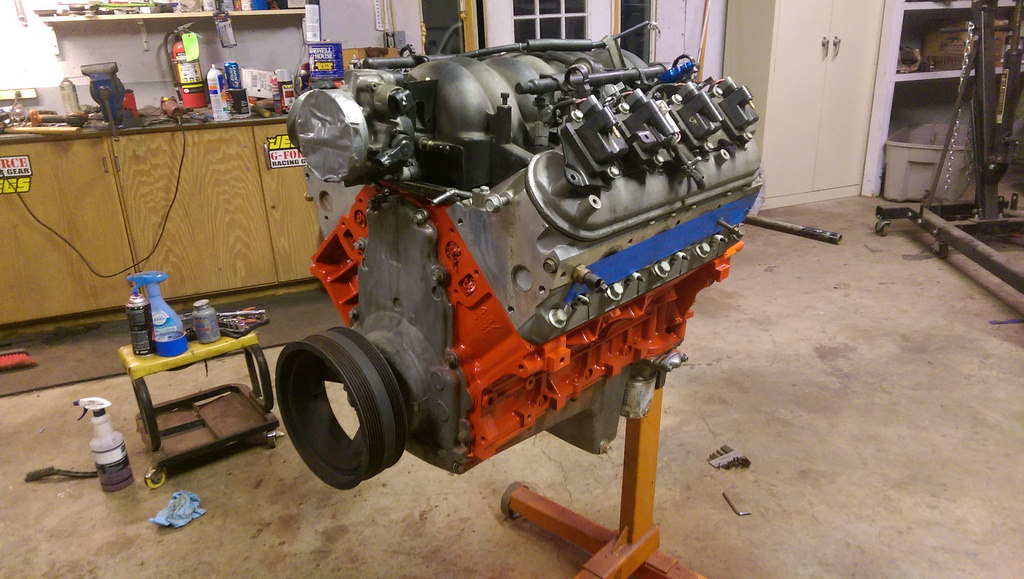
Love this shot.
1955 Nomad project LC9, 4L80e, C5 brakes, Vision wheels
1968 Camaro 6.2 w/ LSA, TR6060-Magnum hybrid and etc SOLD
1976 T/A LS1 6 Speed, and etc. SOLD
Follow me on Instagram: ryeguy2006a
10-24-2016 #109
Registered User
- Join Date
- Sep 2009
- Posts
- 2,707
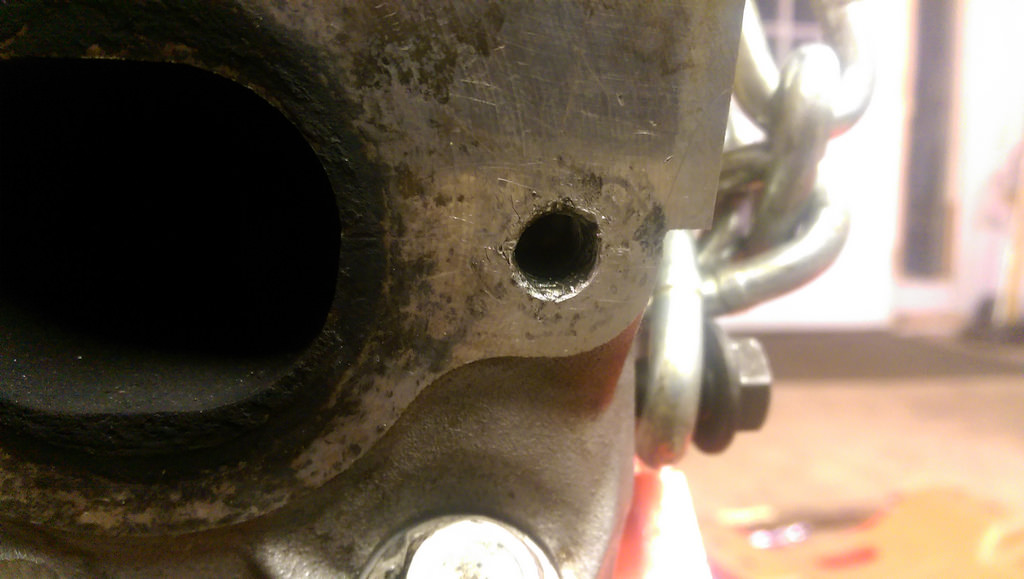
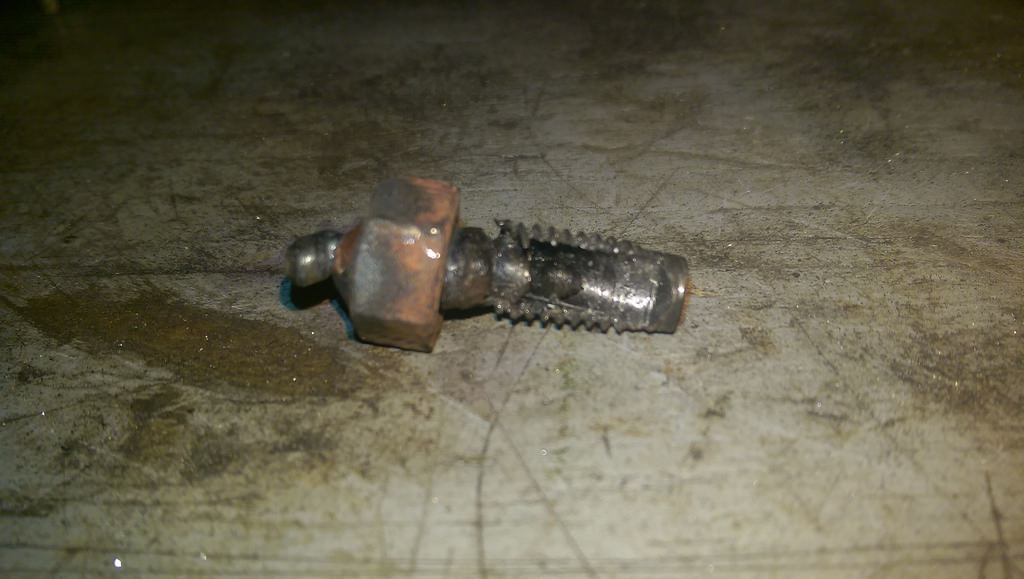
I started off this past weekend with every intent of getting the motor/trans fully assembled and final installed into my frame. I had also thought that I may be able to take a stab at getting the firewall prepped so I would be able to install the frame for good. Well, as luck would have it I didn't get anywhere close to that. I started outlining what needed to be done prior to installation of the engine/trans, and remembered that one of the cylinder heads had a broken exhaust manifold stud. After messing around with that for three hours, I finally was able to get it out. I had to drill the stud out, and what eventually got it out was when I welded a nut to the broken stud, and was able to unscrew it with a wrench. Not much to show for it other than the remains of the bolt.
After that was done, I focused on getting the clutch and flywheel installed. Before I could do that, I had to install the pilot bearing for the T56. Being that it was a truck motor it never had one, so it did make it easier to just install that rather then removing an old bearing too.

Flywheel with new ARP bolts. Note that I had a piece I cut off of an old flywheel and I used it to wedge between the motor and flywheel to torque the flywheel bolts.

Clutch and flywheel installed using ARP bolts, and I had to buy a clutch installation tool to center the clutch plate.
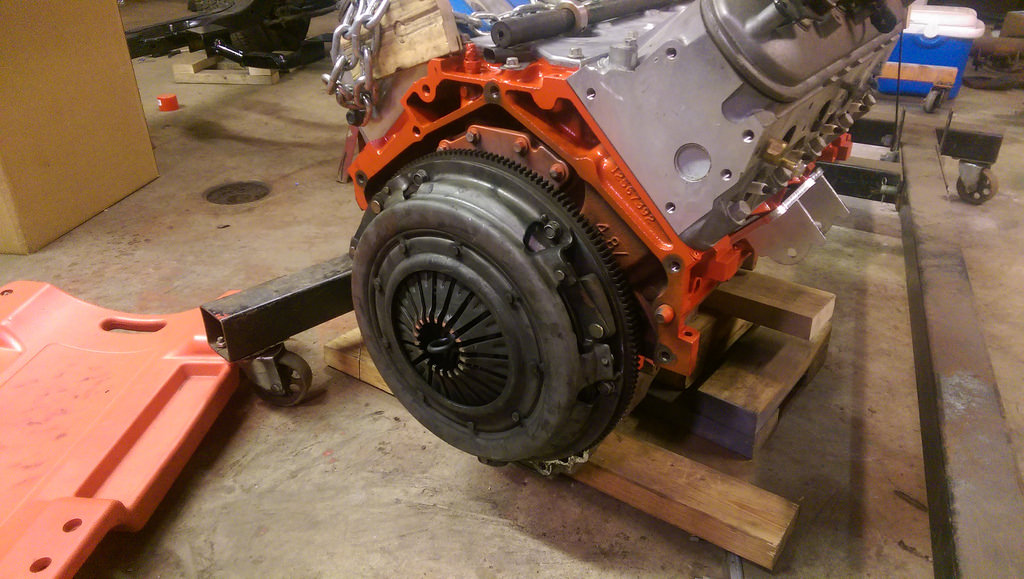
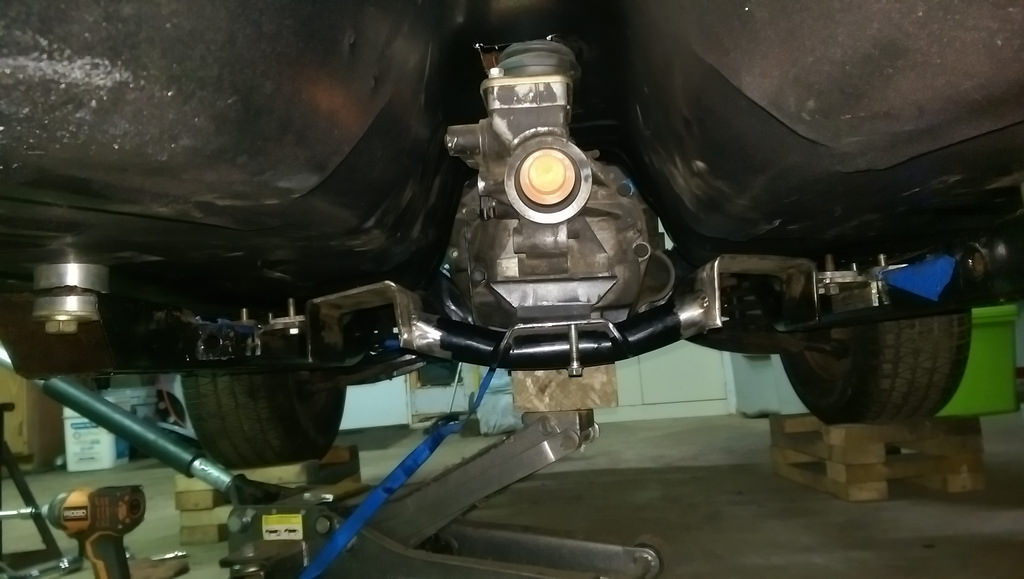
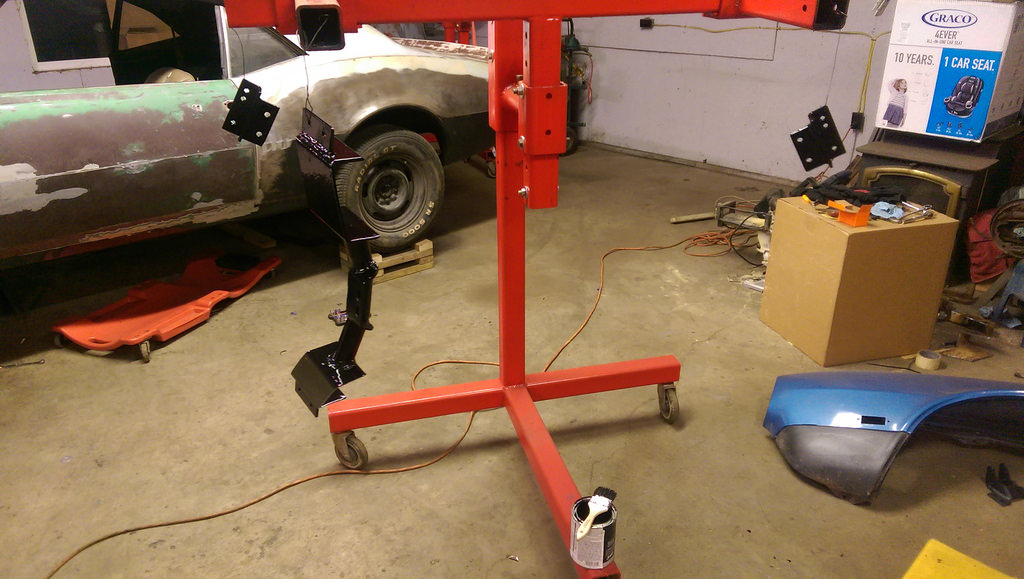
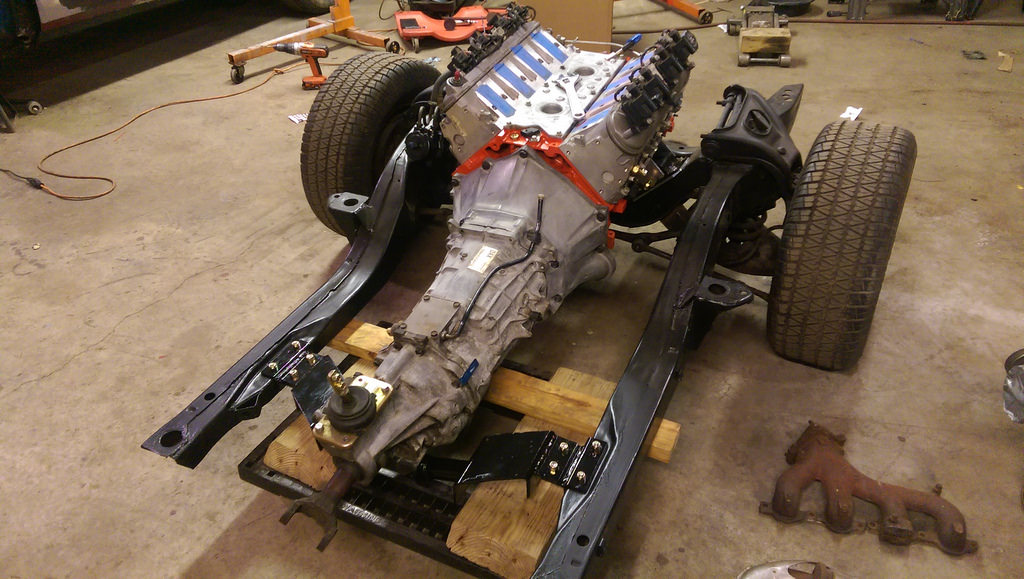
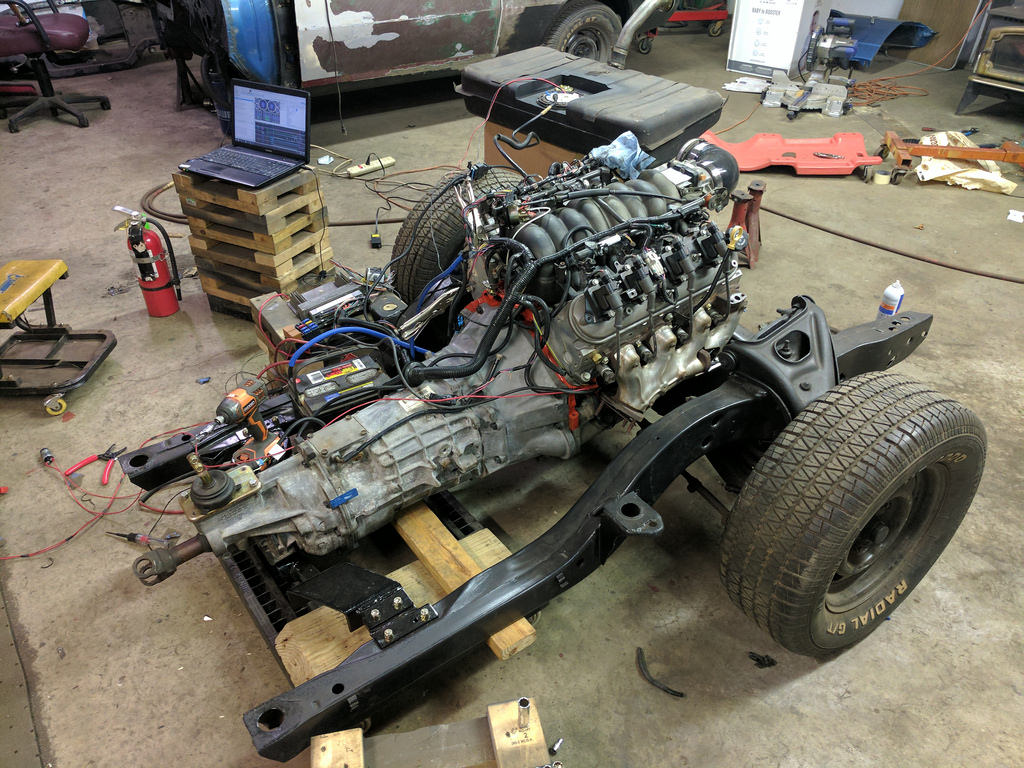
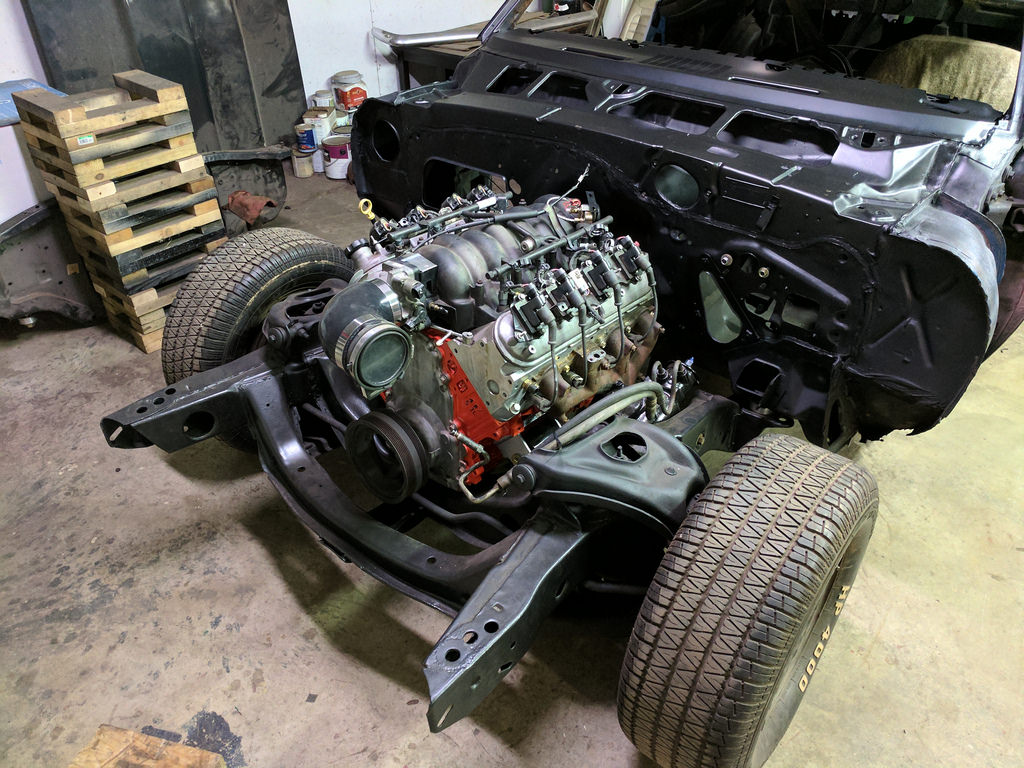
Once that was installed, I moved on to something different and got my crossmember bolted up. I'm really happy with the final results.
I also installed the new MAP plug in my LS1 intake.
I struggled for a while getting the input shaft into the pilot bearing, but it finally gave up and seated fully against the block. Hear is my finished motor/transmission. ready to install into the frame.

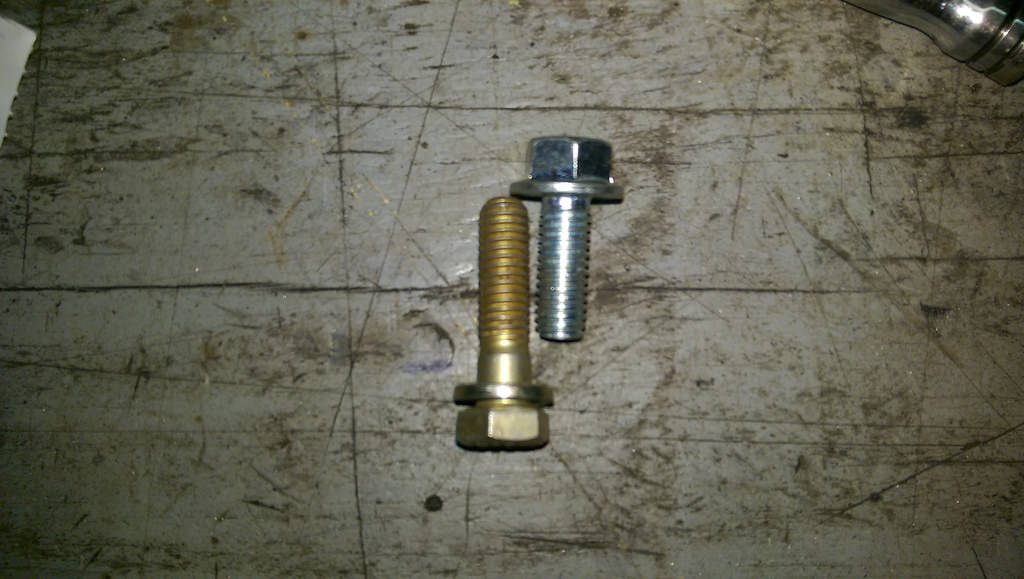
Now, as I was running out of time and started to install and torque the bolts for the frame mounted clamshells and adapter plates from Hooker and I started to have some issues. It appears that the front bolts were too short for my frame? Not sure if this was an over look by Hooker, or if when my motor was mounted in the frame, that it moved slightly. Either way, I had to get a bolt that was slightly longer to account for this. Luckily, I had some left over bolts from another project that were grade 8 and exactly the same length. I even had some lock washers. Just thought I would share for anyone else in this situation.
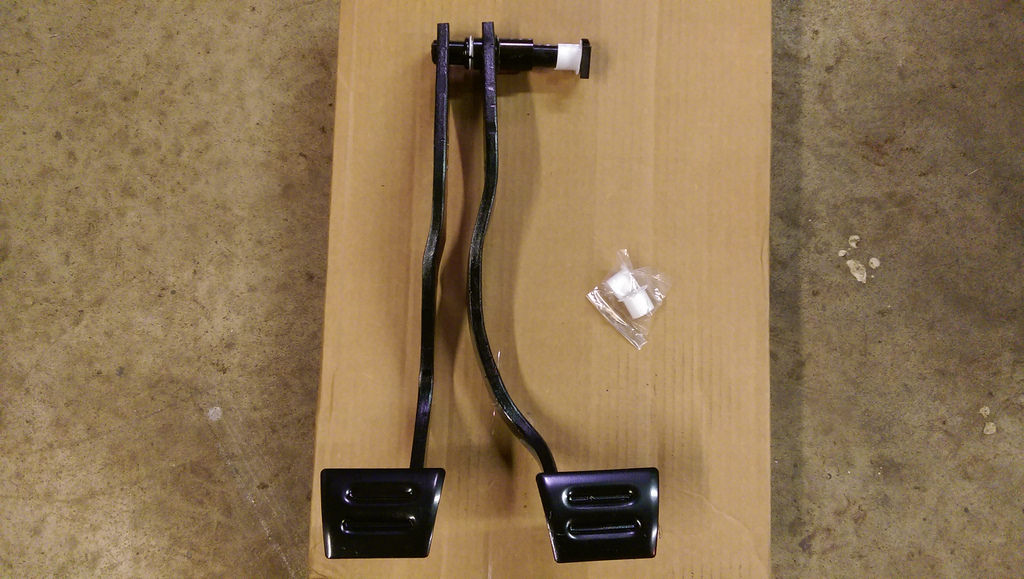
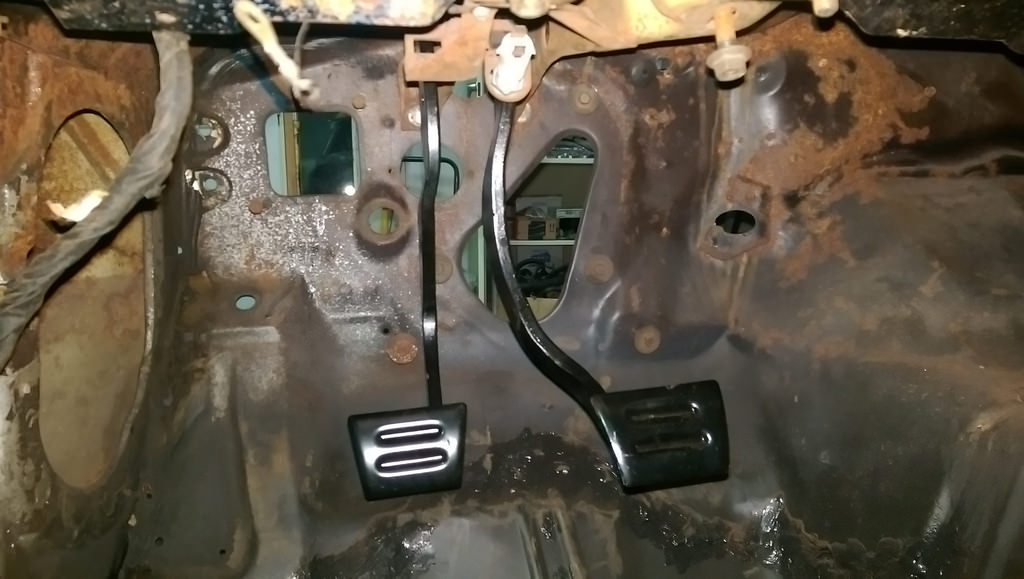
I ran out of time this weekend so I didn't get the final install of the engine done, but I did make an order on Thursday for some more parts to hopefully get me to a point where I can do a test fire of the motor! Really excited for that. I thought that I would give some kudos to Jeg's who had some extremely fast shipping. I ordered this 67-68 F-Body brake and clutch pedal kit from OER through Jeg's on Thursday afternoon, and I had them on my doorstep on Saturday afternoon! Very quick delivery! As for the pedals, they were a great price and should work perfectly. Still need to install them, but they had excellent reviews for fitment.
All for now,
Ryan
1955 Nomad project LC9, 4L80e, C5 brakes, Vision wheels
1968 Camaro 6.2 w/ LSA, TR6060-Magnum hybrid and etc SOLD
1976 T/A LS1 6 Speed, and etc. SOLD
Follow me on Instagram: ryeguy2006a
10-25-2016 #110
Registered User
- Join Date
- Sep 2009
- Posts
- 2,707
Worked out in the garage again tonight for a few hours. I got the motor/trans that much closer to installing into the car. My father-in-law is coming over to help me look at a small repair patch on the cowl today after work. Once that is done, I want to paint the firewall and install the frame. Then I can start bolting as much onto the car as I can before the move.
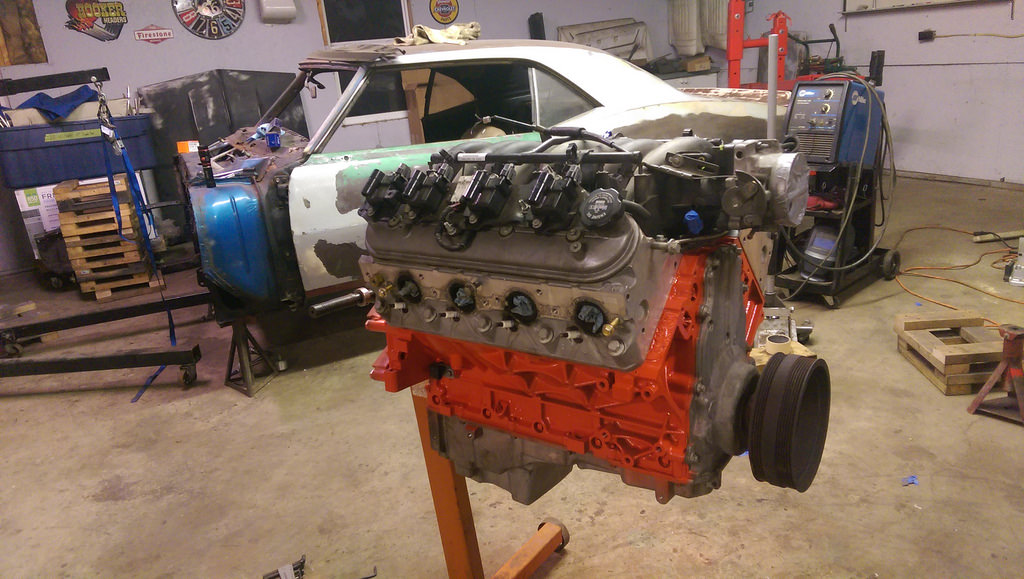
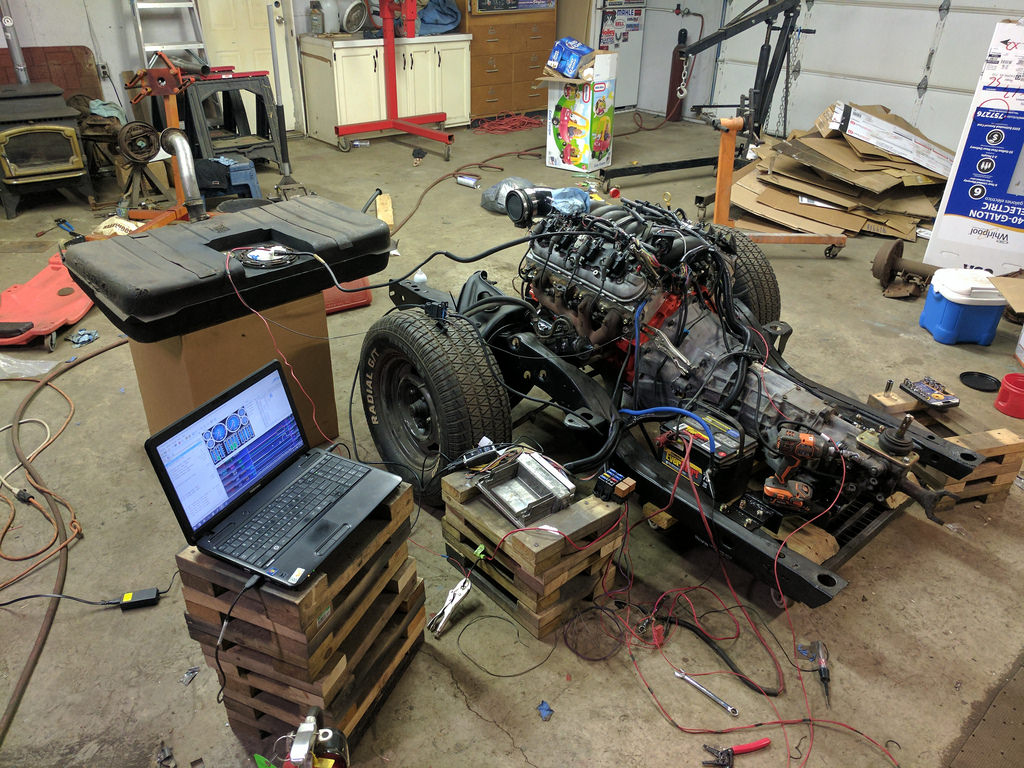
Frame with crossmember installed with all grade 8 hardware and Loctite 242 on all bolts.
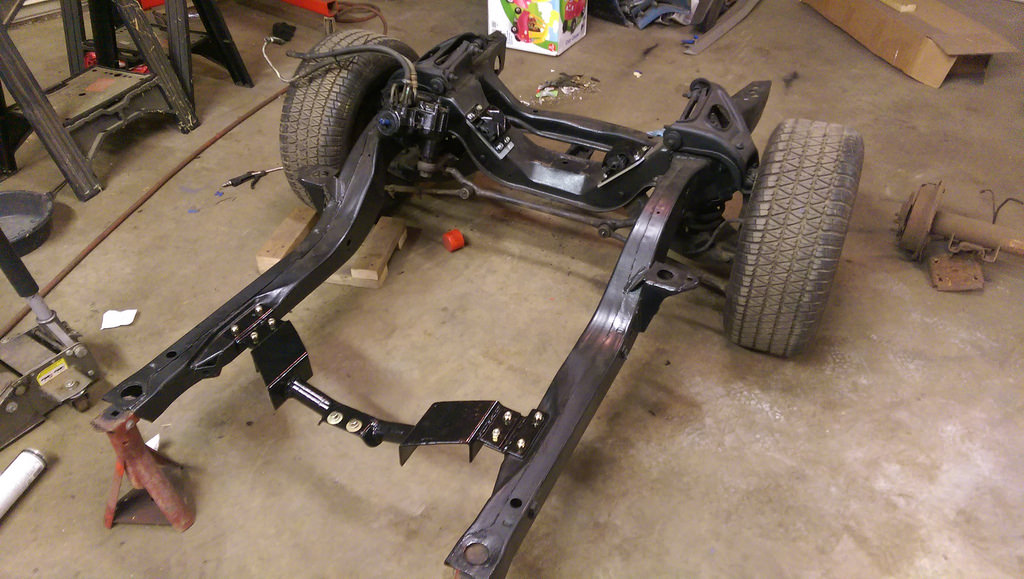
And after a not much persuasion, the driveline installed perfectly. I even put both of the motor mount bolts in by hand! Now that is good alignment.
Since I would like to see if this motor will fire and run, I wanted to get some sort of exhaust on there. I decided to go to the point of no return and cut off the O2 sensor boss and smooth off the driver's manifold (from 02 LS1 Camaro) and see if it would fit for me. And to my surprise, it actually cleared! The problem is it only clears by about 1/8". I think it should be enough, but does anyone have any feedback?
Hopefully that will hold ok. I preheated the manifold before I welded it, so hopefully it is a good weld. They are going to be a temporary exhaust until I buy the headers from Hooker.
De-burred inside with my carbide.
Now it was hard to get a good angle, but this is the clearance that I have for the steering box.
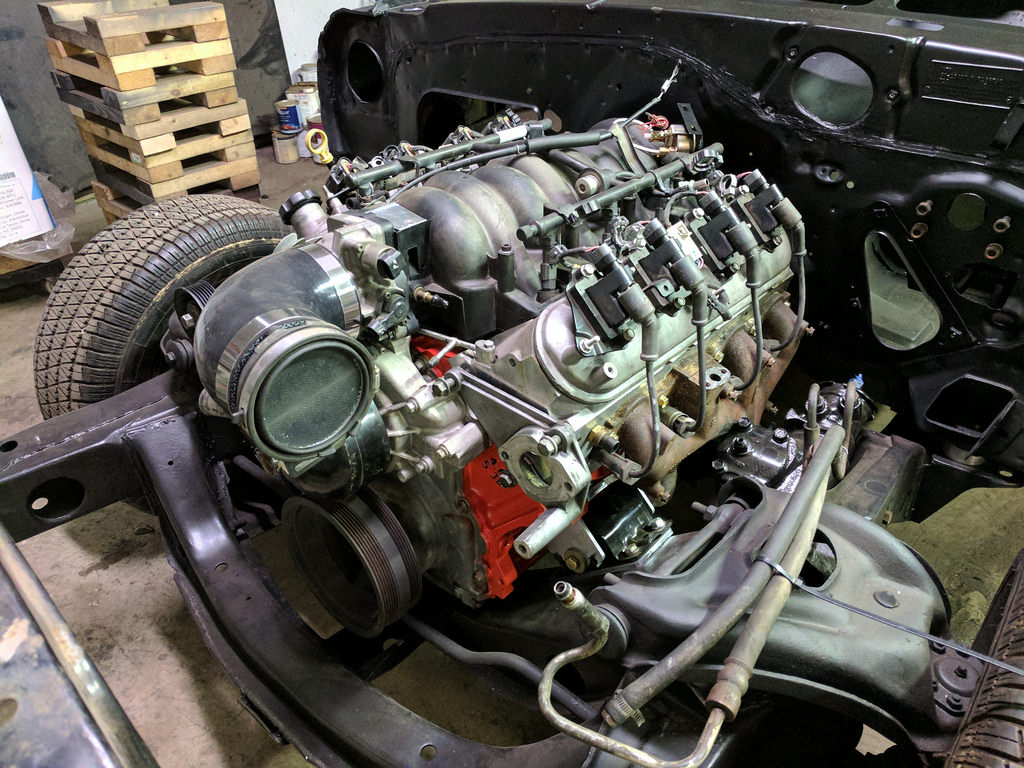
I cleaned up and installed the LS1 intake as well as the injectors and rails. Unfortunately, what I thought was a yellowish dust is actually a yellowish paint overspray that doesn't want to come off. It will eventually be replaced so I am not too concerned about it.

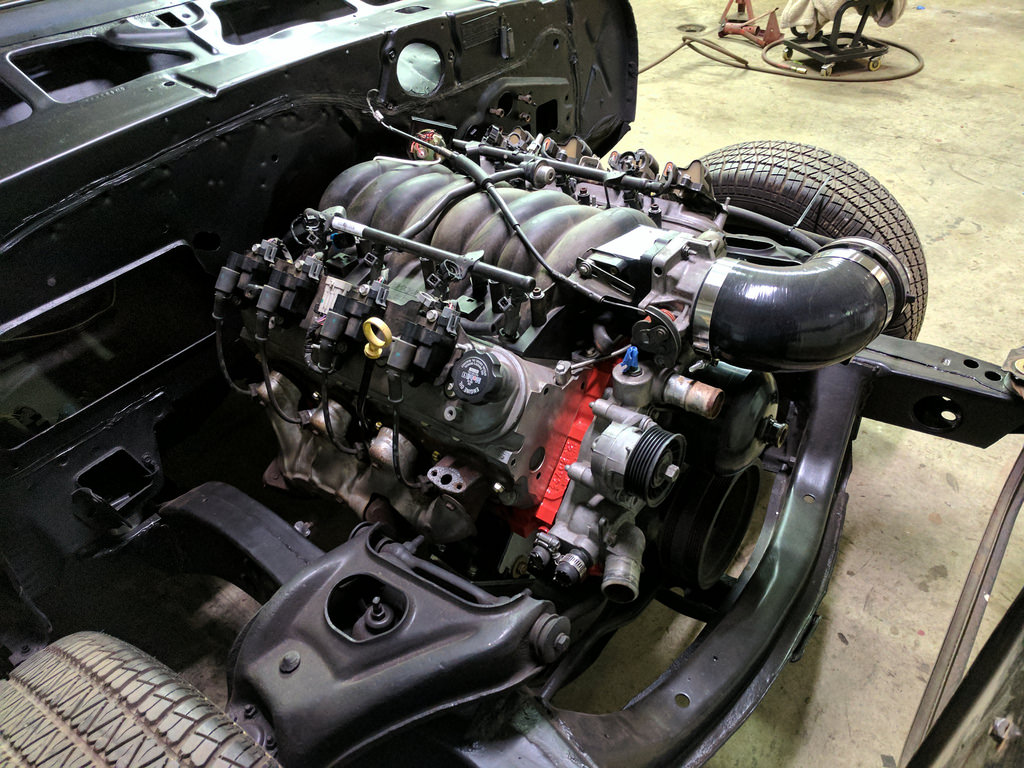
Test fit the wiring harness and ecu, and it will fit nicely. Just need to loom it up and tidy some longer wires.
And getting prepped for a test fire!

And to throw a random update, the pedals fit perfectly. It took me about 3 minutes to remove the auto pedal and swap out the manual pedals. I couldn't ask for a better price and fitment.
All for now. Hope to have the firewall repaired and possibly painted by tomorrow so that I can start to get this beast into fewer pieces. And possibly a video of the motor running by this weekend.
Cheers,
Ryan
1955 Nomad project LC9, 4L80e, C5 brakes, Vision wheels
1968 Camaro 6.2 w/ LSA, TR6060-Magnum hybrid and etc SOLD
1976 T/A LS1 6 Speed, and etc. SOLD
Follow me on Instagram: ryeguy2006a
10-25-2016 #111
Registered User
- Join Date
- Mar 2015
- Posts
- 251
Where are you going to run the ECM? Looks good, cant wait to see it running.
2014 ZL1
10-25-2016 #112
Registered User
- Join Date
- Sep 2009
- Posts
- 2,707
I'm not 100% sure yet. I like the idea of the wiring being hidden and inside the cabin, but there are places to hide it inside the engine bay too.
1955 Nomad project LC9, 4L80e, C5 brakes, Vision wheels
1968 Camaro 6.2 w/ LSA, TR6060-Magnum hybrid and etc SOLD
1976 T/A LS1 6 Speed, and etc. SOLD
Follow me on Instagram: ryeguy2006a
10-26-2016 #113
Registered User
- Join Date
- Sep 2009
- Posts
- 2,707
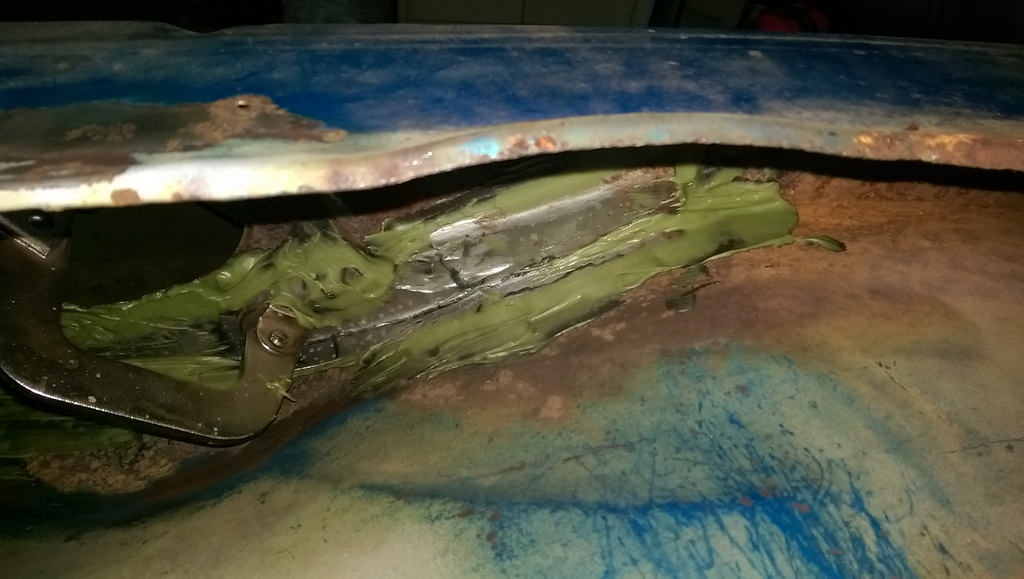
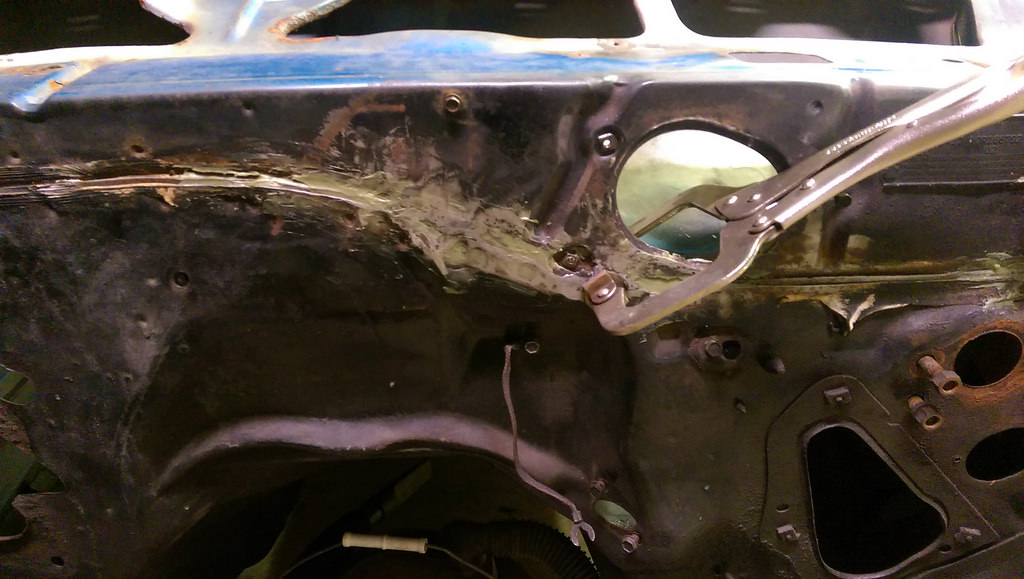
My father-in-law came over last night and helped me with the firewall. We prepped the metal clean and applied a product called Fusor along with a structural panel behind the firewall to brace and seal where the panels had rusted. I honestly wasn't sure how to approach this panel, as it was a very strange place to see rust. I am really happy with this repair as it was a much safer alternative to cutting and welding out the panels. Once that has 24 hours to cure, I am going to go over everything with the Rustoleum paint in the inside of the cowl. Then I want to seam seal inside to prevent that from happening again.
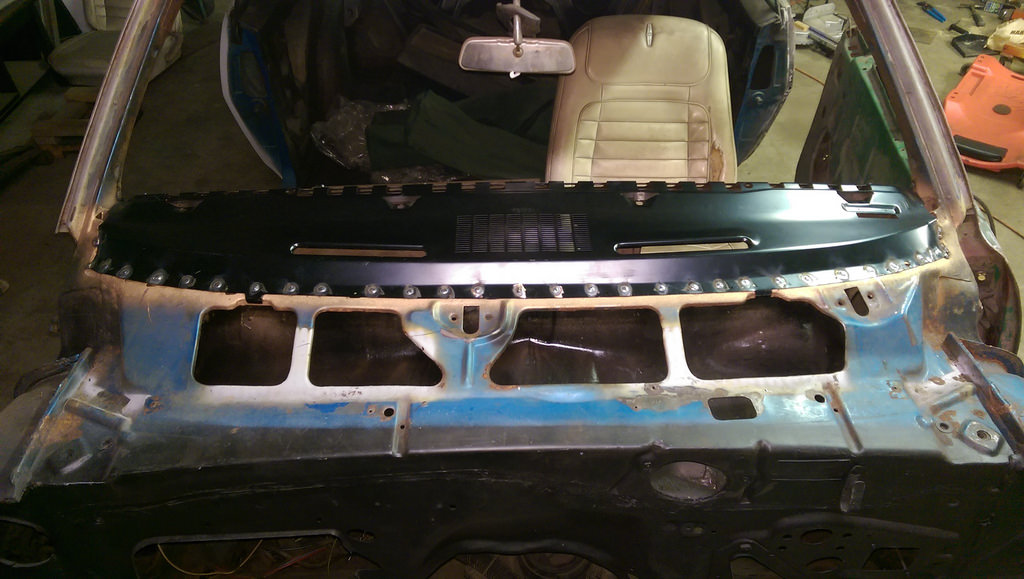
While he was prepping that I was helping with the firewall, I was cleaning up my bench and putting tools away. I have been scrambling to get everything done and leaving all of my tools out, so it has gotten very crazy. Once I was done with that, I cut and trimmed the shifter opening for the shift lever. I made sure to mark off when I did the last test fitment a few weeks ago when I was building my crossmember.
I have been working flat out for the last 5 days and any spare time that I have has been working on this car. I need a few days to recover, and then hopefully I can prep and paint the firewall Friday night. Once that is finished, I can bolt down my sub-frame for hopefully the last time and start bolting doors, fenders, hood, etc so that it is in as few pieces as possible for the move.
Ryan
1955 Nomad project LC9, 4L80e, C5 brakes, Vision wheels
1968 Camaro 6.2 w/ LSA, TR6060-Magnum hybrid and etc SOLD
1976 T/A LS1 6 Speed, and etc. SOLD
Follow me on Instagram: ryeguy2006a
10-31-2016 #114
Registered User
- Join Date
- Sep 2009
- Posts
- 2,707
The goal of the weekend was to get as close to finishing the firewall/cowl/dash as possible. I mostly accomplished it, but am lacking some paint. Last week I worked to get the cowl repaired and now that is done and it was time to strip down the firewall and get it prepped for final paint. Here is what I started with:
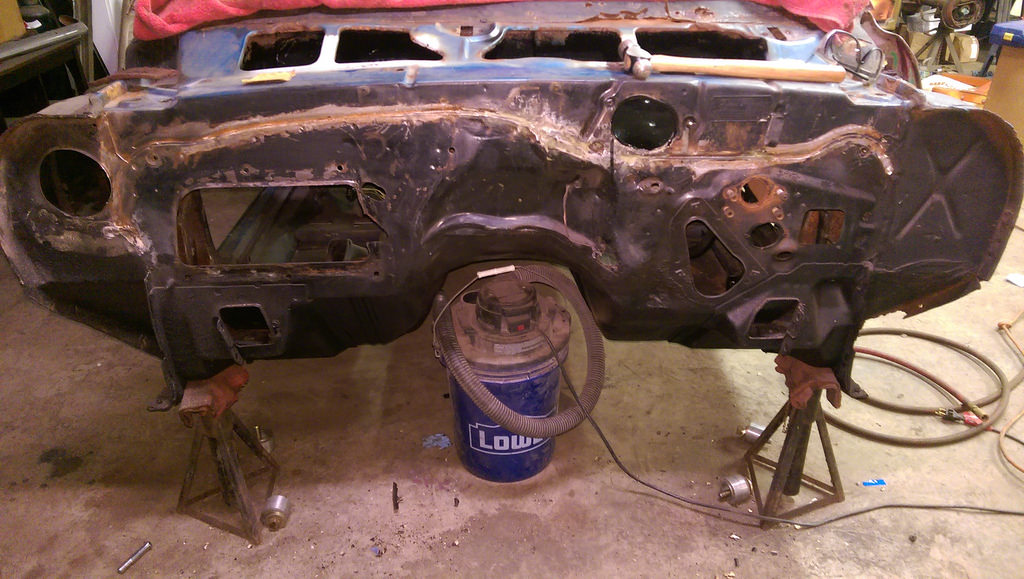
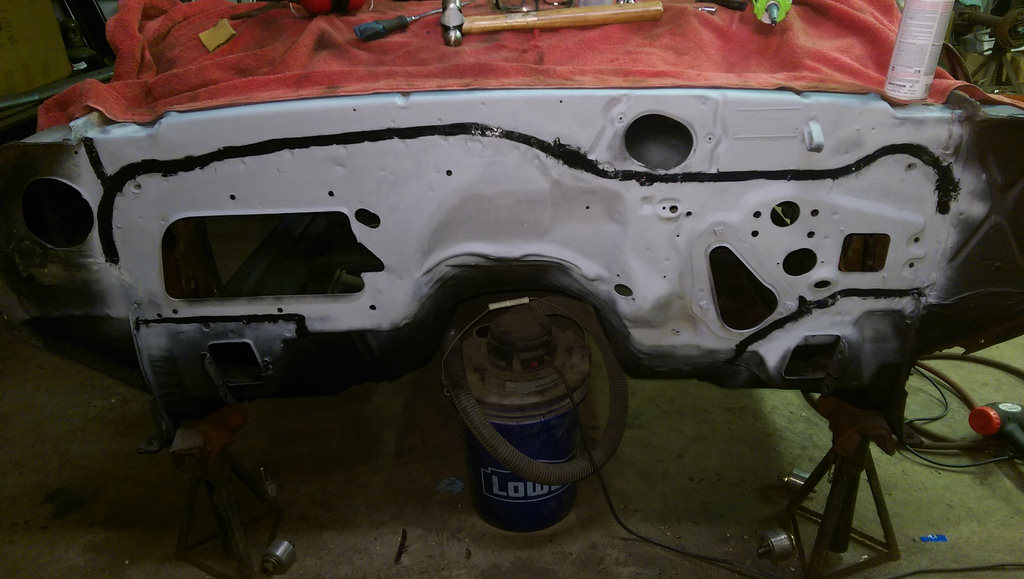
Stripped down, primed and a fresh bead of seam sealer. I was really happy with how closely it resembled the original look. Which is what I was going for. I used a paint brush about 3/4" wide, and I cut down the bristles to about 1/2" long.
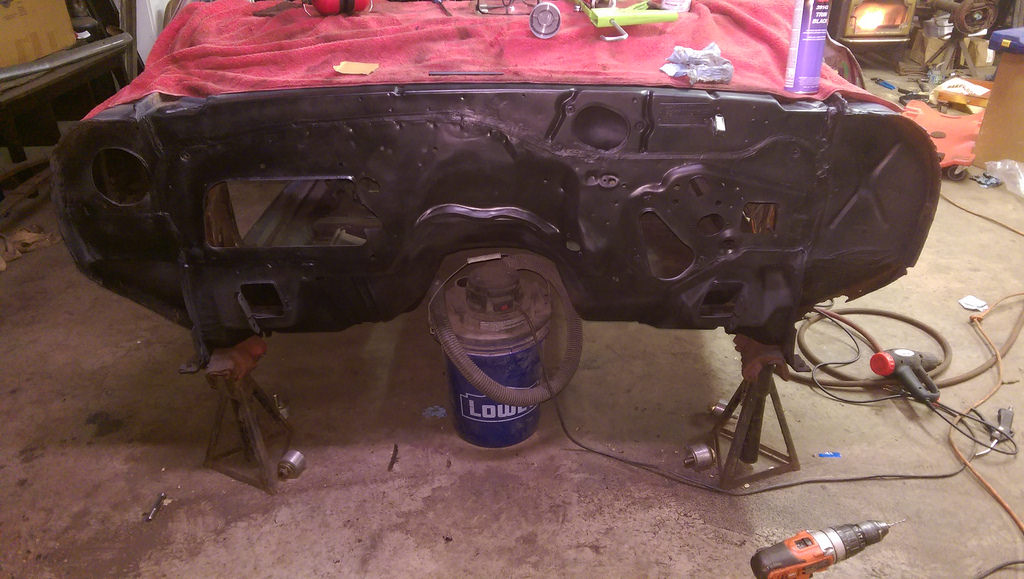
It was tough lighting, but here is the best I could do for a picture. I want to give it a few more coats when I am done with the dash, but here's the general idea. I'm also toying with the idea of filling in some of the indents with body filler for a slightly cleaner look.
Then the part I was dreading... Rusted dash board. Here is what I started with.
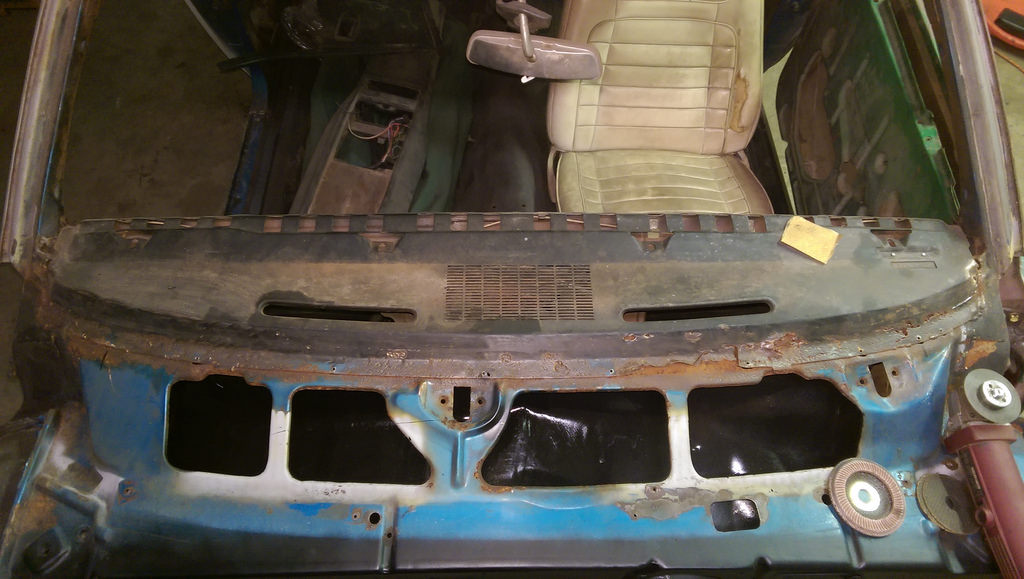
And what I found. As much as this car was rusty, for once I was pleasantly surprised as the panel was in much better shape than I thought. It was solid enough to clean up and treat for rust as is without any patch panels.
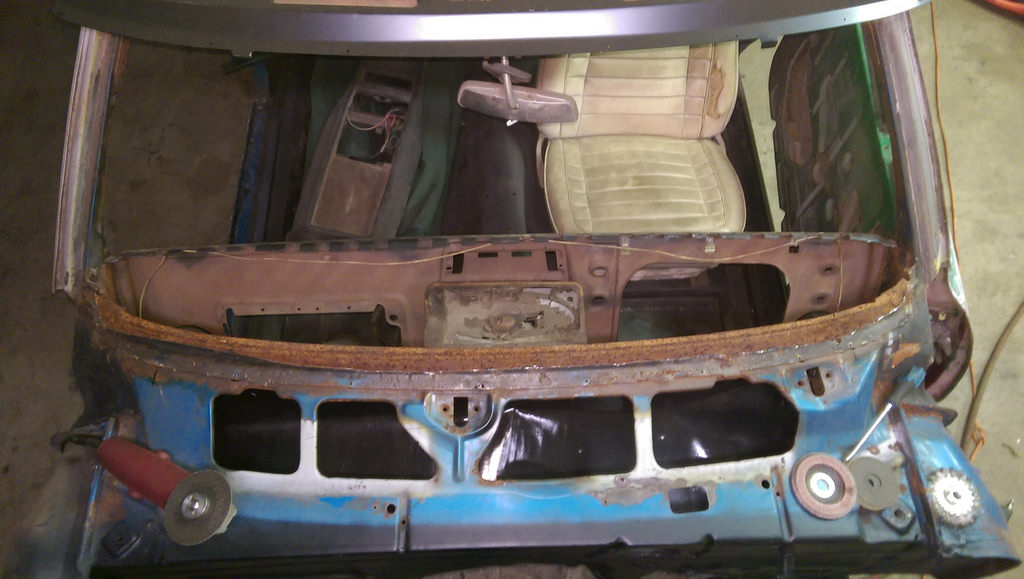
Applied weld through primer, and test fit.
After I drilled my holes to spot weld the panel to, I thought I should probably test fit the dash board to make sure it all fits correctly. GLAD I DID. If I wouldn't have done that the gap would have been too much on the interior where it bolts together. So if anyone is doing this for a first gen car, make sure to test fit multiple times. It took only a few extra minutes, but was worth it in the long run. Wouldn't want to re-do that.
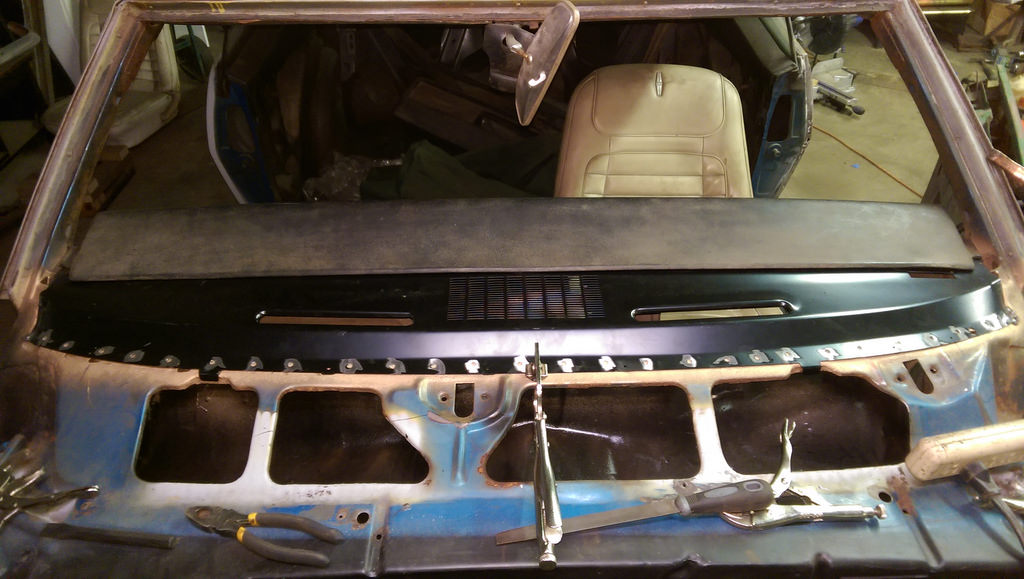
And where I left for the night.
I basically need to scuff up the dash, cowl, and firewall and will spray the entire thing with SEM trim black. I was really happy with the results on my 76 T/A and it still looks great 5 years later.
Cheers,
Ryan
1955 Nomad project LC9, 4L80e, C5 brakes, Vision wheels
1968 Camaro 6.2 w/ LSA, TR6060-Magnum hybrid and etc SOLD
1976 T/A LS1 6 Speed, and etc. SOLD
Follow me on Instagram: ryeguy2006a
11-07-2016 #115
Registered User
- Join Date
- Sep 2009
- Posts
- 2,707
Lots of good news with the latest progress update. After working so hard towards getting the engine to fire, I realized that my starter was junk. The solenoid stud was broken, and was no good... So after making a few phone calls my buddy had one from an LS1 that he said I could borrow until I get a new one. There were so many unknown variables about this engine, so I really wanted to verify that it was in working order before I bolted the frame down and started putting metal around it.
Here we are minutes before the first start up!
And the moment I have been waiting anxiously for...
(click the picture)
https://www.flickr.com/gp/98271343@N03/A0W12C
It came right to life. Notice, that I had my oil pressure gauge and HP Tuners hooked up so that I could monitor things. Thrilled that the engine came to life and that all of my wiring was correct when I repaired the harness. I made sure to log the first start up, and I was able to review the data afterwards. I didn't see anything out of the ordinary, so I feel that with the info I have it is a healthy motor. No drips, or weird sounds, and the computer data checked out. Overall it was a success and a huge motivator!
After that, I immediately tore the harness off, and packed it away in preparation for move. I'm not going to get to the wiring for a long time, so that has to go into a box for a while.
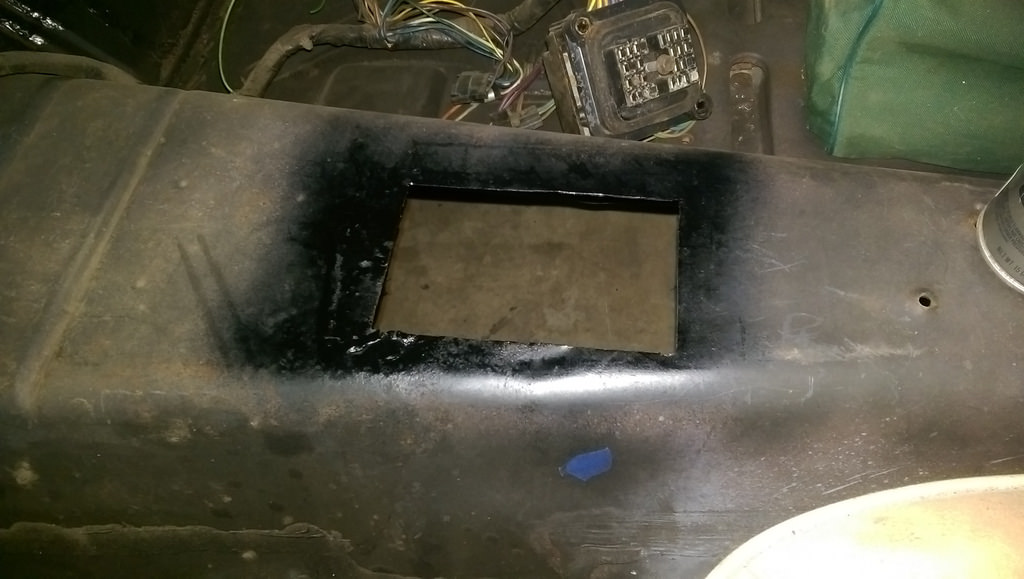
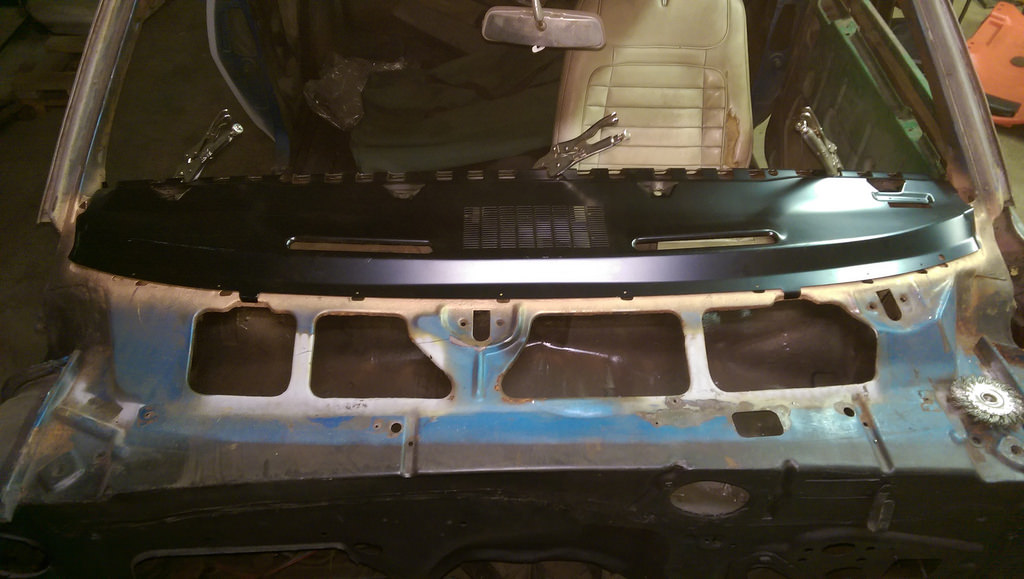
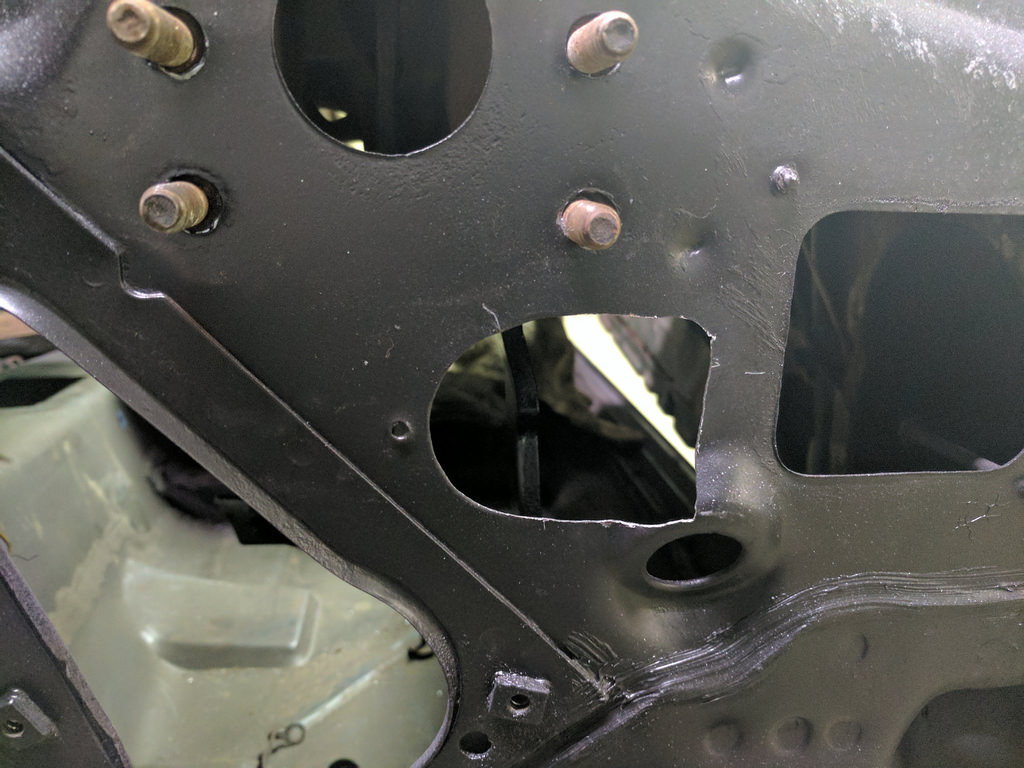
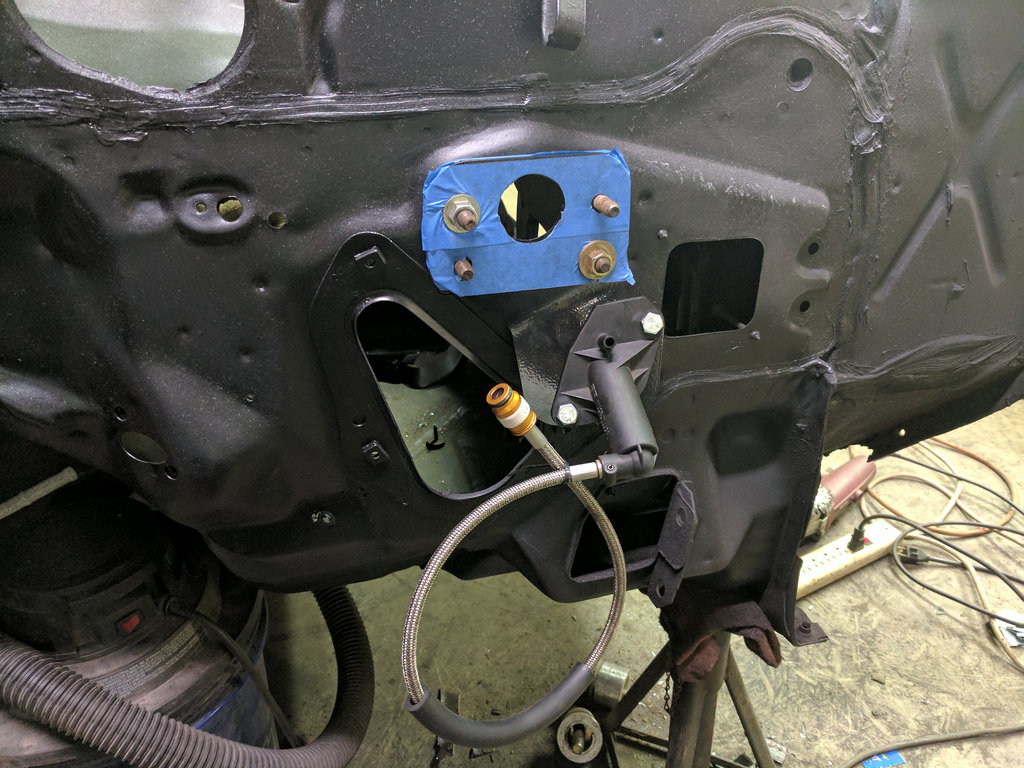
Changing gears, I had to get my firewall ready for a final coat of paint. I had to slightly enlarge the factory clutch opening to fit the 4th gen clutch hydraulic MC.
And with the bracket and MC in place. Everything fits like a glove.
Then, I prepped the firewall for a final coat of paint. I used a product called Trim Black by Transtar, which is nearly identical to SEM Trim Black which I have used in the past. I wasn't sure how it would turn out as I haven't used that before, but I was extremely pleased with the final results.
Prepped the cowl
After that dried, I applied a few more coats Sunday morning. This is what I found in the afternoon.
That's all for this weekend's progress. Short and sweet. Over the next week I hope to get the car back together into a roller and bolt as many pieces on it as I can. Then it can go into temporary storage until we close on the new house. Probably won't have many updates as we will be making the house ours; paint, decorations, tables, etc. Basically earning my keep haha.
1955 Nomad project LC9, 4L80e, C5 brakes, Vision wheels
1968 Camaro 6.2 w/ LSA, TR6060-Magnum hybrid and etc SOLD
1976 T/A LS1 6 Speed, and etc. SOLD
Follow me on Instagram: ryeguy2006a
11-11-2016 #116
Registered User
- Join Date
- Sep 2009
- Posts
- 2,707
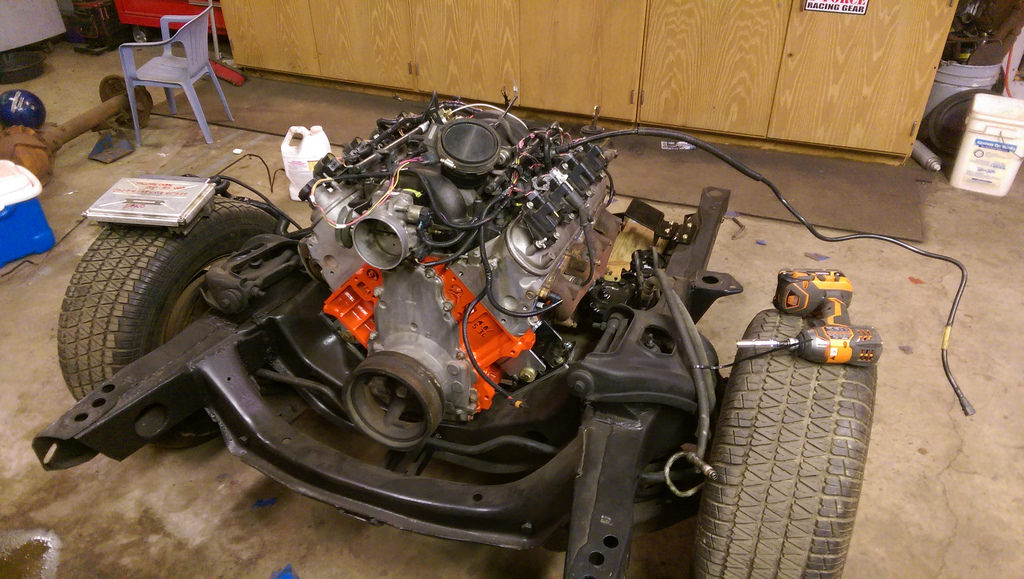
Now that I know the motor runs and the firewall is painted, I feel confident that I can bolt down the frame for good! I ran out a few nights ago and put the frame under the car. I snagged a few pictures, and I'm really happy that I went with the orange block/raw head combo. Looks great to me!
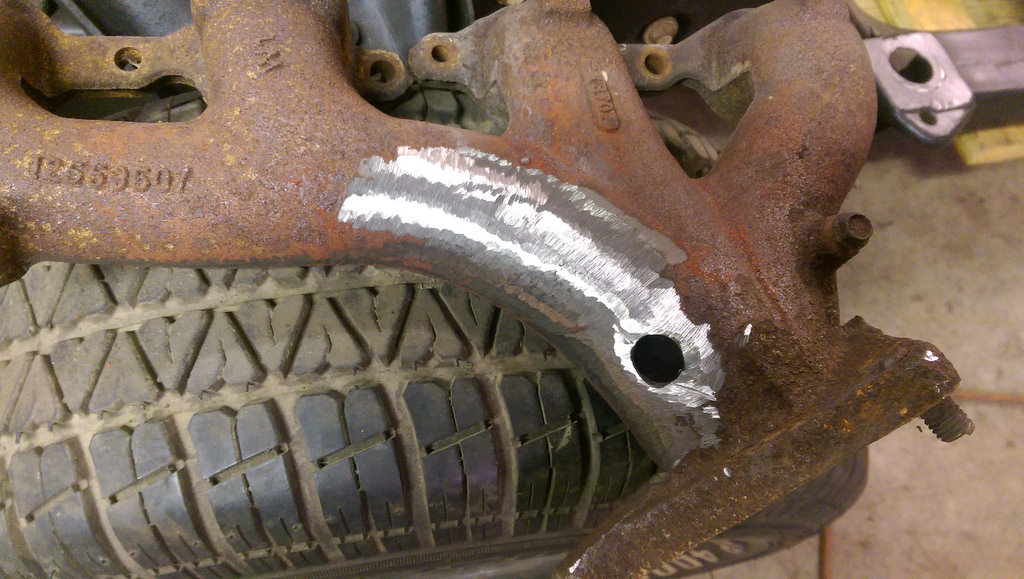
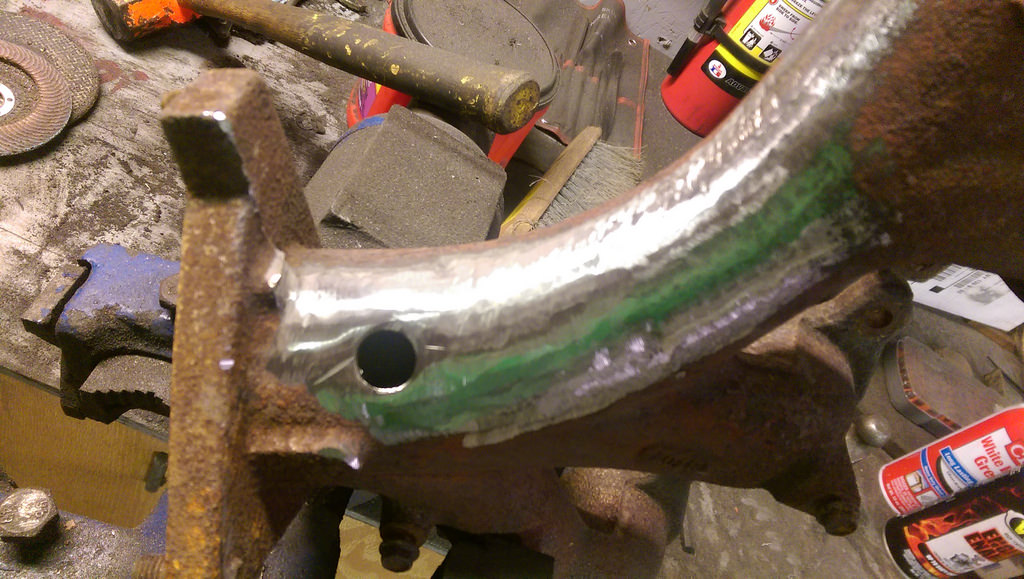
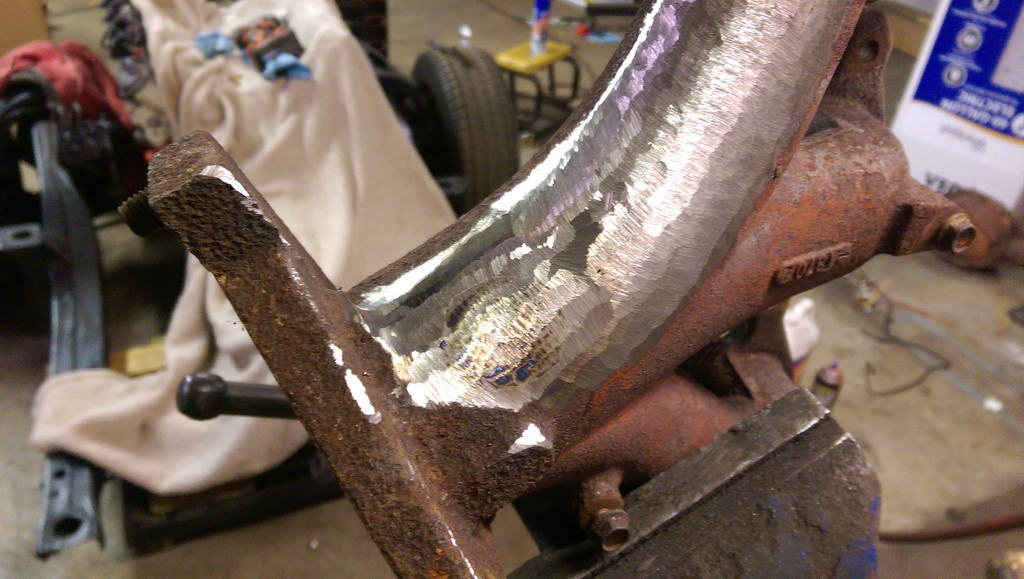
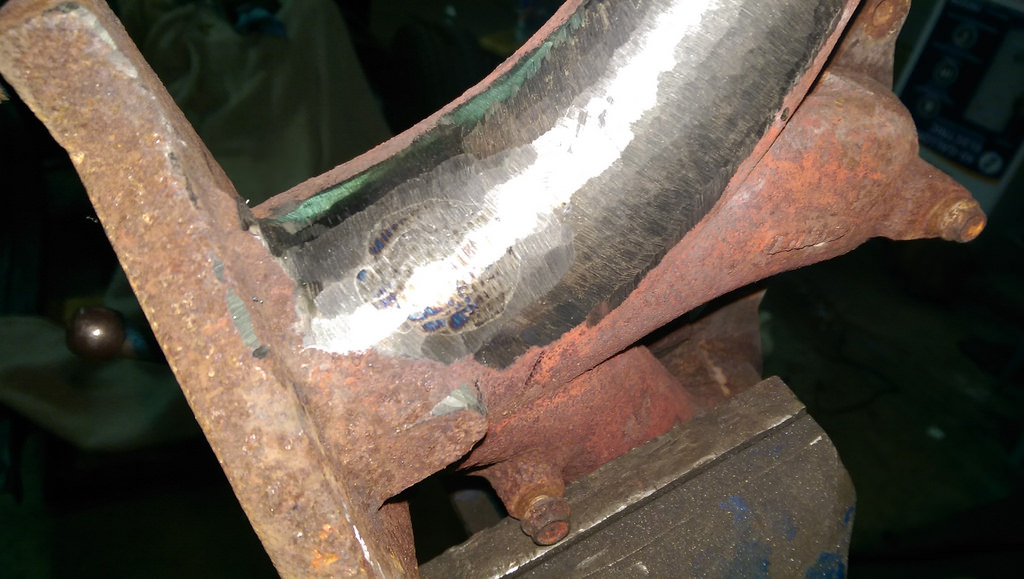
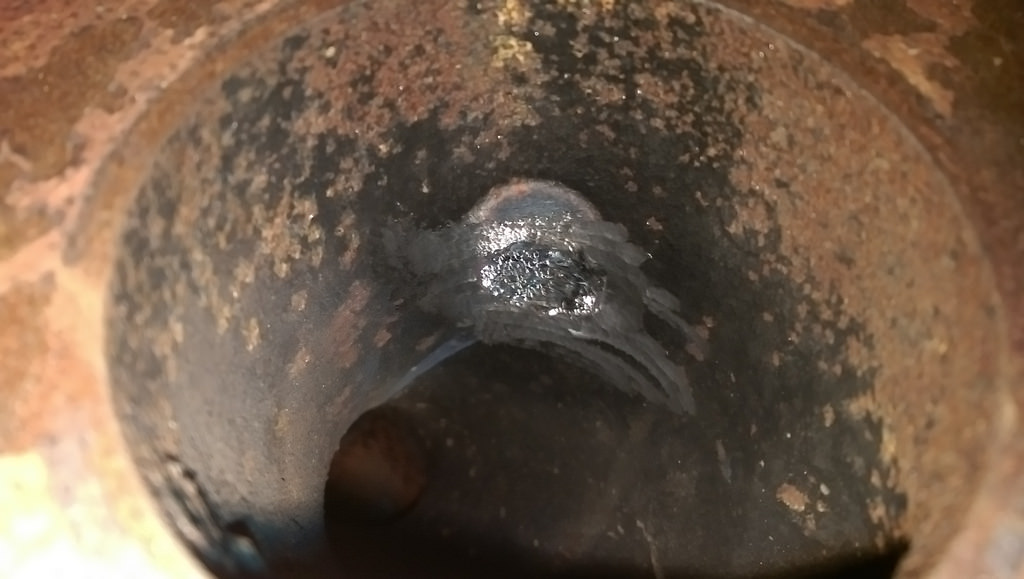
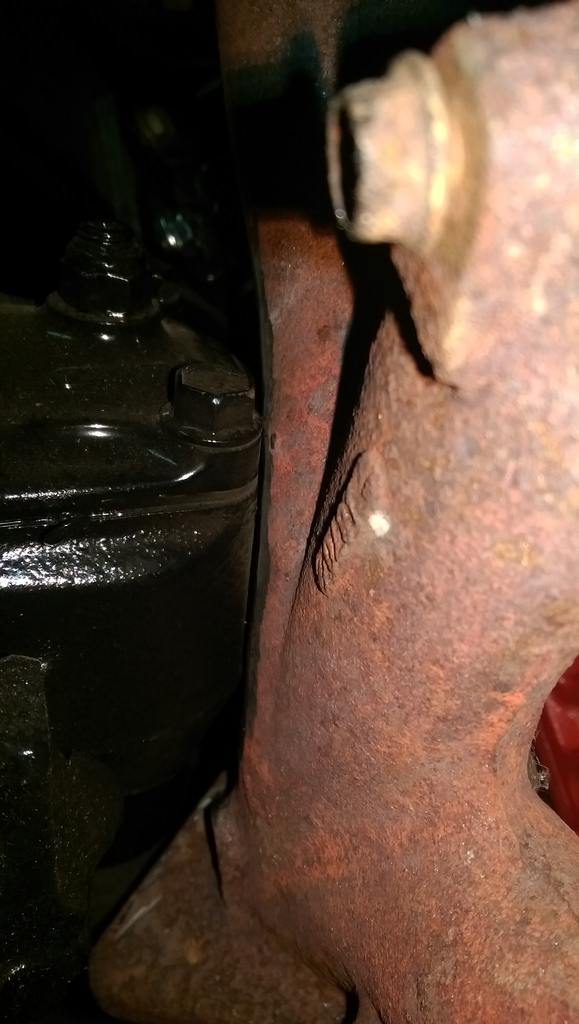
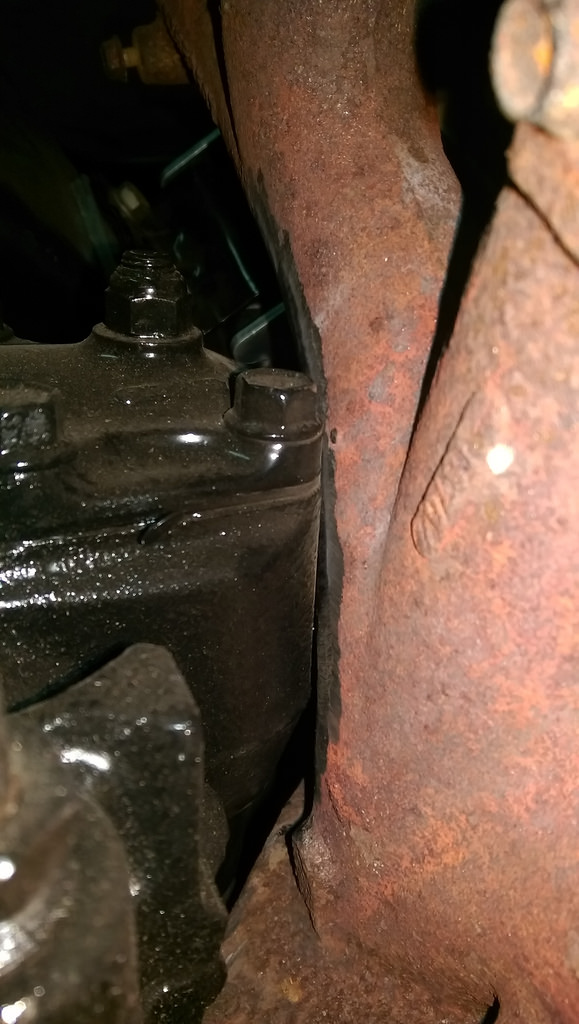
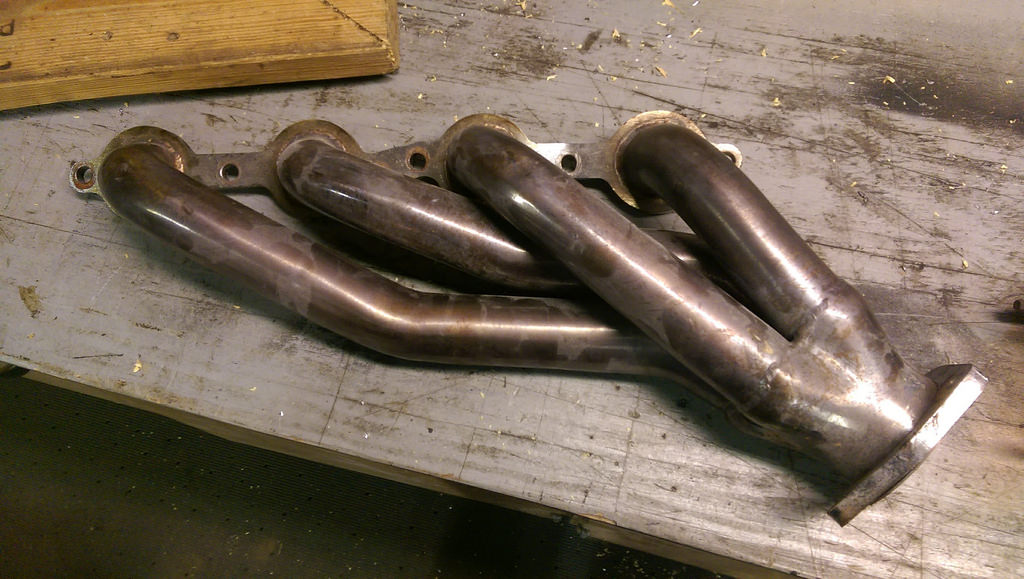
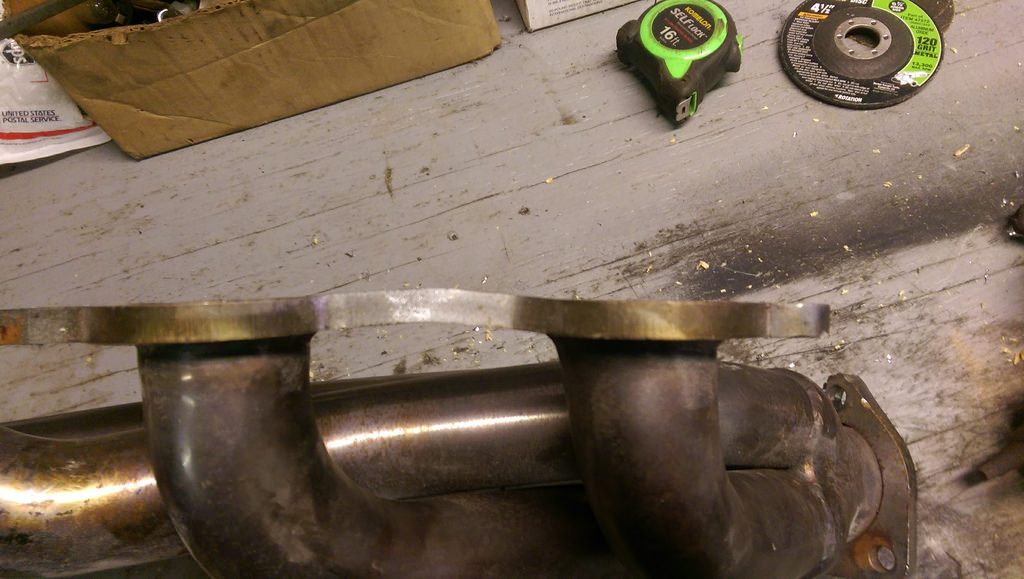
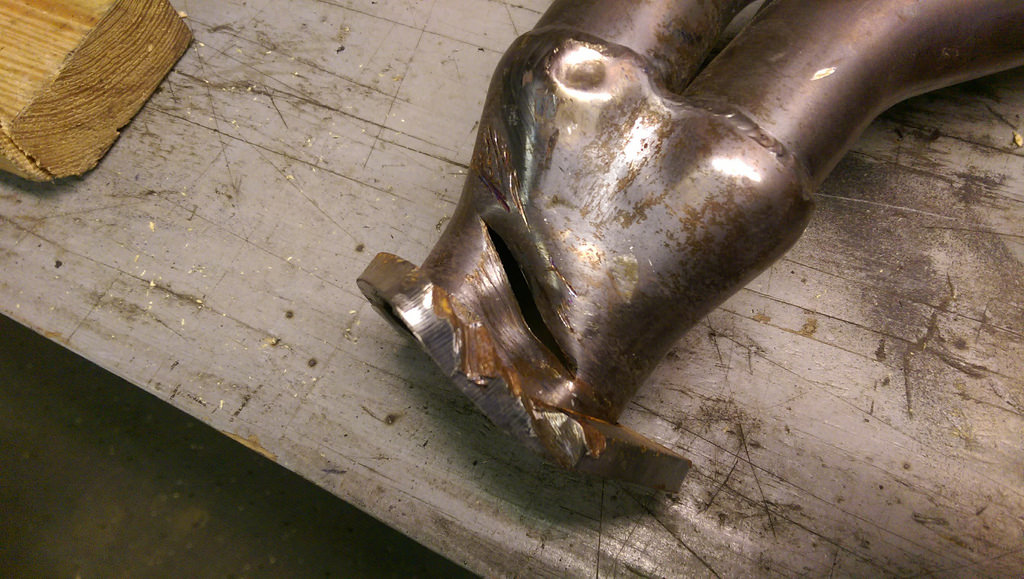
On another note, I was able to score some FREE shorty headers from the guy that I bought my 5.3 engine from. They were the ones that were on this engine when the transmission broke. The passenger side is unaffected, but the drivers side shows some carnage... I'm going to see if I can straighten out the flange on the driver's side with a press. Worst case, I can't use them and I am out no money.
Passenger side fits perfectly and clears everything.
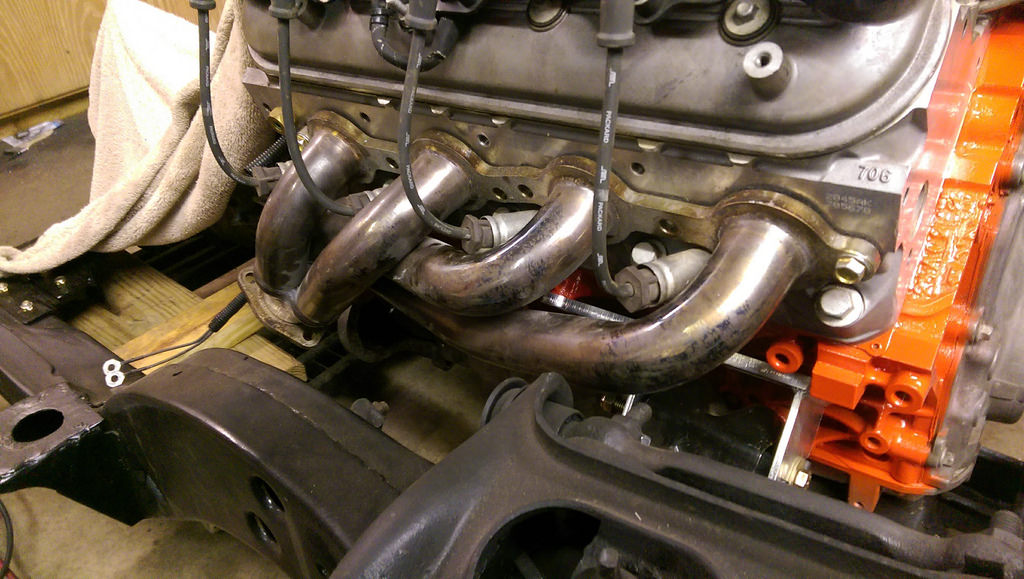
I didn't take any of the driver's side on the motor, but it does touch one primary tube. I think that if I can bend it slightly it would fit around the steering box.
Good
BAD...
All for now.
Ryan
1955 Nomad project LC9, 4L80e, C5 brakes, Vision wheels
1968 Camaro 6.2 w/ LSA, TR6060-Magnum hybrid and etc SOLD
1976 T/A LS1 6 Speed, and etc. SOLD
Follow me on Instagram: ryeguy2006a
11-12-2016 #117
Registered User
- Join Date
- Mar 2015
- Posts
- 251
Glad to see your got it fired up. What CAI set up you going with? Where did you get your silicon 90 deg elbow from?
2014 ZL1
11-13-2016 #118 Registered User
- Join Date
- Nov 2010
- Posts
- 1,387
Looks Good! You are staying on budget I see! I have a spintech side exit exhaust system if you are looking for a cheap way to so your exhaust and get great sound! But anyway great work!!! Keep at it!
68 Camaro RS twin turbo
https://www.pro-touring.com/threads/...d-Intent-V-2-0
1993 Toyota Supra 6768 Built Single Turbo
Slow Lifted Jeep No TURBO :(
Randal F
11-14-2016 #119
Registered User
- Join Date
- Sep 2009
- Posts
- 2,707
Thanks for the motivation! Not sure yet what I'm doing for a CAI. I will probably just run a filter off of the MAF for now. Then I can fabricate something cleaner at a later date. Or if I go with a turbo, it won't matter

I'm trying to spend my money where it counts. If there is something that I can do later such as headers or rear gears, I am going to let that take the back burner.
1955 Nomad project LC9, 4L80e, C5 brakes, Vision wheels
1968 Camaro 6.2 w/ LSA, TR6060-Magnum hybrid and etc SOLD
1976 T/A LS1 6 Speed, and etc. SOLD
Follow me on Instagram: ryeguy2006a
11-14-2016 #120 Registered User
- Join Date
- Nov 2006
- Location
- Ma.
- Posts
- 5,567
Keep plugging away at it! it's coming along nice.
Wayne
Car FINALLY home !!!!!! lol
Project FNQUIK https://www.pro-touring.com/showthre...ghlight=FNQUIK

 Reply With Quote


