

Results 61 to 80 of 808
-
07-20-2016 #61

 Registered User
- Join Date
- Dec 2008
- Location
- Detroit
- Posts
- 2,585

Nice build. I definitely admire the work you're putting in, I'm following......
Big dreams, small pockets....
Chris--
'72 Cutlass S LSA/T56 Magnum
Bowler Performance, Rushforth Wheels, ATS, Holley EFI, KORE3, Ridetech
Project Motor City Madness
-
07-31-2016 #62 Registered User
- Join Date
- Sep 2009
- Posts
- 2,707
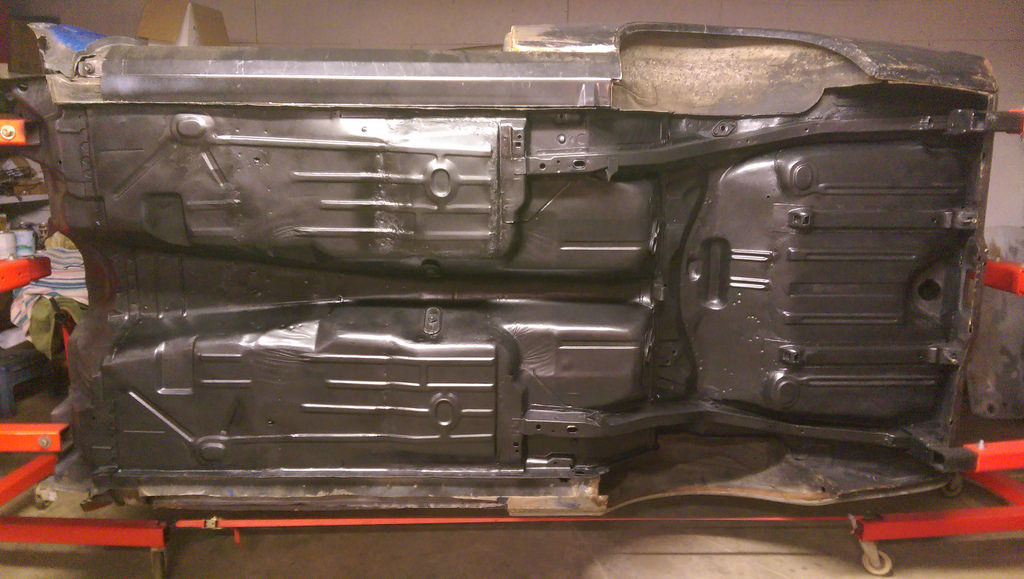
After some much needed vacation with the family, I have a few updates. I needed to get the car and the garage prepped for the next stage of the build. I spent the good part of my time in the garage just cleaning tools and putting them away. After I got that all done, I wanted to clean this shell as it has been through a lot of work over the past few months. I was so busy, I didn't take pictures when the car was outside. Here are some when I finished with the body and the frame.
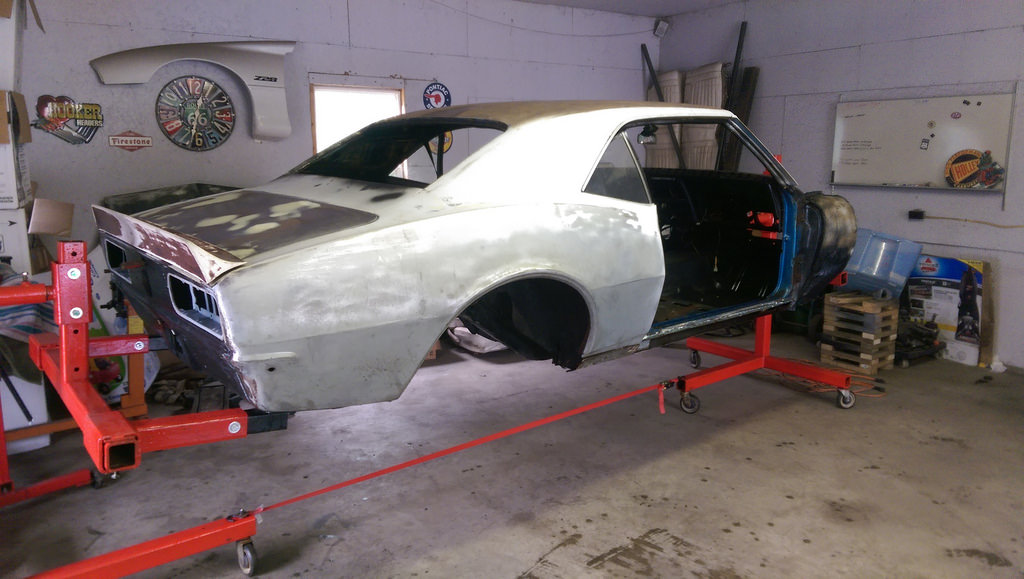

And I thought I would post this as it will likely get sanded off or covered up at some point. Here is some of the original paint in it's glossy and patina glory.
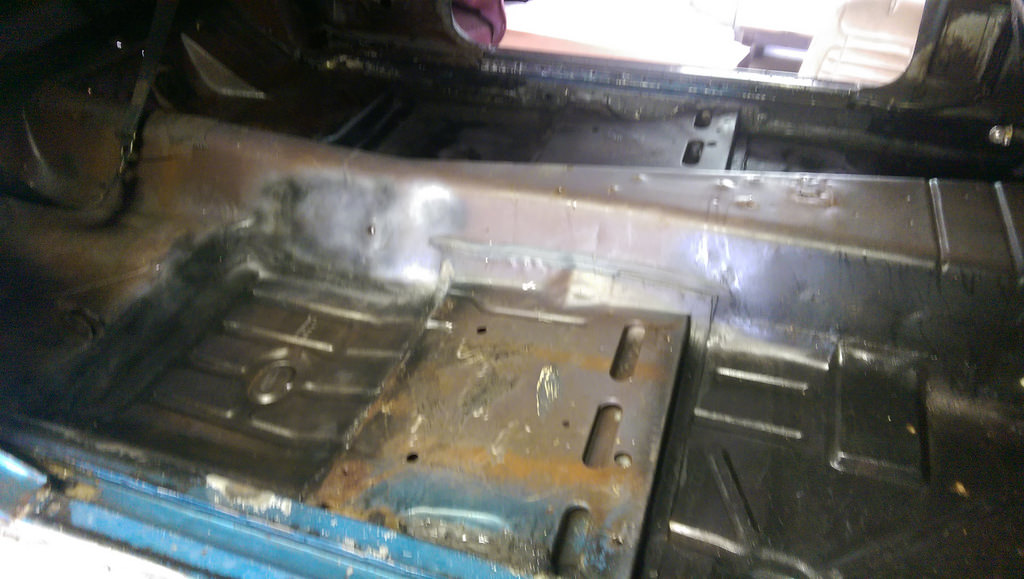
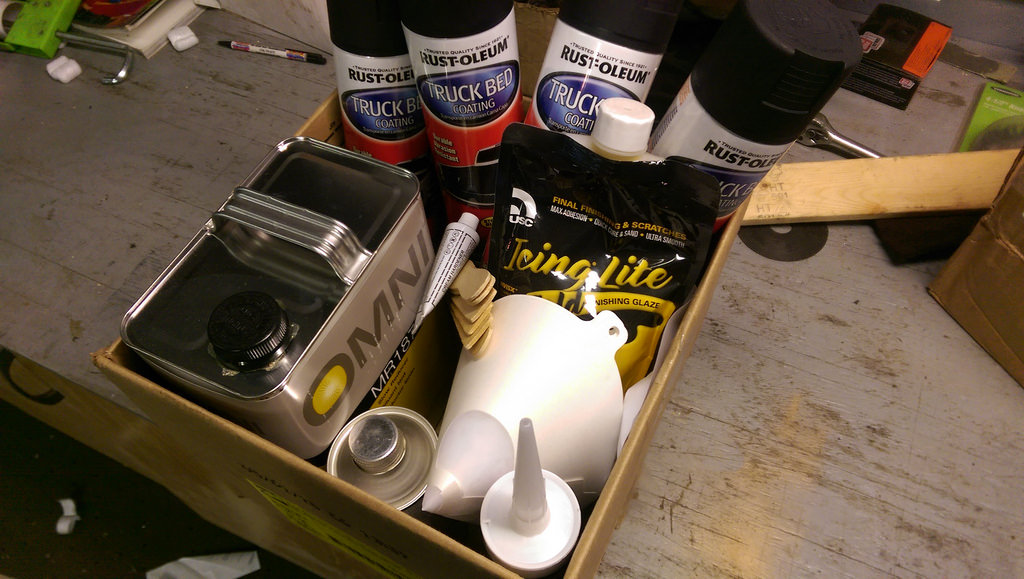
Now that I prepped everything, I am finally to a point that I wanted to spray on the final layer on the bottom of the car. After seeing the results from my buddies car, I decided on some some of the spray on bed liner for the bottom of the car. I am super happy with the results. I decided on the bedliner for basically three reasons; 1) I wanted to have something that would be easy to touch up, and being in a rattle can it doesn't get much easier 2) I wanted something that would be durable to rocks and road debris and 3) I wanted something that wouldn't break the bank. I love the way it turned out.
Here are the materials that I purchased to begin with.
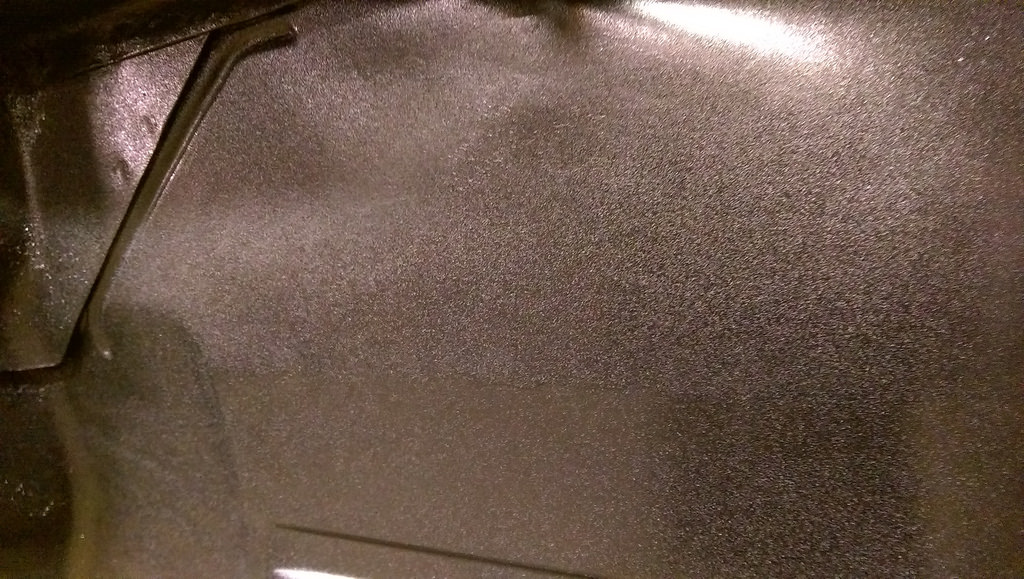
I did a test patch a few days ago, and I wasn't fully happy with the results as it had a shimmer to it, but while it was dry, I sprayed with a cheap flat black paint so that it would fuse together, but keep the texture. It's not fully dry, but I love the way it turned out.
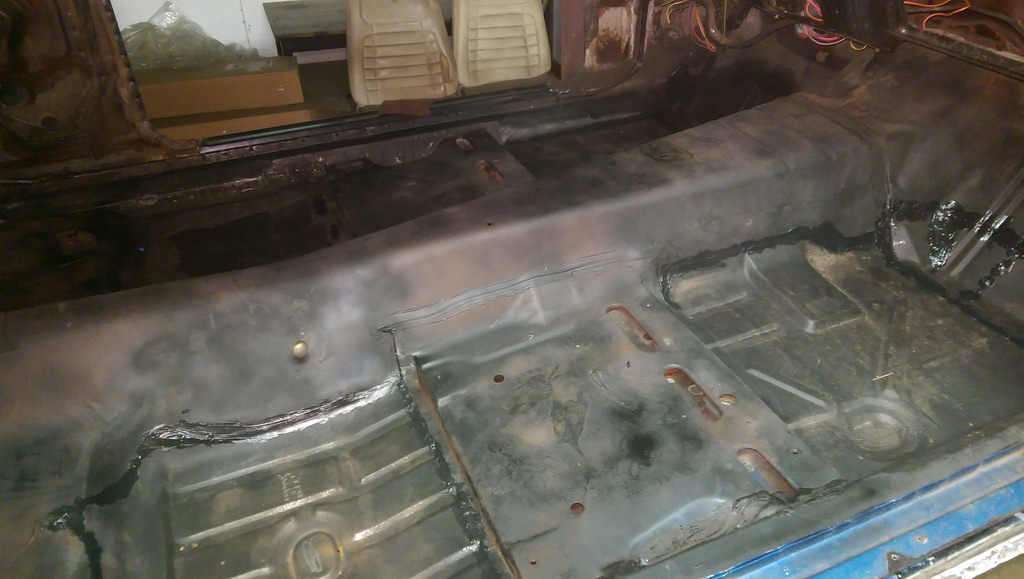
After I was done with the bottom and waiting for it to dry, I seam sealed all the panels that I replaced and topped it off with some flat black paint to give it all a consistent look.
I'm thrilled with my progress so far. I need to touch up a few places, but then it will be ready for the sub-frame. I need to prep, clean and paint the sub-frame and it will be ready to be bolted back together. I can't wait for that day!
1955 Nomad project LC9, 4L80e, C5 brakes, Vision wheels
1968 Camaro 6.2 w/ LSA, TR6060-Magnum hybrid and etc SOLD
1976 T/A LS1 6 Speed, and etc. SOLD
Follow me on Instagram: ryeguy2006a
07-31-2016 #63
Registered User
- Join Date
- May 2015
- Location
- Island Lake, IL
- Posts
- 815
Looking good Rye! I hear you when you have to clean up tools because everything becomes a mess when you're getting things done.
07-31-2016 #64
Registered User
- Join Date
- Sep 2009
- Posts
- 2,707
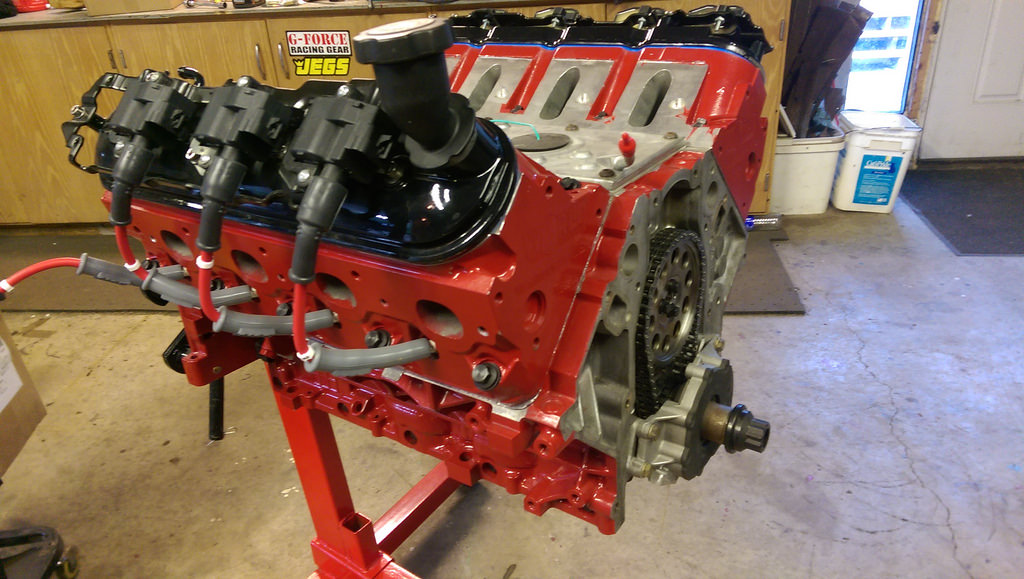
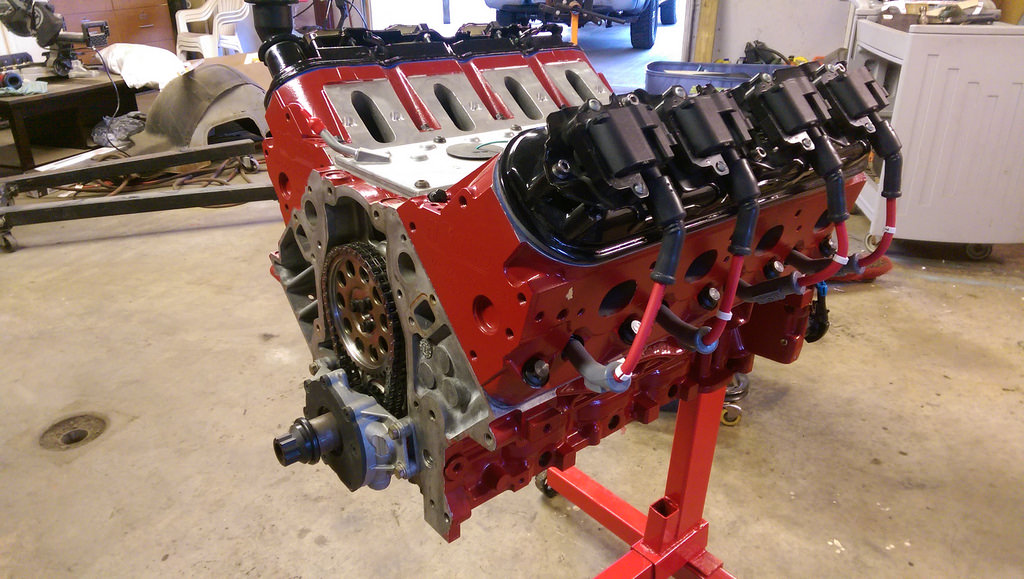
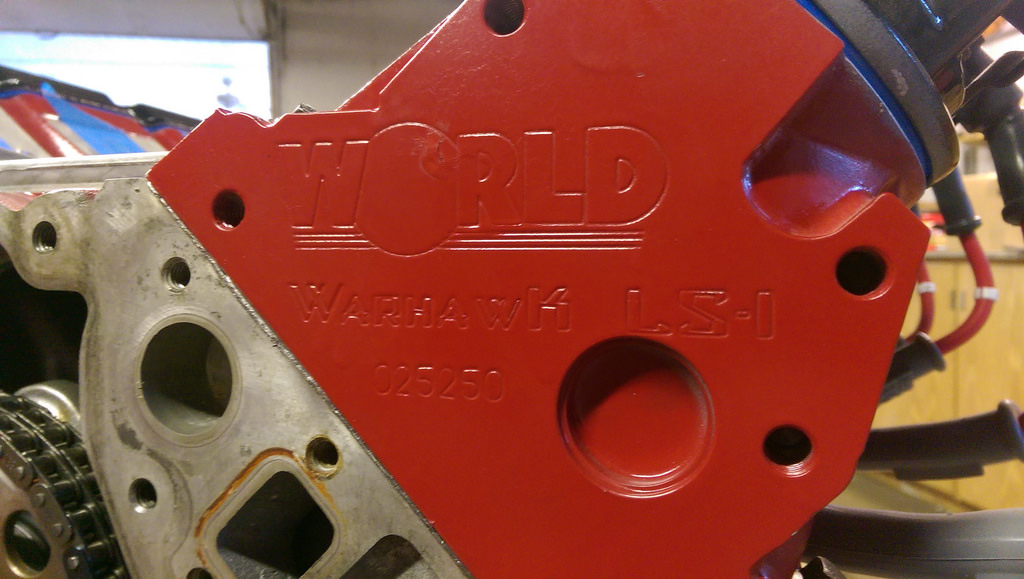
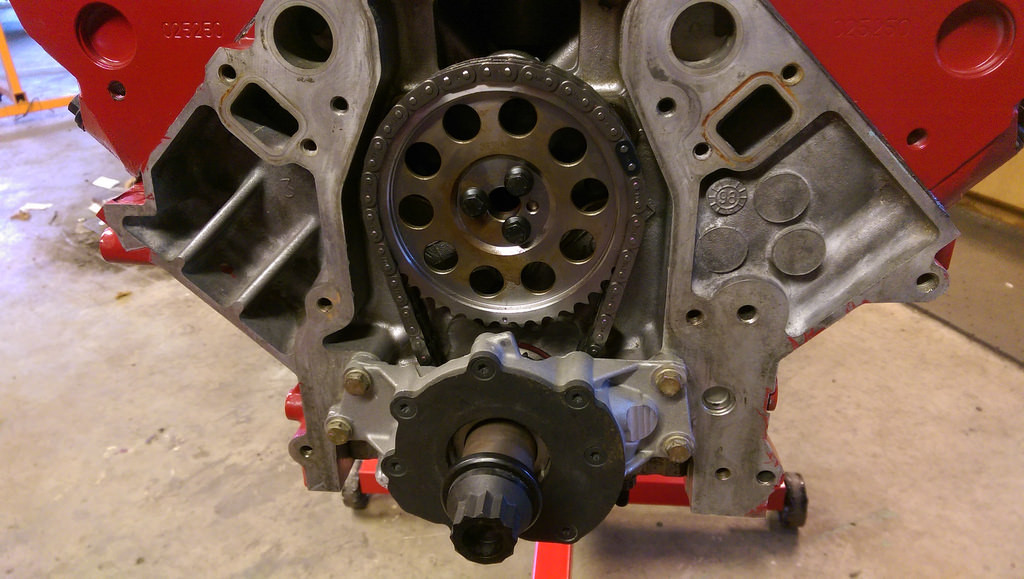
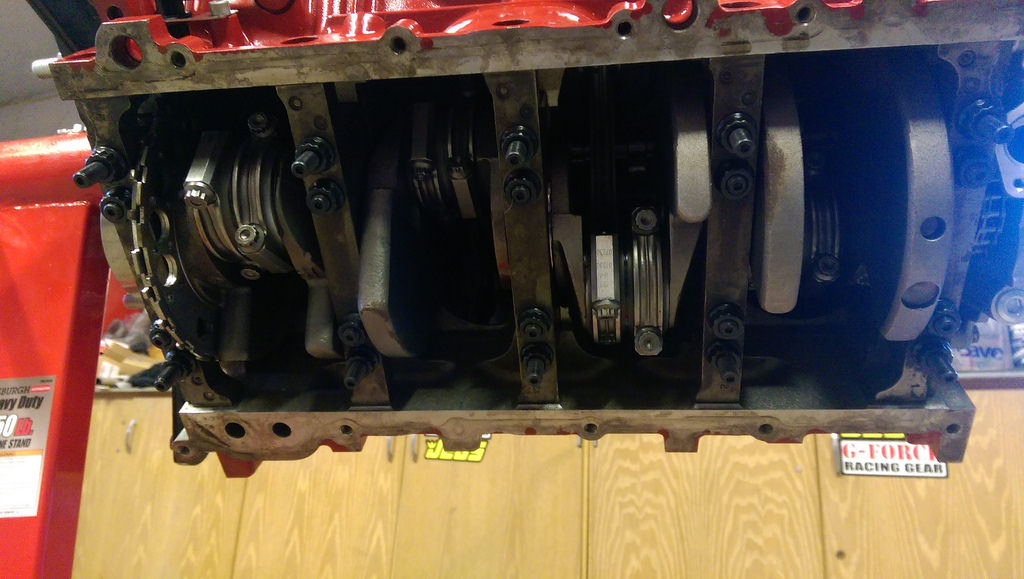
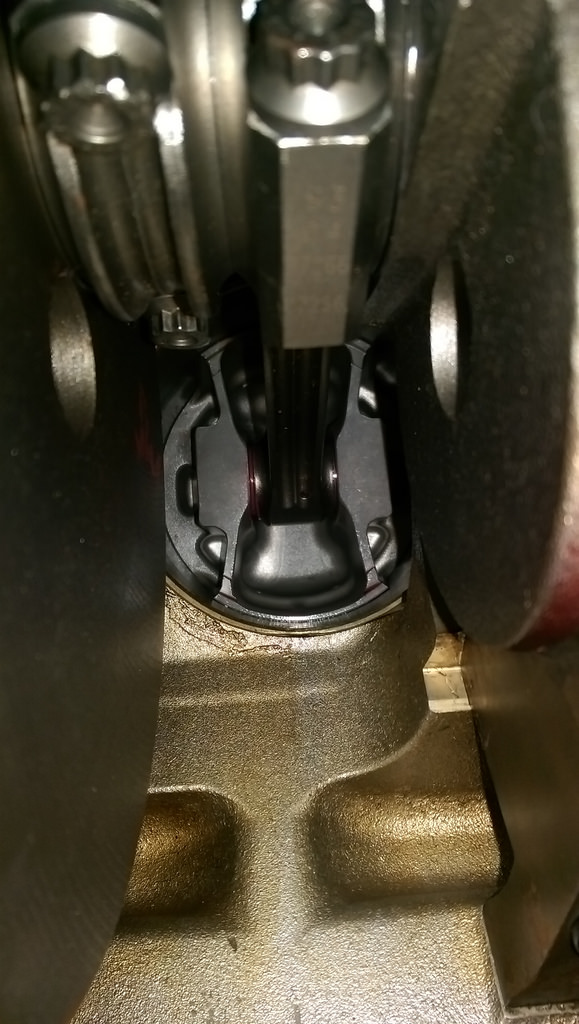
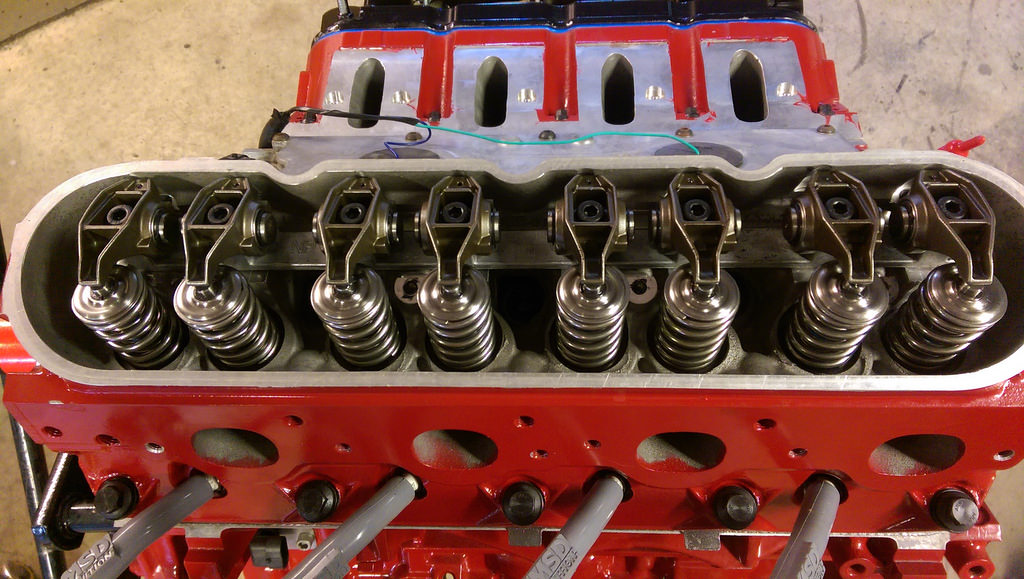
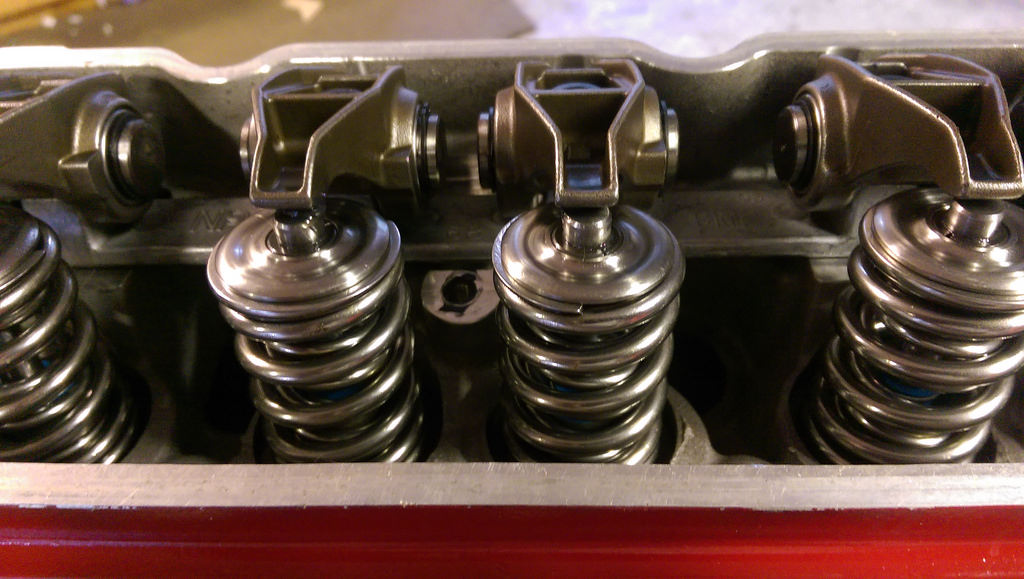
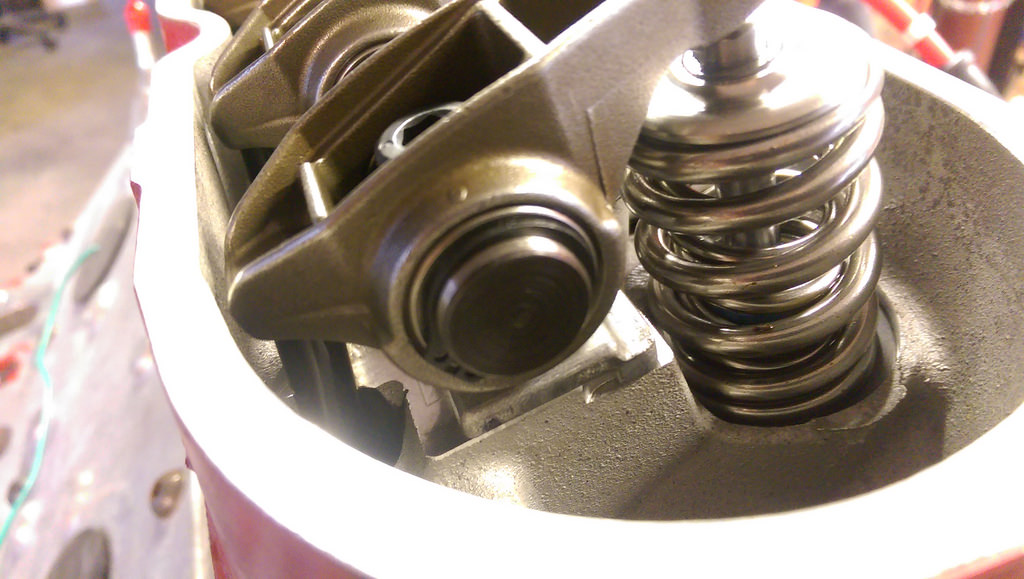
And this is probably my most exciting update is the motor that I just picked up. I wasn't looking for a new motor, but I was texting a guy who I had bought parts from before, to see if he had another intake. He didn't have an intake, but instead he mentioned that he was moving out of town and the motor he built was for sale. It's a '99 C5 Corvette LS1 with all new internals with the only used parts are the block and lifter trays. It has a brand new crank, forged Eagle H-beam rods, and Mahl forged pistons. To top off the shortblock it has World Products Warhawk 235 heads with stainless valves, double valve springs, comp push rods, new lifters, stock rockers with trunion upgrade. It also came with the custom spec'd T-rex V2 cam by Thunder racing with double row timing chain, melling high volume oil pump and all new plugs and wires. To top it all off, the motor has ARP bolts throughout the entire engine! Very excited about this score!

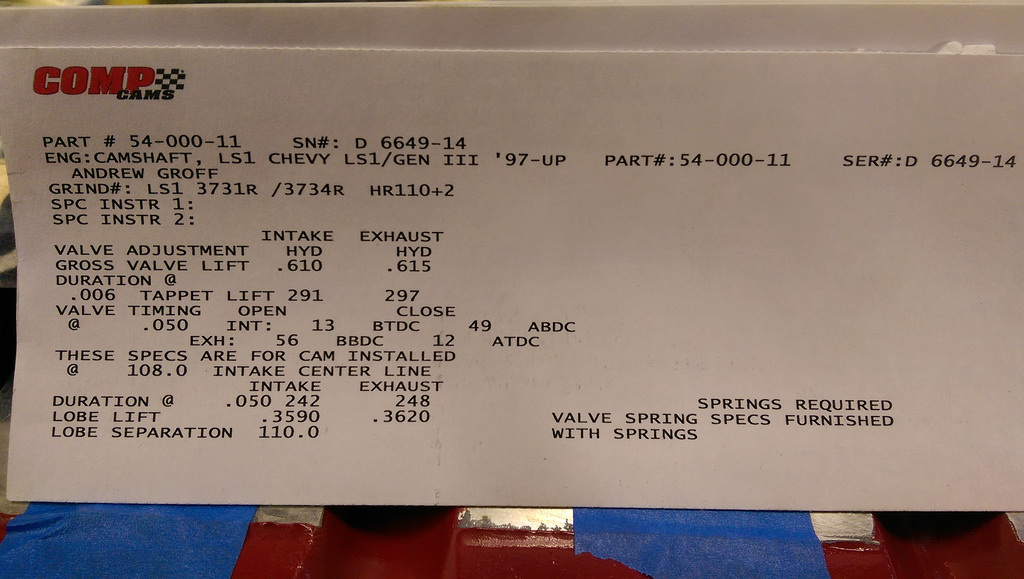
Here's the cam card for the engine. The guy I bought it from said that the T-Rex cam was no longer available so he had the cam custom ground by comp with the exact same specs as the T-Rex V2 cam.
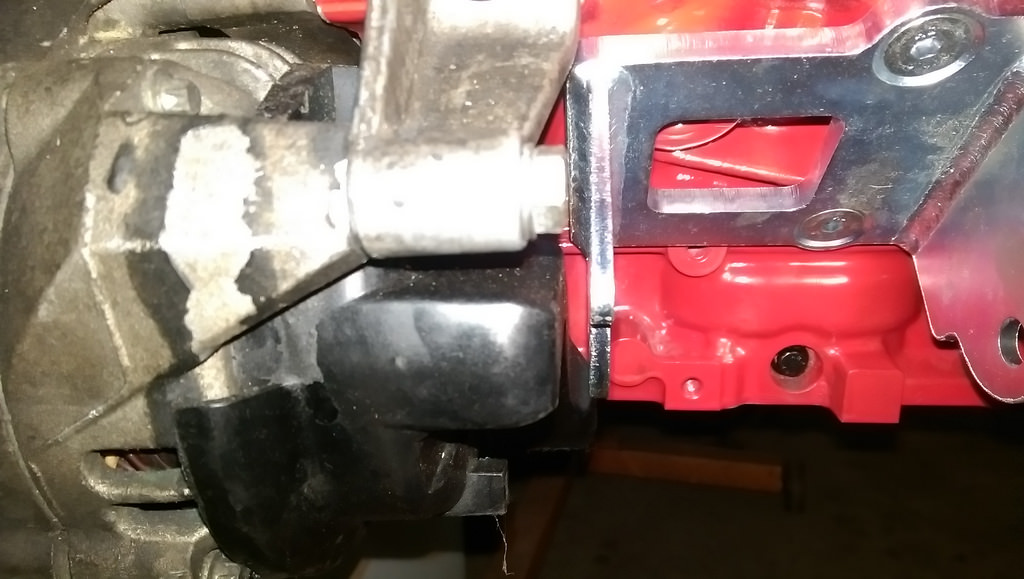
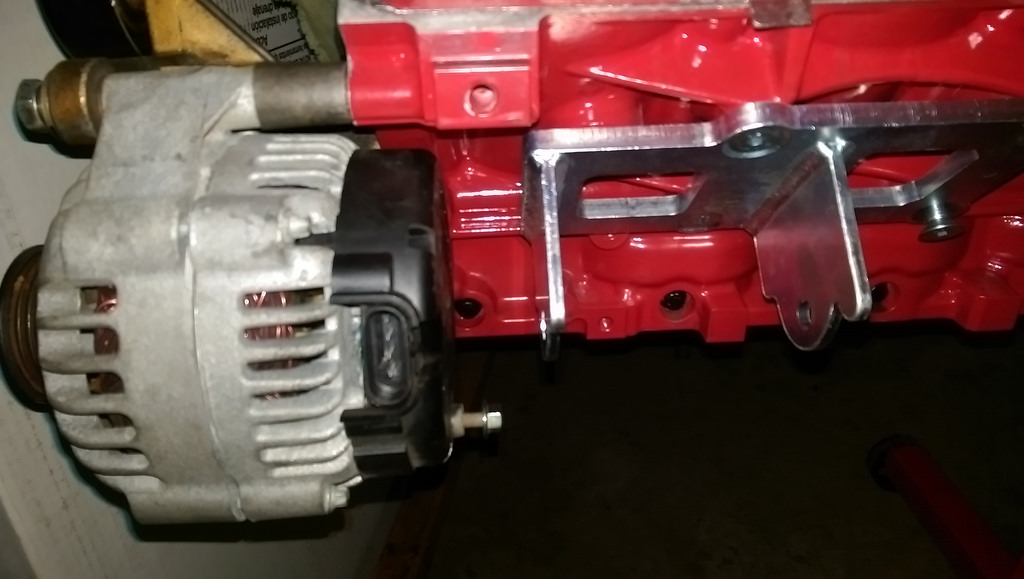
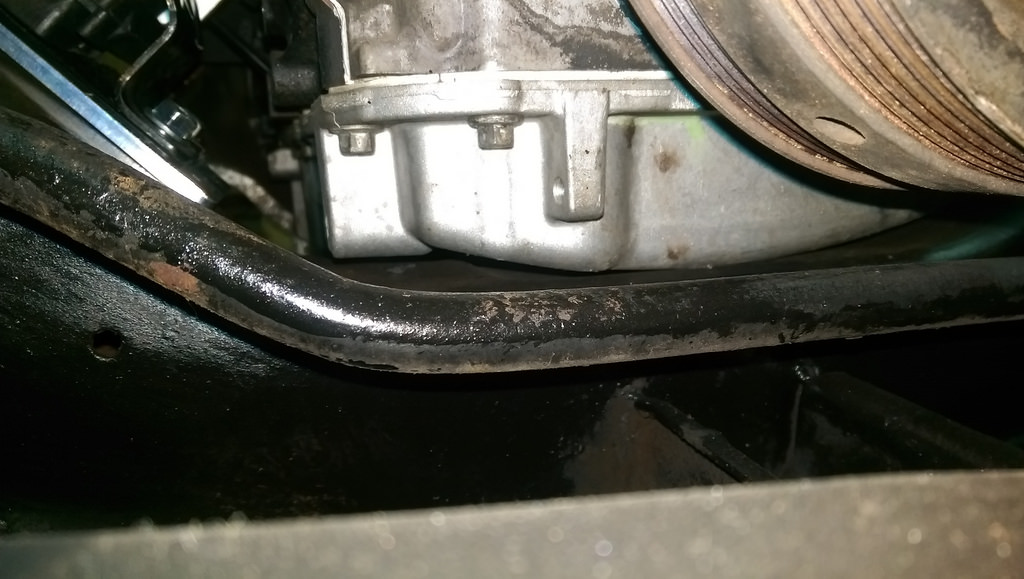
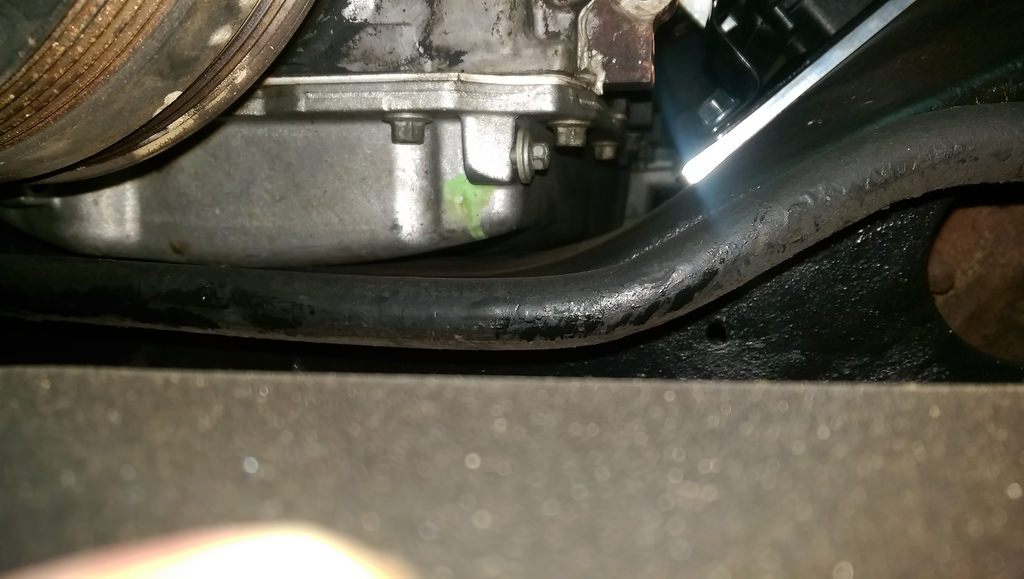
In case anyone is running the Holley mounts for first gen fbody or xbody, here is the engine mount with the low mount 4th gen fbody alternator. First picture is with the stock 4th gen alternator, and the second is with the stock truck alternator.
I'm super excited as I feel like this motor will be taking my build to a higher level.
Cheers,
Ryan
1955 Nomad project LC9, 4L80e, C5 brakes, Vision wheels
1968 Camaro 6.2 w/ LSA, TR6060-Magnum hybrid and etc SOLD
1976 T/A LS1 6 Speed, and etc. SOLD
Follow me on Instagram: ryeguy2006a
08-04-2016 #65
Registered User
- Join Date
- Sep 2009
- Posts
- 2,707
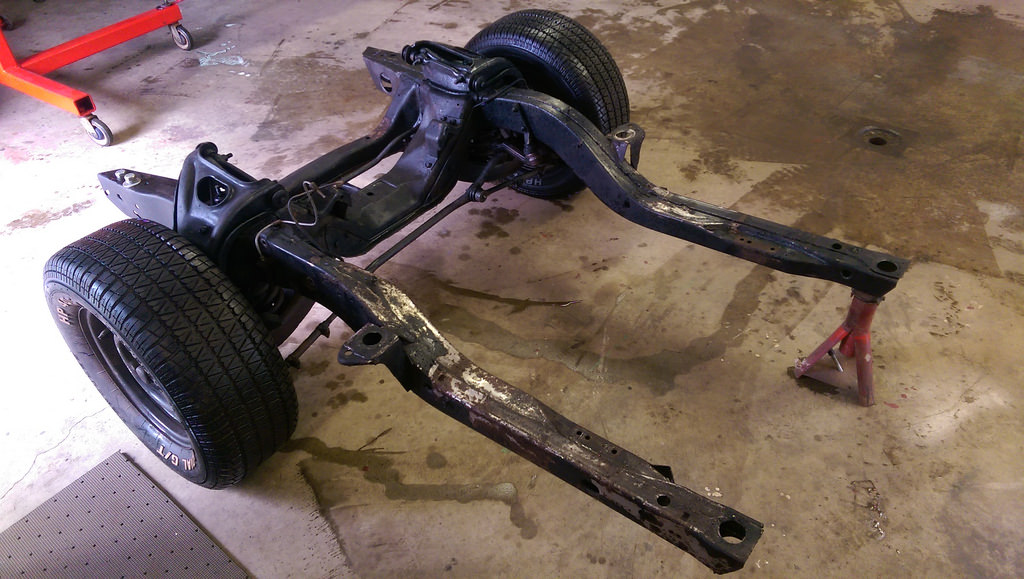
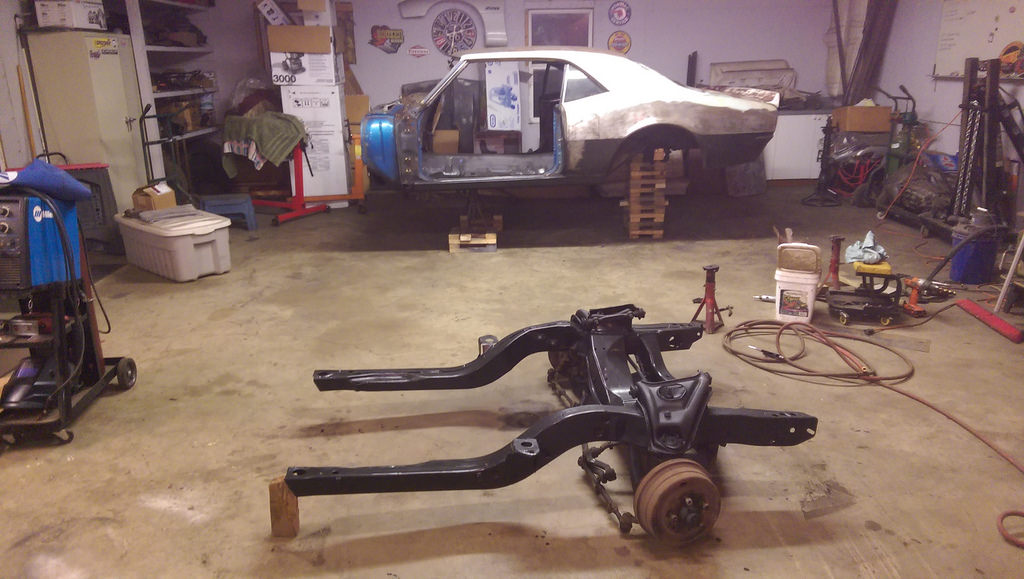
Quick update, I cleaned up and painted the sub-frame. Nothing special, but the I painted the sub-frame with a Rustoleum rust converting paint, and while it was still drying, I topped it off with a flat black rattle can. It gave it a nice satin black, that is very stock appearing.
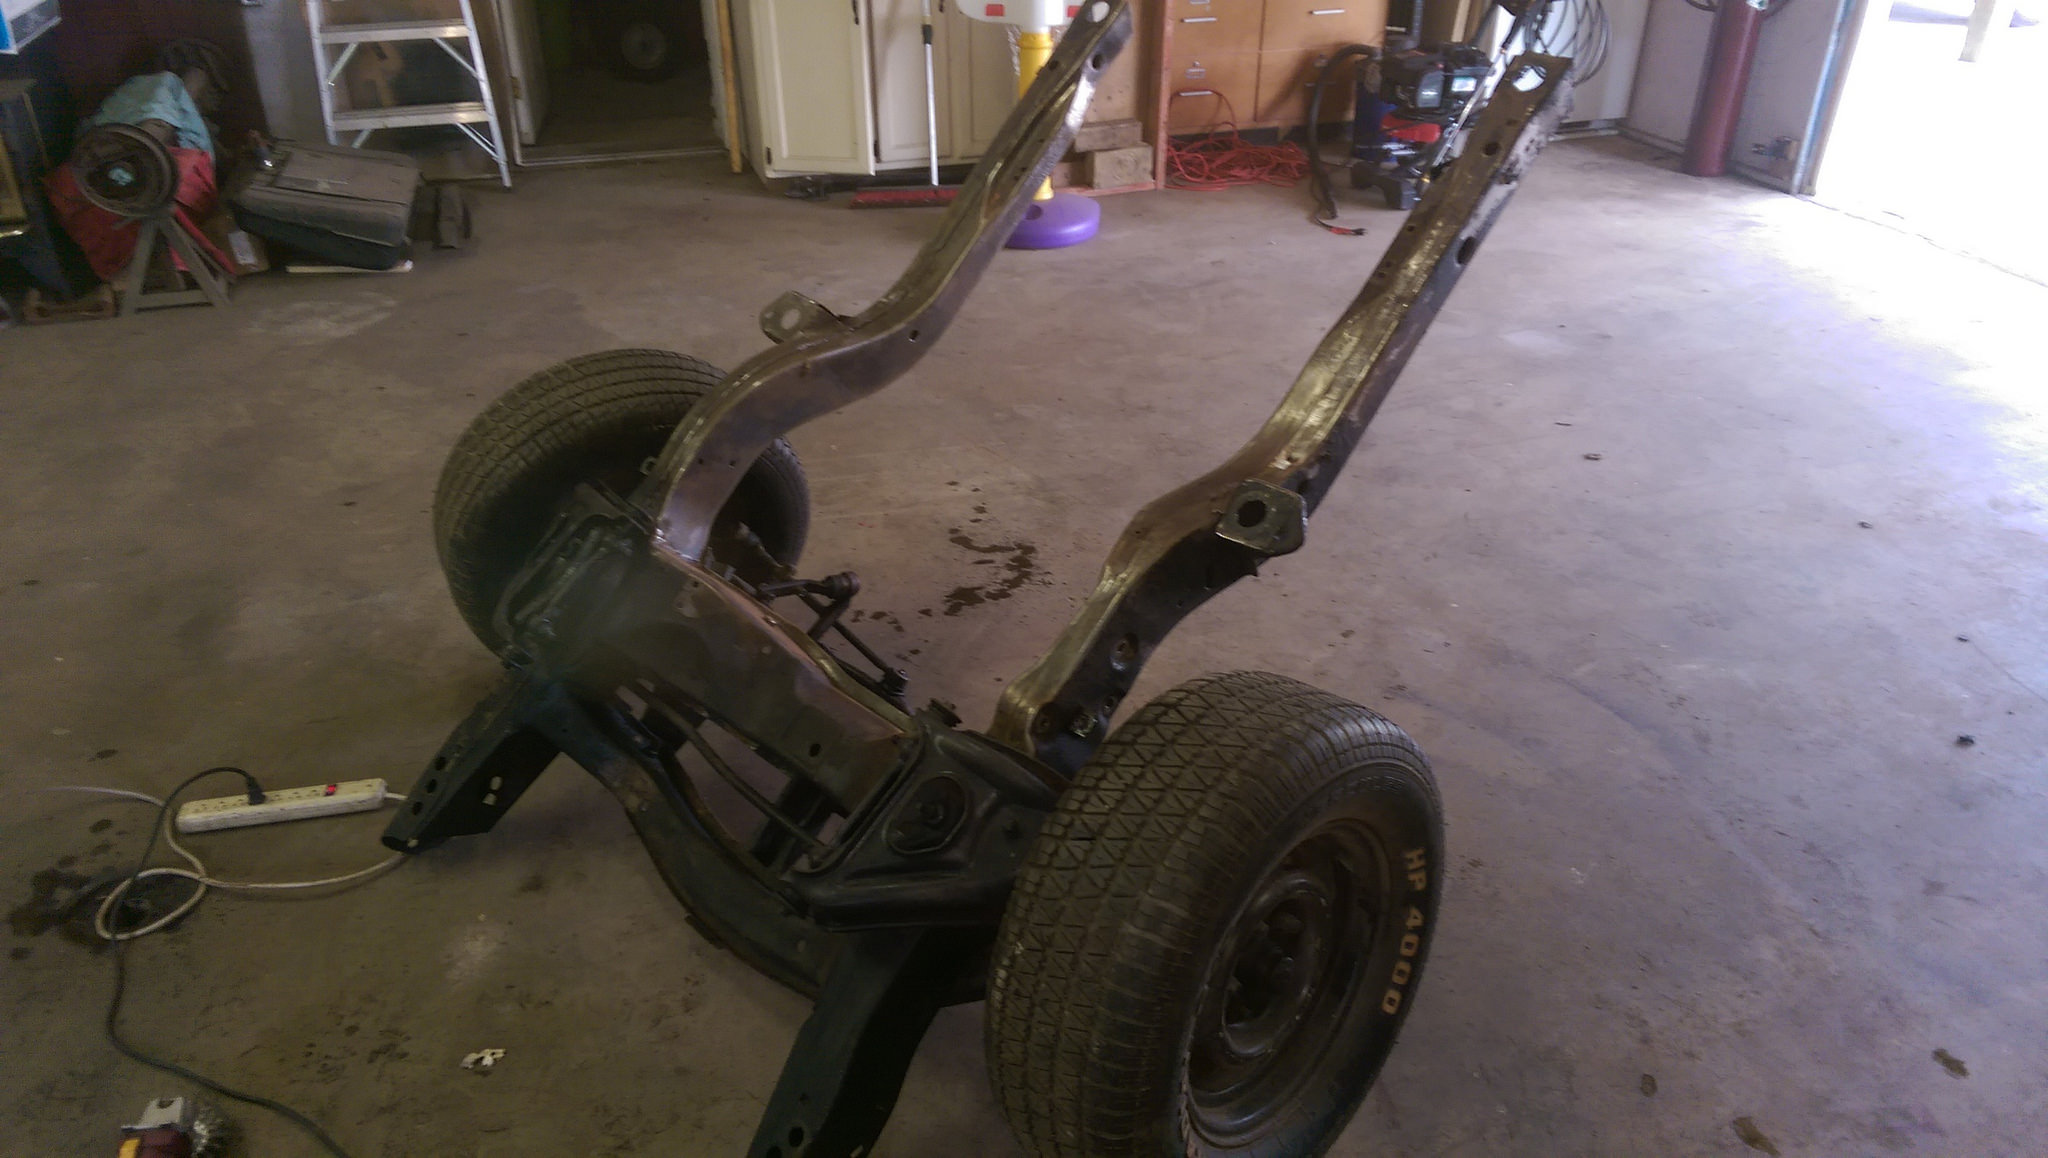
While I was wiring wheeling the frame, I was hit.

And the frame all painted from last night. Pretty simple compared to the rust repairs I have been doing.
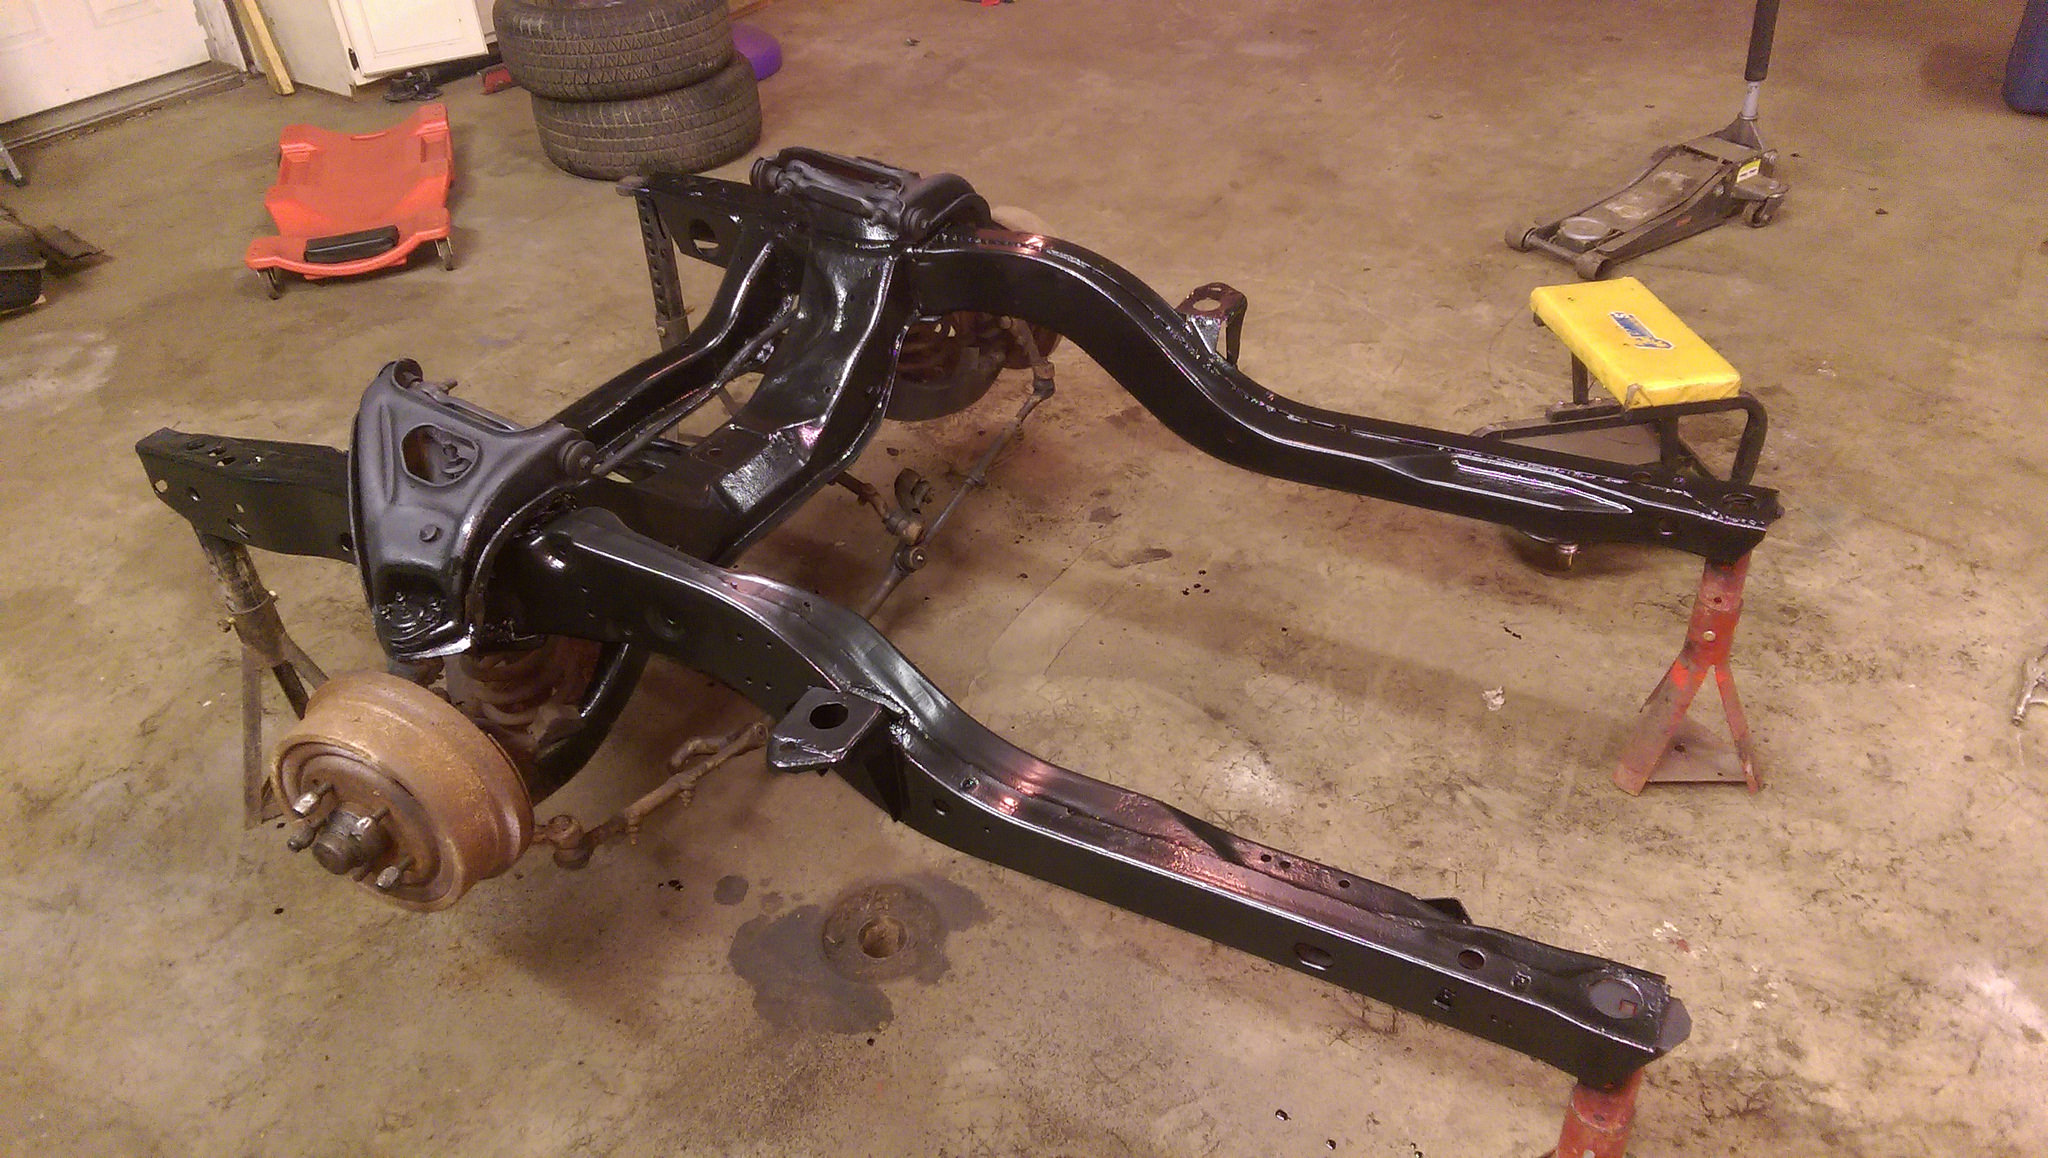
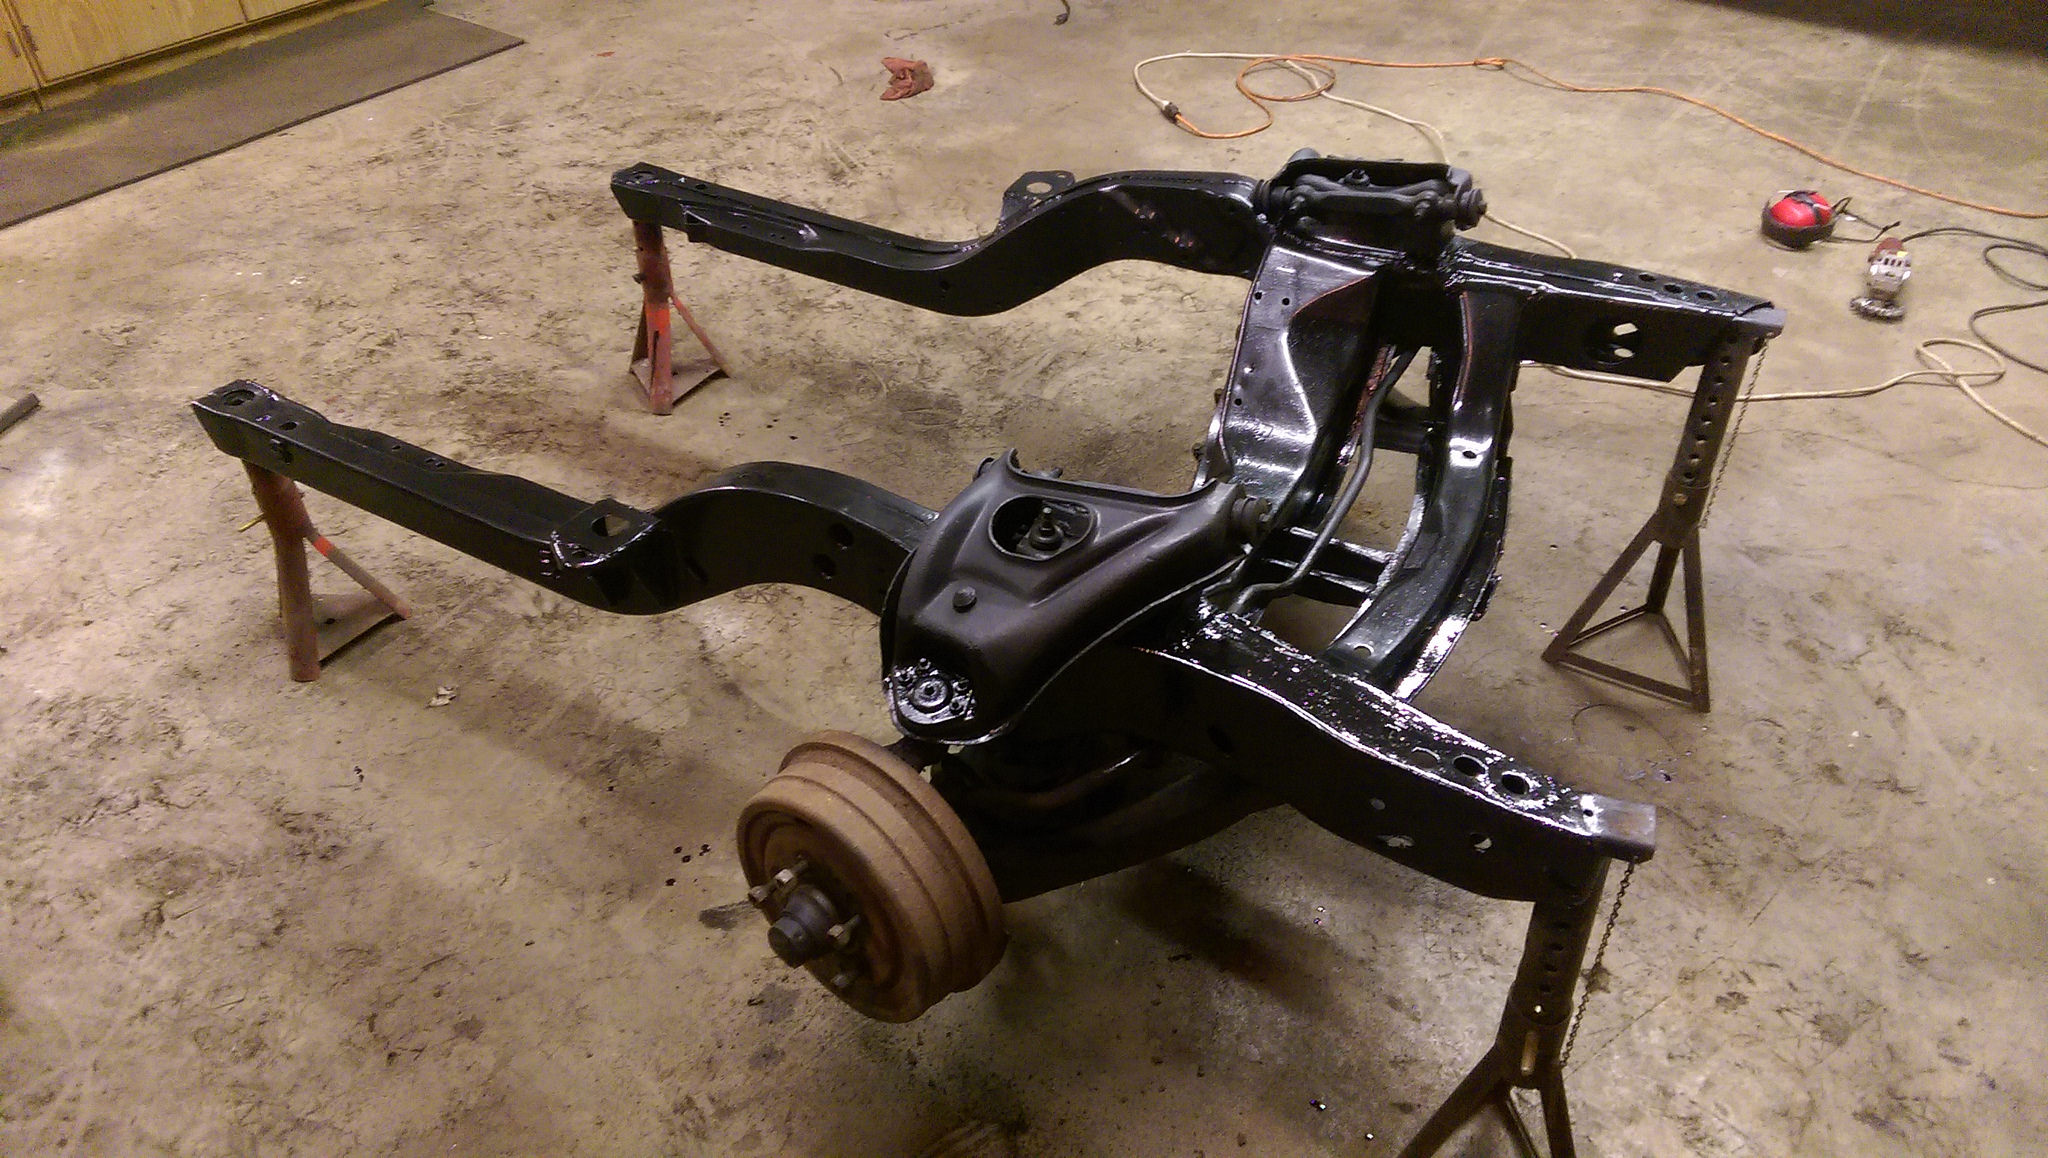
And these are the pictures I took this morning.
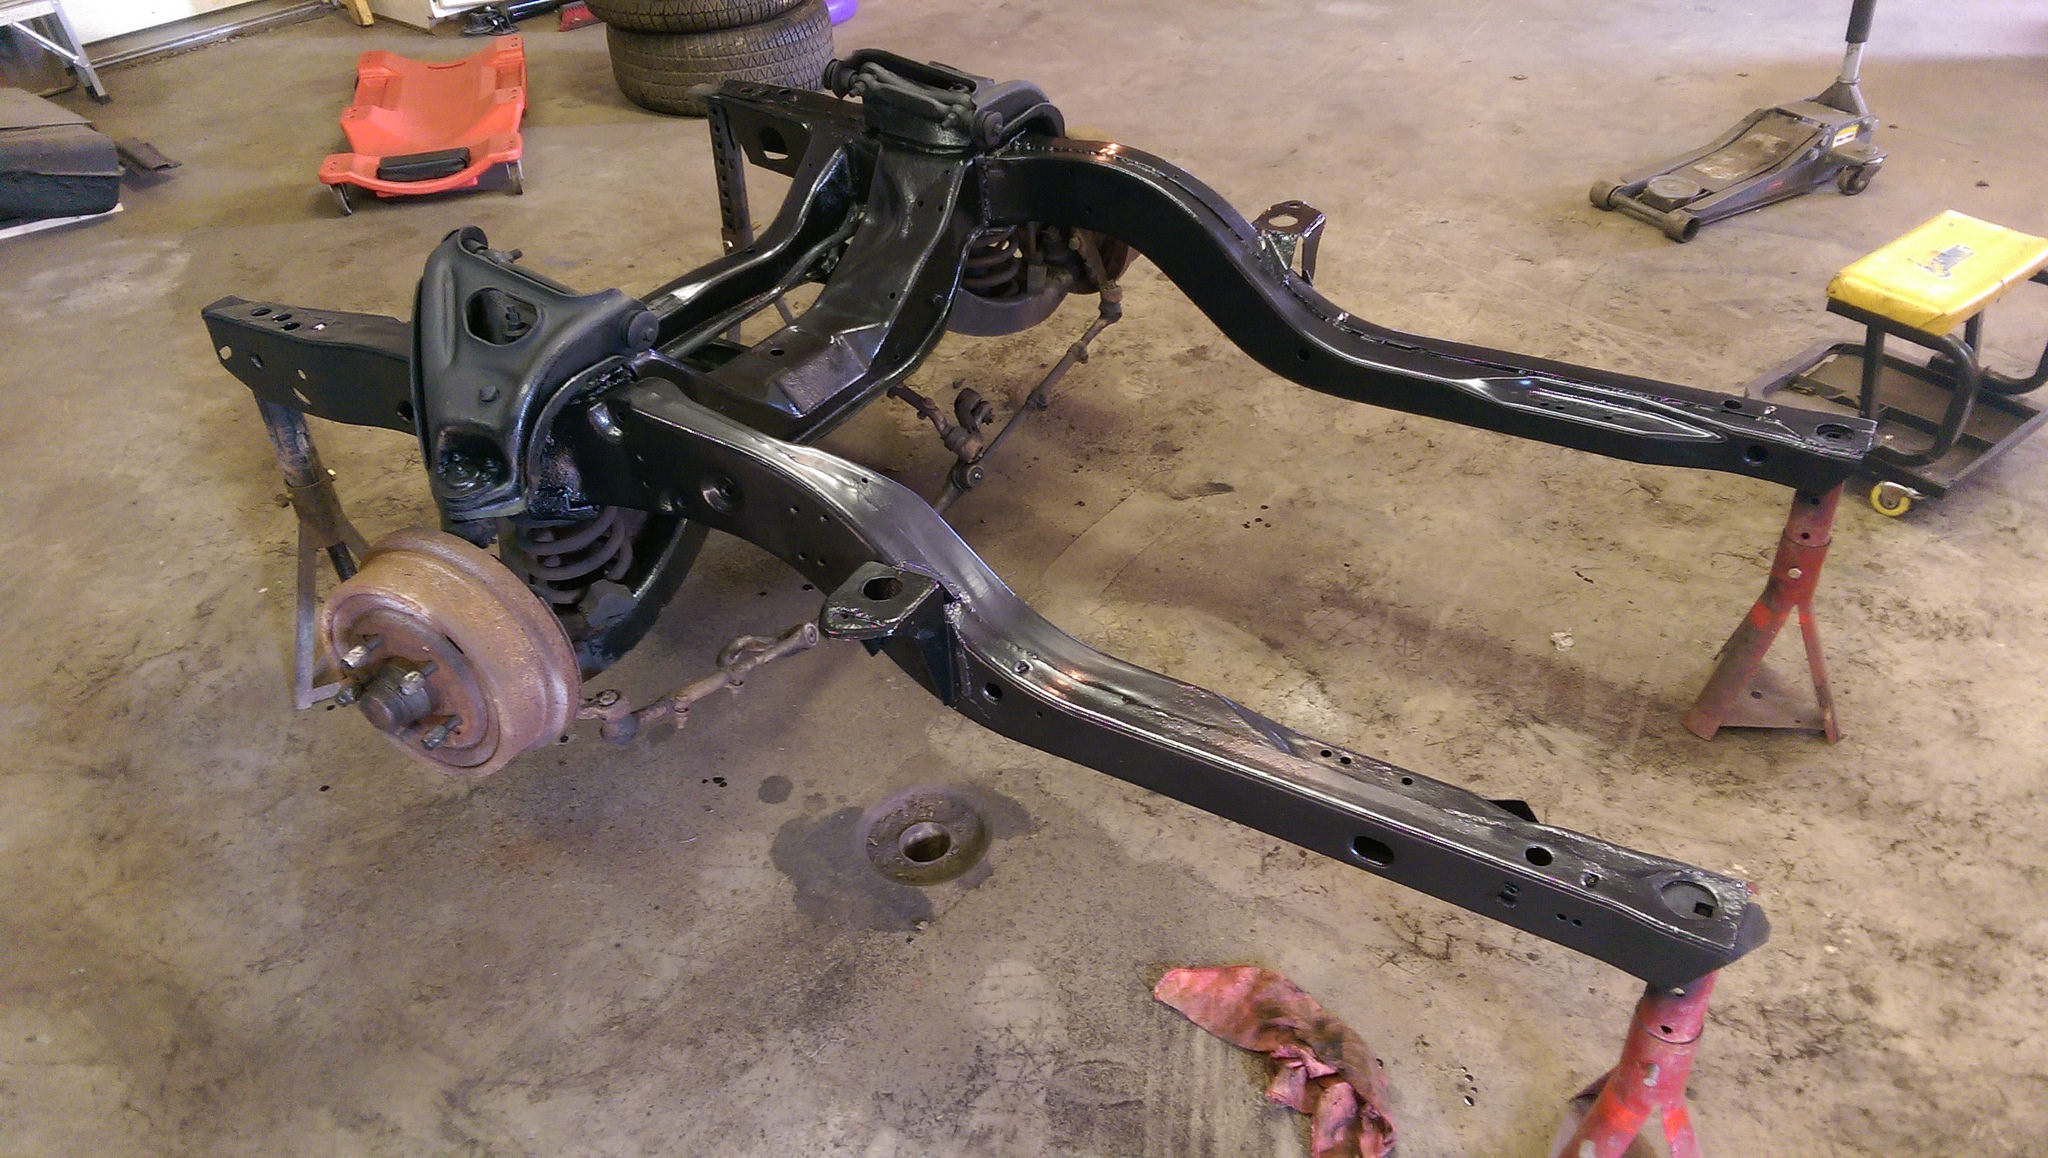
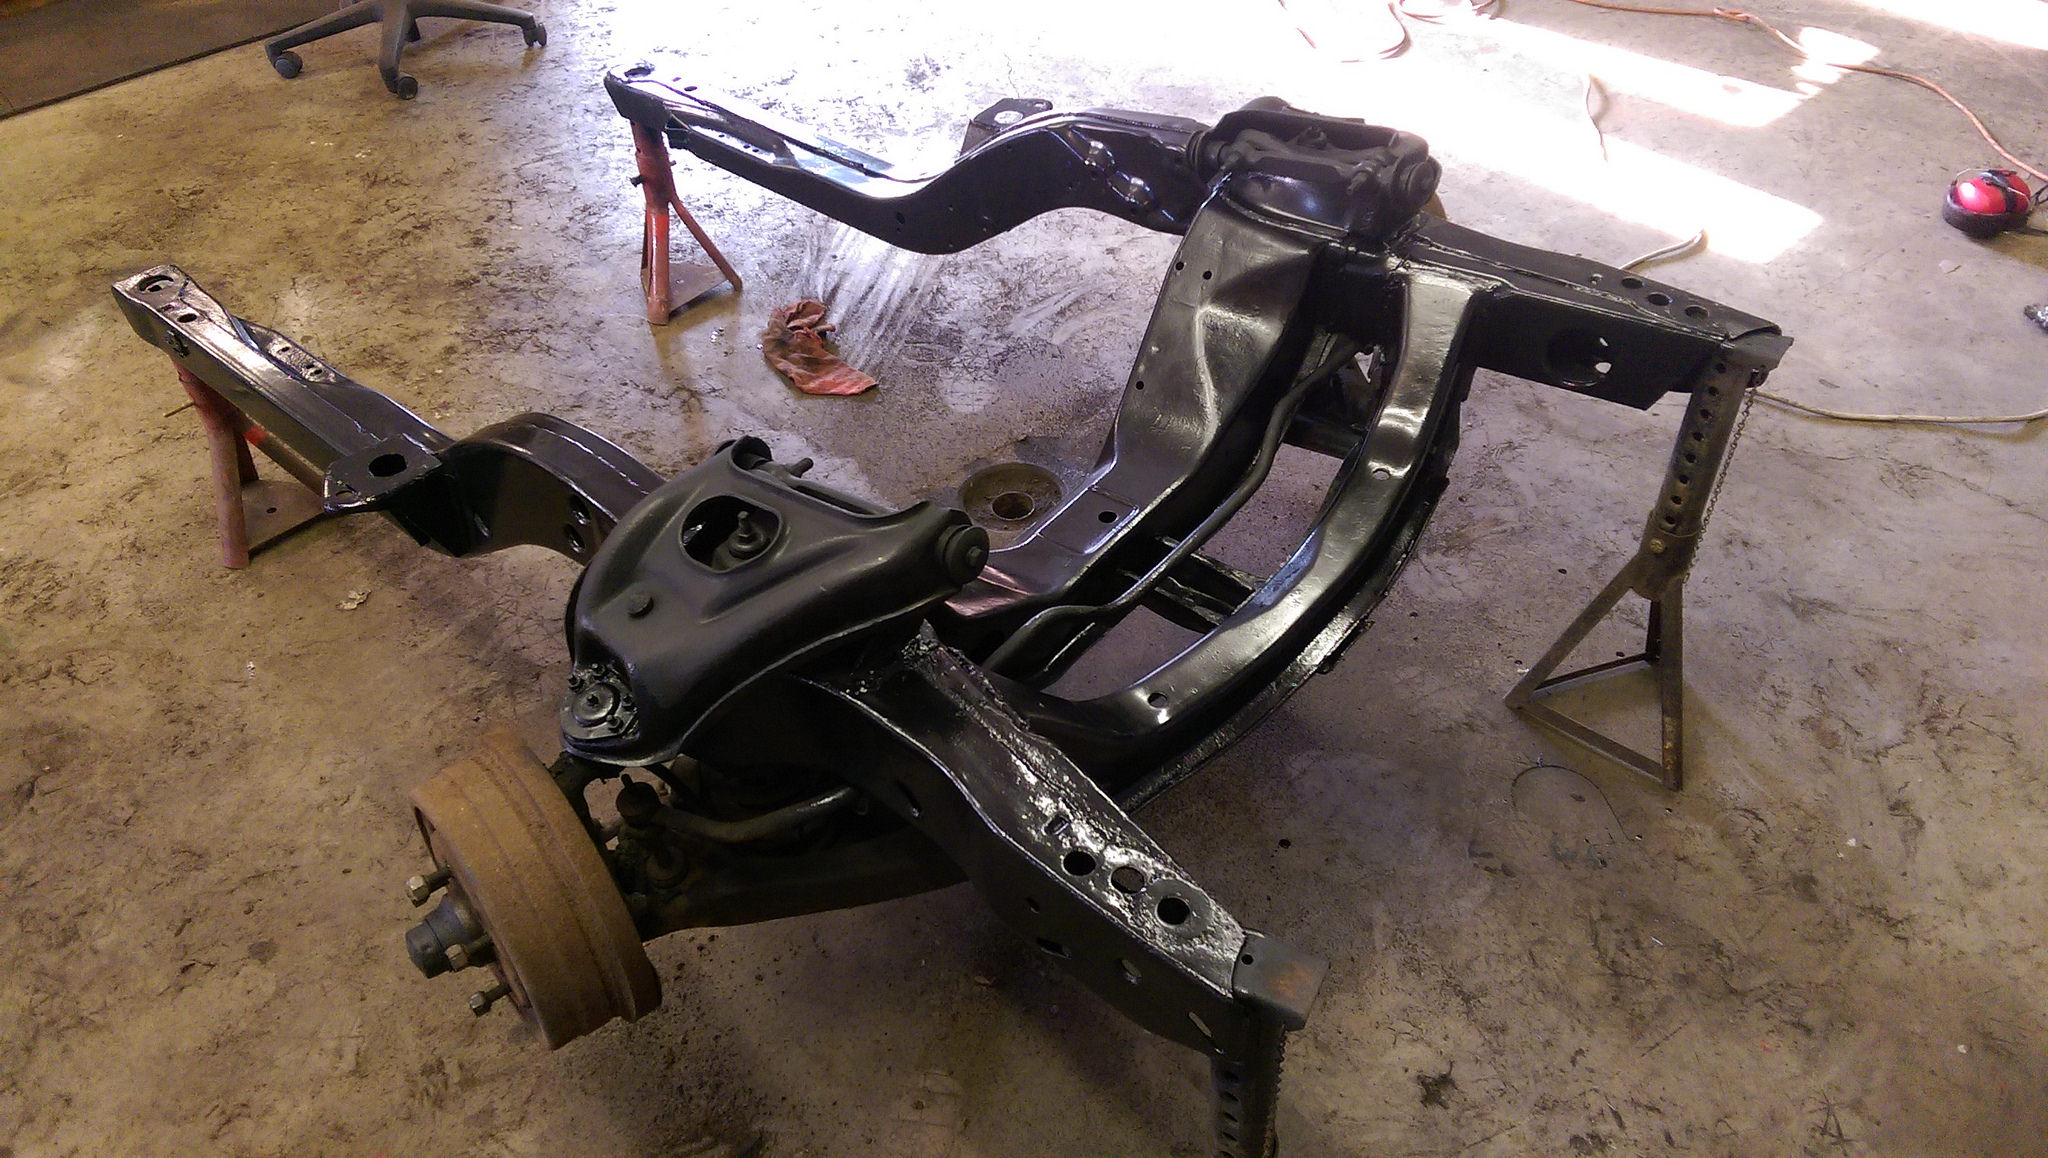
I am going to wait for a few days for this to fully cure before I do anything further with it. I have a few small patches that need to be fixed on the lower cowl, on the shell, but I wanted to make sure that the frame had enough time to fully cure.
Cheers,
Ryan
1955 Nomad project LC9, 4L80e, C5 brakes, Vision wheels
1968 Camaro 6.2 w/ LSA, TR6060-Magnum hybrid and etc SOLD
1976 T/A LS1 6 Speed, and etc. SOLD
Follow me on Instagram: ryeguy2006a
08-04-2016 #66 Registered User
- Join Date
- Jul 2011
- Location
- Prescott, AZ
- Posts
- 206
What an awesome find! Getting a fully built engine like that probably shaved a huge chunk of time and money off of your build. The progress is looking good!
08-04-2016 #67
Registered User
- Join Date
- Sep 2009
- Posts
- 2,707
Thanks Centerforce! You are right and I got that motor for a song! After I sold some of my parts that I had around my shop, I am basically into the engine for nothing more than my time to go and get it. I'm hoping to get the car back into a roller by the end of August. Mostly because I want to be progressing forward with my project, but also because if our house sells we may be forced out of our house at the end of August, haha.
Also, since I am going to need to put another good chunk of money into the LS1 motor with the supporting mods (intake, injectors, TB, long tubes, trans upgrades and etc.), I will be running the 5.3 with Z06 cam for now. That way I can save up and do the swap right when I put the big motor in.
I am very much looking forward to be done with the metal work and it's so close I can taste it. I jumped ahead a little with the sub-frame, but I wanted to let the frame sit for a few days so that it would fully cure before I move it around.
1955 Nomad project LC9, 4L80e, C5 brakes, Vision wheels
1968 Camaro 6.2 w/ LSA, TR6060-Magnum hybrid and etc SOLD
1976 T/A LS1 6 Speed, and etc. SOLD
Follow me on Instagram: ryeguy2006a
08-08-2016 #68
Registered User
- Join Date
- Sep 2009
- Posts
- 2,707
I finished the last of the repairs that require the rotisserie this weekend. I am so happy that I was able to get my car on one of these as it made the metal work SO much easier. Being able to rotate the body to the exact position you needed made the repairs so much easier. I have two small patches left in the lower cowl that I need to address, but both will be easy enough to get to without the body being on the rotisserie.
The last patch that I needed to make (on the rotisserie) was on the lower trunk drop. Since I am on a tight budget, rather than buying a new replacement panel I opted to build my own patches. I was pleasantly surprised with the outcome. It isn't perfect, but I really like how it turned out. I was originally going to leave the panel as is and just replace a small patch, but after a little digging I found 4 layers of terrible in this order: 1. the new quarter skin, 2. original quarter panel, 3. body filler and 4. the rusted trunk drop. So I just cut the whole mess out and replaced it with new metal.
Before:
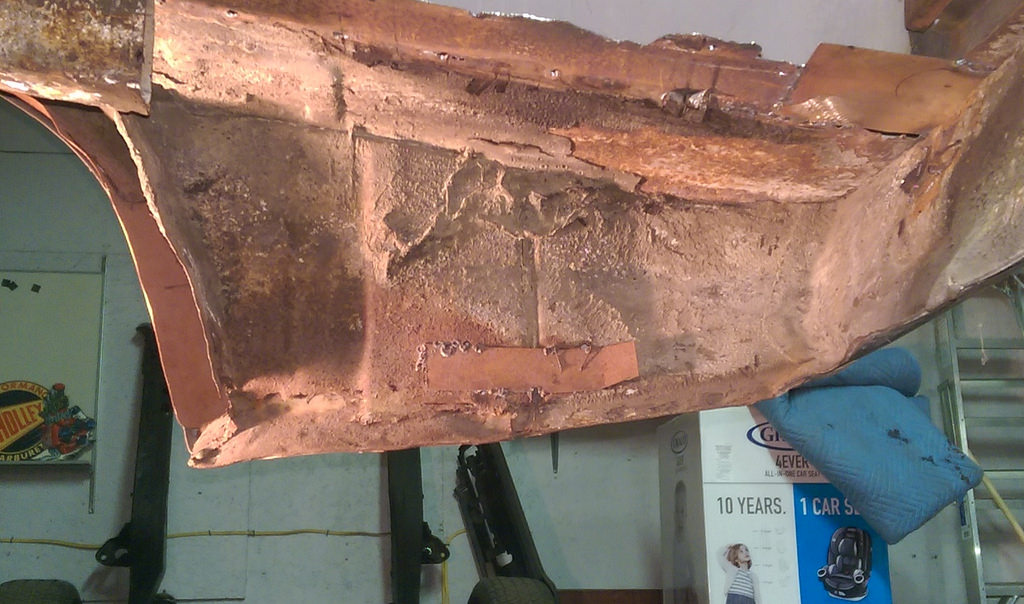
After:
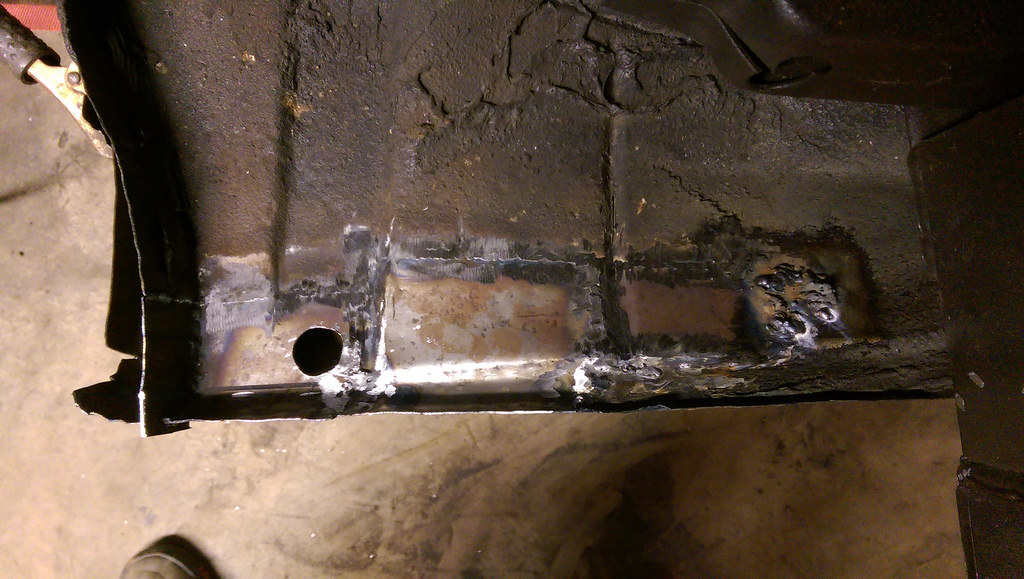
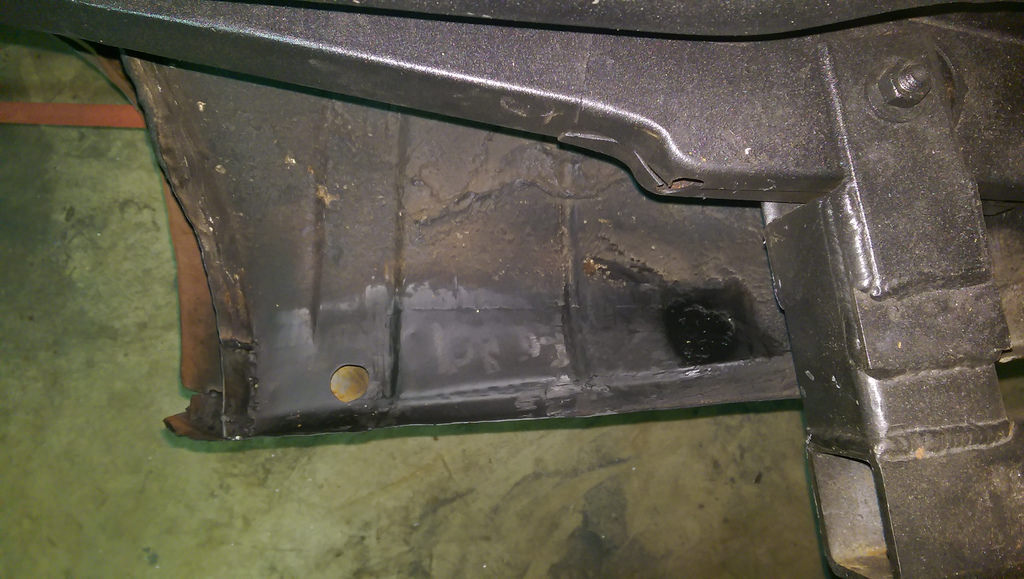
I didn't get another picture, but I sprayed it over with the bedliner when I was done.
Here is the body off of the rotisserie waiting to mate back up with the freshly painted frame and solid body bushings! I can't wait to start putting parts back on the car!
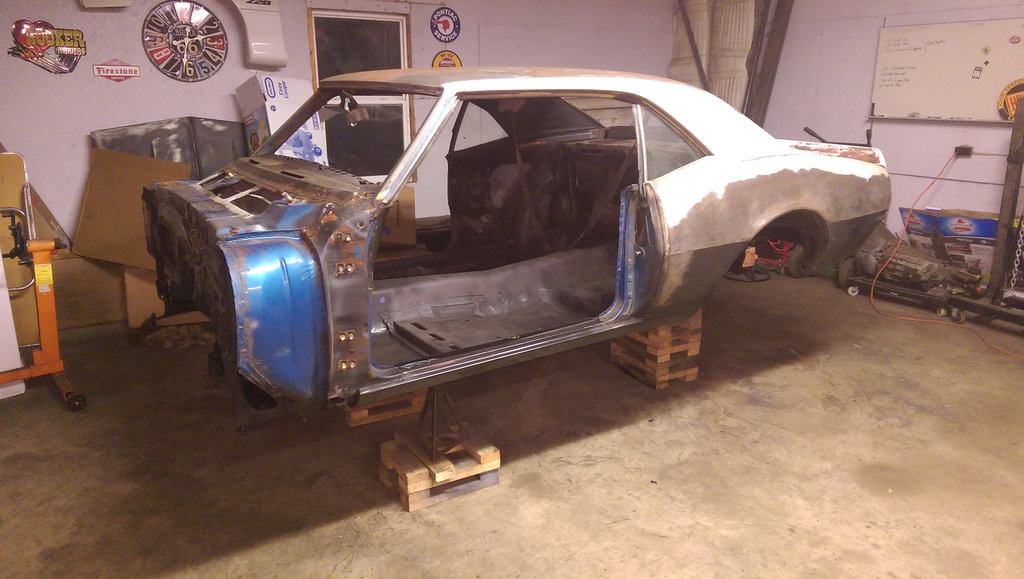
Ready for the next project, hopefully with less rust the next time...
All for now,
Ryan
1955 Nomad project LC9, 4L80e, C5 brakes, Vision wheels
1968 Camaro 6.2 w/ LSA, TR6060-Magnum hybrid and etc SOLD
1976 T/A LS1 6 Speed, and etc. SOLD
Follow me on Instagram: ryeguy2006a
08-12-2016 #69
Registered User
- Join Date
- Sep 2009
- Posts
- 2,707
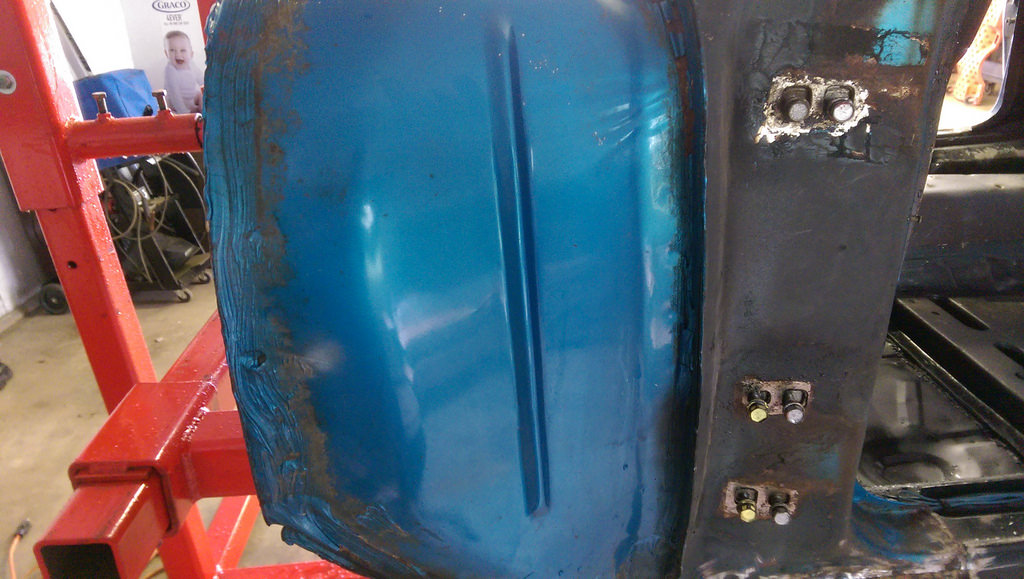
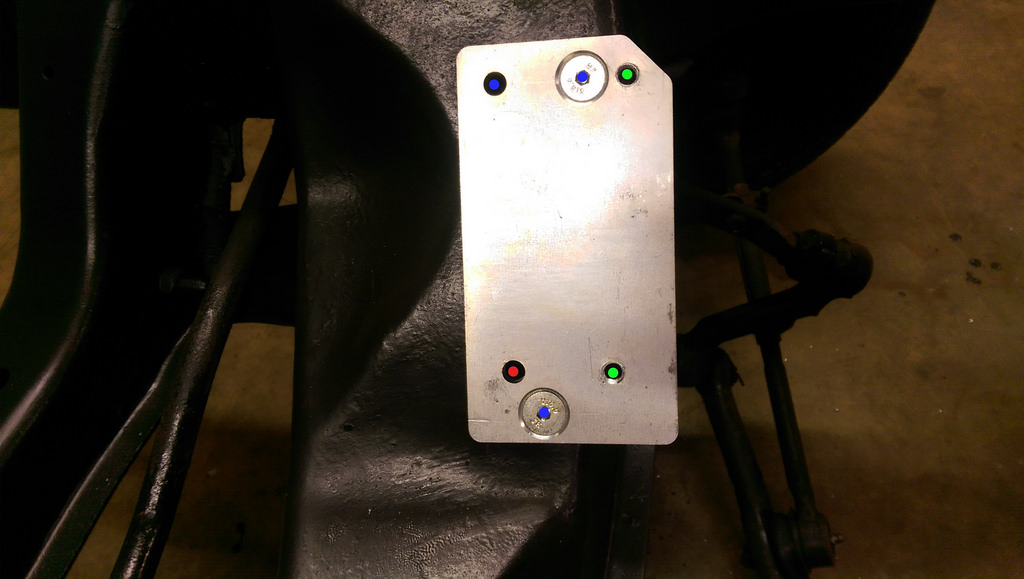
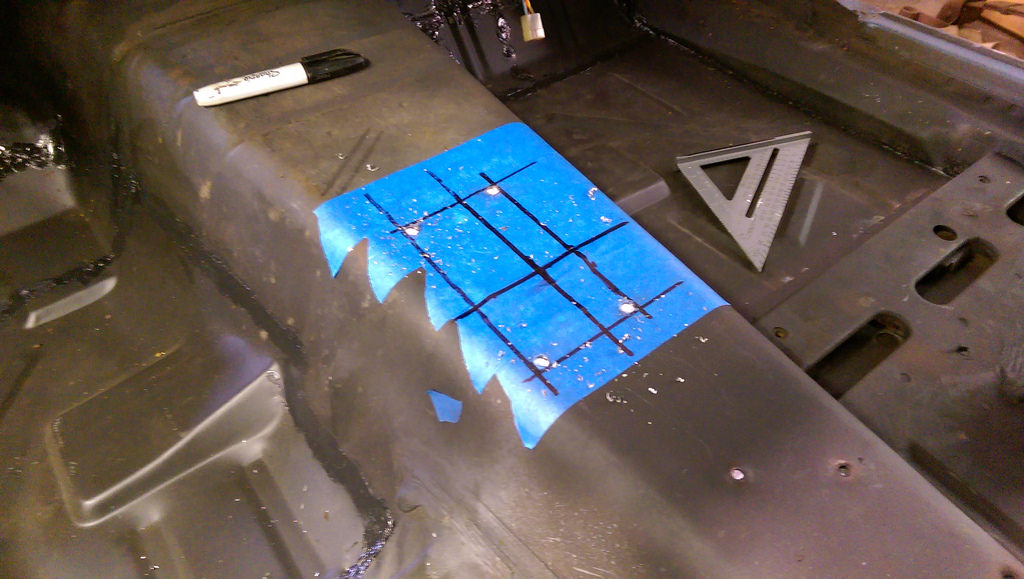
I was able to get a few hours out in the garage, and I was determined to put that motor in my frame. I bought this mounting kit soon after I bought the car, and I have been very anxious to see how they fit. I bought the Hooker engine mounts this time, as they made a kit specifically for the first gen f-bodies. It cost a little more, but what a well engineered kit. I struggled a great deal finding the right spot to put my LS1 with the motor mounts I used on my 1976 T/A. The mounts come with plates that convert the mounts over to the later model clam-shell engine mounts. It only required that I drill 2 holes, one on each side. It took me in the neighborhood of 5 mins each side to drill the hole and bolt the mounts down.
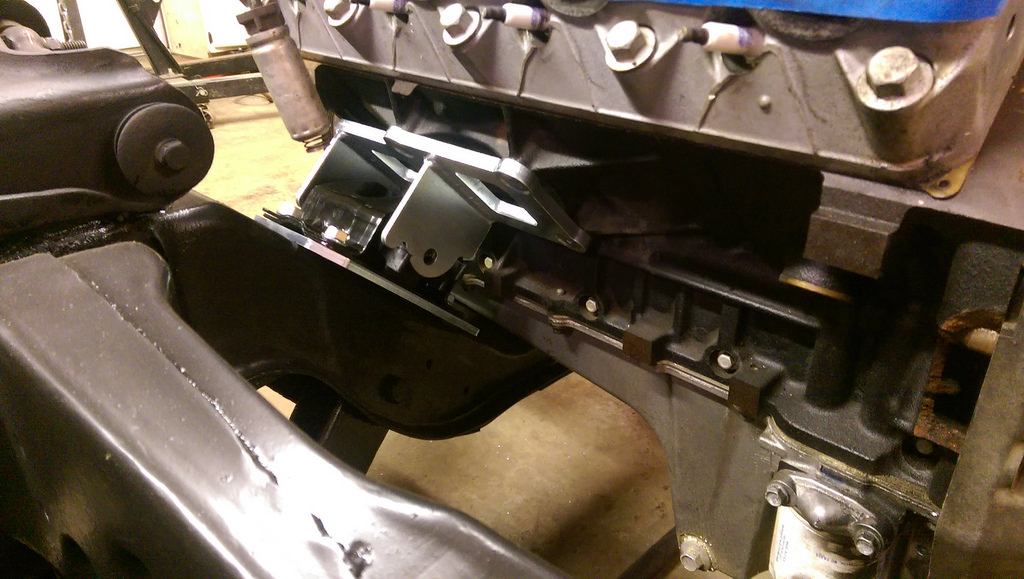
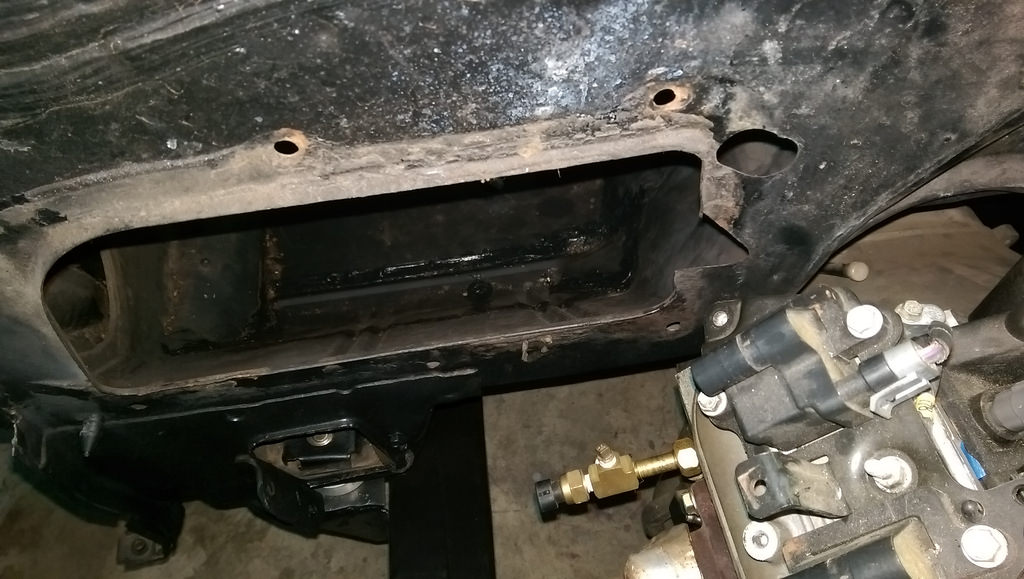
Here is the mount plate attached after I drilled the hole.

Labeled for those curious: Blue are the existing frame holes, Red is the one hole that was needed to drill, and Green are threaded holes for the new mounts
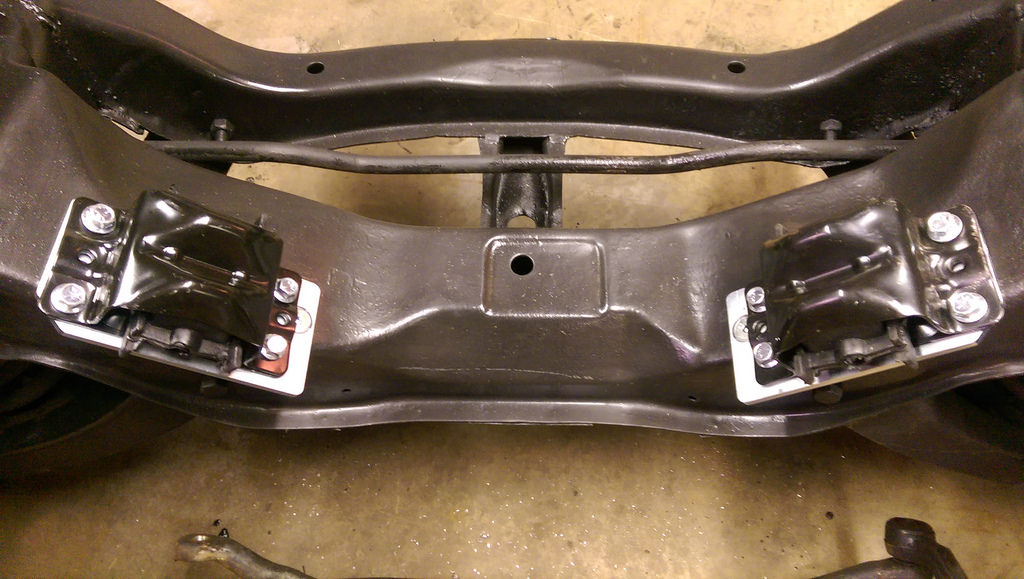
Here they both are attached. Note that the plates have notches that are designed that way to clear the headers.
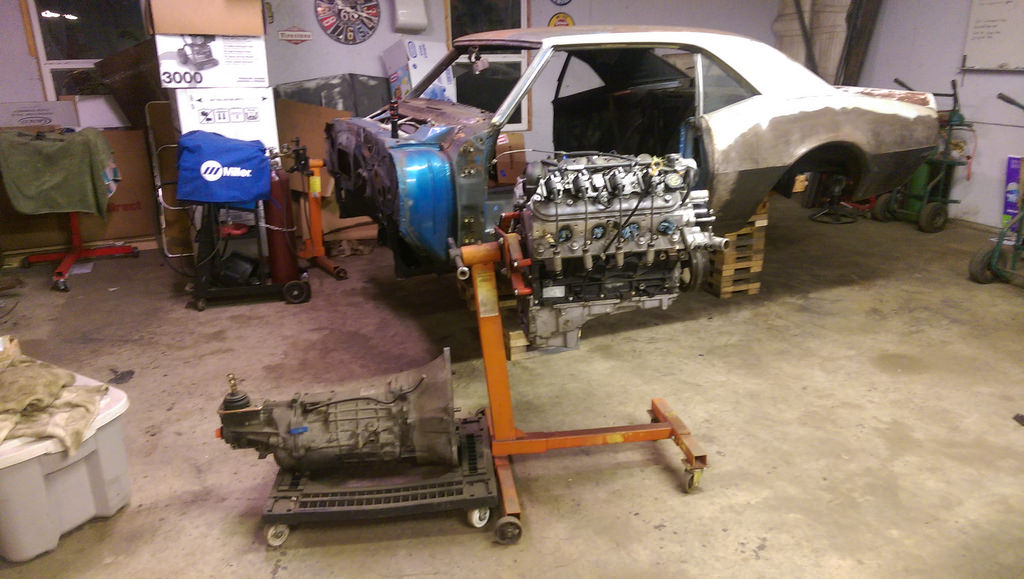
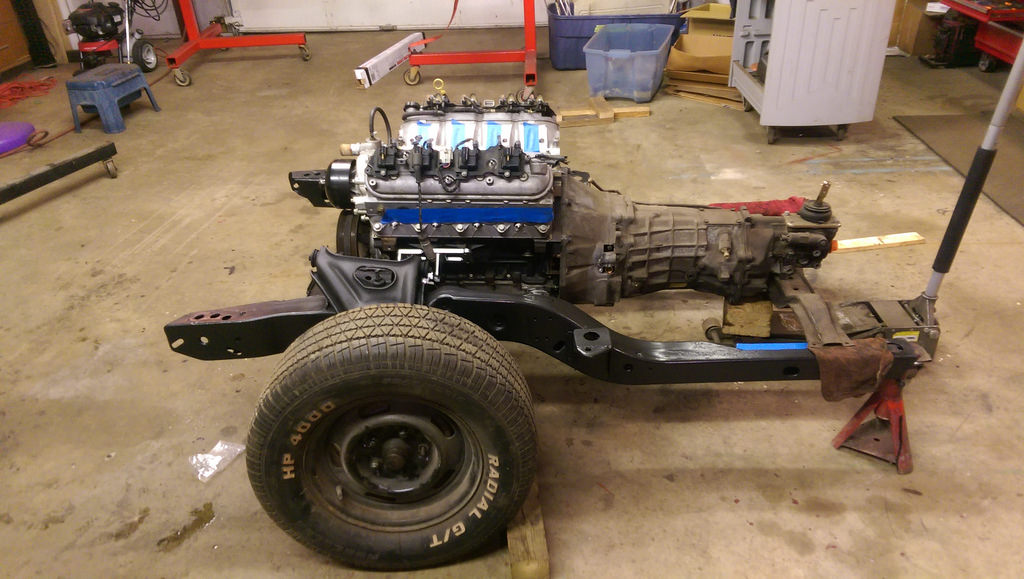
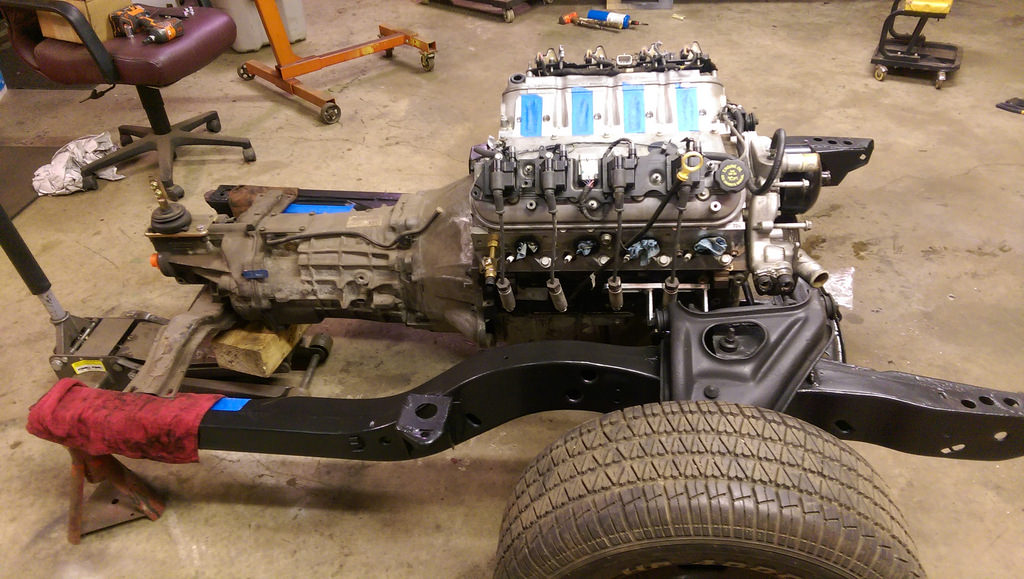
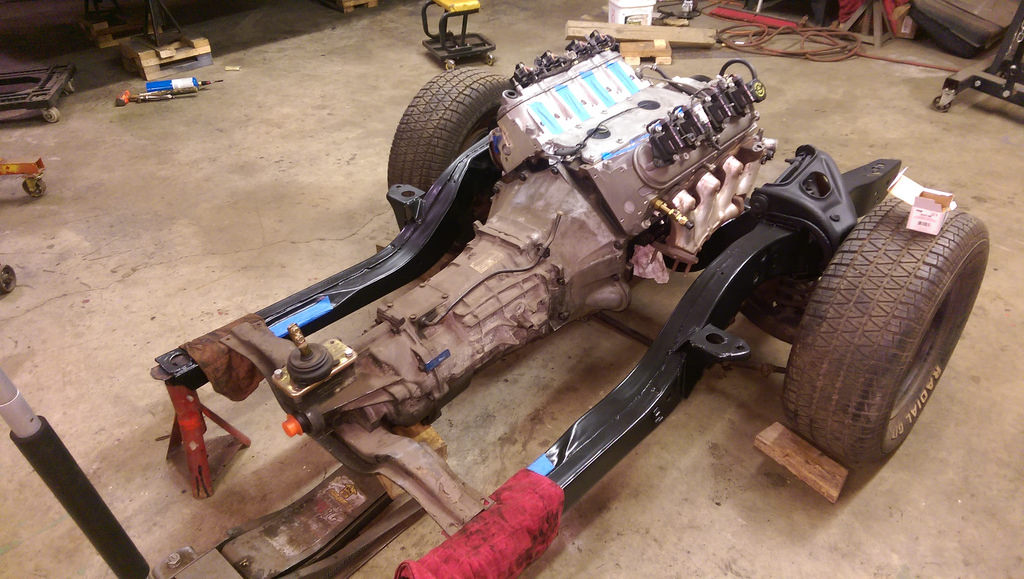
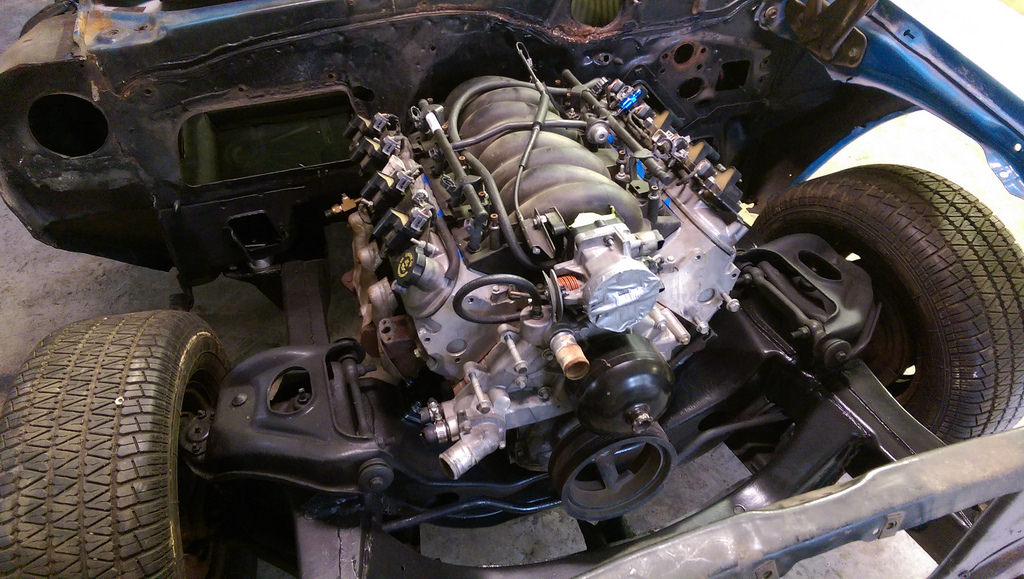
Here is the motor and trans ready to be mounted together for the first time!
Now if you remember, the 5.3 had the lower driver side flange broken off due to the previous transmission failure. The dowel pin locator was still in place, and I got lucky that the transmission actually had both dowel pins in it. (they must have pulled out of the previous motor it was attached to) So I left the passenger side, and it fit together perfectly.
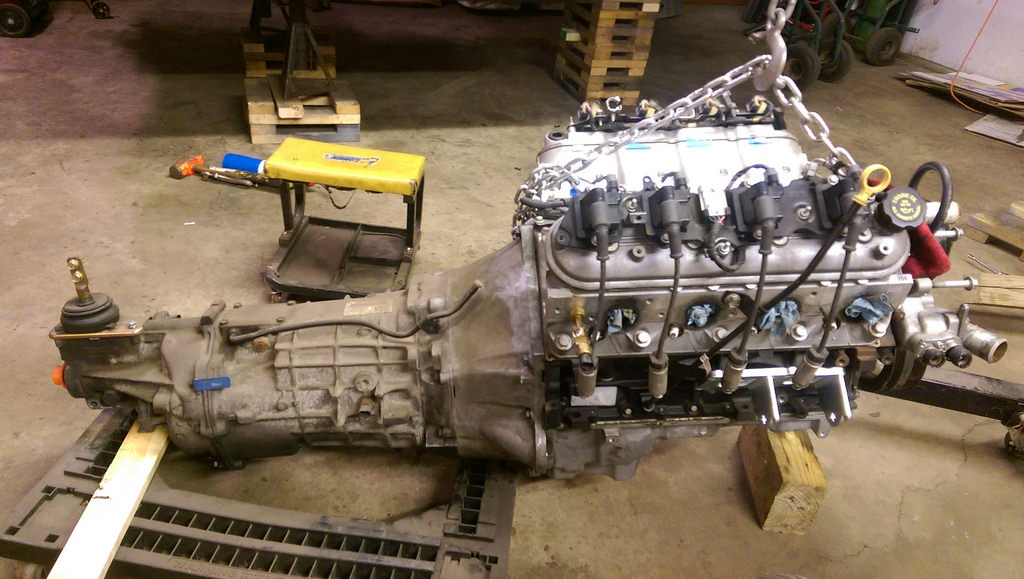
Fits just like it should. Very happy I went with the Hooker/Holley Mounts.
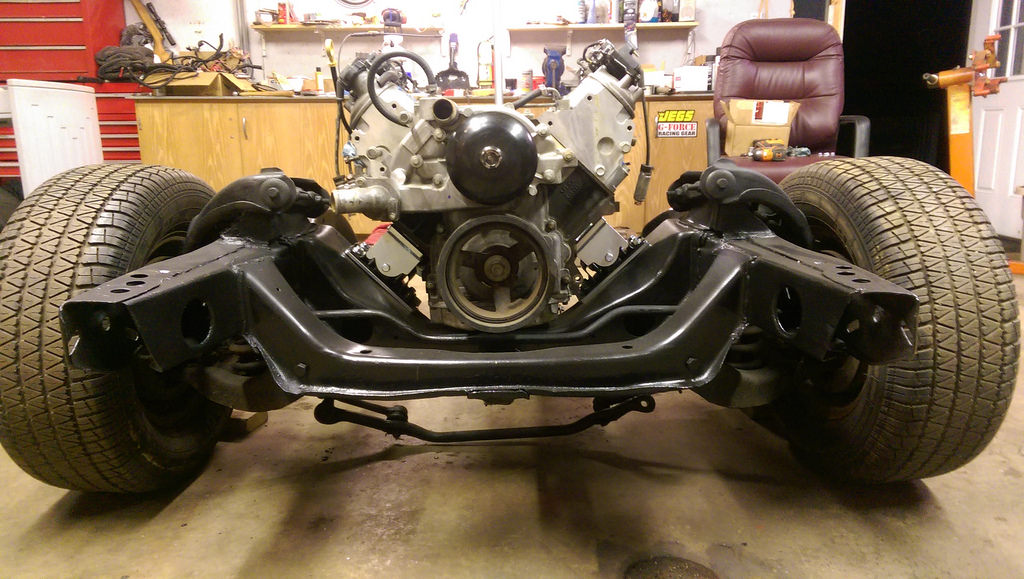
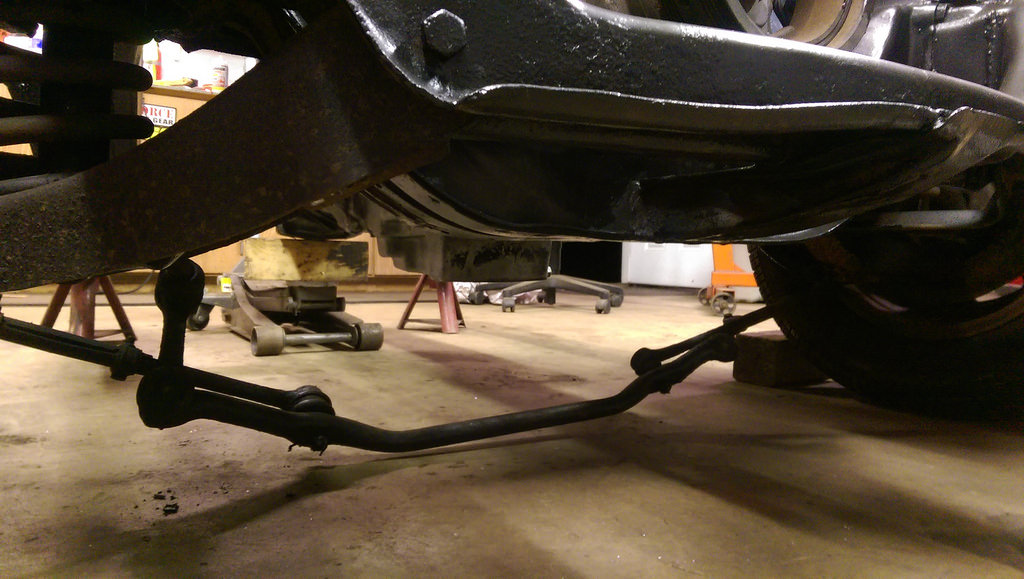
Here is the clearance with a truck pan for anyone interested. It does clear all of the rear steer linkages, but hangs down by only 3-4" haha
Little too low for my liking...
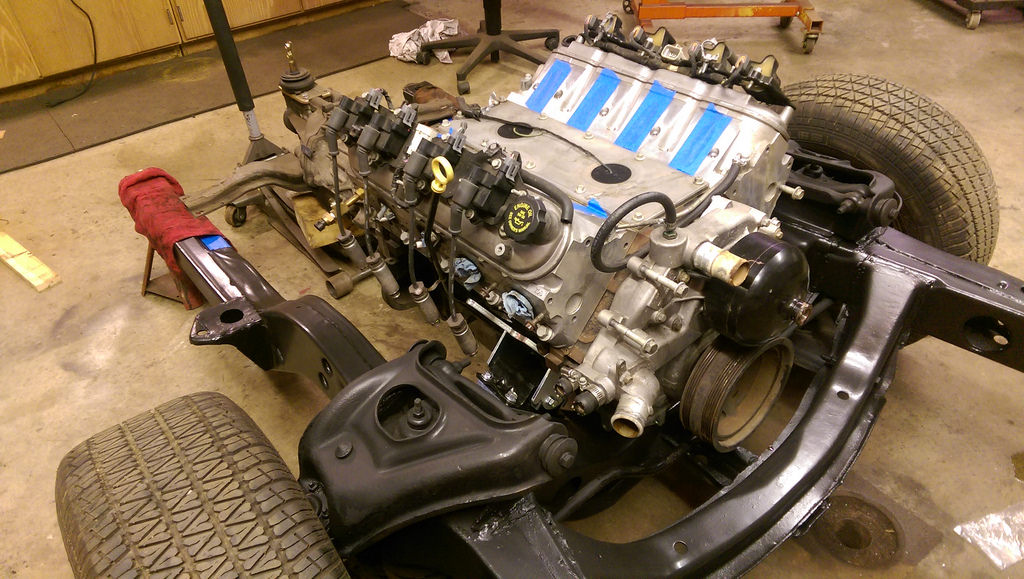
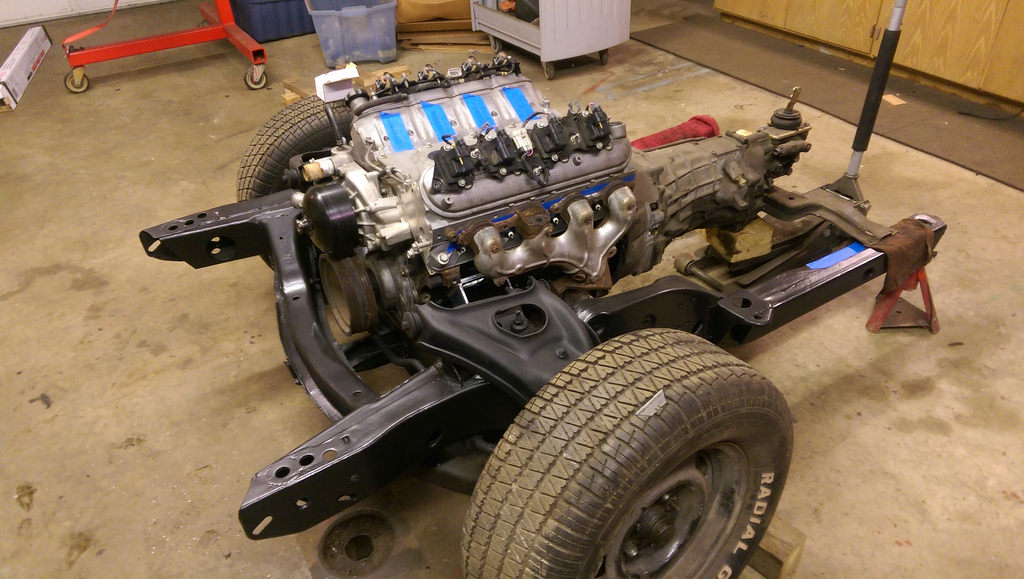
Now, there really isn't a lot of information out there on what stock manifolds may or may not fit with these mounts. I had a set of 01-02 Fbody manifolds laying on my parts shelf, ant thought I would give them a try. They fit surprisingly well, but I don't have the steering box on there yet so there could be a problem with the driver side. Passenger side fits with no problems clearing everything by 1/2". If they fit or will fit with a little modification I will run those for the time being and save up for the long tubes.
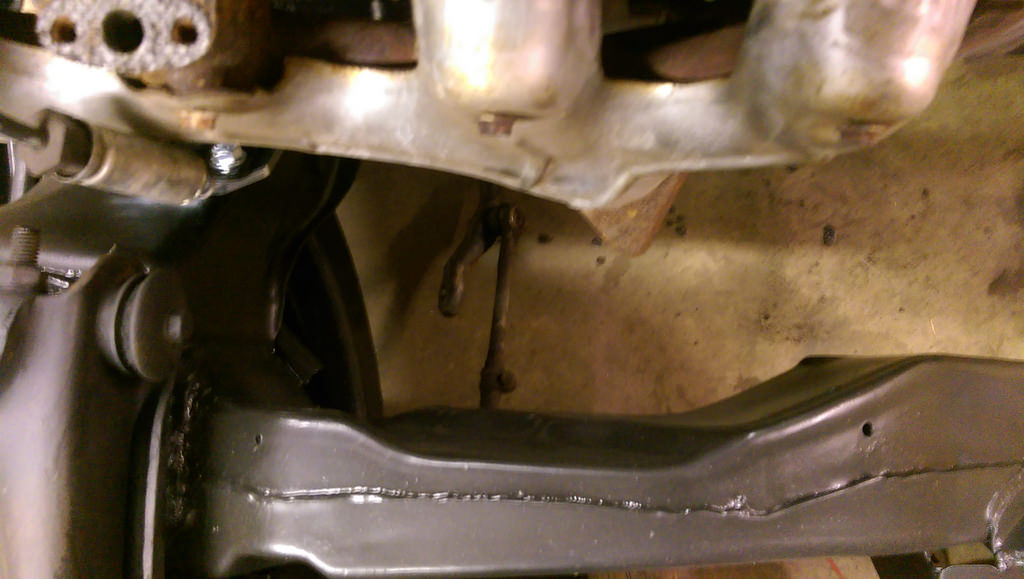
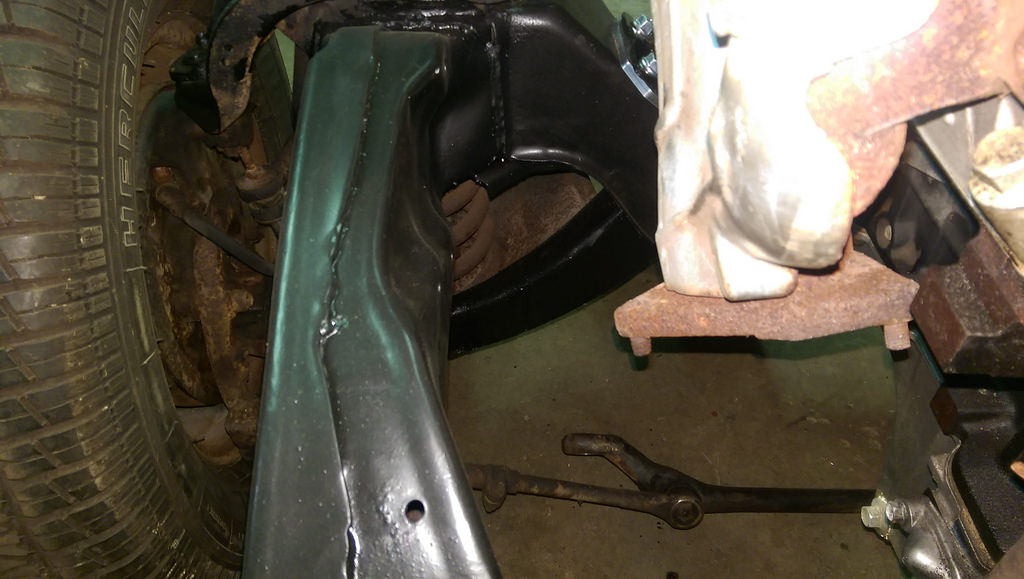
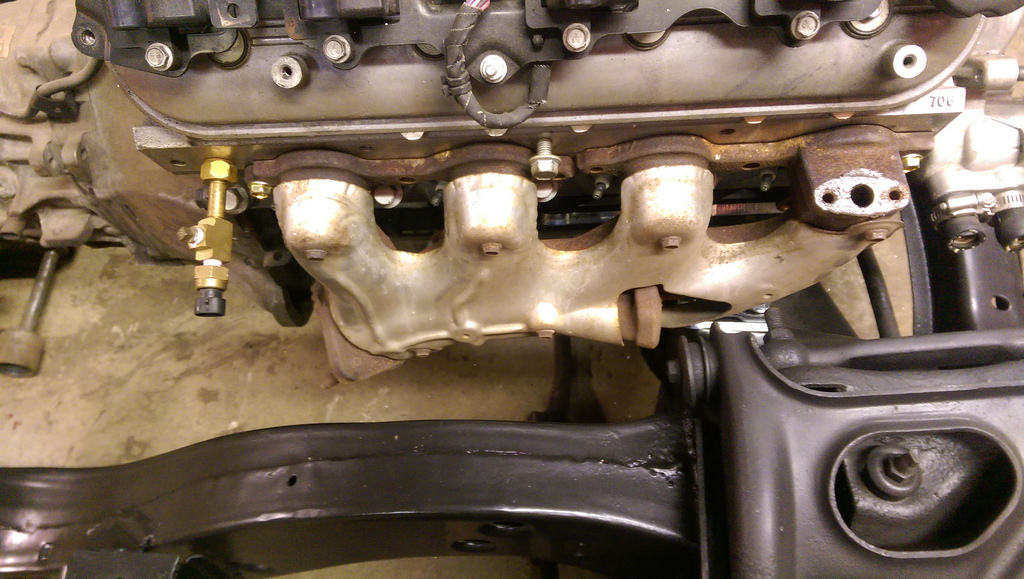
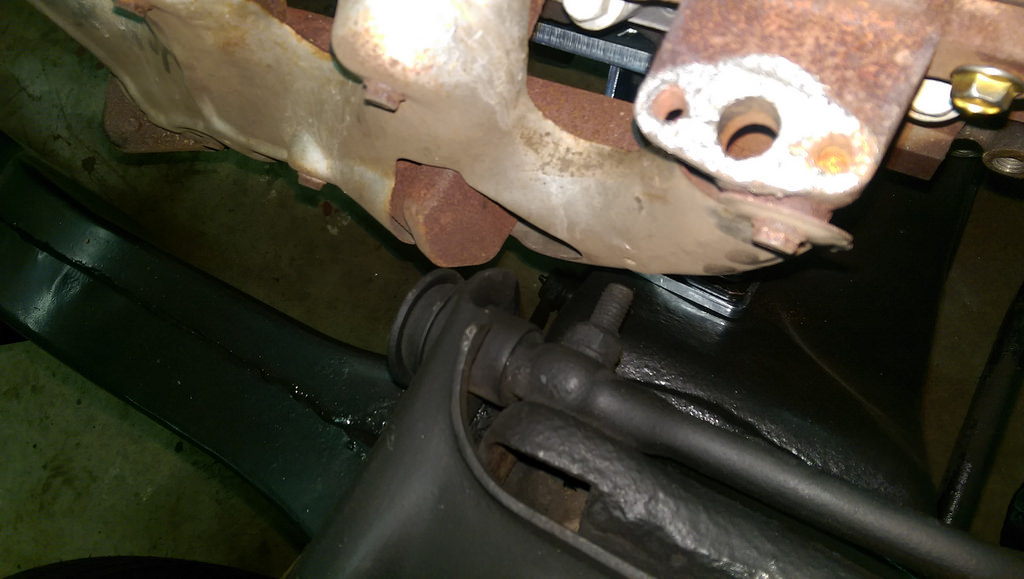

And just a few more of the frame and drivetrain.
Not long now, haha.
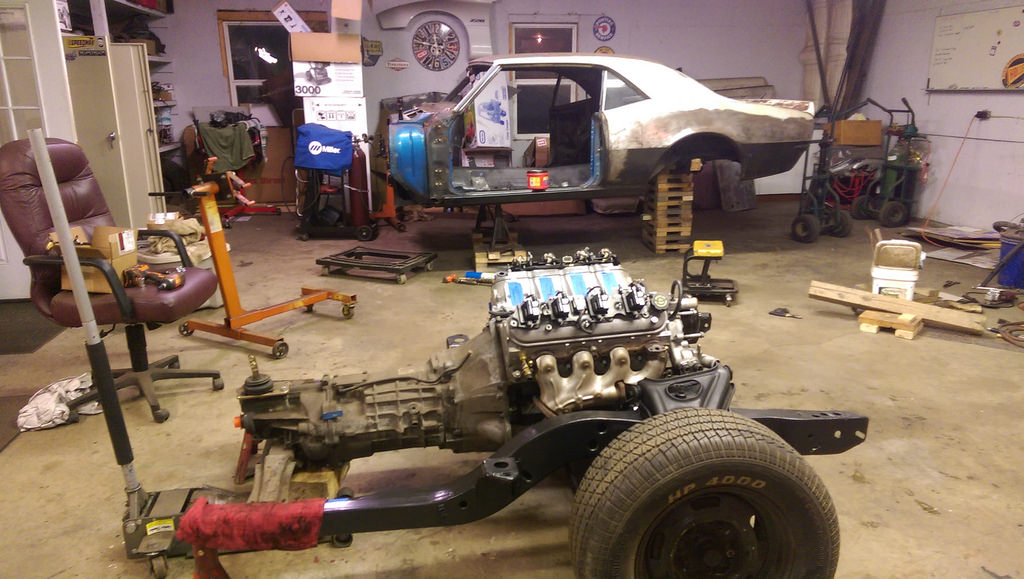
Super happy with this update because this is the stuff that I really enjoy doing. Hopefully going to test fit the frame this weekend, get a hole cut for the shifter, test fit engine harness to find a location for the ECU, and body panel fitment. I can't forget that I still need to do final fitment of the rocker panel on the driver side and install the passenger side rocker panel.
I decided to wait until I had the frame mounted before I did any final welding on the rocker panels as things may settle slightly. I will likely mount the doors, fenders, core support, and possibly the hood this weekend and start the repairs to the rocker panels. I want to make sure that all my panels are going to fit with all of the repairs that I made on the body. Once the rockers are in place, the only panel left will be my upper dash. Which will get a new piece from AMD.
Cheers,
Ryan
1955 Nomad project LC9, 4L80e, C5 brakes, Vision wheels
1968 Camaro 6.2 w/ LSA, TR6060-Magnum hybrid and etc SOLD
1976 T/A LS1 6 Speed, and etc. SOLD
Follow me on Instagram: ryeguy2006a
08-12-2016 #70
Registered User
- Join Date
- May 2015
- Location
- Island Lake, IL
- Posts
- 815
Good stuff Ryan! I'm always excited to see every step you make with the project.
08-14-2016 #71
Registered User
- Join Date
- Sep 2009
- Posts
- 2,707
Another big update for me. With the help of both my dad and father-in-law, we were able to shuffle my newly painted and assembled frame under the car. I am very happy to say that the fully assembled frame fit flawlessly! There is clearance everywhere in both the tunnel and the firewall. Very pleased with the ease of fitment with the Hooker engine mounts. I am very happy that I have gone with those mounts as it has really taken the difficulty out of this swap. I know the rear end isn't in the car, but I put a slight rake in the body and the motor/trans are almost at the perfect angle.
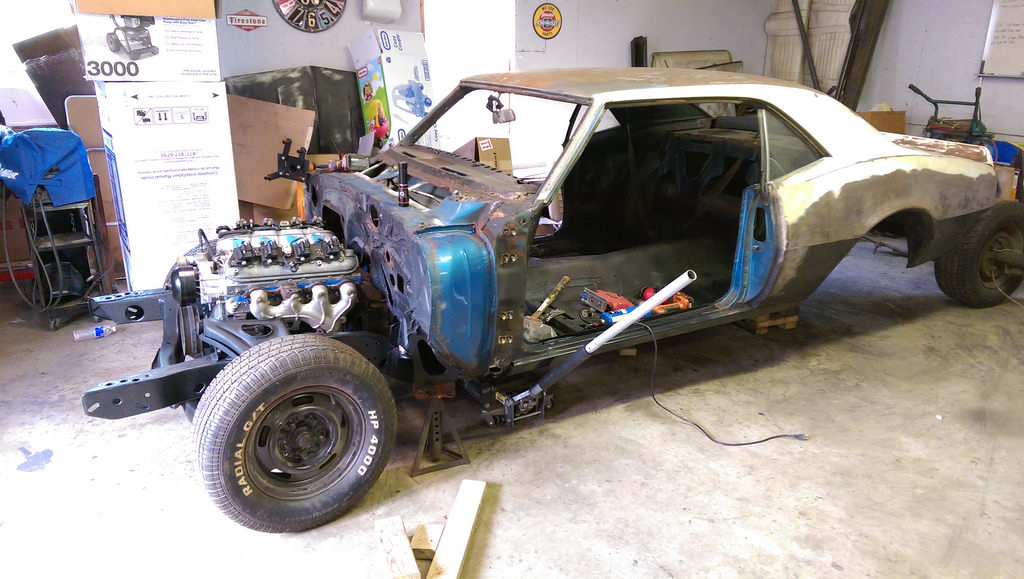
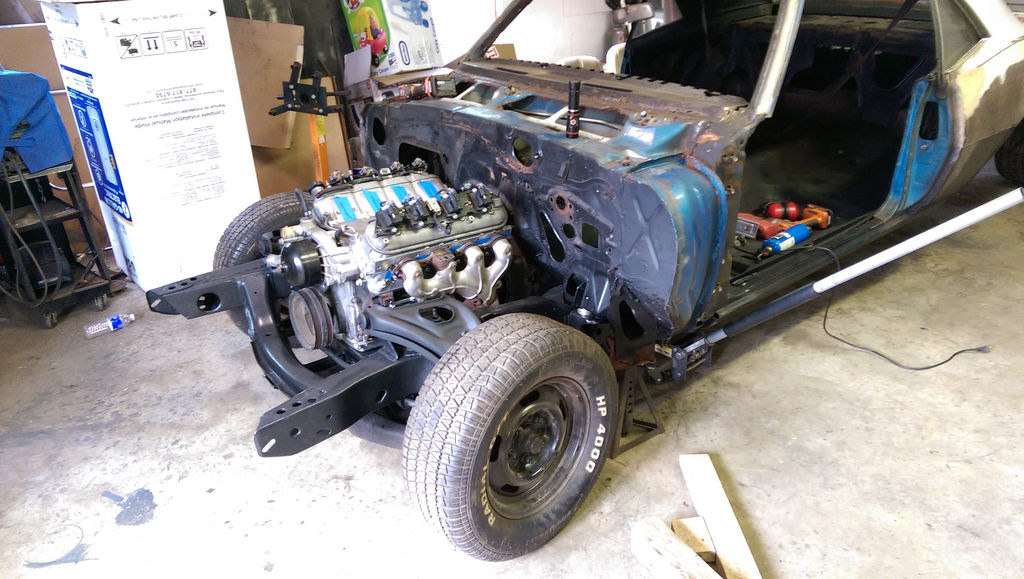
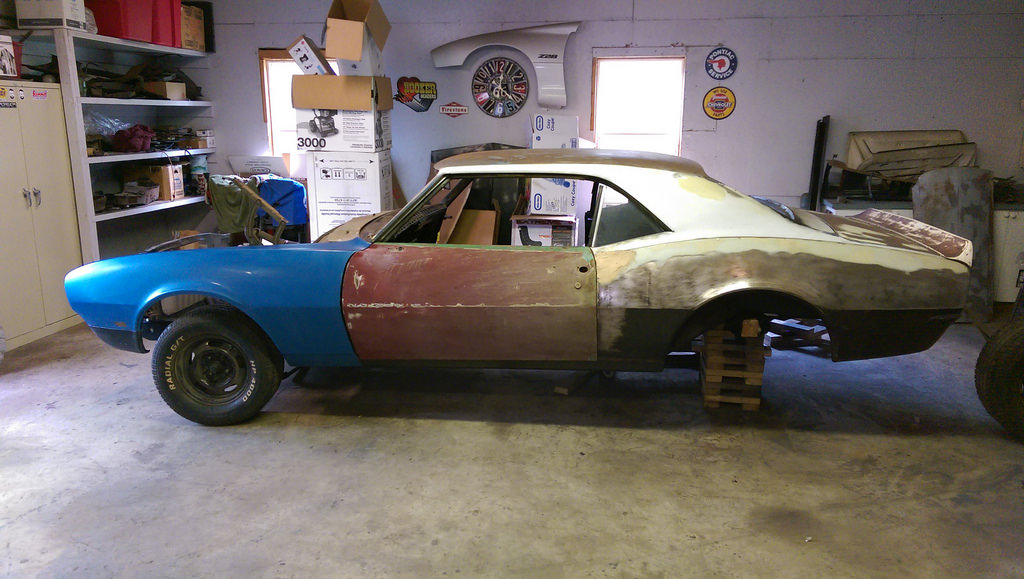
And the reason that I have gone through the steps of putting the frame under the car is so that I can fit the body panels. Overall, fitment of the door and fender is pretty good. I am going to need to modify the rocker panel in order to pull the top out to meet the door and fender about 1/4". I had a good idea that I would need to make some modifications to the rocker panel, but happy that it isn't worse than it is.
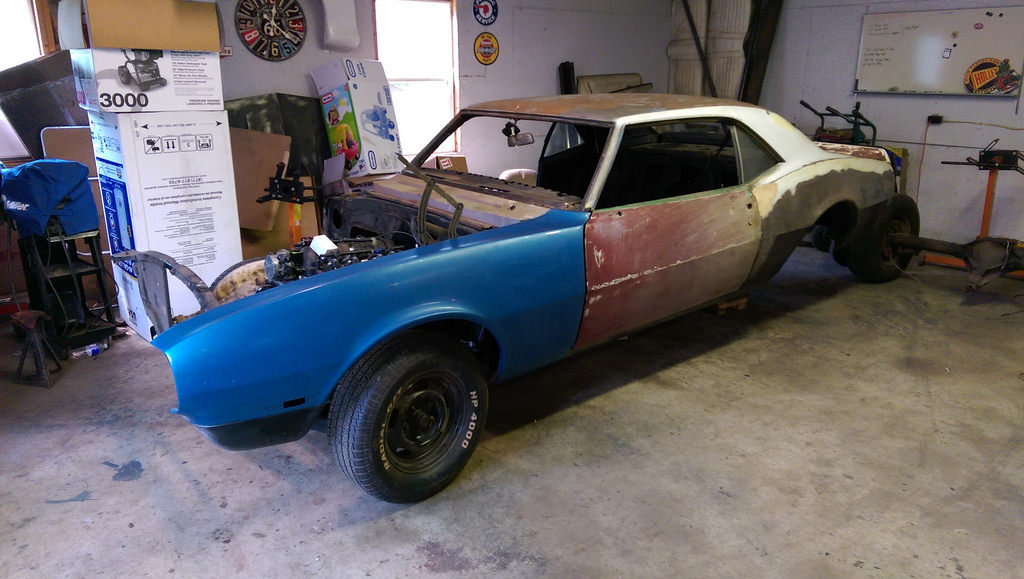
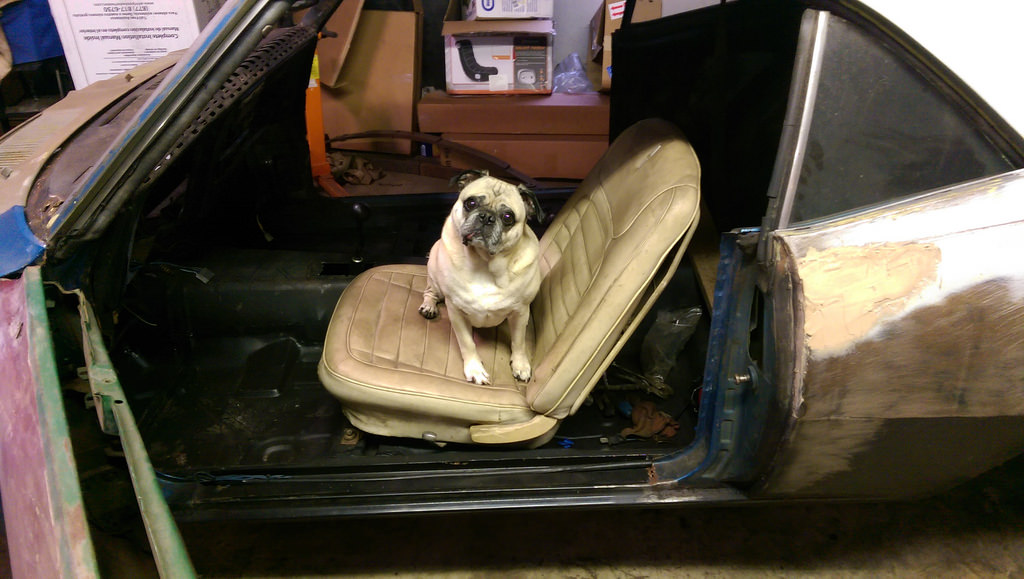
I also wanted to get an idea of where the shifter was going to come out, so I cut the hole in the trans tunnel. I cut the hole a little small so that I could trim it back later. I even threw in a seat just to get an idea of how it's going to feel. The trans still needs to be raised slightly, but first impression is the shifter is right where it needs to be.
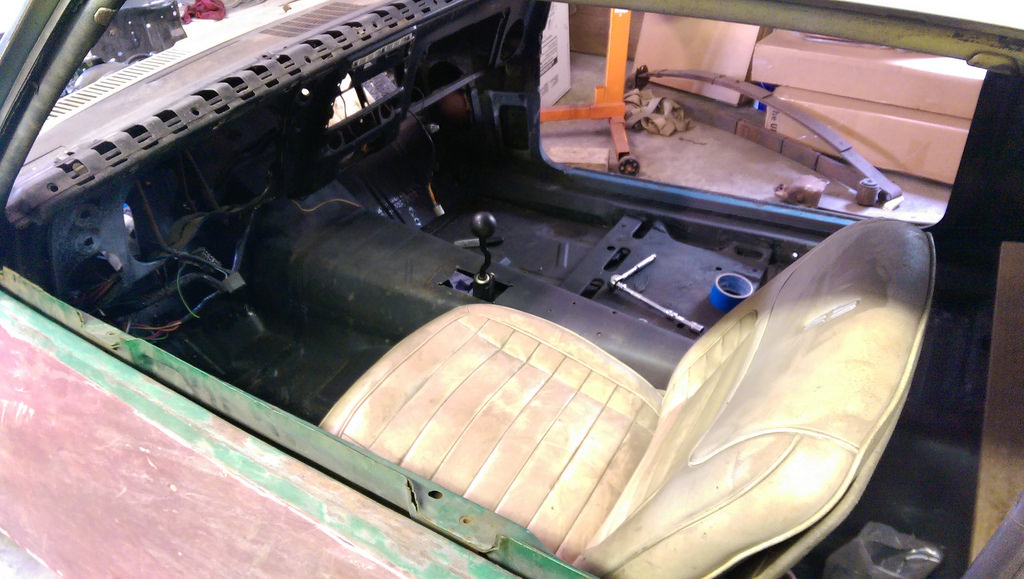
It is amazing how the car can appear to be so much more complete with just a few body panels on it. It is really neat after making a large leap such as this update, to take a step back and admire all of the work that has been done. It is pretty amazing that the car is where it is today. It has only been 8 months since I got the car, and it is now back to where it was when I got it. Minus all the rust. I still need to repair a few more panels, but I am hoping that the trend will continue with the updates going forward.
Cheers,
Ryan
1955 Nomad project LC9, 4L80e, C5 brakes, Vision wheels
1968 Camaro 6.2 w/ LSA, TR6060-Magnum hybrid and etc SOLD
1976 T/A LS1 6 Speed, and etc. SOLD
Follow me on Instagram: ryeguy2006a
08-14-2016 #72
Registered User
- Join Date
- May 2015
- Location
- Island Lake, IL
- Posts
- 815
I see you got those Pro-Touring F-Body solid body mounts put to use. I was talking to Dave last week about a customer raving about them on his 1st gen recently. The guy has a 1st gen like you're working on now but convertible. Apparently just installing those mounts stopped a lot of flexing noise throughout the car just pulling in and out of the garage.
NOT A TA recently posted a small tip with regard to those mounts. Applying grease around the sleeve and contact point of the mount will help lessen any possible noise. Just don't grease the actual bolt. He works on a lot of F-Body cars and installs them on every one.
08-15-2016 #73
Registered User
- Join Date
- Sep 2009
- Posts
- 2,707
I was actually going to be buying a new set within a week of when you posted yours, so it was perfect timing. I have used Dave's mounts in the past, which is why I was so happy that a nice used set came on the market. He has a great product, and it really makes a huge difference verse the stock rubber mounts. Originally Posted by F-Body International

Good tip and thanks for sharing. The frame isn't in permanently, so when I pull it apart for final mounting I am going to grease them up for sure.
1955 Nomad project LC9, 4L80e, C5 brakes, Vision wheels
1968 Camaro 6.2 w/ LSA, TR6060-Magnum hybrid and etc SOLD
1976 T/A LS1 6 Speed, and etc. SOLD
Follow me on Instagram: ryeguy2006a
08-15-2016 #74
Registered User
- Join Date
- Sep 2009
- Posts
- 2,707
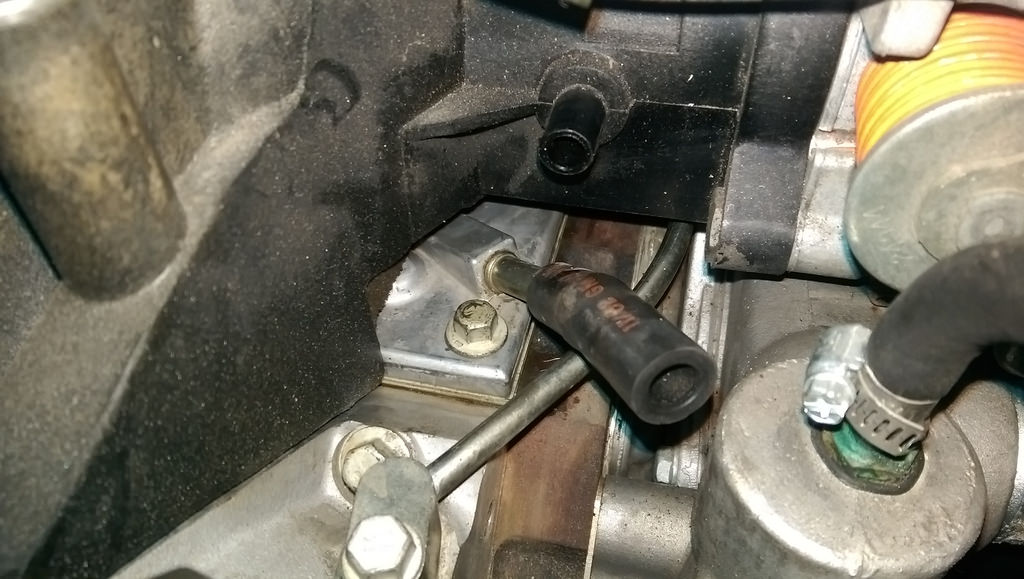
I took a few more pictures yesterday of the firewall clearance for those that are interested. Plenty of room around everything.
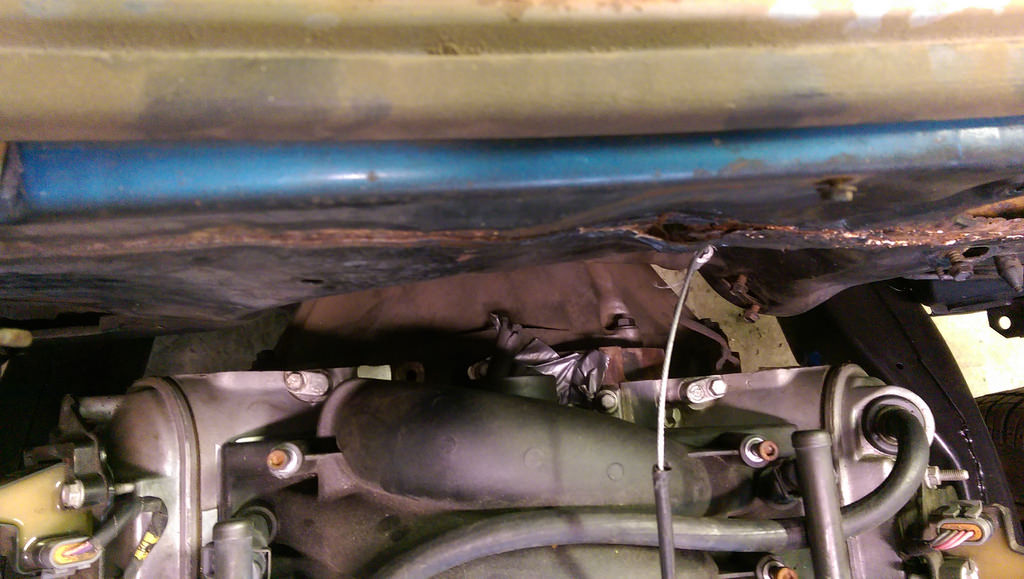
Might be tight around the heater core, but nothing major.
Also, this little guy (wife's dog, now ours) wandered in and was acting photogenic.
1955 Nomad project LC9, 4L80e, C5 brakes, Vision wheels
1968 Camaro 6.2 w/ LSA, TR6060-Magnum hybrid and etc SOLD
1976 T/A LS1 6 Speed, and etc. SOLD
Follow me on Instagram: ryeguy2006a
08-15-2016 #75
Registered User
- Join Date
- Mar 2015
- Posts
- 251
I love that cam. I had that cam in my old 02 SS. I would Highly recommend at least 4.10 gears. I ran 4.30's and that thing would buck in 1st. Also what clutch are you running? Going to need to look into a nice clutch with that big cam. I snapped all 5 lug nuts in my moser 9 on NA. ARP studs are a must. Love this build.
08-15-2016 #76
Registered User
- Join Date
- Apr 2016
- Posts
- 191
Not sure if I read right, but are u using the truck oil pan with these mounts? Clears steering etc? BTW great build very inspiring for us following along
08-16-2016 #77
Registered User
- Join Date
- Sep 2009
- Posts
- 2,707
Thanks for the info. I am sorta on the fence about this cam, as it seems a little too large for me. I'm probably going to sell it and get something smaller. Good info on the ARP wheel studs. I have a complete set of 1/2" ARP studs that I will have to use. Originally Posted by camarodude87
1955 Nomad project LC9, 4L80e, C5 brakes, Vision wheels
1968 Camaro 6.2 w/ LSA, TR6060-Magnum hybrid and etc SOLD
1976 T/A LS1 6 Speed, and etc. SOLD
Follow me on Instagram: ryeguy2006a
08-16-2016 #78
Registered User
- Join Date
- Sep 2009
- Posts
- 2,707
So, Yes you read that right that I have the truck pan on my car right now, but when the time comes for final installation I will be using the 302-2 pan. The motor came with the truck pan installed and although it fits around the entire steering linkages, hangs way too far below the frame for comfort. I have seen another thread where someone cut 4" off of the bottom of the truck pan an installed in a X-body Nova. That thought has also crossed my mind. Originally Posted by Jk918
1955 Nomad project LC9, 4L80e, C5 brakes, Vision wheels
1968 Camaro 6.2 w/ LSA, TR6060-Magnum hybrid and etc SOLD
1976 T/A LS1 6 Speed, and etc. SOLD
Follow me on Instagram: ryeguy2006a
08-18-2016 #79
Registered User
- Join Date
- Sep 2009
- Posts
- 2,707
So, I thought I would share a quick tip for anyone doing some wiring and tracing a harness that is out of a car. Until last night, I had always gotten a battery out, and jumped wires to it, so that I could test circuits. It dawned on my yesterday that the circuits are 12v, and even with 8-9v you can still get a faint light with a test light, so I grabbed a 9v battery I had and it worked like a charm. When I was repairing the wiring harness for the 5.3, I was using a 9v battery and my test light and it worked perfectly, and much less cumbersome than a full sized battery!
1955 Nomad project LC9, 4L80e, C5 brakes, Vision wheels
1968 Camaro 6.2 w/ LSA, TR6060-Magnum hybrid and etc SOLD
1976 T/A LS1 6 Speed, and etc. SOLD
Follow me on Instagram: ryeguy2006a
08-28-2016 #80
Registered User
- Join Date
- Sep 2009
- Posts
- 2,707
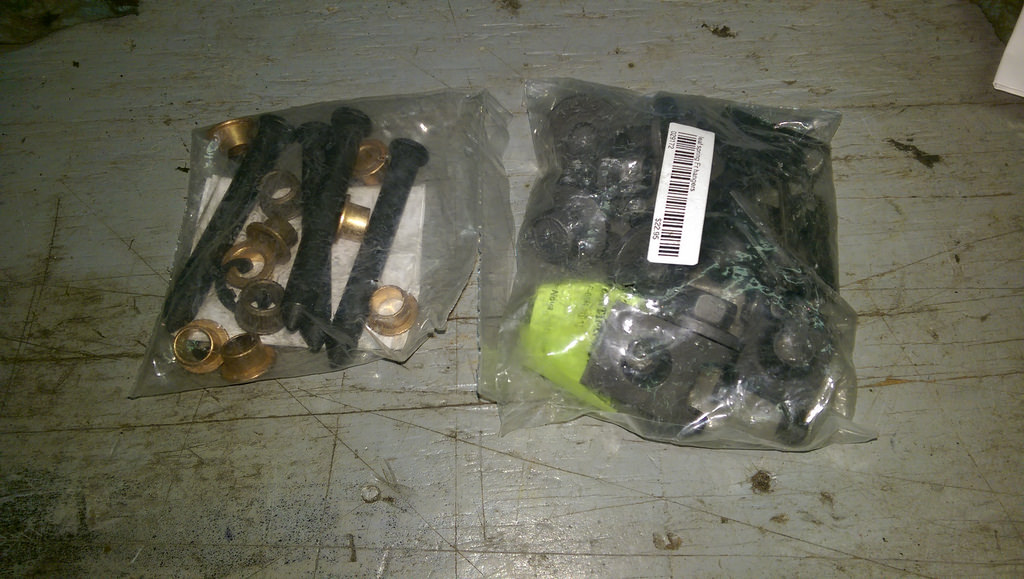
It's been a few weeks without an update. I had to do some repairs on my truck, but I got a little time last night in the garage. I picked up some new door pins and the higher quality "CIP" J-nuts from Steve's Camaro site.
I installed the new hardware and put the stock 8.2 rear back under the car so that it is a roller again. I wanted to get the car back at ride height to make sure that the sub-frame is at the right angle so that I may find the right angle for my trans crossmember. I have decided to make my own crossmember to keep on budget.
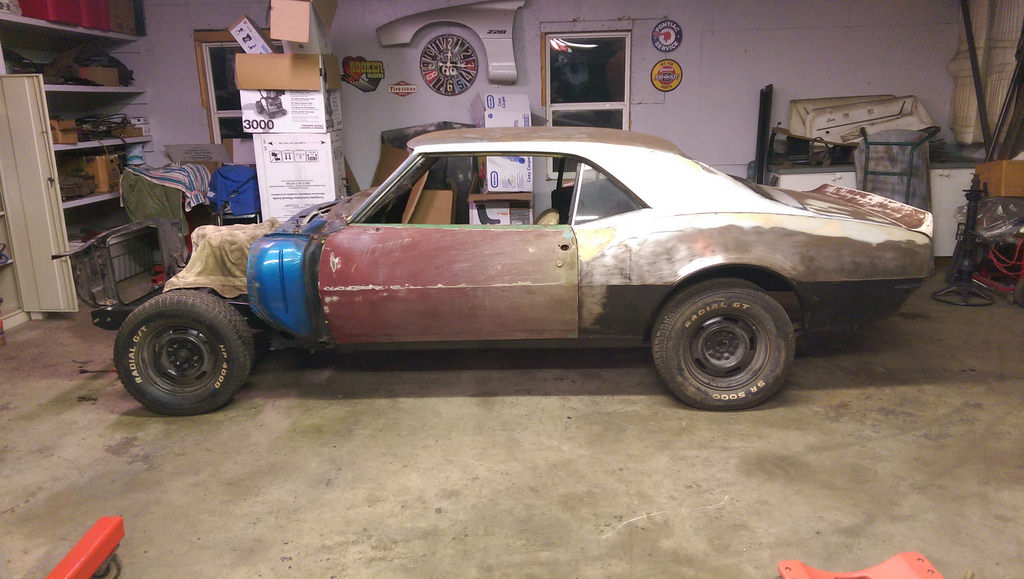
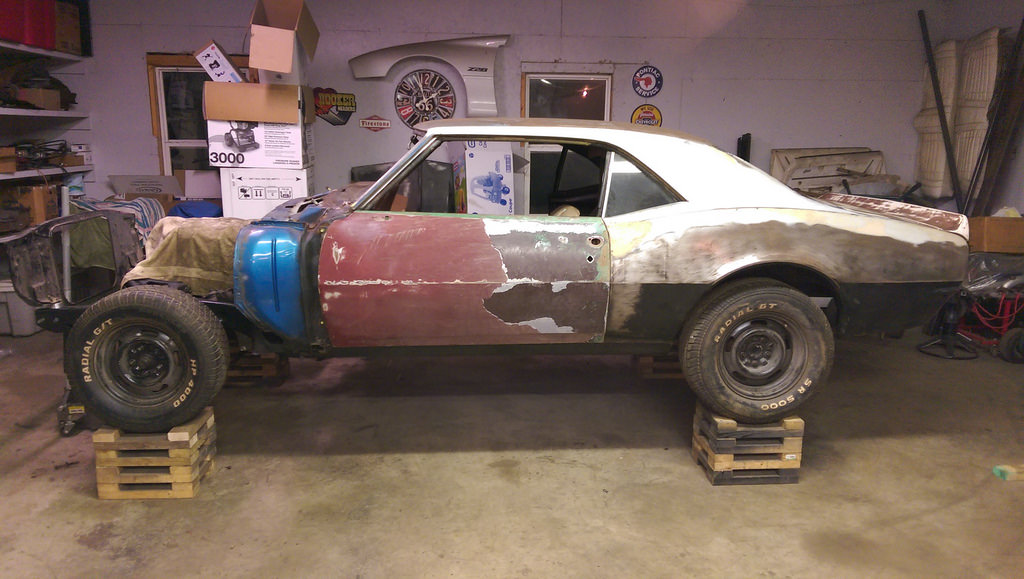
After I verified the angles I needed, I decided to put the car back up on the wheel stands so that I can finish up the driver's side rocker panel.
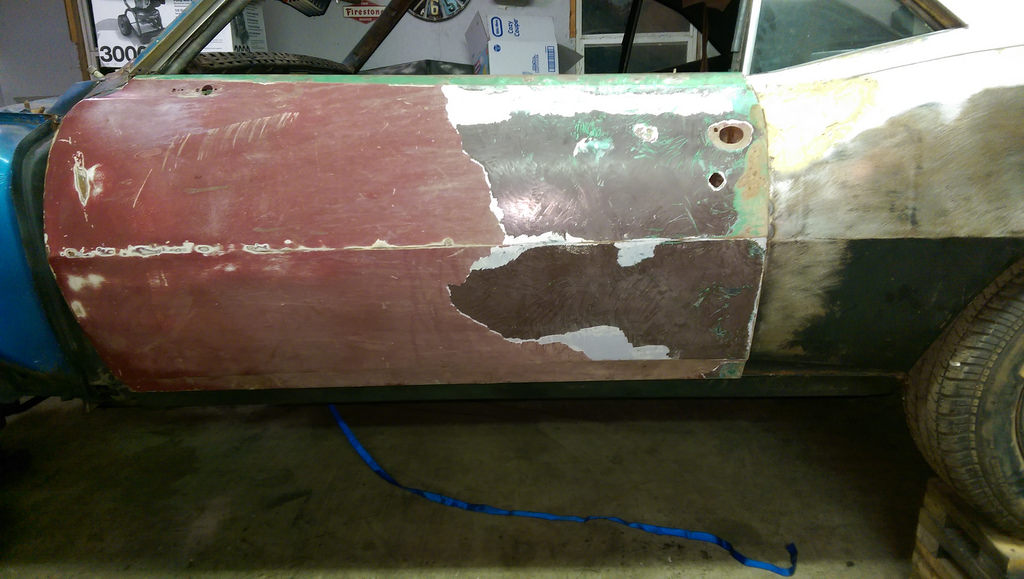
I was trying to clean up the door so that I can get the correct body lines, and realized the other paint was just flaking off. After about 30 mins with a razor blade, I got a good amount of the paint off of the door.
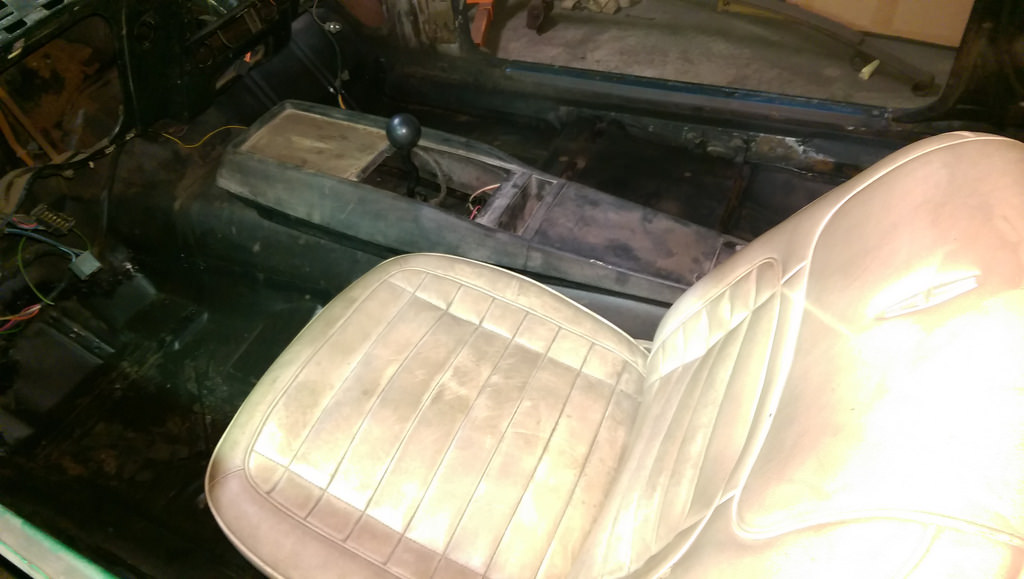
Just for fun, I set the center console roughly where it should be and the shifter comes up almost perfectly center in the console.
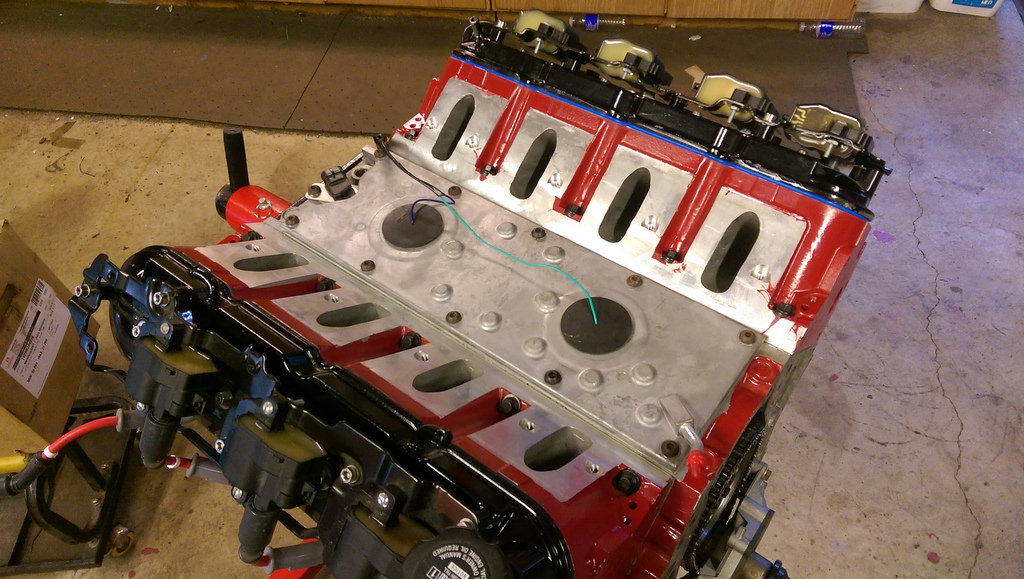
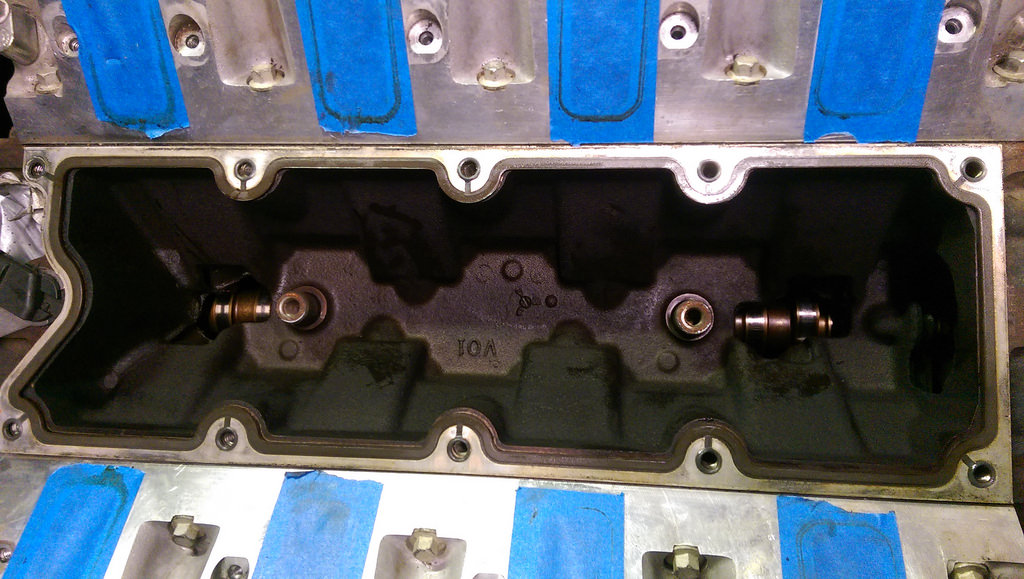
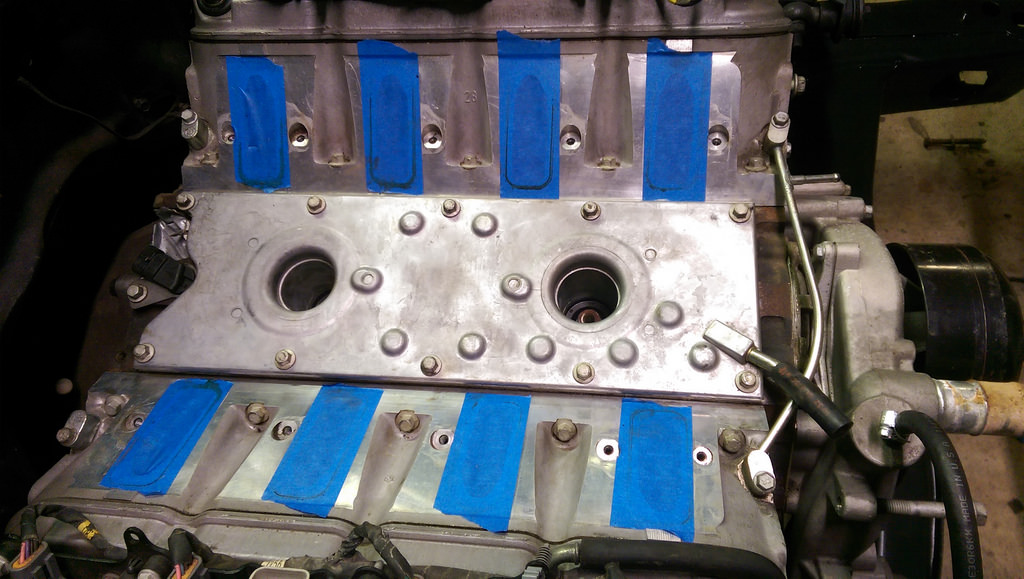
Also, a very small update but if anyone was wondering, the truck block doesn't have the boss like the aluminum blocks do. That means no modifications for the LS6 valley cover.
Not much visual progress, but heading in the right direction.
Ryan
1955 Nomad project LC9, 4L80e, C5 brakes, Vision wheels
1968 Camaro 6.2 w/ LSA, TR6060-Magnum hybrid and etc SOLD
1976 T/A LS1 6 Speed, and etc. SOLD
Follow me on Instagram: ryeguy2006a

 Reply With Quote


