
Results 741 to 760 of 808
-
08-09-2021 #741

 Registered User
- Join Date
- Sep 2009
- Posts
- 2,705

Wow, that's hot. Too hot!! Hopefully things cool down soon for you guys...
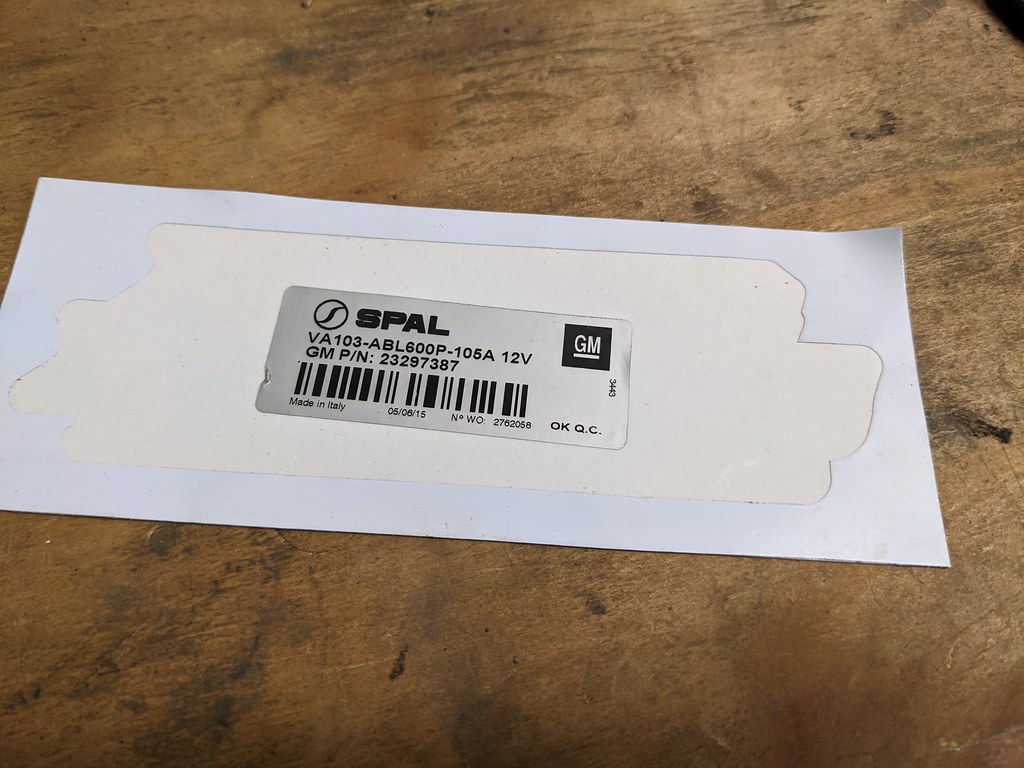
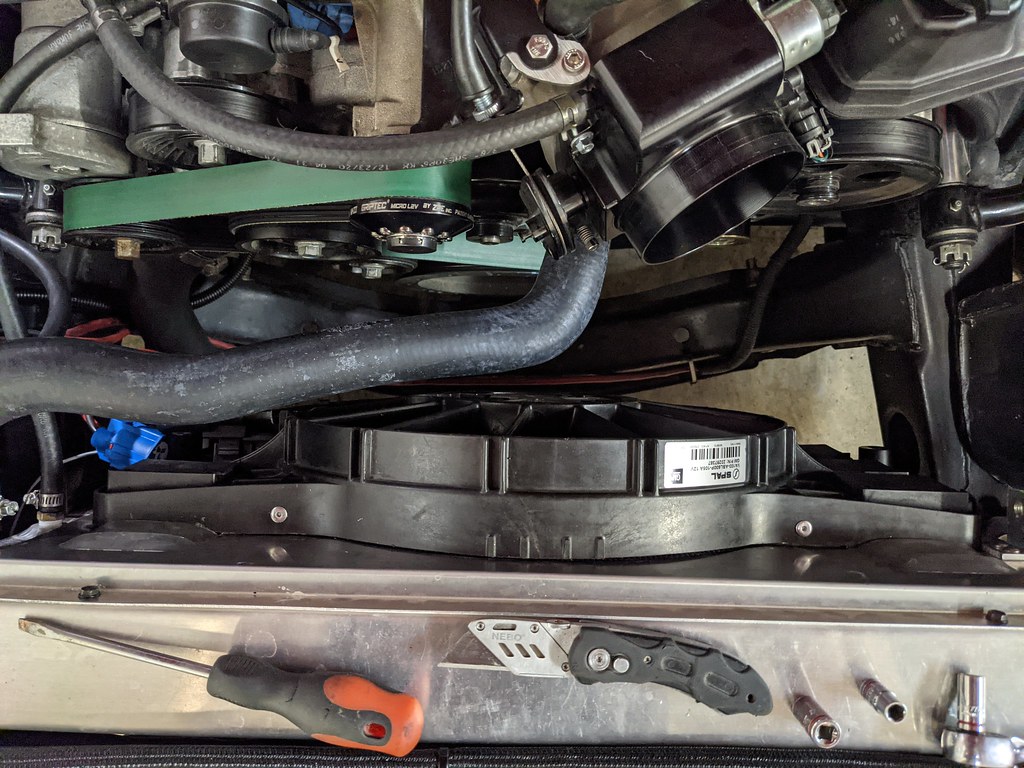
After cruising around I wasn't entirely happy with how the IAT's were reacting with the fans on. They weren't dropping like I was expecting, so after thinking on it a while I decided to make a change to the shroud. I found another guy who had the entire opening of the cooling fan he was running open (Thanks John), and the fan was riveted to the shroud. I really liked that idea and decided to copy that same concept. That meant I had to cut the shroud open and make some mounting tabs.
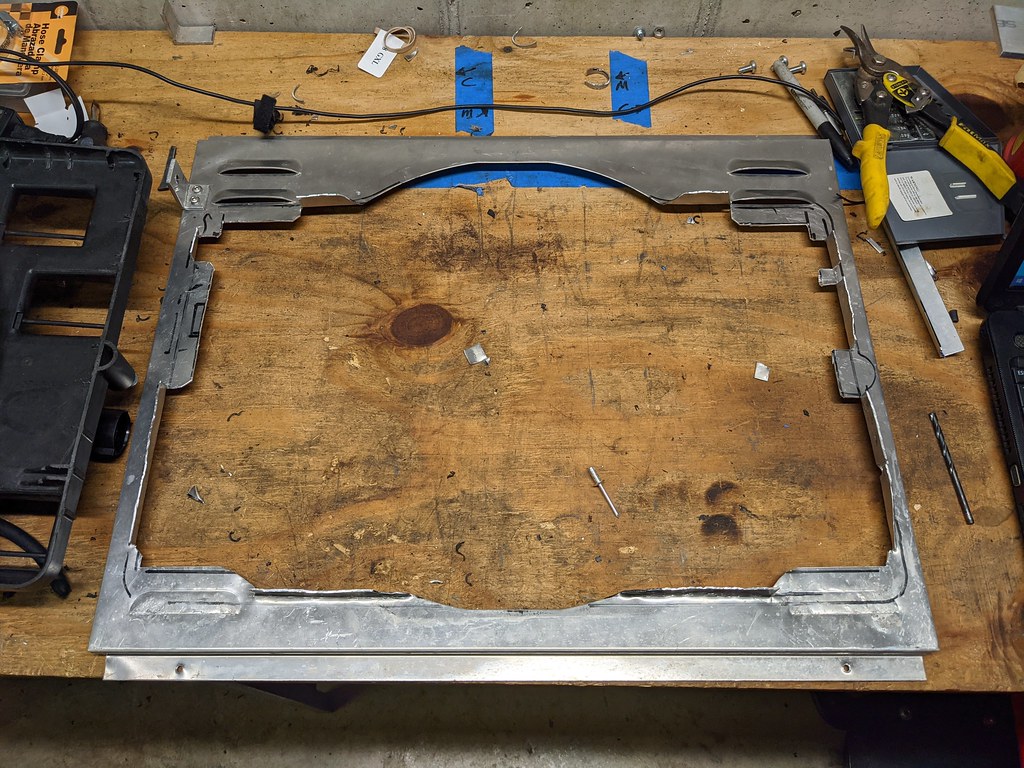
I'd guess that I gained an additional 30% more airflow through the C7 shroud rather than all of the air coming through the 16" opening that the shroud had before. Now there is a more direct path for the air to flow, but not only when the fans are on but at speed when the flaps are open.
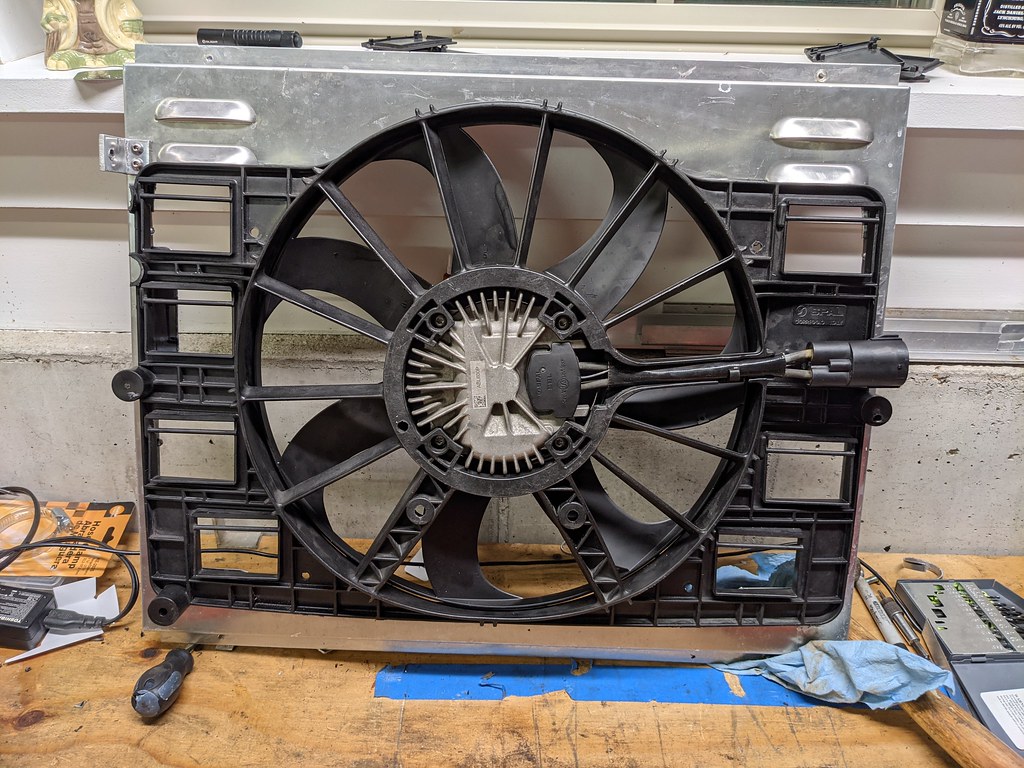
I found a nice guy over on the Corvette forums that had a wrecked C7 and had 4 perfect flaps, which is exactly how many I needed. He gave them to me, all I had to do was pay shipping!
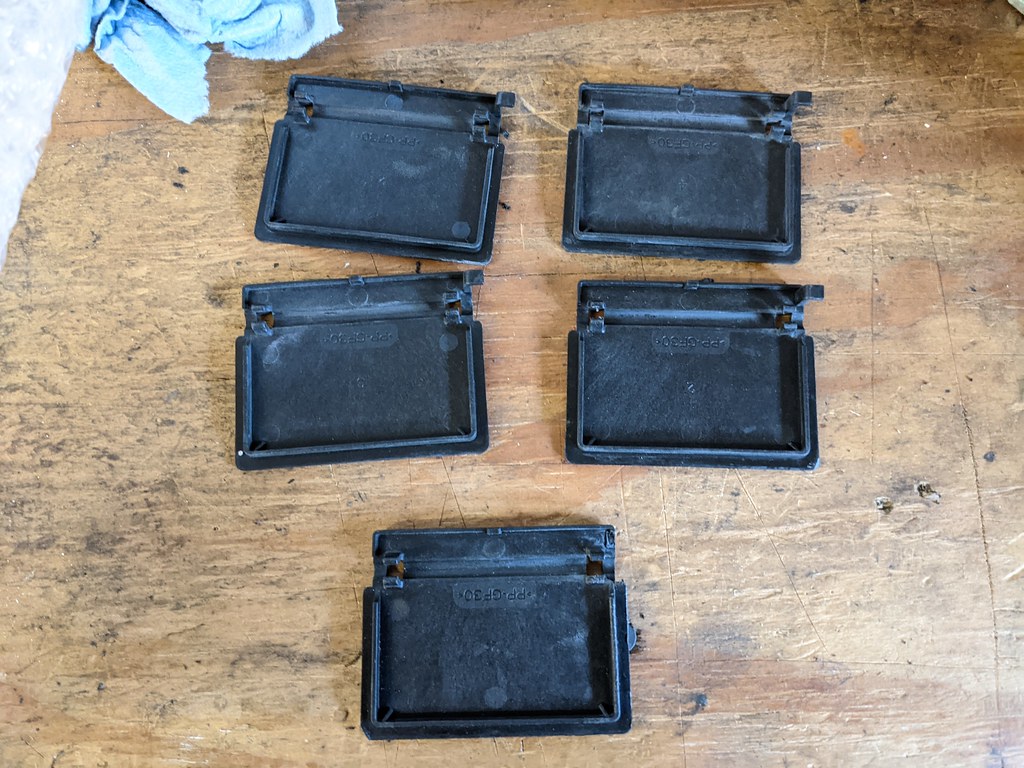
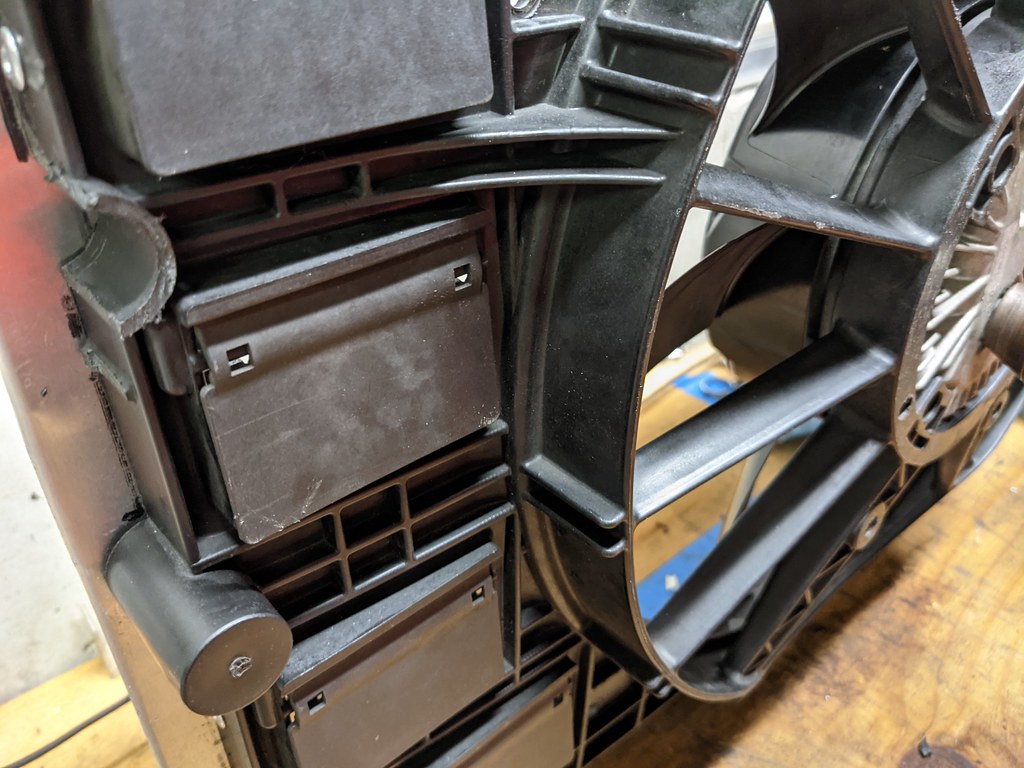
After a ton of test fits, I started to rivet them together. They turned out great and I'm very happy with the way it turned out now. Should have just done this from the beginning. Before when I was first cutting up the shroud, I saved the decal that came on the shroud originally. I wanted to put it back on when it was finished, and I'm glad I did. I think it was a nice finishing touch.

I also needed to shorten up my upper radiator hose. I didn't quite trim it enough when I first installed it, so now it doesn't touch the fan.

I'm finally happy with the way this turned out. It looks great and is actually more rigid now than it was before. The real test is if all the efforts were worth it. I finished this up on Friday night to hopefully make it to a car show on Saturday morning. Great news is that it was 80* out and I was able to get out to the show and test the fans out. The engine coolant didn't change at all, but the IAT's stayed lower. Huge win! I drove the car for about 100 miles and the whole car performed flawlessly, but especially the IAT's. I stopped to let the car idle for around 10 mins to see what it would do. The IAT's were right around 95* cruising then when I stopped they slowly crept up to around 125* and seemed to stay right around that temp. To me that seems pretty good considering all the engine bay heat and no airflow. I could probably get it a little better if I made a CAI shroud around my filter. I'll probably do that at some point, but for now I'm really pleased. The best part was the IAT's cooled right back down once I was moving again. Dropped 15* quickly then slowly went back down to around 95*.
Cheers,
Ryan
1955 Nomad project LC9, 4L80e, C5 brakes, Vision wheels
1968 Camaro 6.2 w/ LSA, TR6060-Magnum hybrid and etc SOLD
1976 T/A LS1 6 Speed, and etc. SOLD
Follow me on Instagram: ryeguy2006a
-
08-09-2021 #742
 Registered User
- Join Date
- Dec 2008
- Location
- Detroit
- Posts
- 2,585
That's awesome! What are you running in your HX, water or coolant?
Big dreams, small pockets....
Chris--
'72 Cutlass S LSA/T56 Magnum
Bowler Performance, Rushforth Wheels, ATS, Holley EFI, KORE3, Ridetech
Project Motor City Madness
08-09-2021 #743
Registered User
- Join Date
- Sep 2009
- Posts
- 2,705
Thanks Chris. I'm running a distilled water and Water Wetter.
1955 Nomad project LC9, 4L80e, C5 brakes, Vision wheels
1968 Camaro 6.2 w/ LSA, TR6060-Magnum hybrid and etc SOLD
1976 T/A LS1 6 Speed, and etc. SOLD
Follow me on Instagram: ryeguy2006a
09-08-2021 #744
Registered User
- Join Date
- Sep 2009
- Posts
- 2,705
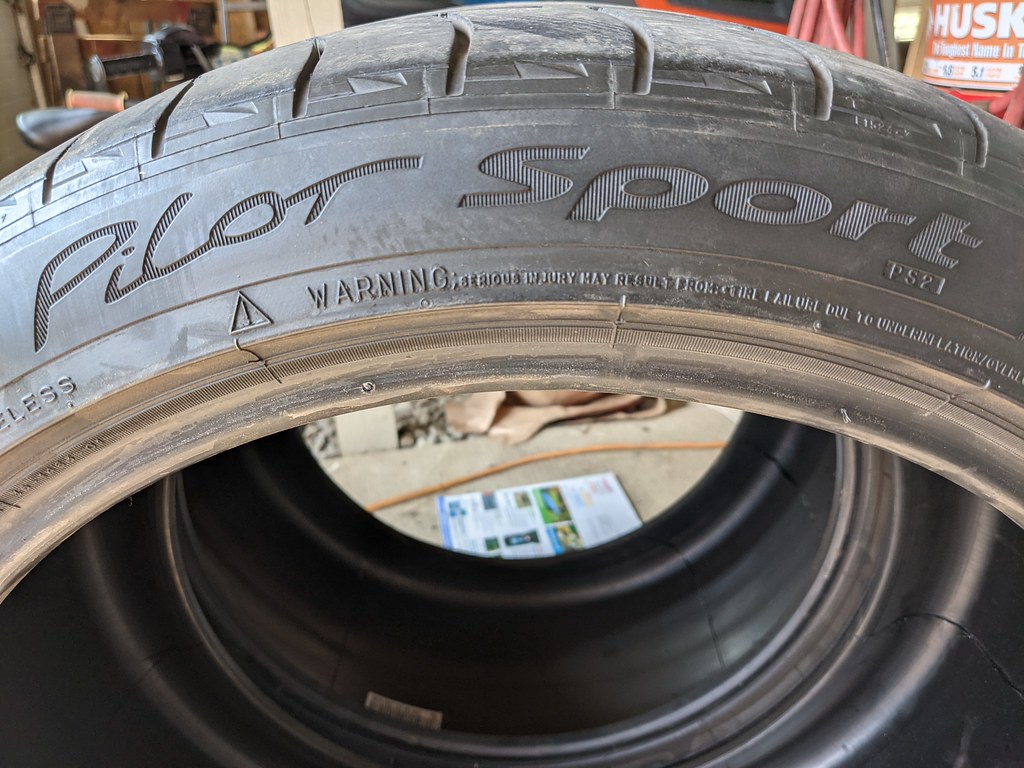
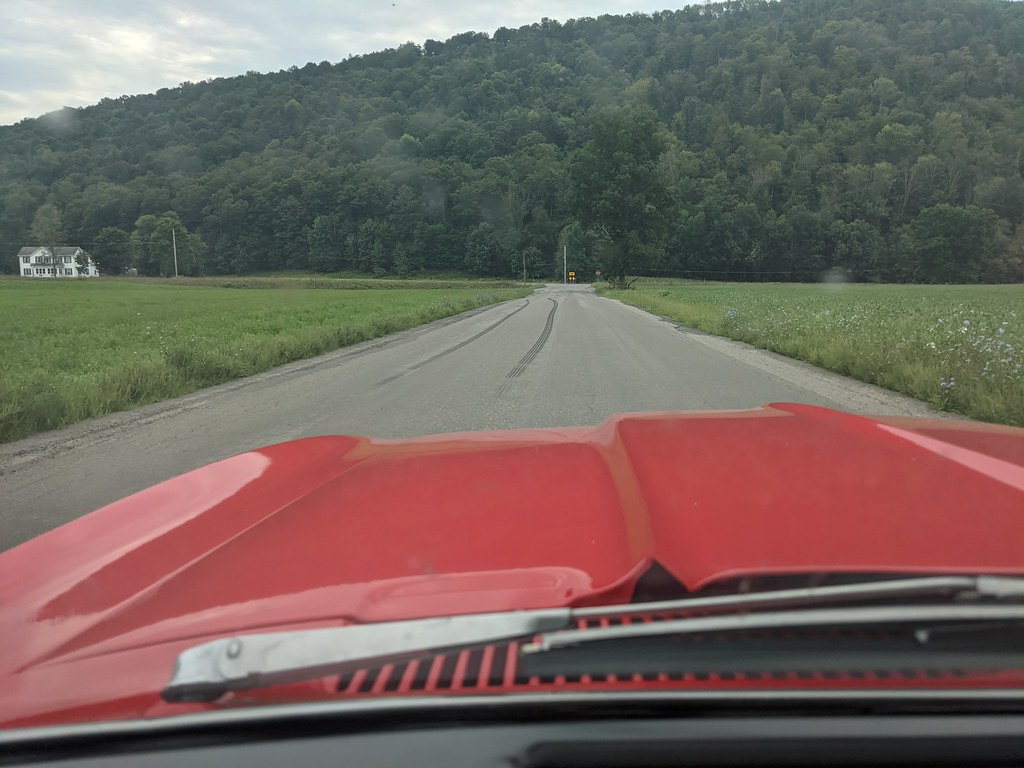
Not a ton of progress, but I swapped out my 255-45-18 tires for some Michelin ps2 275/35r18. I got them pretty cheap and they have helped slightly with traction. I got them for a really good deal to check for fitment, but I'd really like to go with a 275-40-18 eventually.
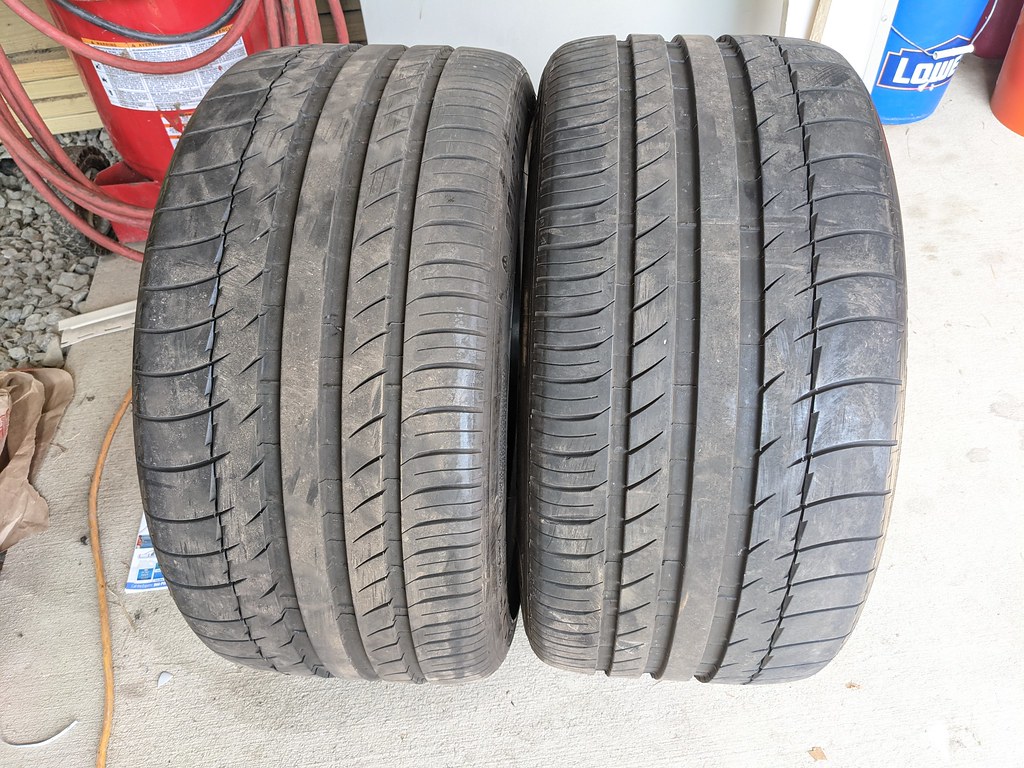
They didn't help that much though with traction haha.
I also picked up a set of 7.425" pushrods to see if more lifter pre-load will help to reduce the LS sewing machine sound. I know its very common with LS motors and aftermarket cams, but I want to try and reduce it if possible. Hopefully can swap those out over the next few weeks.
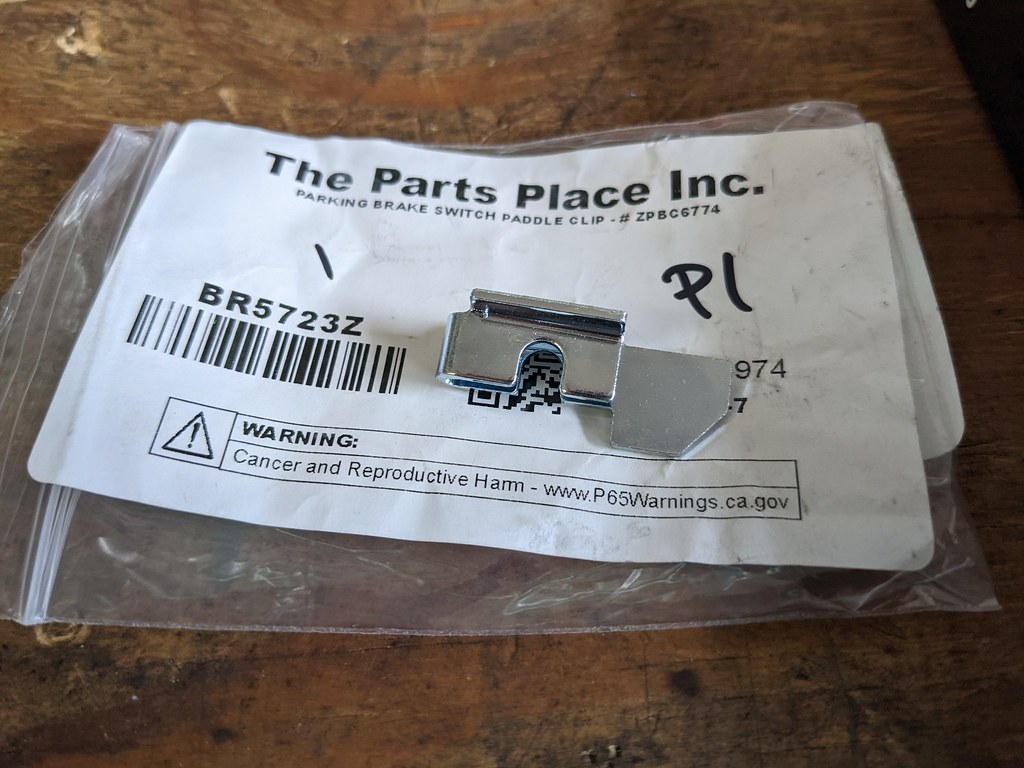
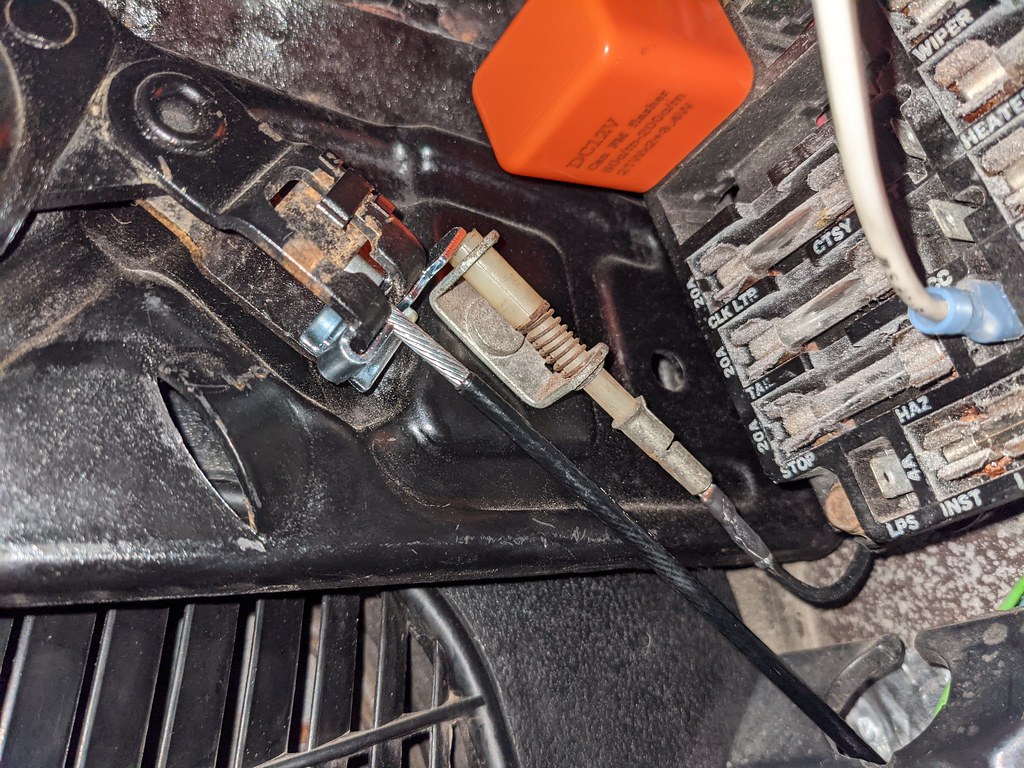
I also picked up this little tab for the ebrake switch. After I install that, I'll be able to hook up the light on my dash.
Cheers,
Ryan
1955 Nomad project LC9, 4L80e, C5 brakes, Vision wheels
1968 Camaro 6.2 w/ LSA, TR6060-Magnum hybrid and etc SOLD
1976 T/A LS1 6 Speed, and etc. SOLD
Follow me on Instagram: ryeguy2006a
09-08-2021 #745 Registered User
- Join Date
- Nov 2006
- Location
- Ma.
- Posts
- 5,567
Nice place to try out those new tires, you can see for a mile!
Wayne
Car FINALLY home !!!!!! lol
Project FNQUIK https://www.pro-touring.com/showthre...ghlight=FNQUIK
09-13-2021 #746
Registered User
- Join Date
- Sep 2009
- Posts
- 2,705
You are so right. That road is ideal for testing. People actually come from other towns to test on this road in my town haha.
1955 Nomad project LC9, 4L80e, C5 brakes, Vision wheels
1968 Camaro 6.2 w/ LSA, TR6060-Magnum hybrid and etc SOLD
1976 T/A LS1 6 Speed, and etc. SOLD
Follow me on Instagram: ryeguy2006a
09-14-2021 #747 Registered User
- Join Date
- Feb 2016
- Location
- SoCal
- Posts
- 475
You still havent fixed your serp belt routing have you? Haha
1970 VW Bug - Just your average mid engine Bug
Track toy - 06 Evo - E85 and lots of boost
Newest track toy - 2021 Supra
09-15-2021 #748
Registered User
- Join Date
- Sep 2009
- Posts
- 2,705
Haha, no I haven't. Thanks for the reminder though. I had planned on just going to the parts store to get the right length belt rather than buying one online and hoping it fits. Just haven't taken the time to do it. I haven't noticed any belt slippage, but it should have the right belt on it.
1955 Nomad project LC9, 4L80e, C5 brakes, Vision wheels
1968 Camaro 6.2 w/ LSA, TR6060-Magnum hybrid and etc SOLD
1976 T/A LS1 6 Speed, and etc. SOLD
Follow me on Instagram: ryeguy2006a
09-20-2021 #749
Registered User
- Join Date
- Sep 2009
- Posts
- 2,705
I swapped out the pushrods Friday night and took some measurements. I used my adjustable pushrod checker and came up with the same measurement that I did when I built it originally. Zero lash comes out to 7.325". So with my 7.400 pushrods I come up with a 0.075" preload which is right about where the stock should be. BTR calls for a 0.100" preload, so I was right swapping out to the 7.425" pushrods. Glad to see that the inside still looks really clean. In addition to swapping out the pushrods I was tracking down a small oil leak. Good news is that the valve cover gasket had just pushed outside of the groove on the driver's side. Easy fix.
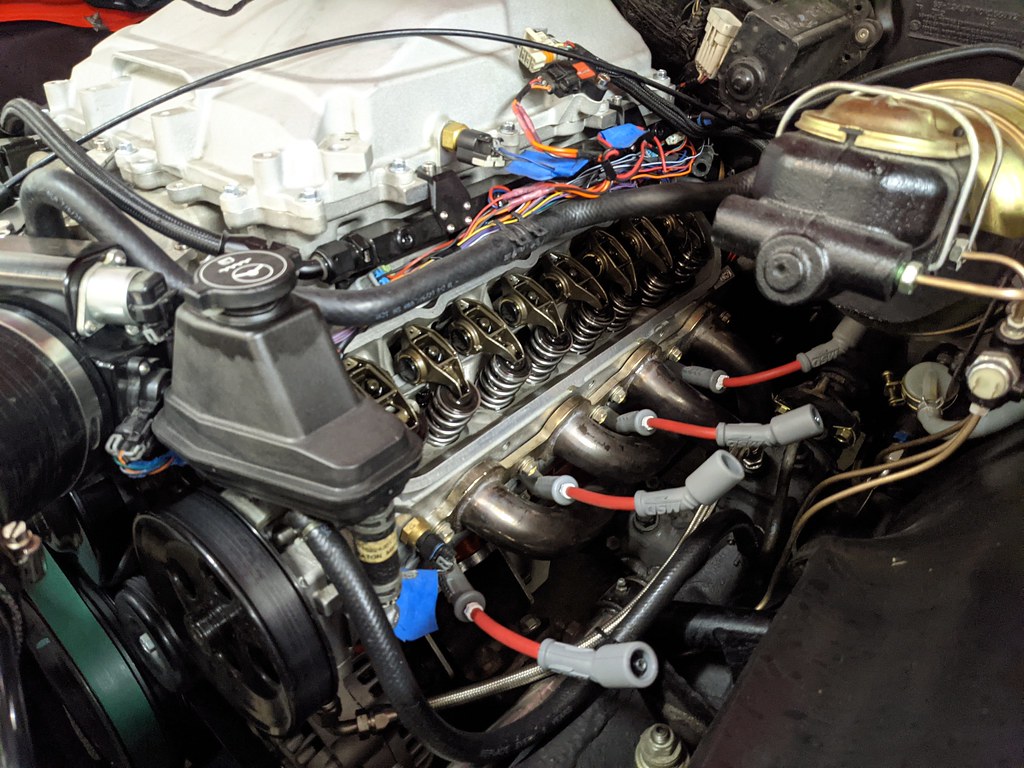
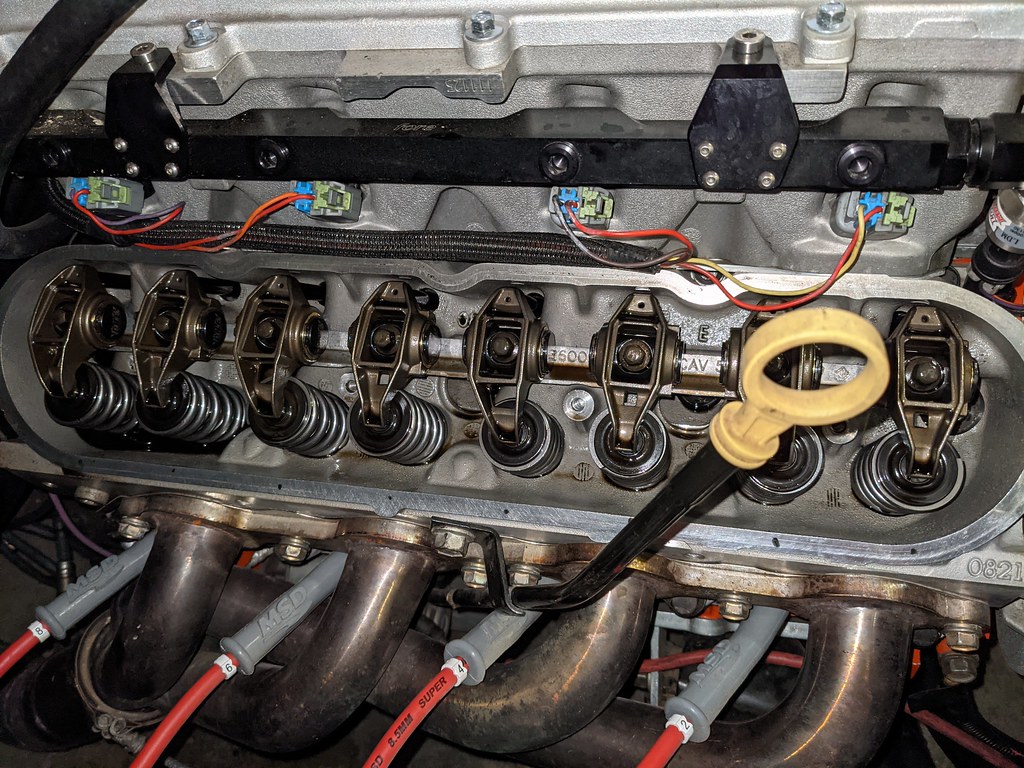
After that was all done, I took the car out on Saturday and it was slightly quieter, but not the results that I was hoping for. I'm guessing that it may not be the engine at this point, but maybe the design of the headers. I've heard various reports of different header manufactures where people have loud or quiet valves depending on that. I'm hoping to swap out my shorty headers at some point for some long tubes so maybe that will change things. I'm probably being particular because whenever I drive it I'm listening for it. Other people that have ridden in the car say it's not very noticeable.
Also Friday night, I got my parking brake wire hooked up and the new paddle installed. This was super easy and took me all of about 10 minutes. Nice to have a dash indicator now.
I'm hoping to get my new Astro Vents installed soon too. Just plugging away at the little things and enjoying driving the car.
Cheers,
Ryan
1955 Nomad project LC9, 4L80e, C5 brakes, Vision wheels
1968 Camaro 6.2 w/ LSA, TR6060-Magnum hybrid and etc SOLD
1976 T/A LS1 6 Speed, and etc. SOLD
Follow me on Instagram: ryeguy2006a
09-27-2021 #750
Registered User
- Join Date
- Sep 2009
- Posts
- 2,705
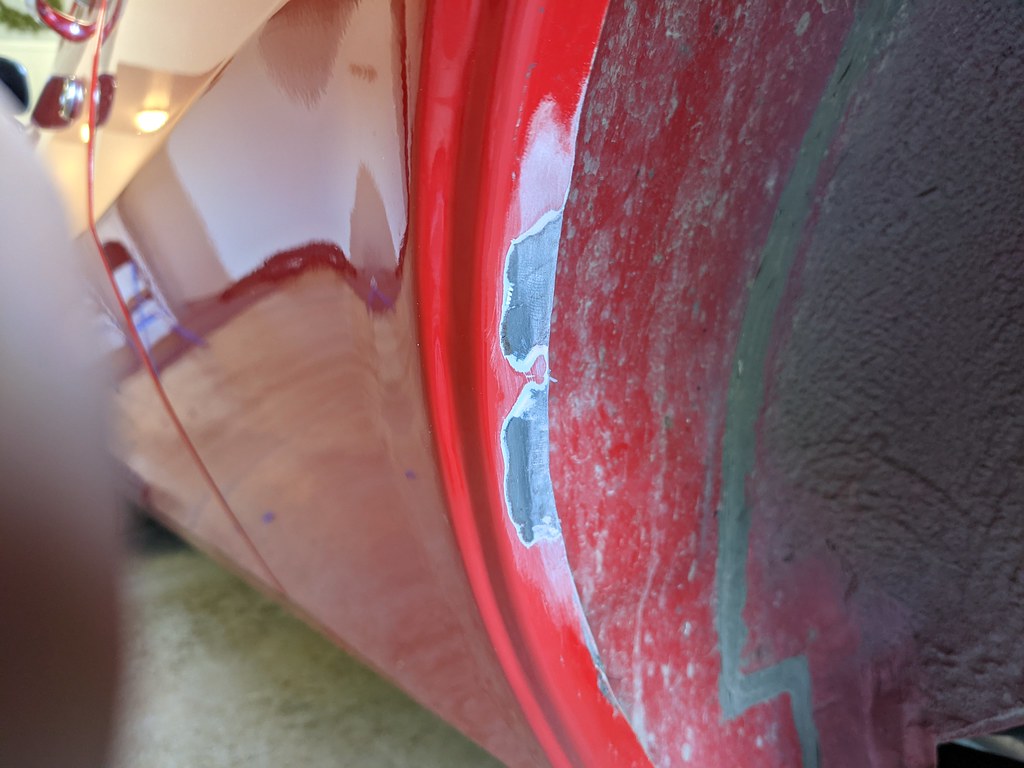
So I'll post up something that is a little interesting and a little embarrassing because I should have noticed it sooner. I'll start by showing my little quickie body work project. I've had some trouble ever since I built my car with some rubbing on the driver's side, which came to a head recently as I hit a road bump recently and my tire actually contacted the quarter. It wasn't serious damage thankfully, but it caused some paint damage when I hit it back in place. I'll fix this the right way this winter, but for now I had some Duplicolor color match rattle can paint that did a really nice temporary job. Just sanded it back a little with 400, then tapped it off, hit with primer and paint. Pretty pleased for a 20 min fix. Definitely not perfect, but it won't get any worse now.

When I was putting the wheel back on I started looking at that area and noticed that it seemed to be closer to the front than the rear. Then as I stepped back and got down I realized that the wheel wasn't centered in the wheel house. I didn't have tape measure right handy, but I checked and had two finger gap on the driver's side, and a loose 3 finger gap on the passenger at the front of the quarter. After I investigated further the rear axle had shifted forward at some point causing the wheel to not stay centered. I loosened up both the leaf spring pocket and the u bolts and made some adjustments and now it's the same on both sides. No idea how I didn't catch that sooner.
Before:
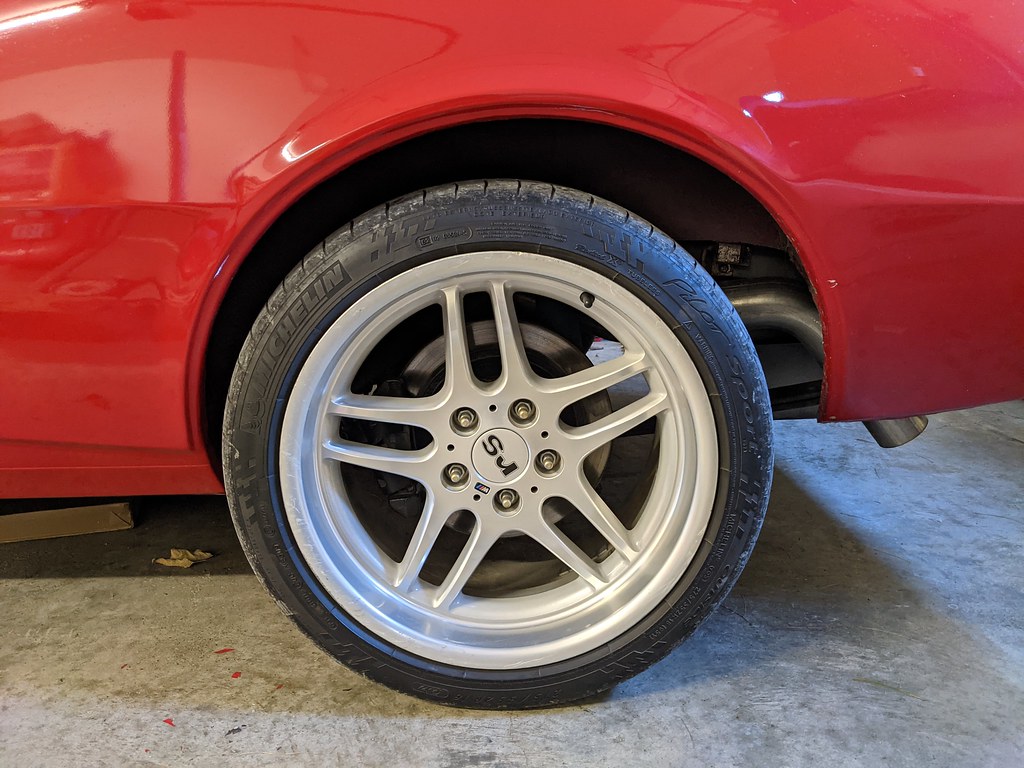
After:
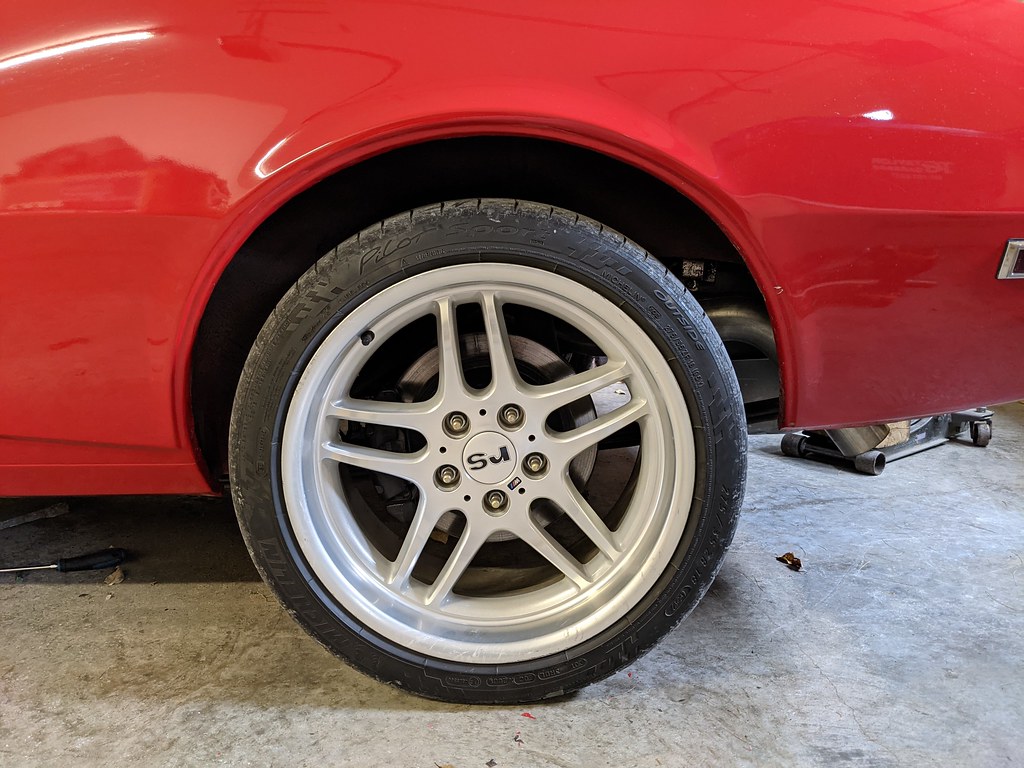
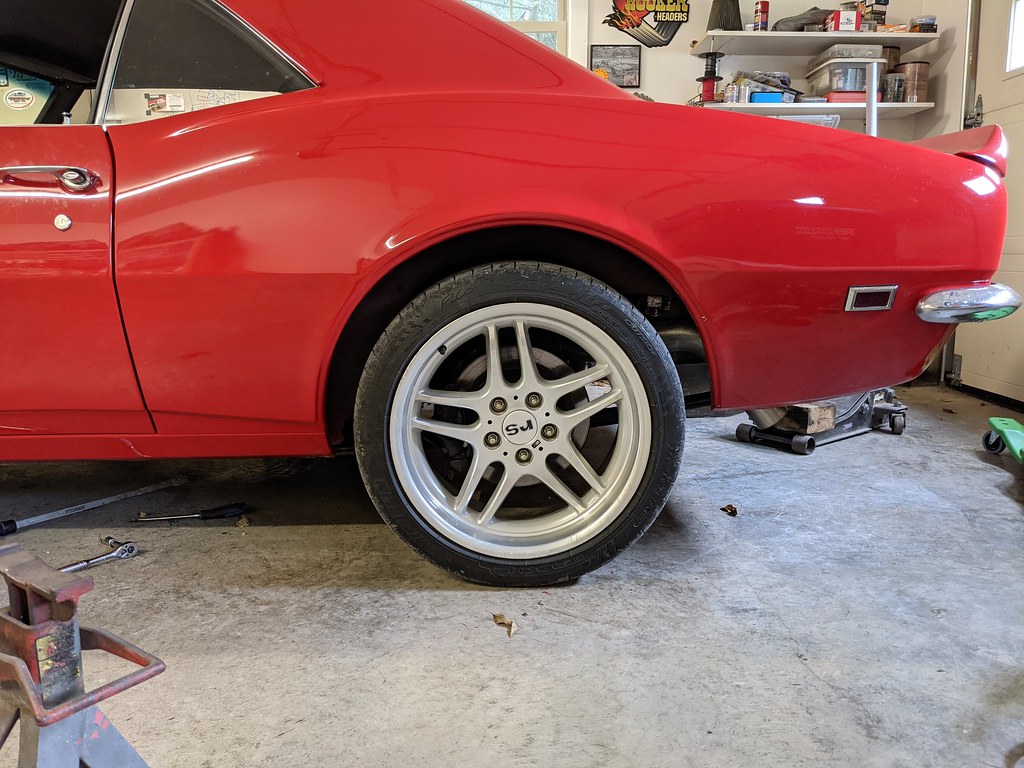
Much better now!! I've driven it around and so far zero scrubbing.
I never drive the car at night, but I figured I should install the dome light. My son was interested in what I was doing when I was doing so I had him help me install it and cut the headliner. I also showed him how the circuits work. Probably forgot it already, but he was super interested at the time haha.
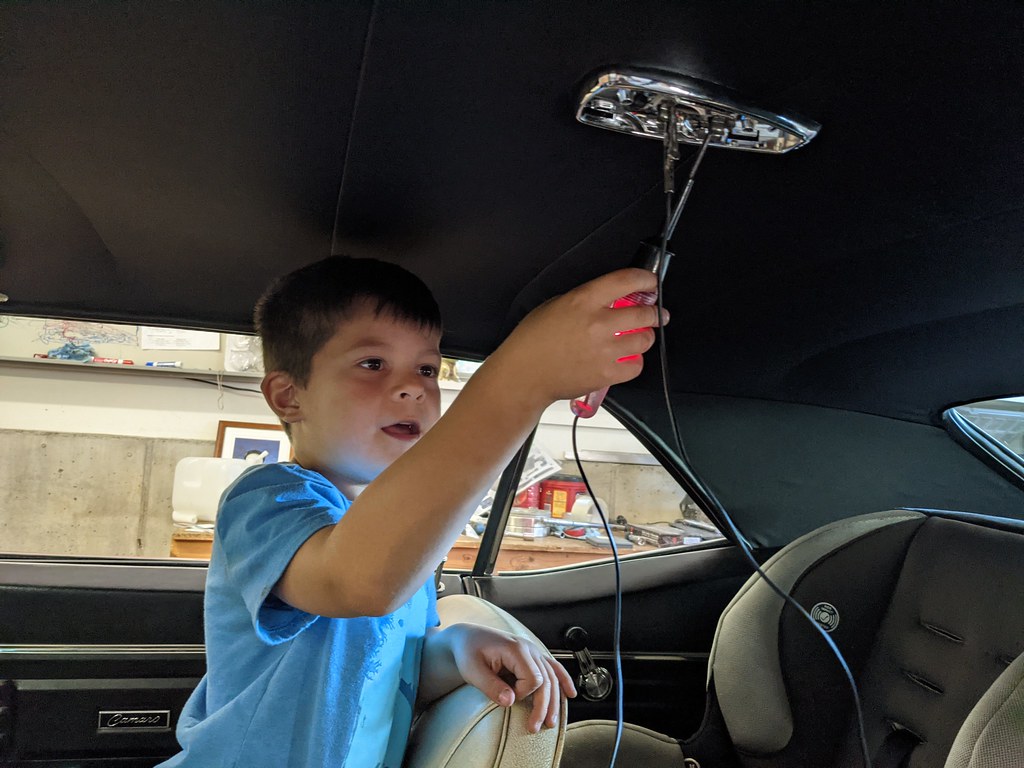
Best,
Ryan
1955 Nomad project LC9, 4L80e, C5 brakes, Vision wheels
1968 Camaro 6.2 w/ LSA, TR6060-Magnum hybrid and etc SOLD
1976 T/A LS1 6 Speed, and etc. SOLD
Follow me on Instagram: ryeguy2006a
10-04-2021 #751
Registered User
- Join Date
- Sep 2009
- Posts
- 2,705
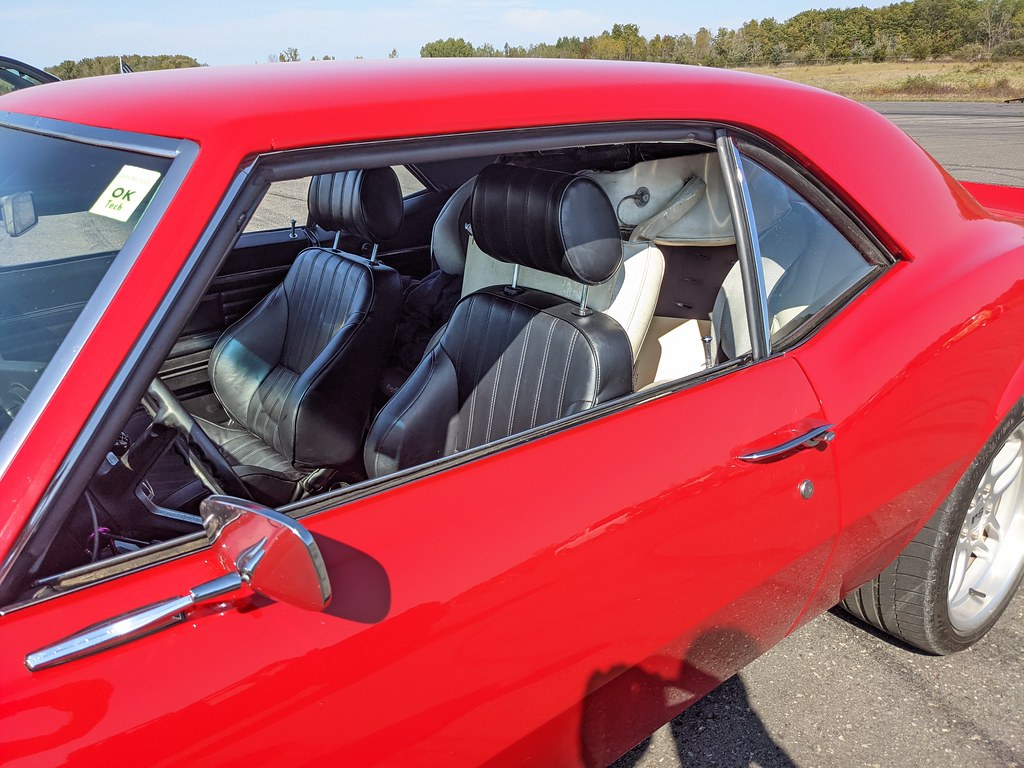
I've been looking to update my seats for a long time, but have been getting along find with the stock 53 year old seats for 5 years now. I guess the biggest reason for me keeping the seats (other than my budget), is that the seats were born with this car. They are far from perfect, but are in much better shape than most after that long. That said, I had been thinking of updating my seats recently and sent a message to my buddy Don. He has a 1967 Camaro that he pulled these out of in favor of some dedicated racing seats since his car is more oriented towards Auto X. He gave me a deal on the seats, first gen brackets and a matching rear seat cover. He lives a little over 2 hours from me, but he was going to be at an AutoX event this past weekend and said he'd bring them along. I was considering going to the event anyway, so it was a great opportunity to take the car out and the weather was a beautiful upstate, NY fall day. Changing leaves and all. Unfortunately I didn't grab any pictures...
Anyway, drove up to the event and swapped the seats right in the parking lot haha. My brother-in-law rode up with me and we had them swapped out in about 20 mins. Got to watch Don and the others race a few times and then hit the road back home. Next year I'll get my car out to an event. It took me most of the summer to dial in the car, but it will be ready for next year. Here's the car loaded up with the new seats installed and the old seats in the back. Driver's seat fit in the trunk and the passenger had to go behind my seat.
We had a great ride home, but after I filled up I smelled some raw gas. I didn't think much of it because I had done a few hard accelerations and figured it was coming out of the filler neck or something. But then we got about 20 mins from home and it got interesting. Was cruising along, then all of a sudden my wideband started flashing yellow/red on my 3.5" screen and it died. Tried cranking it over and nothing. Fuel pressure is only reading about 15 psi?? I got the car pulled over to the side of the road then after a little troubleshooting, I tried it again and it went right back to 43psi where I have it tuned for. That was strange??
Ran fine, but I went easy on it. Then after I dropped off my BOL, I was about a mile from the house and it got bad. It would only build about 10-25 psi, and wouldn't stay consistent. I was thankfully able to limp the car home. I haven't had time to diagnose the issue, but I'm leaning towards bad fuel pumps or possibly a cracked fuel fitting on the assembly which is very common on the CTS-V pumps. I'm not happy about the fueling issue, but I will say that without the Terminator X system I would have had to get a tow truck. What is simply amazing about this system is because of the learning features, it added 50% fuel across my fuel tables which enabled the car to run enough to get me home. I was already thrilled with the ECU/software already, but for me this was just amazing. I can only imagine the many other situations where this system could save engines by it's learning capabilities.
After I got home, I unloaded the car and then grabbed some pictures of the seats. I'm in love with them, and they look right at home. Love the bolstering and how much more connected I feel to the car. You feel so much more planted and even the clutch engagement feels more solid now. Very pleased! Thanks Don.
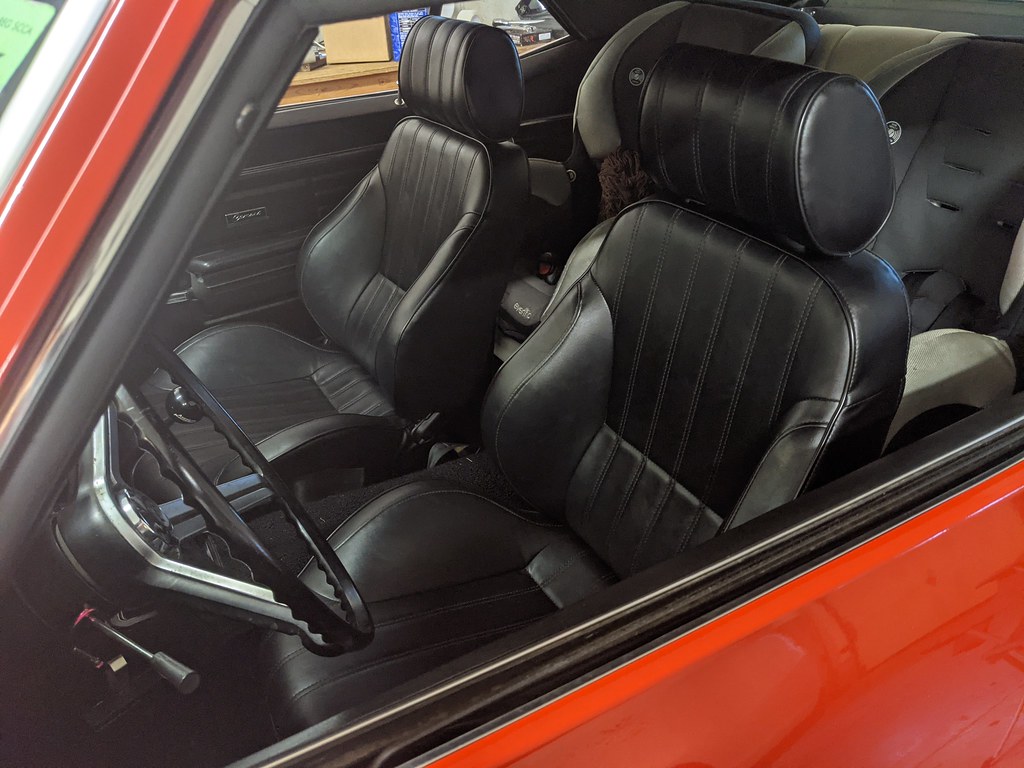
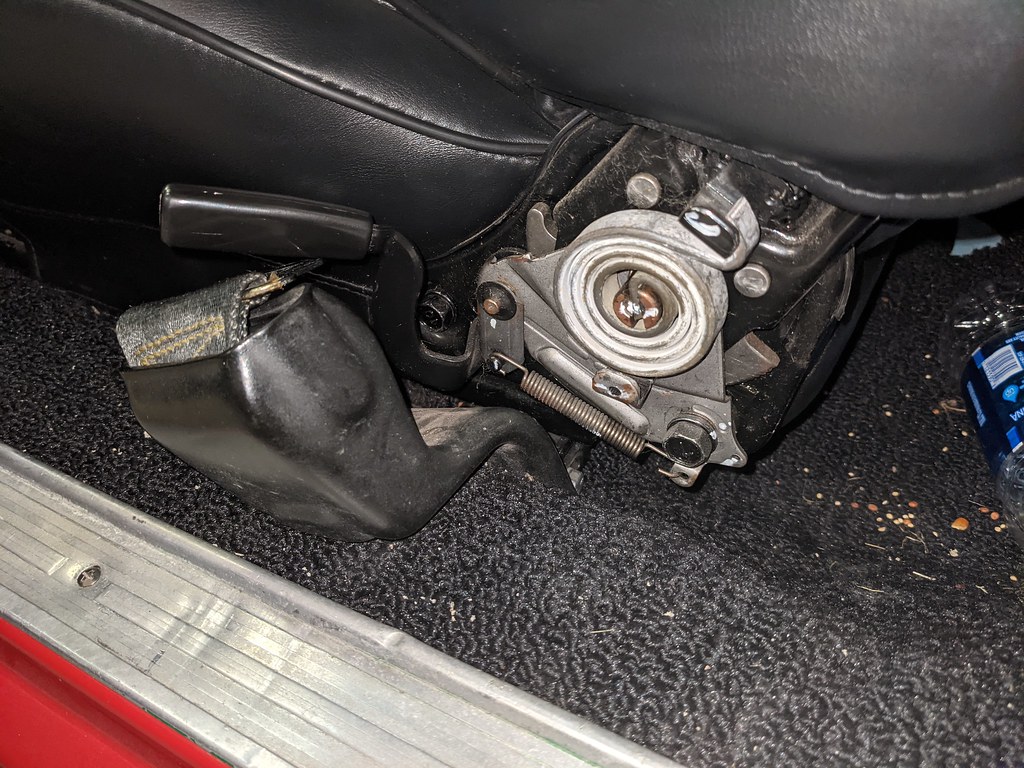
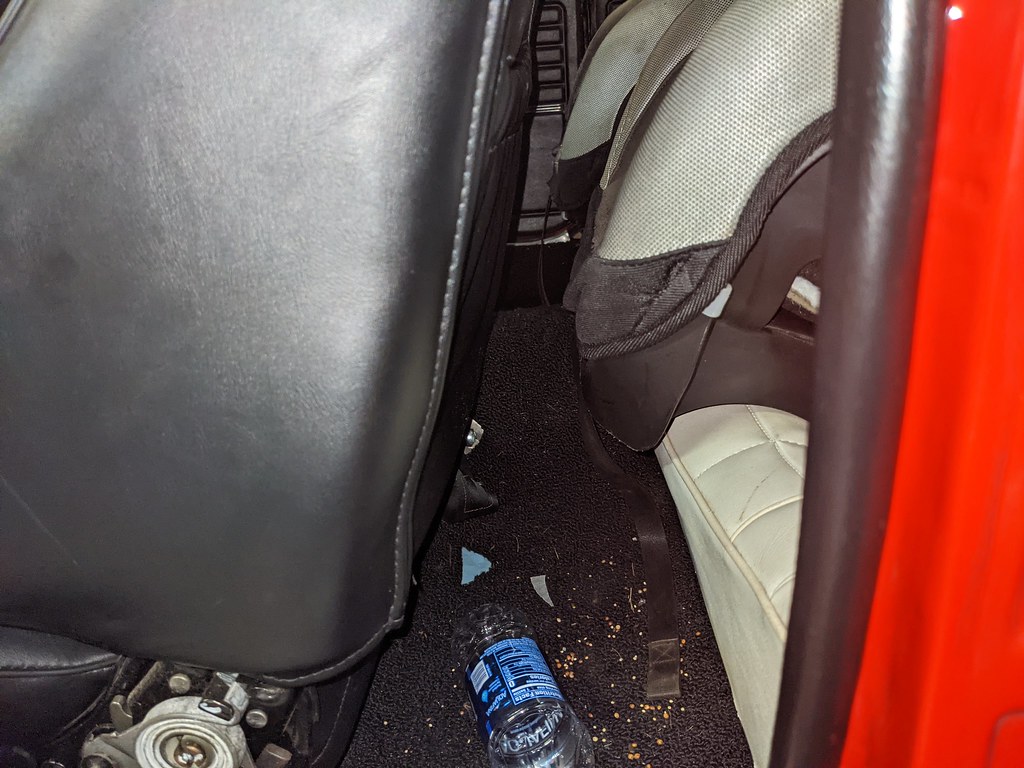
I need to do a little tweaking on the seats because they seem to be interfering with my seat belt retractor. I had to pop off the little covers so that I could get them to fit and slide without hitting. I'll address that soon.
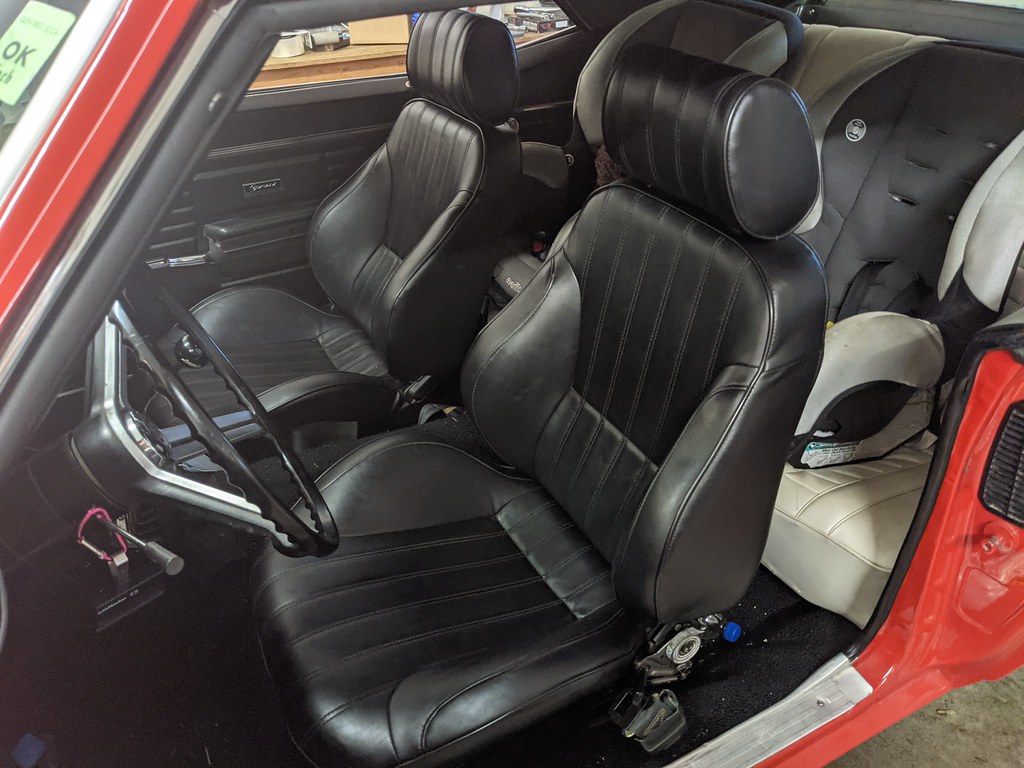
The other big win is that the seats allow me to have more leg room, while keeping my son's seat at the same location! I think that if I could find a different car seat for him, we would both be much more comfortable.
I need to dig into the issue with the fuel pump because I'd really like to do so cruising this fall. I hooked up the heater in the car this spring so that I could drive it later into the fall! I'm hoping it is a simple fix, but we will have to see.
Cheers,
Ryan
1955 Nomad project LC9, 4L80e, C5 brakes, Vision wheels
1968 Camaro 6.2 w/ LSA, TR6060-Magnum hybrid and etc SOLD
1976 T/A LS1 6 Speed, and etc. SOLD
Follow me on Instagram: ryeguy2006a
10-25-2021 #752
Registered User
- Join Date
- Sep 2009
- Posts
- 2,705
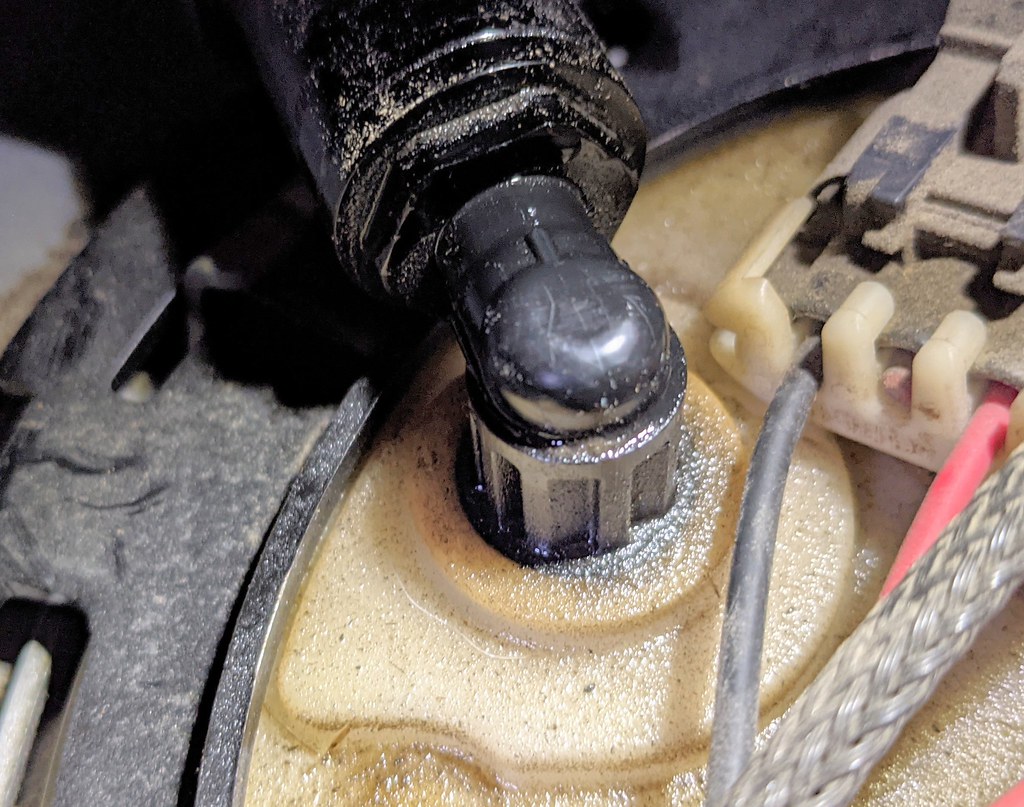
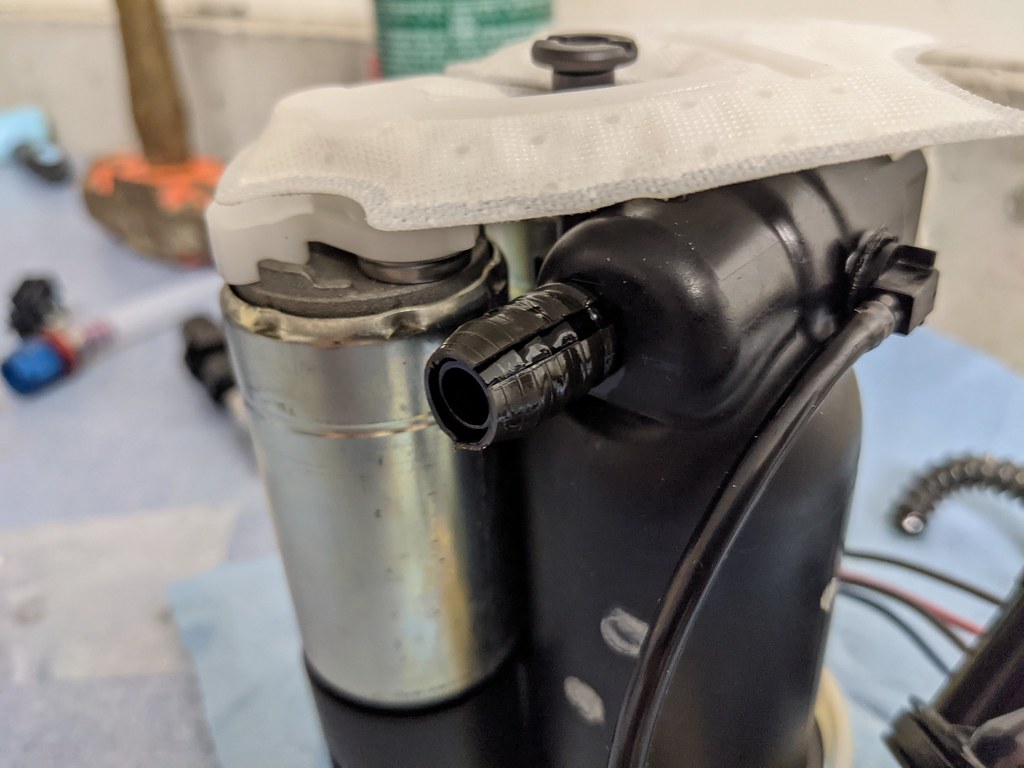
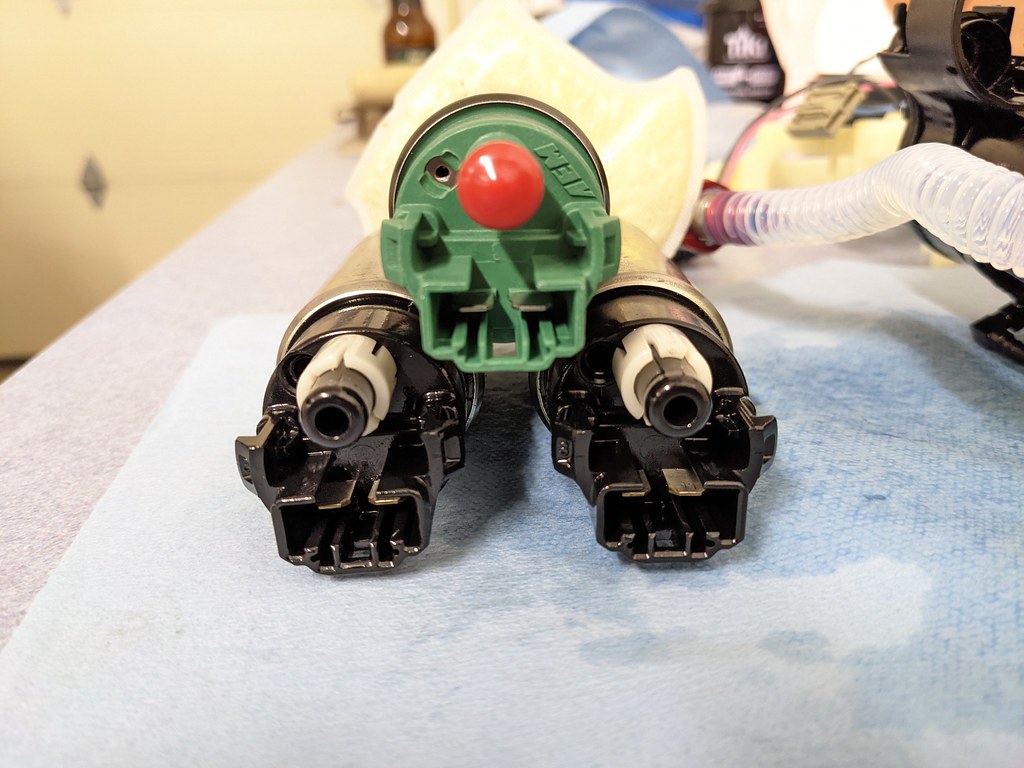
It's been a little bit since my last update. I haven't been able to drive the car because of the fuel issue. After further investigation, I determined that unfortunately the fuel pump outlet has some micro-cracks and is weeping fuel. So that explains why I was losing pressure and got a slight gas smell after I drove the car and parked it in the garage.
It was really hard to capture in a picture, but there are a few hairline cracks on the top. The real issue I found later on though.
Rather than buying a whole new fuel pump assembly for $1k+, I opted to buy an ALM Performance replacement hat that is machined from billet aluminum and comes with a full flow -6AN fitting. It was a little pricey, but much cheaper than buying a whole new pump. It's a shame that it will be hidden under the car too. I'll have to open up my hatch from time to time and look at it.
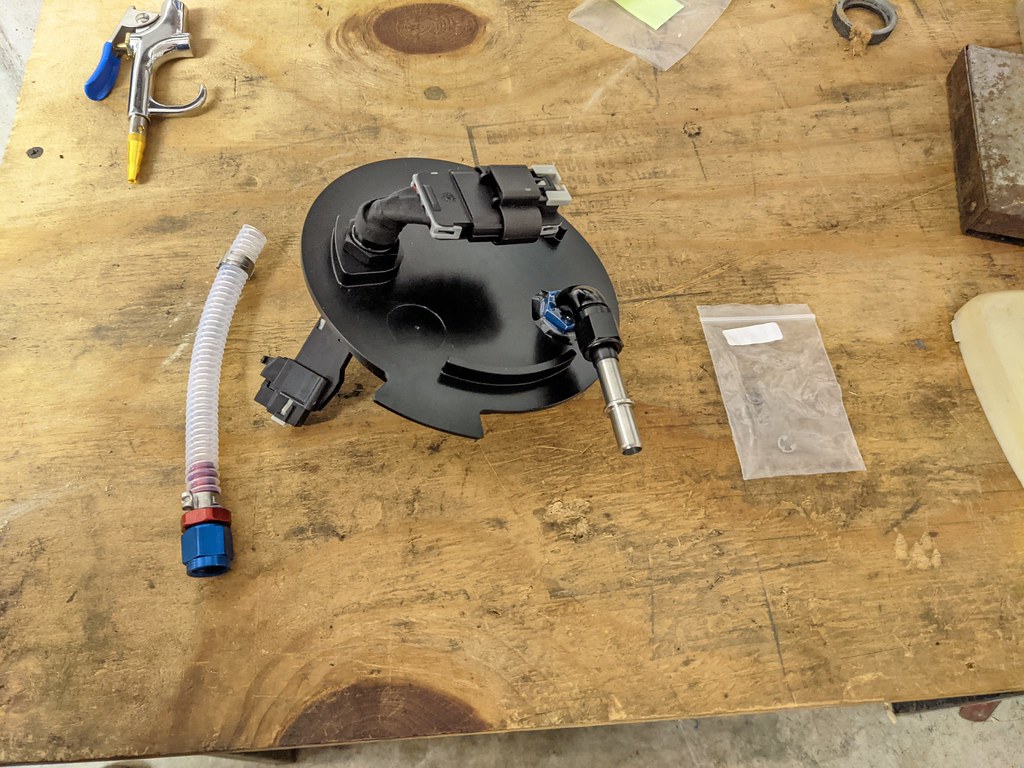
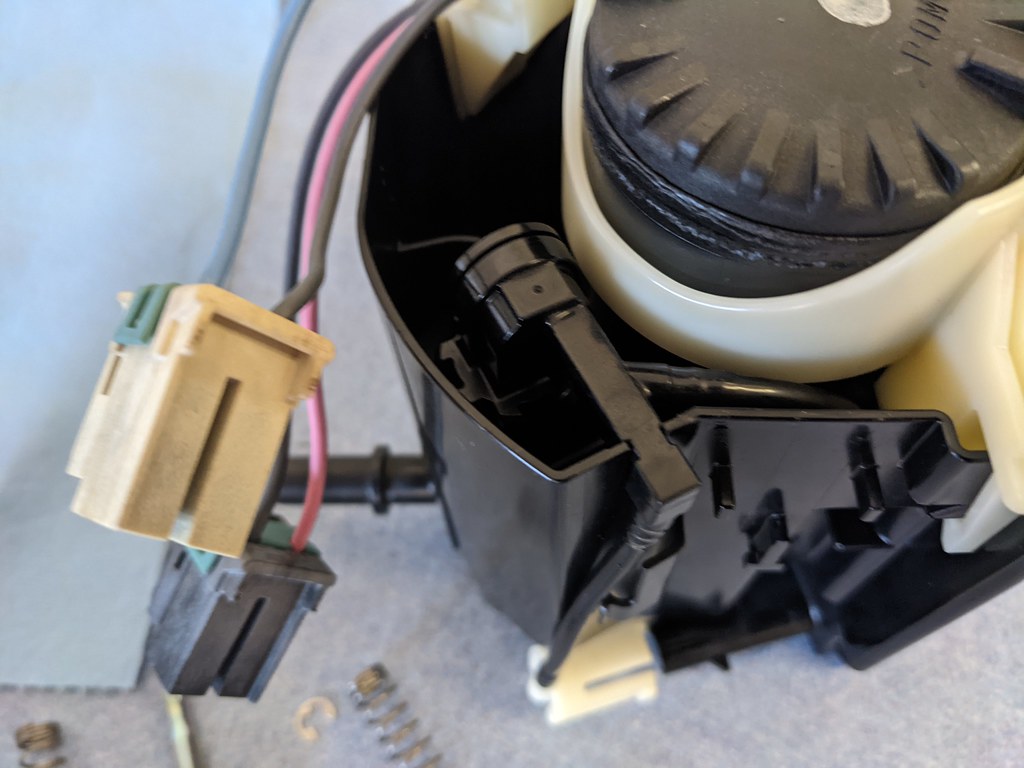
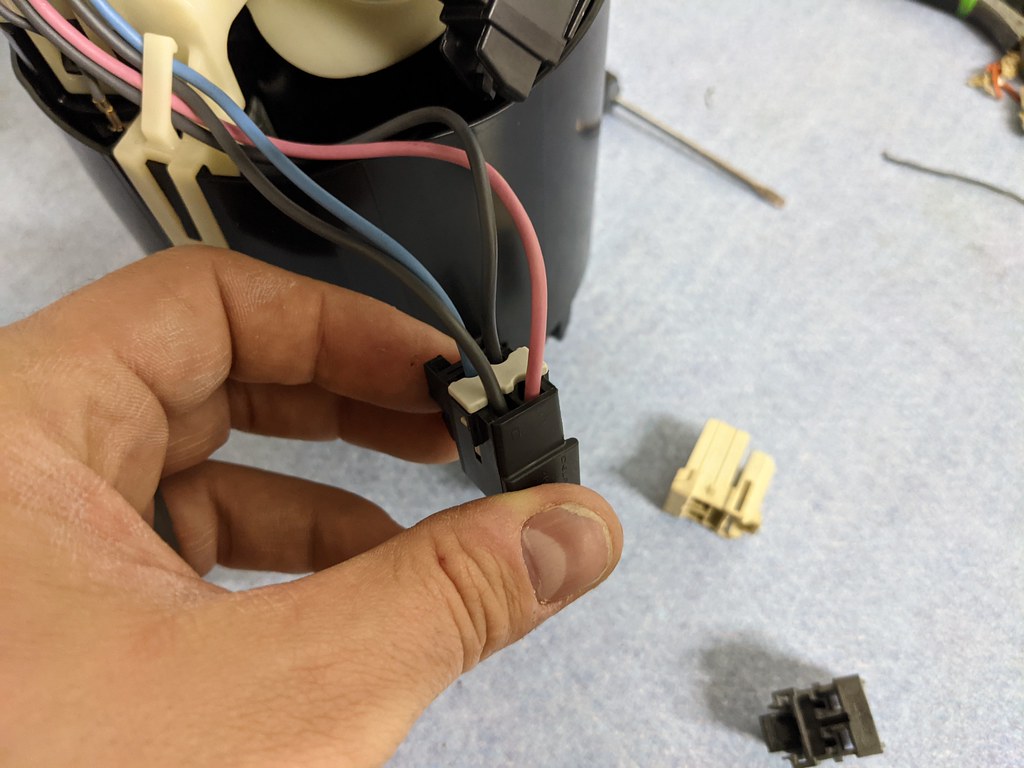
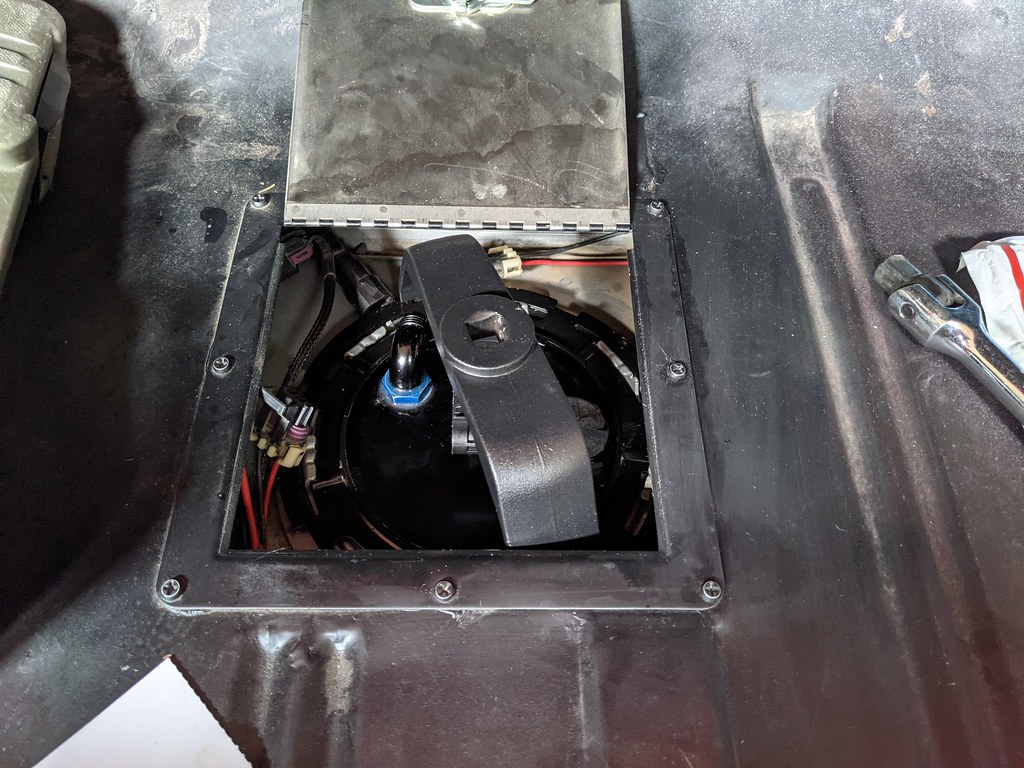
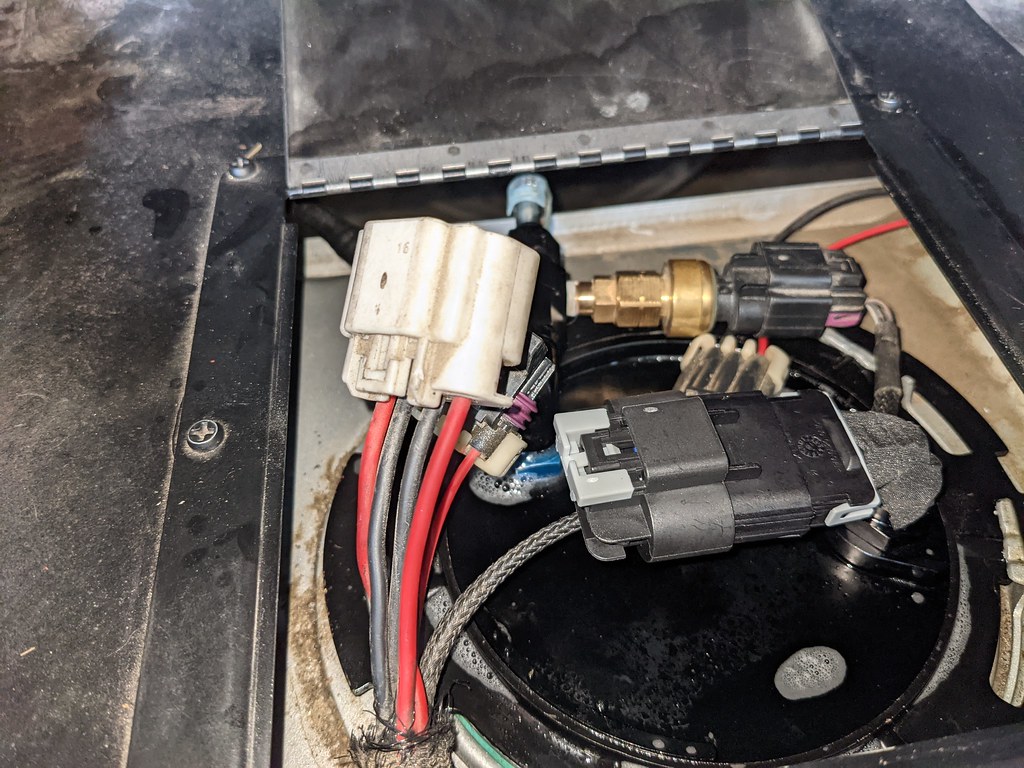
Speaking of the fuel pump hatch, I'm SOO glad that I installed that hatch now. It was incredibly easy to remove the fuel pump. A few wiring connections, the fuel line, locking ring and it popped right out. Took me less than 3 minutes.

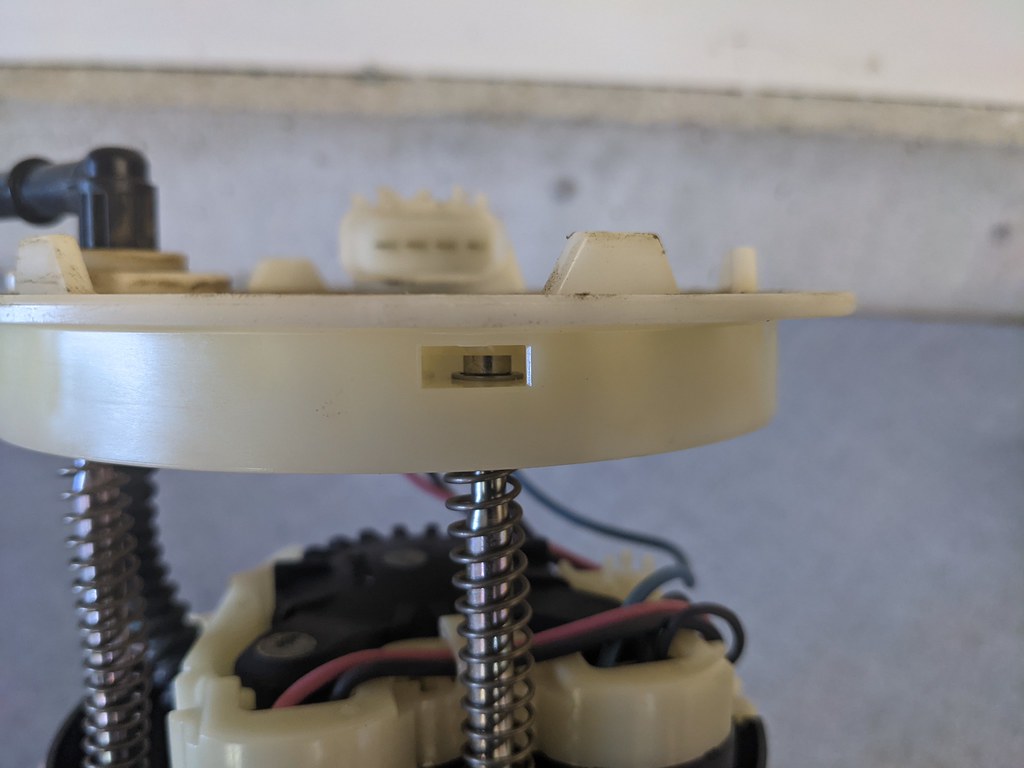
In order to remove the hat, you have to pop out these little c-clips. I made a little hook on the end of a piece of mechanics wire to grab and pop them off.
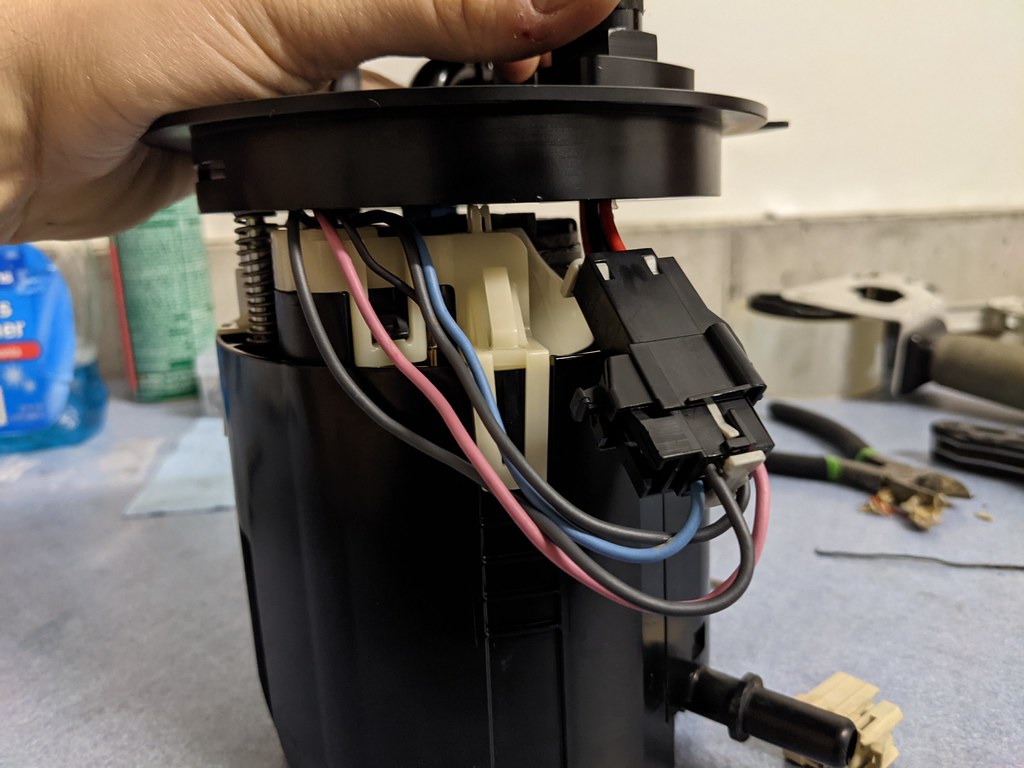
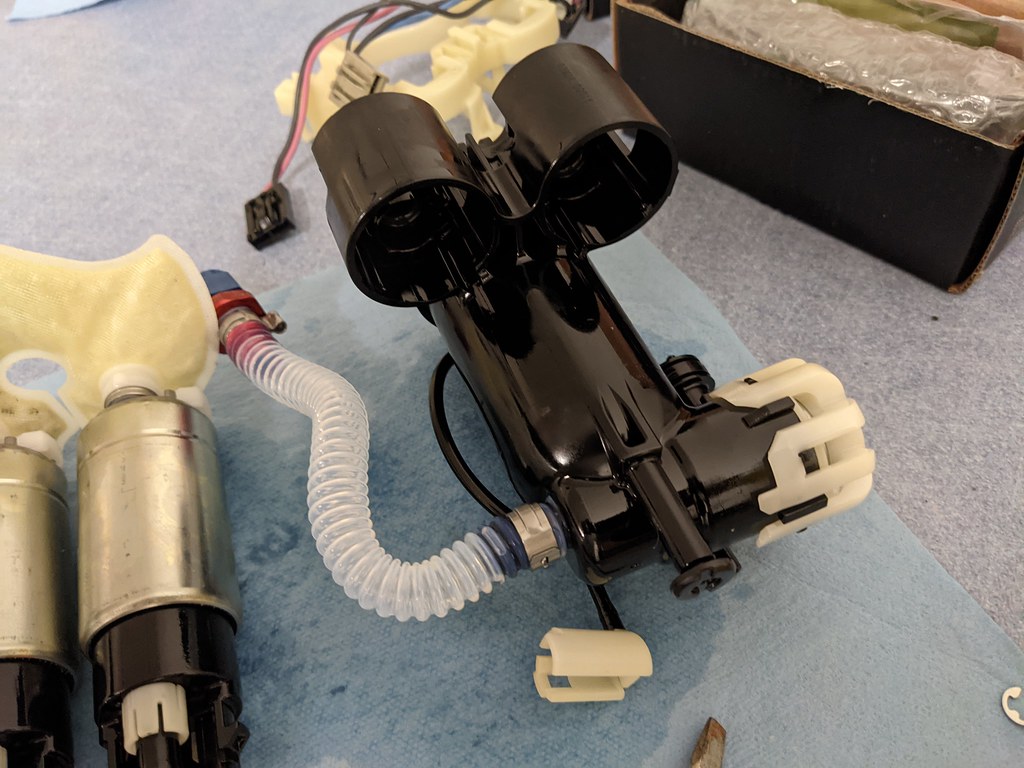
Pulled it all apart and cut the stock hose off.
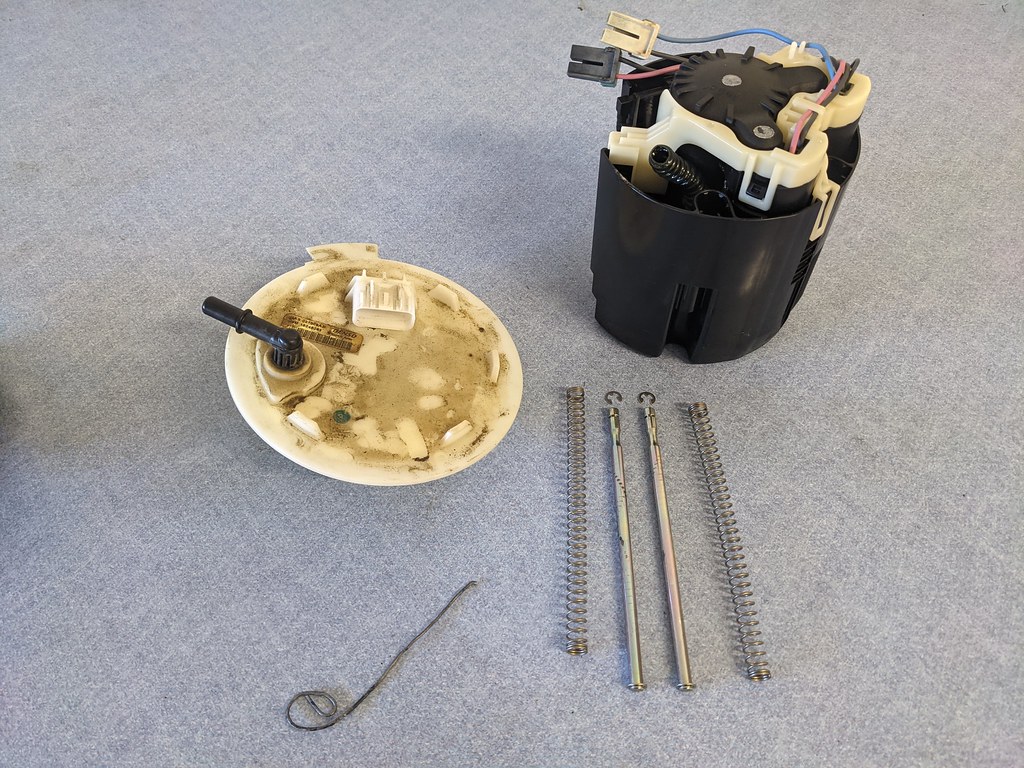
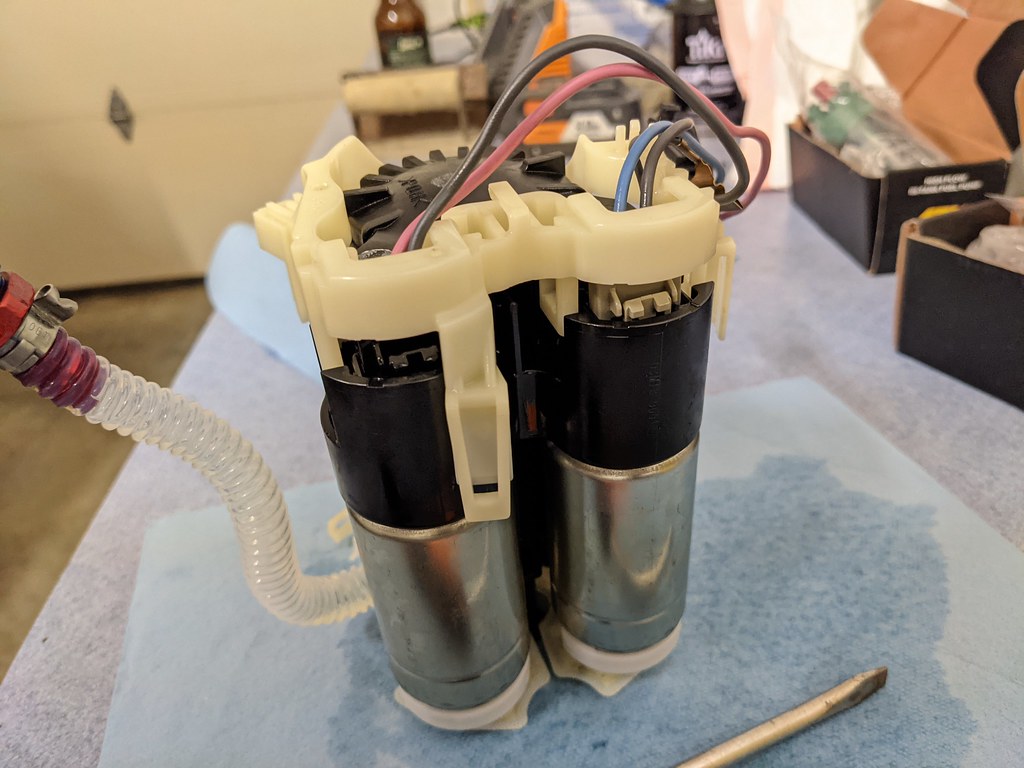
Then to get to the other side of the hose, I had to pull apart the assembly. Started with a few little clips that retain the pumps to the bucket.
Popped off this hose.

Had to carefully pull up on this piece. There's an o-ring that seals it together tightly, so it took a little effort to pop off.
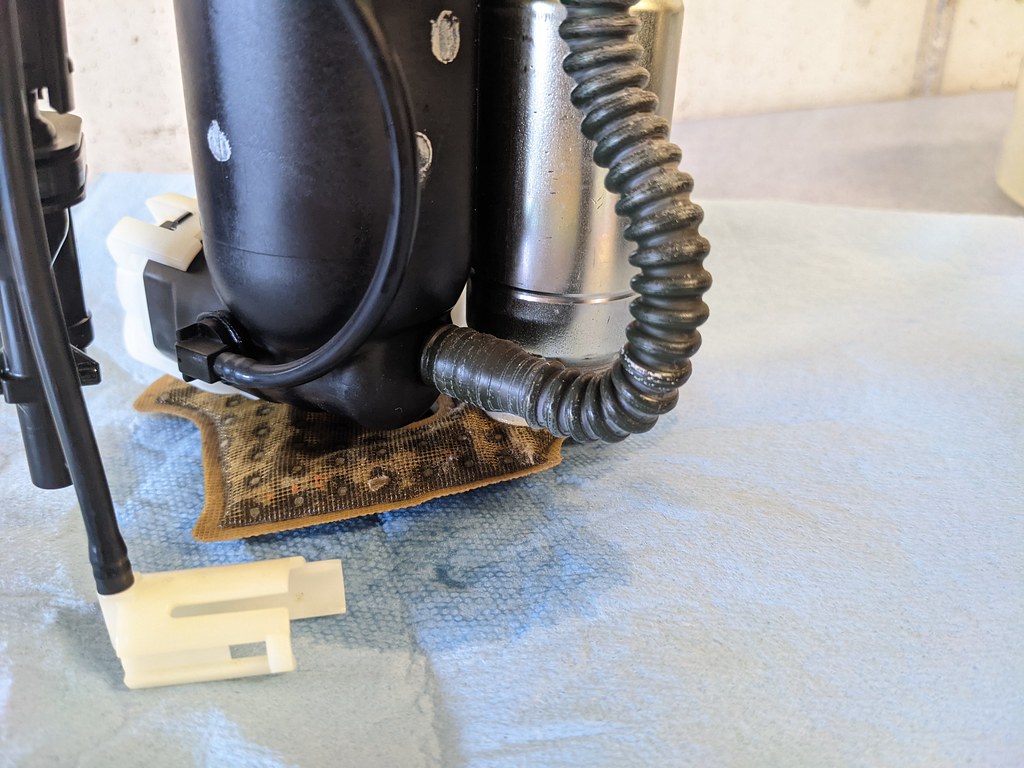
Then here's where I found the real issue with my fuel pressure. When I removed the fuel pumps, I found this junk in the bottom of the fuel bucket! Looks like a rubber band and some cardboard remnants! Upon further investigation, there was a piece even wedged in the pump inlet at the bottom of the fuel bucket!

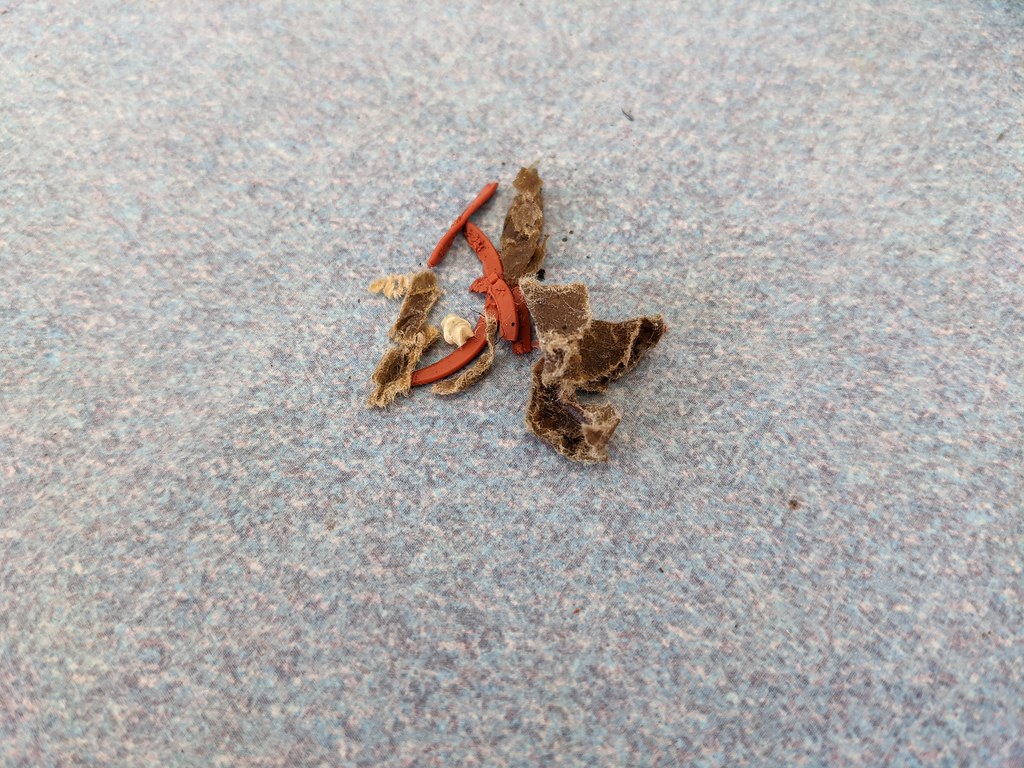
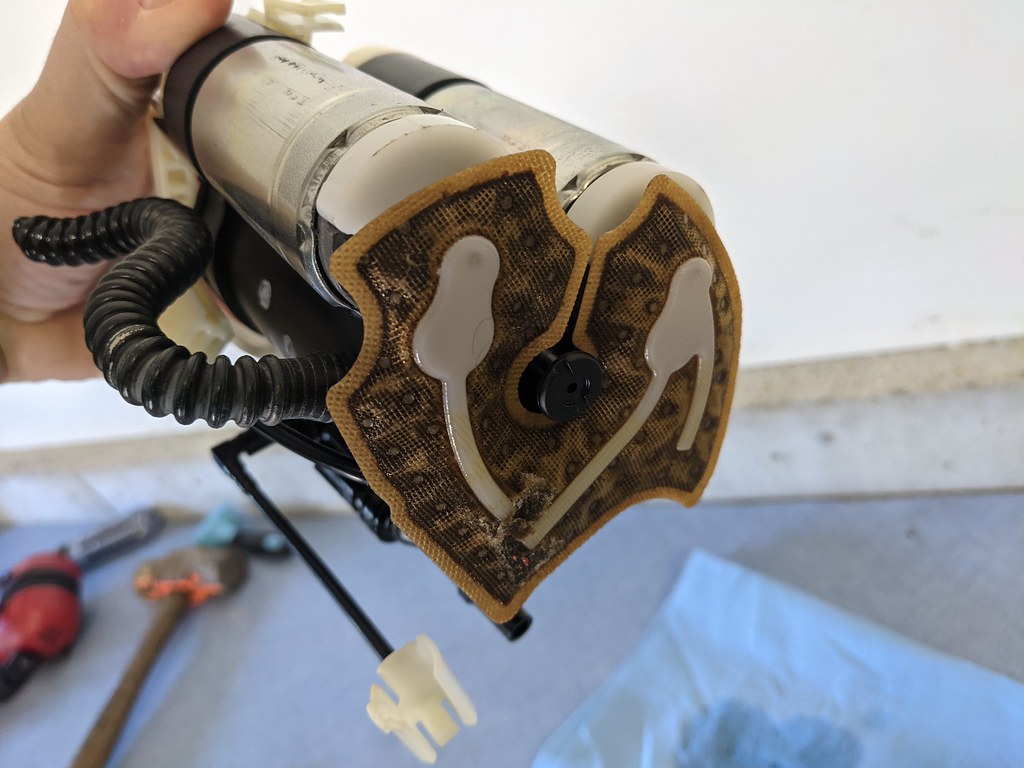
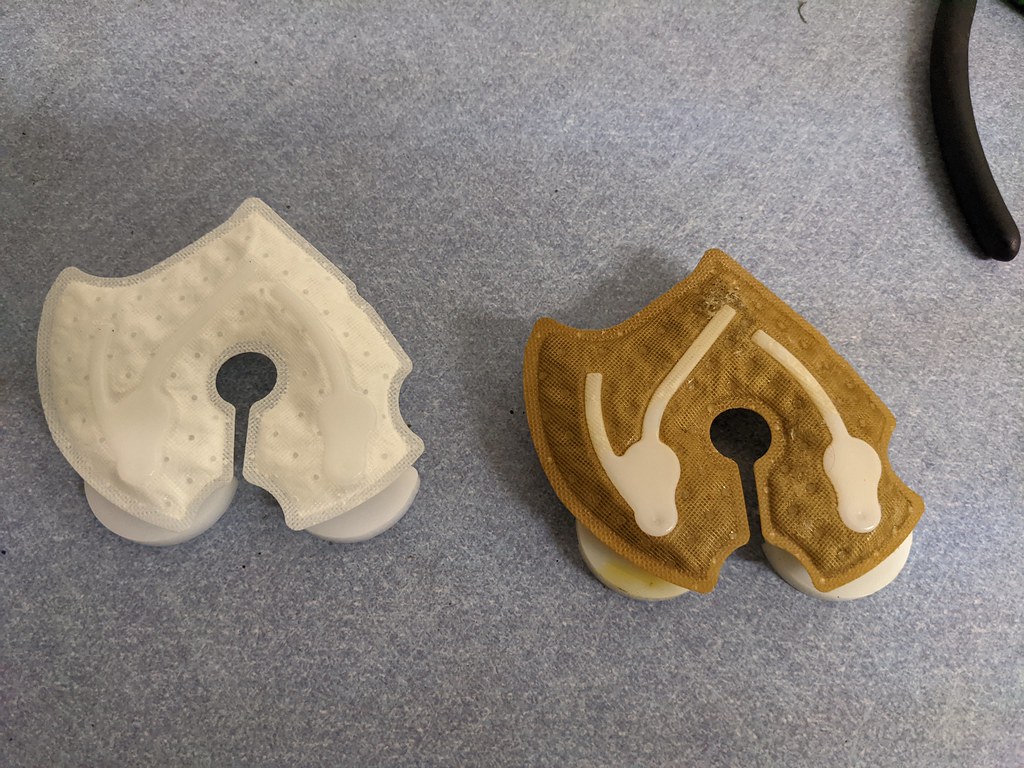
To top that off, the fuel pump sock was disgusting. There were little bits of that cardboard among other junk. It was a used pump and I could blame the guy I bought it from, but he gave me a great price on it because it was in unknown condition. It's on me for not inspecting it more closely. There is also the possibility that the cardboard could have fallen into my tank at some point. regardless, I'm glad I found this out now before I grenaded my motor.
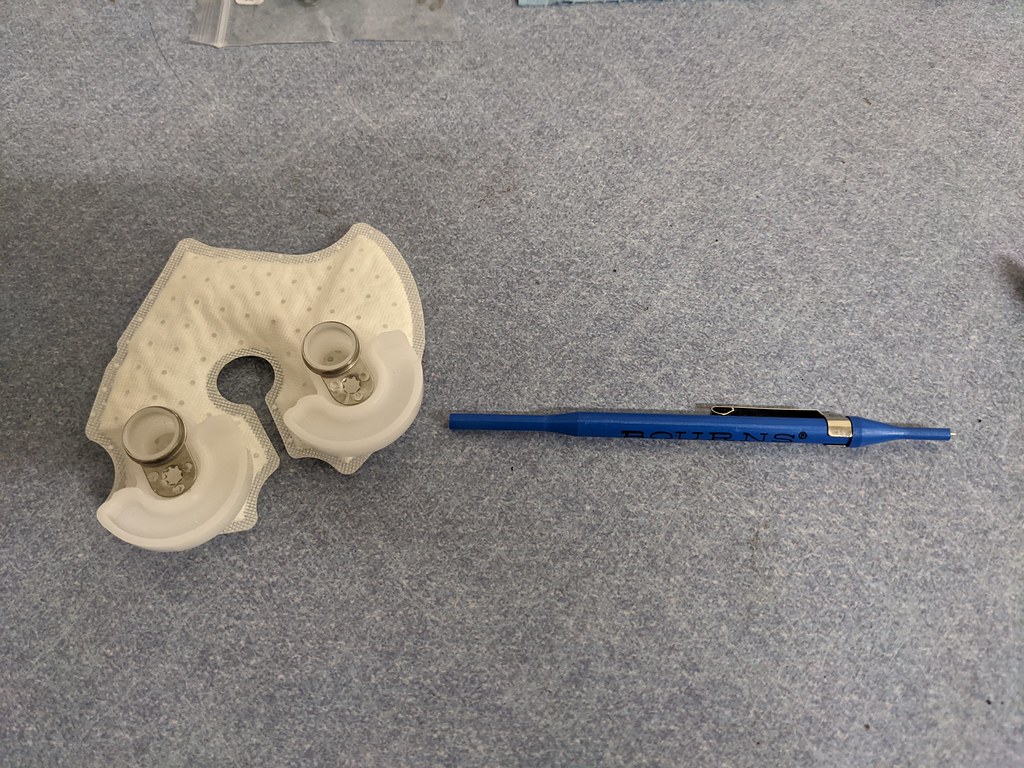
Huge shout out to Carl with vaporworx! I had mentioned to him the issues with fueling that I was having and he offered to test out my module at no charge. It fit in my timeframe and he turned it around within 24 hours. It was back to me within a week, so I'm very grateful for that. Then to top it off, when I found this fuel sock I wasn't able to find a replacement. He had one in stock and got it shipped to me right away! I had it in a few days and it got me back together. If you need anything fuel related, go to Carl!
1955 Nomad project LC9, 4L80e, C5 brakes, Vision wheels
1968 Camaro 6.2 w/ LSA, TR6060-Magnum hybrid and etc SOLD
1976 T/A LS1 6 Speed, and etc. SOLD
Follow me on Instagram: ryeguy2006a
10-25-2021 #753
Registered User
- Join Date
- Sep 2009
- Posts
- 2,705
After I replaced the fuel sock with the new one, I moved on to installing the new fuel hose provided with the kit. I carefully sliced the old hose with a fresh razor blade and it split right open.
Clamp down the hose tightly. I happen to have a pair of the crimpers that are made for these style clamps. (I'll edit this in the future, but I'm having a fuel pressure drop at WOT that I think is from not clamping this hard enough. Will update when I find a solution)

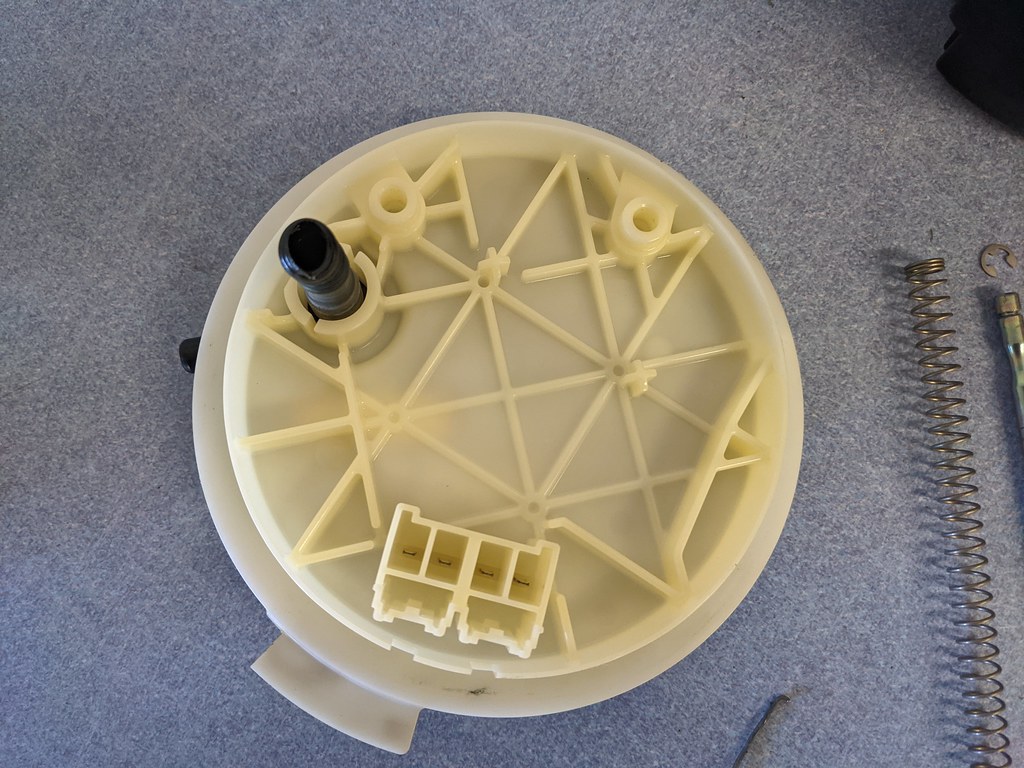
Then I moved on to installing the new hat. It is installed in the reverse of how it was disassembled. I had to pop in those little c-clips into the guide rod, put the pump assembly back into the fuel bucket and the springs into the pocket of the bucket.

There are also a few wiring components that need to be de-pinned and put into new connectors. They are all provided with the kit.
One thing I didn't like was that this connector is bulkier and to get full compression needs to sit outside the bucket. It's not a "problem" since you can remove and install it like this, but worth noting.
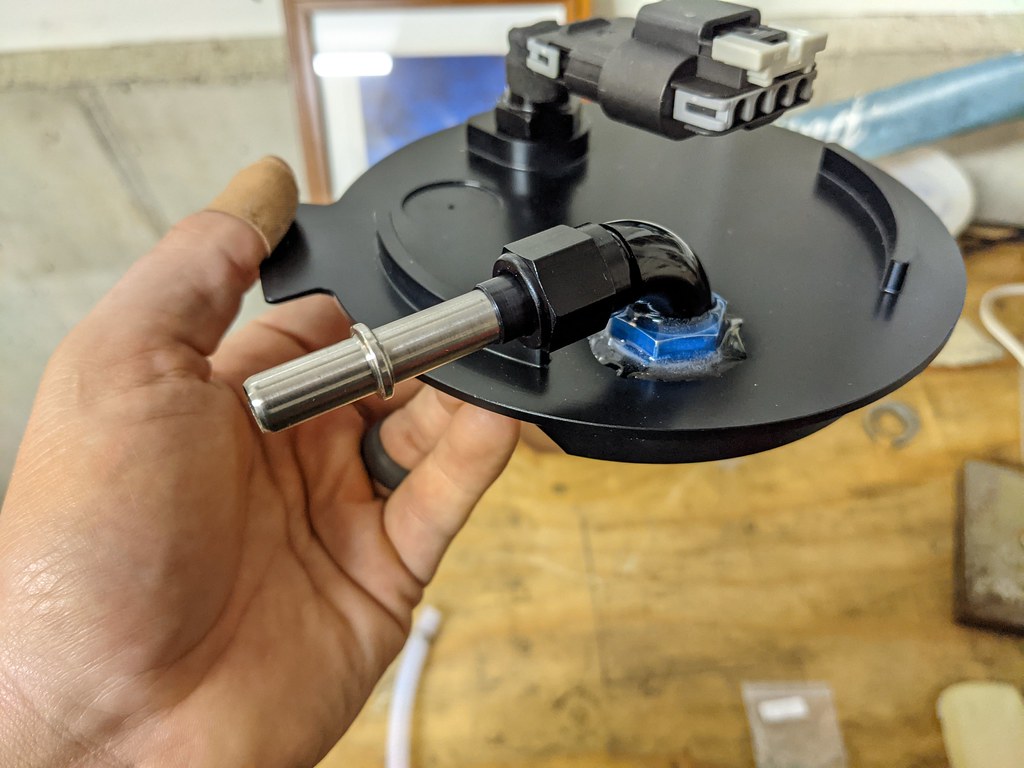
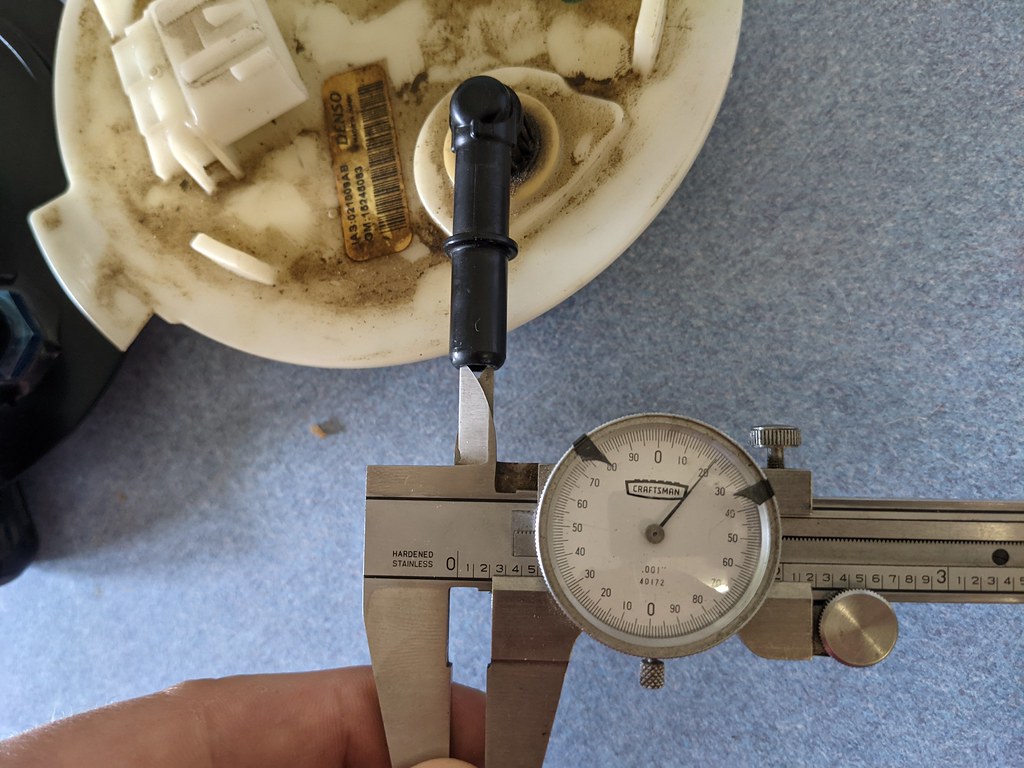
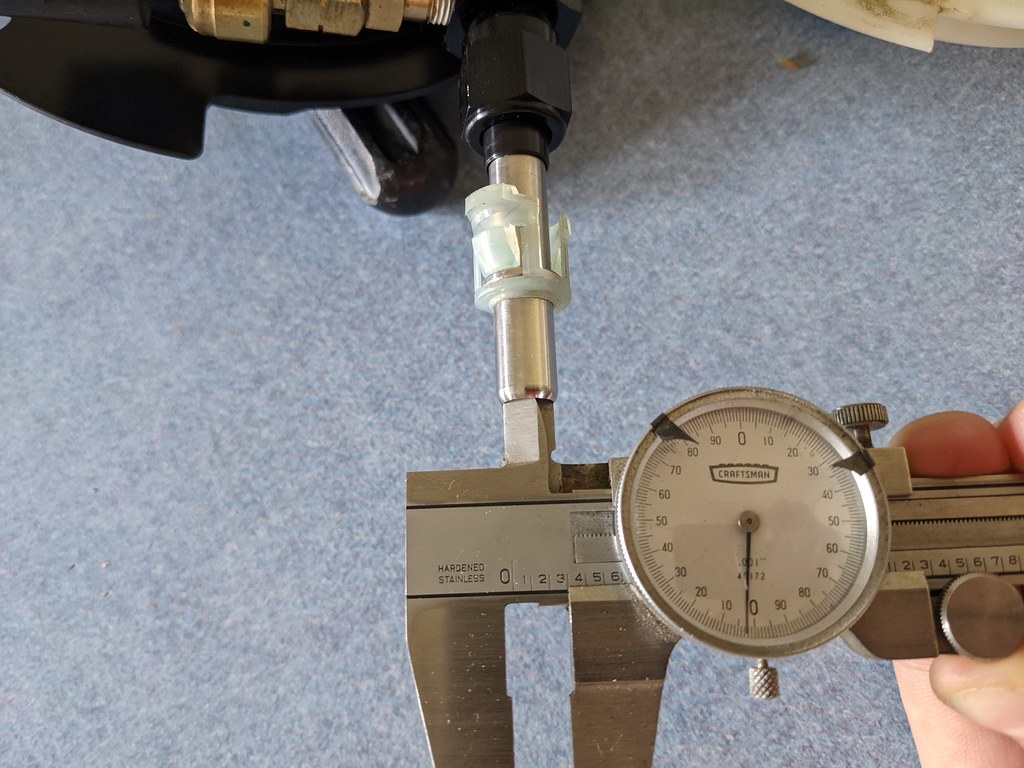
Now I have a complete assembly again with much better fuel fittings. The full flow fittings should allow the pumps to flow fuel more easily so in theory should be easier on the pumps and potentially more at full duty cycle. I also measured the new outlet just for fun and it is substantially larger. By my calculations it's roughly 37% larger ID.

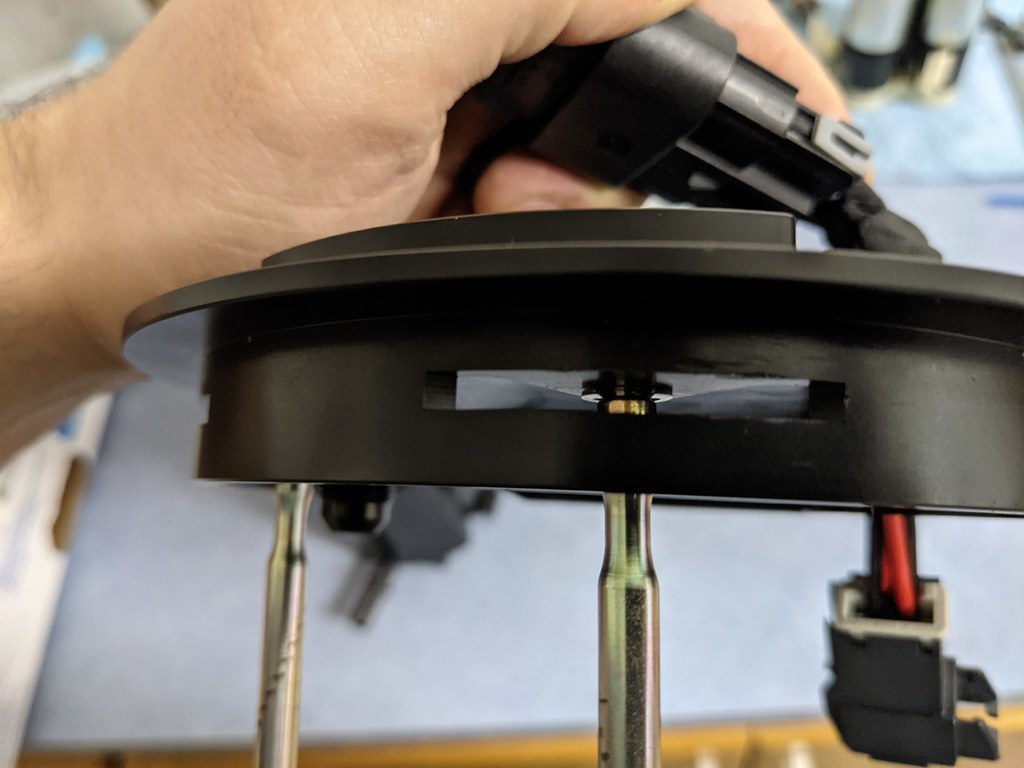
Next up was reinstalling the pump. I grabbed a cheap pump ring installation tool on Amazon and this is well worth the money. I popped it on and it clicked right into the slot easily with my breaker bar.
The last thing that needed to be done was swapping over the connect for the pumps. Because the mating connector for the fuel pump side isn't made, it is necessary to de-pin and reassemble using the new connector.
Good news is I was able to get in the car and after a few cycles of the fuel pump I had full pressure again. Fired up the car and had full fuel pressure! Took the car out for a spin and it performed flawlessly. What better way to break in a new fuel pump than a 2nd gear rolling burnout?
I didn't get any pictures but last night I finally got around to wiring up the manifold referenced signals to the pressureworx module. I'm hoping to get out tonight and test it out. Should provide more fuel pressure as the boost increases. Should ensure I have no fueling issues up top. I got lazy. I ran the wires front to rear, but never took the time to hook them up. I also extended the wires for my flex fuel connector, connected it and ran it into the car. Now let's see how long it takes me to actually hook it up haha. The closest e85 station to me is about 45 mins so I'm not in a huge rush to finish the install.
Cheers,
Ryan
1955 Nomad project LC9, 4L80e, C5 brakes, Vision wheels
1968 Camaro 6.2 w/ LSA, TR6060-Magnum hybrid and etc SOLD
1976 T/A LS1 6 Speed, and etc. SOLD
Follow me on Instagram: ryeguy2006a
10-25-2021 #754
Registered User
- Join Date
- Sep 2009
- Posts
- 2,705
Oh and for those who are interested. Here is a picture of my fuel learn table after I drove home with the low fuel pressure. It added fuel where I was trying to keep the car running. This is an important thing to remember when you have the EFI systems that have learning capabilities. I made sure to reset the table and reflashed it back to my ECU, because if not it would be adding all that fuel and be wayyy rich. It would have probably fouled plugs and generally been bad for the motor. Similar issues happen to guys when the wideband O2 fails. When you install the new part you have to remember to reset the fuel learn tables.

1955 Nomad project LC9, 4L80e, C5 brakes, Vision wheels
1968 Camaro 6.2 w/ LSA, TR6060-Magnum hybrid and etc SOLD
1976 T/A LS1 6 Speed, and etc. SOLD
Follow me on Instagram: ryeguy2006a
11-05-2021 #755
Registered User
- Join Date
- Sep 2009
- Posts
- 2,705
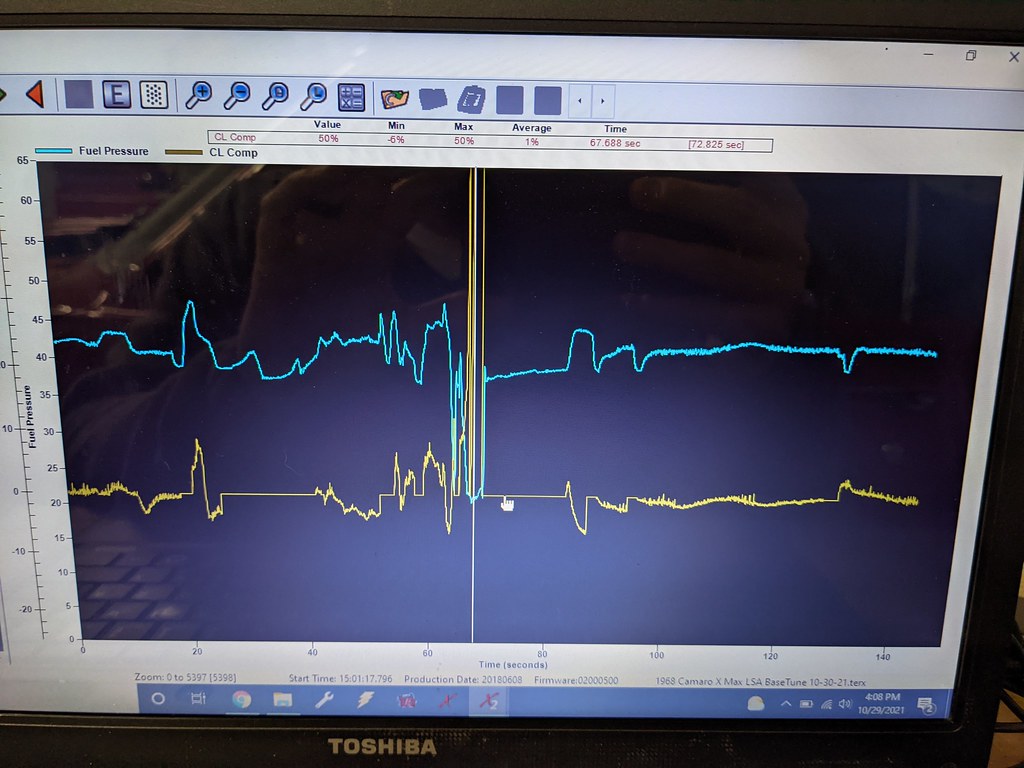
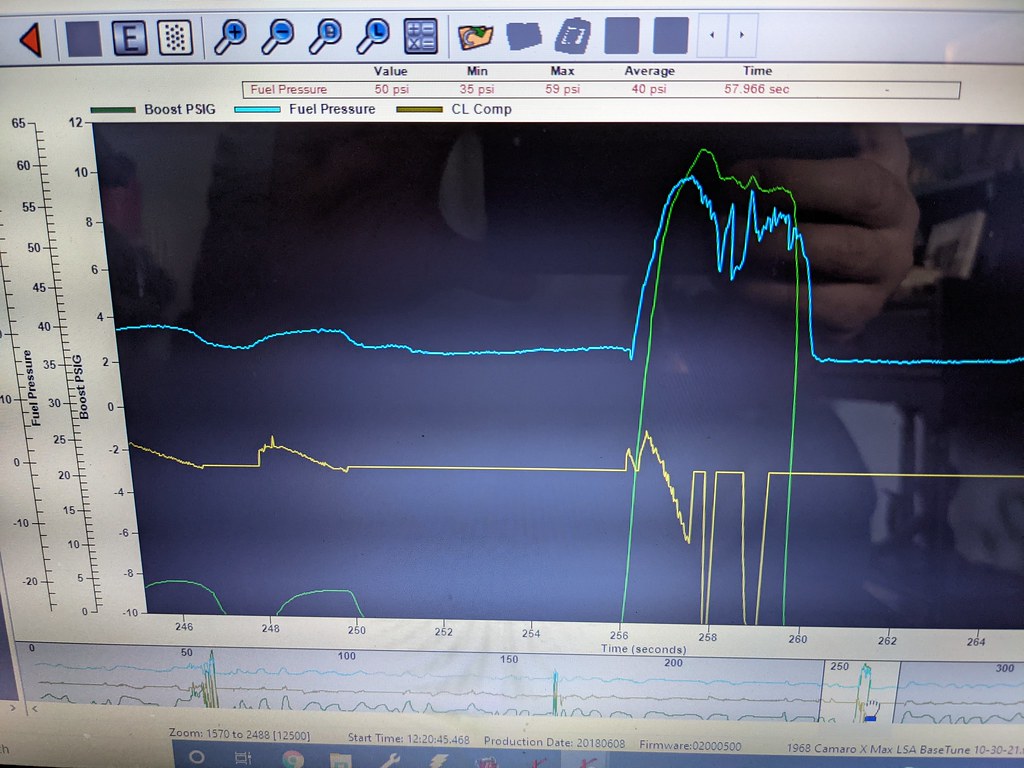
Ok, well I've been through a bit of a rollercoaster since my last update. As I was tuning my car before my dyno session for some power pulls, I realized that I was running out of fuel in full boost. It was very discouraging, because I was really looking forward to getting the car on the dyno... Being that I'm in NY, we have very little time before we get a snowstorm and the towns all spread salt on the roads. But after bouncing some ideas off some trusted car colleagues (thanks Andrew), I was able to determine that it's very likely that my one or both of my stock fuel pumps are failing or weak. They are just not able to keep up with my fuel demands in boost and rpms. I took a data log and you can see here in the blue is my fuel pressure and the yellow is the ECU trying to add back fuel. Fuel pressure gets down to around 22psi in full boost, but with the fuel module it ramps up the fuel pressure 1:1 with boost. So, I've definitely got a problem...
One thing that may not be clear from this graph though is Holley saved my engine. If I was running a stock ECU that didn't have the ability to add that much fuel up top in boost, I would likely be shopping for a new short block.
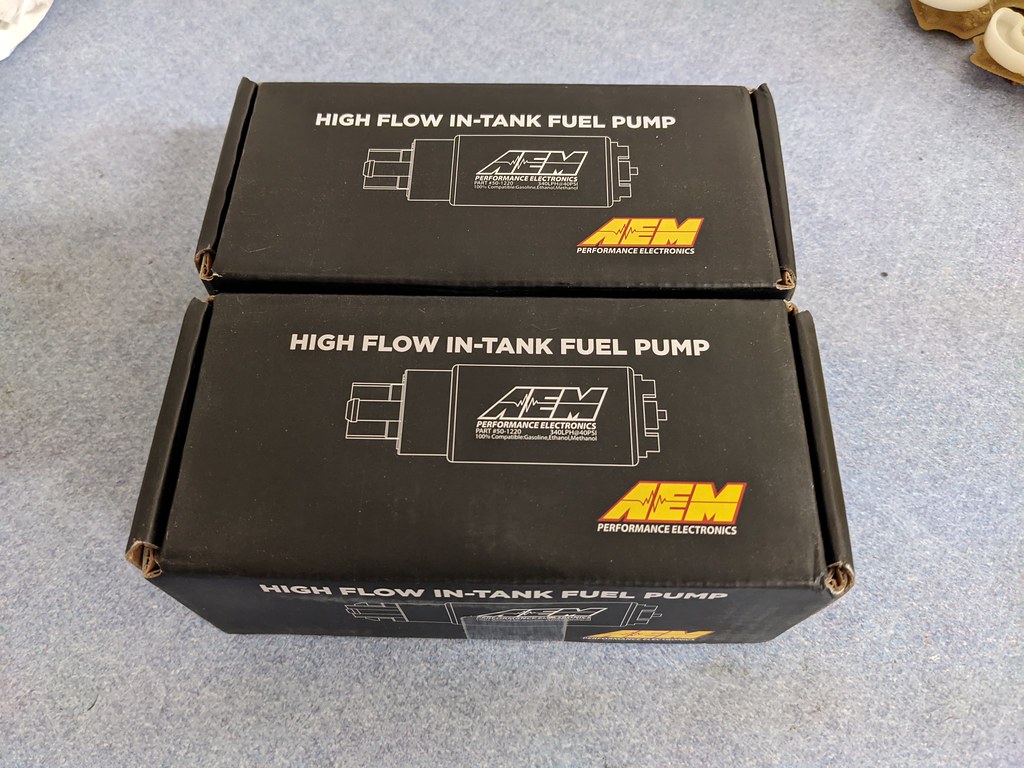
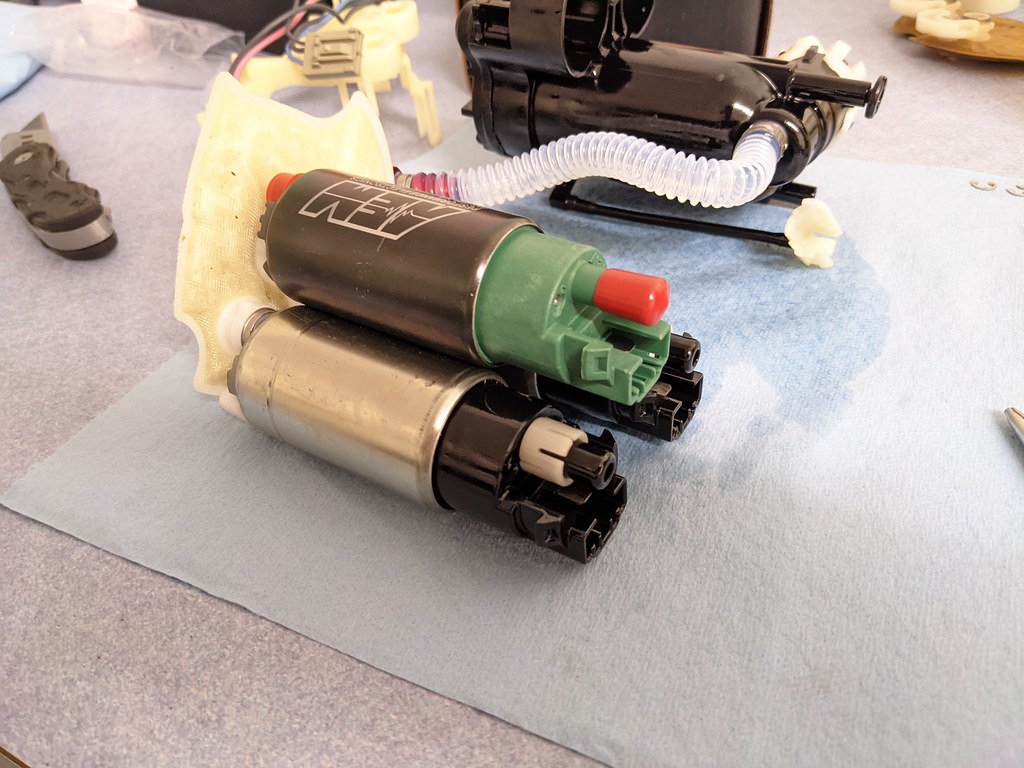
The solution was to contact Carl at vaporworx and order a pair of upgraded fuel pumps from AEM. He recommended a pair of AEM 320 lph @ 43psi pumps which are a direct swap for the stock 190 lph CTS-V fuel pumps. This should provide me plenty of fuel all the way up to 60+ psi and even have enough flow if/when I run e85. Carl was able to expedite them to me and I was able to swap them out last night.
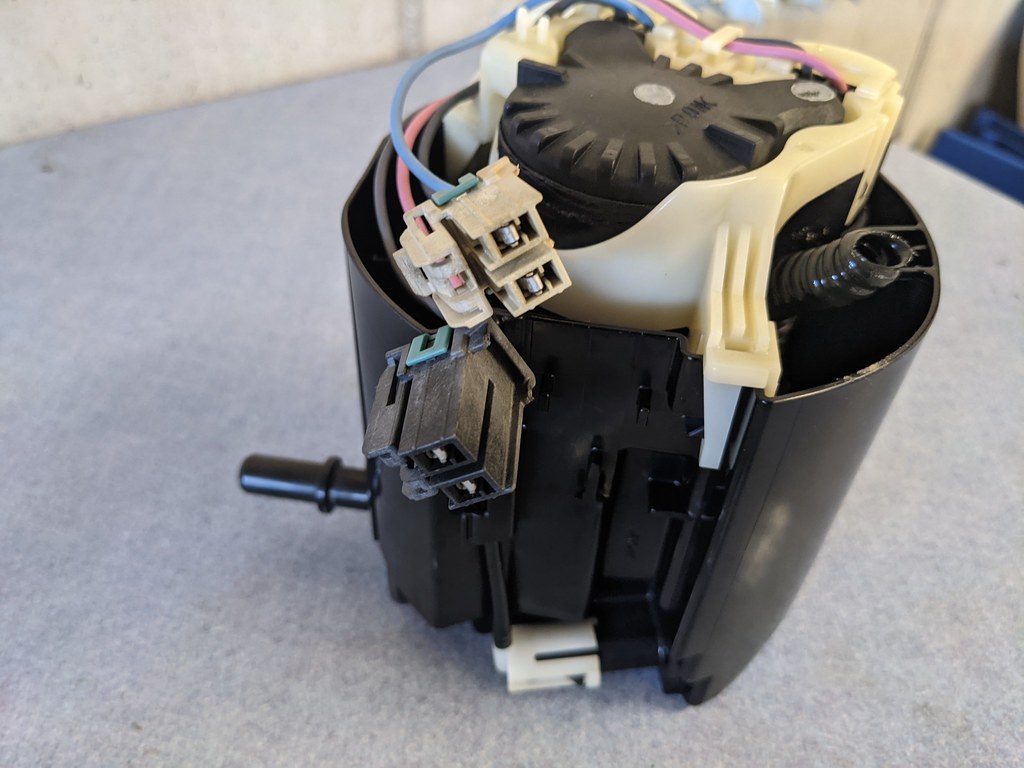
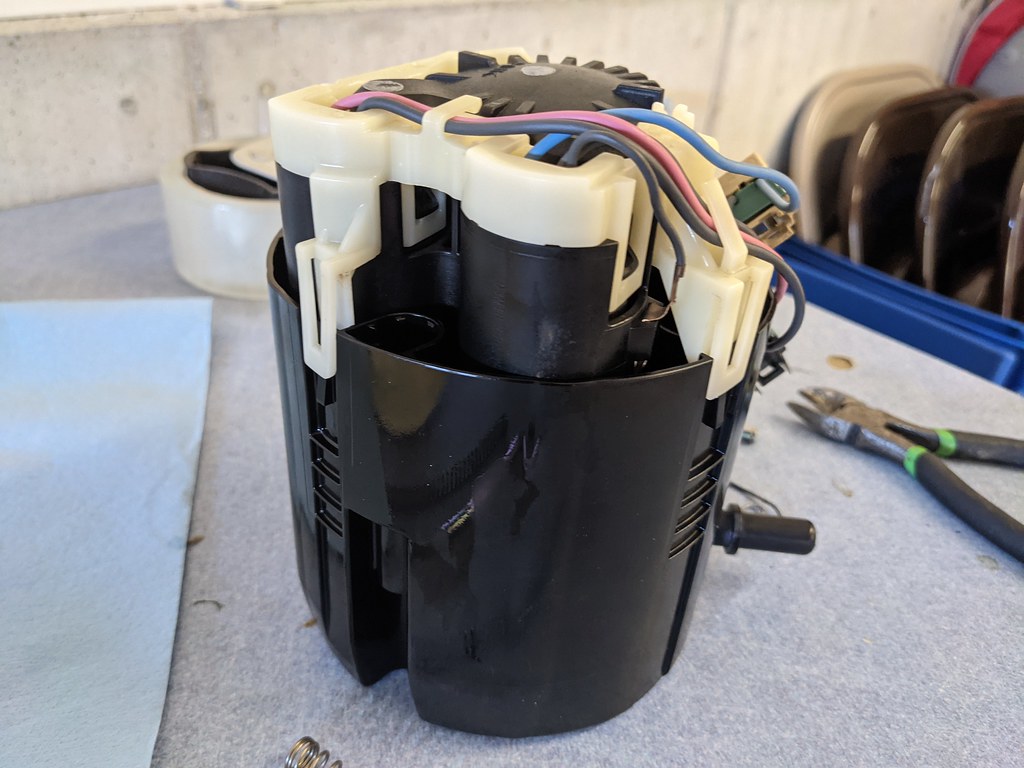
I'm getting pretty good at this by now... here's how the stock pumps attach inside the bucket.

Pop off the white retaining clip, and the fuel pumps pull right out.
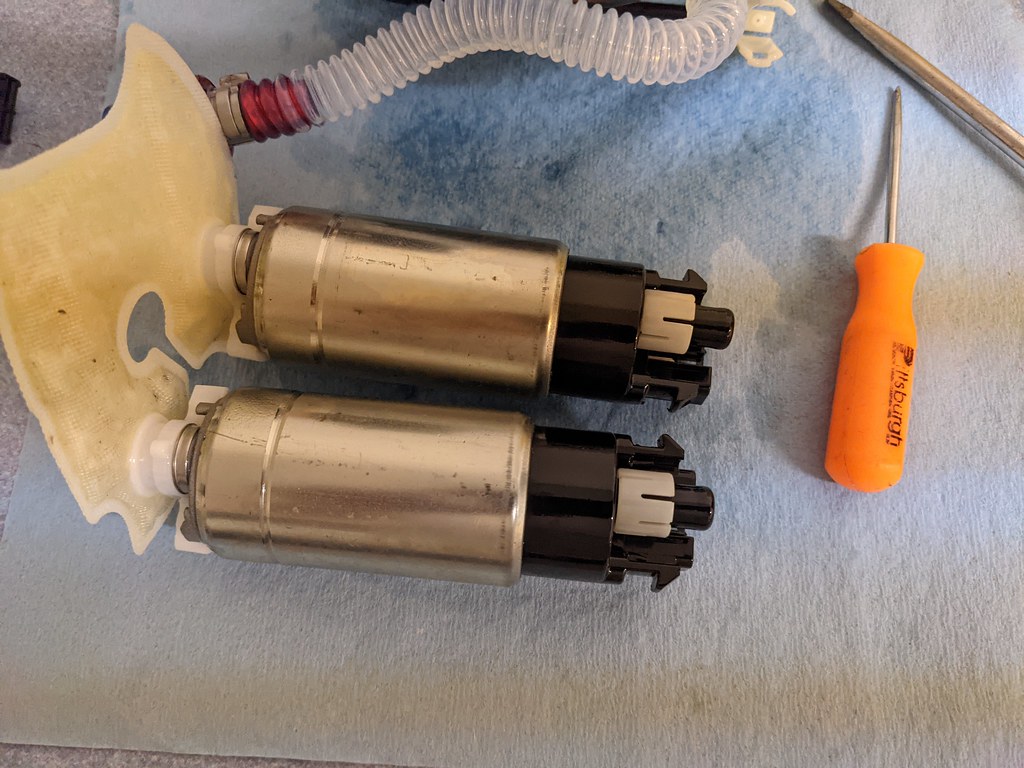
Here you can see the fuel pumps are an exact direct fit for the stockers. Wiring harness and all.
One thing that does need to be swapped over is the little white spacers from the stock pumps. They go on first and I used one of the new o-rings that came with the kit.
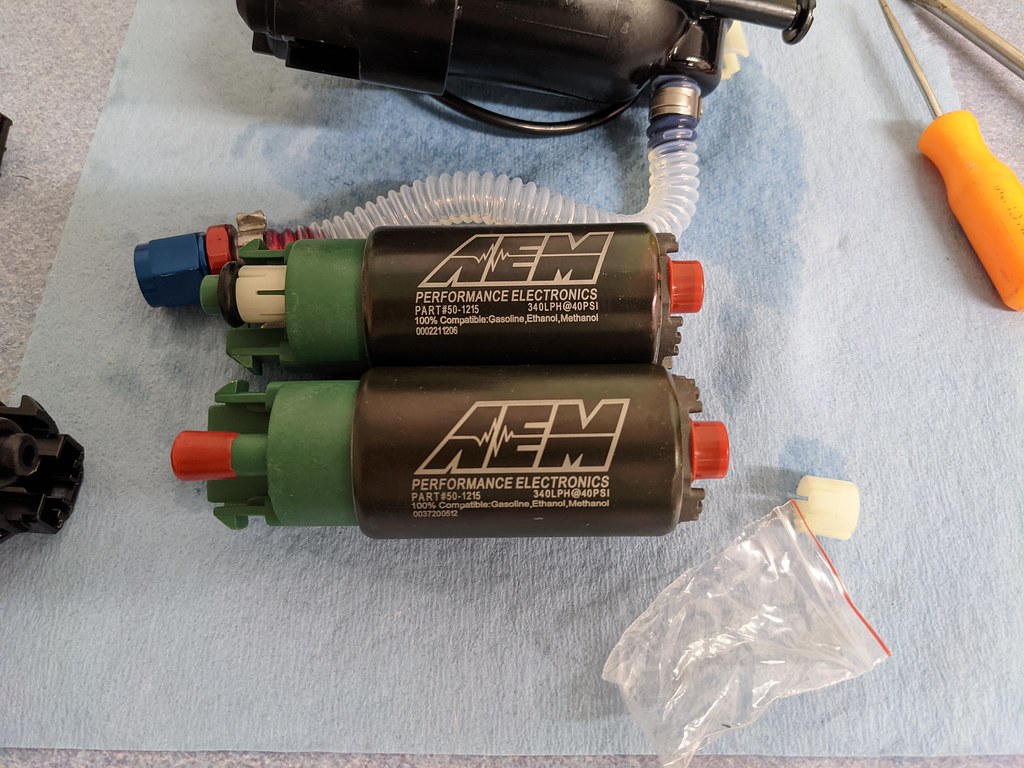
Then they just slide right in. The fuel socks are separate, but they all fit inside the bucket nicely. Then it was all back together and ready to go. SOOO glad that I added that fuel door in the trunk. I would have gotten sick of pulling that tank by now...

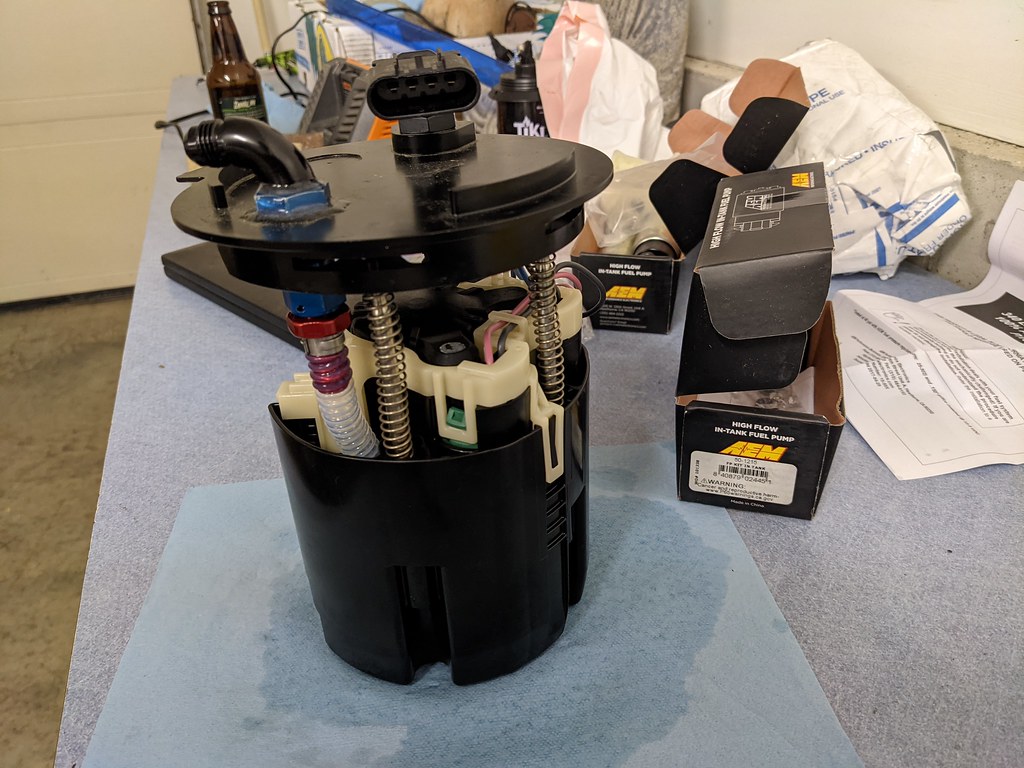
Then it was time for the moment of truth. Was that really the issue??? I went out to do a little testing and tuning and found out that was exactly my problem! I took the car out for about an hour during my lunchbreak and honed in my in boost fuel VE table. It was way out of wack, but I was able to get a few data points and get it looking wayyy better.
Here I am out mingling and trying to fit in...
I played around with my fueling once I grabbed lunch, then took a log on the way home. Bingo, that's what I wanted to see! Rising fuel pressure along with the boost. Blue is fuel pressure, yellow is CL compensation, and I added green for boost. Fuel pressure stays constant, then rises with boost. Fuel trims still need work as you can see. Too rich as it's pulling 25% fuel, but I'd rather be too rich than too lean up top. Looks like for this run I topped out at just shy of 11psi.
I also got this cool shot when I brought my car to work last week.

I re-scheduled my Dyno appointment for Monday so wish me luck. I think I'm ready now. It's definitely running as strong as ever now.
Cheers,
Ryan
1955 Nomad project LC9, 4L80e, C5 brakes, Vision wheels
1968 Camaro 6.2 w/ LSA, TR6060-Magnum hybrid and etc SOLD
1976 T/A LS1 6 Speed, and etc. SOLD
Follow me on Instagram: ryeguy2006a
11-09-2021 #756
Registered User
- Join Date
- Sep 2009
- Posts
- 2,705
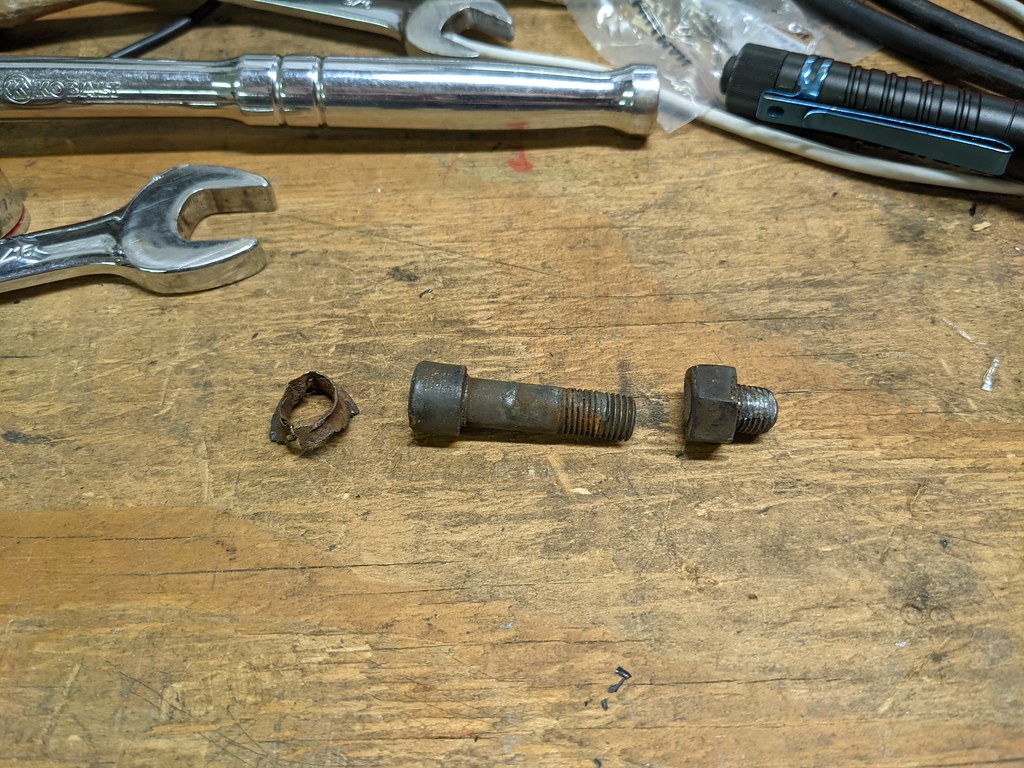
In preparation for the dyno appointment on Monday, I was checking over the car for anything that could be an issue. Then I noticed one last thing... My rear end slid forward on the driver's side again! So this is definitely an issue and since I had already bought all the parts to fix it, I pulled it all apart. As soon as I got the shock plate off, it was clear that the bolt was sheared off.
Quick fix with the new grade 8 hardware.
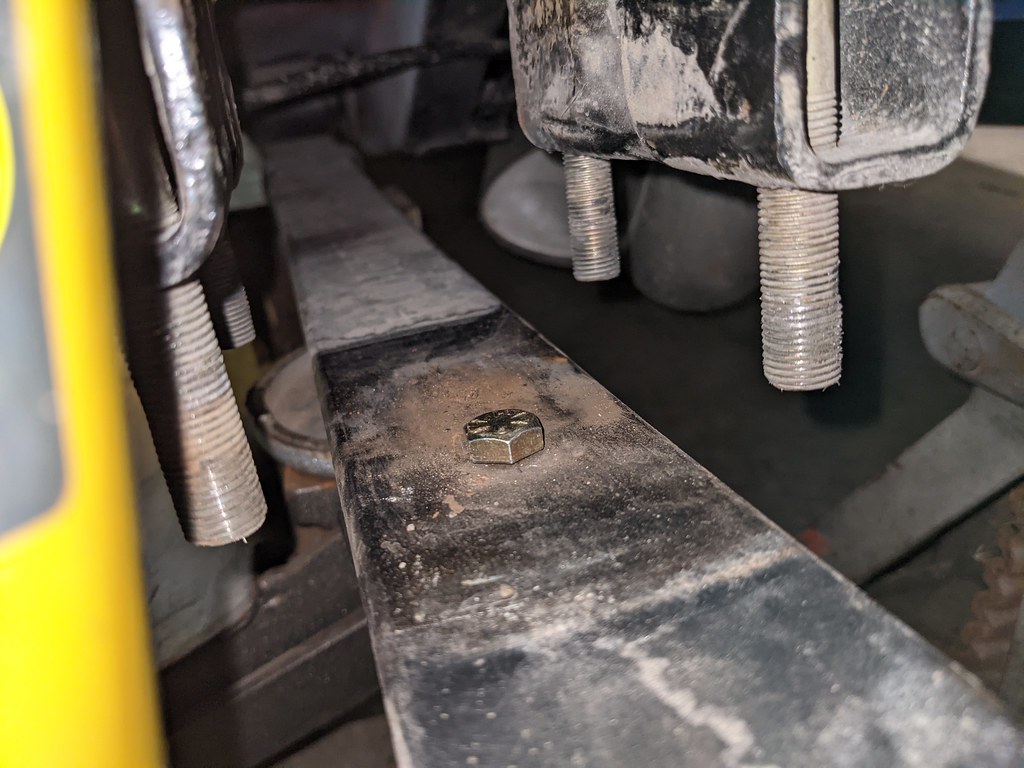
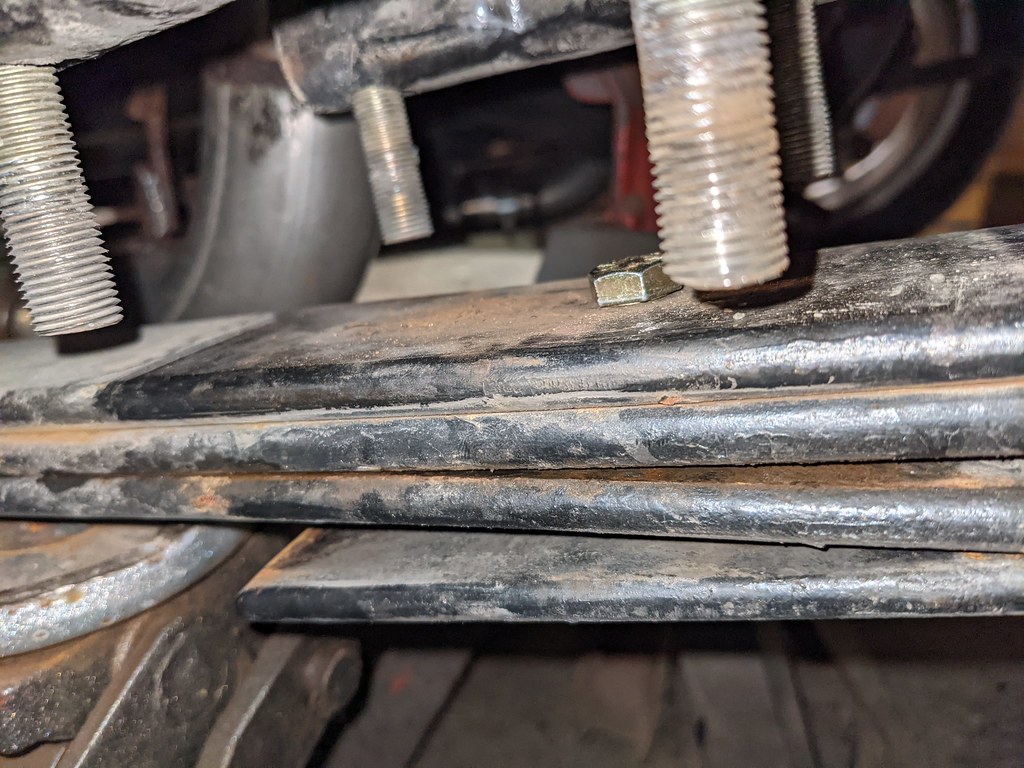
Went back together and was centered back in the wheel well just like before. Not sure why it broke, but now it should stay in place.
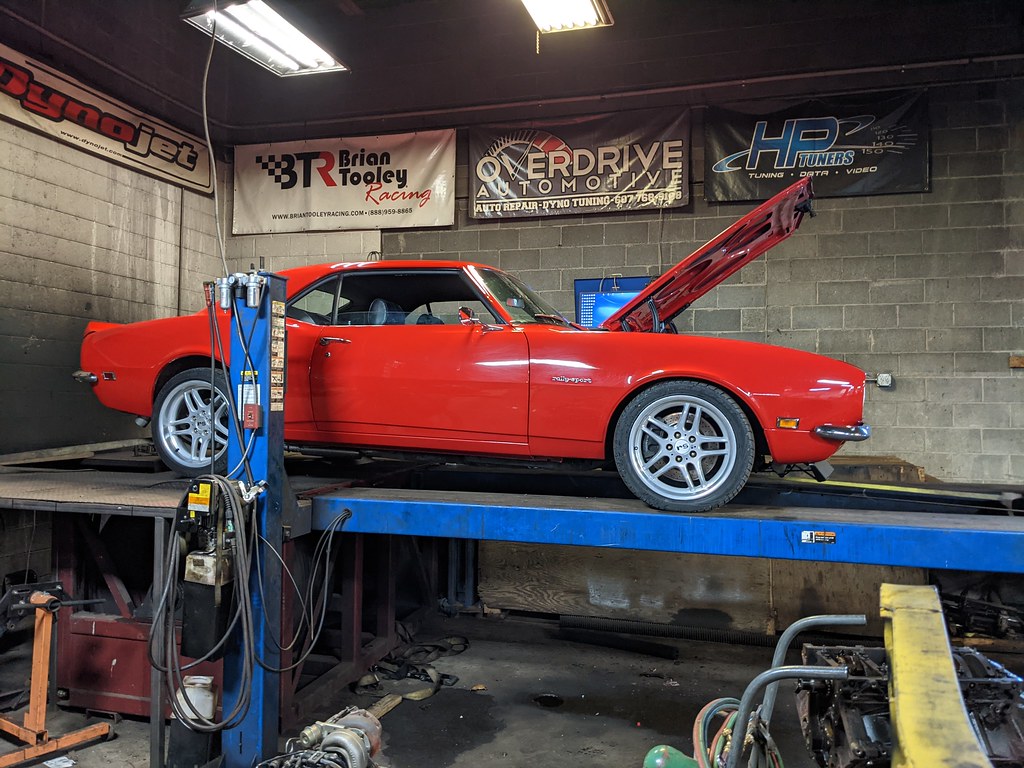
Now the car was as ready as it was going to be and I headed out to the dyno. I made a couple pulls on the highway and still had rock solid fuel pressure! That bad pump really messed up my VE tables, but I was tweaking on it every time that I drove it since I swapped fuel pumps. I got it dialed in to where I was +/-5% in closed loop and still was after I opened her up. I had prepared 3 different tunes loaded on the handheld for the car. Dyno 1 tune was the same one I've been running all summer. Second and third each had the same tune, other than progressively adding timing in the WOT areas.
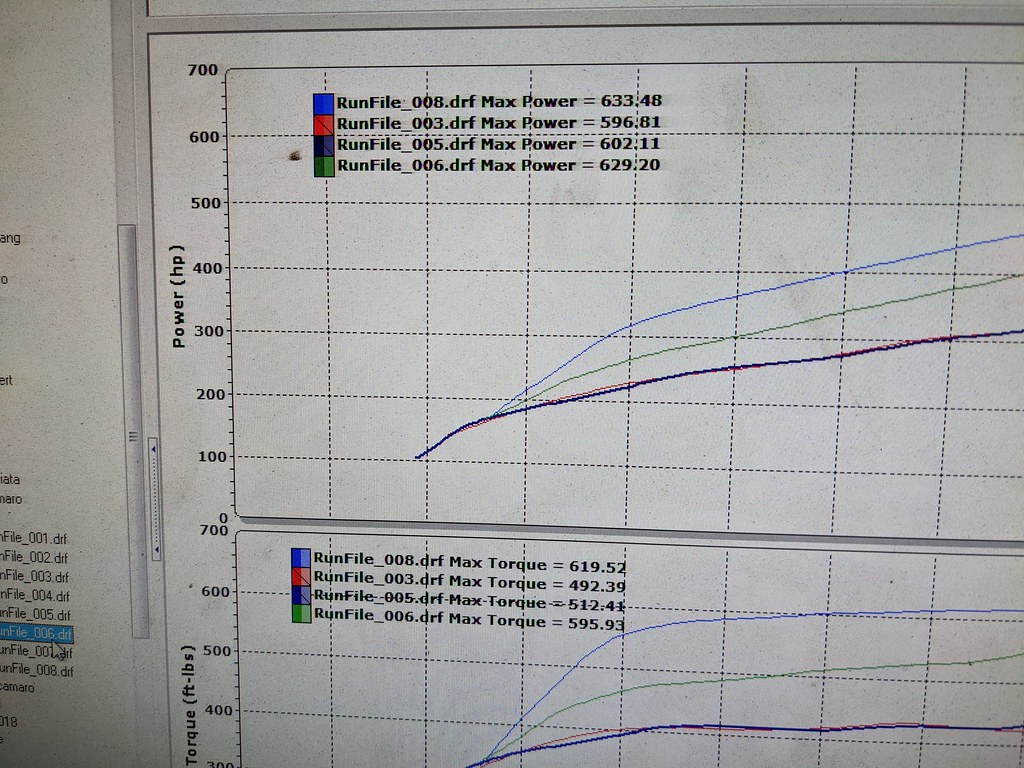
I arrived at the Overdrive Automotive and we got right to work. I had my dyno 1 tune in the car, we got the car up on the dyno and he got the car rolling in 4th gear and hit it. You could hear the car load up at first, but then quickly hit the rev limiter. Spun on the dyno! They sprayed some sticky aerosol and tightened the straps a few more clicks. Next run we were able to get a clean pull although he said it was still spinning a little bit around 3500 rpms. 596 HP and 497 TQ! In my head I really wanted to hit 600 rwhp, so the fact that we were this close right out of the gate, I knew that we could do it. He did make a few adjustments on the next few pulls to the timing tables between 60-100 kpa which he said was mostly for drivability and we bumped the rev limiter from 6500 to 6950 on my dyno 1 tune rather than loading dyno 2 or 3.
Here's the video! I love the way it sounds.
https://youtu.be/UFD9SW36-n8
We continued to have traction issues, and he added some solution from VP that really helped with traction for drag racing applications. That was the ticket and we ended up with final numbers of 633 HP and 619 TQ! I couldn't be happier with the results and how it all came together. What's amazing to me is that the tune is still on the more conservative side with my timing. He said that if we wanted to we could keep adding power because with a change of .5* of timing we gained around 7 HP on the last pull. He guessed we could probably add another 2-3 degrees. But I'm more than happy with this power level right now. I can always get a full on dyno tune, run full length headers, pulley changes for more boost and even add e85 to my tune up down the road for more power.

What I've learned from this whole experience is number one... I need more traction! Number 2 is that your tune is everything. Holley makes their software really easy to use and make good power, but it isn't self tuning by any means. You either need to read up and do a lot of homework like I did, or leave it to someone who really knows what they are doing. Even with all of the homework that I did, there is no replacement for an experienced tuner. Tom at Overdrive made a few changes to my car on the fly and it made a big difference as far as the drivability after the dyno. I've learned a lot just watching him and can't wait to continue tweaking the tune. He mentioned adding a 2 step to a clutch pedal, that I may give a try for next year.
I've still got some nice weather in the forecast so I'm looking forward to getting the most out of this year and get some more miles on her.
Cheers,
Ryan
1955 Nomad project LC9, 4L80e, C5 brakes, Vision wheels
1968 Camaro 6.2 w/ LSA, TR6060-Magnum hybrid and etc SOLD
1976 T/A LS1 6 Speed, and etc. SOLD
Follow me on Instagram: ryeguy2006a
11-09-2021 #757
Registered User
- Join Date
- Sep 2018
- Posts
- 49
That is so BADASS!
love reading your updates Ryan,
motivates me to make progress on my car.
11-09-2021 #758 -Moderator/Sponsor-
- Join Date
- Apr 2001
- Location
- The City of Fountains
- Posts
- 15,975
Outstanding results?
Andrew1970 GTO Version 3.0
1967 Cougar build
GM High-Tech Performance feature
My YouTube Channel Please Subscribe!
Instagram @projectgattago
Dr. EFI
I deliver what EFI promises.
Remote Holley EFI tuning.
Please get in touch if I can be of service.
"You were the gun, your voice was the trigger, your bravery was the barrel, your eyes were the bullets." ~ Her
11-09-2021 #759
Registered User
- Join Date
- Oct 2011
- Posts
- 696
Sounds awesome Ryan! That’s a great power level. Your probably around 750hp at the crank if not more, amazing!
My Very Ambitious 69 Build
https://www.pro-touring.com/threads/...lls?highlight=
11-09-2021 #760
Registered User
- Join Date
- Feb 2016
- Location
- SoCal
- Posts
- 475
That TQ curve is just awesome.
1970 VW Bug - Just your average mid engine Bug
Track toy - 06 Evo - E85 and lots of boost
Newest track toy - 2021 Supra

 Reply With Quote


