
Results 581 to 600 of 808
-
08-18-2020 #581
 Registered User
- Join Date
- Nov 2017
- Location
- Lake Elsinore, CA
- Posts
- 90
Ryan,
Watching your build unfold is causing me a huge problem. I now really want a first gen in my garage...
Jeff
-
08-18-2020 #582
 Registered User
- Join Date
- Nov 2018
- Posts
- 645

That little M logo looks like a great place for a little bow tie.
08-20-2020 #583 Registered User
- Join Date
- Sep 2009
- Posts
- 2,705
Thanks Jeff.
You know I've had a few people suggest that now. I'm going to look into it.
1955 Nomad project LC9, 4L80e, C5 brakes, Vision wheels
1968 Camaro 6.2 w/ LSA, TR6060-Magnum hybrid and etc SOLD
1976 T/A LS1 6 Speed, and etc. SOLD
Follow me on Instagram: ryeguy2006a
08-21-2020 #584
Registered User
- Join Date
- Sep 2009
- Posts
- 2,705
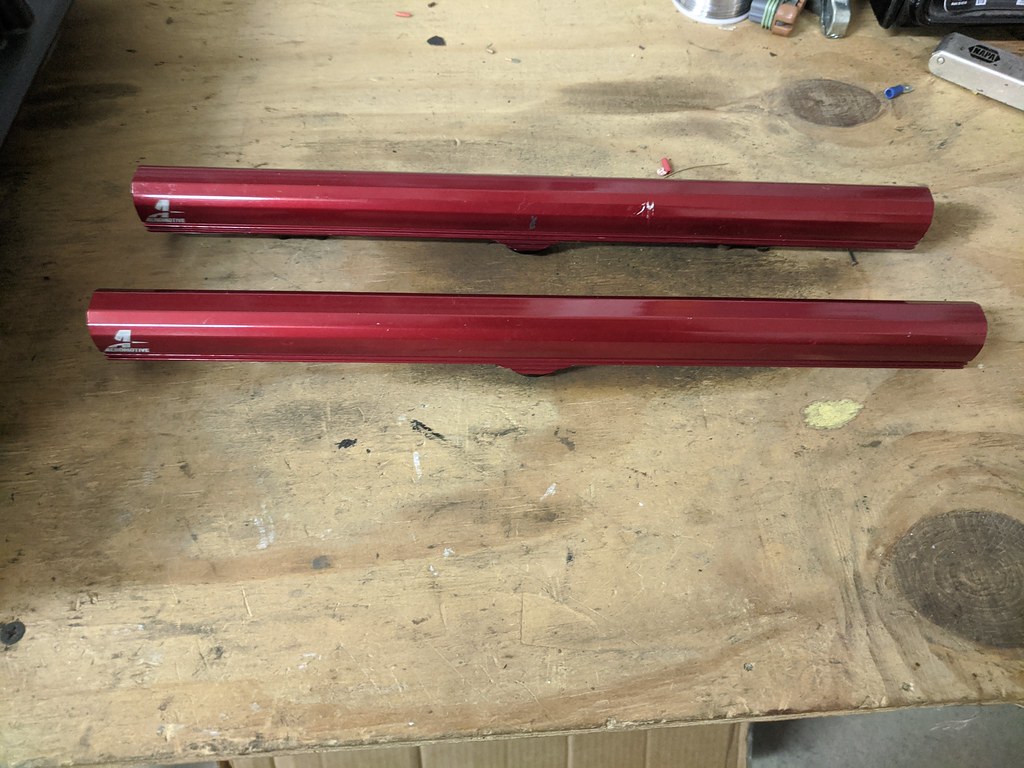
I was very excited to receive the FAST 102 intake as the seller gave me a really good deal including a set of Aeromotive fuel rails.
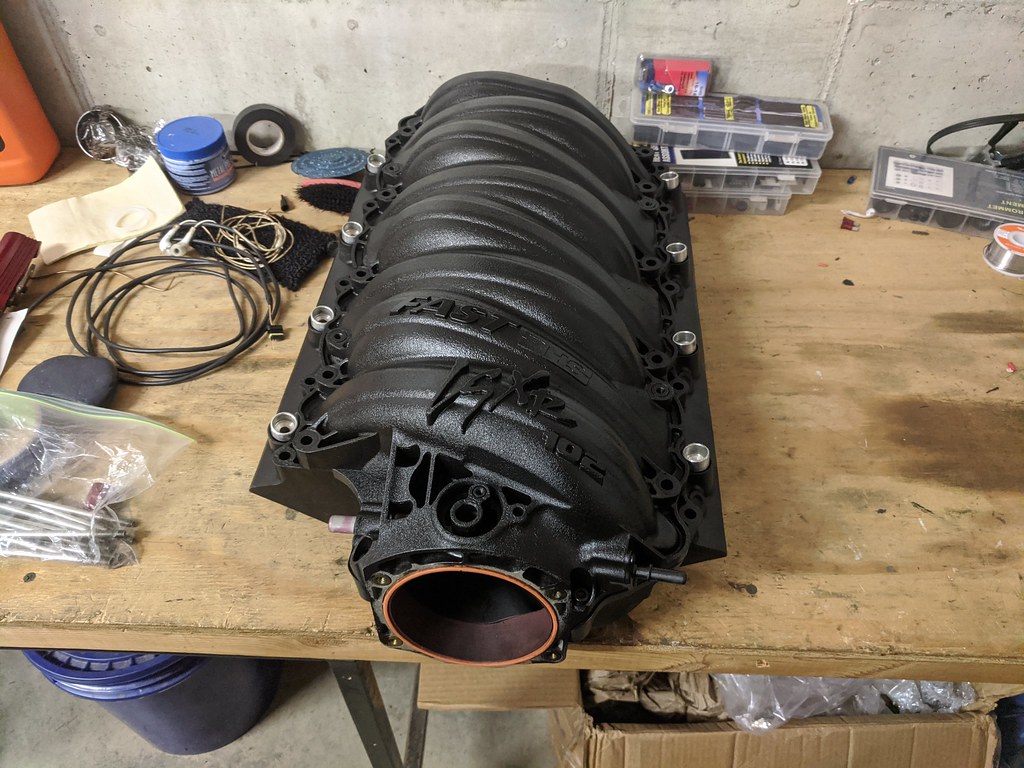
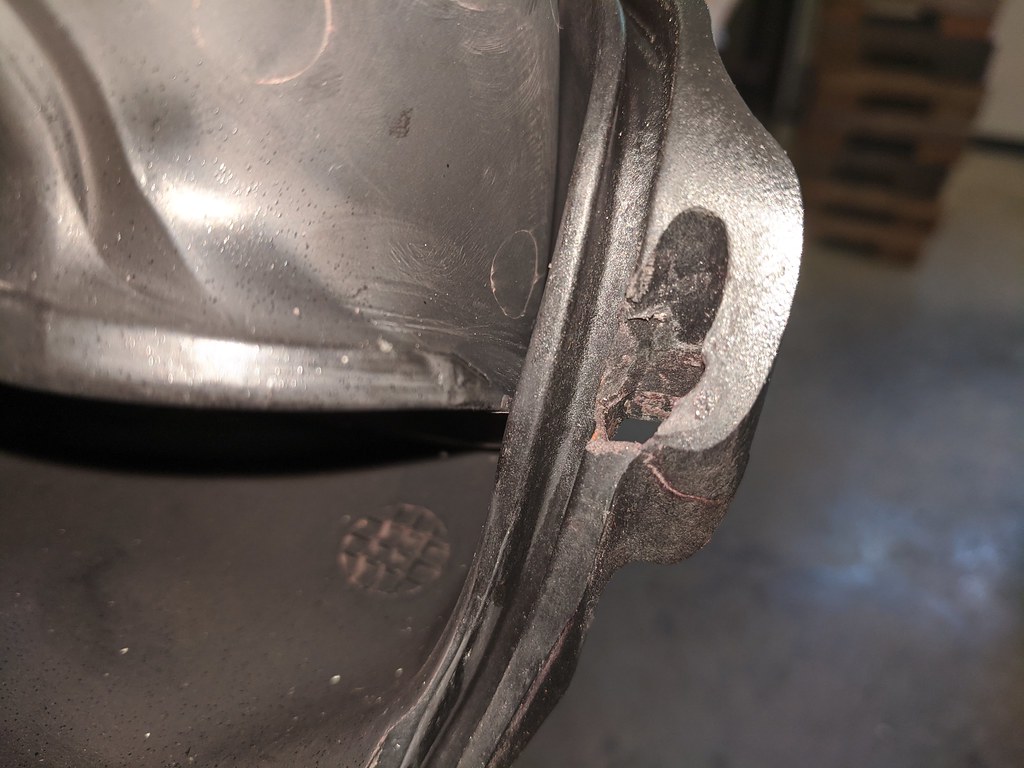
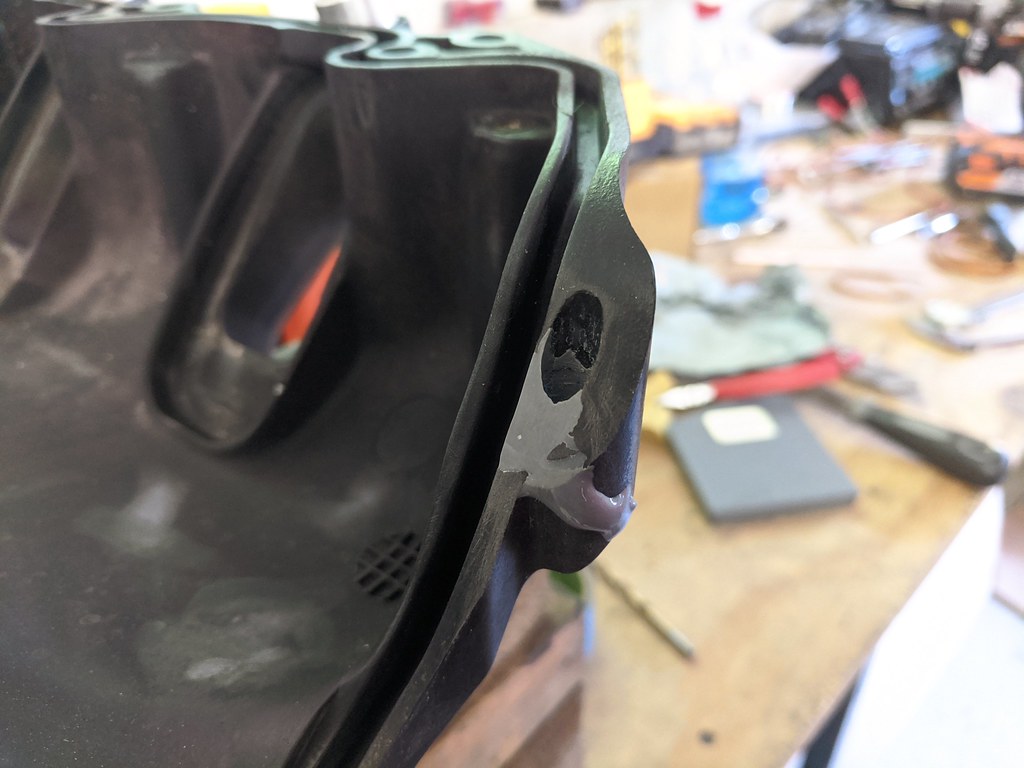
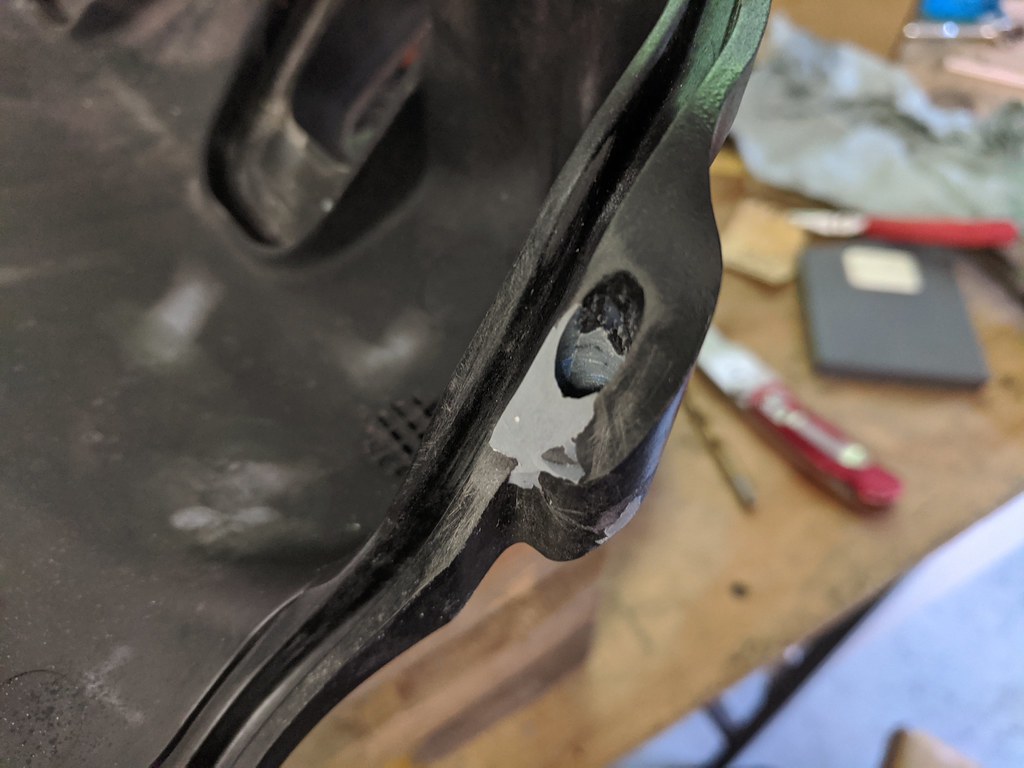
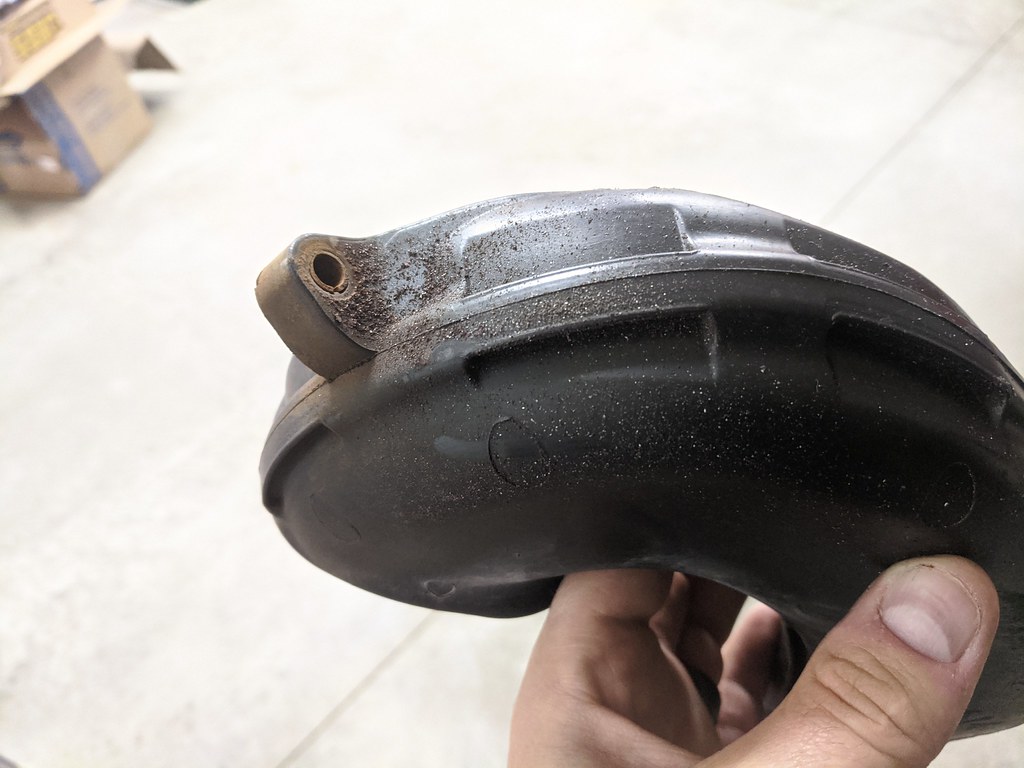
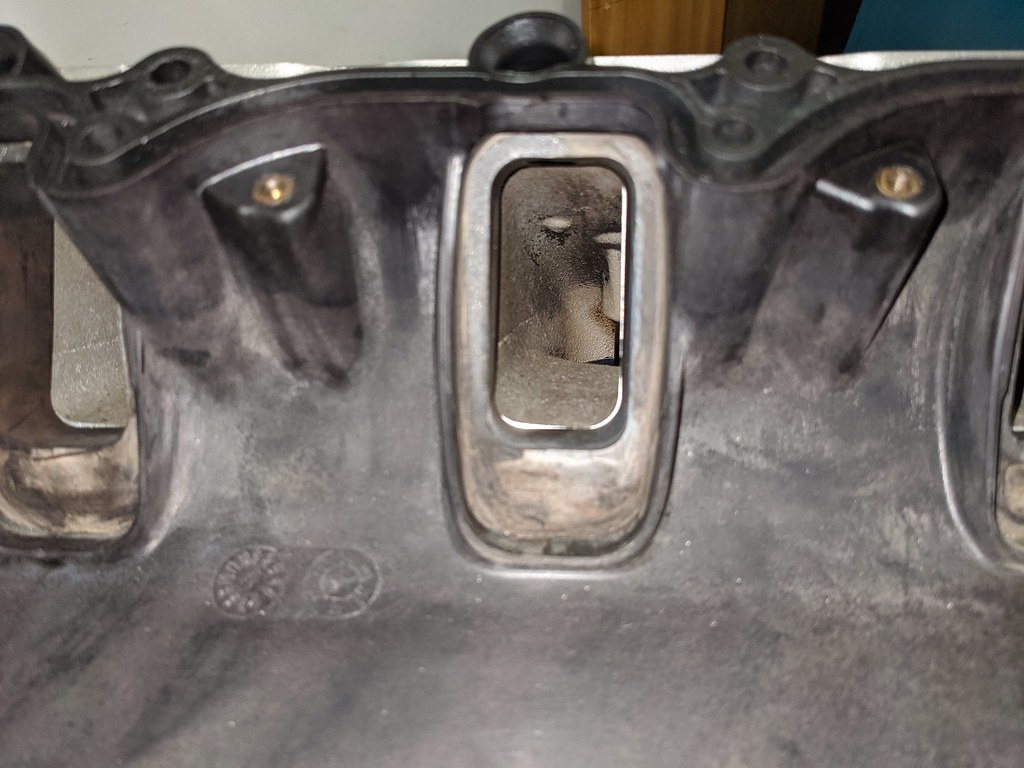
Although after I was looking at it for a few minutes, I noticed that the upper intake wasn't sitting flush with the lower on the driver's side. So I tried tightening it, but nothing happened? So I pulled off the upper and found this...
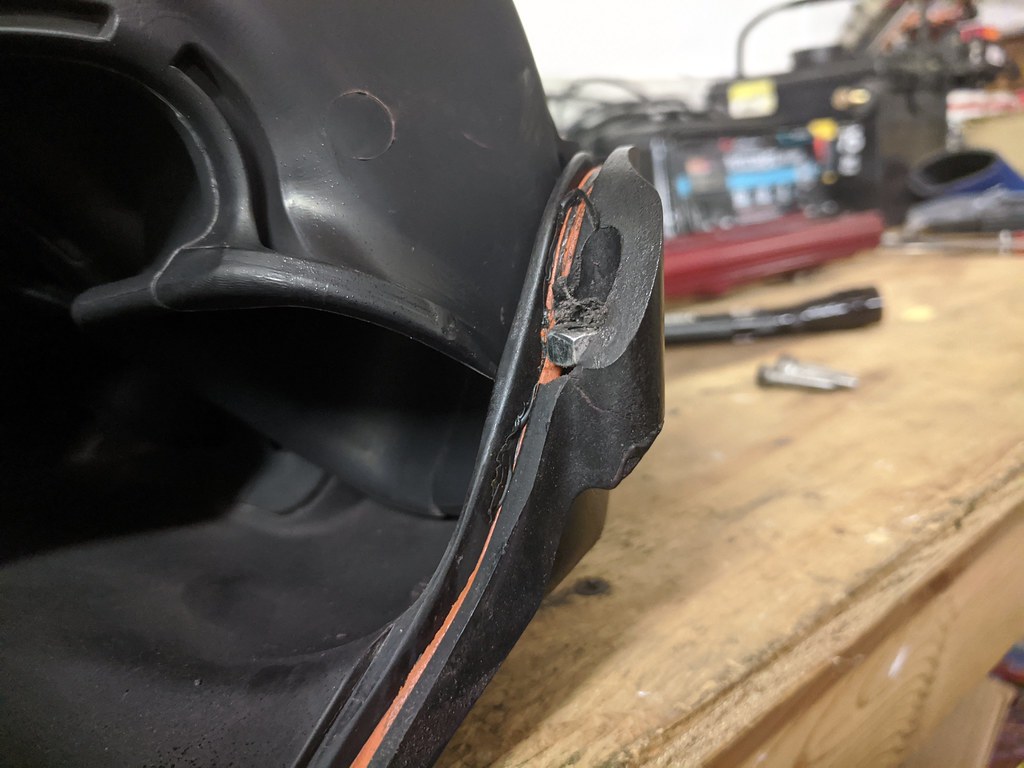
After I pulled the nut and a ton of silicone.
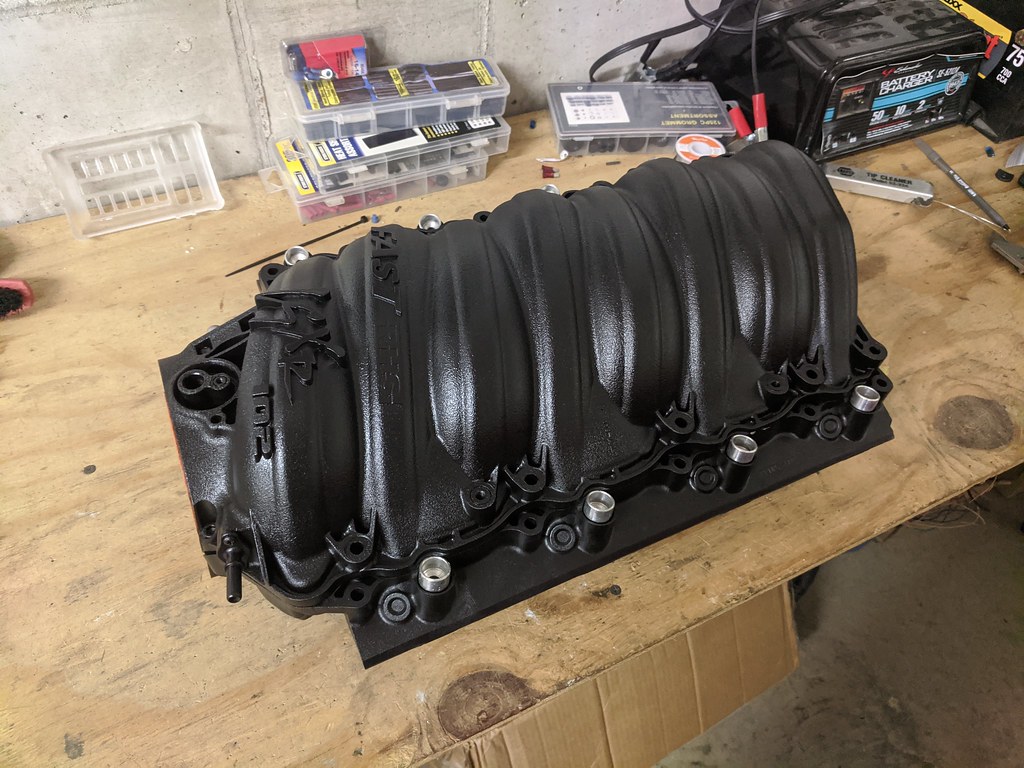
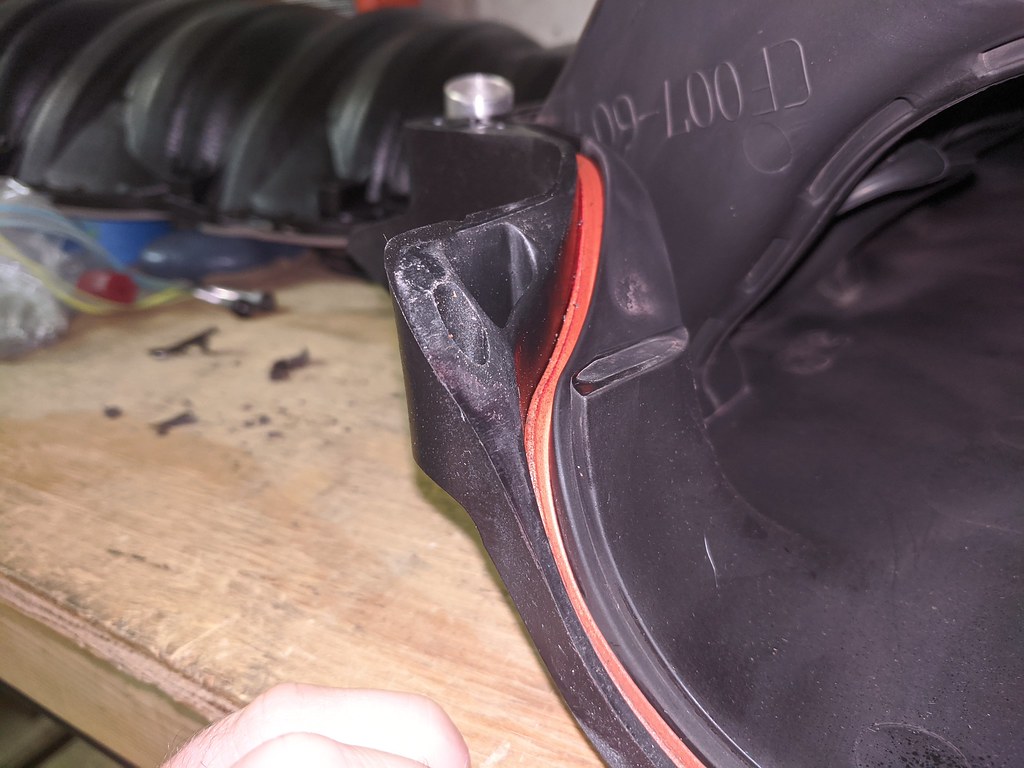
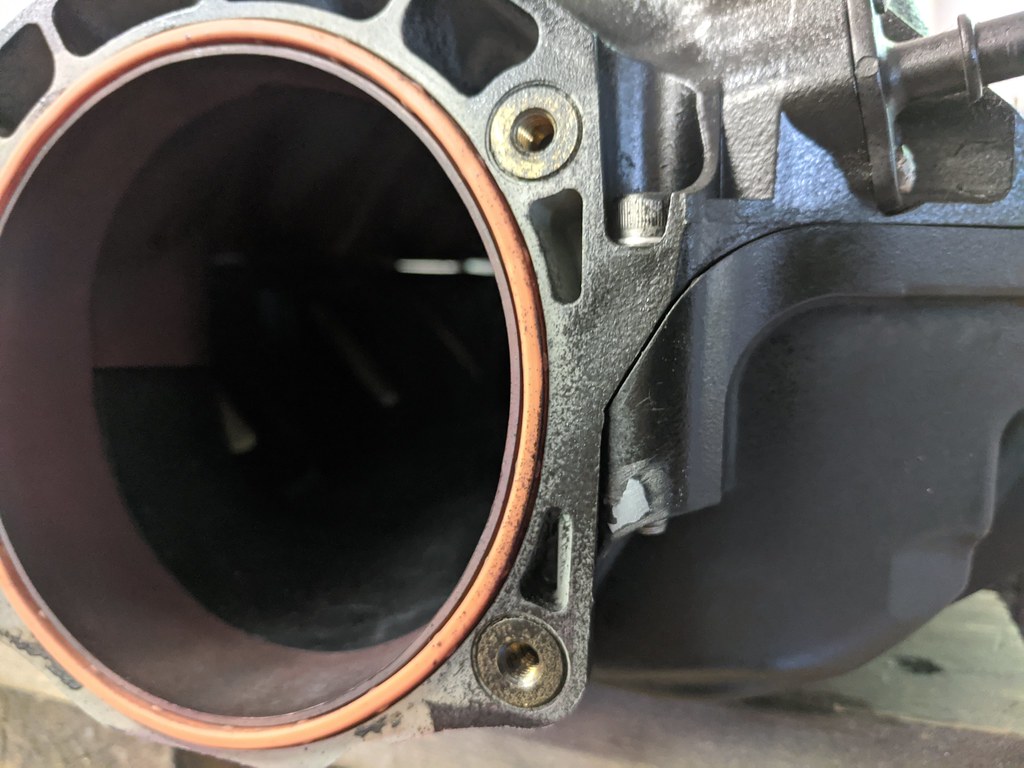
Here is the passenger side and what it should look like.
I contacted the seller and he said that he was unaware and wouldn't have sold it to me if he knew it was broken. They offered to give me a refund, but given the high cost of shipping, I was hoping to get a partial refund. Was in communication, but then radio silence...
Anyway, I was pretty confident that I could repair it with epoxy considering it was on the outside of the intake seal, and the broken piece was sort of a cone shape. So as it was torqued, it would only get tighter to the lower manifold.
Thanks,
Ryan
1955 Nomad project LC9, 4L80e, C5 brakes, Vision wheels
1968 Camaro 6.2 w/ LSA, TR6060-Magnum hybrid and etc SOLD
1976 T/A LS1 6 Speed, and etc. SOLD
Follow me on Instagram: ryeguy2006a
08-24-2020 #585
Registered User
- Join Date
- Sep 2009
- Posts
- 2,705
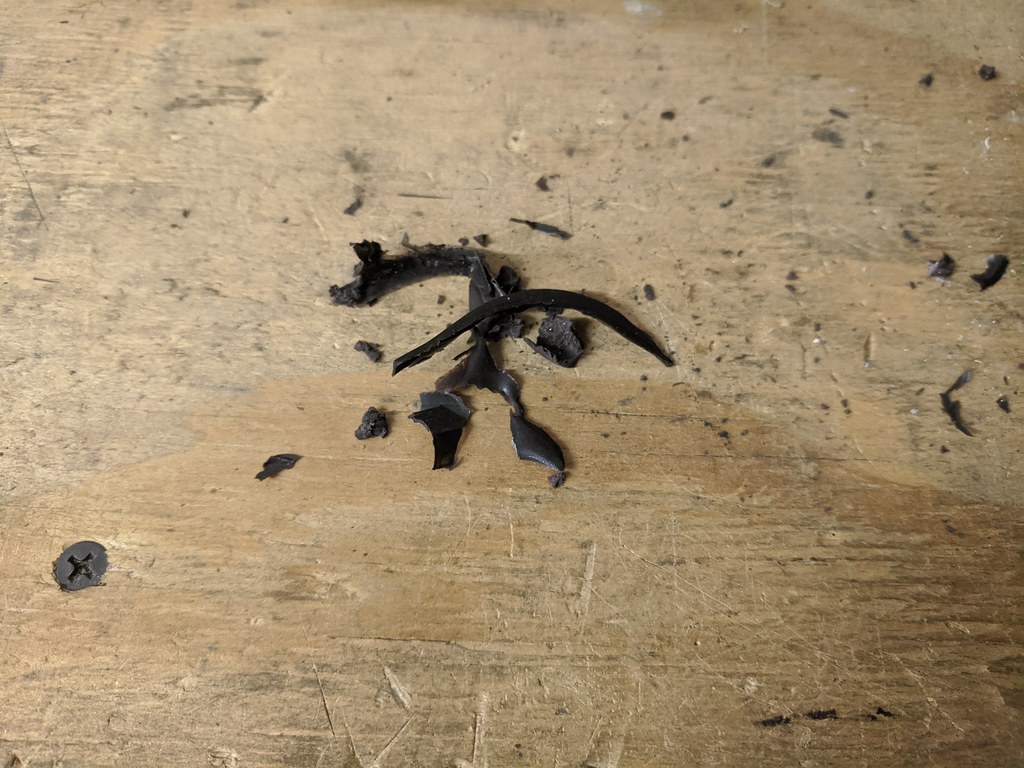
After assessing the damage and dug out all of the silicone that was holding the nut in place. The nut actually pulls in from the bottom, so I'm not sure why it was above where it should have been?
The great news is that the damage was to the outside of the rope seal for the upper and lower shells, so the repair really only needed to keep the seal and nut in place. I figured I'd give it a shot and grabbed some JB weld.
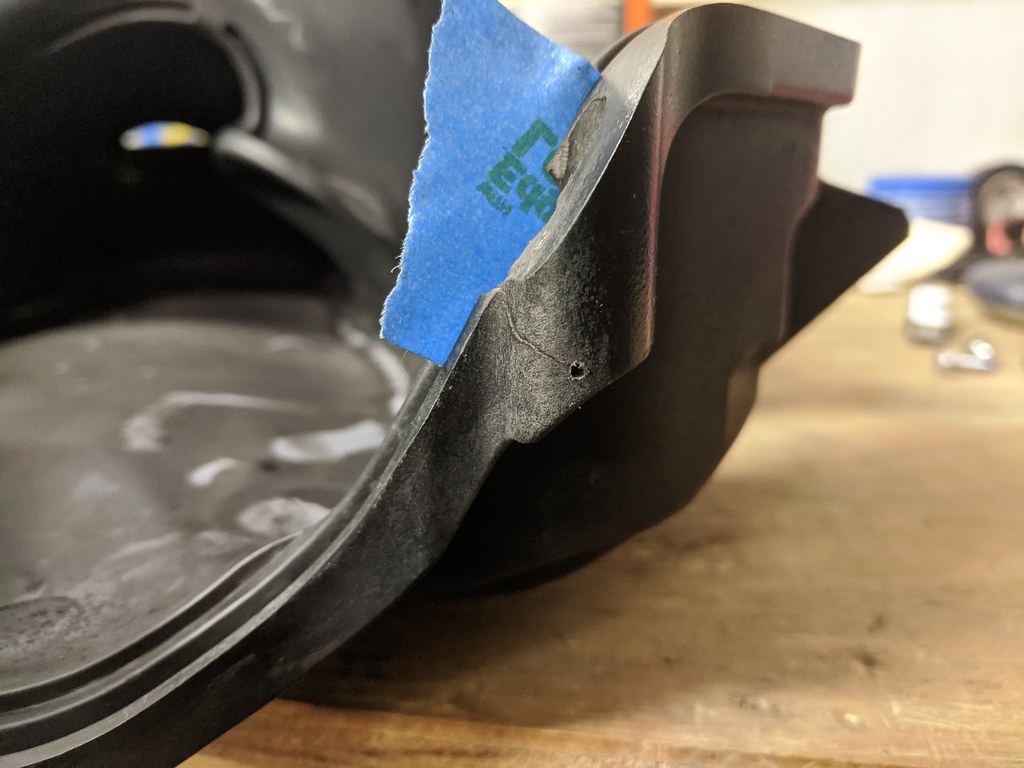
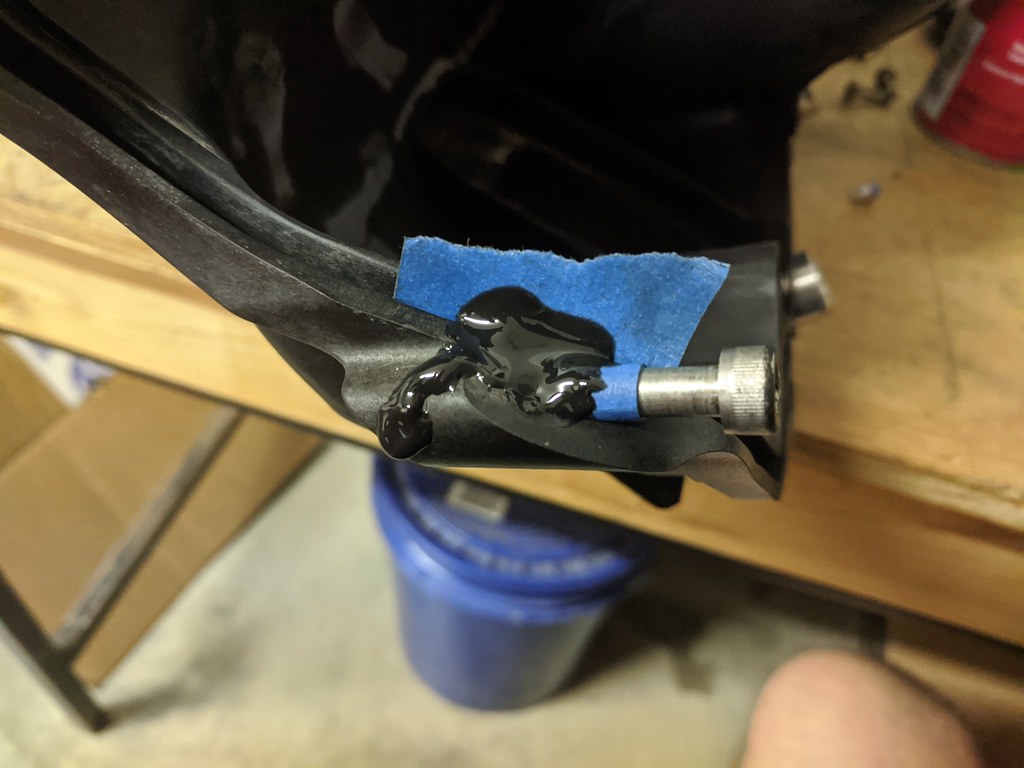
I started by adding some tape as a guide to replicate the seal tray area, and also found the end of the crack and drilled it with the smallest bit I had. Hopefully that stops the crack from continuing.
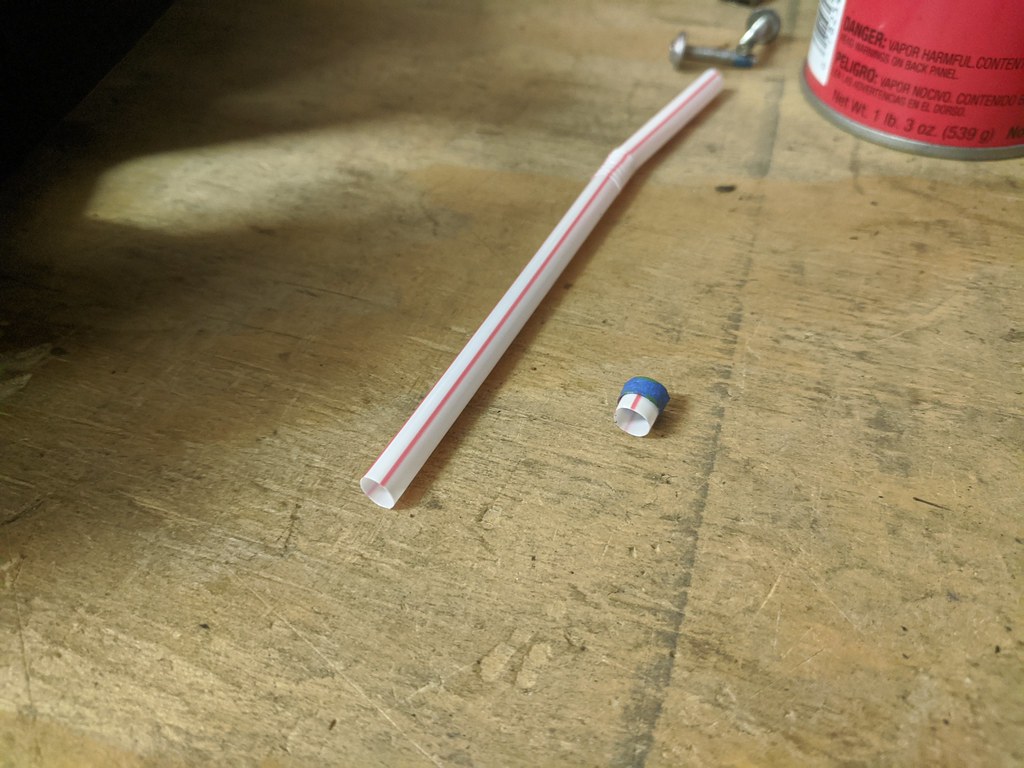
So after giving it some thought on how I wanted to proceed, I came up with how I wanted to get the bolt hole. I found a straw in the kitchen that would allow for me to put the bolt through it and wrapped it with painters tape until it had the same diameter as the good hole on the other side. Since there was enough of the original hole and the hex on the bottom side for the nut, I knew exactly where it needed to be. Just basically filling in the gap.

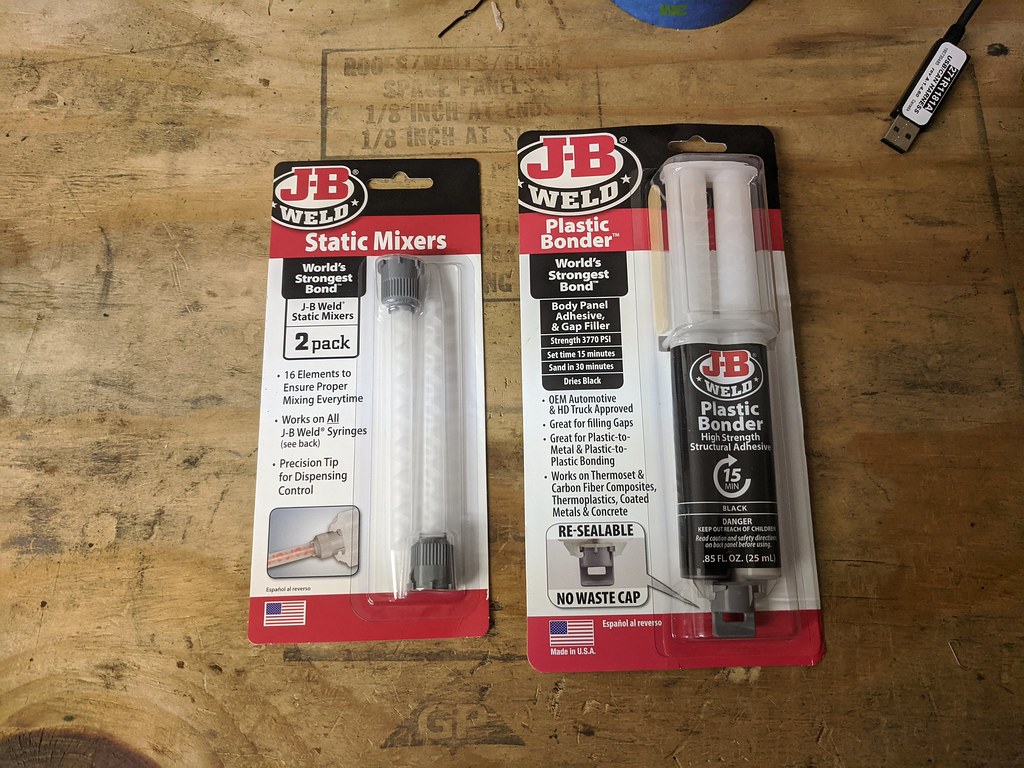
I couldn't really find a good answer online for what JB weld product to use, so this was a little bit of trial and error. I found this product that said it worked with composites and to boot it was black so it would hopefully make for a seamless repair. Not sure if there was a chemical reaction or if I didn't squeeze out enough in the beginning to ensure I had a good 50/50 mix, but it never hardened. I waited for about a week and it still hadn't set up. So, I cleaned it all out again and tried the gray for plastics.
Take two!
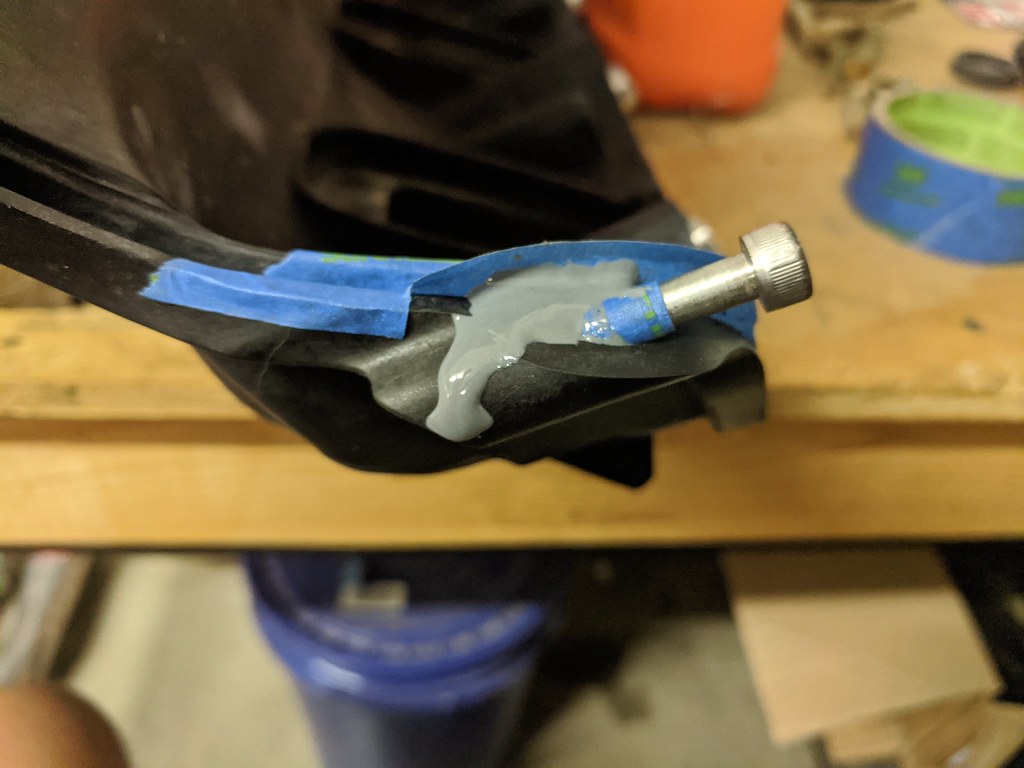
Now that worked just like advertised and those little mixing tubes worked so well. It gives you much more time to work with the material rather than spending some of that time mixing on a piece of cardboard.
It sanded quite easily and had a very strong grip on the material. Very happy with the results.

Then I torqued down the front two bolts to see how it would hold up, and it seems to be a very strong repair. I was able to get the top shell to sit flush with the lower just like the other side. So I'm thrilled that I was able to save it.
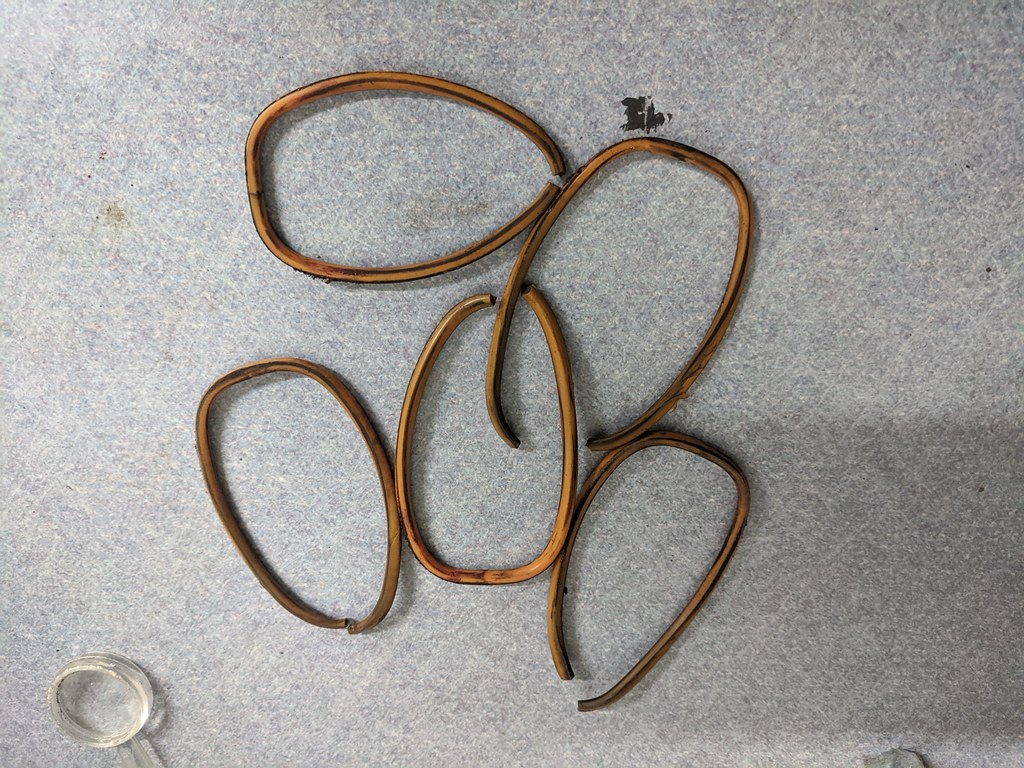
I suppose there is a silver lining to everything, so as I was doing the repair I thought I might as well take the intake runners off to see if there was any other damage, or debris. I ended up finding that 5 of the 8 runner seals were torn in half and a few of the runners had some junk on the top sides. It almost looked a little metallic, but wouldn't stick to a magnet. So unless it was aluminum or another non-magnetic metal, I'm not sure what it was. Either way the entire intake is getting a deep clean to avoid any issues down the road.
I'm ordering new runner seals and stainless hardware including the intake runners. They come with steel hardware inside and a few of the tops of the bolts were rusty.
Cheers,
Ryan
1955 Nomad project LC9, 4L80e, C5 brakes, Vision wheels
1968 Camaro 6.2 w/ LSA, TR6060-Magnum hybrid and etc SOLD
1976 T/A LS1 6 Speed, and etc. SOLD
Follow me on Instagram: ryeguy2006a
08-28-2020 #586
Registered User
- Join Date
- Sep 2009
- Posts
- 2,705
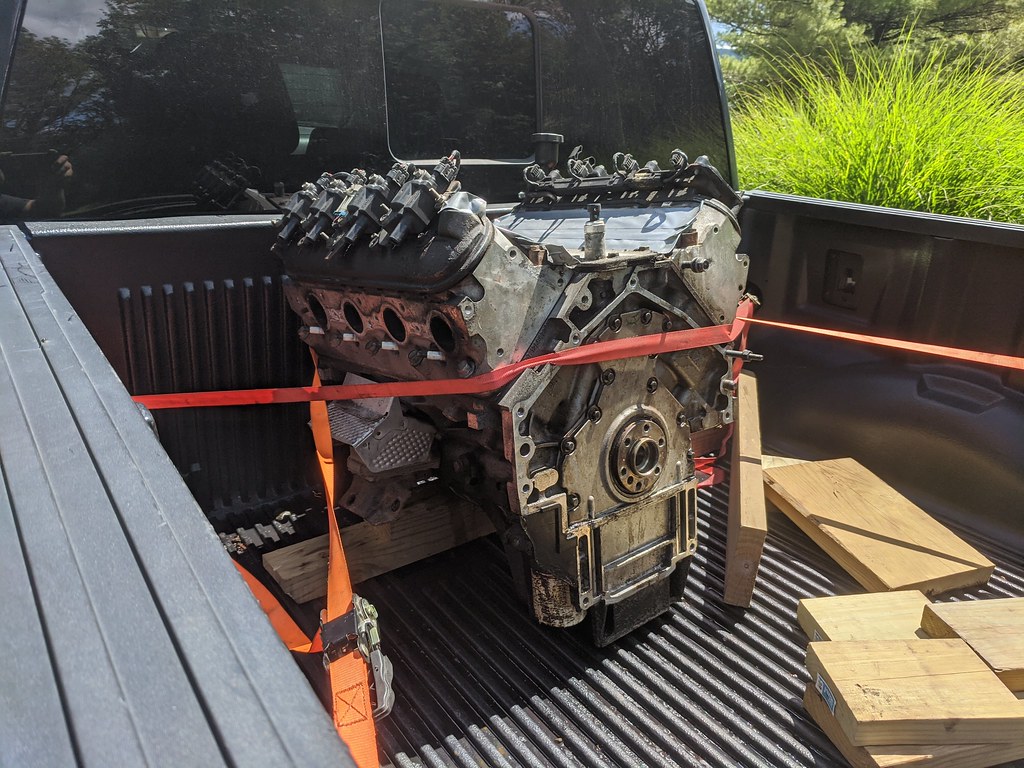
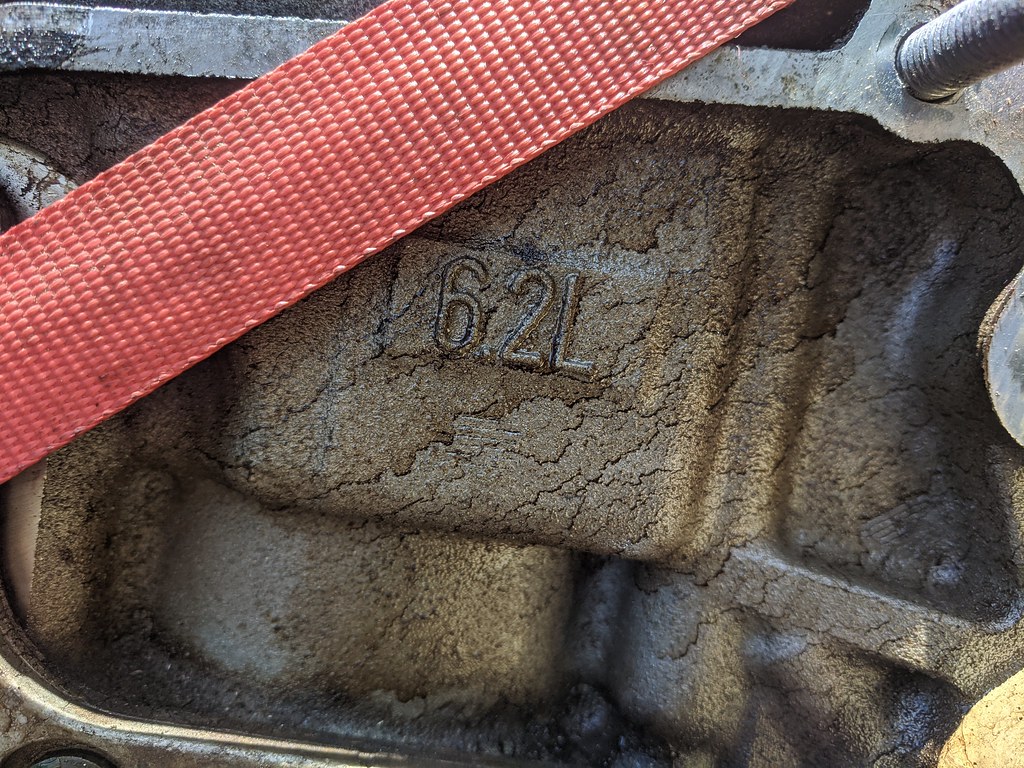
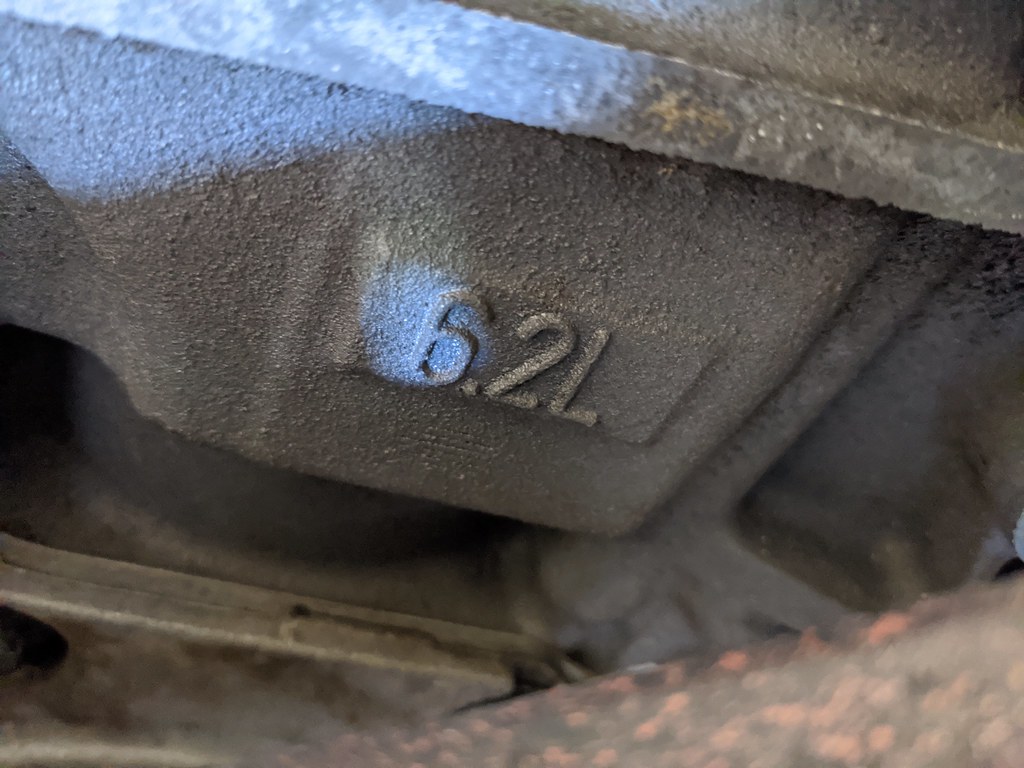
Ok, I'm sure that the suspense is killing everyone, but I'm finally ready to disclose the secret I have planned for my car. I had a buddy of mine pick up a 07 Denali several months ago, and I called dibs on the 6.2 L92. I've been keeping my eyes out for one for a while since I've really always wanted at least a 6.2 for this car. He gave me a great deal on the long block and I finally picked it up last week. There was some strange issue with the title of the truck which is the reason that it was being parted out, so the engine is in great shape and running the day that he pulled it over to his garage to pull the motor. He said he spun 3 of the 4 tires when he drove it over and was quite impressed with the power it made stock.
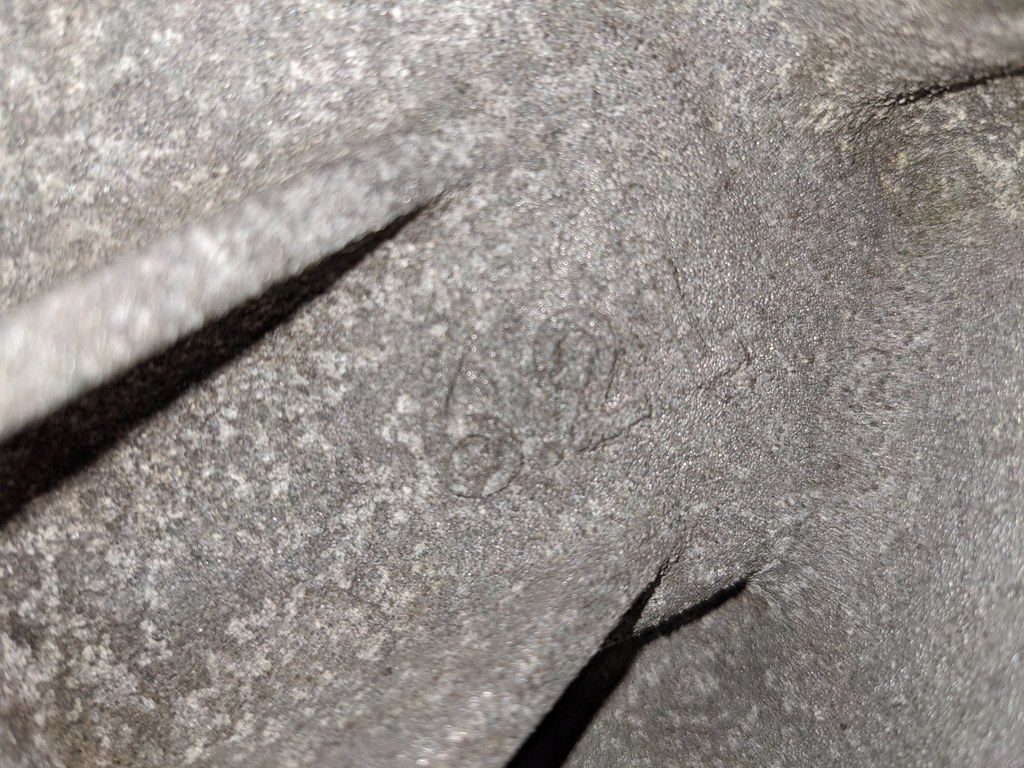
I'm planning to disassemble the motor down to the short block, check everything out and replace everything other than the block, covers and rotating assembly. I'm planning on deleting VVT with a stage 3 cam, LS7 lifters, new oil pump, new timing chain, and etc. for the short block. For the heads, I'm running a pair of LS3 821 heads I picked up a while ago and doing some light porting on the exhaust side and possibly some bowl clean up, but nothing crazy. I'll be leaving the intake runners completely stock. I'm in the process of cleaning up the FAST 102 intake I picked up and will be getting a set of LS9 injectors to top off that package. While I have the intake separated, I'm planning on assessing the ports for any potential light matching they would require, but again nothing crazy.
One of the great things about the Terminator X EFI is I can simply change a few boxes and convert from 24x/1x signals to 58x/4x signals for the crank/cam. It's really that simple for the tune. Now on the harness side I am deciding now if I want to modify the one wire in the harness to give the crank/cam sensors the gen4 5v rather than the 12v signal in the gen3 sensors. The other possibility is just selling my harness/ecu outright and purchasing the same thing, but set up for the LS3 style injectors and crank/cam voltage. I'm really leaning toward just modifying what I have since it was a PITA to install in the first place. Time will tell though.
Day I brought it home.
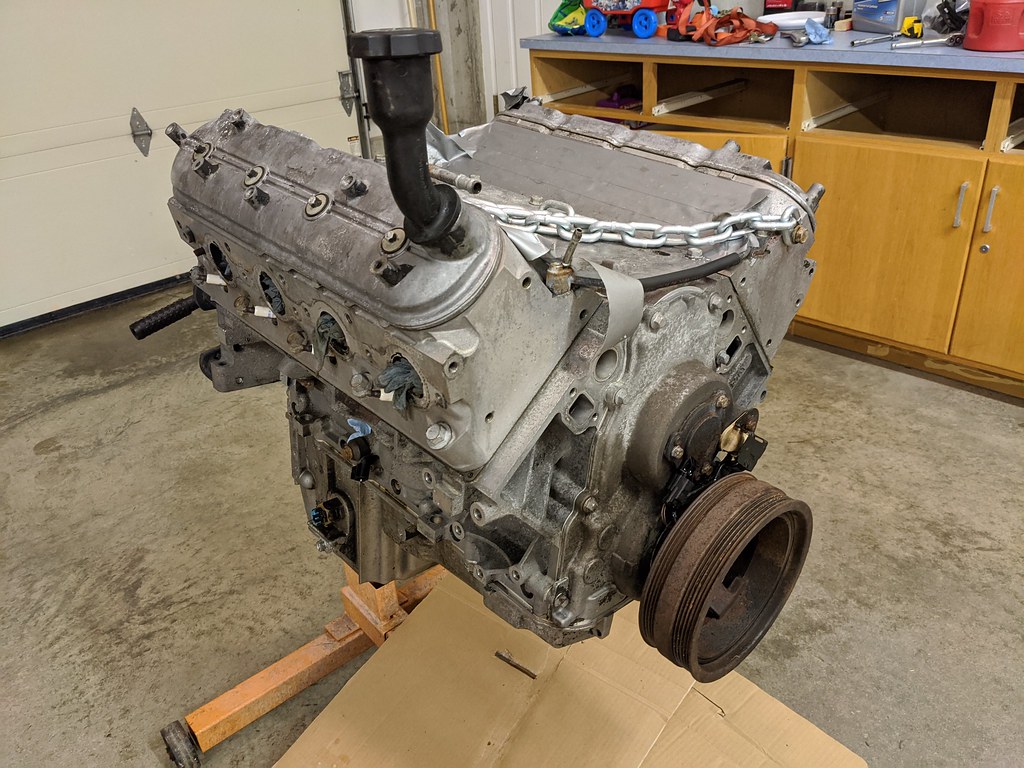
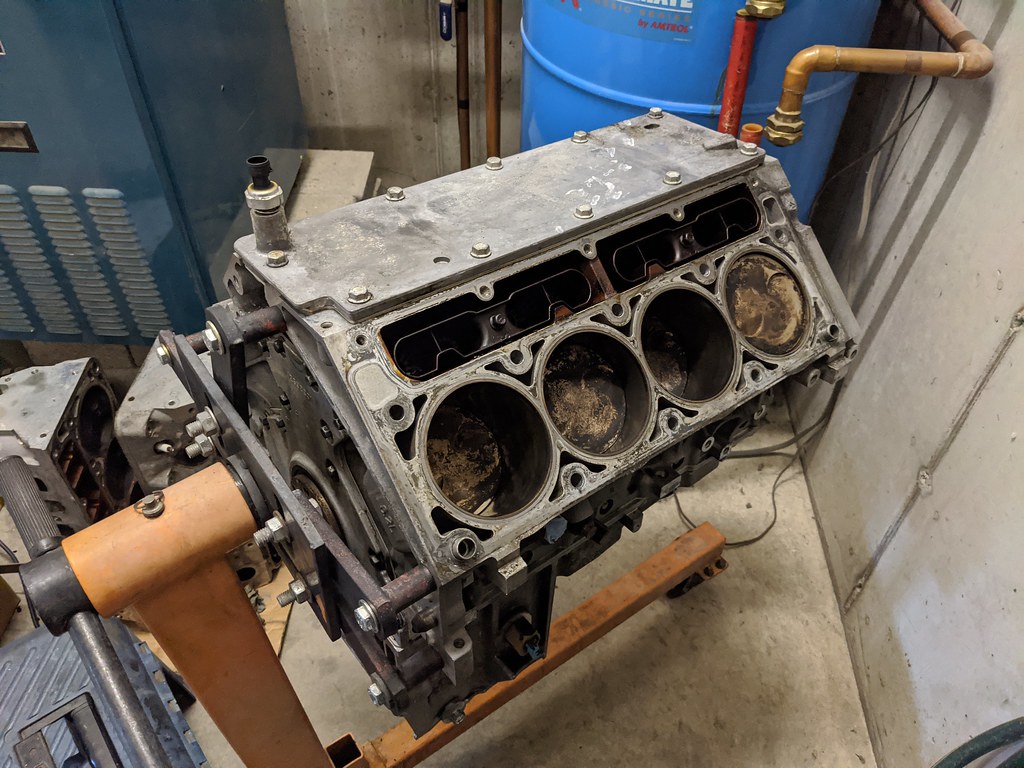
First step was cleaning up the short block. I sprayed it multiple times with oven cleaner and used the power washer to get the bulk of it off. Overall I'm pretty happy with the way that it's cleaning up. I'm debating on whether or not to clean it up and get some VHT engine enamel or leave it natural.
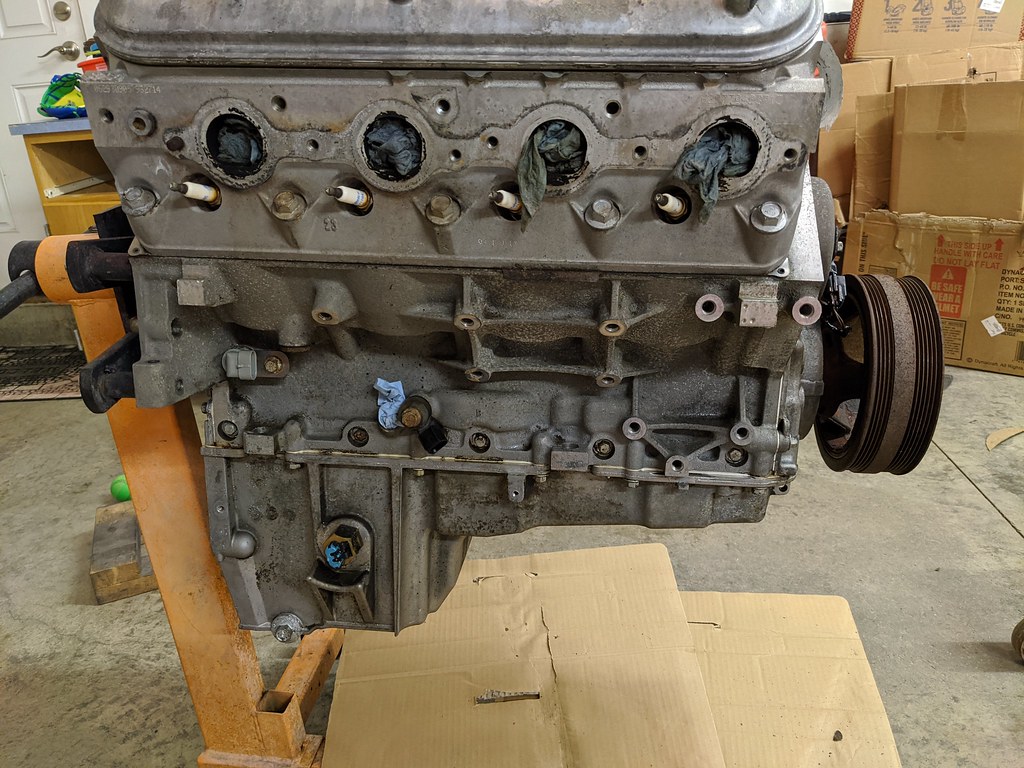
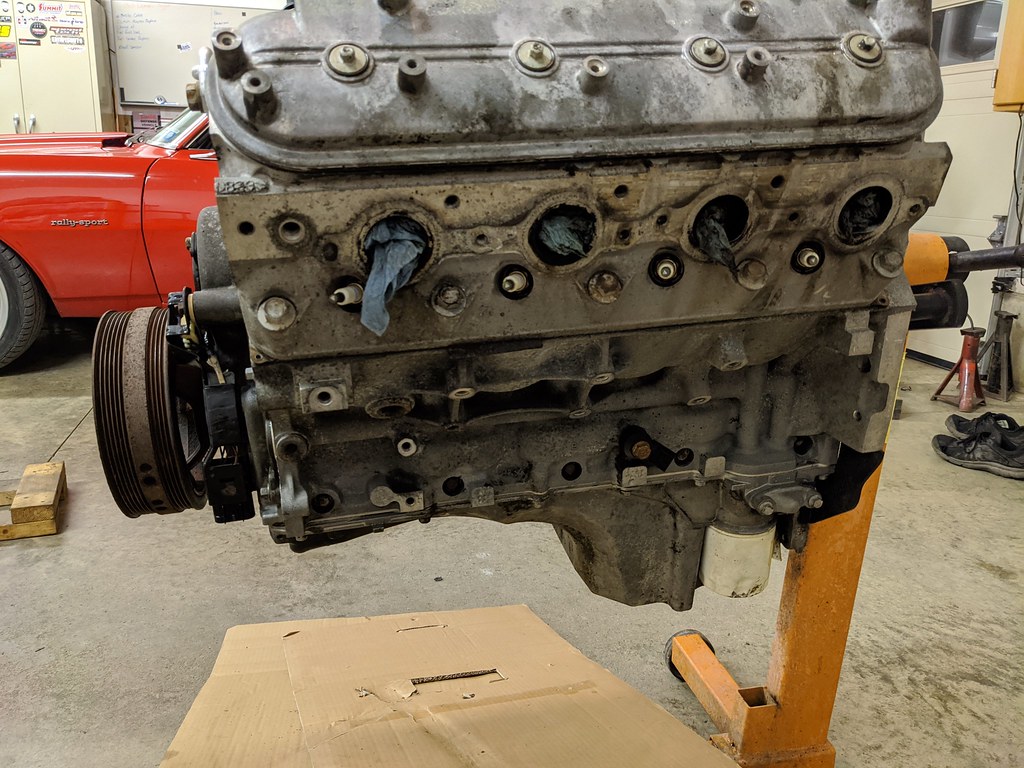
After I cleaned it up, I was like a kid in a candy store. I had to rip it apart and see what I was working with. I wasn't thrilled to see that much gunk in the motor, but it did have solid oil pressure when it was parked. I'm not going to use these heads, so I'm not too concerned.
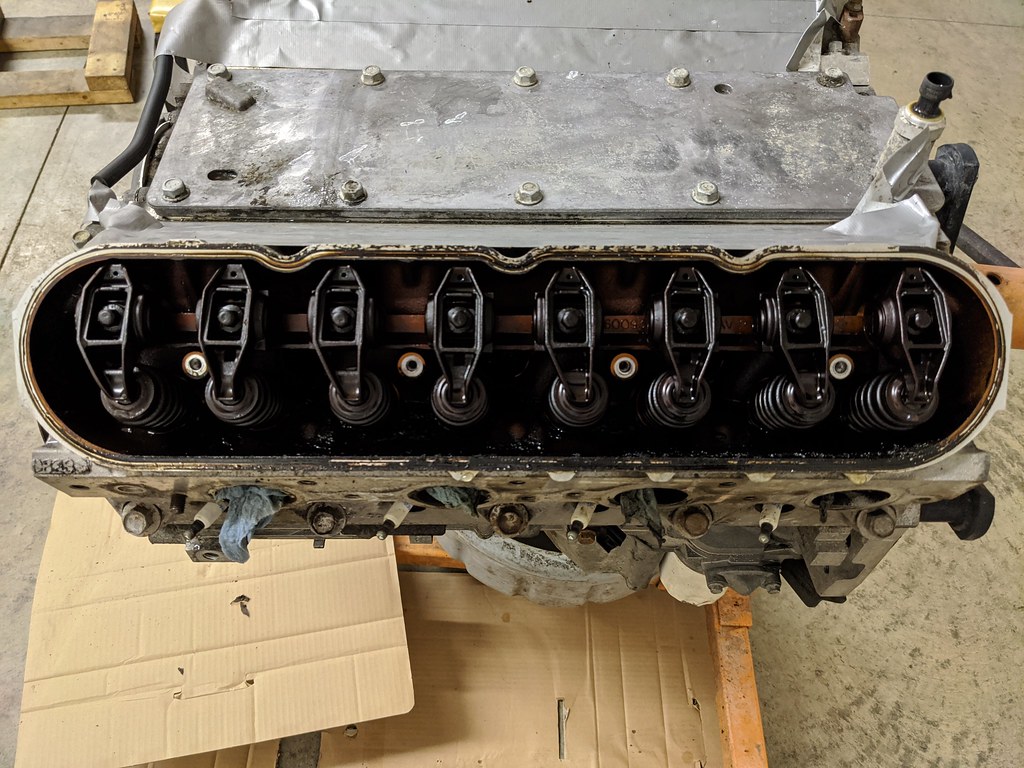
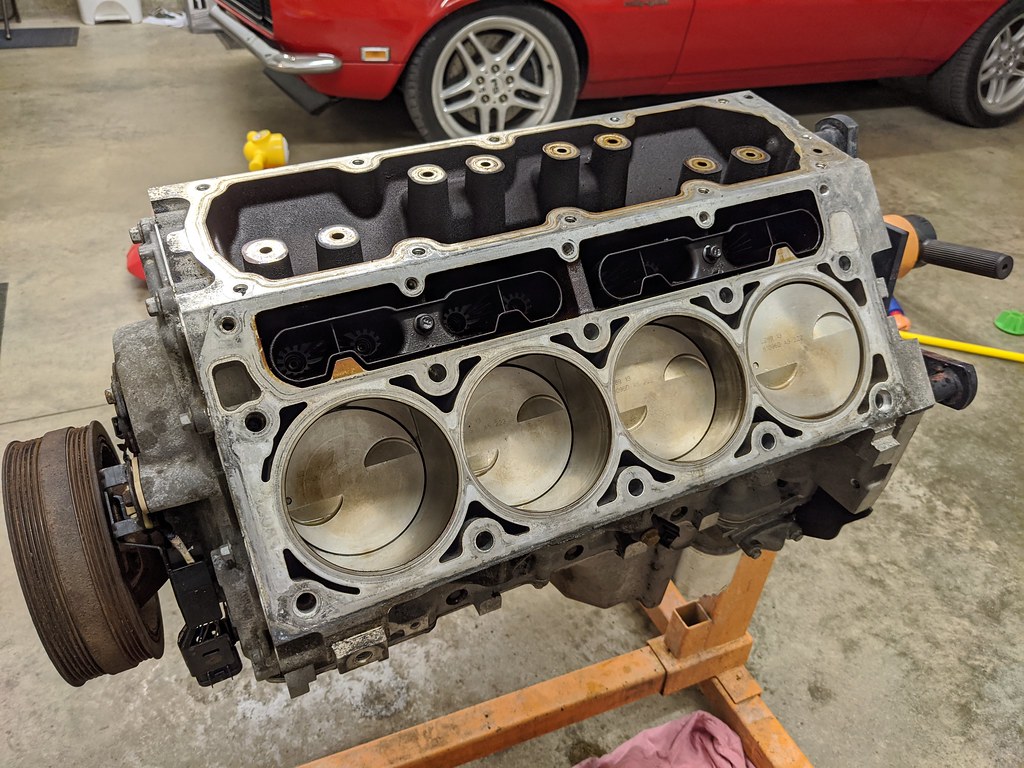
First head is off. I was very pleased to see that the cylinder walls were all in great shape and all had visible cross hatching.
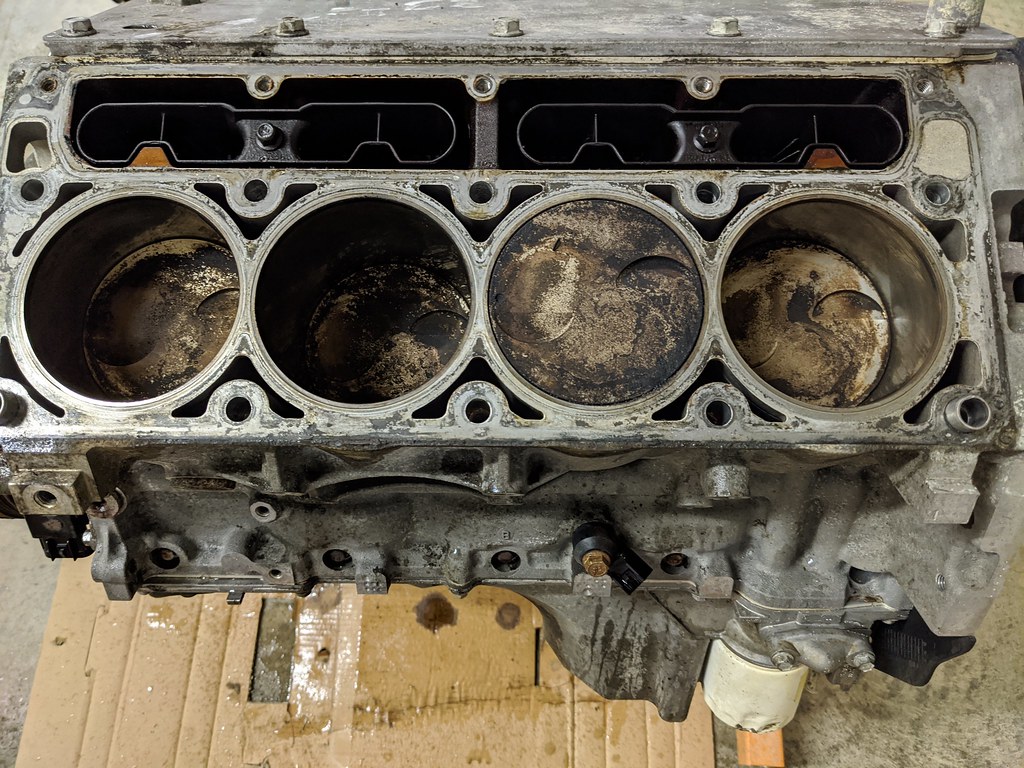
I hate posting pictures like this because it doesn't give a good representation of the actual condition as the camera picks up things that I can't even see. There wasn't any thing that I could catch with a fingernail. this isn't even cleaned up and there was some debris in there from pulling the head. Once I get everything cleaned up I'll follow-up with some better pictures.

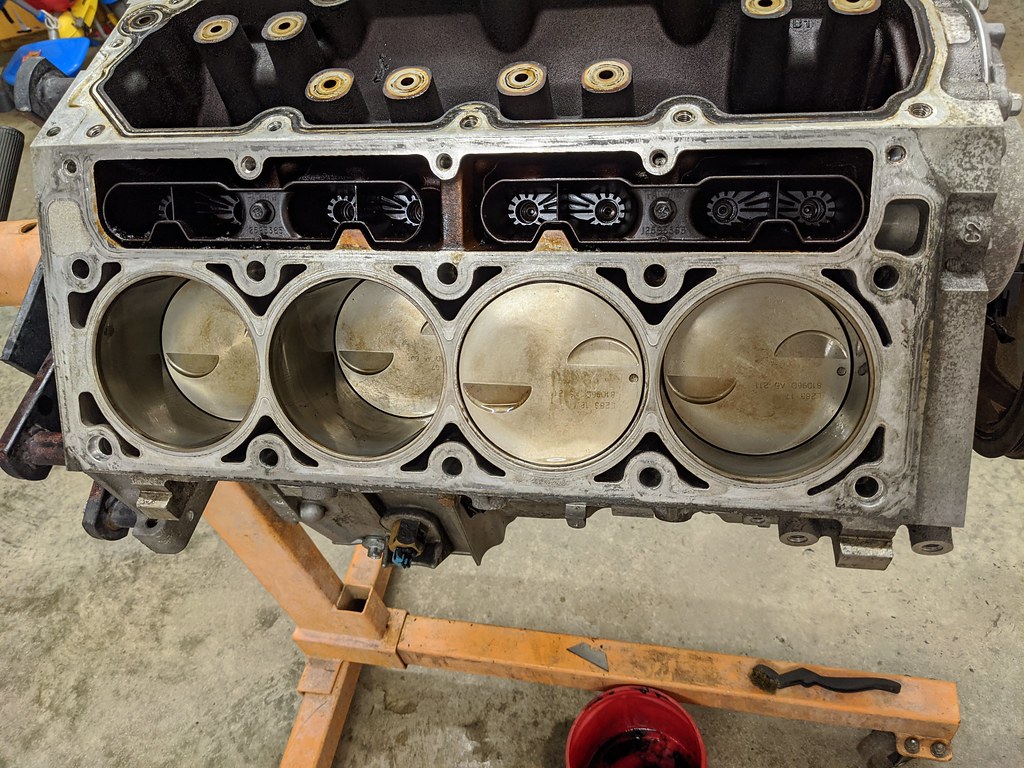
Here is the same picture above but all cleaned up.
I'd love the outside of the motor to come out like the spot behind the bell-housing. Any tips other than painting the block of how to clean it up?
Pushed to the side for when I have time to clean it up and prep it for parts.
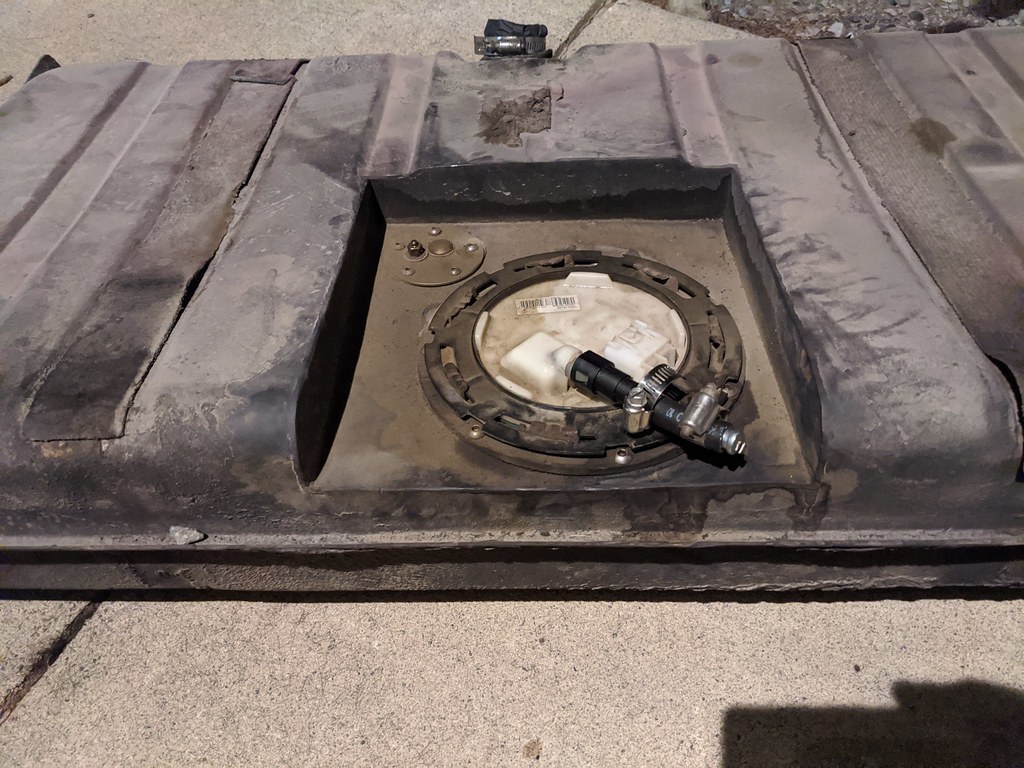
It's been storming lately so I took that opportunity to fix my fuel leak and while it was out I was going to fix my fuel sender. I was using the 5th gen fuel sender and the OHMs were different.
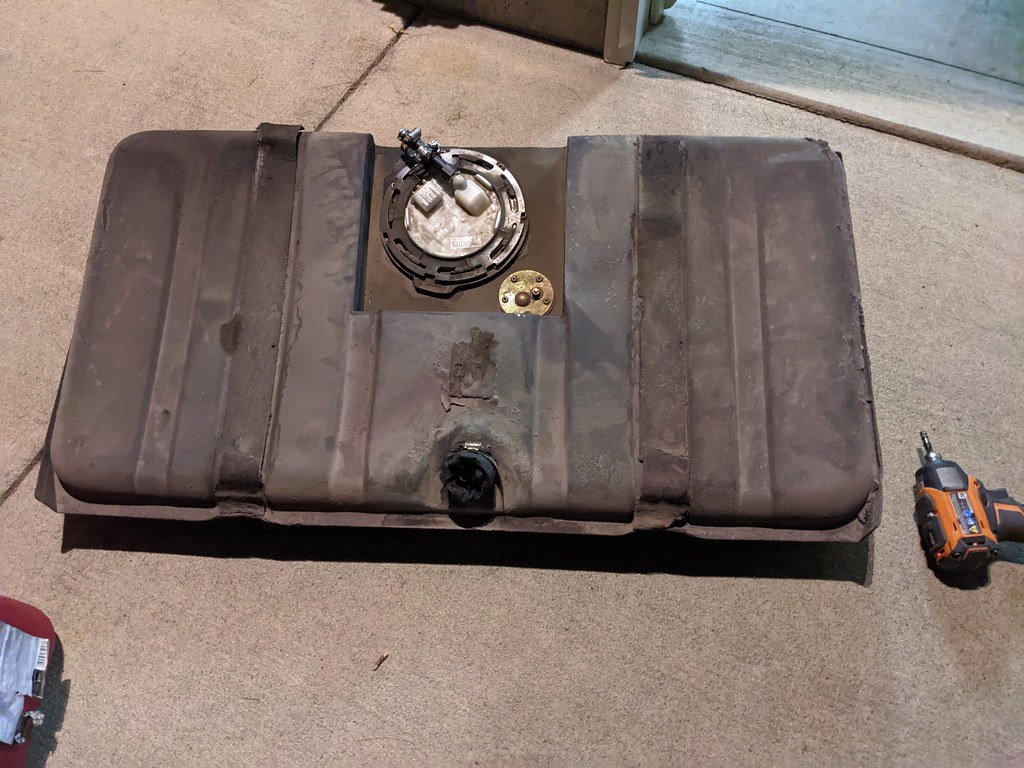
You can see where it was leaking.
I siphoned out as much of the gas as I could to avoid smelling like a gas can every time I worked on it.

I confirmed that the fuel level sender worked properly for my car and then I played around with getting the float in the right spot to read correctly full and empty. It's actually much more difficult than it sounds. I should have paid more attention to where I placed the level sender for a better shot for the fuel level sender. A trick I used was the copper wire from house wiring. It is so much easier to bent and tweak than the stainless wire on the float. Then I copied it over to the stainless rod.
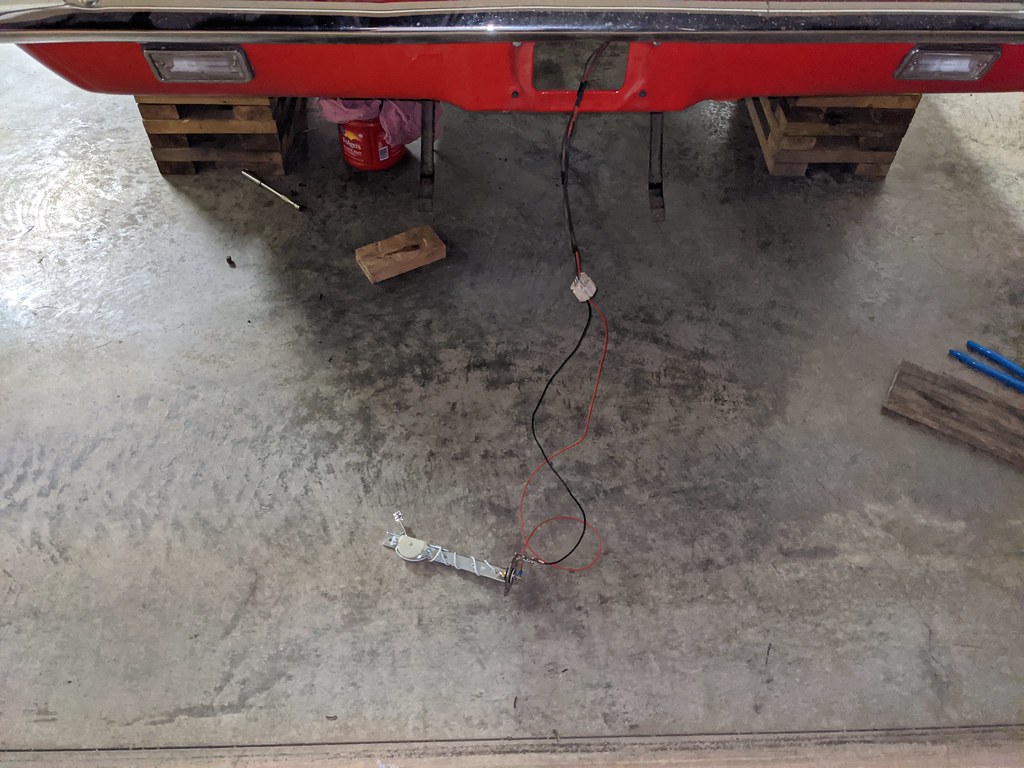

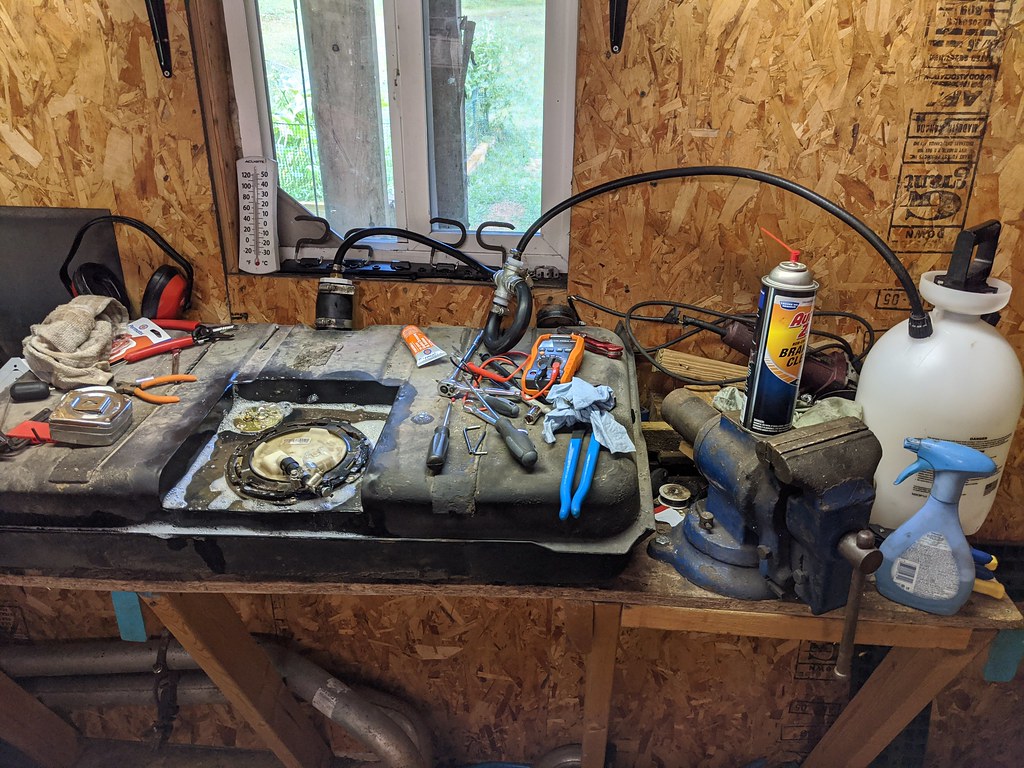
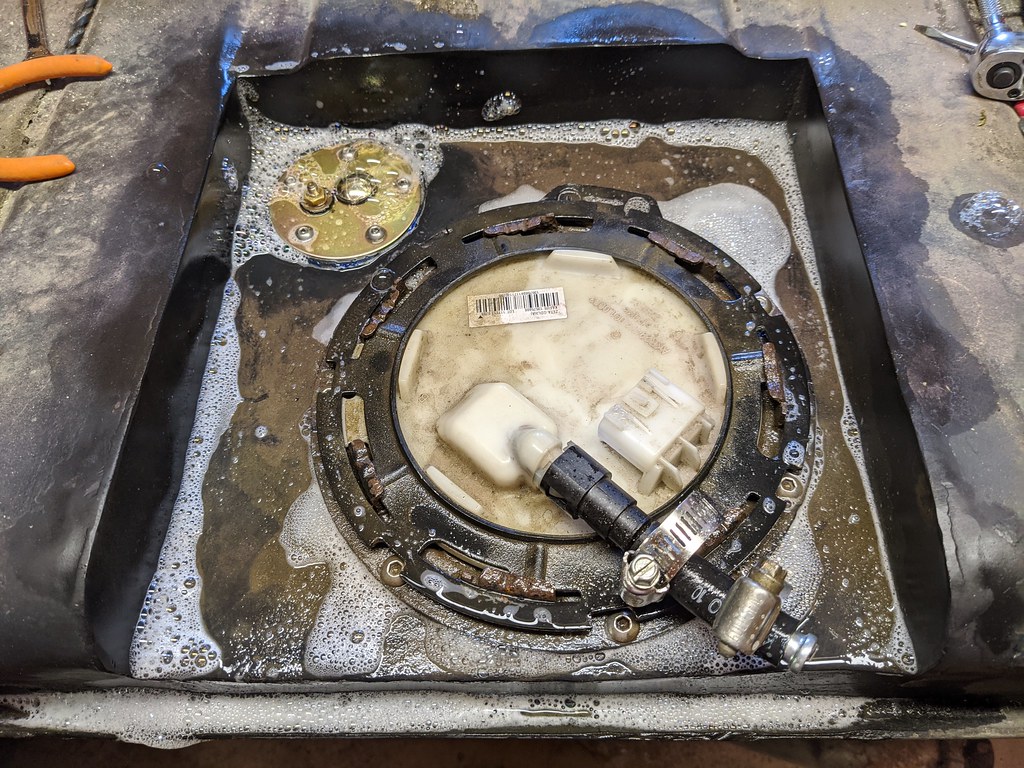
I didn't get any picture of the finished sender, but it's pretty unique to my car. I then came up with this system to put pressure on my fuel tank to check for leaks. It's a typical house sprayer for round-up and I added a nozzel to go to a 1/4" NPT and grabbed a PVC pipe that I could do the same for the fuel filler. It worked great and showed me all the spots where it was leaking. The picture below is when I was testing for current leaks. Wow, there were a lot. The bubbles around the outside of the fuel recess aren't leaks, they are just collected there. All the one's around the fuel ring are leaks.
Cheers,
Ryan
1955 Nomad project LC9, 4L80e, C5 brakes, Vision wheels
1968 Camaro 6.2 w/ LSA, TR6060-Magnum hybrid and etc SOLD
1976 T/A LS1 6 Speed, and etc. SOLD
Follow me on Instagram: ryeguy2006a
08-29-2020 #587
Registered User
- Join Date
- May 2015
- Location
- Island Lake, IL
- Posts
- 815
Man I’m excited for you to get this engine going.
09-04-2020 #588
Registered User
- Join Date
- Sep 2009
- Posts
- 2,705
Thanks, I'm pretty excited too. I've been slowly collecting parts to complete this swap.
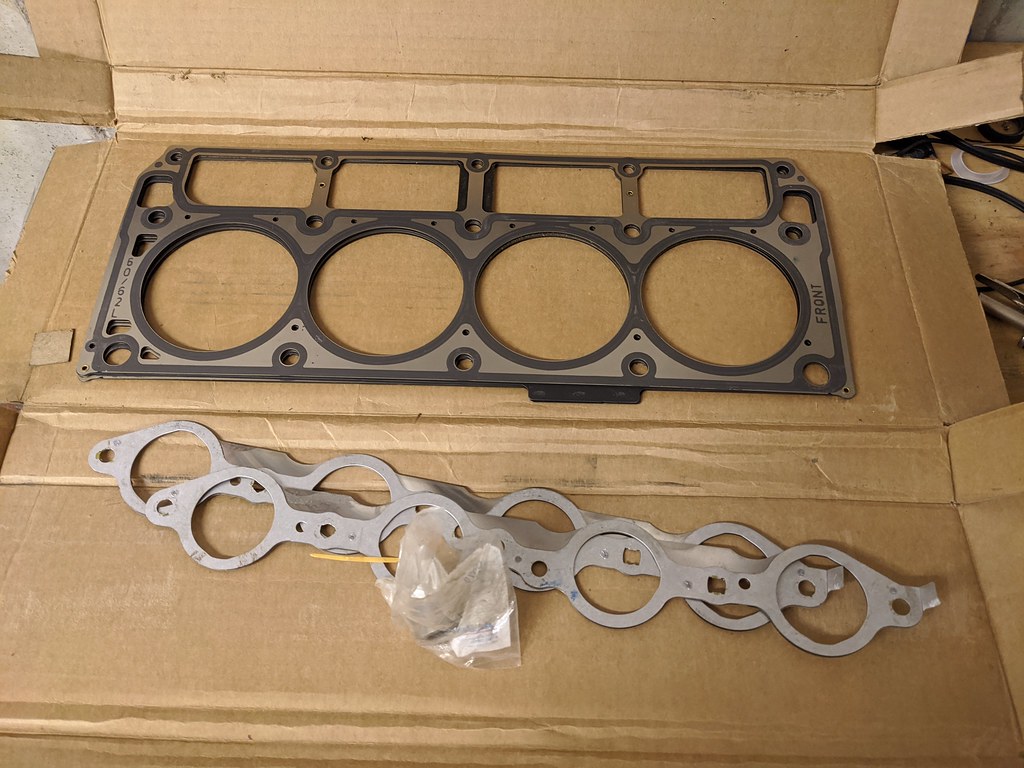
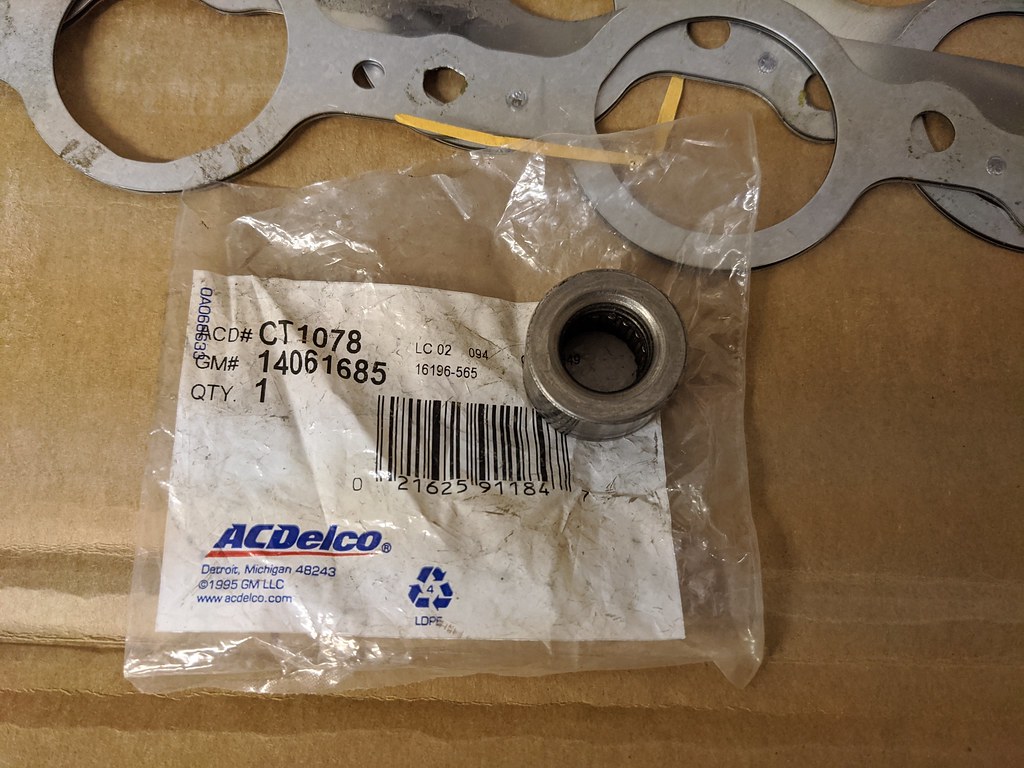
Some head gaskets, exhaust gaskets and a new pilot bearing (small bearing).
I likely won't end up using it, but I picked up a zero mile stock LS3 cam and sprocket that someone pulled out to do a full top end build on a new crate motor. At the very least, I can put this motor together with VVT delete now.
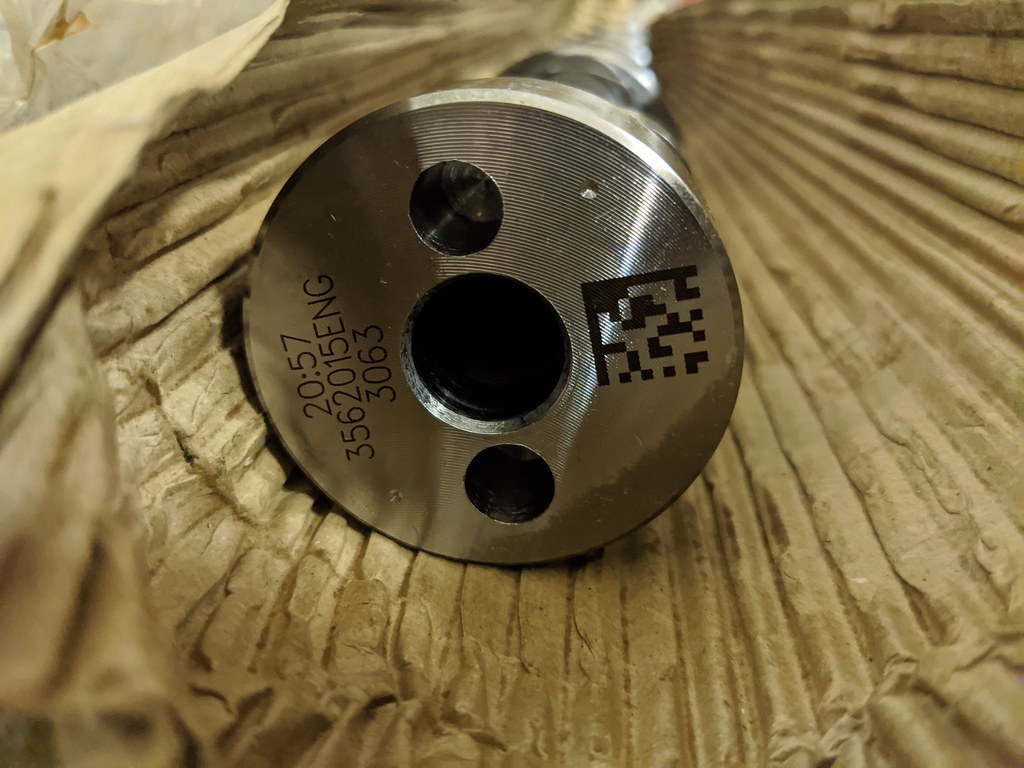
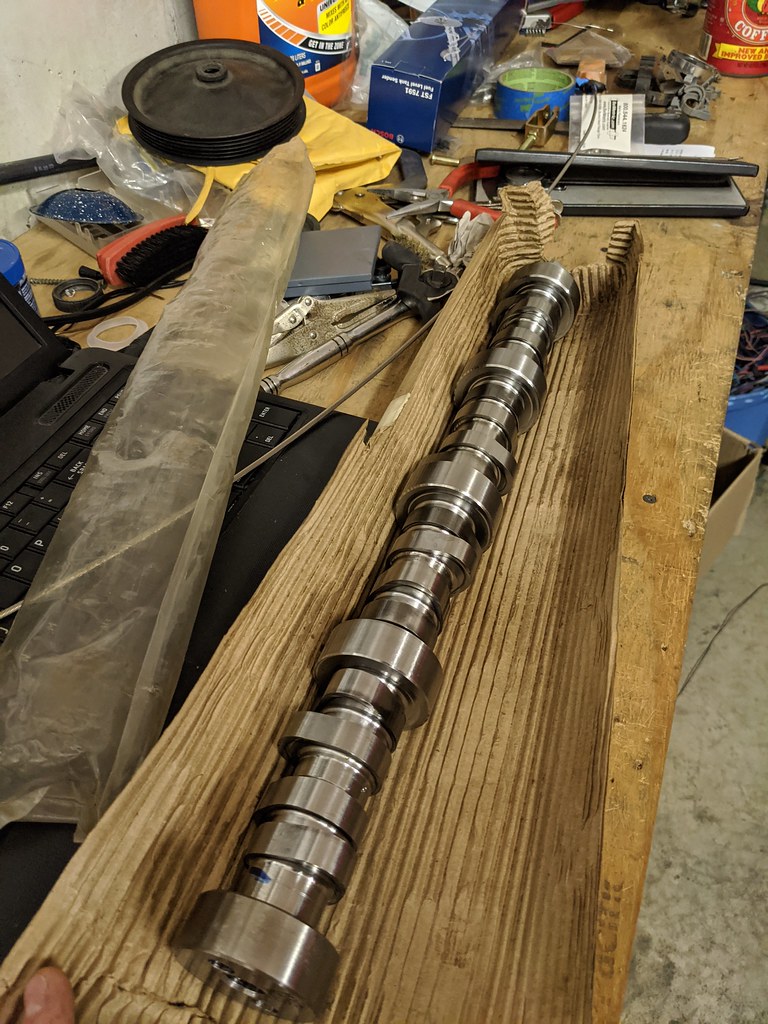
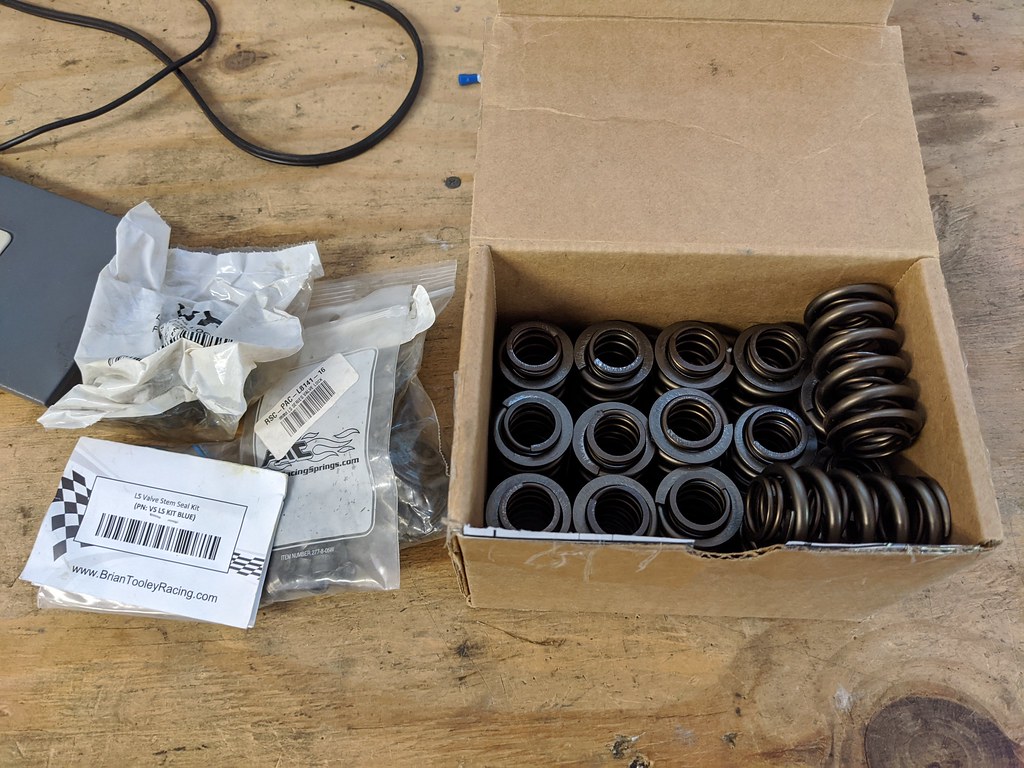
I also grabbed some lightly used PAC .650 lift springs and all associated components. Now, I'm in the market for a stage 2 or 3 cam to complete the package.
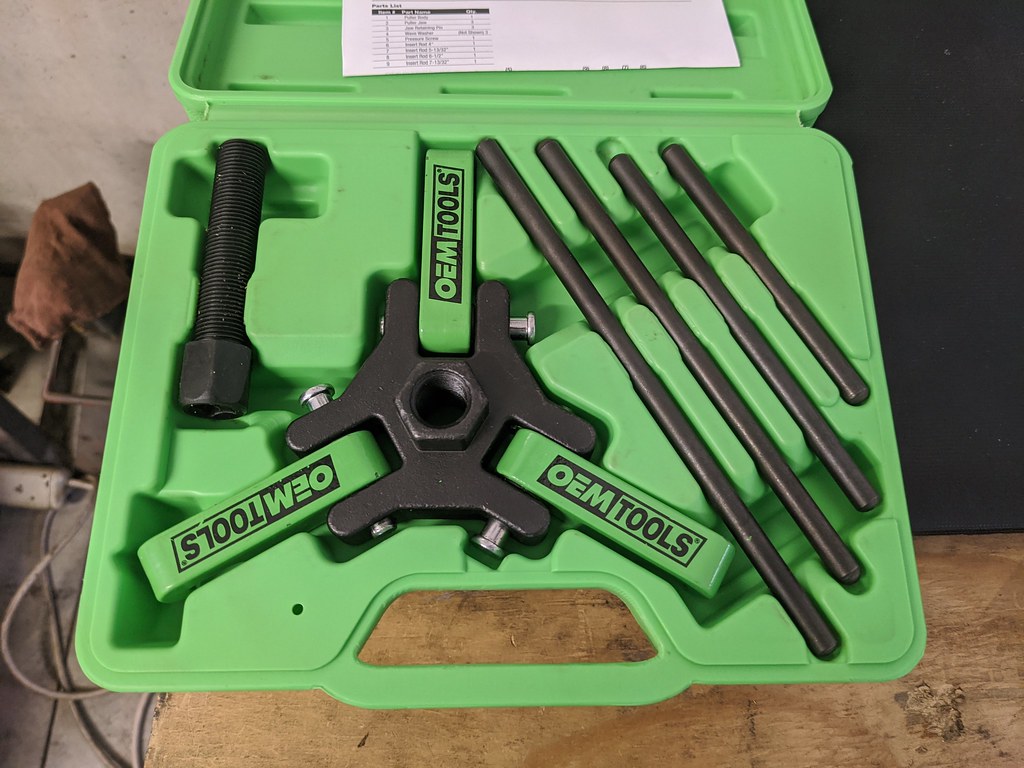
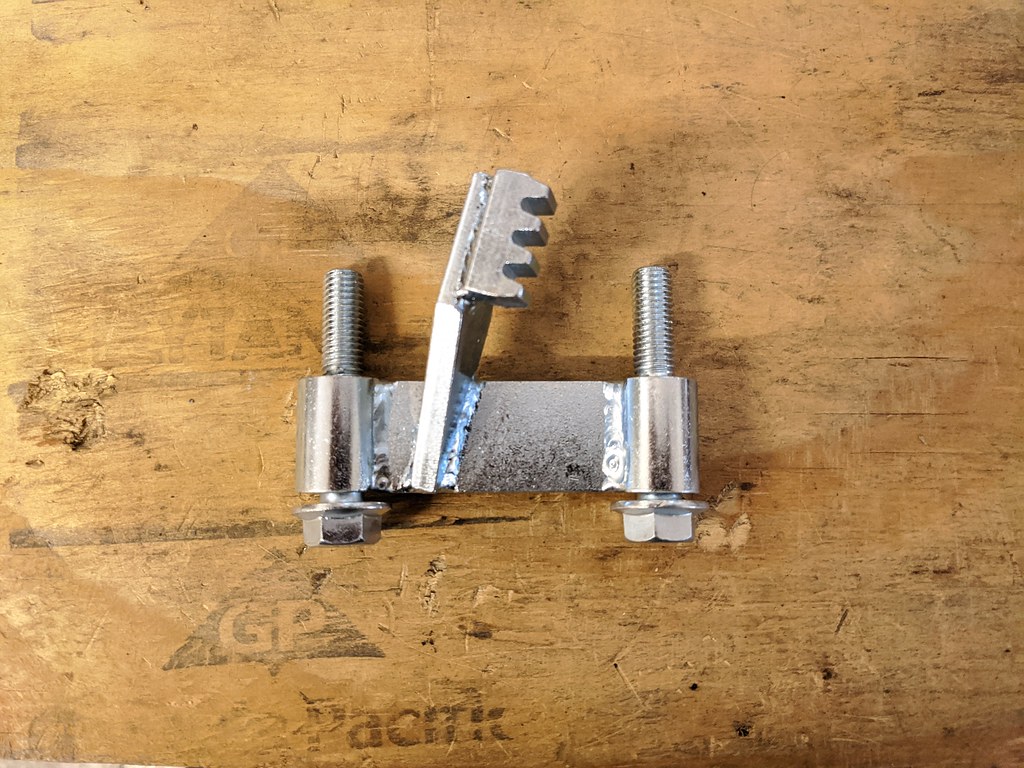
I've needed one enough times that I decided to just buy one of the damper pullers. Now I just have one and don't need to run to the parts store, and this one comes with the rods to do the job right. Very highly rated on Amazon. Also grabbed a cheap flywheel locking tool. I need to grab a flexplate from a buddy and then I can pull the rest of the motor apart.
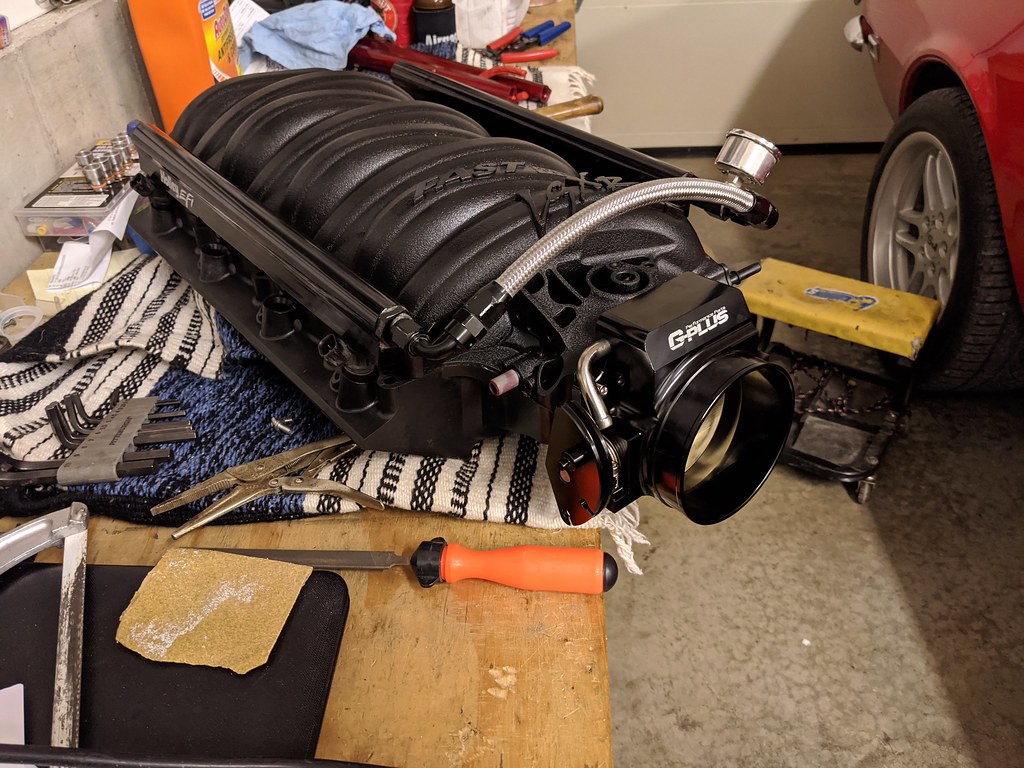
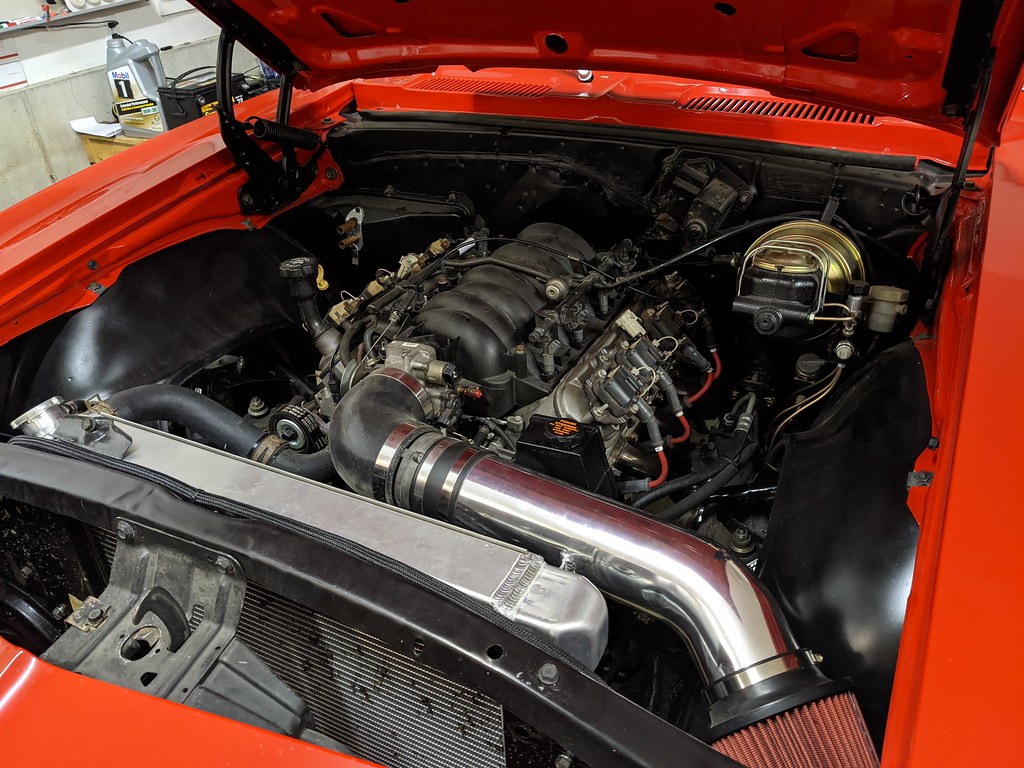
I was also missing some of the hardware for the FAST intake and the fuel rail bolts came in so I could do a test fit for the rails and see how they look. I'm torn between those rails or the Holley EFI rails I picked up a while ago. Decisions....

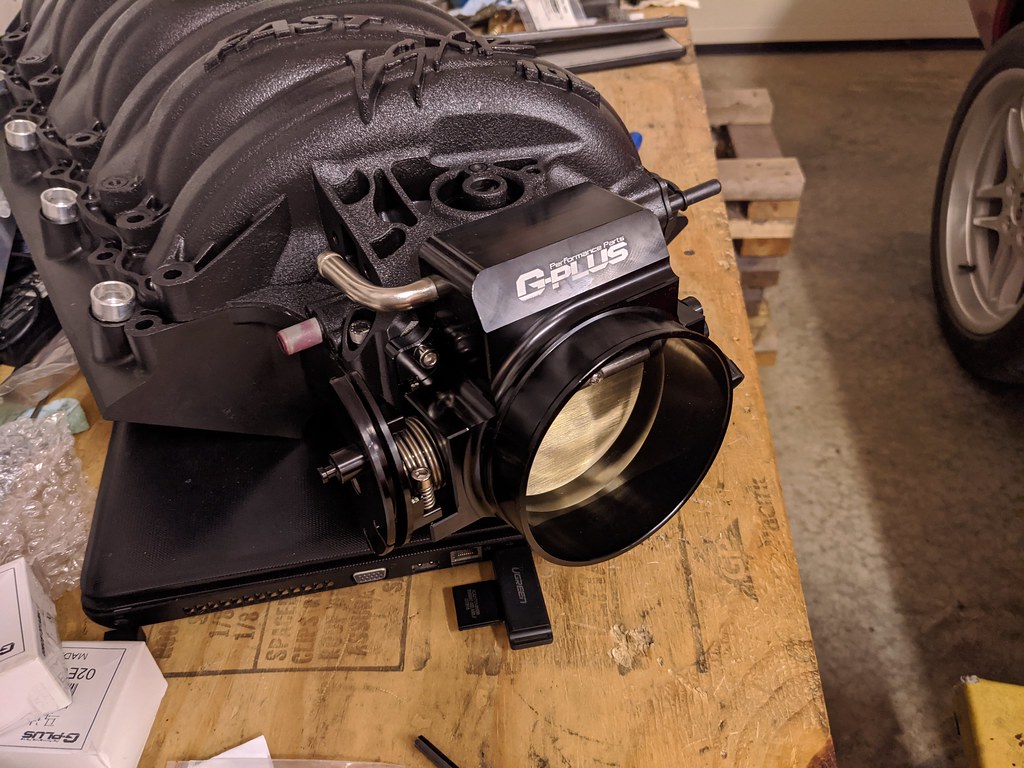
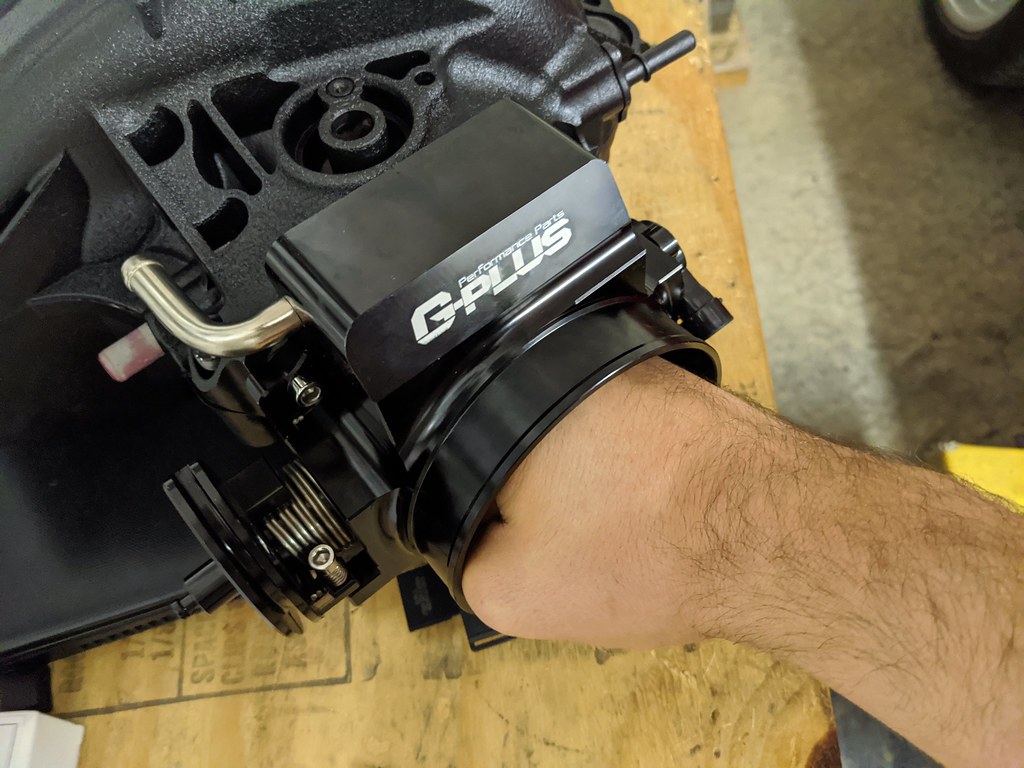
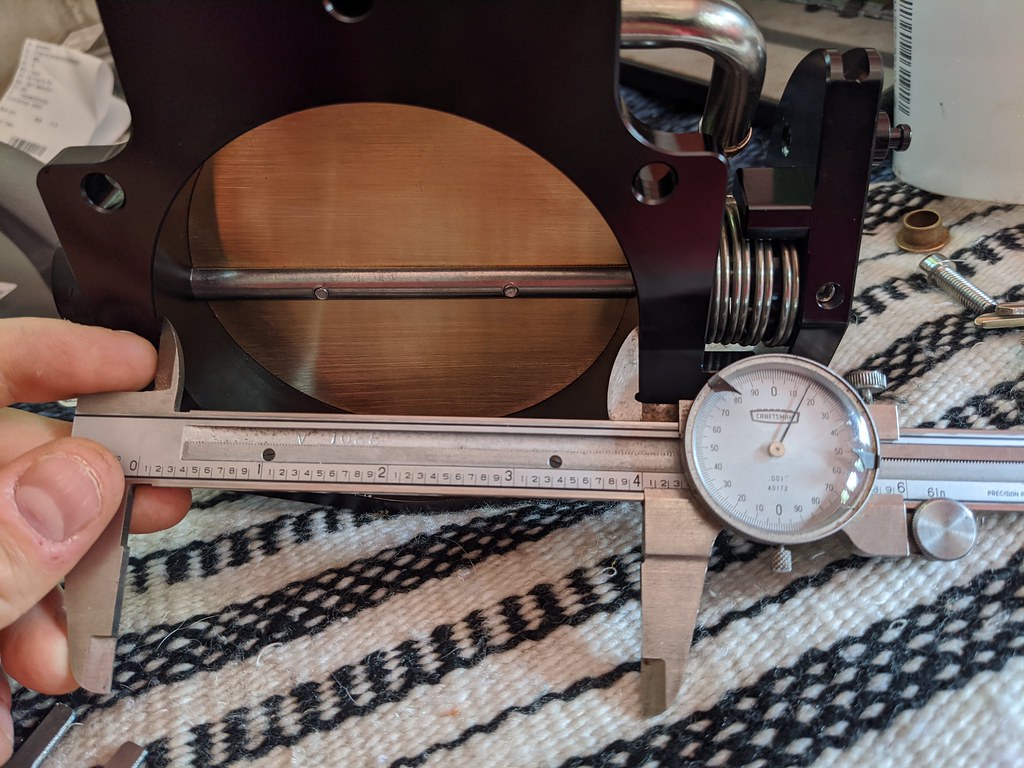
I've heard a lot of good feedback on the GPlus throttle bodies so I thought I'd give it a try for $60 bucks. First impressions are that I'm very impressed with the quality. It seems to be quite well made for the price, but the real test will be how it responds when the car is up and running. And wow, 102mm is huge!
I have really just been driving the car and haven't been working on it, which is a nice change.
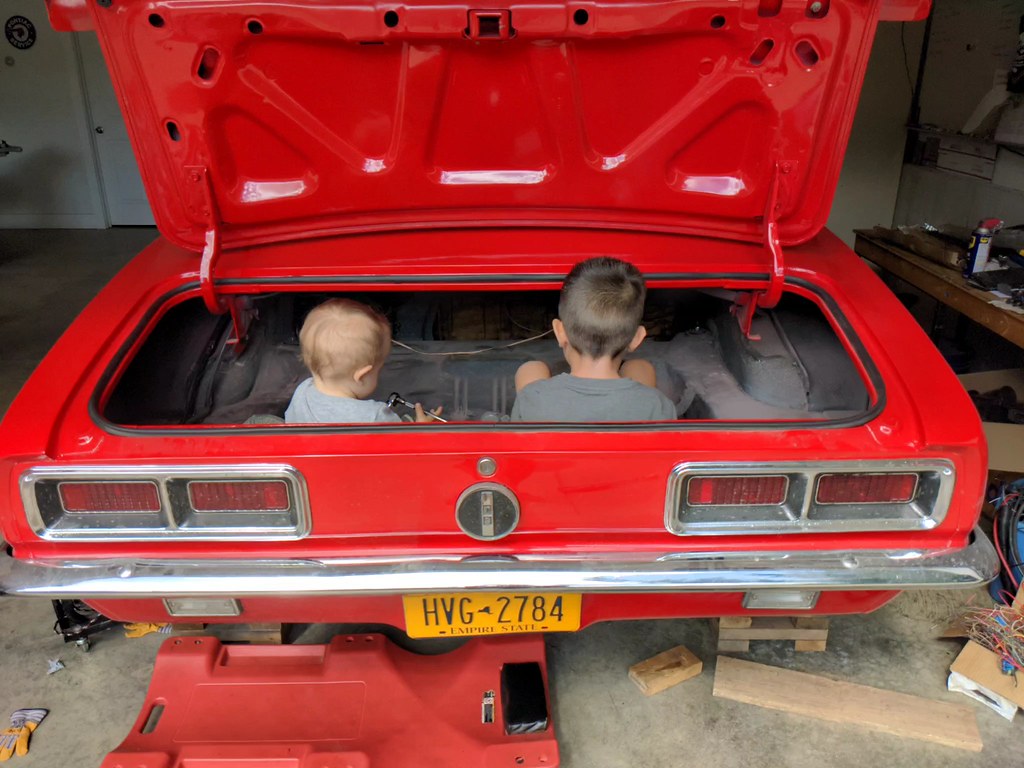
Snapped this cool picture of my two boys. Trying to get them involved as much as I can right now.
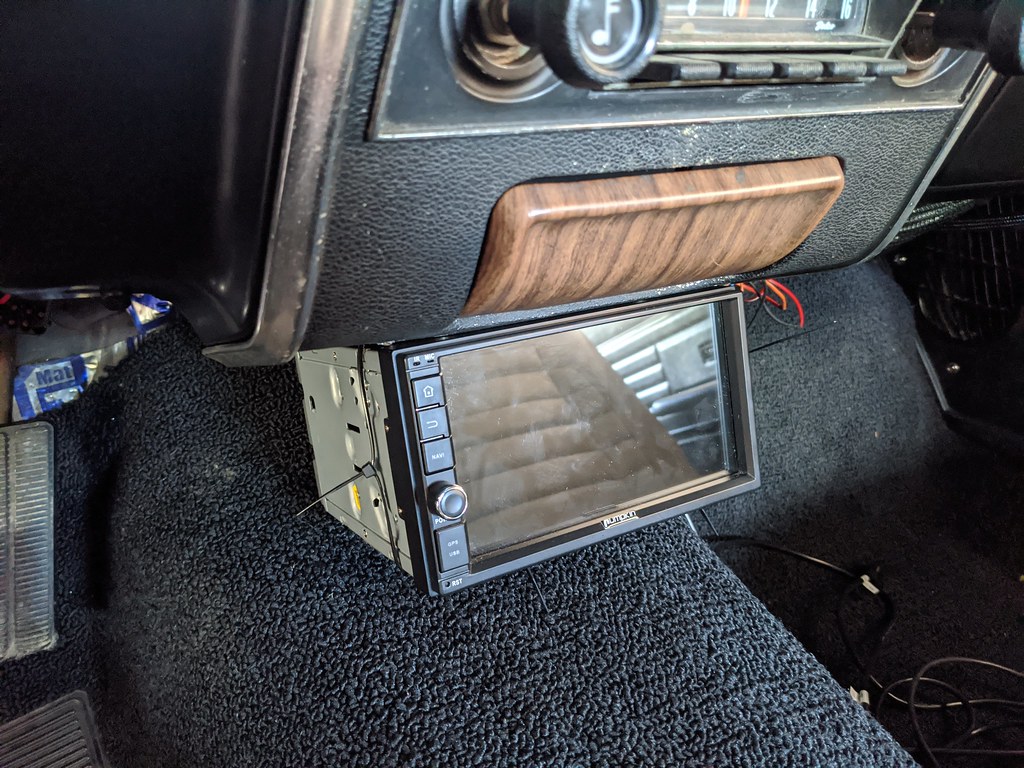
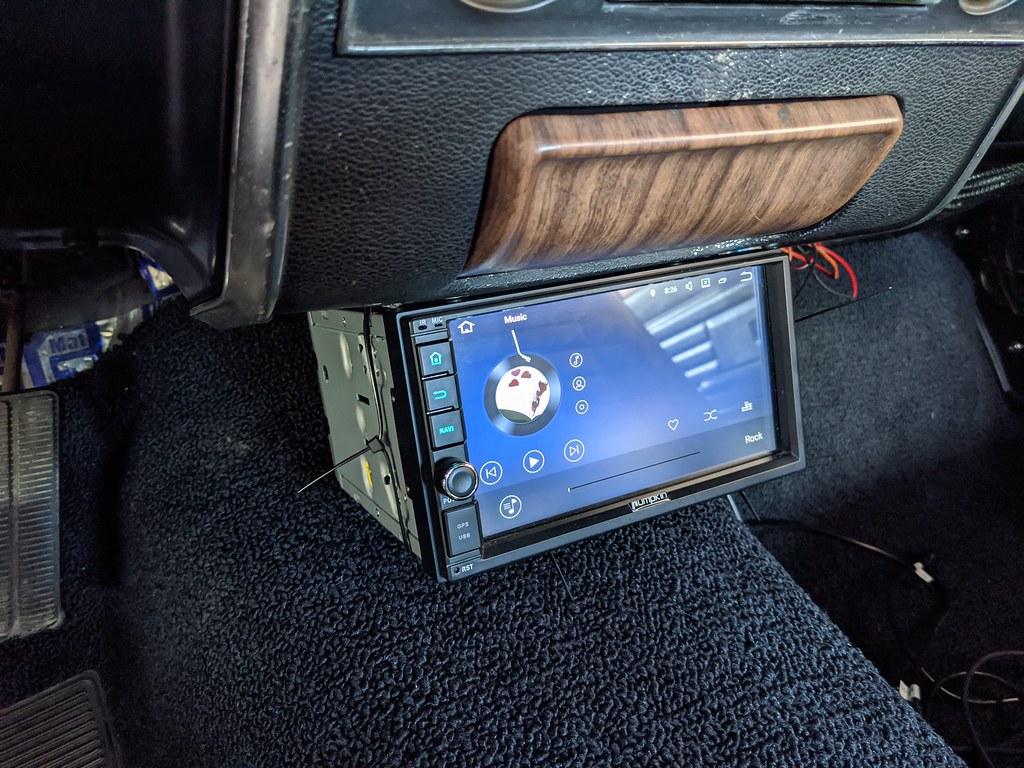
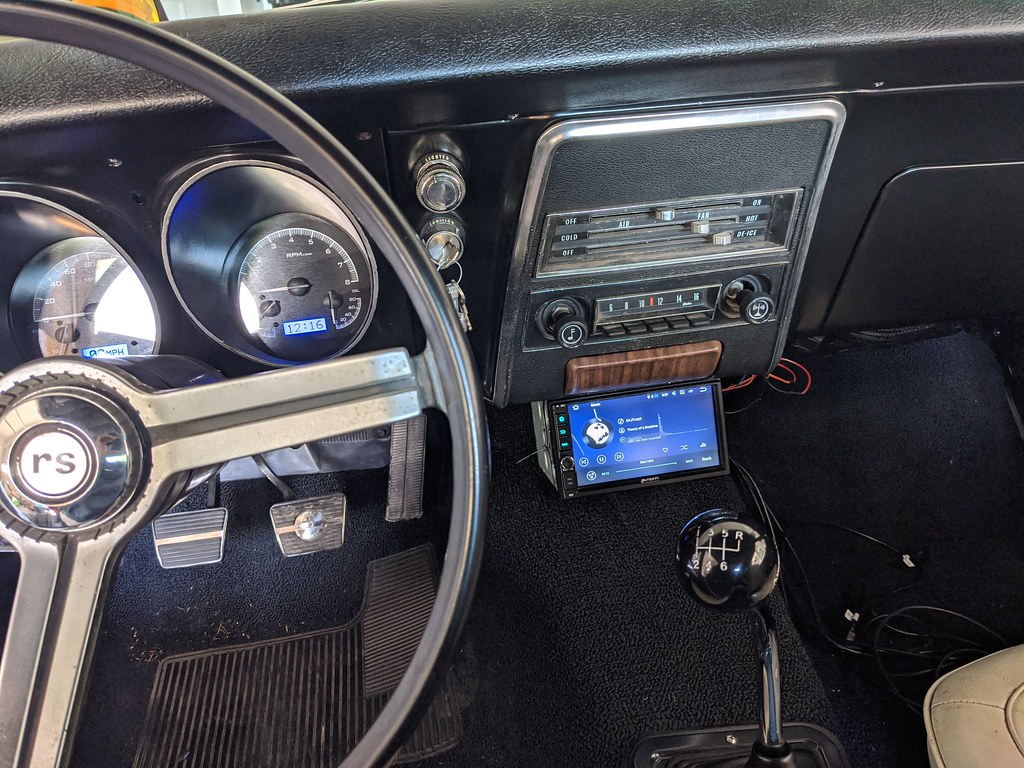
I was however getting tired of listening to just engine noises, so I tossed in an extra stereo I had on my shelf so that I had some tunes. I also did it to see how I would like a double din and if it was worth the effort to install one. Still up in the air, but for the time being zip ties to the rescue!!
I've also been playing around with the Holley software and learning a lot with the help of Andrew, (andrewb70). He's a wizard with the Holley software and my car runs the best it has with his help.
We were addressing some of the funky VE table issues and got it smoothed out now.
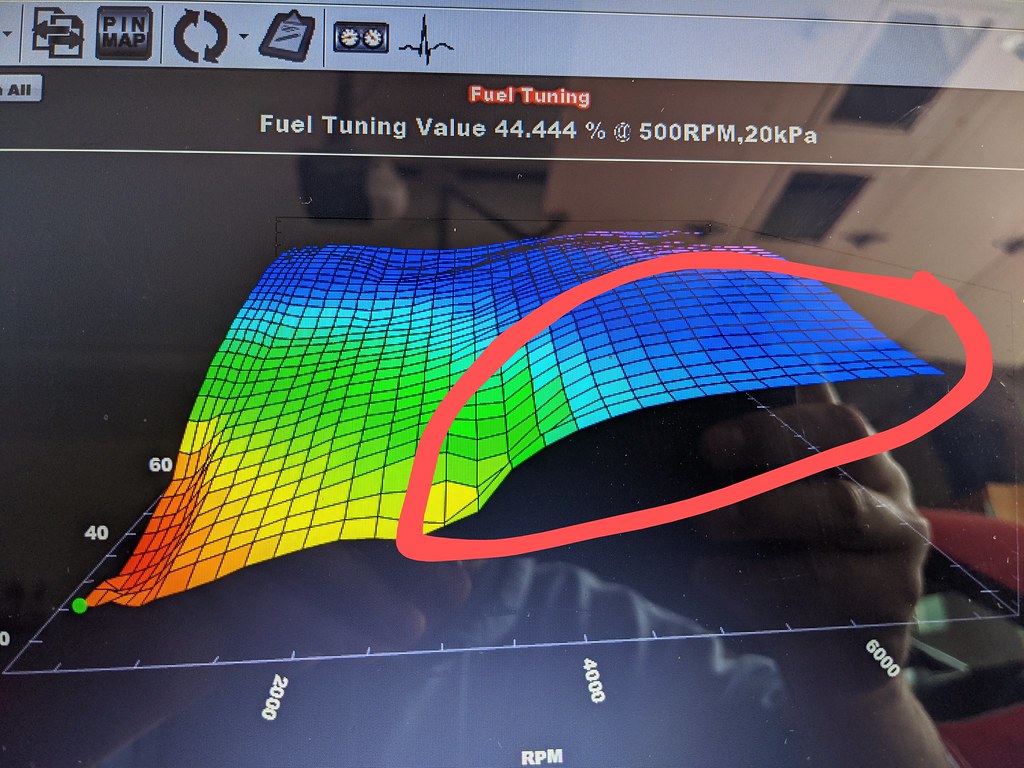
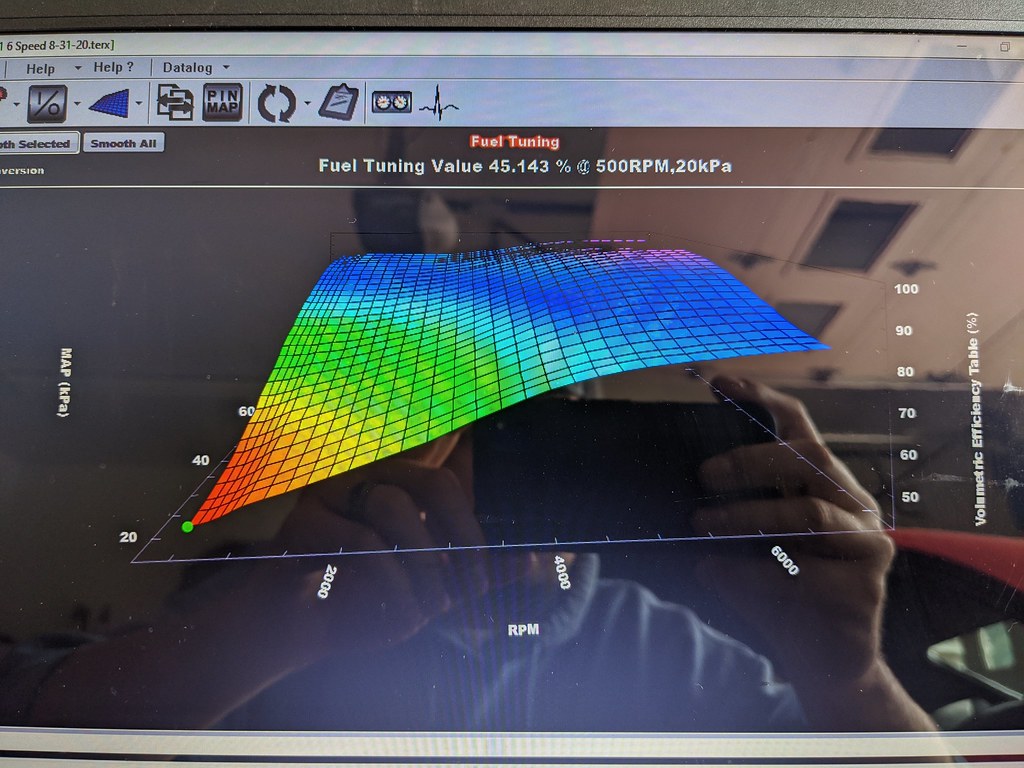
Here is the learn table which is where the system will self tune. It's now within 5% which is good in my books.
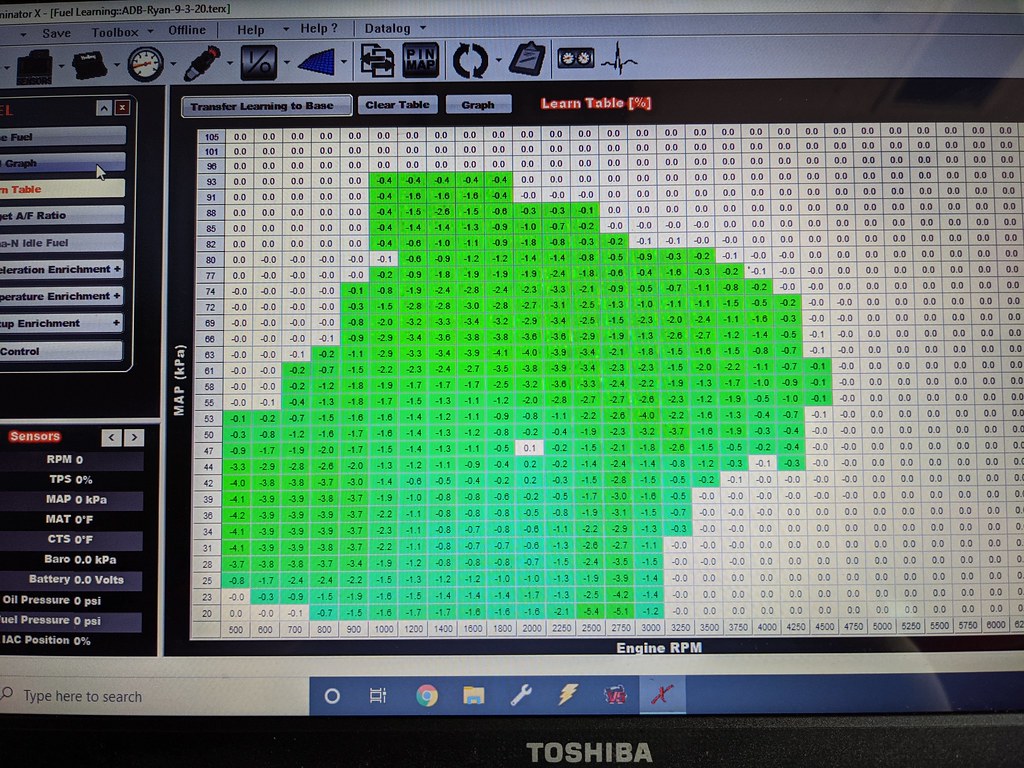
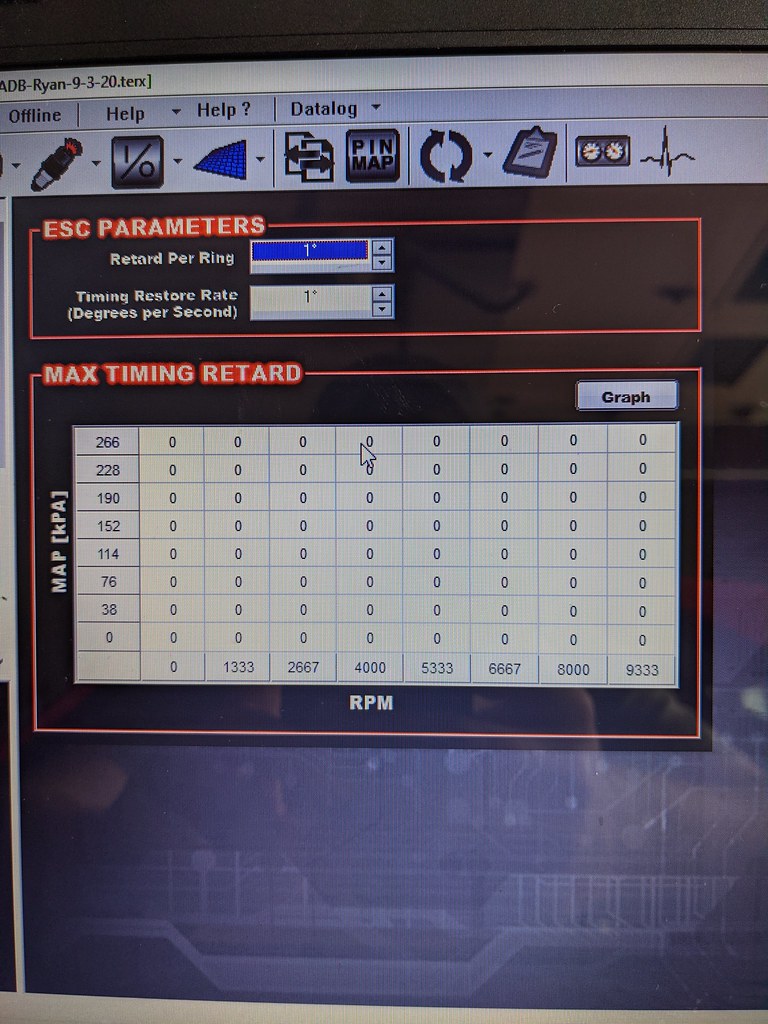
I'm going to start playing around with the timing tables to get a little more out of the car. I first wanted to make sure that my knock sensors are functional, and noticed that this table is zero'd out. I'll need to get in and add some Knock Retard before I start adding timing.
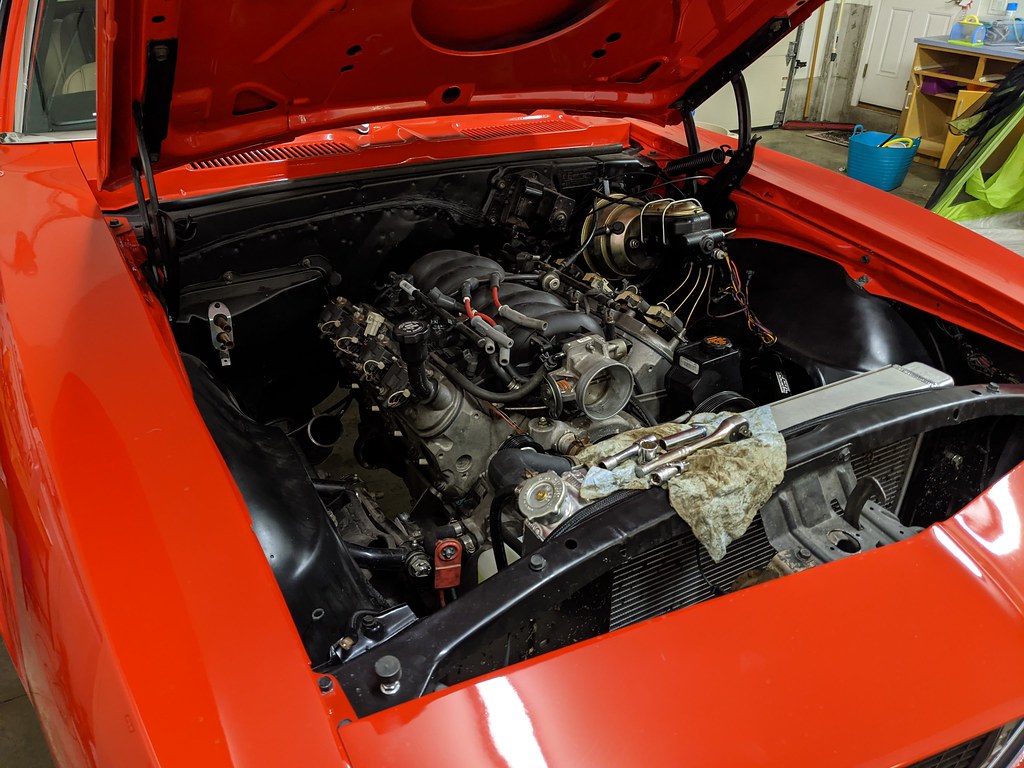
Then last night I went out and decided to see what I could do about getting the engine cleaned up further. It turned out really well for just a little elbow grease. More to come!
Cheers,
Ryan
1955 Nomad project LC9, 4L80e, C5 brakes, Vision wheels
1968 Camaro 6.2 w/ LSA, TR6060-Magnum hybrid and etc SOLD
1976 T/A LS1 6 Speed, and etc. SOLD
Follow me on Instagram: ryeguy2006a
09-04-2020 #589
Registered User
- Join Date
- Jul 2018
- Posts
- 434
Check out some of the Sony XAV-AX series heads, AX5000, 7000, 8000, I have the AX5000 for now but will probably upgrade to the 7000 https://www.sony.com/electronics/in-...ers/xav-ax7000
09-14-2020 #590
Registered User
- Join Date
- Sep 2009
- Posts
- 2,705
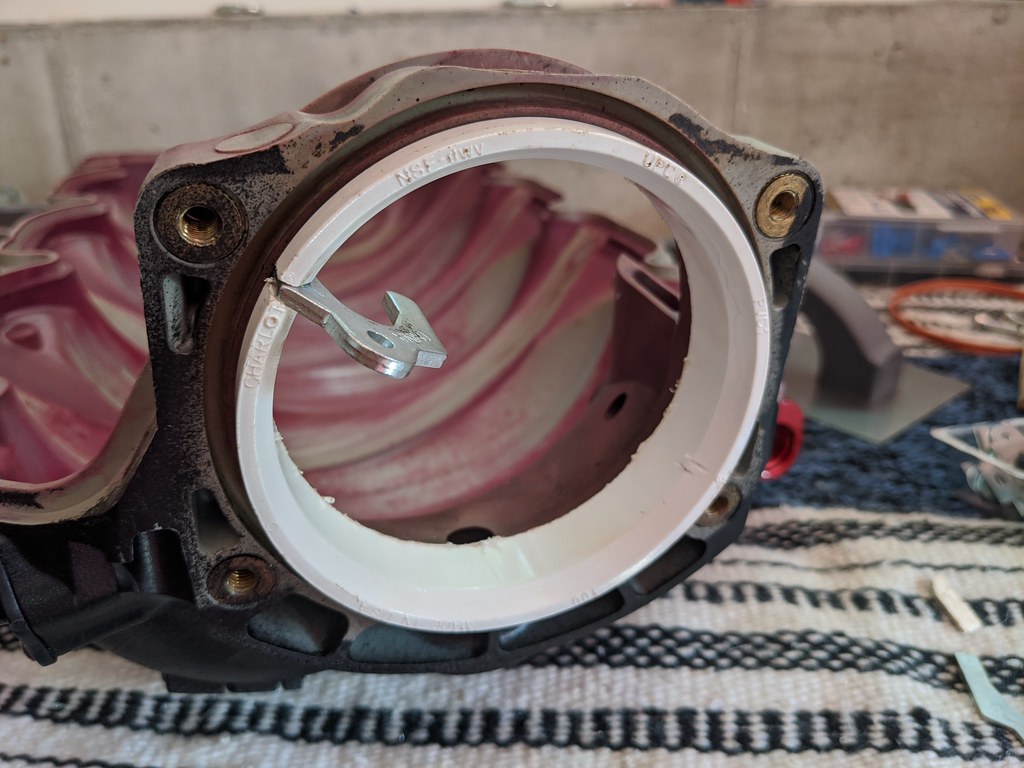
Still plugging away and seeing how all of the parts are going to work together. I started taking some measurements and noticed that the opening for the FAST intake wasn't a true 102mm horizontally, but was vertically. So after a quick call to FAST, they informed me that this can be common when the throttle bodies are over-tightened. After looking a little closer the sides of the intake opening were cupped towards the center. After I took measurements from the throttlebody vs the opening of the intake it confirmed that. So I started the process of slowly heating it up and straightening it. Not sure if I buy the over-tightened story, but it was straight from FAST so it is what it is.
I found out that a 3" PVC pipe has almost exactly a 4" outer diameter, so I used that as a starting point to get it back to where it should be. I didn't get a picture of the measurements before I started but it was around 3.870", which is much smaller than 4.016"(converted from 102mm). I cut about 1" off of the end of the PVC pipe and then cut a section out of it. I heated it up and slowly added some body shims I had to help this stretch back into place.
Getting better
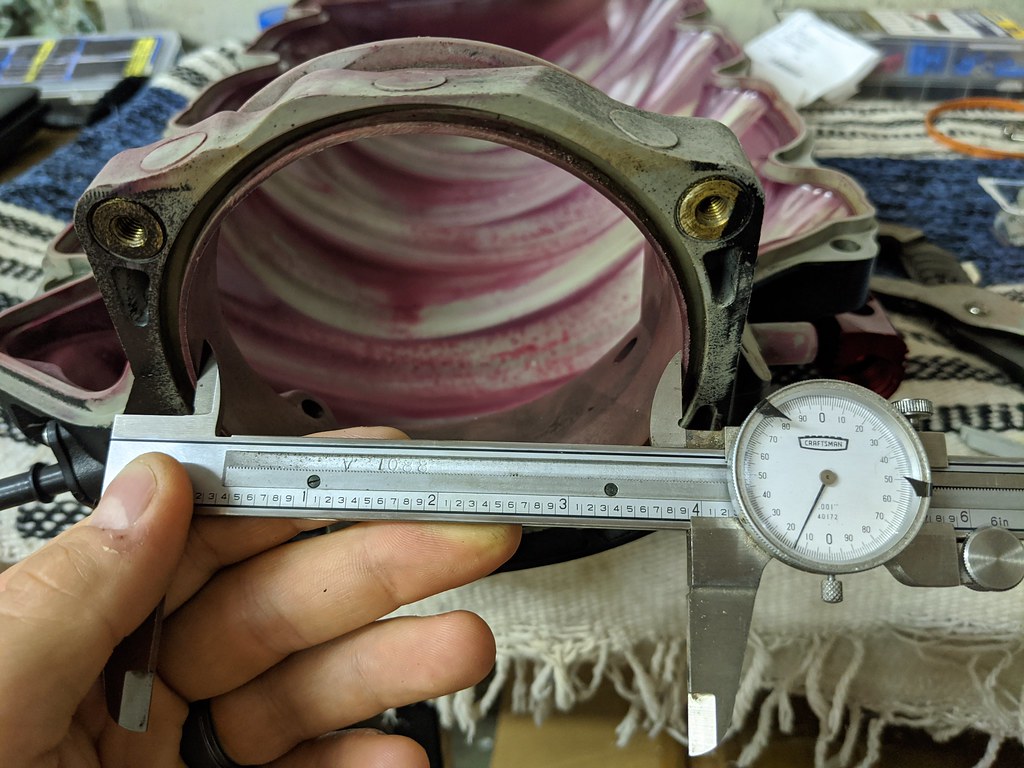
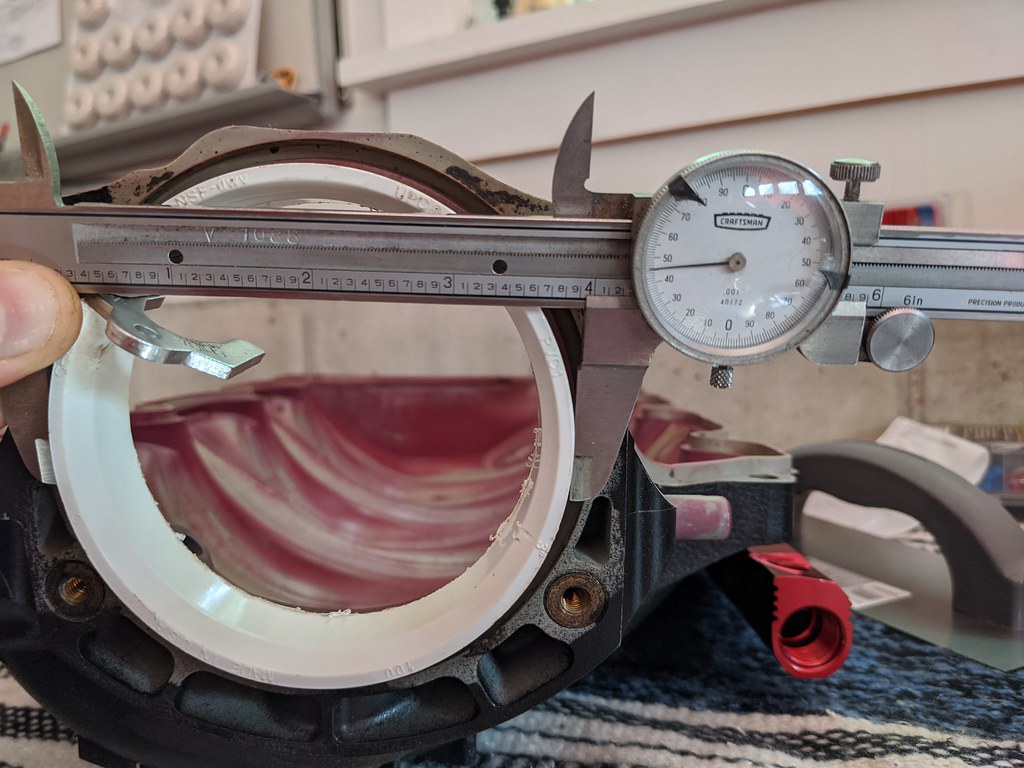
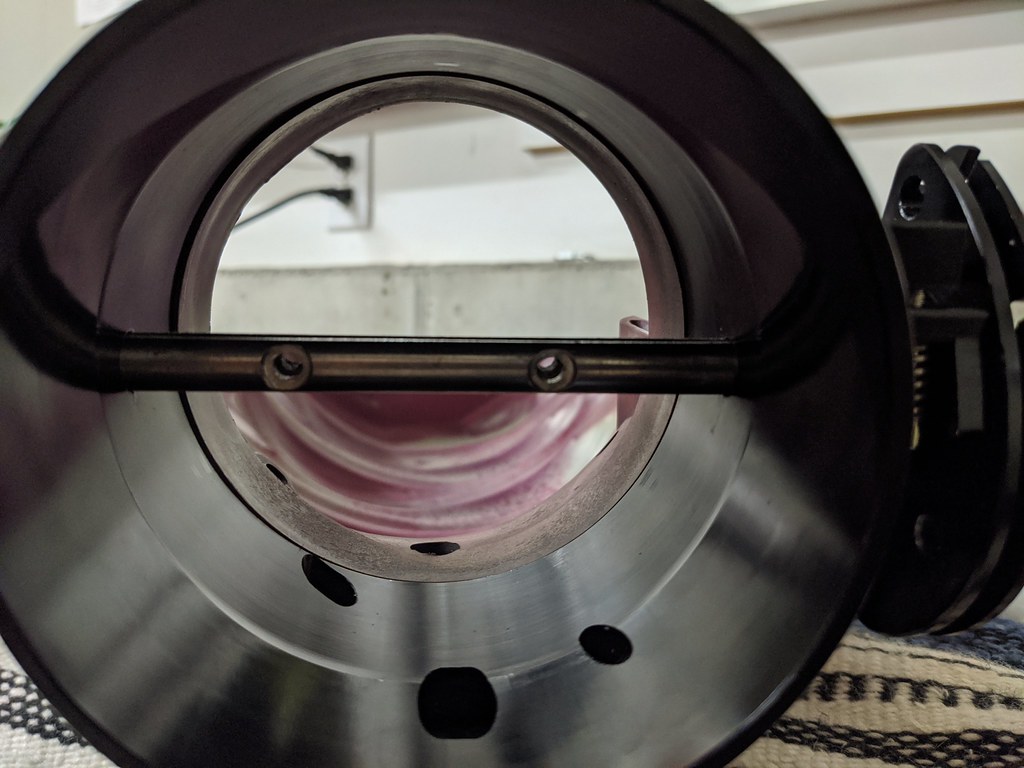
Eventually I was able to get the whole PVC pipe in there which measured out at 4.020, so it was a little larger than the TB. But what happened is the intake would stretch back to it's natural position and wouldn't get any larger than 3.965". At this point it's close enough for me to catch it with a cartridge roll and have a flush opening with the TB.
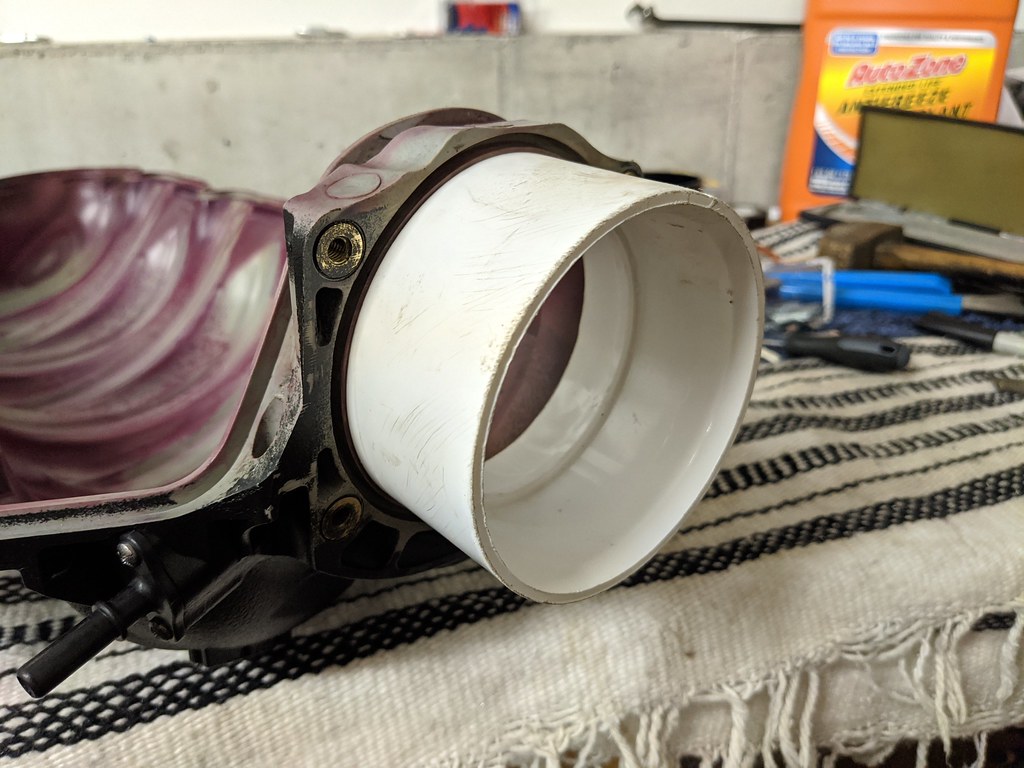
I'm much happier with this now. Should have gotten a picture before I started. I could actually see the seal for the TB...
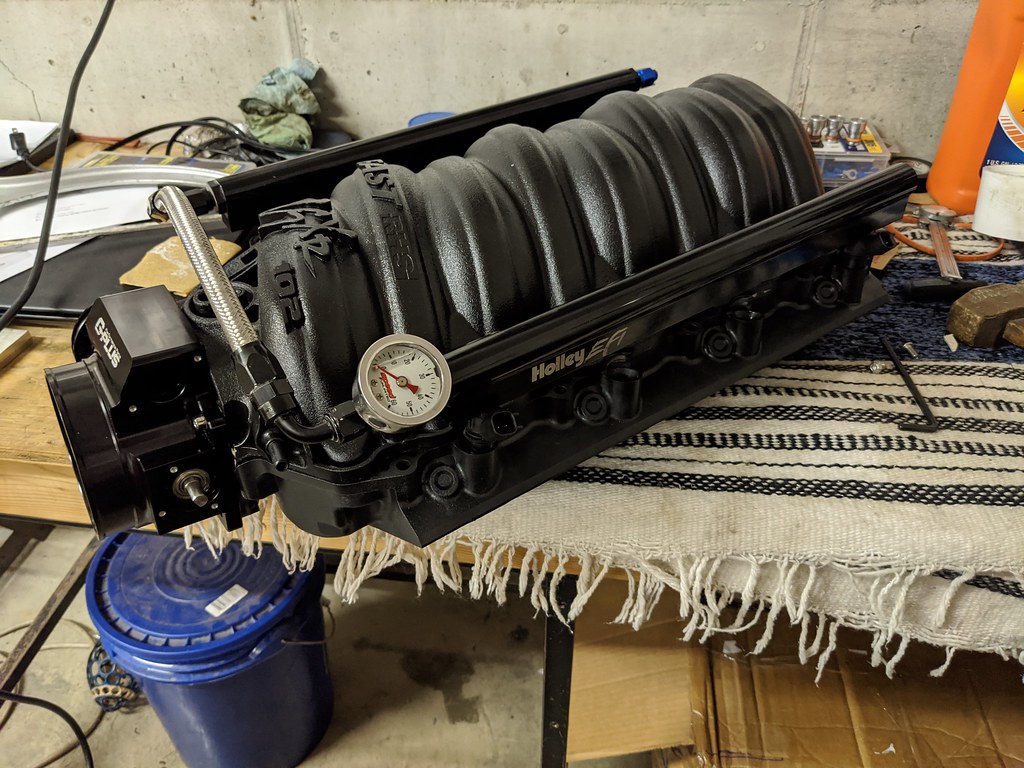
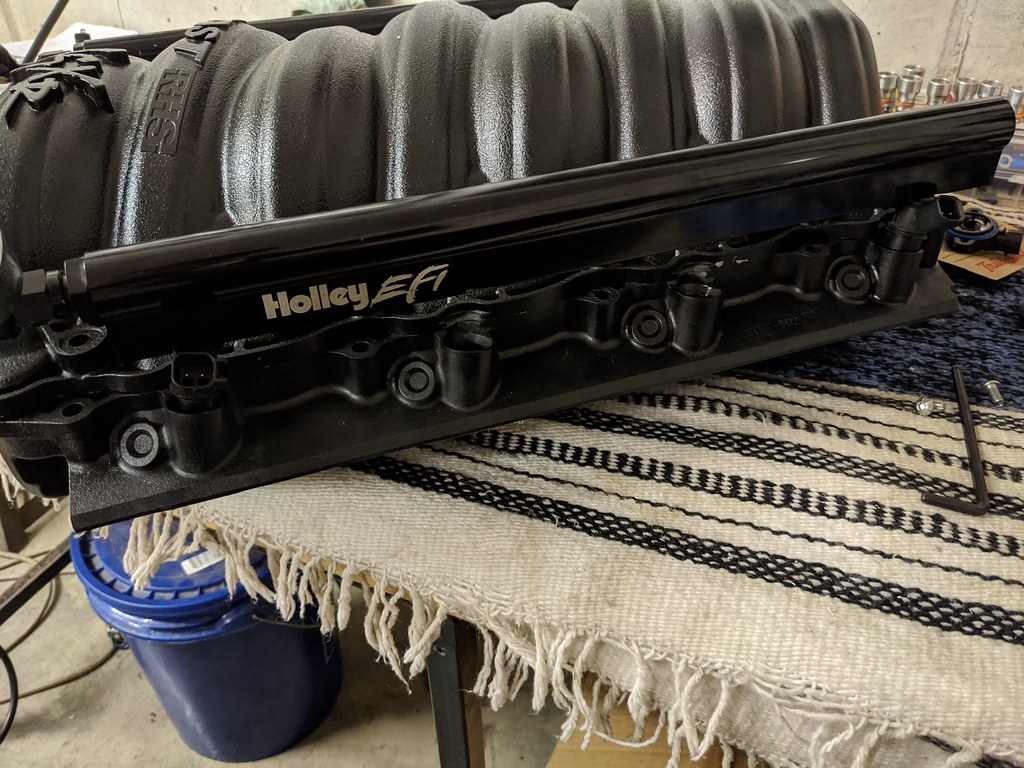
While I had the intake out, I decided to throw on a set of Holley EFI fuel rails I've had for a while and they actually fit much better than the Aeromotive rails. I think that with the stainless steel heads on the bolts, it will break up all the black and look really good. I may brush some Torch Red paint I have on the logos on the intake.
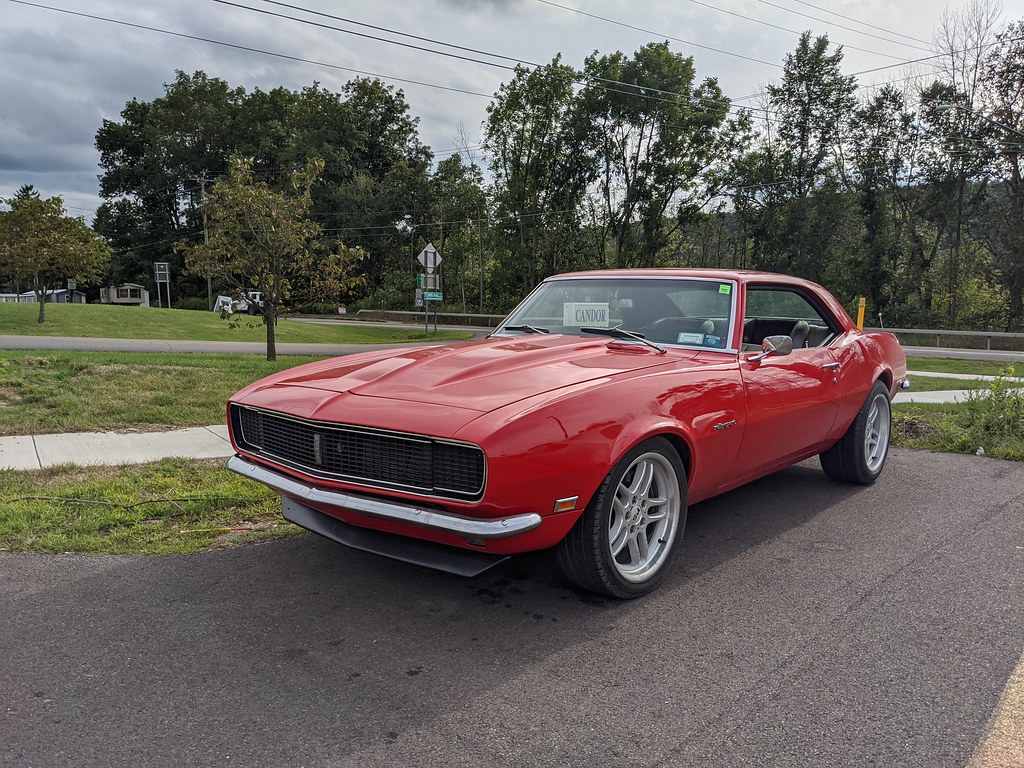
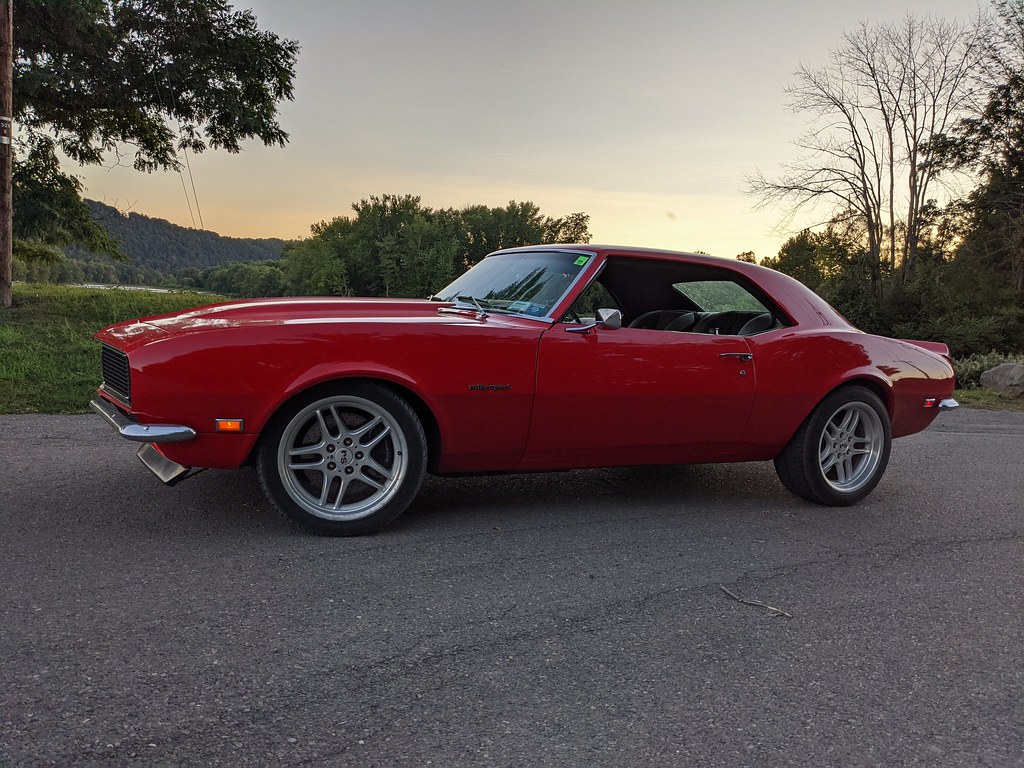
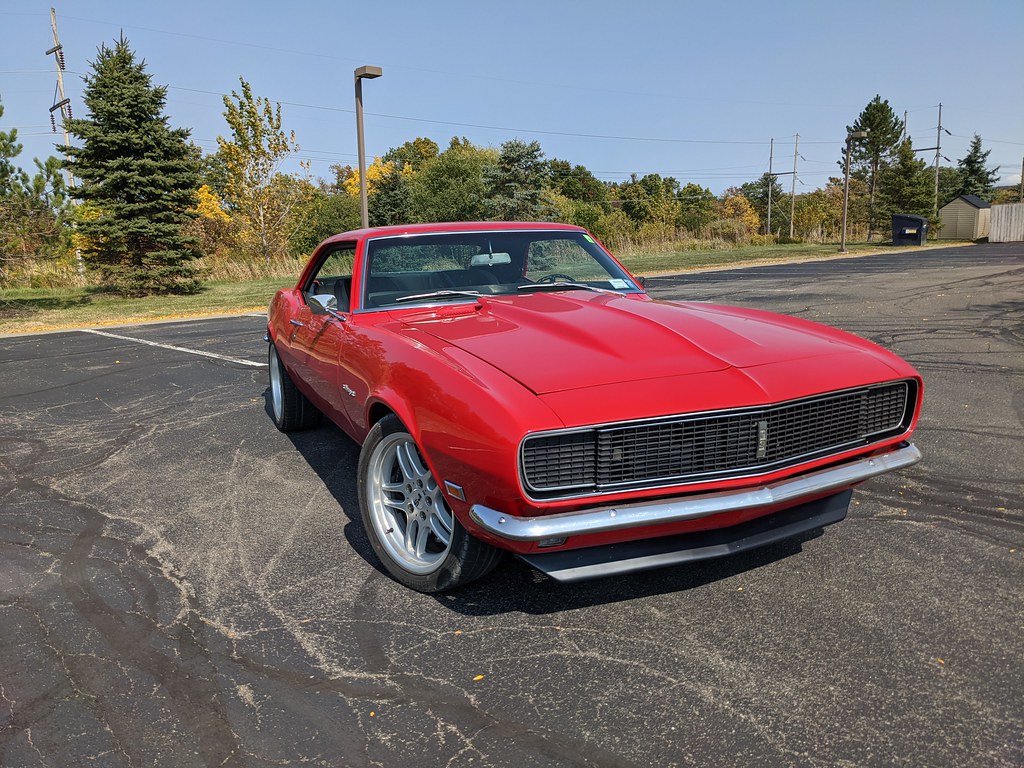
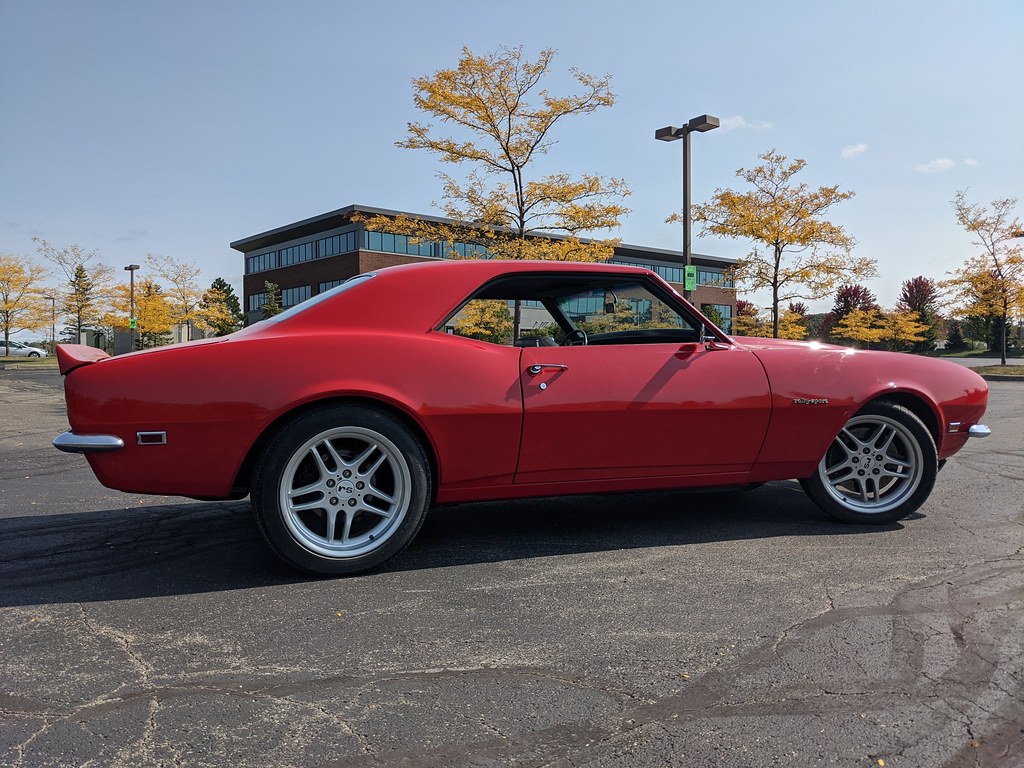
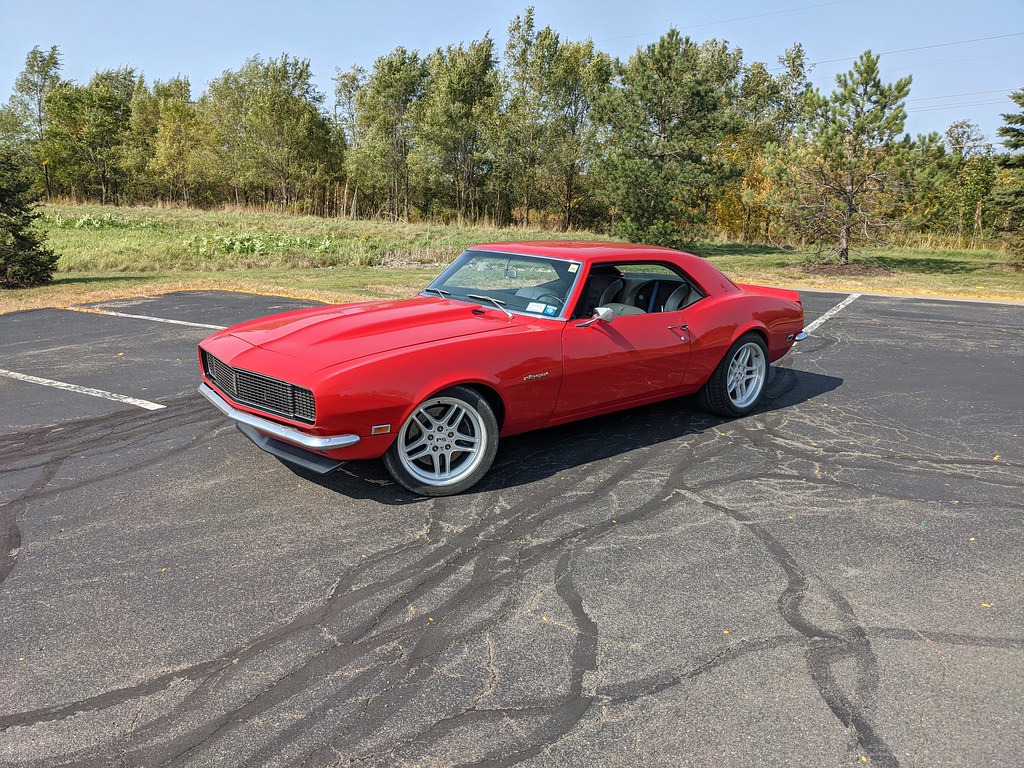
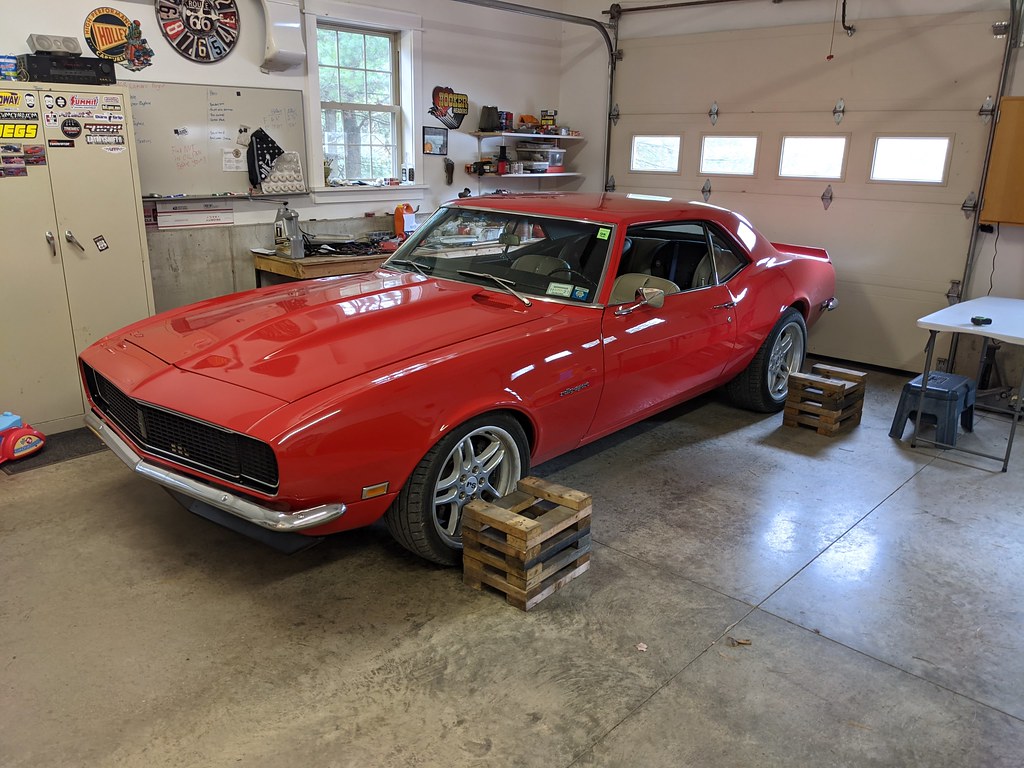
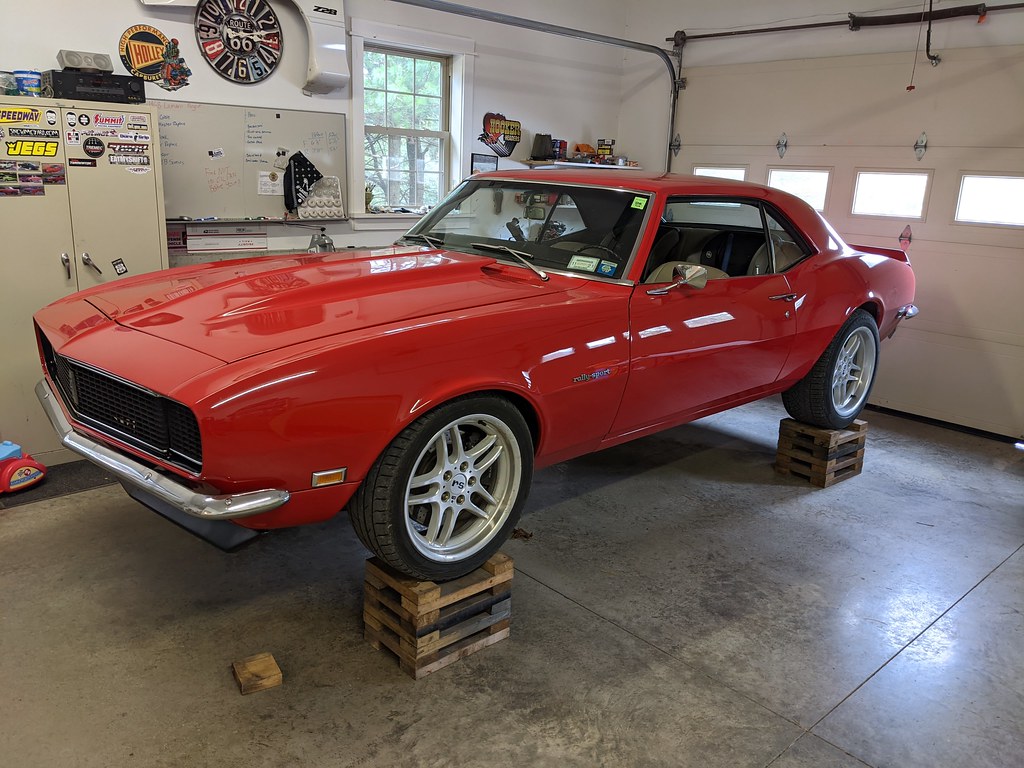
On Saturday I got my car out for a short drive and wanted to grab some pictures. Thought I'd share. I'm no photographer, but I think they turned out pretty good for cell phone pictures.
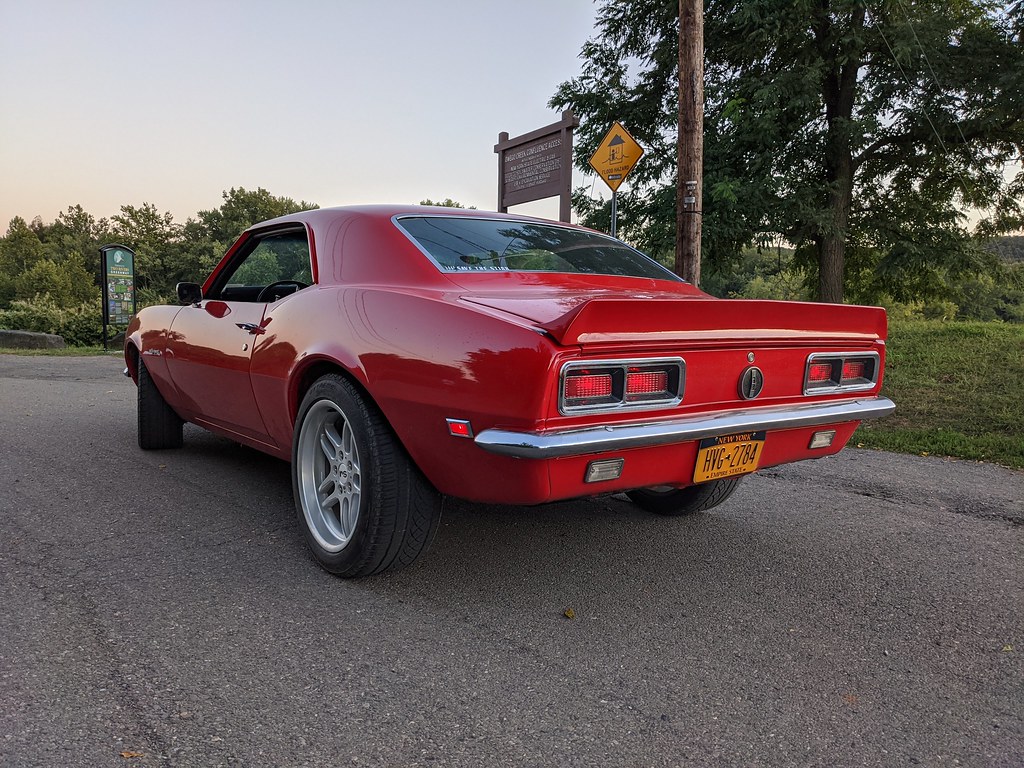
This is a cool picture because in 2012 we had a historic flood in this town and that blue label on the sign behind the car was the highest level that the water rose to!
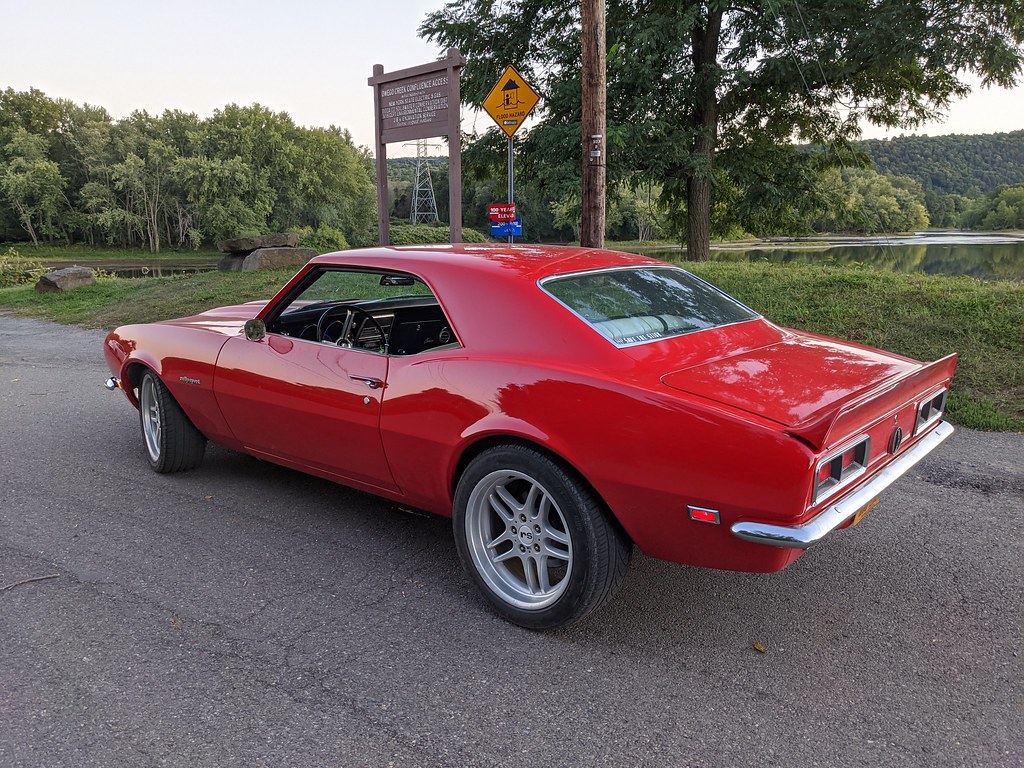
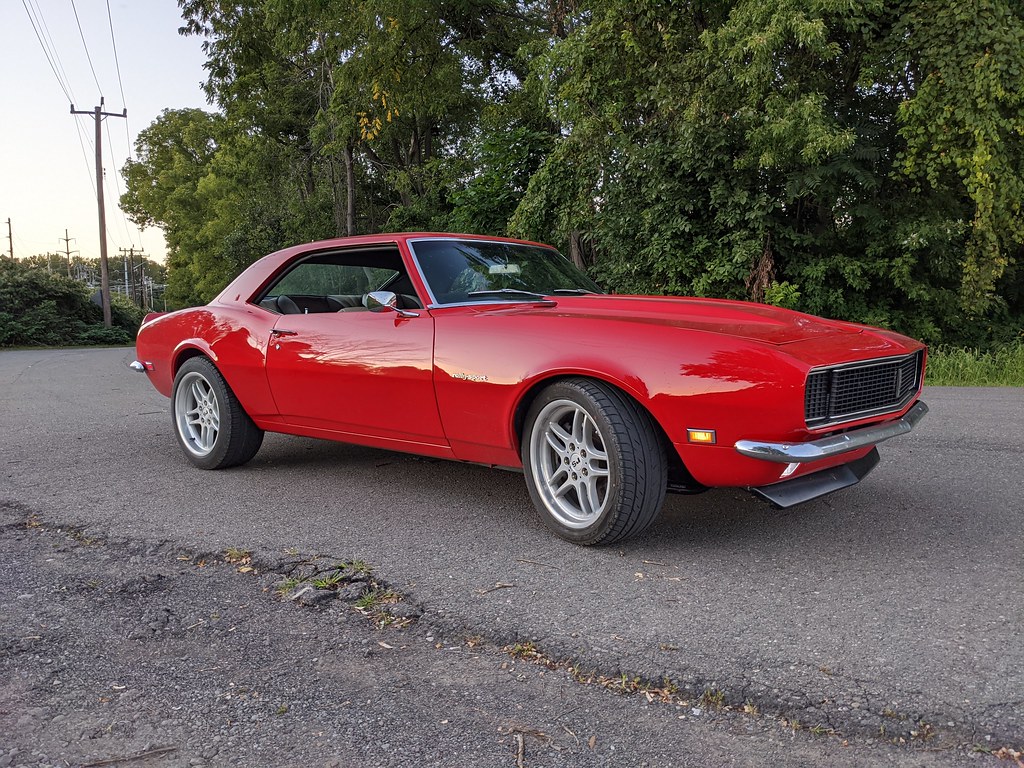
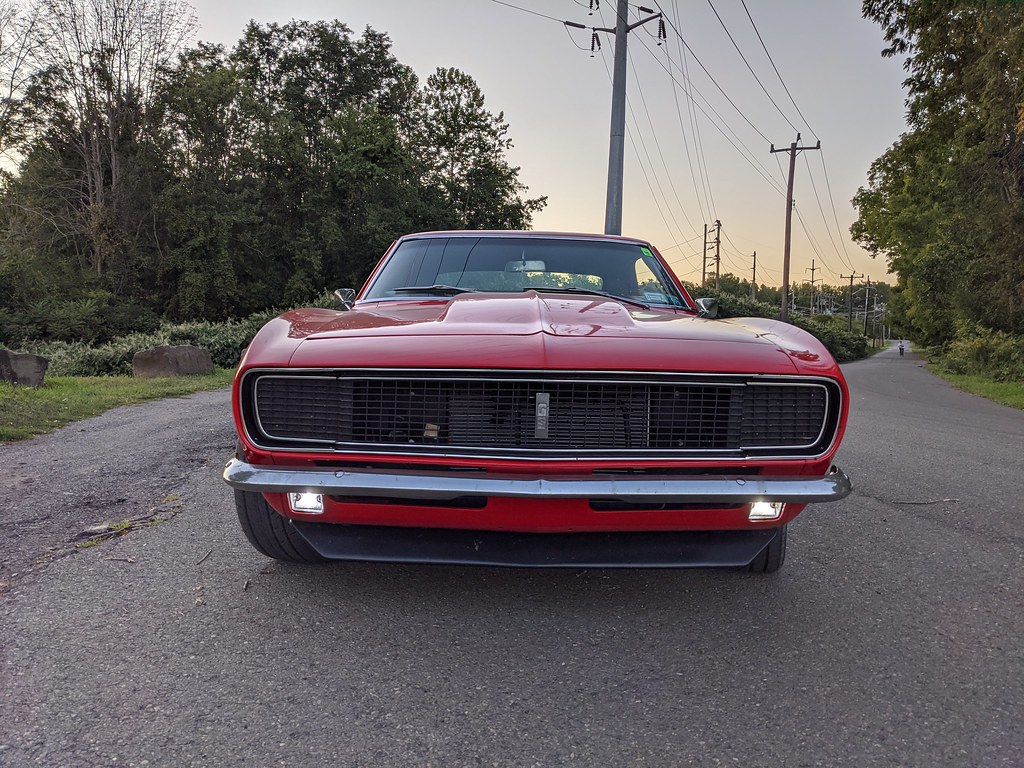
This was my favorite picture from the day.

Cheers,
Ryan
1955 Nomad project LC9, 4L80e, C5 brakes, Vision wheels
1968 Camaro 6.2 w/ LSA, TR6060-Magnum hybrid and etc SOLD
1976 T/A LS1 6 Speed, and etc. SOLD
Follow me on Instagram: ryeguy2006a
09-14-2020 #591 Registered User
- Join Date
- Aug 2015
- Location
- charlotte
- Posts
- 924
Looking good mate, can't wait to see the new engine overhaul and hear about the comparisons
09-30-2020 #592
Registered User
- Join Date
- Sep 2009
- Posts
- 2,705
Not a huge update, just collecting parts and tinkering on the motor and intake. Mostly just driving the car as the driving season is coming to an end. I was planning on modifying my stock 24x harness that came with my Terminator X so that it will run properly with the 58x engine, but came across a great deal on a 58x harness. There were enough differences, that it made sense to just buy this harness since it was about 1/3 the price of new. The guy also included an I/O harness add on and swapped the LS1 style MAP pigtail for the LS3 style.
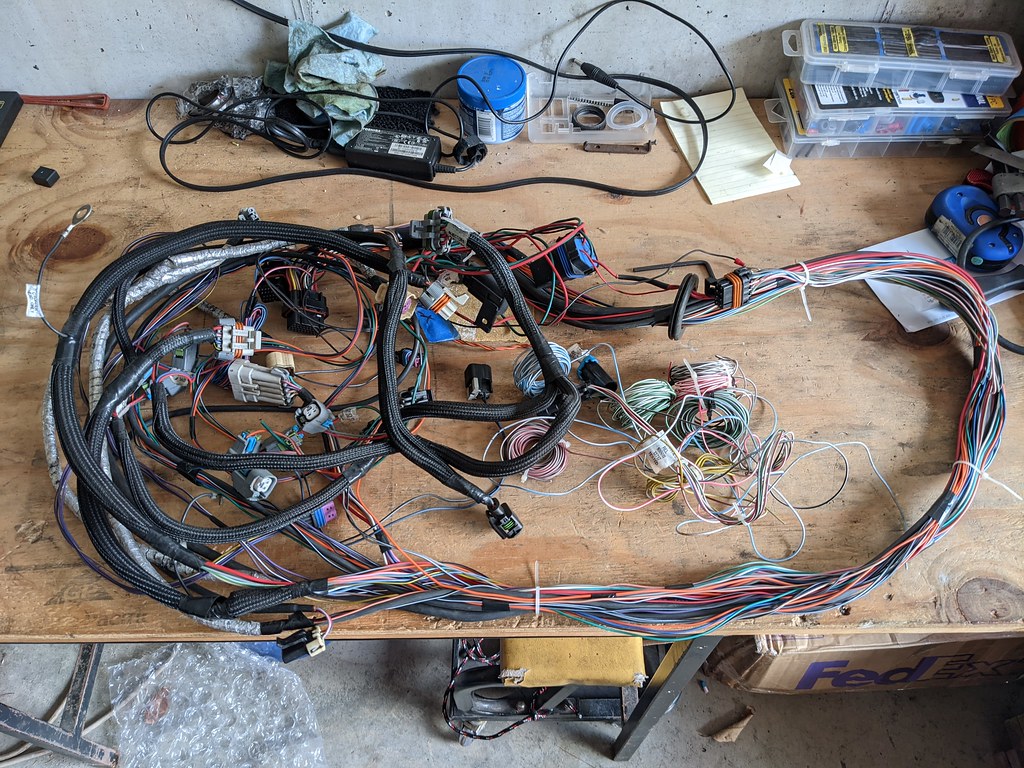
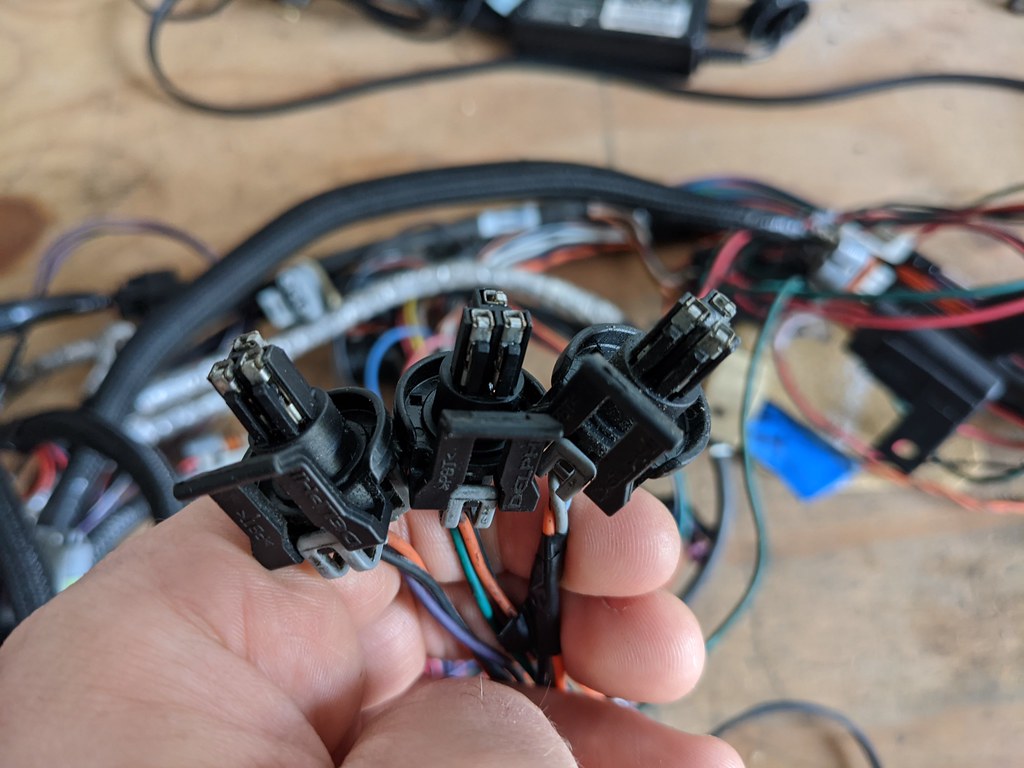
Only thing missing or modified was the seal and terminal retainer for these three pigtails. Cheap fix to get more.
Bobby (Uglybird) hooked me up with a set of 52lb. LSA injectors that he wasn't using. Thanks again man.
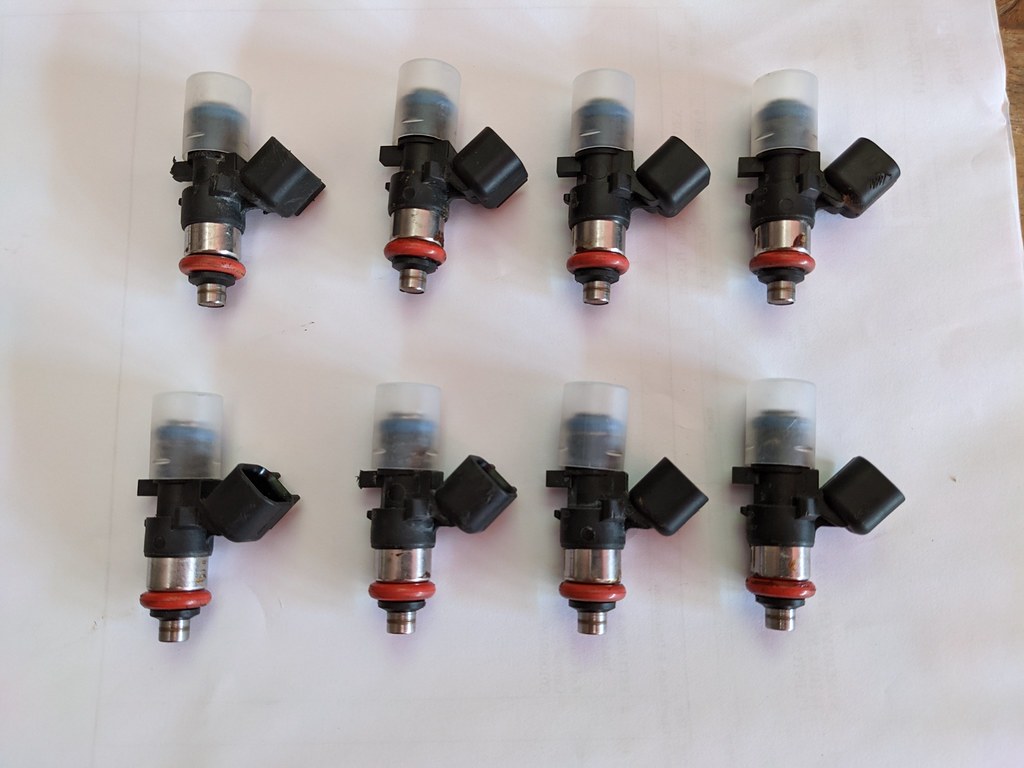
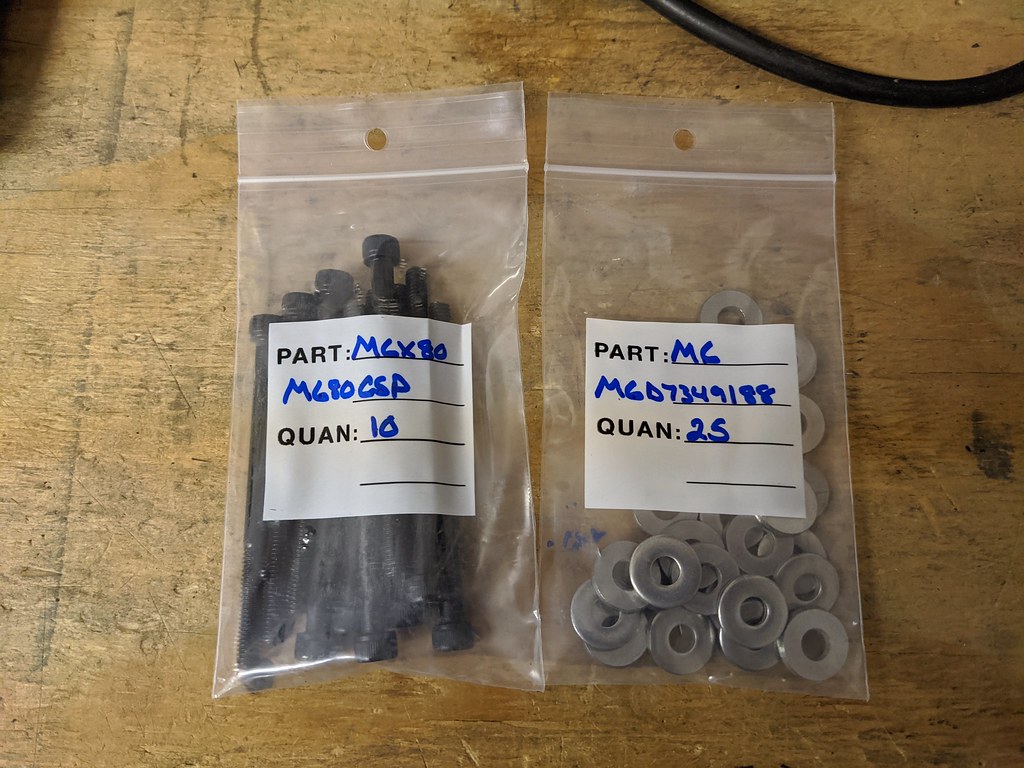
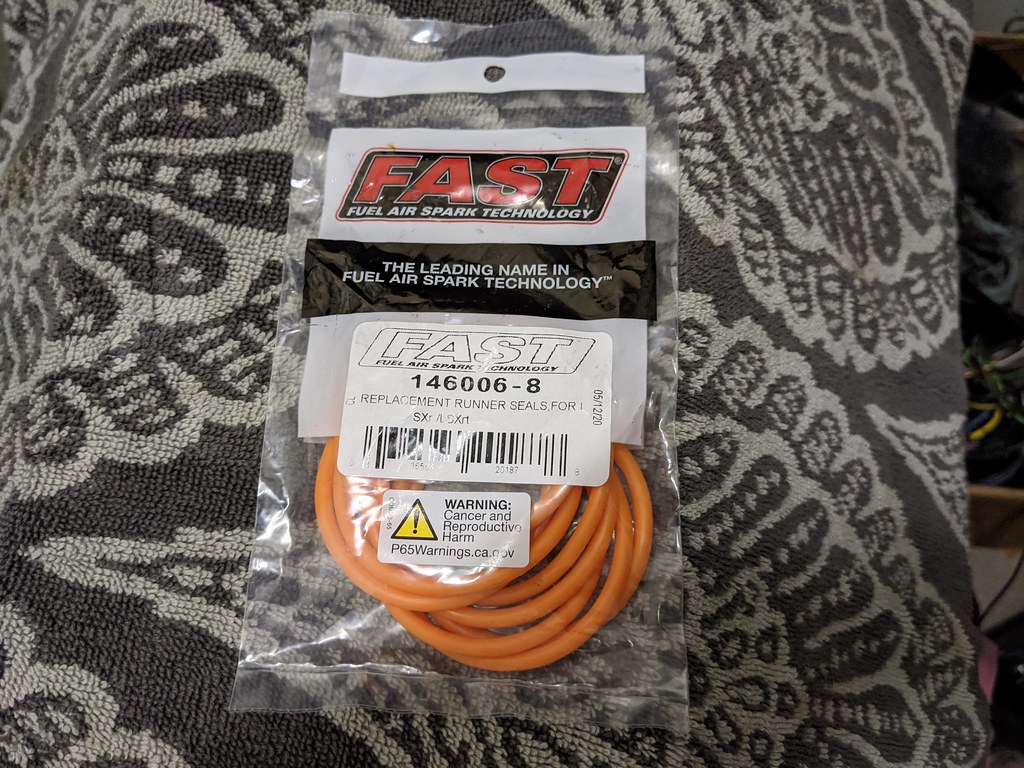
I also picked up all brand new stainless hardware for the FAST intake. All of the external hardware had seen better days, so I swapped it all out. There are 8 internal flange bolts that hold each of the runners in place, which are not stainless. I searched high and low and finally found a set in stainless for a great price. I also bought some brand new runner seals since 5 of the 8 were torn. Should be good as new once I put it all back together.
I set the low mileage 0821 heads on the motor just to see what it all looks like. I can't wait to tear into it. I'm waiting for my buddy to get me a flexplate so that I can get the balancer bolt off and see what the cam bearings look like.
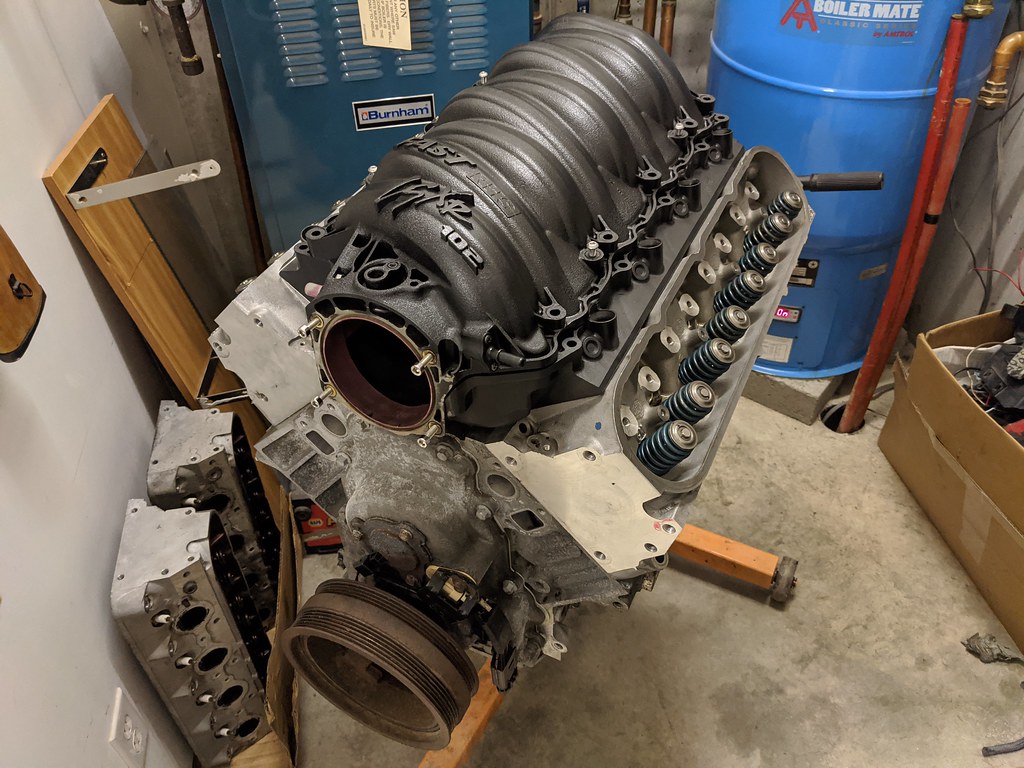
I also pulled the upper intake off to see how the ports matched up with the heads. Really not bad at all, but I'll touch up where the runners don't quite match up. Also now that I have the runner seals, I can re-install the runners and lightly port where the runners meet up to the intake flange. I've read that is where any gains would be made on these intakes, so I'll lightly hit them. Again, not going crazy, but while I'm there I might as well.

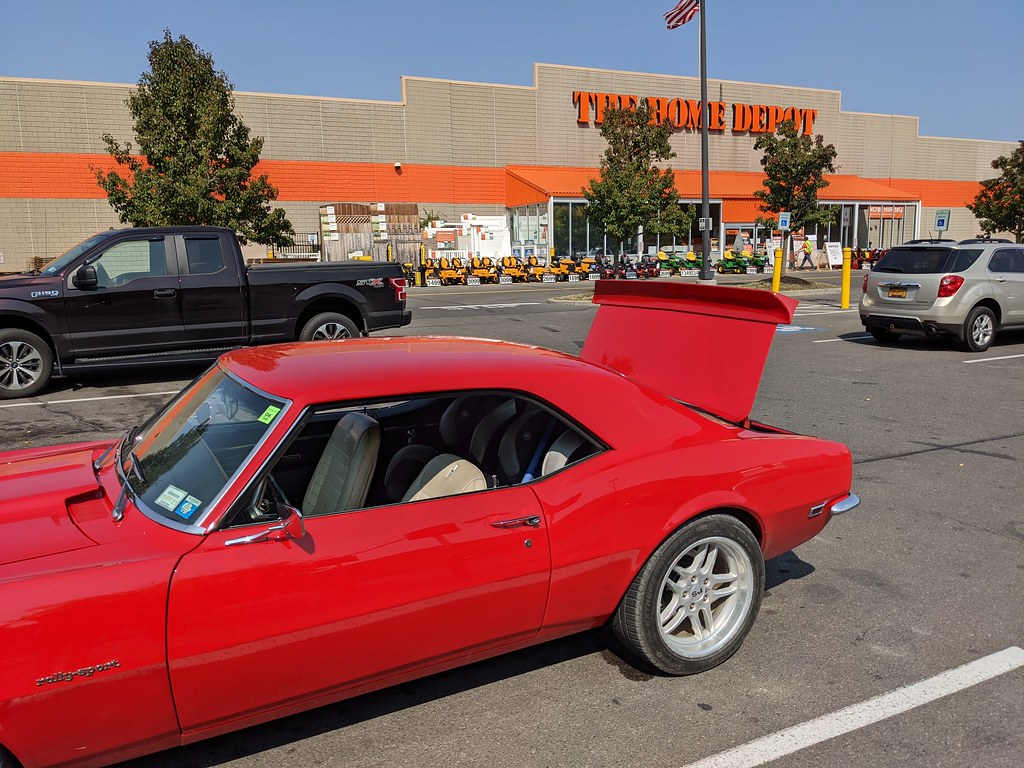
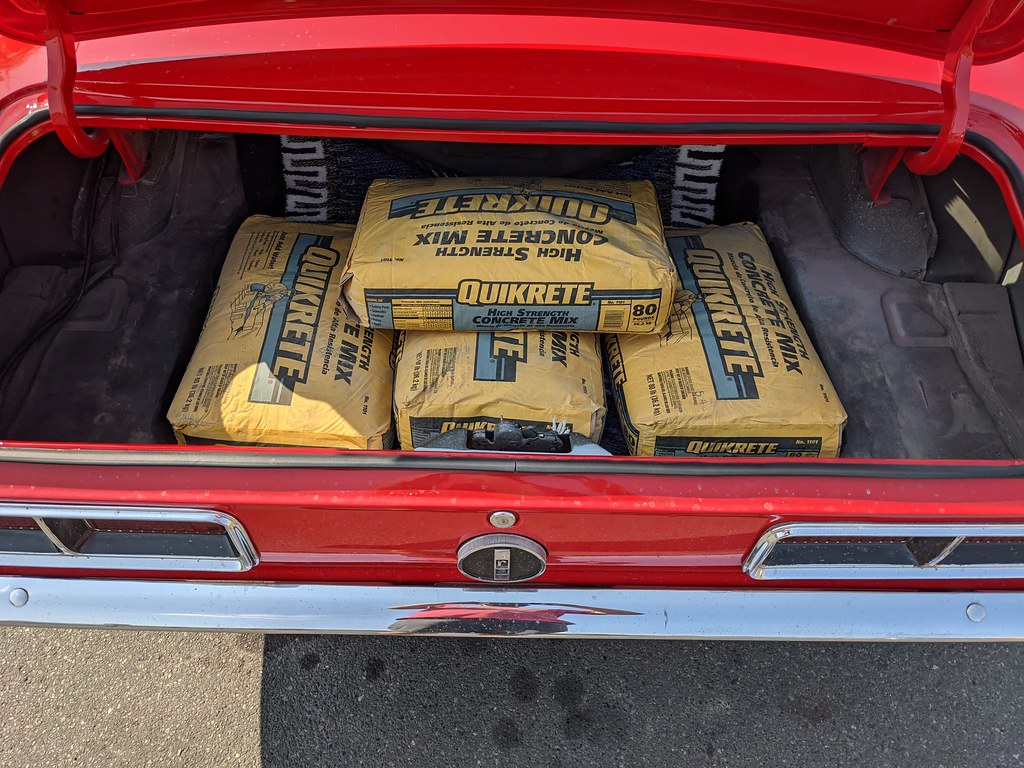
Over the past weekend I needed to run to Home Depot to grab a few bags of concrete. She handled it like a champ!! Just truck stuff, no big deal.
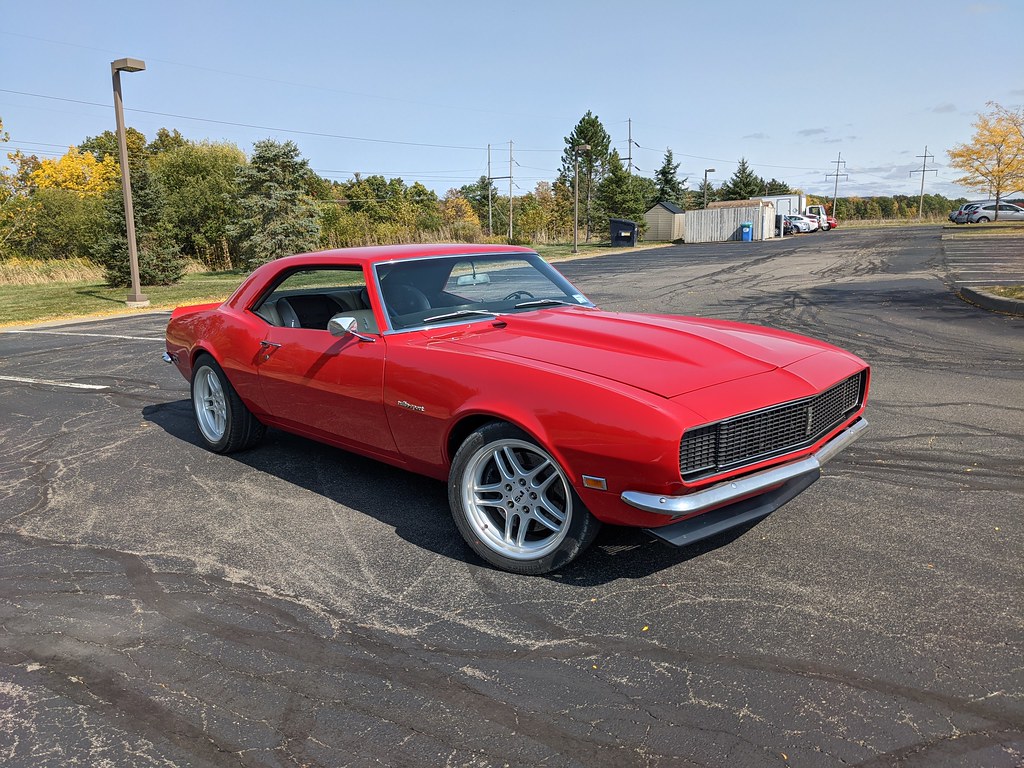
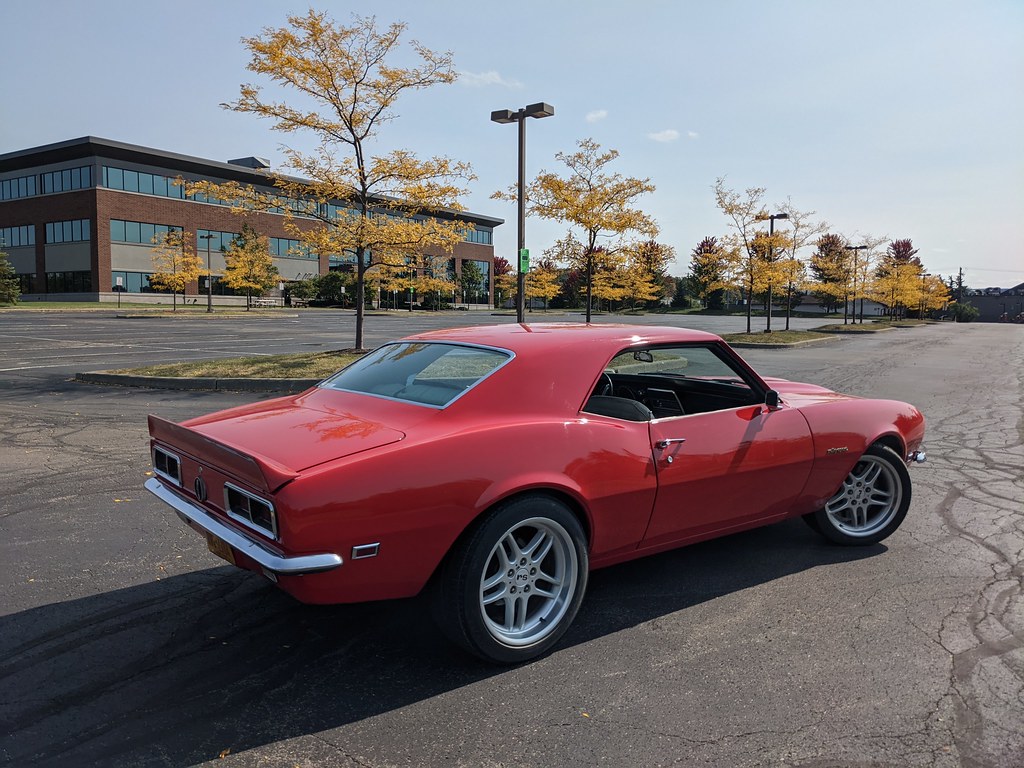
I stopped at my old office building on Cornell's campus and grabbed some cool fall pictures.

Cheers,
Ryan
1955 Nomad project LC9, 4L80e, C5 brakes, Vision wheels
1968 Camaro 6.2 w/ LSA, TR6060-Magnum hybrid and etc SOLD
1976 T/A LS1 6 Speed, and etc. SOLD
Follow me on Instagram: ryeguy2006a
09-30-2020 #593 -Moderator/Sponsor-
- Join Date
- Apr 2001
- Location
- The City of Fountains
- Posts
- 15,975
You'll definitely enjoy the extra displacement!
Andrew1970 GTO Version 3.0
1967 Cougar build
GM High-Tech Performance feature
My YouTube Channel Please Subscribe!
Instagram @projectgattago
Dr. EFI
I deliver what EFI promises.
Remote Holley EFI tuning.
Please get in touch if I can be of service.
"You were the gun, your voice was the trigger, your bravery was the barrel, your eyes were the bullets." ~ Her
10-14-2020 #594
Registered User
- Join Date
- Sep 2009
- Posts
- 2,705
This all feels very familiar. I guess I do this to myself haha
1955 Nomad project LC9, 4L80e, C5 brakes, Vision wheels
1968 Camaro 6.2 w/ LSA, TR6060-Magnum hybrid and etc SOLD
1976 T/A LS1 6 Speed, and etc. SOLD
Follow me on Instagram: ryeguy2006a
10-14-2020 #595
-Moderator/Sponsor-
- Join Date
- Apr 2001
- Location
- The City of Fountains
- Posts
- 15,975
Nothing like pulling a perfectly good engine...lol
1970 GTO Version 3.0
1967 Cougar build
GM High-Tech Performance feature
My YouTube Channel Please Subscribe!
Instagram @projectgattago
Dr. EFI
I deliver what EFI promises.
Remote Holley EFI tuning.
Please get in touch if I can be of service.
"You were the gun, your voice was the trigger, your bravery was the barrel, your eyes were the bullets." ~ Her
10-20-2020 #596
Registered User
- Join Date
- Sep 2009
- Posts
- 2,705
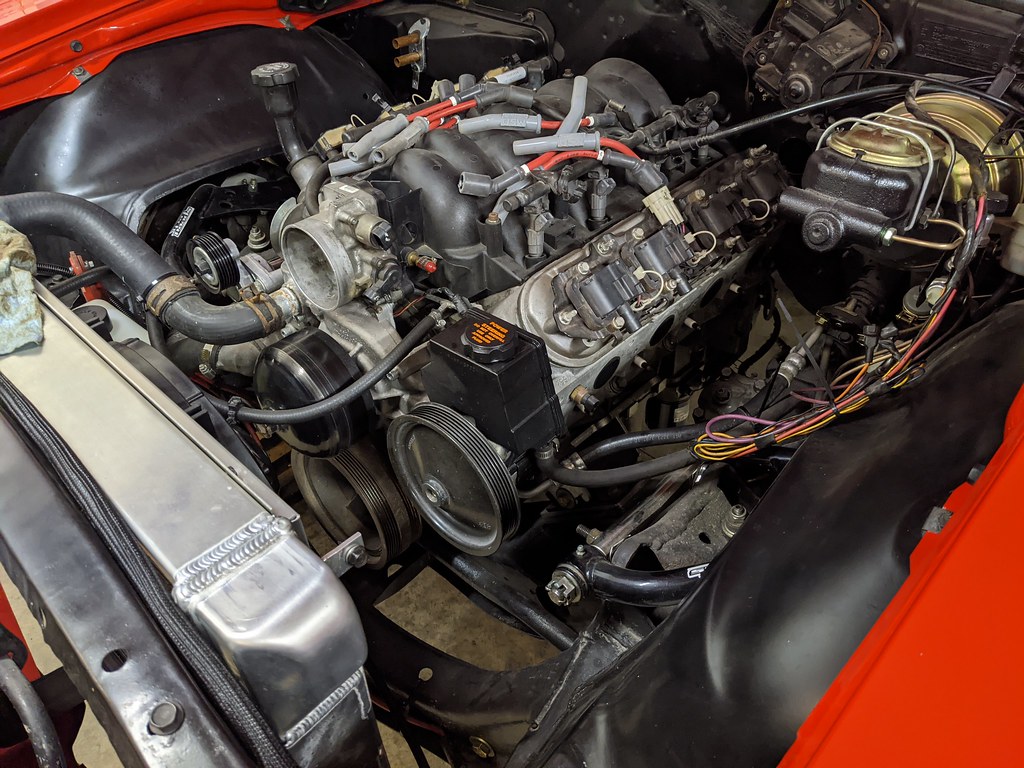
After a busy week of carefully removing all of the engine components it was time to get that LS1 out of there. I pulled the motor and trans together, but not after a little drama. I was going to meet the potential buyer Sunday morning, so I had prepped the car all week here and there to be able to pull the motor Friday night after my boys went to sleep. That way I'd have plenty of time and wouldn't need to rush since I do not want to repaint anything! Well my engine hoist had other plans...
I started trying to jack up the motor and it was leaking internally. Then I noticed this and by that time all the stores that had a new jack were all closed.
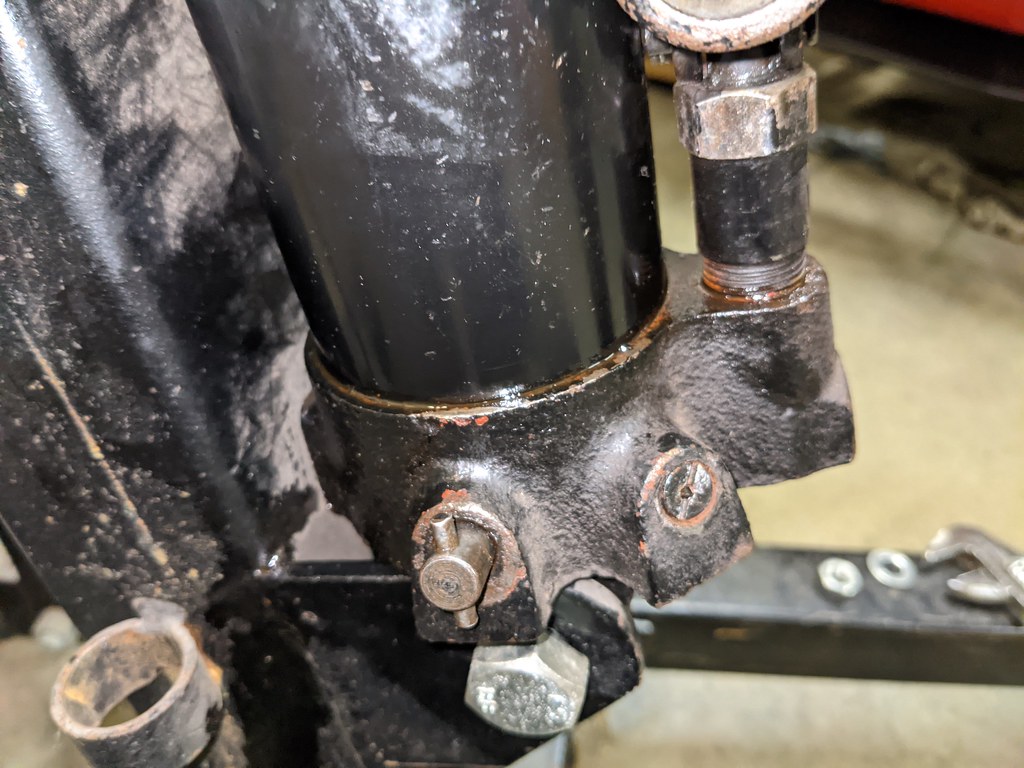
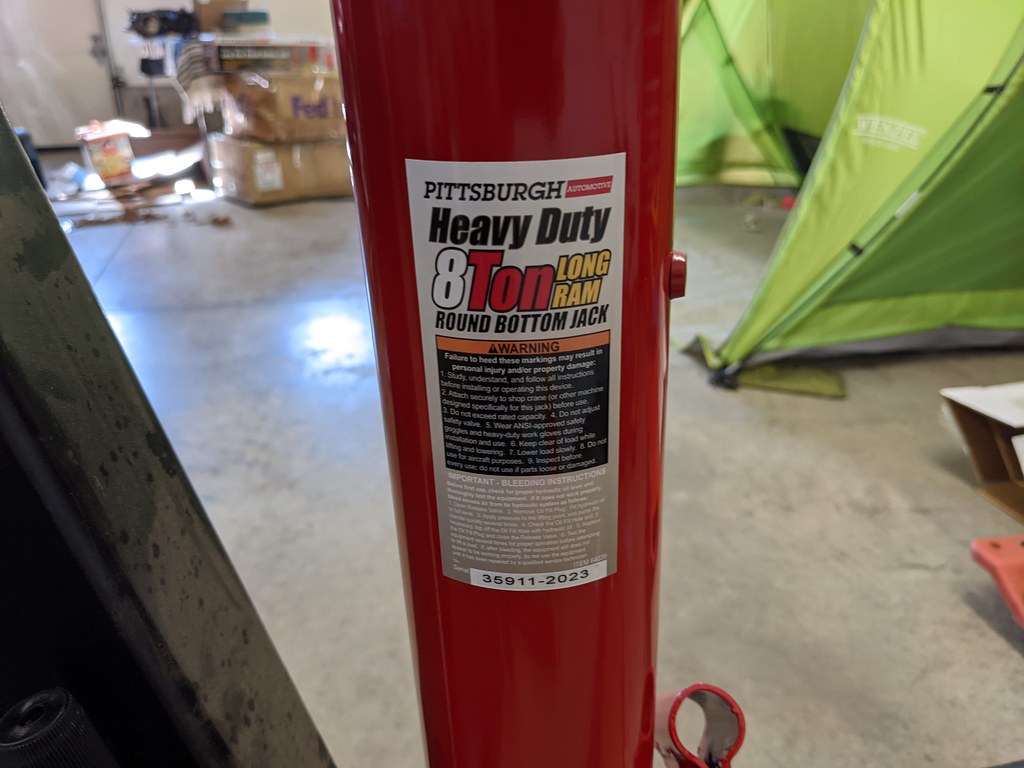
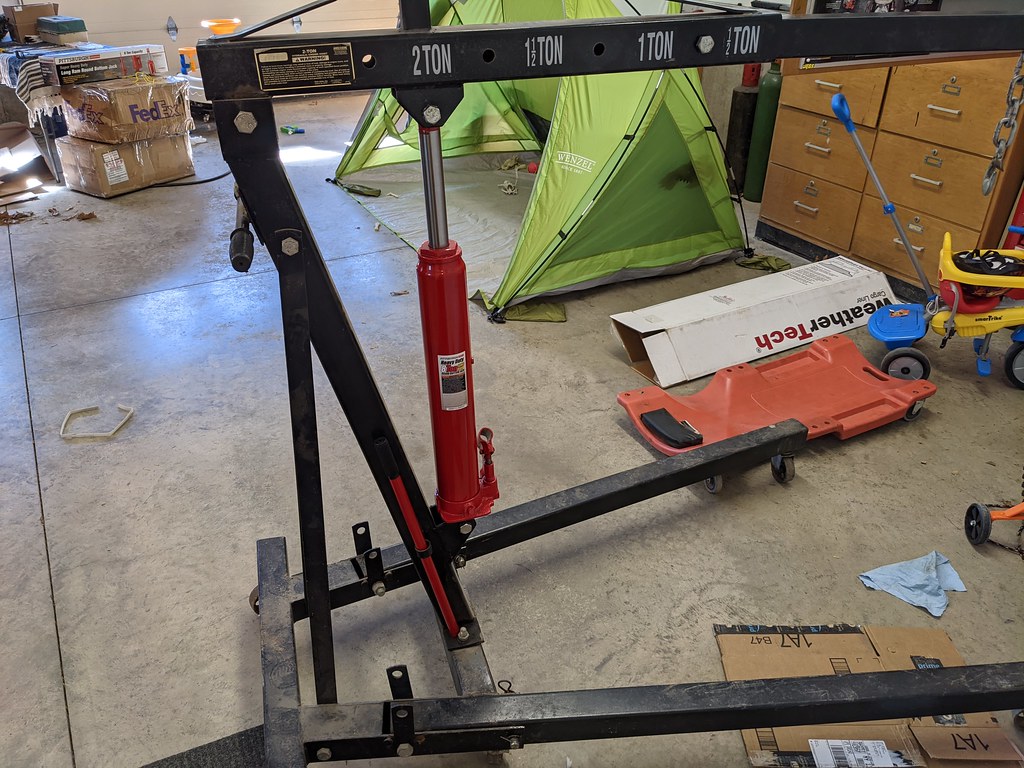
I ran to the trusty Harbor Freight Saturday morning and was able to get the new ram swapped in just a few minutes. Then take two for Saturday afternoon and the motor came out pretty uneventful. My older son even "helped" me. I liked having him out there as we was taking tools out of my toolbox and stacking/organizing them on the floor in his own way.
It's so oily because I had to swap oil pans. I kept the Holley 302-3.
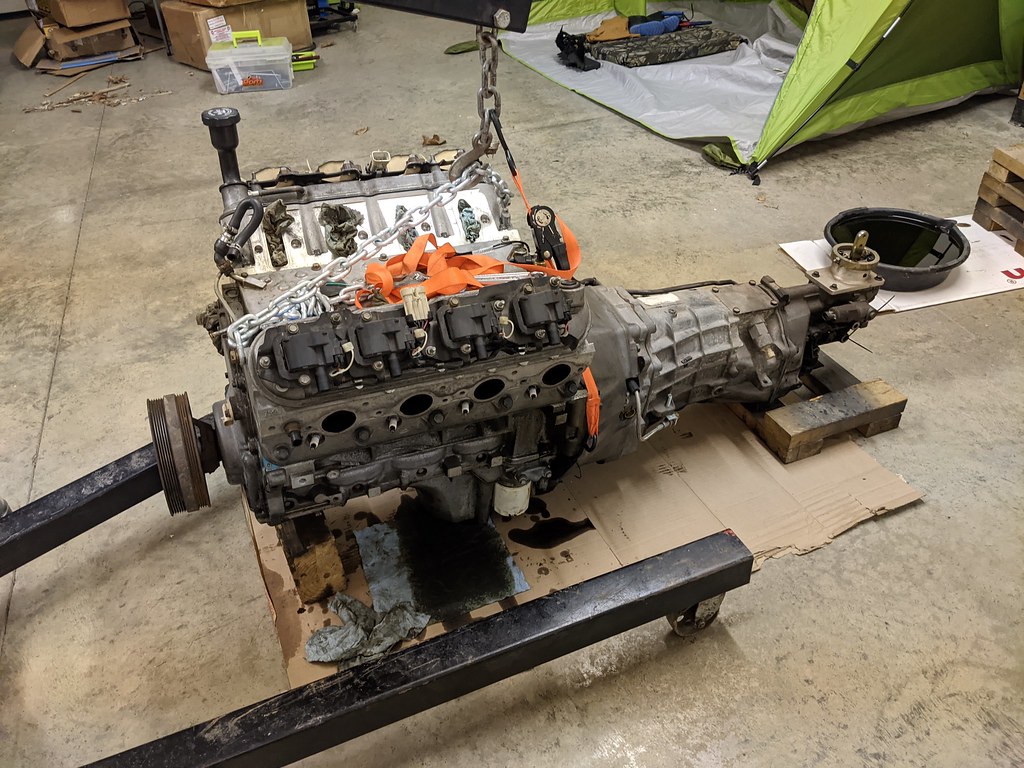
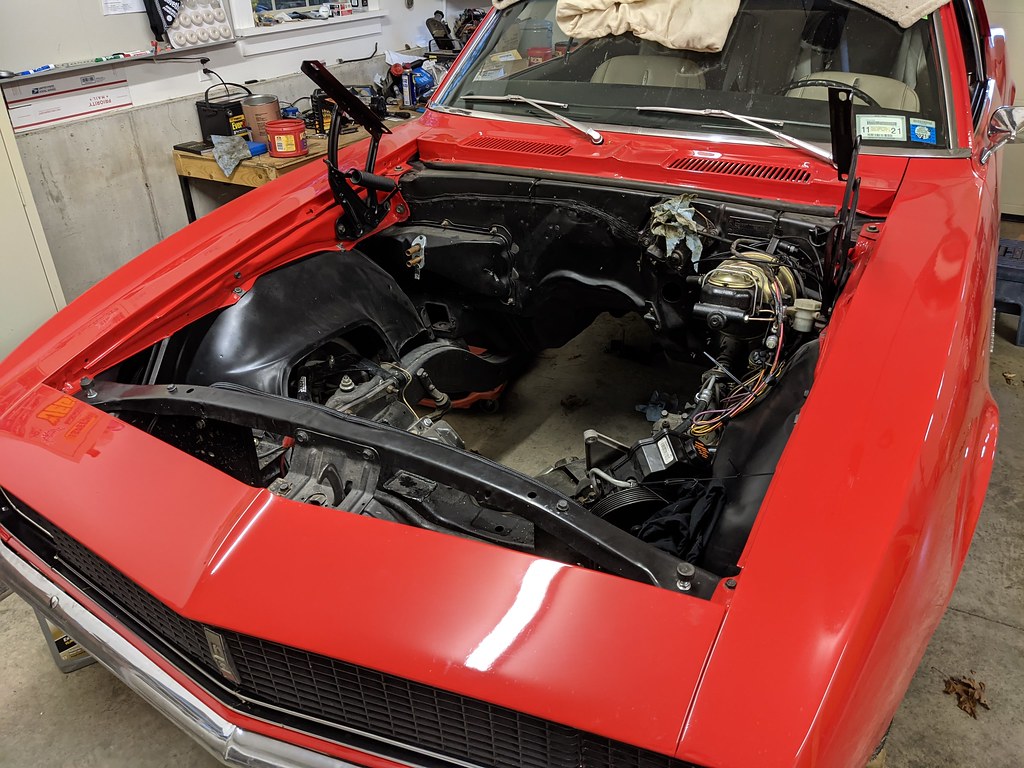
Now I have this strange empty feeling inside...
And looking toward the future, I've decided to change directions slightly and sold the FAST 102. I'm not in the process of collecting parts to add some boost in the way of an LSA supercharger. I'm currently hunting for parts, so if you happen to have a supercharger and lid on the shelf and want it to go to a good home, shoot me a PM.
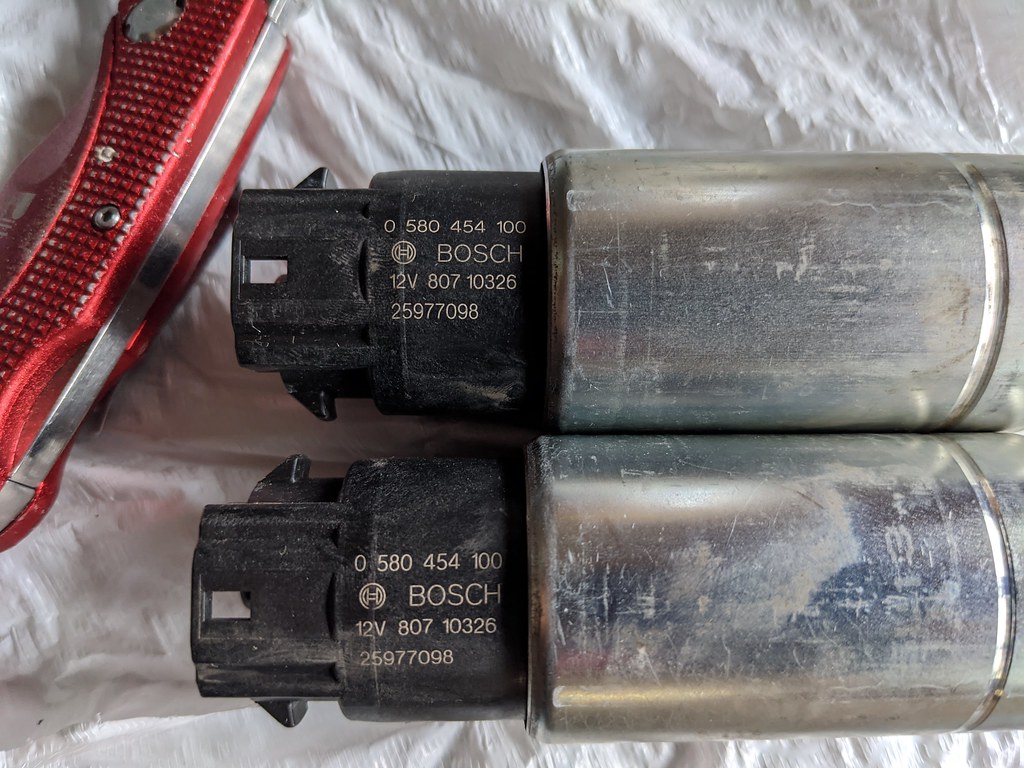
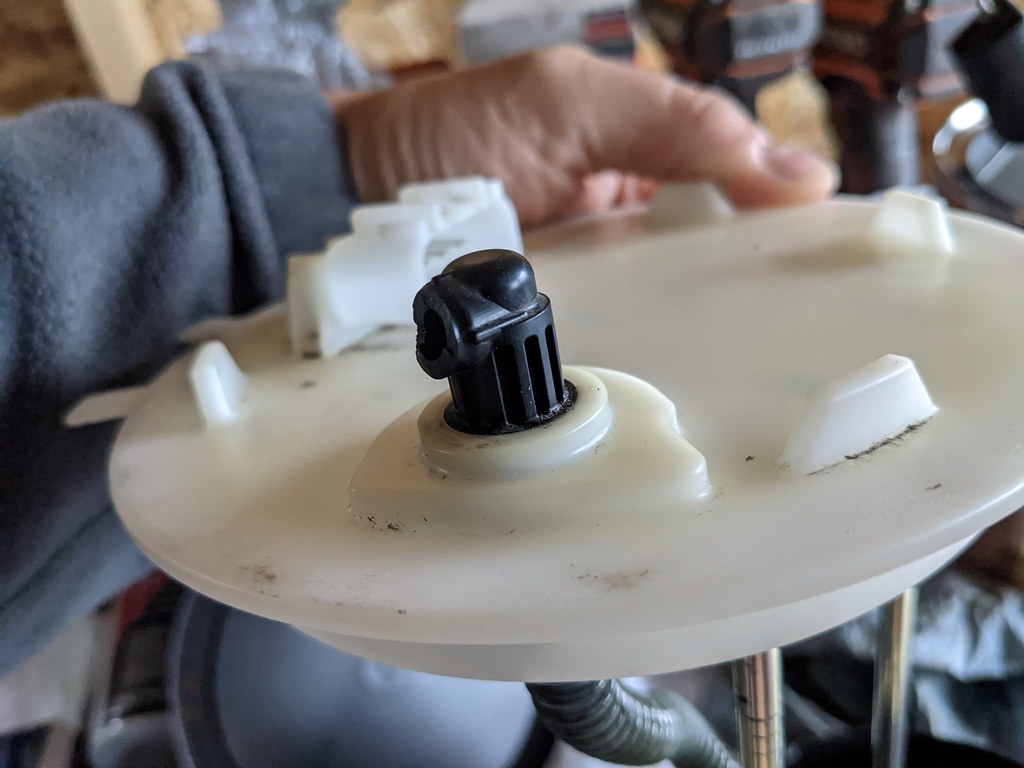
I picked up this Livernoise Firestorm fuel pump assembly for a killer price, but will need to fix the fuel hat. I think I have a clever solution for that, I'll check in soon. Livernoise says it will support 800HP, so it will support way more than I'll need.
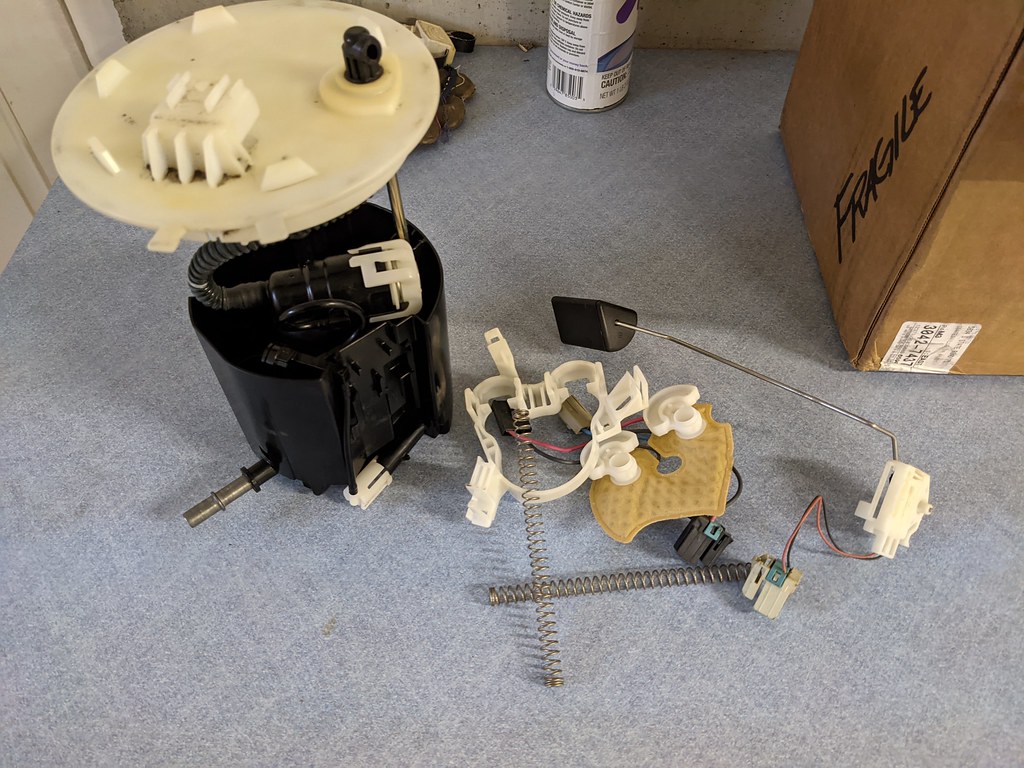

Dual 255 LPH pumps
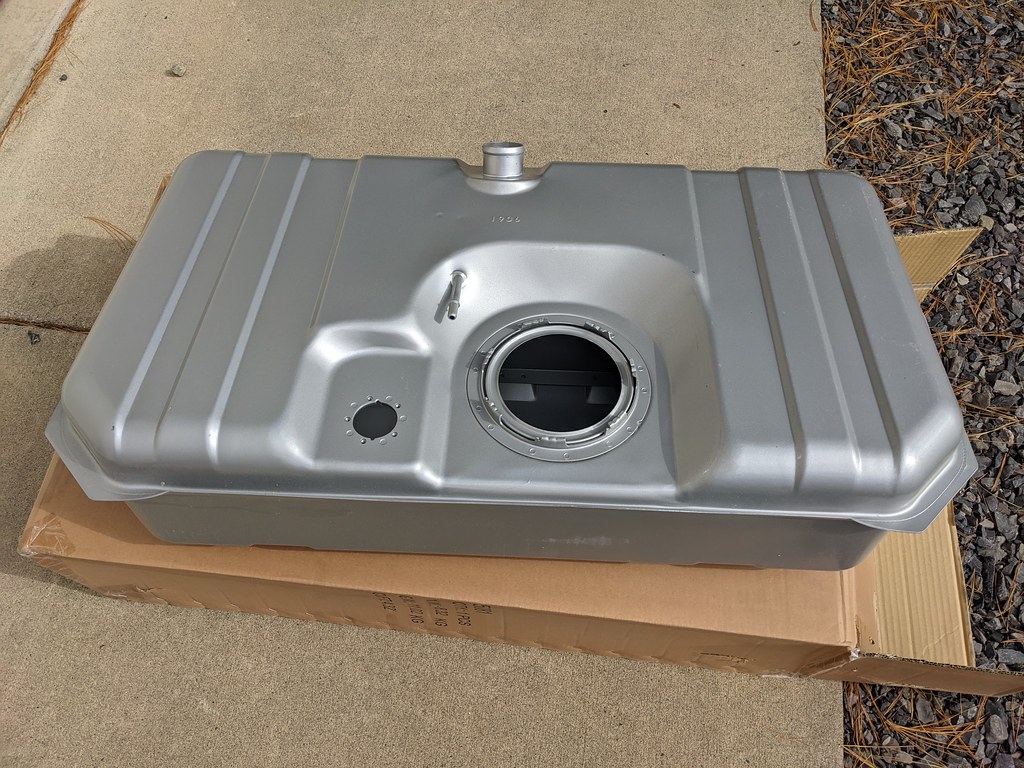
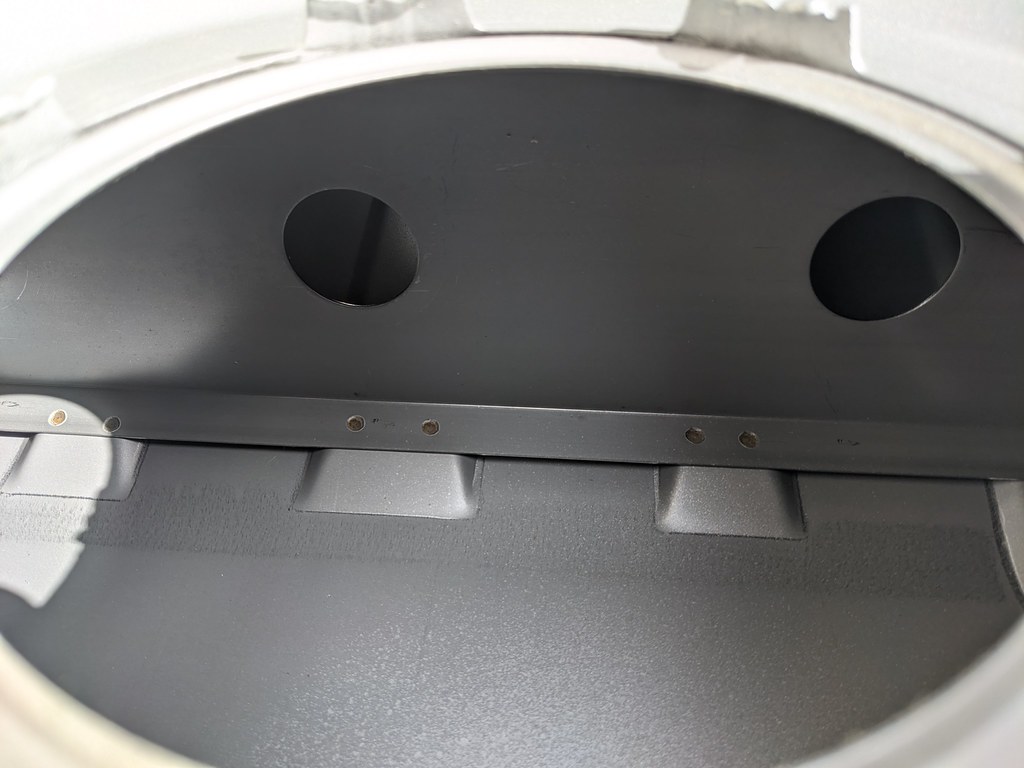
I kept having my fuel tank leaking and ended up pulling the trigger on the Rick's Resto-Mod tank. It will give me room to grow if/when I do a mini-tub, corner pickups, and larger fuel capacity. That's what happens when you have too much to drink working out in the garage I guess haha. I have to say that I'm super impressed with the quality and the construction. Even though the 5th gen pumps don't need it they added some internal baffling, which will help with hard accel or decel.
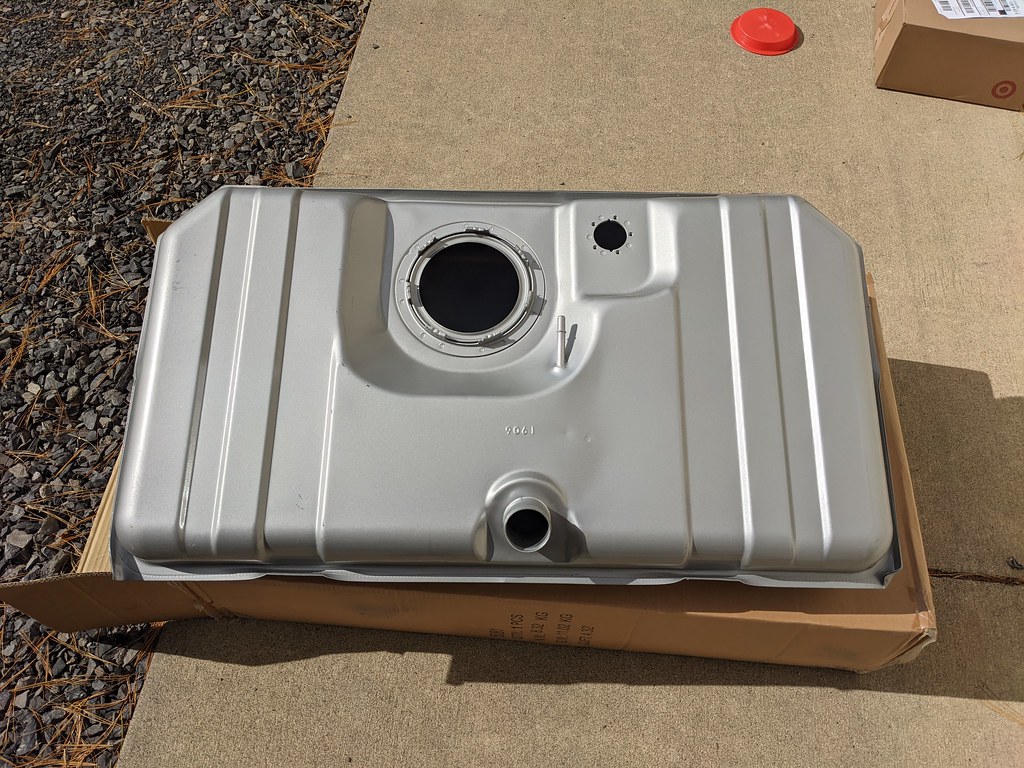
Corner pickups
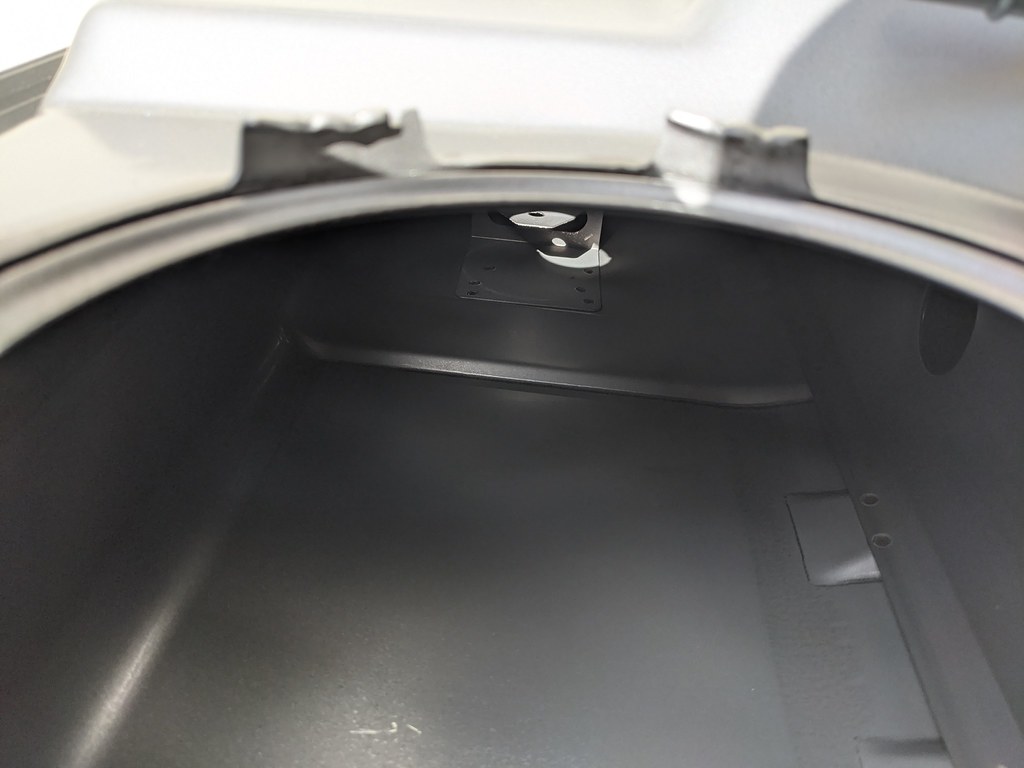
Internal baffling.
All for now, but I'll be adding parts as I now need a transmission, intake and everything else to get this back together.
Cheers,
Ryan
1955 Nomad project LC9, 4L80e, C5 brakes, Vision wheels
1968 Camaro 6.2 w/ LSA, TR6060-Magnum hybrid and etc SOLD
1976 T/A LS1 6 Speed, and etc. SOLD
Follow me on Instagram: ryeguy2006a
10-20-2020 #597 Registered User
- Join Date
- Jul 2008
- Posts
- 454
Man I dropped in right in time! I had a nasty L33 (aluminum 5.3) I was trying to clean up and this 1-2 combo worked for me.
Try using purple power foaming all purpose citrus cleaner, can't miss it, clear neon orange bottle. That'll degrease the block really well and clean the aluminum up too.
https://www.walmart.com/ip/Purple-Po...32-oz/16879848
If you want to go the extra mile get aluminum brightener ( I usually get the Napa brand). THIS IS AN ACID!!!!!! Just want you to be aware of this. Too much time on aluminum, painted, or plastic parts will stain it.
https://www.napaonline.com/en/p/MCR1...num+brightener
I learned about this stuff when I was a teenager helping out a detailer. He would use it for really nasty wheels, cleaned them right up with a pressure washer. Once you degrease the engine, wet it down, spray this stuff on (don't inhale it, you'll be locked up for covid), let it sit long enough to grab a long bristle brush, agitate the area you're cleaning, then rinse it off. I would recommend trying it on a head you aren't using, cover/oil pan, or the back of the block to try it out.
Brush I use, works great, but acid will take it's affect on it and reduce it's life
https://www.napaonline.com/en/p/BK_7...ut=wheel+brush
My engine and heads looked like it'd just come off the factory hoist when I was done. Be wary of using the acid on the machined flats of the engine/heads, might leave chemical streaks.
Good luck!*Jeff*
Project Salty - 1964 4 door Malibu, beaten, neglected, red headed foster child
Cammed LQ4 / T56 Swap Project Thread <-click to read! 😁
10-21-2020 #598
Registered User
- Join Date
- Sep 2009
- Posts
- 2,705
Right on man, thanks for the tips!
1955 Nomad project LC9, 4L80e, C5 brakes, Vision wheels
1968 Camaro 6.2 w/ LSA, TR6060-Magnum hybrid and etc SOLD
1976 T/A LS1 6 Speed, and etc. SOLD
Follow me on Instagram: ryeguy2006a
10-21-2020 #599
Registered User
- Join Date
- Jul 2008
- Posts
- 454
Hope it cleans up for you as well as mine did.

Found pics of the engine. After I bolted worked heads and freshly painted tins on it I knew I had to do something.
Money shot
*Jeff*
Project Salty - 1964 4 door Malibu, beaten, neglected, red headed foster child
Cammed LQ4 / T56 Swap Project Thread <-click to read! 😁
10-21-2020 #600
Registered User
- Join Date
- Sep 2009
- Posts
- 2,705
Did you add anything to protect it from future oxidation?
1955 Nomad project LC9, 4L80e, C5 brakes, Vision wheels
1968 Camaro 6.2 w/ LSA, TR6060-Magnum hybrid and etc SOLD
1976 T/A LS1 6 Speed, and etc. SOLD
Follow me on Instagram: ryeguy2006a

 Reply With Quote


