

Results 561 to 580 of 808
-
05-07-2020 #561

 Registered User
- Join Date
- Sep 2009
- Posts
- 2,709

Thanks Clint!
I've been busy over the last week, slowly cleaning and reinstalling parts. One item I've been meaning to address was that my rear tires kept rubbing no matter what I did for a spacer. So as I was taking measurements from the hub to the inner/outer wheel houses I was getting the same measurements. I hadn't noticed until recently though that the quarter panel/outer wheel lip was about 1/4" wider on the driver's side. That means that it's been my driver's side that was rubbing this whole time, but also meant that I needed to trim off this excess... Out comes the jig saw. I used a jig saw rather than a cut off wheel because of heat. In my thought process, it was the better of two evils. It worked well, but I did stuff a little paint off. Nothing that a touch up brush can't fix though.

I ordered what I hope to be one of the last $100 batch of parts for the car. Rear package tray corner trim, new dome light bezel, door jamb vents, door panel emblems and new door lock knobs. I also have the plastic piece that goes under the pedals that needs to be cleaned up and re-installed.
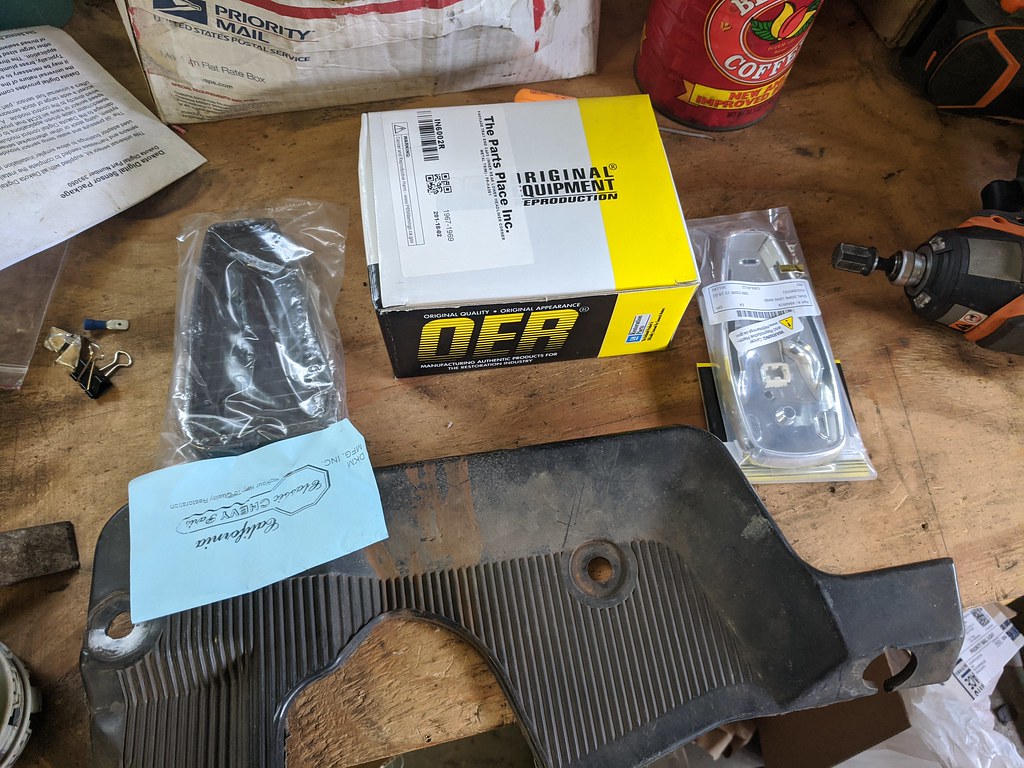
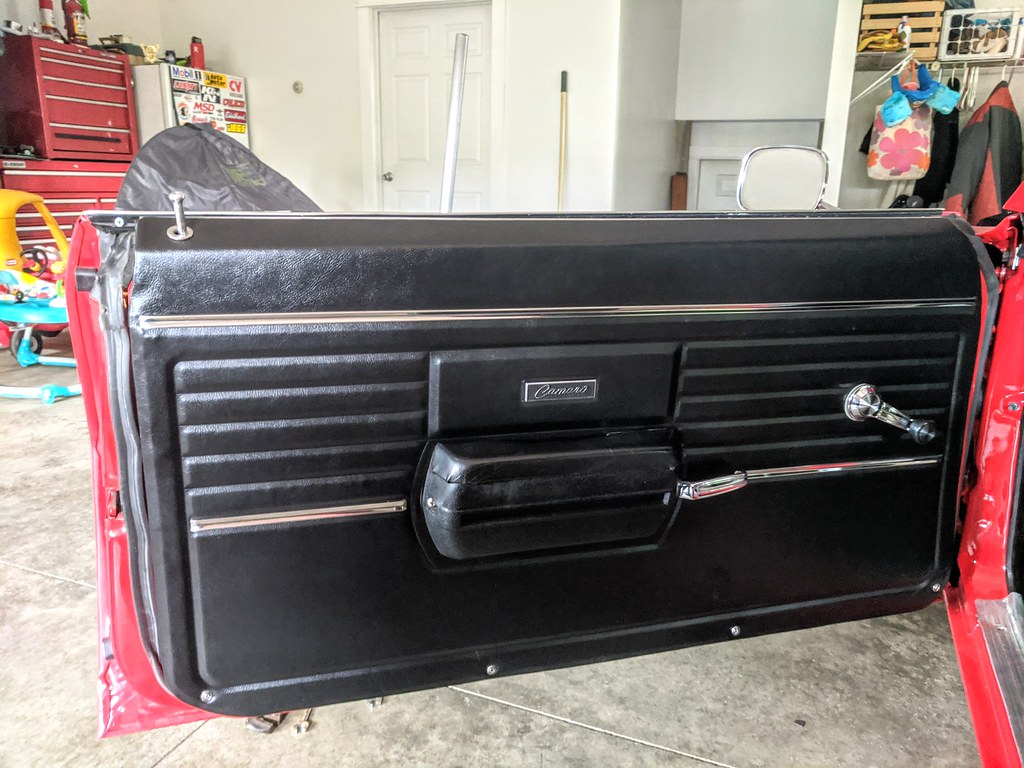
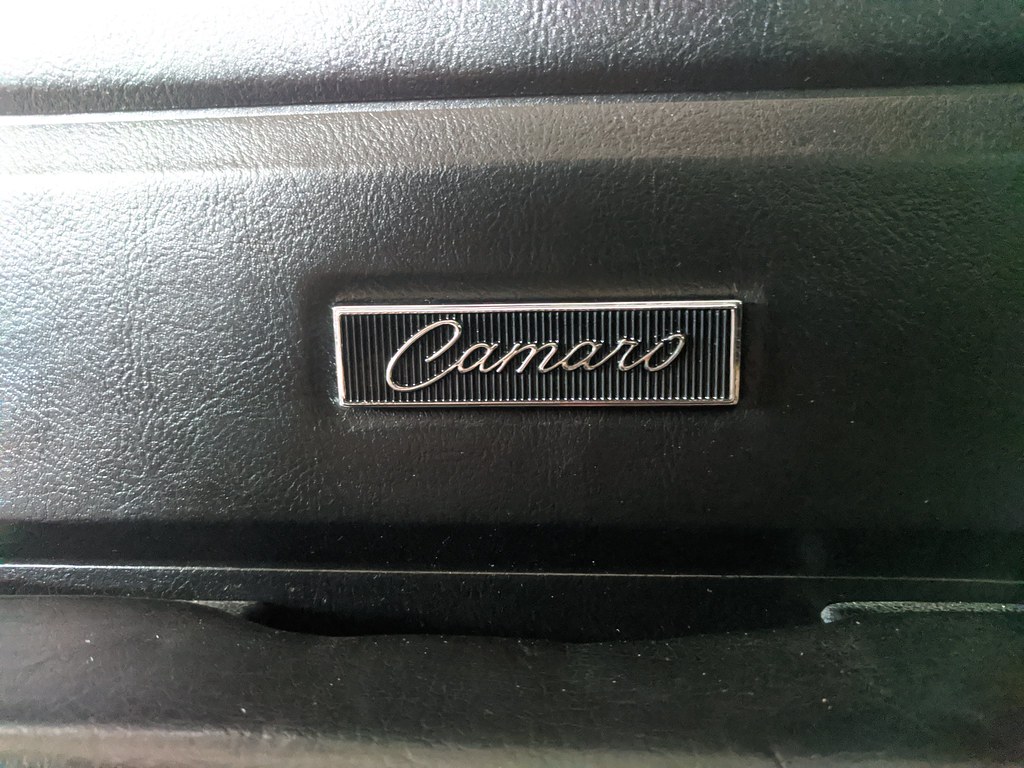
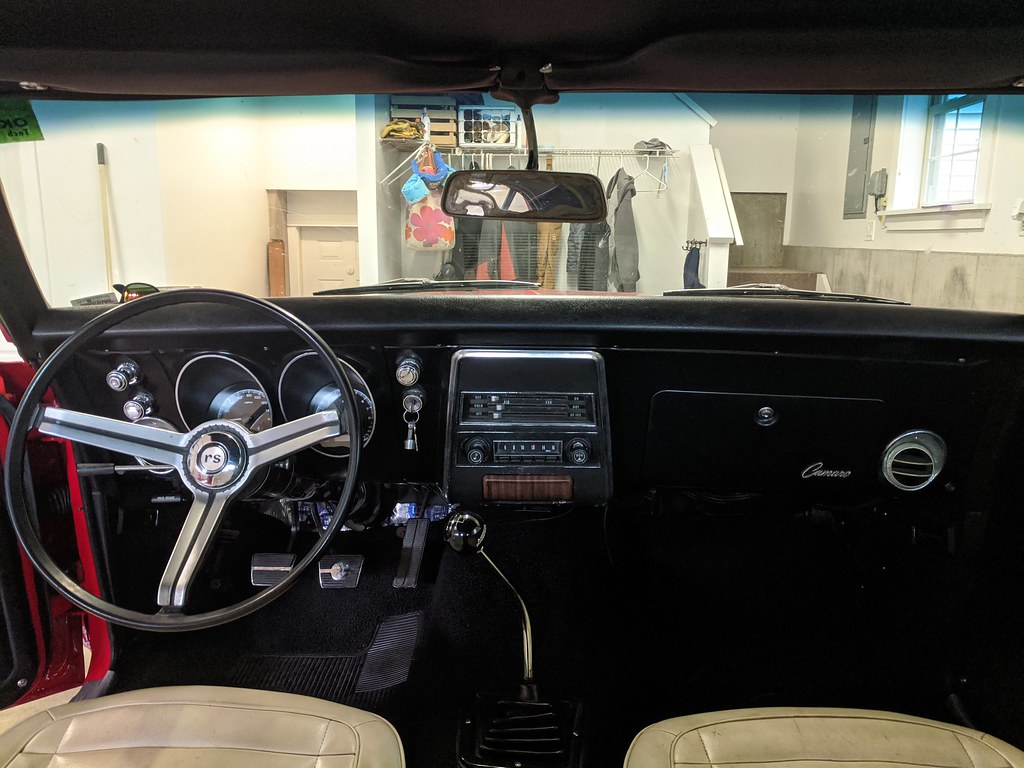
I was so excited to finish up the restoration of the door panels with the new emblems. Not bad for some old original parts and a little elbow grease.
Finally, I was able to button up all of the wiring and give the car a good thorough cleaning.
Now that it's all buttoned up, it was finally time to get her out for a test drive with the new Terminator X ECU. Earlier in the week, I went through the setup wizards that the system provides giving basic info like cubic inches, cam profile (stock, mild or aggressive), and a few other questions. Once it built the tune for me, I downloaded it to my laptop and made a few changes that cannot be done with the handheld 3.5" touch screen. Sunday came around and I figured it was time to see if all the hard work paid off. Turned the key and it came to life! It was very rich, but it was a fresh tune and doesn't start the learning process until 160*, so I assumed it was part of the process. It idled and ran ok, (~10-11 AFR) so I figured it was time to take it around the block. It was sorta bucking and popping which again, not warm enough to learn, but made it to the end of the main road, pushed the clutch in and it stalled on me. Cranked, and cranked, but wouldn't start. Hmmm... gave it a little throttle and it fired right up so I got on it a little and we were up and running. As I'm rowing through the gears, it really came to life at about half throttle and just ripped up to about 5k! Now that's what I remembered! I was going to take a big loop, so I went a little farther down the road to turn on a side road, pressed in the clutch and it stalled. By now it's up to temp but wasn't learning the way I was hoping and it repeated the same story, didn't want to idle and would stall, but ran great past half throttle. Brought it back home and parked it.
I reached out to a friend (Thanks Andrew!!) of mine who has a lot of experience with the Holley EFI and I sent him my tune. He came back to me within a few minutes and asked what MAP sensor I was using. I told him the stock LS1 MAP, and he came back to tell me that the ECU was looking for the internal MAP sensor, not the one on my engine. Because of that the ECU thought I was at WOT the entire time!! I know I changed that setting, but obviously didn't save correctly. Monday night was rainy, but then Tuesday afternoon my wife and I decided to go for a drive to get away from all the craziness. I loaded up the revised tune and immediately(literally the moment it started) the idle was clean, crisp and leaned way out from where it was. (~14.5-15 AFR) I was 110% happier with this experience. I'm taking almost the same route, and get to the end of the road before the main two lane and no idle issues at all. Settled in right where it was commanded to. Took off on the highway and it had all the get up and go I remembered. I slowed down 45-50 in the reduced speed area and it started popping just slightly, but it hadn't hit *160 yet so it wasn't in closed loop learn mode yet. Then go through the drive and once it hit the *160, I could tell it was learning as the AFR started to lean out and the exhaust notes were cleaned up. By the time I got a mile or two up the road it was running as good if not better than with the stock ECU. We continued on with zero issues and the car was running beautifully. I couldn't be happier with the new ECU and that was just with about 20 minutes of run time. I want to tweak the VE tables to really dial in the idle and also integrate my VSS so that I can add in more tuning options with speed in the mix.
Best of all, the wheels no longer rub in the rear!
I'll try and get some screenshots from the laptop next time I'm in the program to maybe help others with similar issues.
Cheers,
Ryan
1955 Nomad project LC9, 4L80e, C5 brakes, Vision wheels
1968 Camaro 6.2 w/ LSA, TR6060-Magnum hybrid and etc SOLD
1976 T/A LS1 6 Speed, and etc. SOLD
Follow me on Instagram: ryeguy2006a
-
05-07-2020 #562 Registered User
- Join Date
- Nov 2010
- Location
- Ventura County CA
- Posts
- 556
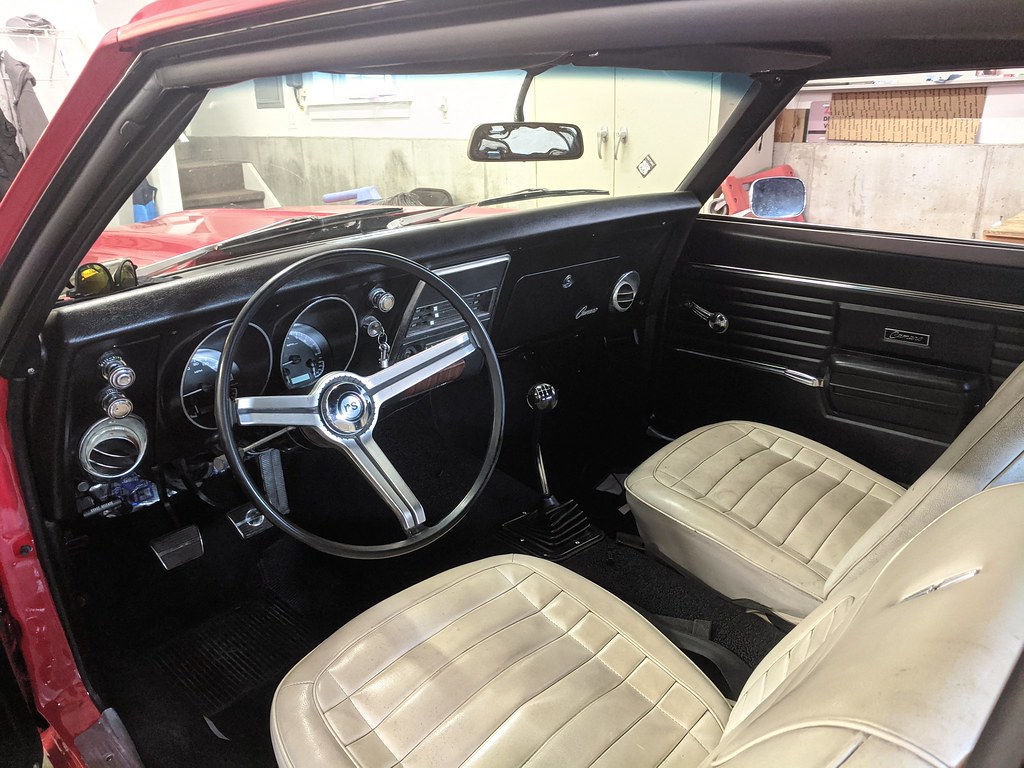
The interior looks stellar! I love the clean original look. You might consider taking some all purpose cleaner to the seats; I bet they would brighten up to new.
Clint - '70 Nova "restomod" cruiser & autocross family car

05-08-2020 #563
Registered User
- Join Date
- Aug 2008
- Location
- Iowa
- Posts
- 304
Nice work with the jigsaw!!
05-29-2020 #564
Registered User
- Join Date
- Sep 2009
- Posts
- 2,709
Thought I'd post up some pictures of the car out in the wild. I took the car on a cruise to Watkins Glen, which is a really neat town that's about 45 mins from me. Most probably know it from the international racetrack, but it's also a really neat town. My wife and I took the day off from all of the craziness that's been happening the last few months and just went for a cruise. We stopped and got some icecream so I grabbed a photo and I also stopped at a Harley store that was on the way to snap some better pictures of the car.
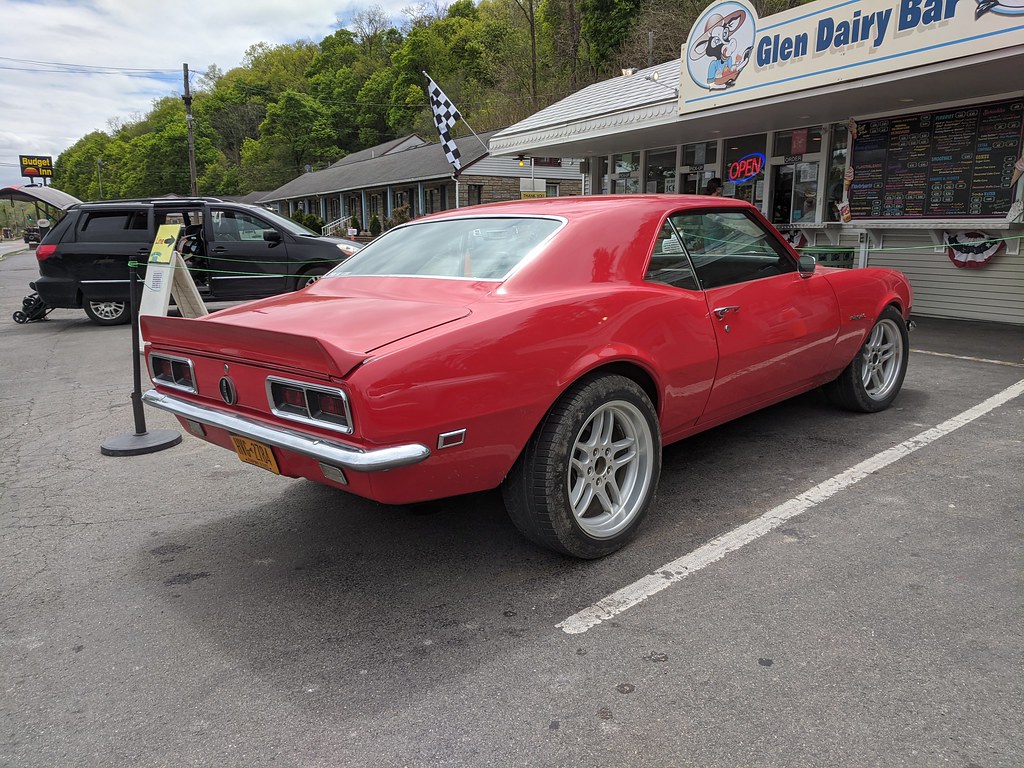

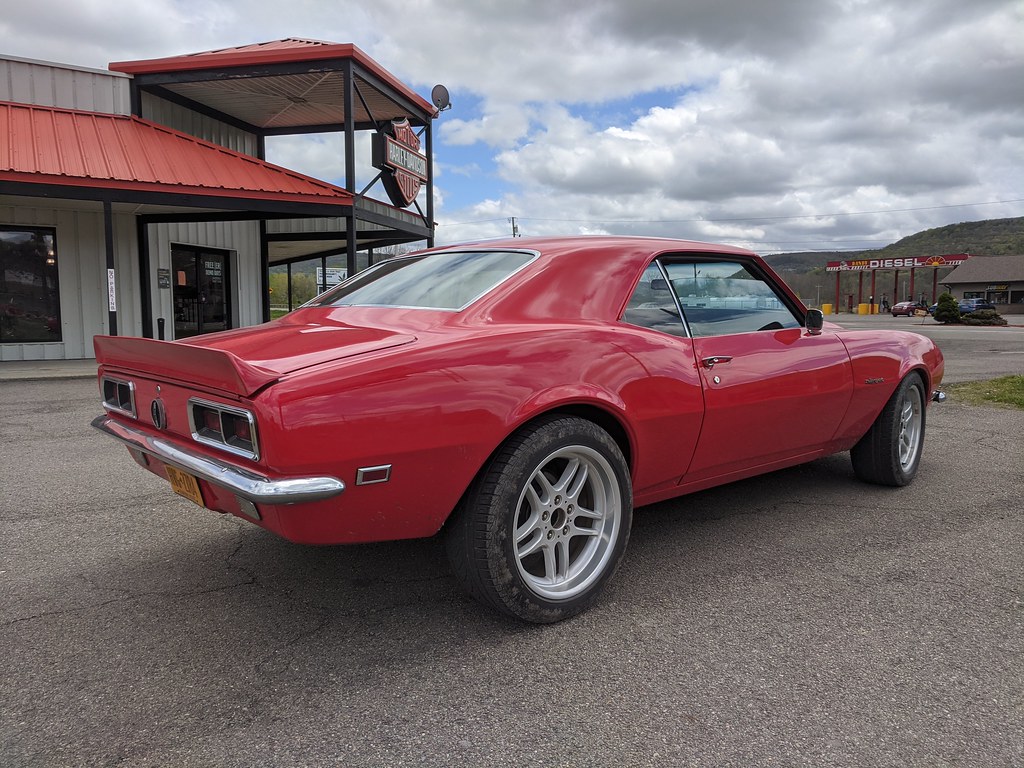
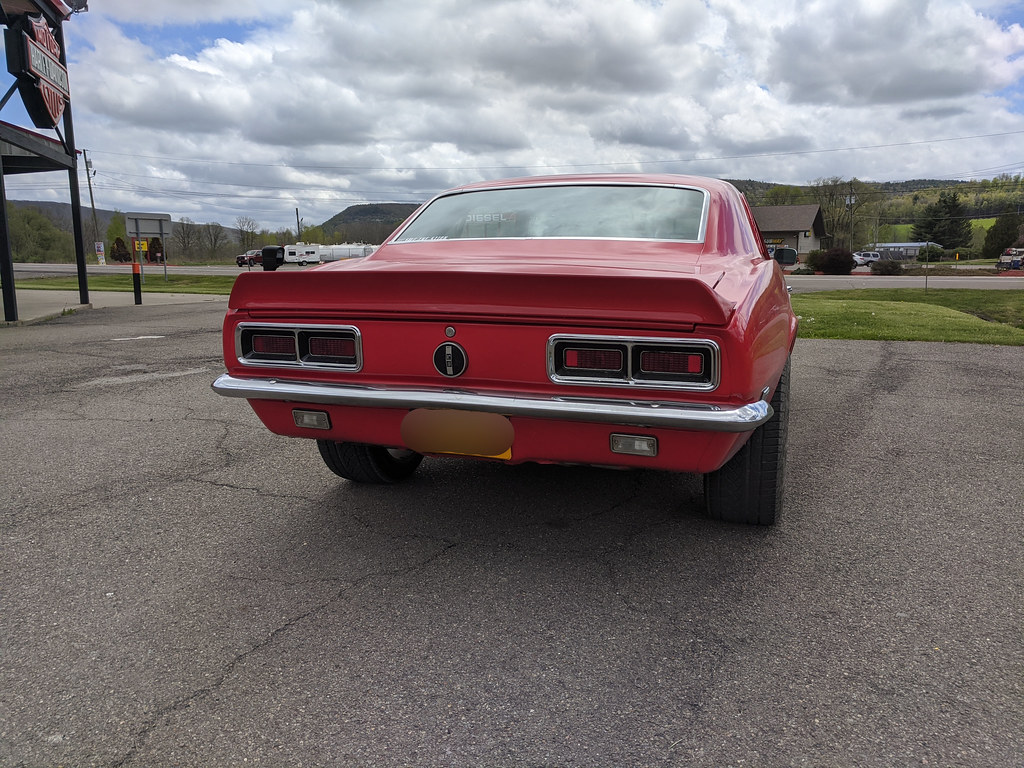
I need to find a much better place to take a picture and washing it would help too haha.
Cheers,
Ryan
1955 Nomad project LC9, 4L80e, C5 brakes, Vision wheels
1968 Camaro 6.2 w/ LSA, TR6060-Magnum hybrid and etc SOLD
1976 T/A LS1 6 Speed, and etc. SOLD
Follow me on Instagram: ryeguy2006a
06-01-2020 #565 Registered User
- Join Date
- Sep 2017
- Posts
- 825
Great job Ryan. It's pics of Saturday cruises of a guy who has actually finished and driving the car that keep us all plugging towards the finish line.
TANKMASTERJ
https://www.pro-touring.com/threads/...touring-Camaro
Jasons Toys
67 Camaro White Lightning LMR LS7 powered, Speed tech Front and Rear.
2023 Rapid Blue ZL1 the Blue Devil
2000 HD Softail
1989 CBR Hurricane anniversary edition
06-17-2020 #566
Registered User
- Join Date
- Sep 2009
- Posts
- 2,709
Keep it up man, your project is looking great!
Haven't been doing anything to my car, but driving it which feels really nice. I've been playing with the Holley software and reading up all of the tables that are in the more advanced features. I've been taking it on a drive about once a week with my wife at lunchtime which has been really nice. The car is a blast to drive and I've been trying to improve on things ever so slightly to make it that much better.
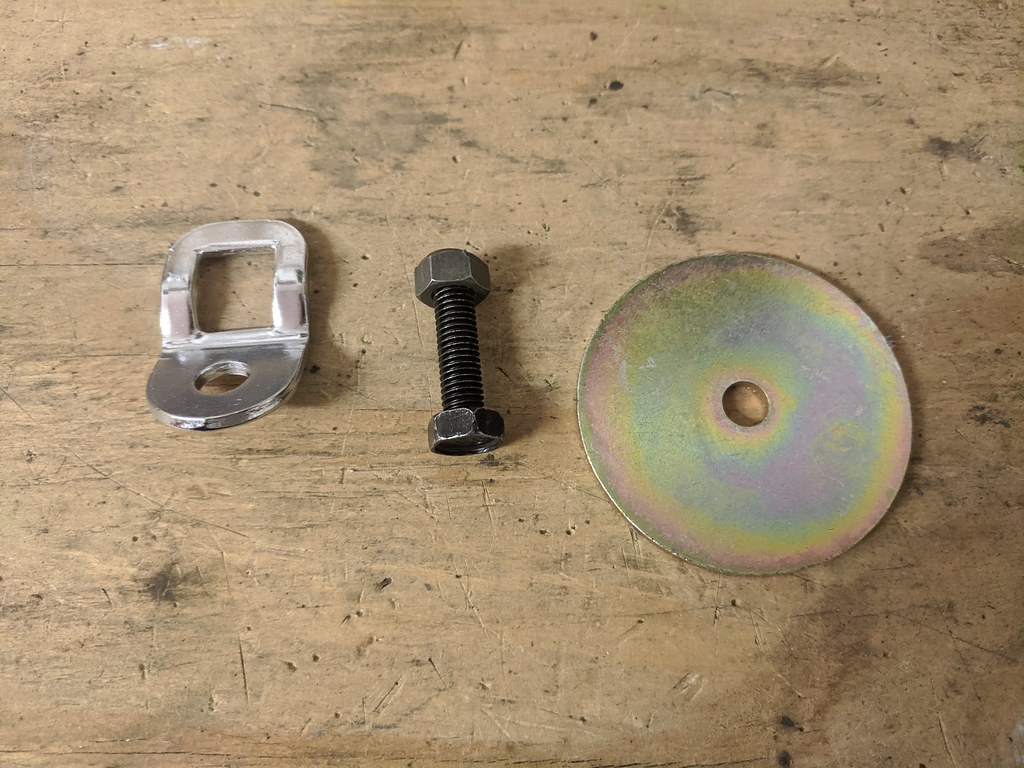
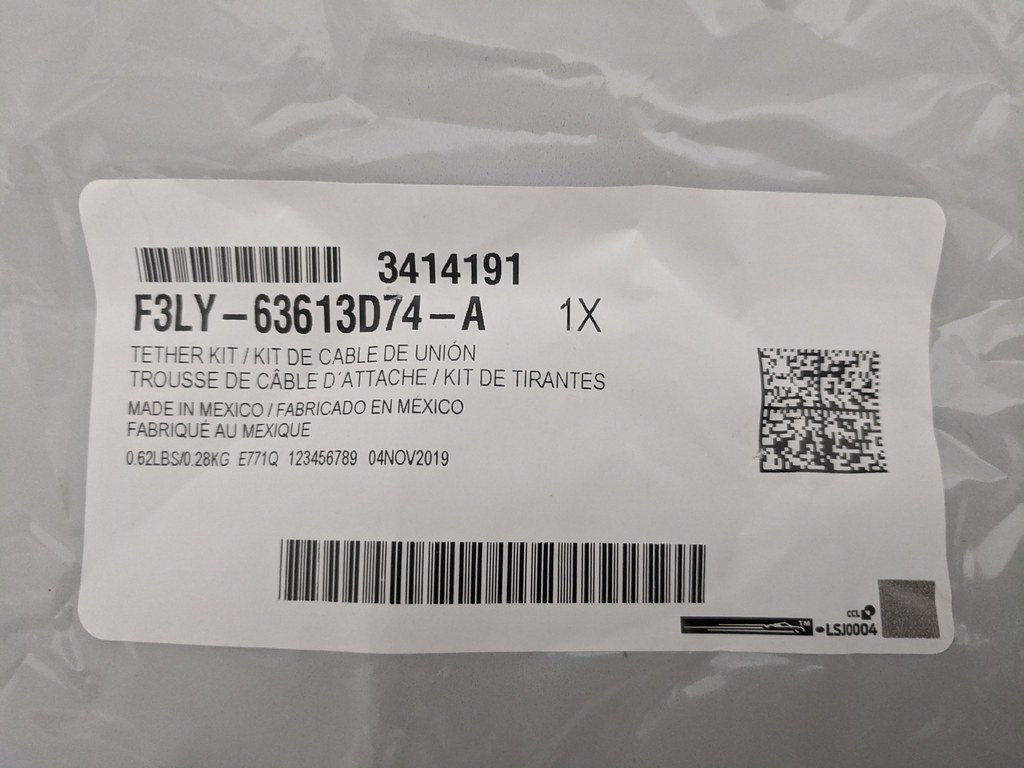
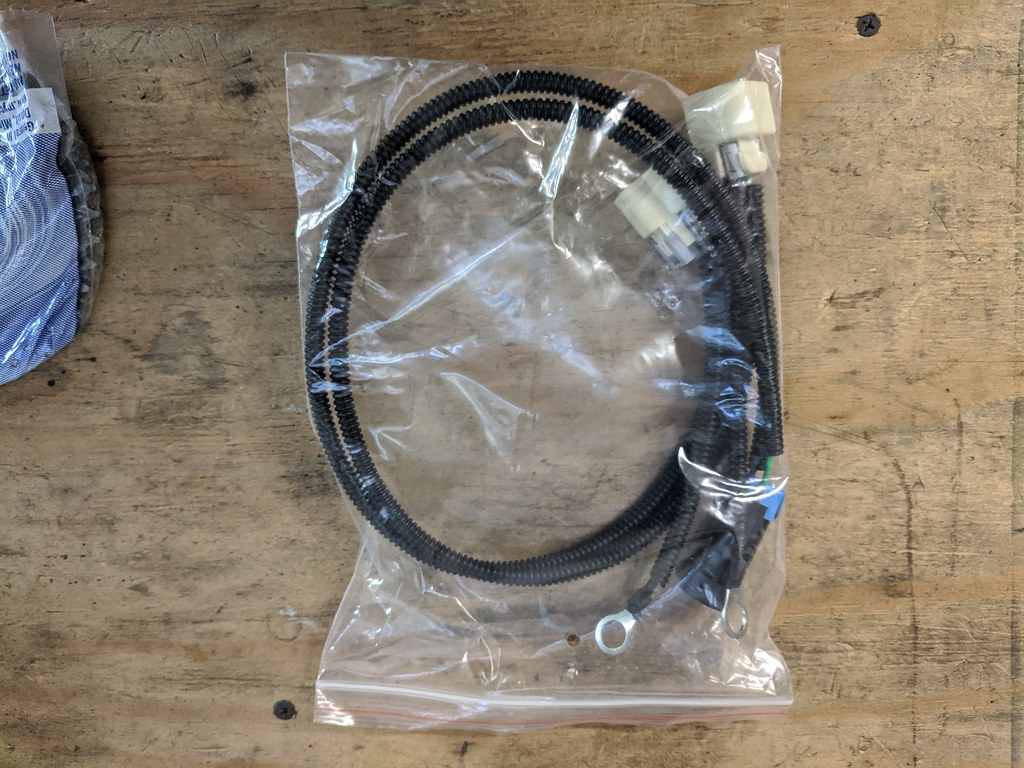
Eventually this will be a cruiser for my family and I want to be sure that my two boys are safe and comfortable. I've been searching online high and low for a set of retro-fit LATCH hooks and a few months ago I finally found a set that will work for me. They are from Ford to retro-fit some model year Mustangs and Crown Vic's, part number F3LY-63613D74-A. As I always do, I price matched online and found that TASCA Ford has them at a unit price of $0.01! I couldn't even come close to making them myself for that price!
I thought that it must be an error, but I added 6 to my cart (3 for each seat) and hit the check out button. It ended up coming to around $11 with shipping and arrived about a week later. They are going to work perfectly, but I need to get the rear seat installed so that I can make sure that the seats are centered squarely in the rear seat. I'm hoping to install those soon, but here's a picture of what you get.
I've always really liked the way the LS motors look with remotely mounted coils. I found a great deal on a set of brackets, coil extensions and wires. Since there is a limited driving season in NY, I'm going to leave this for a winter project.
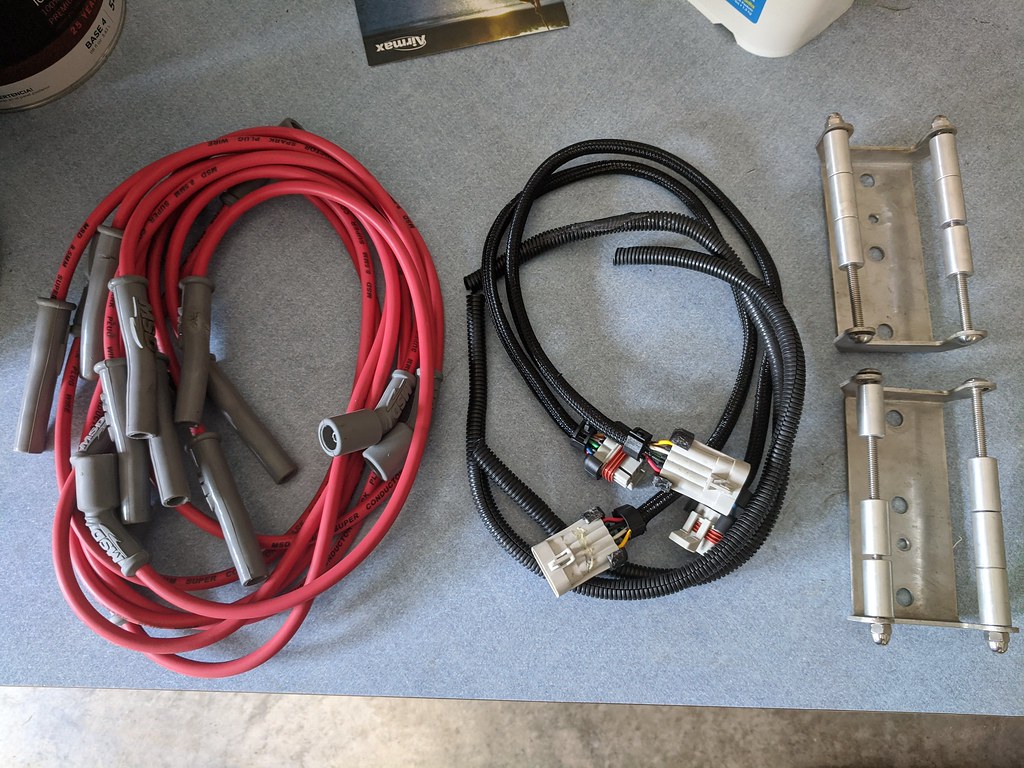
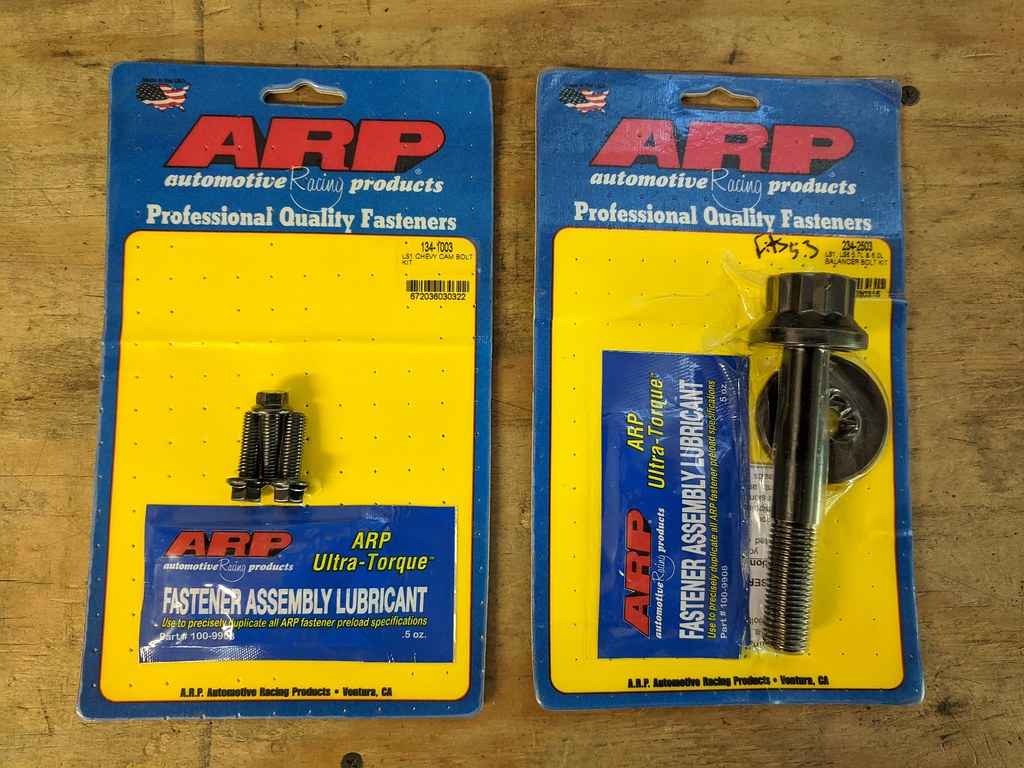
Speaking of projects... I've also started collecting parts for another project, but I'm just going to tease with a few pictures.


One last thing is a maintenance item... I've sprung a leak. I'm not sure yet, but my fuel tank has started to leak. I'm assuming it's leaking from the adapter ring that I installed. Unfortunately I just filled up the tank, so I'm trying to drive it a little more before I drop and drain it to see what failed. While it's out, I've also ordered a new fuel sender so that I'll be able to have a more accurate fuel level reading. I've been using the 5th gen pump's sending unit which is something like 250-40 OHM full empty, but Dakota Digital has a preset for 240-33 OHM. So I bought a new Bosch universal sending unit so it will a little easier. The DD gauges are programmable, but I find it more difficult to fill the tank 1/3 at a time and hope it's right, than just installing a new sending unit and go with their presets.

I'll update the thread when I have more progress.
Cheers,
Ryan
1955 Nomad project LC9, 4L80e, C5 brakes, Vision wheels
1968 Camaro 6.2 w/ LSA, TR6060-Magnum hybrid and etc SOLD
1976 T/A LS1 6 Speed, and etc. SOLD
Follow me on Instagram: ryeguy2006a
06-17-2020 #567 -Moderator/Sponsor-
- Join Date
- Apr 2001
- Location
- The City of Fountains
- Posts
- 15,975
Nice update! Be very careful when doing the remote coils. It is super easy to loose track of which coil goes to which cylinder, etc ..
1970 GTO Version 3.0
1967 Cougar build
GM High-Tech Performance feature
My YouTube Channel Please Subscribe!
Instagram @projectgattago
Dr. EFI
I deliver what EFI promises.
Remote Holley EFI tuning.
Please get in touch if I can be of service.
"You were the gun, your voice was the trigger, your bravery was the barrel, your eyes were the bullets." ~ Her
06-22-2020 #568
Registered User
- Join Date
- Sep 2009
- Posts
- 2,709
Good advice, thanks Andrew.
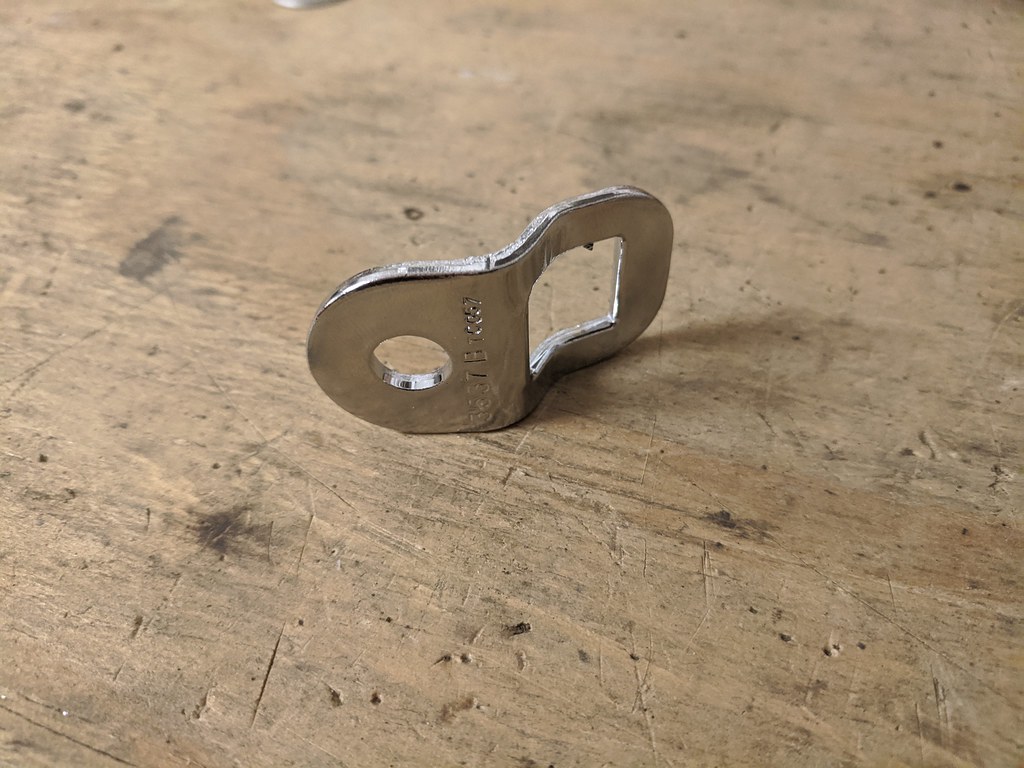
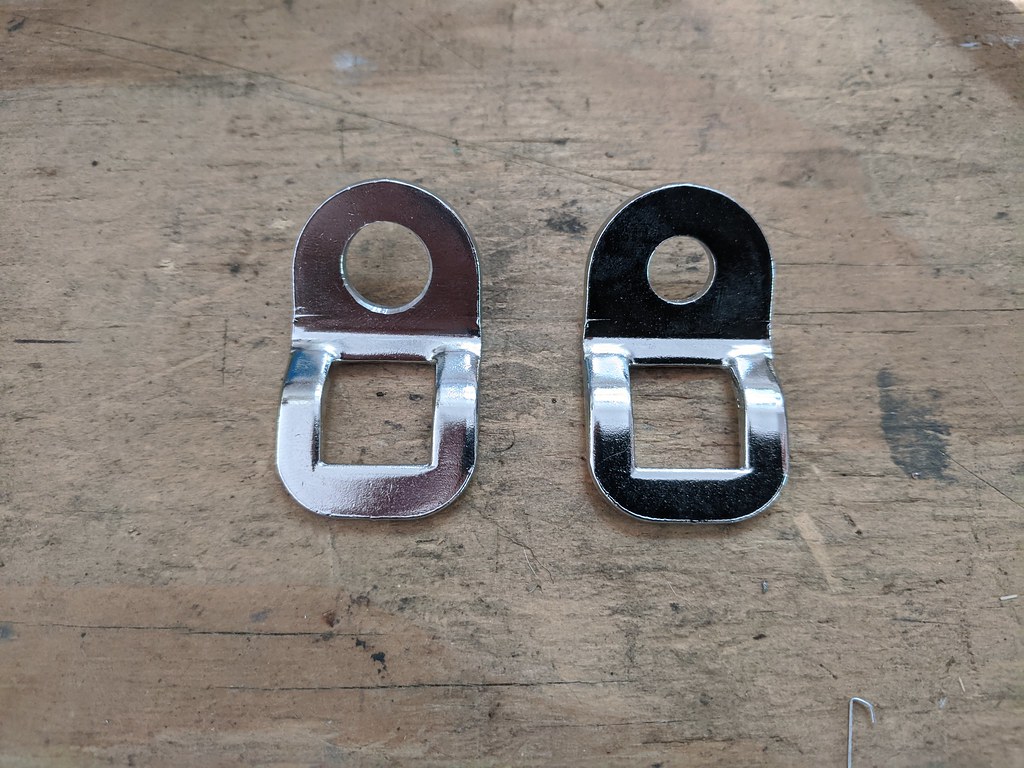
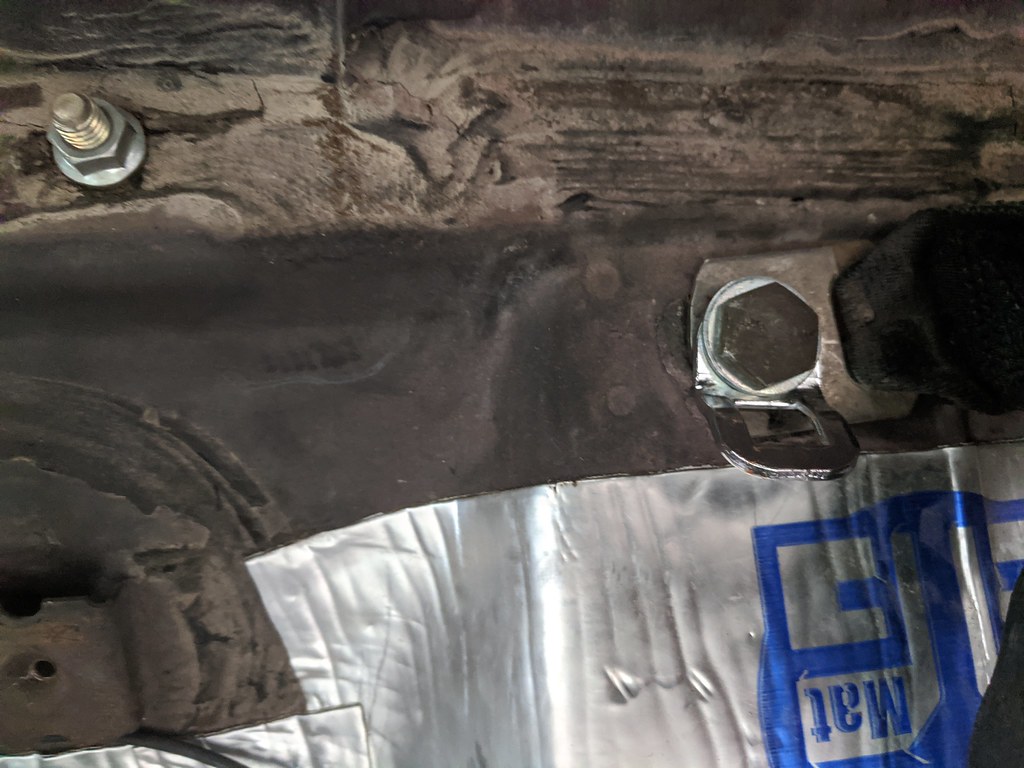
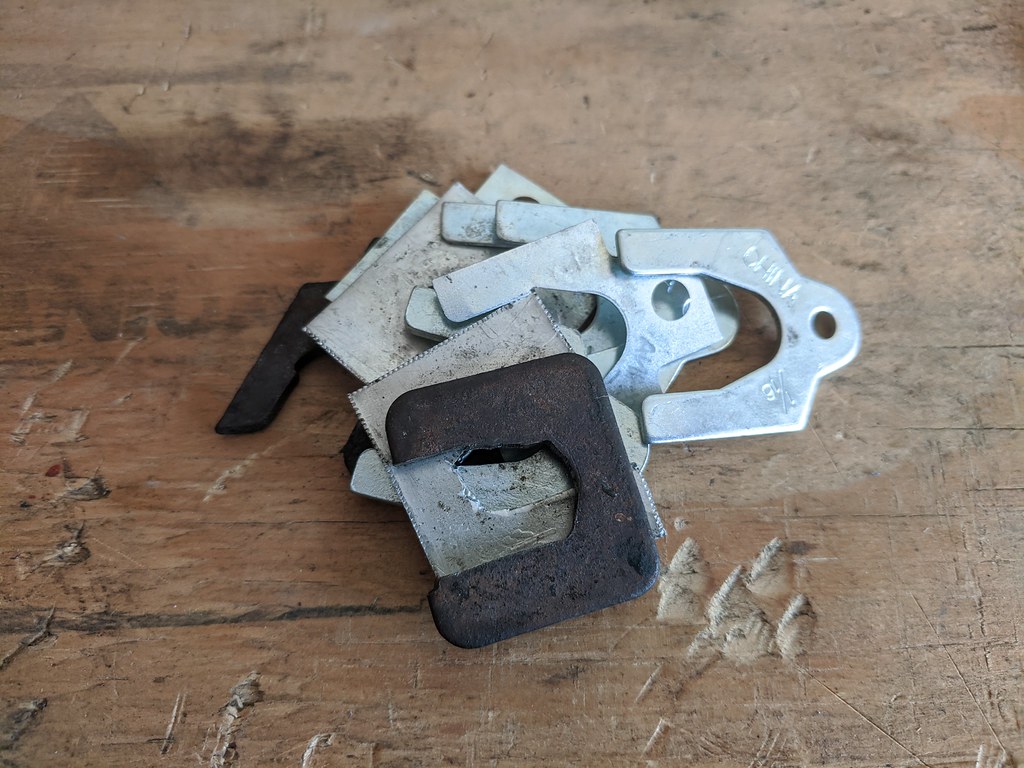
I'm finally getting around to installing the LATCH hooks for my car seats. I've been mulling over how to install these for a while, and after much consideration I've decided to utilize the same bolts as my stock seat belts. This required me to slightly enlarge the hole on the LATCHES. I considered that it would give less material for the hook to bolt to, but at the smallest part of the bolt hole it's as thick as the part that mounts the car seat's LATCH hook. I felt OK with this and moved forward with the install.
Then bolted them down to the stock position.
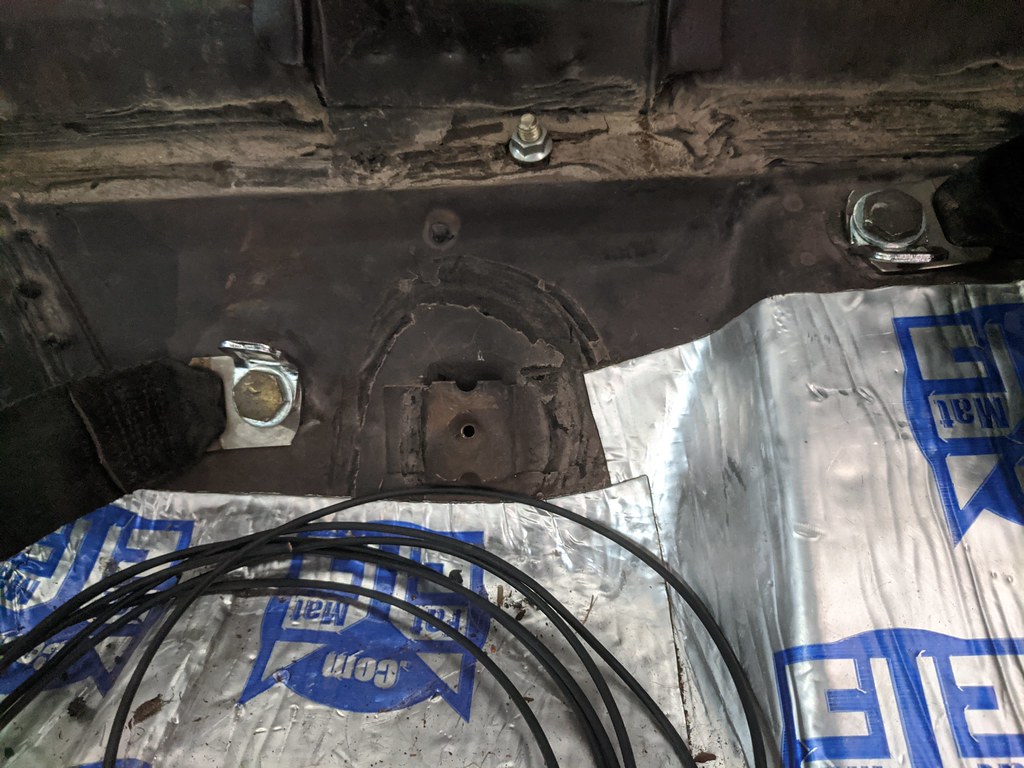
Now, once I got the rear seat back in place, it did interfere with the main support structure, so I had to tap the outer one's down slightly to be parallel with the floor section in that spot.
Then I centered the rear latches in the rear support structures using the large flat washer and hardware in the kit. That part was super easy. Drill the hole, install in the proper order, torque and done.
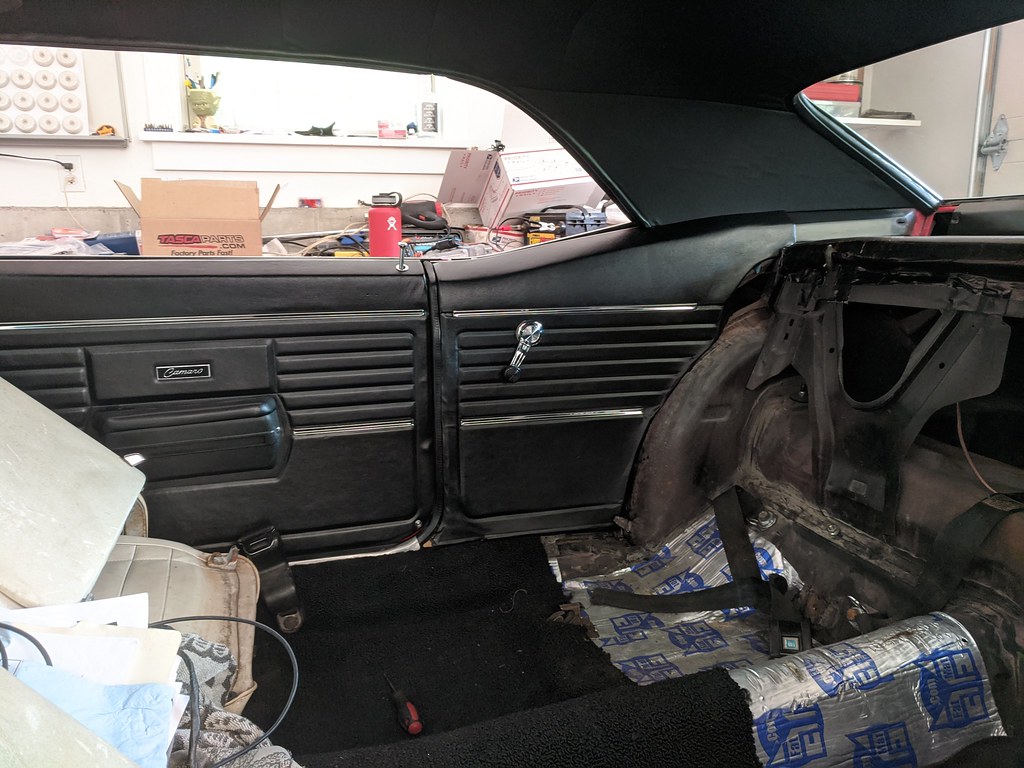
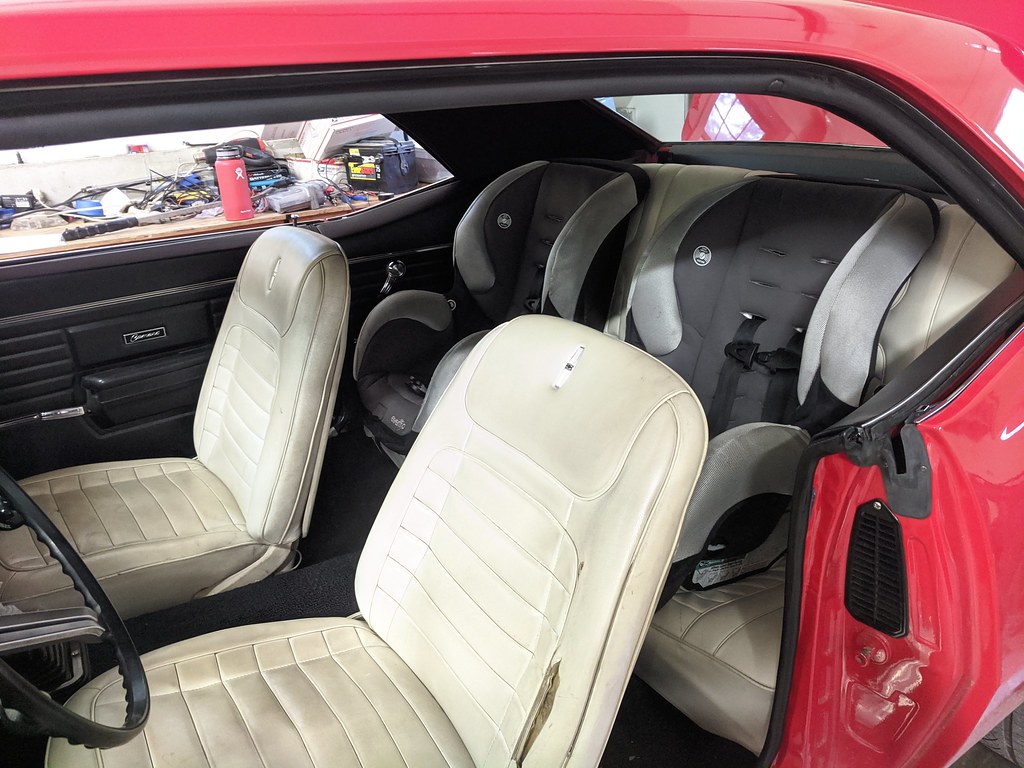
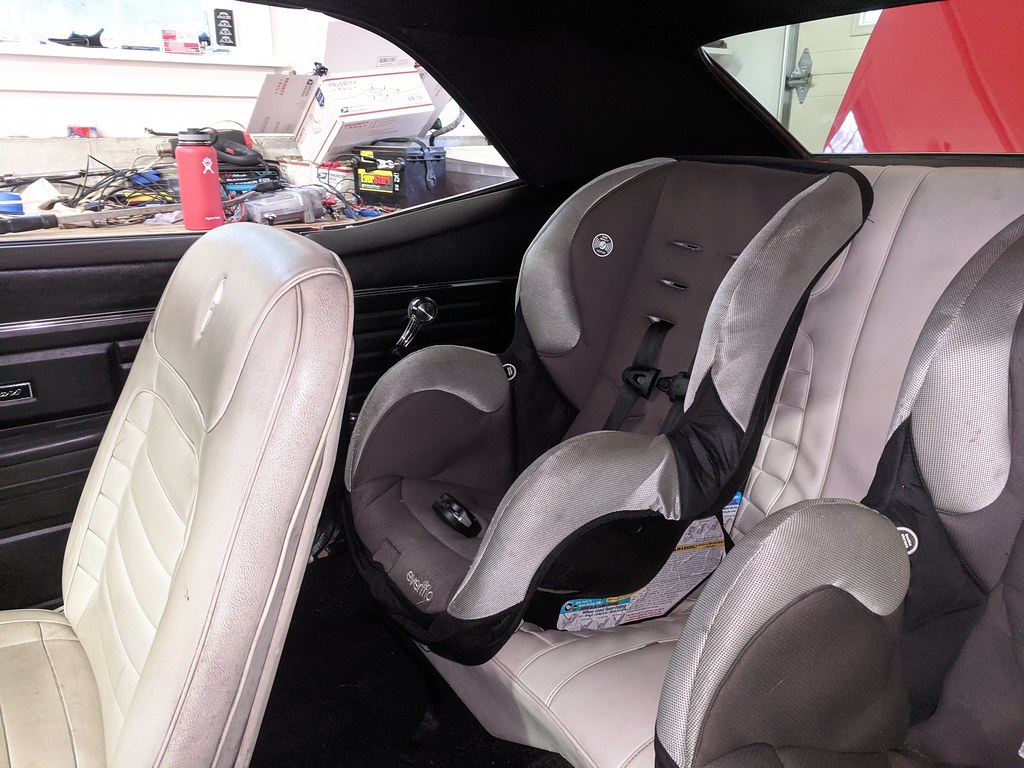
Next I was thrilled to finally install the panels that I refinished. They turned out incredibly well using SEM vinyl dye.
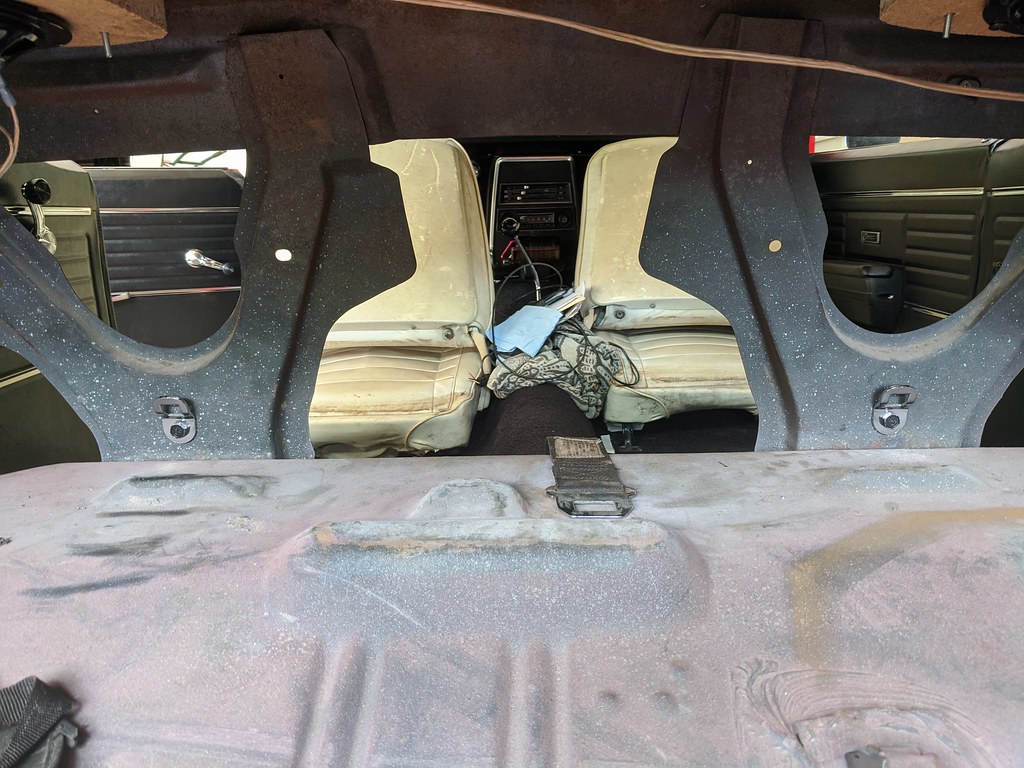
Now because I didn't want to cut any holes in the seats or rear package tray, this is the most difficult part of the install. It meant that I had to put the rear seat back in place, put both seats in the back, clip on the rear support strap over the rear seat, then I could install the rear seat normally. What's nice about it is, the straps seamlessly disappear into the truck and look really clean from the outside looking in. It just makes installing the rear seat bottom incredibly difficult.

Then I just took my time and slowly moved the rear seat bottom in place. I basically had to move inch by inch so that everything would line up properly. It also took some work to get all the straps nice and tight, but I feel so much better about this than using the stock seat belts. Once my son get's older and grows out of this seat I'll have to figure out a rear shoulder strap similar to what Clint (Bandit) did on his Nova. I'm stoked to have a completed interior!!
Full disclosure, please do this at your own risk. This is not a how-to and I'm not an engineer. I'm using parts from Ford that weren't designed for this car, but feel comfortable my installation is much safer than the 50+ year old seat belts installed in the car currently.
Now as luck would have it, my car is up on jack stands again. I had an appointment this past Friday at the shop for a proper alignment using Speedtech specs, installing new smaller diameter 245/40/18 tires and inspection. However, I got a call that they couldn't perform the front end alignment because of a bad outer driver side tie rod. I was still able to get the inspection, so that's good. When I got it home, I immediately put it up on jack stands, pulled the wheels off and confirmed that it was toast. Then luckily as I was pulling the wheels off I was checking everything else and wiggled the wheel studs and I had two loose on the driver's side, then checked and had two loose on the passenger side. Not sure what happened when I was drilling them out in my dad's drill press, but it looks like I bored the holes too big. I used a 39/64 drill bit for the .625 Knurl studs, but maybe there was some run out on his drill press.
So after considering all of my options (new studs with a larger knurl, CPP C5 spindles, and etc) I decided to give Flynbye (Ed Miller) a call and he hooked me up with a set of his custom Aluminum hubs with new 1/2 -20 wheel studs already installed. Great value and are about half the price of any other custom wheel hubs I could find online. I'm hoping to have them soon and get the car back on the road. I also bought all of the parts to hopefully fix my gas tank. Hoping to get that figured out too.
I rescheduled my alignment and tire install appointment for 7/6, so hopefully all of my parts arrive by then.
Cheers,
Ryan
1955 Nomad project LC9, 4L80e, C5 brakes, Vision wheels
1968 Camaro 6.2 w/ LSA, TR6060-Magnum hybrid and etc SOLD
1976 T/A LS1 6 Speed, and etc. SOLD
Follow me on Instagram: ryeguy2006a
06-22-2020 #569 Registered User
- Join Date
- Aug 2015
- Location
- charlotte
- Posts
- 924
Looks good, the kids will love it
06-25-2020 #570
Registered User
- Join Date
- Sep 2018
- Posts
- 49
Looks GREAT Ryan!!!
Now get out there and cruise with the boys!
They will grow up with a great memory of how COOL their dad is!
06-26-2020 #571
Registered User
- Join Date
- Sep 2009
- Posts
- 2,709
So I took my wheels off and found this...
1955 Nomad project LC9, 4L80e, C5 brakes, Vision wheels
1968 Camaro 6.2 w/ LSA, TR6060-Magnum hybrid and etc SOLD
1976 T/A LS1 6 Speed, and etc. SOLD
Follow me on Instagram: ryeguy2006a
06-26-2020 #572 Registered User
- Join Date
- Dec 2005
- Location
- TuoCo, CA
- Posts
- 992
How big are the spaces youre running? Had you ever retorqued those?
Steve
'68 Camaro - SBC, TKO600, 3.73 Moser 12-bolt, Speedtech, ATS-AFX, Hotchkis, Forgeline, Ron Davis and C5 brakes (Kore3), Holley Terminator TBI.
Check it Out Here
06-29-2020 #573
Registered User
- Join Date
- Jul 2017
- Posts
- 166
[QUOTE=ryeguy2006a;1333302]Keep it up man, your project is looking great!
Haven't been doing anything to my car, but driving it which feels really nice. I've been playing with the Holley software and reading up all of the tables that are in the more advanced features. I've been taking it on a drive about once a week with my wife at lunchtime which has been really nice. The car is a blast to drive and I've been trying to improve on things ever so slightly to make it that much better.
Eventually this will be a cruiser for my family and I want to be sure that my two boys are safe and comfortable. I've been searching online high and low for a set of retro-fit LATCH hooks and a few months ago I finally found a set that will work for me. They are from Ford to retro-fit some model year Mustangs and Crown Vic's, part number F3LY-63613D74-A. As I always do, I price matched online and found that TASCA Ford has them at a unit price of $0.01! I couldn't even come close to making them myself for that price!
I thought that it must be an error, but I added 6 to my cart (3 for each seat) and hit the check out button. It ended up coming to around $11 with shipping and arrived about a week later. They are going to work perfectly, but I need to get the rear seat installed so that I can make sure that the seats are centered squarely in the rear seat. I'm hoping to install those soon, but here's a picture of what you get.
Thanks for this and the pics. I was planning on doing something similar with mine for my carseat and this helps! I'd like to try to make something that allowed me to install the car seat without having to remove the seats but havent got that far yet.
06-30-2020 #574
Registered User
- Join Date
- Sep 2009
- Posts
- 2,709
No spacer in the front and the rear I ended up with a 1" spacer. I've re-torqued a few times and the lugs have always been very tight when I went to loosen them so they are holding the torque. Originally Posted by eville

Jason, I went back and forth on my options, but decided that in the grand scheme of things that car seats are pretty temporary so I didn't want to overly modify the car for them. I'm not looking forward to having to remove them if I need to, but feel so much safer to me than using the stock seat belts. Plus when I did use the seat belts, the large buckle latch was right at my son's back so I had to put a towel in there for him to be comfortable. I'm very happy with the way they turned out. Once it comes time for booster seats, I'll do something like what Bandit did with his Nova and retro-fit some shoulder harnesses in the rear.
1955 Nomad project LC9, 4L80e, C5 brakes, Vision wheels
1968 Camaro 6.2 w/ LSA, TR6060-Magnum hybrid and etc SOLD
1976 T/A LS1 6 Speed, and etc. SOLD
Follow me on Instagram: ryeguy2006a
06-30-2020 #575
Registered User
- Join Date
- Sep 2009
- Posts
- 2,709
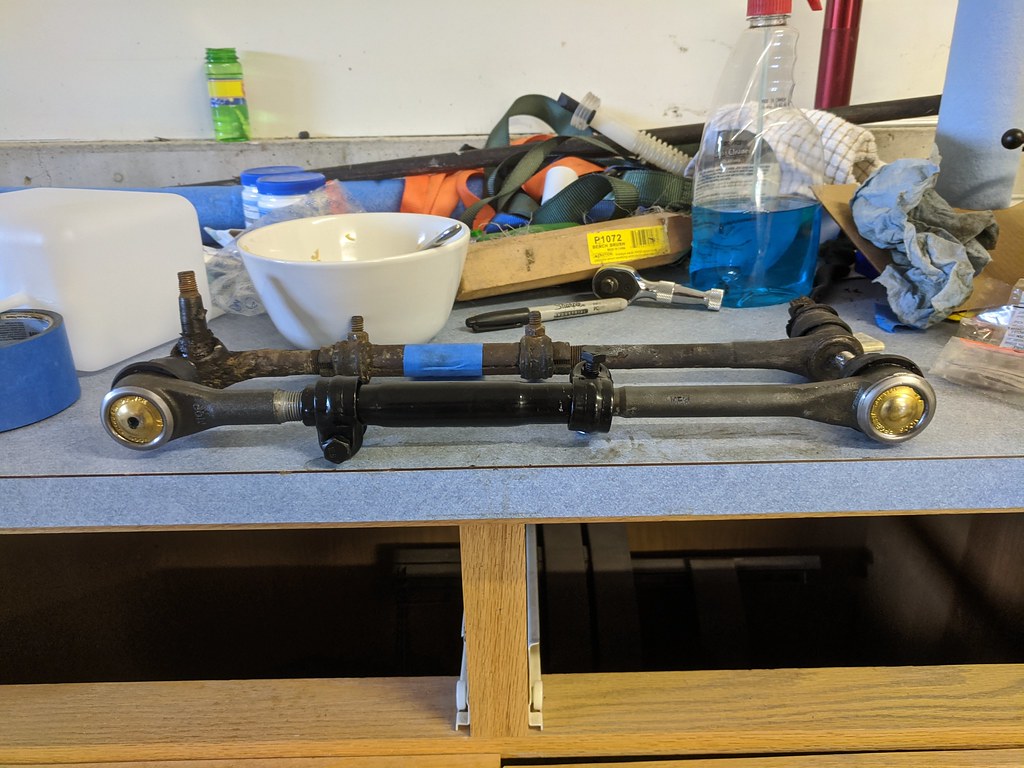
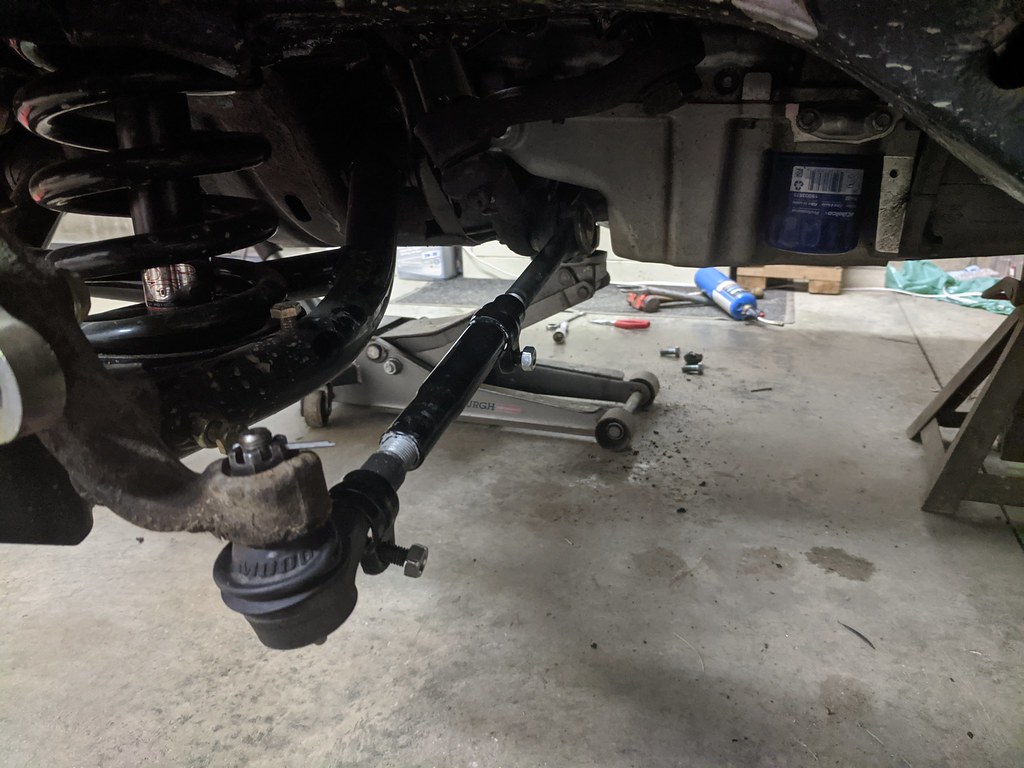
So this tie rod ended up getting expensive... First I got all the parts to fix the tie rods. New Moog inners and outers with new adjusting sleeves. I also grabbed a nice overflow jug from Dorman while I was already making the order.
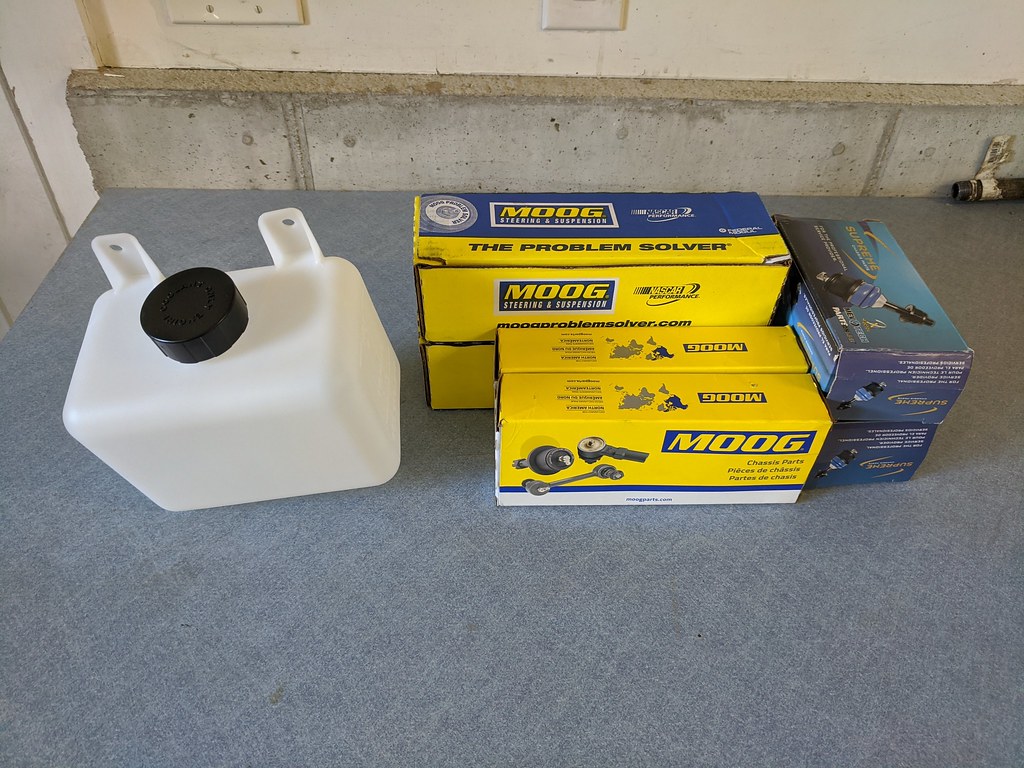
Pulled the old side and got it close to the new assembly. Should be close enough to get me a few miles up the road when it comes time to get it aligned next Monday.
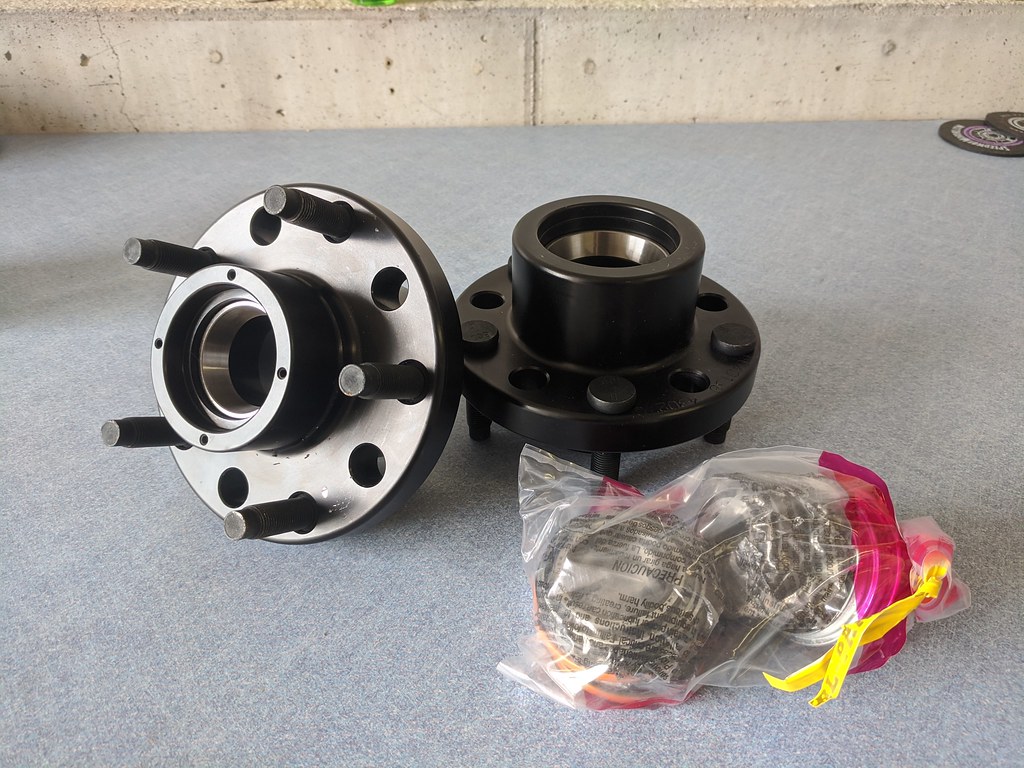
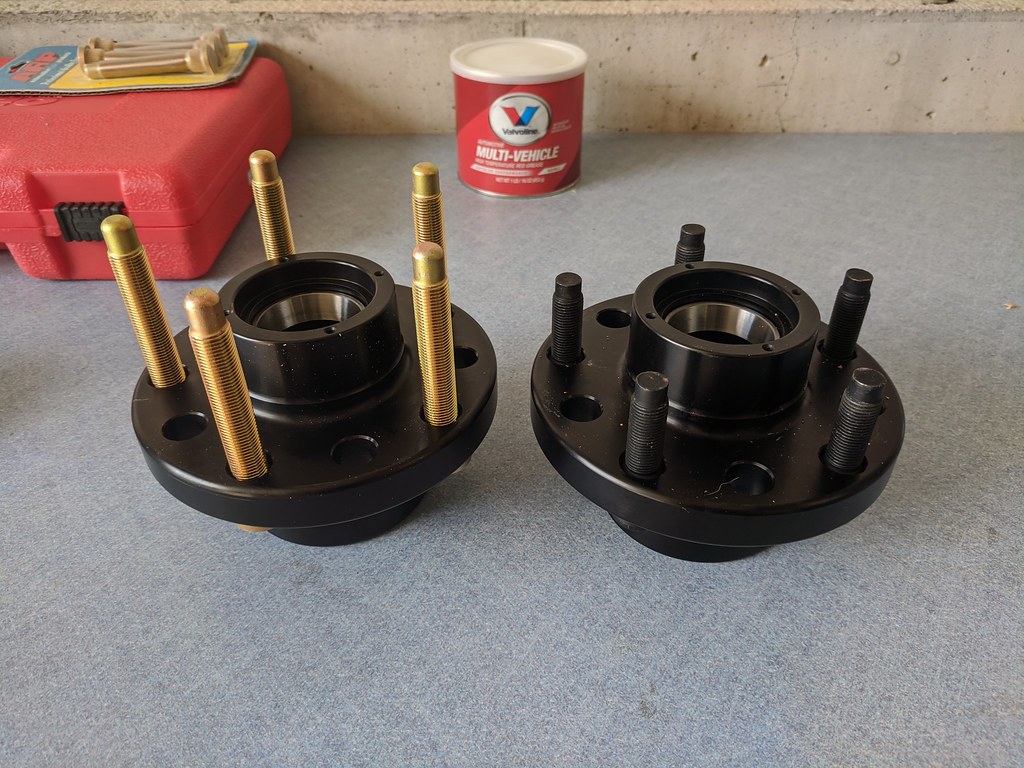
Once I got that straightened out, it was time to focus on fixing the wobbling wheel studs... After pricing out what it was going to cost to get new wheel studs the next size up, I contacted Flynbye with their bolt on aluminum hubs and cut me a good deal shipped to my door. They are very high quality and am very impressed with them considering they are half the price of other aluminum hubs. They came to me very quick and Ed was great to chat with on the phone. He answered all of my questions. The hubs came with new Timkin Bearings and 1/2" wheel studs already pressed in.
Unfortunately upon test fitting, the wheel studs weren't long enough and only allowed for about half of a lug nut of thread engagement. After a lot of back and forth trying to decide what to do, I decided to pop out a lug nut to determine the knurl diameter and get some new studs. Wouldn't you know, they measured right in at .625" which is the same as a set of ARP studs I had on my shelf! Very lucky, so I opted to just press them all out and run the longer ARP's.
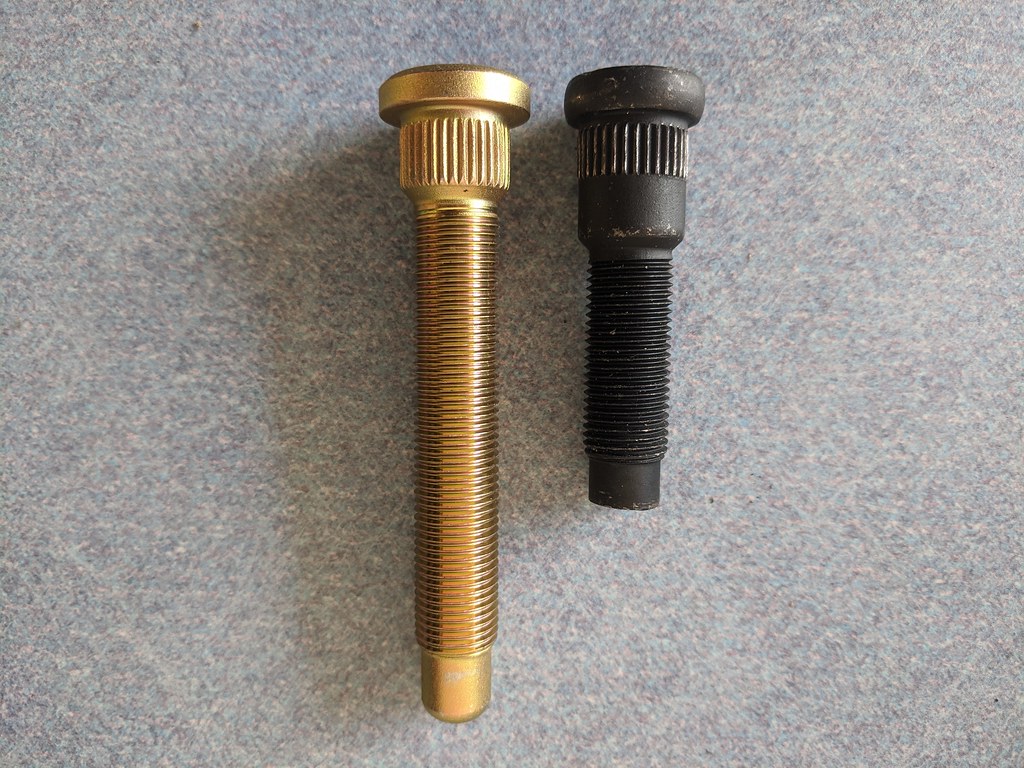
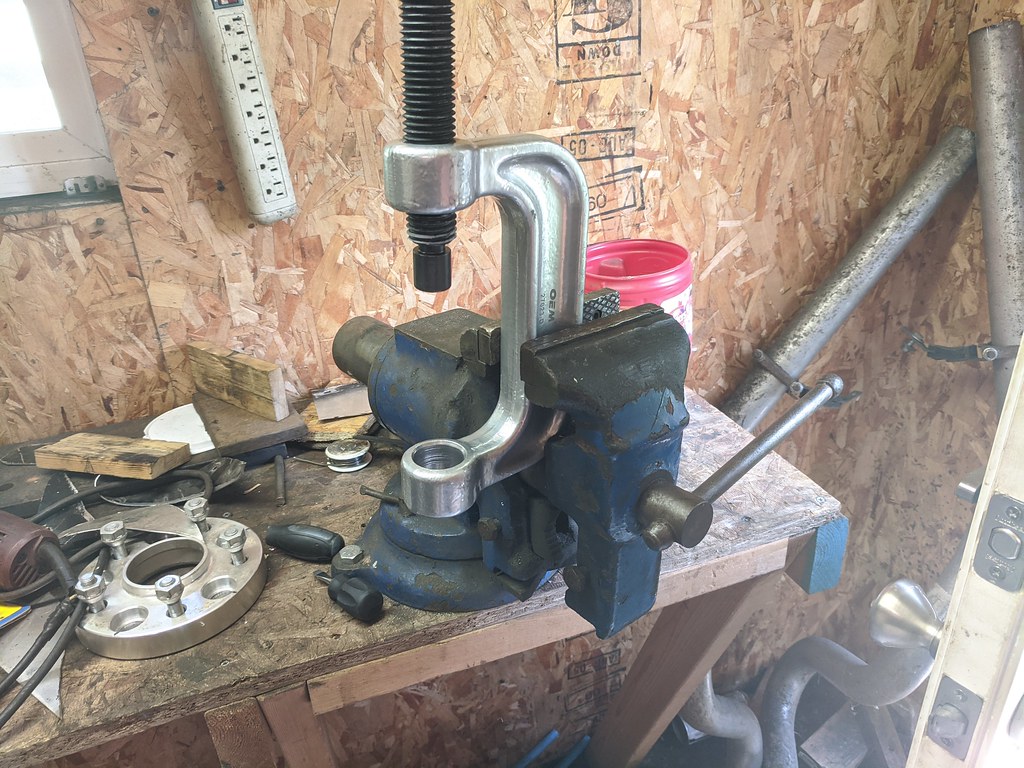
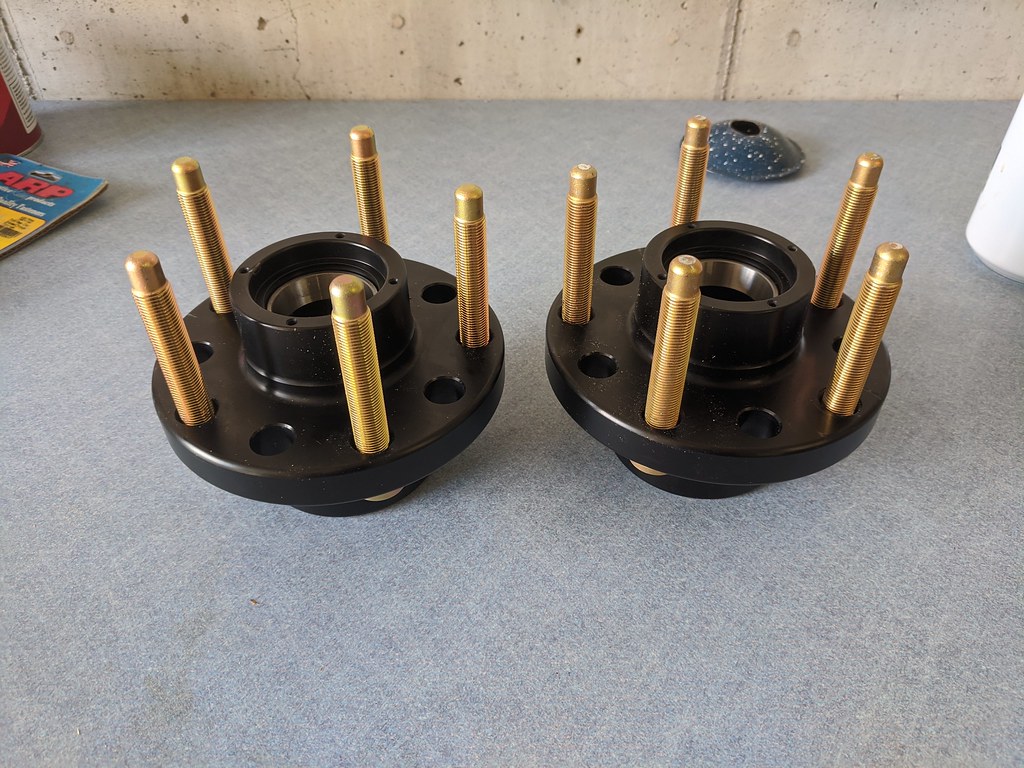
Since I don't have access to a press, I decided to work with what I had... a ball joint press. I made sure to put some cardboard between the press and the hubs when I was making the press which saved the anodizing. It worked surprisingly well although a press would have made it much easier. Oh, and the wheel studs can be installed both ways so be sure to press them in the right direction. Not that I would do that...
Then I packed the bearings with high temp grease and installed the new hubs. I torqued to 12 lbs while rotating the wheel and the driver's side pin slid right in, and the passenger side I had to back it off as the cotter pin hole fell right in the middle of two of the crowns. I backed it off to the next hole.

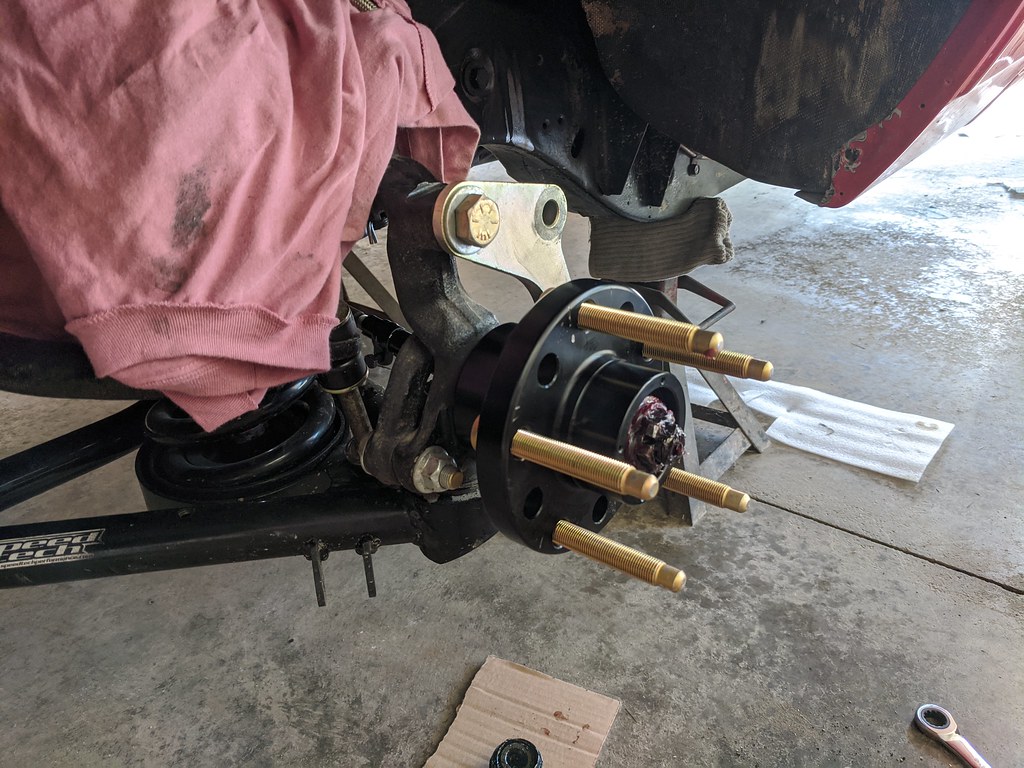
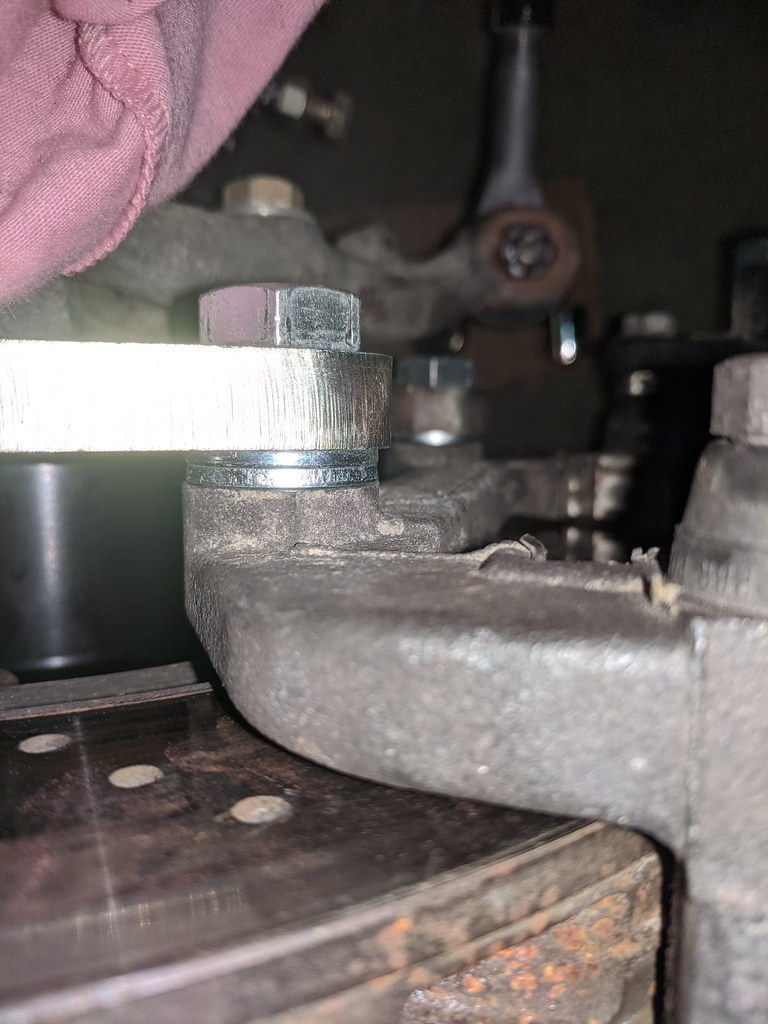
What was interesting is that the new hubs were supposed to be a direct replacement, but when I did a test fit of the abutment brackets, the rotor wasn't centered. It required that I add another .100" shim to center it between the pad mounts. Thought I would include this for someone that may be swapping them out.
The car is all back together and I quickly dialed in the toe measurements and will go for a test drive sometime this week when we get some clear weather. Should be ready for a front end alignment now. Overall, I'm glad that I found the loose stud, since I ended up with a much stronger hub and matching color wheel studs with the rear. (if that matters haha)
1955 Nomad project LC9, 4L80e, C5 brakes, Vision wheels
1968 Camaro 6.2 w/ LSA, TR6060-Magnum hybrid and etc SOLD
1976 T/A LS1 6 Speed, and etc. SOLD
Follow me on Instagram: ryeguy2006a
06-30-2020 #576
Registered User
- Join Date
- Sep 2009
- Posts
- 2,709
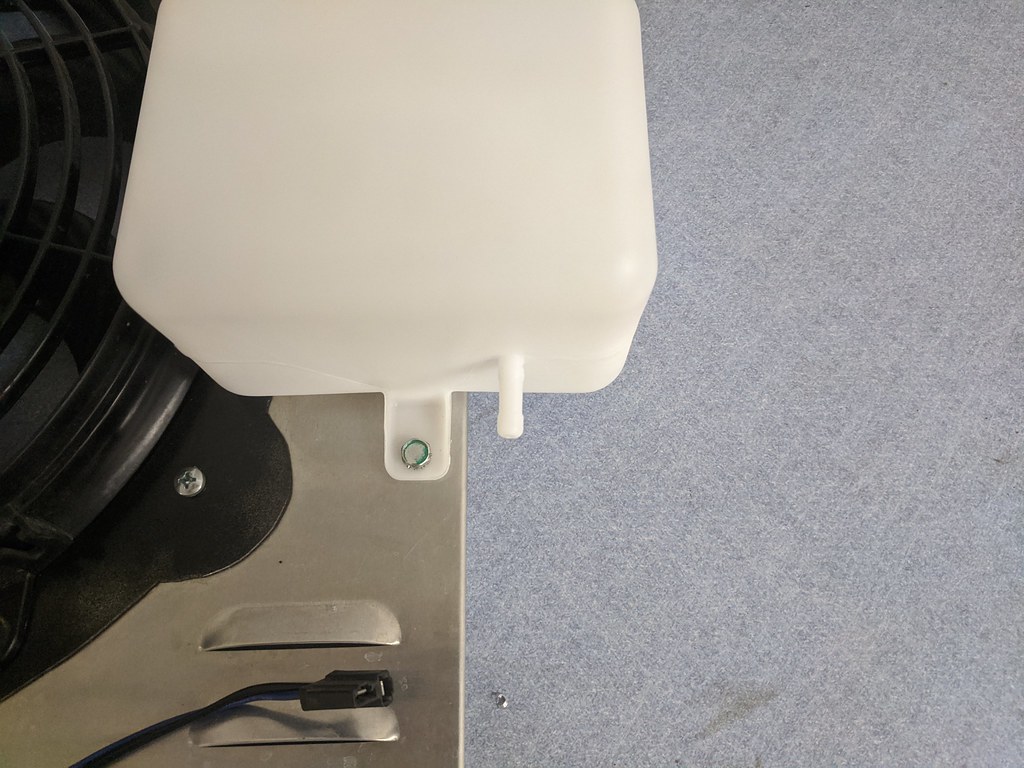
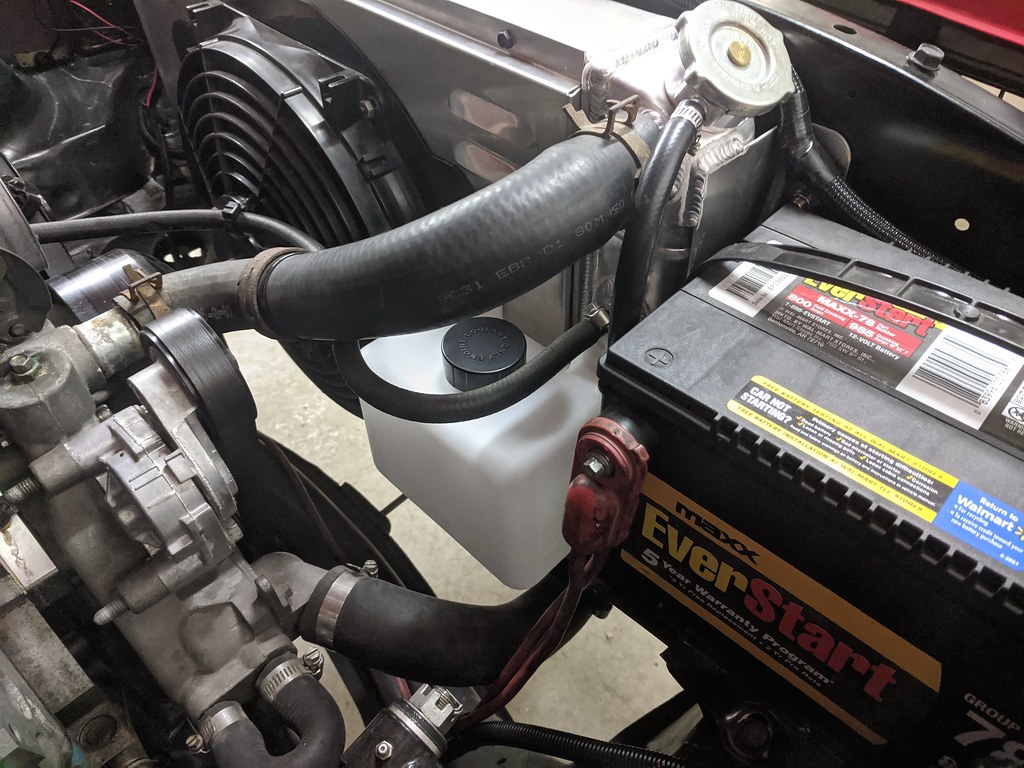
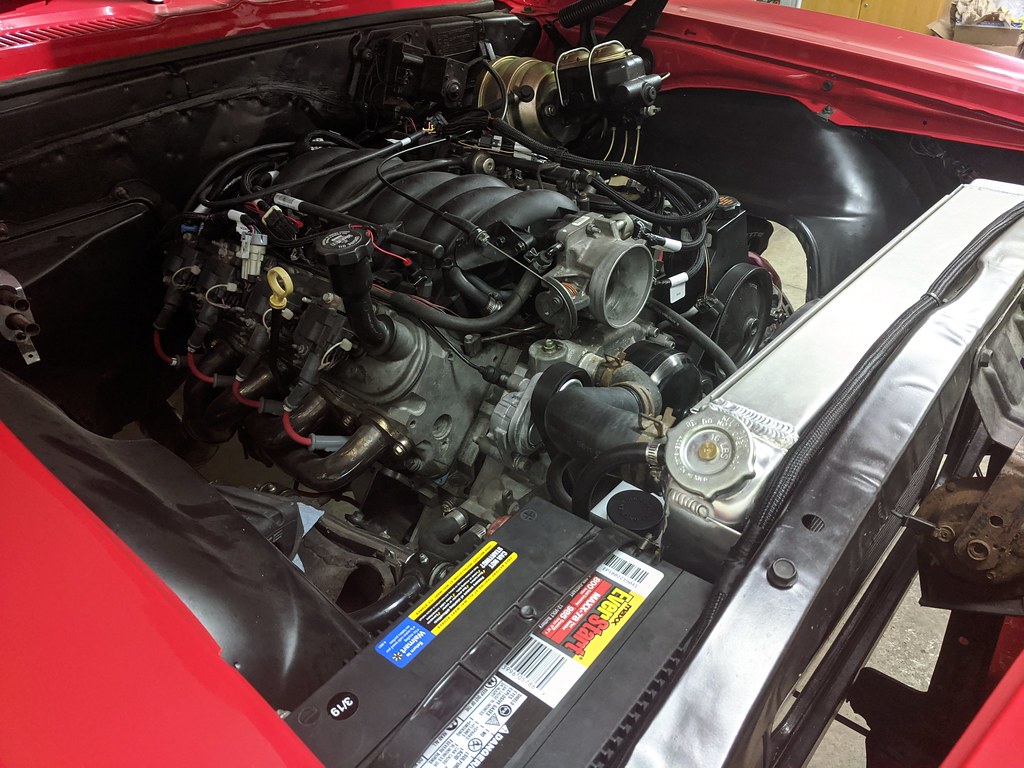
While I was in the middle of swapping out the hubs, I finally installed an overflow jug. Ever since I had the car, the radiator was operating with a partially full radiator, which is certainly not ideal. I mocked it up and it fit very nicely in this little spot under the top radiator hose next to the battery.
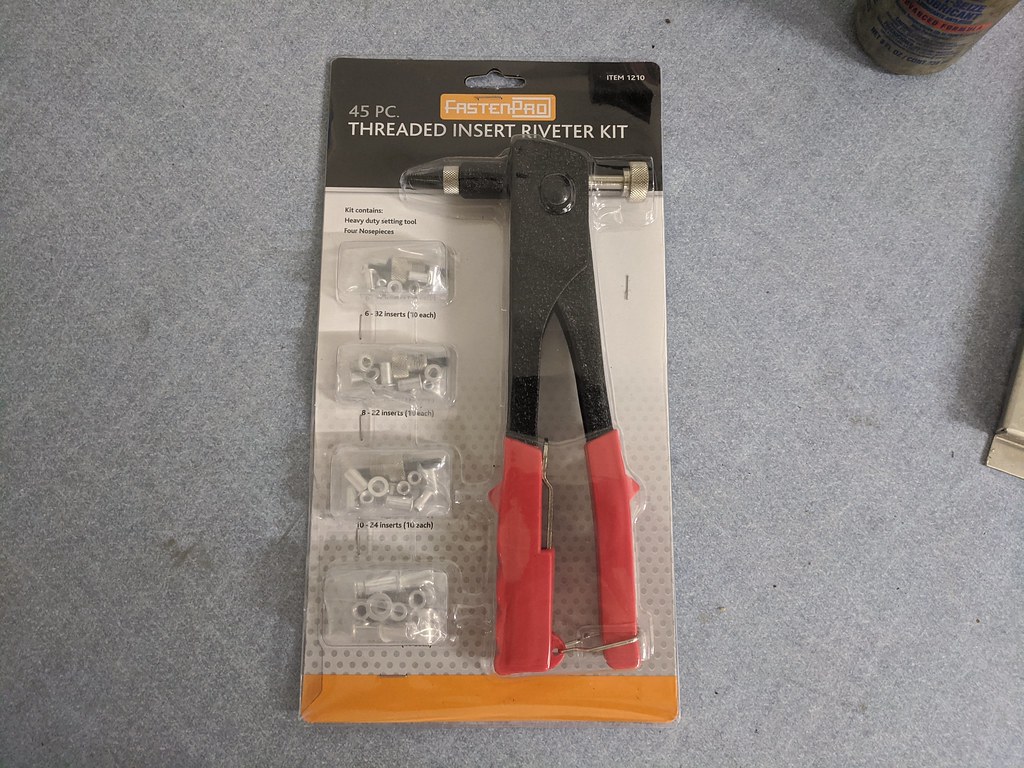
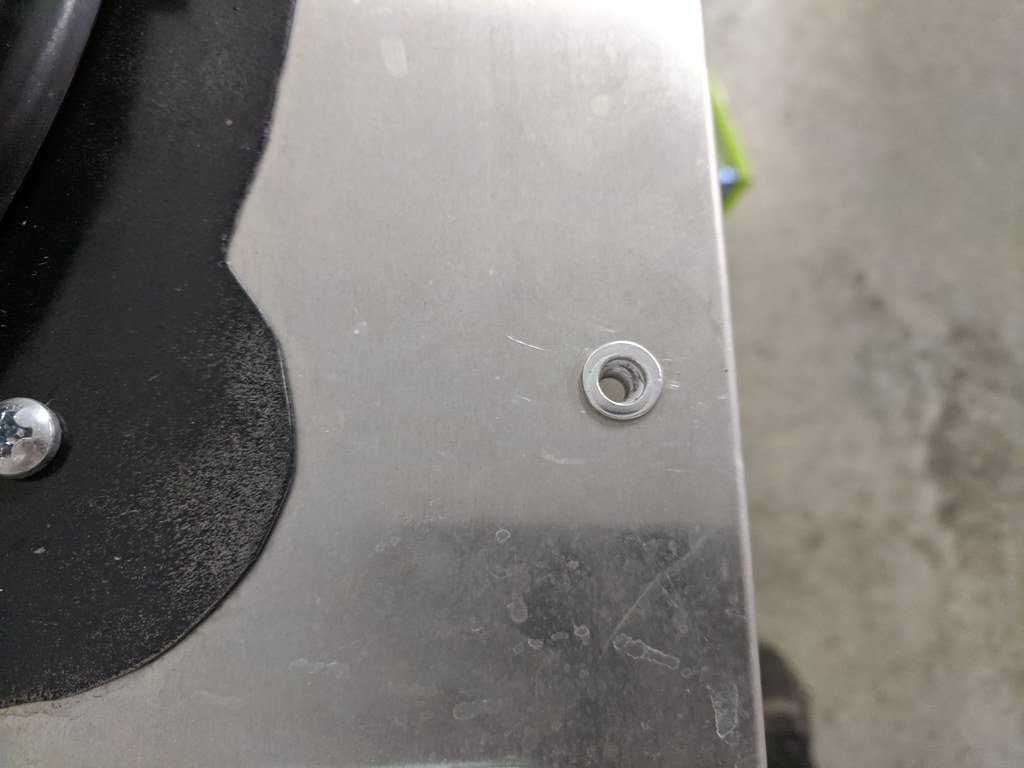
I've always wanted to try one of those Rivnut tools so I thought this would be a great opportunity to do so. It turned out to be a very clean install and I'm glad I went with that tool.
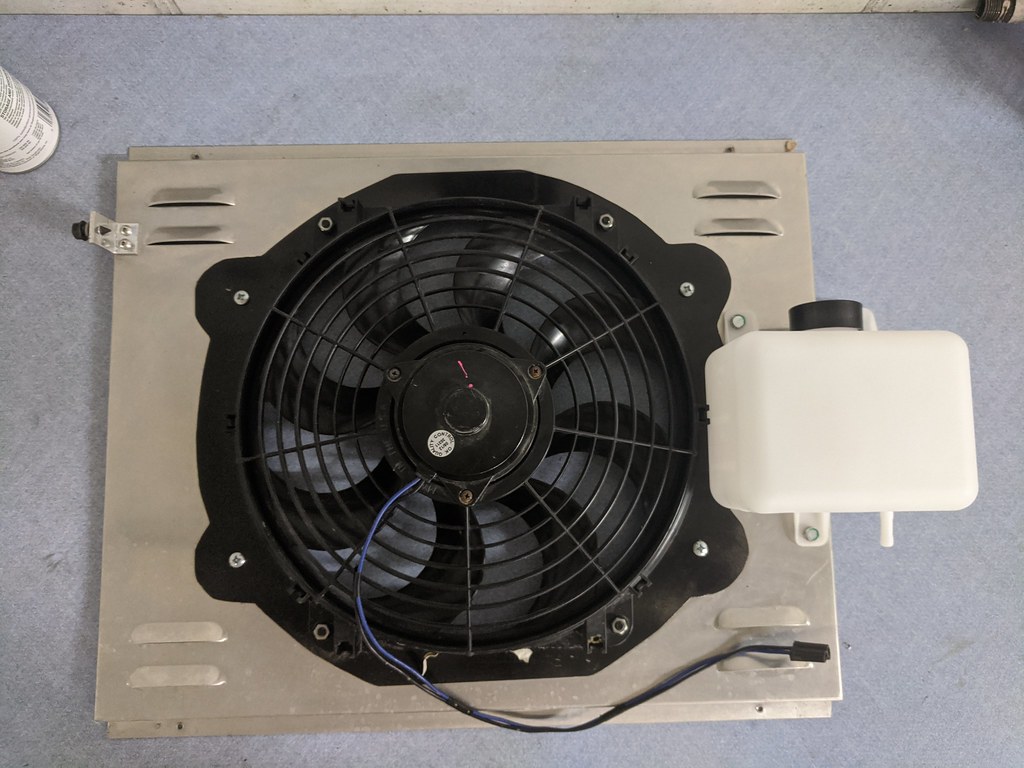

With the shroud back in the car, it's very nice and tidy. Pretty much disappears down low.

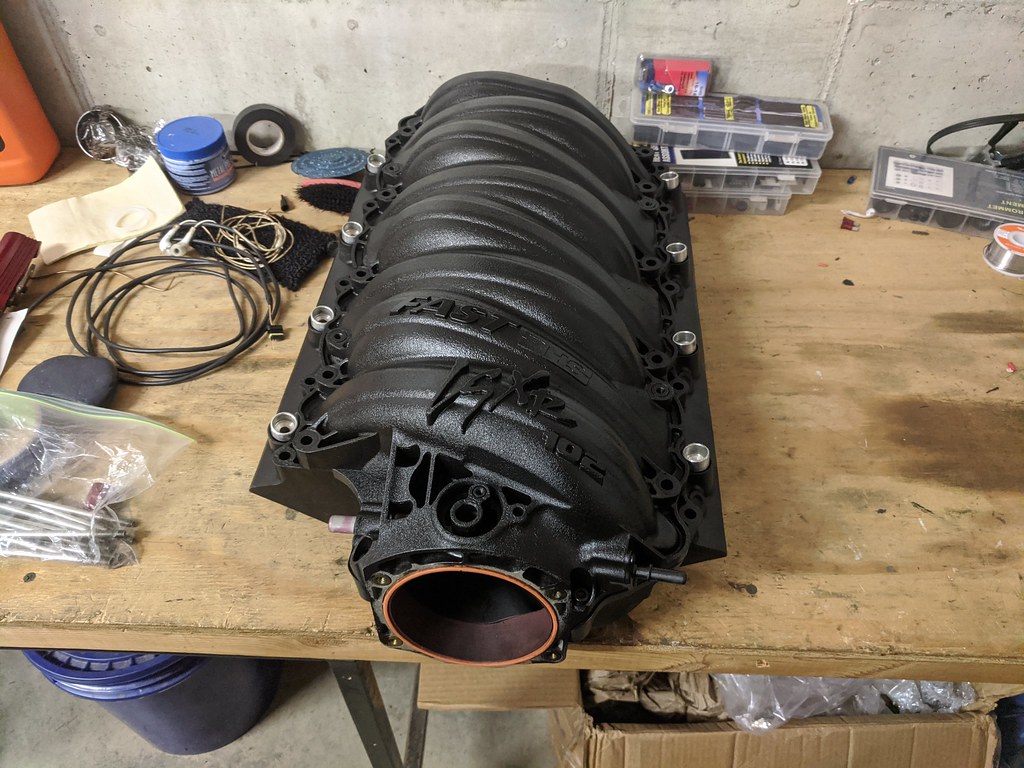
I also picked up a good deal on some extremely low mileage LS7 lifters and LS2 trays from a guy parting out a 22k mile 2017 L96 6.0 engine. They seriously look brand new and will work very nicely for the next project I have in mind.
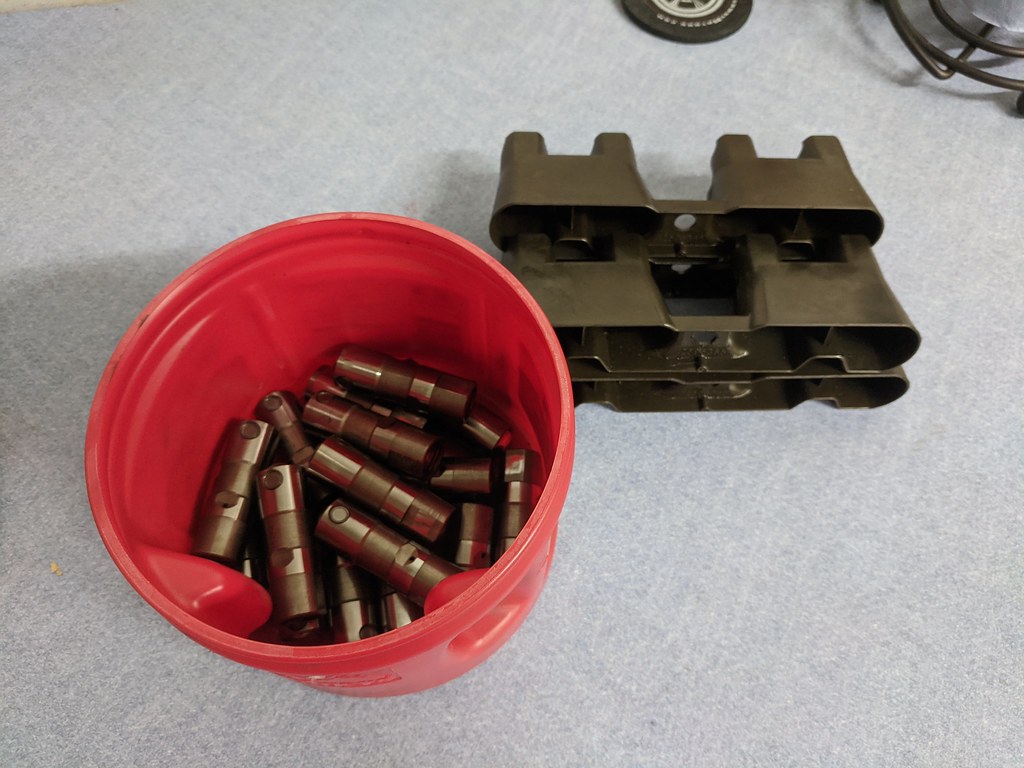
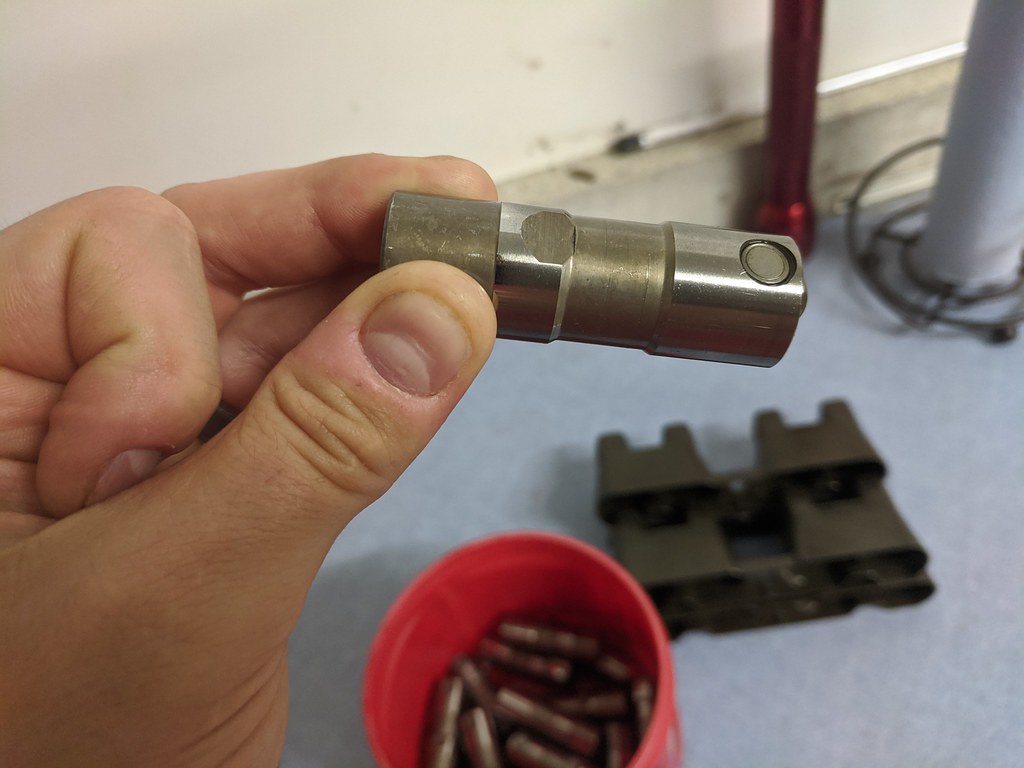

After a careful inspection of all the lifters, they went into a bath of new oil for when I'm ready for them.
Cheers,
Ryan
1955 Nomad project LC9, 4L80e, C5 brakes, Vision wheels
1968 Camaro 6.2 w/ LSA, TR6060-Magnum hybrid and etc SOLD
1976 T/A LS1 6 Speed, and etc. SOLD
Follow me on Instagram: ryeguy2006a
07-07-2020 #577
Registered User
- Join Date
- Sep 2009
- Posts
- 2,709
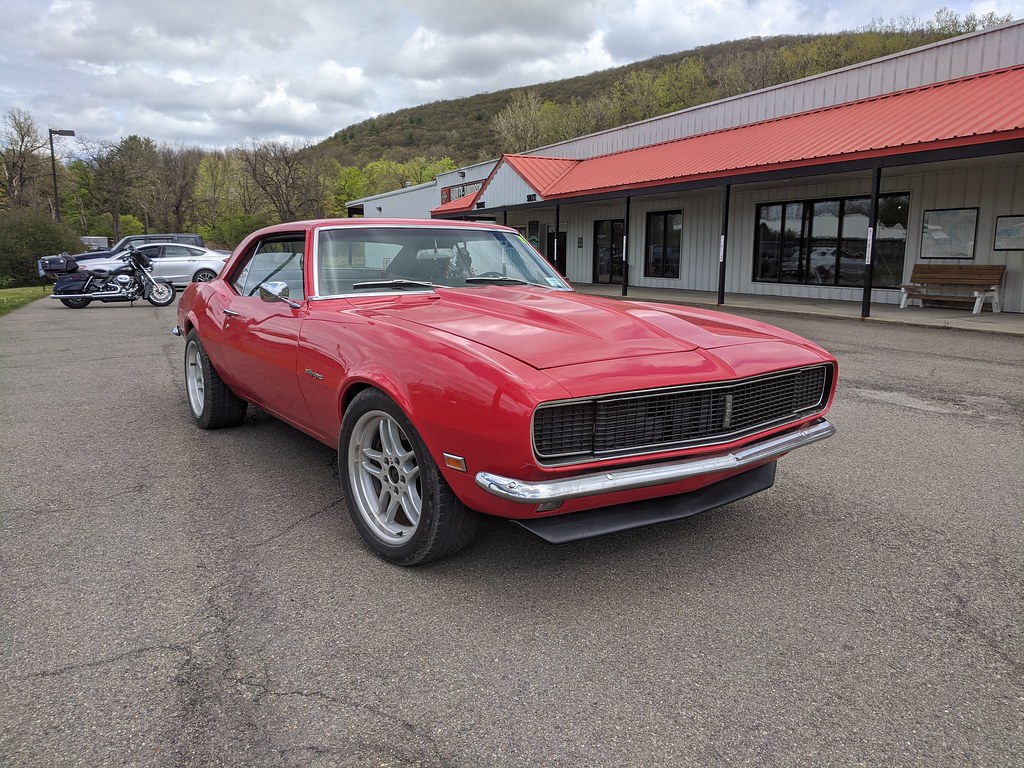
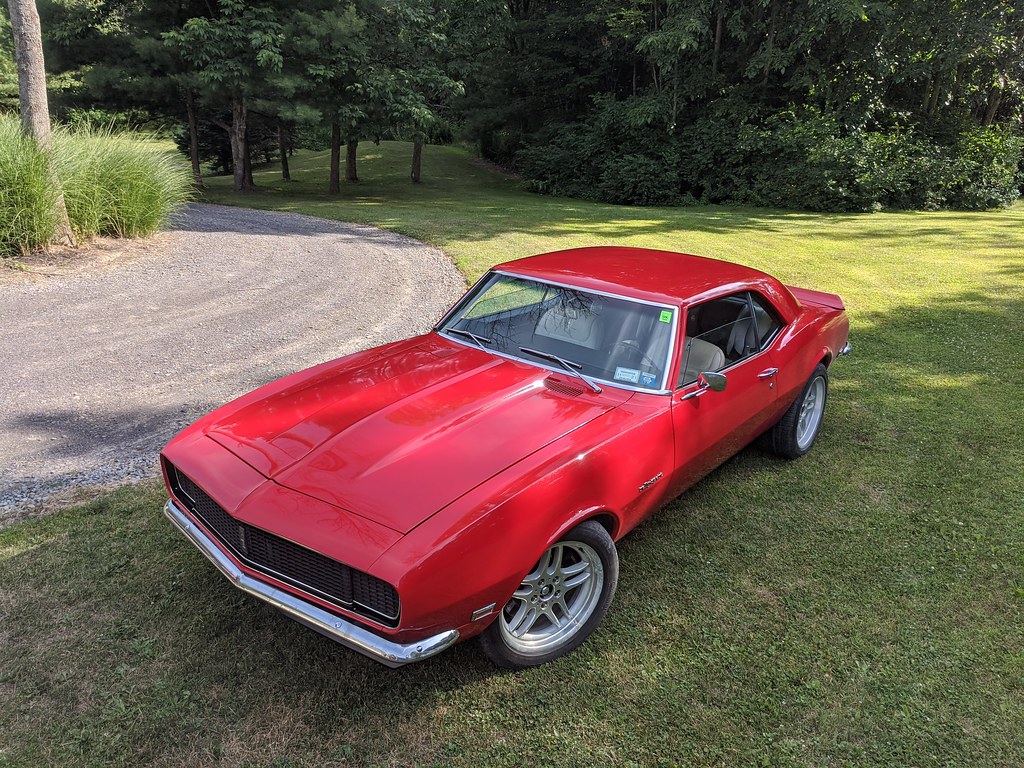
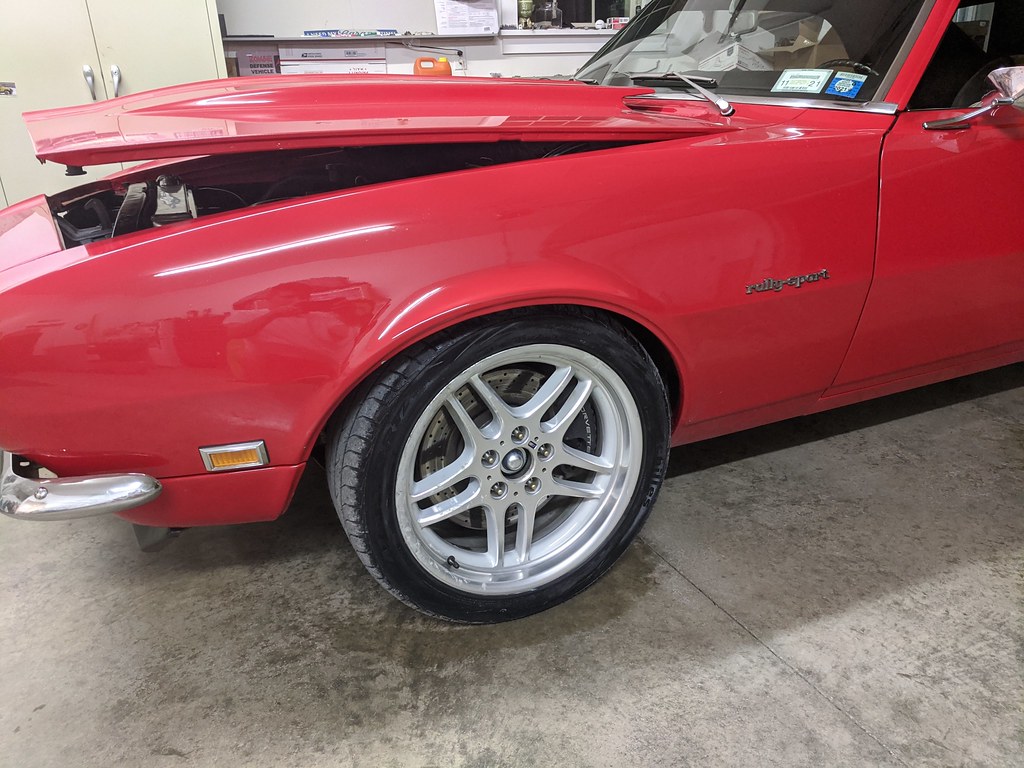
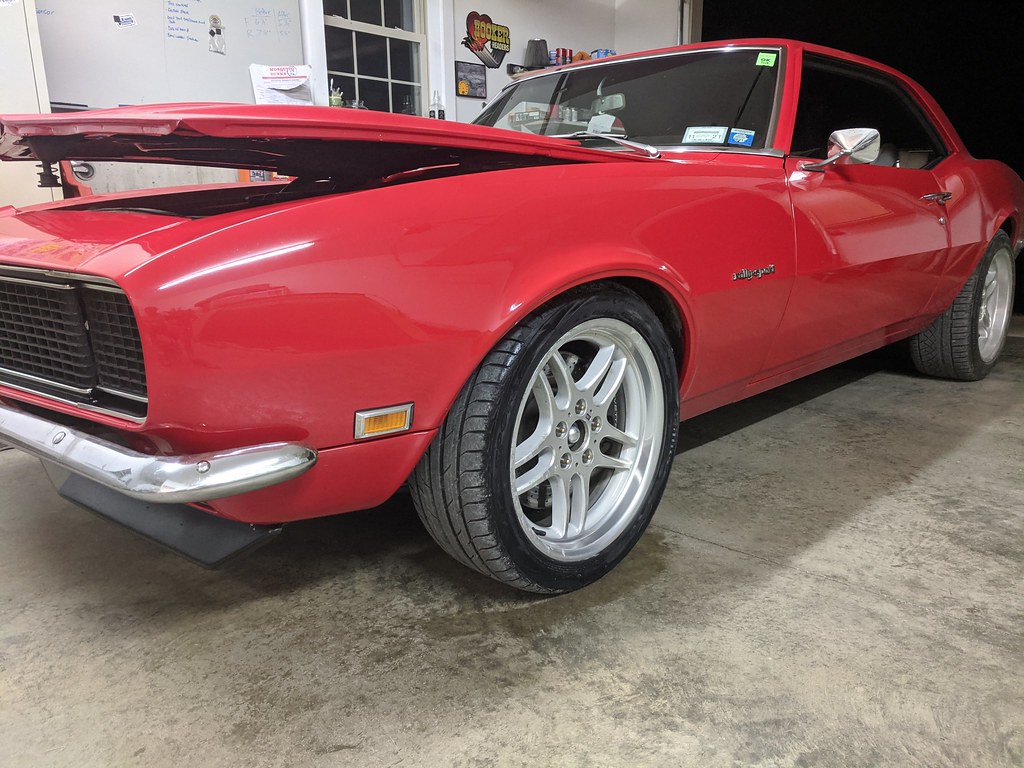
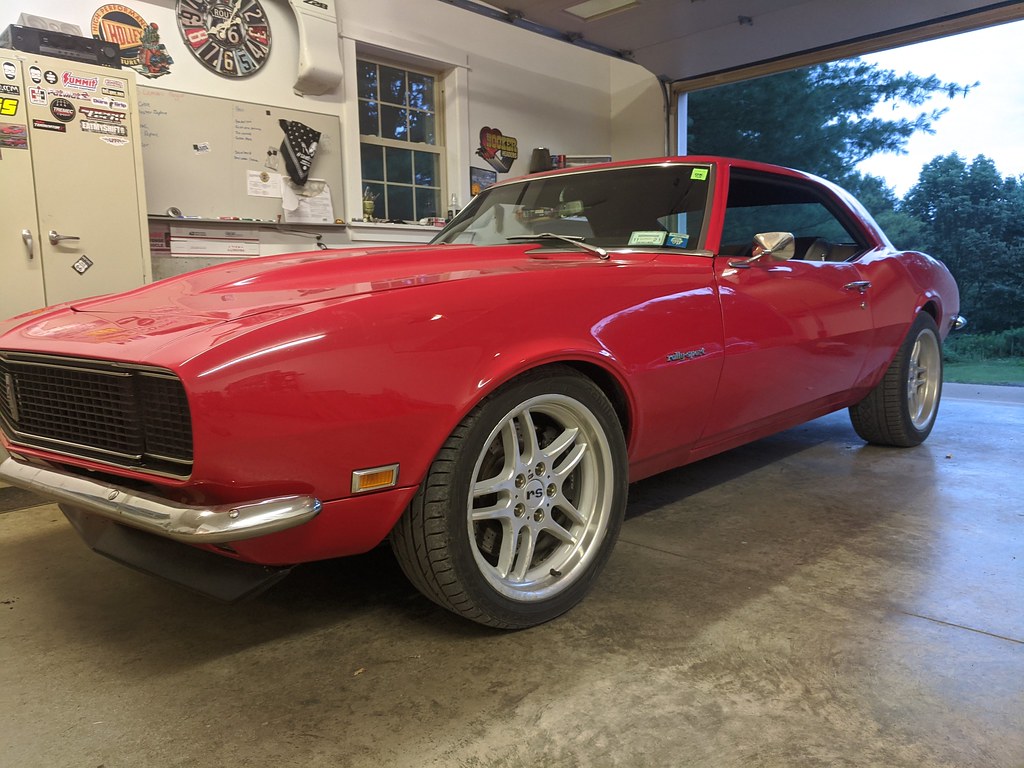
I moved my car outside for the kiddos to play in the garage for the 4th, and grabbed some pictures of the car when the sun was starting to get low. I'm not a photographer, but I think they turned out pretty good. The first picture is my new favorite.

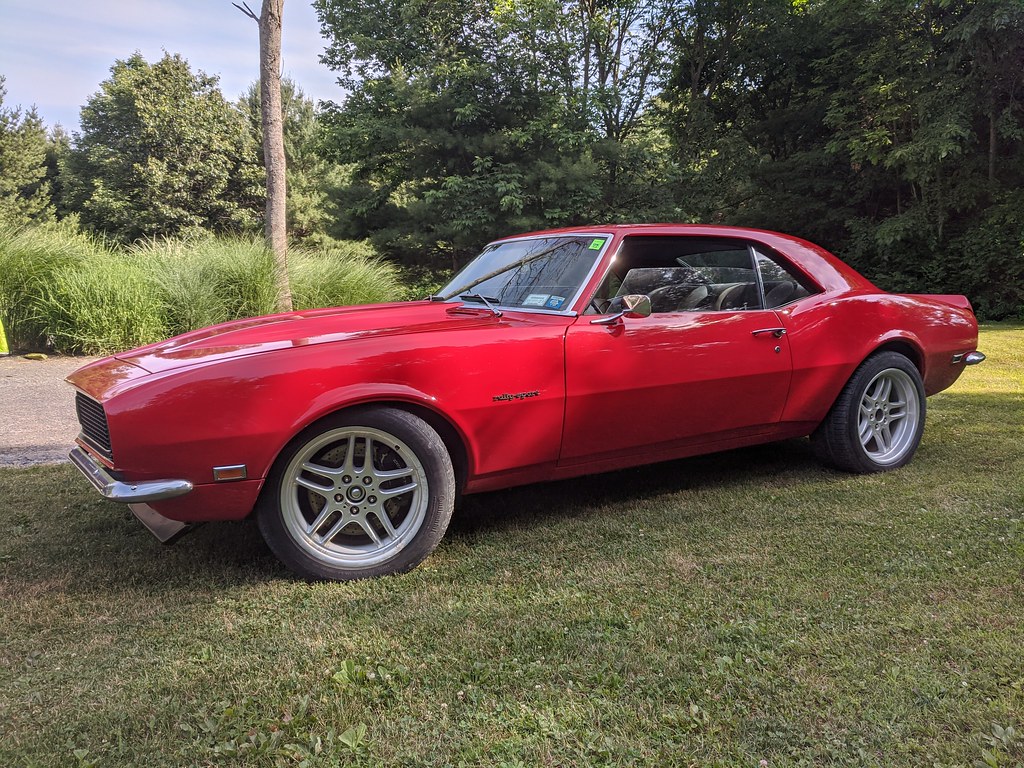
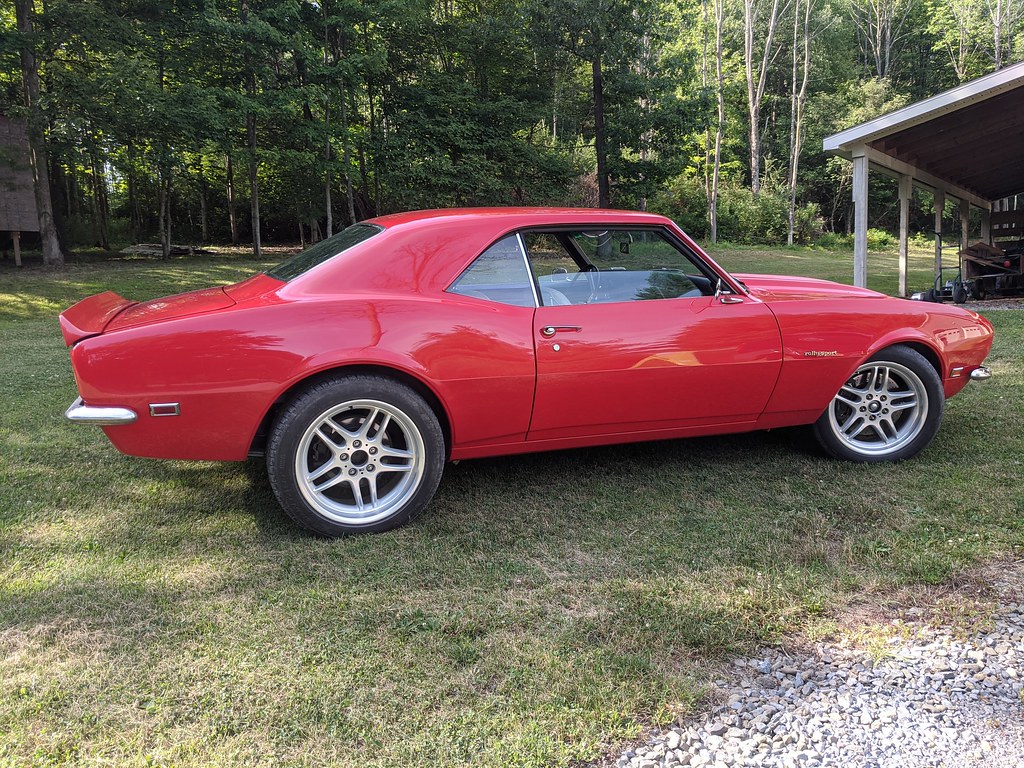
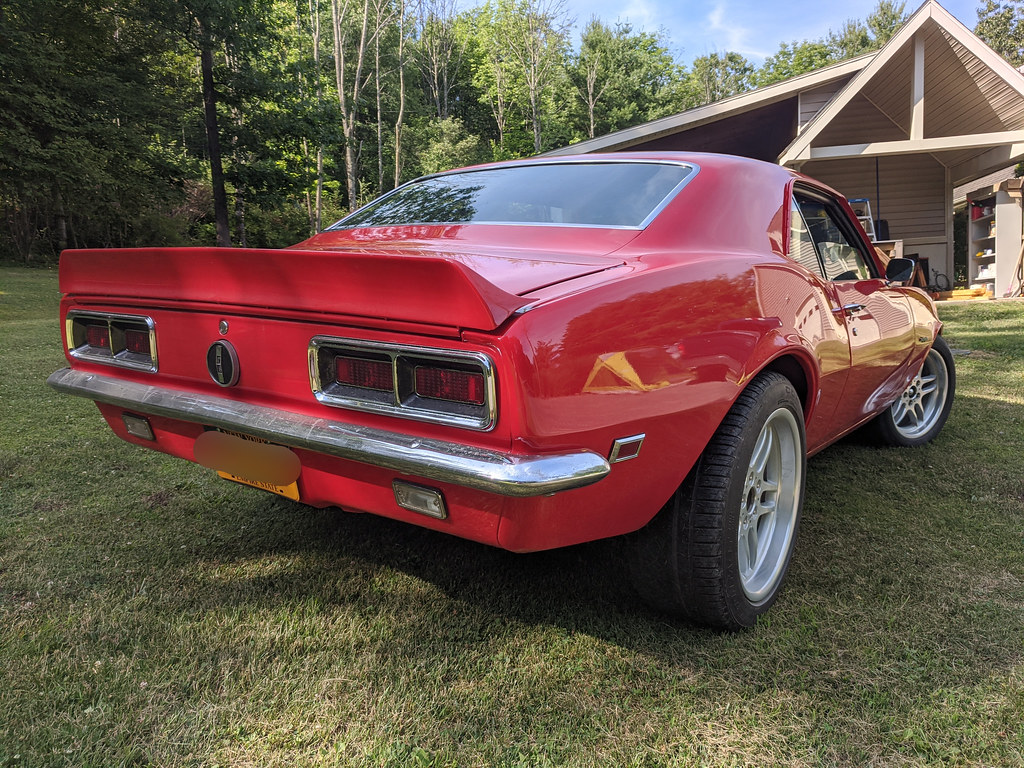
I love how straight the front RS grills turned out. I see so many where the doors are crooked. I spent a lot of time to make sure mine were straight and consistent during panel fitment.

On Monday I was able to get my car back into the shop to get the front end alignment and a new set of front tires. It went off without a hitch and my guy was able to get the specs really close. He said that this was as close as he could get to my specs which I'm happy with. I gave him the specs that Speedtech gives with their control arm kits and the hand written numbers are what he was able to get them to. Feel free to chime in on the specs if they should be adjusted. I know what each of them mean in relation to the wheel, but as far as what each of the specs does to the way the car drives is way out of my wheel house.
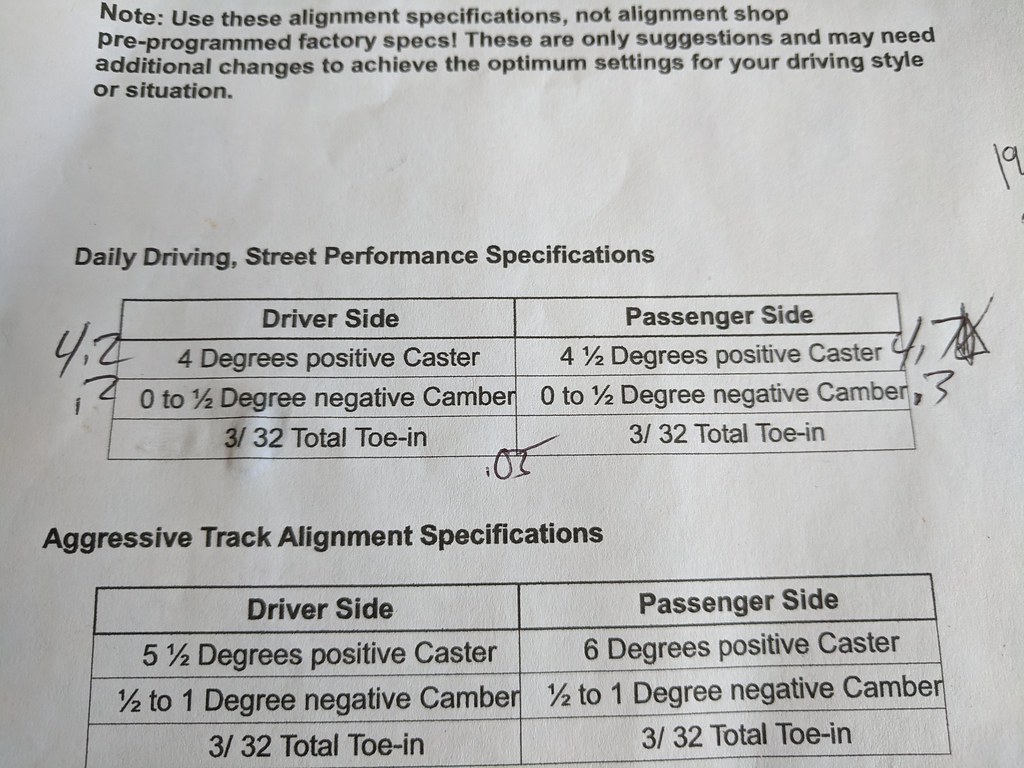
Then right as I was leaving he goes, "Do you want all your shims?" I wasn't sure what he meant, but then he explained that the car was way out of alignment then handed me a pile of shims! He said that I actually had positive camber, which definitely doesn't help a performance car steer.
I snapped a few pictures of the new tires when I got home. The tires that I replaced were 235/50-18 and the new tires are 245/40-18. I had to replace the front tires since they were too tall and actually rubbing the inner wheel house and fender in a few spots. I found several people online that said these wheels fit first gen's with 18's, but I went back and forth between a 245/45 (26.7" tall) and a 245/40 (25.7" tall). According to the tire calculators the 235/50 is 27.3" tall, so I opted for the smaller diameter to give a higher margin and maybe a tighter turning radius. After shopping around and not exactly 100% confident of the tire size I found the best rated and cheapest tire I could find. I came across a pair of Achilles ATR Sport 2 from a reputable seller on eBay for $159 with tax and shipped to my door.
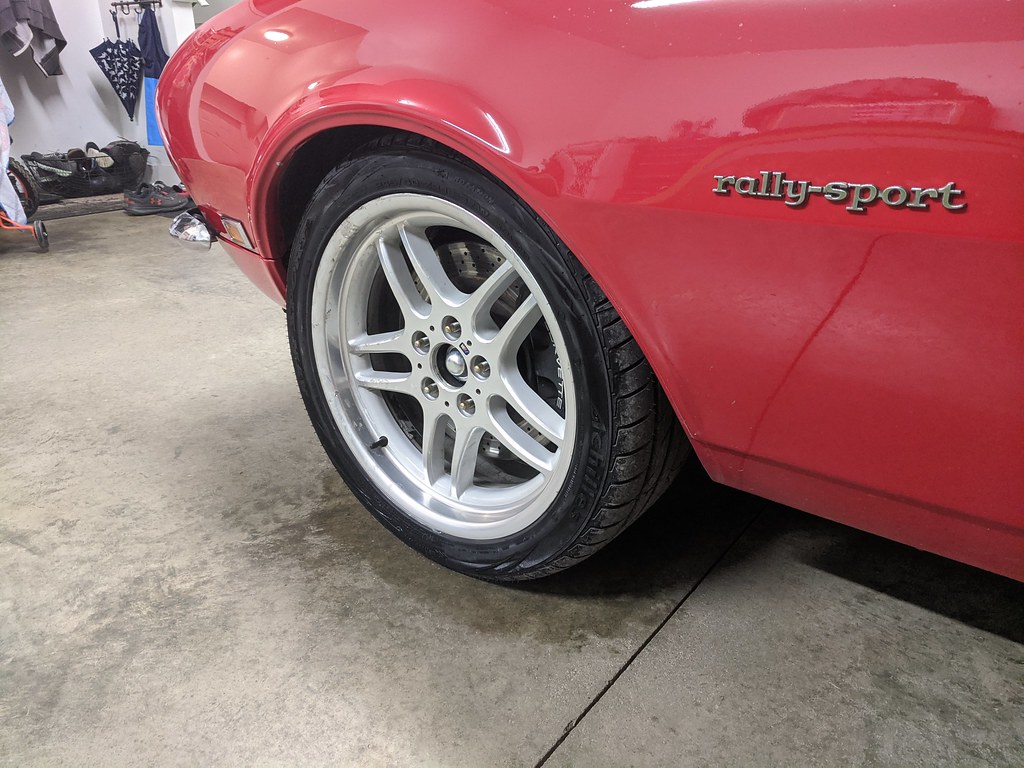
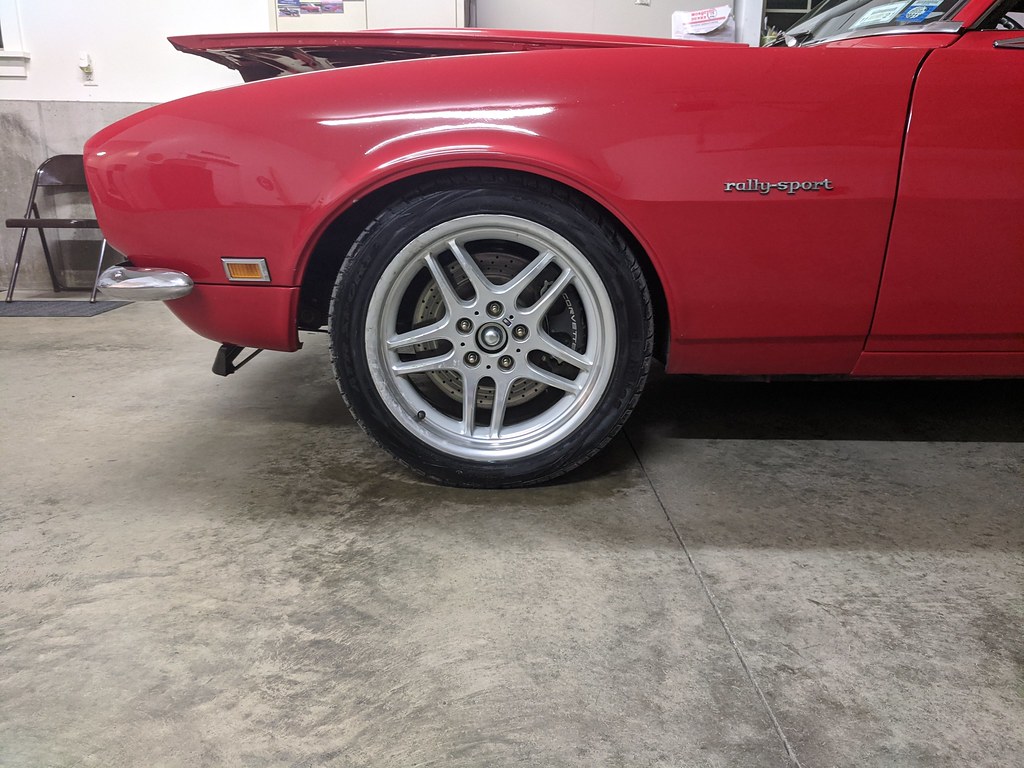
It's got a pretty cool tread pattern too, which is a bonus.
Now my first impressions are that the car handles night and day differently. Before I always felt that it would turn quickly and confidently to the left, but was slow to react and soft making a right turn. I'm very glad that I finally got a proper alignment on the car. I'm really looking forward to getting on some windy roads and really seeing the car shine. The tires give way more grip than the old and cracking tires, so I couldn't be happier. There is a slight bit of play in the steering box, but I believe I can tighten that up and it will be right where I want it to be. The last suspension modification that I would like to do down the road is a pair of frame ties.
Thanks,
Ryan
1955 Nomad project LC9, 4L80e, C5 brakes, Vision wheels
1968 Camaro 6.2 w/ LSA, TR6060-Magnum hybrid and etc SOLD
1976 T/A LS1 6 Speed, and etc. SOLD
Follow me on Instagram: ryeguy2006a
07-07-2020 #578
Registered User
- Join Date
- Nov 2010
- Location
- Ventura County CA
- Posts
- 556
Alignment makes a big difference for sure! I'm surprised you drove it out of alignment for so long. Personally I run more camber and caster on the street, but the specs you are at will be easy on the tires.
If you're interested in doing your own alignments at home, here's what I have done: https://www.pro-touring.com/threads/...doing-it-rightClint - '70 Nova "restomod" cruiser & autocross family car
08-17-2020 #579
Registered User
- Join Date
- Sep 2009
- Posts
- 2,709
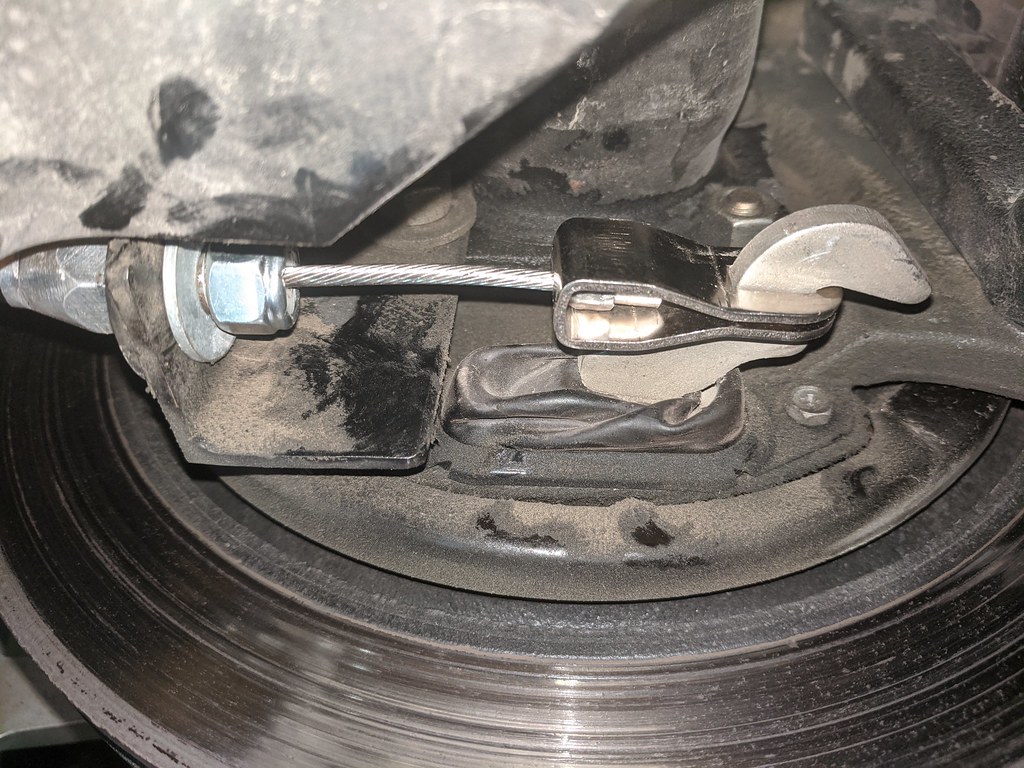
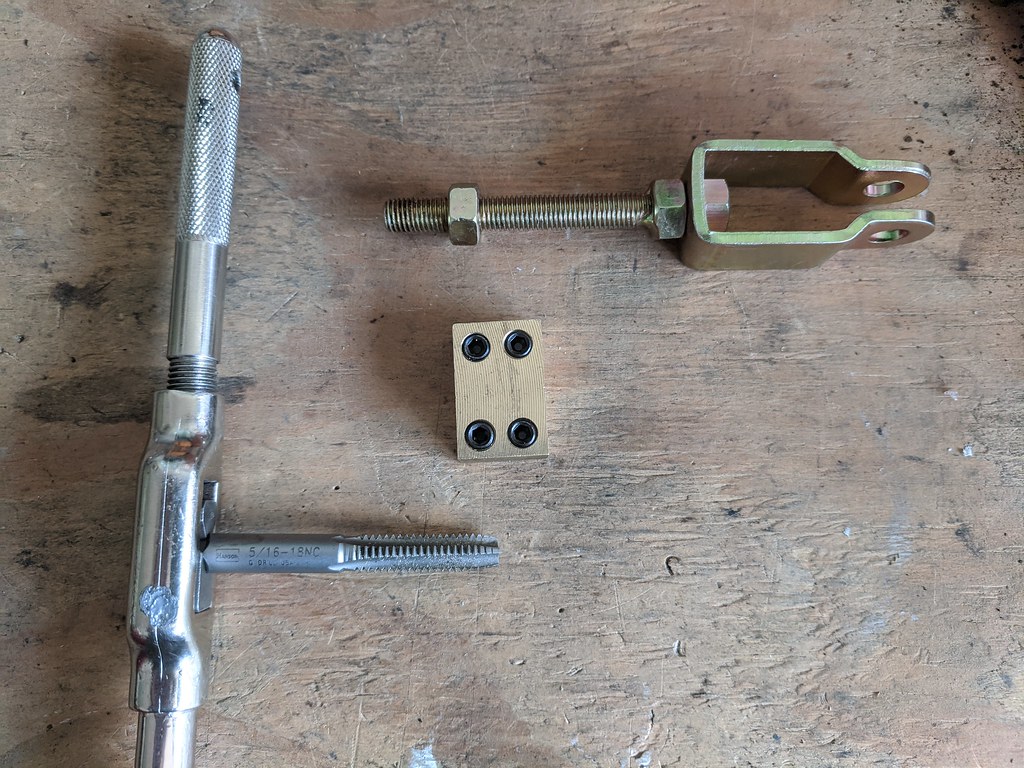
It's been a while since my last post. Been busy driving the car and doing a few things here and there. Nothing too big until yesterday. I finally got around to hooking up and installing my eBrakes. I picked up a universal kit from Jeg's and was pleasantly surprised to find that the clevis' that came with it were a direct fit for my LS1 rear brakes. Win!
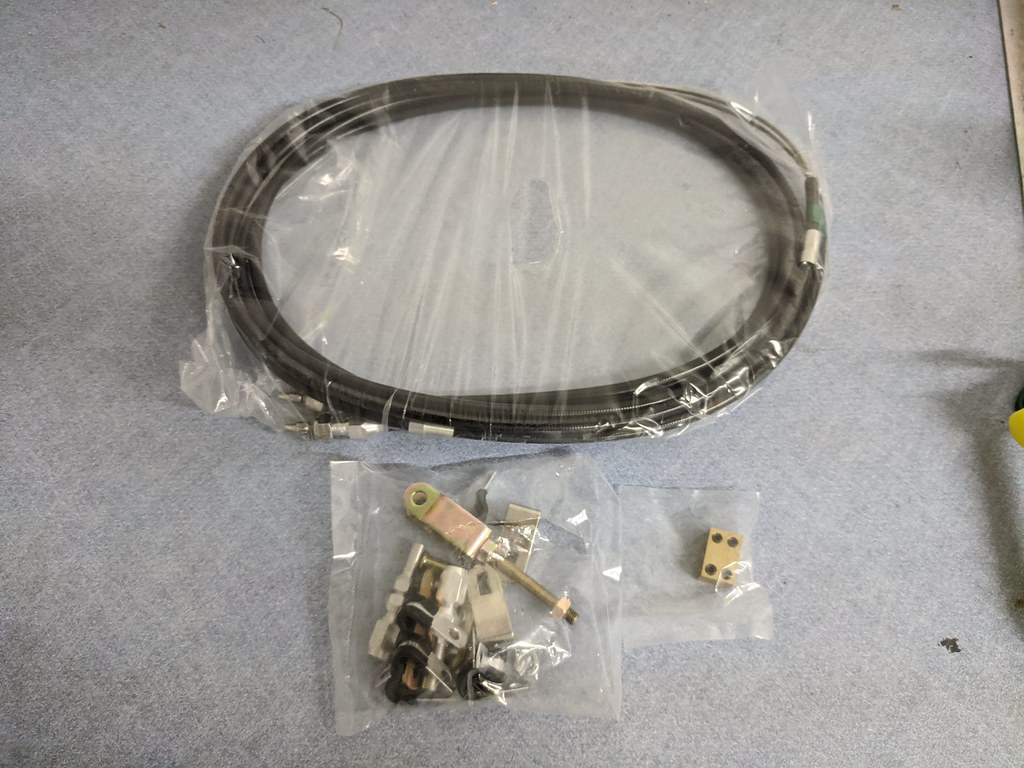
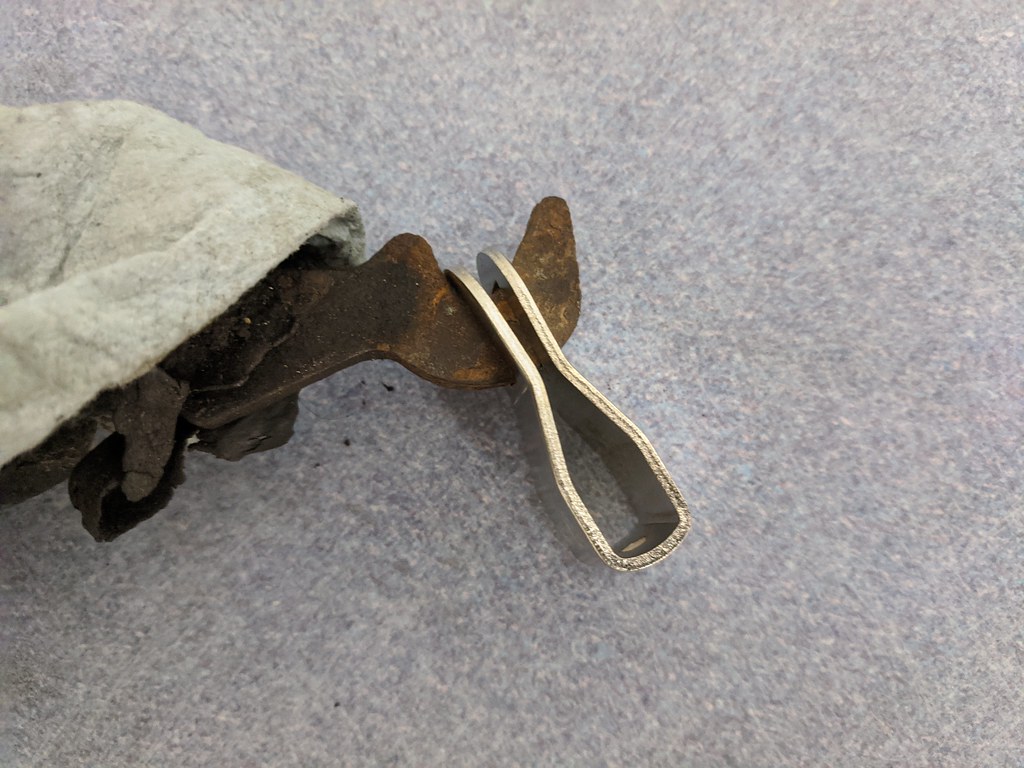
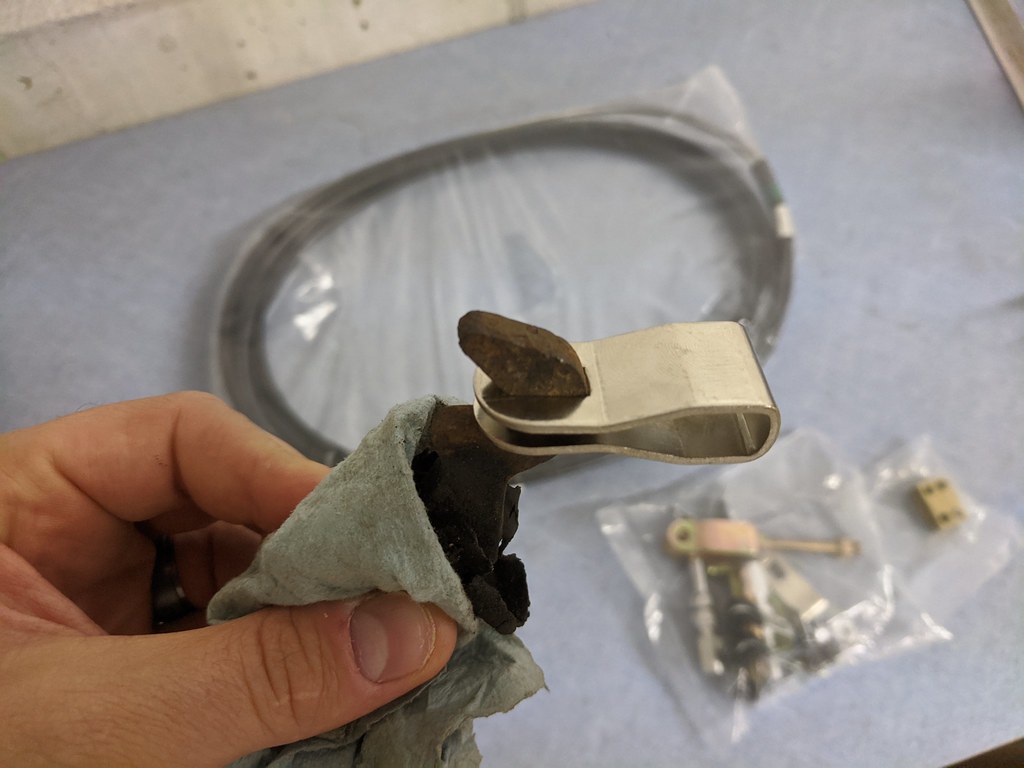
Only thing I needed to do was find some larger washers with the right diameter for the cable brackets I have on the car. I believe they were originally meant to work with the stock 98-02 Fbody cables.
Once installed, the fit like a glove and had a very smooth operation.
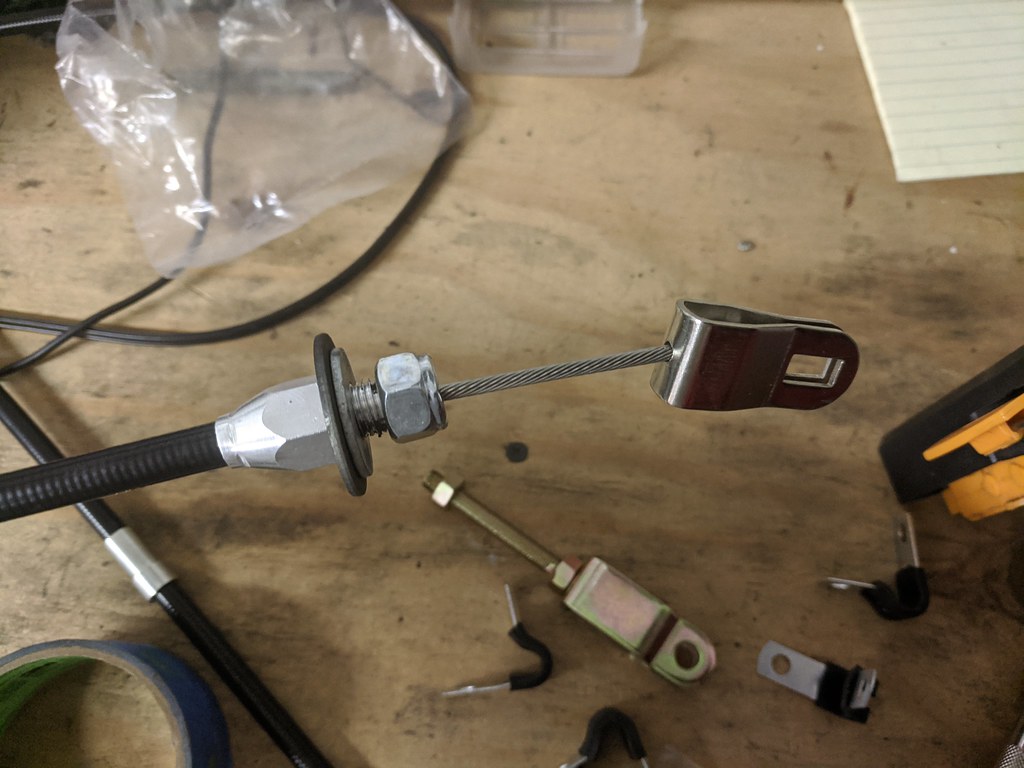
Up front inside the cabin was nothing special, just a replacement OEM cable from Dorman I believe. But in order to use that clever little cable clamp, I had to re-tap the thread size. The stock size was fine thread 5/16, but the front cable was 5/16 course thread. So I just ran the tap through and it worked like a charm. I also have two nuts on the backside of the cable so it shouldn't come loose.
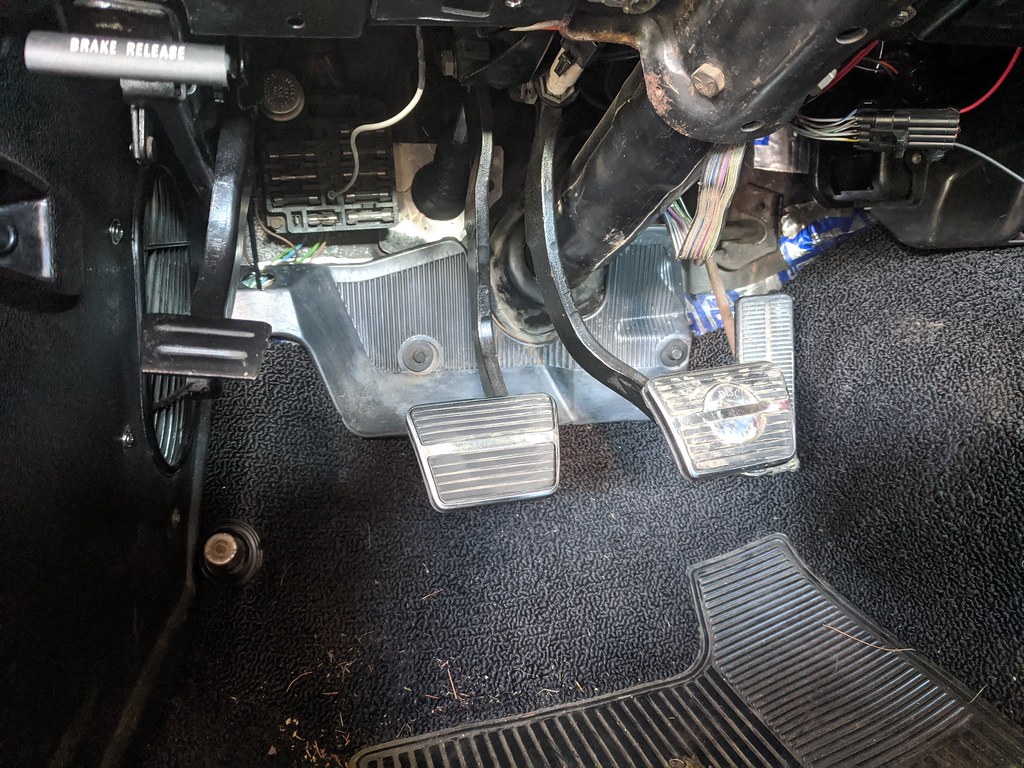

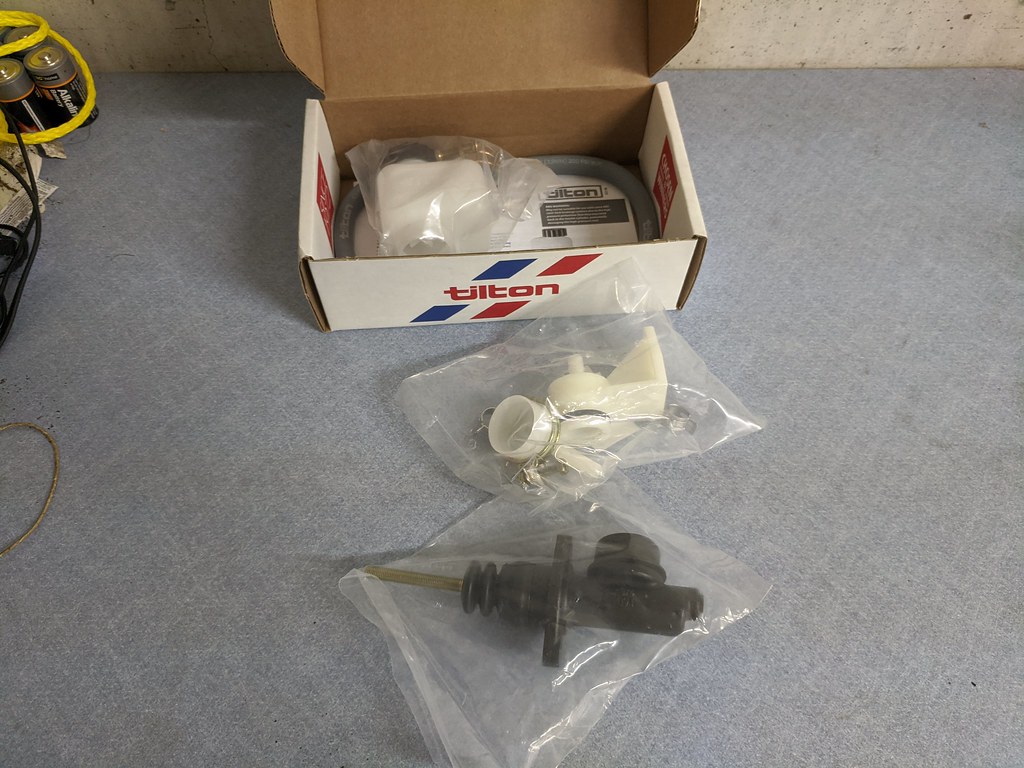
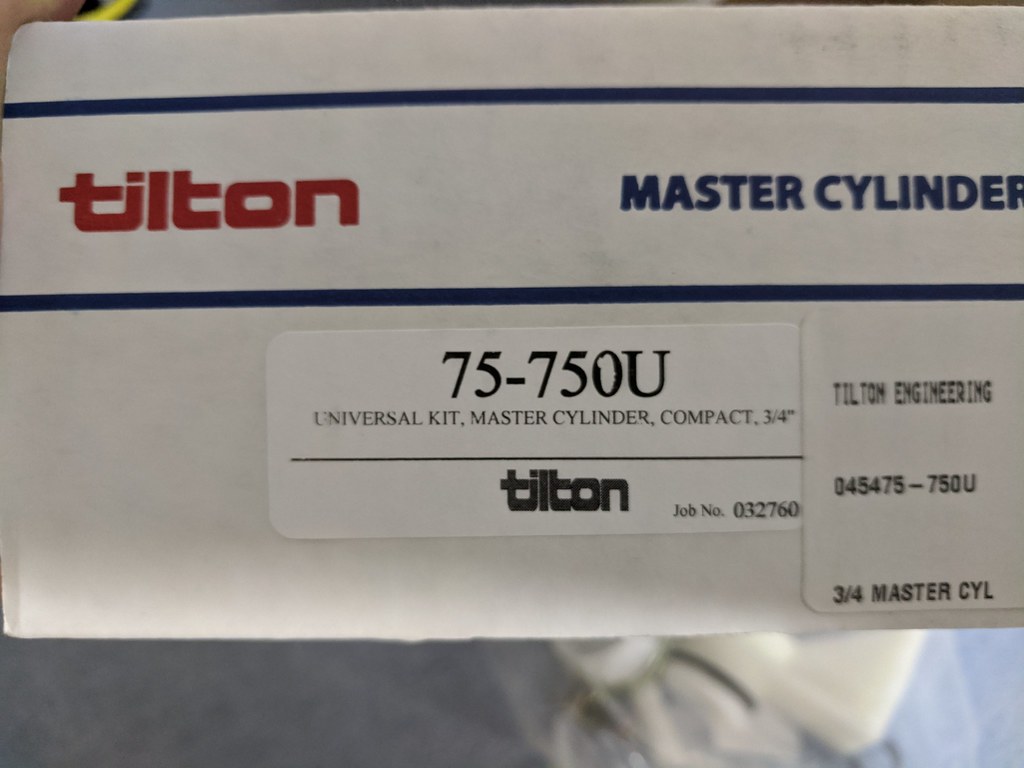
When I placed the order for the cables I also picked up a new clutch master cylinder. I am running a Tick 4th gen Fbody master cylinder and they equip them with a 7/8" bore, which makes for more pressure, but a heavier clutch. I'm swapping the 7/8" out for a 3/4" which should give a lighter clutch pedal closer to stock. I'm hoping that it will be easier to modulate the clutch pedal too as it should have a slightly longer throw. It's very touchy right now.
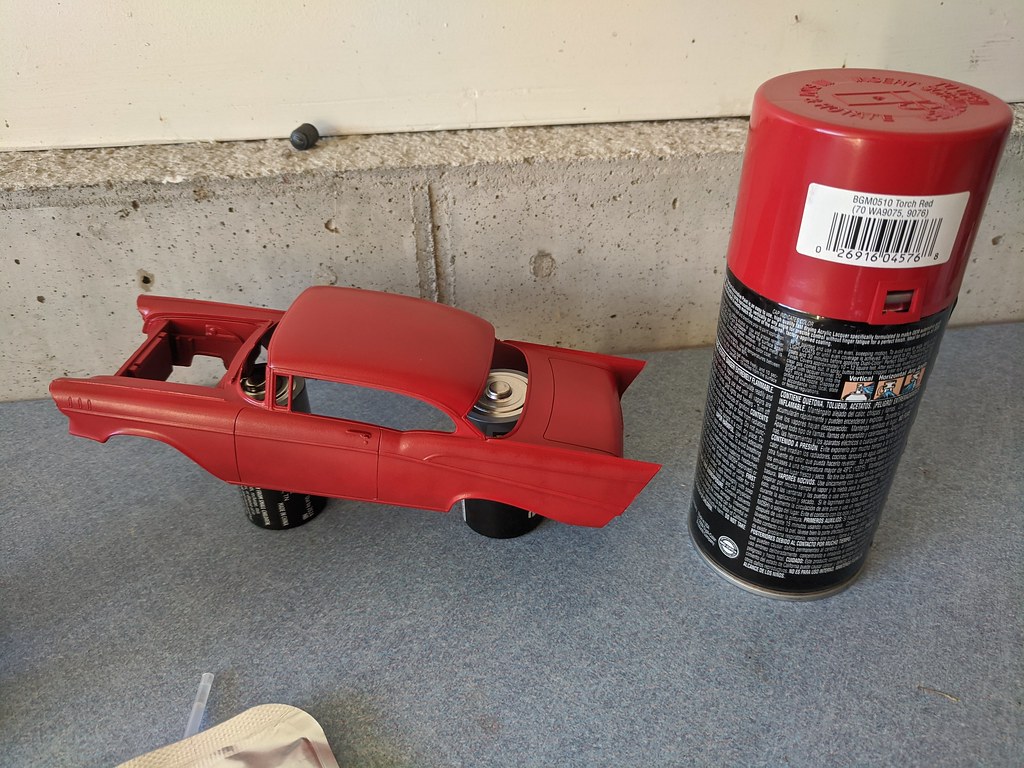
I've also been working on a few projects with my older son. We are building a 57 Bel Air and I found a can of Torch Red touch up paint so the model will be an exact match to my Camaro.
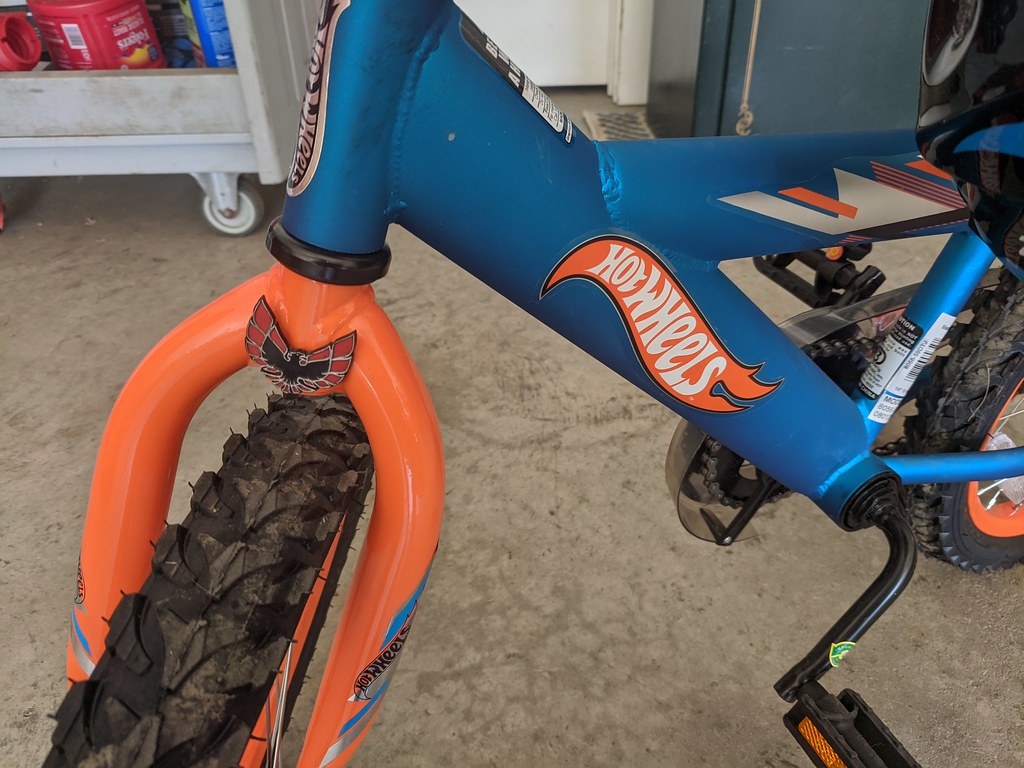
We also modded his new bike. You have to personalize it right!
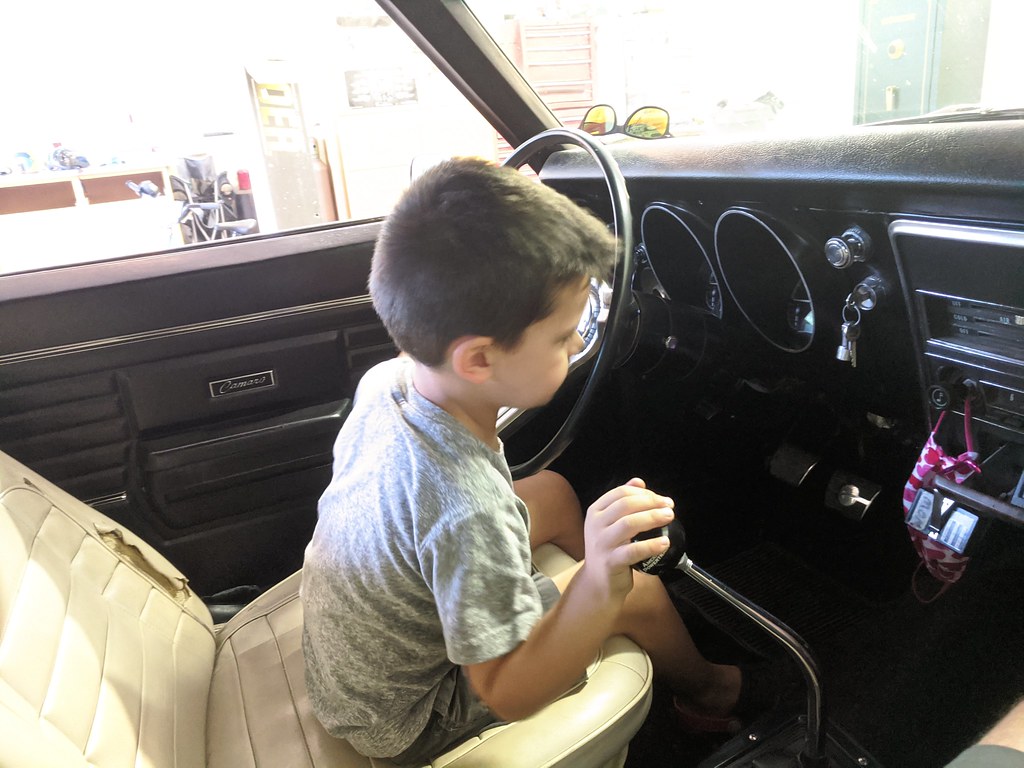
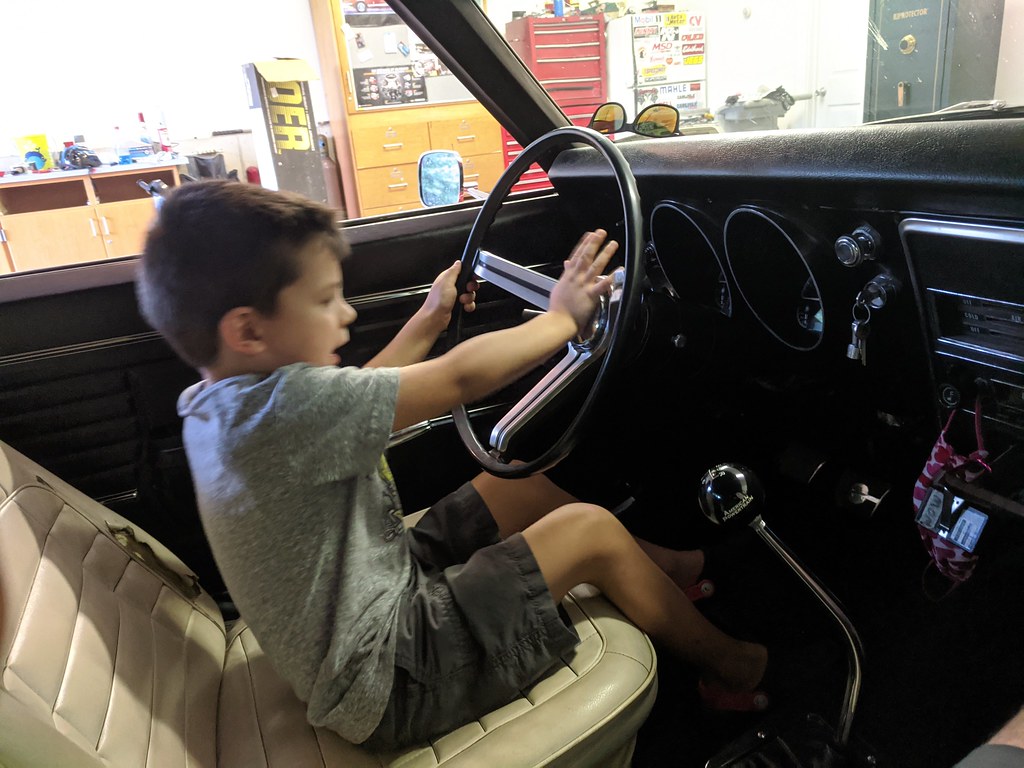
He loves sitting in my car and shifting through the gears too.
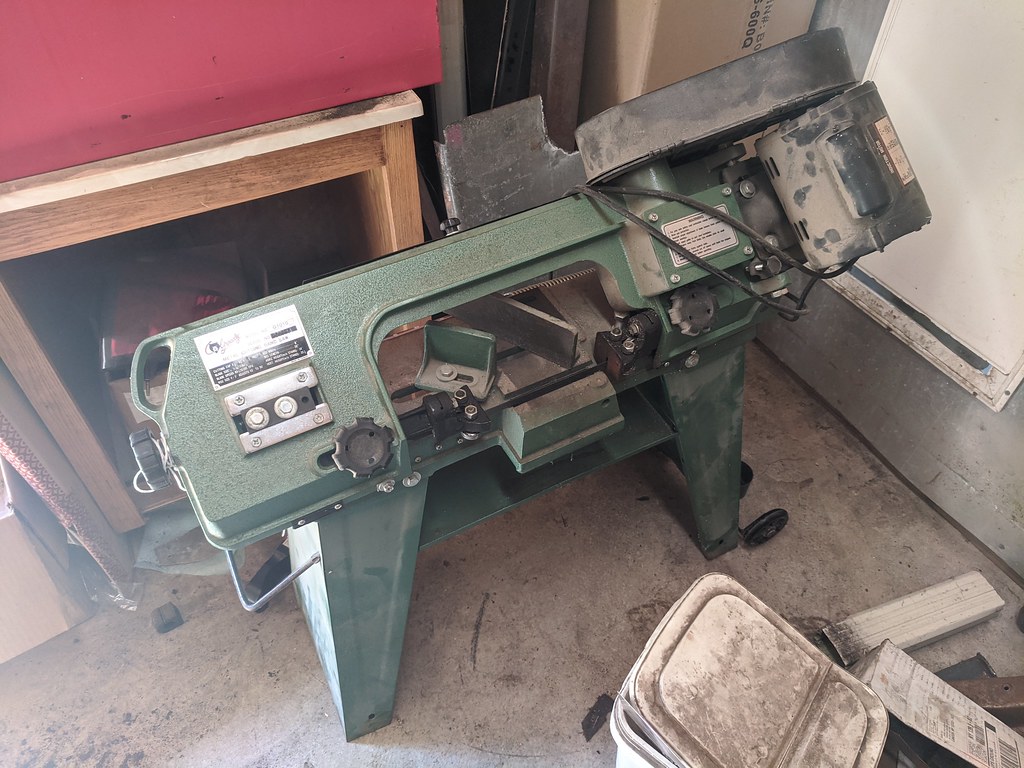
My neighbor was selling a nice band saw recently so I picked that up from him. I'm planning to redo my exhaust this winter and this will come in handy.
I've been slowly collecting more parts for my next stage too.

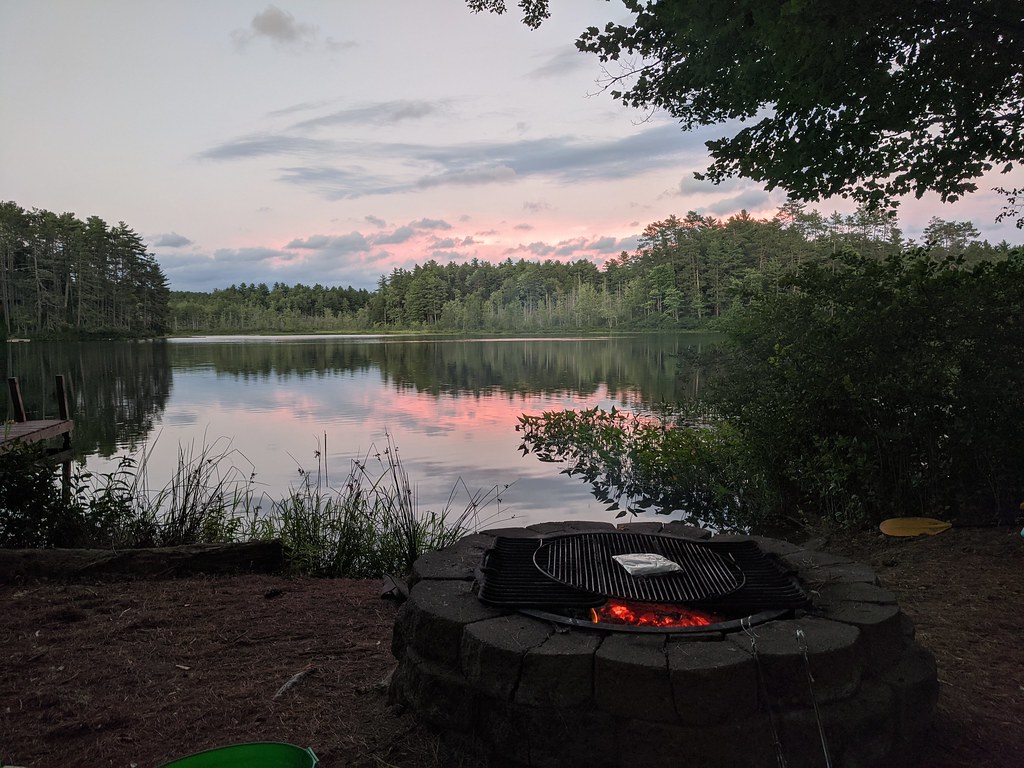
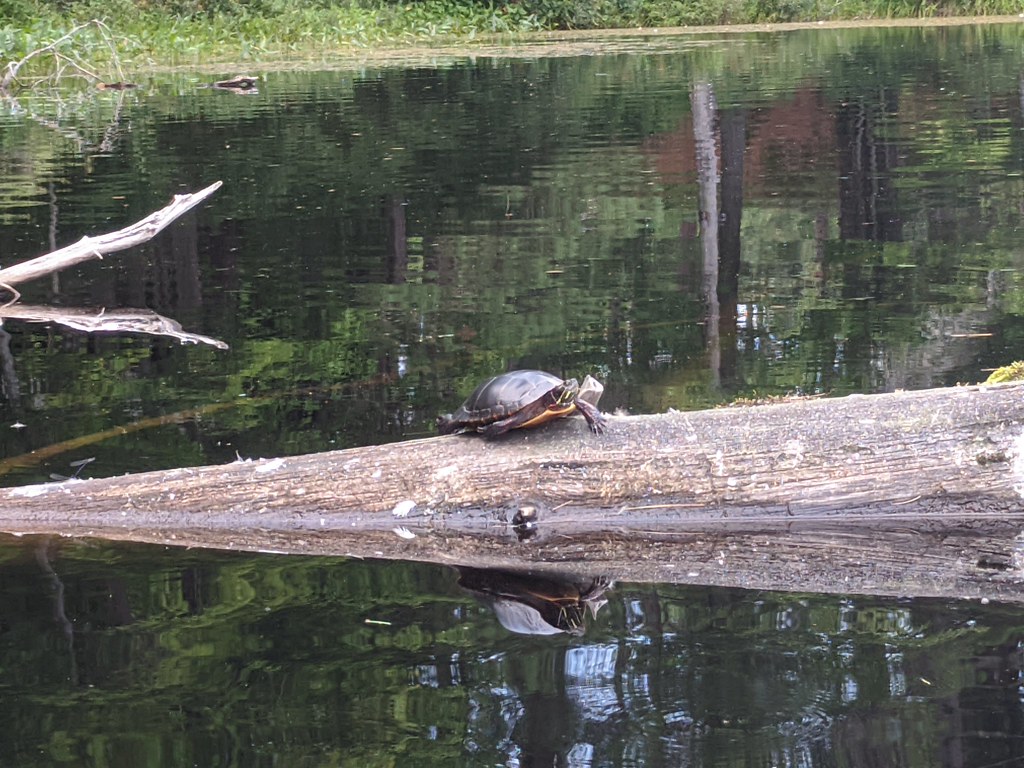
We recently got away to a family friend's cabin in the Adirondacks. It was a great way for us to get away and still be socially distanced. Our whole family really needed that break.
Small mouth on the camp fire grilling.
Cheers,
Ryan
1955 Nomad project LC9, 4L80e, C5 brakes, Vision wheels
1968 Camaro 6.2 w/ LSA, TR6060-Magnum hybrid and etc SOLD
1976 T/A LS1 6 Speed, and etc. SOLD
Follow me on Instagram: ryeguy2006a
08-18-2020 #580
Registered User
- Join Date
- Sep 2009
- Posts
- 2,709
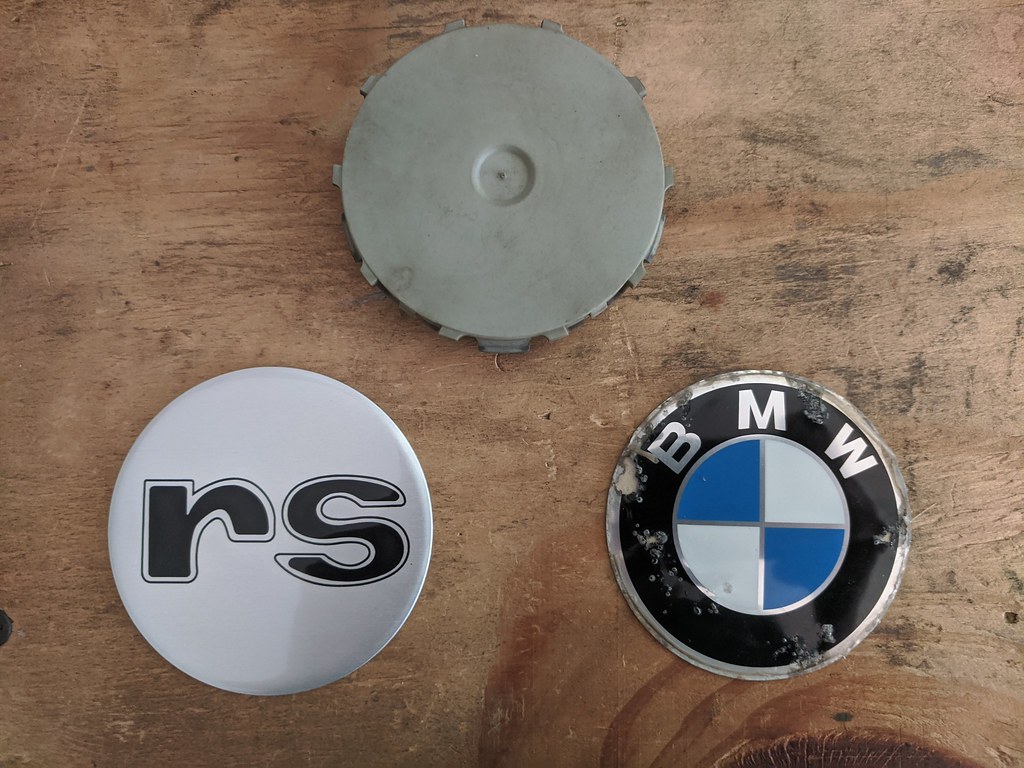
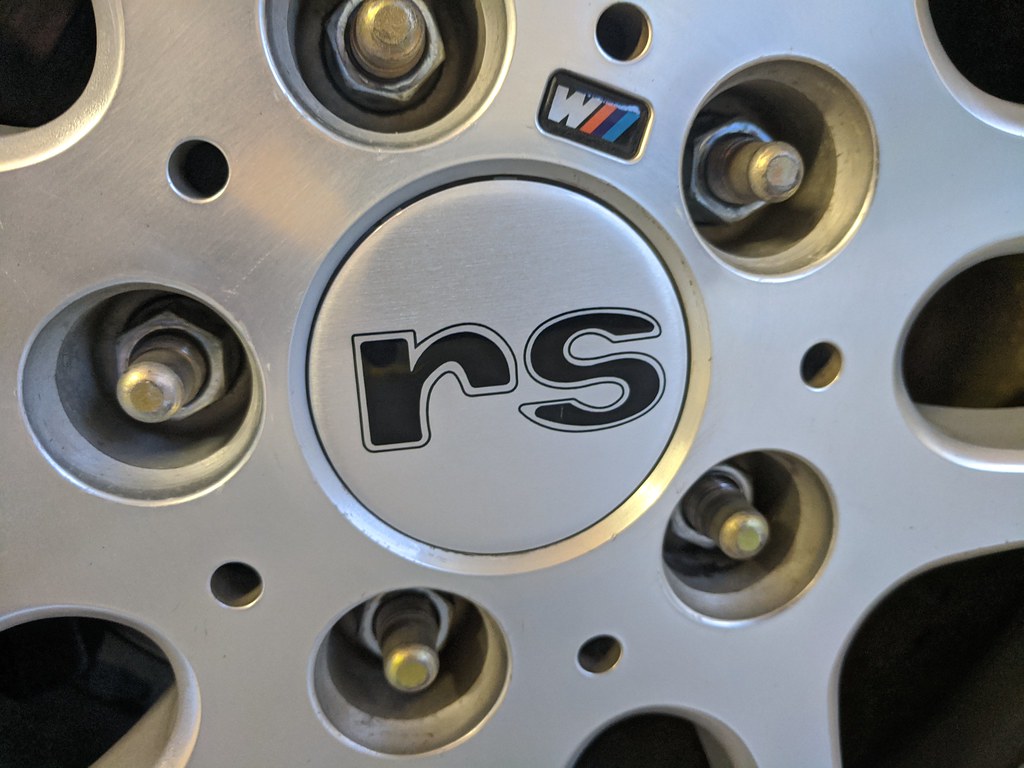
I ordered these about a month ago on Etsy, and they finally showed up! I had some hub cap decals made that will replace the BMW logo from the M Parallel wheels that I'm running. I wasn't sure how close the silver would be, but figured if it was lighter or darker it would still look good. But wow, it's almost a dead match! I'm so happy with the results. Other than that little "M" most probably won't know they are off of a BMW. I had them made to replicate the "rs" logo from the horn button.
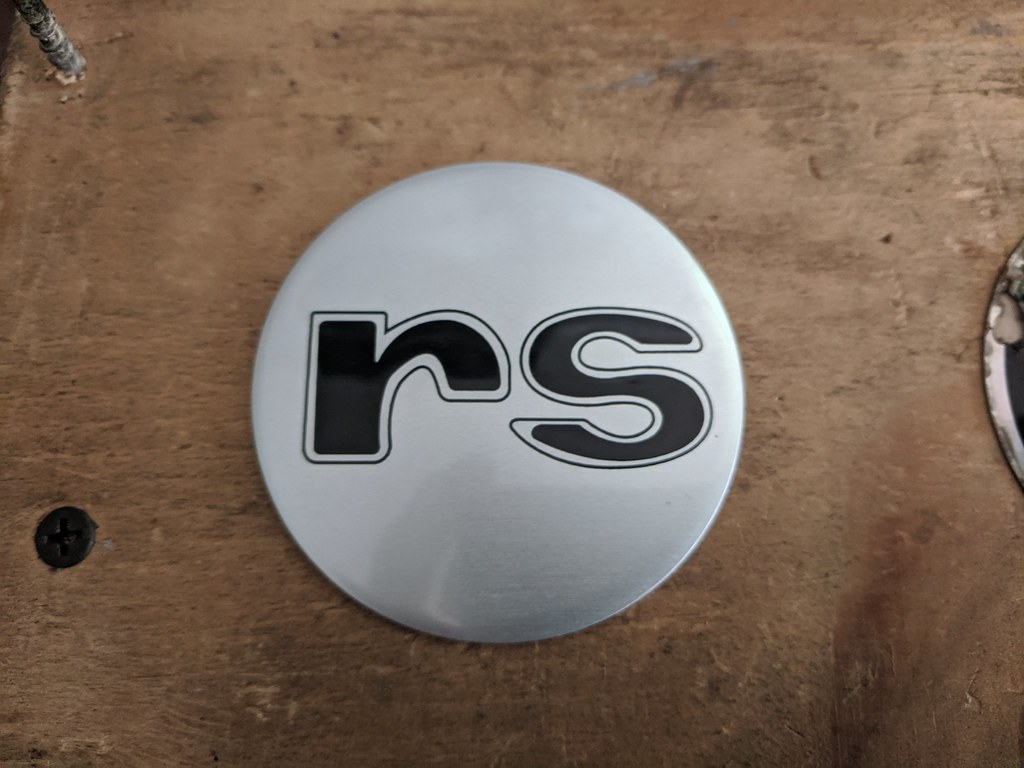
Disassembled the hub caps by removing the plastic trim pieces that held on the BMW centers. The new caps I had made were slightly oversized and had an adhesive back so I didn't need those rings.
For something so simple, I'm super excited as it really finishes off the car. It looks complete now.
My son helped me pop them on and he wasn't too concerned about placement haha. I'll straighten them out to match the "M" logo, but I was glad he wanted to help.
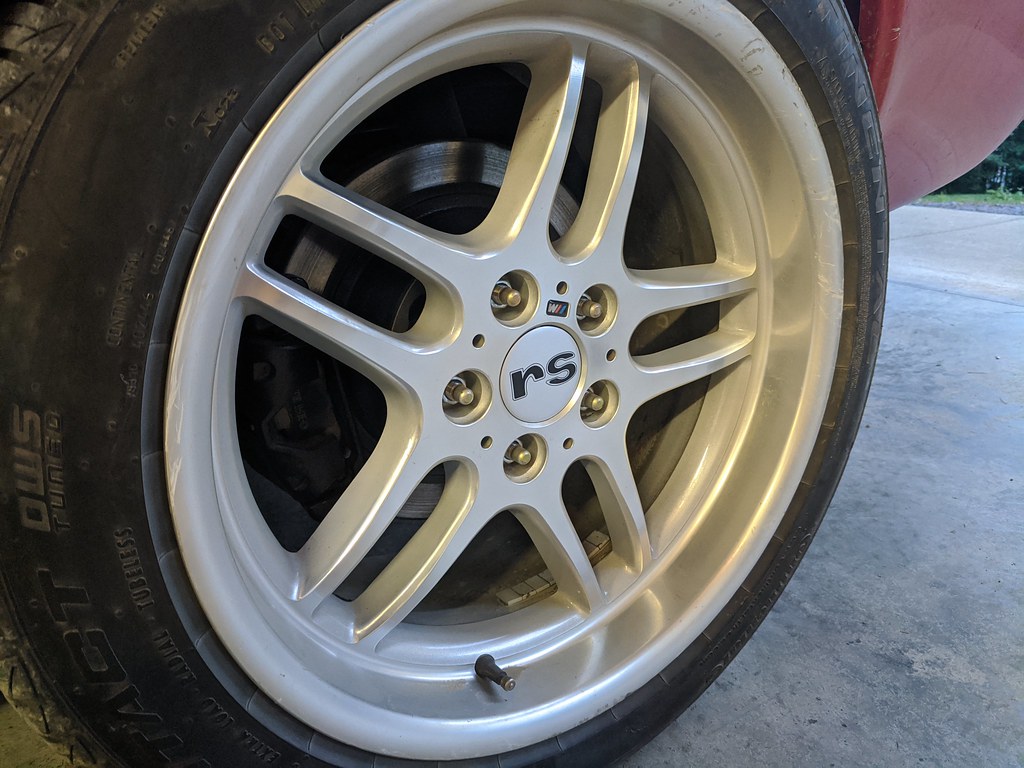
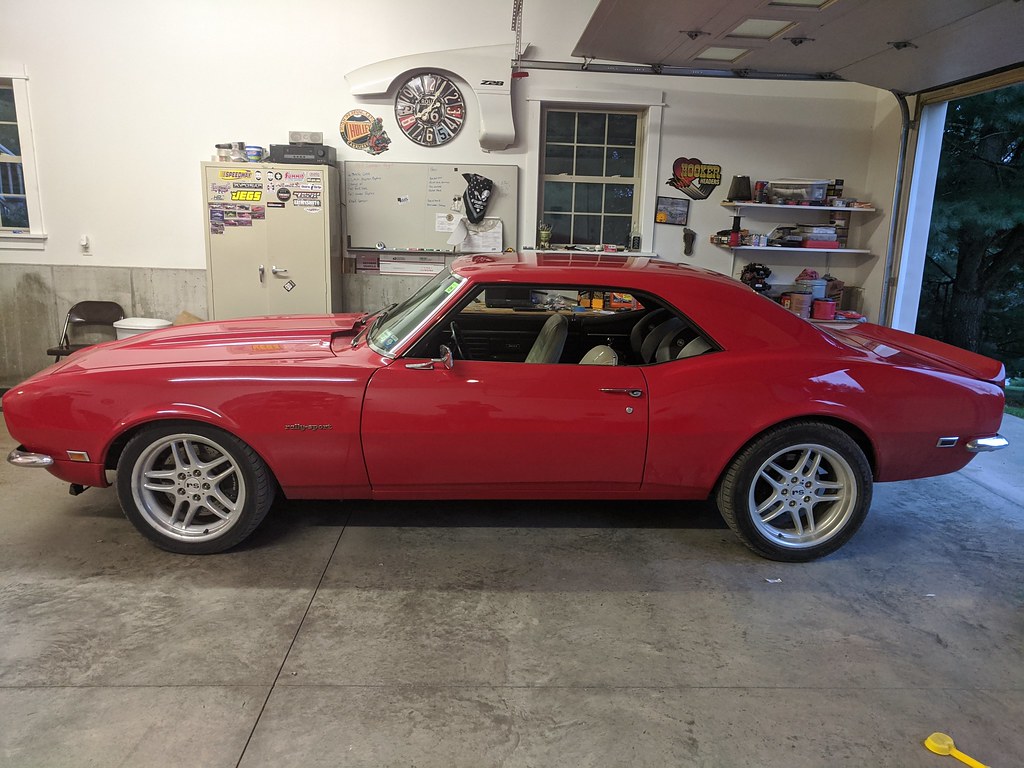
So much better. Glad that the camera hides all of the dirt because the car is filthy. Needs a bath very badly.
Thanks,
Ryan
1955 Nomad project LC9, 4L80e, C5 brakes, Vision wheels
1968 Camaro 6.2 w/ LSA, TR6060-Magnum hybrid and etc SOLD
1976 T/A LS1 6 Speed, and etc. SOLD
Follow me on Instagram: ryeguy2006a

 Reply With Quote


