

Results 541 to 560 of 808
-
03-28-2020 #541

 Registered User
- Join Date
- Dec 2017
- Posts
- 61
Wow, that came out great. At least you are get something accomplished. I have done anything. I need this motivation.
Keep it up man!
1951 Ford F1, 1967 RS Camaro, 1979 Firebird Formula, 1979 Trans Am/LS swap.
-
04-01-2020 #542 Registered User
- Join Date
- Sep 2009
- Posts
- 2,707

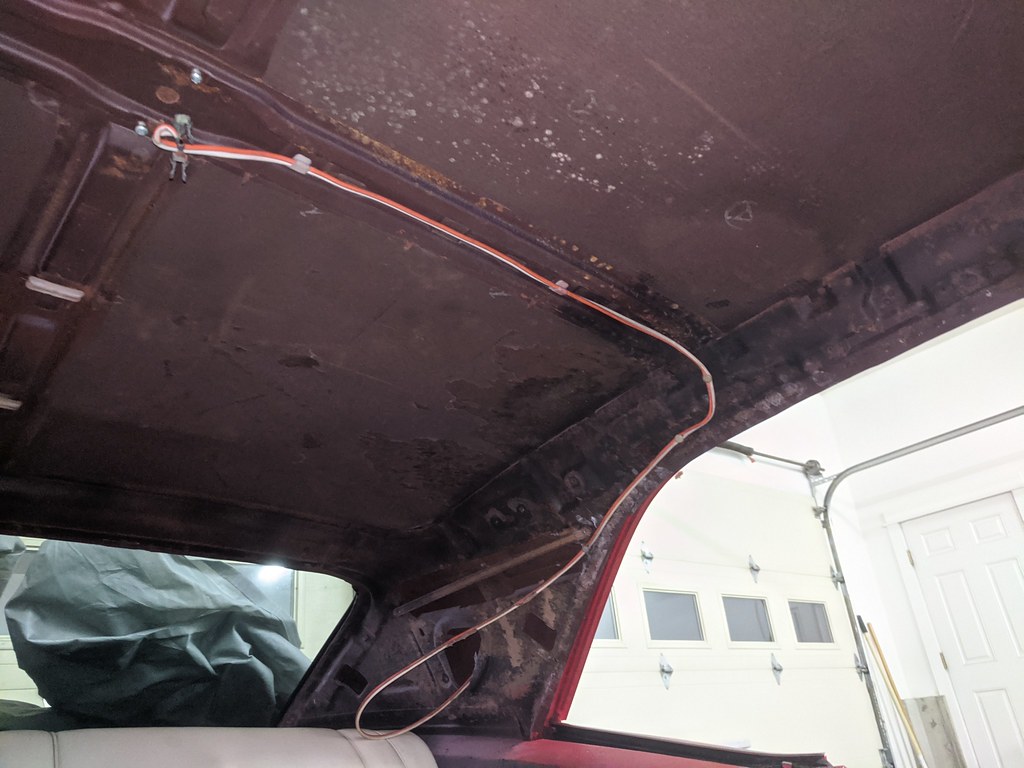
On Sunday in between the kiddos napping and grilling out, I was able to get the headliner bows painted and the headliner flange pieces prepped for the install. I scuffed the bows with 80 grit, sprayed with self etching primer and rattle canned them. Didn't take too much time considering they won't be seen. Just didn't want them all rusty. I got lucky when I bought the car as the headliner was still installed, so when I disassembled, I labeled them for an easy re-install.
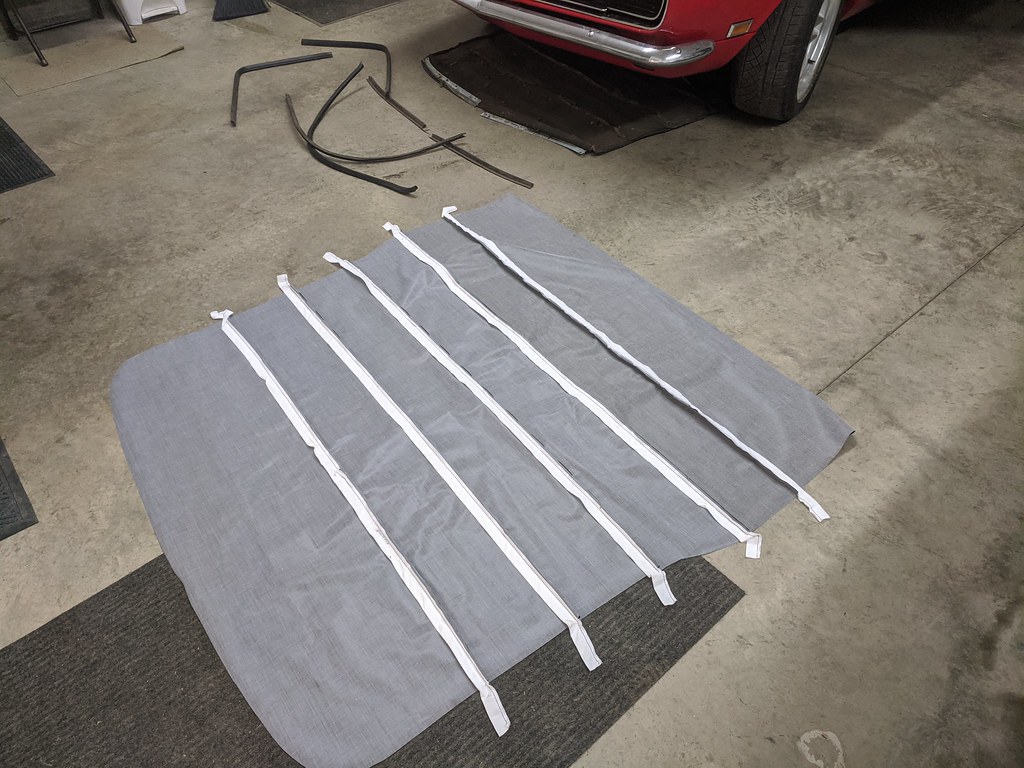
I had laid the headliner in the sun a few days before and it got most of the wrinkles out, but not all. I laid it out on the floor of the garage to mark the center line. Fold it in half length ways, then mark the center. I'm honestly glad I did, because I considered not doing it. I figured that I would be able to eyeball the center line, but with it all hanging down when you are in the car, it made it very difficult. Tip to those who may attempt in the future.
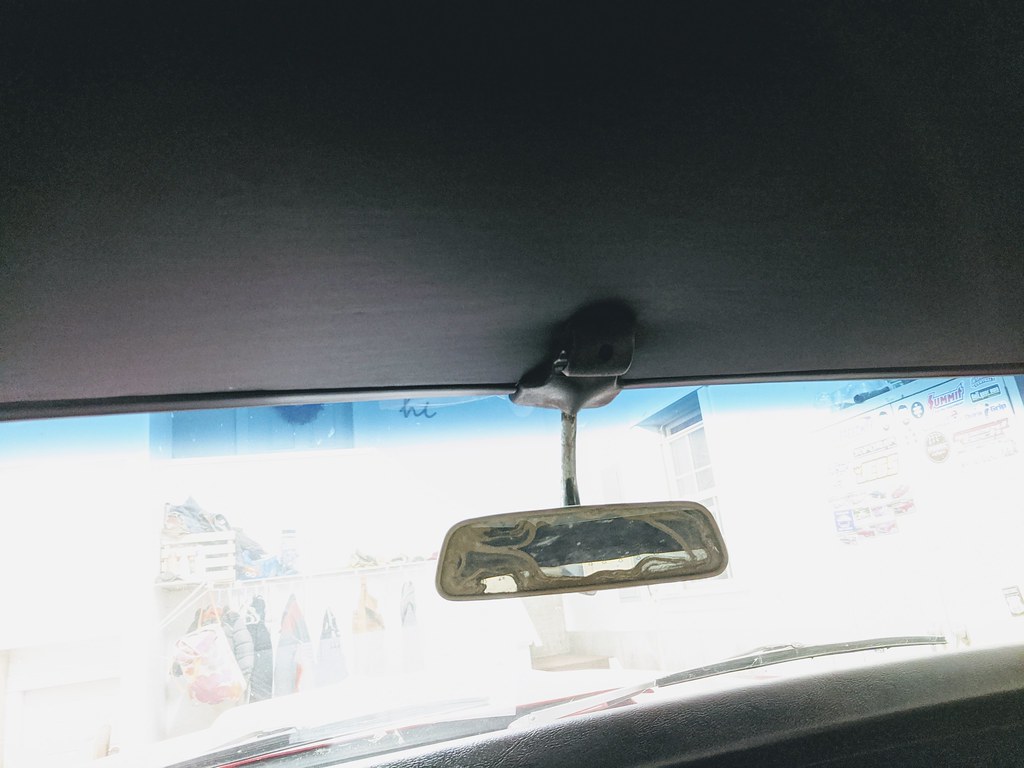
Couldn't forget my dome light!
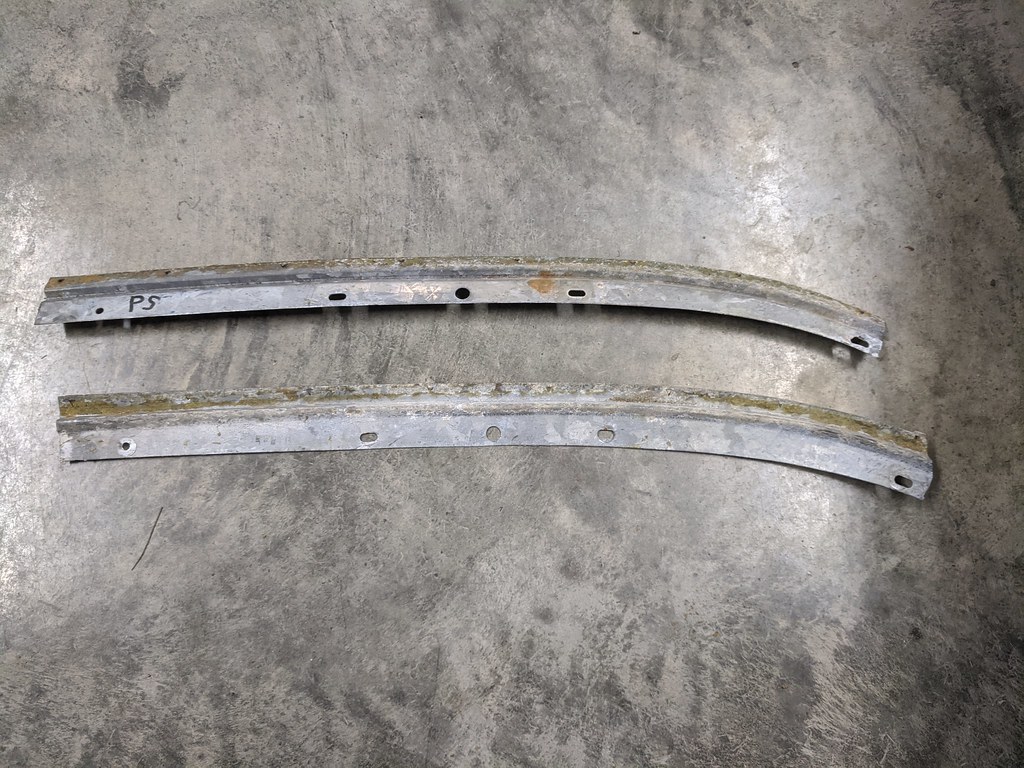
After I cleaned up the headliner flanges, I was amazed at how clean they were! They are untouched originals from 1968. One little surface rust spot on the passenger side.
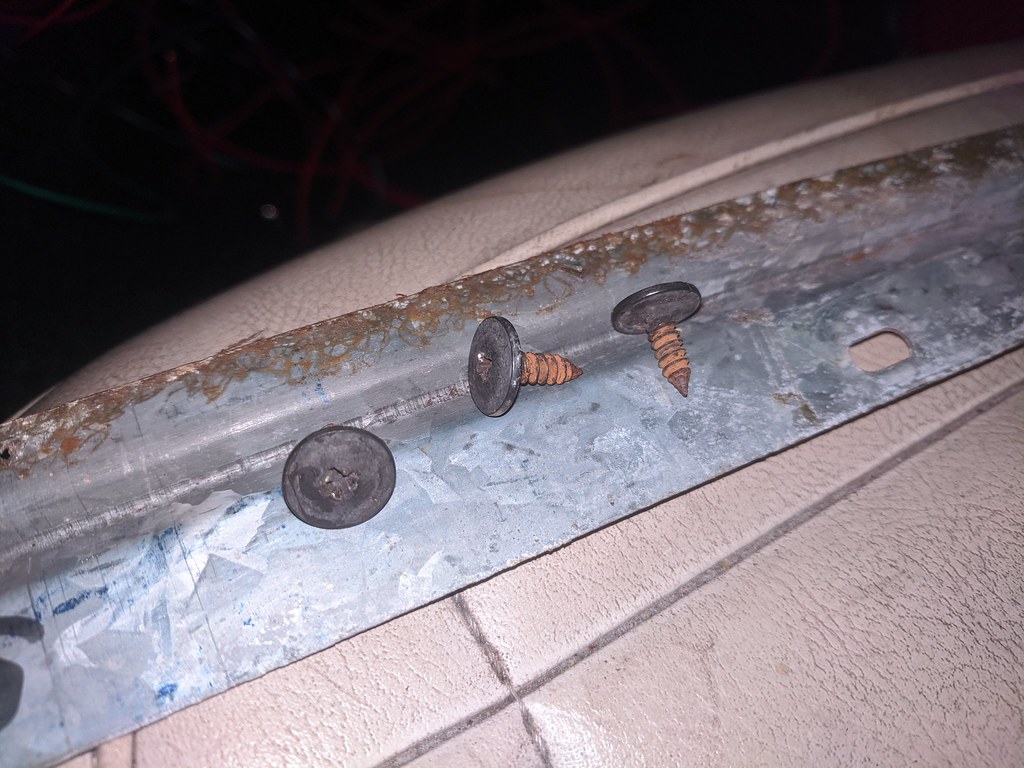
These are the correct screws in case anyone is wondering.
Flanges installed as well as some screws in the holes for the sun visors. Another tip I found when looking up how to install a headliner.
Everything that I read on installing headliners, said to start with the center bow first. This bow is almost more like a metal coat hanger rod, but curved at the ends. Once all the bows were installed, I started in the center. The center bow has some teeth that point towards the rear of the car, so I punched them through the loops for the center and pulled tightly towards the front of the car. I proceeded to pop the front two bows in place.
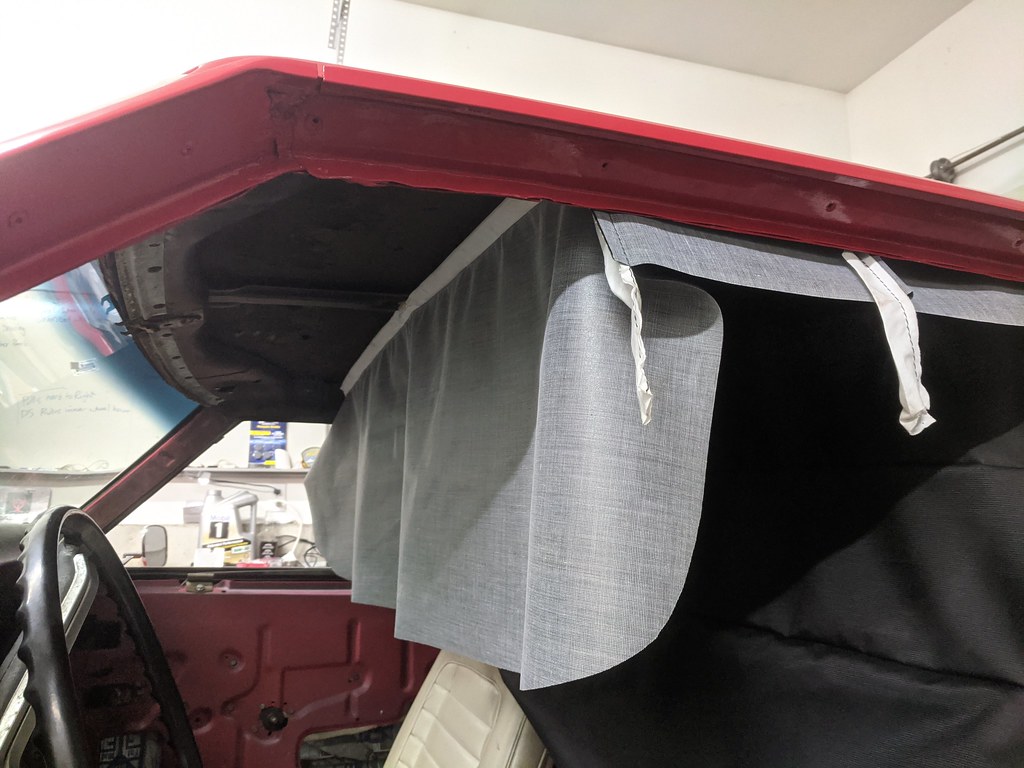
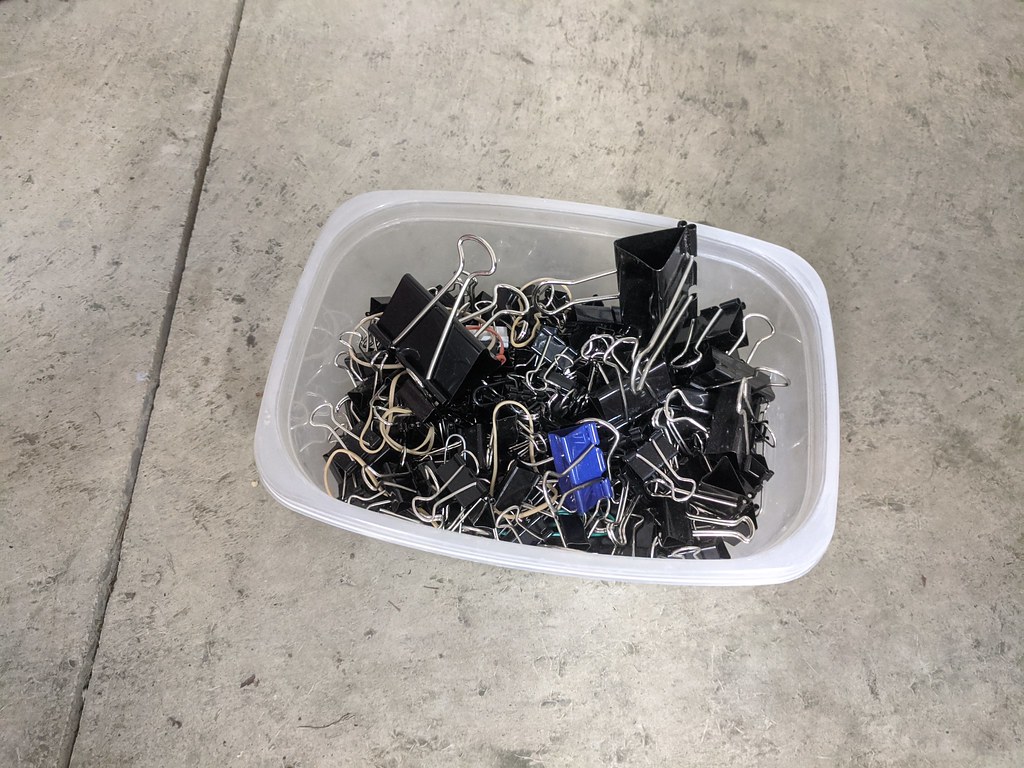
I borrowed this bucket of binder clips from work and started to clip everything roughly in place.
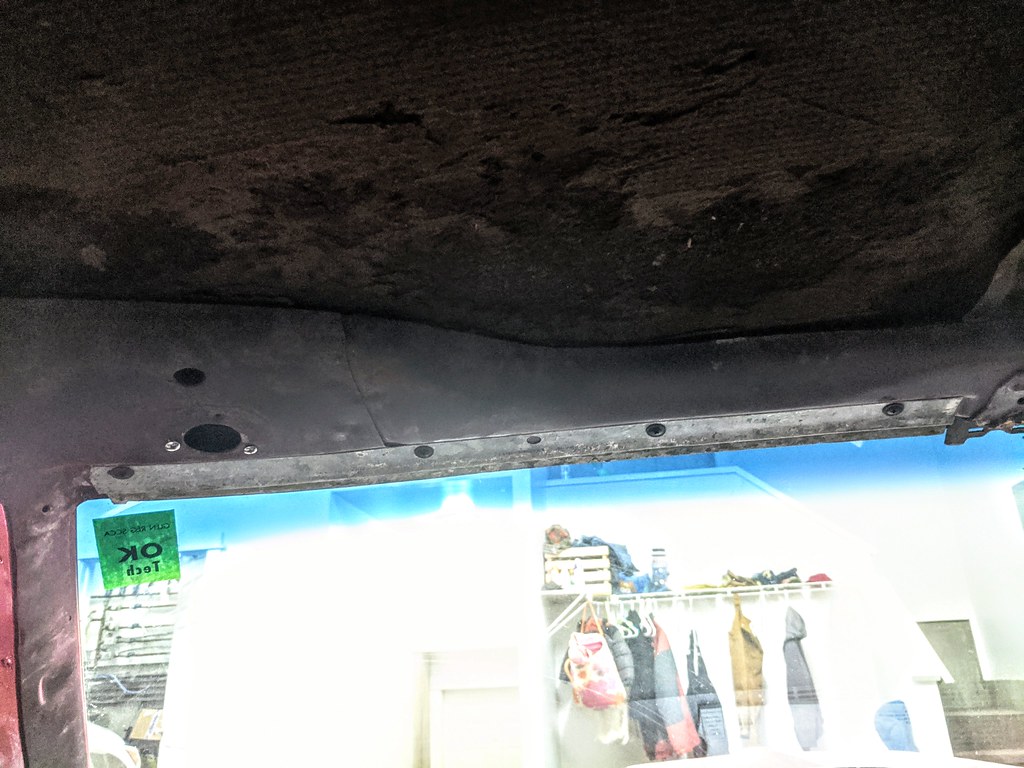
Then moved onto installing the rear headliner flange. This one was not in as good of shape as the front's but overall not bad. I scuffed and shot with some paint to help prevent the rust from coming back.
Everything tightened up quite nicely for the first go around.
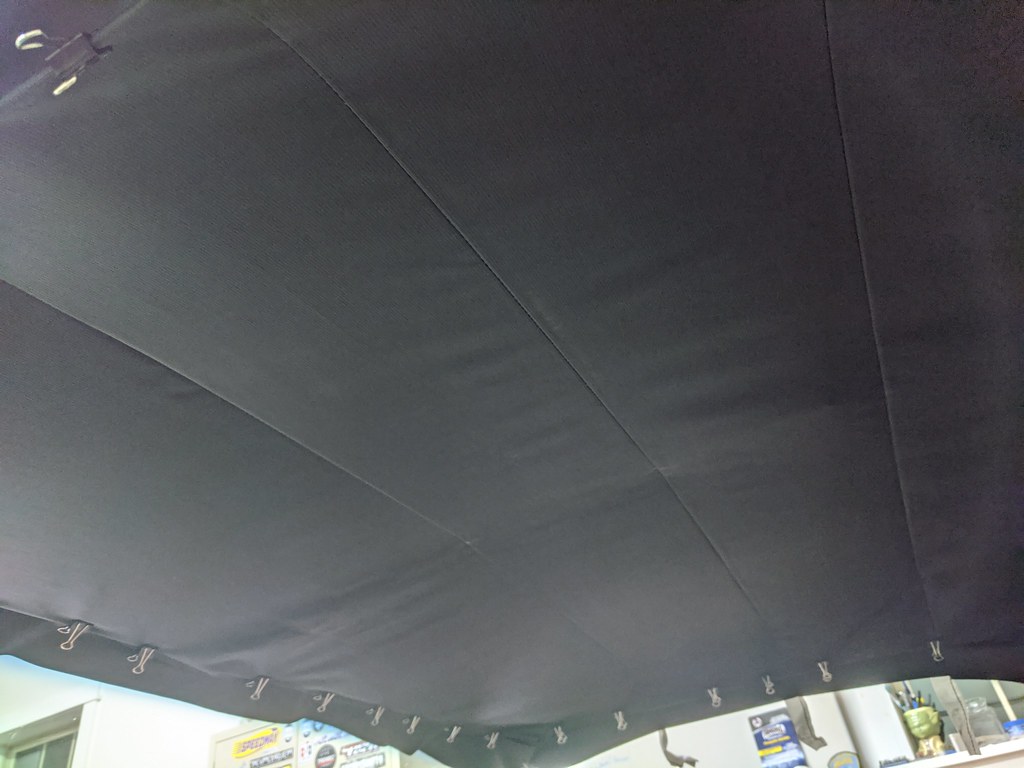
I wanted to get the headliner in place so that it could stretch out in place for a few days. I plan to go back sometime this week and re-adjust it all before it's glued in place.
1955 Nomad project LC9, 4L80e, C5 brakes, Vision wheels
1968 Camaro 6.2 w/ LSA, TR6060-Magnum hybrid and etc SOLD
1976 T/A LS1 6 Speed, and etc. SOLD
Follow me on Instagram: ryeguy2006a
04-01-2020 #543
Registered User
- Join Date
- Sep 2009
- Posts
- 2,707
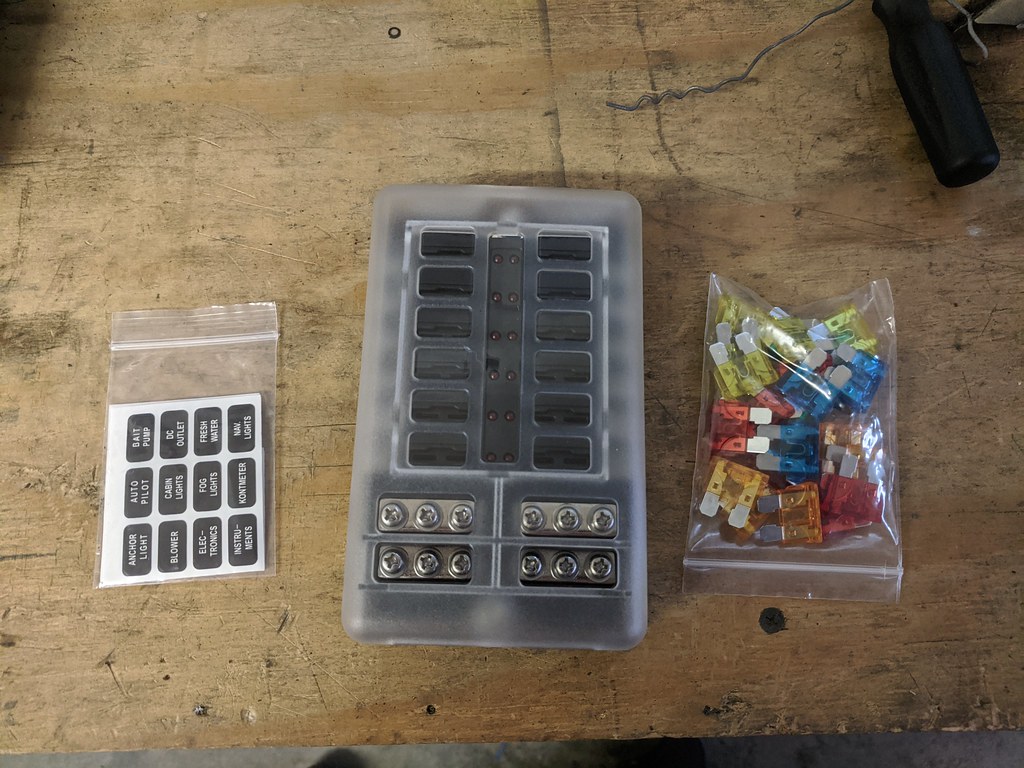
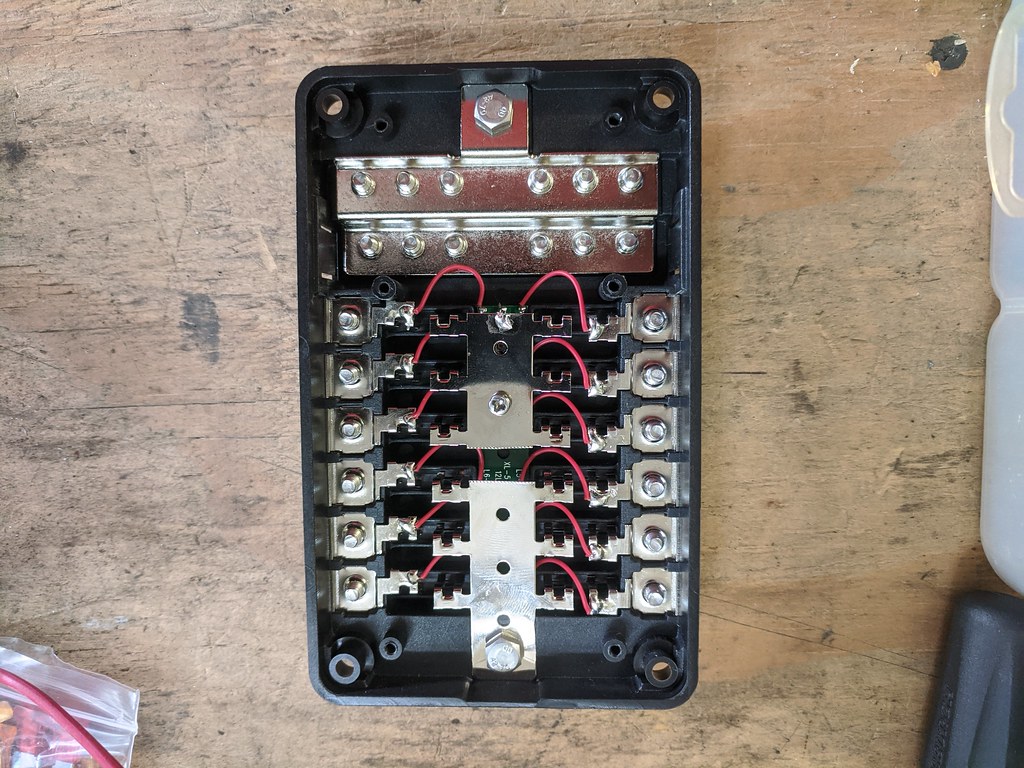
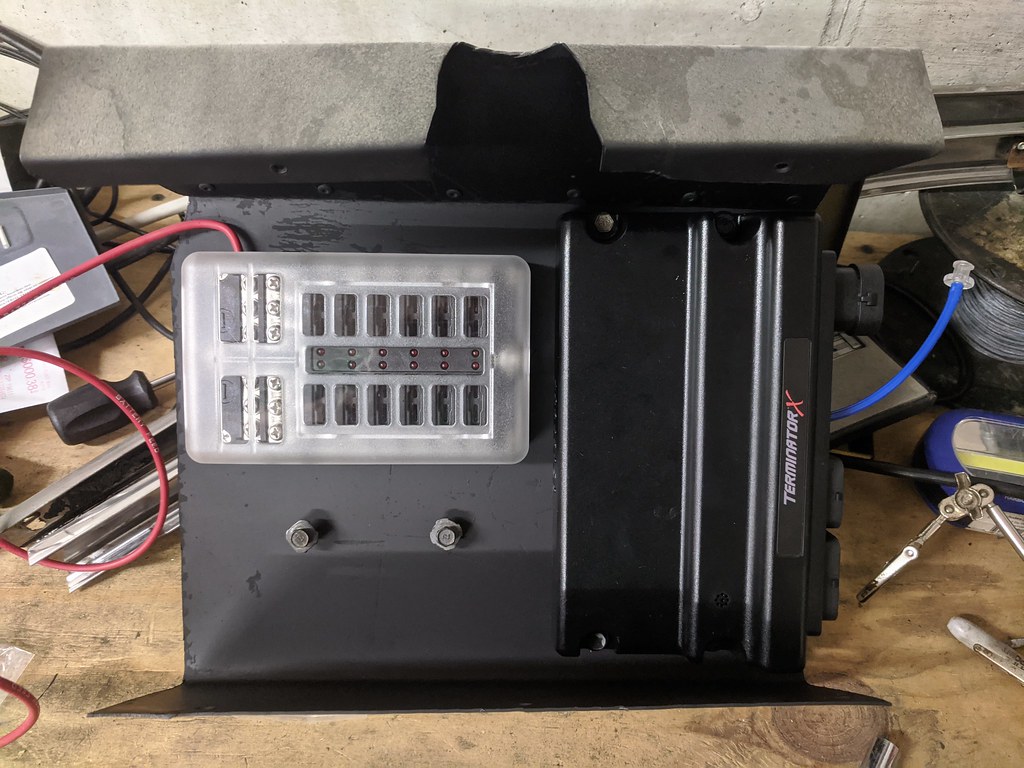
Next on the list was getting a power distribution box. I ordered one from eBay and was pretty pleased with the quality for the price. It gives me a central place to run power and grounds so that I can clean up some of my wiring. The problem was that I also needed to have both constant 12v and switched 12v sources. So I decided to take it apart and see what I could do.

Once I split it apart, I determined where I wanted to split the panel into two circuits.
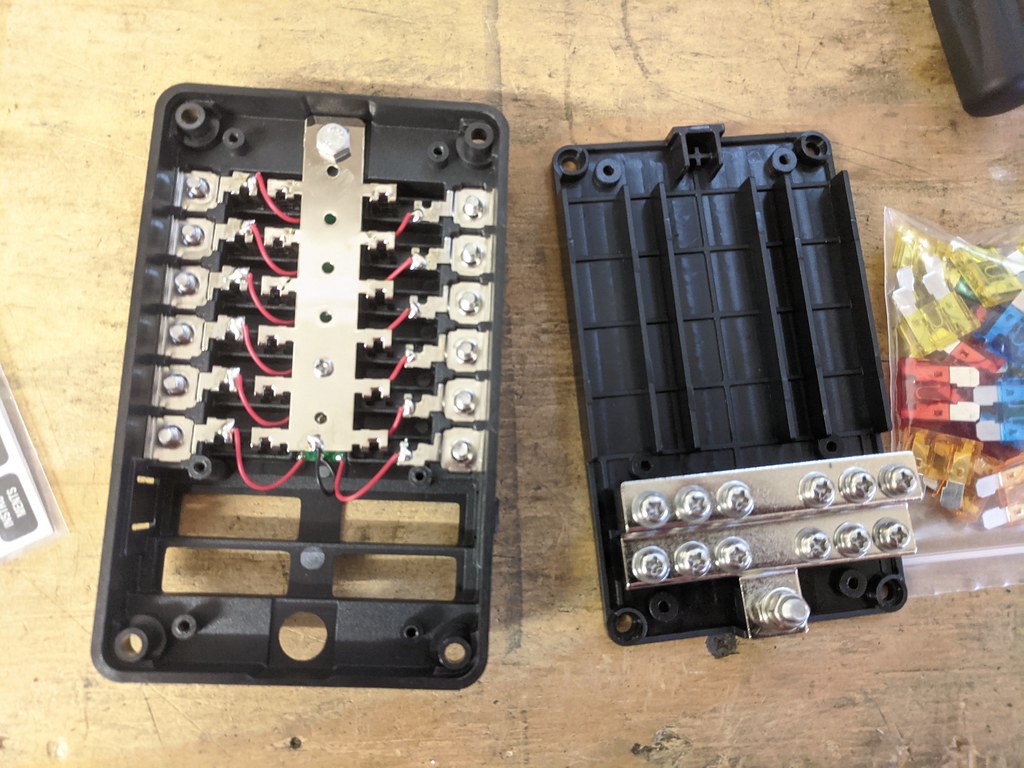
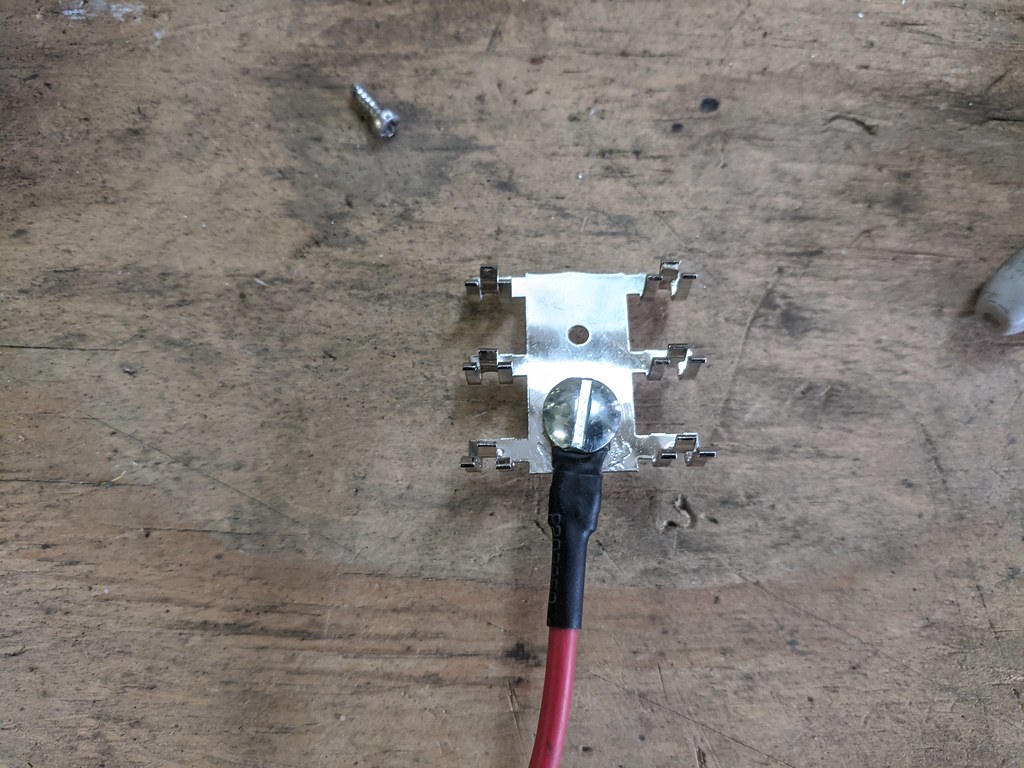
I crimped and soldered on a eye terminal, added some heat shrink and bolted it down to the new switched 12v side. I added a little notch for the 12 gauge wire to pass through. I didn't add a picture before I buttoned it up, but I added a piece of plastic as an added barrier between the ground circuit and 12v wire.
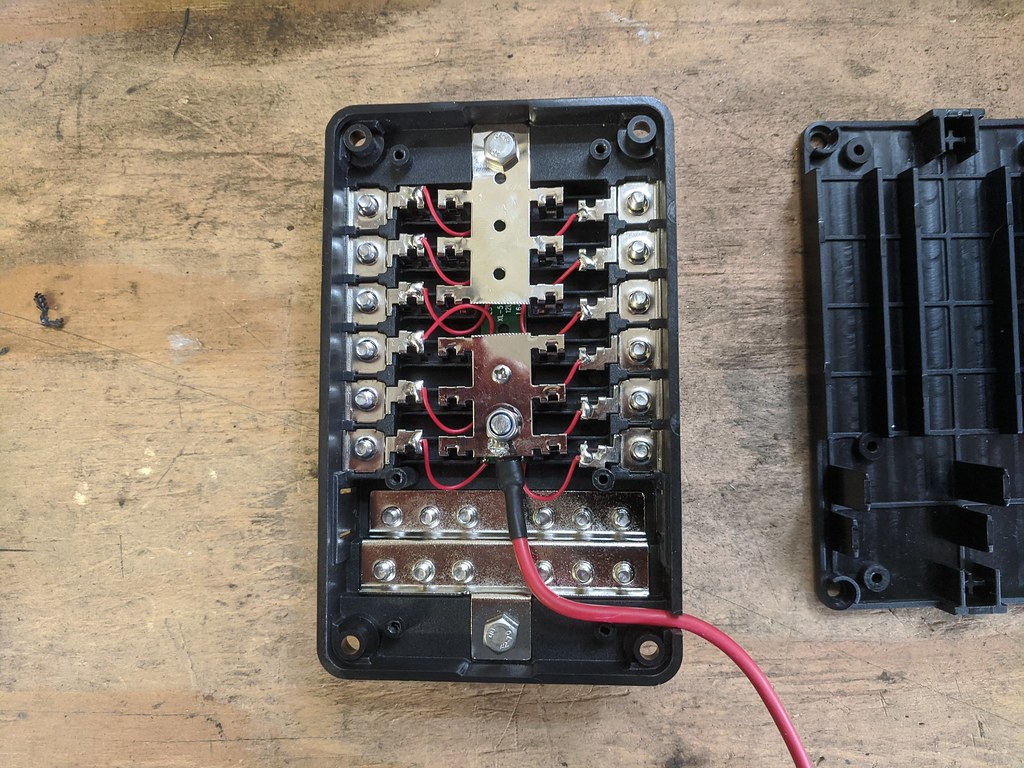
I'll add in a 30 amp relay to switch the ignition side on, but here is the completed conversion. Now the top 6 fuses are constant 12v and the lower 6 fuses are switched 12v ignition sources.
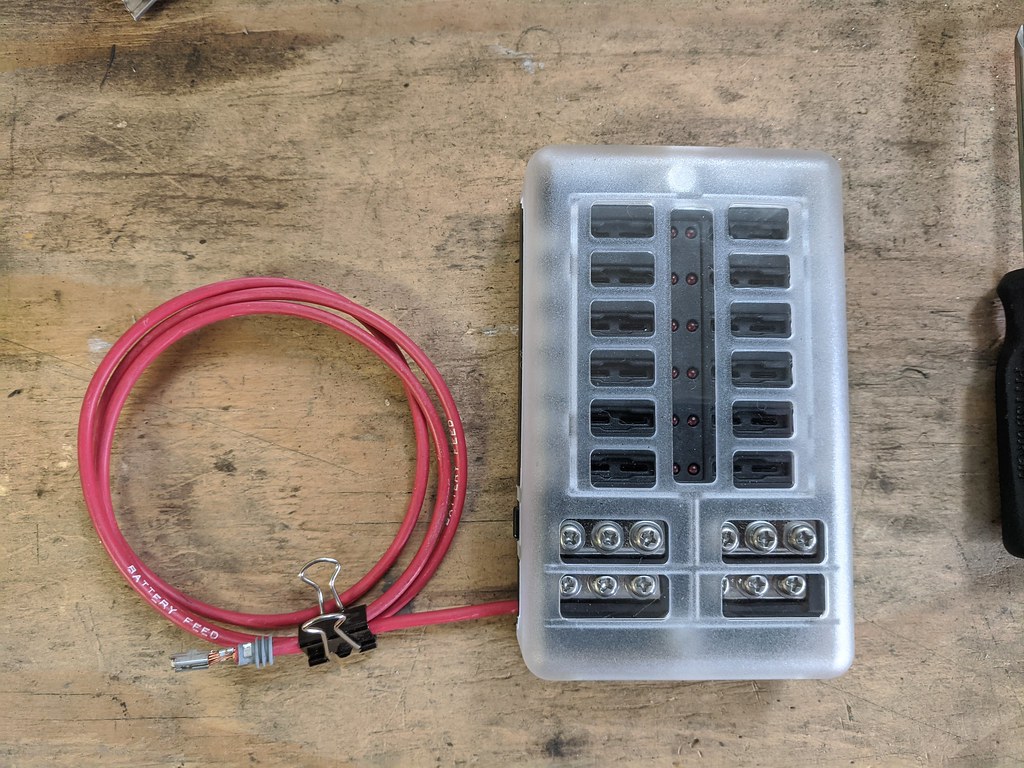

I test fit it on the glove box panel that I made and it will be a perfect fit. Next step is pulling that panel out one more time to fit this fuse panel for installation and then paint. Once that is finalized, I should be pretty close to firing off the engine with the new ECU.
Cheers,
Ryan
1955 Nomad project LC9, 4L80e, C5 brakes, Vision wheels
1968 Camaro 6.2 w/ LSA, TR6060-Magnum hybrid and etc SOLD
1976 T/A LS1 6 Speed, and etc. SOLD
Follow me on Instagram: ryeguy2006a
04-01-2020 #544
Registered User
- Join Date
- May 2015
- Location
- Island Lake, IL
- Posts
- 815
Those little indicator lights are a neat feature. Nice!
04-01-2020 #545
Registered User
- Join Date
- Jul 2018
- Posts
- 434
Awesome work and detail
04-13-2020 #546
Registered User
- Join Date
- Sep 2009
- Posts
- 2,707
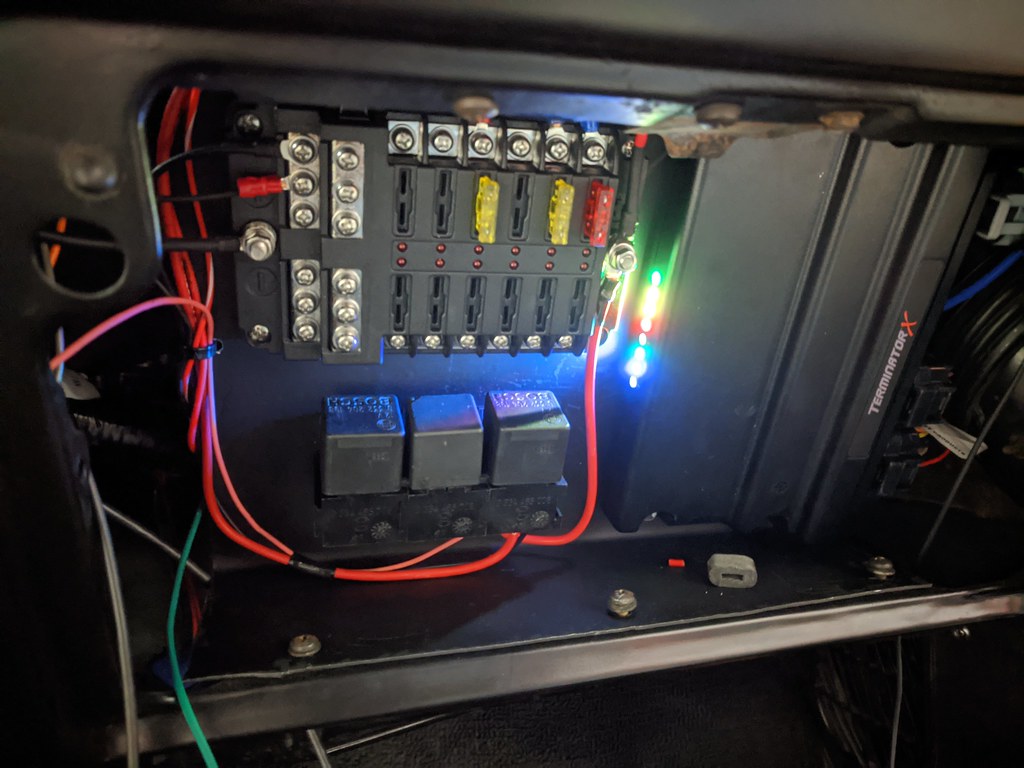
I've been plugging away working towards a complete interior and other misc. things here and there. I finished up the install of the fuse and relay blocks as well as the mounting of the ECU. I love the placement of everything, but it was difficult to find a mounting location that was easy to get to, but also retaining the glove box. So I opted to use the glove box for my wiring needs.

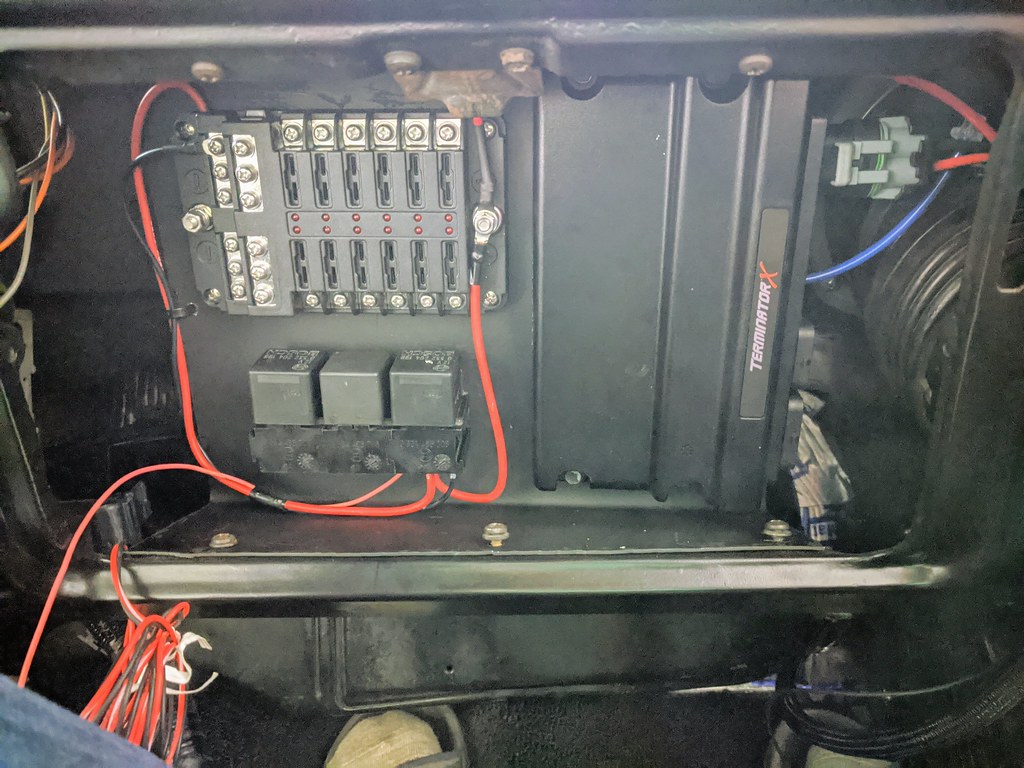
It's Alive!! Once all the wiring is final, I'll tidy everything up with some loom.
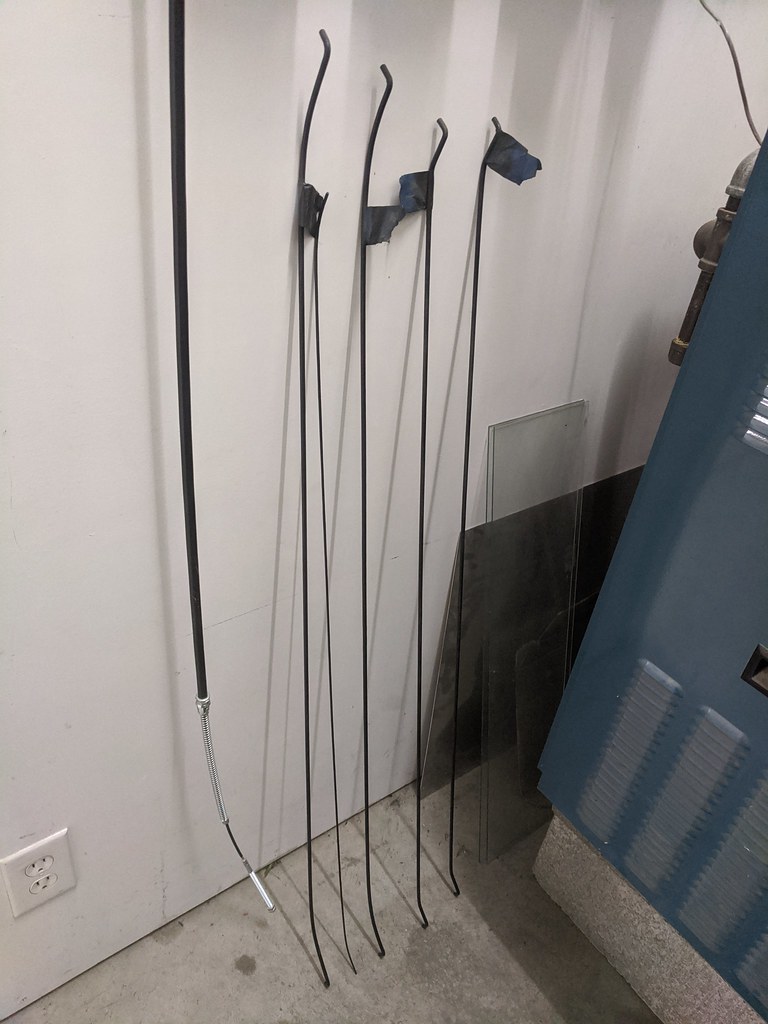
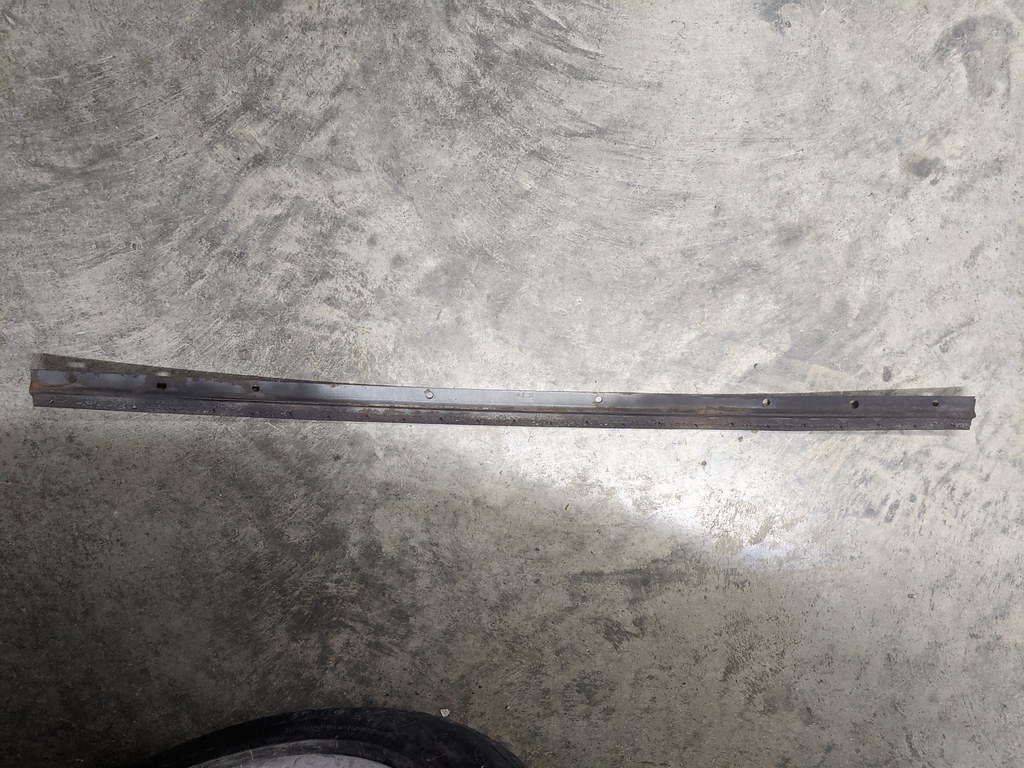
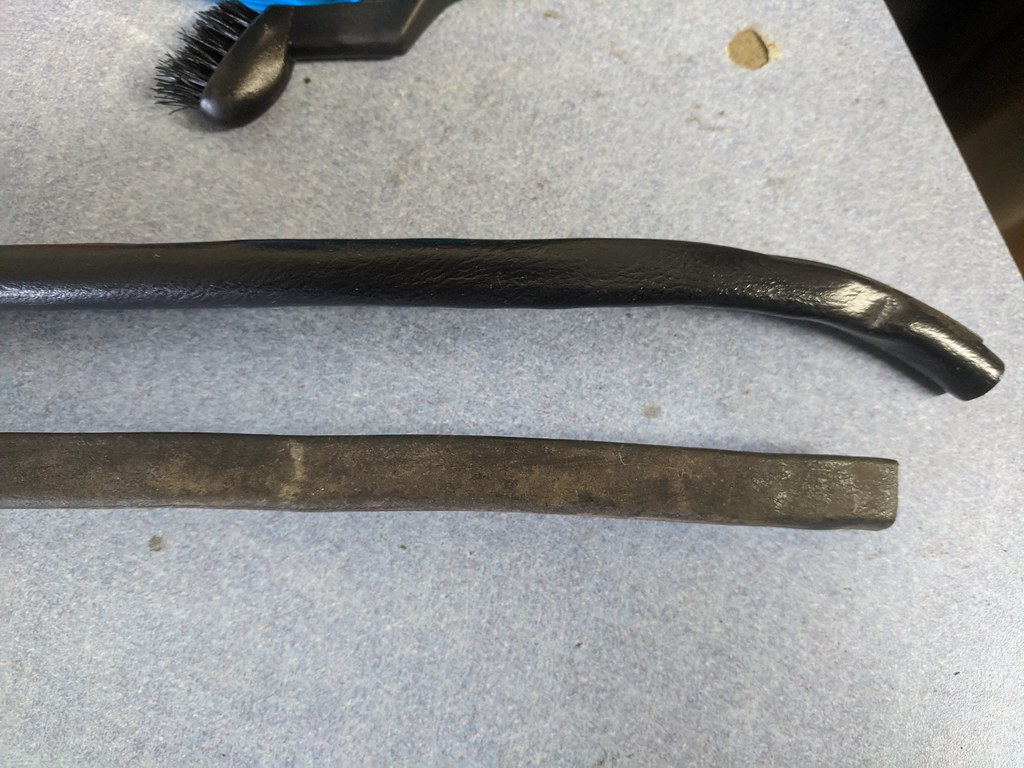
I've been constantly impressed with the condition of the original parts on this car. Here are the original windlace trim parts from the car. I was assuming that I'd need to replace these with new, but thought I might try cleaning them up. I'm glad I did, they are in great shape and are still quite flexible! I'll let you guess which was was the before.
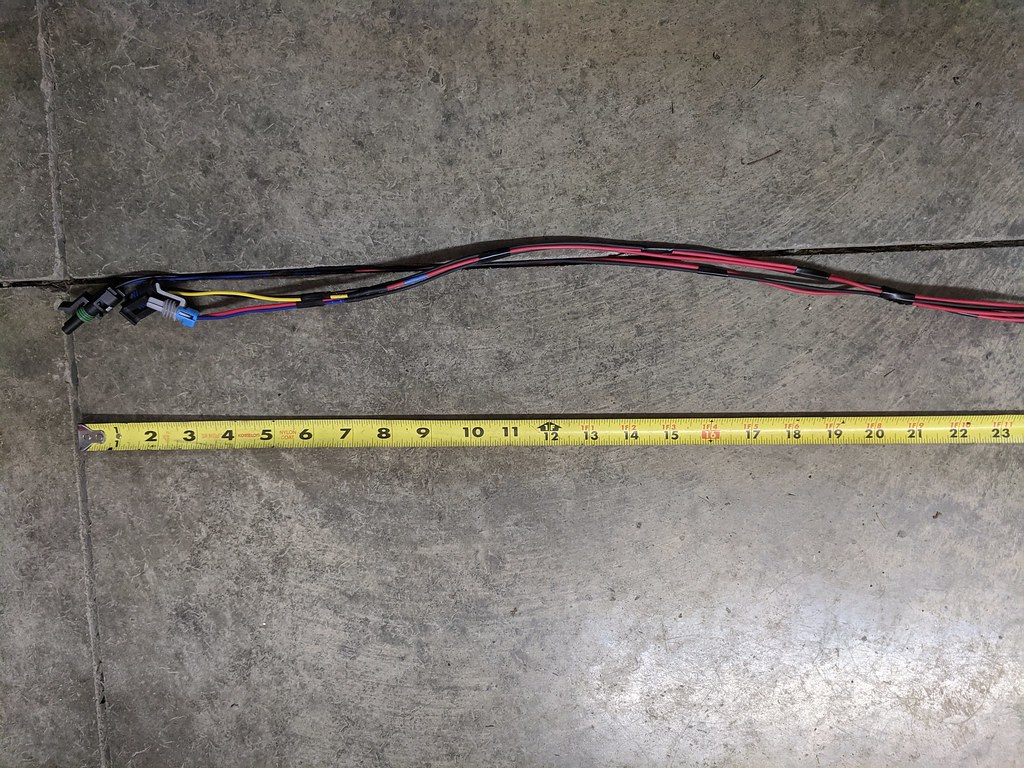
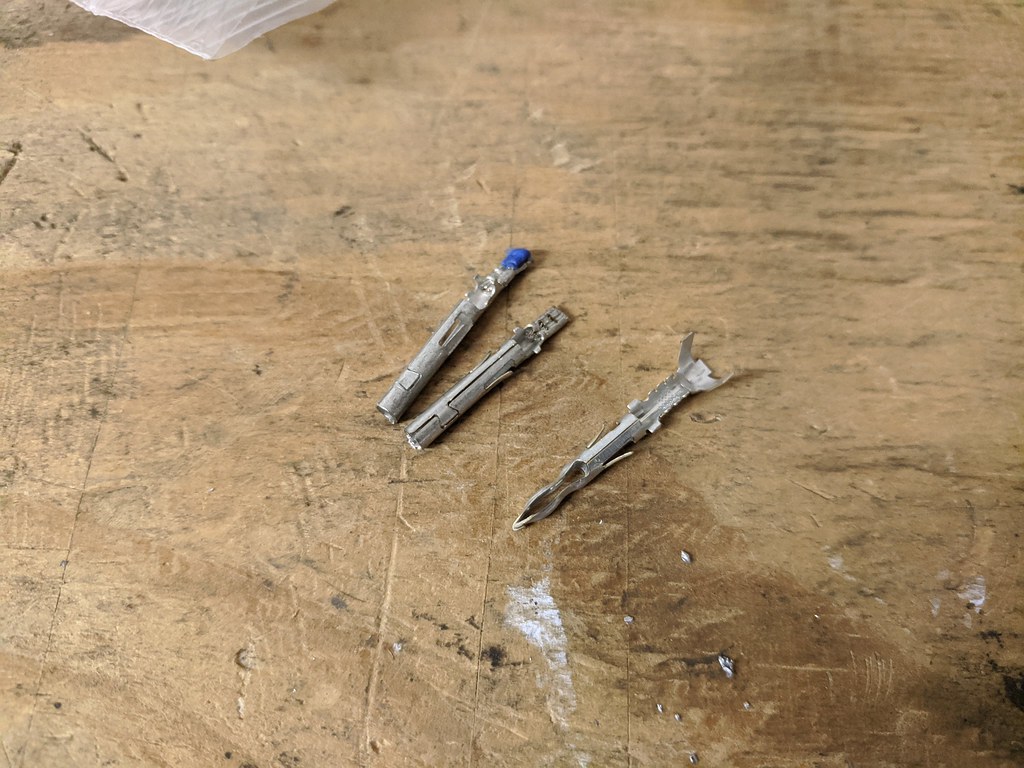
Since the Terminator X has a universal LS wiring harness, I needed to add in the t56 "sub" harness for the Reverse lights, Reverse lockout and Vehicle Speed. I picked up one of the pigtail kits for the three connectors from eBay and VSS and RLO were perfect, but the reverse light switch had female terminals installed rather than the correct male. It took me about an hour to figure that out. So I've ordered a new set of correct terminals and a Metri-pack terminal removal tool. Should be here by the end of the week to finish that up. I should mention that only the VSS and Reverse Lockout will be hooked up to the ECU. The Reverse lights do not communicate with the ECU at all, but rather are wired into the body harness.
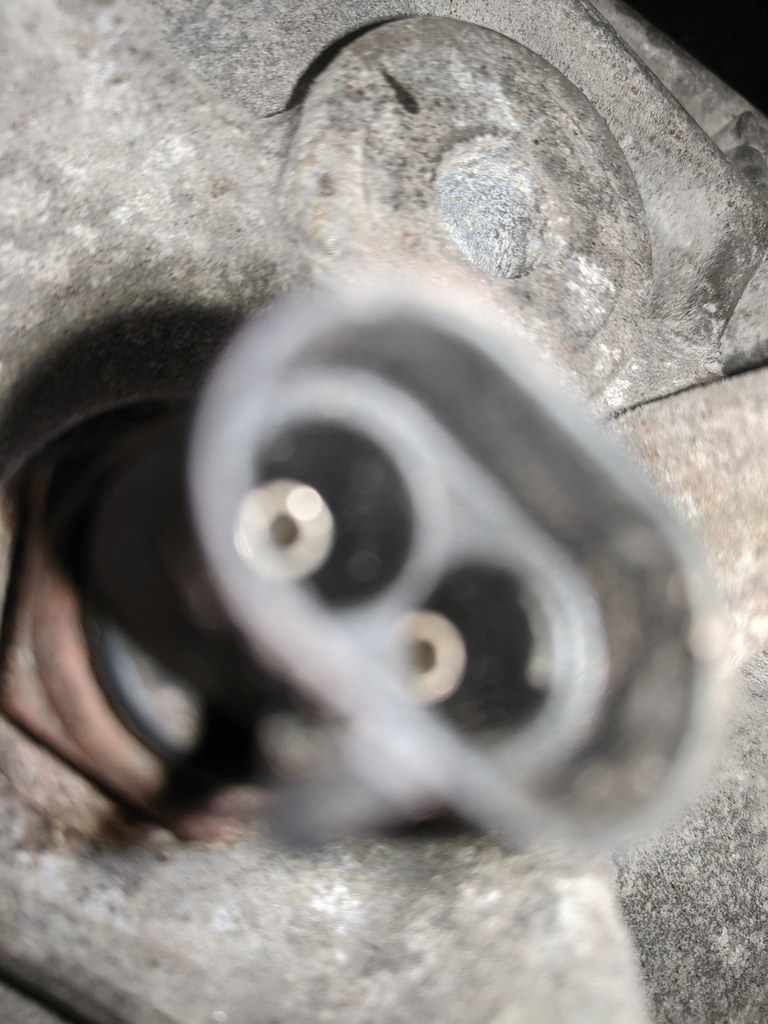
Picture's blurry, but that's the best I could do to show that the reverse switch has the female terminals on it, so the plug would need male terminals to install correctly.
1955 Nomad project LC9, 4L80e, C5 brakes, Vision wheels
1968 Camaro 6.2 w/ LSA, TR6060-Magnum hybrid and etc SOLD
1976 T/A LS1 6 Speed, and etc. SOLD
Follow me on Instagram: ryeguy2006a
04-13-2020 #547
Registered User
- Join Date
- Sep 2009
- Posts
- 2,707
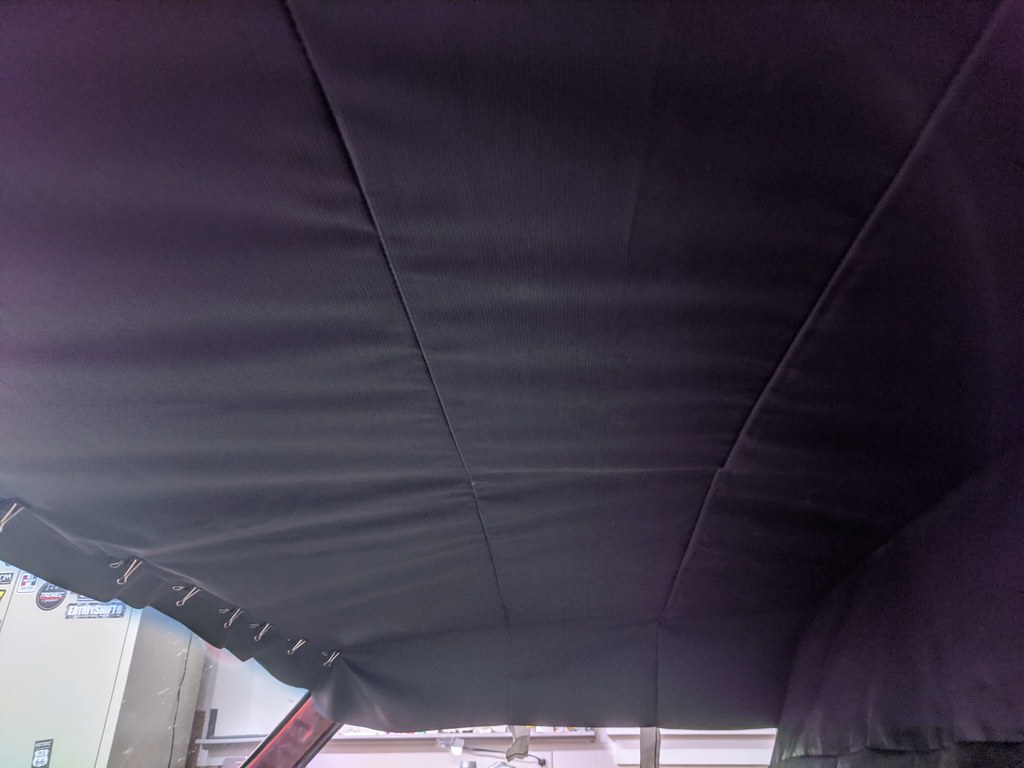
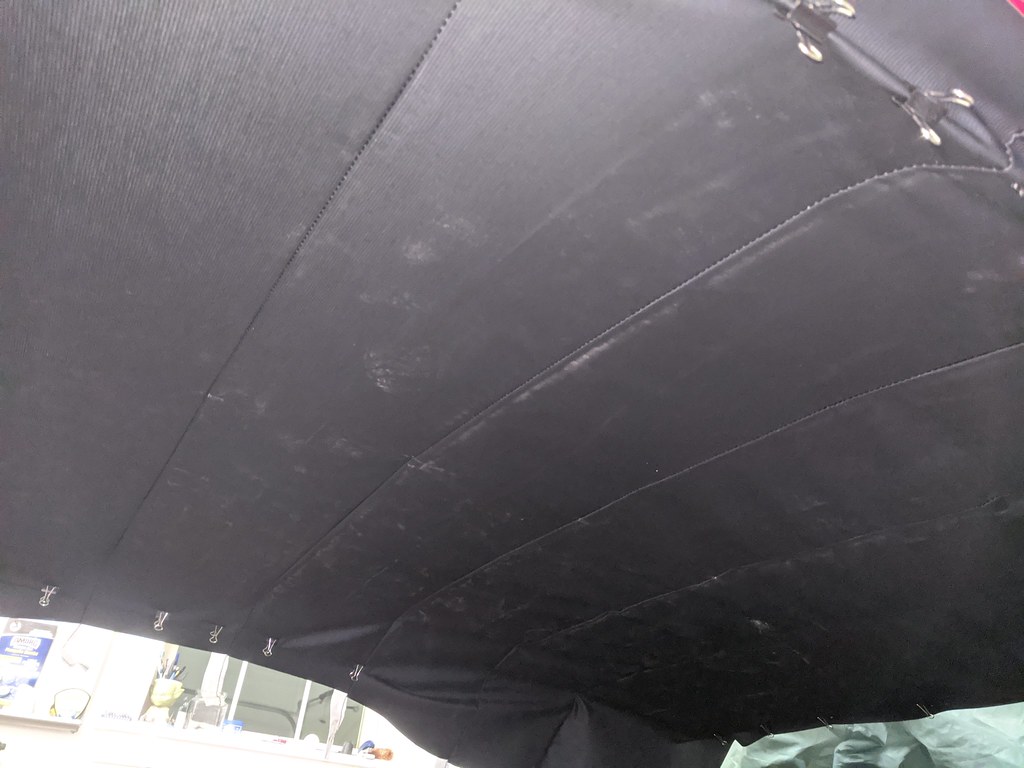
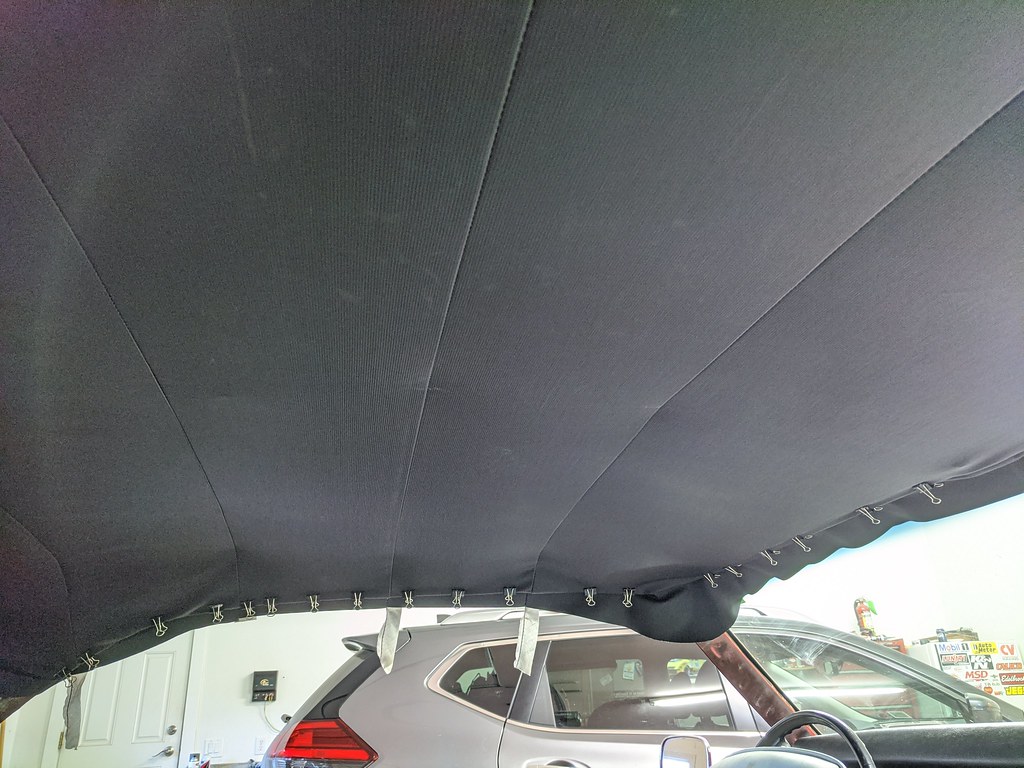
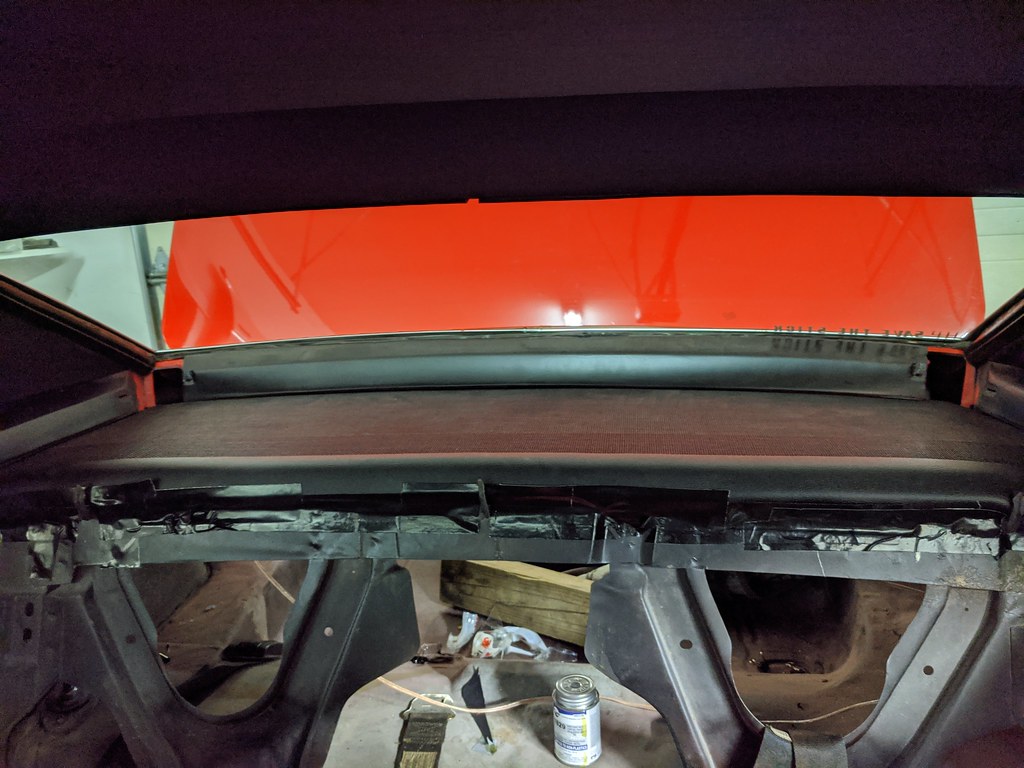
Moving back to the headliner install, I was able to get back in and stretch it all nice and tight. One thing that was bugging me was in the center of the headliner where the bows attach to the center of the roof was a noticeable spot that was being pulled up. When I installed the bows, I put all of them in the lowest of three holes. Looking back I should have started with the middle hole, then I would either had to adjust up or down one hole rather than having to potentially test all three positions. Here is what they looked like when the bows were too low.
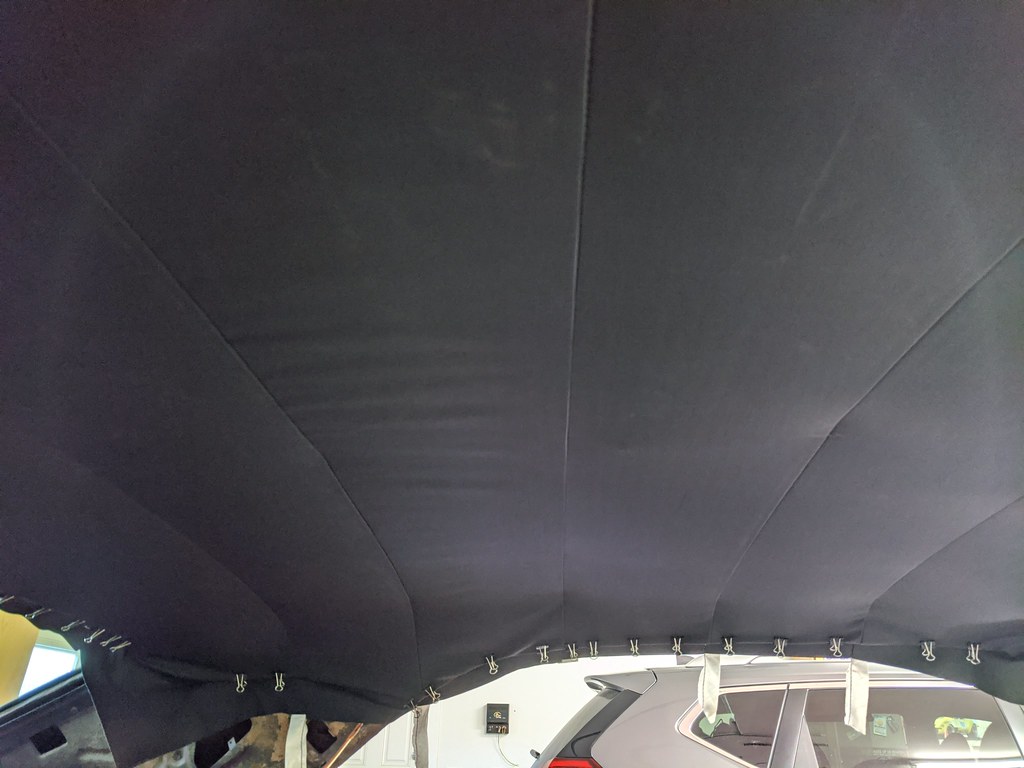
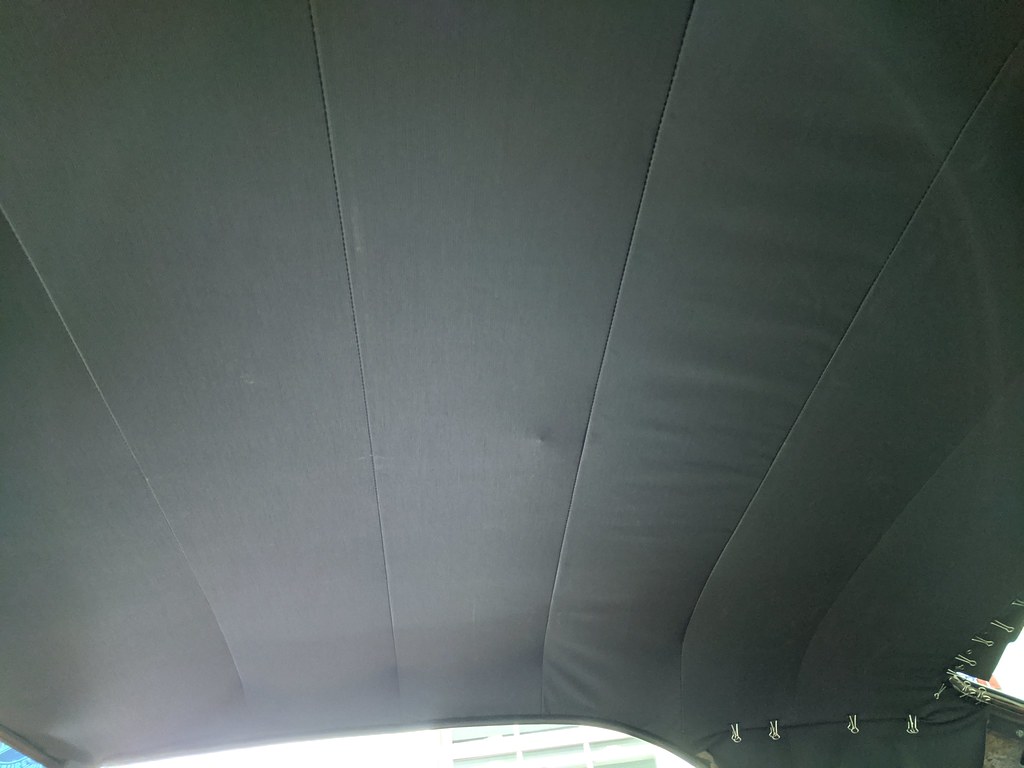
I hated to do it, but I pulled the headliner back down and put all of the bows into the middle positions and that was the ticket. That tension was gone in the center of each of the bows and it was even all the way across the top. Glad to be done with that. Next it was time to glue down the headliner and do one final stretch. I wasn't happy that I was unable to get the wrinkles out of the the material between 3rd and 4th bow. No it was pulled nicely to the rear of the car, but when I tried to pull it from the side, it made a bunch of other places start wrinkling so this was the best I could do. I'm hoping that I can use a heat gun or iron carefully to reduce or eliminate some of it. Overall pretty pleased with the final product.
I didn't take a picture, but I took 1/4" staples to the tack strip then trimmed off the excess and installed the sail panels. I was also able to re-install the original trim wind lace panels on the front and rear which makes for a very original looking install. In the middle of that install, I was also working on polishing up the trim and reinstalling it on the rear interior panels. They turned out better than I expected. It worked so well that I'll be doing the same thing to the door panels, A pillar trim and other misc. parts I have.
Before:
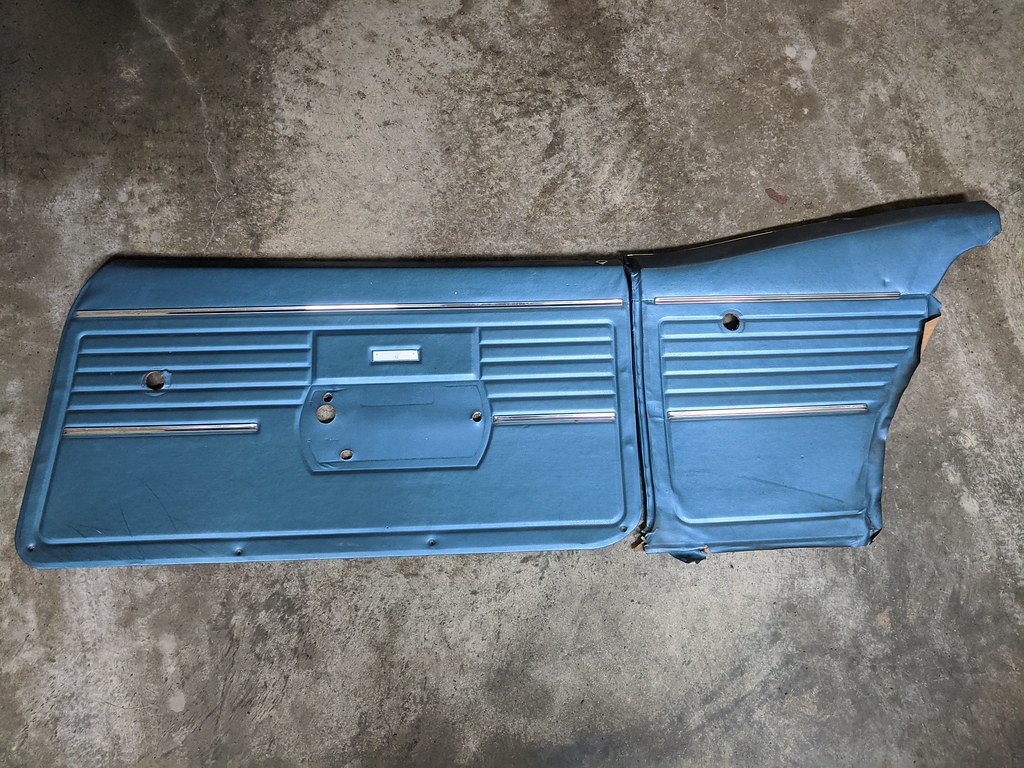
After:
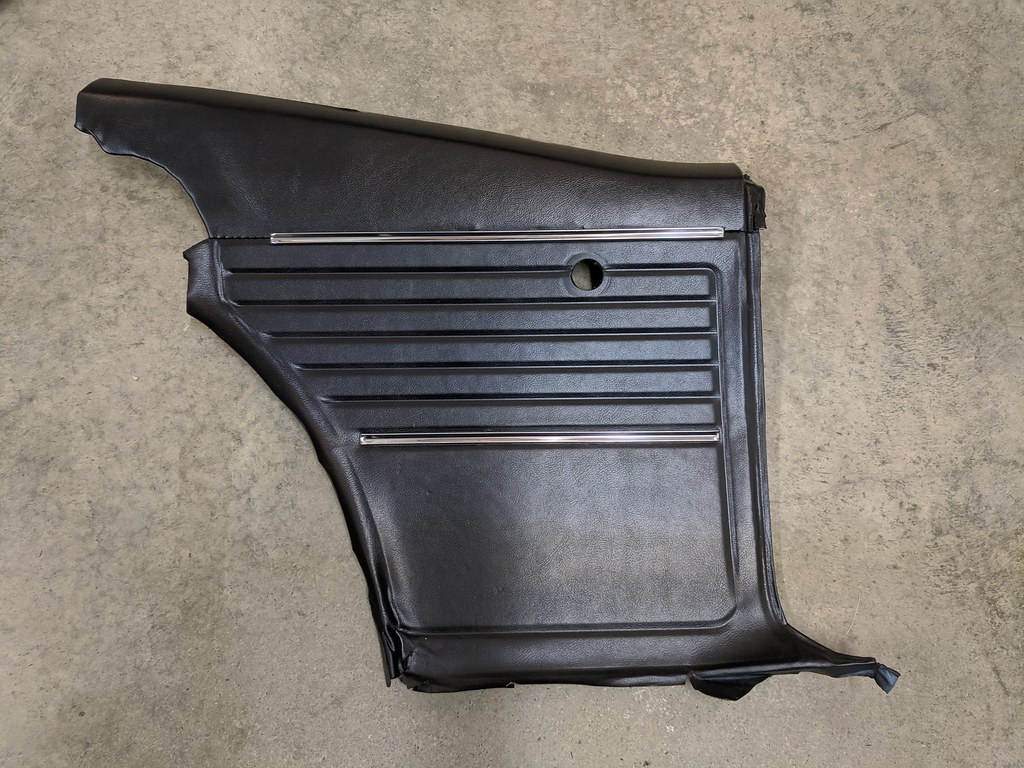
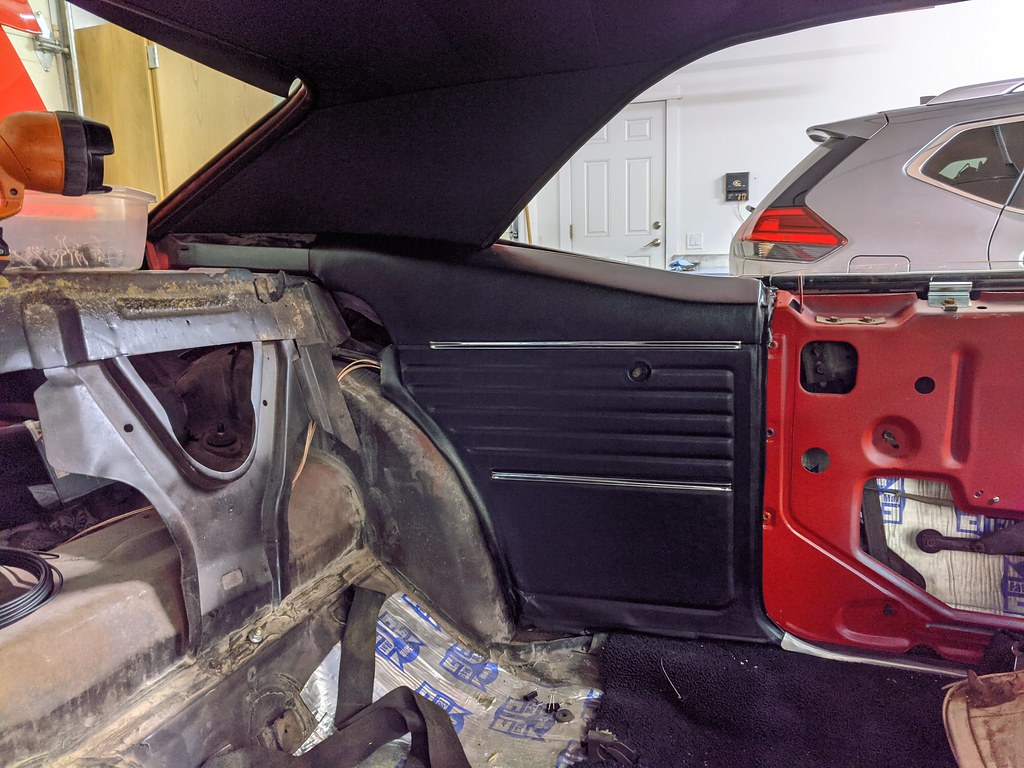
Here's the passenger side.
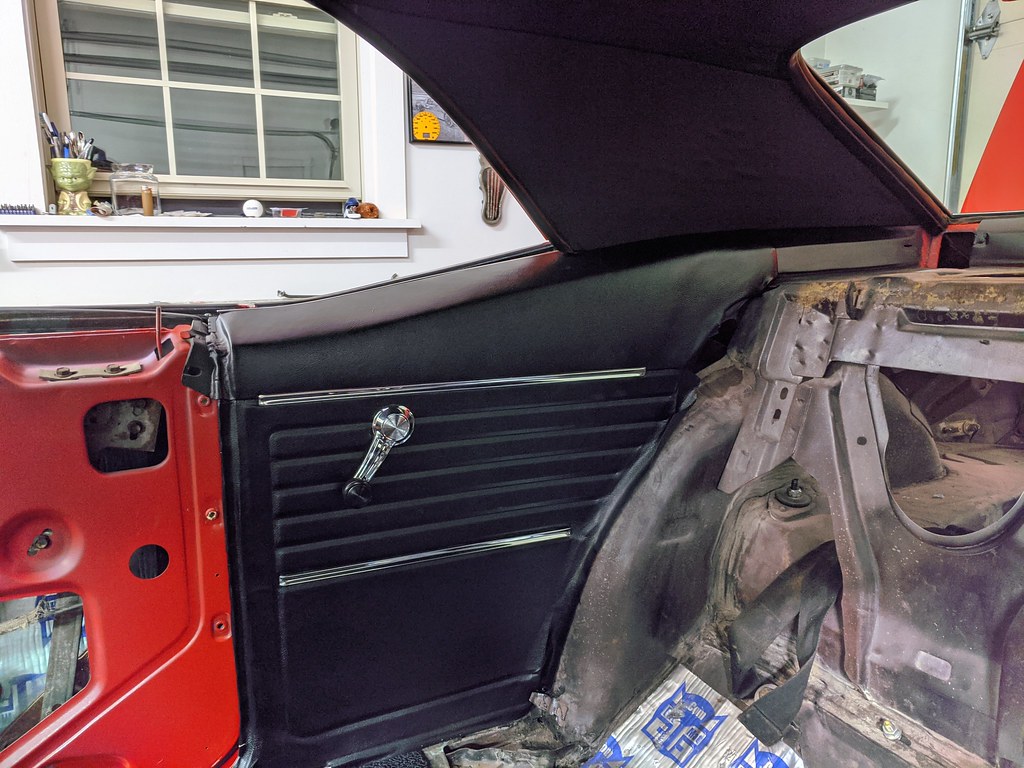

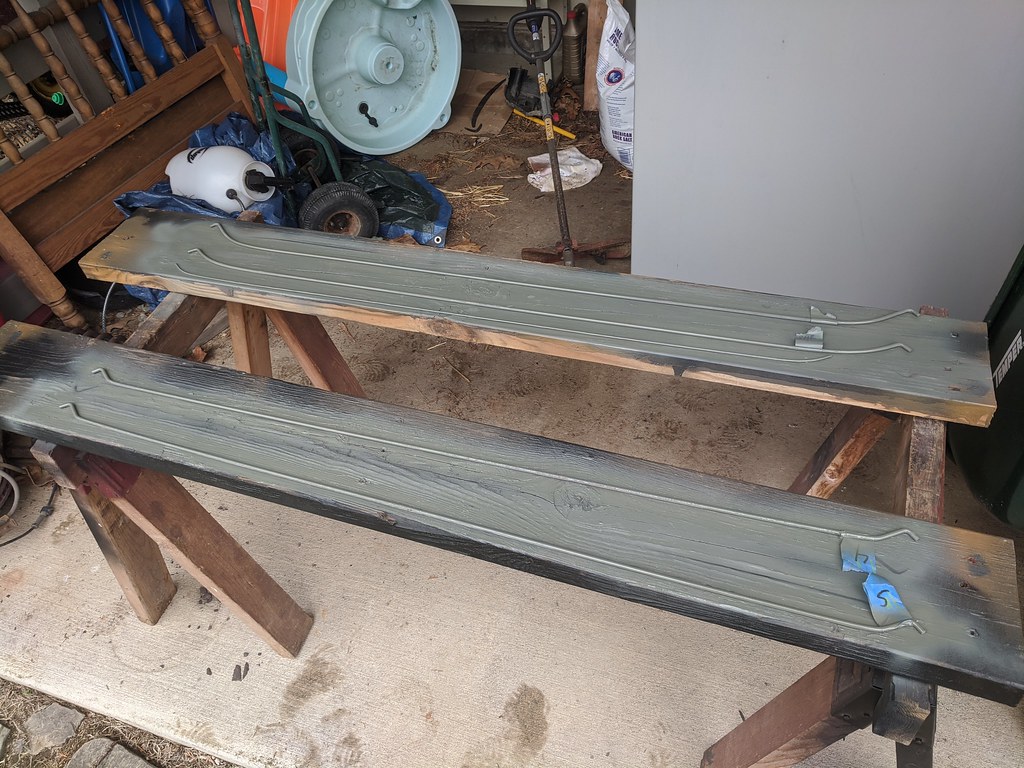
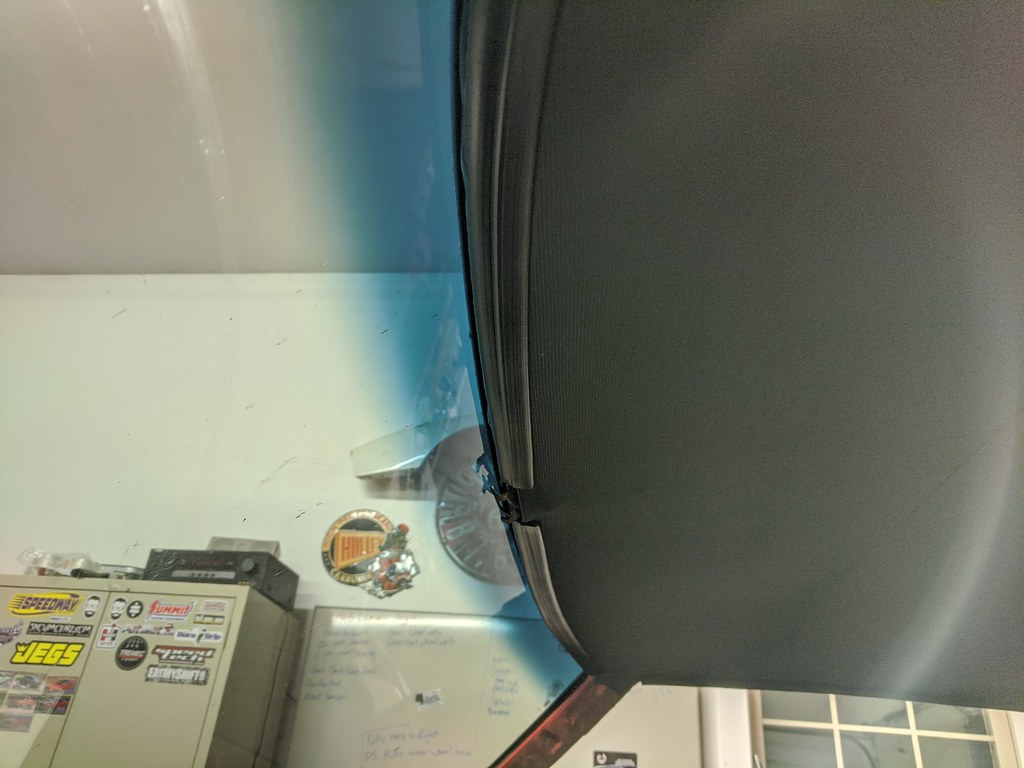
Once I test fit the windlace with the rear interior panels, I found that I needed to move them both down slightly to eliminate the gaps. Now that the headliner and sail panels are installed, glued down and the windlace in the correct placement it was time to re-install the weatherstripping gutters. But before I could do that, I needed to polish them and clean up all of the grime and overspray over the years.
Before:
That's all for now. Hoping to finish up a few wires, and button up the remaining interior pieces that need to be re-installed. It's going to be very different this year driving the car with a completed interior.
Thanks,
Ryan
1955 Nomad project LC9, 4L80e, C5 brakes, Vision wheels
1968 Camaro 6.2 w/ LSA, TR6060-Magnum hybrid and etc SOLD
1976 T/A LS1 6 Speed, and etc. SOLD
Follow me on Instagram: ryeguy2006a
04-13-2020 #548 Registered User
- Join Date
- Nov 2006
- Location
- Ma.
- Posts
- 5,567
A lot of progress. Nice job on the head liner.
Wayne
Car FINALLY home !!!!!! lol
Project FNQUIK https://www.pro-touring.com/showthre...ghlight=FNQUIK
04-15-2020 #549
Registered User
- Join Date
- Sep 2009
- Posts
- 2,707
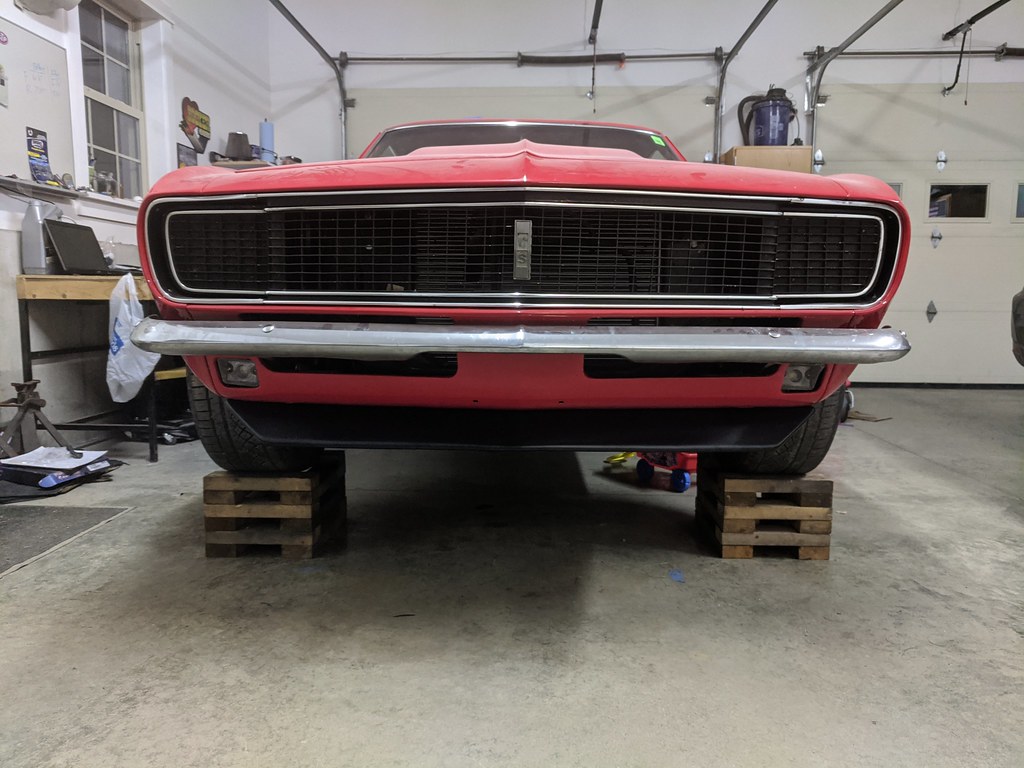
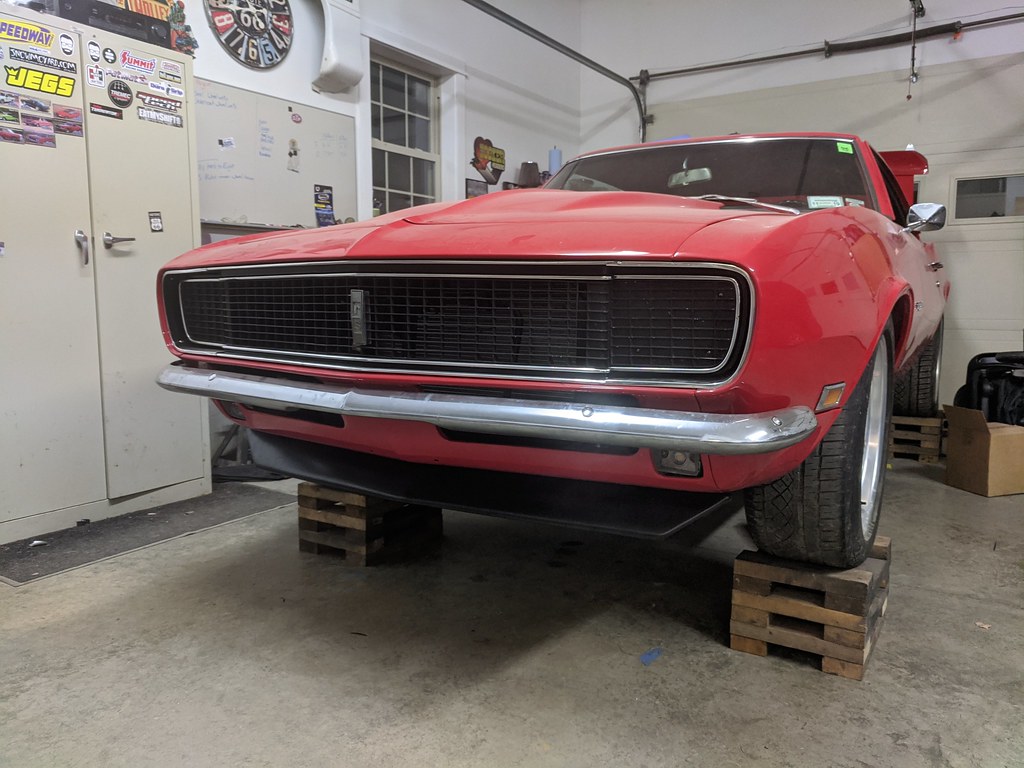
I bought the RS chin spoiler kit for my car almost a year ago, but I was driving it so much last year that I didn't take the time to get it installed. I've been doing so much interior stuff lately, I wanted to take a break and do something different. I figured, while it was up on the wheel stands it would be a good opportunity to install it. It only took about an hour, but it made a huge difference in the front. I'm really glad I finally installed it.
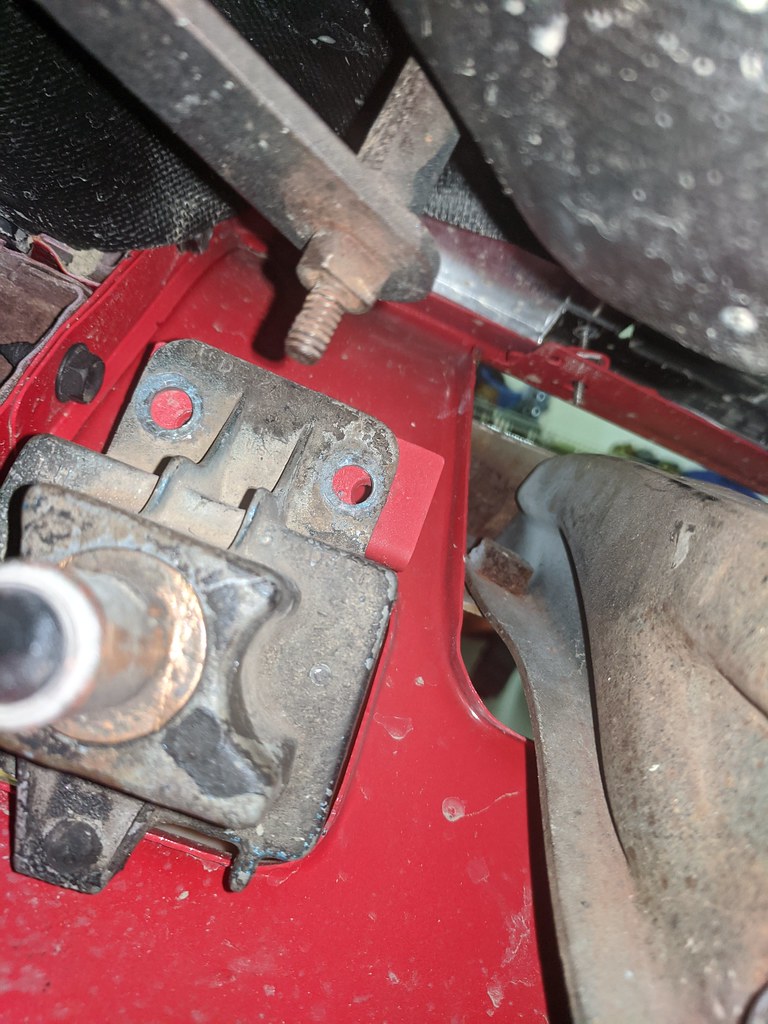
While I was under the front, I decided to see if I could make the turning signal fit a little nicer. I never test fit the signals before I painted and installed it on the car, and come to find out the bracket wasn't welded in the right location. Not perfect, but definitely much less noticeable. Maybe when I do a cam swap, I'll pull off the front end and address it then. Also, it doesn't mean anything, but the turning signal housings are from a real Tripoli Turquoise 1968 Camaro Z/28 RS car. I picked them up at a swap meet several years ago. I love using original pieces when I can.
Here's the marker light held in the correct position and how misaligned the bolt hole are.
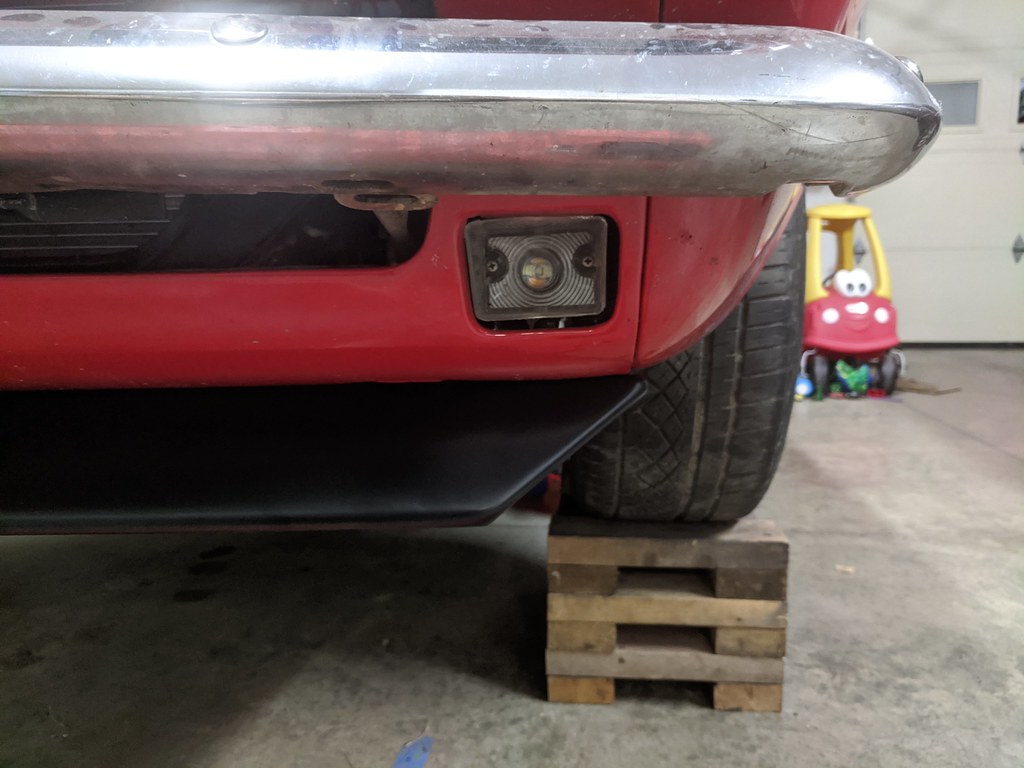
Before:
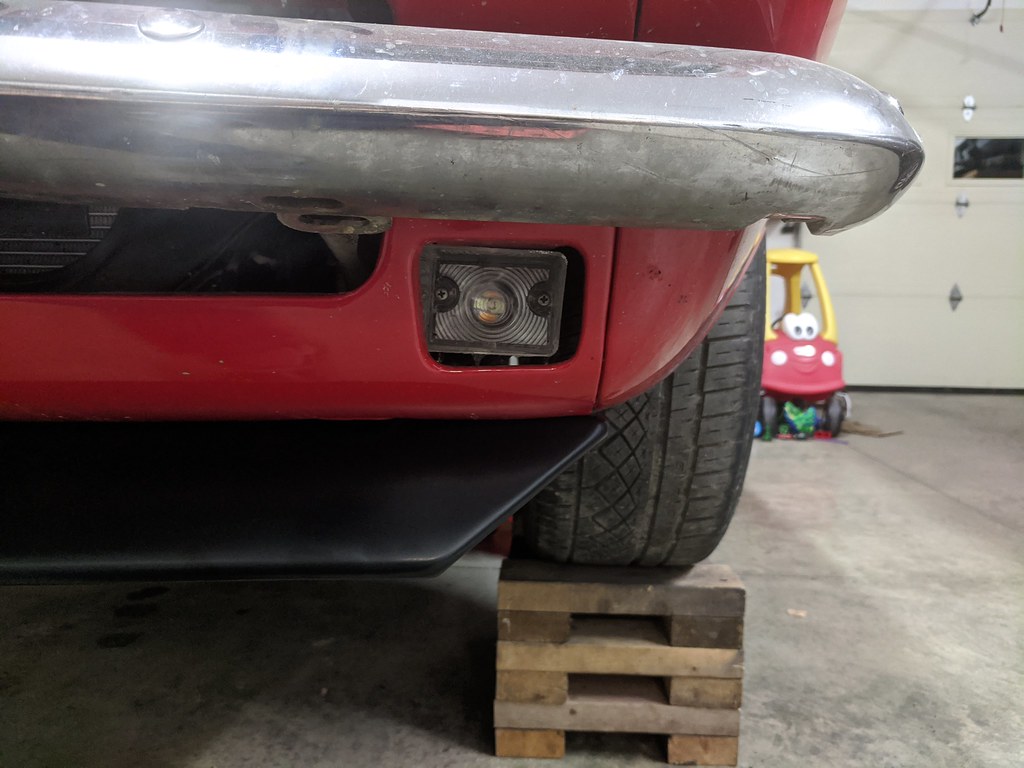
After:
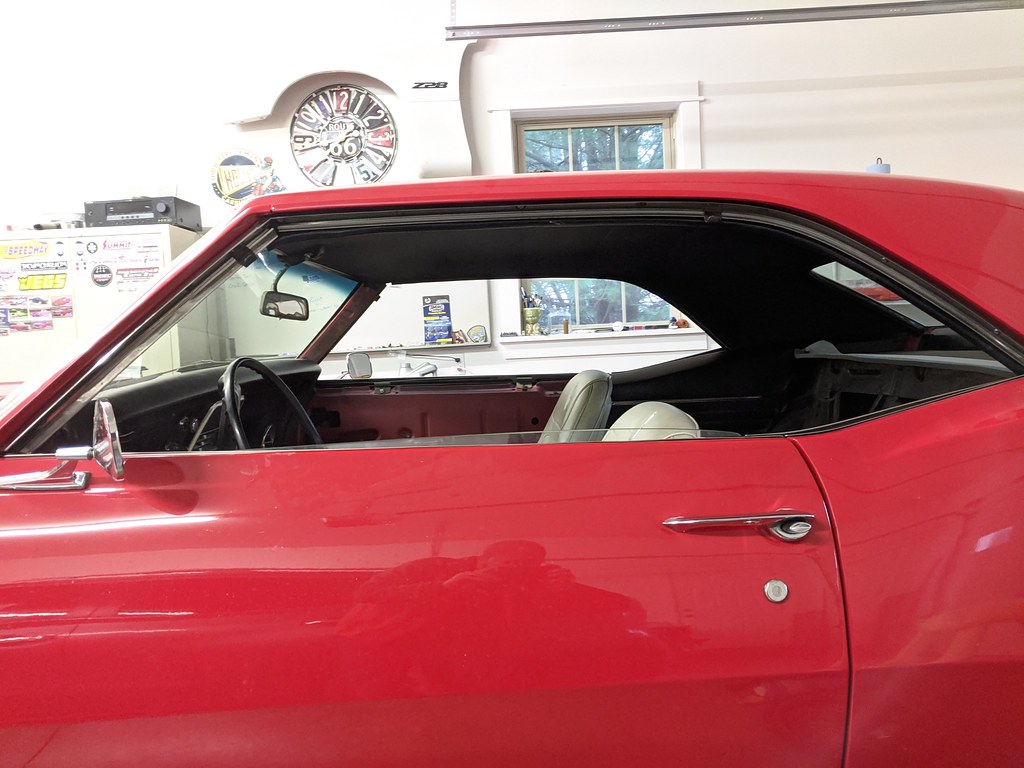
Then I moved onto installing the door weather seals. They didn't take long at all, but what did was aligning the door and quarter glass. All I can say to anyone doing it themselves is take your time and make small adjustments. Not sure if this is the correct way, but I started with the rear quarter glass. I made sure that it fit really well into the weather seal, and then moved onto the door glass. That got me really close, but I ended up needing to bounce back and forth tweaking them so that all the seals fit together properly. It's not perfect, but is as good if not better than how it would have been from the factory.
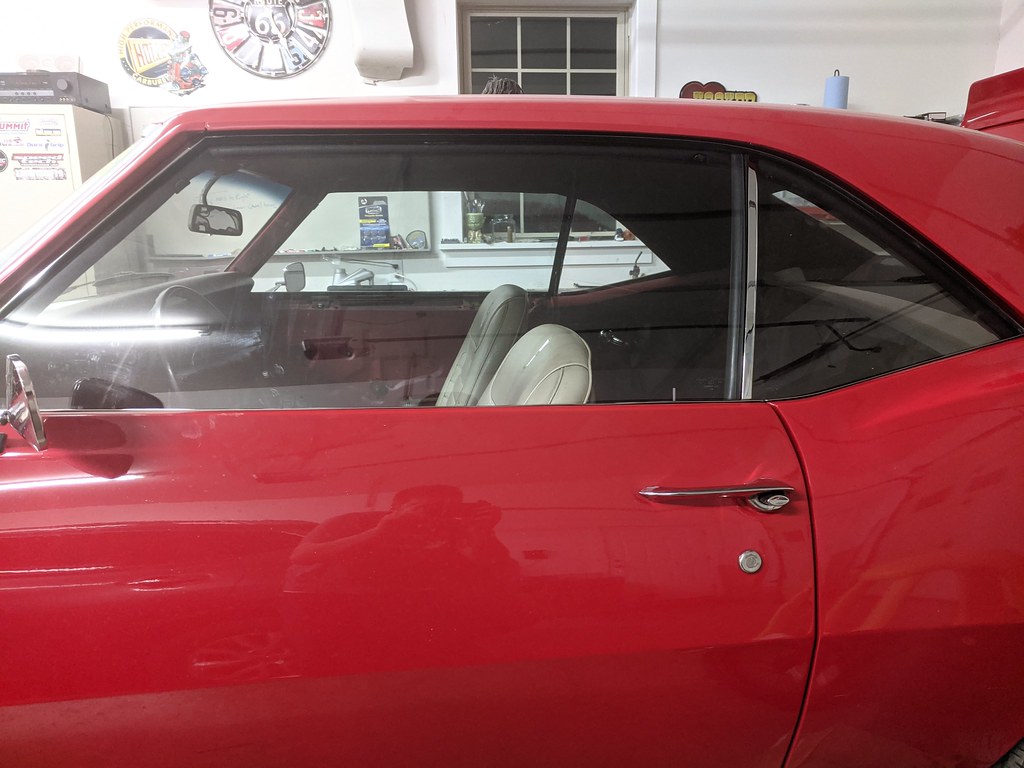
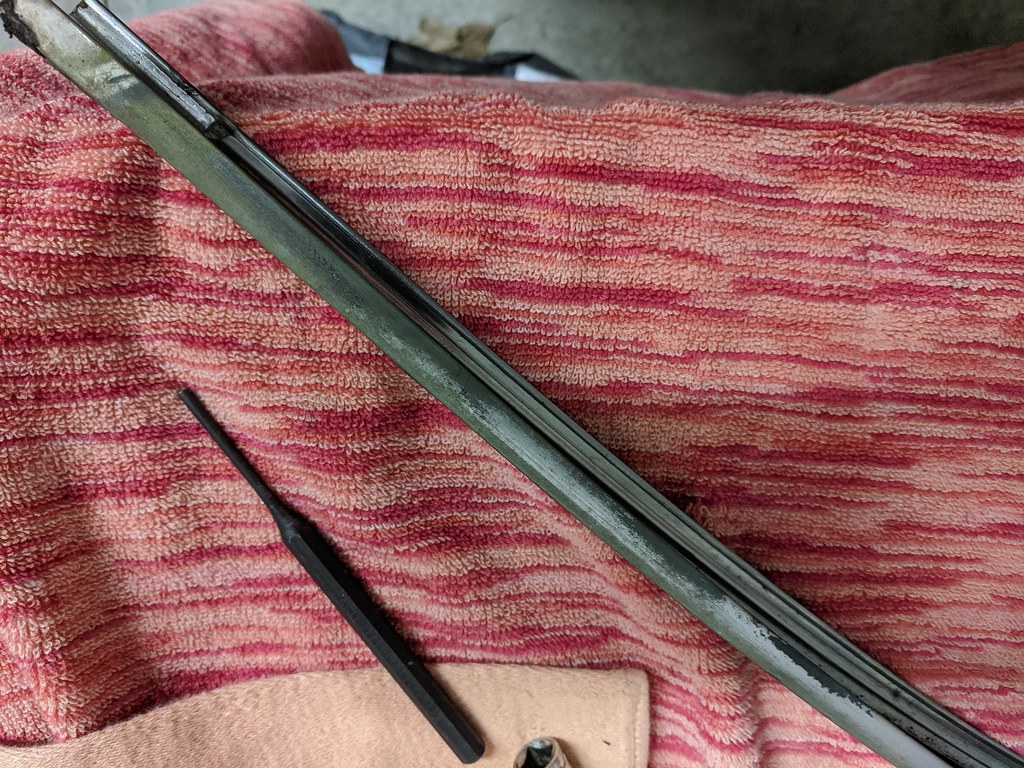
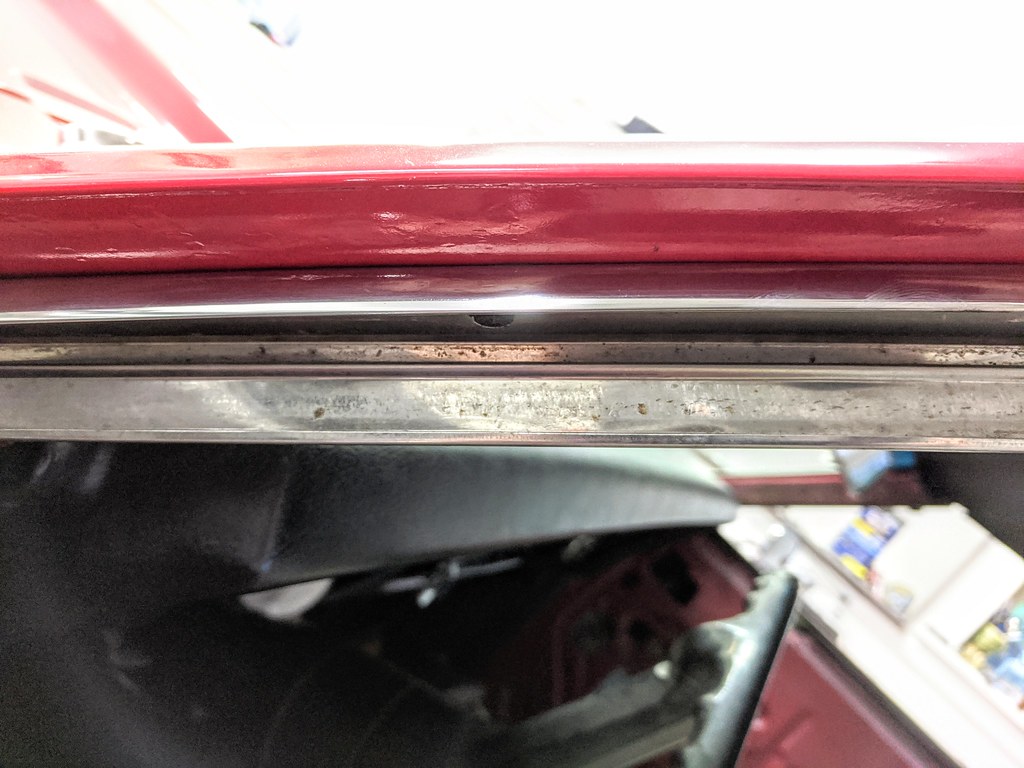
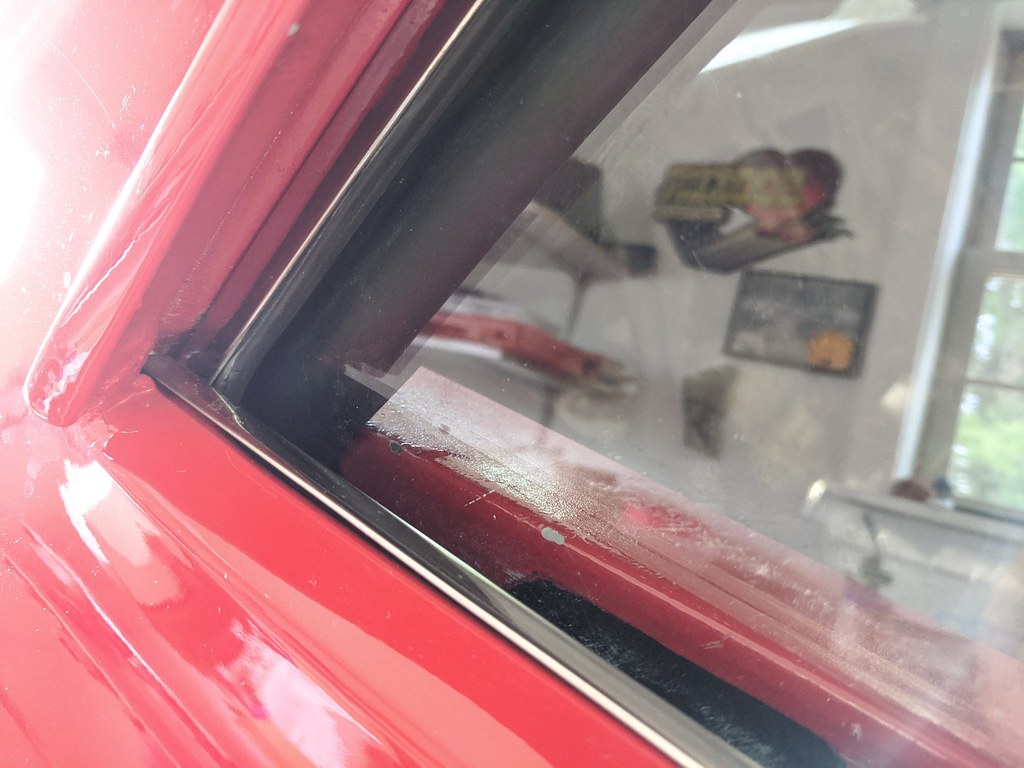
It's hard to tell, but here is one picture I got when I was fitting the rear quarter glass. Without the seals on it seemed to fit great, but after, it was clear that it was contacting the "gutter". With the window rolled up, the glass was directly contacting the polished lip. There are set screws that needed to be pulled inward and then re-tightened. Afterwards, it fit very nicely in the weather seal pocket.
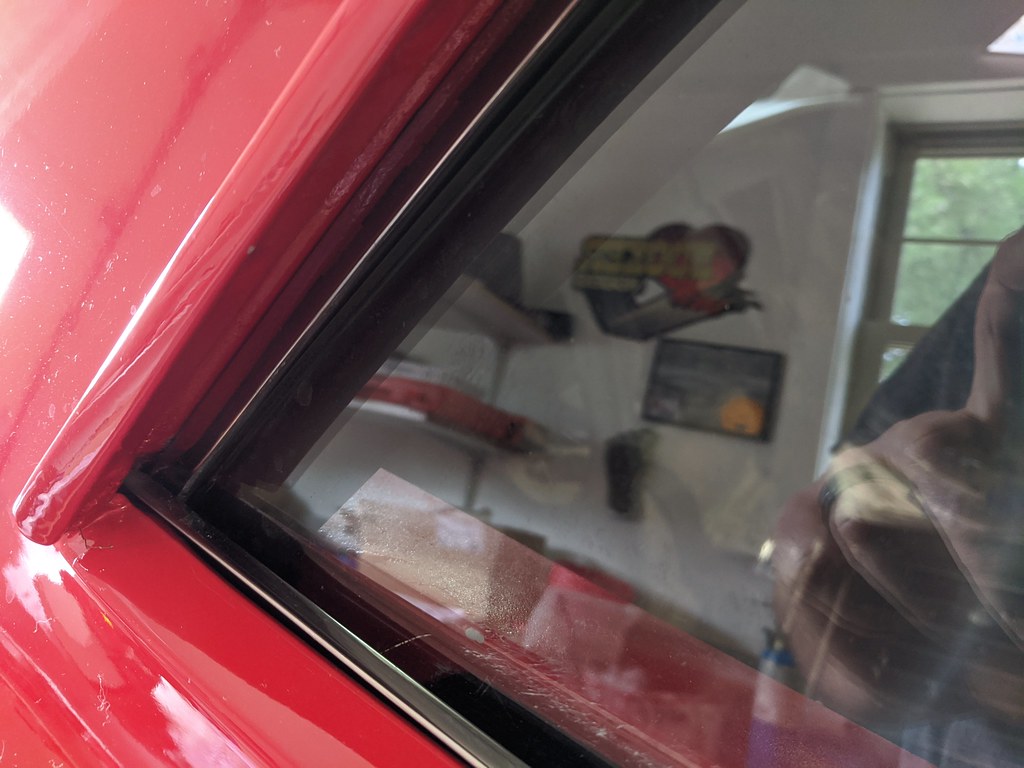
Hard to see, but the line on the weatherseal where its light black to dark black is the edge of the glass.
Cheers,
Ryan
1955 Nomad project LC9, 4L80e, C5 brakes, Vision wheels
1968 Camaro 6.2 w/ LSA, TR6060-Magnum hybrid and etc SOLD
1976 T/A LS1 6 Speed, and etc. SOLD
Follow me on Instagram: ryeguy2006a
04-15-2020 #550
Registered User
- Join Date
- Aug 2014
- Posts
- 435
Looks great! Nice job on the headliner. Most of the DIY ones have a lot of wrinkles, and if I were doing that I'd probably pay someone. lol I don't have that much patience.
Jay
04-15-2020 #551 Registered User
- Join Date
- Dec 2005
- Location
- TuoCo, CA
- Posts
- 992
Looking great! The devil is in the details.
Steve
'68 Camaro - SBC, TKO600, 3.73 Moser 12-bolt, Speedtech, ATS-AFX, Hotchkis, Forgeline, Ron Davis and C5 brakes (Kore3), Holley Terminator TBI.
Check it Out Here
04-15-2020 #552
Registered User
- Join Date
- Nov 2006
- Location
- Ma.
- Posts
- 5,567
Great video on how to install and adjust windows. https://www.youtube.com/watch?v=q6YRUjgR2MM
Wayne
Car FINALLY home !!!!!! lol
Project FNQUIK https://www.pro-touring.com/showthre...ghlight=FNQUIK
04-21-2020 #553
Registered User
- Join Date
- Sep 2009
- Posts
- 2,707
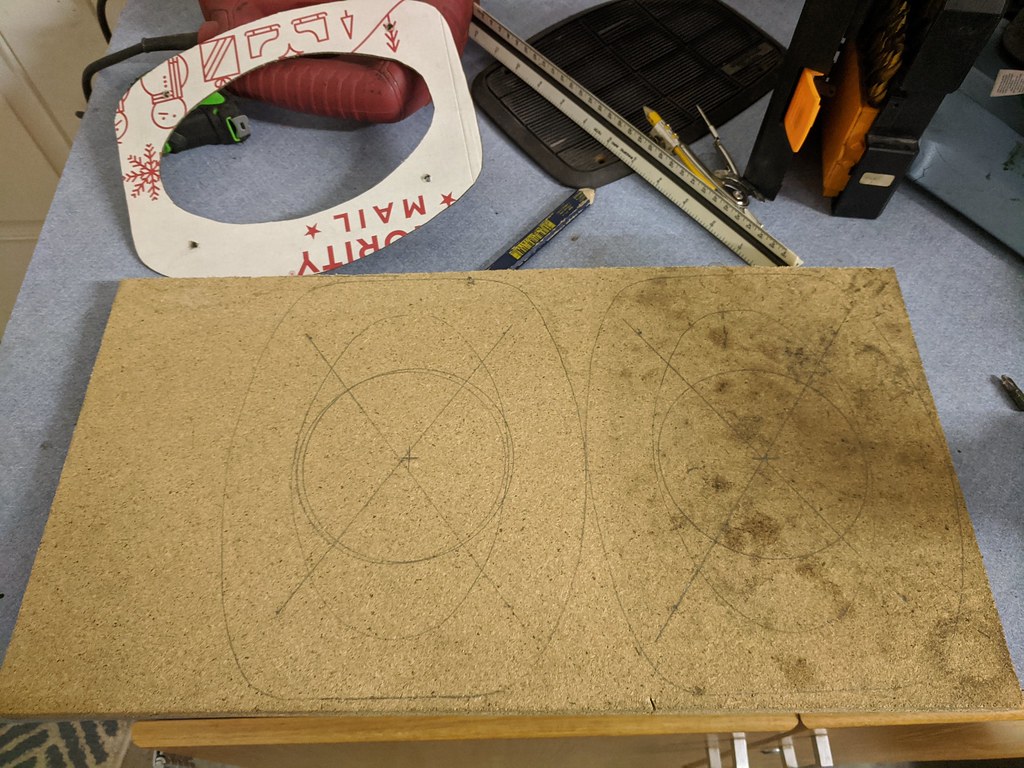
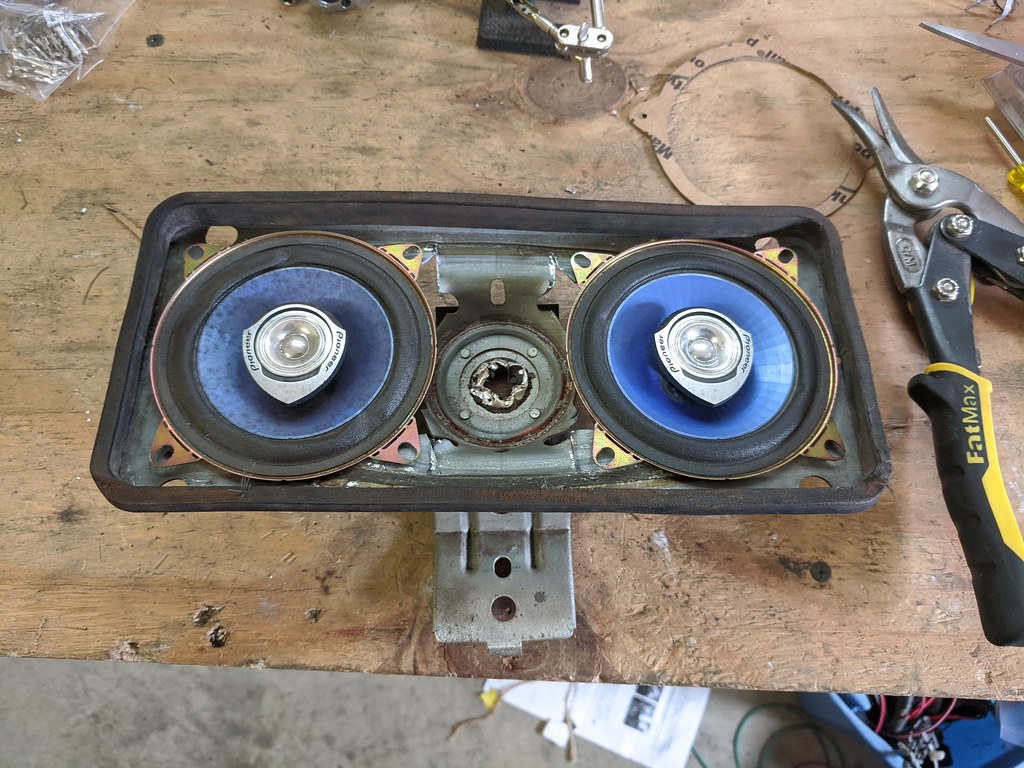
In keeping with the Penny Pincher theme, here's a DIY project that I completed to save a few bucks. The hardware for the rear speakers needed to be installed before the package tray could be installed, but I didn't want to buy new speakers right now since it's really not a top priority. So rather than get new speakers, I decided to use some old speakers I had, but the problem is they are round 6.5" and the package tray accepts 6x9 speakers. So my solution was to make an adapter that mounts to the existing hardware, but is set up for a 6.5" round speaker. I broke out some old speaker covers I had and made a trusty cardboard template.
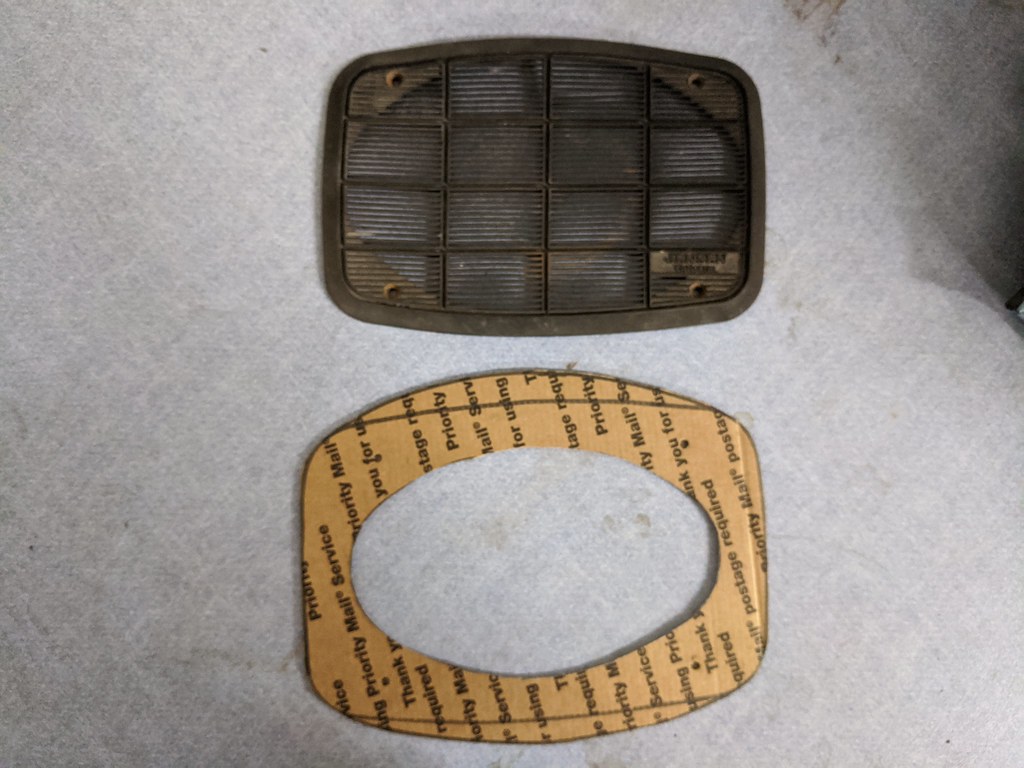
Then transferred it to some 3/4" board I had laying around.
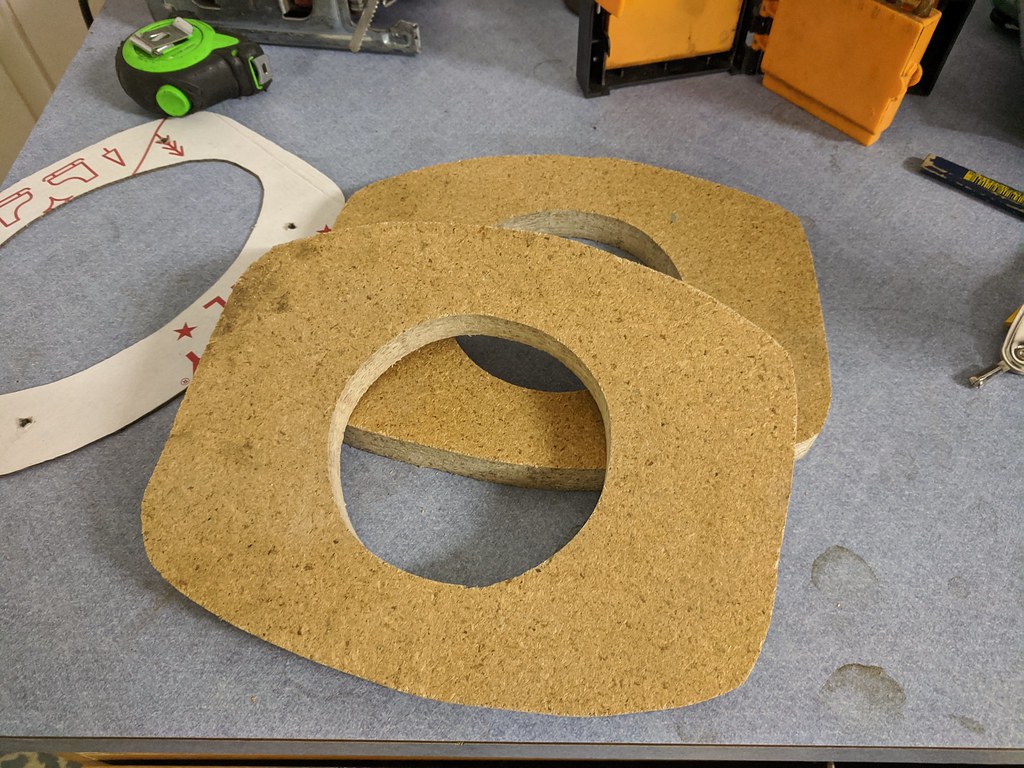
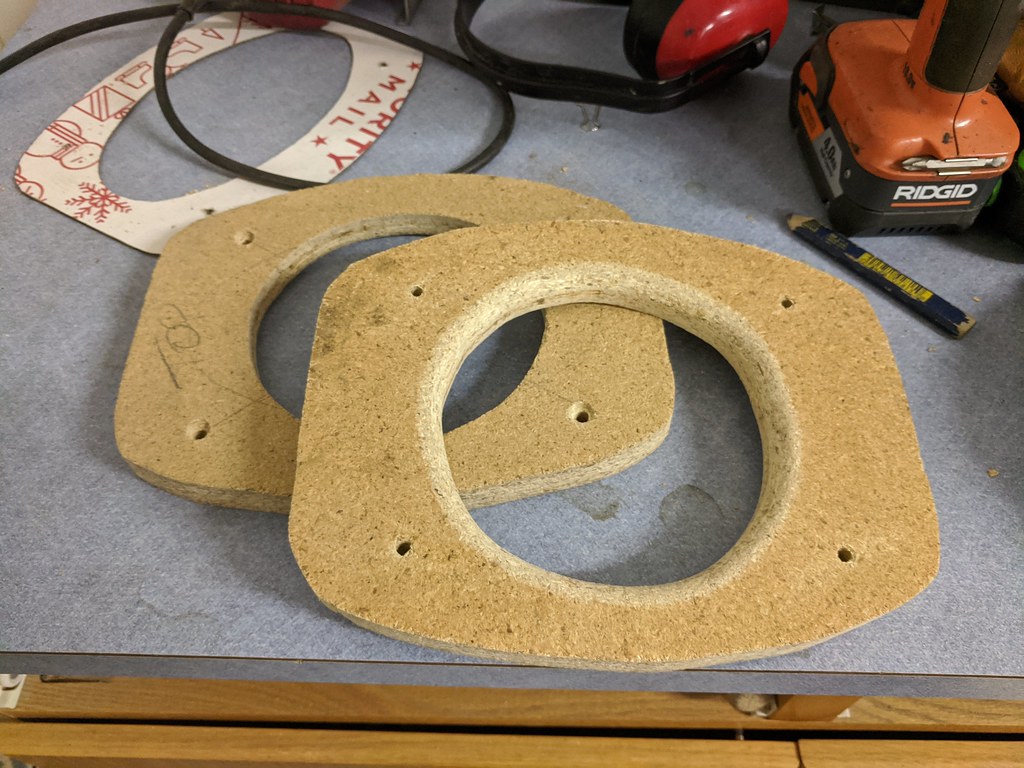
Once I got them cut out, I realized that the hard edge would likely make for some weird sound from the speakers. I used a router to soften the edge and smooth out the transition. And I also realized that when I used my compass, I measured out 2.25" rather than 2.75", so my circle was an inch short. So I had to go back and cut the wholes out larger then bevel the edges.
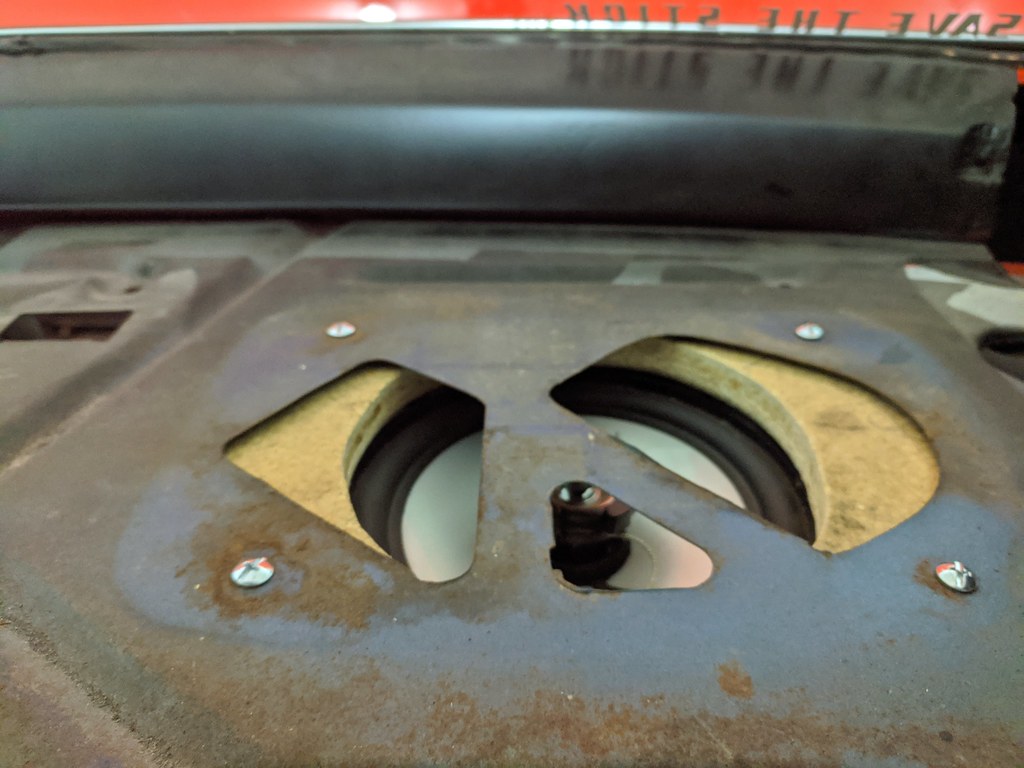
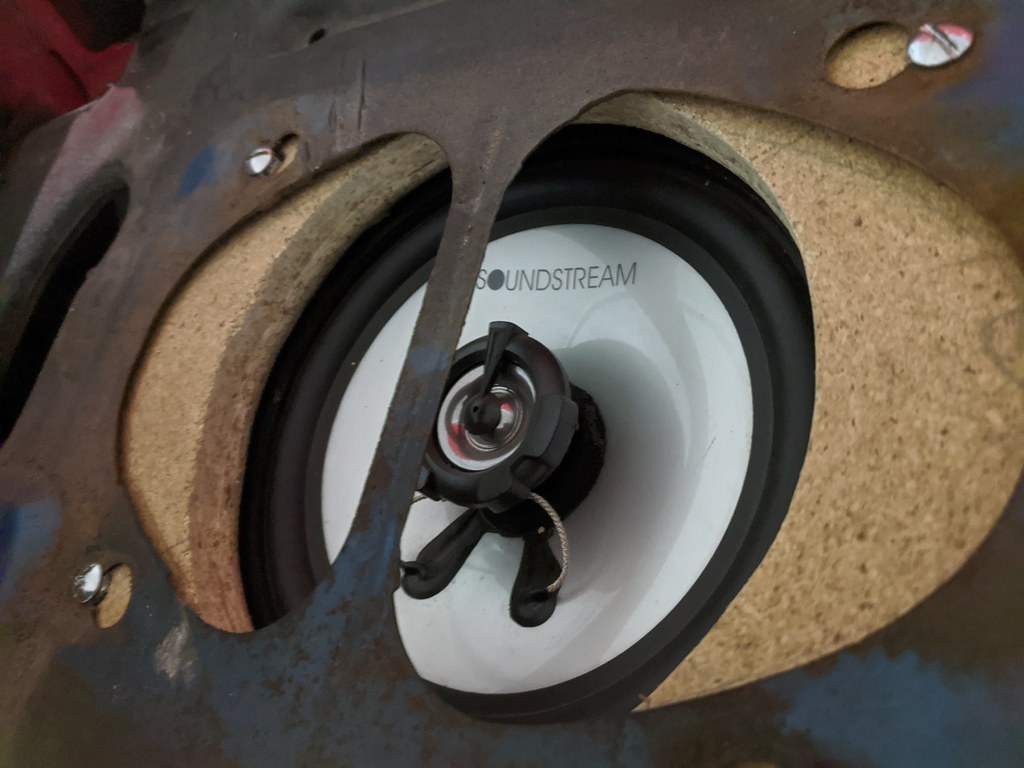
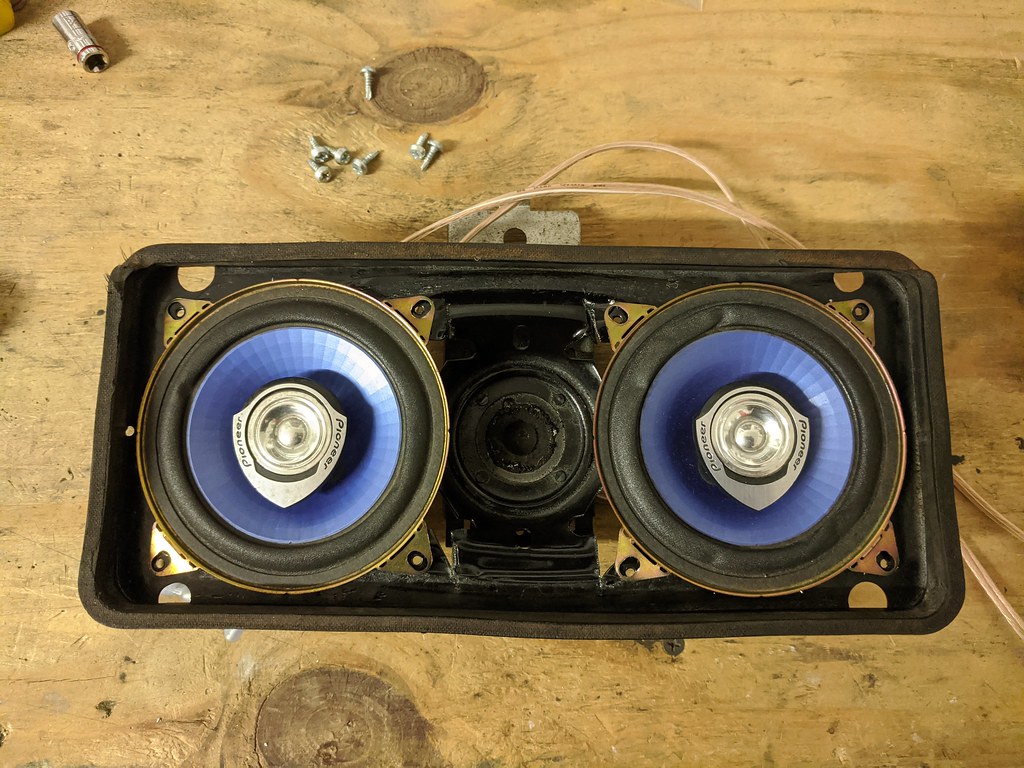
Here you can see the speaker installed and how you can't add hardware once the package tray cover is installed. The metal covering the speakers isn't ideal, but I have a tough time cutting up the package tray considering it's lasted 51 years already... I can live with a little distortion as it gives a little of that retro feeling.
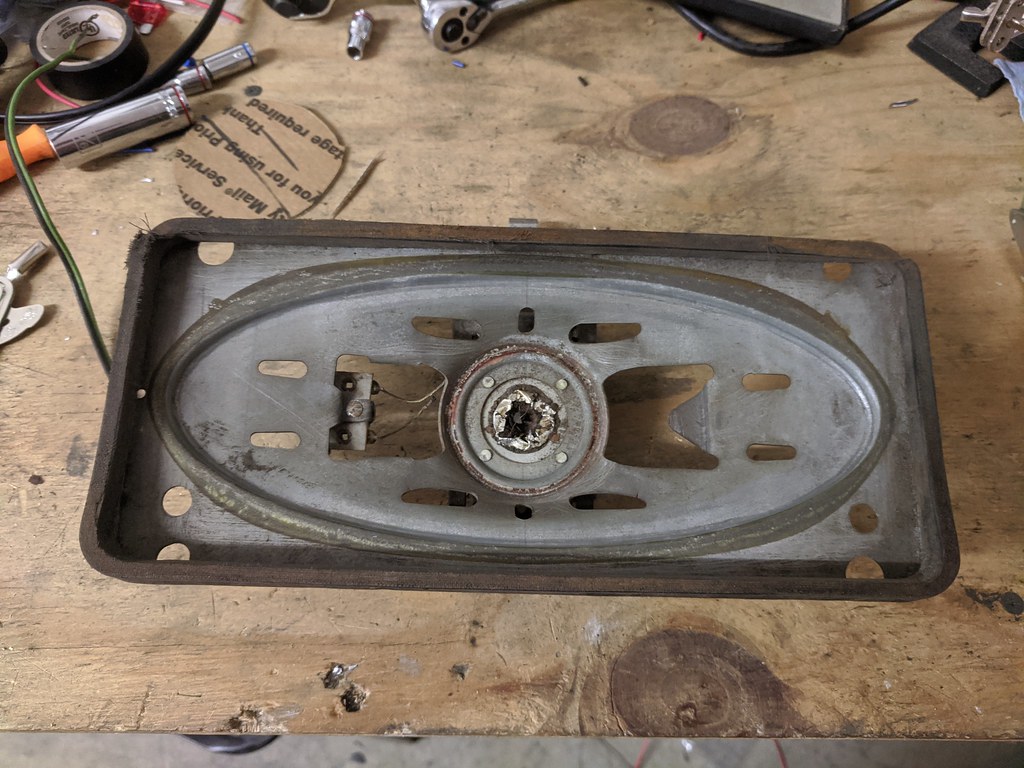
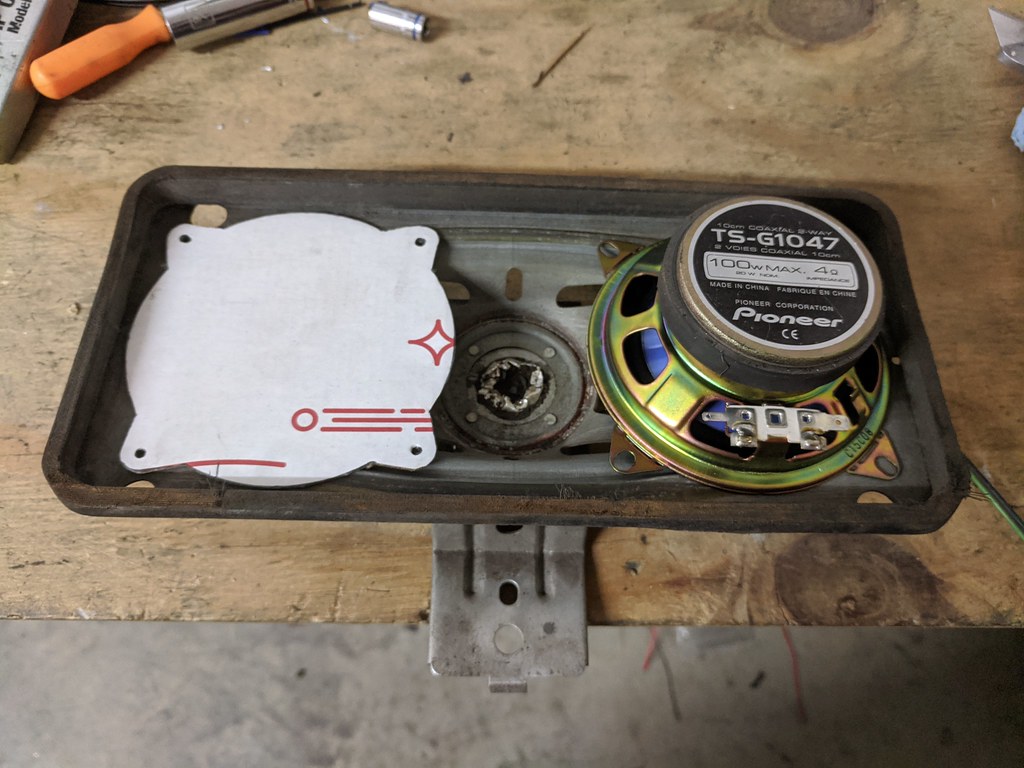
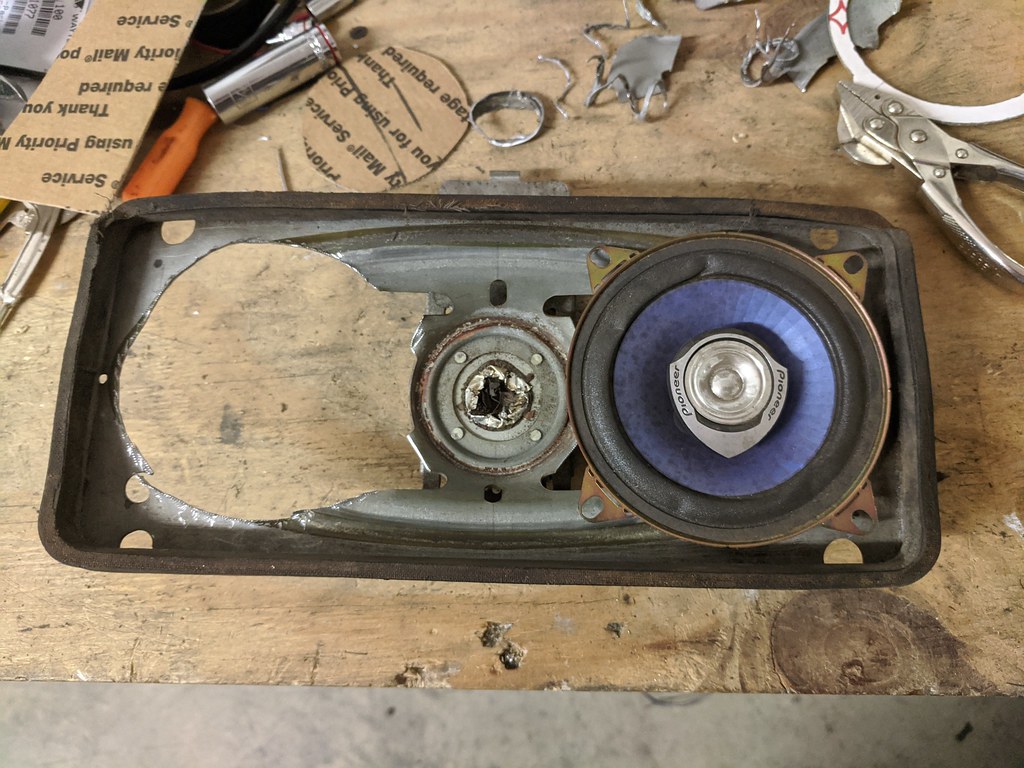
I then moved onto the original mono single speaker from the front dash. The speaker was falling apart, but I thought this would make for a great platform to mount a pair of 3.5" speakers. I created a template and cut out the parts to make the speakers fit. I still need to finish the edges, but this will work nicely.
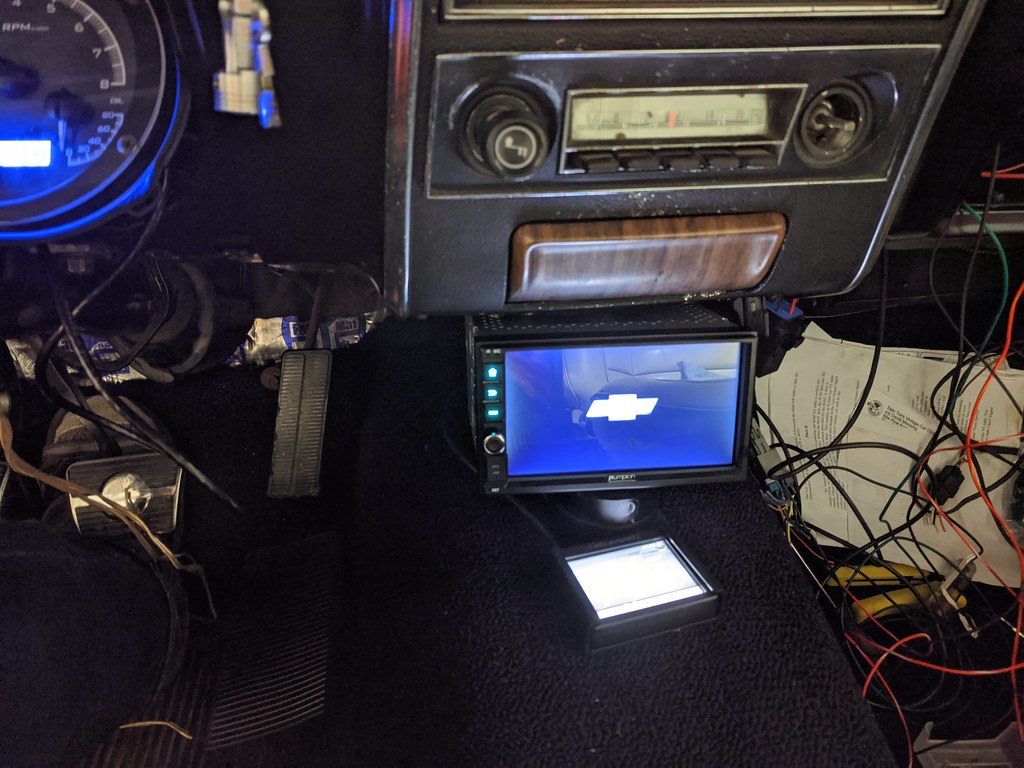
I pulled this stereo out of my old Silverado before I sold it, and thought I would see how it fits down low. It surprisingly fits really well and I'm going to make a bracket to mount it right here. I'm not sure if this will be a permanent thing, but for now it's doesn't cost me anything but time.

My interior is really coming together. I have a few more finishing touches to do and then I can button it up for good. I still need to mock up the rear seats again and I can measure for some car seat anchors. Last year I used the stock seat belts and it worked "Ok", but I'm going to do something stronger. I'm going to make some plates that anchor into the seat belt mounts that will allow me to hook into the car seat latches.
Cheers,
Ryan
1955 Nomad project LC9, 4L80e, C5 brakes, Vision wheels
1968 Camaro 6.2 w/ LSA, TR6060-Magnum hybrid and etc SOLD
1976 T/A LS1 6 Speed, and etc. SOLD
Follow me on Instagram: ryeguy2006a
04-27-2020 #554
Registered User
- Join Date
- Sep 2009
- Posts
- 2,707
I've been plugging away this last week doing some work here and there. I finished fitting up my speakers to the old mono speaker, got the holes drilled and then painted the whole thing. I think it turned out great and only cost me the time to modify it. Turns out the front speakers I have are crackling, so I'll have to get some replacements. They won't get better right?? The rears are perfect, so I may just leave these out for now and worry about it later or I may just pick up a cheap set of 3.5" speakers on eBay.
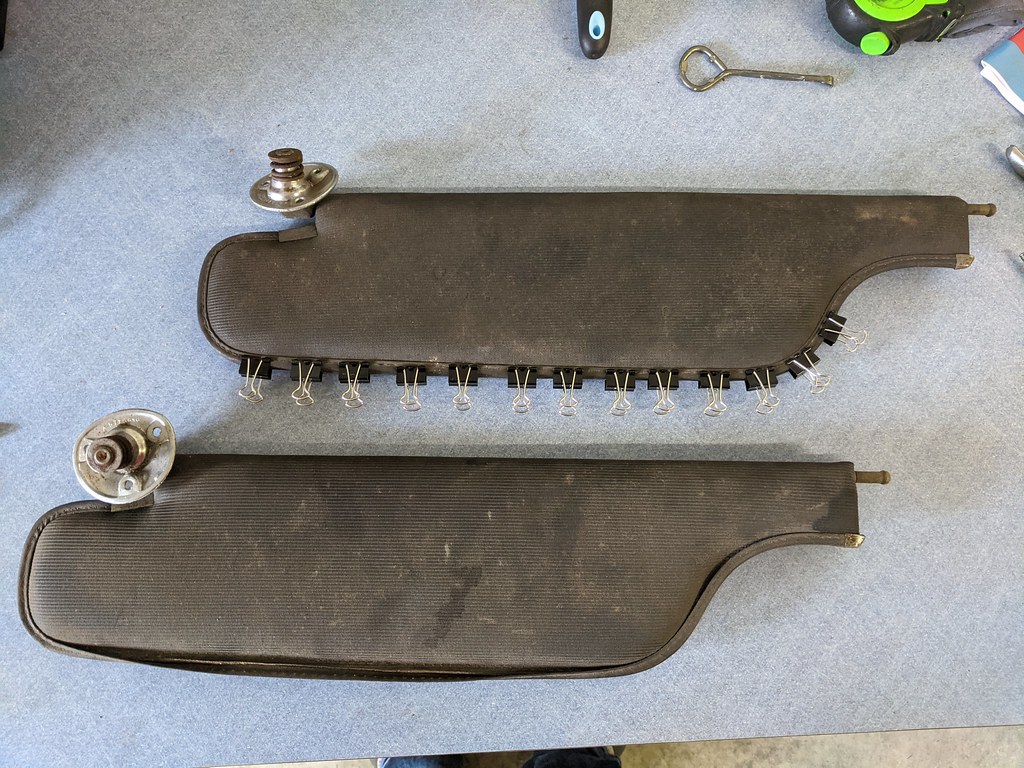
As I've been working away at getting my interior buttoned up, I turned my attention to the sun visors. My originals were in really good shape, with the exception of the trim that goes along the outside. So I put on my upholstery hat, needle, thread and went to work. I didn't spend too much time on it, but was able to get the trim lined up right and was able to put the needle through most of the original stitching holes.
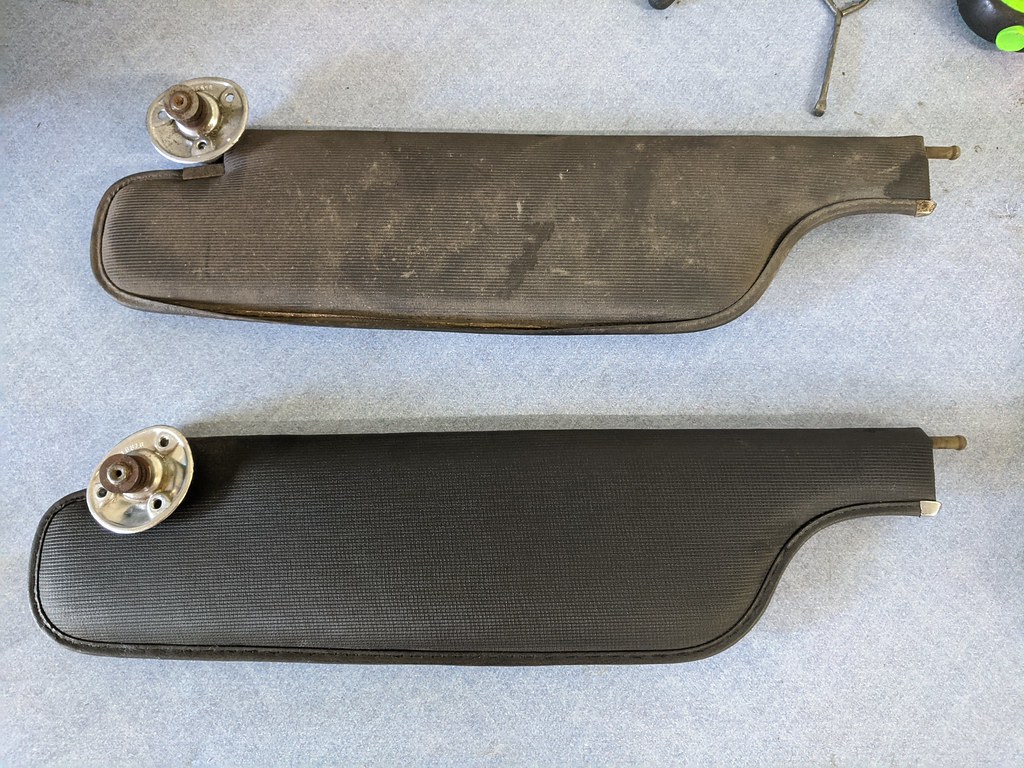
What I started with.
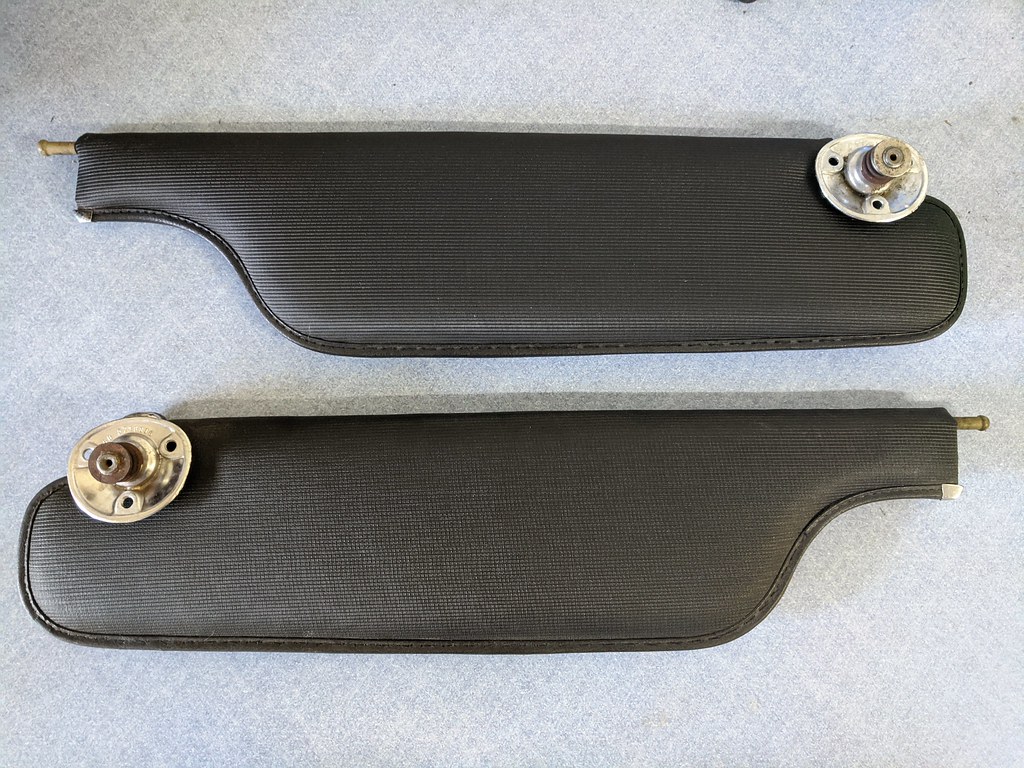
After a little elbow grease.
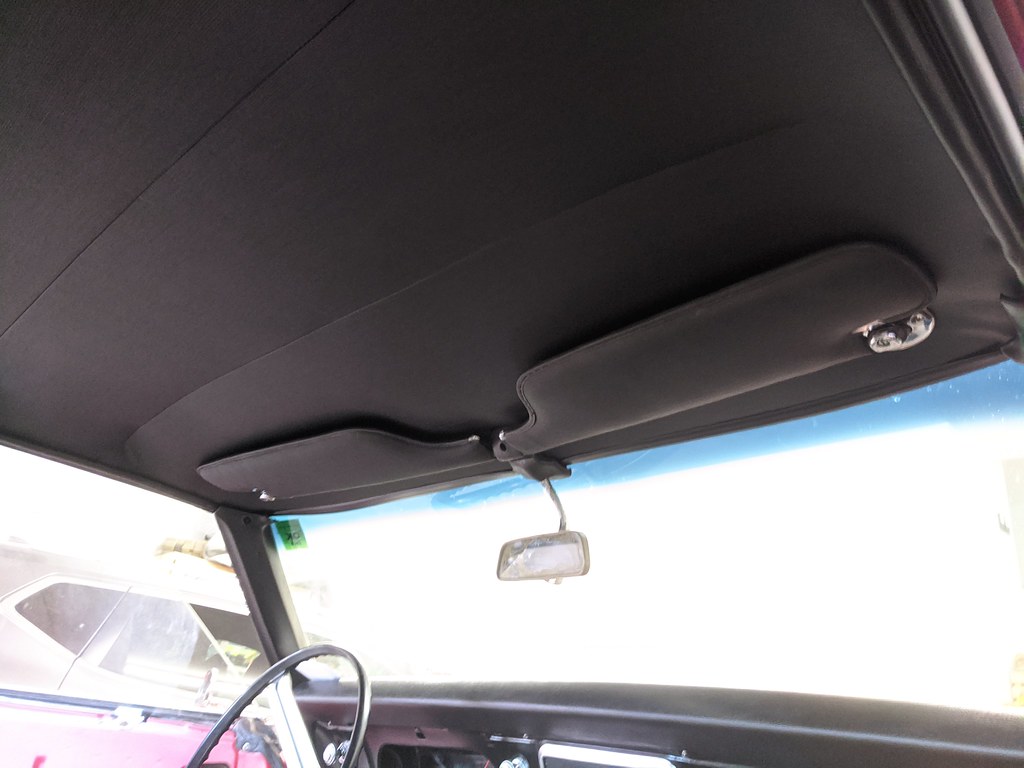
Installed. It helped out tremendously installing the screws in the sunvisor holes before I installed the headliner. took just a minute to find them and cut the holes.
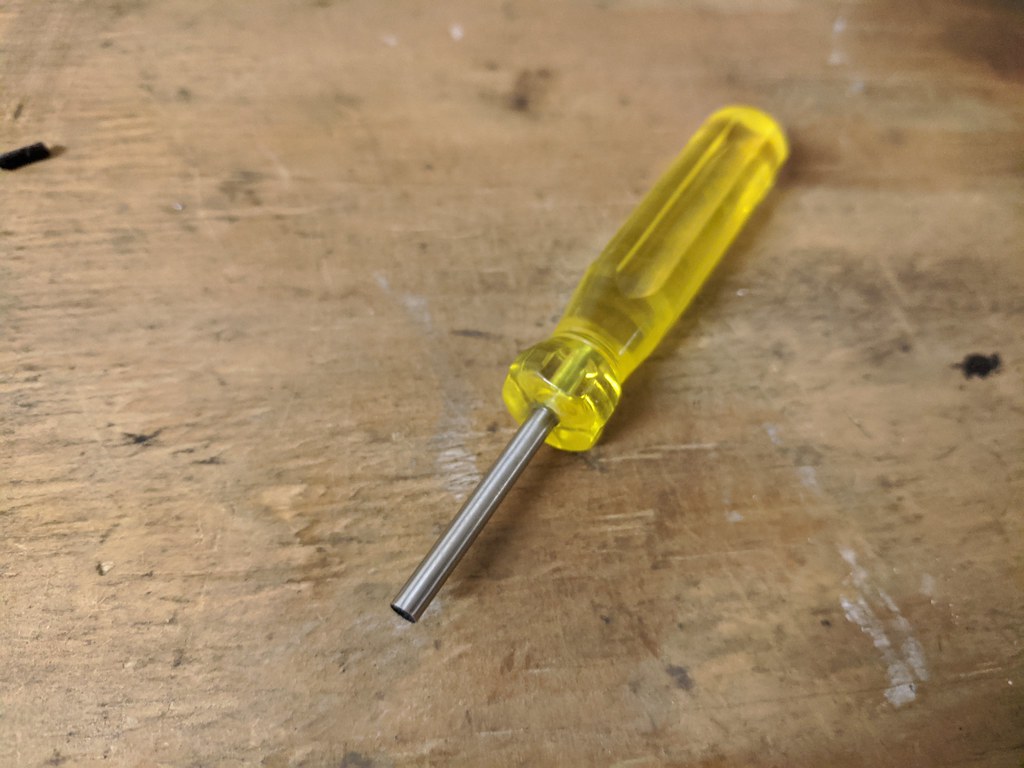
Some parts came in and I was able to swap over the female to male terminals for the metripack connector. I struggled when I first went to install the reverse light plug on my car and come to find out they installed the wrong terminals in the connector. I bought a pack of new ones and the metripack removal tool. That little tool was invaluable and worked like a charm. Definitely worth the wait.
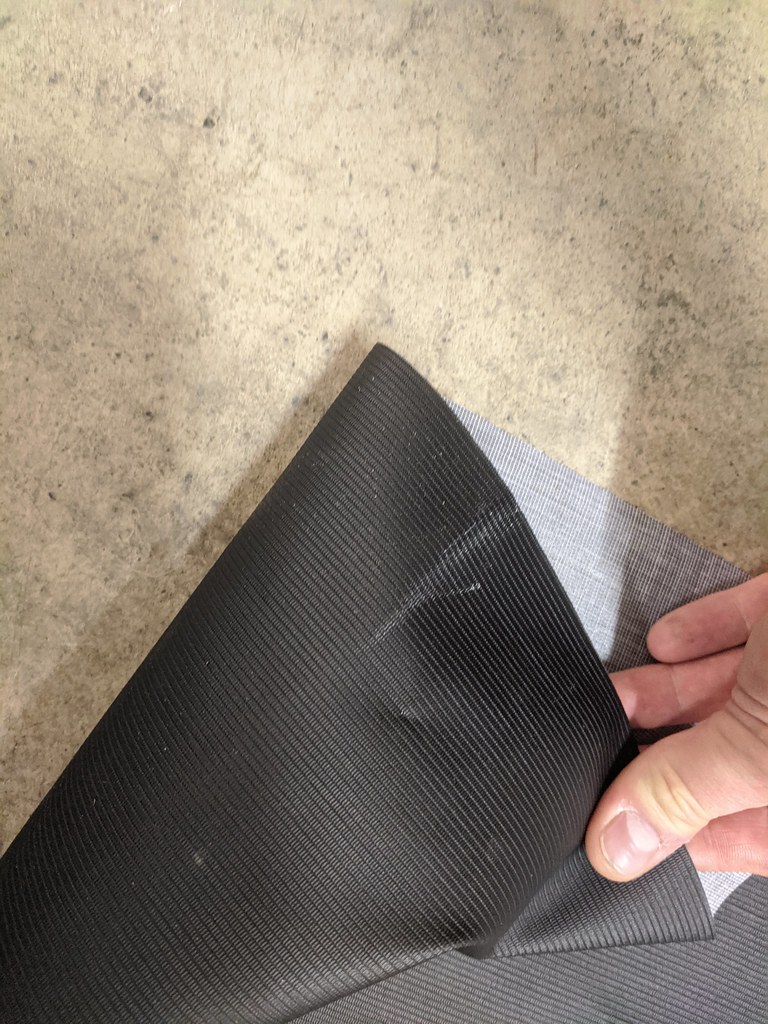
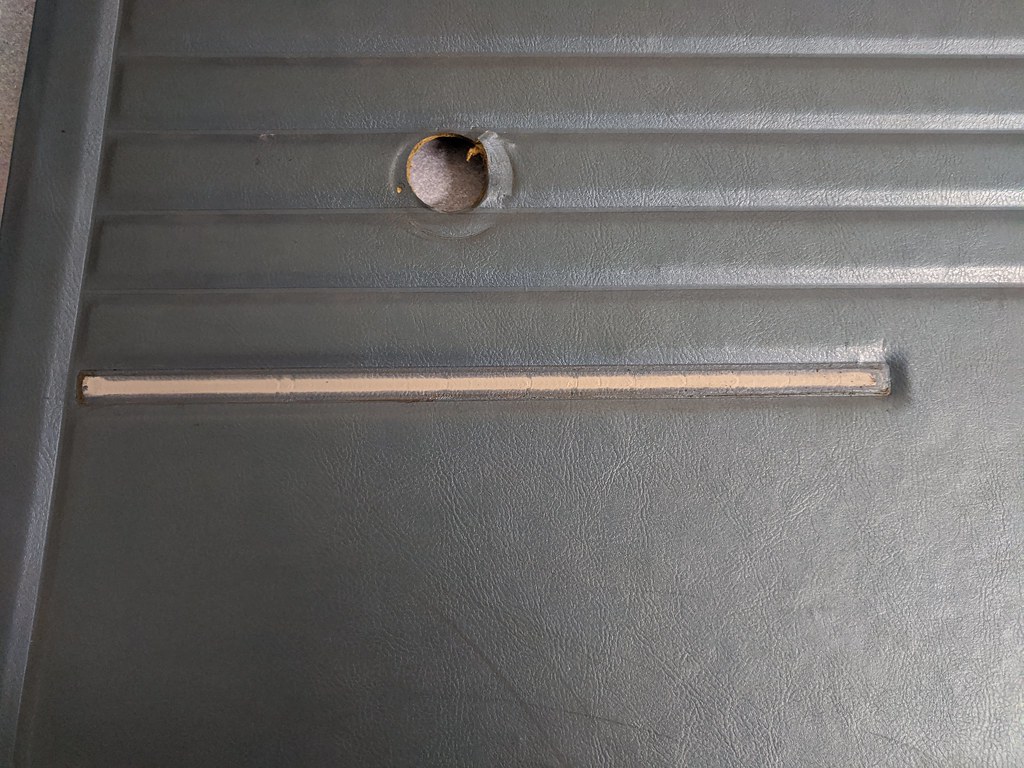
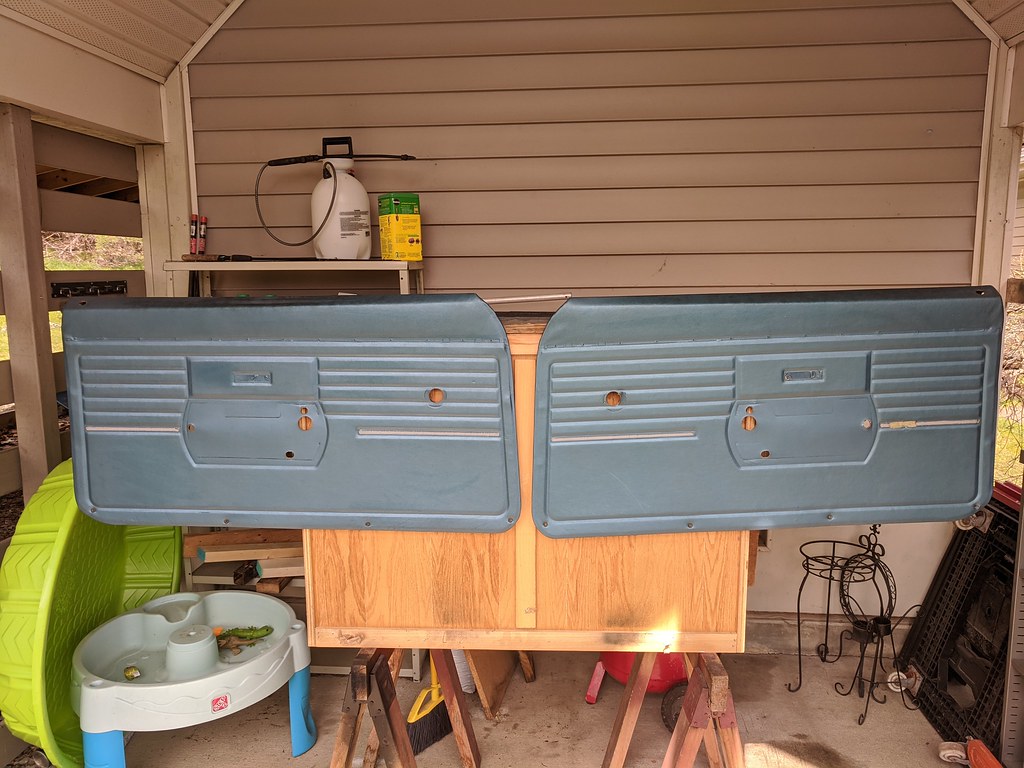
It's been so rainy here in NY, that I haven't been able to dye the last parts for my interior. I saw the forecast and Saturday looked to be dry and 60, so that was my chance to get the doors panels dyed. I first had to strip the door panels down just like I did the rear panels. Those glued lower trim panels from the door panel didn't want to come off. I pried and pried, then started to tear the actual vinyl on the panel which lead to some cussing. Then I came up with a better idea and grabbed about 12" of welding wire and made a couple 90* bends with enough room in the middle for the trim. I used that along with a heat gun and it cut through with steady pressure and worked like a charm.
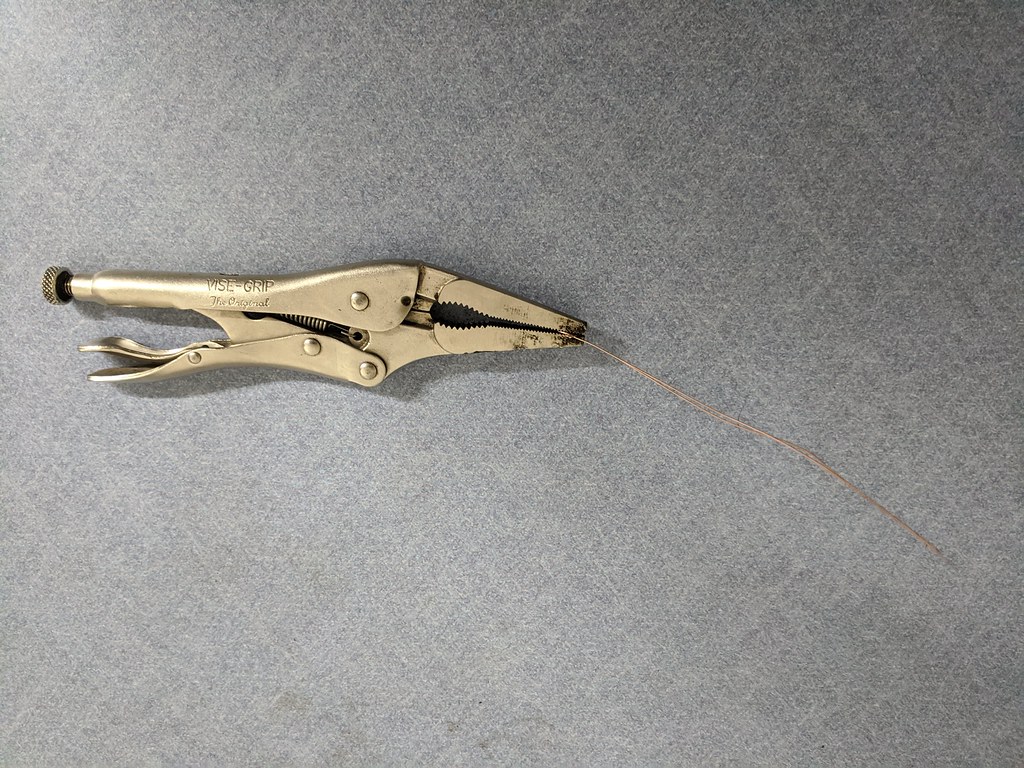

This is the first one where I started pulling from the left side. Once the tool got through the part that I tore, it worked so smoothly. You can see where I stopped prying up by hand and then using the tool.
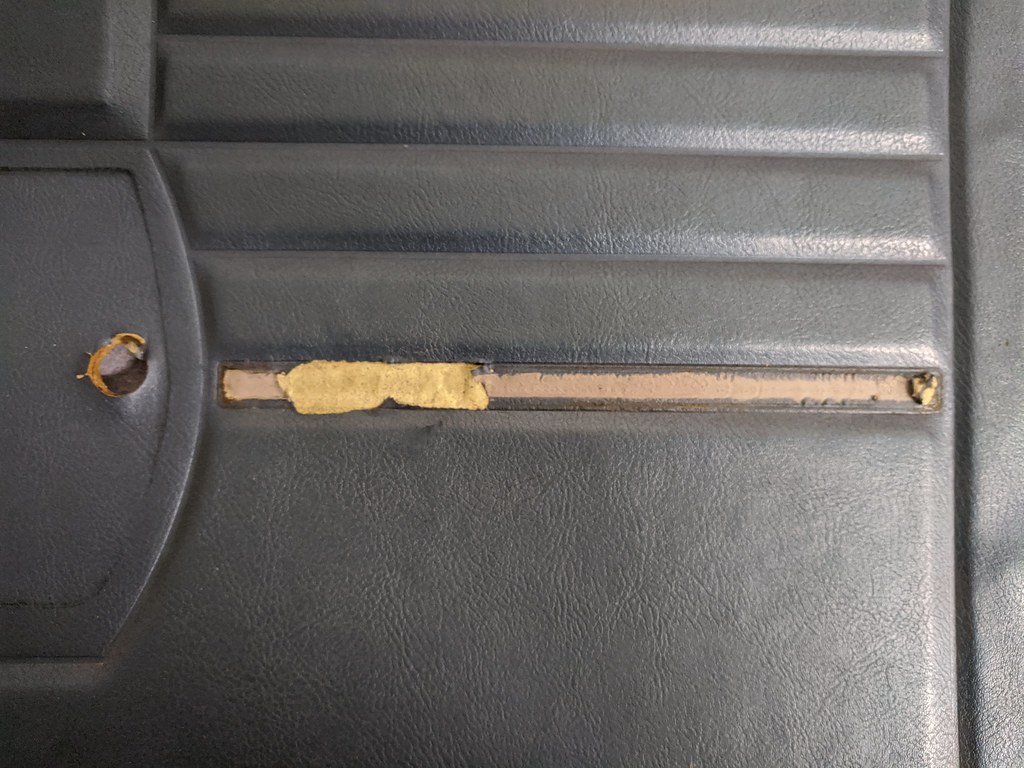
The other side worked perfectly and too so much less time.
I then stripped both panels down bare and proceeded to clean them up for paint. My process was two rounds of cleaning with window cleaner and a soft bristled brush, followed by PrepsAll paint prep cleaner and then a liberal coating of lacquer thinner. An old body guy told that the lacquer thinner softens the vinyl and works as good or better than the adhesion promoter. I have to say I'm impressed with the SEM products as it stands up very well to general use. I've tried scratching it with my nail and lightly with a screwdriver on the back side and it didn't flake or chip one bit. Nice a flexible just like I would expect. Time will tell how long it stands up though.

The finish looks a little blotchy, but it was still a little wet in this picture.

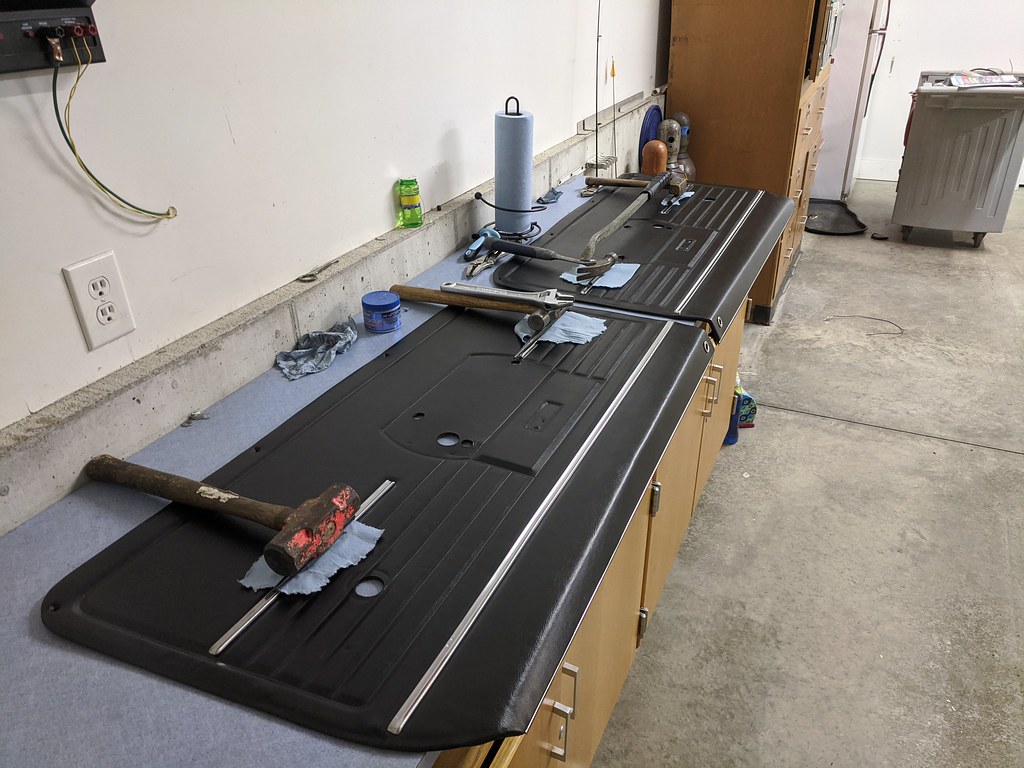
After I hand polished all of the trim it was time reinstall the window felts, middle trim and to glue back on the lower trim pieces. I used the same contact cement from my headliner install and it worked great. I left the original trim glue in place on both the trim and door panel. When the contact cement was applied, it re-activated the glue and worked beautifully to reinstall back on the panels. I used a few hammers to apply light pressure to the trim as it dried overnight.
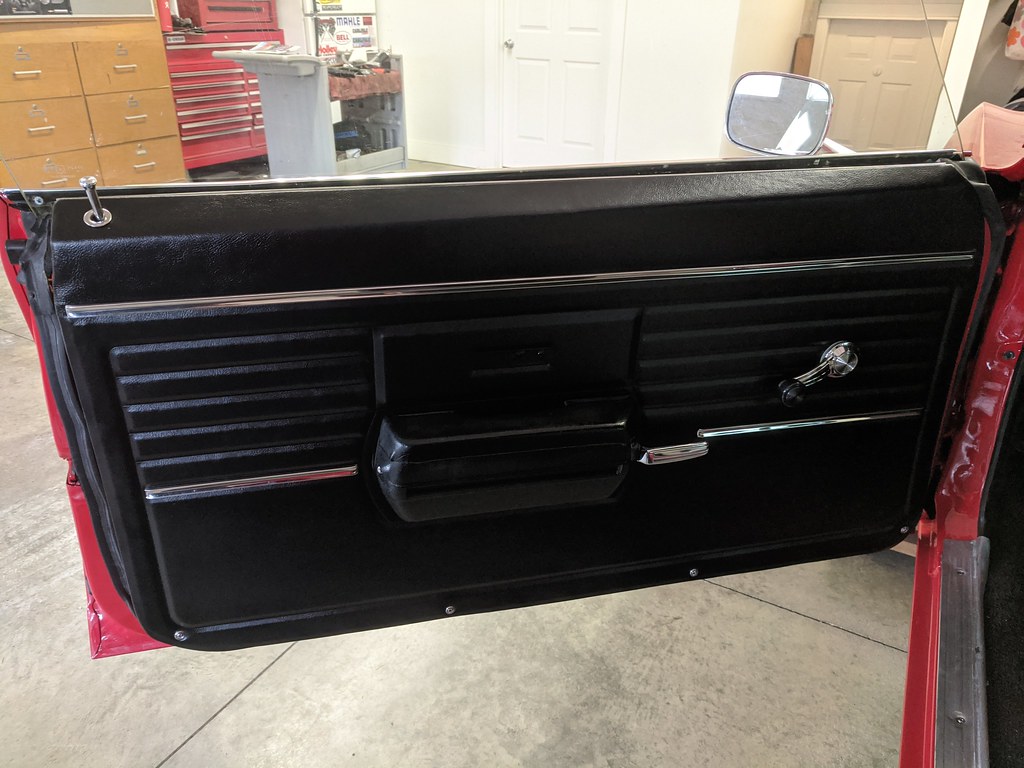
I couldn't help myself and the next morning put the clips back on the panel and installed it. This is the first time I've had the door panels this complete and the right color in the car. I'm actually surprised at how well the panels turned out as they exceeded my expectations. I cleaned/polished/installed the arm rest I picked up at a swap meet last year as well as installed some brand new stainless interior trim screws. It's really starting to come together now.
Hoping to button up the interior very shortly.
Cheers,
Ryan
1955 Nomad project LC9, 4L80e, C5 brakes, Vision wheels
1968 Camaro 6.2 w/ LSA, TR6060-Magnum hybrid and etc SOLD
1976 T/A LS1 6 Speed, and etc. SOLD
Follow me on Instagram: ryeguy2006a
04-27-2020 #555 Registered User
- Join Date
- Aug 2015
- Location
- charlotte
- Posts
- 924
great work, I'm shocked at how nice those doors came out, what a great improvement
04-27-2020 #556
Registered User
- Join Date
- Nov 2006
- Location
- Ma.
- Posts
- 5,567
Wow nice job Ryan, if you told me they were new I'd definitely believe you. My friend swears by SEM products for his body shop.
Wayne
Car FINALLY home !!!!!! lol
Project FNQUIK https://www.pro-touring.com/showthre...ghlight=FNQUIK
04-28-2020 #557 Registered User
- Join Date
- Feb 2015
- Posts
- 95

great project! Really satisfying working with the interior being something you see everytime your in the car. Looking forward getting there myself!=)
04-29-2020 #558
Registered User
- Join Date
- Aug 2008
- Posts
- 42
On the Visors, Did you just re-stich the original trim? or did you have/get/cut new trim? and is the covering on the visors original just cleaned up? or did you recover them with left over headliner fabric? Either way they look great!
04-29-2020 #559
Registered User
- Join Date
- Sep 2009
- Posts
- 2,707
Thanks for all of the compliments guys! I'm very happy with the results of the sun visors and all the panels I've dyed. Prep is key for the dyeing to take properly.
The sun visors are 100% original 1968. I used those binder clips to get the trim back in place and started where the original threads were still intact. I worked my way into the sections that had disintegrated and managed to find most of the original holes. Only thing I would have done differently is used a thicker thread. I used more of a fabric thread, but I'm very pleased with the results. And all I used for the cleanup on the original fabric was genetic blue window cleaner and a stiff bristled plastic brush. The window cleaner gives a nice gloss once it's dry.
1955 Nomad project LC9, 4L80e, C5 brakes, Vision wheels
1968 Camaro 6.2 w/ LSA, TR6060-Magnum hybrid and etc SOLD
1976 T/A LS1 6 Speed, and etc. SOLD
Follow me on Instagram: ryeguy2006a
04-30-2020 #560 Registered User
- Join Date
- Nov 2010
- Location
- Ventura County CA
- Posts
- 556
Great job!
Clint - '70 Nova "restomod" cruiser & autocross family car

 Reply With Quote


