

Results 501 to 520 of 808
-
06-05-2019 #501

 Registered User
- Join Date
- Sep 2009
- Posts
- 2,706

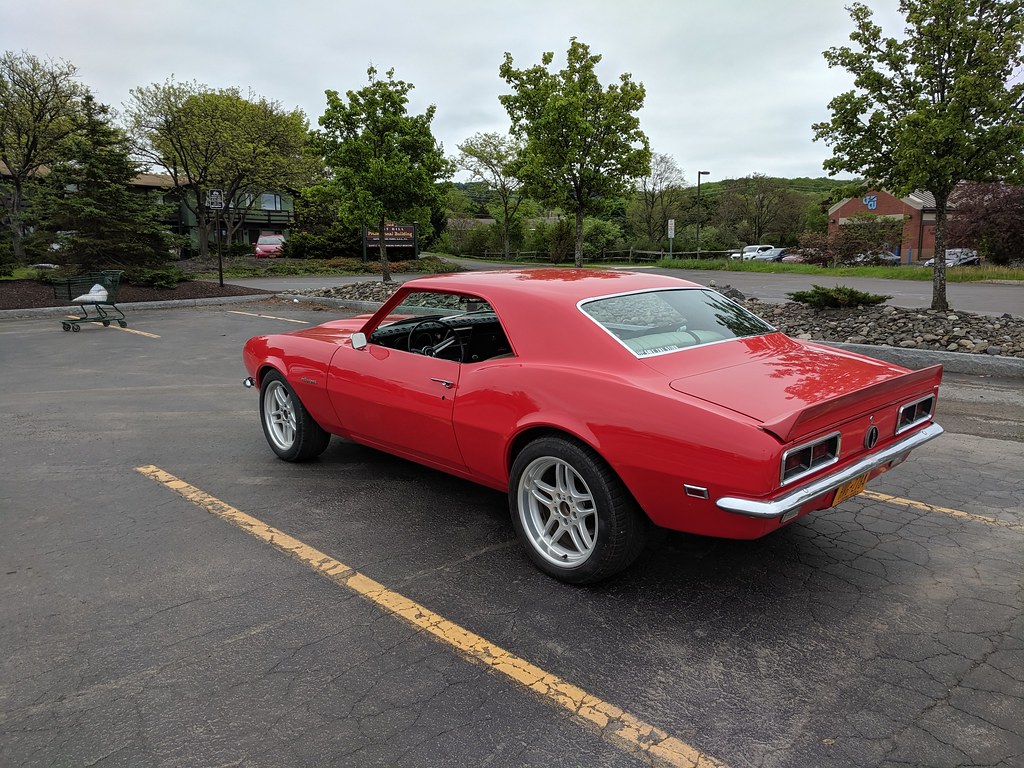
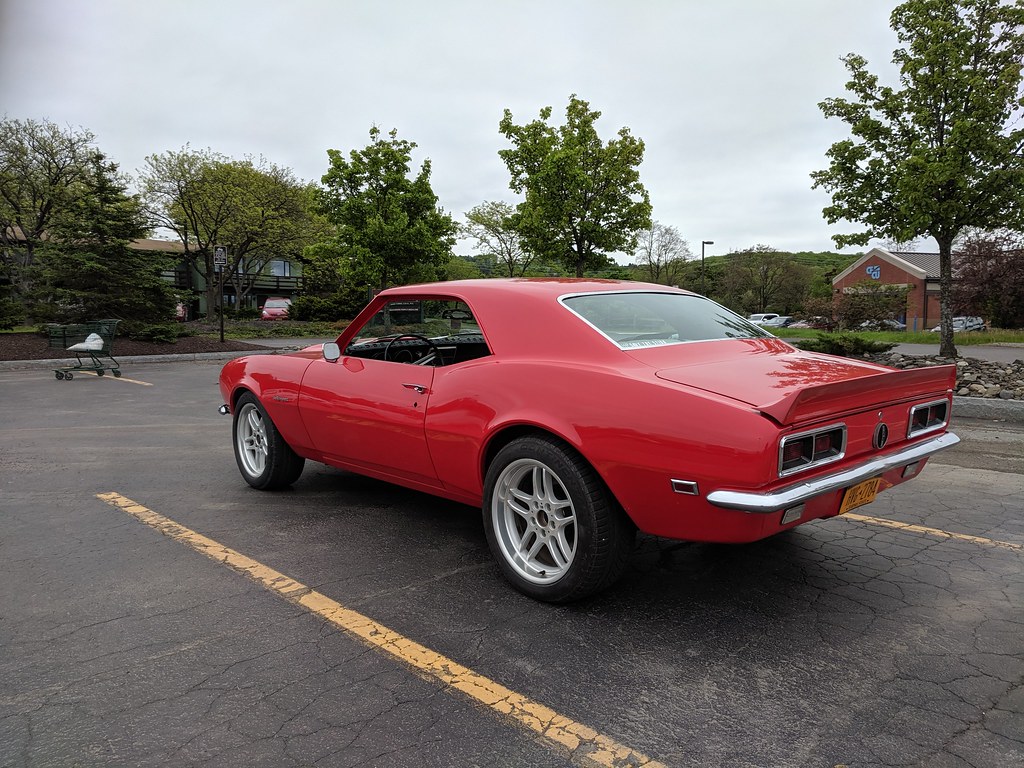
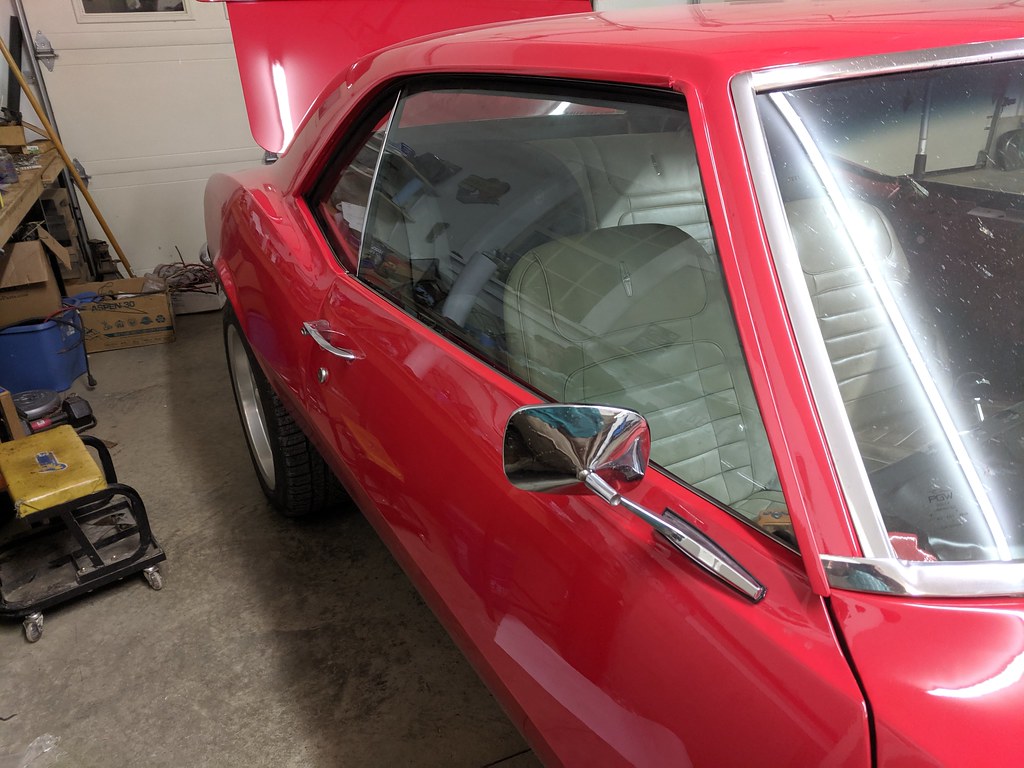
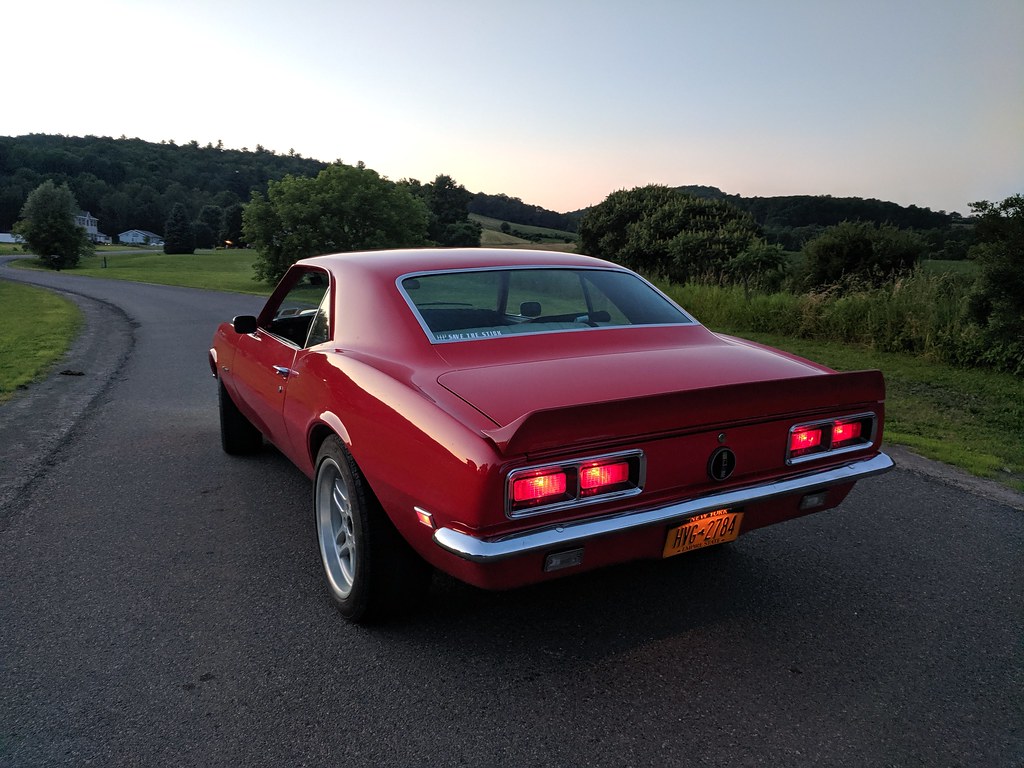
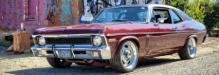
It's been a little while since I made an update, so I thought I'd share. Fortunately, this update has nothing to do with further progress on the build of the car, but rather from driving it! Crazy right?? Now that the car is 100% road legal and 100% functional, I've been driving it any chance I get. Here's the first time that I drove it to work. It's funny, I was so dead set on getting this car 100% complete before I drove it, but now that I can just hop in and drive I haven't wanted to do much else to it. No side windows, no door panels, no dash pad, but honestly hasn't bothered me.
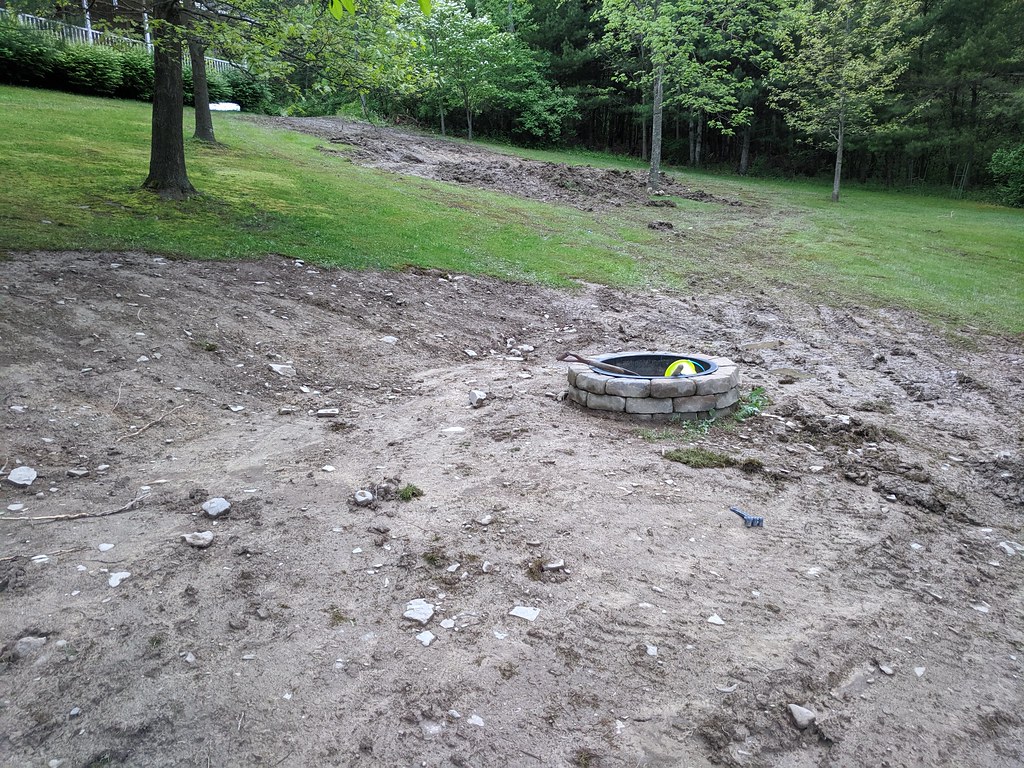
I've been sidetracked over the past few weeks with some landscaping projects. Since I live on a side hill, both involved leveling out area's. One is for my son's new swingset and the other is for our brick fire-pit. Both look pretty awful right now, but once the grass seed grows, it should be just what I wanted.

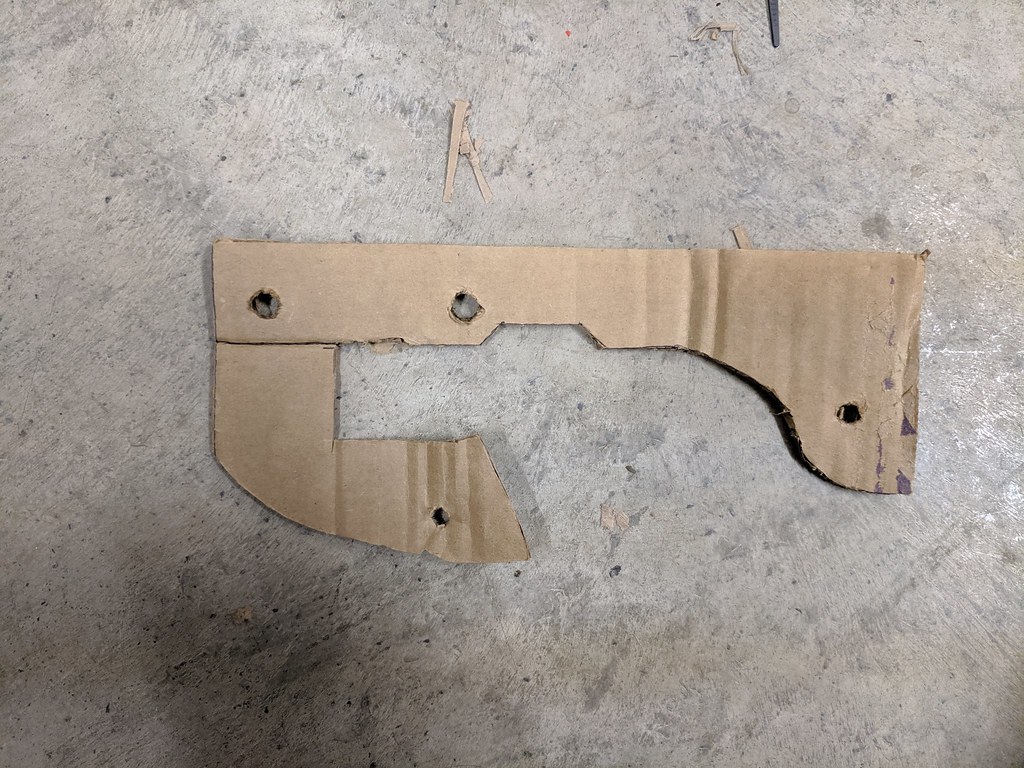
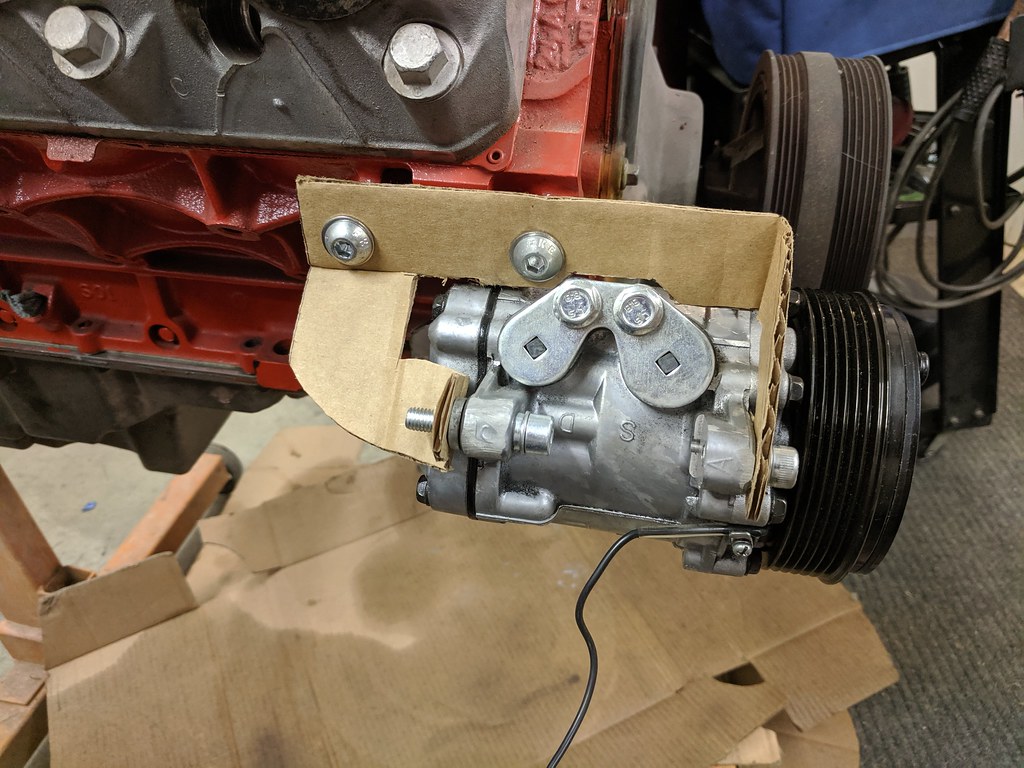
I did sneak out one night last week and started to mock up for the low mount Sanden compressor upper mount. I built the lower mount a while ago, but the upper mount was a little more tricky. Here's what I came up with. I'm going to try and make it out of one piece, but if I can't I'll likely do it with three.
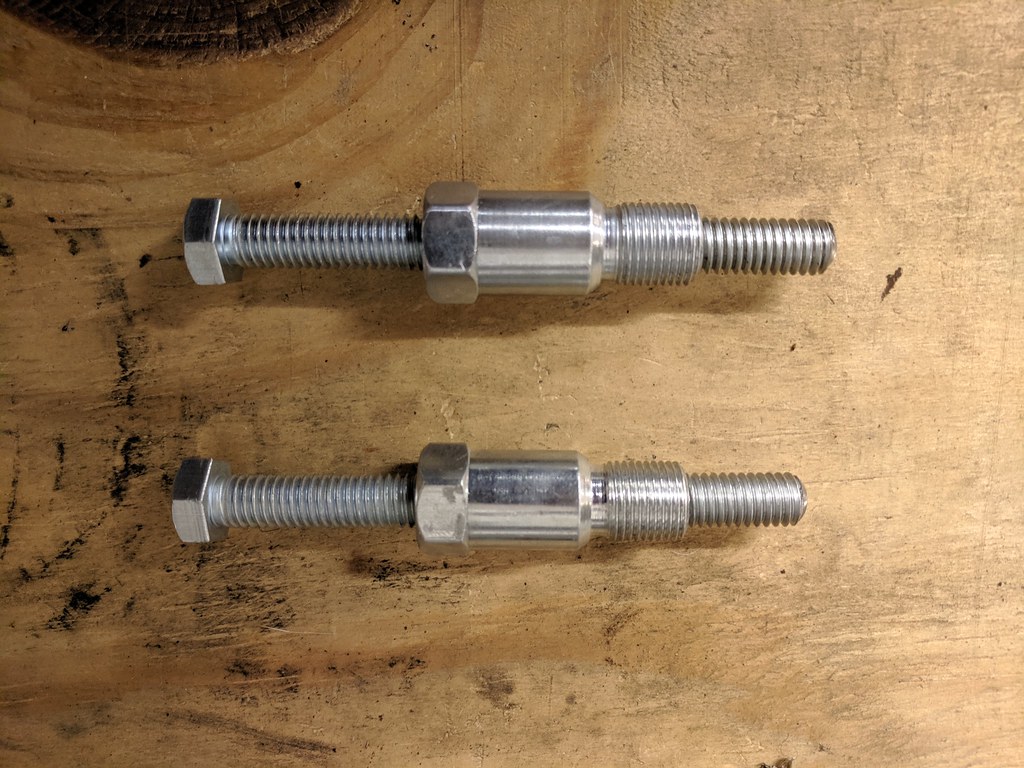
I also built a pair of piston stops one for me and the other for my Dad. We swapped a small cap HEI on his 496 BBC to allow for the Terminator EFI to control the timing, but there seems to run worse the closer that we get to syncing up the commanded spark vs. the actual spark he's showing on the balancer. I'm wondering if the TDC mark on his balancer is off now for some reason. I build this to confirm.
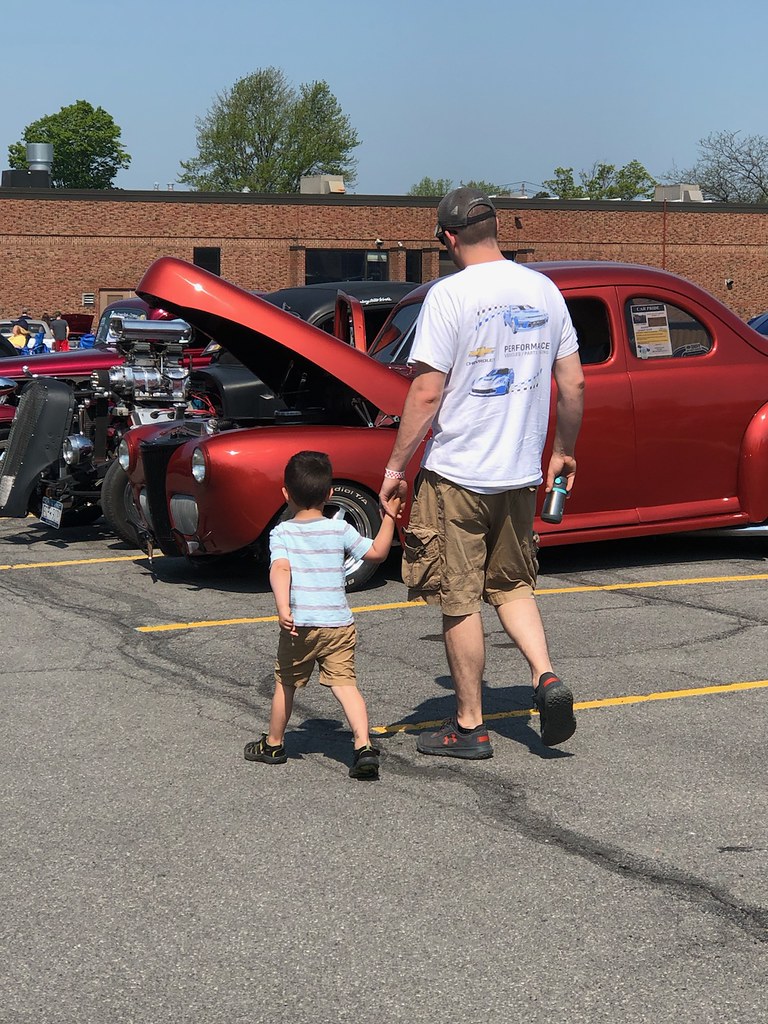
This is the photo from a few weekends ago at the car show. My wife snapped this of my son and I. Definitely one of my new favorite pictures.
I have been at a loss for time recently to work on the car and thought that it would be worth the money to just pay someone to dyno tune my car and be done with it. Well after I called around, I just can't justify a $450 invoice to have that done. Heck, that's halfway to the new Terminator X system from Holley. But the silver lining is that it gave me the motivation to use my tuning software and play around with my own VE and MAF tables to dial in my tune. Thankfully, my car isn't that far away from a stock Z06 Corvette so that's what my base is. I've been playing around with the VE tables and so far it has helped out pretty significantly with my light throttle surging issue. I'm hoping to dial it in further over the next week or so and call it good.
That's about all for now. Hopefully my next update will include a tuning update.
1955 Nomad project LC9, 4L80e, C5 brakes, Vision wheels
1968 Camaro 6.2 w/ LSA, TR6060-Magnum hybrid and etc SOLD
1976 T/A LS1 6 Speed, and etc. SOLD
Follow me on Instagram: ryeguy2006a
-
06-05-2019 #502
Registered User
- Join Date
- Sep 2018
- Posts
- 49
Ryan,
what happened with the Dirty Dingo mount for the A/C?
Is the mount your fabbing clear the Hooker engine mounts?
06-06-2019 #503
Registered User
- Join Date
- Sep 2009
- Posts
- 2,706
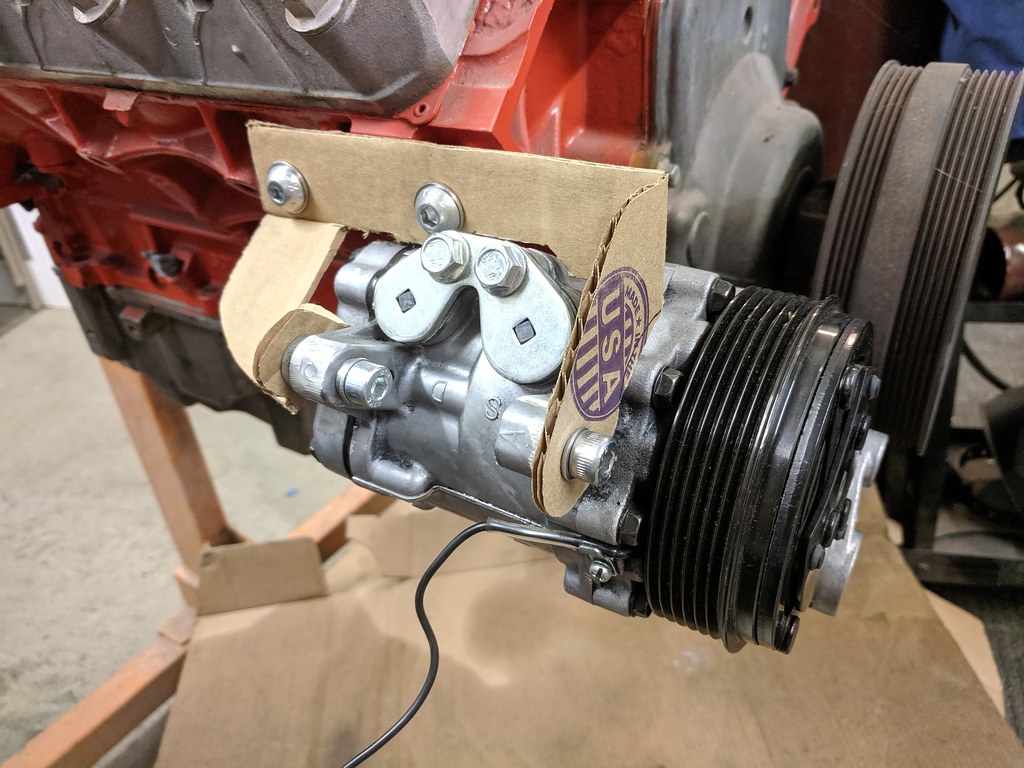
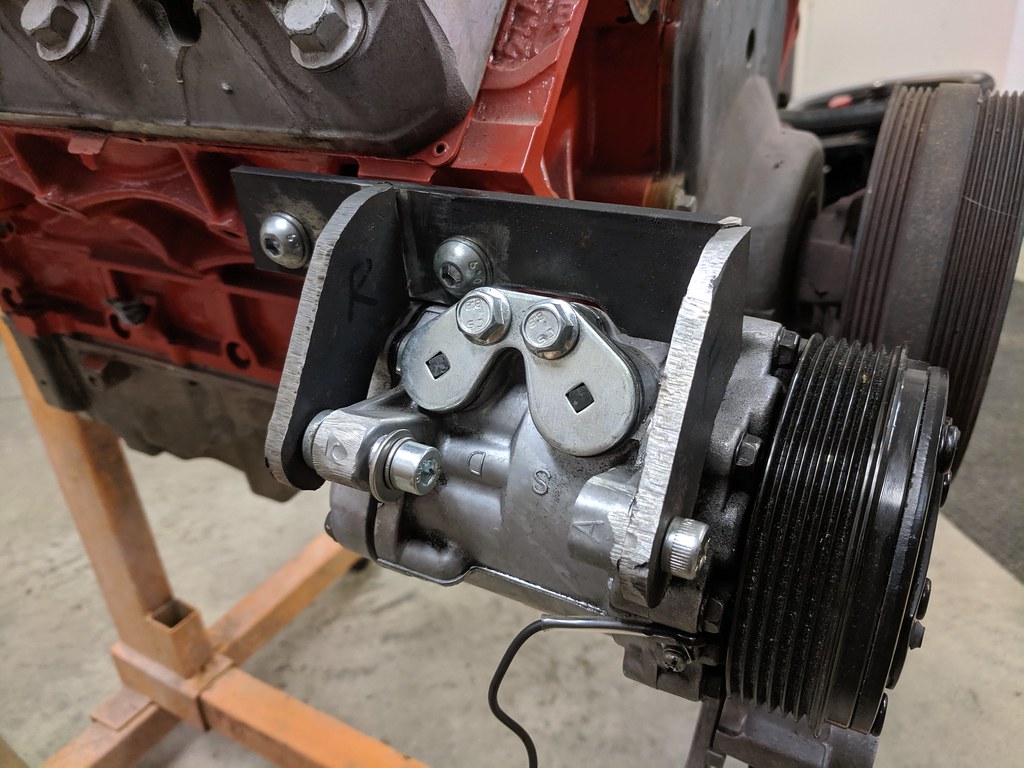
I had to modify the Dirty Dingo mounts to clear the sway bar, frame and work better with the Holley mounts. The DD mounts position the Sanden compressor, which has a 6 rib pulley, on the outer 4 ribs but in order to gain more space I moved the mounts forward as well to run on the inner 4 ribs. It worked perfectly, so now once the upper mount is finished, I'll be able to mount it low and tight and not interfere with anything. I'll mount it on the motor, so that when I'm ready for my Vintage Air install, I just have to pull the cap and make some lines.
1955 Nomad project LC9, 4L80e, C5 brakes, Vision wheels
1968 Camaro 6.2 w/ LSA, TR6060-Magnum hybrid and etc SOLD
1976 T/A LS1 6 Speed, and etc. SOLD
Follow me on Instagram: ryeguy2006a
06-06-2019 #504 Registered User
- Join Date
- Nov 2006
- Location
- Ma.
- Posts
- 5,567
I'm happy for you Ryan, getting the car up and running. I don't blame you for wanting to enjoy it for a while. It looks great in those last shot of it.
Wayne
Car FINALLY home !!!!!! lol
Project FNQUIK https://www.pro-touring.com/showthre...ghlight=FNQUIK
06-07-2019 #505
Registered User
- Join Date
- Sep 2009
- Posts
- 2,706
Thanks Wayne. I'm loving that I'm able to put some miles on it.
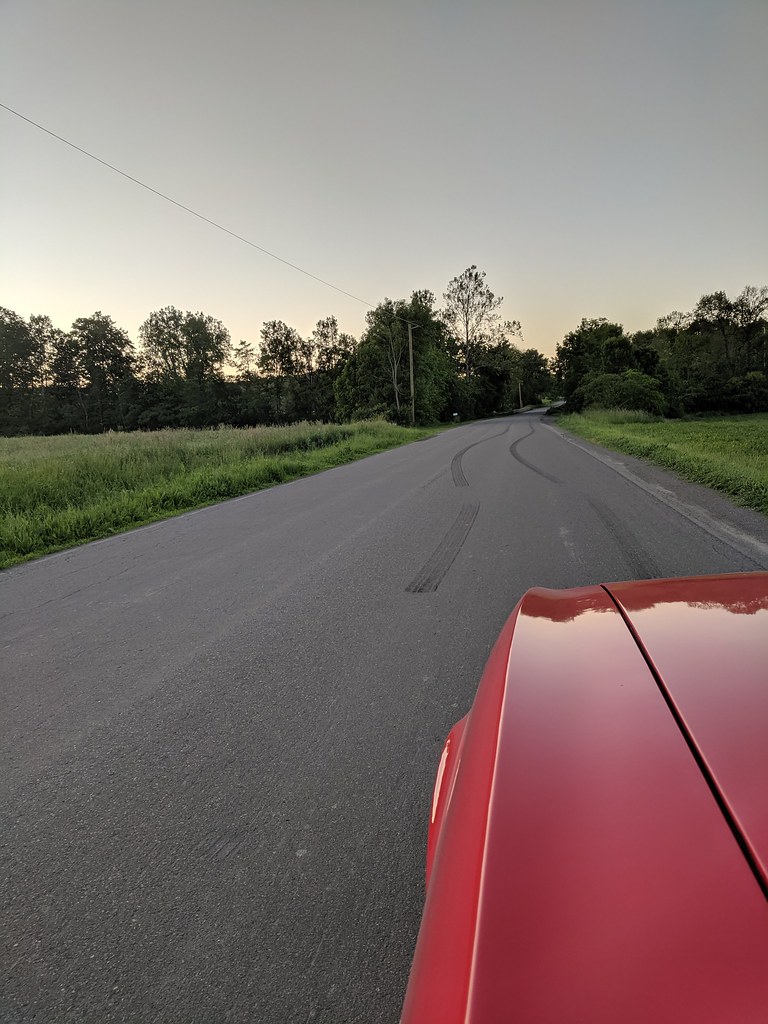
Took the car out last night and had a little fun. I'll just leave this here.
1955 Nomad project LC9, 4L80e, C5 brakes, Vision wheels
1968 Camaro 6.2 w/ LSA, TR6060-Magnum hybrid and etc SOLD
1976 T/A LS1 6 Speed, and etc. SOLD
Follow me on Instagram: ryeguy2006a
06-07-2019 #506 Registered User
- Join Date
- Nov 2016
- Location
- Sulphur, La
- Posts
- 599
That shopping cart in that pic above makes me nervous!!
06-17-2019 #507
Registered User
- Join Date
- Sep 2009
- Posts
- 2,706
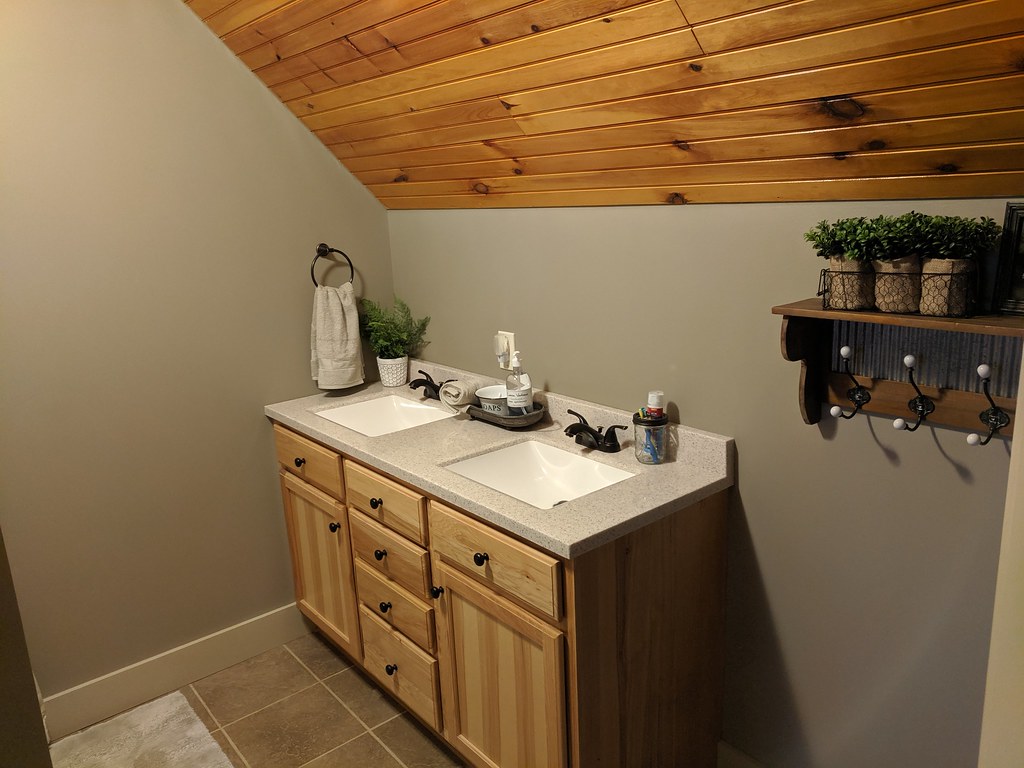
Got to work on my car this weekend after finishing up the light remodel on the upstairs bathroom, new countertop, painted twice (First color wasn't what WE wanted), and lots of new decorations.
And finishing up the re-grading on the lawn to have a flatter fire pit and flat spot for my son's swingset
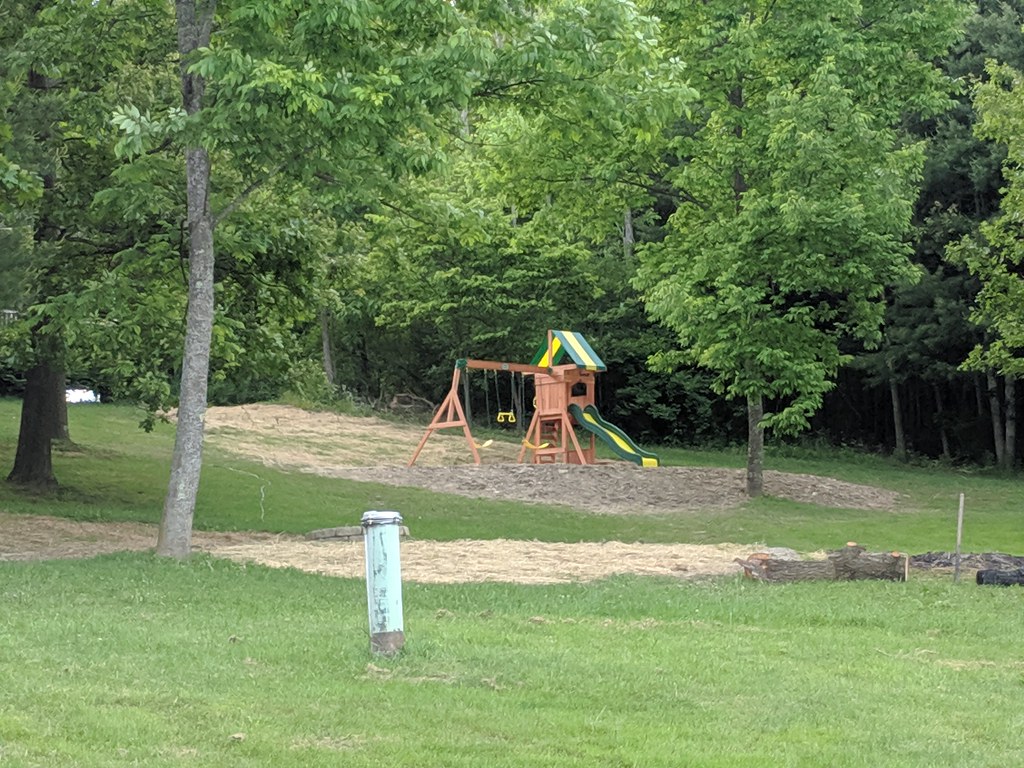
Those were the last two "nesting" projects that I had to finish up before my wife is satisfied that our new son can come into the world successfully. Anyone that has had children knows what I'm talking about with the nesting projects.
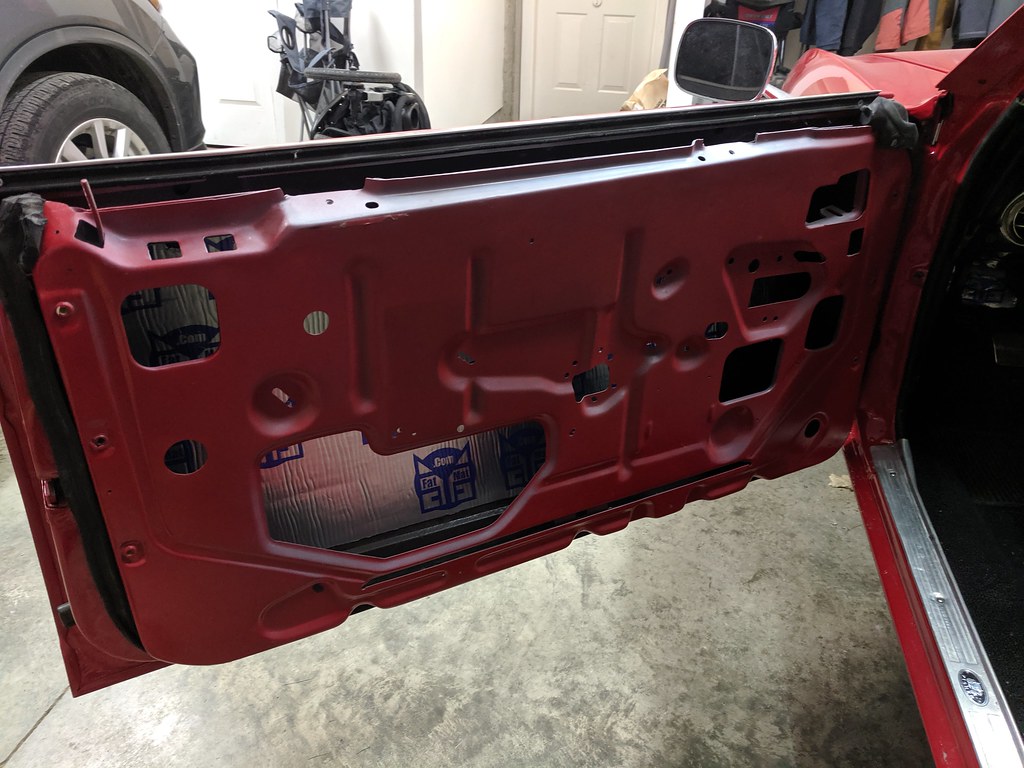
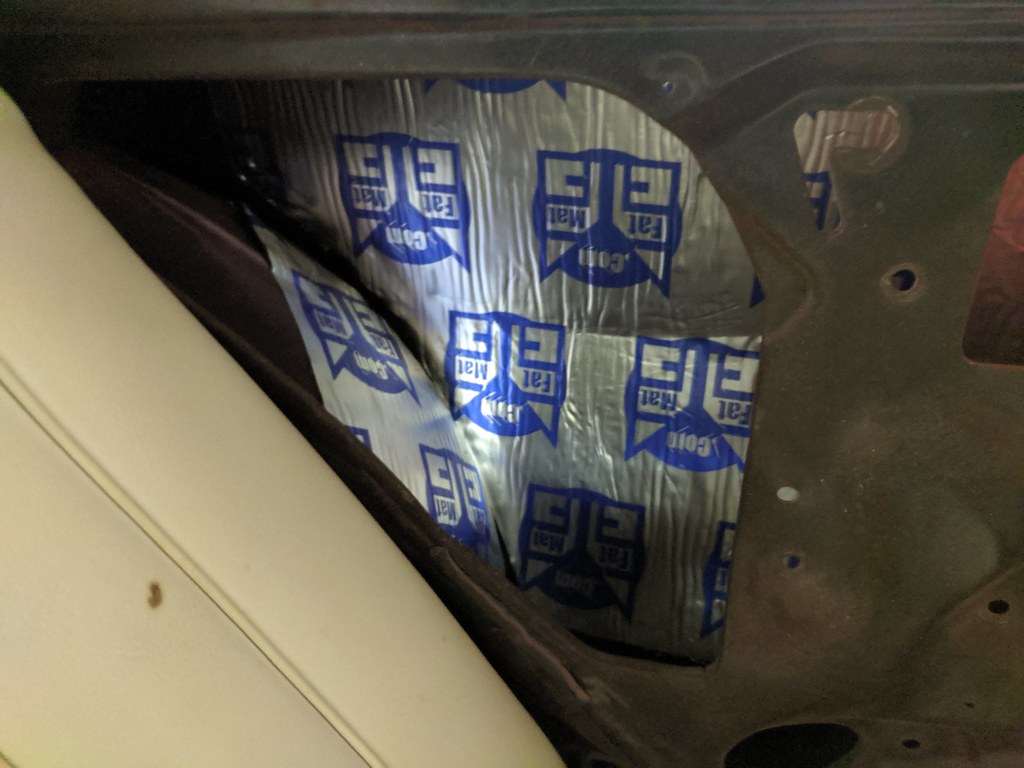
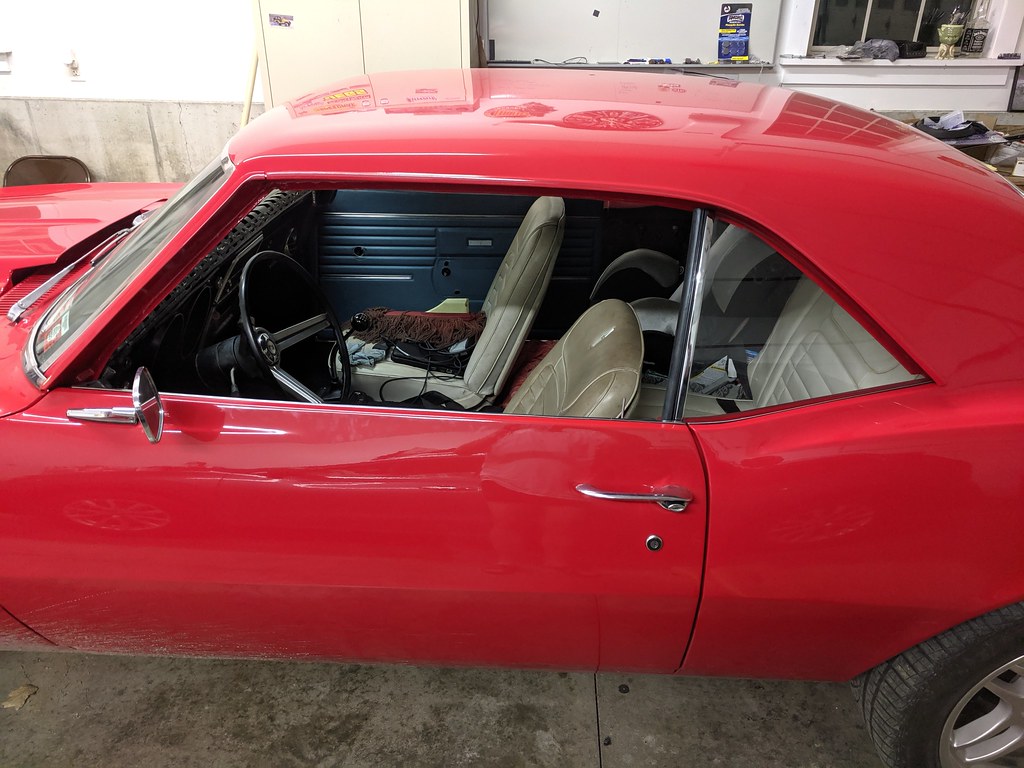
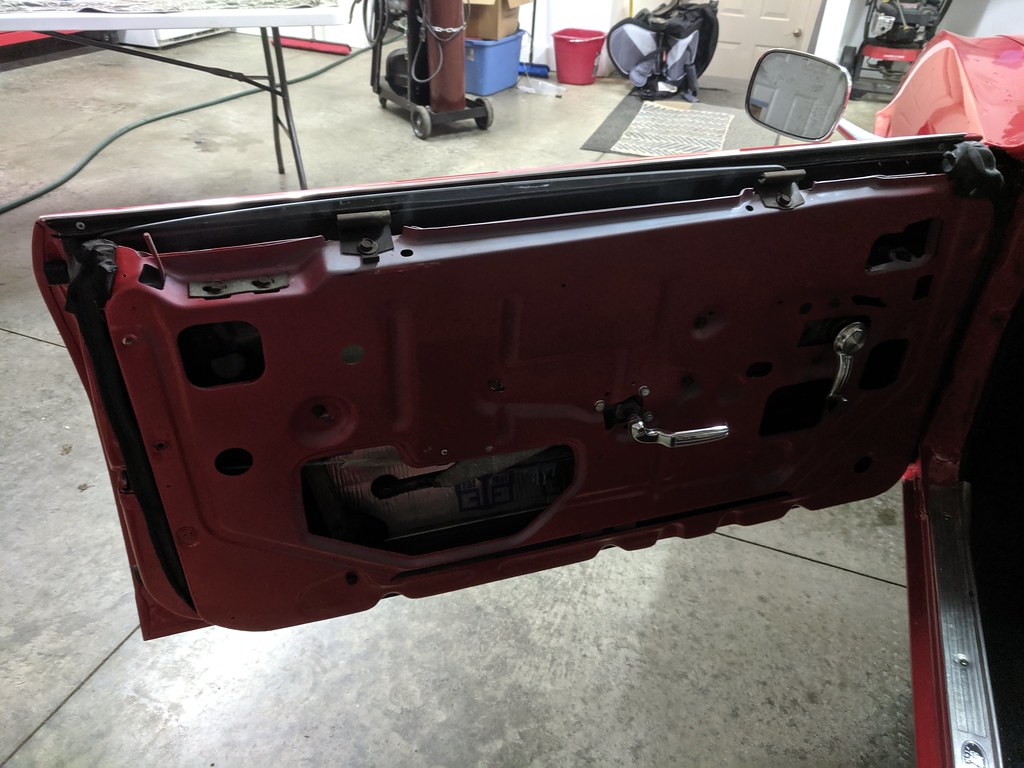
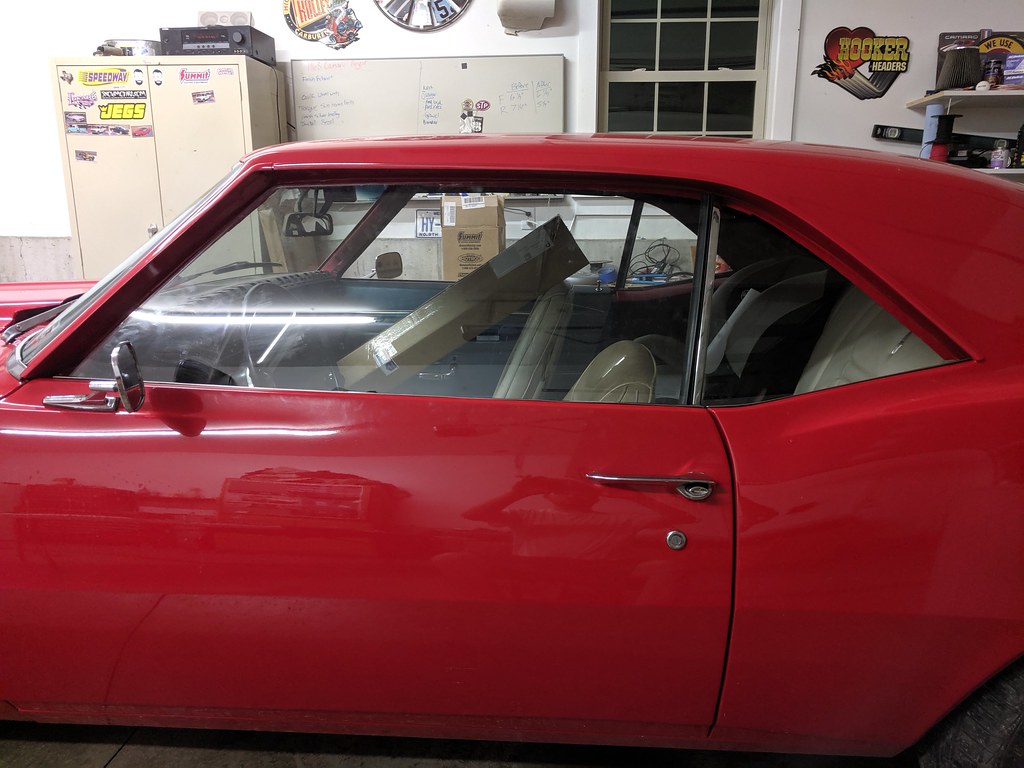
Anyway, I was planning on taking the car to a local cruise in on Saturday but unfortunately due to the weather I wasn't able to take my car. I worked on Friday night to get the car interior more functional and complete. My goal was to get the side windows installed so that it wasn't so loud and windy on the highway. I started by installing some of the Fat Mat in the doors to help control sound.
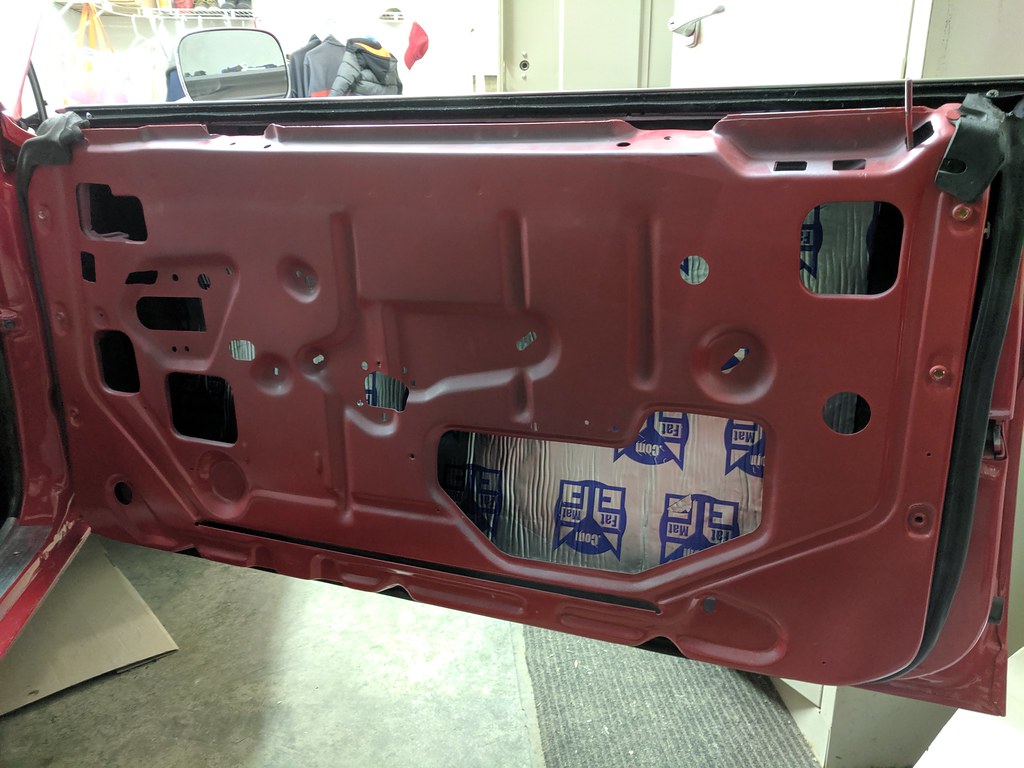
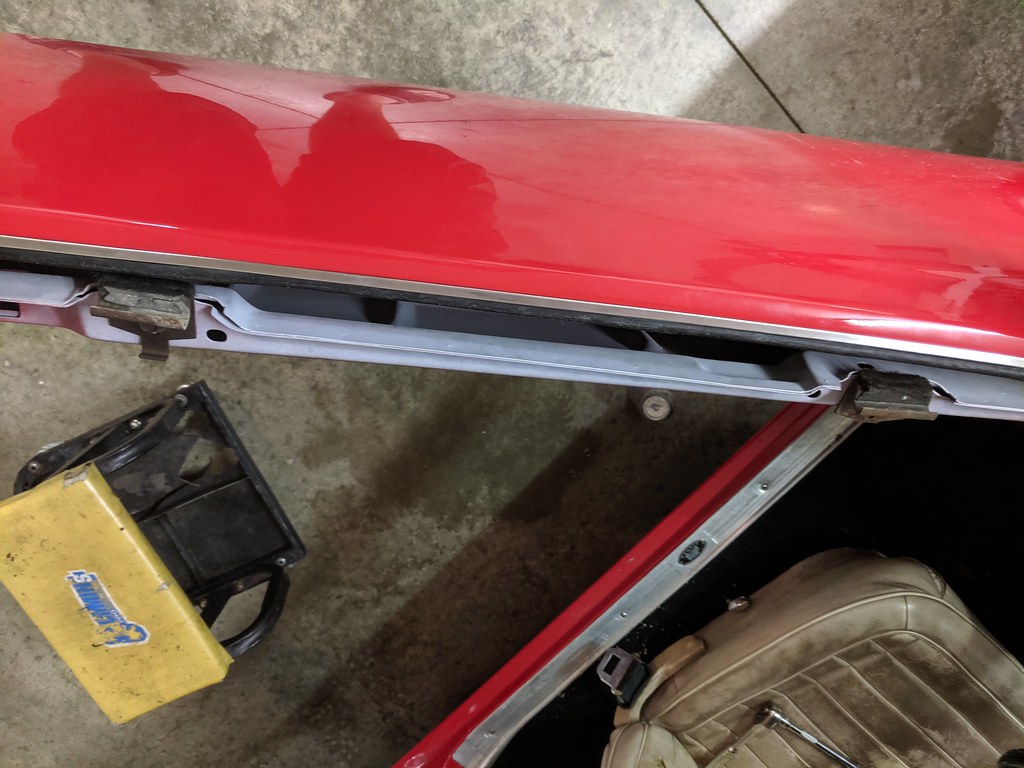
Then I polished up the weather seal retainer/gutter trim piece. It was in good shape, but had a lot of grime and overspray from the years. Turned out great and the Metro weather seals went in beautifully.
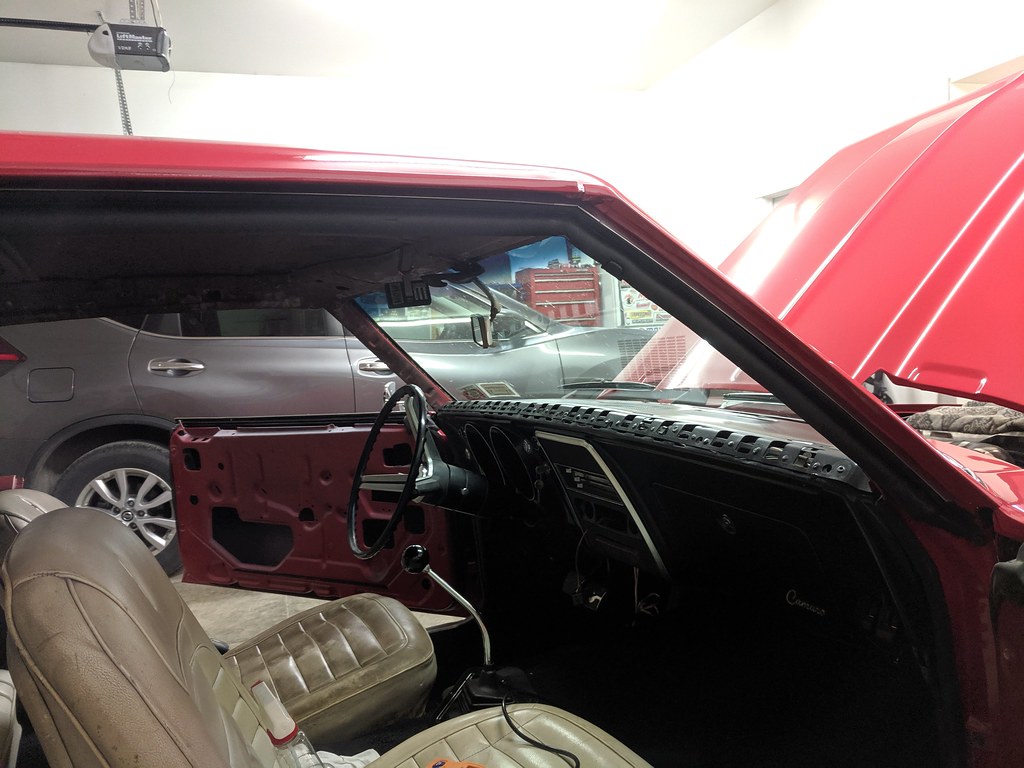
The quarter trim seals finally came in and I installed the new chrome quarter trim too. I also had to recently purchase a new outer window felts, but found a garage sale item on Speedway motors for a set of the Repops seals, and they fit pretty good, but the angle was off for the quarter. After I bent it slowly, it came pretty close and I was happy with the fitment.
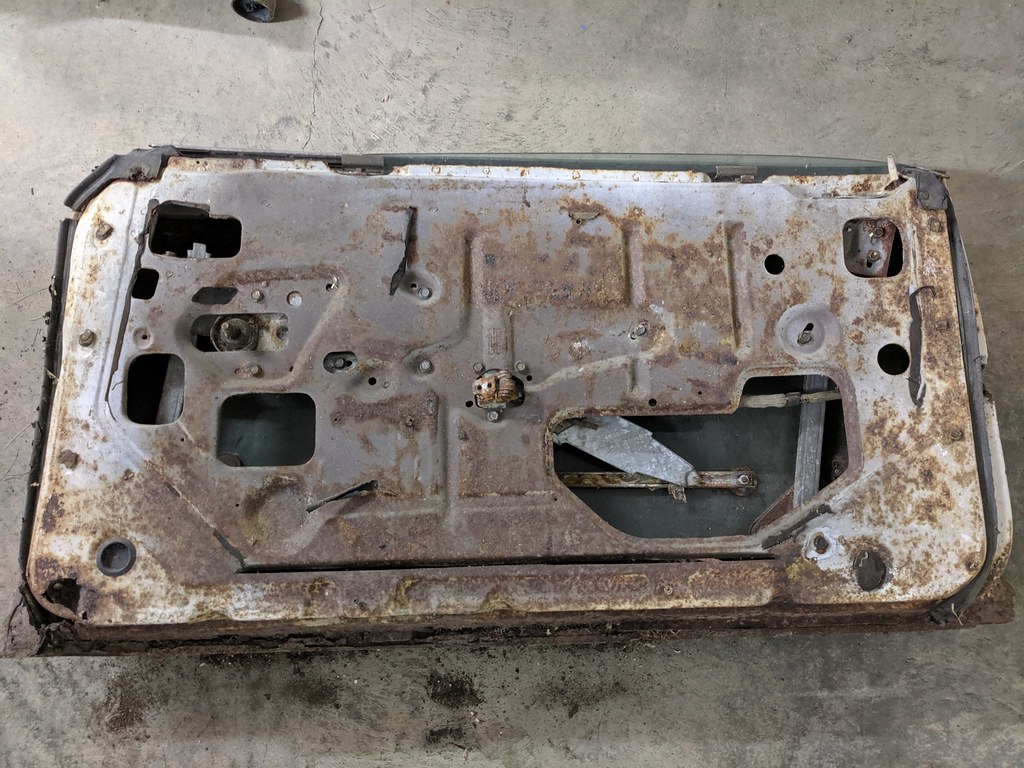
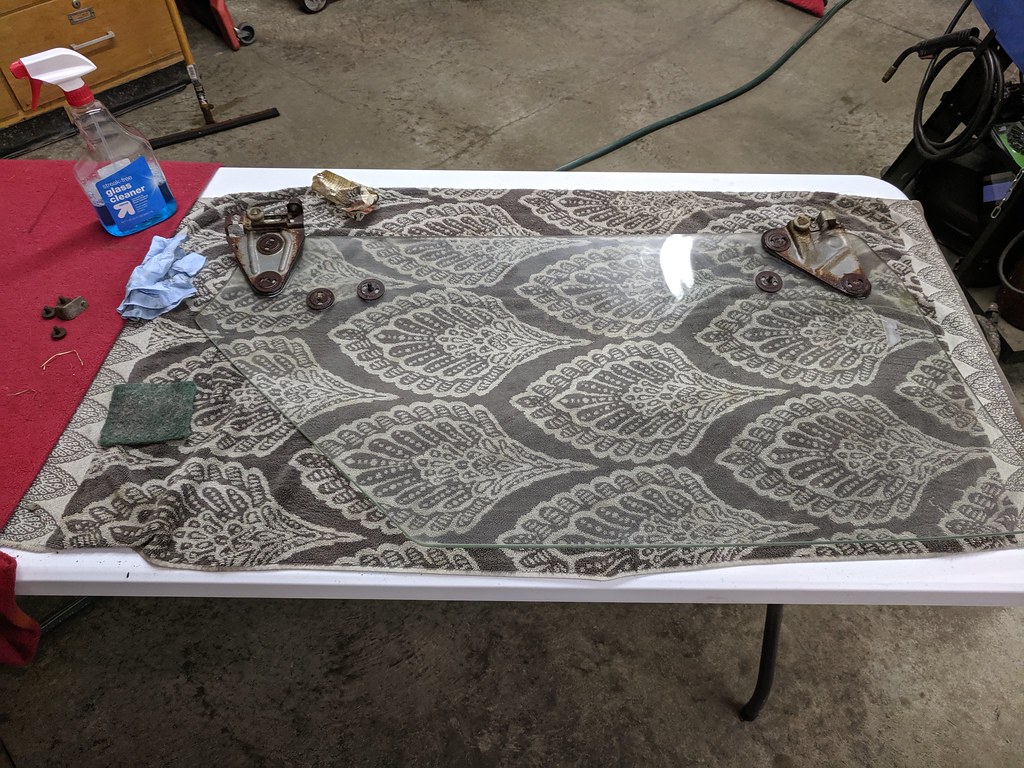
Then I drug out one of the original doors that came with the car to swap over all of the window mechanisms and door latch rods. The door is totally roached, but surprisingly the mechanisms were in great shape with light surface rust. Just needed a little clean-up and I installed them with the original window, which was also in surprisingly great shape.
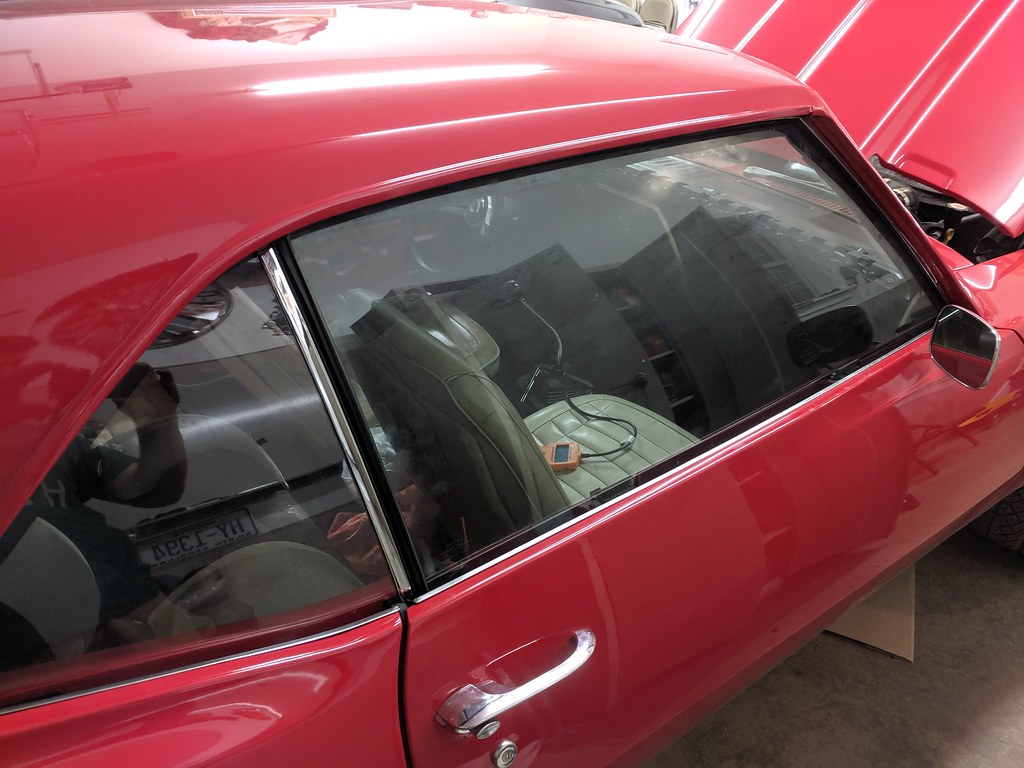
It was getting late, but I got the window installed and adjusted pretty close. Definitely needs lots of tweaking to be perfect, but overall close enough for me at 2am. I didn't notice it before I put it in, but there is some kind of film or overspray on it that will need to be polished off, but there are no major issues with the window so I'm happy to re-use the original born with parts.
Now that I have the one side done, I'm hoping that the driver's side will go much quicker as I know how to install everything. That door glass is a PITA. I had to find a YouTube video to figure out how to get it out of the original door. I've also got everything to properly re-dye the dash, rear and door panels from blue to black. My wife bought me a headliner and sail panel set for Father's Day, so I'll get that installed soon as well. Any input on what glue to use from those who have done it?
Thanks,
Ryan
1955 Nomad project LC9, 4L80e, C5 brakes, Vision wheels
1968 Camaro 6.2 w/ LSA, TR6060-Magnum hybrid and etc SOLD
1976 T/A LS1 6 Speed, and etc. SOLD
Follow me on Instagram: ryeguy2006a
06-17-2019 #508
Registered User
- Join Date
- Sep 2018
- Posts
- 49
Looking good Ryan,
will need report on how well the Fat Mat quieted down the noise.
what made you decide on Fat Mat instead of other brands?
06-21-2019 #509
Registered User
- Join Date
- Sep 2009
- Posts
- 2,706
Time for the driver's side to get some door glass. Same as the other side, I installed some FatMat to help with heat and noise. I also put some behind where the quarter glass goes. I didn't do that on the passenger side, but I need to pull that window anyway to make some adjustments and I'll do it then.
Next up was to install the door latch and rod assembly.
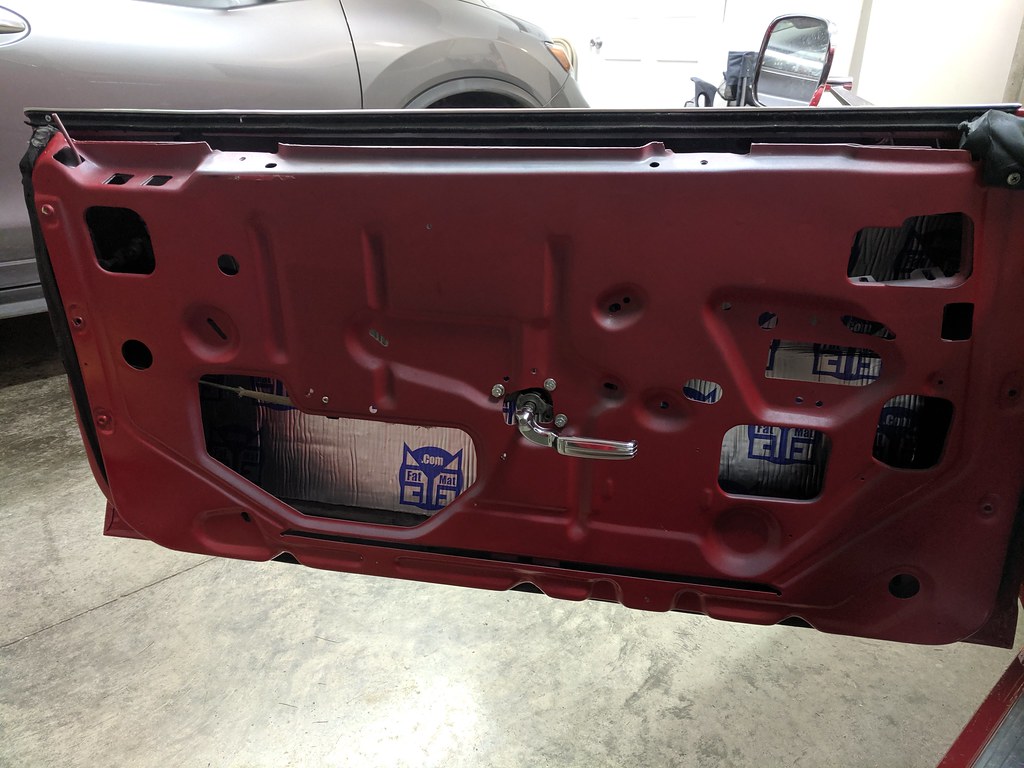
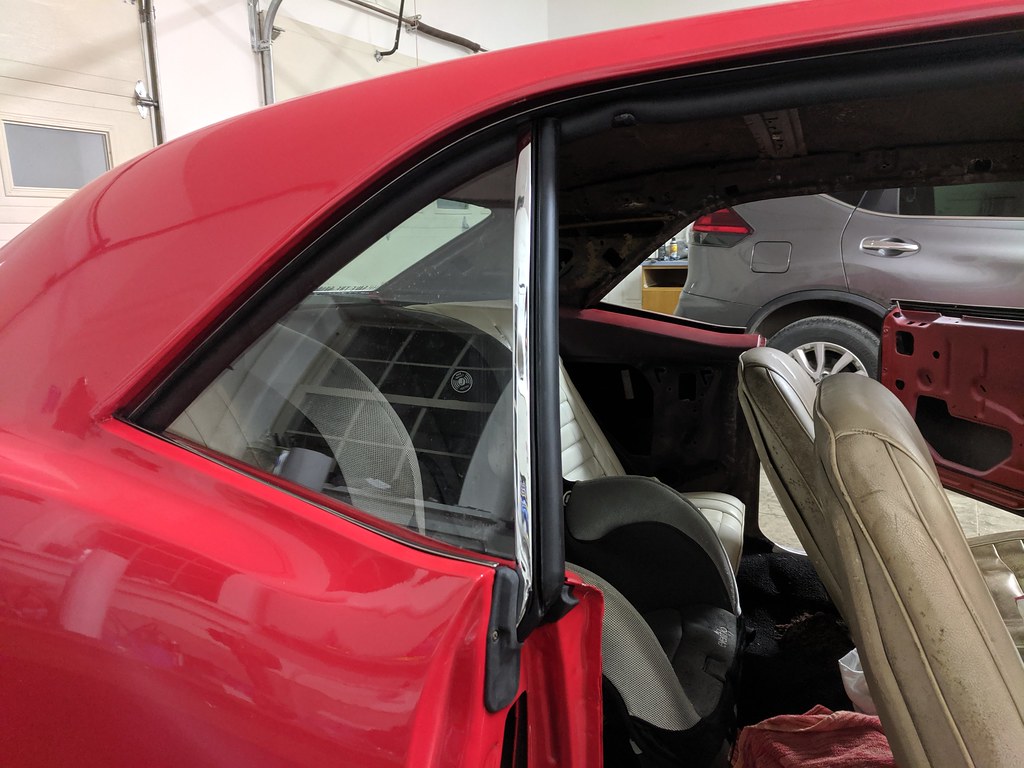
Original Quarter window installed with new chrome and weather seals. I also put on the new door locks.
Next up was the door glass which is kinda tricky until you know how to do it. The best way that I found to do it was to install the crank mechanism first, then install the window glass. You have to shift the glass towards the front of the door, then slide it down and rearward for it to slide into place. After that's done you can install the front and rear tracks and start making adjustments from there.
I was pretty impress with overall how good of condition the tracks were. I scuffed off some light surface rust in spots and dusted it with some flat black spray paint and they look great. Lubed them up and finished installing.
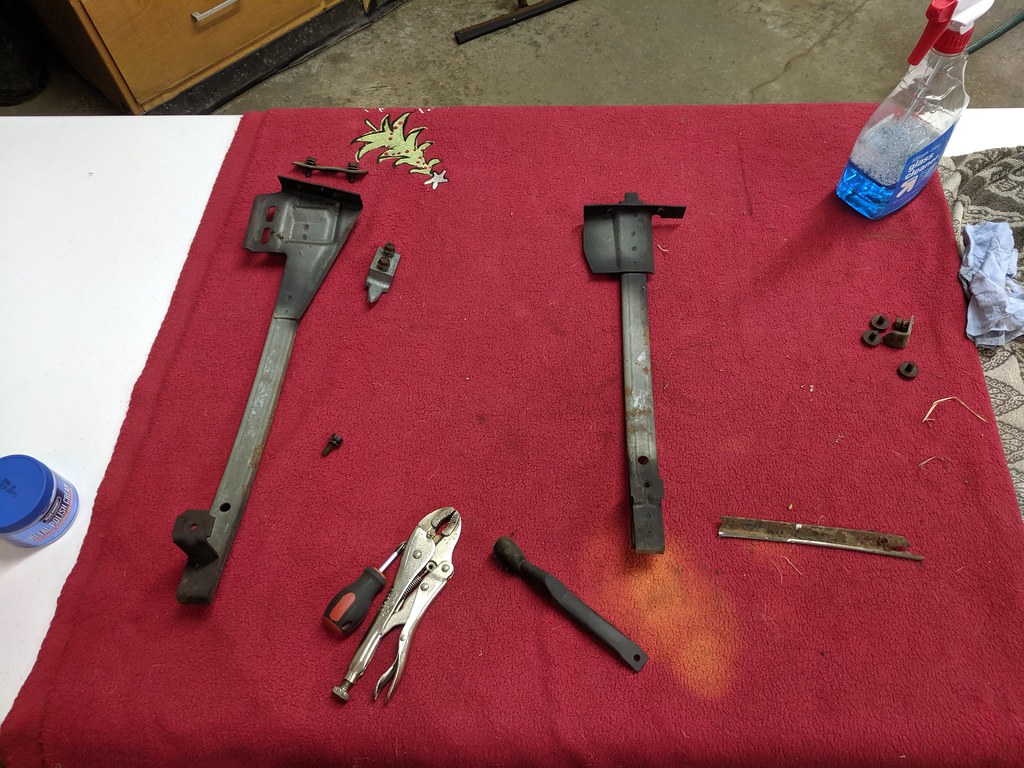
I was super impressed the door guide felts were still in really good condition. I'm going to get new ones just because, but they probably could still be used.
All installed and roughly aligned. I still need to tweak the glass fitment once the seals are installed, but good for now. It's crazy how much more weight the door has with the glass installed. That clunk the door makes when it closes though is very satisfying.
A few weeks ago I made a little more progress on my A/C compressor mount, but forgot to post the pictures. I ended up having to make it in three pieces due to the thickness of the material and the difficulty to get the bend right. It fits beautiful, but I'm going to try and install it to see how the belt alignment is before I final weld it. It's rugged enough now for a test fit to confirm the belt fits right. I left enough room in between the mounts so that I could shim it if necessary for better belt alignment.
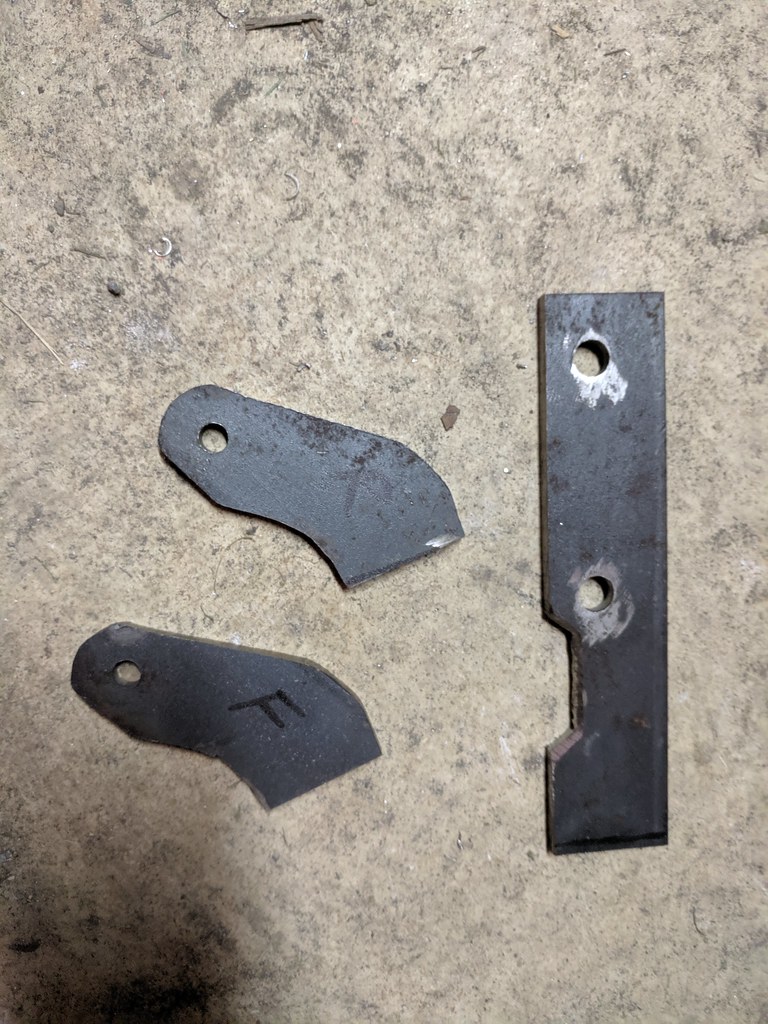
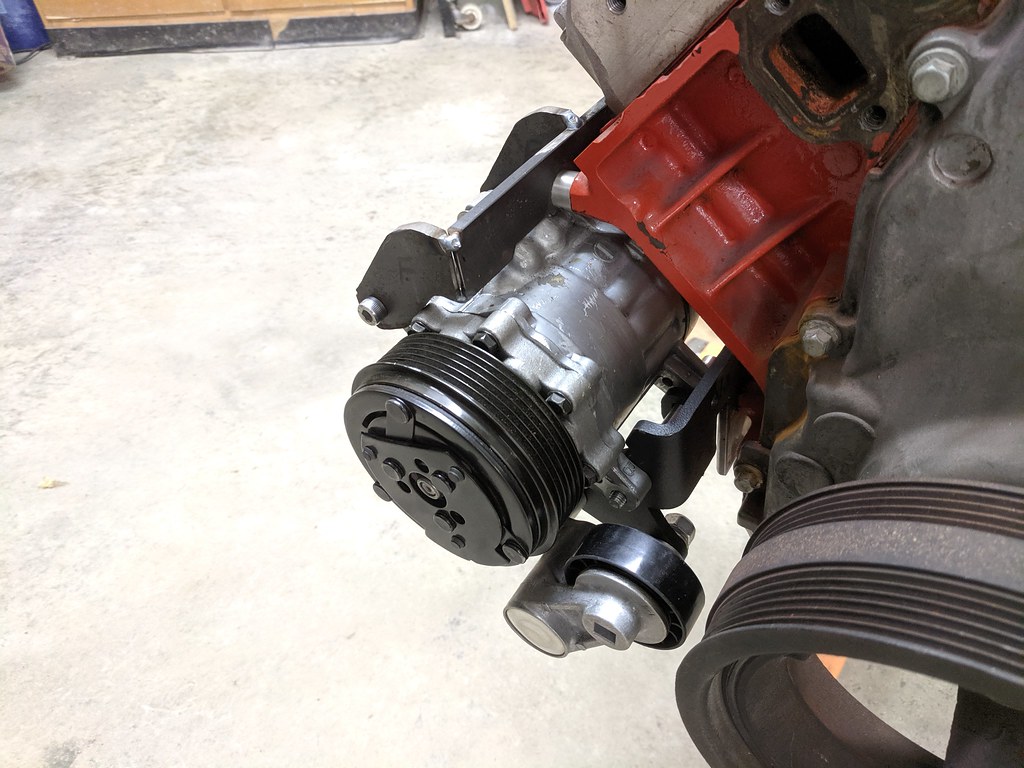
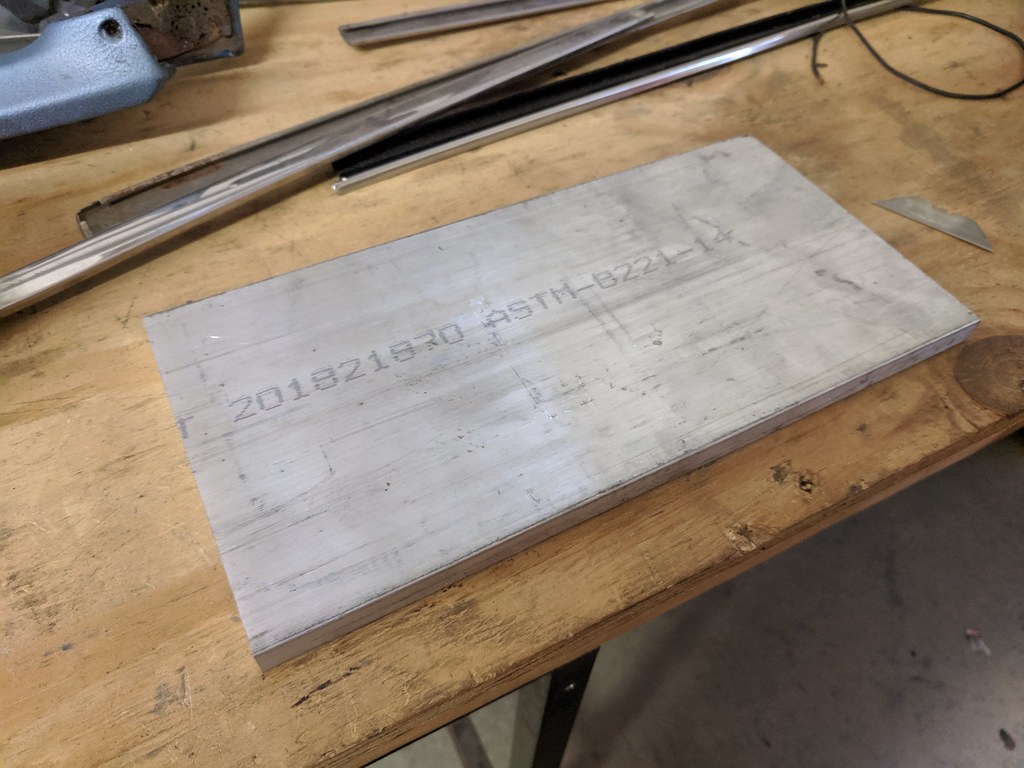
Before I can attempt to install the A/C compressor and bracket, I need to make some sway bar spacers from a piece of 1/2" aluminum stock to allow the bar to clear the compressor.
Thanks,
Ryan
1955 Nomad project LC9, 4L80e, C5 brakes, Vision wheels
1968 Camaro 6.2 w/ LSA, TR6060-Magnum hybrid and etc SOLD
1976 T/A LS1 6 Speed, and etc. SOLD
Follow me on Instagram: ryeguy2006a
06-27-2019 #510
Registered User
- Join Date
- Sep 2009
- Posts
- 2,706
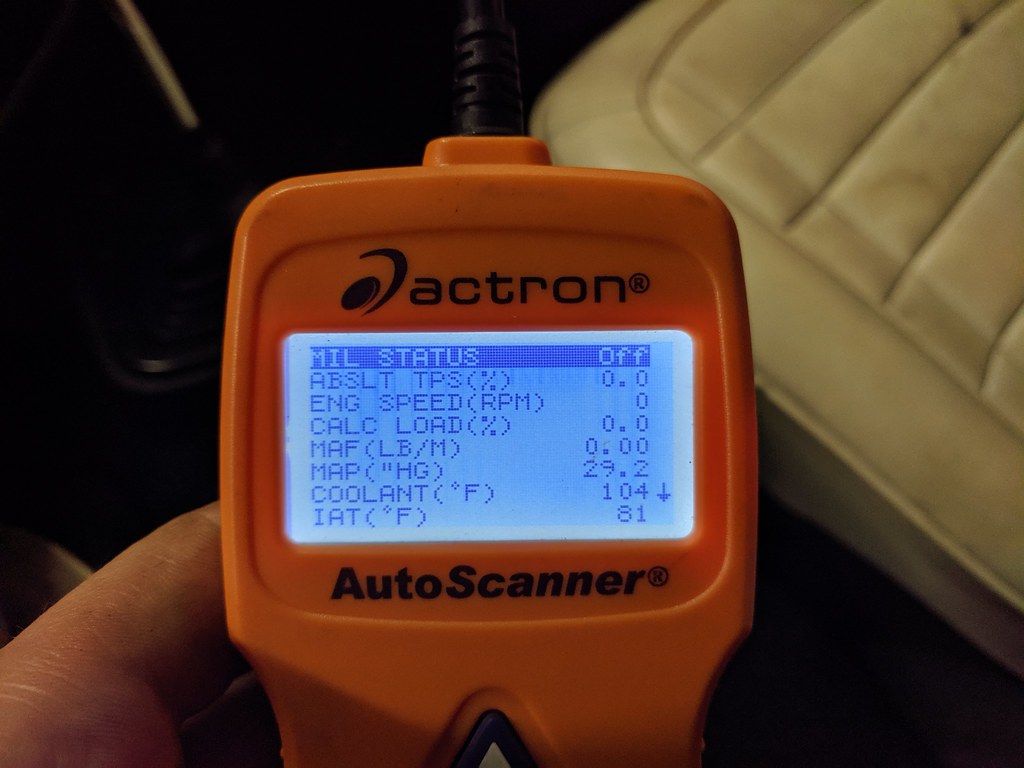
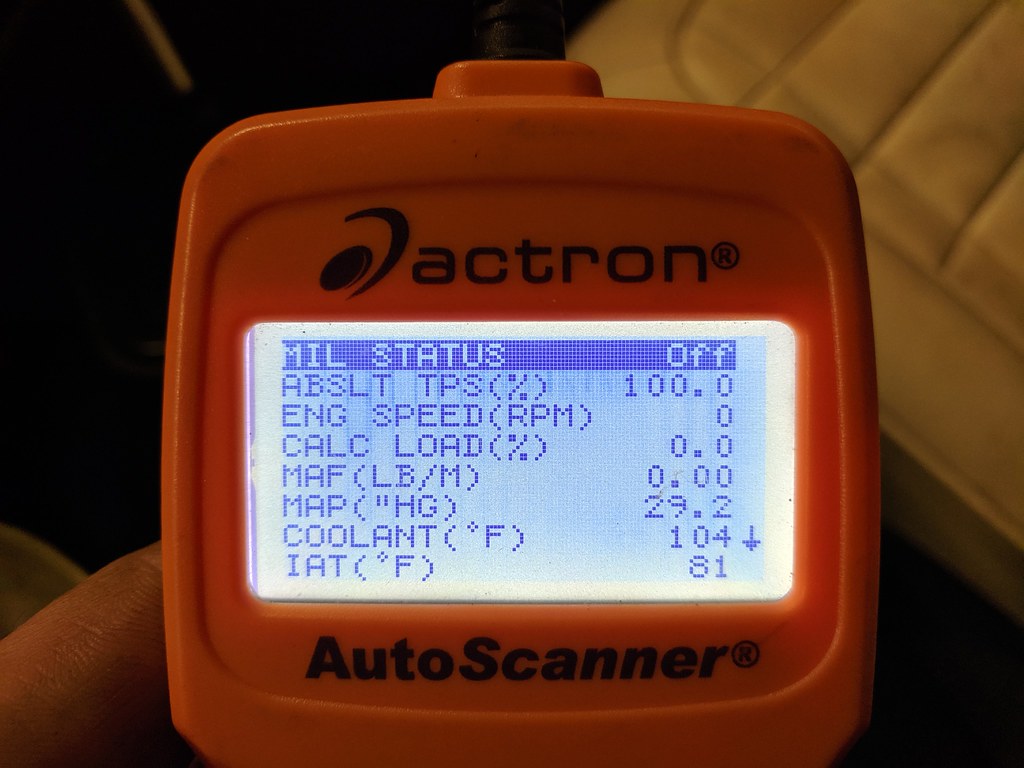
So, I think this is a little funny. I was reviewing my data logs now that I've got the car running good and noticed that a few spots where I know I had nailed the throttle to the floor and my TPS is only showing 62% max. Upon further investigation my home made throttle cable is too long, which doesn't allow it to get me more than the 62% throttle. So, I've ordered a new cable to fix that. I'll be interested to see how much more power I get considering I've only been cruising around with a little over half throttle!
1955 Nomad project LC9, 4L80e, C5 brakes, Vision wheels
1968 Camaro 6.2 w/ LSA, TR6060-Magnum hybrid and etc SOLD
1976 T/A LS1 6 Speed, and etc. SOLD
Follow me on Instagram: ryeguy2006a
07-01-2019 #511
Registered User
- Join Date
- Sep 2009
- Posts
- 2,706
After I found out that my throttle cable was too long, I decided to order a new one. I looked at the Lokar cables, but after searching around for some universal cables I found one on ebay that was meant for a 80's motorcycle that had an adjustable end to fit the cable bracket on the intake and the right ball end to fit the LS1 throttlebody. Best news was it was $9.00 and shipped to me in 2 days.
This is the cable I made when I was first getting the car up and running. It was a cable that came off of a motor I bought a while ago and I merged it with the end of my stock I6 cable that came on my car. It worked, but clearly not good enough.
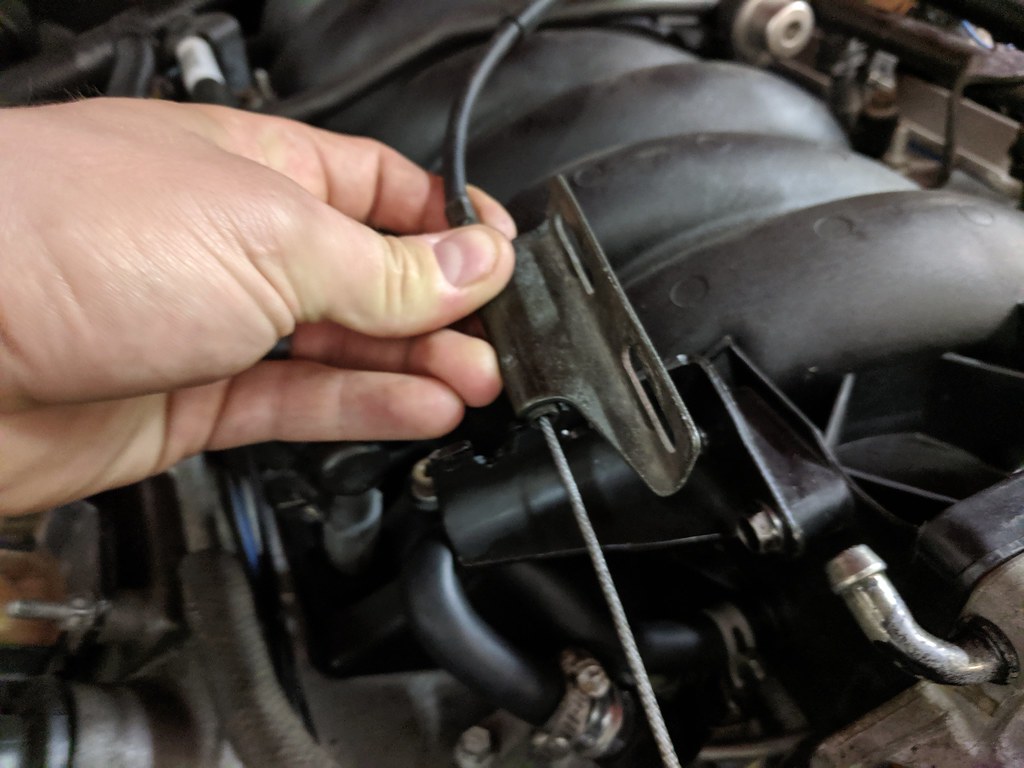
Pulled the old cable off and installed the new OEM cable bracket that I never had on my intake.
Old vs. New
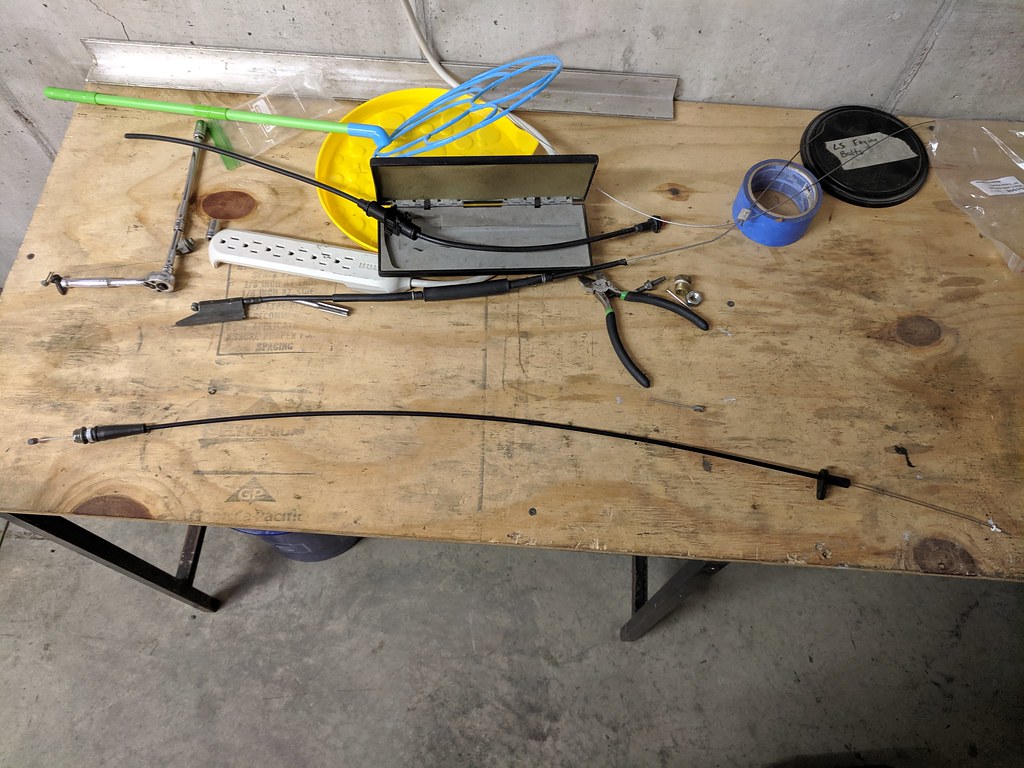
Much better looking.
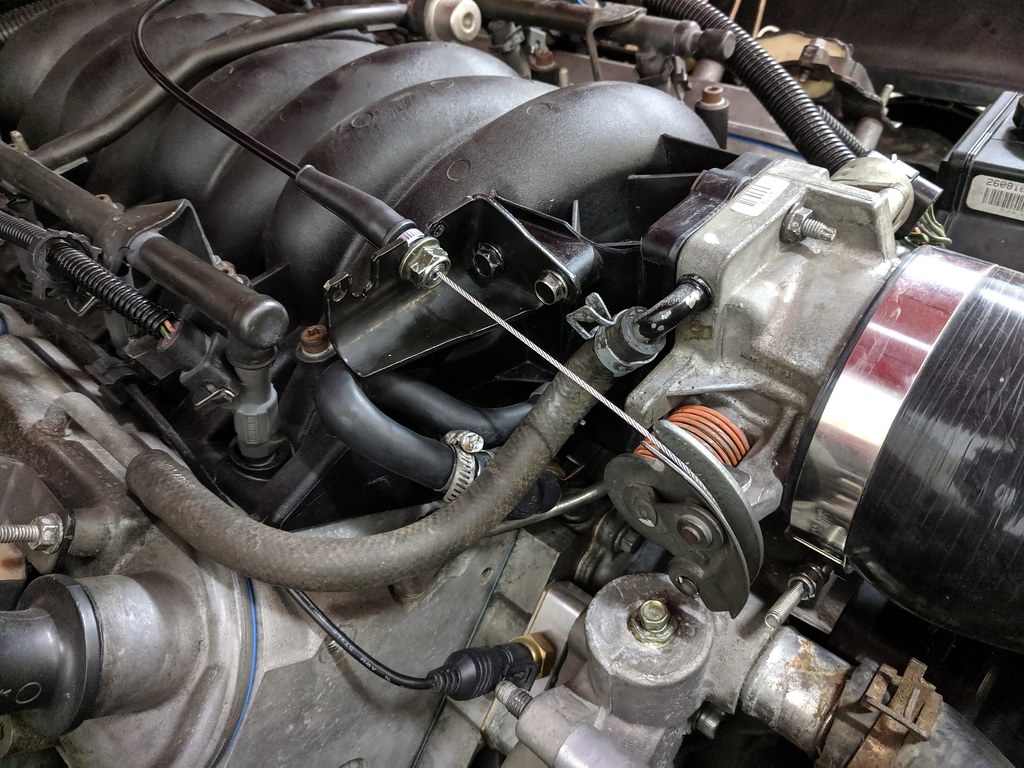
After a little adjustment it now has full throttle movement.
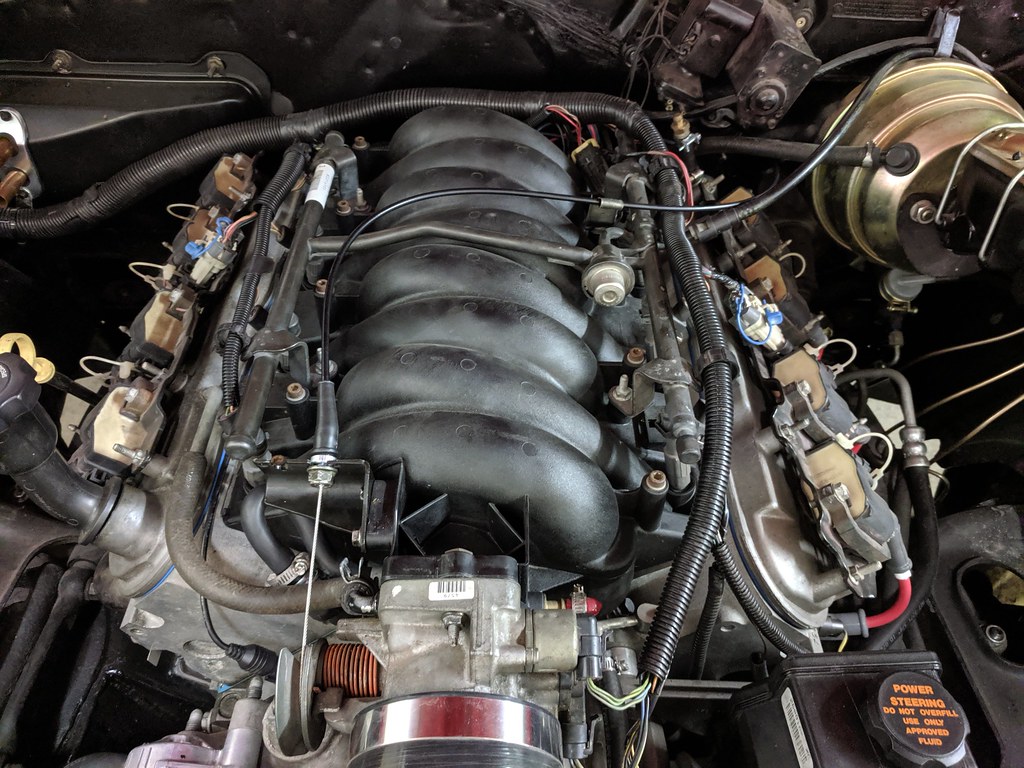
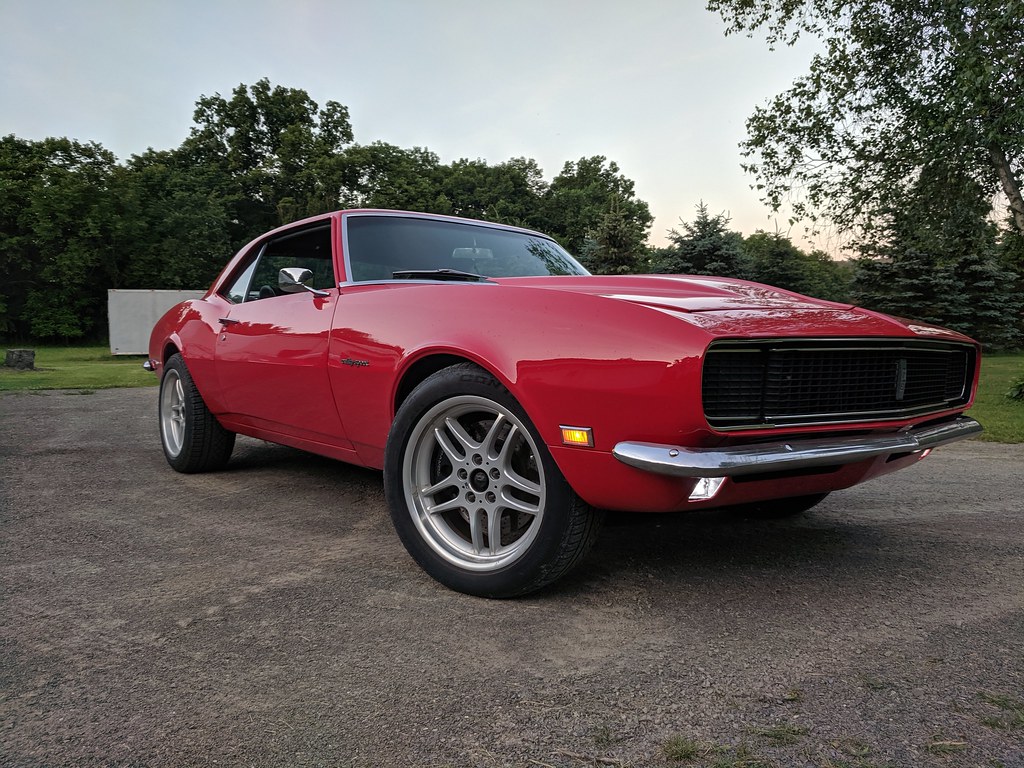
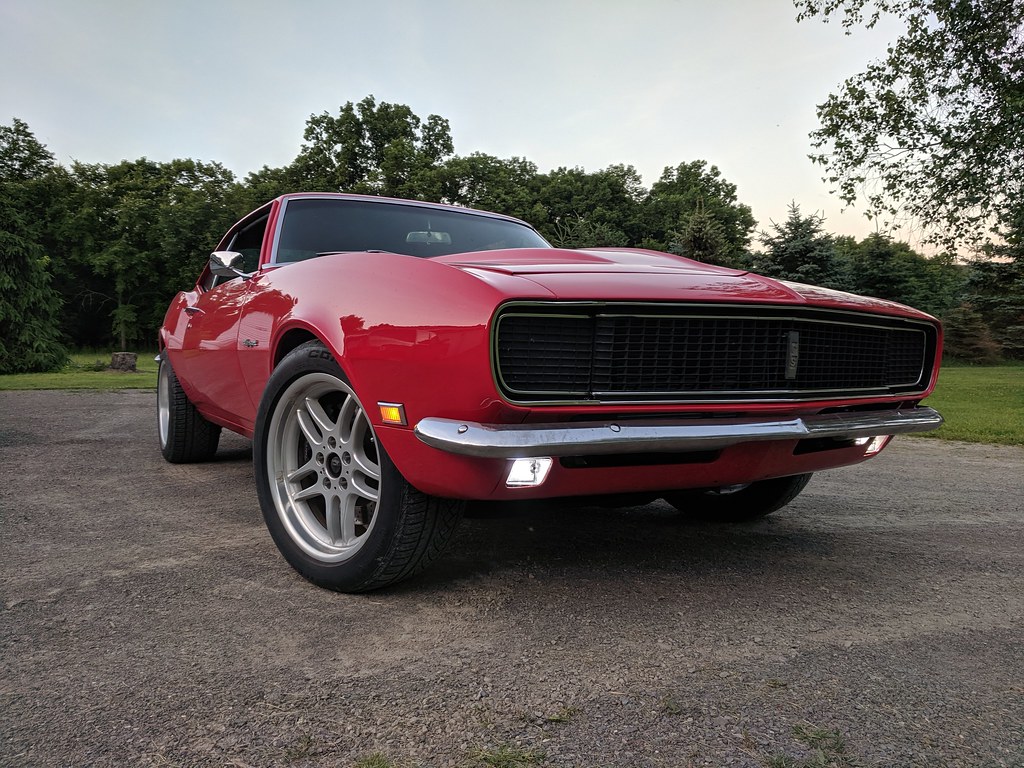
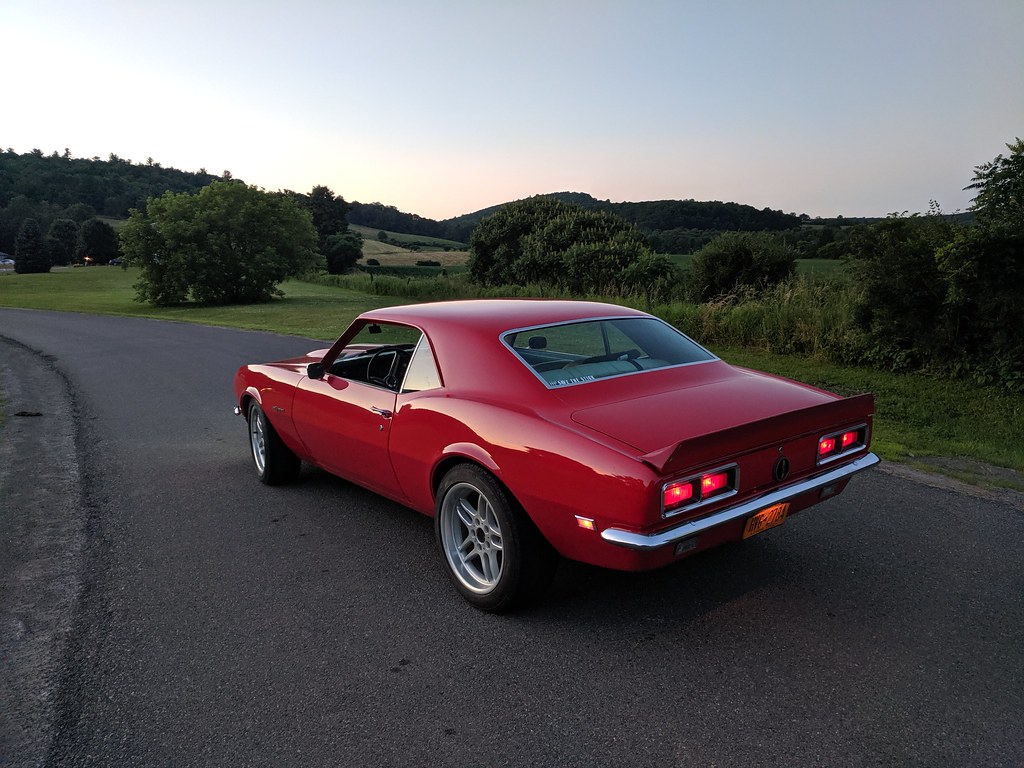
After I confirmed the throttle cable is working as it should, I took it out for a spin. Not surprising but it has way more top end. I was very happy with my newfound power too. Before it would spin in 2nd, but now it blows the tires off in second and will keep doing so until I let off the throttle. Much more fun!
I grabbed some pictures on my ride home as it was getting dark.
The car is running great and really the only complaint that I have at this point is a faulty knock sensor. I ordered one last week and it should be here at today or tomorrow. It's a PITA to swap them out, but it will get rid of that annoying code.
Once the interior is back together, the only other thing I want to do is put as many miles on it as I can this year!
1955 Nomad project LC9, 4L80e, C5 brakes, Vision wheels
1968 Camaro 6.2 w/ LSA, TR6060-Magnum hybrid and etc SOLD
1976 T/A LS1 6 Speed, and etc. SOLD
Follow me on Instagram: ryeguy2006a
07-01-2019 #512
Registered User
- Join Date
- Sep 2018
- Posts
- 49
Looking good!
Is the cable better than TBW?
I have the complete TBW out of the truck my engine came from, should work for me?
Thanks
07-01-2019 #513
Registered User
- Join Date
- Sep 2009
- Posts
- 2,706
I think this is a personal preference. Some people love the DBW and some insist on DBC. I'll say that I'm happy with the cable throttle body on my car, but I do have a complete DBC setup that I may try on my car at some point.
1955 Nomad project LC9, 4L80e, C5 brakes, Vision wheels
1968 Camaro 6.2 w/ LSA, TR6060-Magnum hybrid and etc SOLD
1976 T/A LS1 6 Speed, and etc. SOLD
Follow me on Instagram: ryeguy2006a
07-04-2019 #514
Registered User
- Join Date
- Aug 2014
- Posts
- 435
I haven't done a headliner in a car, but any vinyl work I've done on cars (and there's been a few) I use Weldwood Landau Top Adhesive. Originally Posted by ryeguy2006a

It comes in a can, and you spray it with a spray gun. I usually just buy a Harbor Freight cheapie and throw it away after it doesn't work anymore,
which is usually several projects as long as I don't leave it open. They go on sale for about $15 sometimes. I get the one with the container on the bottom,
not the HVLP ones.
If you buy it online, when you open the can, it should be the consistency of whole milk. I learned this the hard way when I kept trying to use an old can at work that was more the consistency of maple syrup.
Jay
07-04-2019 #515
Registered User
- Join Date
- Aug 2014
- Posts
- 435
I went with DBW because that's a) how my donor vehicle was and b) I do automotive wiring (car stereo/security/etc) for a living, and I am more comfortable with wiring.
No messing with cable lengths that I might get wrong. I've driven cars with DBC and DBW and don't notice a drastic difference either way. If anything, DBC might have a slight edge in throttle response.
Jay
07-05-2019 #516
Registered User
- Join Date
- Sep 2009
- Posts
- 2,706
Thanks for the replies Jay. I'm going to use a product from Weldon that was recommended by the guys over at Camaros.net for headliner installs. It has a brush built into the the cap, which I like so there isn't any overspray.
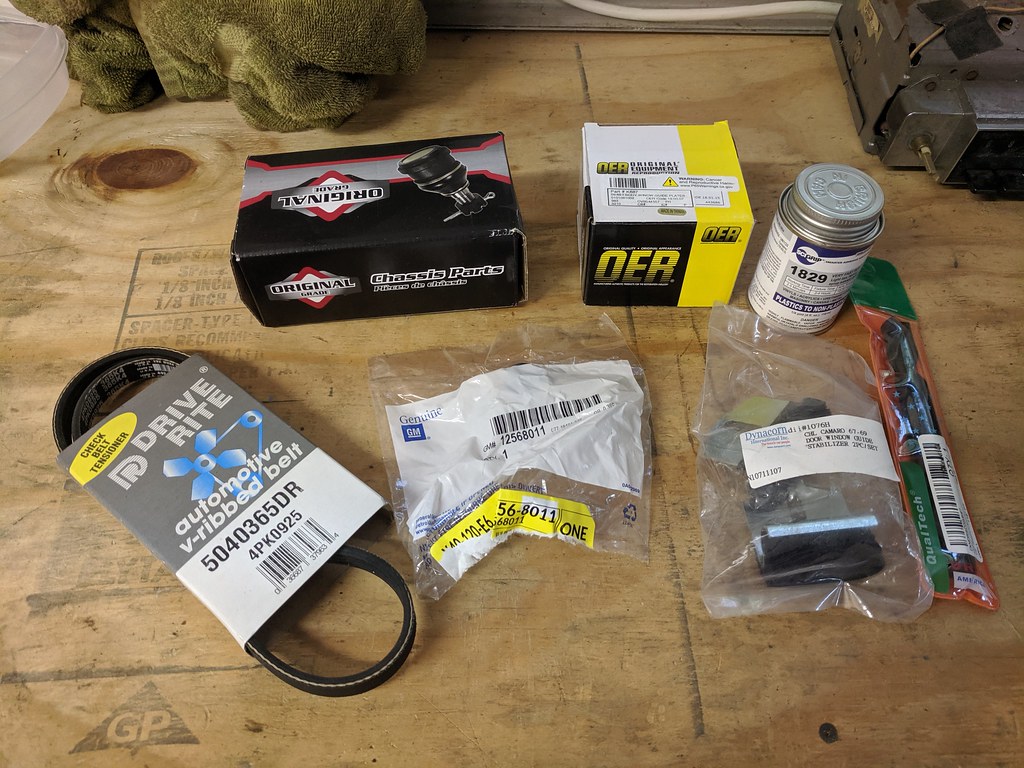
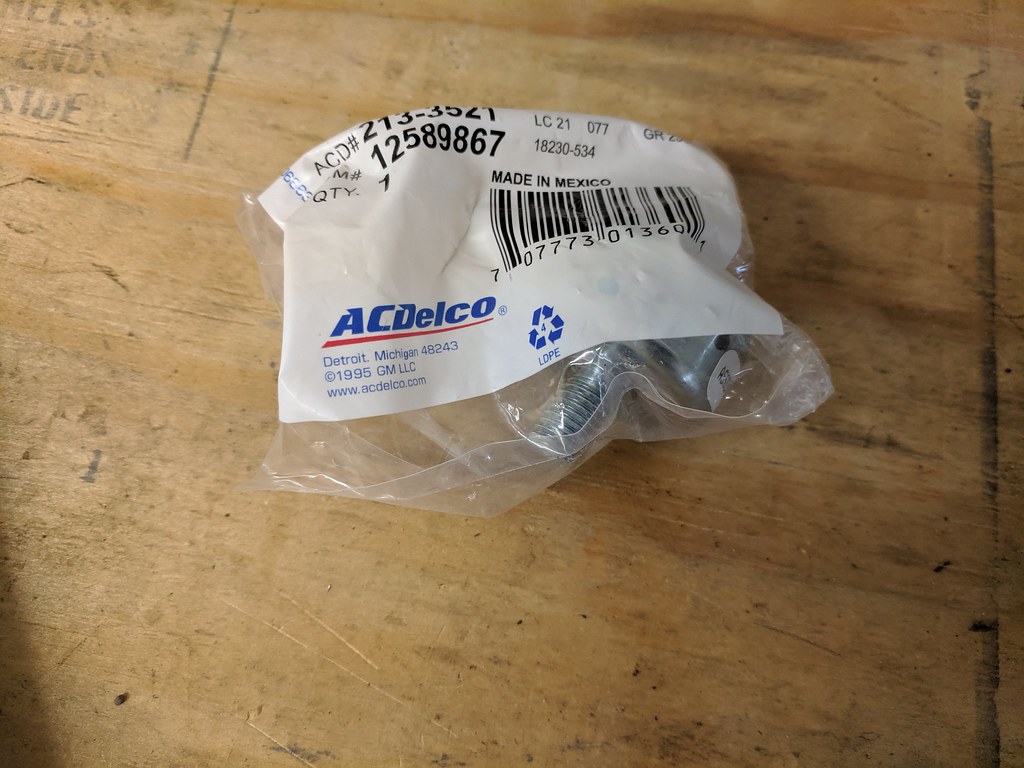
Small parts update. I've got 550 miles on the car now and I decided to buy some parts to correct some small items/issues that have been bugging me. First is a new belt for the AC compressor, which ended up being too short. I need a belt to test fit everything and confirm proper alignment. New upper ball joint as my passenger side is bad. New AC Delco knock sensor to get rid of the P0327 code, LS6 PCV plug for the valve cover, Weldon 1829 for the headliner, Door guide parts and a new 39/64 drill bit.
A few things are happening with the rear diff. First is the 500 mile rear diff break-in period means that I need to replace the rear diff fluid. But since I'm going to have the diff cover off, I wanted to pull the rear axles to drill for 1/2" studs so that I can use a smaller wheel spacer. The 1" spacer that is on there now is too much and it causes the rear tire to rub ever so slightly on the inner wheel house/outer quarter panel. I would just run a 1/2" or 3/8" spacer, but the current studs that are installed are too short. So if I'm going to replace the studs anyway, I might as well go with the 1/2" studs that have been on my shelf since 2012.
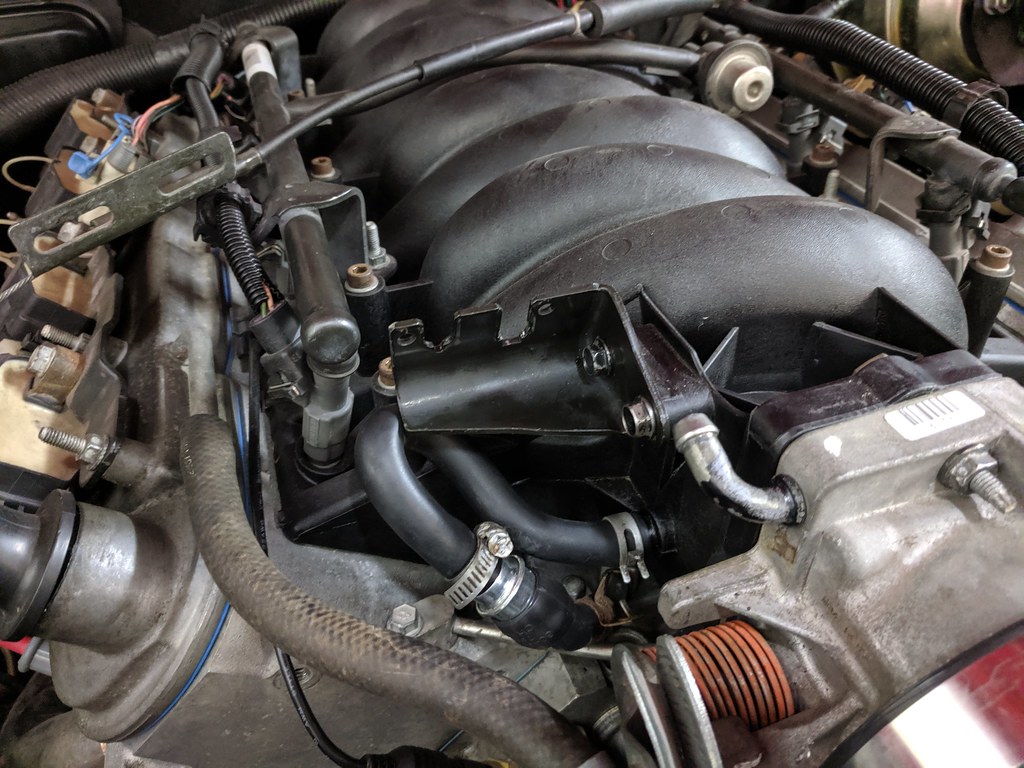
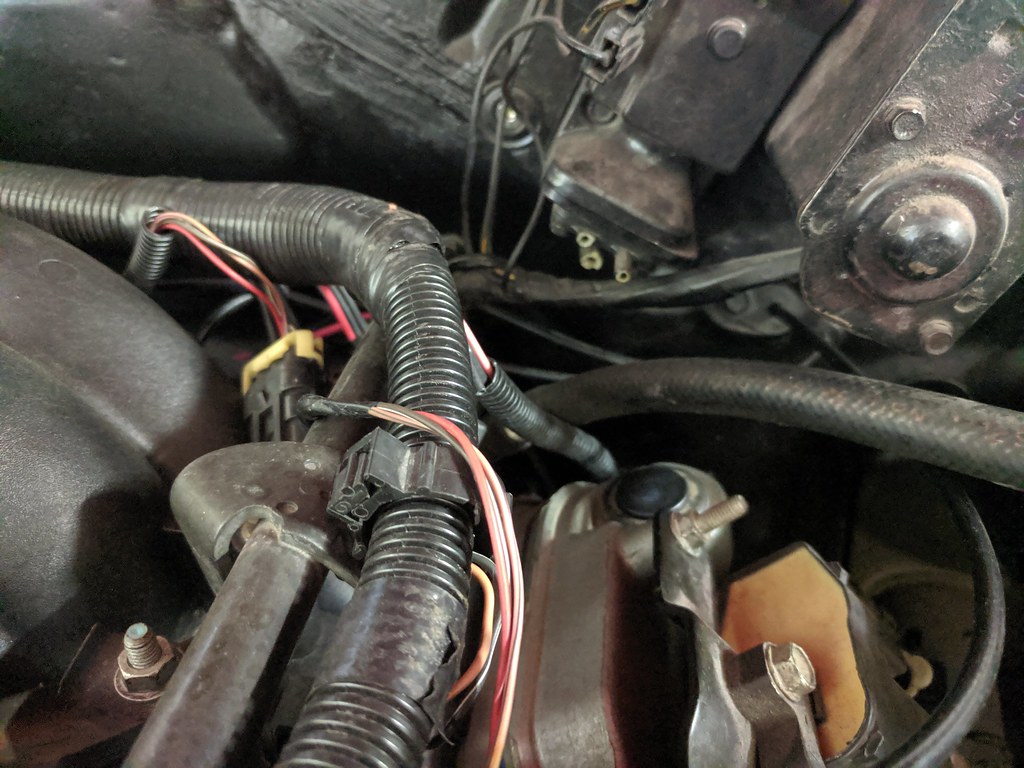
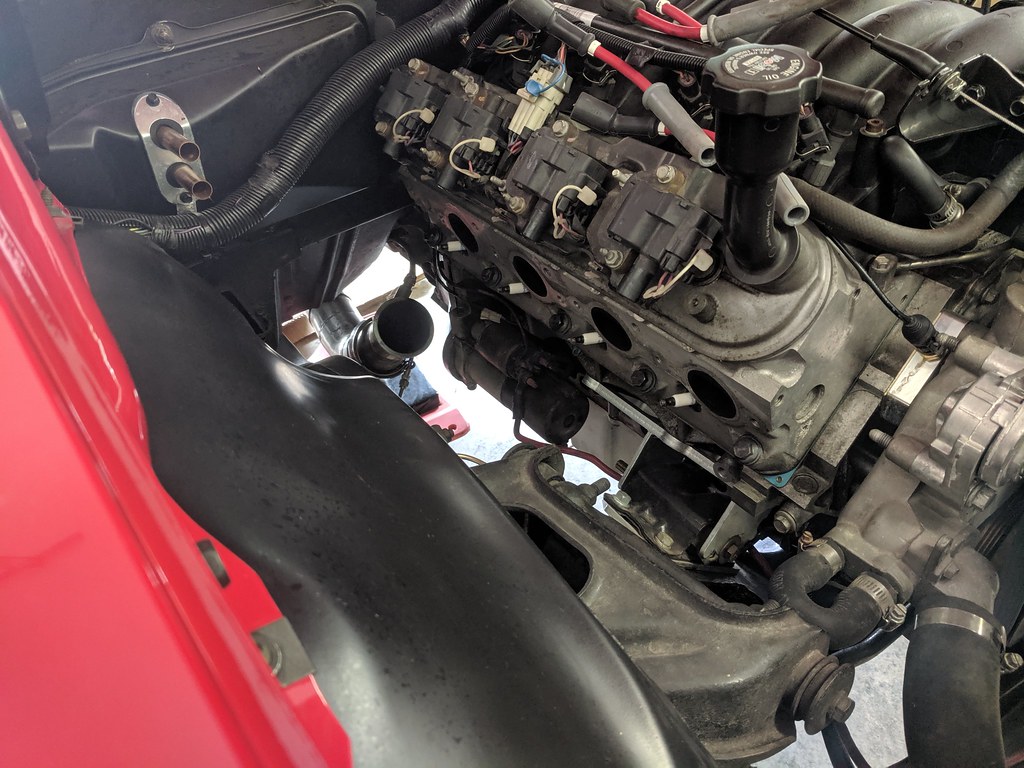
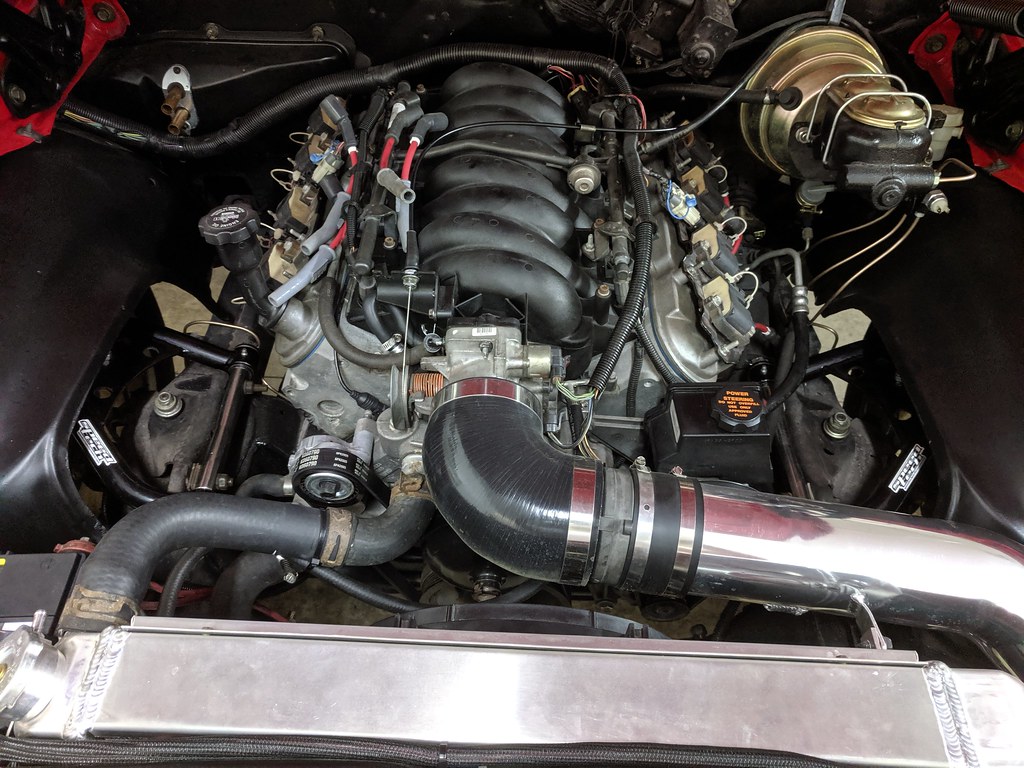
Got rid of an eye sore in my engine bay. Before:
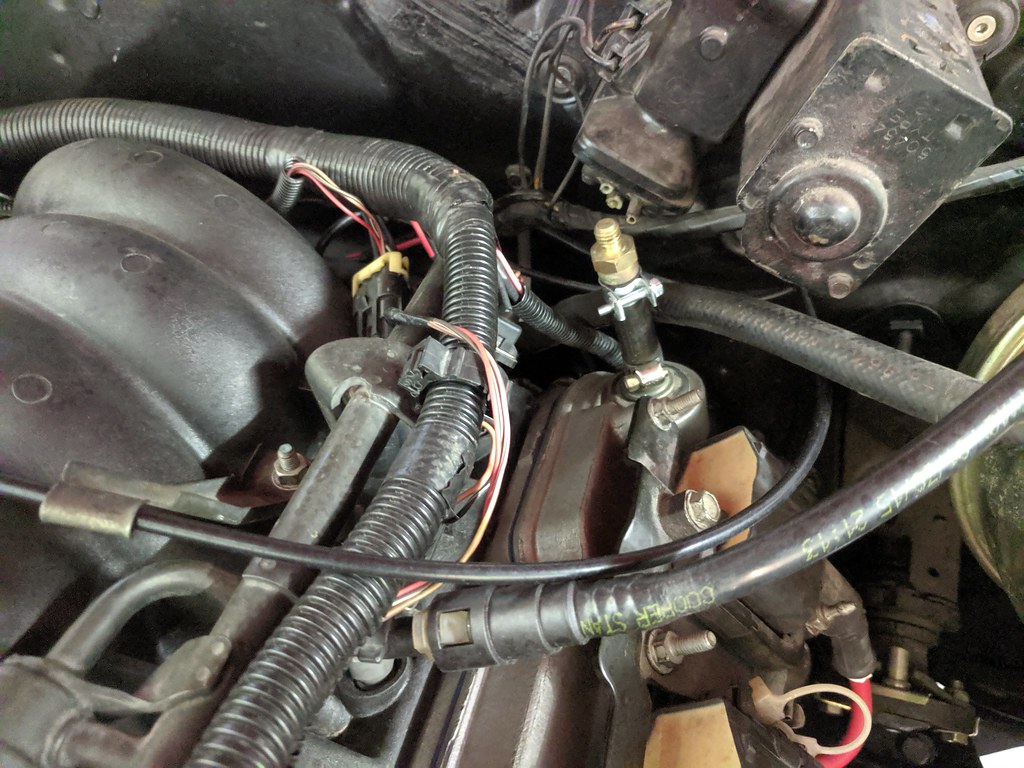
New LS6 PCV delete plug
Yesterday my Dad, cousin and myself met up for the parade in our hometown. We got some perfect parking spots and had an opportunity to get some great photos. My dad's 1971 Chevelle, 1969 Superbee, and my 1968 Camaro. I snapped a few, but my cousin brought a real camera and got some fantastic photos. Hope to have those soon. Here's a few.
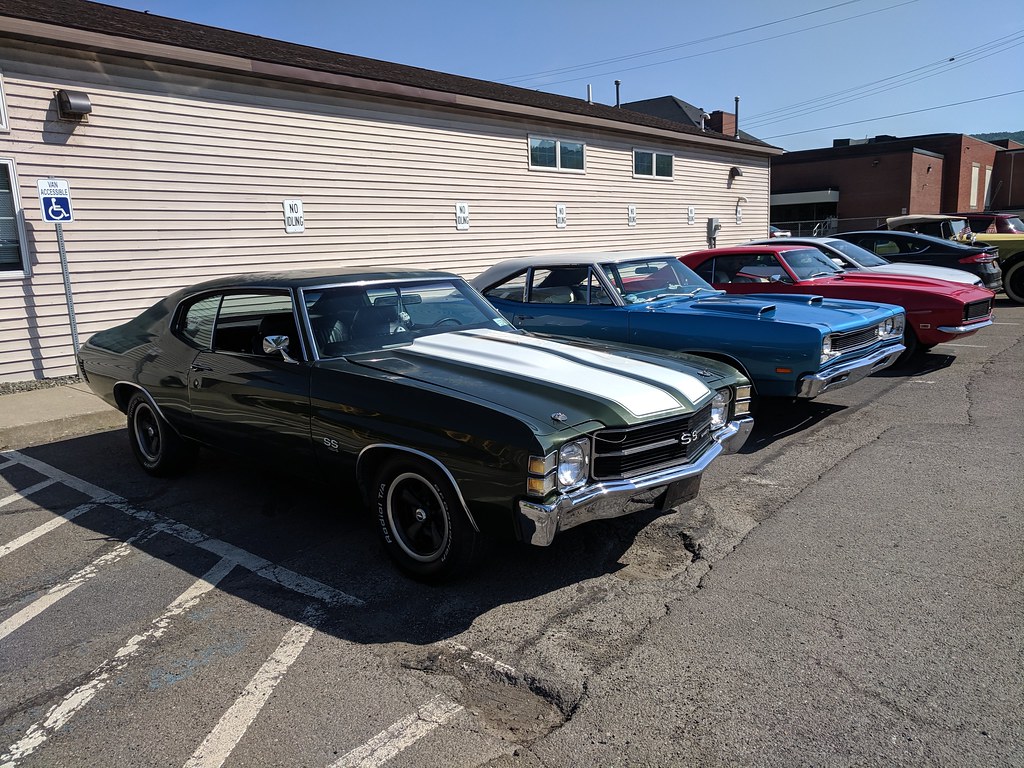
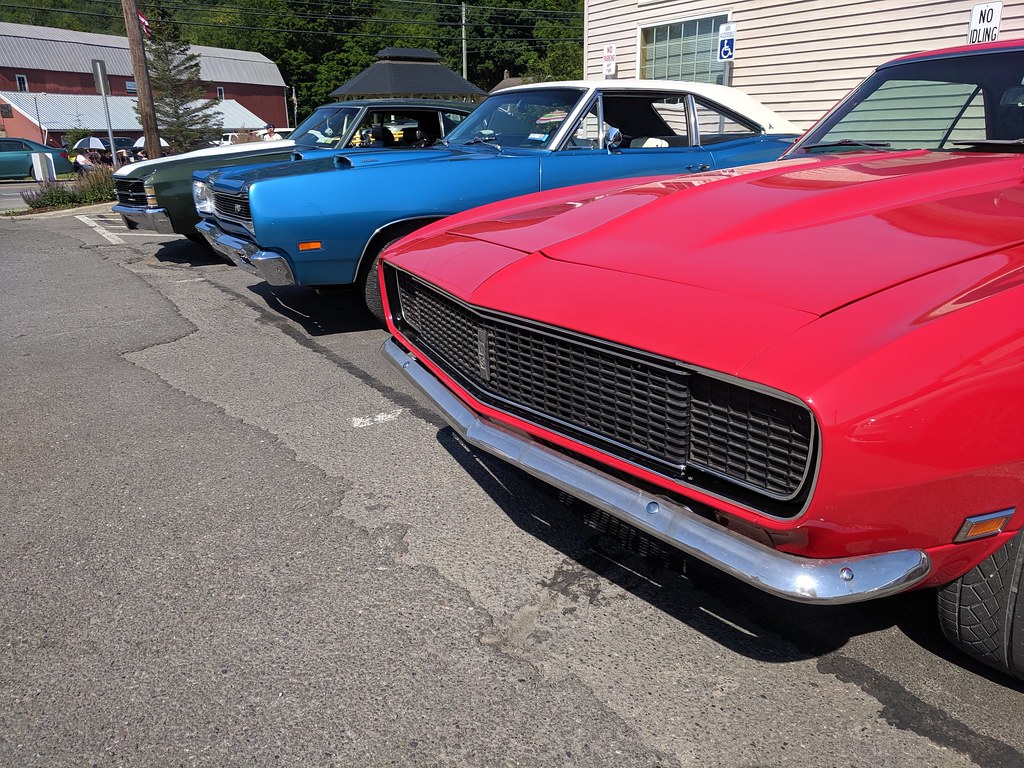
I love this picture. "NO IDLING"
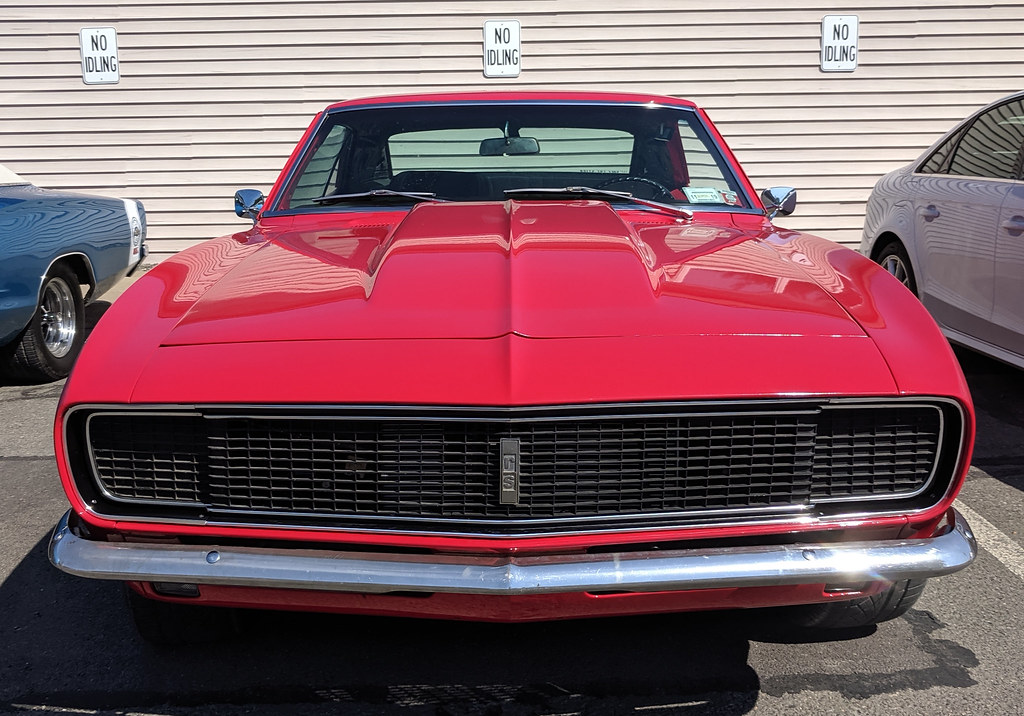
Happy 4th of July!
1955 Nomad project LC9, 4L80e, C5 brakes, Vision wheels
1968 Camaro 6.2 w/ LSA, TR6060-Magnum hybrid and etc SOLD
1976 T/A LS1 6 Speed, and etc. SOLD
Follow me on Instagram: ryeguy2006a
07-09-2019 #517 Registered User
- Join Date
- Nov 2010
- Location
- Ventura County CA
- Posts
- 556
The car is looking great! Glad you have made it to the driving and enjoying phase!
Good luck on the headliner install. I admire the folks that do those and do them well. I went with a 1pc headliner from TMI on mine and it was really straightforward to install, but I also love/prefer the look of a classic sewn/bow headliner.Clint - '70 Nova "restomod" cruiser & autocross family car
08-28-2019 #518
Registered User
- Join Date
- Sep 2009
- Posts
- 2,706
Thanks Clint, I'm so glad to be enjoying the car now.
Now that I've been driving the car around, I've finally hit the 500 mile mark which meant that I needed to swap out the rear differential fluid per the break-in instructions. So I brought the car over to my dad's house to test out his new lift.
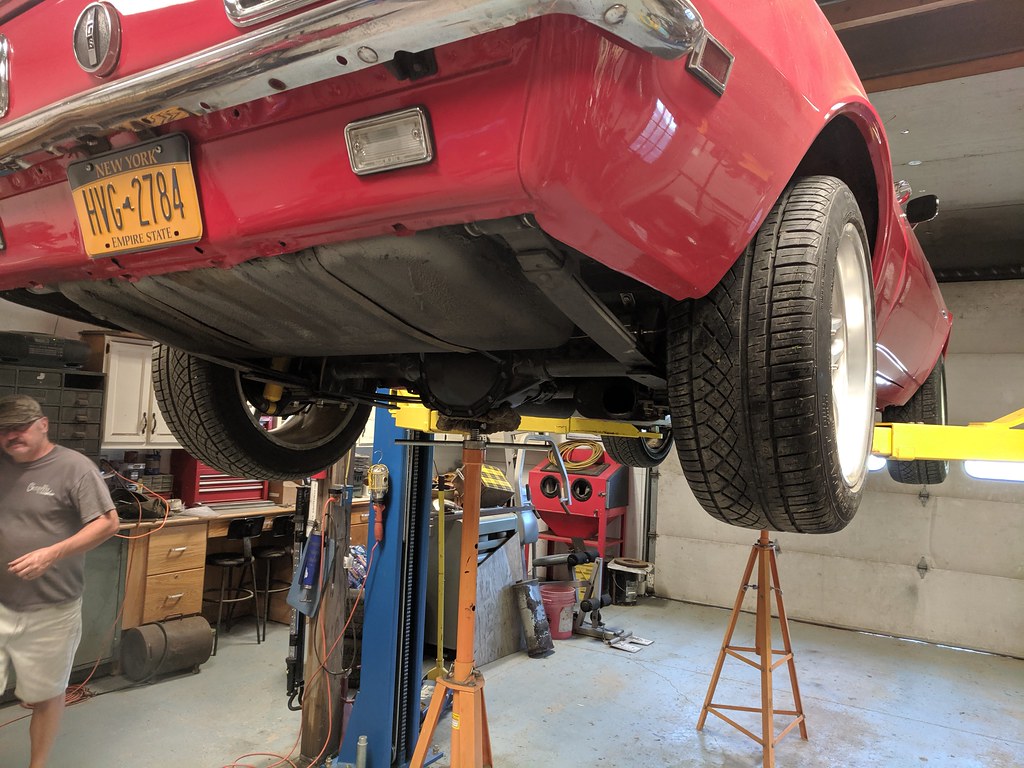
I wished I could say that it was smooth sailing, but while I had the axles removed, I figured it would be a great time to update to 1/2" rear wheel studs. I did this for two reasons, one is they are stronger and will match the front and two is that I needed to run a smaller wheel spacer since the rear tire was kissing the outer wheel house lip. I bought a brand new 39/64" drill bit and thought I would be good, but neglected to remember that the rear axles are hardened... This took the edge off of the bit after about 4 studs. After I made a few phone calls for someone that may have a good one to car buddies, one guy had a sharpening tool for large drill bits. That ended up being the ticket and I was able to finish. But what I thought was going to be a 3-4 hour job, ended up being almost 8 hours... Here it is all buttoned up with new studs.
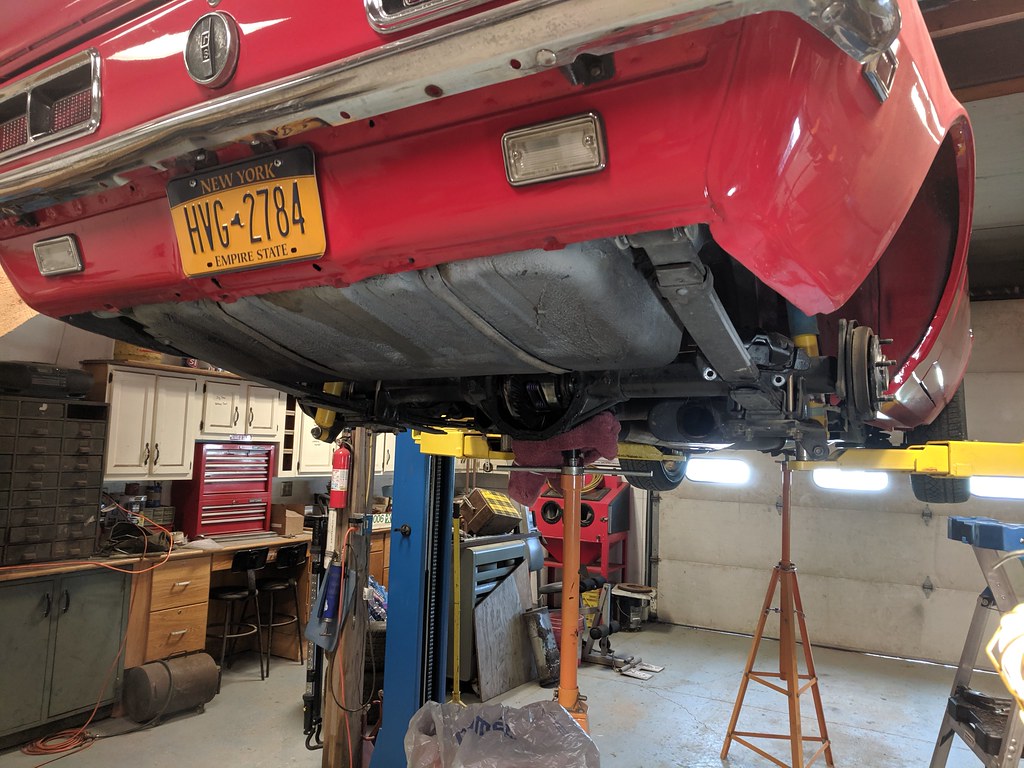
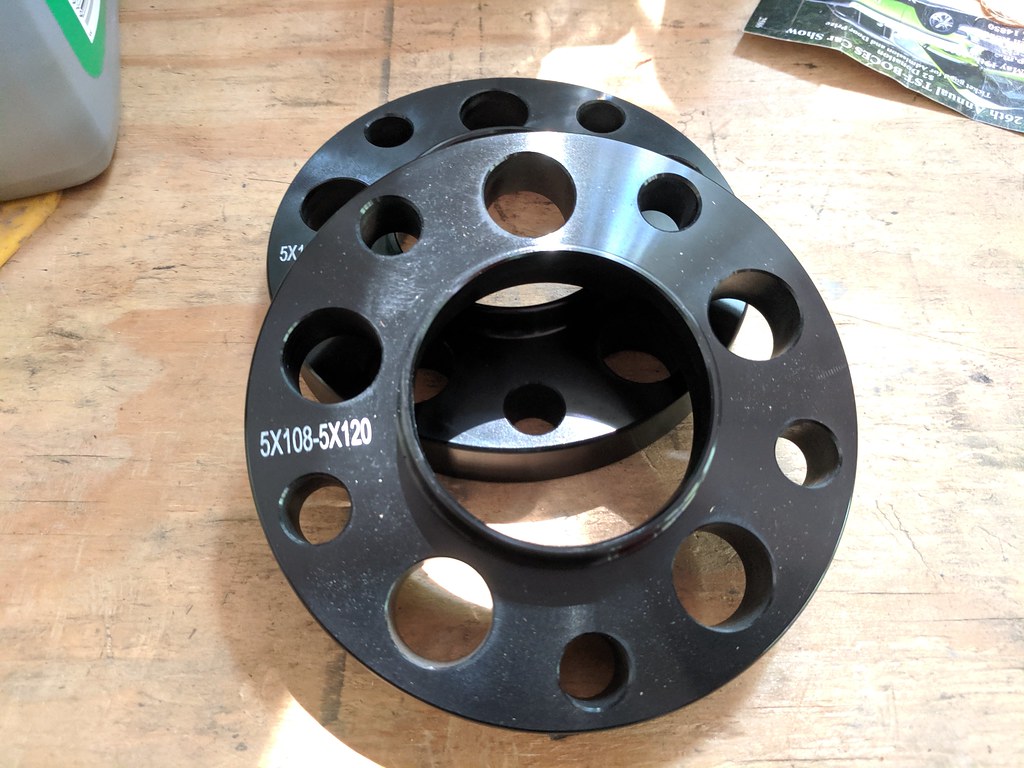
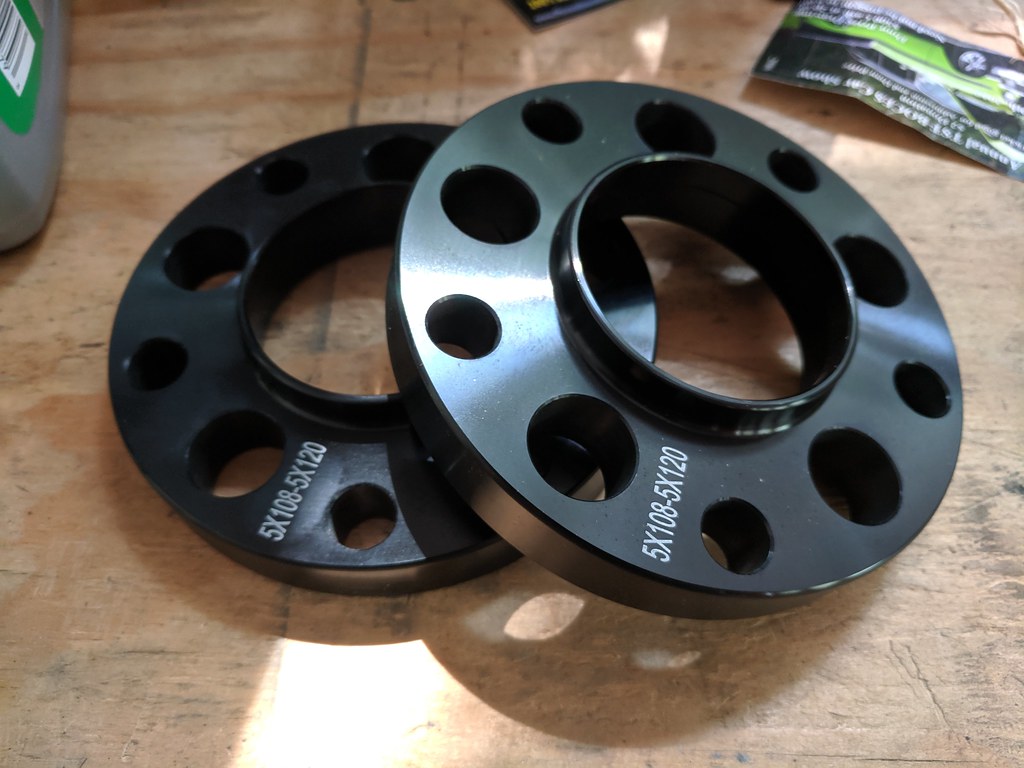
Then after a bunch of trial and error I finally found a set of wheel spacers that will not rub. I shopped around and the best deal that I could find was a set meant for a BMW, in 20mm thickness which is just a hair over 3/4". They came in 2 days and anodized. Not bad for $19 shipped in my opinion.
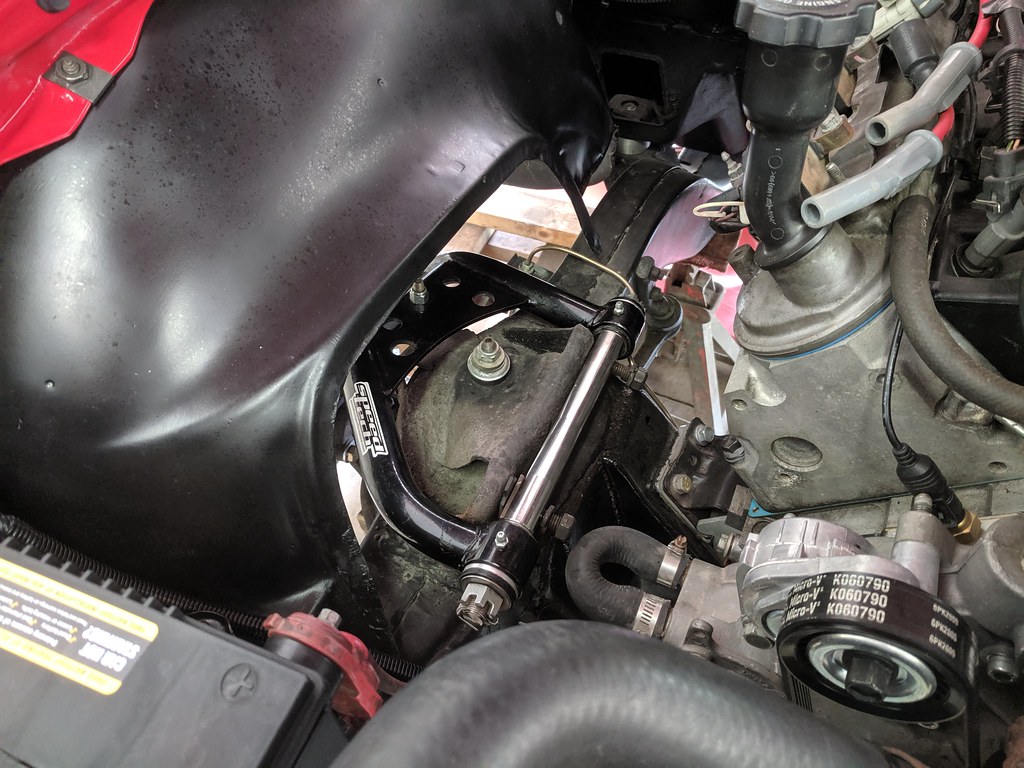
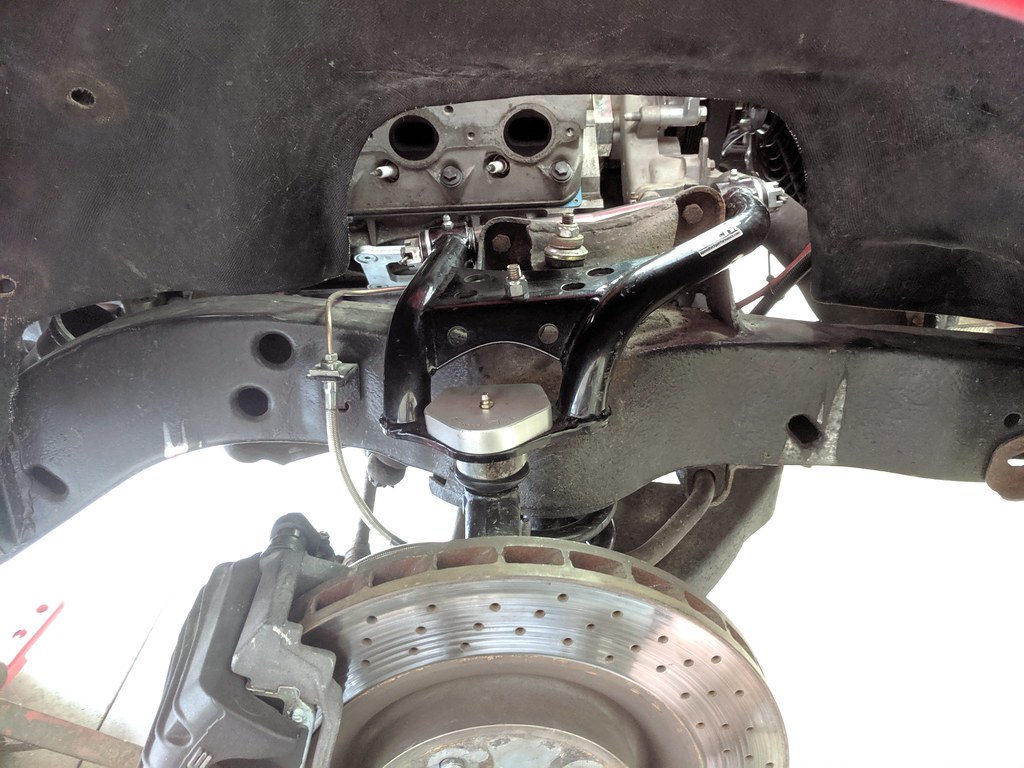
Right after this maintenance/upgrade my wife and I welcomed our second child and boy number 2. Everyone is happy and healthy. We are just now settling into our new normal routines. Even though I haven't been working on the car, I've had my eyes out for deals. I recently came across a great deal here on PT for a complete set of Speedtech upper and lower control arms. I've been itching ever since to get them installed. Last weekend I finally got the go ahead from the boss to pull the trigger on the install.
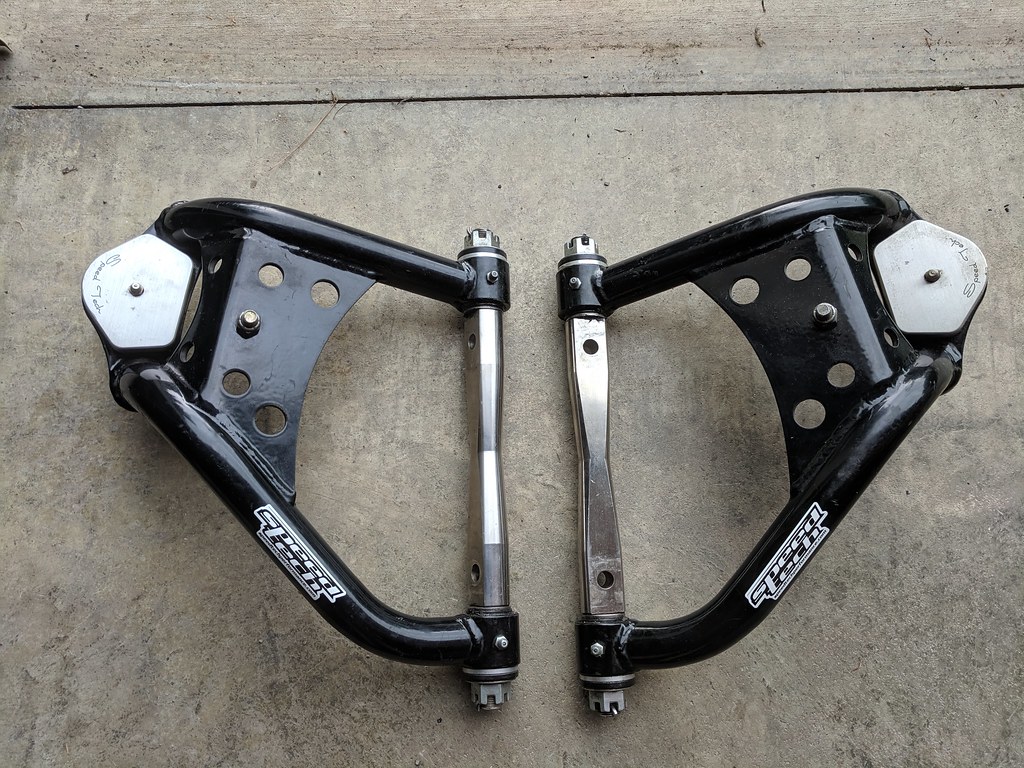
First thing I had to do was pull off the passenger side exhaust header so that I could remove and replace the passenger side.
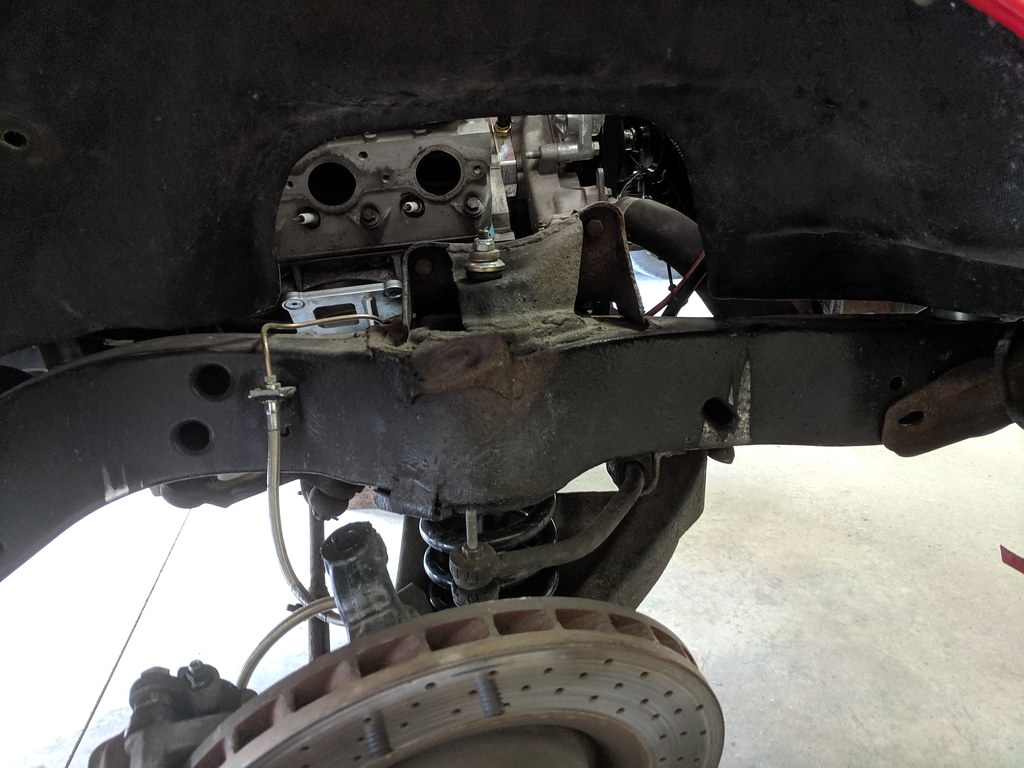
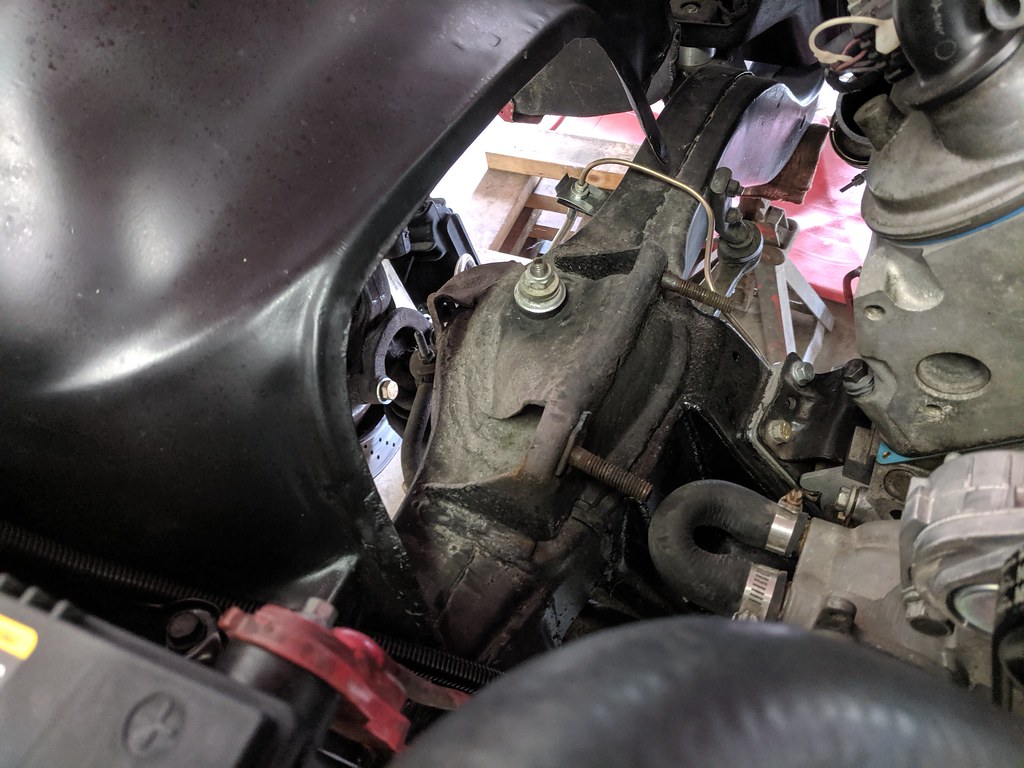
Upper swap was pretty straight forward.
The lowers on the other hand were much more difficult. When I bought the car the odometer said it had 112k and I'm pretty sure that the lower control arms were never replaced. The bolts were really stuck in there.
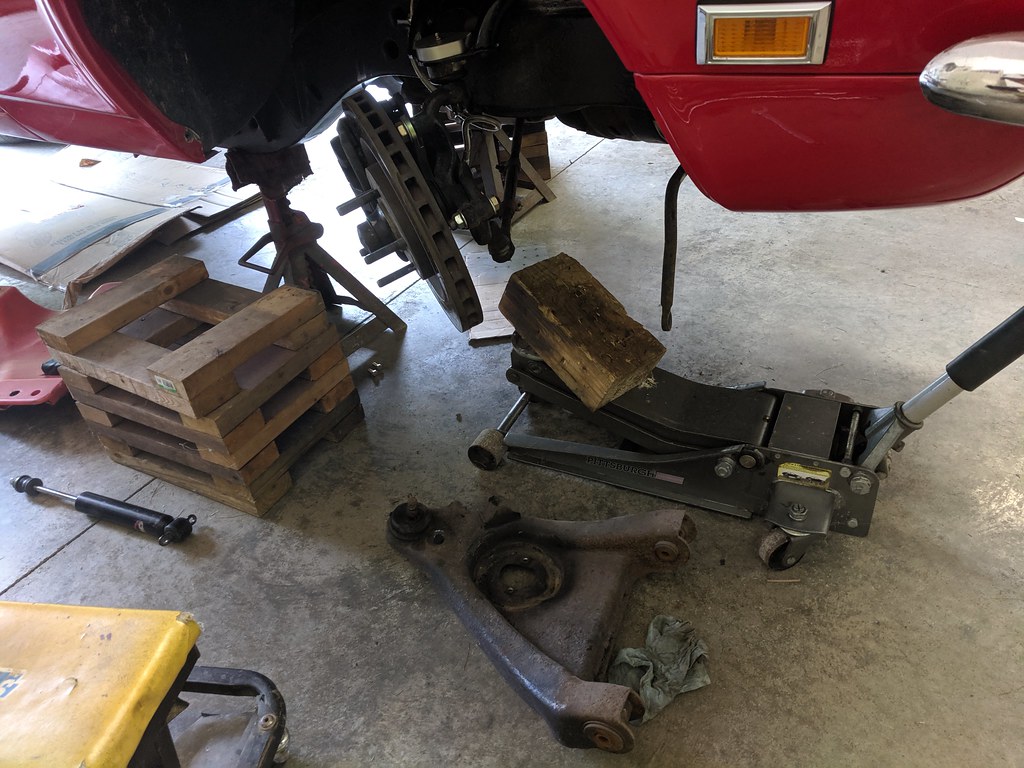
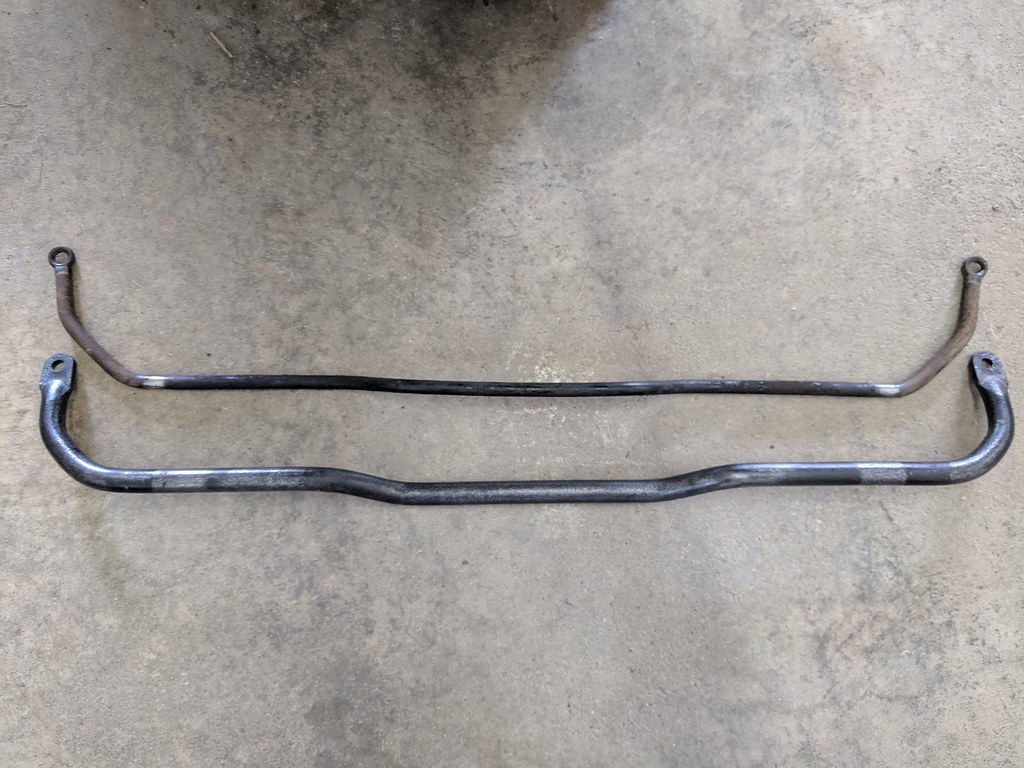
At the same time I swapped in the 1 1/8" sway bar I picked up from a buddy earlier this year. Crazy how much larger it is than stock.
And everything is finished with the install and torqued to spec.
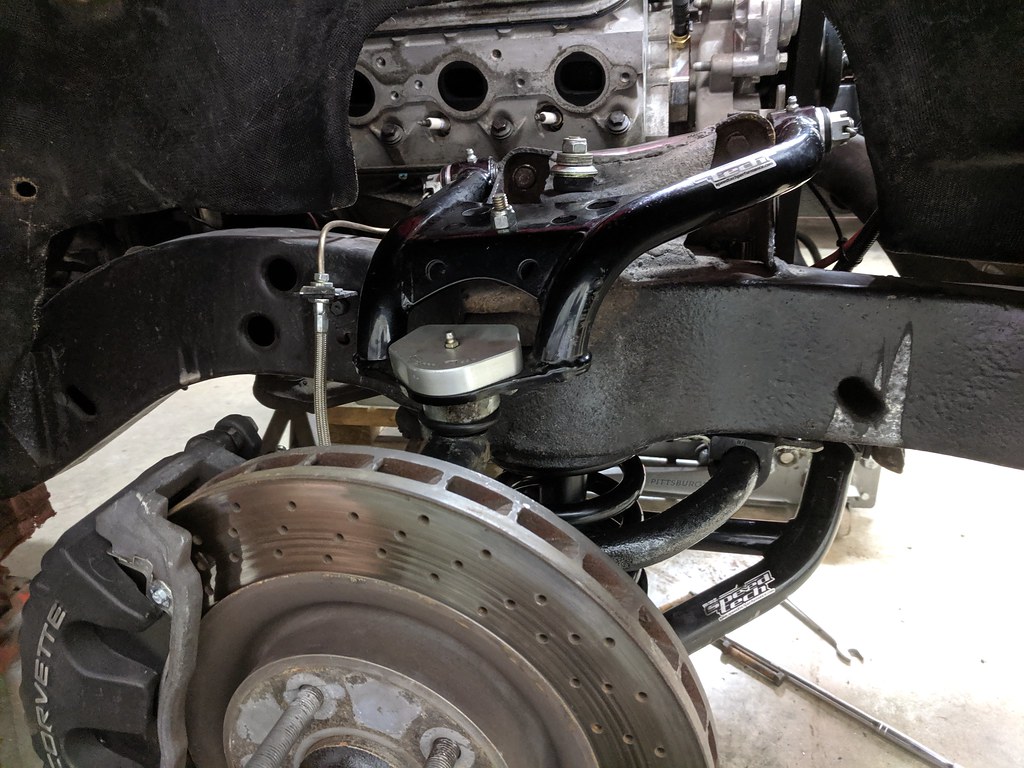
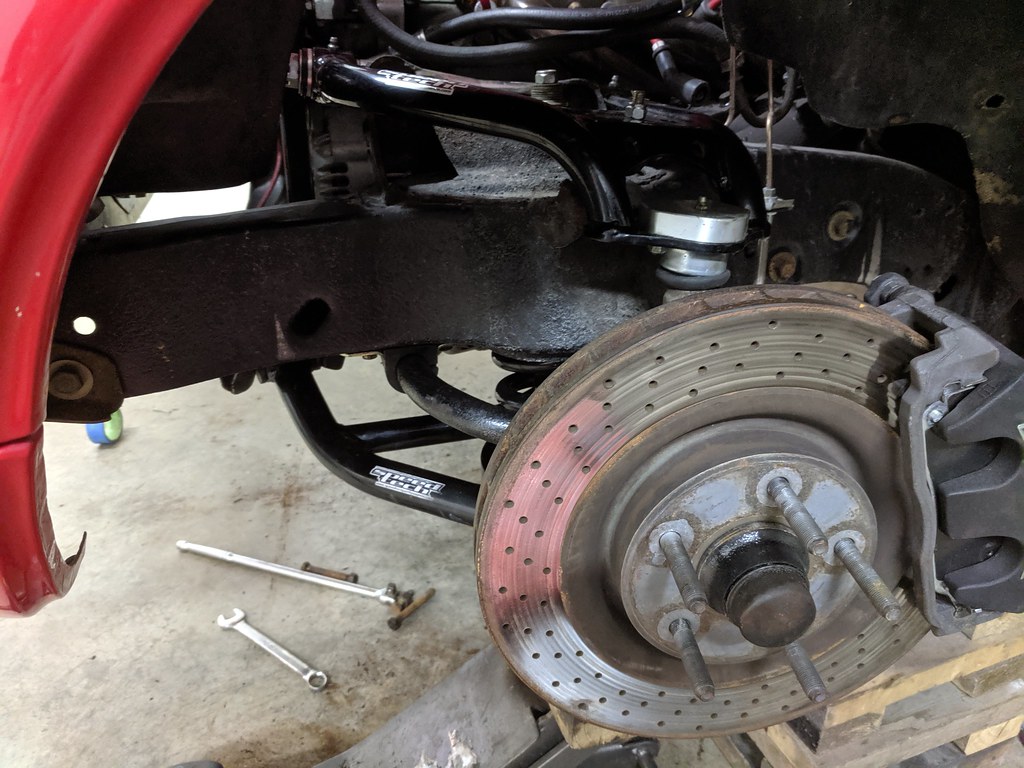
They look great from the engine bay.
Can't really see it from here, but they do look cool peaking from the bottom.
While I was working on the install over the few days, I snapped this picture while I was leaving to pick up my son.
That bring me up to now. After roughly putting a front end alignment I took it for a quick test drive. All I can say is wow what a difference. The steering is very responsive now and I'm stoked to drive it with a real alignment! Going to schedule that soon. With the engine running at 100% and the steering top notch, it really is a super fun car to drive. I'm excited to take it down a windy road and see how it performs.
Cheers,
Ryan
1955 Nomad project LC9, 4L80e, C5 brakes, Vision wheels
1968 Camaro 6.2 w/ LSA, TR6060-Magnum hybrid and etc SOLD
1976 T/A LS1 6 Speed, and etc. SOLD
Follow me on Instagram: ryeguy2006a
08-28-2019 #519
Registered User
- Join Date
- Nov 2010
- Location
- Ventura County CA
- Posts
- 556
Exciting changes! You'll be able to achieve a much more favorable alignment now (more caster) with those new arms and that bigger swaybar will reduce body roll and suspension geometry changes. You may want to pick up a rear bar too now so you can balance things out. My car pushed really bad when I had a big front bar and stiffer springs with no bar and stock springs out back.
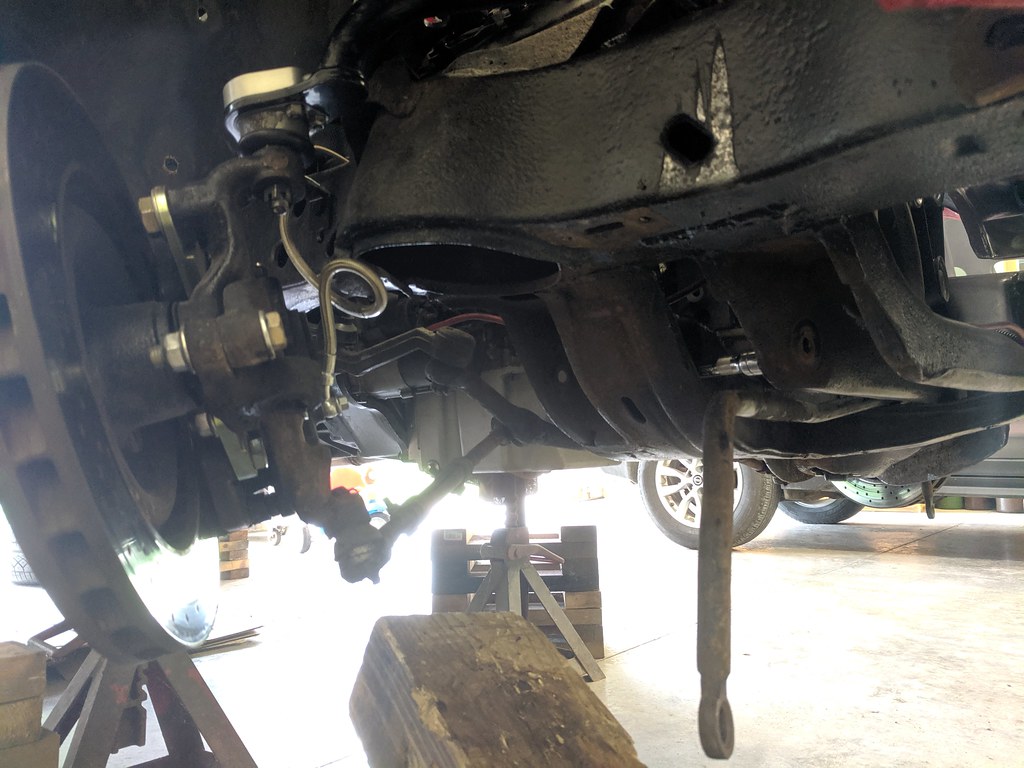
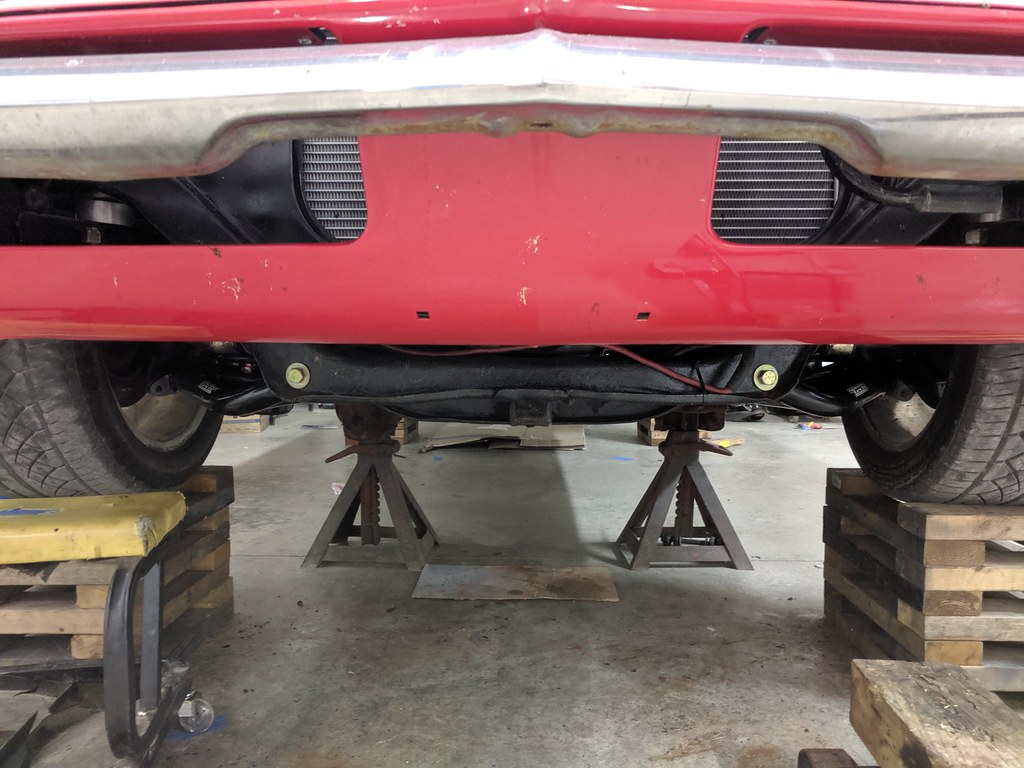
I noticed your front brake hoses are tightly looped around while mine are not. I wonder if your hoses are longer than they should be. The OE tabs on my original disc car are in a different spot higher on the frame; is it possible the hoses you are using are meant for my OE disc tab location instead of your OE drum tab location? Here is a photo of mine for reference.
More importantly, congratulations on #2!! I remember feeling like I hit the reset button when we had our second, back to sleepless nights and dragging all the baby stuff around everywhere. But over time two has been great for my family.Clint - '70 Nova "restomod" cruiser & autocross family car
08-31-2019 #520
Registered User
- Join Date
- Sep 2018
- Posts
- 49
Congratulations on baby #2!!!

 Reply With Quote


