
Results 81 to 100 of 152
-
06-08-2022 #81

 Registered User
- Join Date
- Aug 2012
- Location
- Phoenix
- Posts
- 158

Here's the latest!
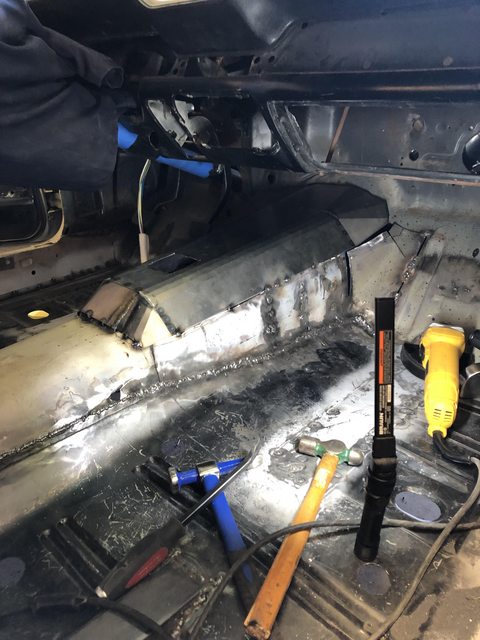
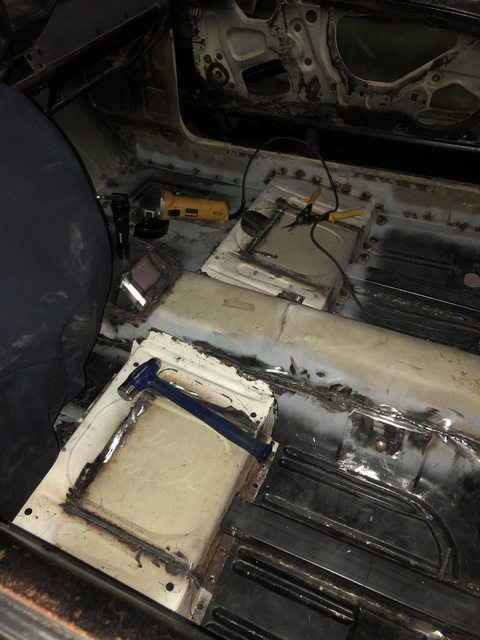
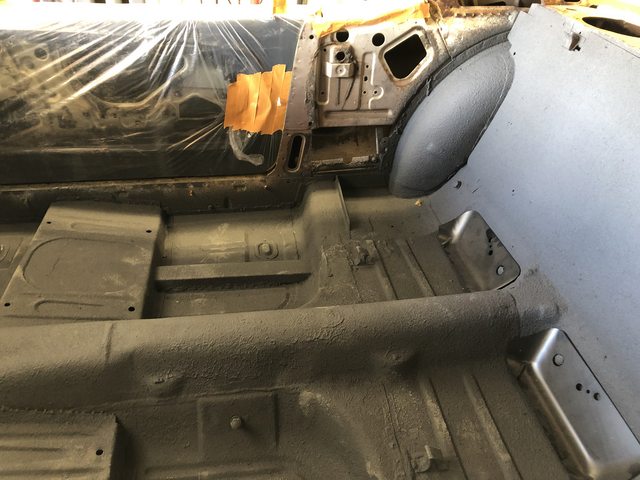
I got my floors, tunnel patch, and seat pans welded in. I was trying to decide on whether or not I would wait for the pans to go in before or after I sprayed lizard skin. As you can see, I put the pans in. I'll spray some lizard skin under the floor in the area of the seat pans to help with blocking heat and call it a day. My logic, flawed or not, was that I was tired of metalwork and welding and wanted to get on to the next steps.
Anyway, I got all of that done and headed to my buddy's place to drop off my fuel tank with him and borrow his paint guns. While I was there, his newest German Shepard decided he didn't recognize me well enough and tried to take a snap at my face while i was petting their other dogs. When i shoved him back, he caught my arm. I showed him the error of his ways and we're on good terms now. No stitches needed, just bruising and likely a new scar. I took the rest of the Memorial Day weekend off to nurse my busted wing.
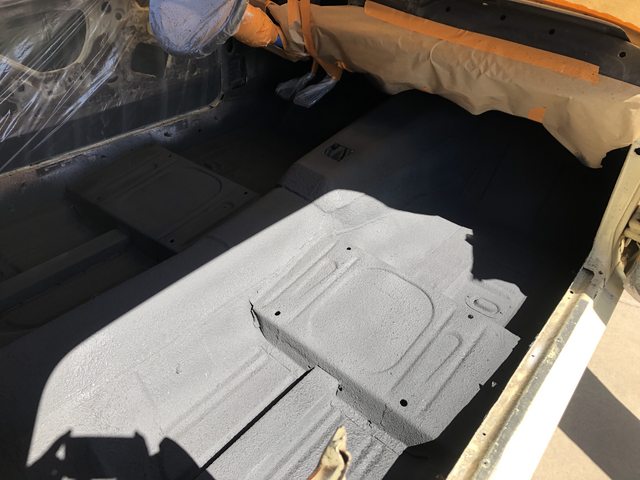
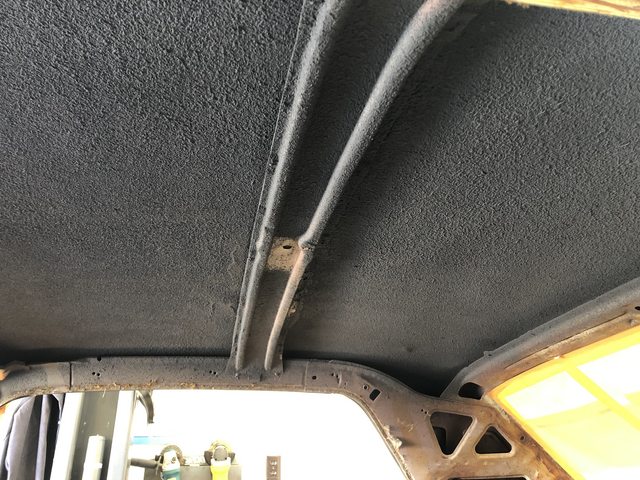
The latest is the floors have primer on them. I need to touch up a couple of places under the car, but next step is seam sealing the welds. I have also decided to pull the front and rear glass and headliner out to spray some lizard skin on the roof while I'm in that mode. I know the windshield and gasket are shot, so this gives me a chance to replace those and check the channel for any hidden rust. Hitt hates welding stainless since he hasn't perfected the control of heat and warping with it, but I told him that i didn't care how ugly the top of the tank was. Just as long as it didn't leak.
On to pics!
Working on the tunnel.
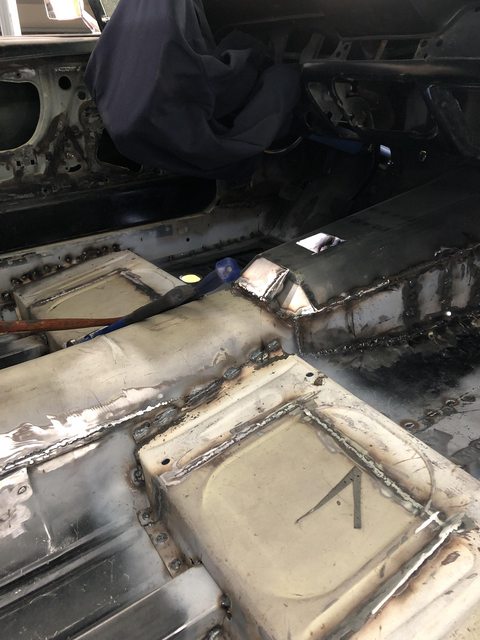
Pans going in.
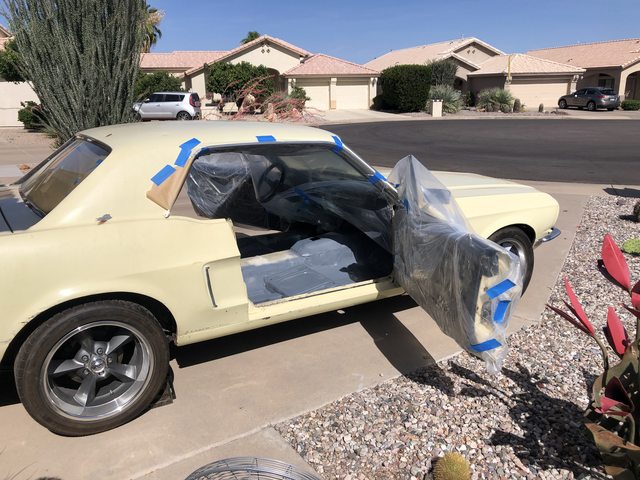
First time seats have been in the car in over 2 years!

Primer down.
Tank work.

Stupid dog.....a few days after the disagreement.
 Kris - Building the poor man's '68 Mustang.
-
06-08-2022 #82 -Moderator/Sponsor-
- Join Date
- Apr 2001
- Location
- The City of Fountains
- Posts
- 15,975
Good progress. What's the story with the dog?
1970 GTO Version 3.0
1967 Cougar build
GM High-Tech Performance feature
My YouTube Channel Please Subscribe!
Instagram @projectgattago
Dr. EFI
I deliver what EFI promises.
Remote Holley EFI tuning.
Please get in touch if I can be of service.
"You were the gun, your voice was the trigger, your bravery was the barrel, your eyes were the bullets." ~ Her
06-08-2022 #83
Registered User
- Join Date
- Aug 2012
- Location
- Phoenix
- Posts
- 158
He followed their other dog out of the garage as i was getting out of my car. Their other dog is a hound-mutt and barks at everything. She ran up to me barking and as i was leaned down and to give her ear scratches like a do when i come over, the shepard decided that he didn't care for it and tried to nip me. I don't think i'd been down there to meet him but -maybe- once since Mike got him, so it was a combo of other dog barking and not being familiar as far as I can tell. Mike called to him after i pushed him off and dressed him down verbally. He followed me around in their house with his tail tucked and licking my hand after i got my arm cleaned up. Originally Posted by andrewb70

Dunno, I didn't feel threatened and I'm not upset at all about it. I was raised around Dobermans all my life and it won't be my first dog-induced scar. (none of mine ever bit me, it was a neighbor's dog as I dashed across their yard as a dumb kid)Kris - Building the poor man's '68 Mustang.
06-13-2022 #84
Registered User
- Join Date
- Aug 2012
- Location
- Phoenix
- Posts
- 158
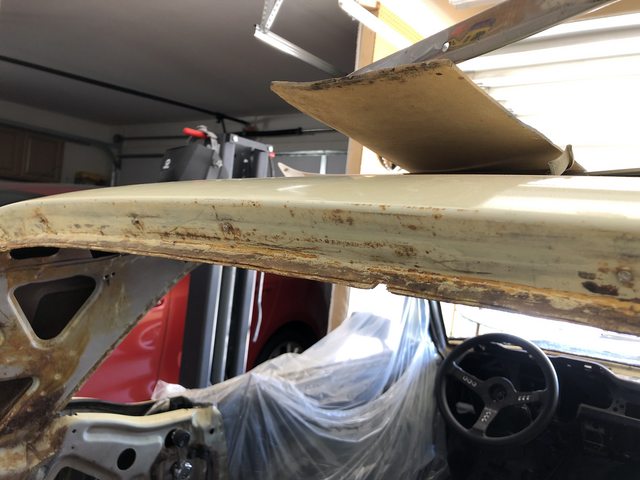
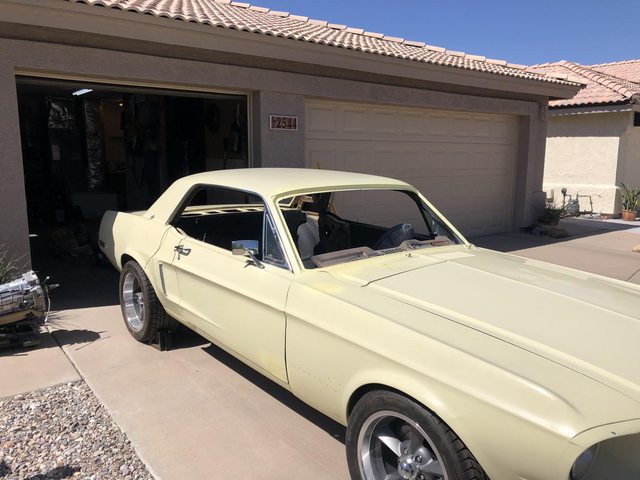
More 'while I'm here' happened. I started to carefully remove the windshield and back glass trim and realized that it didn't want to come off easily. After lots of careful maneuvering and actually cutting and removing both pieces of glass, I was able to determine why the trim wasn't letting go. It had been held in place with silicone tub caulk! Yep....Not a bit of actual sealer anywhere on either of the gaskets. But there was a serious amount of caulk between the trim clips and body that I guess was meant to hold the trim in place.....who knows.....
Anyway, got all of that garbage out and didn't find anything too terrible. A couple of rusty spots were present, so I decided to wire wheel the channels and prime them as well. I've ordered some factory color 2k paint in a rattle can to go over the areas before I seal everything back up. I'll also need to do a little hammer work on the trim to flatten it back out where the previous installer ham-fisted it down in a couple of places.
Sooner or later, I'll actually get to start putting stuff back together......probably.
I hear that old body filler and caked-in dirt also help hold trim on.
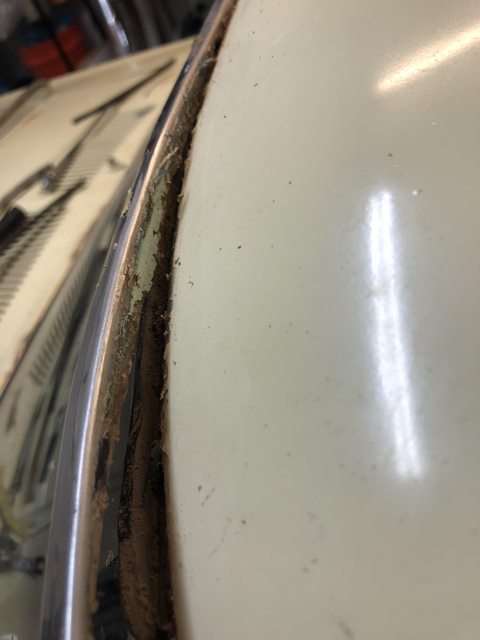
This is not a tub...

This was after I removed the glass and gasket and pulled off the majority of the caulk by hand.
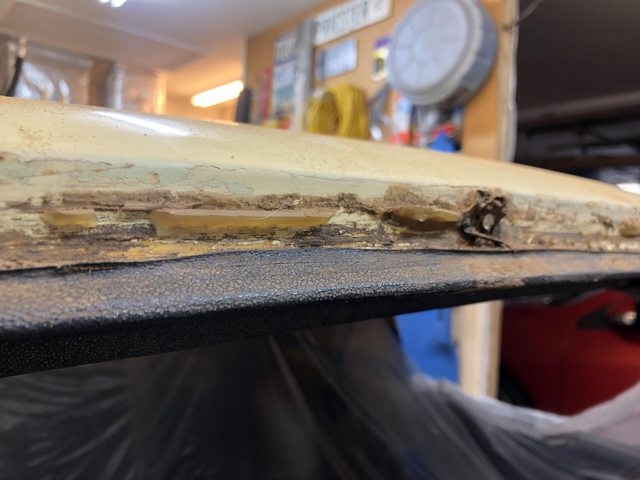
It cleaned up well in most spots.
Rear glass - seam sealer looks to have gone away and rust had started to form in the corner.
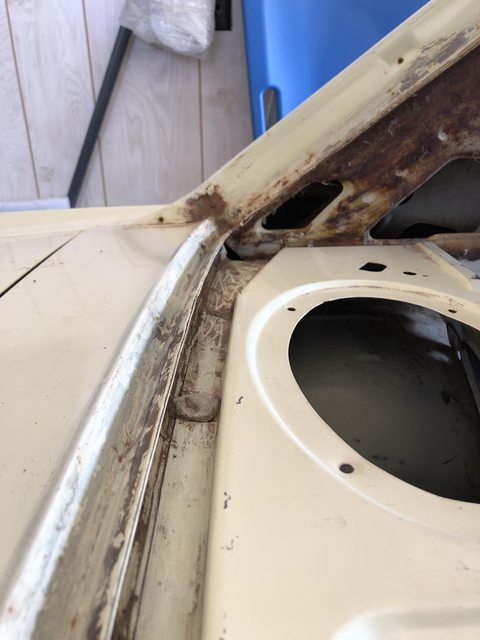
And some minor spots along the top of the rear glass.
Primer on and instantly dried in the 112* heat.
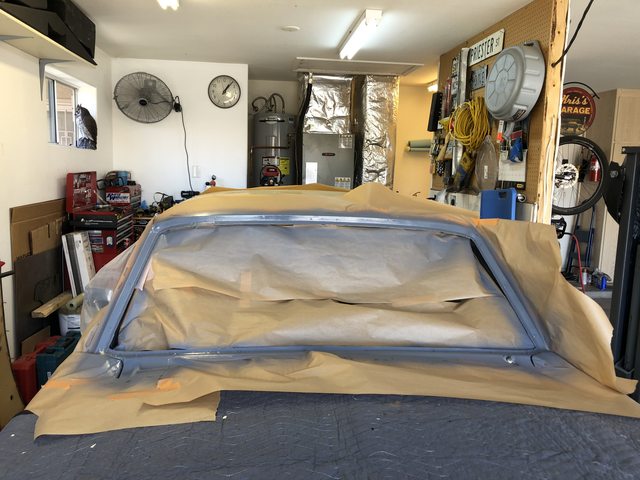
I swear I'll be putting parts back on at some point.....Kris - Building the poor man's '68 Mustang.
06-13-2022 #85
-Moderator/Sponsor-
- Join Date
- Apr 2001
- Location
- The City of Fountains
- Posts
- 15,975
Solid progress!
Andrew1970 GTO Version 3.0
1967 Cougar build
GM High-Tech Performance feature
My YouTube Channel Please Subscribe!
Instagram @projectgattago
Dr. EFI
I deliver what EFI promises.
Remote Holley EFI tuning.
Please get in touch if I can be of service.
"You were the gun, your voice was the trigger, your bravery was the barrel, your eyes were the bullets." ~ Her
06-19-2022 #86
Registered User
- Join Date
- Aug 2012
- Location
- Phoenix
- Posts
- 158
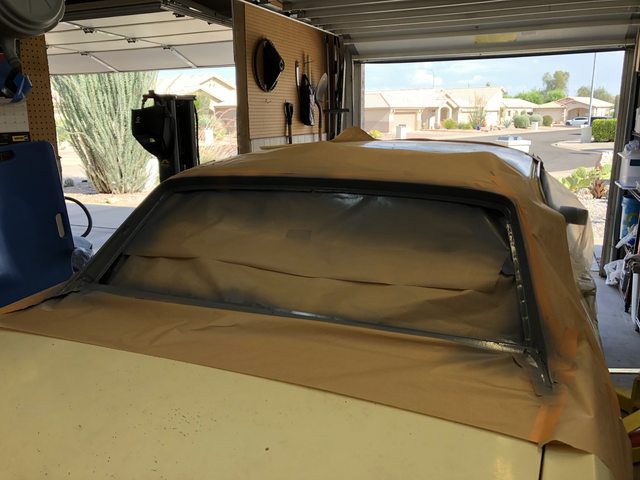
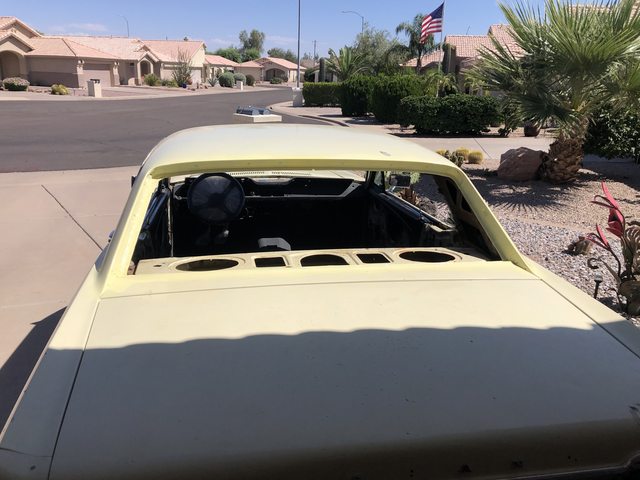
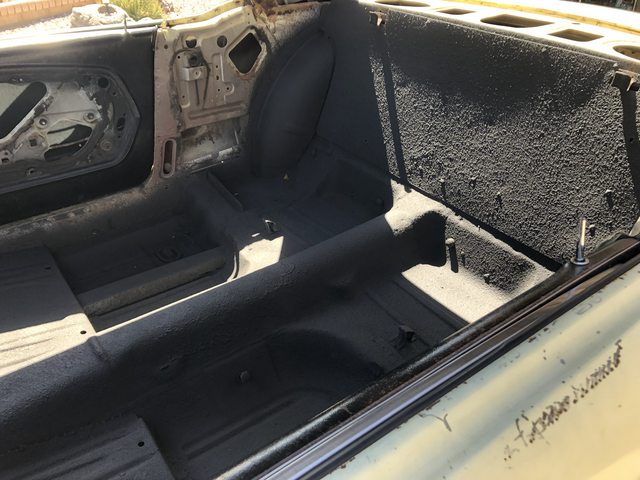
Got color sprayed on the window channels and the Lizard Skin sound control sprayed on the floor/divider/roof.
 Kris - Building the poor man's '68 Mustang.
06-25-2022 #87
Registered User
- Join Date
- Aug 2012
- Location
- Phoenix
- Posts
- 158
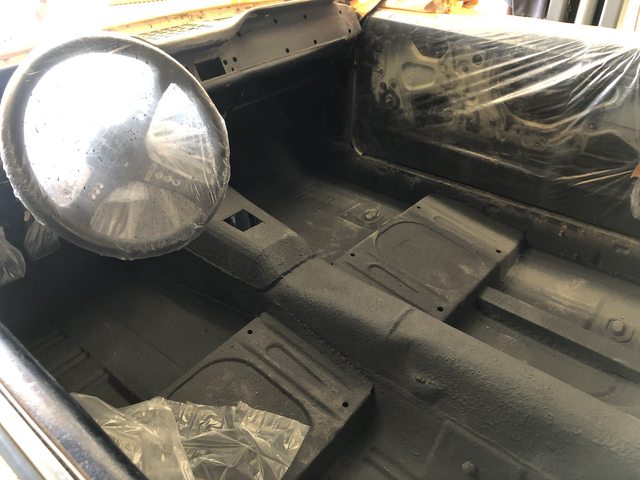
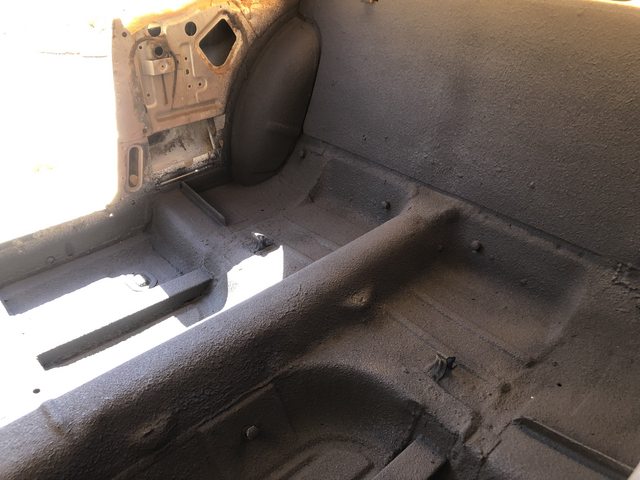
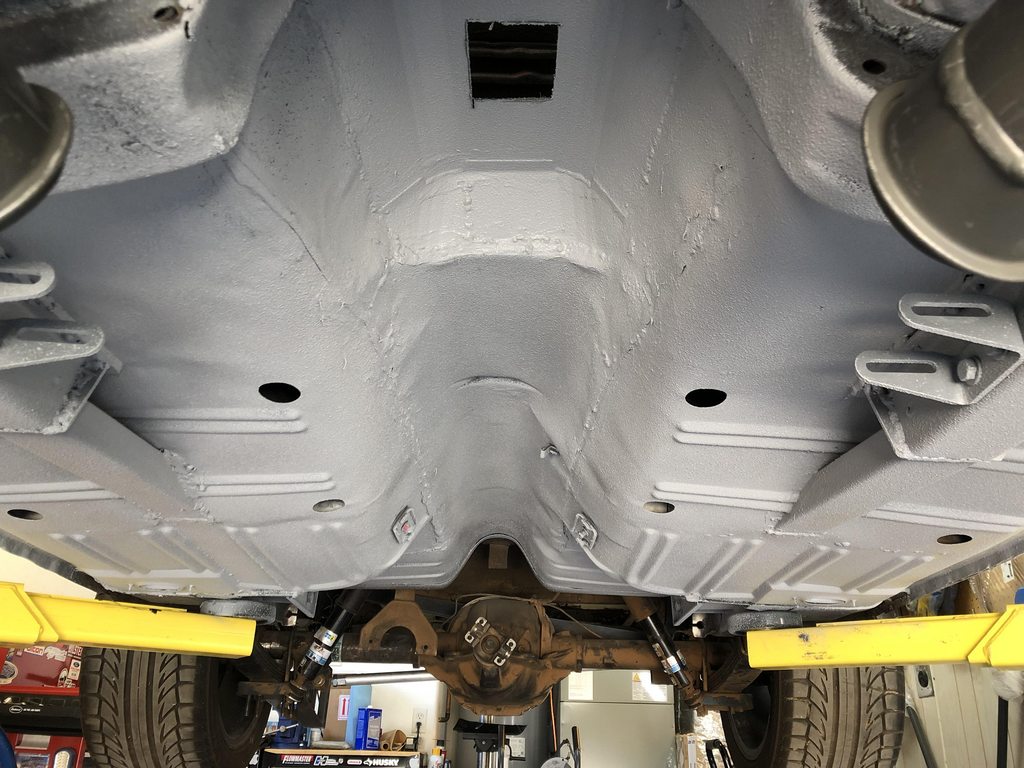
Lizard skin is done! Today's effort was spraying the ceramic insulation. I re-masked it all and sprayed the roof, firewall, floors, and divider. It seemed to spray easier than the sound control.
Either way, it's done. Tomorrow will be getting it back in the air and spraying Raptor Liner on the underside of the floor.


 Kris - Building the poor man's '68 Mustang.
06-25-2022 #88 Registered User
- Join Date
- Dec 2006
- Location
- SF Bay Area
- Posts
- 456
Looks good! Are you planning on putting anything on top of it, like insulation or anything?
chunger
'68 Ranchero 500
'70 Cougar XR-7 Convertible
'98 Mustang GT Convertible
06-25-2022 #89
Registered User
- Join Date
- Aug 2012
- Location
- Phoenix
- Posts
- 158
It shouldn't be necessary since I used both sound and heat control from LizardSkin. But I will likely use some sort of factory style underlayment for extra padding when I get ready to put carpet down and the one-piece headliner in. Originally Posted by chunger
Kris - Building the poor man's '68 Mustang.
06-26-2022 #90
Registered User
- Join Date
- Aug 2012
- Location
- Phoenix
- Posts
- 158
Slept in today like a lazy bum and got a late start. But I got the Raptor Liner sprayed under the floors. I believe this completes the spray work. The next step is something even more fun.....wiring. yay!
Side note: I need to get better at welding or find better ways to cover up the ugly!
 Kris - Building the poor man's '68 Mustang.
07-09-2022 #91
Registered User
- Join Date
- Aug 2012
- Location
- Phoenix
- Posts
- 158
Last weekend I finally got the T56 back in the car for the final time (hopefully). I wanted to see what sort of changes the tilt column and shift lever that came with the transmission kit made so I added the lever and I think it may be too long/tall for my tastes.
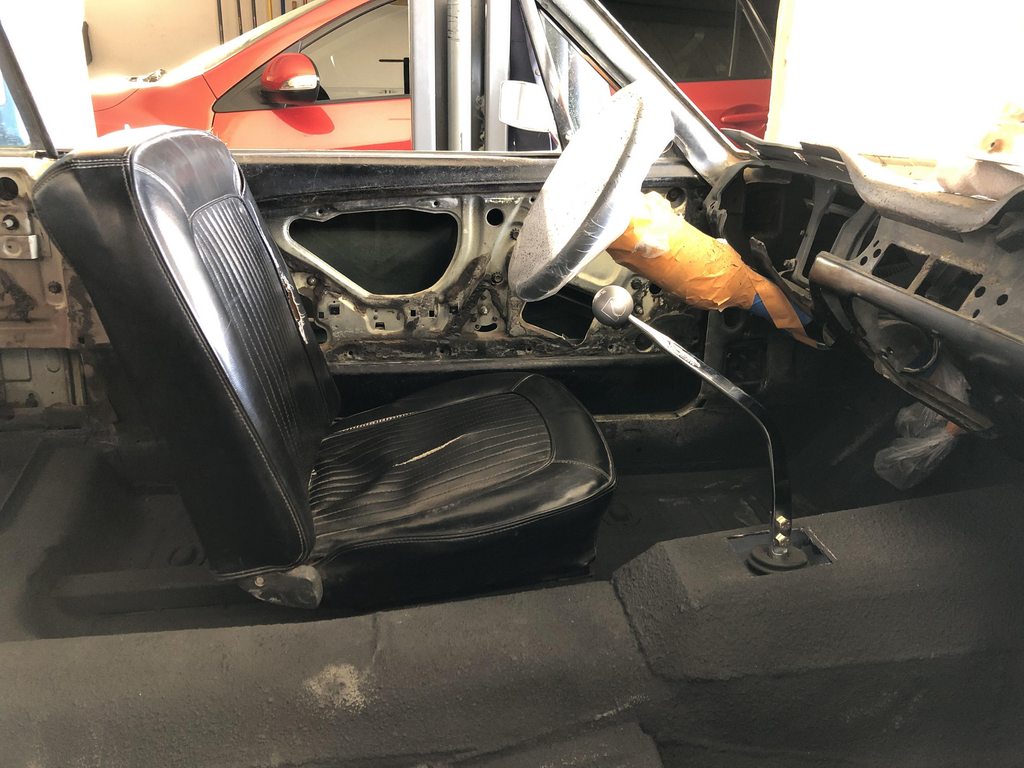
I took a seat and rested my forearm on the shifter ball with the transmission in 6th.....I'll look at shorter lever options. A buddy has offered his for test fitment. It's the 10" tall/4.75" back version whereas mine is the 12" tall/7.5" back.
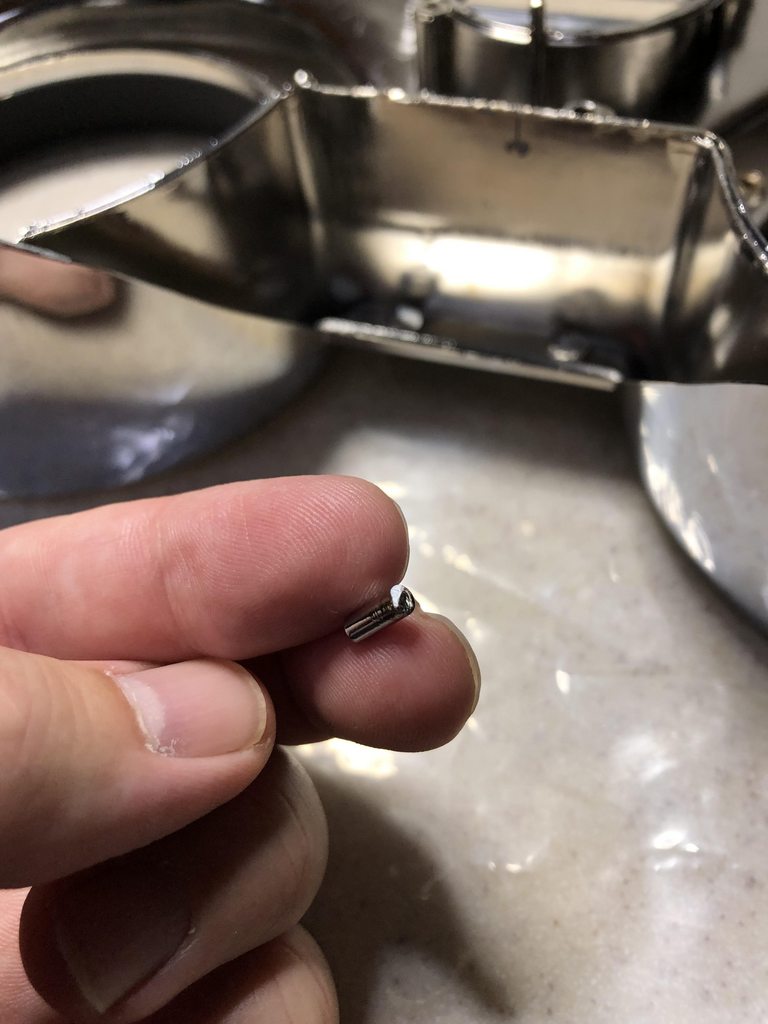
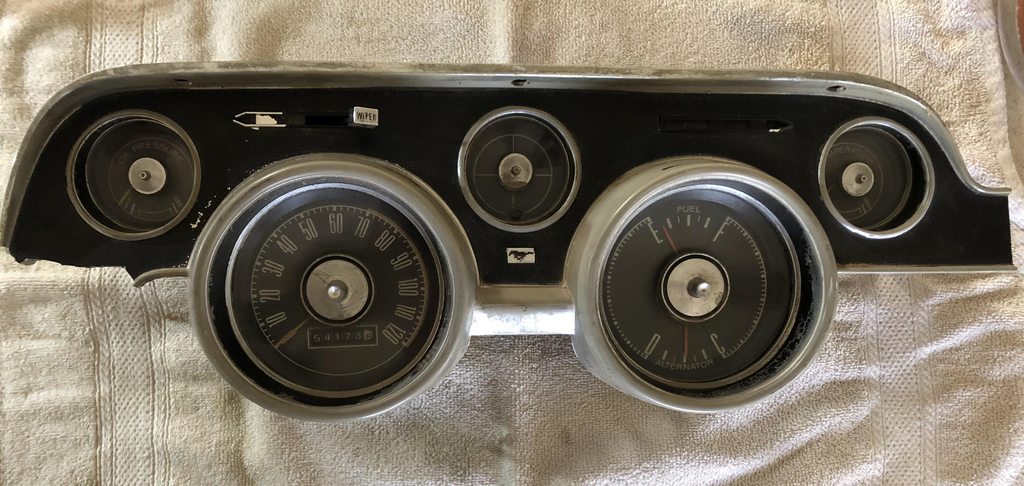
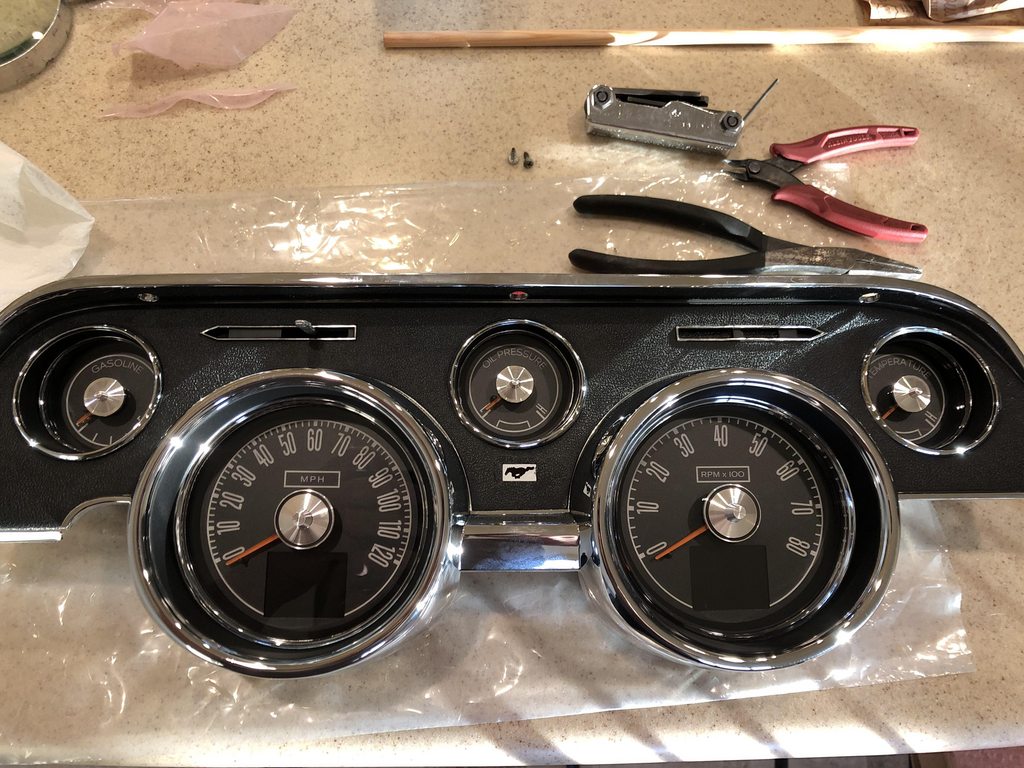
This week, my new cluster bezel came in. When i opened it, a locating pin fell out of the bag. It looks as if it was broken when the chrome finish was applied since half of the broken section of the pin is chrome that would normally not be if it were totally attached. Either way, it didn't affect me adding my Dakota Digital gauges so it all worked out.
I tried to get a decent pic showing the chrome on the area of the pin that it shouldn't have been.
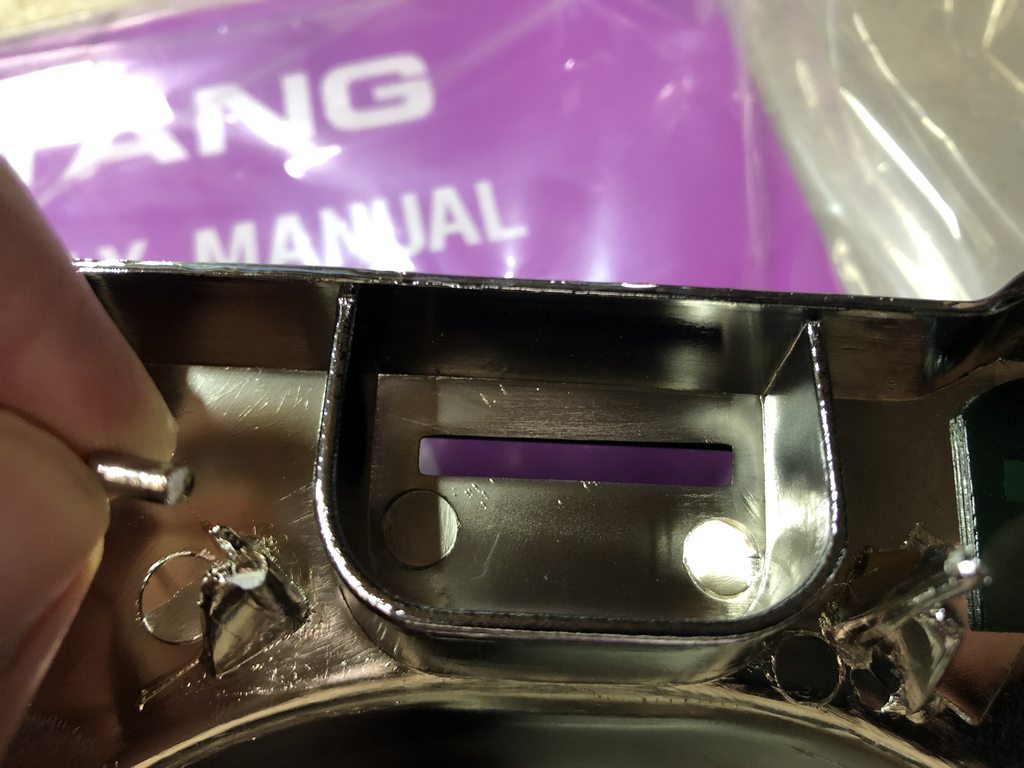
All of this is tired, but I'll wrap it up and hang on to it for now.
Much better.
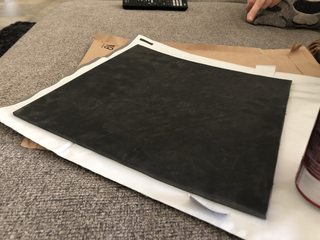
I also picked up a small sheet of massbacked vinyl. I'll cut a small section to cover the shifter hole when I decide what boot/cover I'll end up using.
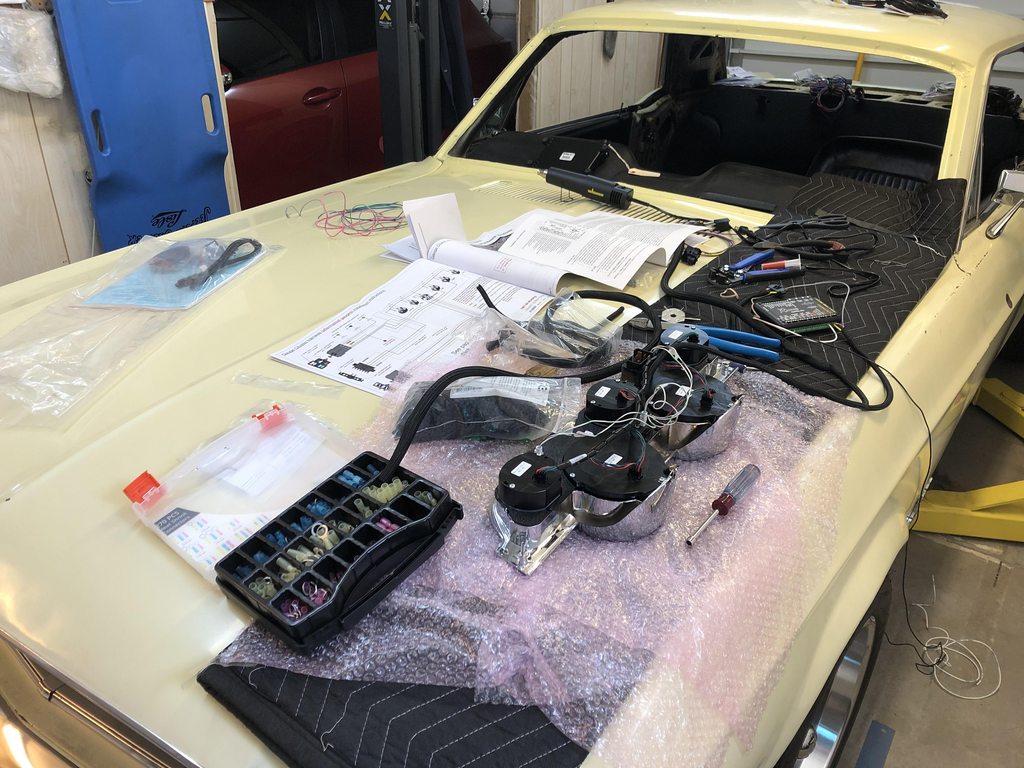
Today's efforts! I begrudgingly started the wiring.
I started out by mounting the fuse block and working my way out from there. I will be wrapping the wires with TechFlex and Tesa's 51036 tape.
Step one: mount/remove/remount/remove/mount one last time.
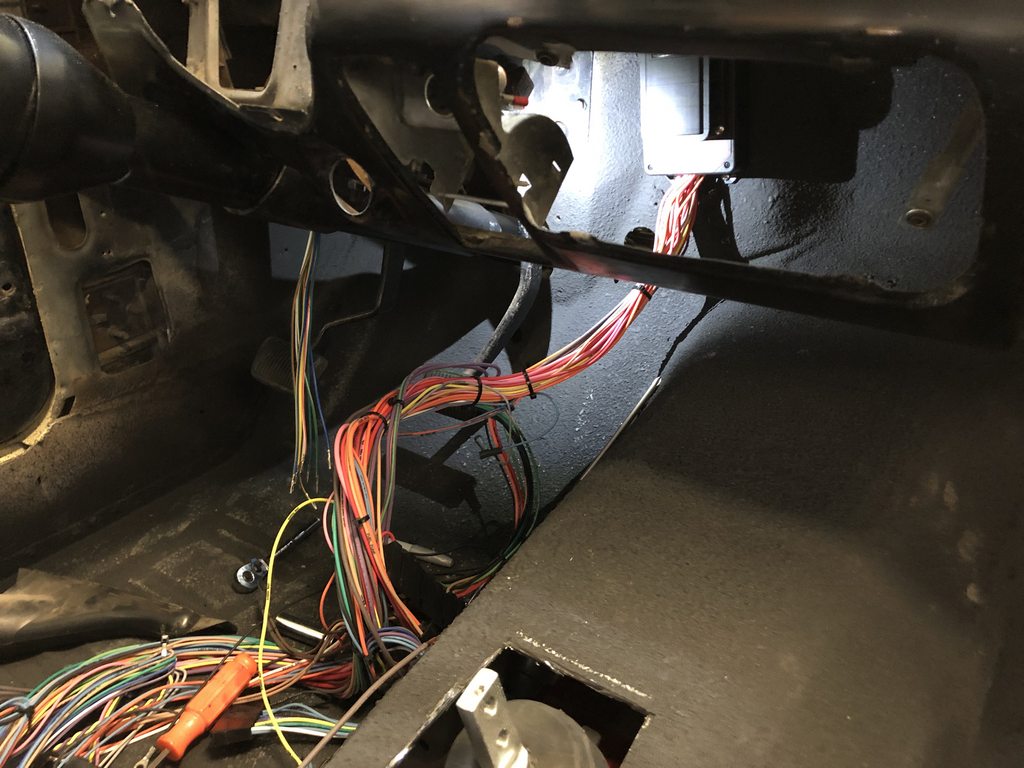
Step two: stare into the void.
Step three: just keep at it!

I'll add that, so far, the AAW wiring kit is well thought out and their super pricey crimpers make nice crimps.
I'll keep chipping away at this tomorrow.Kris - Building the poor man's '68 Mustang.
07-10-2022 #92 Registered User
- Join Date
- Sep 2010
- Location
- corona,ca.
- Posts
- 1,081
Really like the progress.
I'm very slowly doing a 68 notch back for my daughter.72 chevelle.
07-18-2022 #93
Registered User
- Join Date
- Aug 2012
- Location
- Phoenix
- Posts
- 158
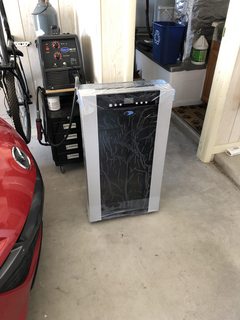
This is becoming a test of willpower between the 'while i'm here' and desire to be able to drive the car. Work has been somewhat slow since we've been in the 100-teens in Phoenix. I was gifted a portable AC unit to cut down on the heat and now I need to rearrange the garage and find an outlet that it won't keep tripping.
The 'while I'm here' part:
The car has been in its share of crashes. I knew that ahead of time. What I did not expect was the meth-fueled backwoods hackery that I keep finding.
This escalated quickly.
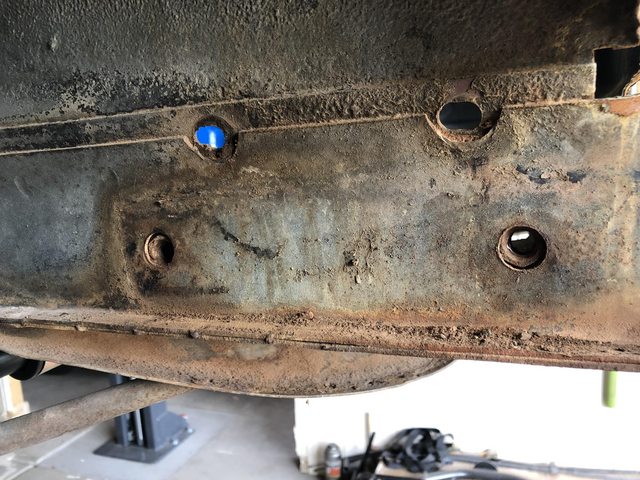
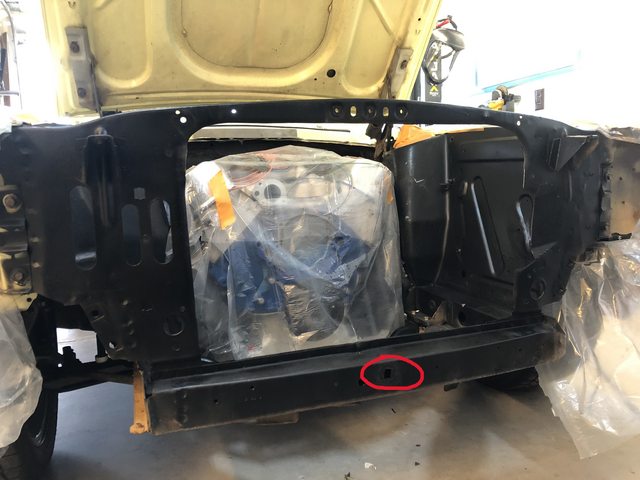
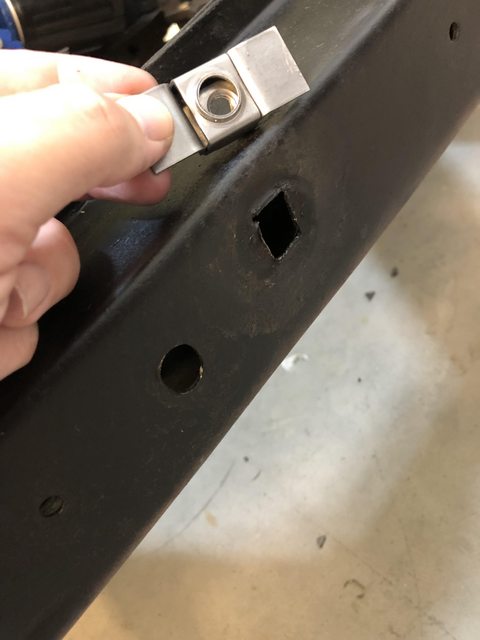
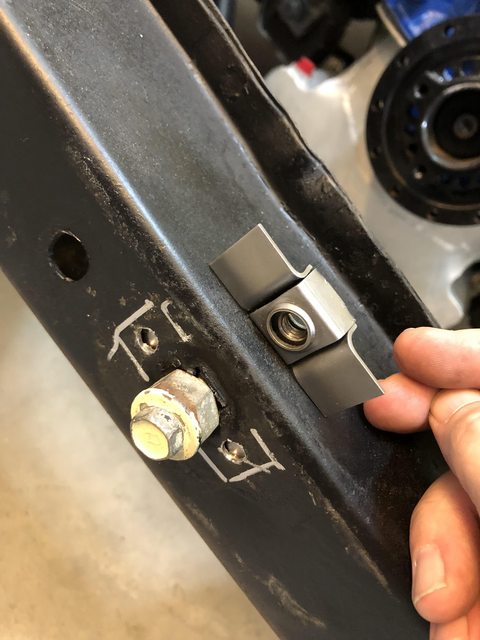
3 of the 4 bumper bracket to frame bolts were cross-threaded and not where they should have been. You can see that one was pushed into the rail and the other 2 damaged ones are pushed in the direction of the bumper being bent up when it was wrecked.
The rear one is fine. The front one is.....pushed back into the rail.
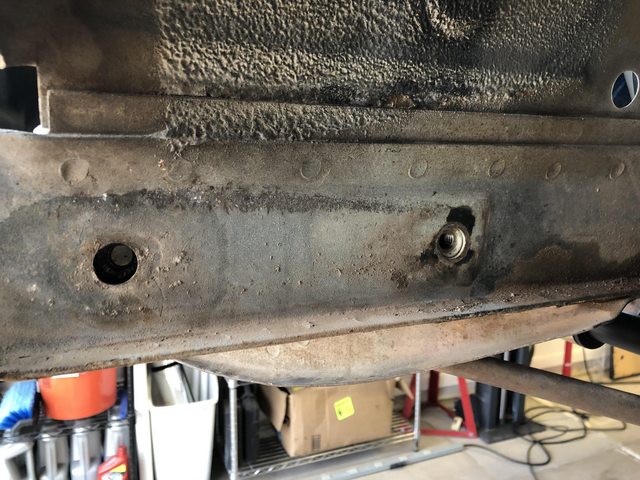
Front is pushed up and rear pushed down.
None of that is really terrible. I was able to chase threads to salvage them and push the mangled one back into place. I'll get new bolts and move on from this.
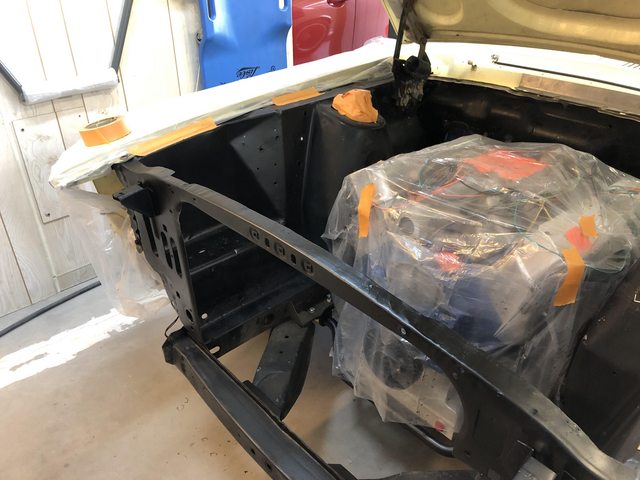
Next up: taking in all of the wrinkles/rust in the front aprons and core support.
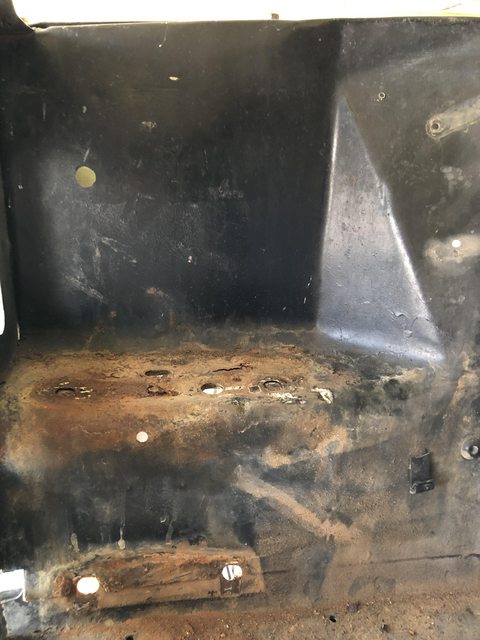
battery tray rust. Not a big deal since the tray was removed and battery is going to the back. I'll clean it up and treat it. The driver's side apron had wreck damage as well as minor wrinkles in the support.
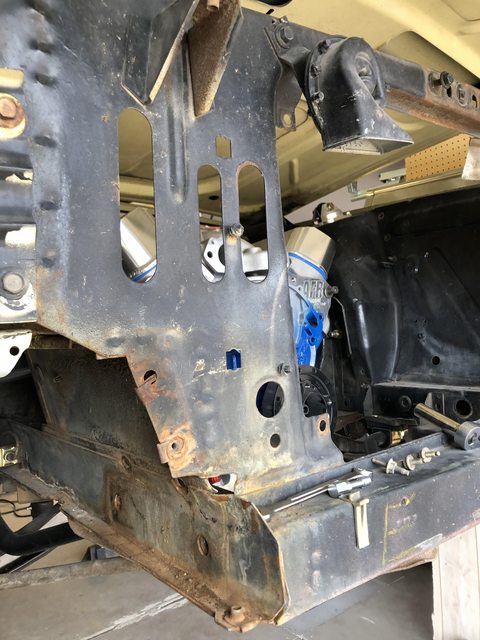
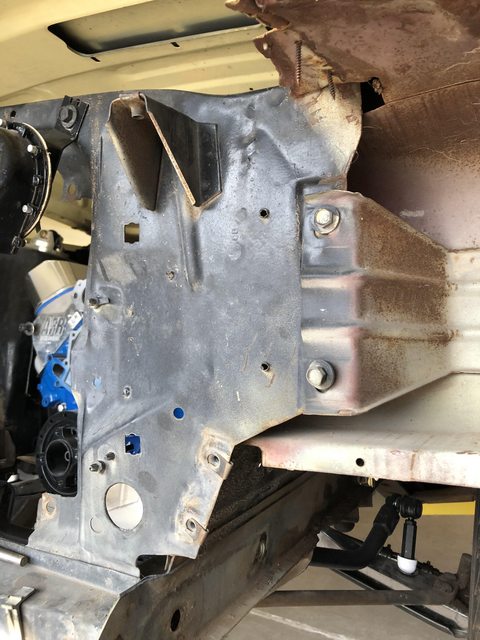
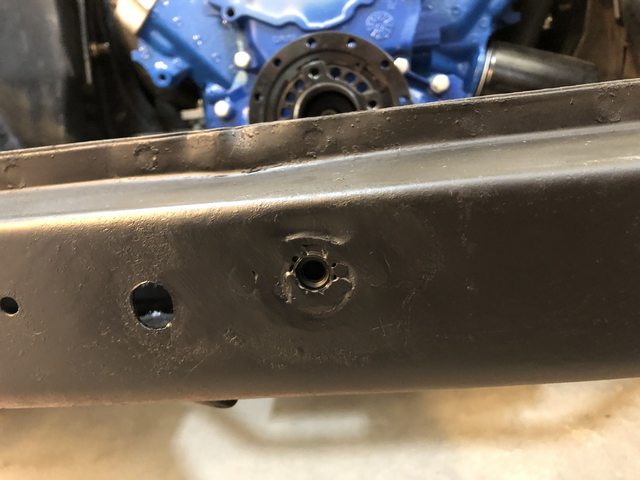
The nut in the center of the core support looks to have been welded on -outside- of the support and came off with the grill support piece.
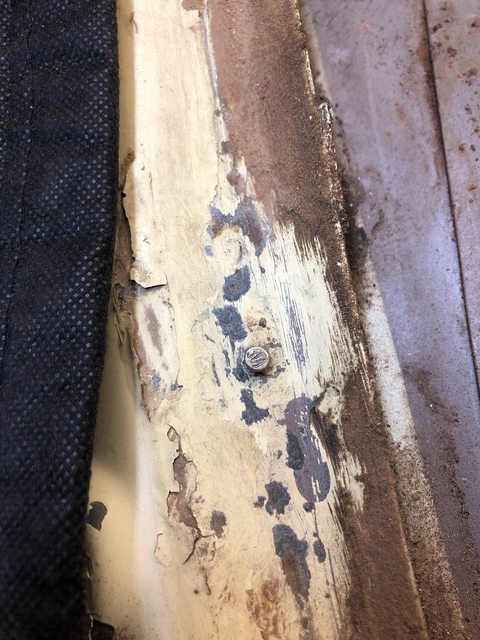
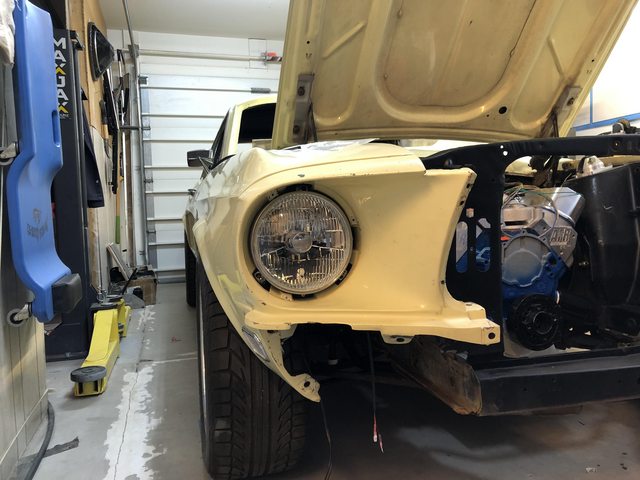
And then there's this trainwreck. The driver's headlight extension was held on by having the bumper brace pushed up from the bottom and the headlight wires being pulled tight. No hardware in it at all....
Unless you count the drywall screws that were added for.....reasons?

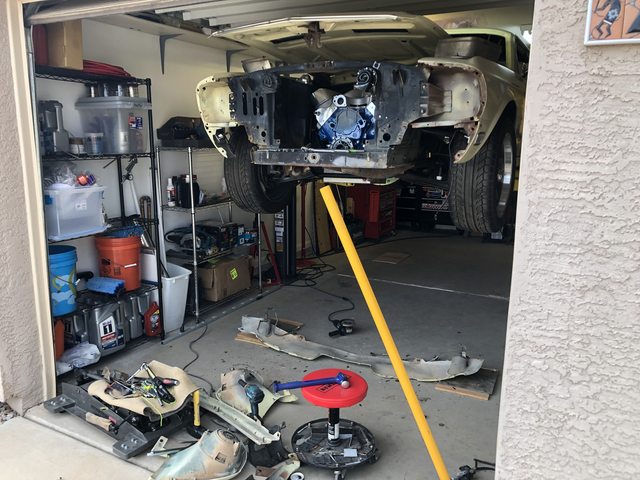
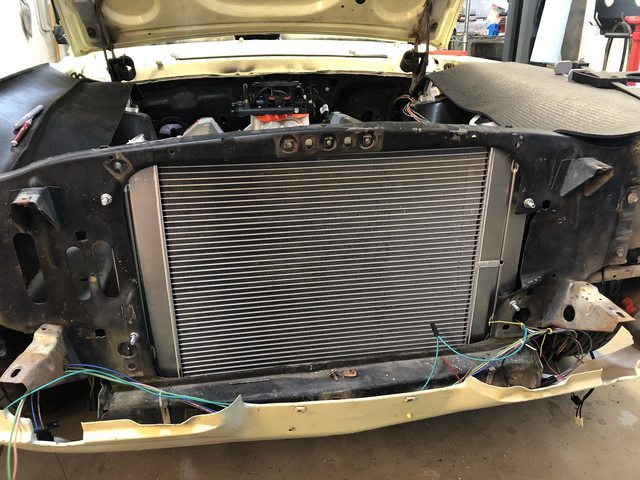
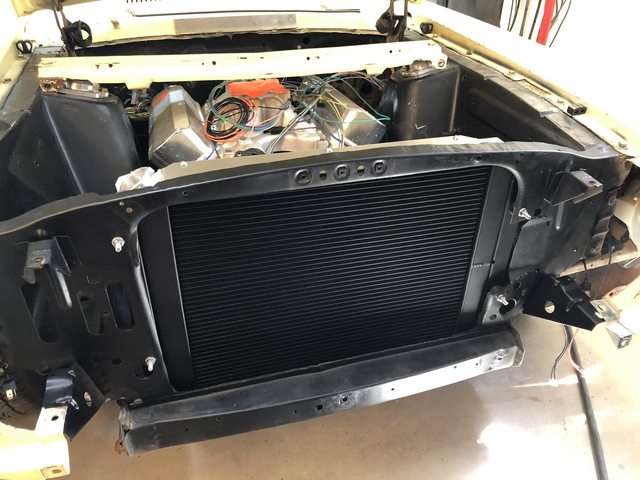
Anyway, I pulled the grill out to begin wiring and prepping for the radiator. One thing snowballed into another, and here we are. I did get the core support trimmed out to allow space for the much larger Ron Davis radiator. I have some cleanup to do next and I'll decide what will get replaced and what will go on the 'later' list.
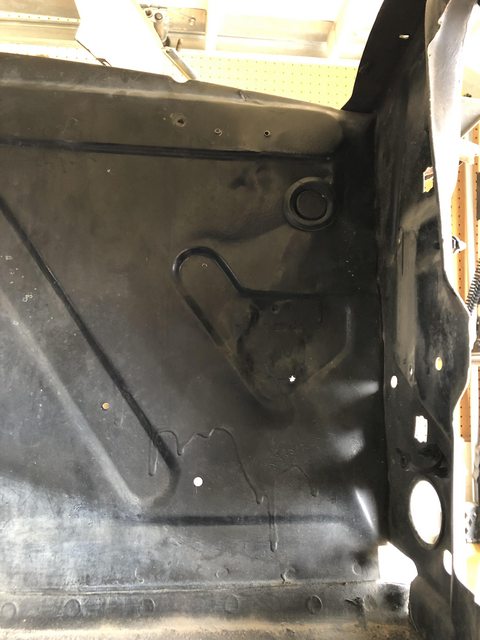
I don't have a before really....but after:
This thing is huge.
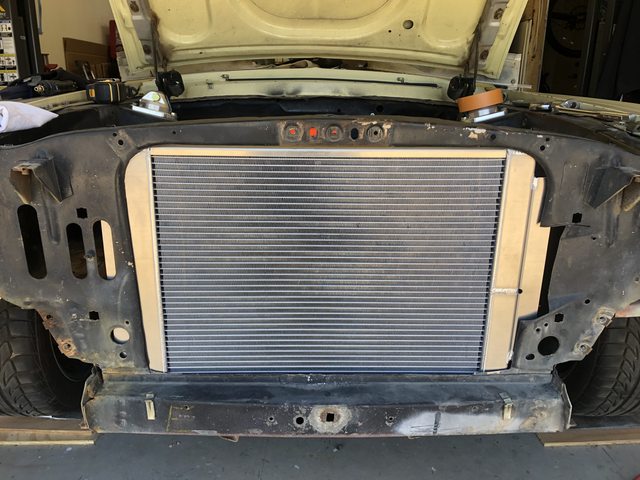
This is just resting on the lower rails at the moment. I'll get it properly mounted after i wrestle with wiring for lights.
 Kris - Building the poor man's '68 Mustang.
07-22-2022 #94
Registered User
- Join Date
- Aug 2012
- Location
- Phoenix
- Posts
- 158
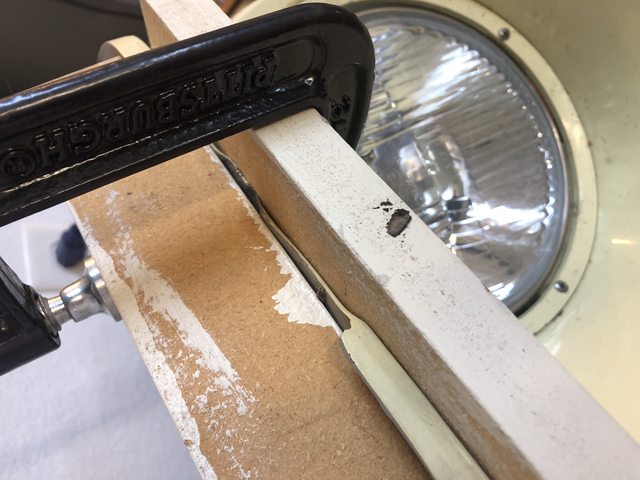
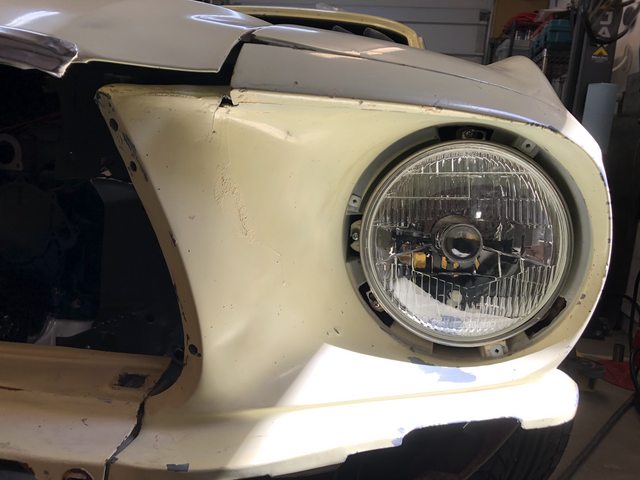
In other news, I forgot to mention the passenger side headlight bucket. The bent bumper support was pressed into the bottom of that side as well but had managed to bend the bottom lip. I'm hoping that I can heat it and flatten it back to a somewhat correct shape.
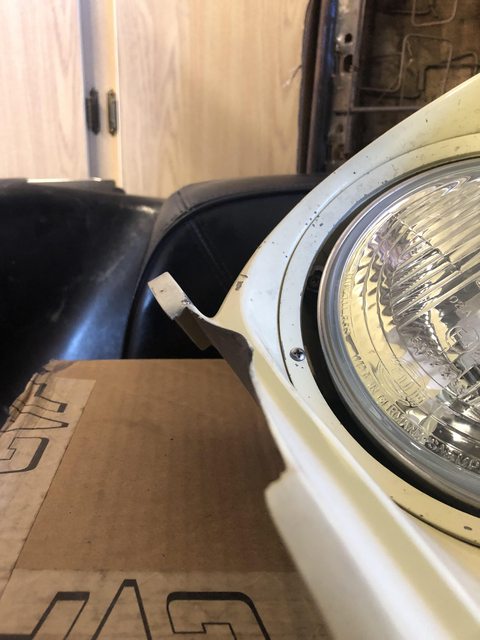
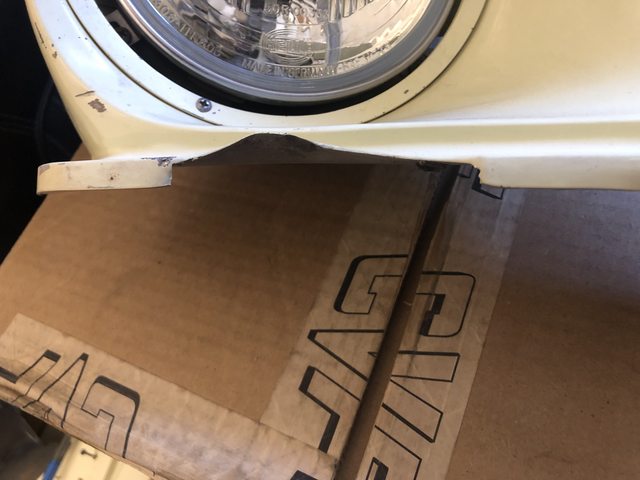
I was able to heat that section and use two pieces of scrap wood and a c-clamp to slowly apply pressure to it. It's not perfect, but it'll do well enough. I'd rather not keep trying to smooth it out and end up cracking it.
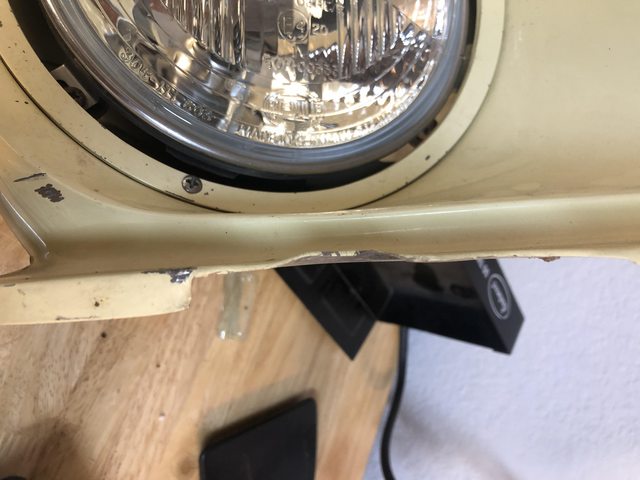
Ugh.....it just keeps getting better. I had hardware arrive today that would allow me to remount the fender extensions and rough-in the headlights so i could finish the wiring on the front half of the car. I take the passenger side extension apart and start to realize that something wasn't quite right...
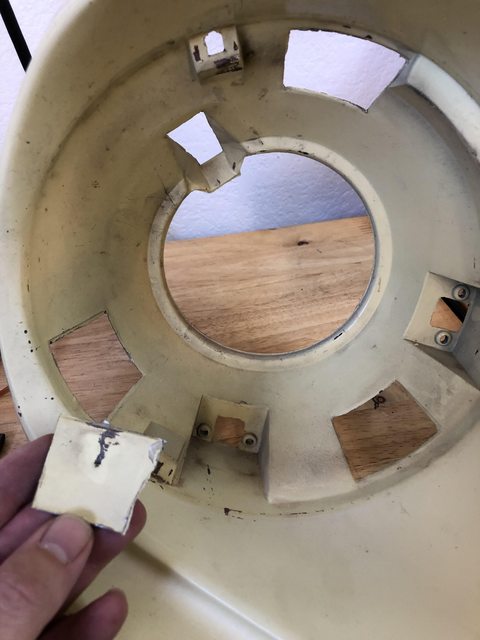
See it? No? Here.....
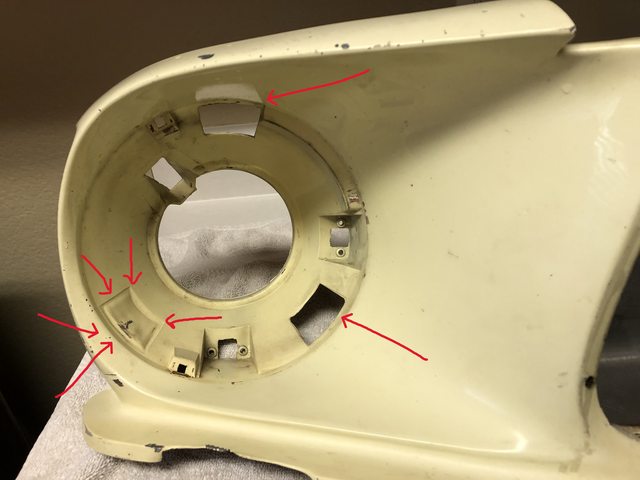
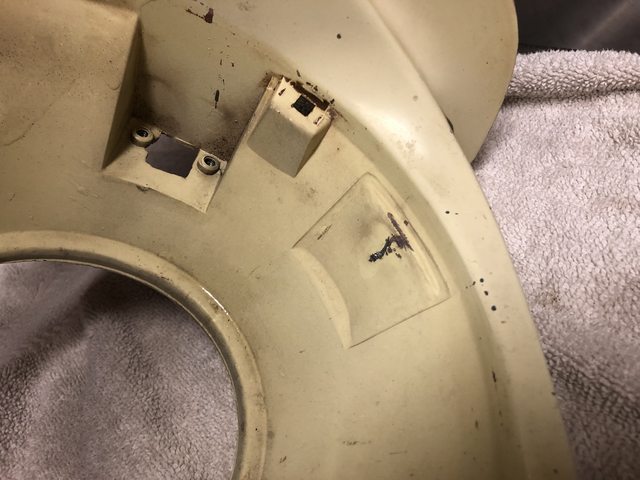
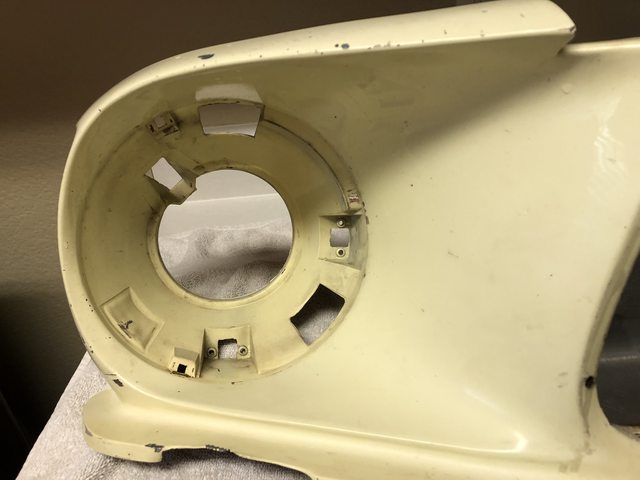
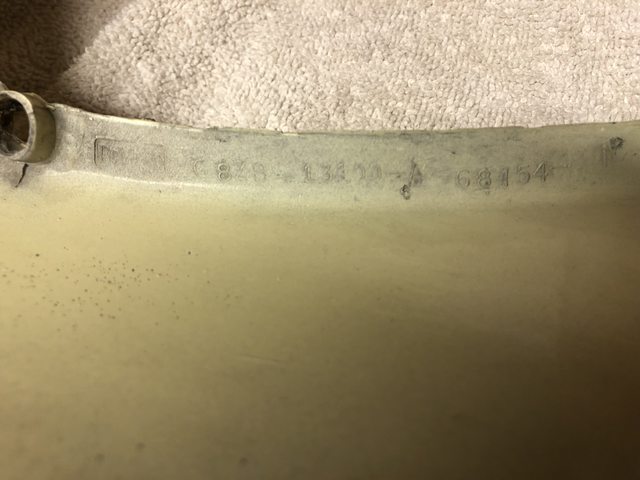
One of the three damned cutouts was left there from day one! I'm pretty certain it's original because both sides have FoMoCo stamps on them.
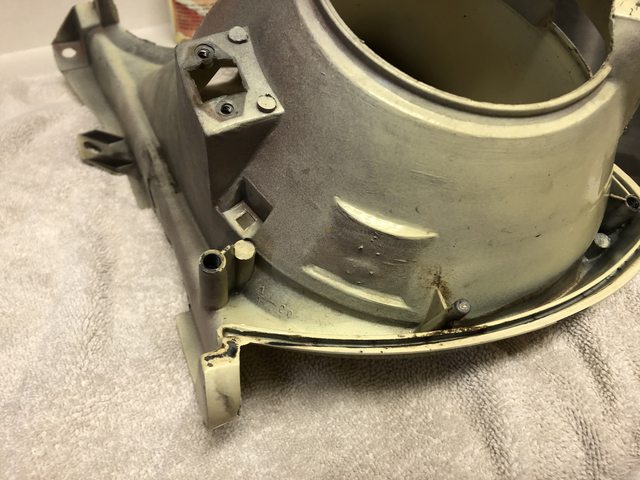
So I get to get my dremel out to knock that out. But it gets better....the driver's side isn't original to the car. It's green on the back and has body filler squished in a corner.
Not only that, but there's wrong hardware everywhere in it AND it's bent enough at the area along the bottom of the headlight that I either need to 'massage' it back into shape with a plastic hammer and heat, or just wing it and leave it bent and the headlight door fitting poorly.
Green!

I didn't take a picture of the wavy bottom. I just put it all back in the garage and came in for some coffee and forum ranting.
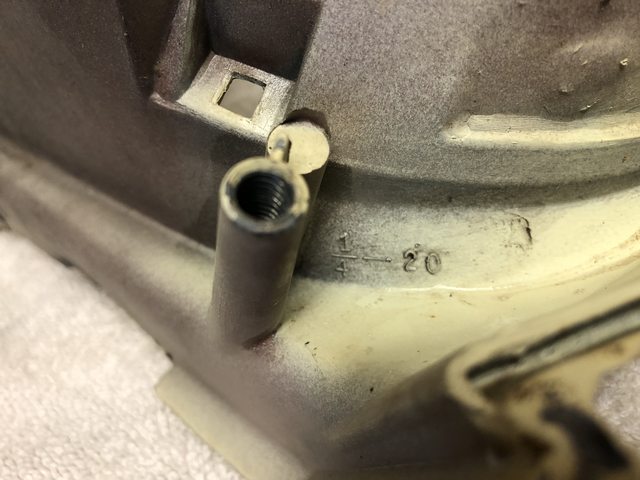
One last thing I thought was neat.....if you're not aware, Ford wanted someone to know that the correct hardware for the mounting studs was 1/4-20 sized.
 Kris - Building the poor man's '68 Mustang.
08-24-2022 #95
Registered User
- Join Date
- Aug 2012
- Location
- Phoenix
- Posts
- 158
Ive been keeping another thread active on the Vintage Mustang Forums.
This is the latest on everything that Ive copied from that thread.
My MaxJax failed. The pump acts like it gave up and wouldnt lift any longer. It's been great. When it works. I've been hesitant to go on a rant about it, but Ive had it fail on me twice. It didn't want to lift regardless of how many times I bled the system. The second time it happened, 2 weekends ago, I called my sales guy and explained my extreme disappointment. He said that he'd have tech contact me....4 days later I contacted him again for an update. He got supervisors involved and soon after, I got an email from a Bendpak tech asking for pictures of the power unit. I sent them over and soon after I sent them, I got a response saying that they were going to replace it and I'd get a tracking number. That was the end of last week and I've not gotten shipment notice, but I can respond back when it arrives with a report.
2 days later:
BendPak has sent me a replacement motor/pump for my lift. It arrives tomorrow. In the meantime, I've been trying to get other stuff on the nose done so I can install the radiator and reassemble the nose of the car. I've got a huge order of all of the grill/valance/bumper hardware arriving tomorrow along with a new front bumper. My plan is to -hopefully- have the nose going back together this weekend.
In the meantime, I've got random pics of stuff that's been happening.
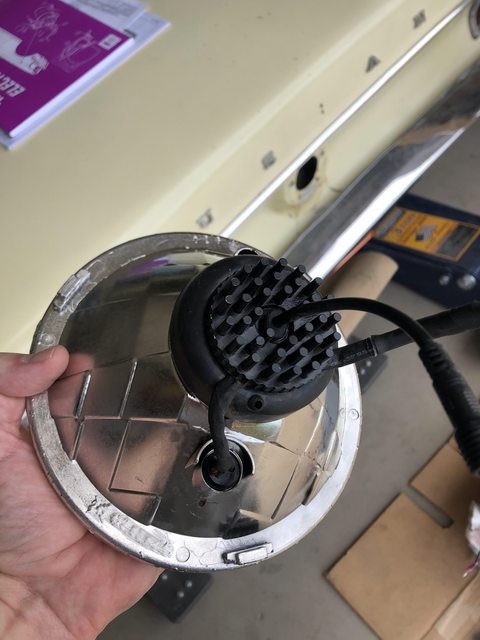
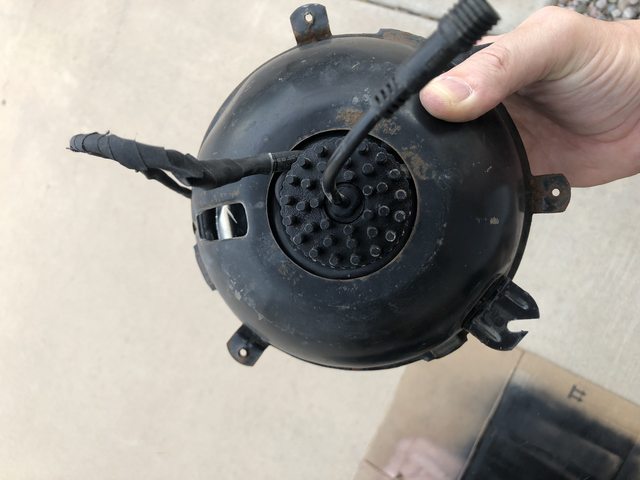
For starters, some on VMF asked me about my new Dapper headlights. Here's the backside of my setup. You can see the heatsink and the main light pigtail along with the feed wires for the daytime running light. I wrapped those in shrink wrap and then Tesa tape to protect them. It's a snug fit but I didn't have to cut or trim the bucket at all.
Random cleaning/disassembly pics:
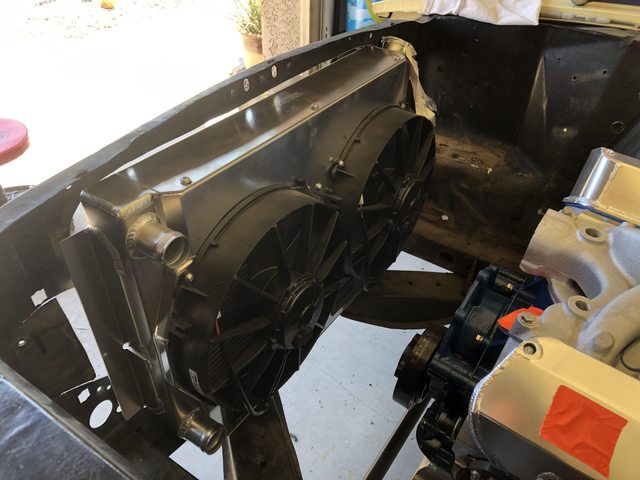
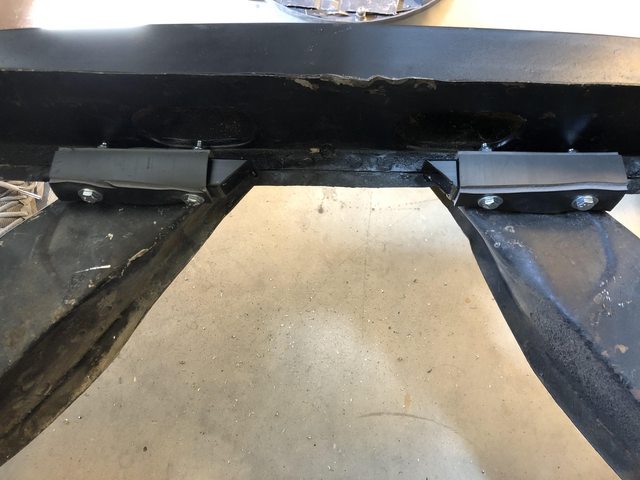
In this one, you can kinda see the 1" square tube that I welded to the top of the strut rod brackets to help support the radiator. I've got some mass backed vinyl that I will attach to the top of them to pad it a bit. The radiator will be held in place with 1" rubber isolators. I got the idea from a VMF member building a 65 mustang track-only car.

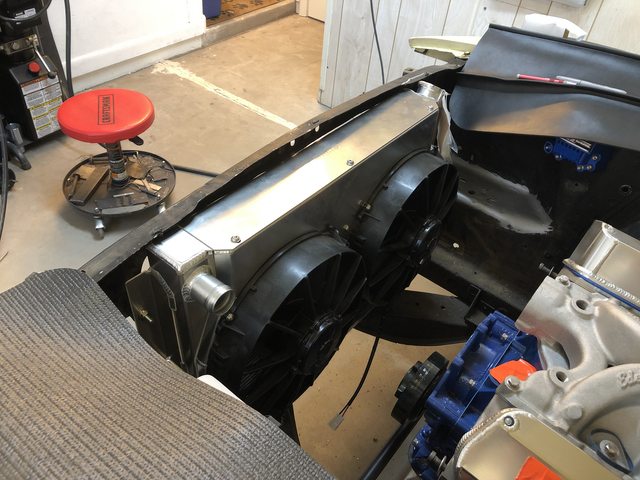
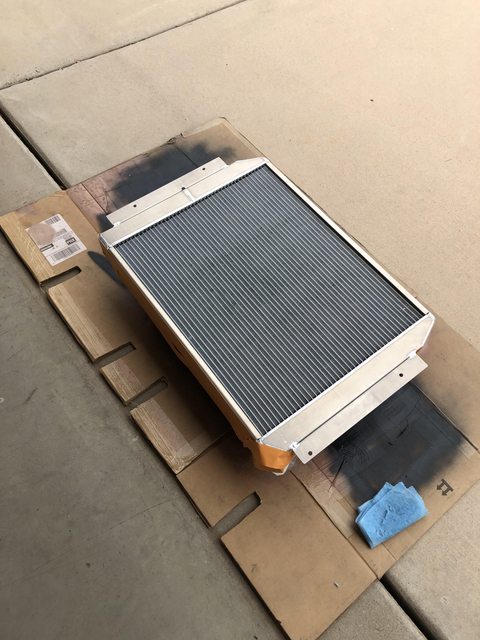
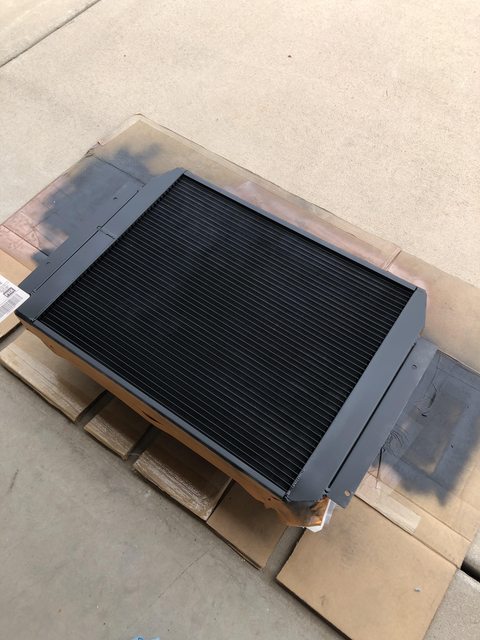
I didn't want the aluminum radiator showing through the grill, so I used a thin coat of Eastwood's satin radiator paint on the face of it.
And I also spritzed underhood satin black on the areas that needed touching up.
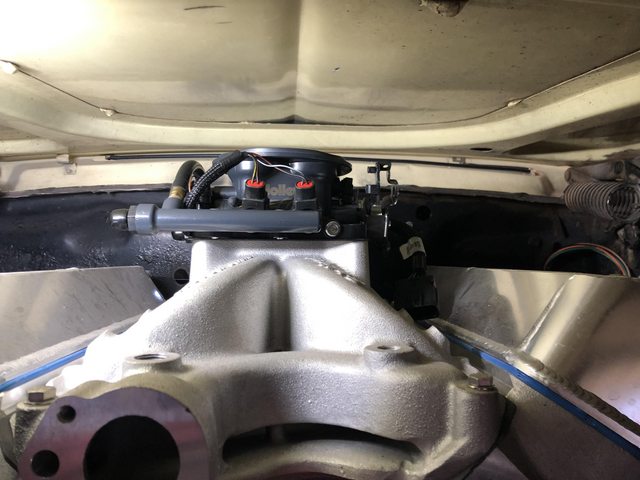
And this.... Whoever hacked together this car after it was wrecked just welded a nut on the -outside- of the support which caused the hood latch brace to stick out farther than it should have....
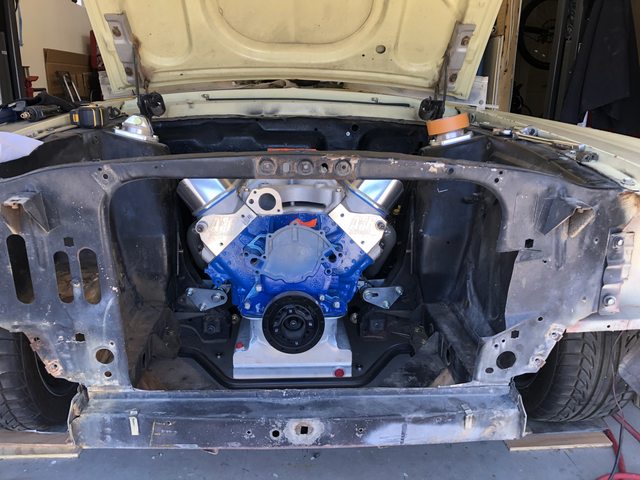
And this is gonna be a tight fit. 2.5 inches from flange to hood. I'm going to have to figure something out for an air cleaner.
Several days later: August 11th
Where to start....
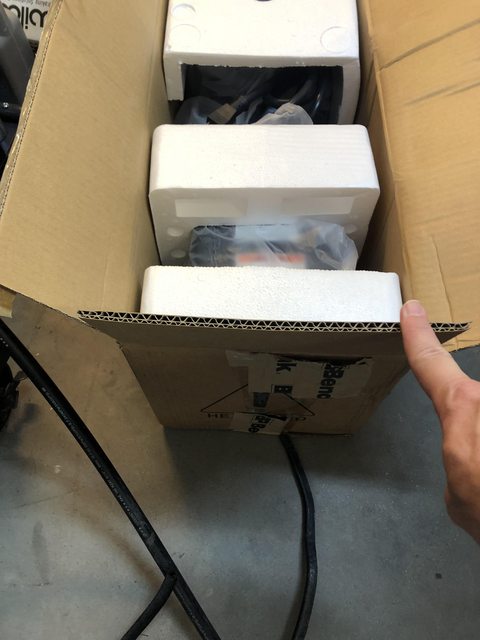
The lift! Bendpak sent me an entire replacement power unit. It arrives in a single layer cardboard box. It's 50 pounds! The bracket on the back of the motor is bent from being shipped but serviceable. The electric switch and some spray foam packaging just loosely laid over it and the styrofoam that was supporting the tank was in pieces. I wipe everything down since it was covered in oil, mount it, hook it up and fill it, plug it in and lo and behold......NOT A DAMNED THING HAPPENED. It's a brick. I left a strongly worded voice mail and email with my sales rep. I will see how they respond tomorrow.
On to my NPD order.
The 18-pound box of brackets and fasteners arrived.... I forgot the bumper bolt kit! Crap!
Oh well, I'll order that soon. The chrome bumper guards come with the rubber cushions already. I mention that because I ordered a set. No big deal. The outer arms that I ordered stated in the description that the rubber isolators were included. Mine weren't. So, I'll mention that when I call to order the bumper bolts.
I'm so damned mad about the lift....
August 12th:
Bendpak emailed me this morning asking me to send them a video of the motor not working. Really? You want video proof of my monumental disappointment when I press that button?
After I sent the video, they asked me to open the front cover, verify that there are no loose wires, and check continuity on the Up switch. I don't know about you guys, but that sounds a lot like they're asking me to be an entry level electrician.
August 14th:
I decided to reinstall my fender extensions and finish freshening them up with new hardware, etc.
First thing to do was remove the old knockout that got left in on the assembly line. The Dremel made quick work of that.
On to test fitting...the passenger side isn't bad
The drivers side is a mess.
Both fenders need replacing as well as both extensions....and the valance and stone deflector and probably the core support and most likely both front aprons.... thats all an issue for future me.
I repaired the missing nut in the core support crossmember with a weld nut from McMaster-Carr.
I also trimmed a couple of pieces of MBV and attached them to the 1" square tubing I had welded to the strut rod brackets to use for the radiator support.
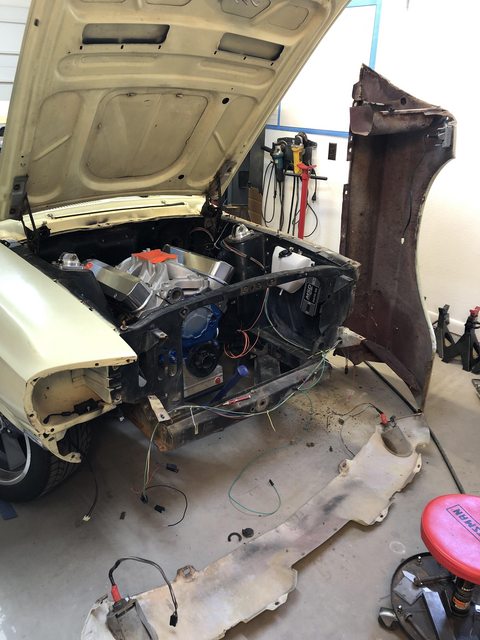
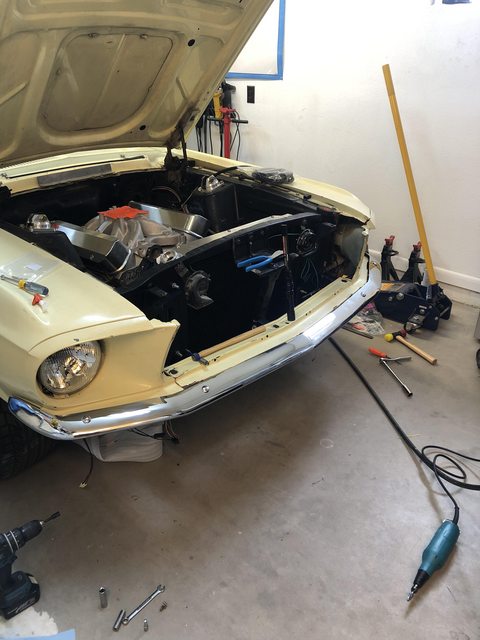
With all of that done, I can finally mount the radiator.
And I couldn't help myself, so I did a test fit of the refreshed grill to confirm that a blacked-out radiator looked better to me than the bare aluminum one....

To wrap it up, I drilled out a hole and mounted one of the two bulkheads I'll be using and started to run the 2/0 cable from the trunk up to the general area.
I'll pick up some MS21919 (Adel) clamps and start roughing in the final cable locations.
On the lift front.... Im -hopeful- that bendpak will send out a second (but functional) power unit Monday so I can get back to using my lift.
August 21st:
The second replacement power unit for the lift arrived. After comparing this one to the first one they sent, I believe the first one was either a return or a sadly packed refurb.
The latest one arrived packed better and only had a bent bracket.
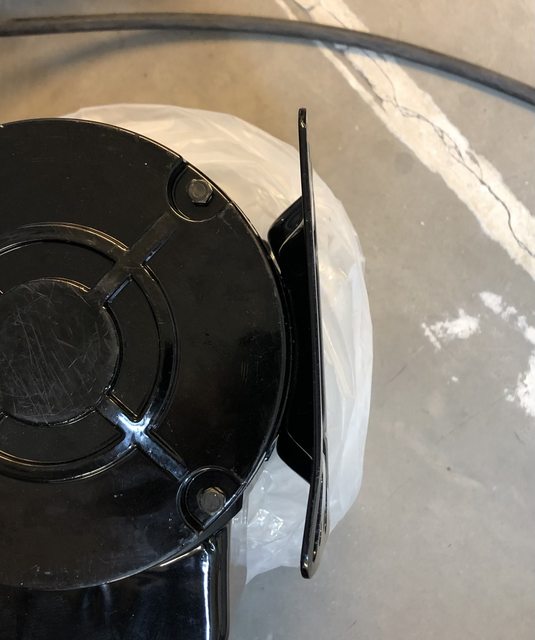
Everything is back up and running now. I'm sitting on two extra units now. The original one with a suspect pump and the first replacement with an electrical issue. We'll see what Bendpak wants to do with them.
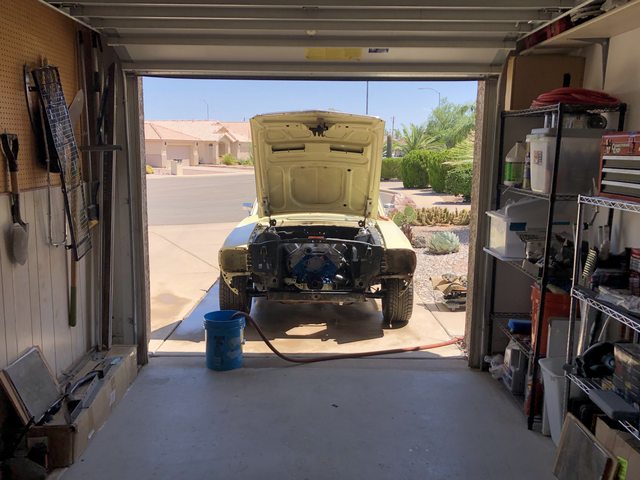
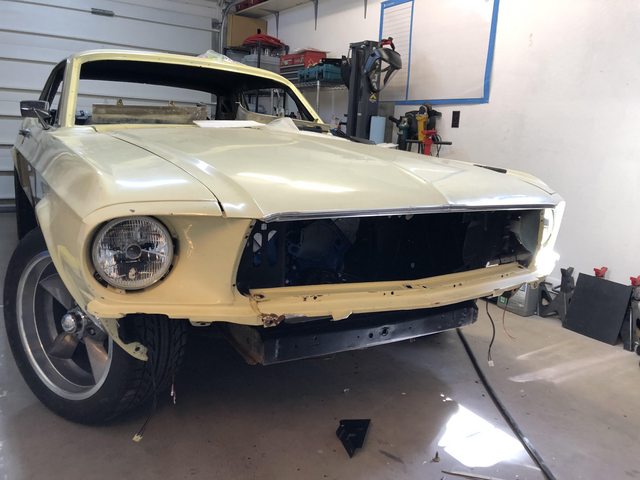
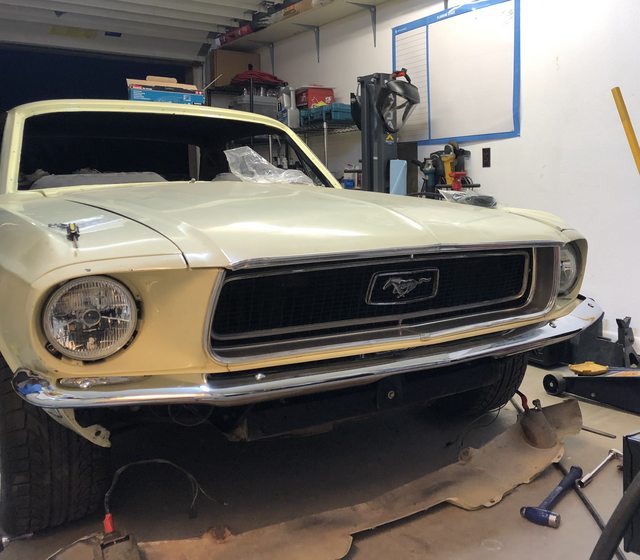
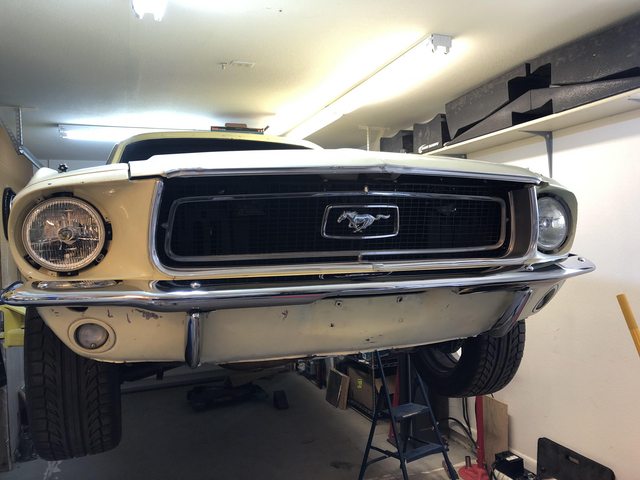
I decided to start reassembling the nose after doing all the test fitting. It gave me the chance to do something I'd wanted to do since I bought the car.... replace the bent up front bumper!!
The hood alignment isn't great, I tried to sort it out a bit but with the fender/extension issues, I doubt it'll get much better.
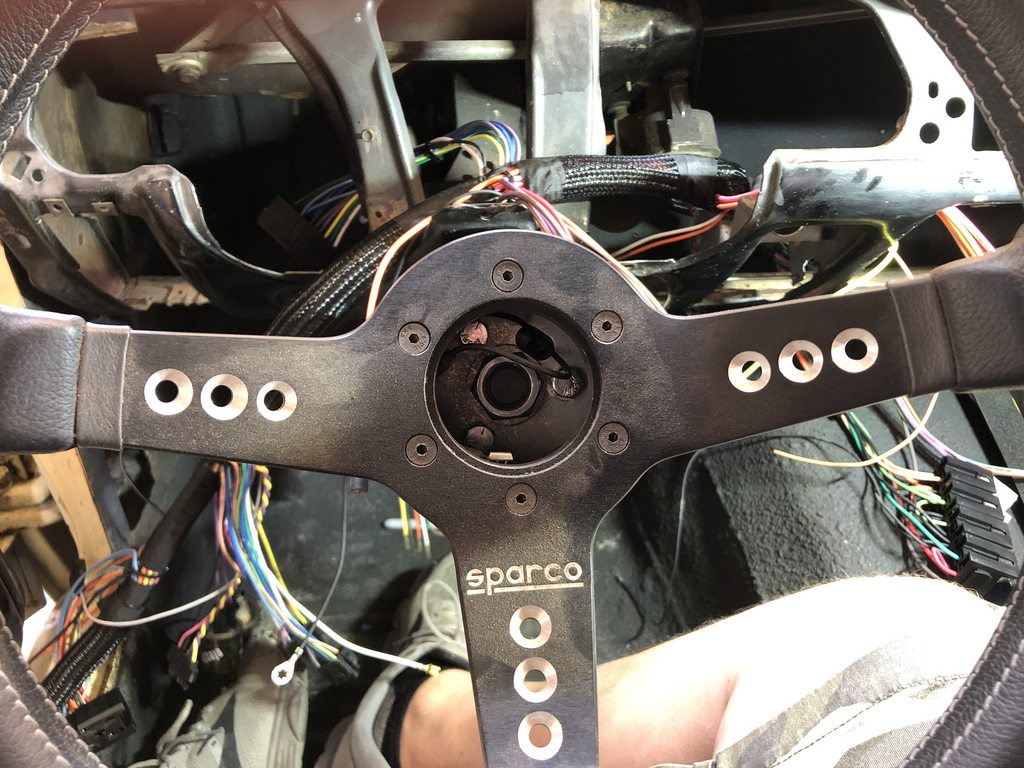
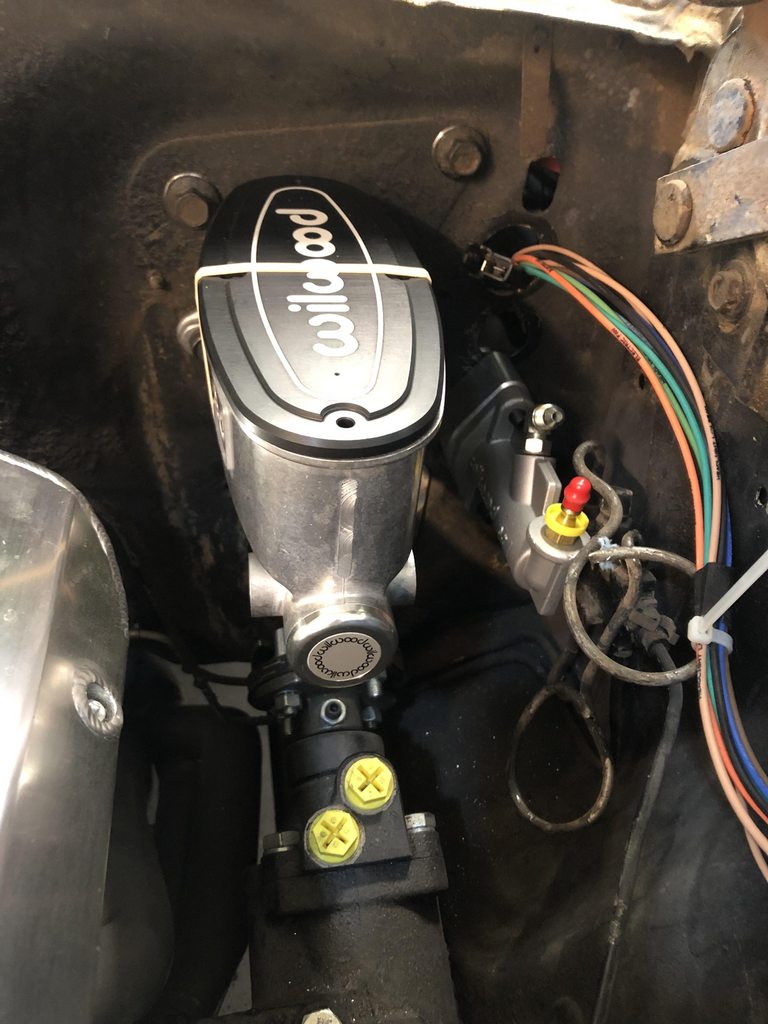
After all of that, I started to hang the MC so I could start checking the fit between that and the clutch MC.
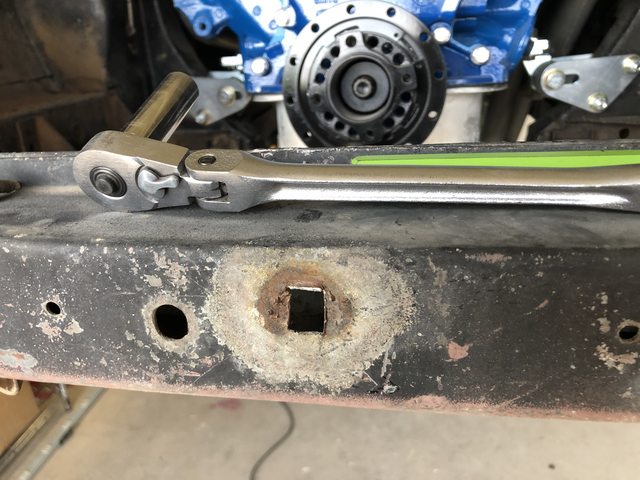
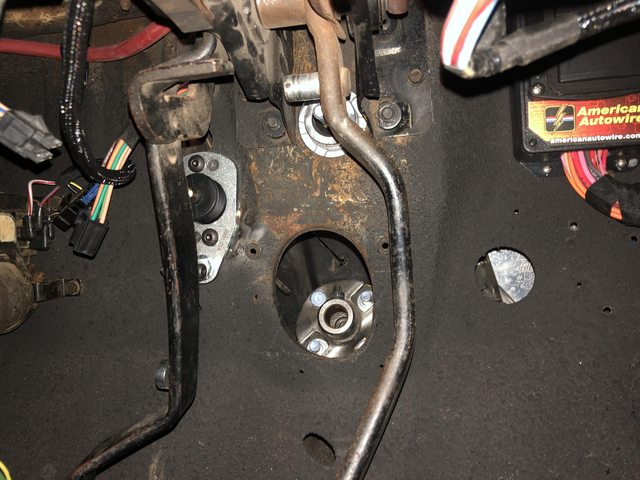
Got ready to do that and found that one of the POs had cross-threaded one of the holes....
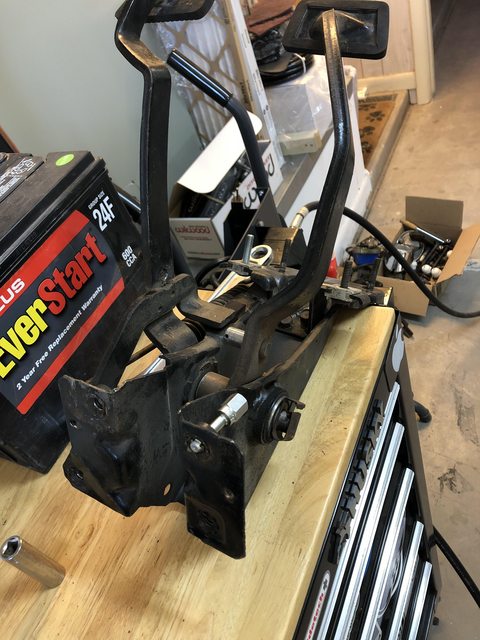
In order to fix that correctly, I pulled out the column and the pedal bracket. I'm glad I did.
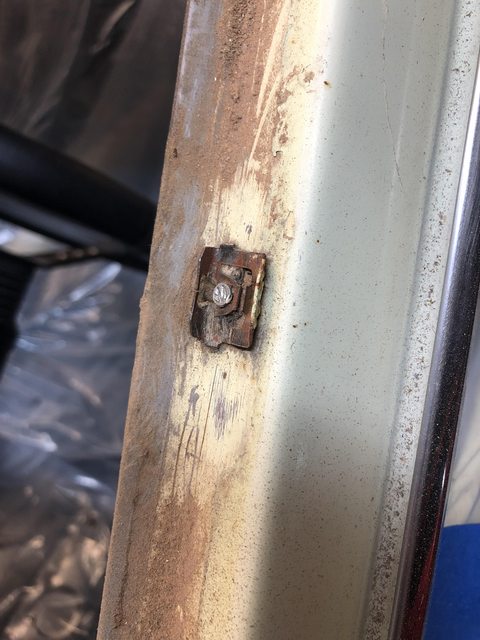
I found that the stamped nut had been spun at some point. I assume it was when the cross-threading happened.
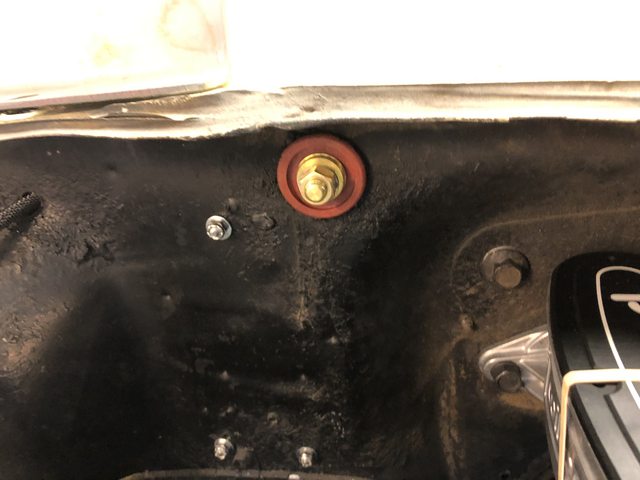
I was able to get the threads cleaned up and dragged the welder over and tacked the nut in place.
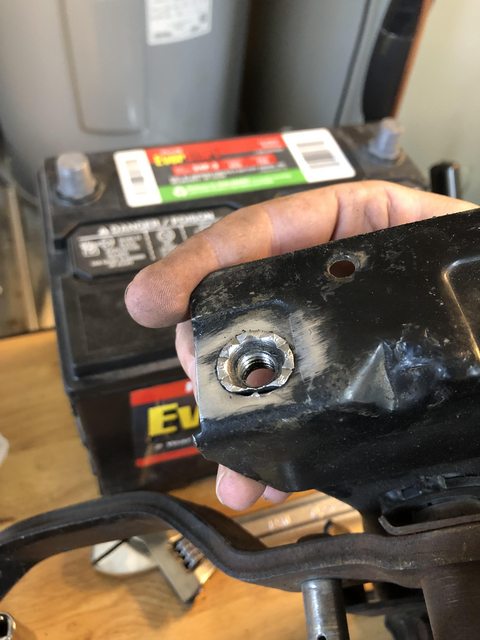
I'll need an extra set of hands to work on the hole that the clutch mc will use since it got all mangled up in the past somehow.
I decided to make progress elsewhere.
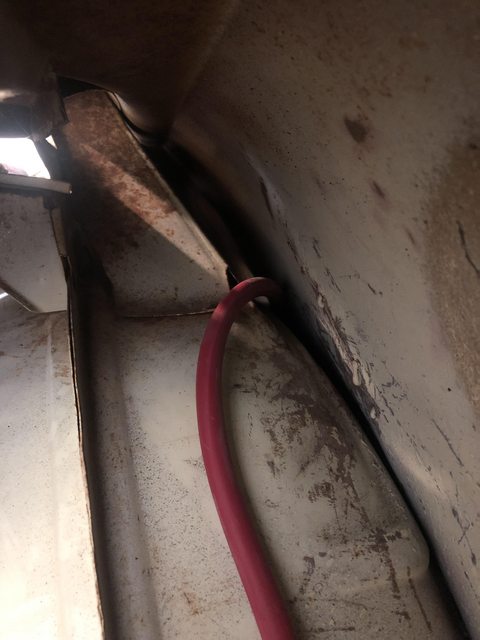
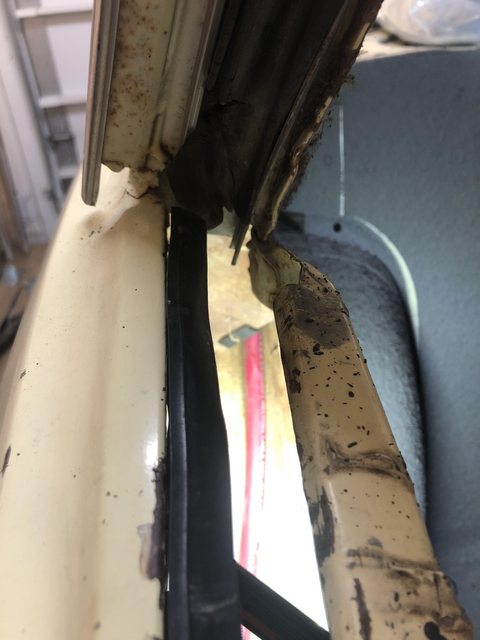
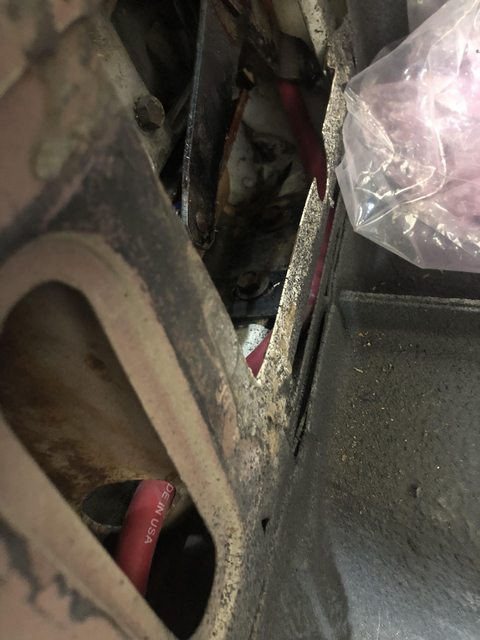
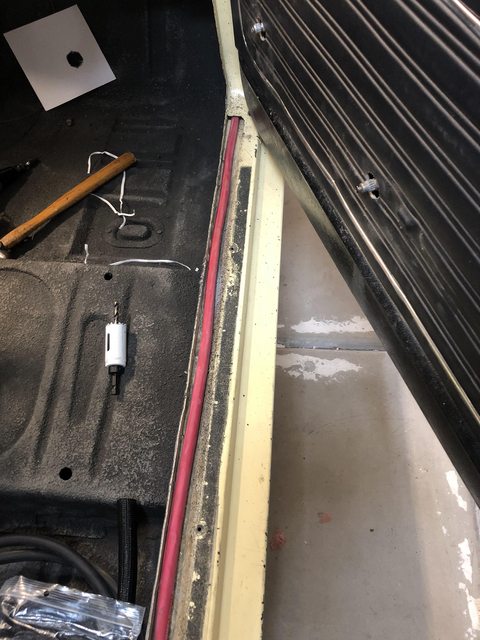
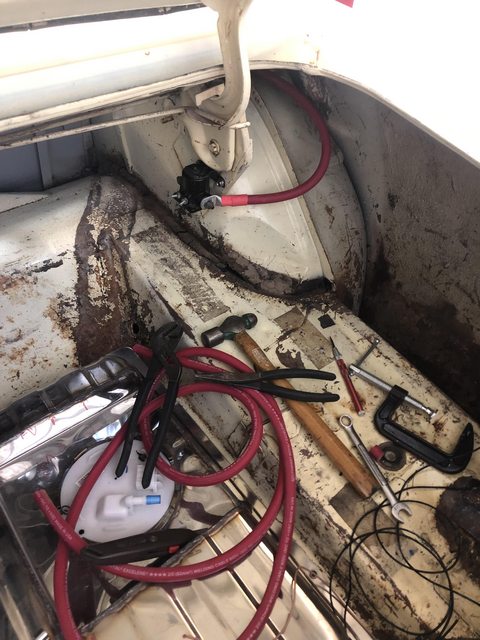
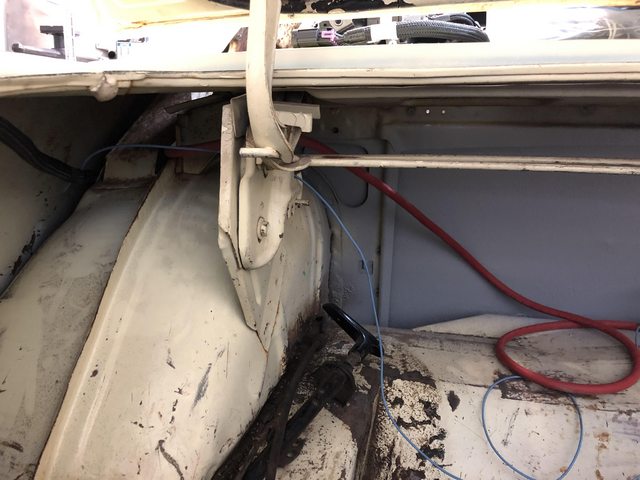
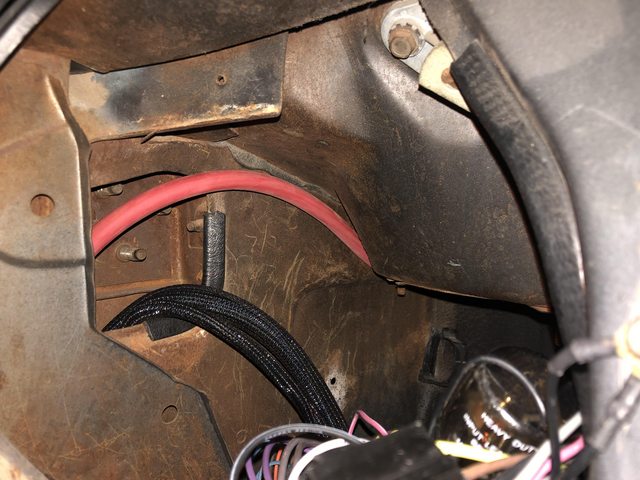
I've laid out the 2/0 welding cable that will drive the starter.
I didn't care for it laying on the wheelhouse between the quarter, so I reran it between the pinch weld and bracket. I used some old windlace to prevent the edge of the bracket rubbing against the cable.
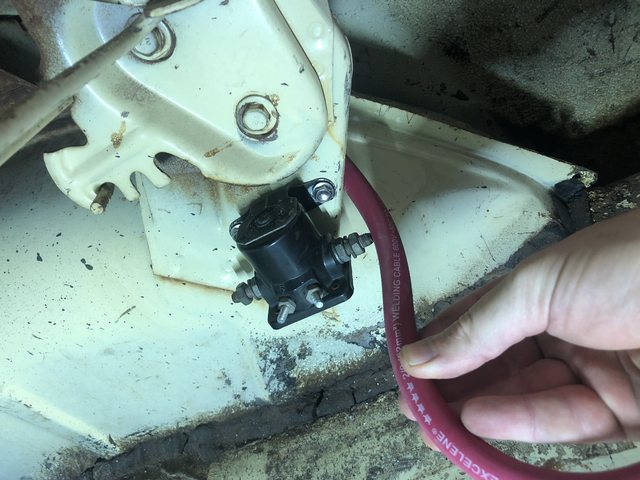
I mounted the solenoid on the trunk bracket, cut the cable to length, and put an end on it. Now to do a zillion other things before the end of the year.
 Kris - Building the poor man's '68 Mustang.
08-30-2022 #96
Registered User
- Join Date
- Aug 2012
- Location
- Phoenix
- Posts
- 158
Just wanted to quickly update the progress.
Put the pedal bracket back in and mounted the MC to realize that my driver's side prop valve bracket puts the valve in the same space that the clutch MC is. The passenger side bracket should arrive tomorrow. I've also had to weld up the split where the hole for the original clutch rod passed through and grind it smooth for the MDL bracket to fit correctly.
Decided to use an existing hole for my main power/alt connection on the firewall. The 2ga wire runs along the driver's side to the trunk similarly as the starter cable on the passenger side. Once my battery arrives today, I'll mount it and then add my fused connection to it and have power up front. I decided to move the fuse box over a little to give myself a bit more room away from the wiper motor bracket.
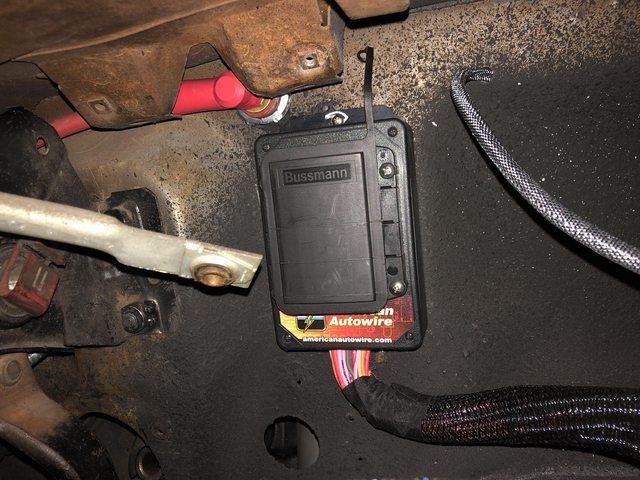
I will likely end up using this area to mount the control box for the Dakota Digital box. I don't want to put it anywhere else on the firewall since I can't be certain where the AC evaporator will sit when I finally get around to installing AC.
This is what I'm currently working on. Tying the AAW harness, Dakota Digital control box, Holley Terminator ECU, MSD 6AL, and Bowler T-56 sending unit all together in one semi-neatly hidden package..
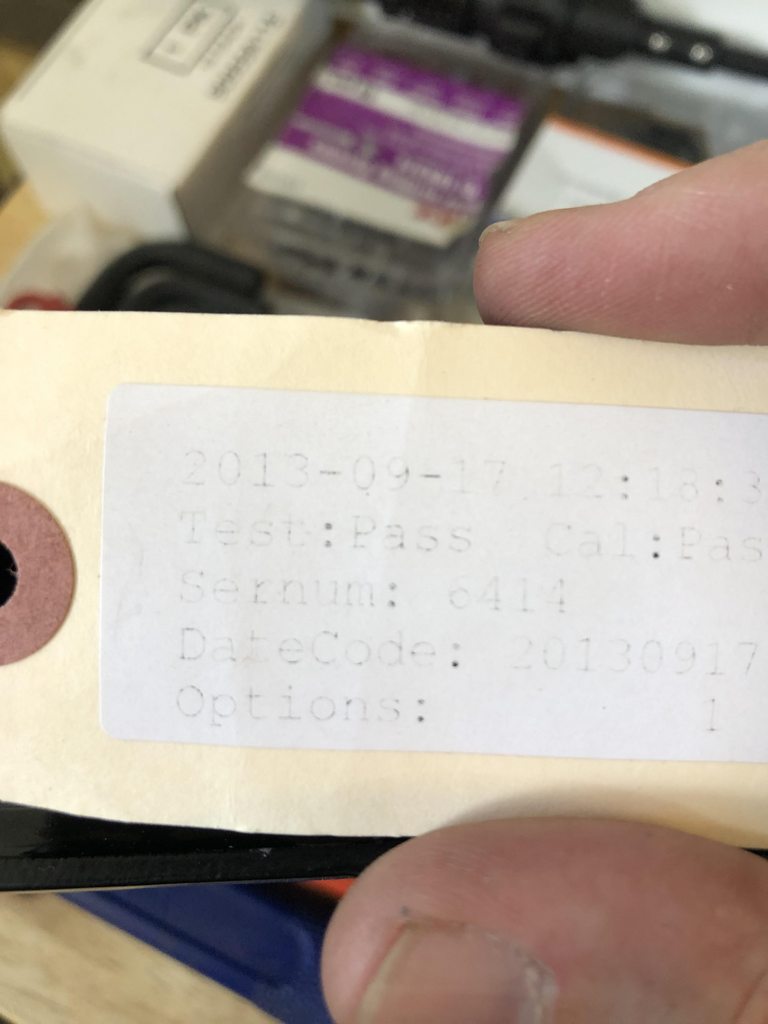
Once I get power routed to everything, I can start testing and re-testing my work. Oh, and I'll likely need a few firmware updates for my ECU. It's new in the box and here's the manufacture date/build tag.
Yes, that says September of 2013. Any of you Holley gurus care to wager how many updates it'll take to get it current?
 Kris - Building the poor man's '68 Mustang.
08-30-2022 #97
-Moderator/Sponsor-
- Join Date
- Apr 2001
- Location
- The City of Fountains
- Posts
- 15,975
Let me know if you need any help with the integration between the Holley ECU, Bowler box and DD. Hopefully you're using the DD BIM module.
Andrew1970 GTO Version 3.0
1967 Cougar build
GM High-Tech Performance feature
My YouTube Channel Please Subscribe!
Instagram @projectgattago
Dr. EFI
I deliver what EFI promises.
Remote Holley EFI tuning.
Please get in touch if I can be of service.
"You were the gun, your voice was the trigger, your bravery was the barrel, your eyes were the bullets." ~ Her
08-30-2022 #98
Registered User
- Join Date
- Aug 2012
- Location
- Phoenix
- Posts
- 158
I looked at it but have not pulled the trigger. Am I setting myself up for multiple headaches? Originally Posted by andrewb70
Kris - Building the poor man's '68 Mustang.
08-30-2022 #99
-Moderator/Sponsor-
- Join Date
- Apr 2001
- Location
- The City of Fountains
- Posts
- 15,975
No, all of those parts work well together. But the Holley software has to be configured precisely according to the DD instructions for everything to work properly, especially with the speed input from the Bowler all in one box. Originally Posted by arcane73
Andrew1970 GTO Version 3.0
1967 Cougar build
GM High-Tech Performance feature
My YouTube Channel Please Subscribe!
Instagram @projectgattago
Dr. EFI
I deliver what EFI promises.
Remote Holley EFI tuning.
Please get in touch if I can be of service.
"You were the gun, your voice was the trigger, your bravery was the barrel, your eyes were the bullets." ~ Her
08-30-2022 #100
Registered User
- Join Date
- Aug 2012
- Location
- Phoenix
- Posts
- 158
Thanks. I'll know more once I get power to everything. My primary concern was making sure I get all of the firmware updates done correctly and in order. I knew there would be some signal matching work to do when it came to making everything play nice together. Originally Posted by andrewb70
I appreciate it!Kris - Building the poor man's '68 Mustang.

 Reply With Quote


