Results 41 to 60 of 75
-
06-13-2015 #41

 Registered User
- Join Date
- Aug 2007
- Location
- Roanoke (FortWorth) Texas
- Posts
- 786
Cant wait to read the results of this comparison. We've seen the 3-link vs tri 4-bar before but not vs torque arm. I've been considering swapping out my torque arm for a 3-link for some time. Benefits would be added tunability, less weight, and it wont be in the way of things like exhaust and drive shaft which is a pain when its time to work on the car. Originally Posted by RobNoLimit

ChrisTotal Cost Involved - Ridetech - Fatman - Total Control Products - Gateway Performance - MaverickMan Carbon
-
06-15-2015 #42 Registered User
- Join Date
- Aug 2010
- Location
- now In Dandridge, Tn.
- Posts
- 1,301

Torque Arm
The challenge for a torque arm build is really in the mounting of the torque arm at each end. No doubt there are many ways to skin this cat, and a lot of them can be found here. We are taking a an approach that may be a bit simpler, and more complicated. Our approach is more permanent, with some weld in parts. This may be easier for us to make the parts, and easier for some to install, but it is more permanent. But, it does make the car more rigid, and most can be removed. All except the front crossmember and some tabs on the housing. As we had previously welded in the subframe connectors, it seamed reasonable to weld in the bridge crossmember. If we decide that we don't like the torque arm, the bridge will stay in. On the plus side, it helps add some more rigidity to the car, so we like that. There isn't much room under the car, as you all know, so any space is at a premium. We plotted and measured the underside of the car and built a bridge from .135 sheet and fitted with crush tubes to allow us to really tighten up the hardware. Also some passage ways for wiring and plumbing.
Anyway, we made patterns and cut parts to fit the floor, we planned for exhaust and plumbing, and the dropped portion of the Trailing Arm mounts will also act as a driveshaft safety loop.
08-20-2015 #43
Registered User
- Join Date
- Aug 2010
- Location
- now In Dandridge, Tn.
- Posts
- 1,301
While we have been making progress it's been slower than planned due to the Sniper IFS sales. So it's not all that bad. We are just about ready to put the IFS under the car now. We had a few changes to make. The 8" balancer for the 383 just barely rubbed the sway bar, so we put a 6" balancer on it. We decided to fab up some of the exhaust while the sub was out of the car, it's a lot easier. Test fitting the eng/trans into the sub is something that I highly recommend. It just makes things easier down the line. For the picts I bolted on the side rail stiffeners to show how they mount. These attatch to the rocker pinch weld and can also be connected to the subframe connectors. Yes, we are finally going to put the Sniper sub in the car.
08-20-2015 #44 Registered User
- Join Date
- Nov 2006
- Location
- Hildebran, NC
- Posts
- 992
Awesome!!
Go ahead and pencil me in a slot to drive this thing at Charlotte GoodGuys!!!
08-21-2015 #45
Registered User
- Join Date
- Aug 2010
- Location
- now In Dandridge, Tn.
- Posts
- 1,301
I hope we make it there with the car, and if we do, your in. Originally Posted by rchaskin
08-21-2015 #46
Registered User
- Join Date
- Aug 2010
- Location
- now In Dandridge, Tn.
- Posts
- 1,301
The big day - #1
We're finally going to put the Sniper subframe in. We're using solid 'short' mounts. We learned in trail fitment that a 3/16 spacer was requires under the center mounts on each side. Everything went right into place. The guys put the bolts in snug, and then moved the sub around to get it centered up, then tightened the main bolts. Then the subframe connector tabs. and last, the new side rail kit.
08-21-2015 #47
Registered User
- Join Date
- Aug 2010
- Location
- now In Dandridge, Tn.
- Posts
- 1,301
Side Rail kit
The side rail kit goes in with ease now. The connector tabs have already been welded in place from the test fit, and all the holes were drilled in the pinch weld. So, it's just bolts and wrenches. The plan here is to gain a few things at once. 1) Strengthen the factory connection from rocker to the 'A' and 'B' pillars. 2) Provide a stronger connection from the subframe to the subframe connector, and in so doing so, a stronger and more rigid placement of the subframe. and 3) Clean up the line on the bottom of the car. We used regular hex bolts for now, I think we're going to swap for some brushed stainless button heads down the the road.
08-21-2015 #48 Registered User
- Join Date
- Feb 2005
- Location
- Minneapolis, MN
- Posts
- 195
What brakes did you end up using?
08-21-2015 #49
Registered User
- Join Date
- Nov 2006
- Location
- Hildebran, NC
- Posts
- 992
Thats what I'm talking about.....I'll be ready. Originally Posted by RobNoLimit

08-21-2015 #50
Registered User
- Join Date
- Aug 2010
- Location
- now In Dandridge, Tn.
- Posts
- 1,301
We are running TBM (Brake Man) 13" x .812" wave cut rotors on all four corners. With TBM 4 piston calipers all around. The rears have smaller pistons than the fronts. Originally Posted by brawls43
08-21-2015 #51
Registered User
- Join Date
- Aug 2010
- Location
- now In Dandridge, Tn.
- Posts
- 1,301
Had to have a look with the wheel/tire on. How's that for steering angle. 32 degrees baby!. The side shot is at full droop, the suspension will compress 3" to RH. Can't wait.
08-27-2015 #52
Registered User
- Join Date
- Aug 2010
- Location
- now In Dandridge, Tn.
- Posts
- 1,301
Here's some of the "Want" list. .... balance bar brake set up, hydrolic clutch master, (for future swap) OE pedals and firewall bracing, adjustable pedal ratio, no firewall carving....... Not possible you say? No Limit I say.
08-27-2015 #53
Registered User
- Join Date
- Feb 2005
- Location
- Minneapolis, MN
- Posts
- 195
Nice! Thought it looked like the TBM stuff. Originally Posted by RobNoLimit
08-27-2015 #54 Registered User
- Join Date
- Nov 2008
- Location
- Lawrenceburg, TN
- Posts
- 4,086
dang! Originally Posted by RobNoLimit
09-15-2015 #55
Registered User
- Join Date
- Aug 2010
- Location
- now In Dandridge, Tn.
- Posts
- 1,301
More on the master conversion. We are now in version 3.0. Slight slotting of the lower mounting holes allow the same unit to fit a variety of vehicles, including Nova, Chevelle (A-body), and C10 trucks. I'm sure there are others due to the GM design concept of product duplication. The pivot shaft has been raised to help stabilize the input rods and reduce input angle change. We now have two link mounting holes for the link that connects to the stock pedal. You can choose 6.25 - 1, or 5.5 - 1 effective pedal ratios. One hole needs to be drilled in the OE clutch pedal, 2" down from the pedal pivot. Also, for the clutch, a 1" pass through hole needs to be drilled in the firewall for the clutch link rod.
We have chosen to use Wilwood masters with plastic reservoirs. I like these, they have a bleed port at the end of the cylinder, and the plastic reservoir makes it easy to see the fluid levels. I'll get some install picts in a few days.
09-15-2015 #56 Registered User
- Join Date
- Mar 2008
- Location
- Indiana
- Posts
- 250
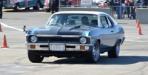
No Limit Sniper IFS test car. The Roach
I need one of those master setups badly, interested to see the final version and price. Awesome work Rob
Aarik
68 Camaro LS2/T56, Jake's Rod Shop C6 Subframe, JRS torque arm. Ridetech TQ Shocks
10-15-2015 #57
Registered User
- Join Date
- Aug 2010
- Location
- now In Dandridge, Tn.
- Posts
- 1,301
We are now in the first production run of the master mounts. Should have them avail in early Nov. Originally Posted by Hugger67RSSS
10-15-2015 #58
Registered User
- Join Date
- Aug 2010
- Location
- now In Dandridge, Tn.
- Posts
- 1,301
Getting some more done finally. The original plan was to keep the car as OE intact as we could. To make this a "bolt-together" project. When it comes to the mini-tub upgrade, that's sort of outside the plan of 'bolt-on'. Following that work and skill set, we had decided that the weld-in sub connector was in line with the mini tub work. The cage is also a weld-in, but for the safety we thought this was OK. Now to the rear suspension. We really want to be able to swap from a Torque Arm to a 3-link at any time (with an hour of work) to test out and see which is really the better choice. I have done this lately with the HellBoy and there are gains/losses (more on that later) The lower bars, panhard bar, coil-over and sway bar will be the same on each set-up, and all are tunable. Only the top link and torque arm will swap in and out.
I can totally understand why Hotchkis has had difficulty bringing a 3-link kit to market. Fitting the top link and more importantly, the front (chassis) mount for the top link, in a "bolt-on" manor, with any real strength, is almost impossible. We fabbed a 16 ga. rear tunnel section with a mount set incorporated that was to replace the OE rear tunnel along with some added bracing. It worked, yet required a lot of fab and fitting. - If you thing the mini-tub job is a pain, then this was too much. There just isn't much structure there to work with. Add in that our fine specimen, the El Roacho, had a lot of rust in the rear seat pan, and we finally gave in and accepted the idea that there will be no back seat, and no stock-ish rear seat pan. Once we crossed that line, things got a lot easier. We chopped out a large section of the rotted floor, from rail to rail and from the seat pan ledge back to the trunk rib double panel. All of the OE seams were welded, and a second, lower cross tube was added to the roll bar. Next we made a nice, strong top link rib that fits from the new crossbar back to the trunk rib. This will be the top mount for the 3-link and is plenty strong enough to take the beating. We have started to panel off the new raised tunnel area, and the interior will have a nice, flat shelf for groceries, golf clubs, pit gear, or Tina's dogs. Just no back seat. The raised shelf will also give us more room under the car, so we will raise the mufflers up so that they are flush with the side rails, not hanging down. BTW, with this added bracing, the car 'sounds' much more solid.
12-03-2015 #59
Registered User
- Join Date
- Aug 2004
- Location
- north central Iowa
- Posts
- 503
Rob,
how much if any of the rear setup will crossover to the 68-72 nova's? or are you planning on developing a rear setup for the nova? I love the looks of the front setup and am leaning toward that on my 72 when I get back on that project.72 Nova SS, on the back burner for now.
current cruiser: "The green machine"
'70 Impala 4drht, 26K original miles, 2" drop springs and large swaybars, drives pretty good for a land yahct in the middle of an ls1 swap, but thinking about changing directions to a duramax diesel swap.
12-04-2015 #60
Registered User
- Join Date
- Aug 2010
- Location
- now In Dandridge, Tn.
- Posts
- 1,301
Most of the parts would cross over with very litle or no mods. I am still wondering about the viability of this rear suspension in kit form, there is a lot of fab work. - but it does work awesome.

 Reply With Quote