

Results 81 to 100 of 217
Thread: 70 Formula 535
-
05-28-2018 #81

 Registered User
- Join Date
- Jul 2013
- Location
- N. Scottsdale
- Posts
- 379

Thank you. Yes, AZ. We installed the field (about 1/4 acre) because there really isn't anywhere in our neighborhood for the kids to run around.
-
05-28-2018 #82
Registered User
- Join Date
- Jul 2013
- Location
- N. Scottsdale
- Posts
- 379
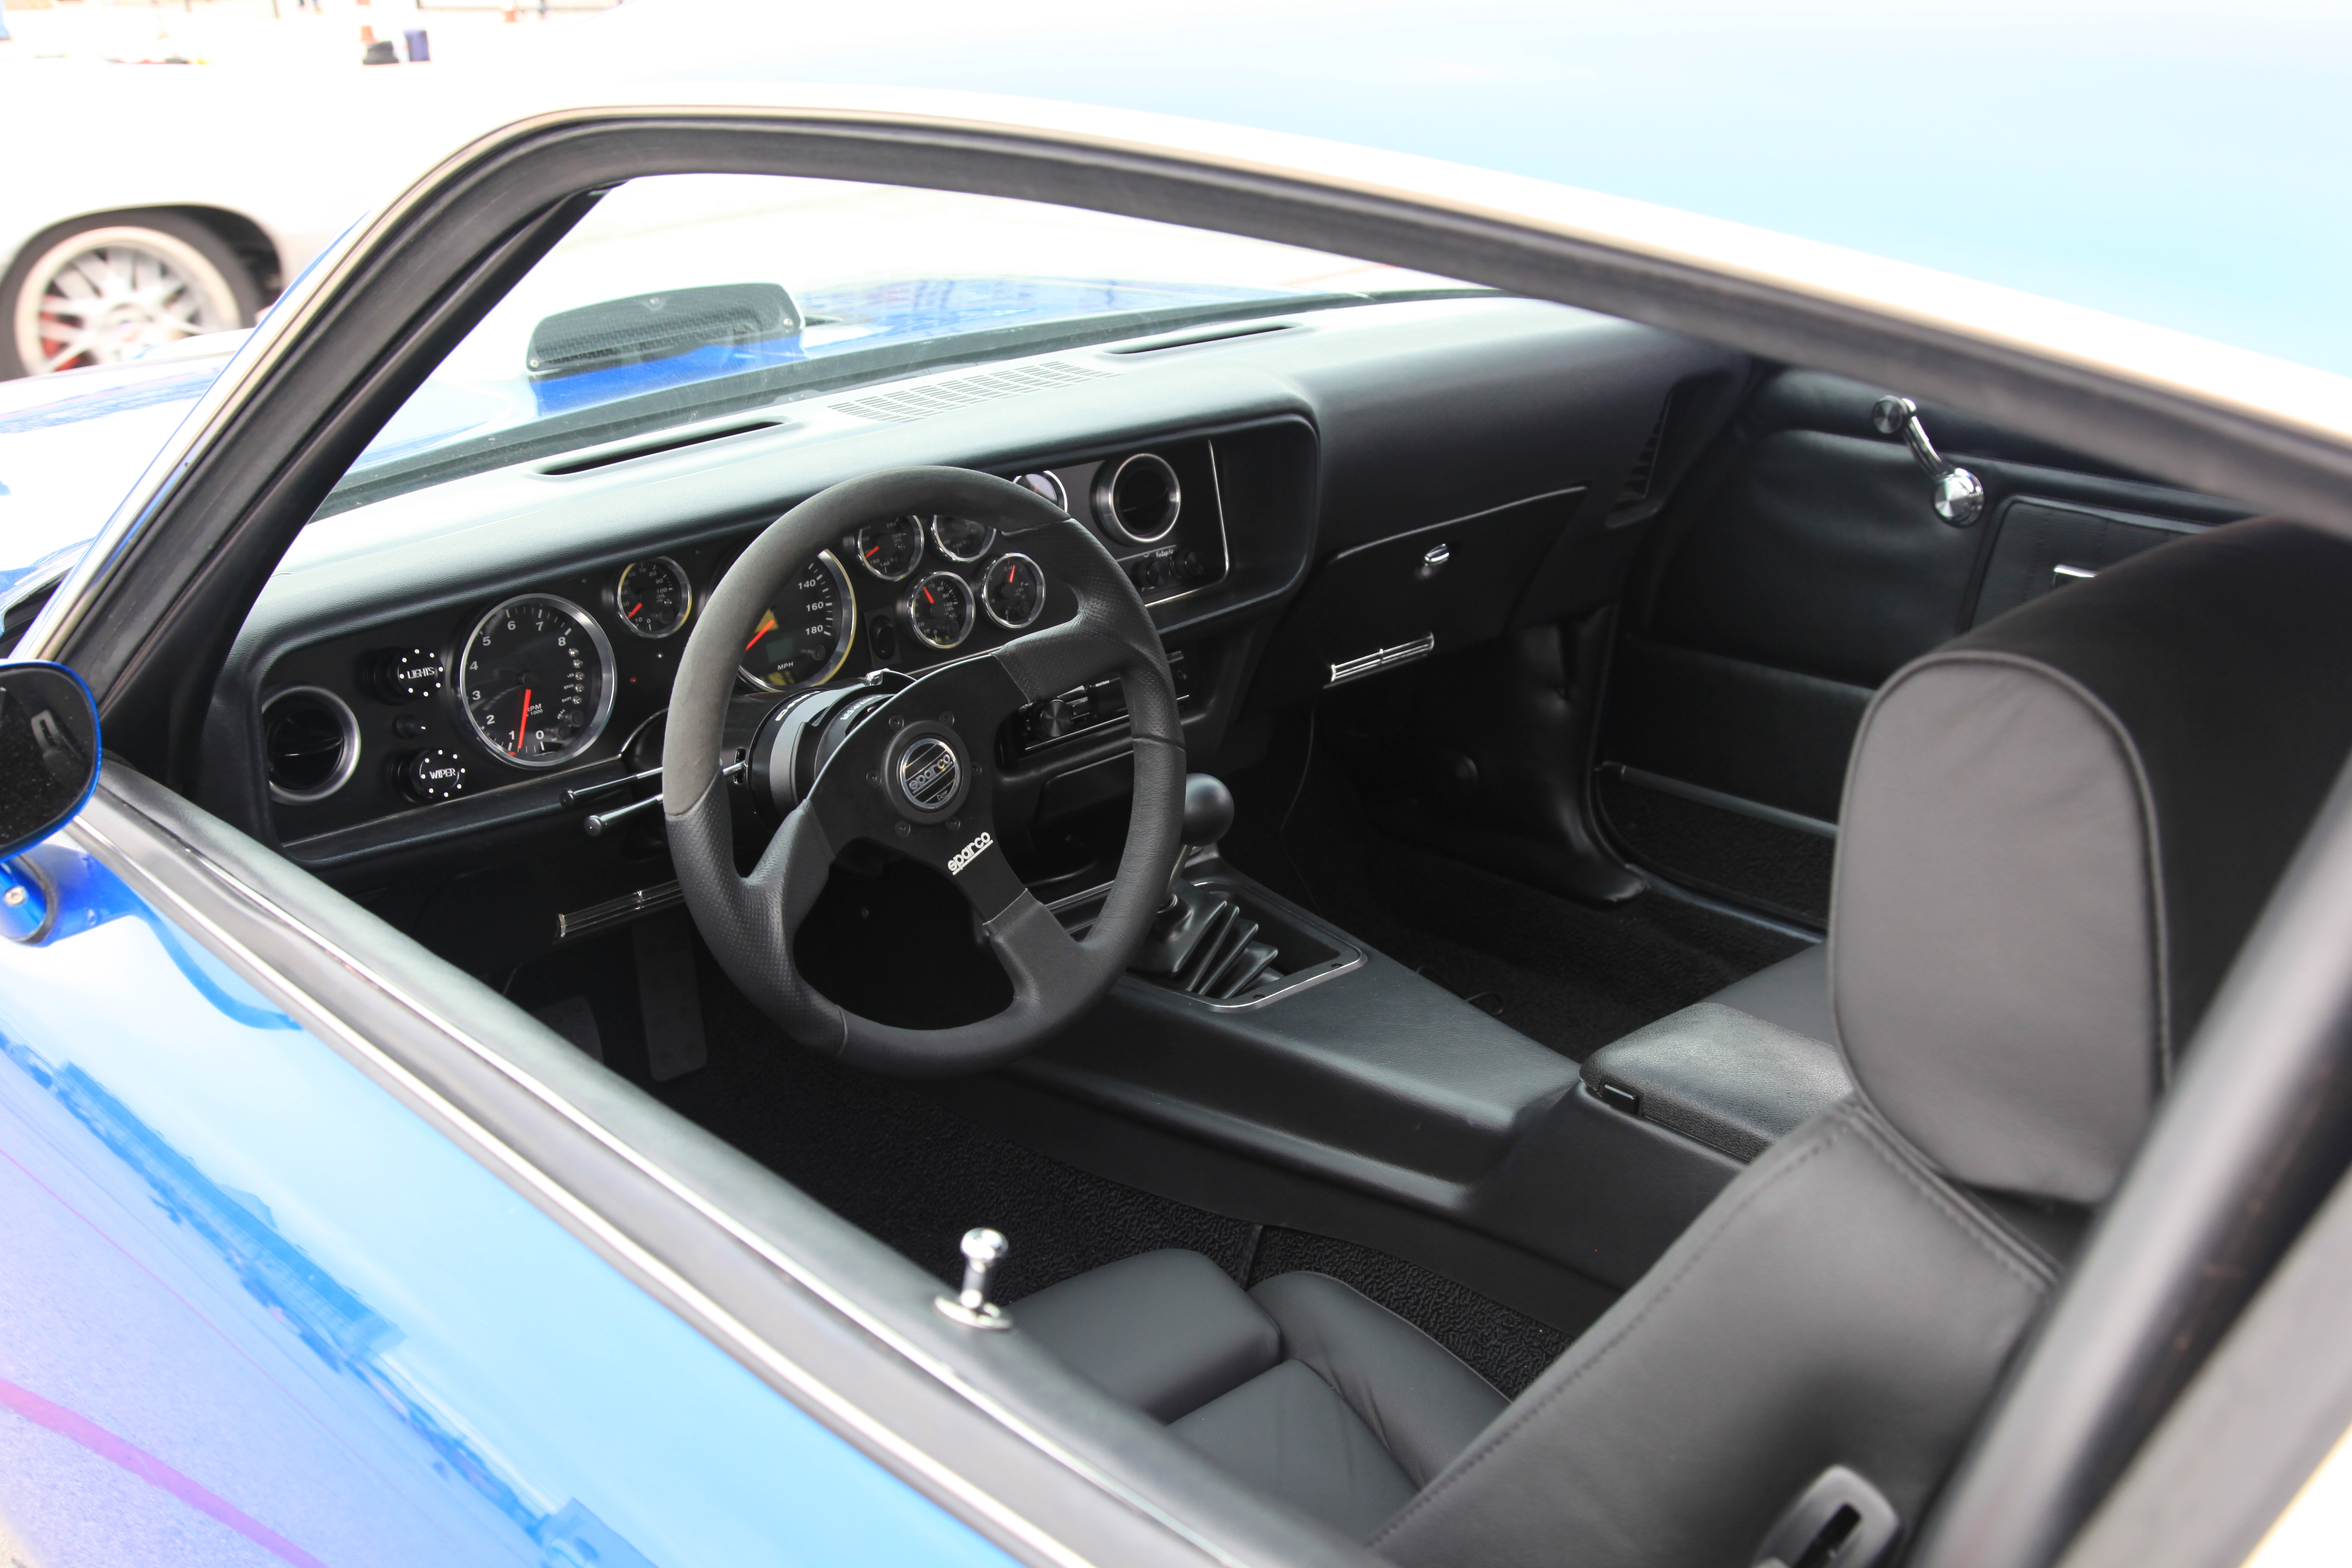
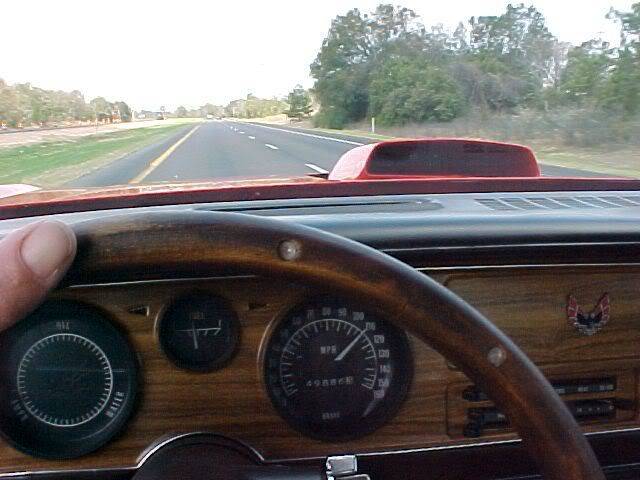
I know I'm looking way ahead, but thinking about what to do about gauges.
Option 1: Factory woodgrain dash bezel with factory gauges. I really like the look of the factory gauges (160mph, 8k), but they need to be restored. I used AutoInstruments.com last time I did this. They turned out great, but I believe it cost right around 1k. Although the dash bezel would be correct for the car, I'm not sure a woodgrain dash would look quite right in a build like this.
Option 2: Use a factory Trans Am dash bezel (machine turned) and factory gauges. I suspect the dash bezel would look more at home in the build, but I'd still have to pony up to get the factory gauges restored.
Option 3: Factory woodgrain dash bezel with aftermarket gauges. Perhaps there are some advantages to having modern gauges, and the cost would be a wash in the end. The concept of a GPS speedo appeals to me. But I have no idea of where to start with something like this. I don't even know if aftermarket gauges go in the factory pods and mount like the originals, or if they attach to the back of the bezel somehow. And then there's the signal indicators, wiring, etc.
Option 4: Trans Am dash bezel with aftermarket gauges. This would give me the most updated look.
What to do?
05-28-2018 #83 Registered User
- Join Date
- Aug 2004
- Location
- Austin, Tx
- Posts
- 495
Option 4, although I am admittedly biased. I used Speedhut's 4.5" speedo and tach and their small other gauges from the Revolution line. I've been happy with them.
 Bryan (a.k.a. Carbuff)
70 Camaro RS Hunk'o'Metal - Previous Project
71 Firebird Project T.O.W. - New Project
05-31-2018 #84
Registered User
- Join Date
- Jul 2013
- Location
- N. Scottsdale
- Posts
- 379
I like what you did with your dash. Very nice interior. So many different directions one can take. Originally Posted by carbuff

06-01-2018 #85
Registered User
- Join Date
- Jul 2013
- Location
- N. Scottsdale
- Posts
- 379
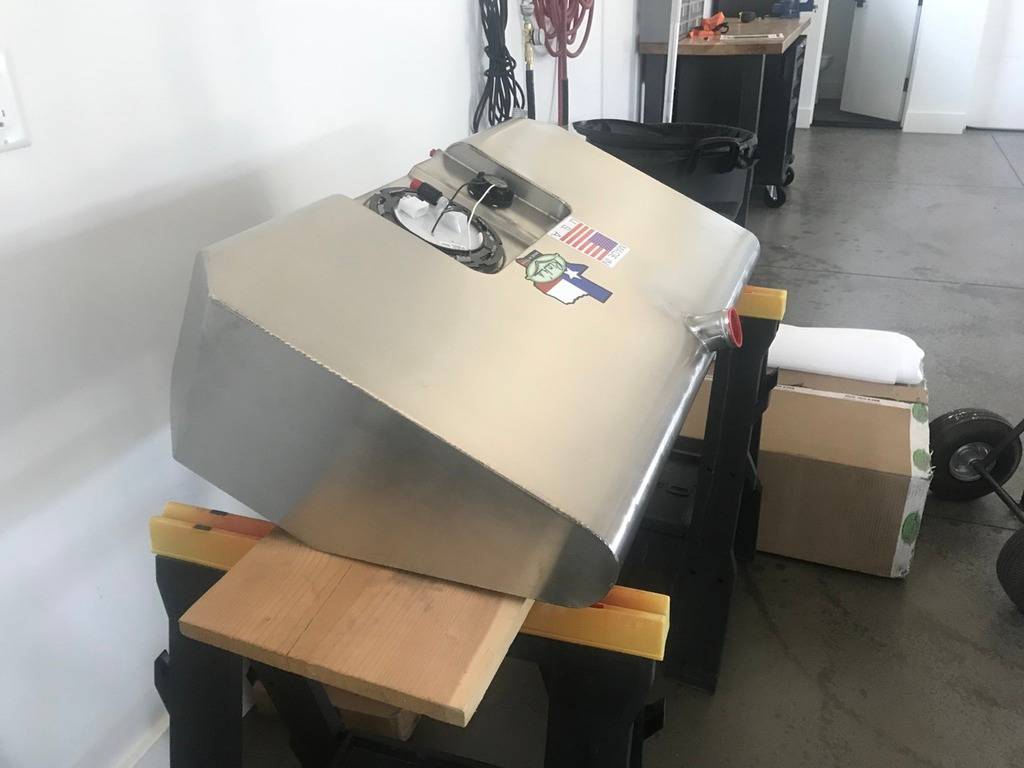
Finally called Rick's and ordered the fuel tank. It will be set up with ZL-1 pump, corner pickups, vaporworx, etc. It will also be wired to work with the Fast EZ EFI 2.0 I have, which uses a negative trigger.
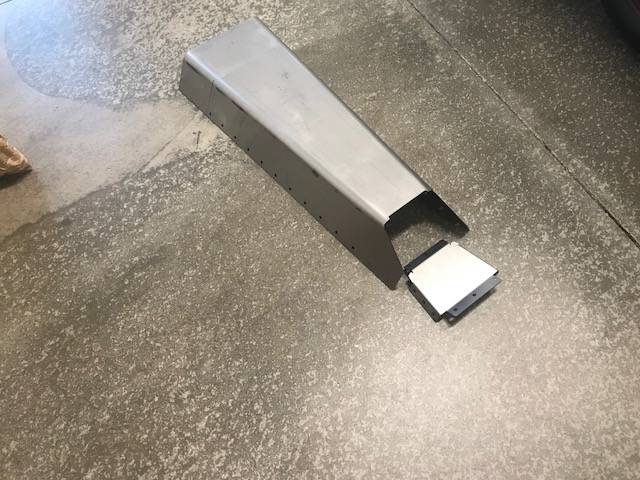
Received the T56 tunnel cover from Speedtech yesterday. Thought about starting from scratch on this, but I think the cover provides a good starting point, and should save a few hours of labor. The main piece looks exactly like the 67-69 part--hope I received the right one. There is an end cap for the back end, maybe that's the difference?
I also ordered a fuel pump trunk access panel from DSE. I believe it's cost effective given the time it would take to make something similar.
Am now doing research on header material. Not sure whether I should go with stainless or mild steel with some sort of ceramic coating.
06-01-2018 #86
Registered User
- Join Date
- Sep 2004
- Location
- Fresno, Ca
- Posts
- 379
Something else to consider....
https://www.holley.com/products/ls_p...ts/71223008HKR
06-01-2018 #87
Registered User
- Join Date
- Sep 2004
- Location
- Fresno, Ca
- Posts
- 379
It's for an LS/T56 swap, but I bet the T56 ends up pretty close to where it would when attached to a Poncho V8-- besides, it look like there's a fair amount of room in the porch/cover.
06-01-2018 #88
Registered User
- Join Date
- Jul 2013
- Location
- N. Scottsdale
- Posts
- 379
Here's the speed tech cover.
06-27-2018 #89
Registered User
- Join Date
- Jul 2013
- Location
- N. Scottsdale
- Posts
- 379
Need to order my brakes. The plan all along has been Baer 6P 14" front & 14" rear with park brake & hydroboost (Hydrotech), but after reading through threads in the brake forum, I feel like my decision making on this was way too simple...don't want to make a mistake.
06-27-2018 #90 Registered User
- Join Date
- Jul 2013
- Location
- Gilbert, AZ
- Posts
- 934
Curious what you end up with. I'll be getting brakes later this year after my car spending freeze ends and I'm in my new house... and I have some spare $$$$ to buy some brakes. Originally Posted by Alponcho
Josh Campbell- Pushing the limits of my HOA since 2011
71 Firebird- 455, Ridetech front suspension. https://www.pro-touring.com/threads/...04#post1124504
67 Camaro RS/SS clone, Speedtech front suspension, coilovers, soon to get LT1/T56.
82 Z28- cheapie beater, soon to get a 406.
66 Mustang coupe- 393, T-5, sold. https://www.pro-touring.com/threads/...-Coupe-GT393-C
06-28-2018 #91
Registered User
- Join Date
- Jul 2013
- Location
- N. Scottsdale
- Posts
- 379
My car spending freeze lasted about a year longer than I anticipated. There were so many things towards the end of the project we didn't plan and budget sufficiently for...A/V stuff, automated blinds, glass shower doors & hardware, mirrors, pavers driveway & walkways, pool extras and decking, BBQ area, perimeter fencing, landscaping, irrigation, outdoor lighting, curbing for the field, sod, compressor lines in the detached garage...it all added up. Originally Posted by CampbellshotrodsAZ
06-28-2018 #92
Registered User
- Join Date
- May 2005
- Location
- Houston
- Posts
- 215
As far as gauges and dash is concerned, have you looked at what Year One has to offer? The built a few Bandit cars with a nice looking gauge set up. A little bit of factory feel but updated. The door panels look good as well.
Wick
'71 Camaro RS Project
06-29-2018 #93 Registered User
- Join Date
- Mar 2007
- Location
- Florida
- Posts
- 2,391
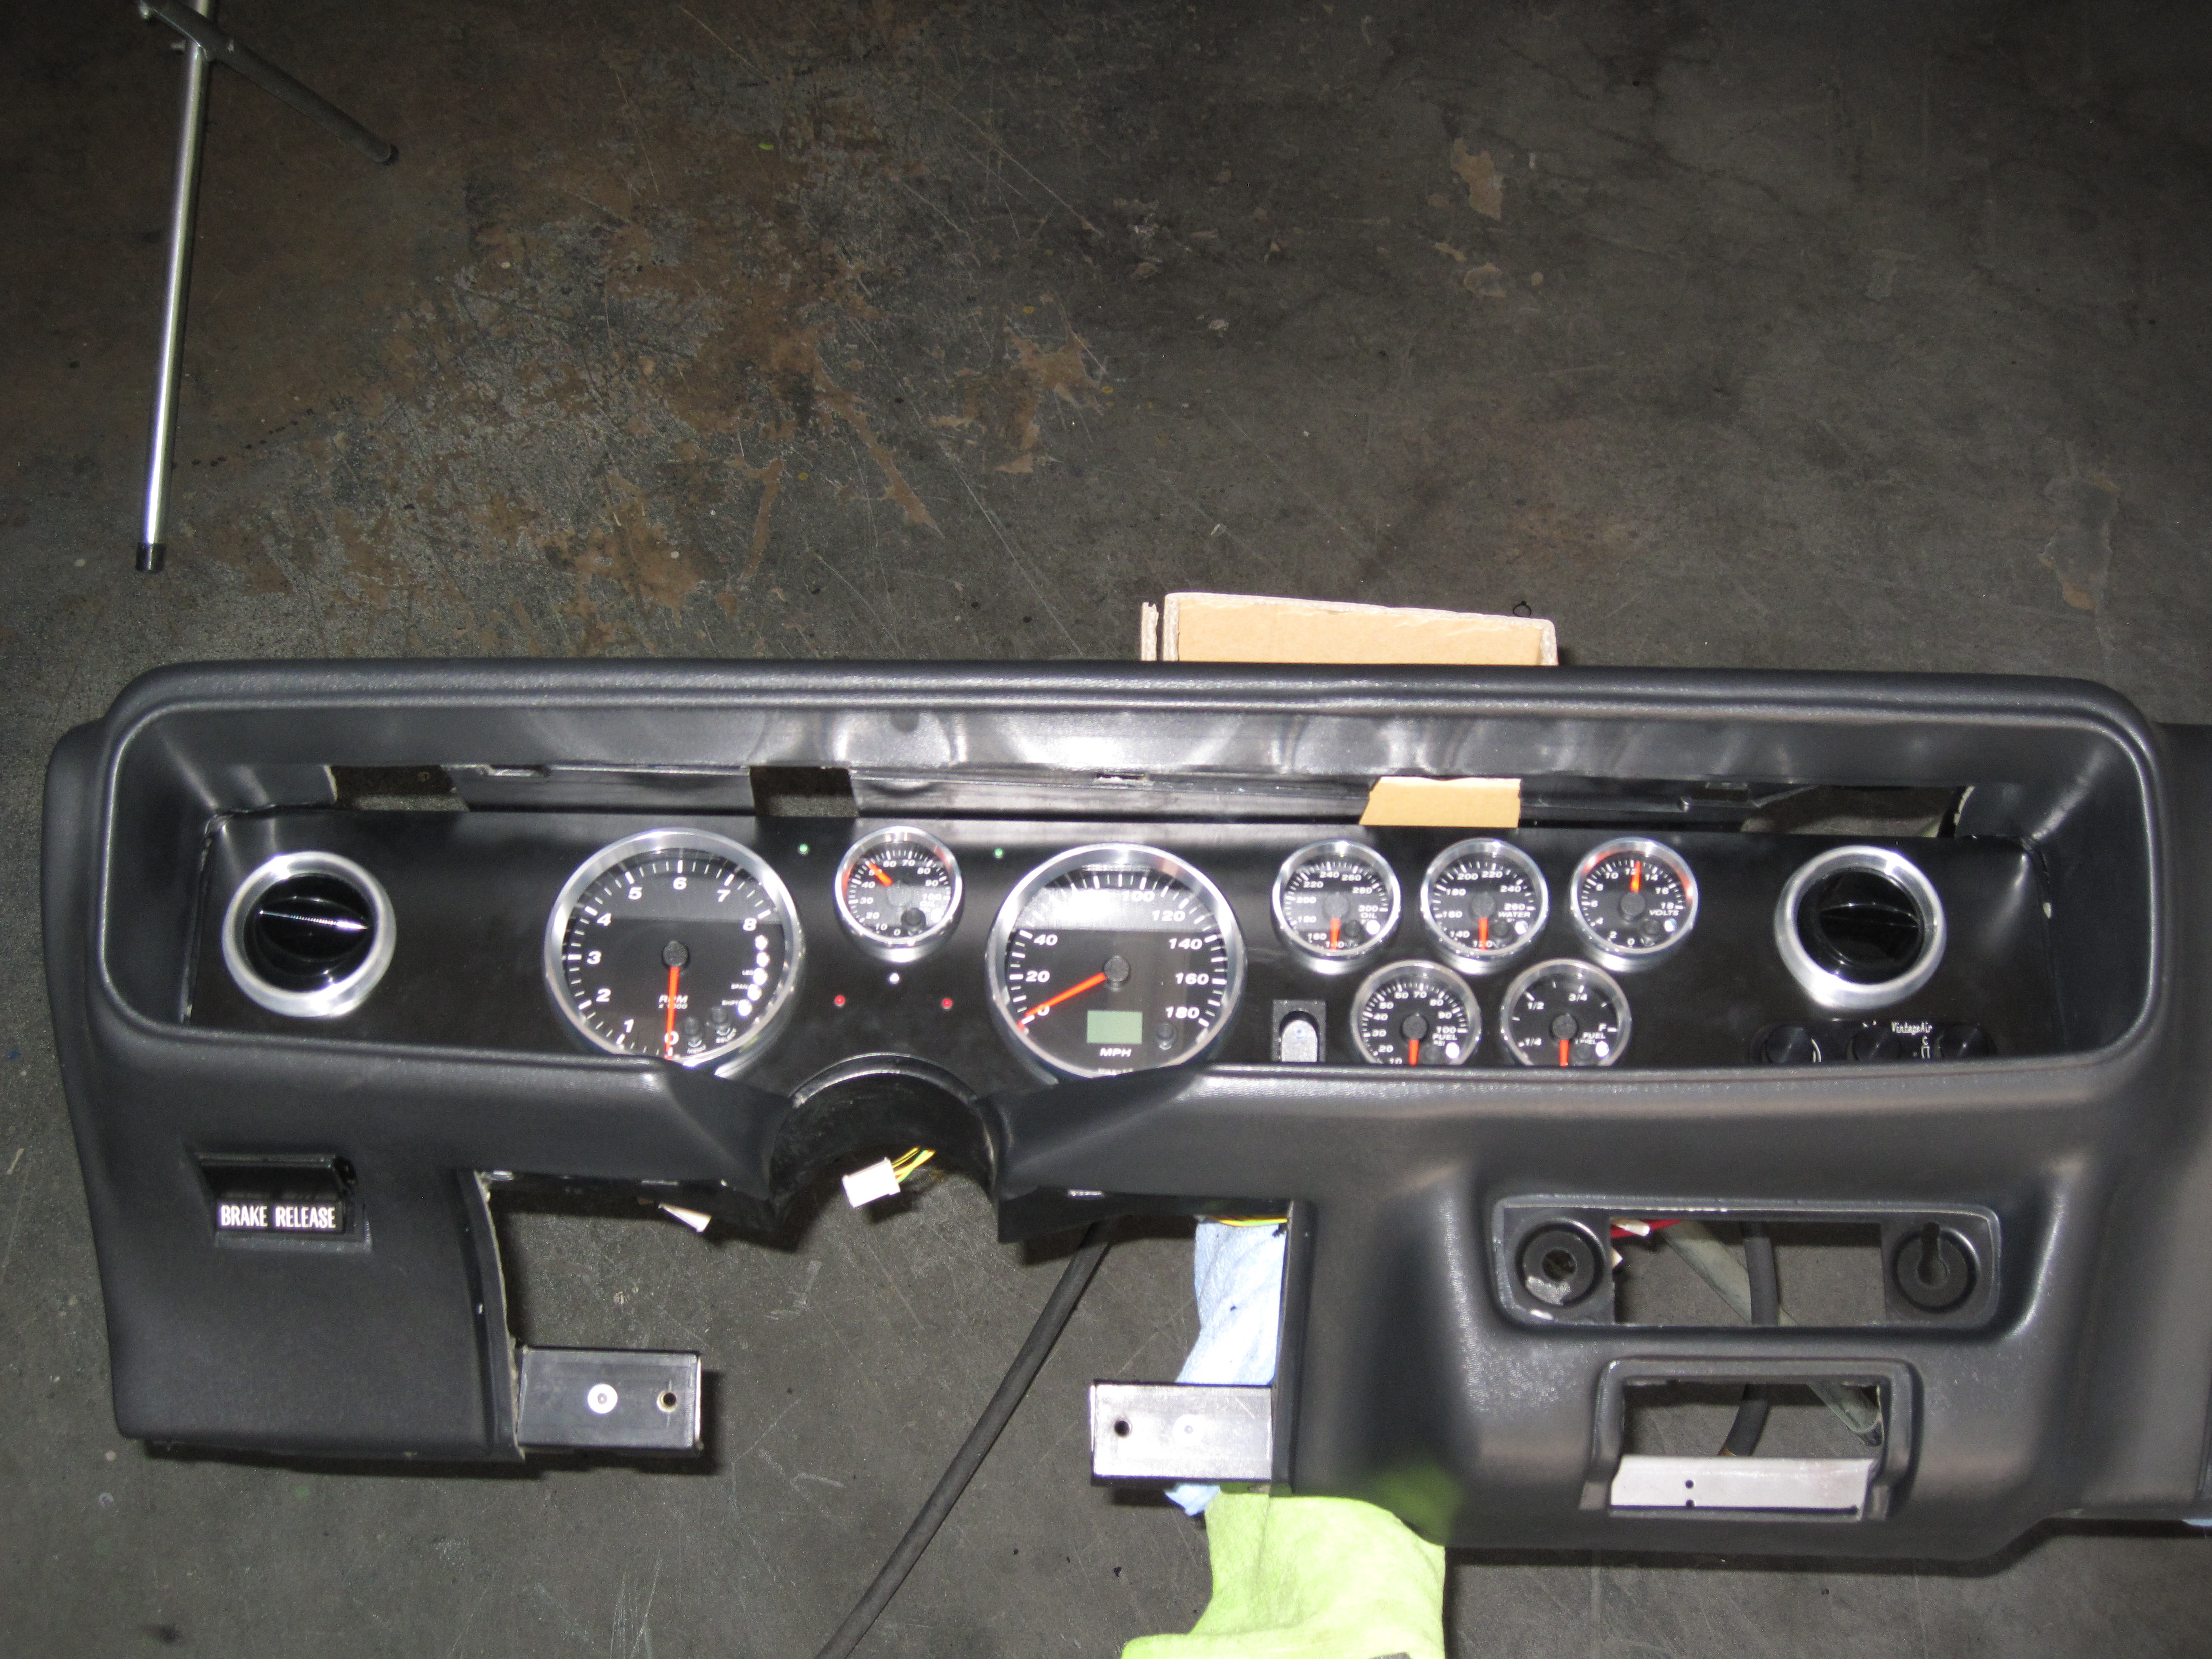
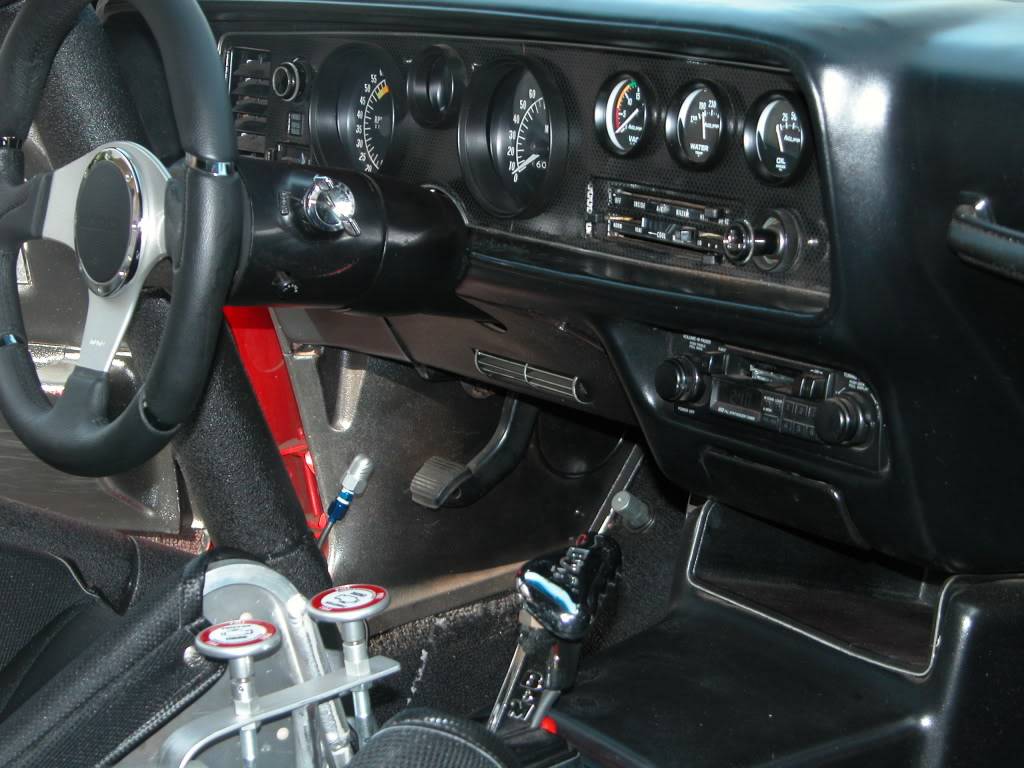
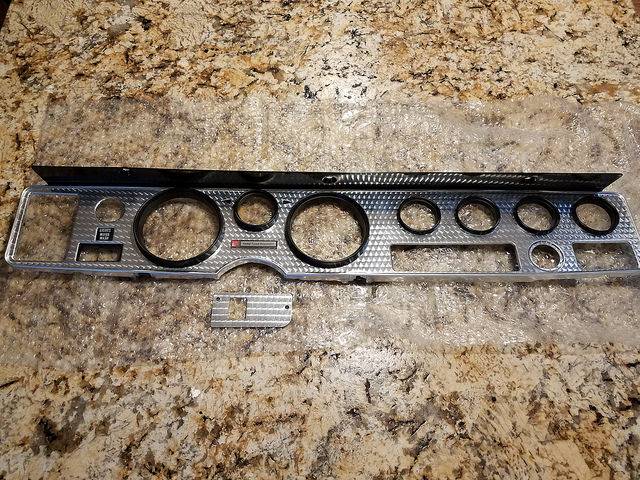
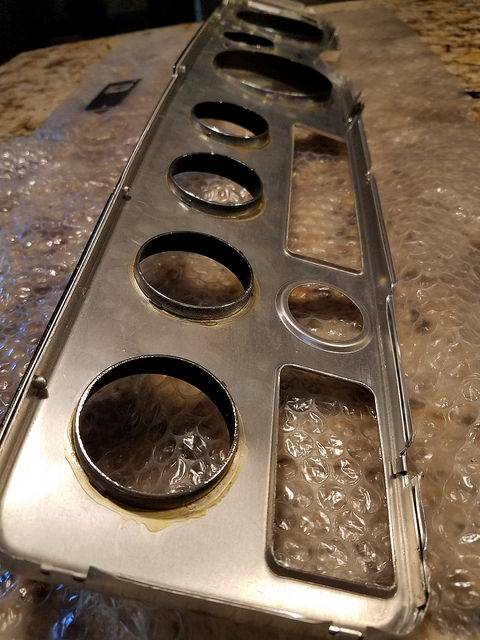
The dash panel in the bandit cars Year one made I saw didn't include a finished edge on the panel that makes them look home made and unfinished. They look like carbuffs mock up pic above instead of the nice finished look like his installed pic with the aluminum trim. Whoever designed the 2nd gen Firebird dash put a lot of thought into it and did a really nice job. It's very difficult to improve on the layout. I'll post a couple pics below and here's a link to a build thread on one of the dash panels I've done. Might give you ideas even though these were done 8-12 years ago now. http://transamcountry.com/community/...?topic=31560.0
I've tried working with the various light (early) and darker (later 2nd gen) wood grain dash panels but the wood grain gives them a "dated" look from the 70's that just looks kinda funny to me in a car with modern components in the interior. So I haven't used them in anything but (non TA) restorations. I actually had a wood Grant wheel to go with the wood dash panel in my own car for 10-15 years up till maybe '05.
I have the Baer 14" with 6P front and rear installed (untested). The rear 14's are kinda overkill for a street car as you won't need the heat dissipation advantage unless you're on track. Mine is a manual set up with twin master cylinders so no experience with Hydroboosting them. You'll need at least 18" wheels and be very careful about valve stem placement.

06-29-2018 #94
Registered User
- Join Date
- Jul 2013
- Location
- N. Scottsdale
- Posts
- 379
The dash panel you made looks terrific. Really like the carbon fiber look. However, I decided to use a really nice engine turned dash bezel I picked up recently. It's in great shape and it looks right in a Pontiac. The only negative is that it's from a later TA and has the radial tuned suspension emblem. I've only done restorations and so I'm used to being a stickler for correctness, but as I make more progress, I'm sure I'll get over it. I think I'll used Speedhut gauges. They should fit well and are customizable so I can try to mimic factory colors. I'll go with GPS speedo with fuel level, tach, battery, oil pressure and engine temp. I think I'll set up the dash panel like an A/C car, with the two holes on the right reserved for vents (I'm going to use Vintage Air). I plan on skipping the vents under the steering wheel and glove box. Originally Posted by NOT A TA
With respect to brakes, I'd definitely consider manual...would be simpler and less expensive. Just don't know if I would regret it given that the majority of time will be street/highway. What drove your choice?
My wheel of choice right now is 18" Forgeline GA3.
One more thing, why do I need to be very careful about valve stem placement?
08-04-2018 #95
Registered User
- Join Date
- Jul 2013
- Location
- N. Scottsdale
- Posts
- 379
Did some traveling with the family in July, so not much progress. Tank showed up on Friday so maybe next week we'll install it, along with the exhaust and everything else we'll need to get the headers made.
Also very close to ordering brakes, wheels & tires. Am thinking Baer 6p 14", Forgeline GA3 (titanium or satin gunmetal centers, brushed outer), Rival S. Open to suggestions for alternatives that are less expensive. Otherwise, I'm hoping vendors have better pricing than what I see online if I buy direct!
08-08-2018 #96 Registered User
- Join Date
- Jul 2007
- Location
- Phx AZ
- Posts
- 25
Nice place out there, u off of Pima ? Looks like pinnacle peak behind ya. Did a lot of dirt bikin out that way.
08-09-2018 #97
Registered User
- Join Date
- Jul 2013
- Location
- N. Scottsdale
- Posts
- 379
Thank you. Good eye...just to the west of pinnacle peak. It's an area of 5 acre lots between Jomax and Dynamite, all on dirt roads...for now. City wants to pave on the two main roads they control to mitigate dust. I believe 2 or 3 property owners (of the 30 or so in here) are holding it up. Originally Posted by Rebob
08-12-2018 #98 Registered User
- Join Date
- Sep 2005
- Location
- Athens, GA
- Posts
- 341
I love this project! I was hoping to see the car completed after I read the first page. I jumped to the last page to see the finished car.

I can't wait to see it done.The difference between an environmentalist and a developer is that a developer wants to build a house in the woods, an environmentalist already has one.
08-12-2018 #99
Registered User
- Join Date
- Jul 2013
- Location
- N. Scottsdale
- Posts
- 379
Sorry to disappoint, but I had no intention of stringing this project along for 4 years now. I really do hope to finish it in the upcoming year. Originally Posted by southernfriedcj
08-31-2018 #100
Registered User
- Join Date
- Jul 2013
- Location
- N. Scottsdale
- Posts
- 379
Worked on the car a bit today.
First thing I noticed was fluid dripping from the same front shock I had fixed a few months ago. Can't tell where it's leaking. Back to DSE on Monday. Hopefully they'll send me a new ball joint boot, new nylock nuts for the shocks and sway bar coupler, and the castle nut for the ball joint (which I lost).

Tried to install the steering column to get ready for the header guy, but I ran into a problem. There is no way to get inside the subframe and DSE engine mount to tighten the set screw on the u-joint connected to the steering rack. I'm wondering if this is unique to the Pontiac engine mount. Also wondering how I'm going to deal with this issue. Has anyone run into this?
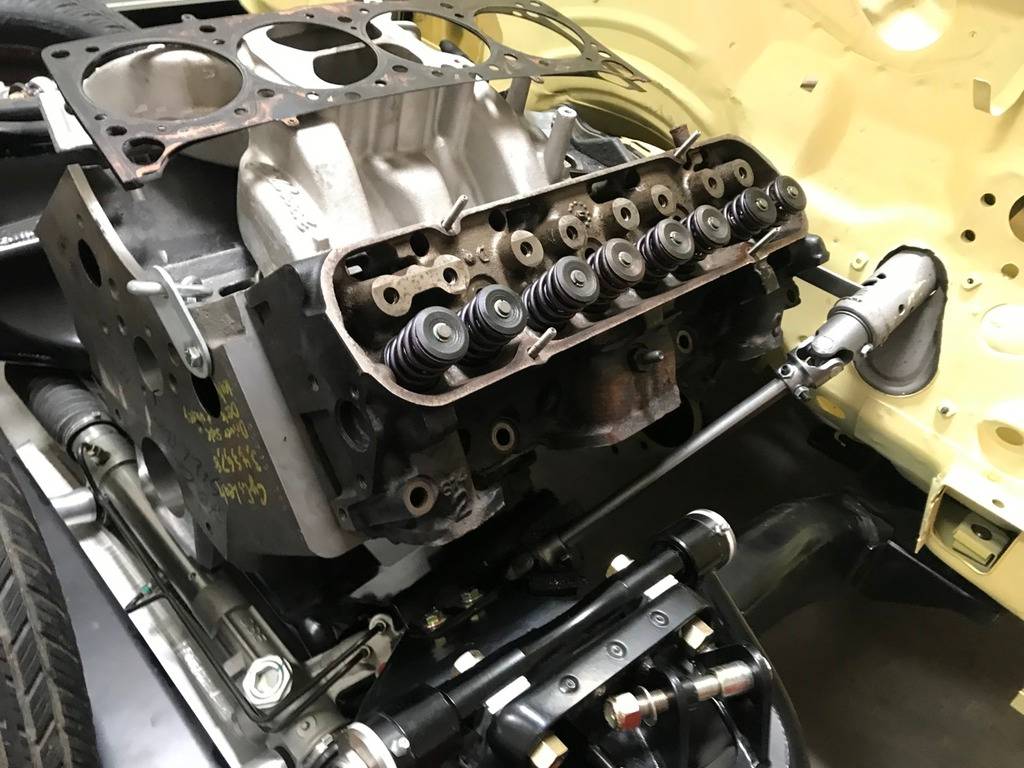
Because the front end of the car is at the body shop, we decided to mock it up with iron block and iron heads (Pontiac folks might wan to take a close look) and whatever else we can find that will be heavy.
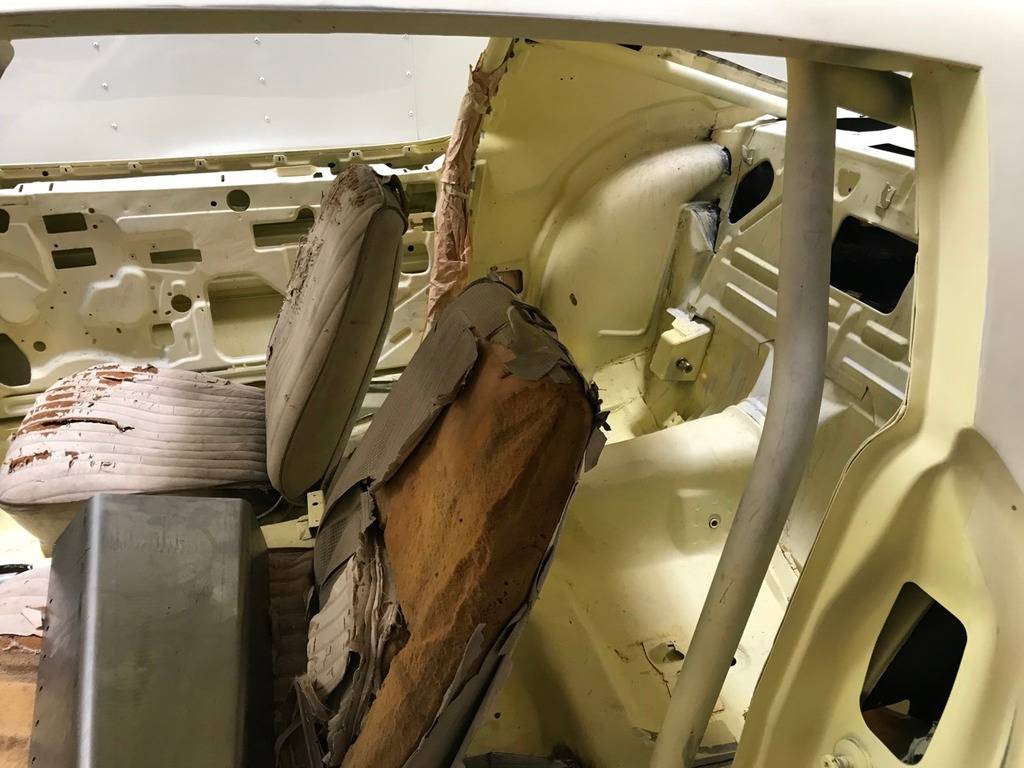
Installed the original seats to get an idea where I should have the cross bar welded. I know I should be doing this up with the seats I'll be using, but with brakes, wheels and tires on the horizon, I need to wait. The bar can't be any higher than the door opening, and I know the Recaros won't sit lower than these seats, so it looks like I'll be good to install it a couple inches below where it bends.
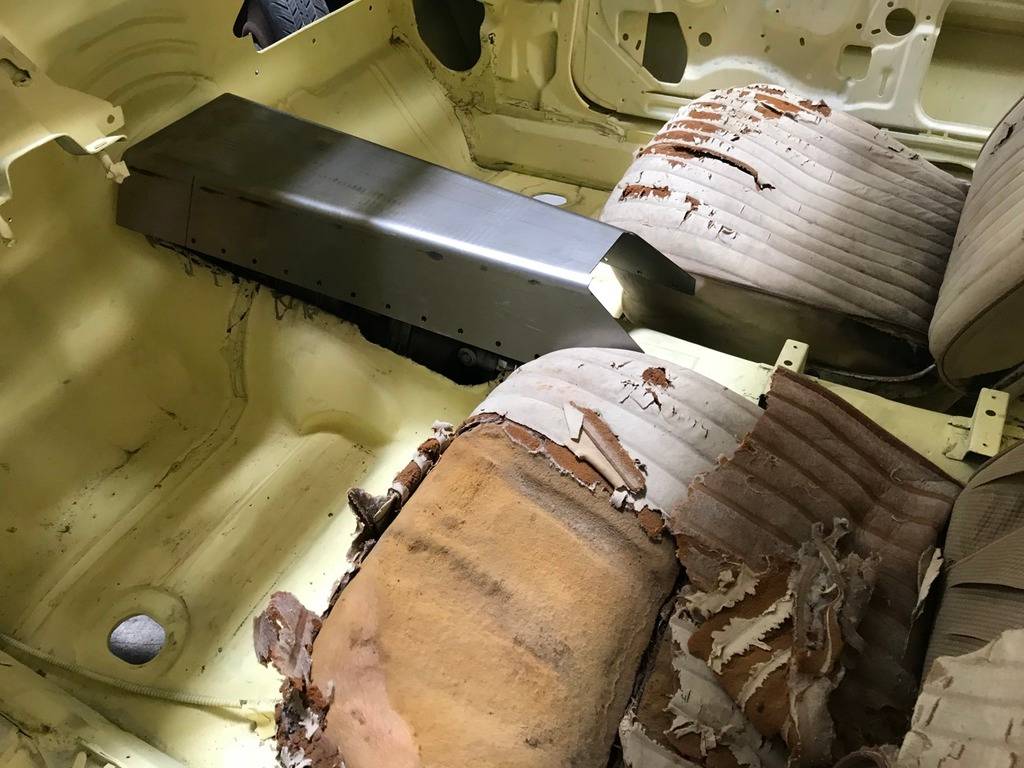
I thought we cut too much out of the tunnel, so I was relieved to see that the Speedtech cover will fit in place perfectly. This will save my body guy a few hours.
Tags for this Thread

 Reply With Quote


