

Results 41 to 60 of 429
-
05-20-2014 #41
 Registered User
- Join Date
- Jun 2008
- Location
- Acworth, GA
- Posts
- 255
 Bring it!!
 Originally Posted by chevyz240

-
05-22-2014 #42 Registered User
- Join Date
- Aug 2004
- Location
- Västerås, Sweden
- Posts
- 332

This is the view from the laundry room.
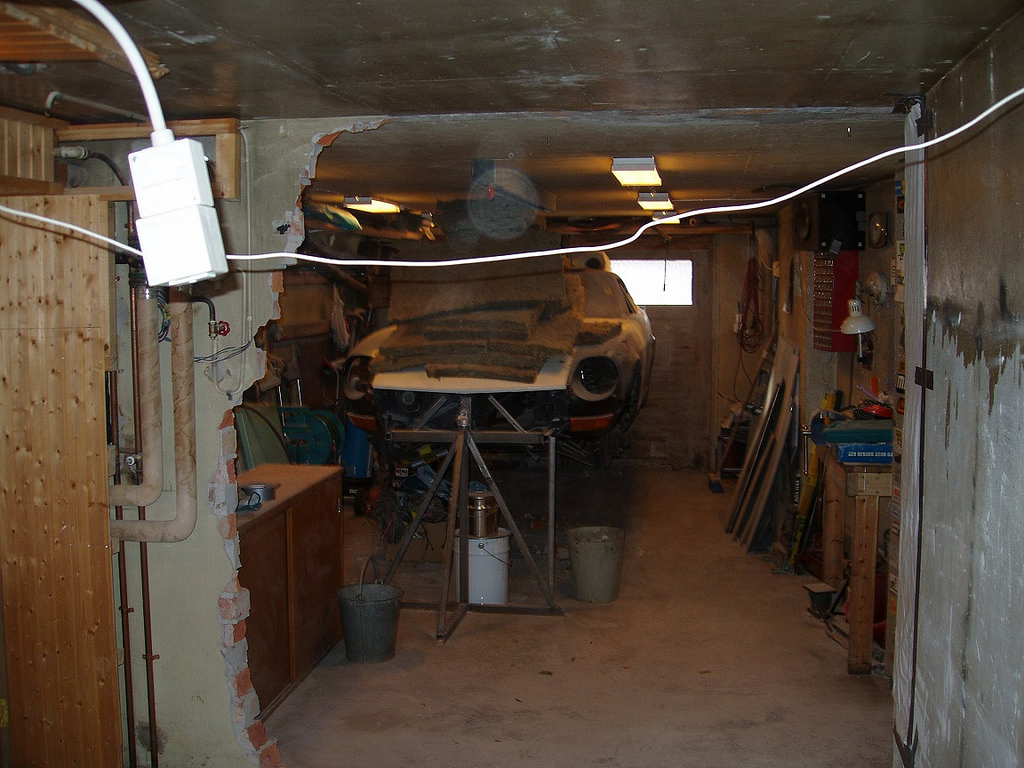 PA090005liten by ChevyZ240, on Flickr
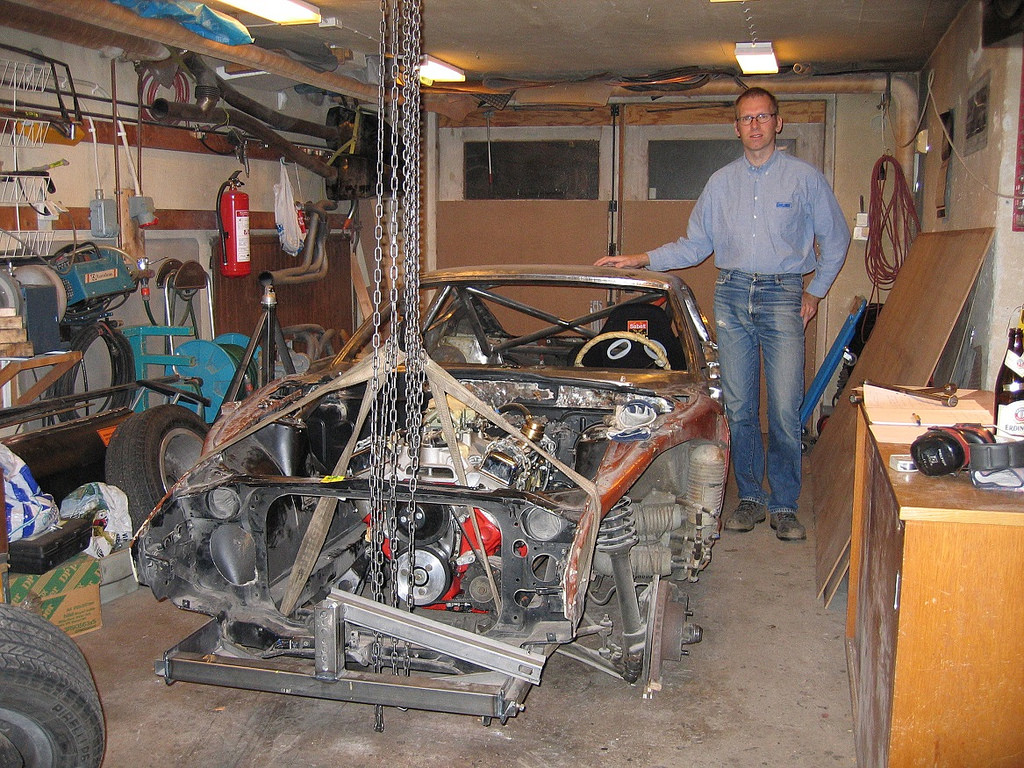
In order to park the Porsche in the inner part of the now two-car garage, the Datsun had to come down from the rotisserie. This was fairly easily accomplished by using two chain hoists.
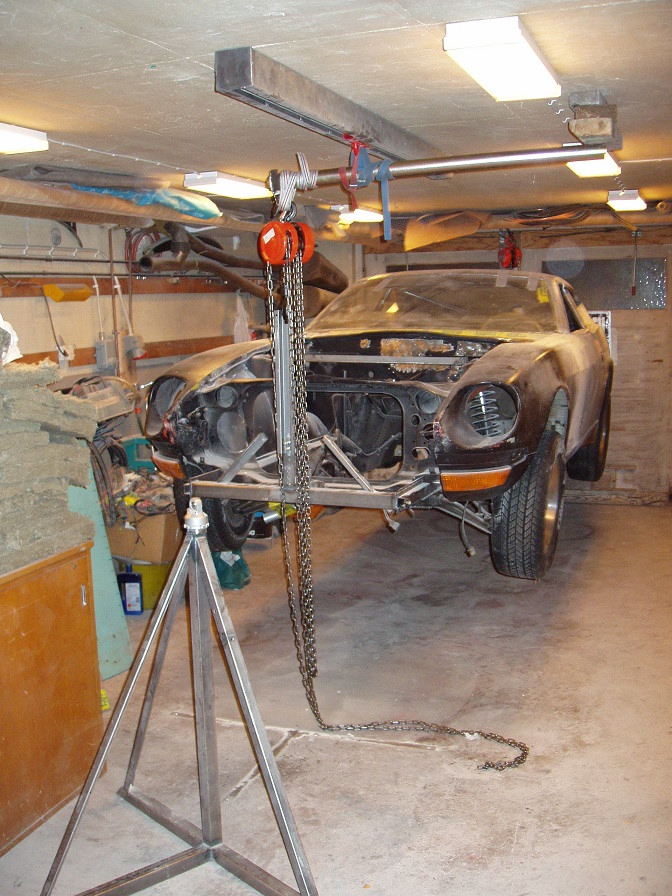 PA090015liten by ChevyZ240, on Flickr
Sitting on its wheels again for the first time in about two years!
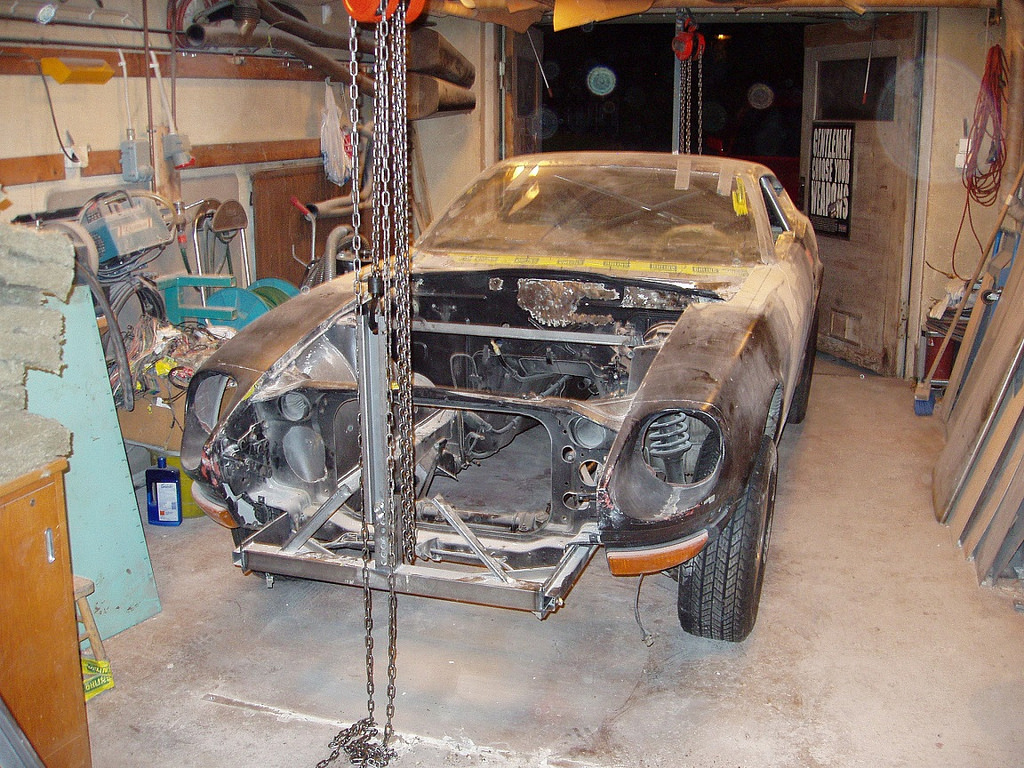 PA090017liten by ChevyZ240, on Flickr
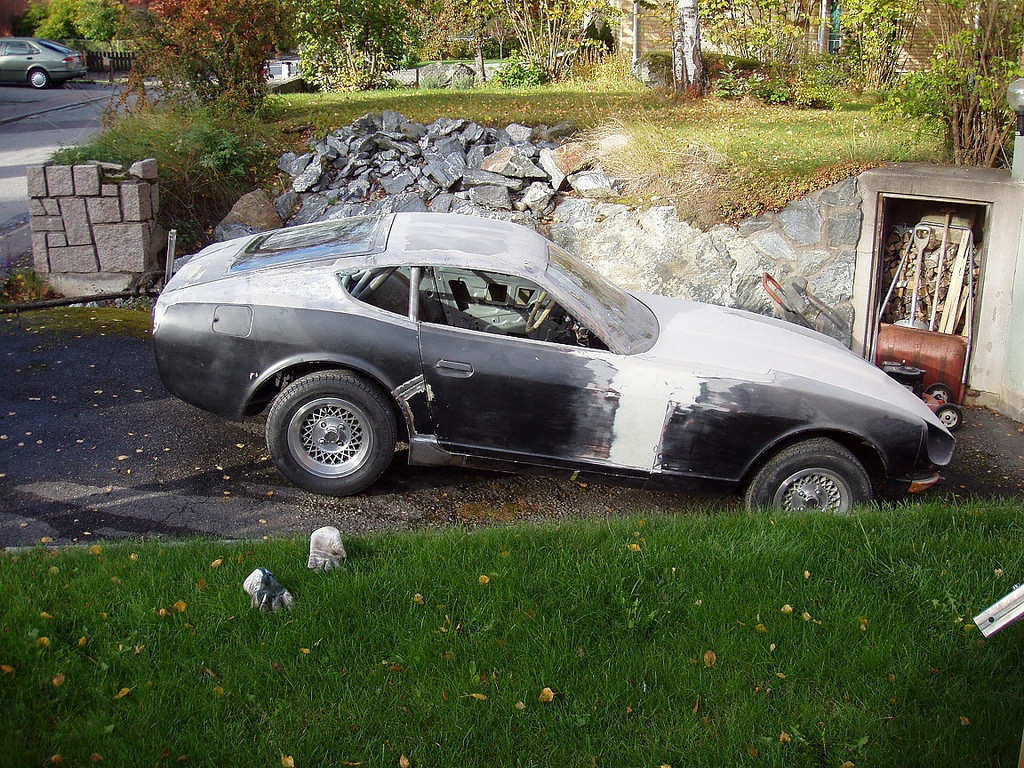
View from the street.
 PA090022liten by ChevyZ240, on Flickr
Henrik
PA090022liten by ChevyZ240, on Flickr
Henrik
"Mechanix Menace": An LS7-motivated, chopped, tube framed, and heavily modified 1973 Datsun 240Z

https://www.pro-touring.com/threads/...73-Datsun-240Z
05-22-2014 #43
Registered User
- Join Date
- Aug 2004
- Location
- Västerås, Sweden
- Posts
- 332
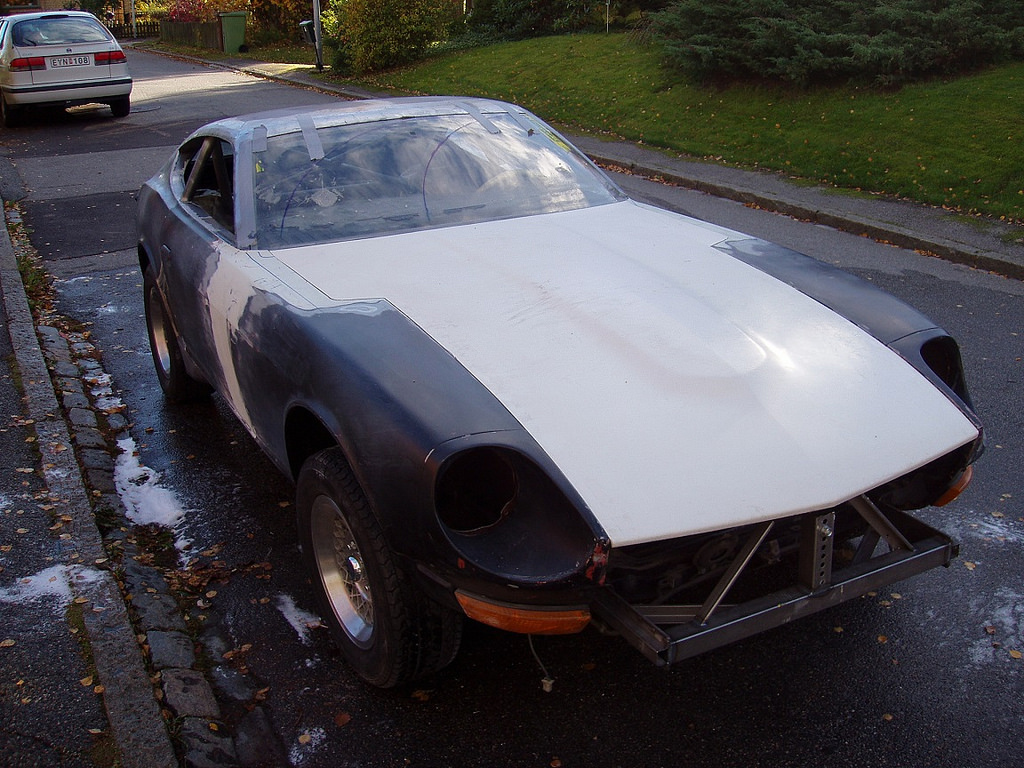
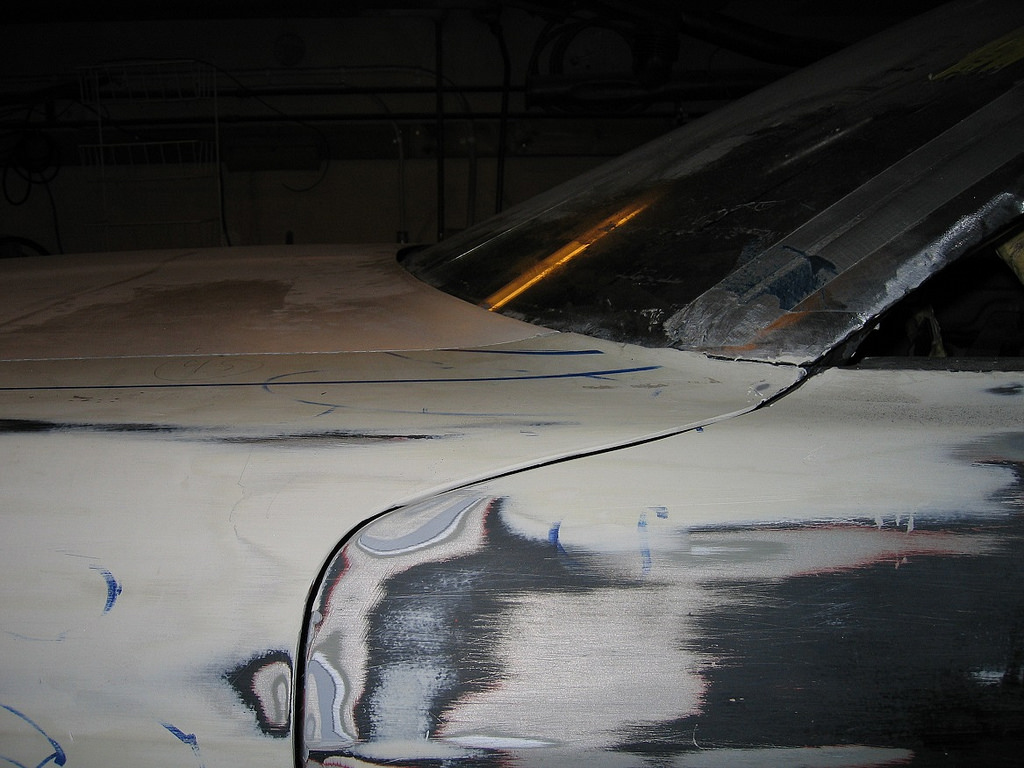
On Oct 10, 2005, a friend helped me tow the Z-car out from the garage and up on the street. This was the first time the car saw daylight in almost two and a half years! It was also the first time I was able to view the car from more than a few feet away, with the metalwork on the roof mostly done. I feel that it looks the way I planned it to look. You also get a good view of the fiberglass hood, and the narrow slot against the windshield. I think it looks a lot cleaner without the different panel gaps, fresh air louvers and the wipers, don't you?
 P1010001liten by ChevyZ240, on Flickr
Another side view, similar to the one heading my site. For sure, the car looks kinda funny with the high stance, but that will be rectified later!
 P1010003liten by ChevyZ240, on Flickr
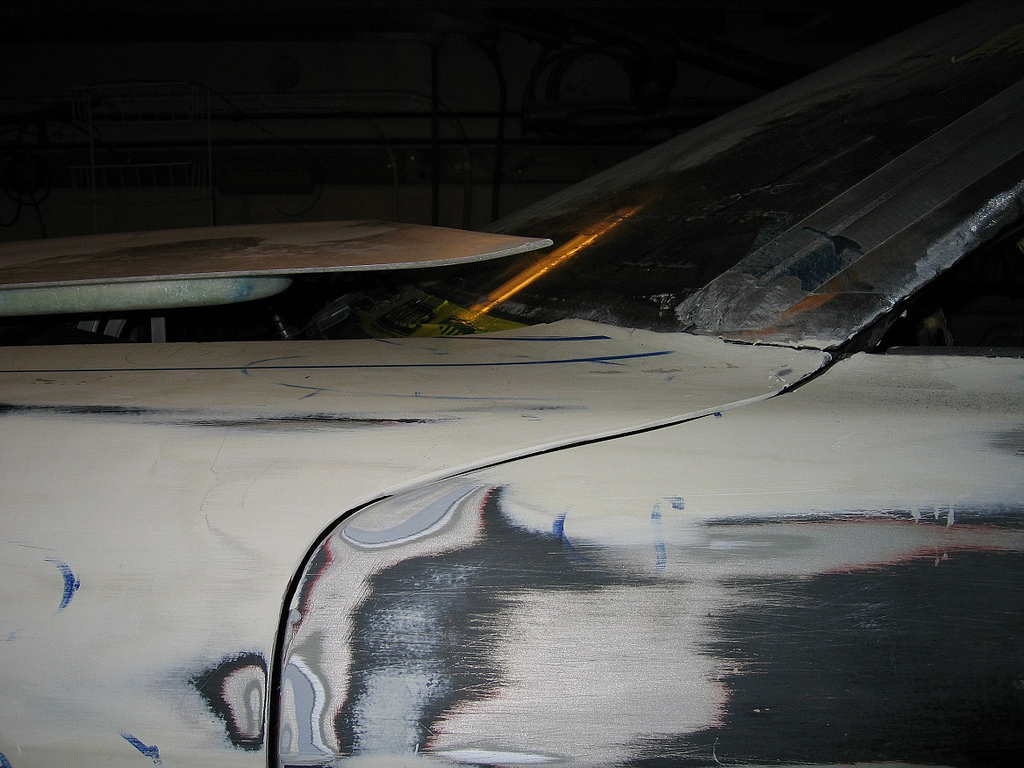
In this view, I think the clean look of the car with the new hood is even more obvious.
 P1010004liten by ChevyZ240, on Flickr
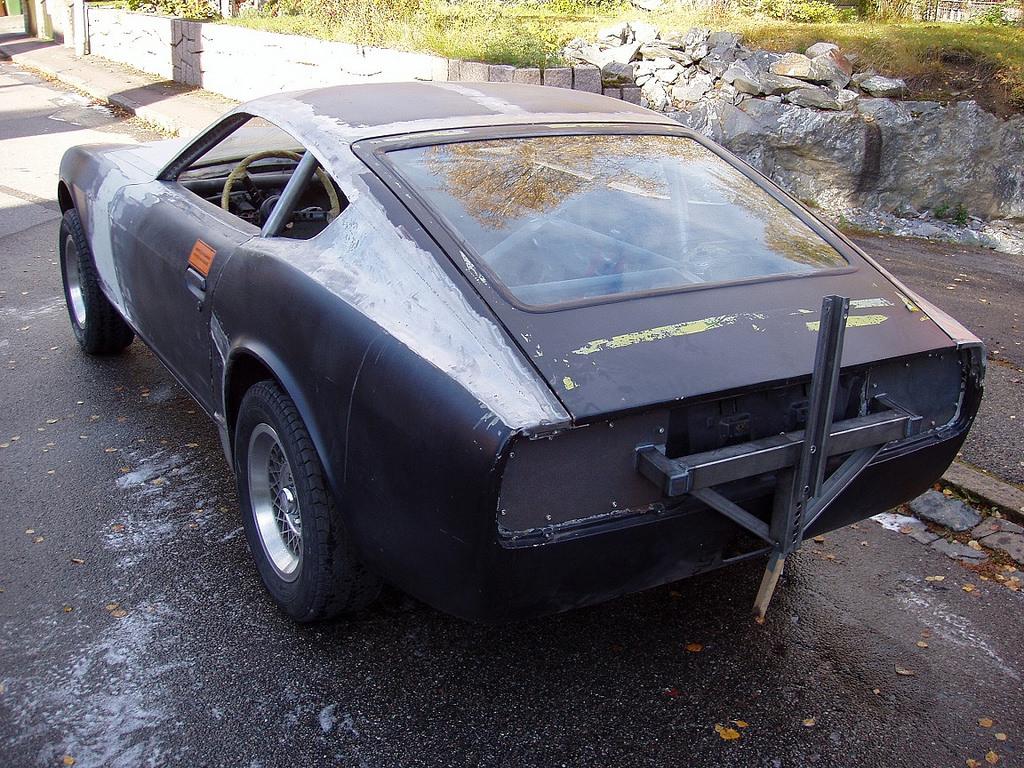
Rear view.
 P1010011liten by ChevyZ240, on Flickr
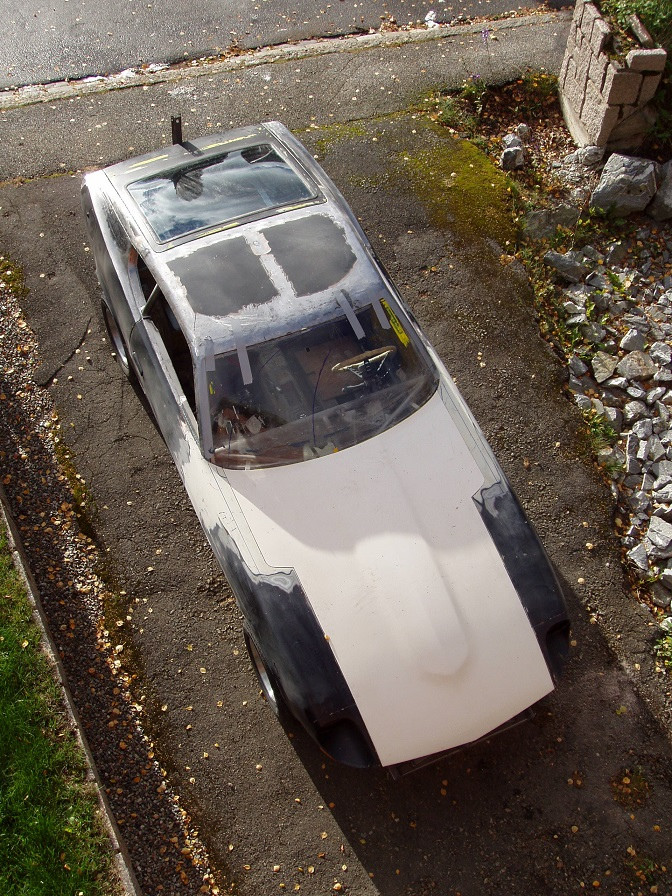
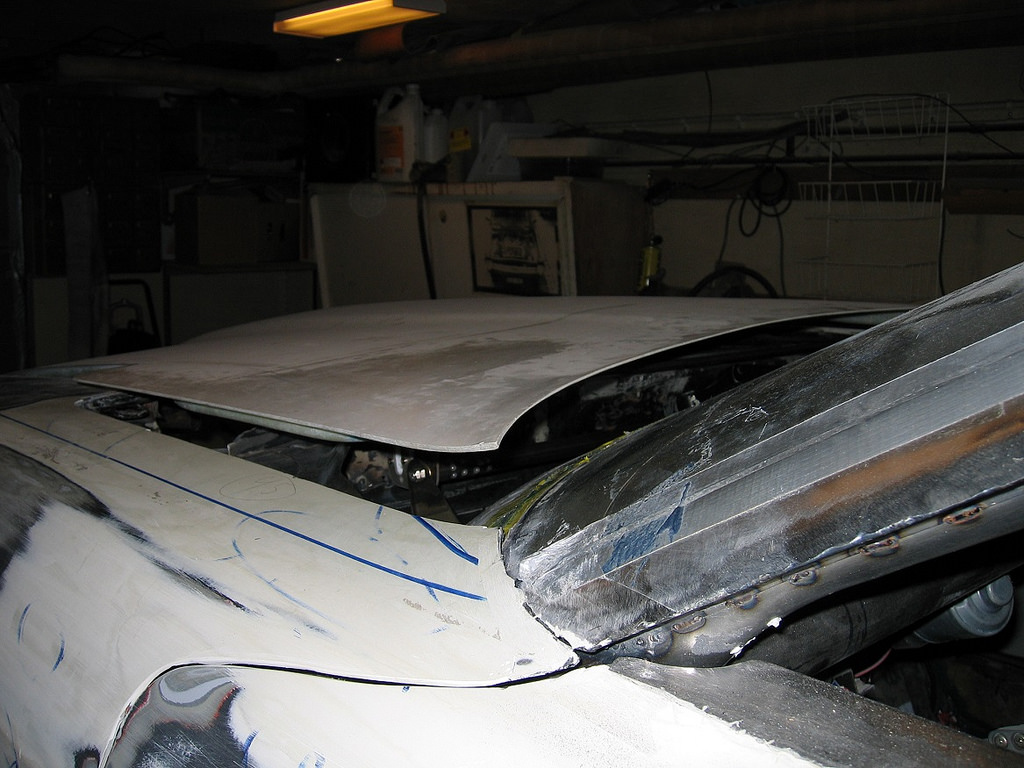
And a top view!
 P1010036liten by ChevyZ240, on Flickr
Henrik
P1010036liten by ChevyZ240, on Flickr
Henrik
"Mechanix Menace": An LS7-motivated, chopped, tube framed, and heavily modified 1973 Datsun 240Z
https://www.pro-touring.com/threads/...73-Datsun-240Z
05-24-2014 #44 Registered User
- Join Date
- Mar 2012
- Location
- Lethbridge, AB
- Posts
- 177

you have done some amazing work here! I didn't think the 240z could look any better! just awesome!!!
Build Thread!!!https://www.pro-touring.com/showthread.php?88692-1971-Speedipus-Rex&p=925864&posted=1#post925864
05-25-2014 #45
Registered User
- Join Date
- Jan 2014
- Location
- Michigan
- Posts
- 60
Amazing work. Can't wait for more
05-25-2014 #46 Registered User
- Join Date
- Oct 2011
- Location
- Wichita KS
- Posts
- 59
Awesome work!! I have a 260Z that I need to give some attention, but nothing like yours! I thought that widening my 68 firebird 6inches in the rear was involved. But you really fabricate like a pro!!Please keep up the good work!
05-25-2014 #47
Registered User
- Join Date
- Aug 2004
- Location
- Västerås, Sweden
- Posts
- 332
Thanks all you guys! Widetrax, I like your widened rear fenders, are the fronts going to be widened too?
Henrik
"Mechanix Menace": An LS7-motivated, chopped, tube framed, and heavily modified 1973 Datsun 240Z
https://www.pro-touring.com/threads/...73-Datsun-240Z
05-25-2014 #48
Registered User
- Join Date
- Oct 2011
- Location
- Wichita KS
- Posts
- 59
Henrik,
Thanks! Yes I do, at least 2 inches, but I will need to find some more old fenders to play with. I have seen it done in so many different ways I am not sure which style to do them.Also I want to notch the subframe for more turning radius. I want to use at least 10 inch wide wheels on the front.
05-25-2014 #49
Registered User
- Join Date
- Aug 2004
- Location
- Västerås, Sweden
- Posts
- 332
Width the increased track to fill out the fenders, do you really need to notch the subframe? Originally Posted by Widetrax
Henrik
"Mechanix Menace": An LS7-motivated, chopped, tube framed, and heavily modified 1973 Datsun 240Z
https://www.pro-touring.com/threads/...73-Datsun-240Z
05-26-2014 #50
Registered User
- Join Date
- Oct 2011
- Location
- Wichita KS
- Posts
- 59
I though of that, but looking at my subframe it has rub marks on it from the tires on the stock steel wheels. So I figured it would not be hard to fabricate some 1/4 wall pipe notches into it while I have it off for additional welding and gusseting( what Mark Stielow does), and changing the body mounts. Also I am kind of one of those people, if large is good then I will push it to XL! Like the back of the car, I moved the quarter panels out 3 inches, I also mini tubbed it 2 3/4 inches for a total of 18 inches off wheel tub. So if a 12 inch wheel will fit, then I will go bigger on the front, and have room for it.
05-26-2014 #51
Registered User
- Join Date
- Aug 2004
- Location
- Västerås, Sweden
- Posts
- 332
Sounds reasonable! Originally Posted by Widetrax
 Henrik
"Mechanix Menace": An LS7-motivated, chopped, tube framed, and heavily modified 1973 Datsun 240Z
https://www.pro-touring.com/threads/...73-Datsun-240Z
05-28-2014 #52
Registered User
- Join Date
- Aug 2004
- Location
- Västerås, Sweden
- Posts
- 332
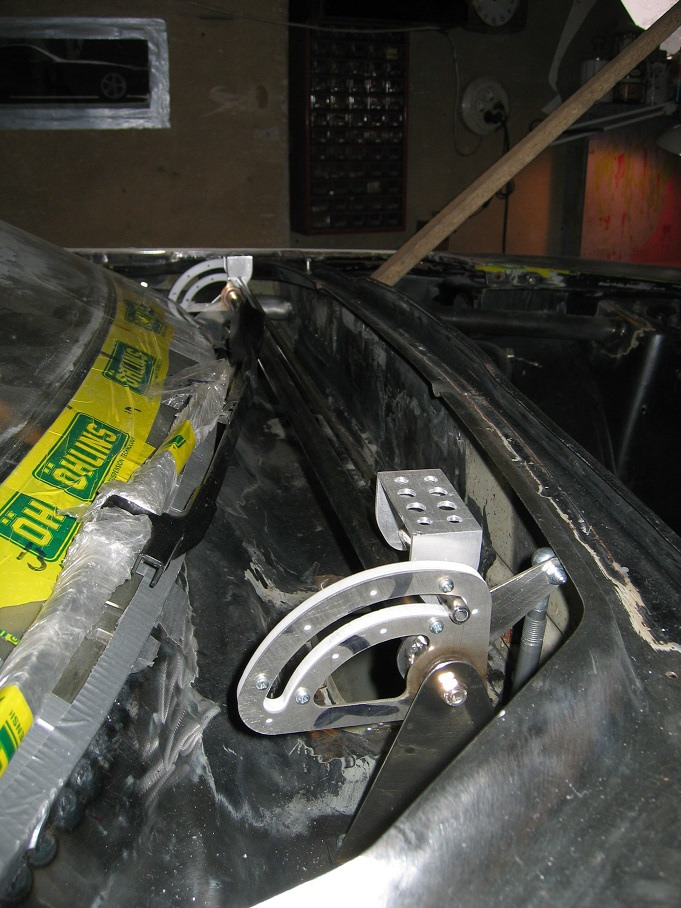
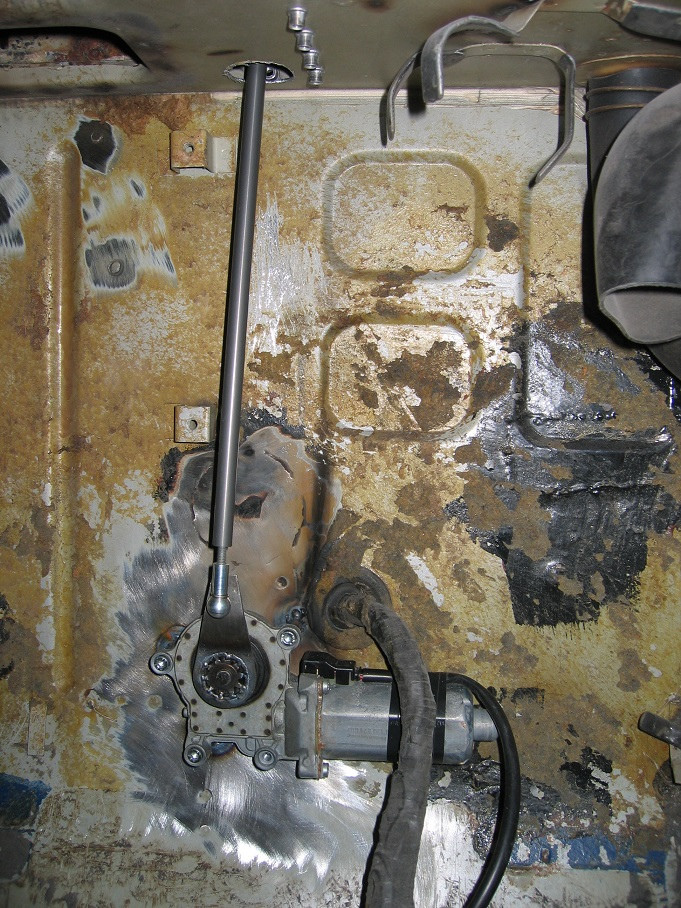
February 26, 2005. This is the mechanism that will open the hood around 1.5 inches when the wipers are turned on. Since they are concealed below the hood, this is necessary to give them space enough operate. Here the mechanism is seen in the down position. The aluminum bracket with holes in it will be bonded to the underside of the hood. There will be locking pins sliding in the Teflon pieces which are screwed to the stainless plates. Both the Teflon pieces and the stainless steel plates have been water-cut.
 IMG_0154liten by ChevyZ240, on Flickr
The motor that operates the mechanism is placed low on the passenger side on the inside of the firewall. The motion is transferred via a pushrod.
 IMG_0155liten by ChevyZ240, on Flickr
Here the hood is in the down position...
 IMG_0156liten by ChevyZ240, on Flickr
...and here it's in the up position.
 IMG_0157liten by ChevyZ240, on Flickr
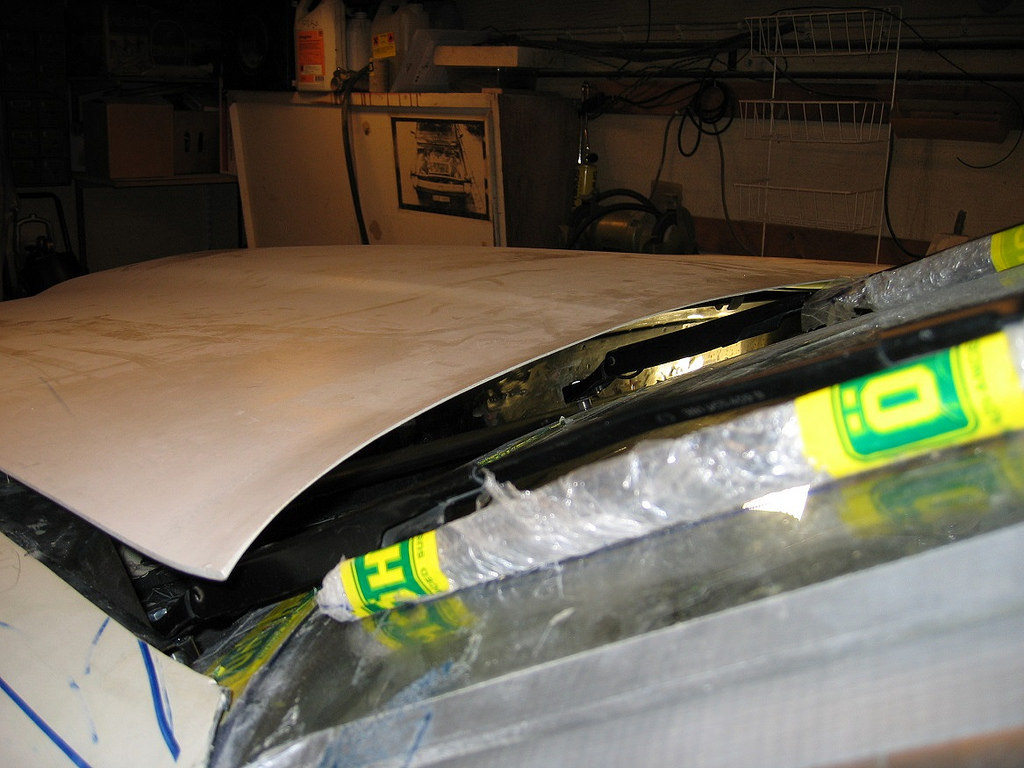
Another view of how much the hood is raised to allow wiper operation.
 IMG_0158liten by ChevyZ240, on Flickr
Here the mechanism is seen in the up position.
 IMG_0161liten by ChevyZ240, on Flickr
The brackets for the locking pins have been bonded to the underside of the hood.
 IMG_0162liten by ChevyZ240, on Flickr
Henrik
IMG_0162liten by ChevyZ240, on Flickr
Henrik
"Mechanix Menace": An LS7-motivated, chopped, tube framed, and heavily modified 1973 Datsun 240Z
https://www.pro-touring.com/threads/...73-Datsun-240Z
05-28-2014 #53
Registered User
- Join Date
- Aug 2004
- Location
- Västerås, Sweden
- Posts
- 332
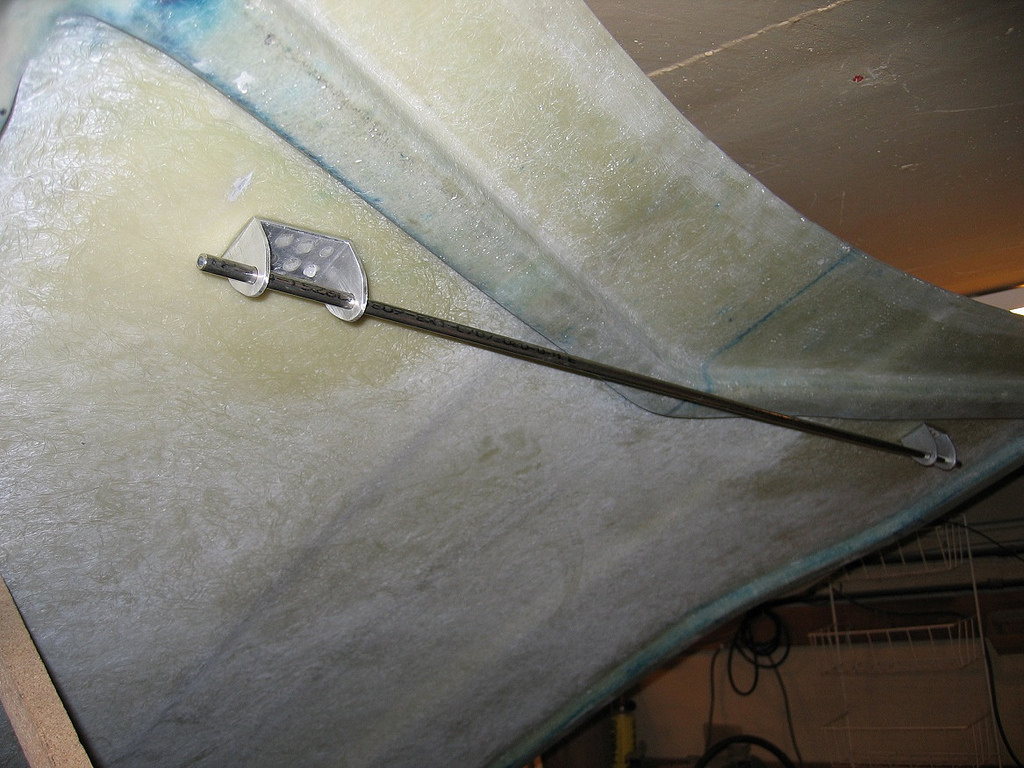
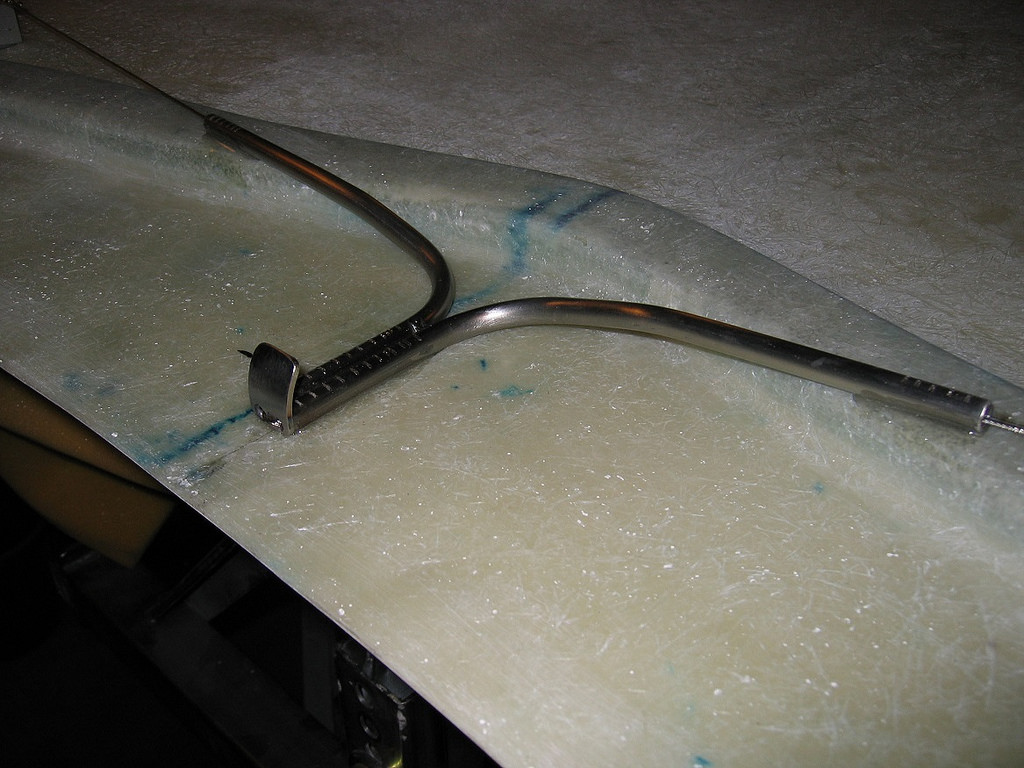
March 13, 2005. The hood latch mechanism has been completed.
 IMG_0173liten by ChevyZ240, on Flickr
One of the locking pins in the locked position. As can be seen it is kept in the locked position by a spring.
 IMG_0174liten by ChevyZ240, on Flickr
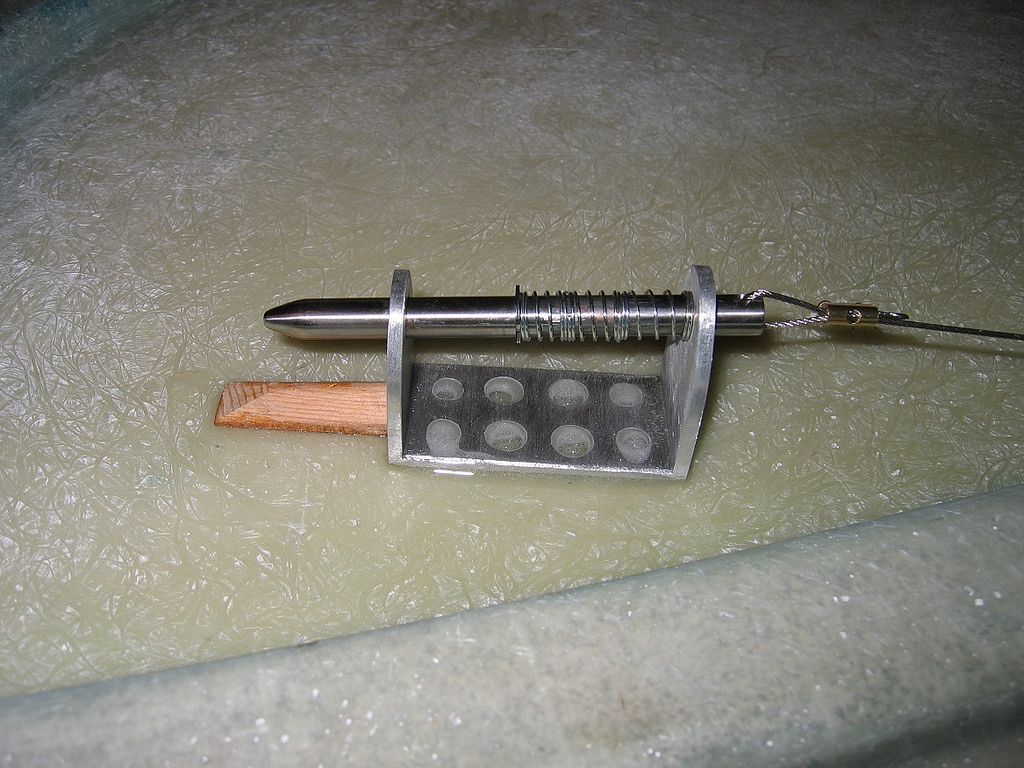
Here it is in the unlocked position. The little piece of wood is a stop for the hood when it is closed. It positions the hood so the locking pins automatically snap in to their respective guide grooves when the latch is released. The piece of wood and the aluminum bracket will be covered by a few layers of fiberglass to reinforce the area.
 IMG_0177liten by ChevyZ240, on Flickr
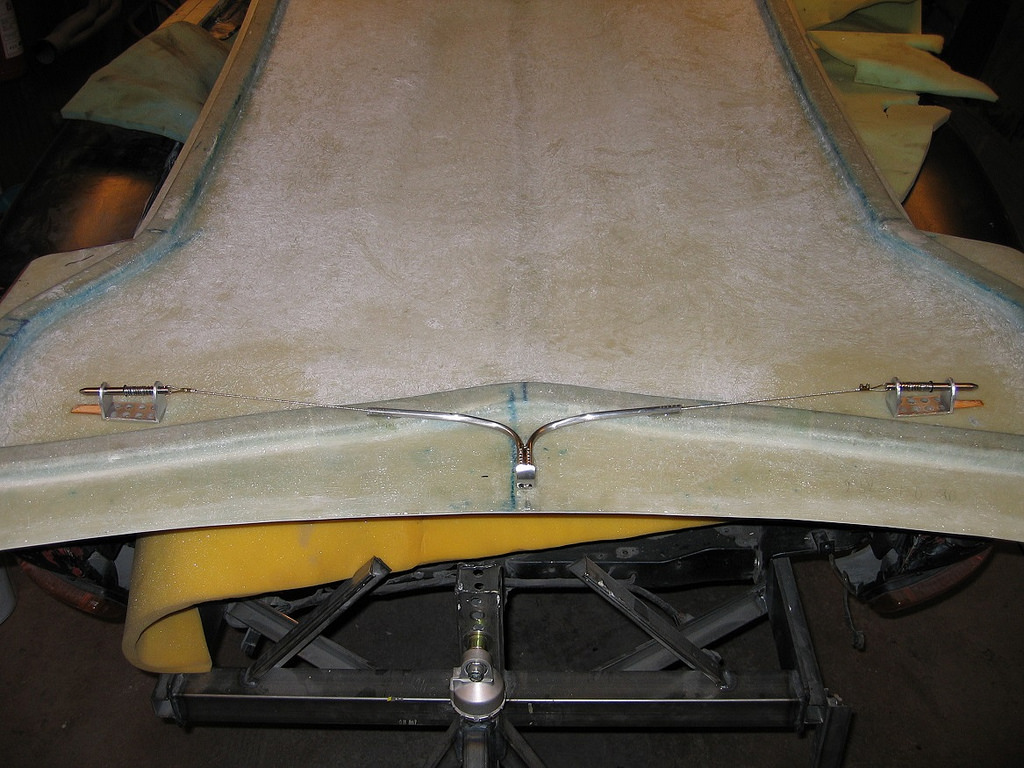
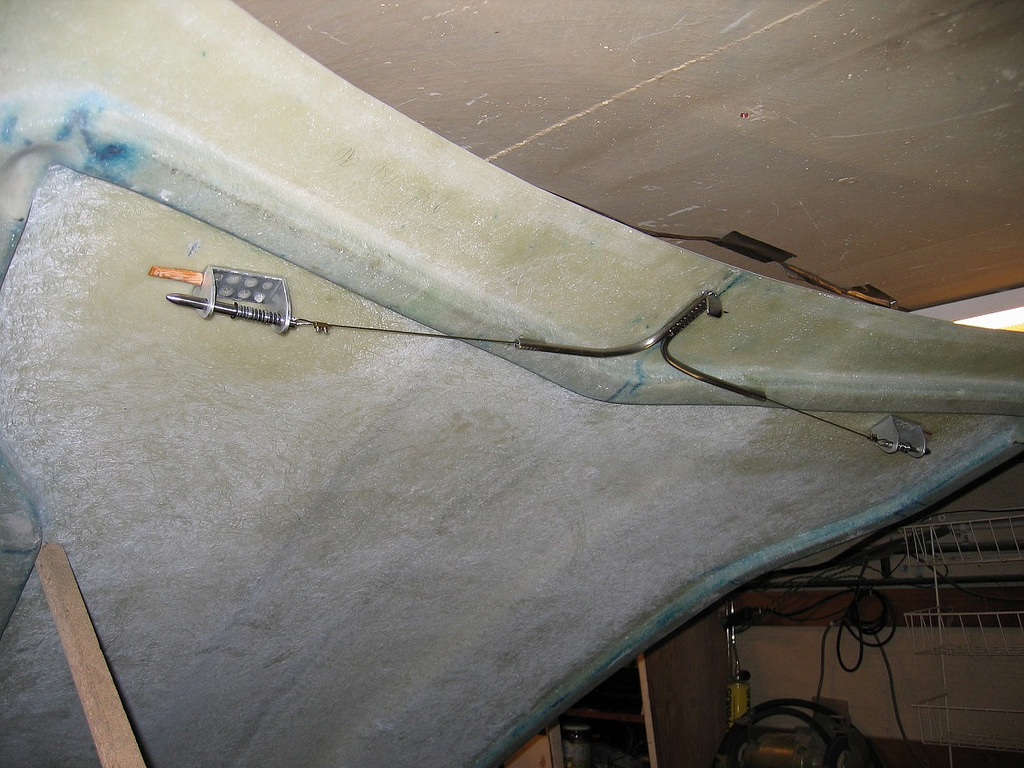
This is the handle for the latch mechanism in the locked position.
 IMG_0179liten by ChevyZ240, on Flickr
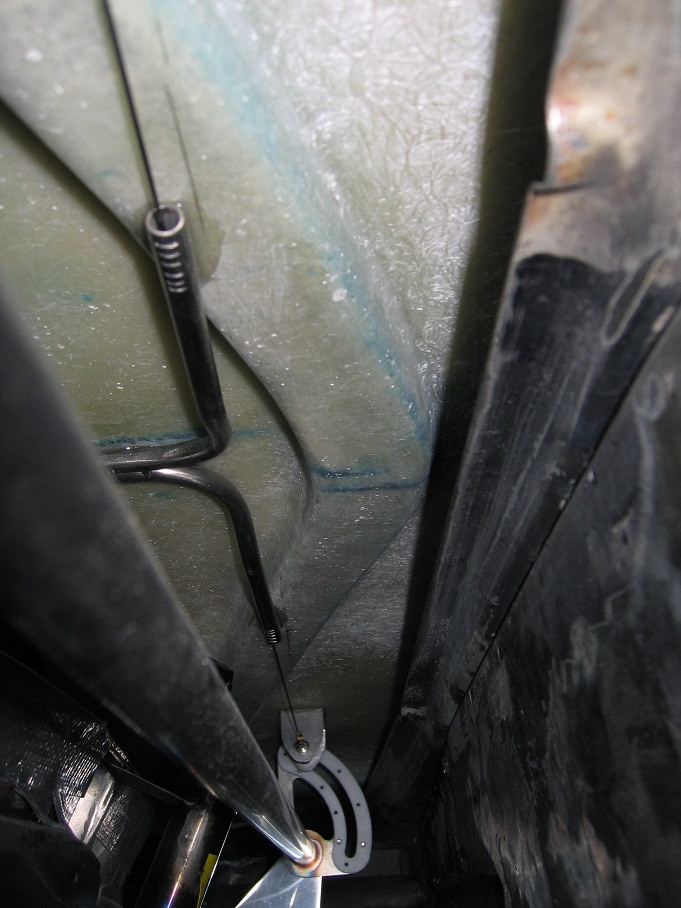
Here the handle is pulled and the locking pins are pulled in their unlocked positions by wires.
 IMG_0178liten by ChevyZ240, on Flickr
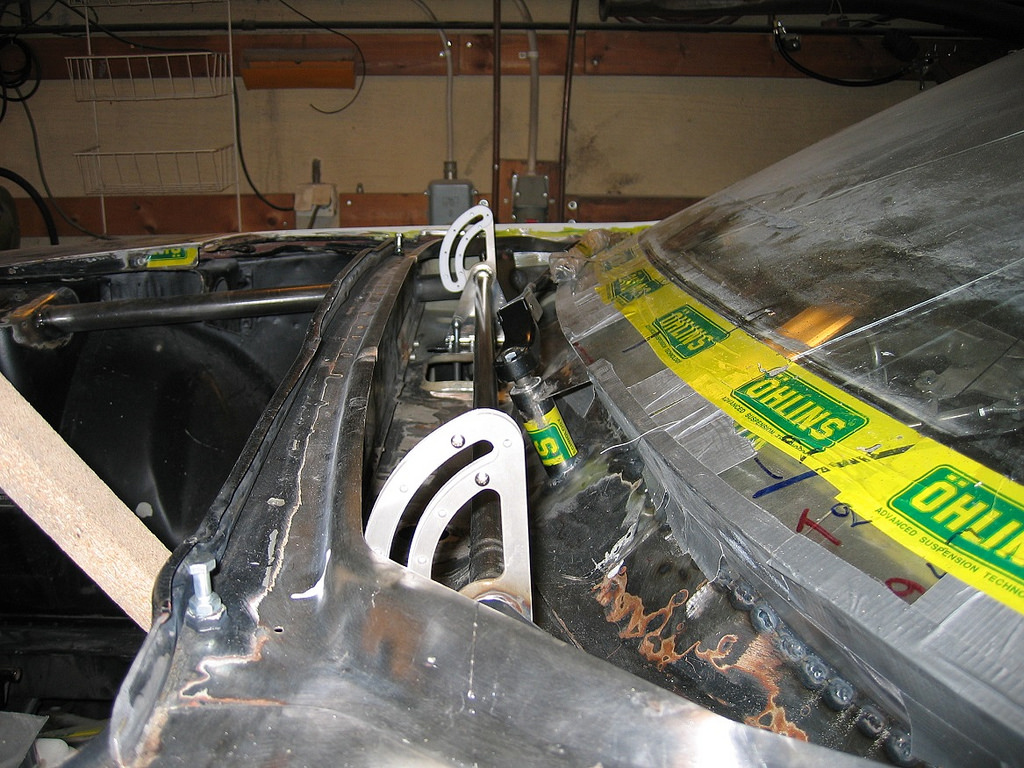
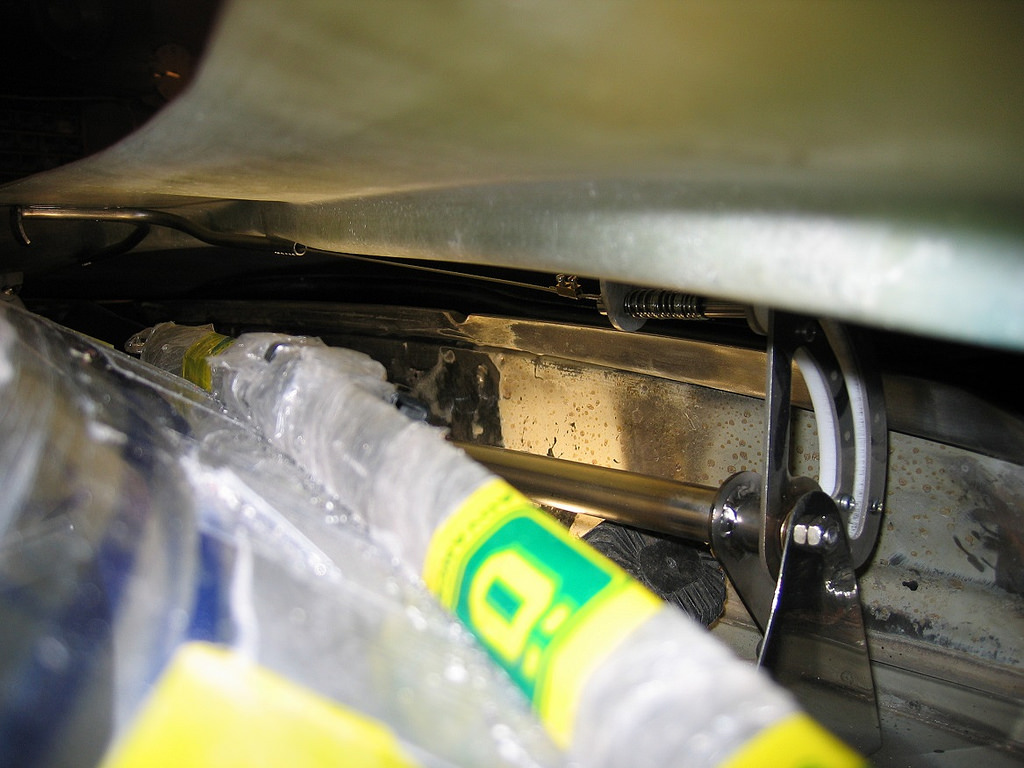
A view from the cowl area below the hood. Both the latch mechanism and the raising mechanism can be seen. The hood is here in the raised position.
 IMG_0187liten by ChevyZ240, on Flickr
As seen from the passenger side...
 IMG_0184liten by ChevyZ240, on Flickr
Yet another view from below the hood.
 IMG_0188liten by ChevyZ240, on Flickr
And this is what it looks like when the hood is opened.
 IMG_0193liten by ChevyZ240, on Flickr
Henrik
IMG_0193liten by ChevyZ240, on Flickr
Henrik
"Mechanix Menace": An LS7-motivated, chopped, tube framed, and heavily modified 1973 Datsun 240Z
https://www.pro-touring.com/threads/...73-Datsun-240Z
05-28-2014 #54
Registered User
- Join Date
- Aug 2004
- Location
- Västerås, Sweden
- Posts
- 332
March 15, 2005. Here I am testing wiper operation. After some clearancing work, the wipers can move freely without hitting anything.
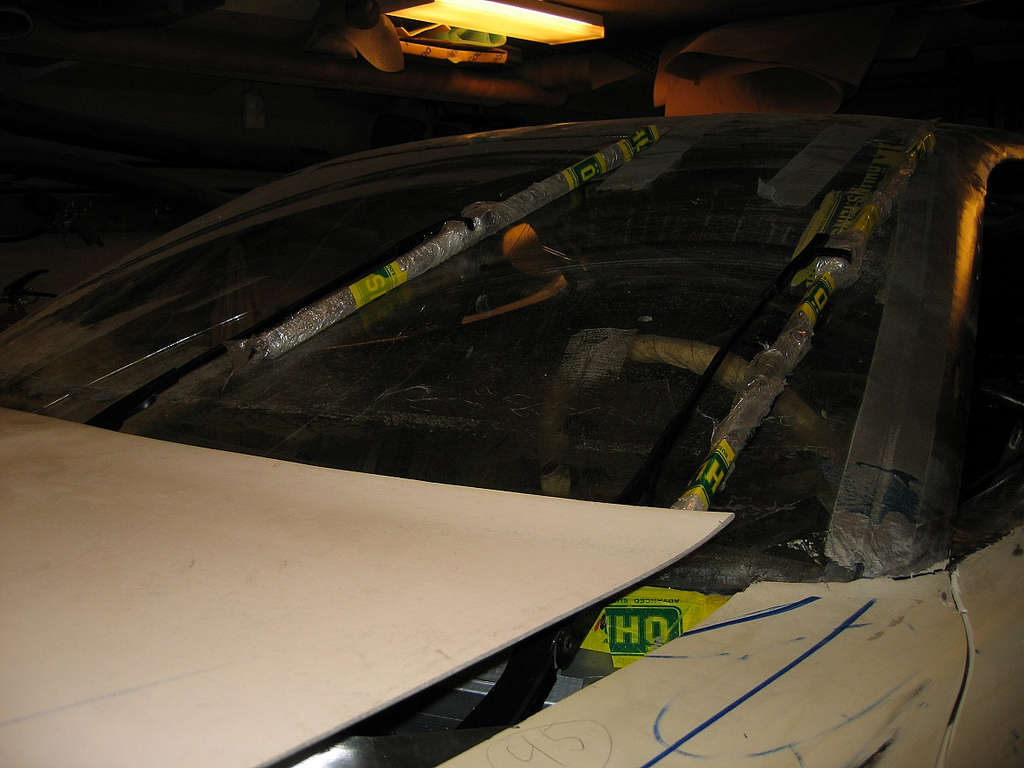 IMG_0196liten by ChevyZ240, on Flickr
As seen from behind...
 IMG_0198liten by ChevyZ240, on Flickr
...and from the front.
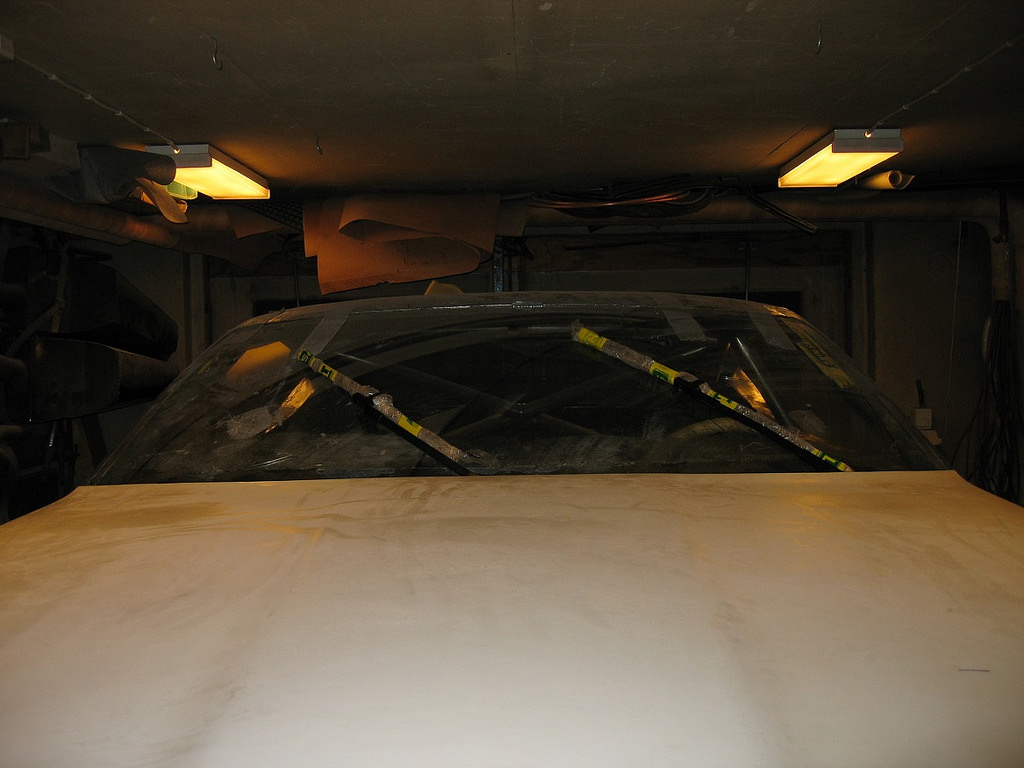 IMG_0201liten by ChevyZ240, on Flickr
I intend to create a system of relays and micro switches that automatically raises the hood when the wipers are turned on and lowers it when they are switched off. In addition I think that front end lift and drag may be improved with the hood in the raised position. I will test this when the car is back on the streets again. If that's the case, I may raise the hood during performance driving!Henrik
"Mechanix Menace": An LS7-motivated, chopped, tube framed, and heavily modified 1973 Datsun 240Z
https://www.pro-touring.com/threads/...73-Datsun-240Z
05-28-2014 #55
Registered User
- Join Date
- Aug 2004
- Location
- Västerås, Sweden
- Posts
- 332
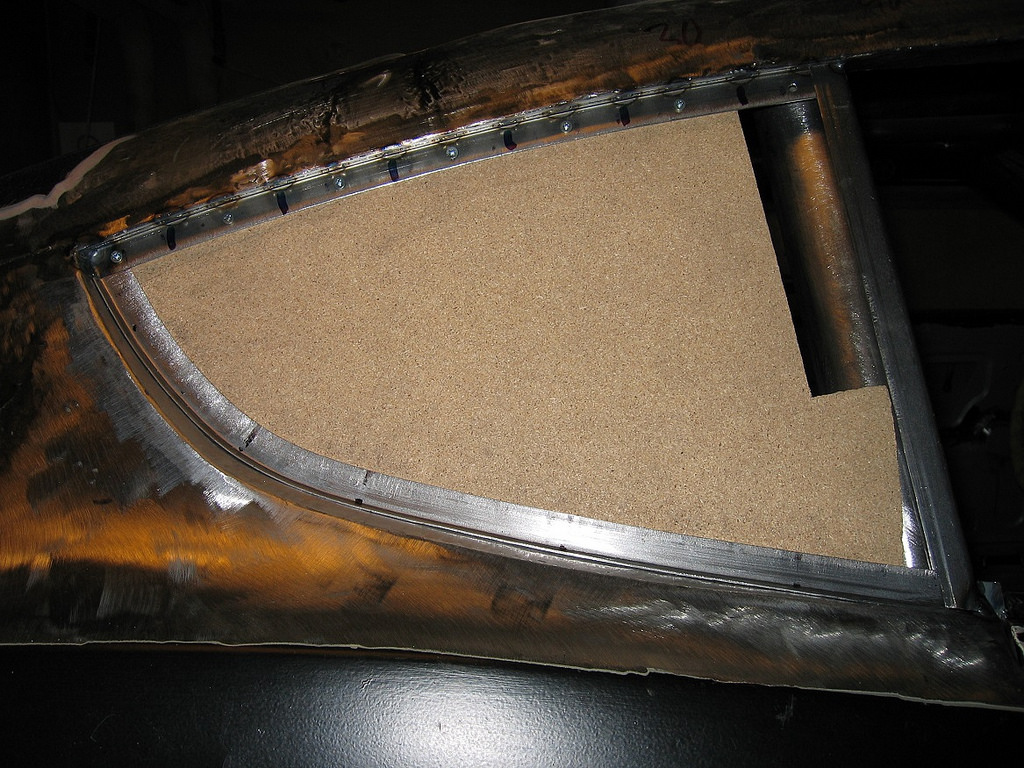
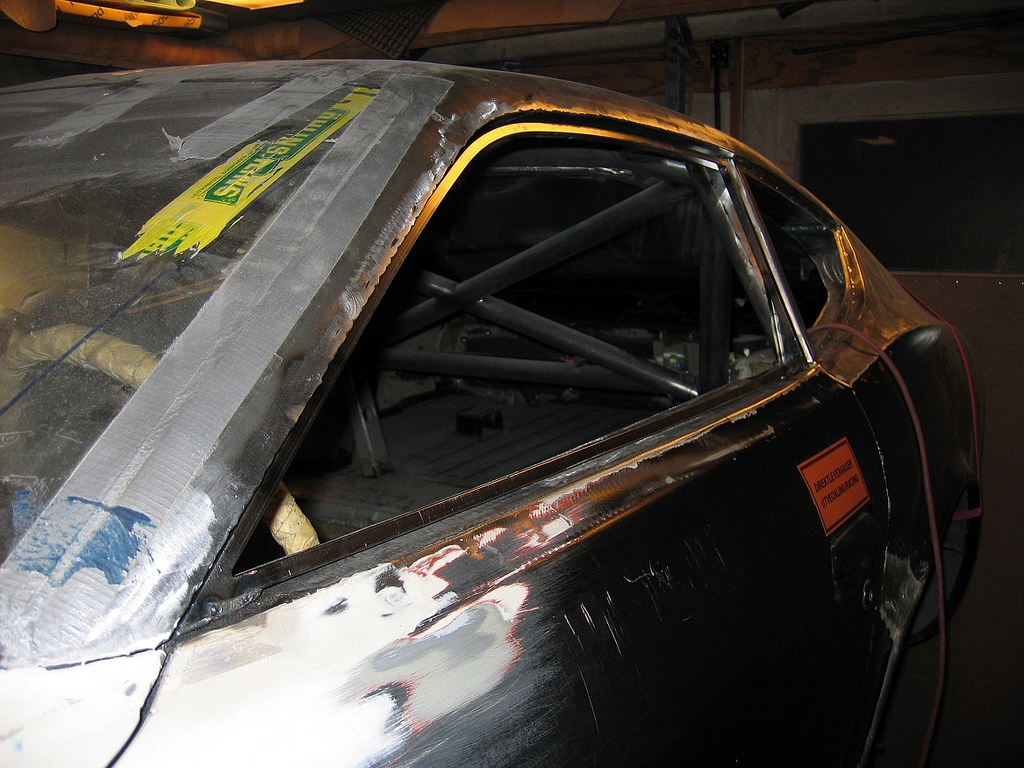
March 21, 2005. As I wrote before, I intend to make all windows flush with the body. They will eventually be made out of double curvature Lexan or similar. Here, the upper part of the attachment frame for the rear quarter window is being held in place with a piece of board.
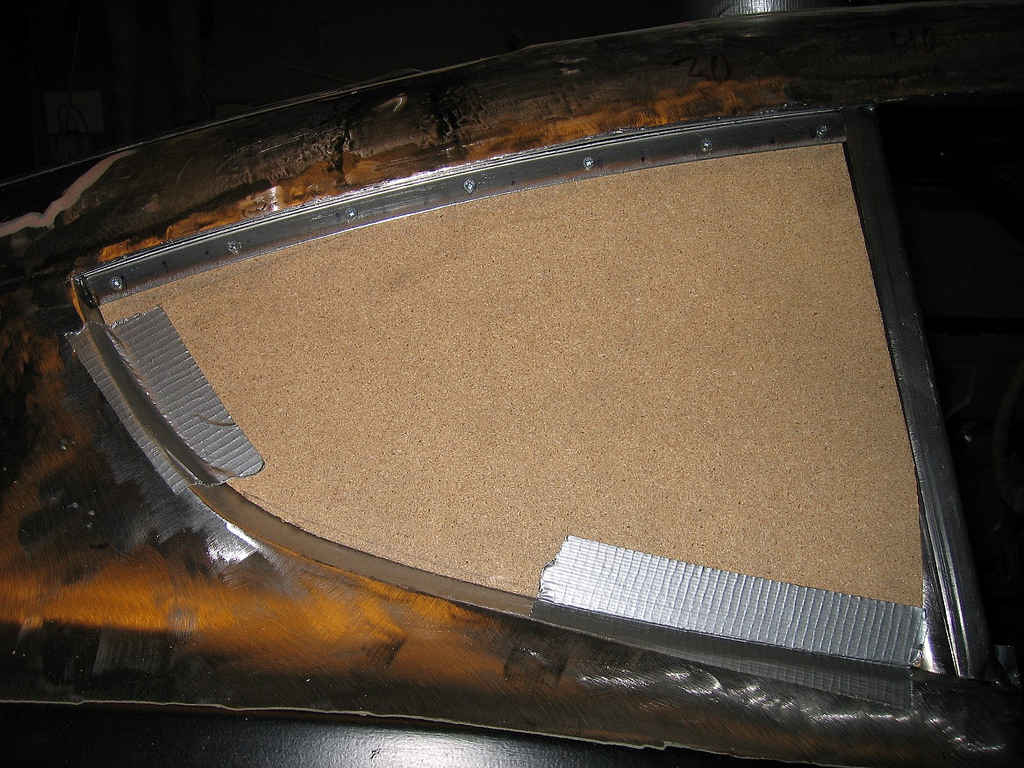 IMG_0223liten by ChevyZ240, on Flickr
The upper part has been welded in place, and the lower part is checked for fit here.
 IMG_0224liten by ChevyZ240, on Flickr
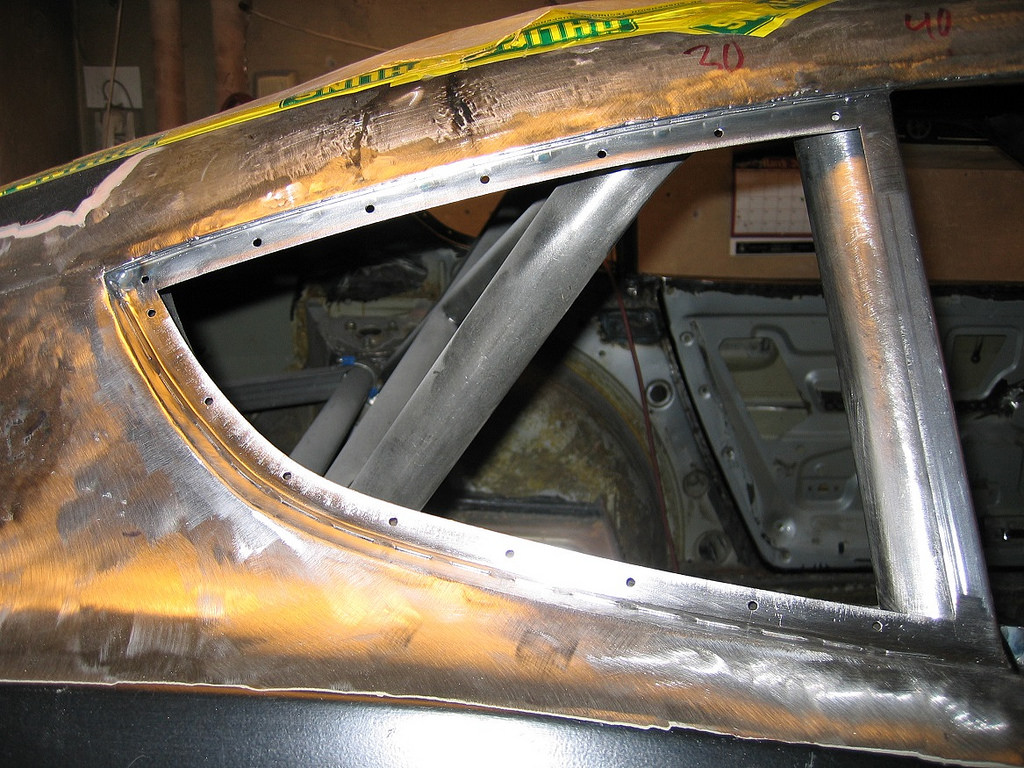
The lower part also has been welded to the body.
 IMG_0225liten by ChevyZ240, on Flickr
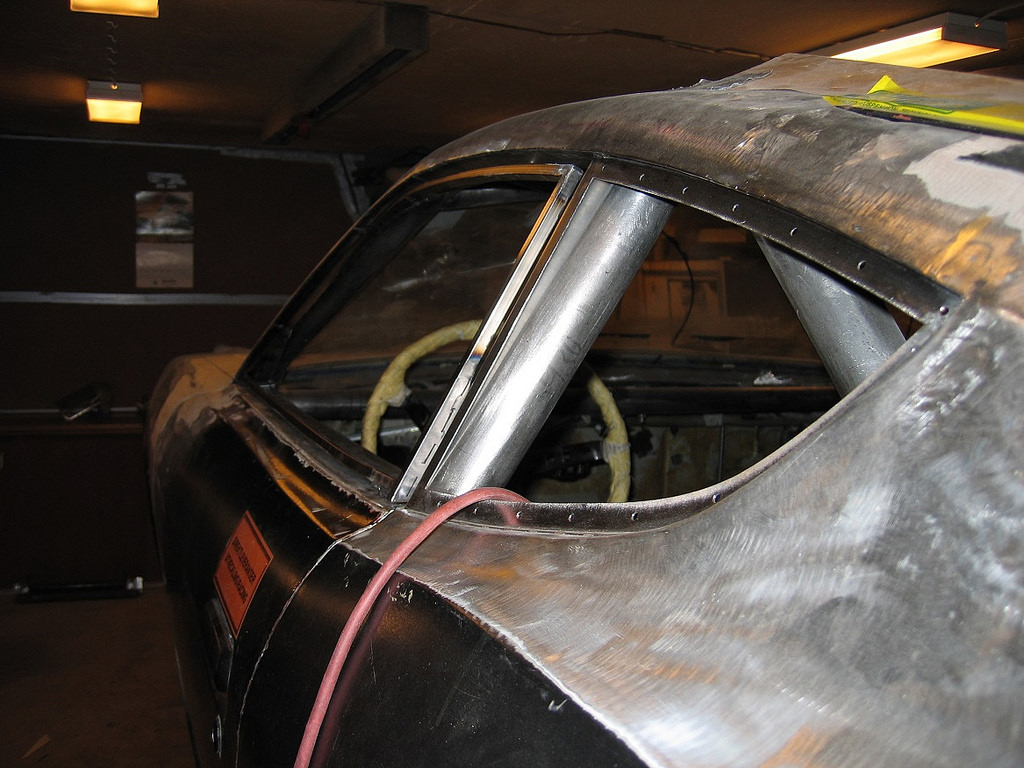
This is what the final product looks like.
 IMG_0226liten by ChevyZ240, on Flickr
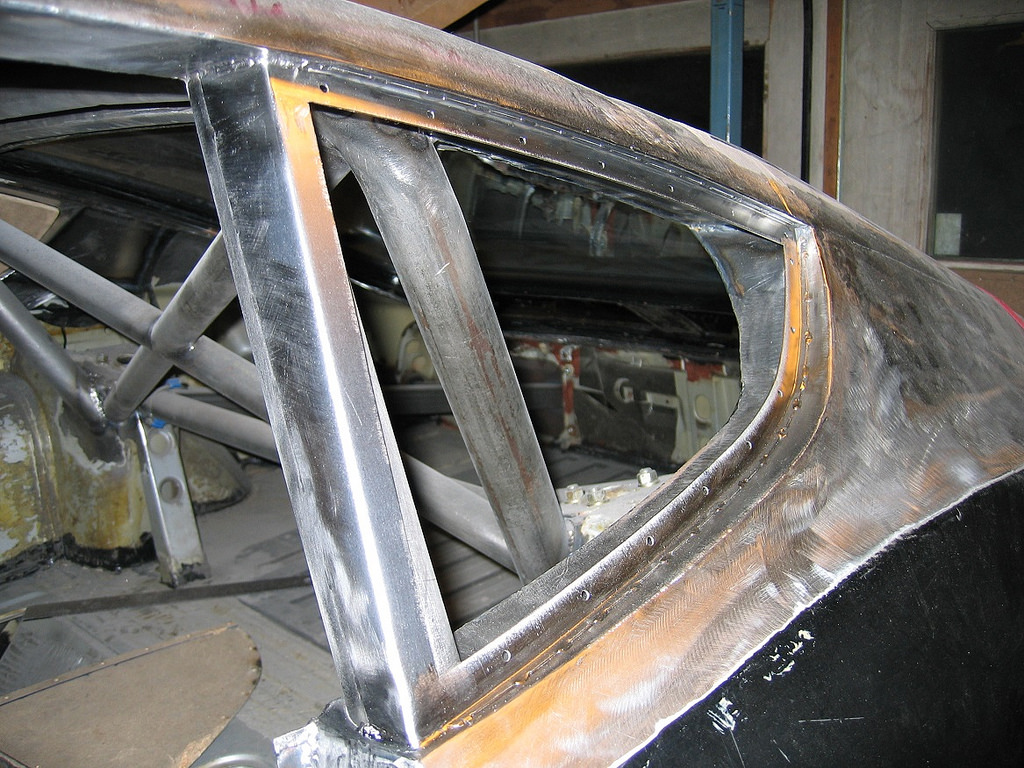
Another view that also shows how the frame has been integrated with the roll cage. Eventually, the curved window will be glued to a composite frame, that in turn will be screwed to the attachment frame from the inside. For this summer (I hope), a temporary solution will be flat Lexan screwed directly to the steel frame.
 IMG_0218liten by ChevyZ240, on Flickr
Henrik
IMG_0218liten by ChevyZ240, on Flickr
Henrik
"Mechanix Menace": An LS7-motivated, chopped, tube framed, and heavily modified 1973 Datsun 240Z
https://www.pro-touring.com/threads/...73-Datsun-240Z
05-28-2014 #56
Registered User
- Join Date
- Aug 2004
- Location
- Västerås, Sweden
- Posts
- 332
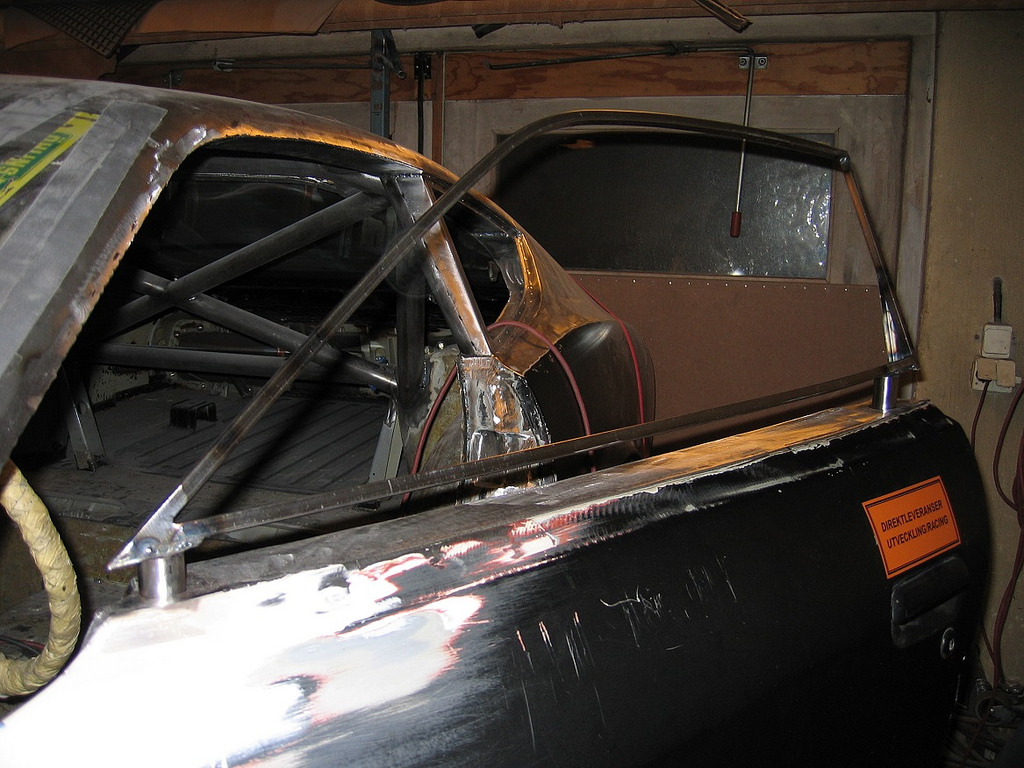
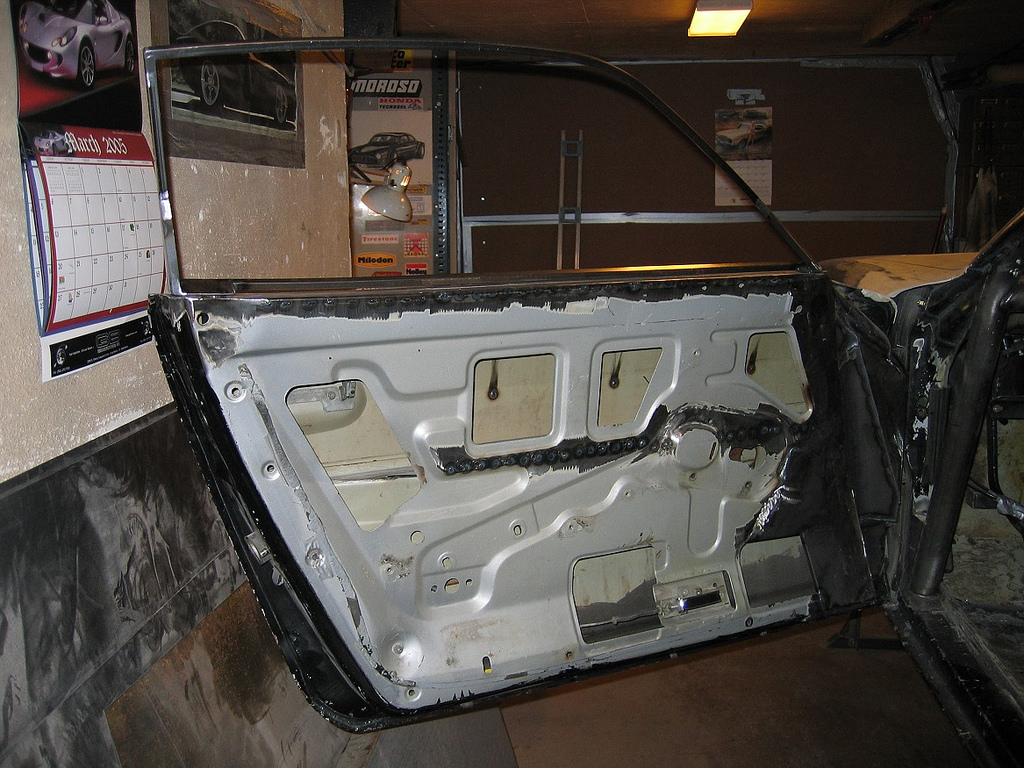
March 22, 2005. The door windows will be fixed to a frame that will be removable from the door, when cruising or driving during extremely hot conditions. The frame will be held in place by two welded-in stainless tubes at the top of the door.
 IMG_0232liten by ChevyZ240, on Flickr
In order to get the two tubes in the door parallel, a jig is made out of square tubing and two pieces of round bar stock.
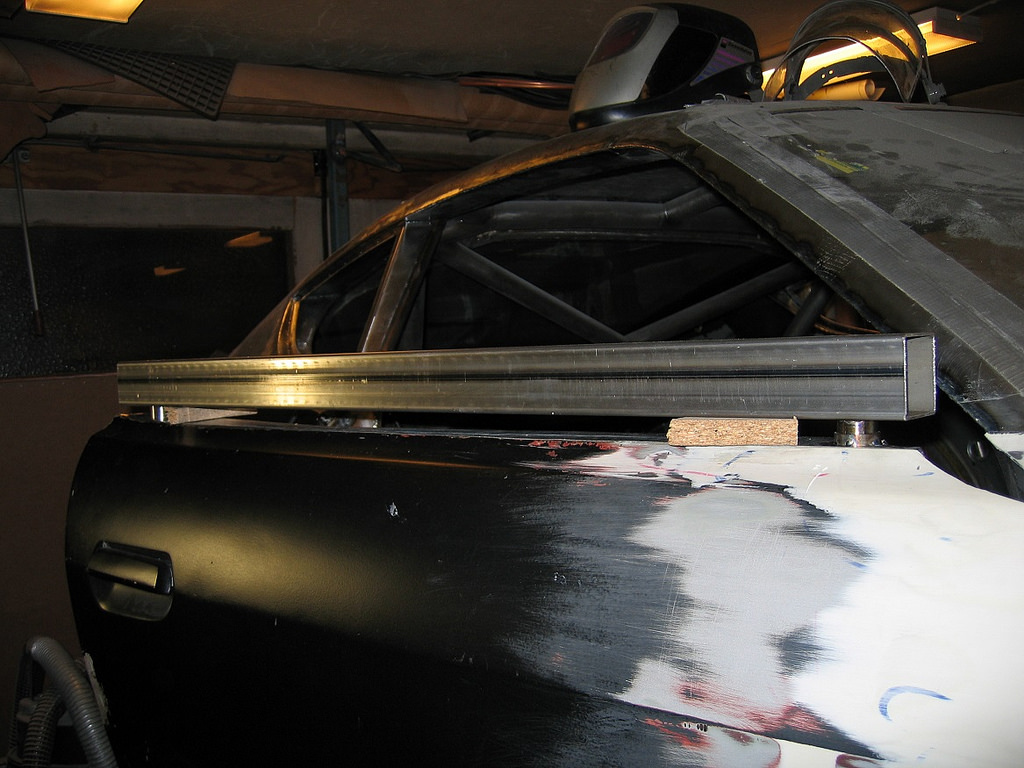 IMG_0234liten by ChevyZ240, on Flickr
Here the two tubes have been welded to the top of the door.
 IMG_0246liten by ChevyZ240, on Flickr
These are the pieces of square tubing that will make up the door window frame.
 IMG_0248liten by ChevyZ240, on Flickr
I am starting the welding of the window frame by aligning the rear part with the door pillar.
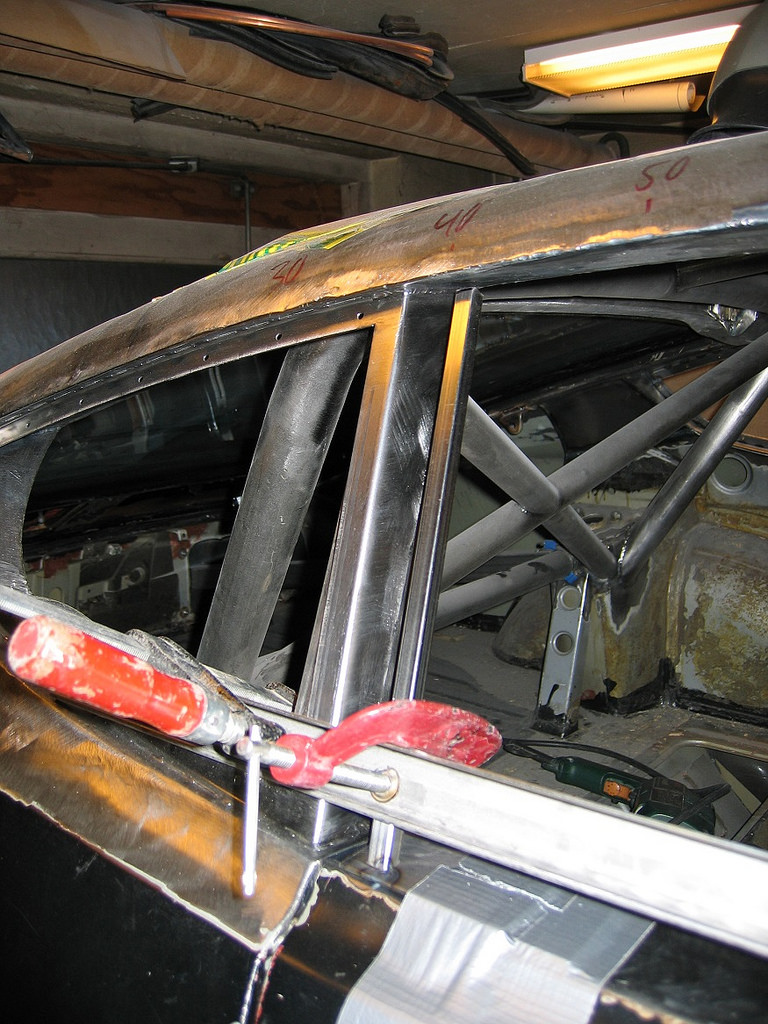 IMG_0249liten by ChevyZ240, on Flickr
Next up is the upper part of the window frame.
 IMG_0252liten by ChevyZ240, on Flickr
Here's the rear part all aligned and ready for welding.
 IMG_0253liten by ChevyZ240, on Flickr
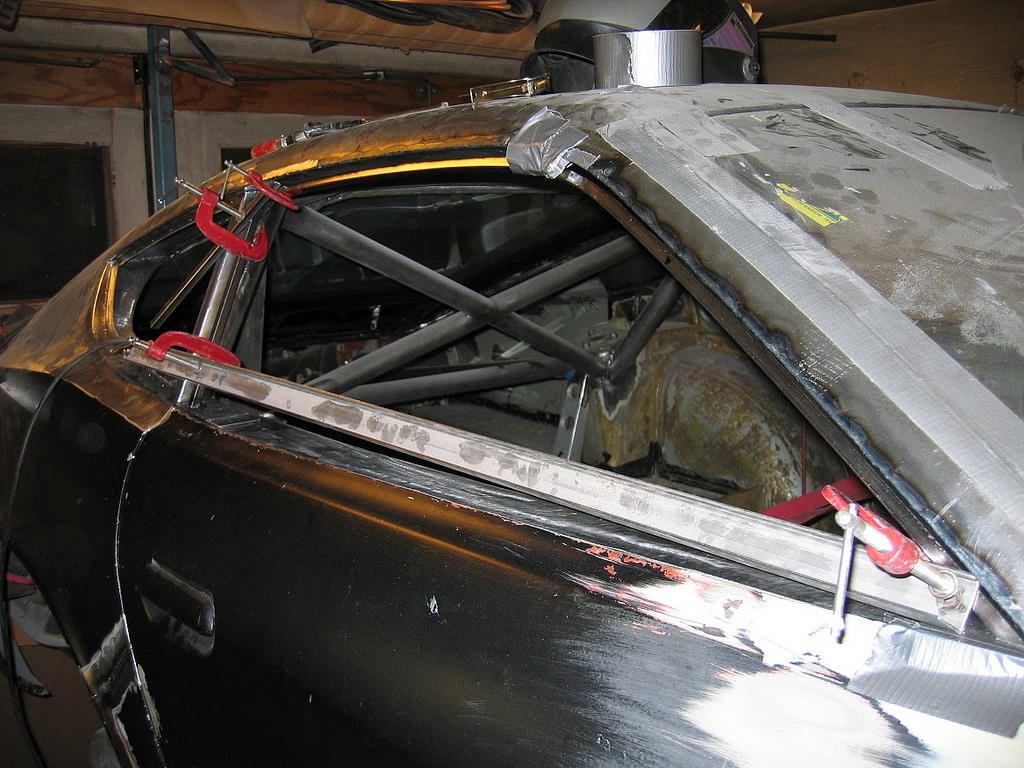
With the upper rear corner welded, the front part of the upper tubing is aligned.
 IMG_0256liten by ChevyZ240, on Flickr
Henrik
IMG_0256liten by ChevyZ240, on Flickr
Henrik
"Mechanix Menace": An LS7-motivated, chopped, tube framed, and heavily modified 1973 Datsun 240Z
https://www.pro-touring.com/threads/...73-Datsun-240Z
05-28-2014 #57
Registered User
- Join Date
- Aug 2004
- Location
- Västerås, Sweden
- Posts
- 332
March 25, 2005. After the square tubing is welded together, triangular reinforcements are welded to the lower part of the window frame.
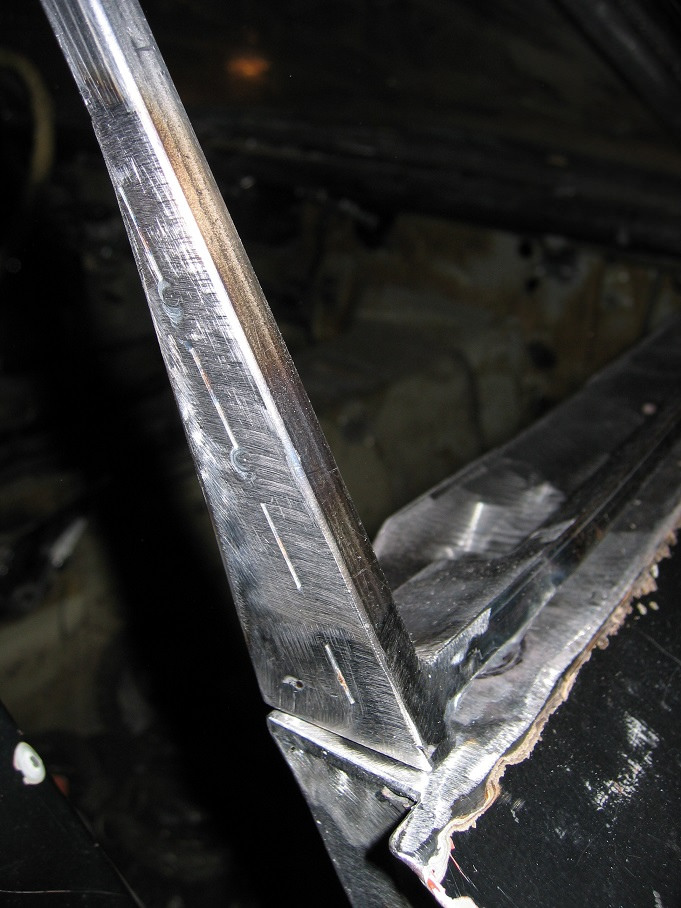 IMG_0267liten by ChevyZ240, on Flickr
This is what the final product looks like from the front...
 IMG_0271liten by ChevyZ240, on Flickr
...and the rear!
 IMG_0281liten by ChevyZ240, on Flickr
The two tubes locating the window frame in the door are seen here.
 IMG_0283liten by ChevyZ240, on Flickr
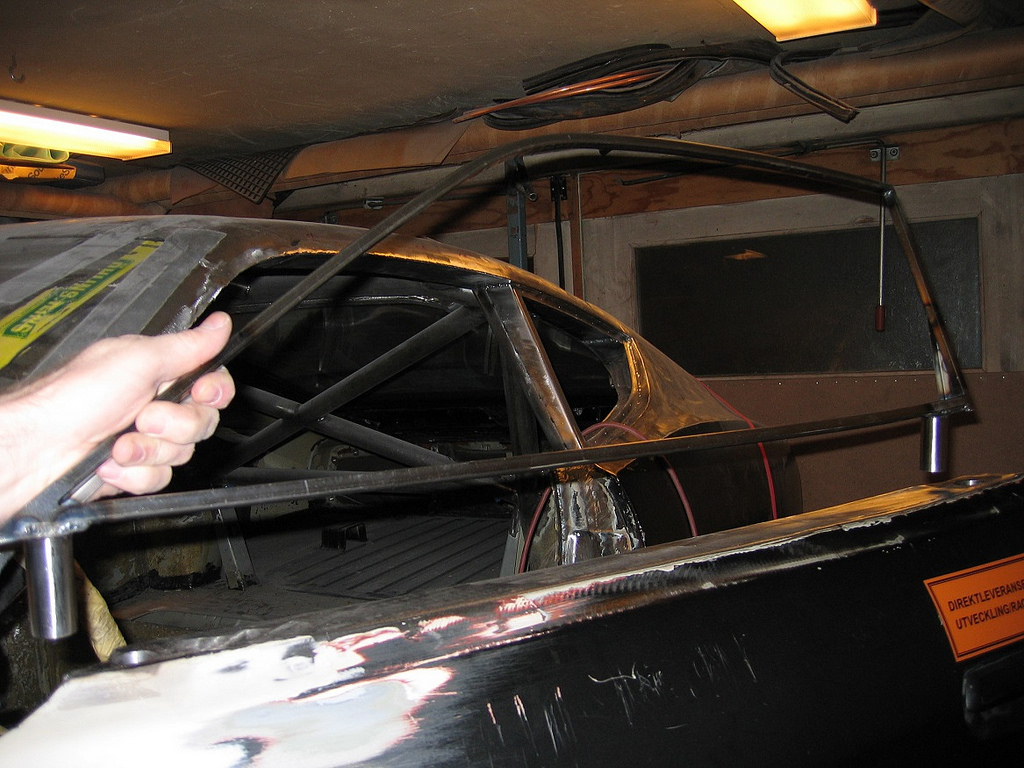
With a quick operation the entire window can be lifted out. Some type of latching mechanism will be added to secure the window in place. I will also make a couple of racks to store the windows safely in the trunk when running with "open" windows.
 IMG_0284liten by ChevyZ240, on Flickr
Another view of the window frame in place.
 IMG_0286liten by ChevyZ240, on Flickr
Henrik
IMG_0286liten by ChevyZ240, on Flickr
Henrik
"Mechanix Menace": An LS7-motivated, chopped, tube framed, and heavily modified 1973 Datsun 240Z
https://www.pro-touring.com/threads/...73-Datsun-240Z
05-28-2014 #58
Registered User
- Join Date
- Aug 2004
- Location
- Västerås, Sweden
- Posts
- 332
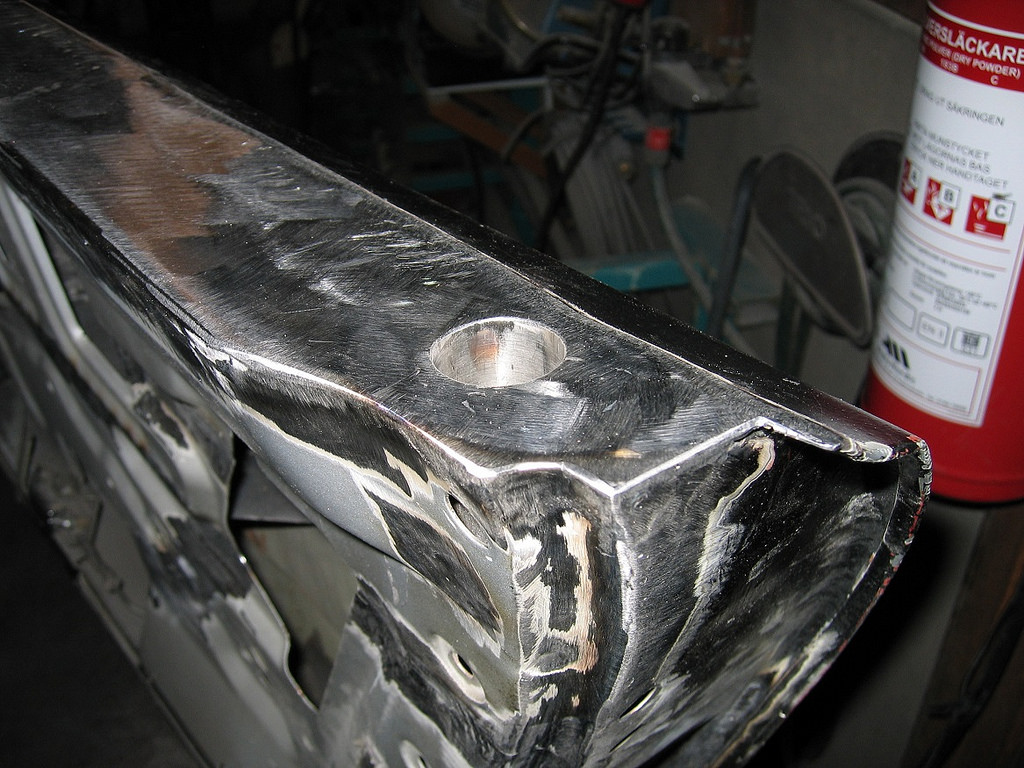
April 3, 2005. Here's a close-up of all the fabrication done to accommodate part of the roll cage in the door.
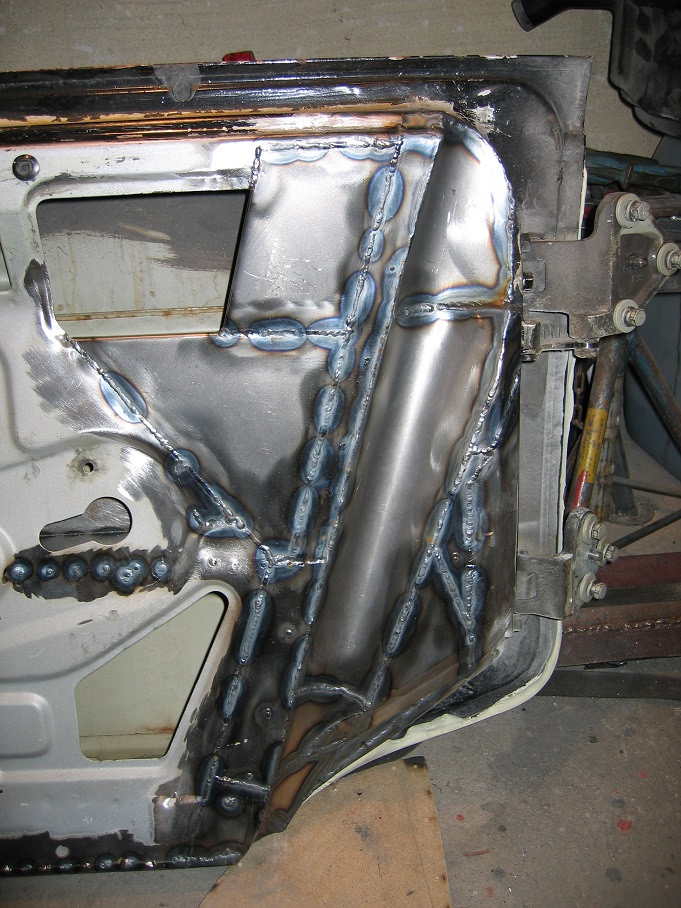 IMG_0294liten by ChevyZ240, on Flickr
Henrik
IMG_0294liten by ChevyZ240, on Flickr
Henrik
"Mechanix Menace": An LS7-motivated, chopped, tube framed, and heavily modified 1973 Datsun 240Z
https://www.pro-touring.com/threads/...73-Datsun-240Z
05-28-2014 #59
Registered User
- Join Date
- Aug 2004
- Location
- Västerås, Sweden
- Posts
- 332
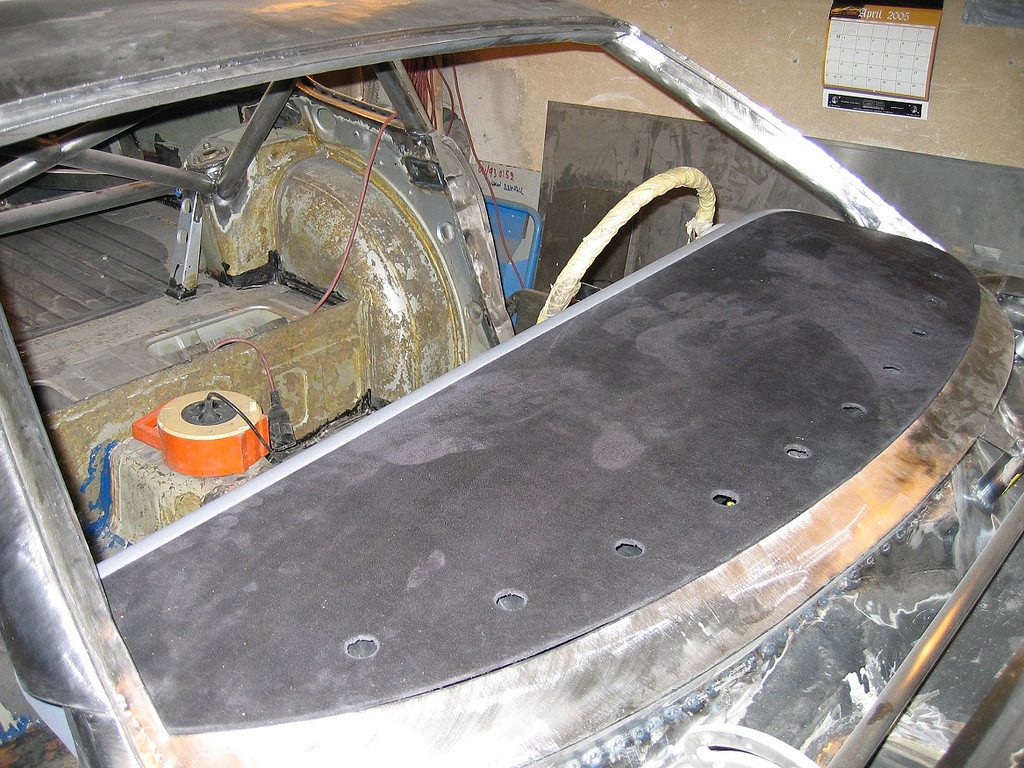
April 10, 2005. I am starting to cover the "dash pad" in black suede, to reduce glare from the windshield. Since this part has to be possible to bend to mount in the car, a channel for the air to the defroster vents is made out of rubber sheet. A sheet metal frame is sewn in, where a duct will connect it to the fan.
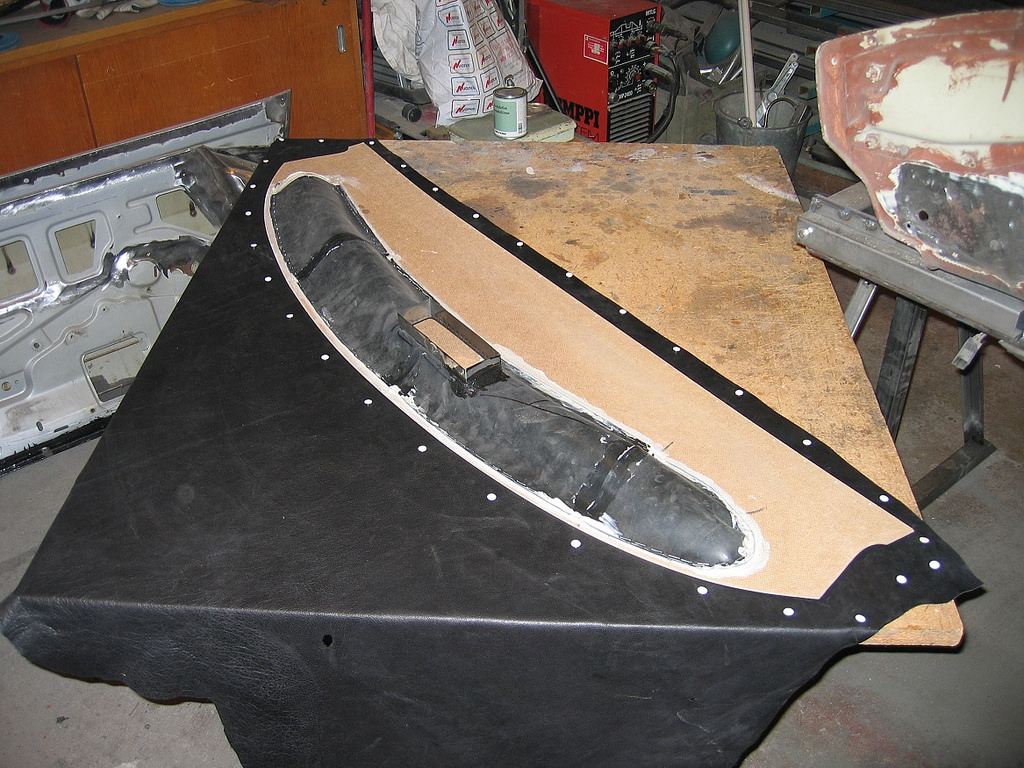 IMG_0295liten by ChevyZ240, on Flickr
I use heavy duty velcro to secure the dash pad to the dash board.
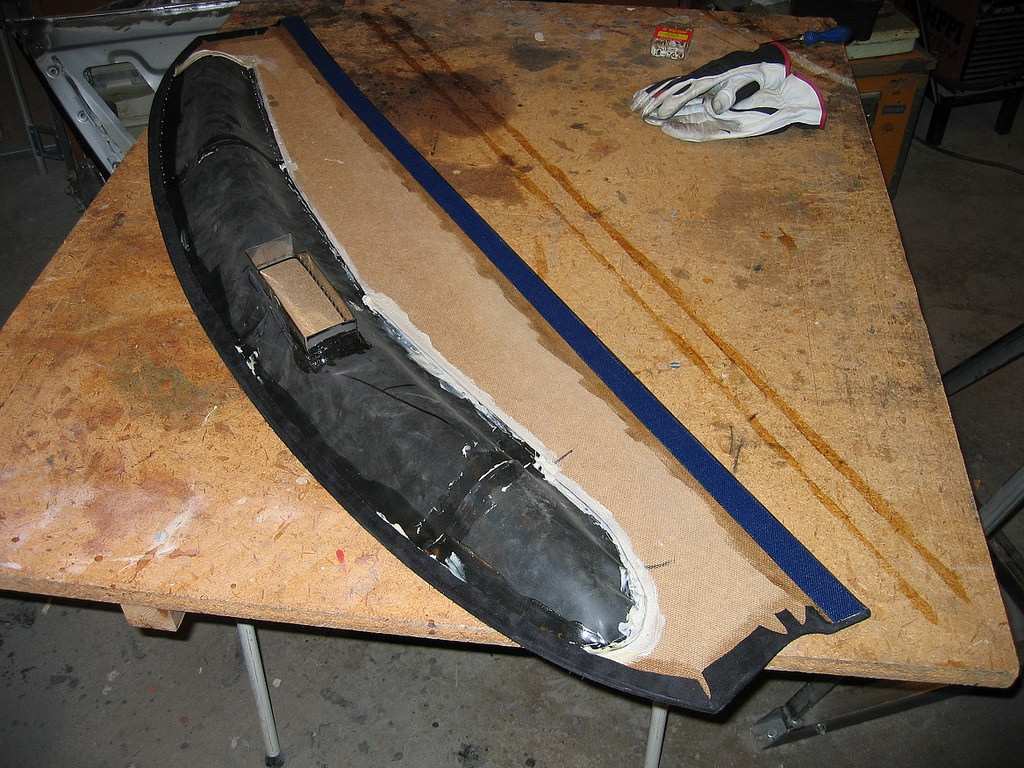 IMG_0299liten by ChevyZ240, on Flickr
The final product with the defroster vent holes clearly visible.
 IMG_0300liten by ChevyZ240, on Flickr
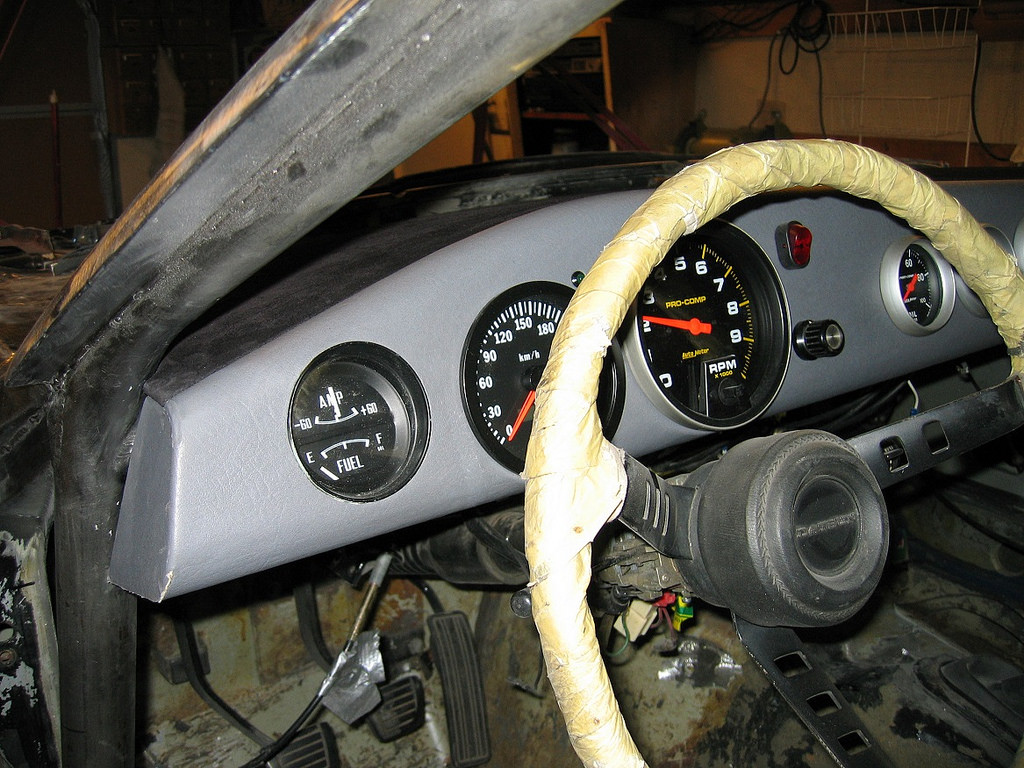
Another view of the dash.
 IMG_0303liten by ChevyZ240, on Flickr
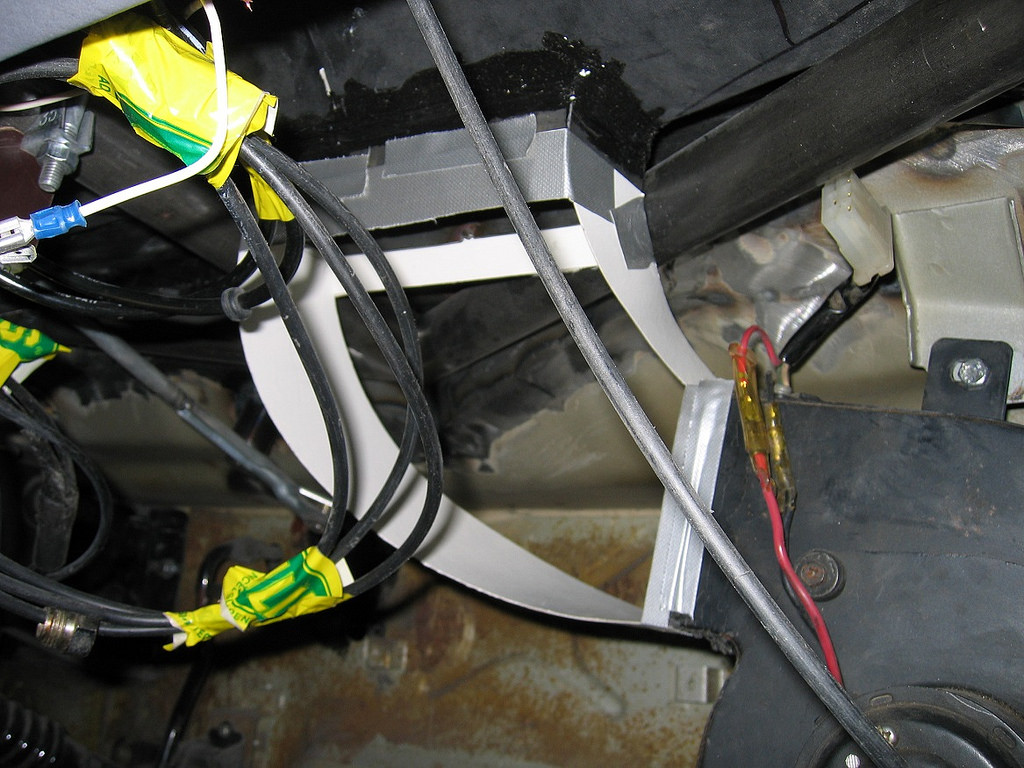
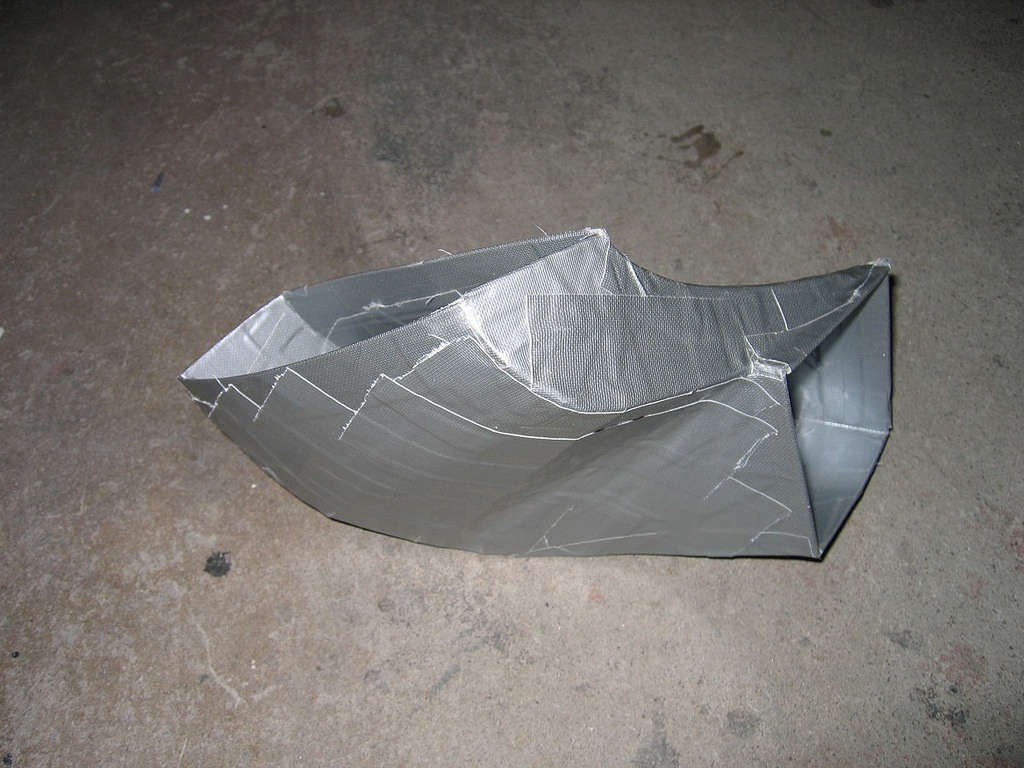
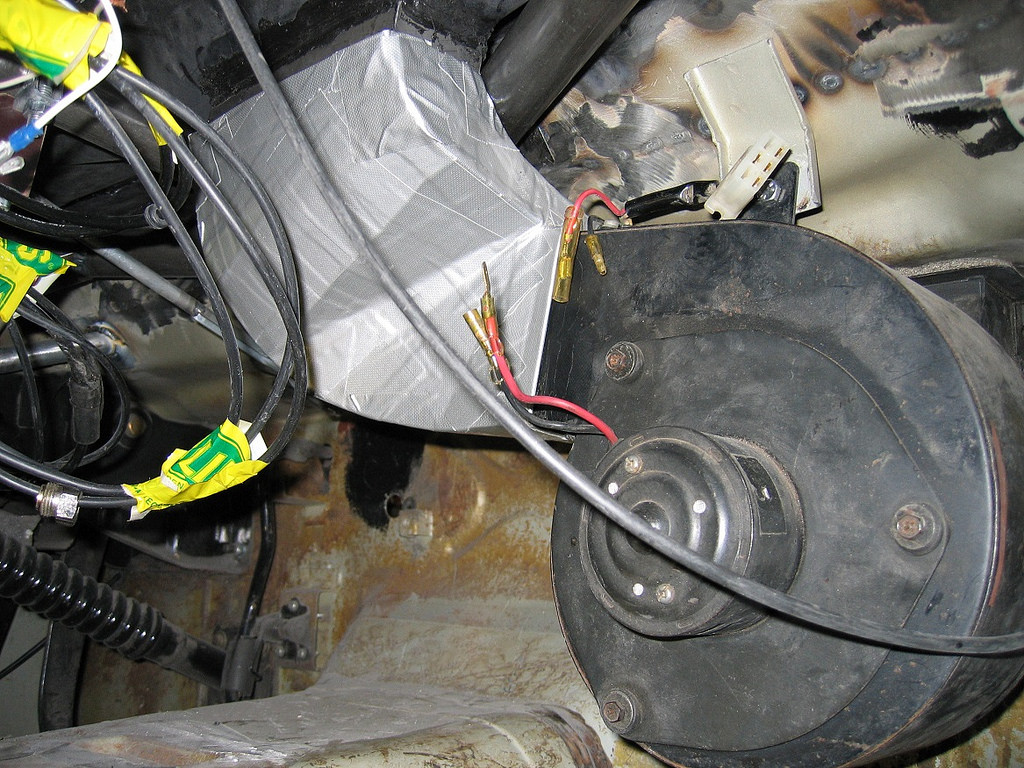
For now, I am using the stock, heavy fan. I am building a temporary duct out of cardboard and duct tape. The shape gets a bit complicated since there are roll cage tubes in the way, and I want it to be as aerodynamically efficient as possible.
 IMG_0304liten by ChevyZ240, on Flickr
The duct is finished...
 IMG_0306liten by ChevyZ240, on Flickr
...and here it is in place.
 IMG_0310liten by ChevyZ240, on Flickr
Henrik
IMG_0310liten by ChevyZ240, on Flickr
Henrik
"Mechanix Menace": An LS7-motivated, chopped, tube framed, and heavily modified 1973 Datsun 240Z
https://www.pro-touring.com/threads/...73-Datsun-240Z
05-29-2014 #60
Registered User
- Join Date
- Aug 2004
- Location
- Västerås, Sweden
- Posts
- 332
November 07, 2005. After the summer it's time to start working on the project again. Here, I have rigged up the car at roughly the ride height I am hoping to be able to run when it's finally done. Low, isn't it!?
 IMG_0896liten by ChevyZ240, on Flickr
Henrik
IMG_0896liten by ChevyZ240, on Flickr
Henrik
"Mechanix Menace": An LS7-motivated, chopped, tube framed, and heavily modified 1973 Datsun 240Z
https://www.pro-touring.com/threads/...73-Datsun-240Z

 Reply With Quote


