

Results 21 to 40 of 150
-
08-17-2014 #21
 Registered User
- Join Date
- Jan 2007
- Location
- NJ
- Posts
- 174
I'm down in North Wildwood Originally Posted by BonzoHansen

-
09-07-2014 #22
Registered User
- Join Date
- Jan 2007
- Location
- NJ
- Posts
- 174
Getting there
A little more progress this week. Getting close to installing the passenger side tub:
12-03-2014 #23
Registered User
- Join Date
- Jan 2007
- Location
- NJ
- Posts
- 174
So I finished up the passenger side frame rail notch and floor pan close outs. I must say that I am not very happy with the way everything turned out. The more I get into it the more I do not like the way you notch the factory frame rail and piece everything back together with close out panels. Also I had originally thought I was going to get by with a trunk floor center section. Again, after getting into it I have decided that I really need to do a full trunk floor pan. There is just too much rust and the overall condition of the remaining pieces of the original trunk floor are not in good enough condition to try to salvage.
That all being said, I am looking into replacing the factory frame rails with aftermarket formed frame rails. So far I have seen products from Competition Engineering, S&W Race Cars and Auto Weld. Does anyone have any experience with any of these frame rails? I am particularly interested in seeing how you tied them into the existing unibody structure at the forward end. Did you fabricate a cross member as is typical in pro street style back halfed cars? Or did you just weld them into the existing unibody structure the same way the factory rails do? If anyone could post up some pictures I would really appreciate it.
09-06-2019 #24
Registered User
- Join Date
- Jan 2007
- Location
- NJ
- Posts
- 174
Wow Dec 2014, it's amazing how life can get in the way of a good car project. So the maro is still around and I have finally found the time to get back into it. 4.5 years later that is. Anyway picking up where I left off, I really was not impressed at my 1st attempt on the mini tub install. So I decided to do it right this time. First thing I did was fabricate a chassis jig / frame table using some 2 x 3 x .125" tube and set it on a set of jack stands I bought from Summit. They are used for working on dirt modified race cars. The smaller aluminum stands are load leveling stands used for trailers. Together they did the trick. I was very amazed at how level everything turned out. Now I had a good foundation to start working from.
09-06-2019 #25
Registered User
- Join Date
- Jan 2007
- Location
- NJ
- Posts
- 174
As you can see in the previous post, I hung the front clip and doors. I aligned everything the best I could to the rocker panels as they were one of the most straight and solid parts of the car. I really only best fit everything as the doors are in rough shape.
09-06-2019 #26
Registered User
- Join Date
- Jan 2007
- Location
- NJ
- Posts
- 174
Next up, weld in some bracing and start cutting all the old rusted pieces out.
09-06-2019 #27
Registered User
- Join Date
- Jan 2007
- Location
- NJ
- Posts
- 174
Well I really went for it. Here you can see just how much of the car was removed, pretty much the entire back end and roof skin. Fortunately the under roof structure was in good shape with just some surface rust.
I used a product I for from Eastwood called FastEtch to prep the metal prior to primer and paint. I really like the FastEtch stuff. It works just as they advertise.
09-06-2019 #28
Registered User
- Join Date
- Jan 2007
- Location
- NJ
- Posts
- 174
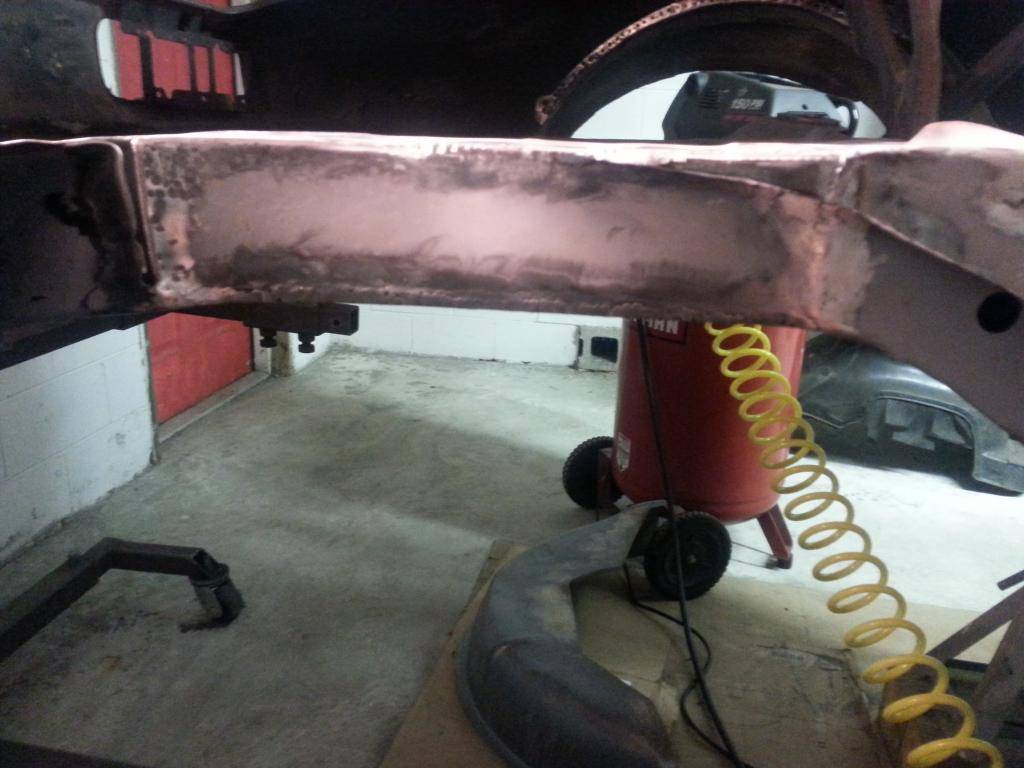
As I mentioned I was not happy with the previous attempt at the mini tub install. Also, I just cant get past notching sheet metal frame rails, not to mention once I got everything taken apart the original rear rails had a good amount of "orange peel" surface rust on them which significantly weakens the material. So I decided to leave the rear rails in place to use as a reference for setting a new full trunk floor pan. I wont bore you with all of the pics of notching and patching the floor for the mini tubs as there are plenty of threads on that process already. Nonetheless here is a quick shot of the 2nd attempt. Much better this time around.
09-06-2019 #29
Registered User
- Join Date
- Jan 2007
- Location
- NJ
- Posts
- 174
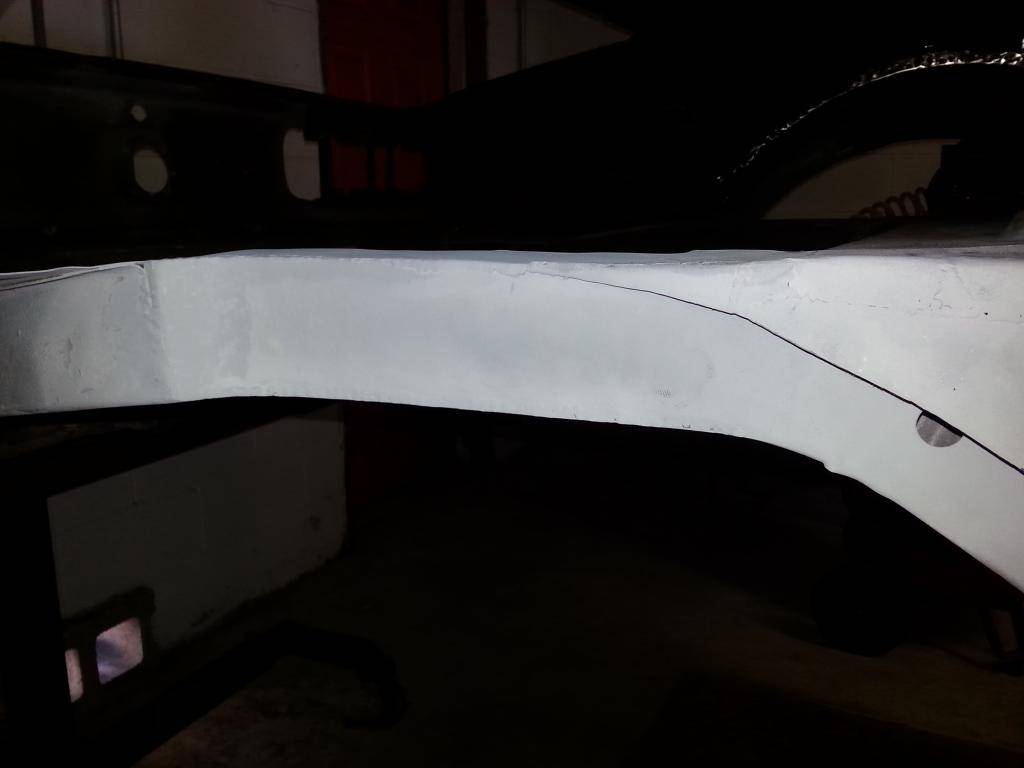
Once I had the trunk floor welded in I cut the old frame rails out. Here's a shot with the mini tubs and outer wells welded in with a bit of epoxy primer. It is worth noting that prior to welding anything in place, I completely mocked up and test fist all of the new panels including quarters, rear tail panel, deck filler, etc. I must have put together and taken this thing apart at least half a dozen times to get to this point. Once I get everything mocked up where I want it I drill a few holes in the panels that I am welding in place and use clecos to hold them in place.
09-06-2019 #30
Registered User
- Join Date
- Jan 2007
- Location
- NJ
- Posts
- 174
Well that's all I have time for right now. More updates coming soon. It feels great to be back at it making progress!!!
09-17-2019 #31 Registered User
- Join Date
- Jun 2015
- Location
- San Diego
- Posts
- 165
subscribed!
09-18-2019 #32
Registered User
- Join Date
- Sep 2012
- Location
- Jersey
- Posts
- 20
 Ditto! Keep the posts and pics coming. I may be in your shoes with my own project... unfortunately. Originally Posted by KB Camaro
~Max
10-15-2019 #33 Registered User
- Join Date
- May 2018
- Location
- way east on a rock
- Posts
- 155
picture works
10-15-2019 #34
Registered User
- Join Date
- Jan 2007
- Location
- NJ
- Posts
- 174
So I was having some trouble with my picture hosting service and it looks like it is worked out.
I've made some good progress over the past month or so. The quarters panels are just about finished. Here is a picture of one of the many test fits I did with all of the exterior sheet metal panels including the roof skin. All in all, most everything fit pretty well with just some trimming and bending of the mating flanges.
10-15-2019 #35
Registered User
- Join Date
- Jan 2007
- Location
- NJ
- Posts
- 174
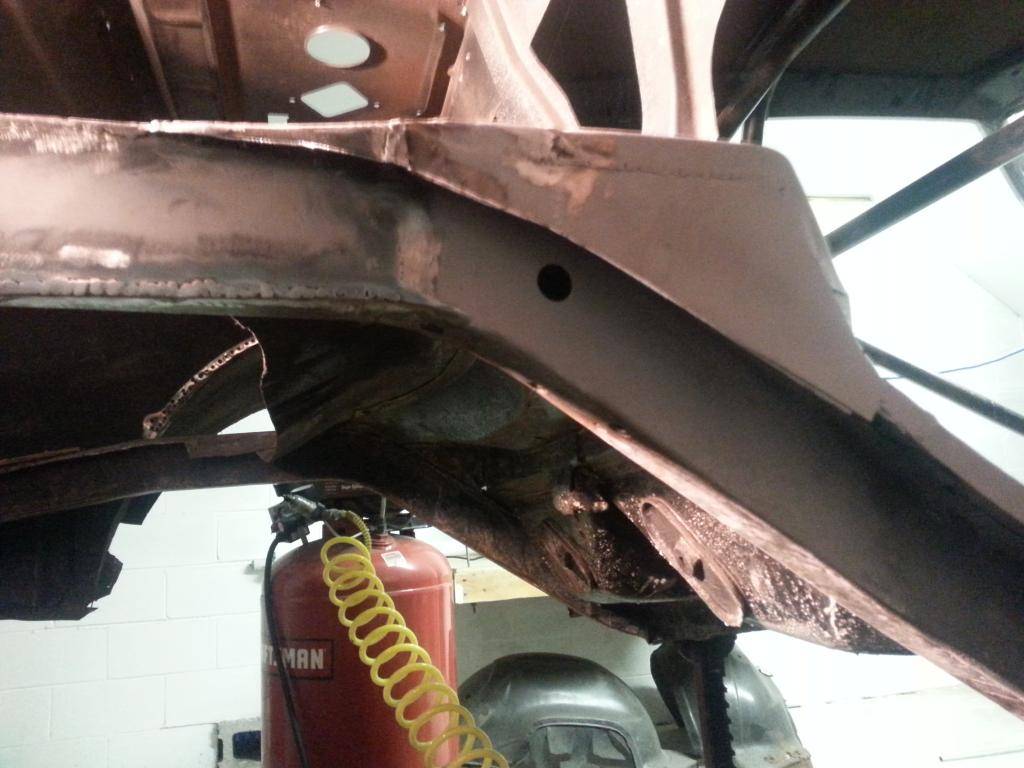
Here is the fit on the A pillar.
10-15-2019 #36
Registered User
- Join Date
- Jan 2007
- Location
- NJ
- Posts
- 174
Here you can see things are starting to come together.
10-15-2019 #37
Registered User
- Join Date
- Jan 2007
- Location
- NJ
- Posts
- 174
Gitten dem gaps right before welding!
10-15-2019 #38
Registered User
- Join Date
- Jan 2007
- Location
- NJ
- Posts
- 174
Here are a couple pics of the quarter panel install. For the most part they fit really well until I got to fitting the rear tail panel (we'll get to that in a little bit).
10-15-2019 #39
Registered User
- Join Date
- Jan 2007
- Location
- NJ
- Posts
- 174
Its kind of tough to tell but the fit between the new quarter panels and the door jamb areas was really good. I did have to do some tweaking and a little hammer and dolly work but all in all it wasnt too bad. Ive heard alot of people say they had issues with the door jamb / striker plate. It sounds like these differ from car to car and can place the quarter too far foward or aft. I didnt really mess with this area too much because the wheel well openings lined up pretty well as did the fit between the quarter and the drip rail near the rear quarter glass opening. Its good to see that the 267 times I test fit everything wasnt for nothing.
10-15-2019 #40
Registered User
- Join Date
- Jan 2007
- Location
- NJ
- Posts
- 174
I did spend a good amount of time bending and trimming the lower flanges on the new quarters to get the gap at the rockers nice and tight. The passenger side needed some hammer and dolly work because there was a small dent of sorts near the wheel well opening. Ill still probably have to pull some more out with the stud welder and slide hammer now that it is all welded in place but I was mainly focusing on getting a good gap at this stage. The other thing I did was weld the lower flange from inside the car since the quarter glass is out. Ive heard people say they use panel adhesive for this area but I wasnt to keen on that.

 Reply With Quote


