
Results 161 to 180 of 195
-
06-10-2018 #161
 Registered User
- Join Date
- Aug 2014
- Posts
- 435

"I can't wait to see it as a roller" is technically 9 words. But yeah. I wholeheartedly agree! lol
Jay
-
06-19-2018 #162
 Registered User
- Join Date
- Jun 2011
- Location
- SoCal
- Posts
- 885
Rear suspension is roughed in. We will likely have to adjust the wheelbase once the cab & bed are back on.

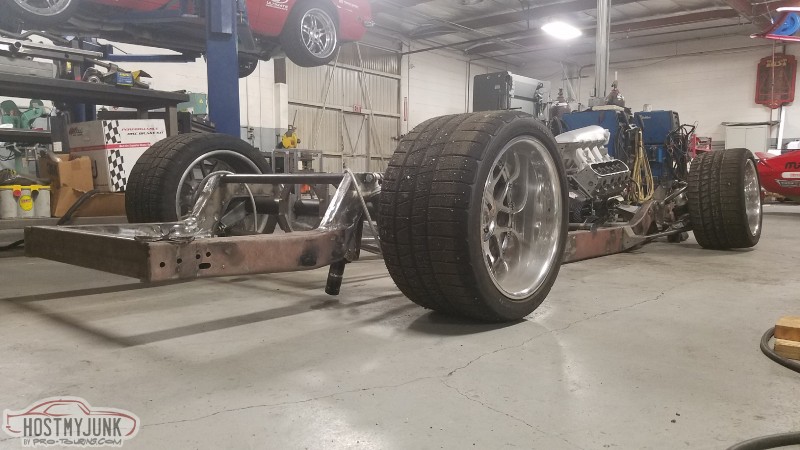 www.totalcostinvolved.com"Quality doesn't cost, it pays"
-
06-19-2018 #163
Registered User
- Join Date
- Apr 2006
- Location
- Huntington Beach, CA
- Posts
- 2,415
Did you steal the boss's wheels lol?
Please Subscribe to the AutoXandTrack YouTube Channel
Autocross and track blog about running autocross and track events with pro touring cars
-
06-19-2018 #164
Registered User
- Join Date
- Jun 2011
- Location
- SoCal
- Posts
- 885
Yessum! I debated between these and Reddawn's wheels but went with the easy route since two were already removed. I prefer the look and size of Ef's HRE's but they wouldn't clear the Wilwood hubs up front. Originally Posted by Chad-1stGen
 www.totalcostinvolved.com"Quality doesn't cost, it pays"
-
06-20-2018 #165
 Registered User
- Join Date
- Sep 2010
- Location
- corona,ca.
- Posts
- 1,081
Jason,are you going to show this as a roller at the brothers show?????
72 chevelle.
-
06-21-2018 #166
Registered User
- Join Date
- Jun 2011
- Location
- SoCal
- Posts
- 885
That's the plan. Might even get rambunctious and put the cab on there. Originally Posted by chevelletiger
www.totalcostinvolved.com"Quality doesn't cost, it pays"
-
06-21-2018 #167
 Registered User
- Join Date
- May 2013
- Location
- Texas
- Posts
- 297
...and if you believe what you see on Facebook... the cab is on!
-
06-21-2018 #168
Registered User
- Join Date
- Jun 2011
- Location
- SoCal
- Posts
- 885
Yessum..... Originally Posted by Munssey

 www.totalcostinvolved.com"Quality doesn't cost, it pays"
-
06-22-2018 #169
Registered User
- Join Date
- Jun 2017
- Location
- Edgewater Co.
- Posts
- 150
You do realize, you've raised the bar for what can be done with a set of C10 frame rails???
I continue to be blown away by this truck...
Joe
-
08-16-2018 #170
Registered User
- Join Date
- Jun 2011
- Location
- SoCal
- Posts
- 885
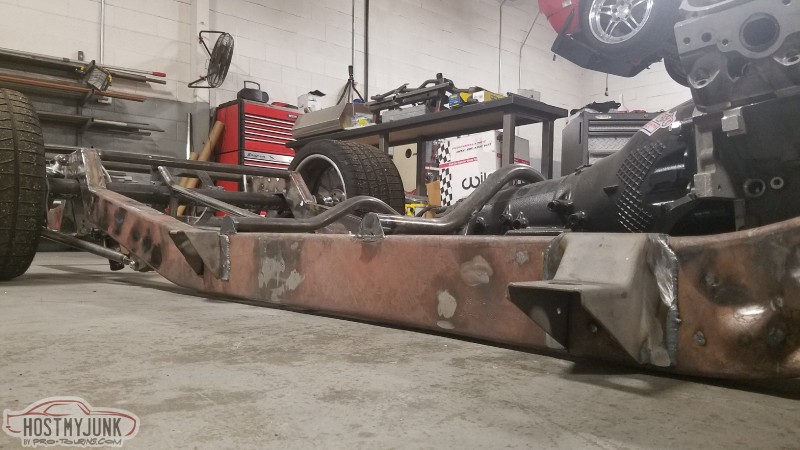
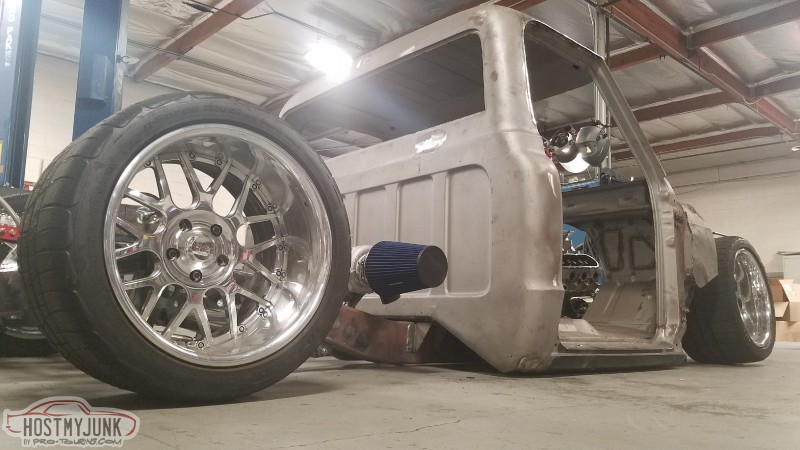
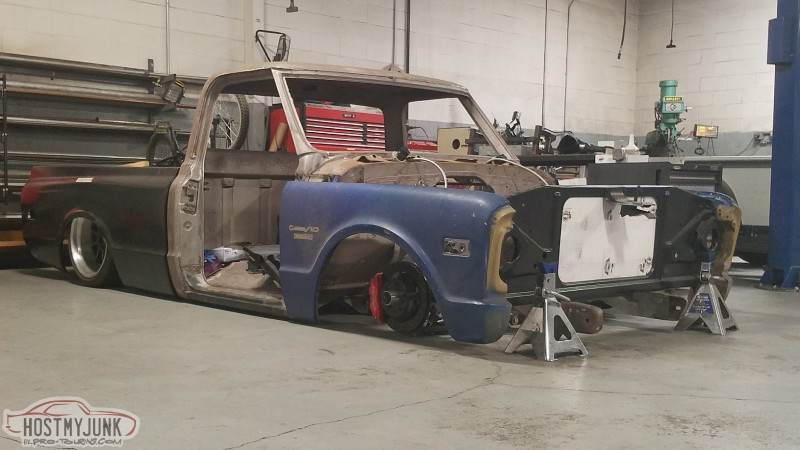
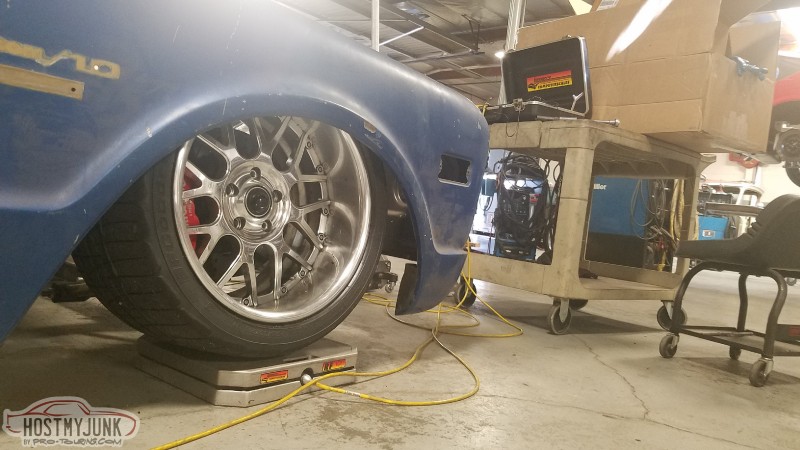
I haven't made much progress lately on the truck because I broke my ankle back in June. Just been planning the layout of all the under bed items. In order to do that I needed the bed in place.
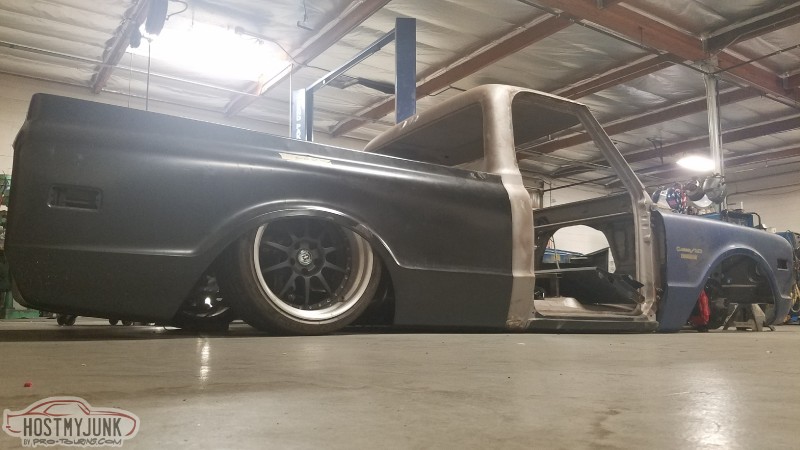
At the time of this pic I didn't have access to a wheel that would fit over the front hub.
 www.totalcostinvolved.com"Quality doesn't cost, it pays"
-
08-19-2018 #171
Registered User
- Join Date
- Jun 2017
- Location
- Edgewater Co.
- Posts
- 150
Damn dude, that's a real momentum killer,, hope your doing better... Your making me regret selling my 71 project. don't worry, I have enough projects to keep me busy for much longer than I'd care to admit, somewhere along the line one wasn't enough. I blame Stacy David... Originally Posted by Sales-TCI-Eng

Joe
-
09-14-2018 #172
Registered User
- Join Date
- Jun 2011
- Location
- SoCal
- Posts
- 885
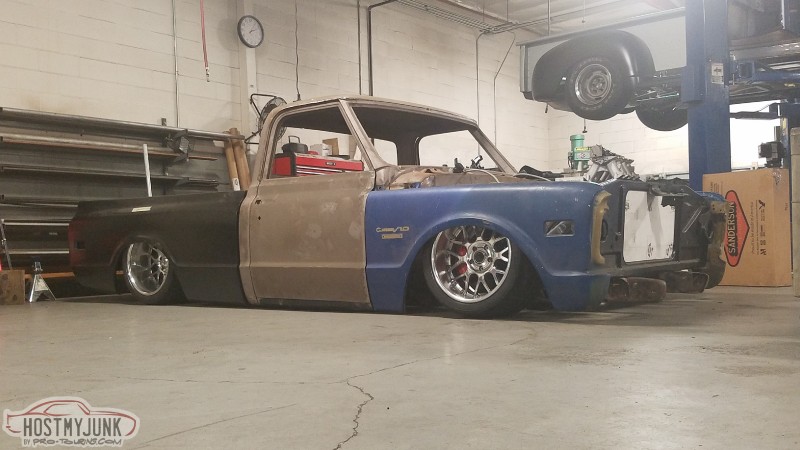
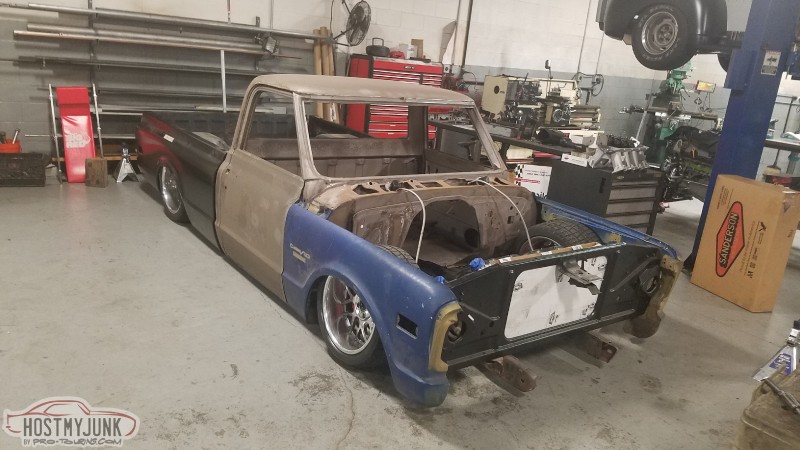
I've been kinda stalled on the rear diffuser design. My brother (the artistic one in the family) was in the area the other day so I had him take a look at it. I think he's come up with an idea that will look good and function well at 150+mph.
Cut up the factory longbed sides.
A little teaser
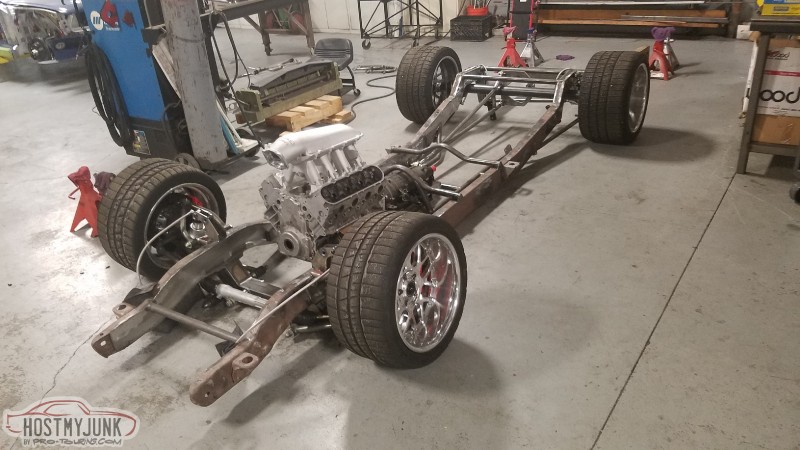
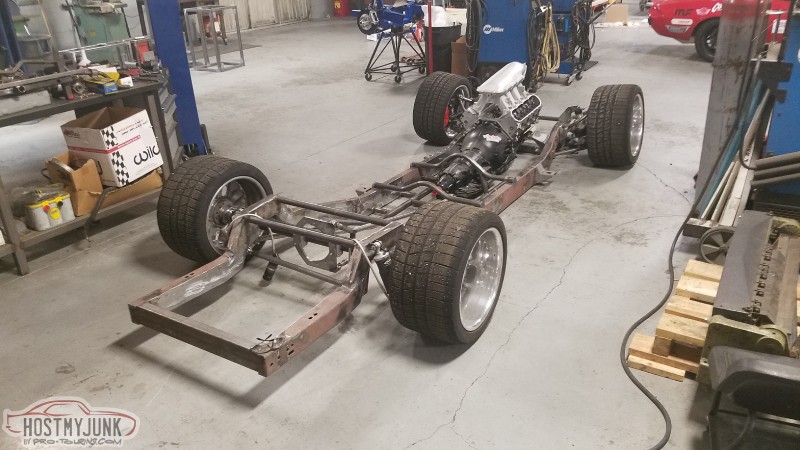
Once again, curiosity got the better of me. Included: Radiator, turbos, battery, air tanks, air compressors, tailgate, rear roll pan & cardboard intercooler(LOL). Excluded: Engine, tranny, driveshaft, 3rd member, glass, interior, grill, wiring, hood, rear brakes, and tunnel/firewall.

Sitting on Ed's wheels/tires 18x11 & 18x12
 www.totalcostinvolved.com"Quality doesn't cost, it pays"
-
09-15-2018 #173
Registered User
- Join Date
- Sep 2010
- Location
- corona,ca.
- Posts
- 1,081
Nice Jason!
My friend Hans and I will have to stop by again and check it out.72 chevelle.
-
09-17-2018 #174
Registered User
- Join Date
- Jun 2011
- Location
- SoCal
- Posts
- 885
Sure, any time. I'm really hoping to have some engine progress in the next few weeks. Worked out some details so that we will be able to break it in on the dyno N/A. Then strap on some borrowed turbo manifolds and let her rip. Originally Posted by chevelletiger
www.totalcostinvolved.com"Quality doesn't cost, it pays"
-
10-18-2018 #175
Registered User
- Join Date
- Jun 2011
- Location
- SoCal
- Posts
- 885
Time for the monthly update.
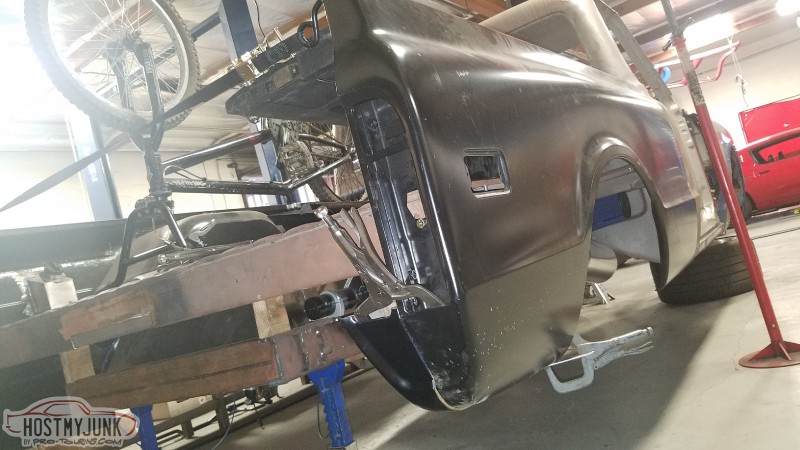
The first few pieces of this was accomplished with Tig because the Mig machine was being used by Ed on Ray Currie's F100. Needless to say I am no sheet metal guru and the Tig added a level of complication due to awkward positioning.
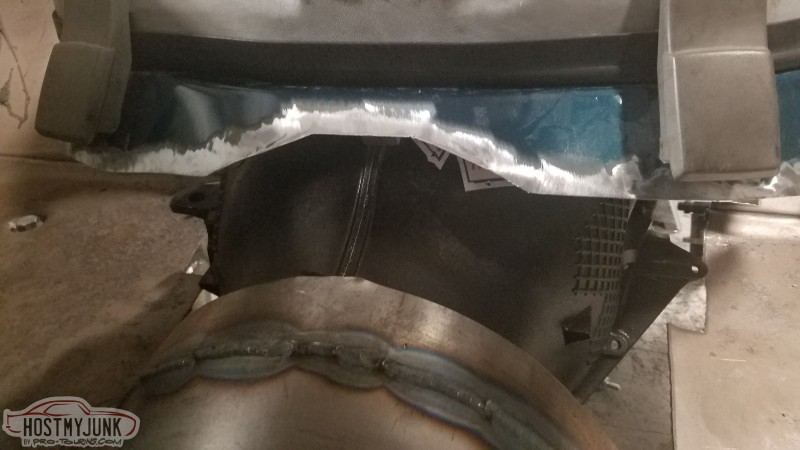
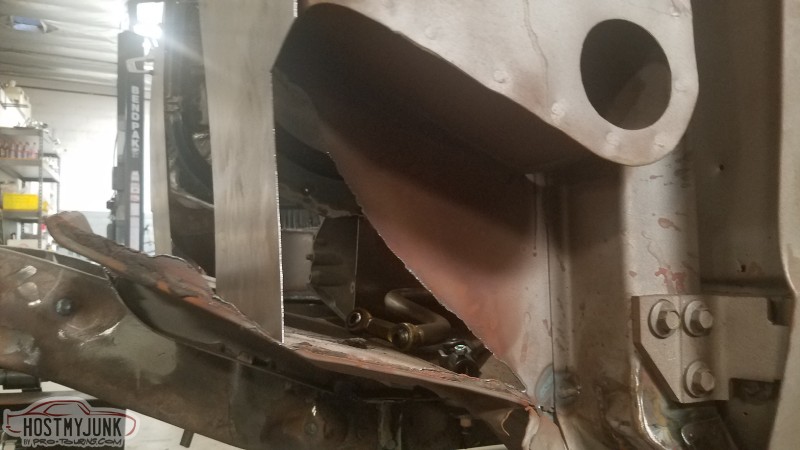
Before, just a big gaping hole.
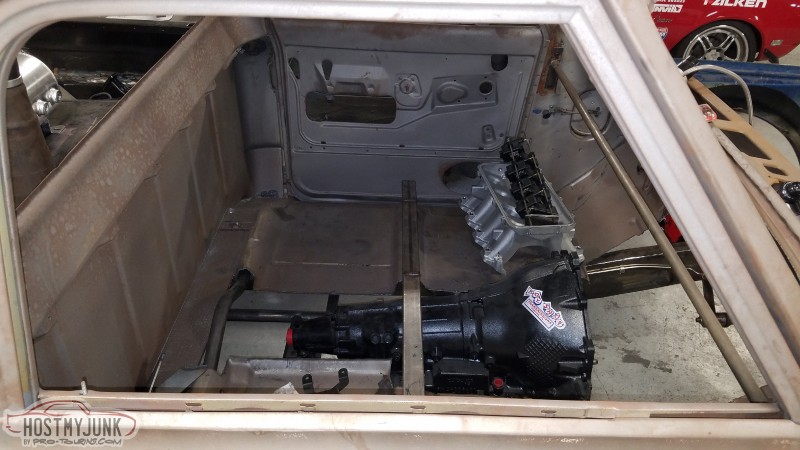
I skipped a couple pics during this 4 step process. one flat panel, and 3 strip pieces to cover the frame crossover tube.
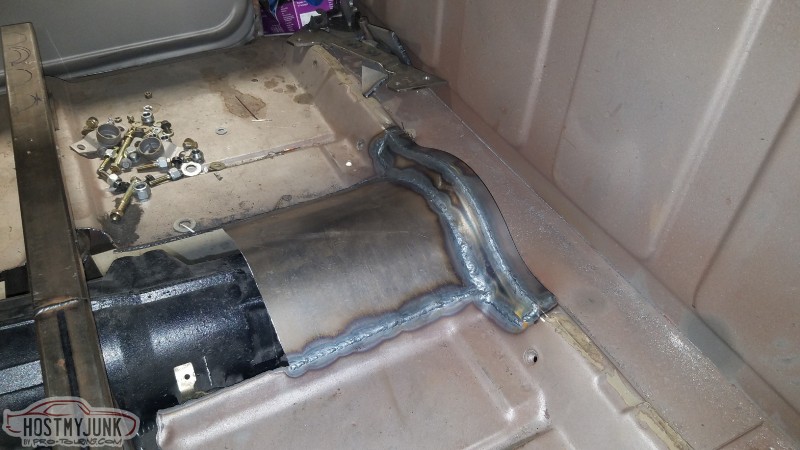
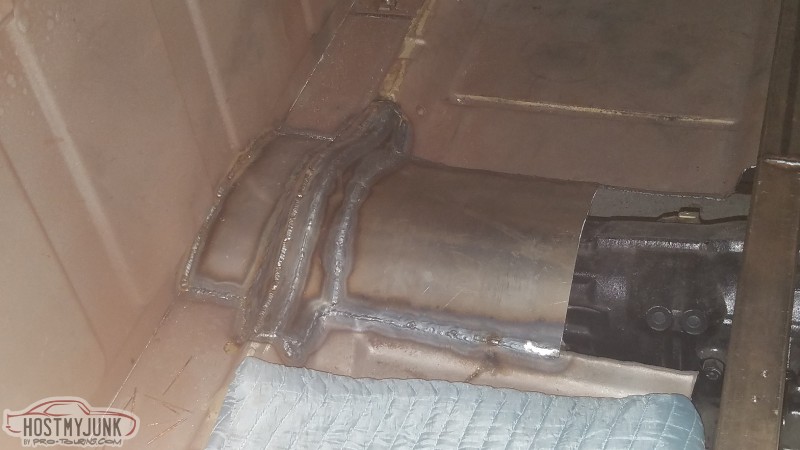
Making room for the driveshaft. This part was a little more involved than the previous steps. Plasma cut the back of the floor out but there is a cross brace underneath. I had to put myself in the path of the plasma overspray to get to a couple areas.
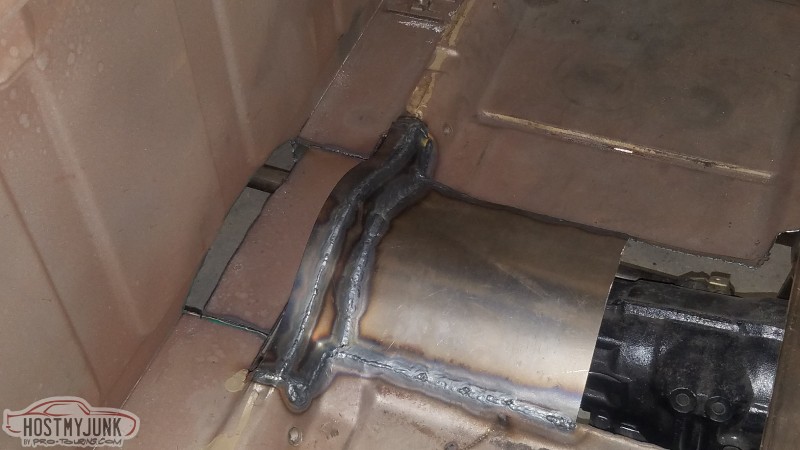
I had considered adding an access panel here for Torque Arm adjustments. Changed my mind once I realized that once the interior and seats were in there it would be a pita anyway.
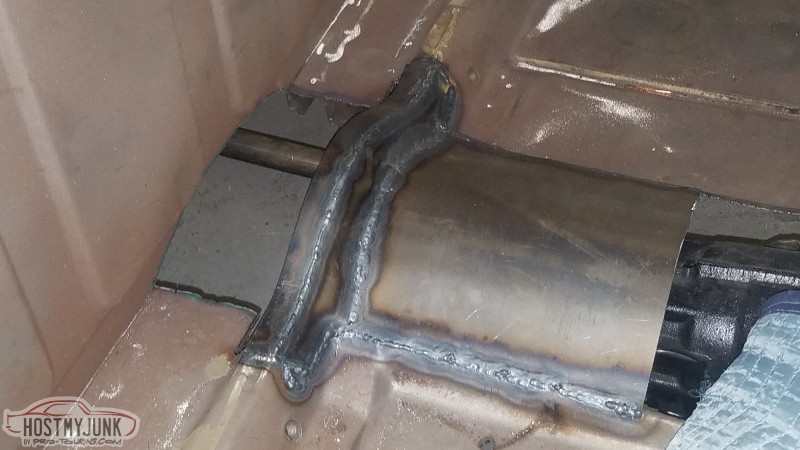
This piece had the same curvature as the previous panel. There's more than enough room for even a 4" driveshaft.
Again, skipped a couple pics here. These two pieces had a little bit of angle so it took a few trial and error fitments to get it right.
Skipped a couple pics again. Now that there is some strength back in the floor I removed the cross floor bracing. Now I'm on the lookout for a van engine cover. Likely going to be an Astro Van. Plan to cut the sheet metal around the whole thing and then graft it to the C10.
 www.totalcostinvolved.com"Quality doesn't cost, it pays"
-
10-28-2018 #176
Registered User
- Join Date
- Sep 2010
- Location
- corona,ca.
- Posts
- 1,081
��me like Jason!��
72 chevelle.
-
11-05-2018 #177
Registered User
- Join Date
- Jun 2011
- Location
- SoCal
- Posts
- 885
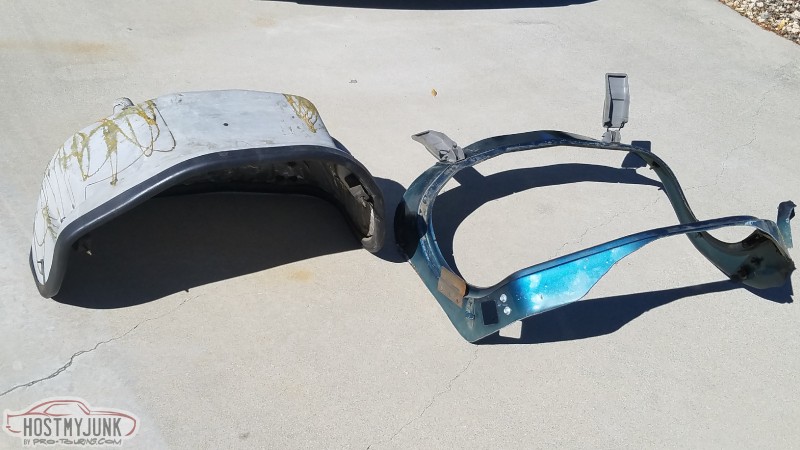
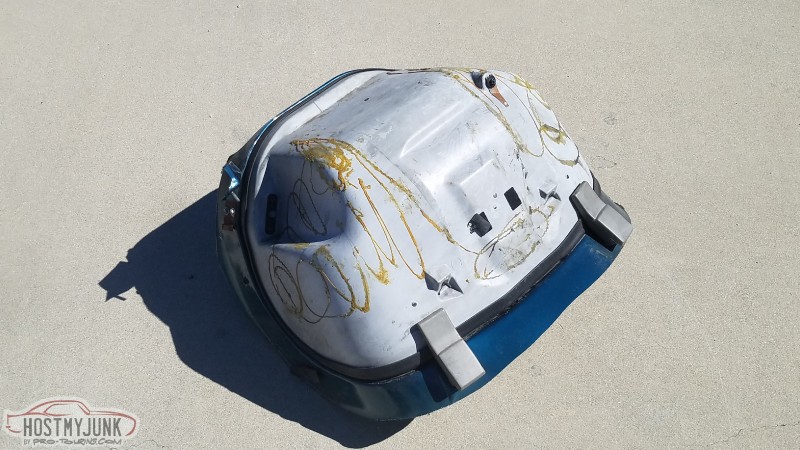
So project #Ctwin is gaining some junkyard parts. After a bunch of measuring and online dimension searching I headed to the Ontario Pick-A-Part with reciprocating saw in hand.
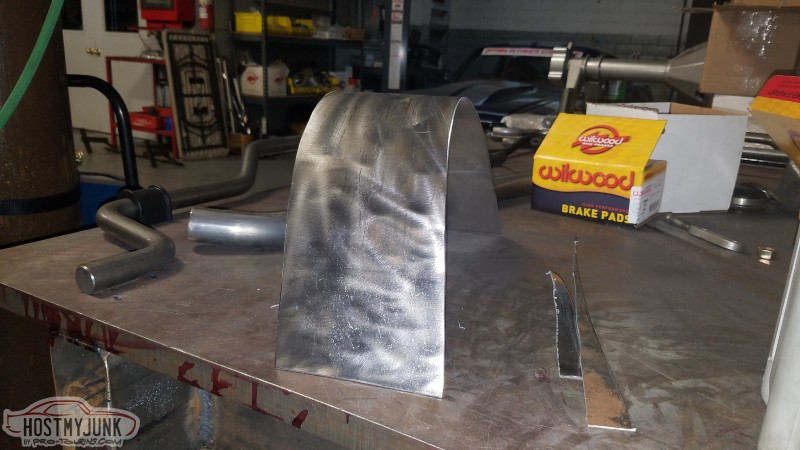
There are 3 variants of the Astro Van engine cover. Early, mid & late. I chose the mid year because of it's larger opening and thick construction.
There were a bunch of vans to choose from. Luckily I found a very clean example and began cutting it up.
The cover and the surround.
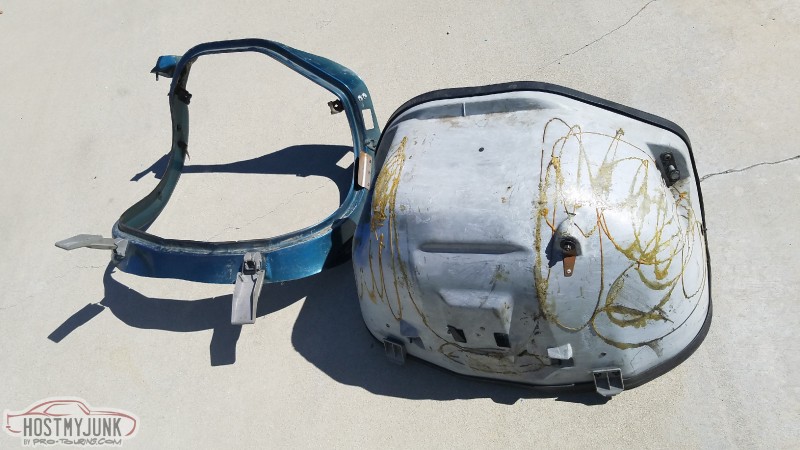
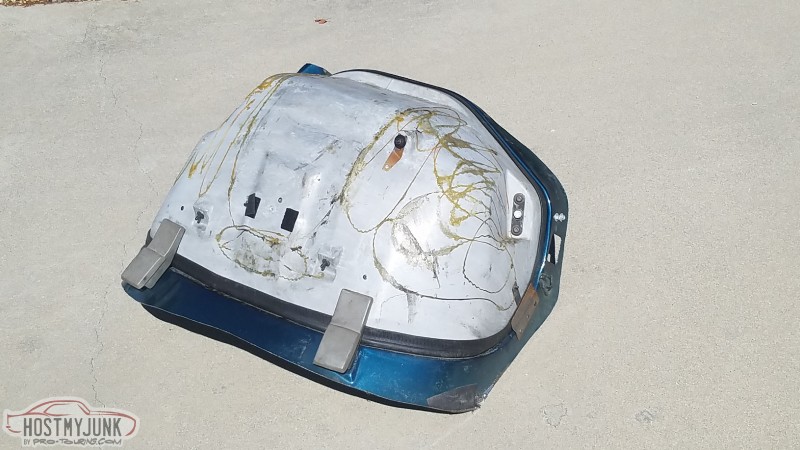
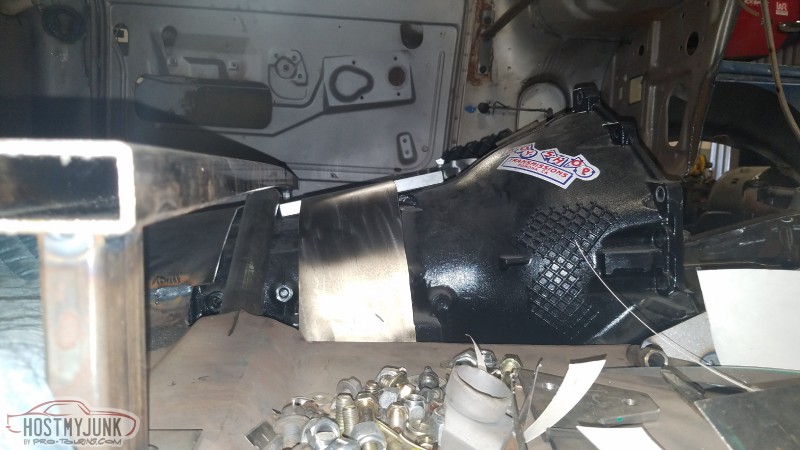
Doing a little prelim fitment check. It's pretty darn close as is. The under side of the dash will need to be raised slightly. That will allow the engine cover to move forward against what will eventually be a new firewall. There will be some serious consideration here for dash design. The cover must be able to be removed easily. Which will be no easy task once there are seats in place. Initial thoughts include designing a hinged center to the dash that lifts up and away. Another thought is to have two separate dashes (driver/passenger) and then have a removable center console that mates up against the dash/engine cover that is also easily removable.
 www.totalcostinvolved.com"Quality doesn't cost, it pays"
-
01-24-2019 #178
Registered User
- Join Date
- Jun 2011
- Location
- SoCal
- Posts
- 885
I finished up Episode 2 last night.
I cover getting the chassis out of the fixture, building the rear suspension, mounting the cab, taking it to the Brothers Truck Show and beginning the diffuser design.
https://www.youtube.com/watch?v=RI5Q...daz5mlw03c010cwww.totalcostinvolved.com"Quality doesn't cost, it pays"
-
02-07-2019 #179
Registered User
- Join Date
- Jun 2011
- Location
- SoCal
- Posts
- 885
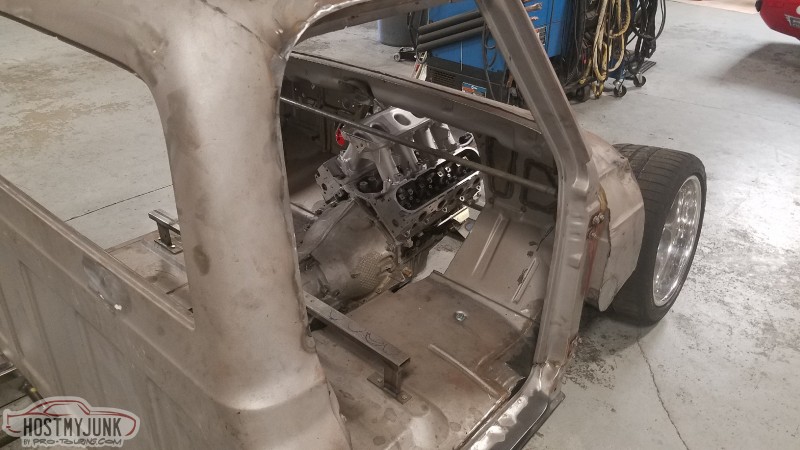
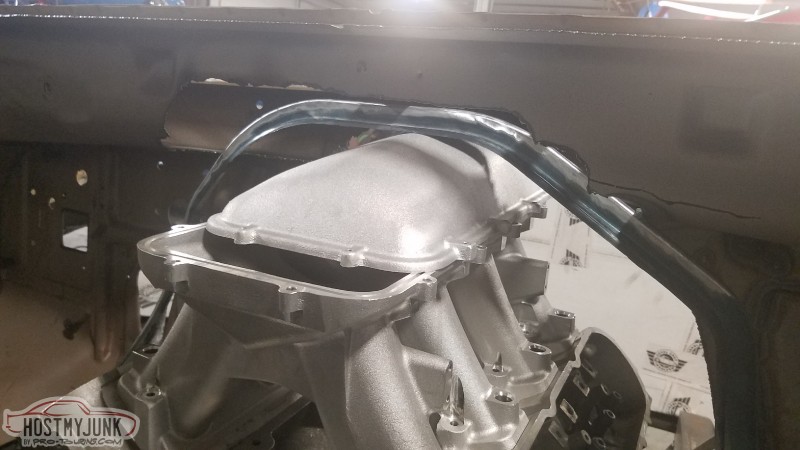
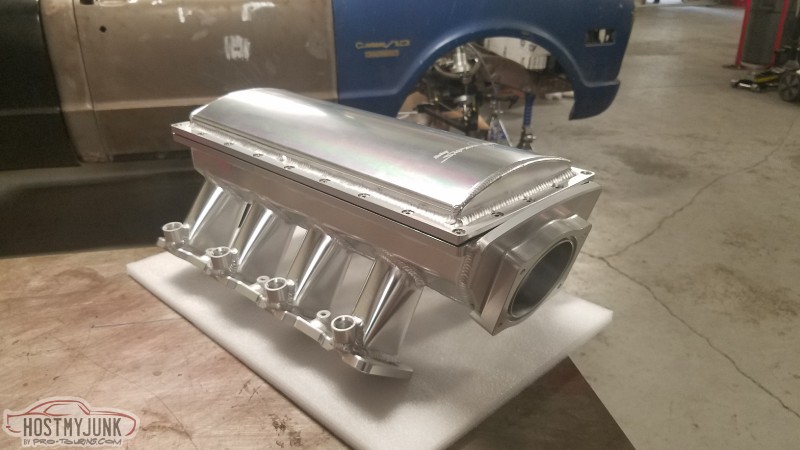
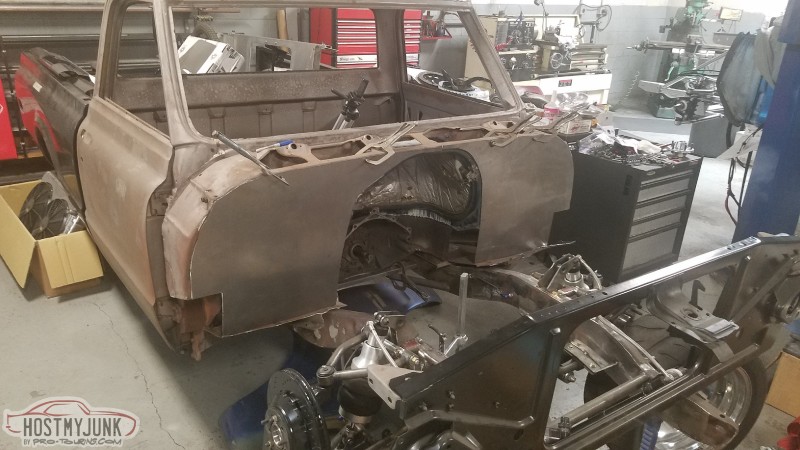
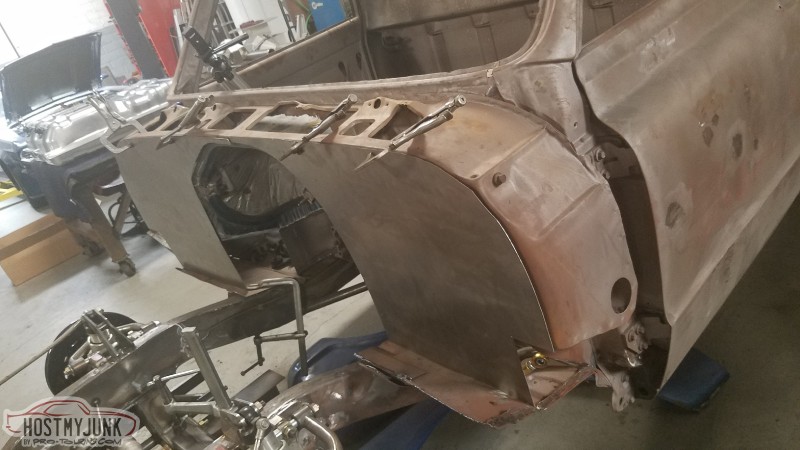
My fears were confirmed. The Holley High-Ram intake will not clear the Astrovan Doghouse.
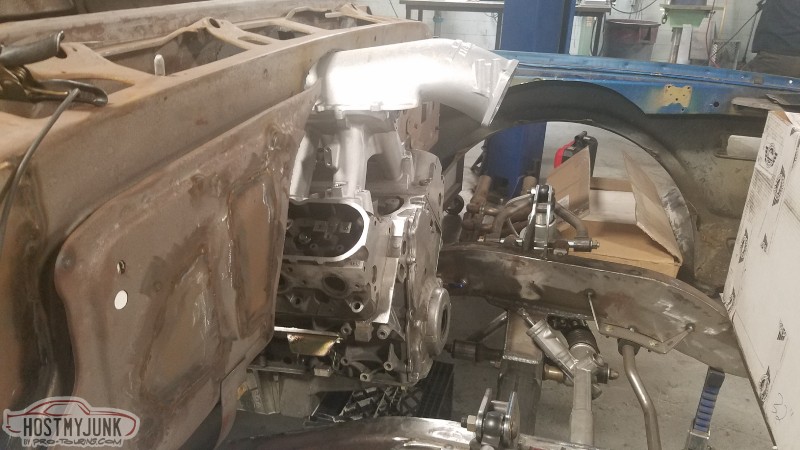
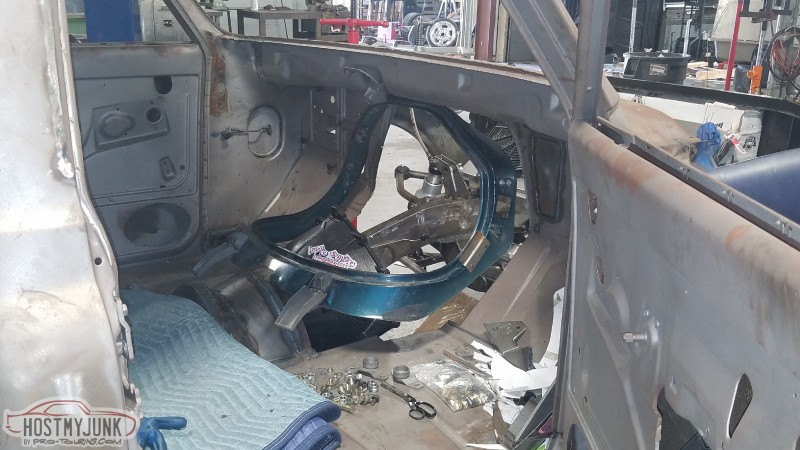
Realizing that the manifold would need to be changed I started grafting this Astrovan doghouse to the tunnel & floor.
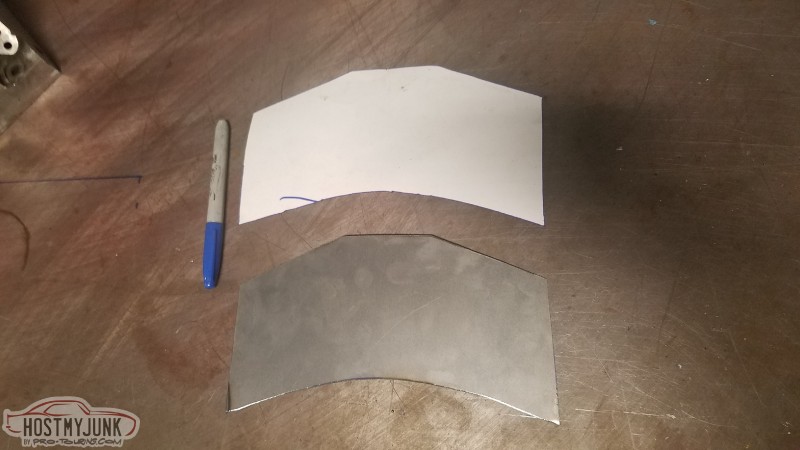
Paper tamplate


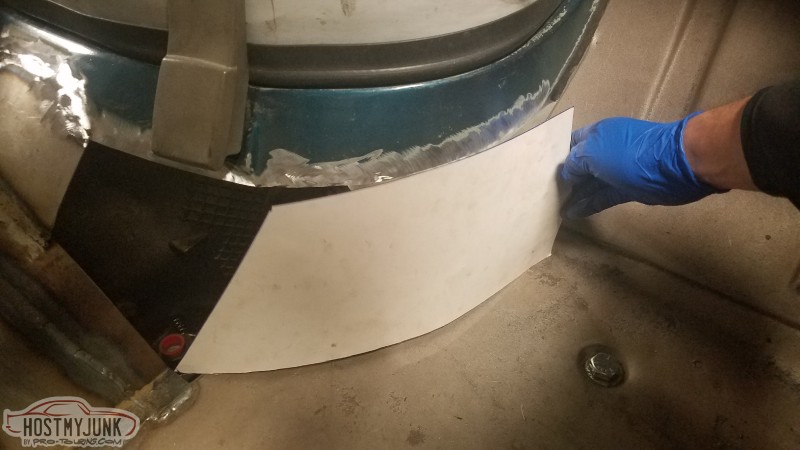
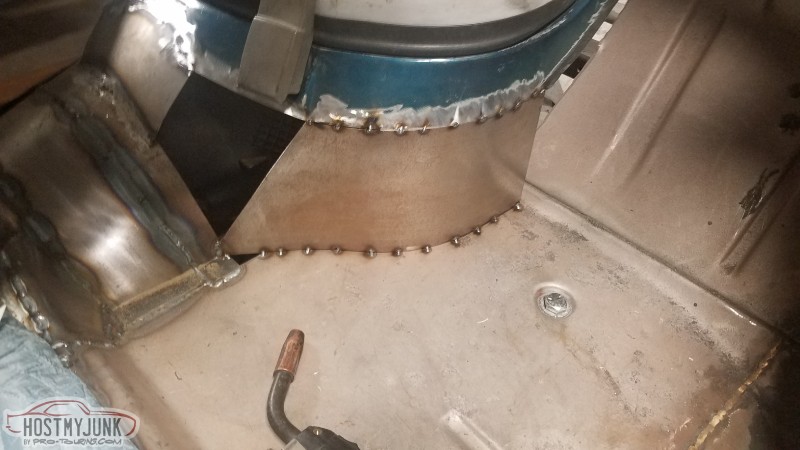
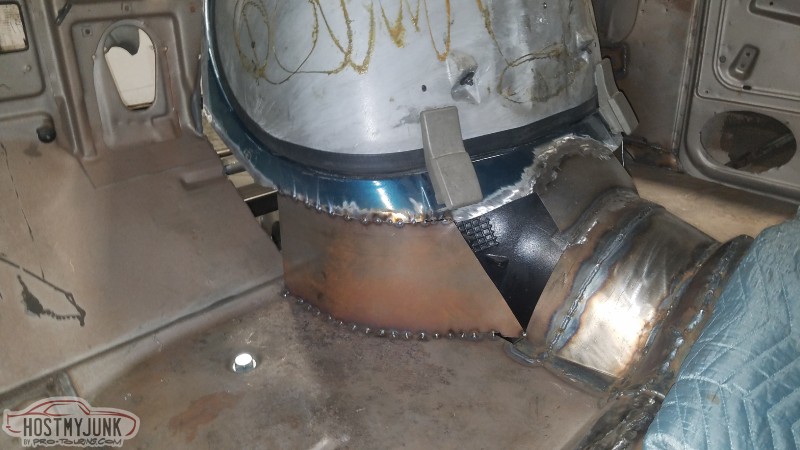
You get the idea, so fast forward to all pieces in place.
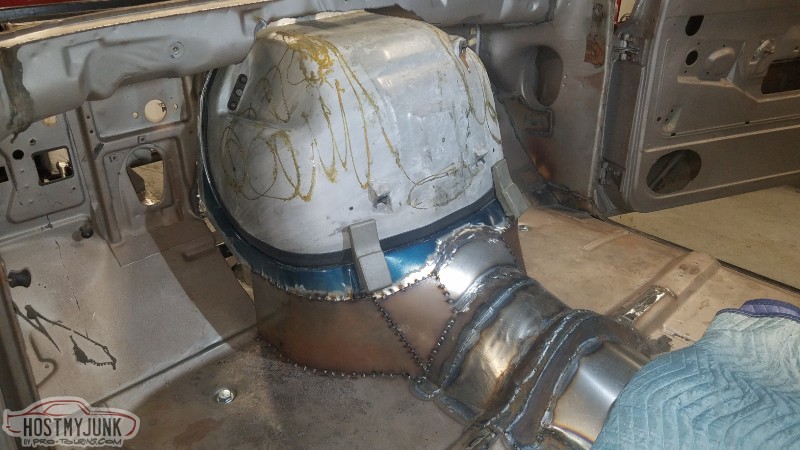

I am not ready to close out the firewall yet. I've got a plan for up there but I need to mount Ed's wheels again and cycle the steering at full compression. I'm looking to gain some forward foot space without encroaching on tire clearance.
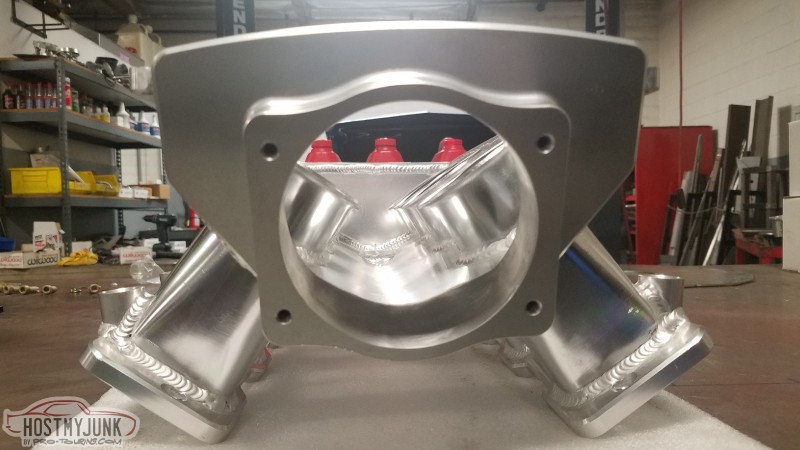
I mentioned that the Holley High-Ram won't clear. We ended up changing to the Sniper Race Series. The only problem there is the inlet is 90mm. So I spent some time opening it up to 102 to match the throttle body.
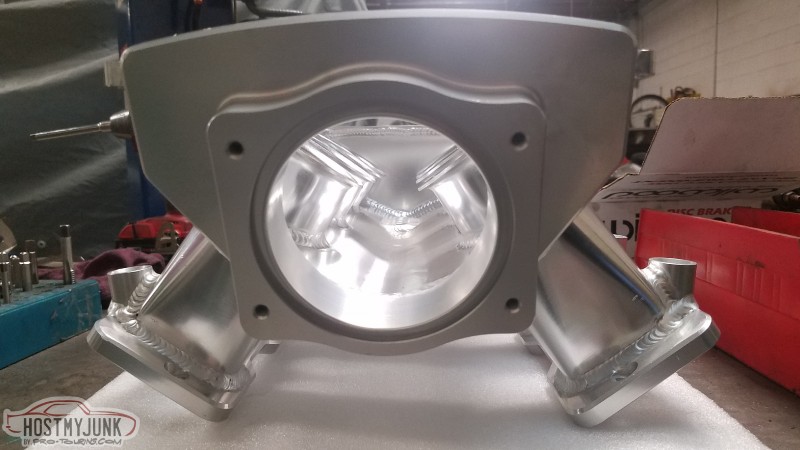
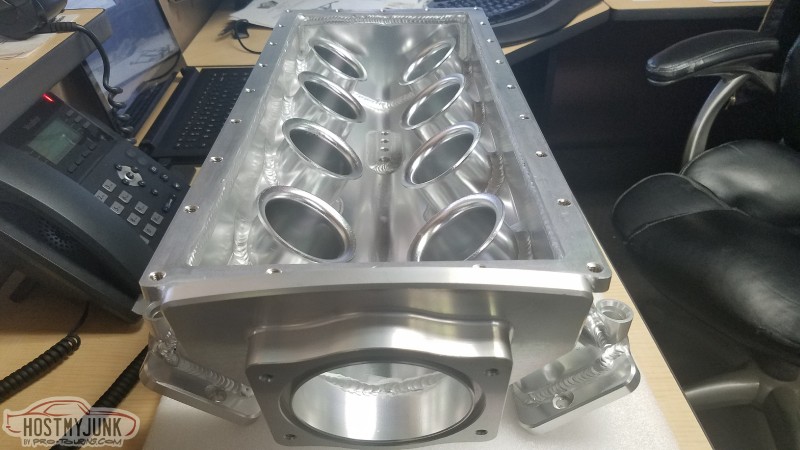
Halfway there
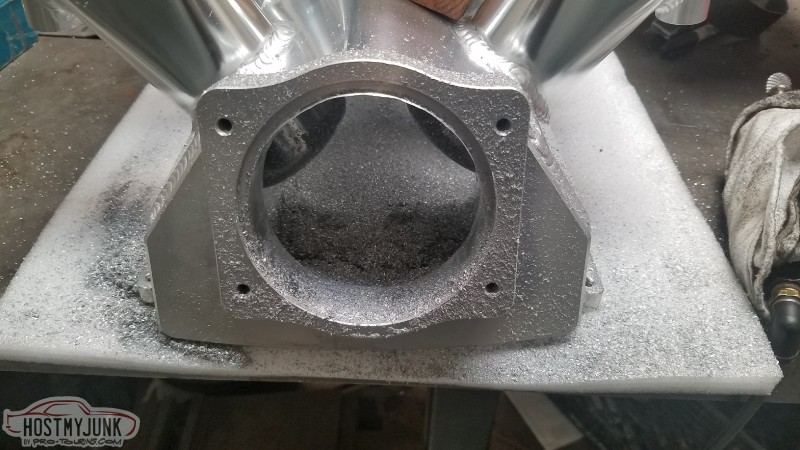
Quite the mess
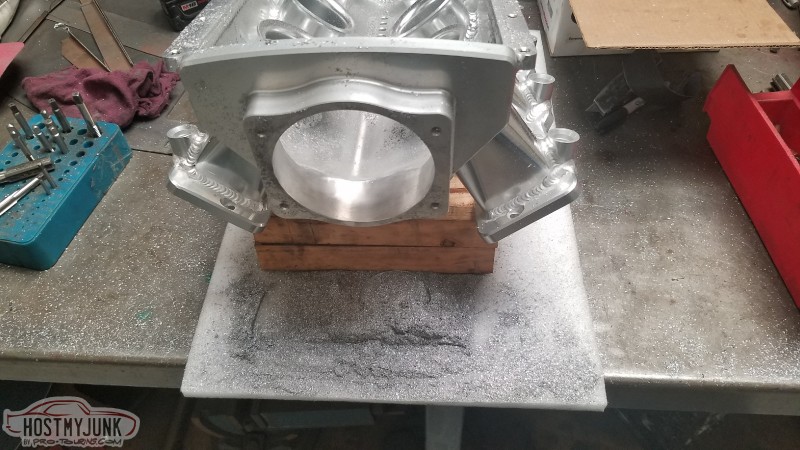
Aaaaaannnnnd DONE
 www.totalcostinvolved.com"Quality doesn't cost, it pays"
-
04-22-2019 #180
Registered User
- Join Date
- Jun 2011
- Location
- SoCal
- Posts
- 885
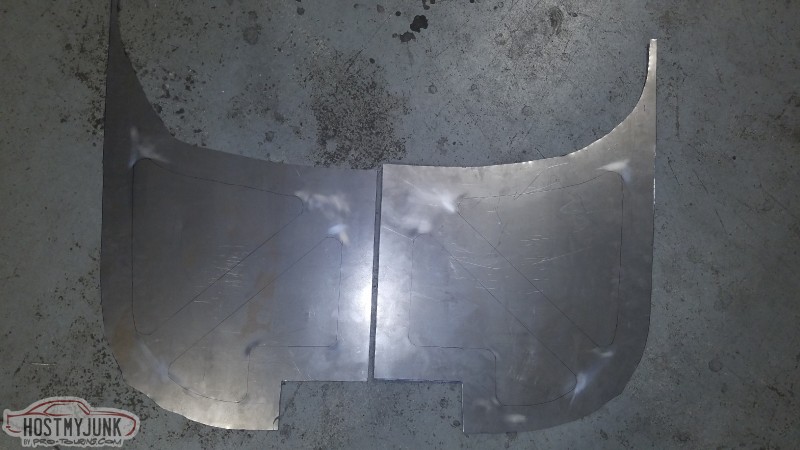
I have every excuse in the world as to why this thing is taking so long. Lack of motivation isn't one of them. I am really trying to stick with one small project at a time. The biggest hurdle as of late has been the firewall. I wanted to remove the rain gutter and make a solid flat panel. I also wanted to change the angle of the toe boards at the same time. This was kind of an afterthought from mocking up a driver's seat and realizing the forward footwell space was limited. The problem of course is making sure there is plenty of tire clearance. My major hold up has been deciding the tire overall diameter. I finally just put a limit of 28" and moved forward.
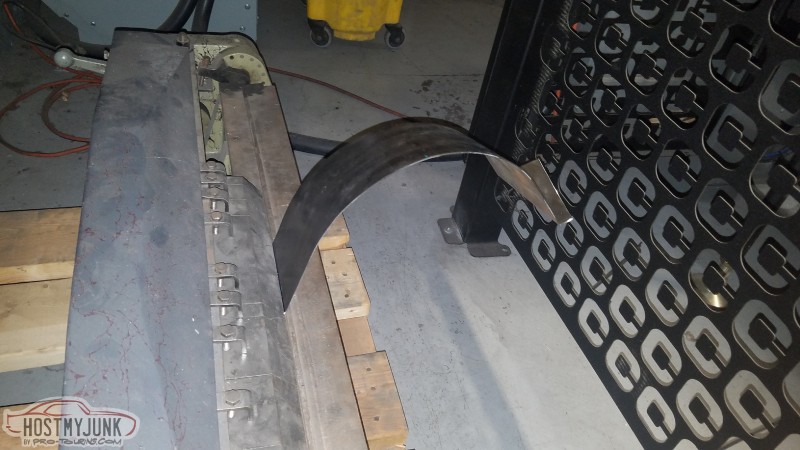
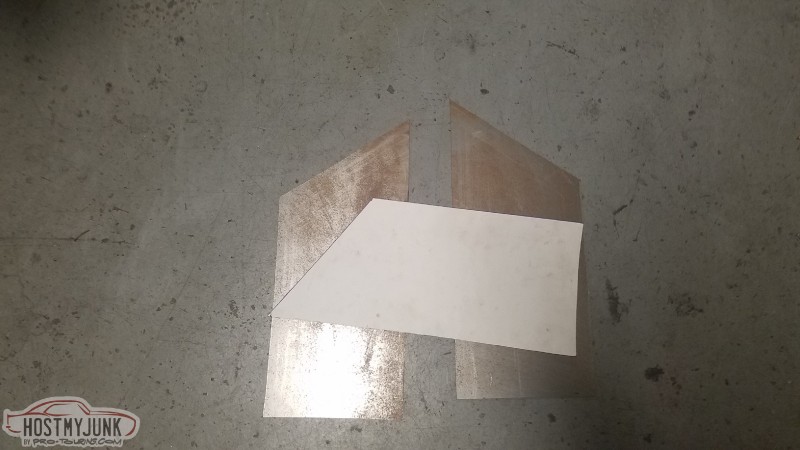
Paper cutouts of the new firewall pieces. In order to make working with them easier I kept them in two pieces.

Initial mock up. Lots of trimming and fitting. I left a little extra because I figured after bead rolling it would shrink/warp in some areas.
Made a pretty simple design for the bead roll.
& spent some time at lunch today rolling some beads. This was my first time using one so I took a bunch of practice swipes with some spare pieces. The plan is to drill some holes about 1.5" in from the perimeter for rosette welds. The toe boards will just be bent up into place and welded/trimmed.

Here is a side view of the toe boards. IMO the old toe board angle is where the pedals should have been from the factory. With the new floor angle that shouldn't be a problem.
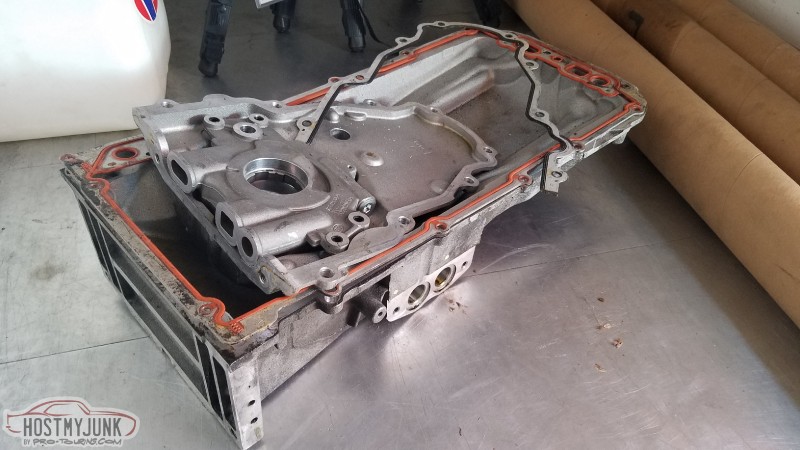
Our buddy Andy 'The Nova Guy' Mule found a LS7 oil pan & pump at the Pleasanton Goodguys. I hadn't planned on going dry sump for cost reasons but I couldn't pass this up knowing that Ed has a spare oil tank.
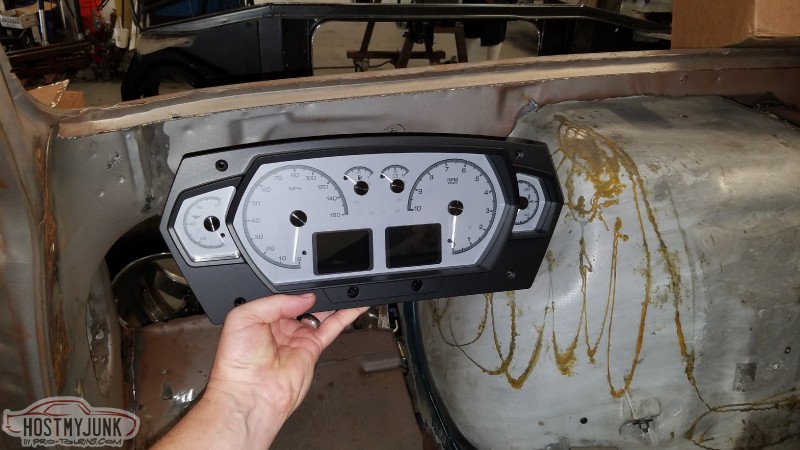
Since the beginning we had plans to run a Dakota Digital dash. I just kept hesitating because we also have a Holley dash. Once I realized that the Dakota harness is a pass thru and that I could stash the Holley somewhere else I pulled the trigger.
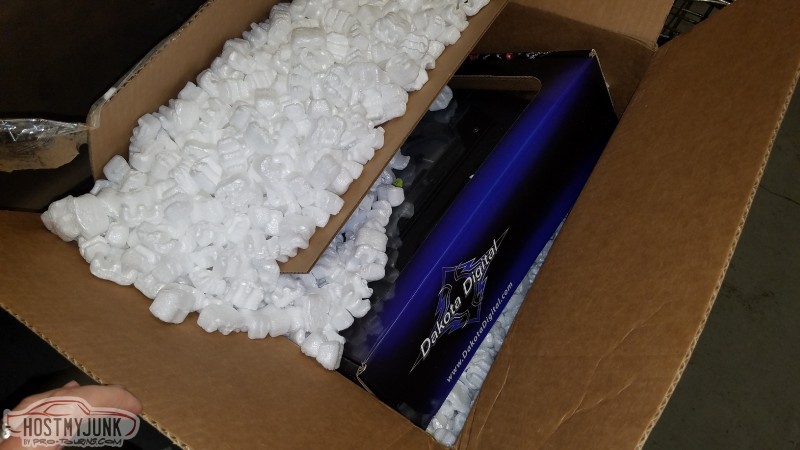
HDX-2200 will work out well in a universal situation. I also nabbed two 2000psi pressure sensors so we can monitor front/rear brake pressure and adjust accordingly via a prop valve mounted near the driver. We will also run twin widebands as well.
 www.totalcostinvolved.com"Quality doesn't cost, it pays"
-

 Reply With Quote


