

Results 141 to 160 of 195
-
12-27-2017 #141

 Registered User
- Join Date
- Jun 2011
- Location
- SoCal
- Posts
- 885

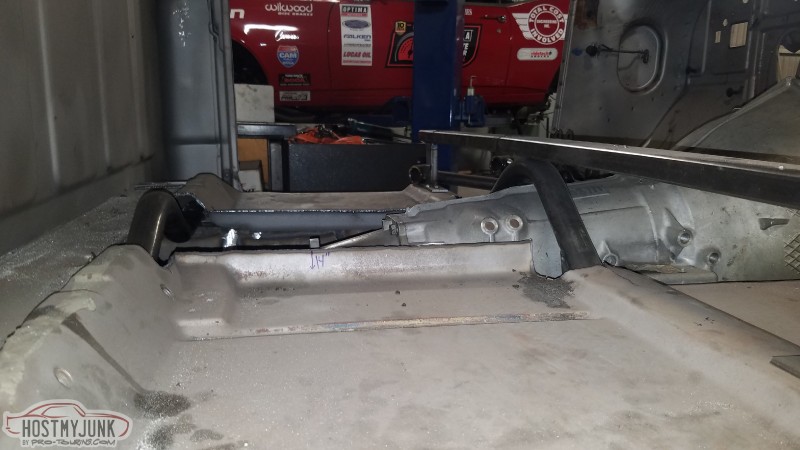
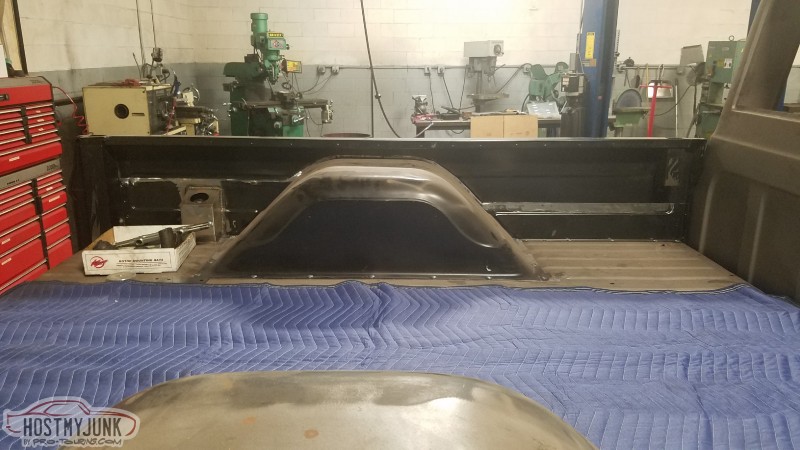
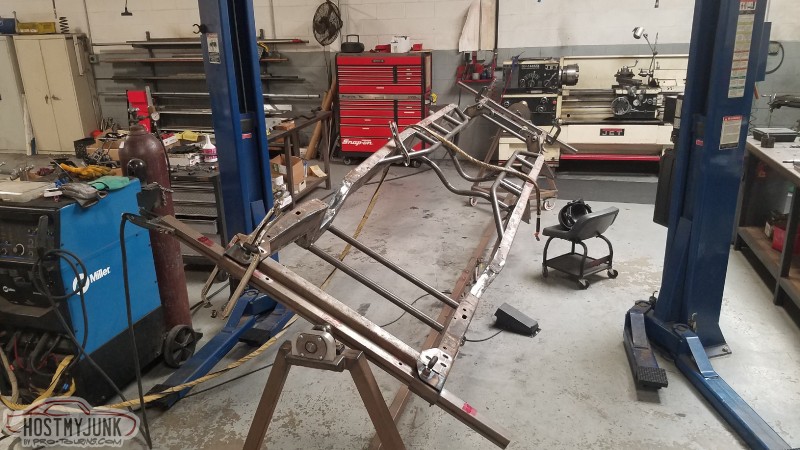
I had hinted at why the chassis cross bars were mounted above the frame rails earlier. The cab has two raised areas in the floor that the tubes line up with. This allows maximum exhaust clearance through the center section. Might even try to incorporate additional cab mounts and seat mounts into them. If you've been paying attention you've seen a couple different pics of engine set back options. I think "The Sweet Spot" has been found, see pic for measurement.
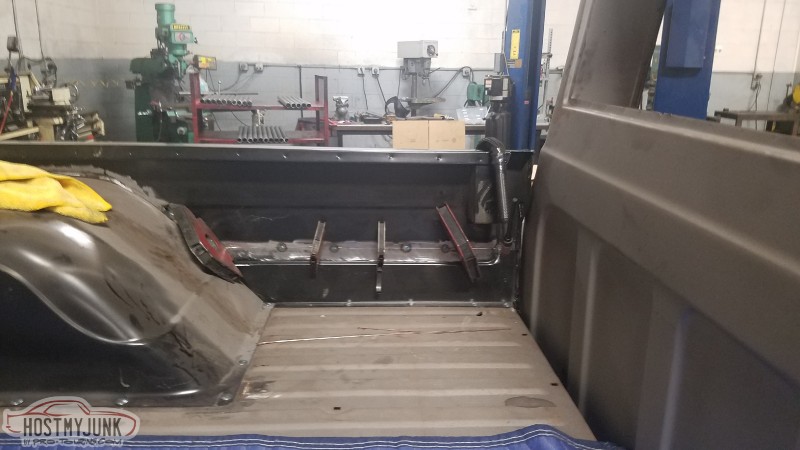
Getting the cab and bed perfectly aligned has proven to be next to impossible without bedsides. Started cutting up these brand new bed sides so we can raise the bed floor.
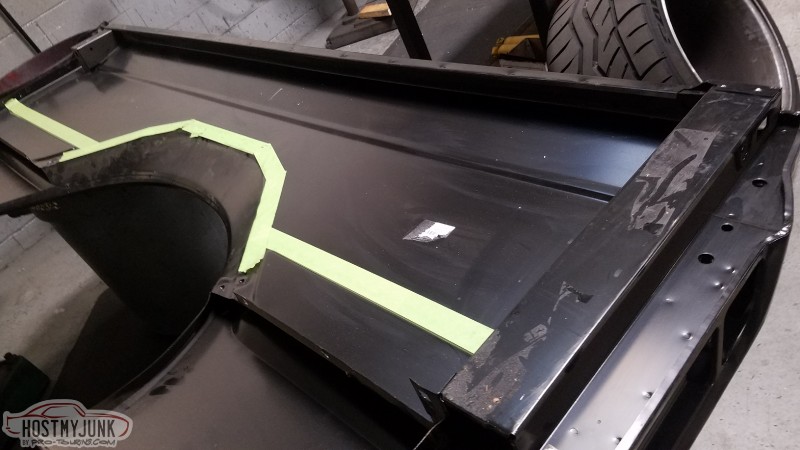
It's kinda hard to see what's going on here. This is the piece that was cut and removed from the bed side. It is now mounted into position on the bed floor. The driver side will be the same except where the gas filler is currently mounted.
 www.totalcostinvolved.com"Quality doesn't cost, it pays"
-
01-10-2018 #142
Registered User
- Join Date
- Jun 2011
- Location
- SoCal
- Posts
- 885
Slowly making progress on mounting the bed sides. I cut a fairly big strip out first and then just trimmed little by little in order not to cut too much. It is a long process but the fitment was perfect. The goal was to keep the factory internal bed body lines for looks and strength. Just kinda sandwiched them closer together. The inner panel will require a little more work once I get the main structure together.
 www.totalcostinvolved.com"Quality doesn't cost, it pays"
02-13-2018 #143
Registered User
- Join Date
- Jun 2011
- Location
- SoCal
- Posts
- 885
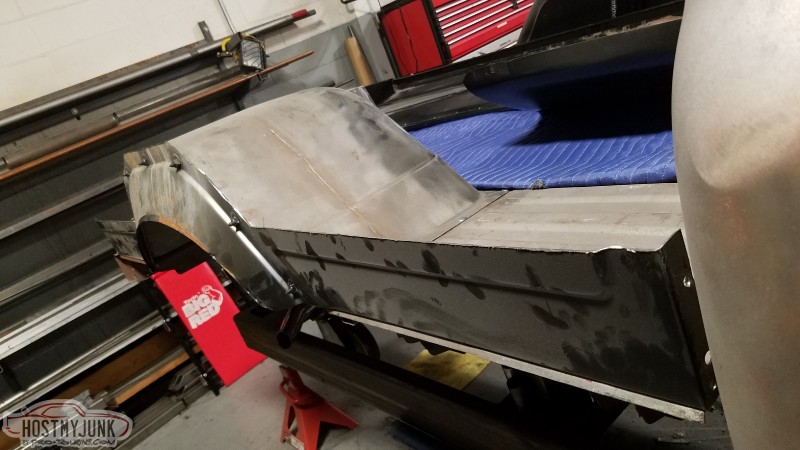
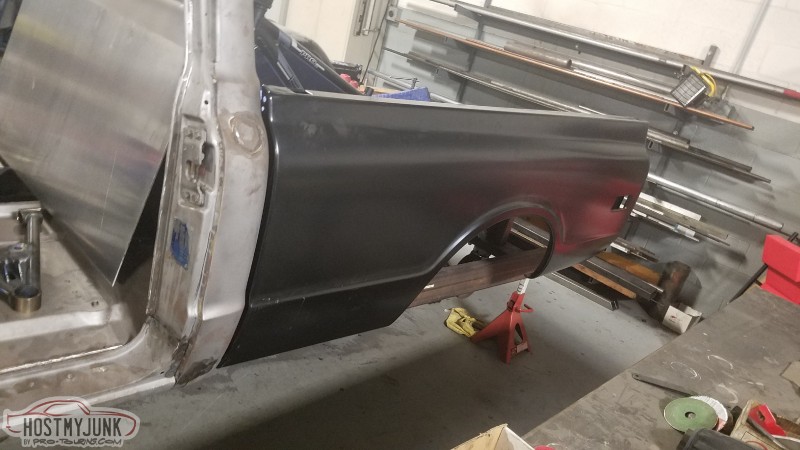
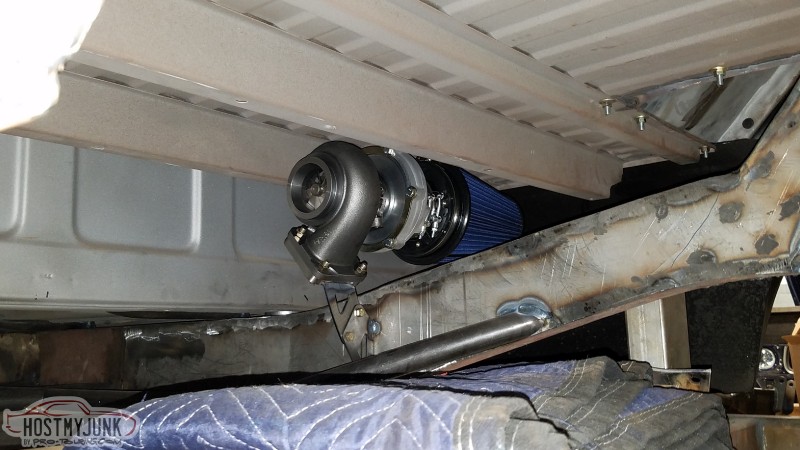
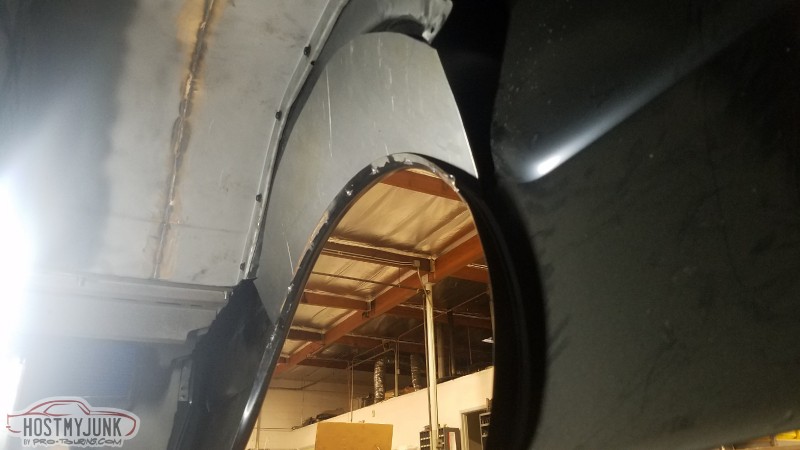
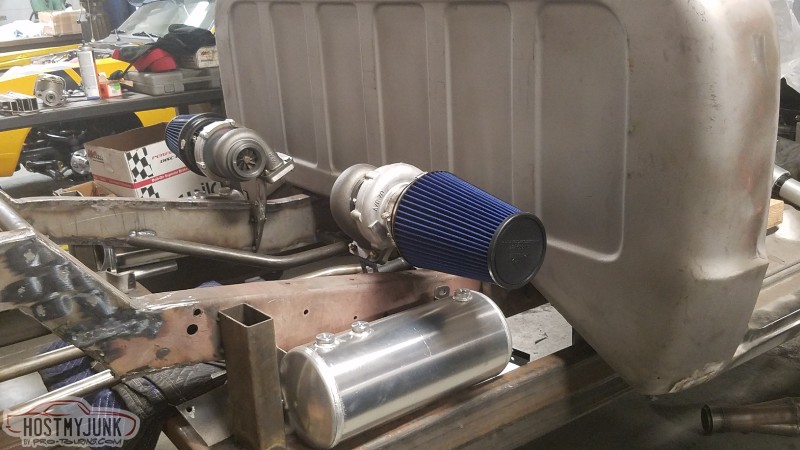
Working on the back panel of the bed.
Step one of turbo placement has begun.

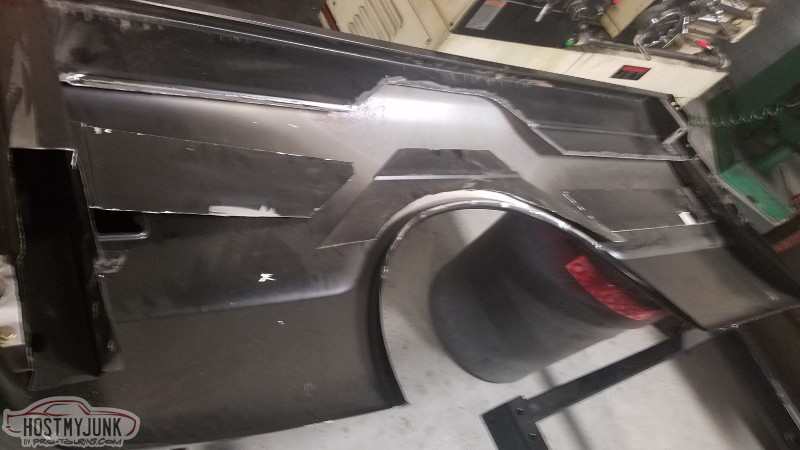
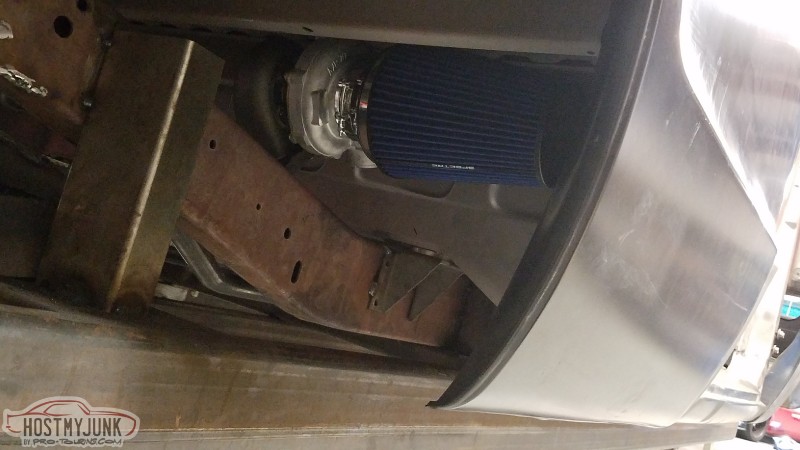
View from outside the fender. Definitely going to need a close out panel to keep tire debris off.
 www.totalcostinvolved.com"Quality doesn't cost, it pays"
03-05-2018 #144
Registered User
- Join Date
- Jun 2011
- Location
- SoCal
- Posts
- 885
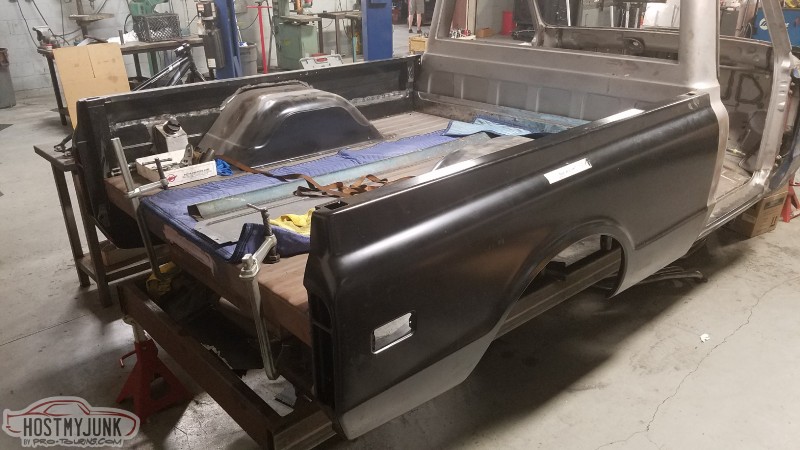
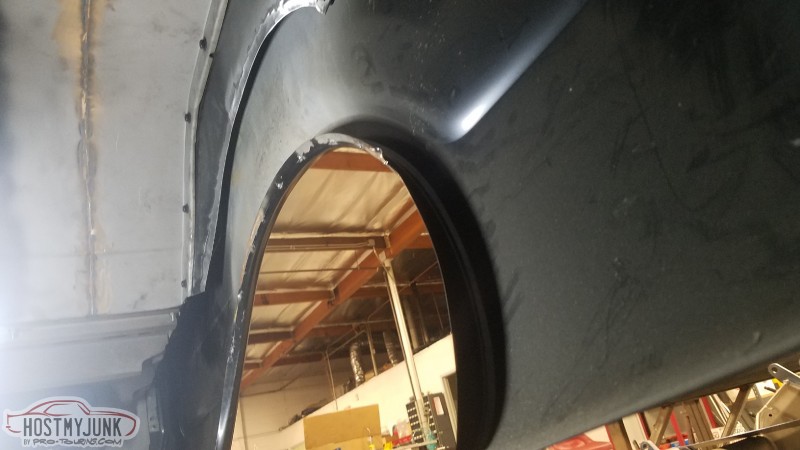
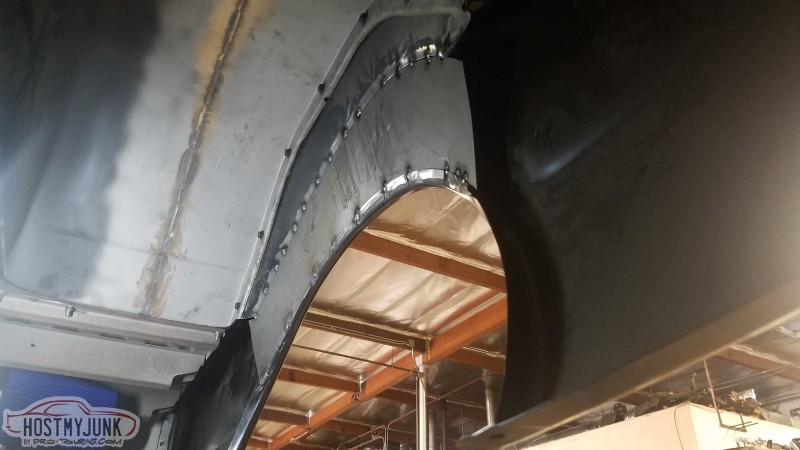
Been trying to get the bed back to a solid piece for safe removal. Made some closeout panels for the outer structure and fitted them up this morning.
Made a cardboard template (oversized of course so I could trim to fit)
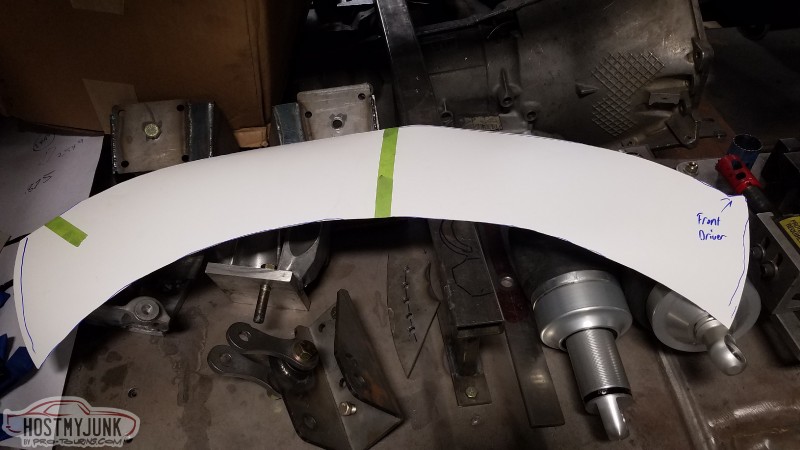
.050" panel cut and ready
So I kinda skipped a picture/step here. I cut a few slits in the lip and rolled the edge before laying the new panel in place. The top is butt welded, the bottom is laid inside of the lip.
This should at least hold the structure in place so I can remove the bed, disassemble and fully weld on a bench (comfortably).www.totalcostinvolved.com"Quality doesn't cost, it pays"
03-07-2018 #145 Registered User
- Join Date
- Sep 2010
- Location
- corona,ca.
- Posts
- 1,081
Looking good J ;)
72 chevelle.
03-08-2018 #146
Registered User
- Join Date
- Jun 2011
- Location
- SoCal
- Posts
- 885
Thanks! Sal tells me yesterday "You're a brave man". I just shrugged. Originally Posted by chevelletiger

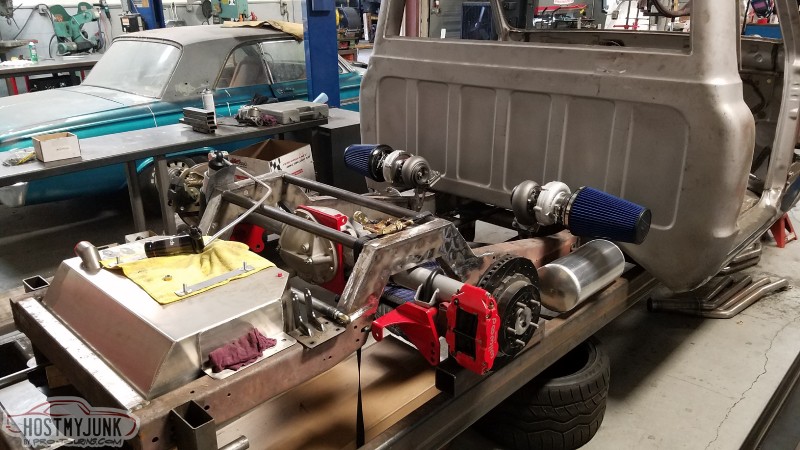
Yanked the bed off yesterday and mounted the driver's side turbo.
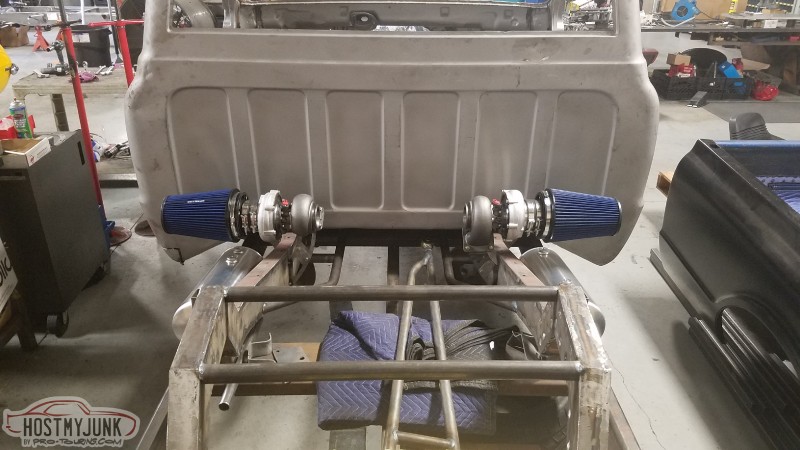
I spy Efrain's car. It's now time to start figuring out where things are going to go. Air tanks, compressors, solenoids, lines, batteries, coolers, exhaust, etc
 www.totalcostinvolved.com"Quality doesn't cost, it pays"
03-18-2018 #147
Registered User
- Join Date
- Jun 2017
- Location
- Edgewater Co.
- Posts
- 150
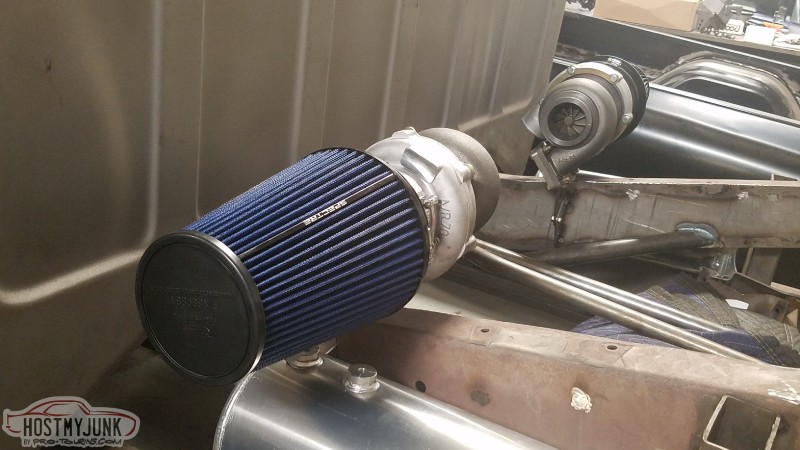
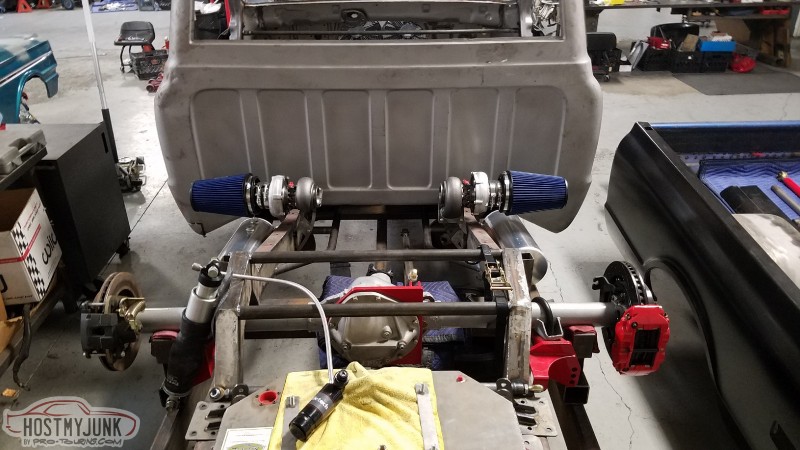
I love how the raised bed floor makes a great spot for the snails, it's amazing how much real estate all that other stuff takes up...
Joe
03-18-2018 #148
Registered User
- Join Date
- Aug 2015
- Posts
- 1
I wish the rear trailing arm set up was for the leaf spring as well for the GMC trucks . How does it work with the leaf spring set up can you use the same rear end etc or are you making a kit for leaf springs for use with the rear torque arm set up. I would like to do a long bed GMC that has leafs.
03-19-2018 #149
Registered User
- Join Date
- Jun 2011
- Location
- SoCal
- Posts
- 885
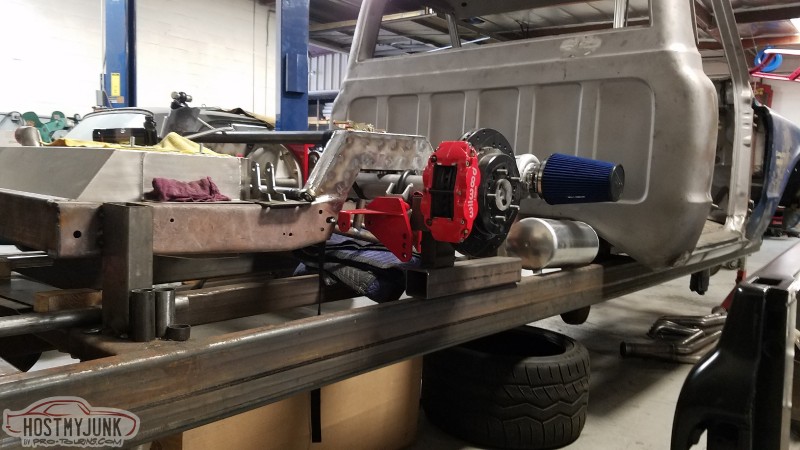
I am running out of room real fast. While the mufflers will be fairly small, leaving enough room around them for other things will make it a tight fit. The engine and tranny oil coolers will likely have to sit vertical, outside the frame rails. The air under the bed will be stagnant so not really sure how to combat heat other than to keep things as far away from each other as possible. Originally Posted by Motoracer838
If it is a long bed then more than likely it has a two piece driveshaft. If it has the two piece D/S than it will have the proper crossmember to mount our brackets to. our rear crossmember is pretty straight forward to install whether it has the existing locating holes on the frame or not. From what we've seen with other customers is that some frames have the holes and some don't. Just mark the axle centerline before pulling it apart so it's easy to place the c-notches. Our frame plates (c-notches) are contoured to match the stock frame so there isn't much room for error on placement. The stock crossmember that we mount the anti-sway bar to is further forward than on the non leaf trucks. They can be relocated if you opt for the anti-sway bar. The factory leaf pads will need to be replaced with our pads and in the proper location (The stock location of the factory Truck Arm pads). Other than those 3 items the rest is straight forward bolt together installation. Originally Posted by Jumbogem29
-Jwww.totalcostinvolved.com"Quality doesn't cost, it pays"
04-02-2018 #150
Registered User
- Join Date
- Jun 2011
- Location
- SoCal
- Posts
- 885
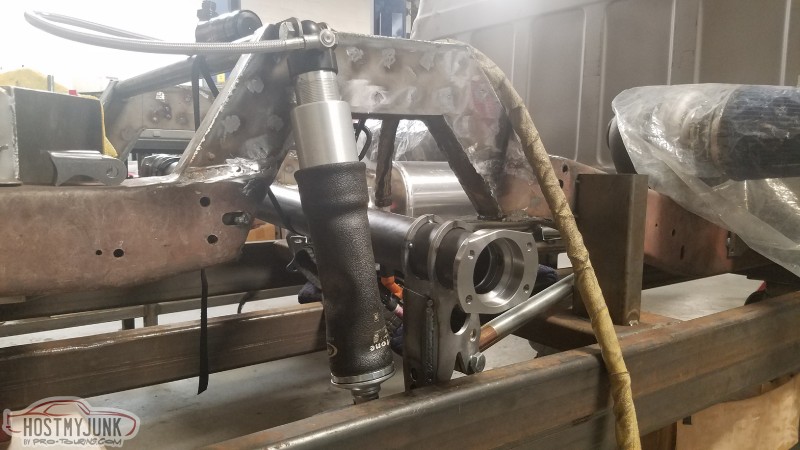
Slowly getting to the rear suspension. The Torque Arm will work as is, with slight modification to the cab. The link arms will need to be shortened. We're not going to use this 12 bolt but it already has the bracketry so it helps with mock up. The problem is the 12 bolt is roughly 1/2" shorter at the pumpkin than a 9" so I have to account for that.
From this angle you can see that the axle bracket hangs to far behind the axle. We need to bring the flange area closer to the back of the axle tube to gain clearance for the panhard bar.
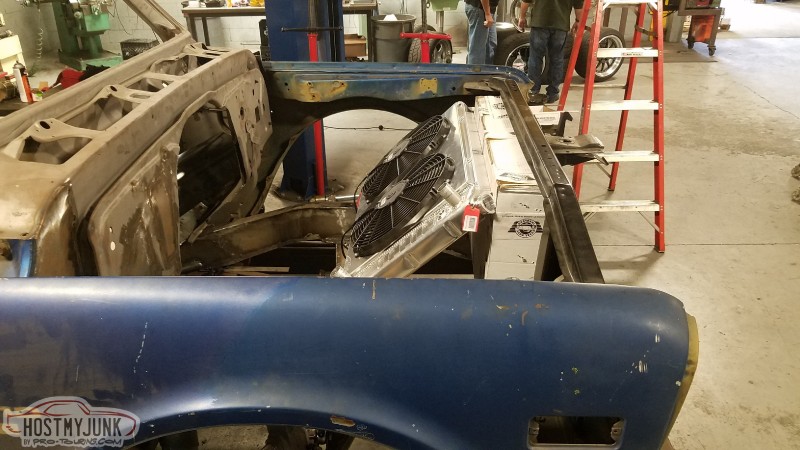
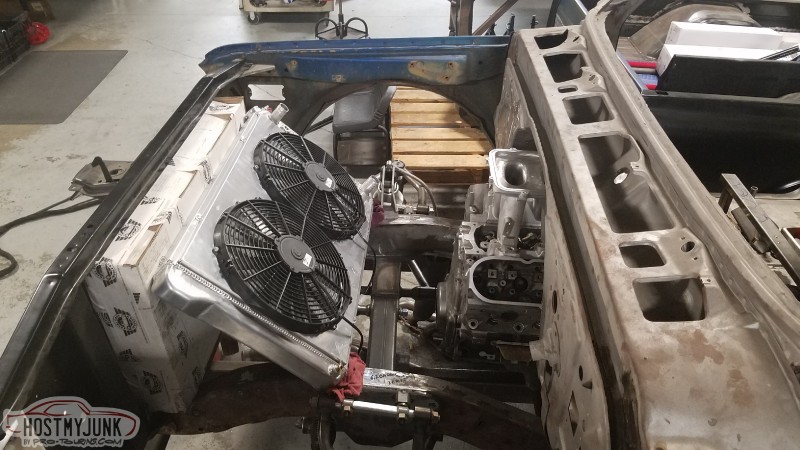
I've hinted at the idea that there won't be much room under the hood. The radiator is roughed in. It's likely too wide, since at current placement the tire will actually interfere at full lock. Once the inner panels are constructed there really won't be much room at all. The cardboard box is a rough intercooler size. Dual inlets, one on each top/side, with a center outlet on the bottom that goes under the radiator. Radiator fan outlets will be routed out of the hood.
 www.totalcostinvolved.com"Quality doesn't cost, it pays"
04-09-2018 #151
Registered User
- Join Date
- Jun 2011
- Location
- SoCal
- Posts
- 885
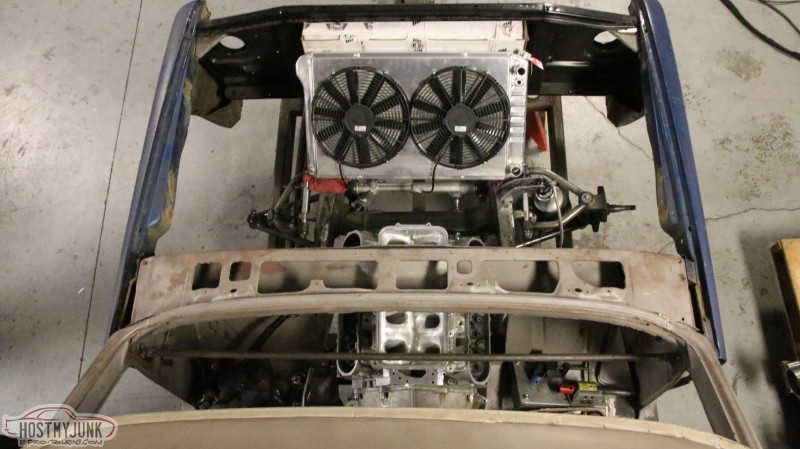
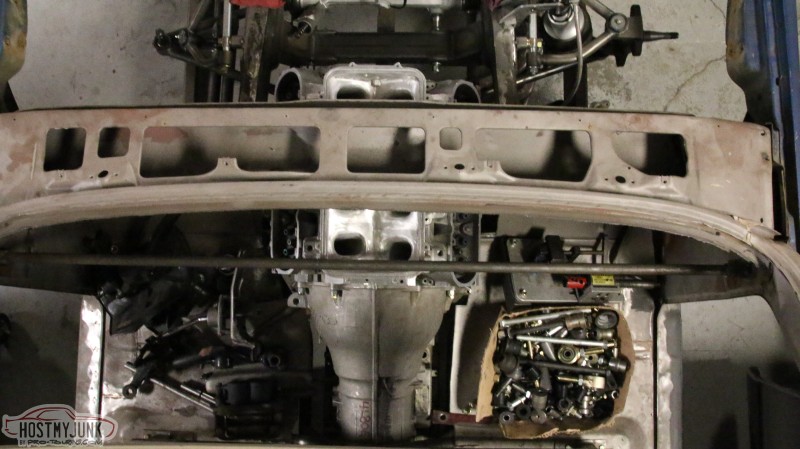
The intake manifold sits pretty high so the dash and firewall will be 'Interesting'. I had already planned on cutting the firewall off and building a new one. The bottom side of the cowl will also have to be cut in oder to clear the plenum.
 www.totalcostinvolved.com"Quality doesn't cost, it pays"
04-09-2018 #152
Registered User
- Join Date
- Jun 2014
- Posts
- 160
This is so cool. I always wonder about leg room and foot room since I wear a sz 14 shoe and im 6'4" lol.
04-13-2018 #153
Registered User
- Join Date
- Jun 2011
- Location
- SoCal
- Posts
- 885
Took a stab at videoing myself. The lighting is terrible and my editing software had some glitches. Otherwise, I think it came out pretty good. I am already shooting b-roll for episode 2, including the engine build, rear suspension design/assembly and removing the drip rails.
https://youtu.be/BZT1BEqQg-cwww.totalcostinvolved.com"Quality doesn't cost, it pays"
04-17-2018 #154
Registered User
- Join Date
- Jun 2014
- Posts
- 160
subscribed to the youtube channel!!!
04-17-2018 #155
Registered User
- Join Date
- Jun 2014
- Posts
- 160
double post
04-19-2018 #156
Registered User
- Join Date
- Jun 2017
- Location
- Edgewater Co.
- Posts
- 150
Love the vid...
Joe
04-24-2018 #157
Registered User
- Join Date
- Jun 2011
- Location
- SoCal
- Posts
- 885
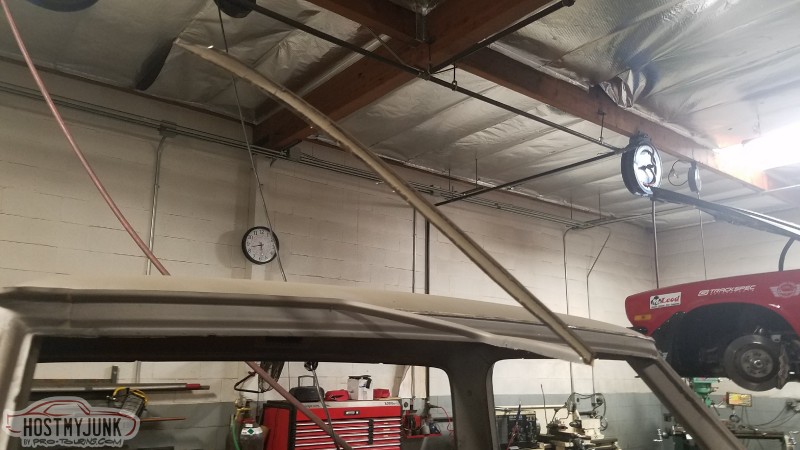
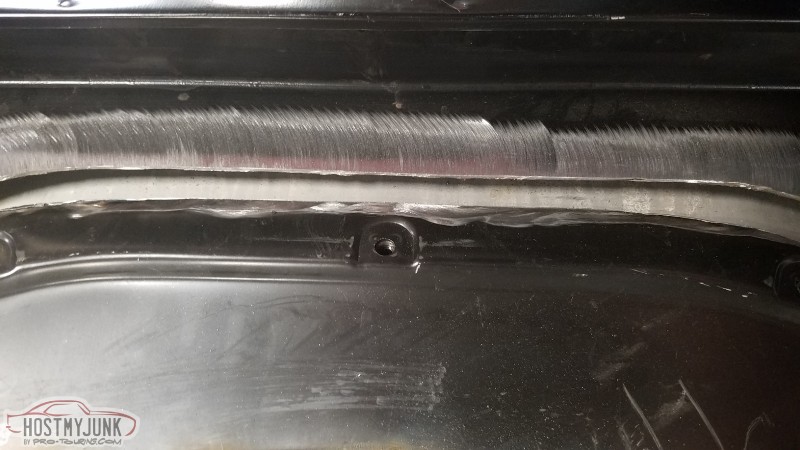
I feel so scatter brained lately. I seem to be jumping from project to project. I started removing the drip rails and then ran into a little problem. So I moved back to finish welding the bed.
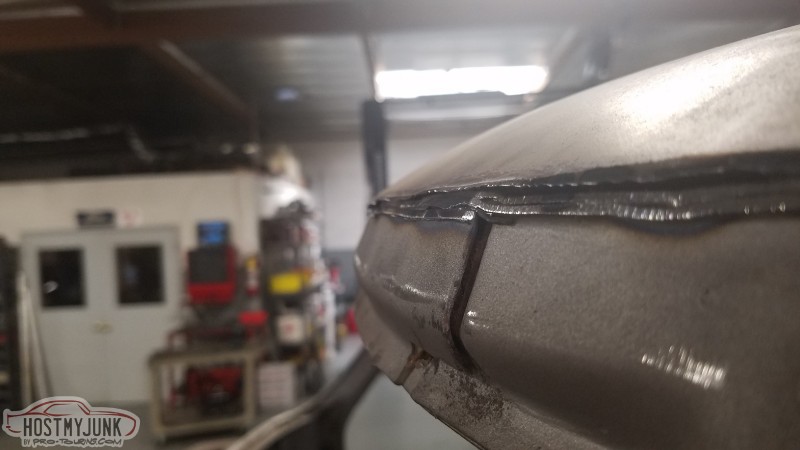
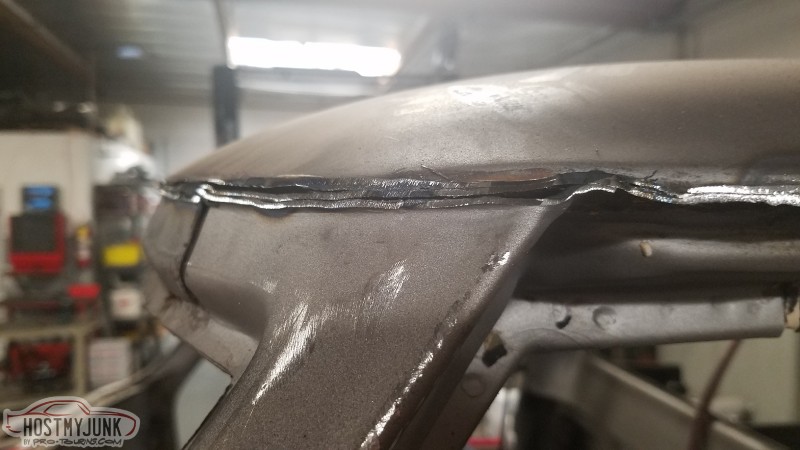
I had planned on doing the drip rail removal a small section at a time. This helps keep the roof structure from distorting. I worked the door areas first and all went pretty easily. Unfortunately, when I cut the front section I realized real quick that the roof skin doesn't line up with the windshield surround. Basicaly, the roof skin overhangs the windshield surround by roughly 3/16". So I went ahead and cut that whole front portion of the drip rail off. I now plan to do a small pie cut on the sides and will lay the roof skin down a little at the front to smooth out the 3/16" difference.
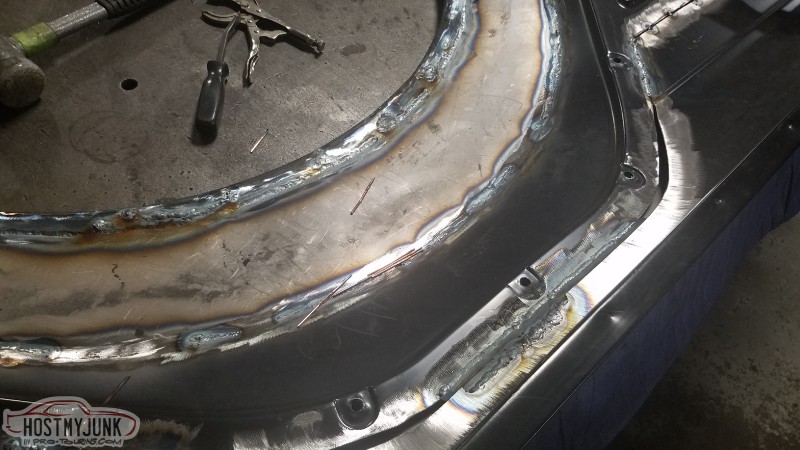
Since the drip rail deal is going to take some thought process I moved back to welding up the bed sides. So the sides were removed for easier access.
Just trying to close up all the seams.(& holes that I made)
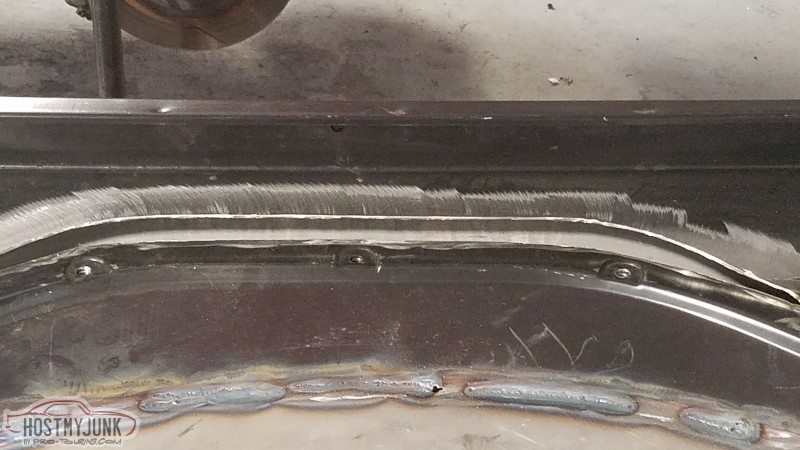
Will be placing some small steel pieces here to bridge the gap.
I've been going back & forth between mig & tig thru this whole process. I'm glad that this isn't my job cause welding sheet metal is not my thing.
 www.totalcostinvolved.com"Quality doesn't cost, it pays"
06-08-2018 #158
Registered User
- Join Date
- Jun 2011
- Location
- SoCal
- Posts
- 885
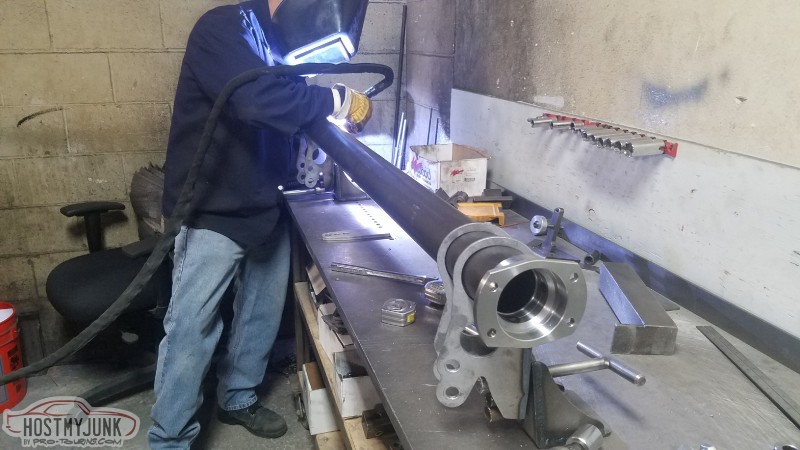
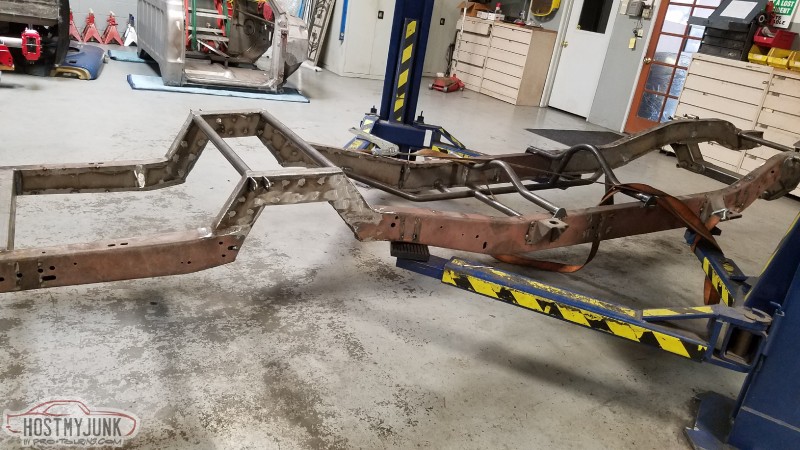
We've been working on rear suspension mock up. The 12 bolt display rearend we had was too wide so we built a mock rearend that is 55" wide housing flange to housing flange and 60" wide axle flange to axle flange. We also had to cut some special axle brackets(similar to our Muscle Car Torque Amr brackets) with a 25 degree angle.
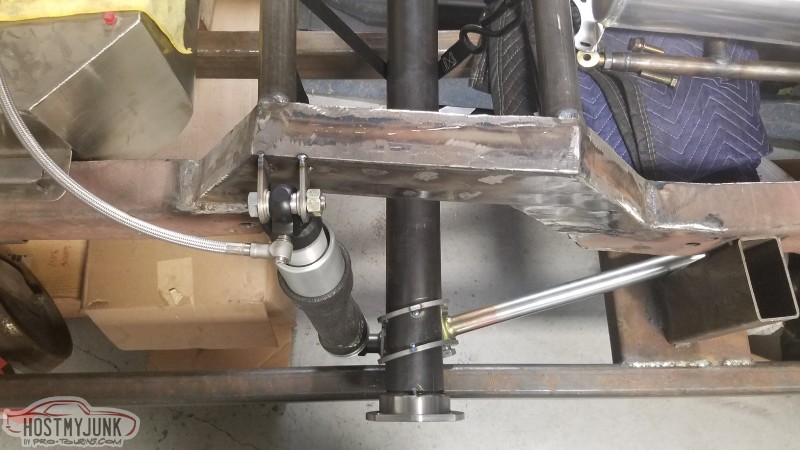
After posting these pics on FB, Bret Voelkel chimed in and said we shouldn't run the shockwaves upside down. Debris can find their way in between the sleeve and body and create leaks. So we may have to pocket the frame a little for bag clearance.
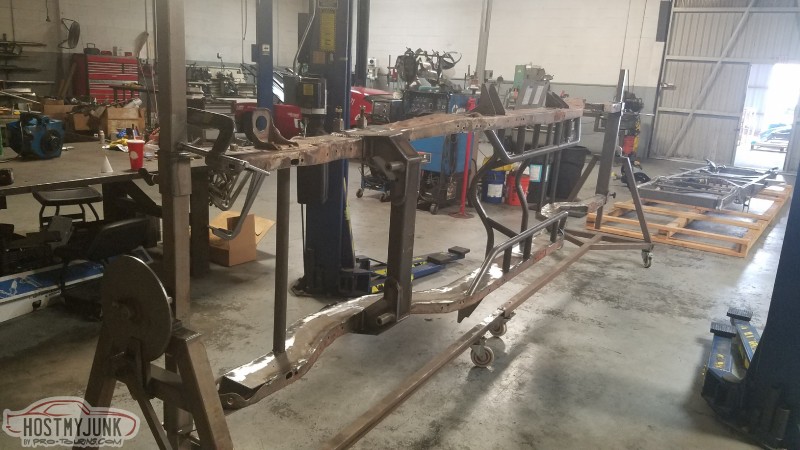
Mocking up Efrain Diaz's 19x10 HRE wheels. The tire is hitting the chassis fixture in this pic. I guess the day had finally arrived where we needed to remove the chassis from the fixture.
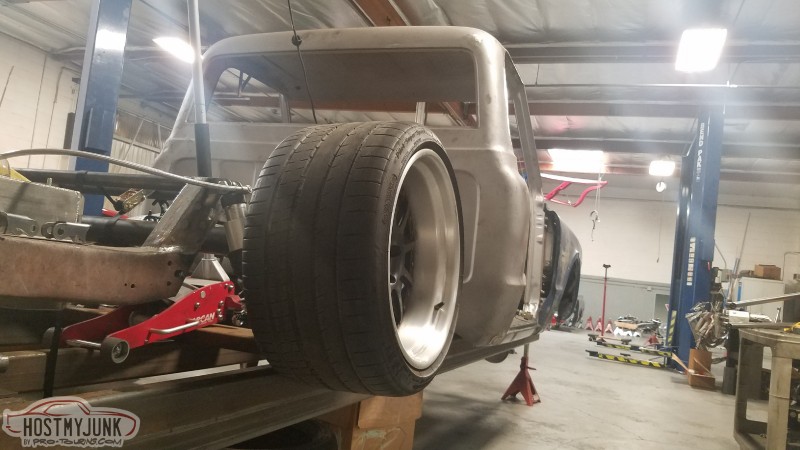
Out of the fixture and on the lift temporarily.
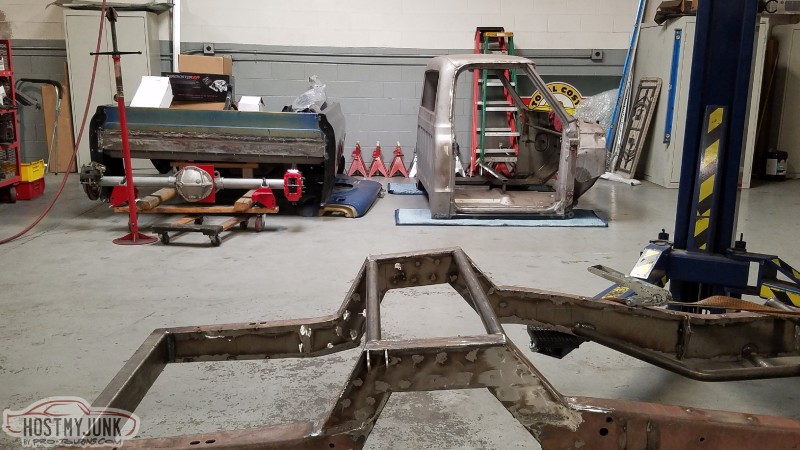
Then moved onto the rotisserie to continue welding and grinding. We've got 2 weeks to make it a roller in time for the Brothers Truck Show.
 www.totalcostinvolved.com"Quality doesn't cost, it pays"
06-08-2018 #159
Registered User
- Join Date
- Apr 2006
- Location
- Huntington Beach, CA
- Posts
- 2,415
I don't see pics in the last two posts
Please Subscribe to the AutoXandTrack YouTube Channel
Autocross and track blog about running autocross and track events with pro touring cars
06-10-2018 #160
Registered User
- Join Date
- Jun 2017
- Location
- Edgewater Co.
- Posts
- 150
I've got one word, Dude!!! Originally Posted by Sales-TCI-Eng
I can't wait to see it as a roller...
Joe

 Reply With Quote


