

Results 261 to 280 of 398
-
03-29-2018 #261
 Registered User
- Join Date
- Aug 2010
- Posts
- 440
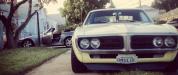
Nobody makes a good tow hook for a 69 Firebird, so I had to do some engineering. I already have ZL1addons hooks for my GT350 and Z/28, so that was my starting point. I'm not building a concourse Trans Am here, so I'm not afraid to cut a small hole in the front valance (especially since the car isn't painted yet). I took a small pie cut out of the 1 1/4"x 1/8" square tubing because the sub frame actually angles out where he tube will be welded. This aligns the tow hook with the center line of the car so the pull will be linear. Need to paint it and get it welded to the sub. The white line indicates the bottom of the square tube. It will be welded in 3 spots to the sub. Trying to figure out how to accurately cut the hole in the valence.
Joe
1969 Firebird Project
1967 Frirebird 400 convertible
2013 Boss 302
-
03-31-2018 #262
 Registered User
- Join Date
- Aug 2011
- Location
- Connecticut
- Posts
- 926
 Looks great! I like the style and durability of those hooks!
 Originally Posted by jlwdvm

1967 Firebird "Poor-Boy Build"
New updated thread
https://www.pro-touring.com/threads/...bird-(Updates)
Follow me on Instagram @NaturalLivingMan
-
03-31-2018 #263
Registered User
- Join Date
- Aug 2010
- Posts
- 440
I'm going to reinforce the bumper attachment bracket area on the rear bumper where it bolts to the frame bracket for the rear. I'll have to drill a hole through the bumper and weld a couple of grade 8 nuts for the rear tow hook to attach. I figure the area is already fairly strong if the factory designed the area to support the weight of the car while jacking the car up for a flat change! Tow Hooks: better to have them and not need them than to need them and not have them!
Joe
1969 Firebird Project
1967 Frirebird 400 convertible
2013 Boss 302
-
04-01-2018 #264
Registered User
- Join Date
- Aug 2014
- Posts
- 435
Just found this one and read through it. Nice to see getting rid of that "tumor" didn't cost you the cars/lift/etc.
I only know 2 guys who didn't get thoroughly F'd in their divorces.
Car is coming along great. Did the ZL1 replace the GT350?
Jay
-
04-02-2018 #265
Registered User
- Join Date
- Aug 2010
- Posts
- 440
I'm lucky I didn't have to pay twice for the GT350...if you know what I mean. The divorce involved a lot of biting my tongue and keeping a cool head, keeping the end goal in mind, and negotiating with someone that always thought she was smarter than she actually is. She is gone, but the cars are still here. I had been watching prices on Z/28's for a while and it looked like it was the right time to buy a low-milage car. Now I have a pony car collection: '13 Boss 302, '15 Z/28, '16 GT350, and a '69 TA clone.
Welded in the tow hook attachment. Somehow I was able to get a hole drilled in the valence that is in nearly the perfect location! On to the rear.Joe
1969 Firebird Project
1967 Frirebird 400 convertible
2013 Boss 302
-
04-03-2018 #266
Registered User
- Join Date
- Aug 2010
- Posts
- 440
The basic idea for the rear. I'm going to weld the grade 8 nuts to the bracket and then box it in. The bumper is a repro that is ok quality, but I am either going to give it a brushed look, or paint it body color, so I'm not worried about drilling a hole in it.
Joe
1969 Firebird Project
1967 Frirebird 400 convertible
2013 Boss 302
-
04-03-2018 #267
Registered User
- Join Date
- Mar 2009
- Location
- Houston, TX
- Posts
- 1,192
Nice work on the front tow hook. Mind if I copy the ideas for my 67 Firebird?
For the rear tow hook, I'm also thinking about doing similar to the rear bumper bracket.Tu Ho
Firebird V2-LS swap
-
04-03-2018 #268
Registered User
- Join Date
- Aug 2010
- Posts
- 440
Sure, you might have an easier time with the '67 because of the different valence.
Joe
1969 Firebird Project
1967 Frirebird 400 convertible
2013 Boss 302
-
04-08-2018 #269
Registered User
- Join Date
- Aug 2010
- Posts
- 440
No wife and no girlfriend at the moment=LOTS of projects getting done! I finished up the rear tow hook-bumper mount and got it painted and installed. It is probably the definition of "over built", but I like to weld. I even went as far as tacking on grade 8 nuts to the stock nuts that the bracket mounts to the frame with. The hook itself threads into 2 grade 8 nuts, and I boxed everything it to stiffen it.
I mounted the emergency brake and cables I received from ControlCables.com....everything works great. Even with driveshaft movement, everything has plenty of space. Installed the Spectra door panels today and started working on templates for the rear package tray/firewall. I will probably use 18g steel for those.
I had been thinking that my optima red top was toast. The 3 year warranty ran out last week...of course. The thing has hardly left the garage, and had been on a battery tender most of the time. I did some research on YouTube and saw that there was still hope for it. I bought a Harbor Freight battery charger capable of restoring batteries and it was able to bring it back to life after 24 hours on the charger. Evidently the charger is capable of reversing sulfation...whatever that is.
"Attachment 151437
Joe
1969 Firebird Project
1967 Frirebird 400 convertible
2013 Boss 302
-
04-20-2018 #270
Registered User
- Join Date
- Aug 2010
- Posts
- 440
Running brake cooling tubing could get tricky. It actually seems similar to running it on my Boss 302. The entrance of the duct is where the fog lights-turn signals used to be.
Joe
1969 Firebird Project
1967 Frirebird 400 convertible
2013 Boss 302
-
05-23-2018 #271
Registered User
- Join Date
- Aug 2010
- Posts
- 440
Making patterns for the panel work that needs to be done. I decided to take out the factory bracing that was behind the rear seat because it was curved. The panel will have a raised area in it to add stiffness and to match the Spectra front door panels, so it wouldn't be able to follow that bend. I have 3/4" square tubing that will be welded to the original sheet metal that I can then weld the panel to.
Joe
1969 Firebird Project
1967 Frirebird 400 convertible
2013 Boss 302
-
05-23-2018 #272
New to Pro-Touring
- Join Date
- Feb 2017
- Posts
- 99
Congrats on getting through the lady problems and keeping YOUR stuff.
The T/A build is coming along nicely. Keep at it.
-
06-02-2018 #273
Registered User
- Join Date
- Jun 2015
- Posts
- 171

looks like vins been removed ,non factory rivets upside down?
-
06-05-2018 #274
Registered User
- Join Date
- Aug 2010
- Posts
- 440
The dash had to be replaced.
Joe
1969 Firebird Project
1967 Frirebird 400 convertible
2013 Boss 302
-
06-06-2018 #275
Registered User
- Join Date
- Aug 2010
- Posts
- 440
Bead rolling looks much easier on YouTube...and the z/28 is no joke!
Joe
1969 Firebird Project
1967 Frirebird 400 convertible
2013 Boss 302
-
06-29-2018 #276
Registered User
- Join Date
- Aug 2010
- Posts
- 440
there is a little more trimming on the last piece of tin before it gets welded in. I have sprayable Boom Mat to use on the underside of the package tray and back side of firewall. Then I plan on putting a top coat of Dulicolor spray on bed liner to finish everything off. Once the interior metal work is done, final paint prep begins. I'm only 7 years behind schedule at this point, but in my defense, the project has morphed from a stock restoration to what it currently is!
Joe
1969 Firebird Project
1967 Frirebird 400 convertible
2013 Boss 302
-
07-24-2018 #277
Registered User
- Join Date
- Aug 2010
- Posts
- 440
Coating all of the interior panels front and back with Boom Mat to help with vibration and noise. Cling wrap works great to mask off the cage bars. I had a short section of bend laying around, so I tried to fab up a pair of turn-downs for the exhaust. Once the interior sheet metal is done, sanding the body in preparation for paint begins!
Joe
1969 Firebird Project
1967 Frirebird 400 convertible
2013 Boss 302
-
08-27-2018 #278
Registered User
- Join Date
- Aug 2010
- Posts
- 440
Finally buttoned up the rear close out panels. they are coated with a layer of Boom Mat and then Duplicolor bed liner. Time to start sanding tte body!
Joe
1969 Firebird Project
1967 Frirebird 400 convertible
2013 Boss 302
-
09-09-2018 #279 Registered User
- Join Date
- Nov 2006
- Location
- Ma.
- Posts
- 5,567
Nice work! This is coming out Great I love what your doing.
Wayne
Car FINALLY home !!!!!! lol
Project FNQUIK https://www.pro-touring.com/showthre...ghlight=FNQUIK
09-10-2018 #280
Registered User
- Join Date
- Aug 2010
- Posts
- 440
Bodywork continues, starts again....or whatever. I'm not sure why gm made the front end so complicated, and there are a few things that I just don't like about it, The center piece of the nose is an aftermarket solid fiberglass piece and the original rubber gasket is too short to run the complete length. Not sure if it shrunk, or just wasn't made right. I didn't like the look anyway, so I decided to fill the gap with short-strand fiberglass filler. I used windshield trim
screws anchored into the nose piece to help bind the filler to the parent piece.
Joe
1969 Firebird Project
1967 Frirebird 400 convertible
2013 Boss 302

 Reply With Quote


