Results 1 to 10 of 10
-
12-04-2013 #1
 Registered User
- Join Date
- Jan 2006
- Posts
- 86
Marquez firstgen headliner pics and Installation
I have begun the task of pre fitting my Marquez 3 piece headliner in my 69 camaro in preperation for tearing down to paint. The center piece fits nicely and is fairly straightforward. The sail panel/A pillar pieces are a different story! Ive scoured the web and the Pro-Touring site for pics and comments with minimal results.
The two things that have me scratching my head is:
1. how best to attach it in place
2. how to transition the pinch molding (rubber edging) that goes over the metal along the top of the door opening and the fiberglass panel where the panel turns into the A pillar cover.
Can anyone post or send me pics of their install?
Thanks in advance!
-
12-04-2013 #2 Registered User
- Join Date
- Dec 2010
- Location
- Fredericksburg, VA.
- Posts
- 3,164

This sounds like a question for Marquez. But I am curious how much this headliner weighs.
12-04-2013 #3
Registered User
- Join Date
- Apr 2012
- Location
- Woodstock, IL
- Posts
- 2,410
Marquez firstgen headliner pics and Installation
We installed one earlier in the year. We fastened it by drilling a couple holes in the side pieces and using trim screws to fasten it to the body. Best thing to do if your car isn't finished is to weld small plates or sheet metal to the body behind it to fasten there. As for the edges, I will have to see what we did when I'm back in the office tomorrow. I want to say we just trimmed it flush and when upholstered, it just butted up against the molding.
As for weight, it's average.. Not heavy, but not super light.
-DaleSchwartzPerformance
The leader in bolt-in muscle car chassis
SchwartzPerformance.com | GMachineChassis.com | Facebook | Twitter | Instagram
Dealer for: Forgeline, RideTech, Tremec, American Powertrain, Silver Sport Transmissions, GM Performance Parts, RECARO, Cerullo Seats, TMI Products, Vintage Air, Baer Brakes, Wilwood, BeCool, AFCO, Tanks Inc, Holley / Hooker, Ultimate Headers, Rick's Tanks, Moser Engineering, Currie, TechAFX, Stainless Works, II Much Fabrication, and many more
12-05-2013 #4
Registered User
- Join Date
- Jan 2006
- Posts
- 86
Thanks Dale. What you say makes perfect sense. I look forward to any pics you might have.
Steve, Its not heavy at all. They are bulky pieces so its tough for me to accurately estimate the weight but un-upolstered probably 10-20 lbs for all three pieces. I warn you that there is a fair amount of work to get the side pieces to fit especially the A pillars. Fiberglass work involved!
12-05-2013 #5
Registered User
- Join Date
- Apr 2012
- Location
- Woodstock, IL
- Posts
- 2,410
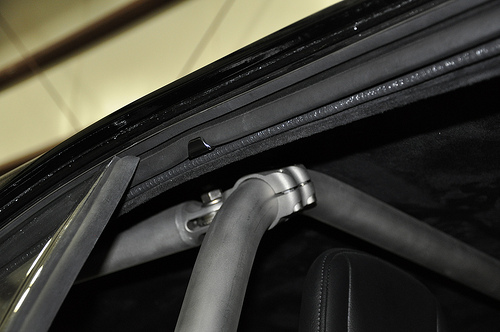
Butted against the stock trim:
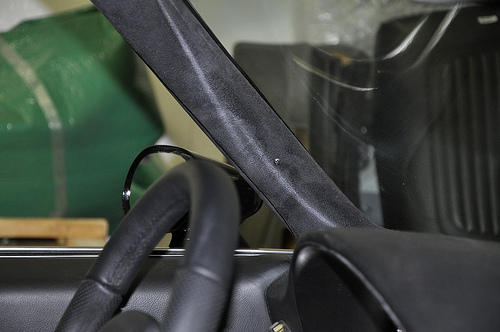
Discreet trim screw on the A pillar:
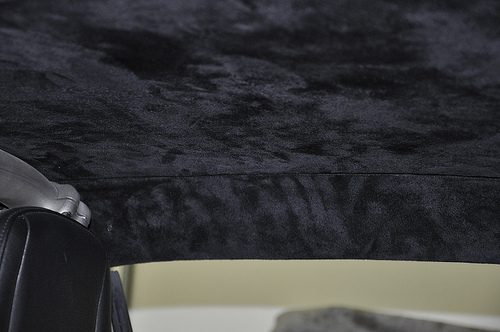
Another trim screw shown to the left of the photo, sorry for being blurry:
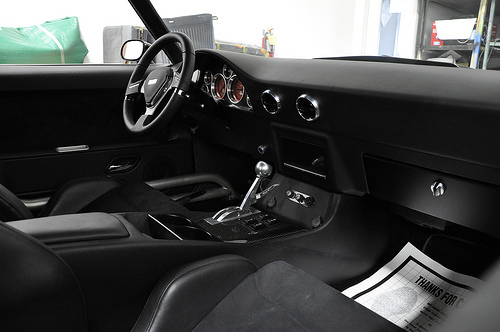
The finished product with Marquez's entire kit, and MCI's console:
 SchwartzPerformance
The leader in bolt-in muscle car chassis
SchwartzPerformance.com | GMachineChassis.com | Facebook | Twitter | Instagram
Dealer for: Forgeline, RideTech, Tremec, American Powertrain, Silver Sport Transmissions, GM Performance Parts, RECARO, Cerullo Seats, TMI Products, Vintage Air, Baer Brakes, Wilwood, BeCool, AFCO, Tanks Inc, Holley / Hooker, Ultimate Headers, Rick's Tanks, Moser Engineering, Currie, TechAFX, Stainless Works, II Much Fabrication, and many more
12-05-2013 #6
Registered User
- Join Date
- Jan 2006
- Posts
- 86
Thanks so much for the pics Dale! Very helpful
Coincidently I am also doing a black suede headliner. I am now toying with the idea of doing Oh S--t! handles as a way of attaching the panels on the sides and some kind of courtesy lights in the back to attach those sections. Anyone have suggestions for nice "Grab handles"?
12-05-2013 #7
Registered User
- Join Date
- Apr 2012
- Location
- Woodstock, IL
- Posts
- 2,410
I know billet specialties makes a grab handle for flat door panels, could work for you too?
SchwartzPerformance
The leader in bolt-in muscle car chassis
SchwartzPerformance.com | GMachineChassis.com | Facebook | Twitter | Instagram
Dealer for: Forgeline, RideTech, Tremec, American Powertrain, Silver Sport Transmissions, GM Performance Parts, RECARO, Cerullo Seats, TMI Products, Vintage Air, Baer Brakes, Wilwood, BeCool, AFCO, Tanks Inc, Holley / Hooker, Ultimate Headers, Rick's Tanks, Moser Engineering, Currie, TechAFX, Stainless Works, II Much Fabrication, and many more
12-07-2013 #8
Registered User
- Join Date
- Jan 2012
- Location
- Virginia
- Posts
- 237
Man that looks good, is that MCI console wrapped or sprayed? If paint, what kind?
Apologies for hijacking...
12-08-2013 #9
Registered User
- Join Date
- Apr 2012
- Location
- Woodstock, IL
- Posts
- 2,410
Marquez firstgen headliner pics and Installation
Everything is leather- the headliner is suede.
MCi has an optional carbon plate which looks awesome too.
-DaleSchwartzPerformance
The leader in bolt-in muscle car chassis
SchwartzPerformance.com | GMachineChassis.com | Facebook | Twitter | Instagram
Dealer for: Forgeline, RideTech, Tremec, American Powertrain, Silver Sport Transmissions, GM Performance Parts, RECARO, Cerullo Seats, TMI Products, Vintage Air, Baer Brakes, Wilwood, BeCool, AFCO, Tanks Inc, Holley / Hooker, Ultimate Headers, Rick's Tanks, Moser Engineering, Currie, TechAFX, Stainless Works, II Much Fabrication, and many more
01-03-2014 #10 Registered User
- Join Date
- Jan 2007
- Location
- Port Orchard, WA
- Posts
- 496
https://www.pro-touring.com/threads/...light=foulplay
Mirror and visors and dome light holds up the center piece w/screw in the sides of the center piece. Sides will need fitting over and over to get to fit right, a tight fit and they will stay in place once covered but I put two screws in the bottom of the side piece sail panels as I was going for an industrial look. Per Marquez, I removed the trim molding pieces and fitted the side pieces even to where the trim moldings went and when you cover it you wrap your side pieces up over the metal where the side molding went into the upper groove. Hope this makes sense. I have more pics if you need them when you get ready to install it.

 Reply With Quote