

Results 81 to 100 of 258
-
03-10-2016 #81
 Registered User
- Join Date
- Feb 2007
- Location
- Hawaii
- Posts
- 225
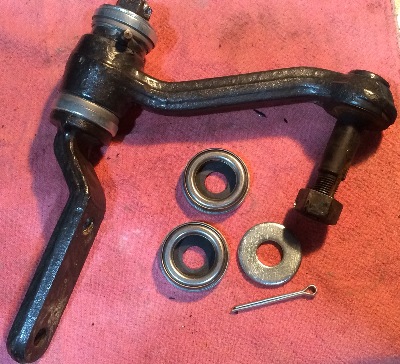
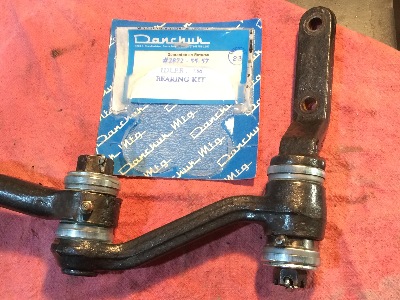
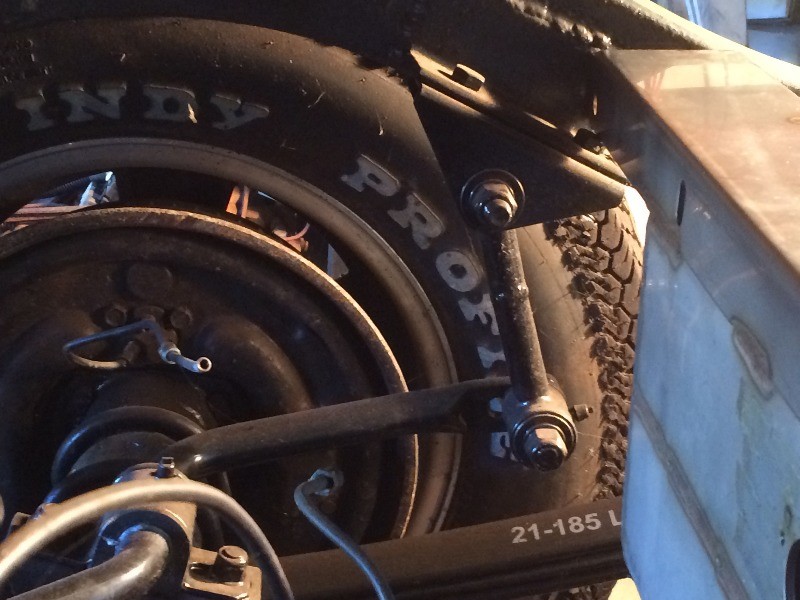
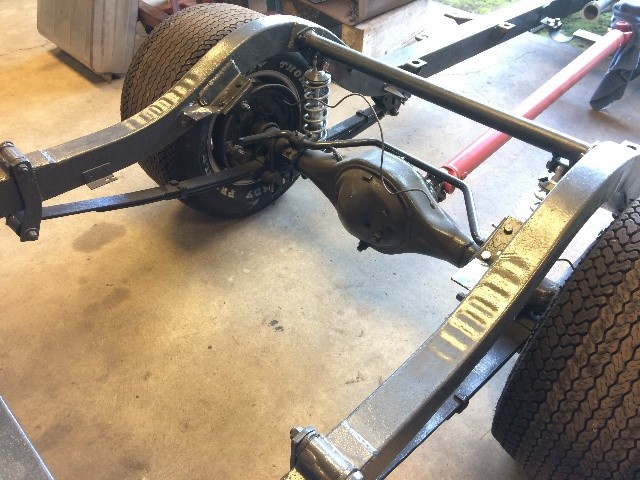
The parts from Danchuck arrived, they are almost identical to the old parts, so the 4 inserts in the new kit will not be used, as the old ones are still in good shape and are pressed into the steering arm and the drag link.
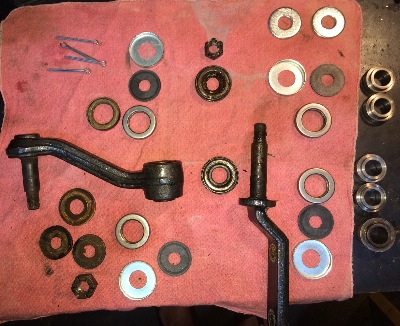
The one exception is that the bearing adapter on the bottom of the idler arm at the frame has a grease zerk on it, the new parts do not, but this grease zerk hits one of the header pipes, so I pressed it out and rotated it 90 degrees or so toward the motor so it would clear the header pipe, and pressed it back in....
Cleaned up, fresh grease and new bearings on the frame mount end, now to do the drag link end....
More Later...
Update,
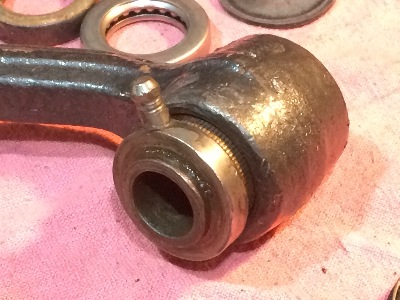
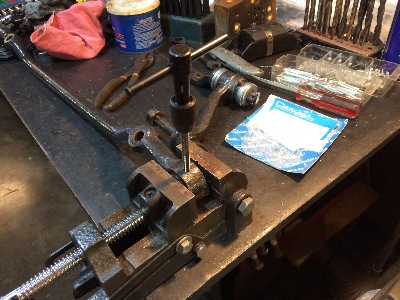
Discovered that the drag link at the idler arm does not have a grease fitting, so am drilling and tapping for that, here's some pix....
Aloha
Willy
More Pix Here....
-
03-16-2016 #82
Registered User
- Join Date
- Feb 2007
- Location
- Hawaii
- Posts
- 225
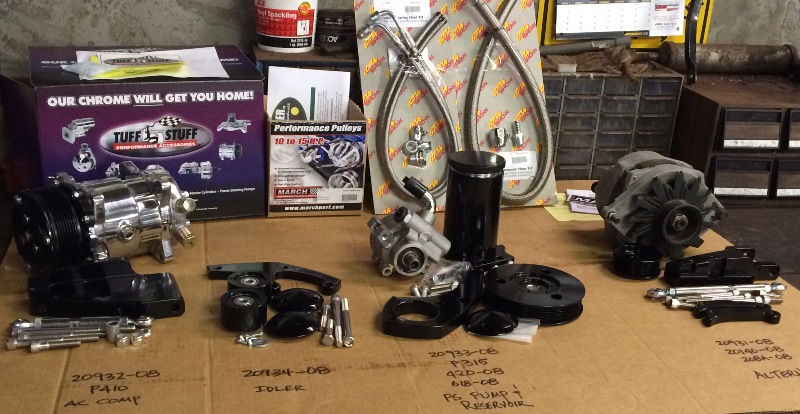
The March Performance parts showed up, this is the install diagram:
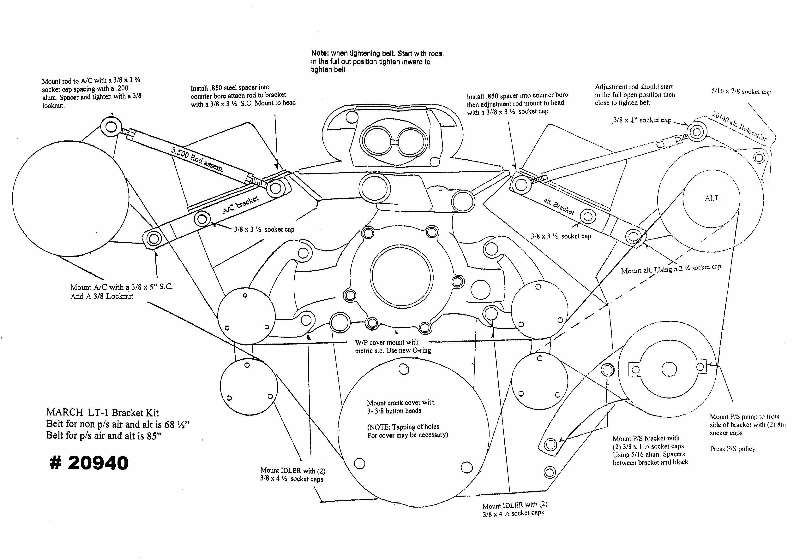
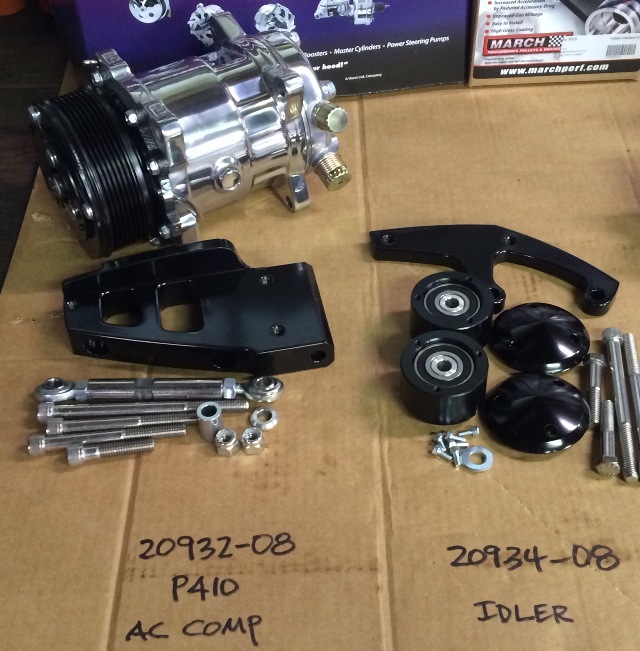
Here's the parts that came today (below), there's only one set of idler rollers, there should be two, let's see what March says about this, I can't make this work with only one set of idlers, look closely at that diagram above....
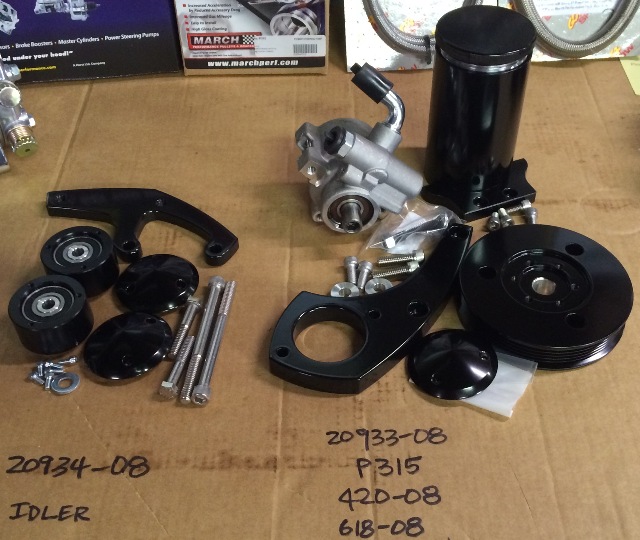
More Here...
Aloha,
Willy
03-18-2016 #83
Registered User
- Join Date
- Feb 2007
- Location
- Hawaii
- Posts
- 225
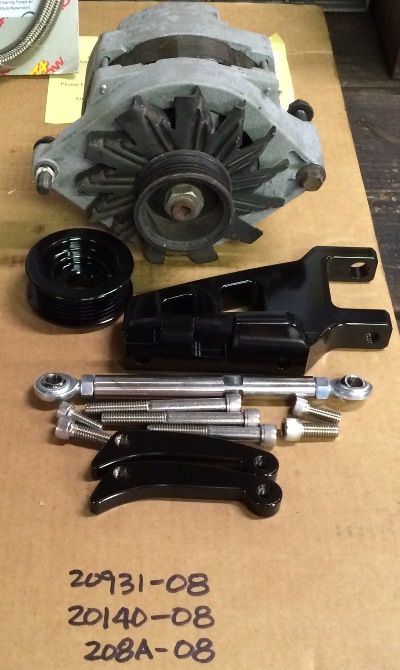
March is sending out the second idler setup....
UPDATE:
Test fitting the March Performance (MP) parts on today...
More HERE....
Aloha,
WillyLast edited by 2Loose; 03-21-2016 at 07:57 PM. Reason: update
03-24-2016 #84
Registered User
- Join Date
- Feb 2007
- Location
- Hawaii
- Posts
- 225
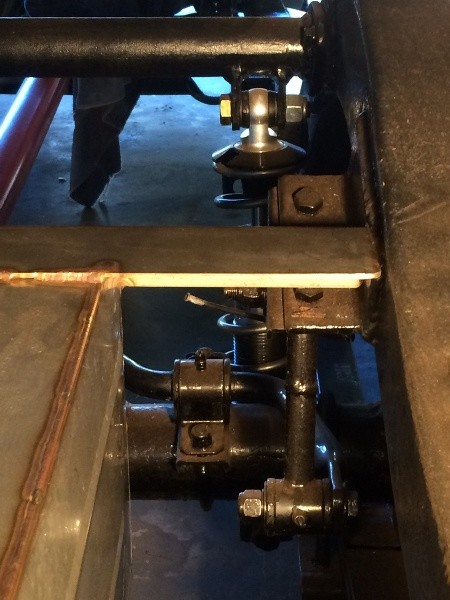
Played around with the power steering pump orientation, started out with this as indicated by March Performance:
But there are obvious problems with the hose connections and the a-arm mount and the header tubes...
so tried this:
Still have hose problems with the alternator and the header tubes...
so tried this:
I can make this position work....
Improved the alternator mount, as for some reason MP sent me
an extra adjustor rod adapter, so I used them both....
And changed the mount for the AC compressor to this:
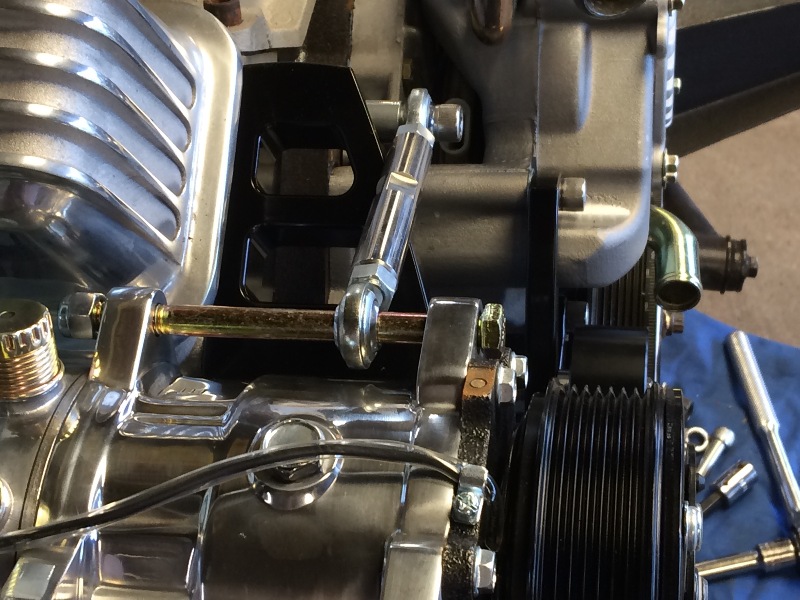
Spacers will be added on that bolt each side of the adjuster rod...
Aloha,
Willy
More Pix HERE....
03-26-2016 #85
Registered User
- Join Date
- Feb 2007
- Location
- Hawaii
- Posts
- 225
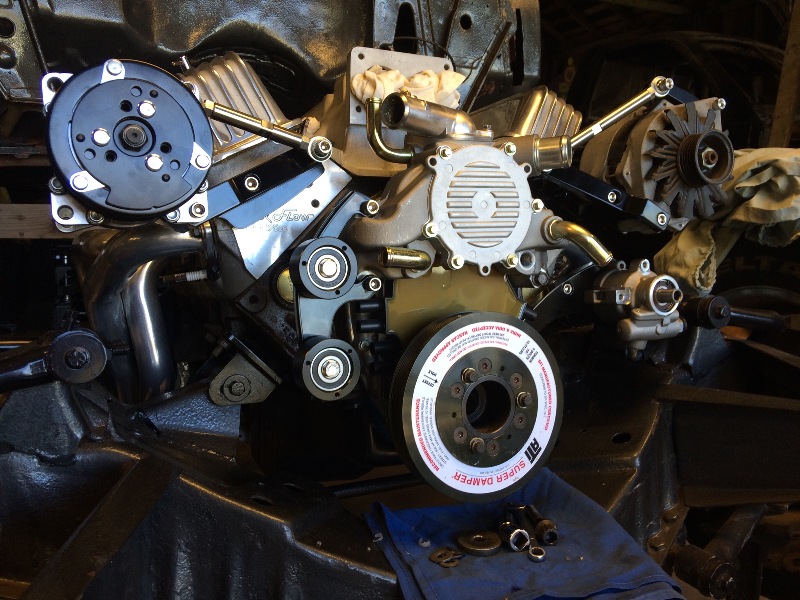
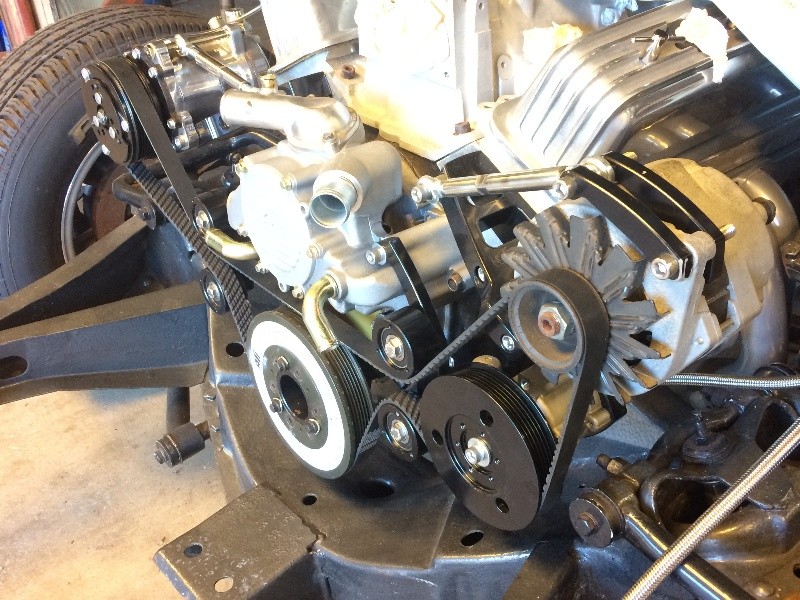
Got some more work done....
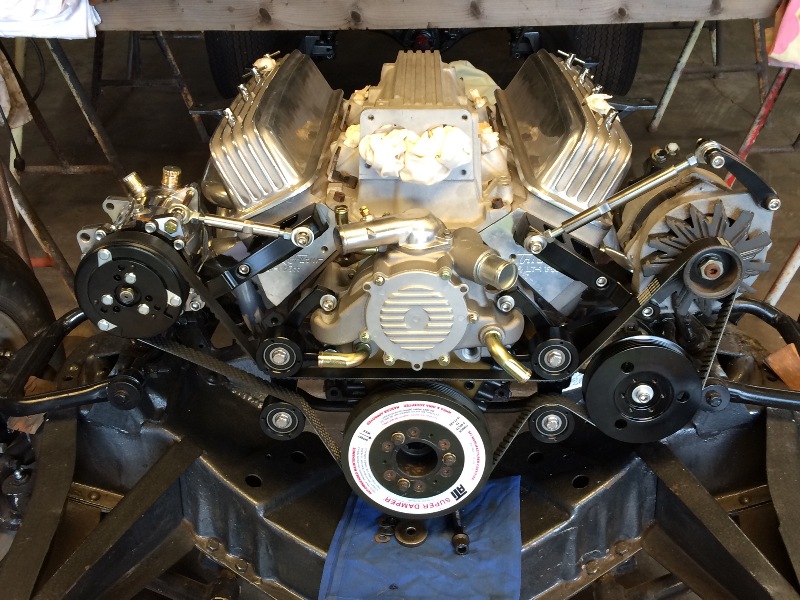

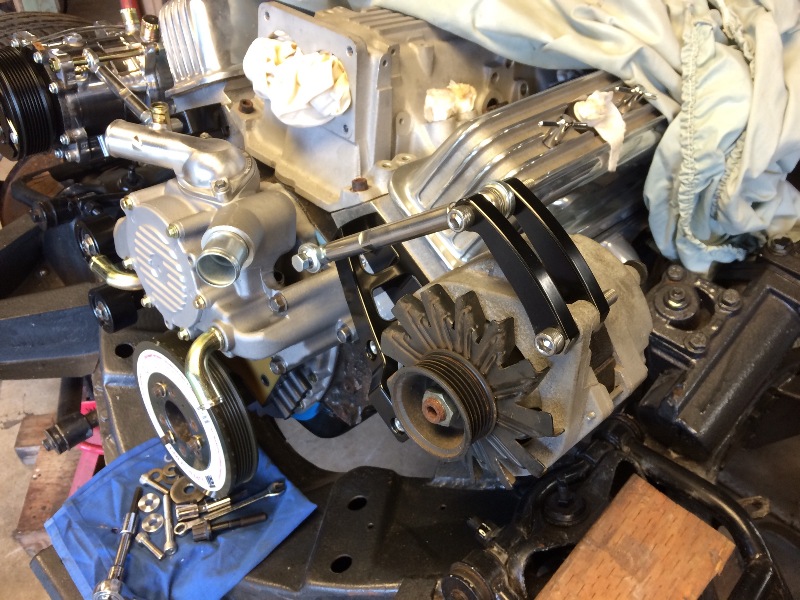
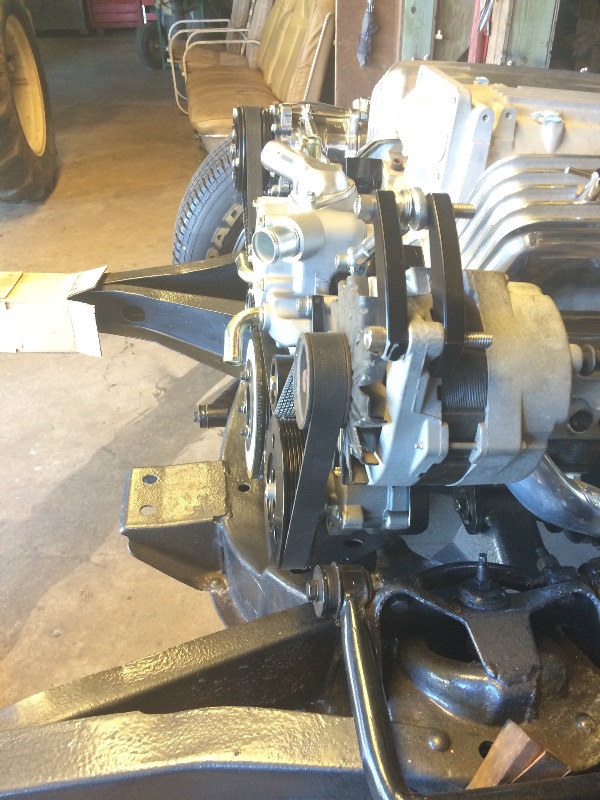
Had to do a bit of remedial work to correct some deficiencies in the way these MP brackets were set up, and had to wait for some parts that were not shipped with the initial order. But I'm pretty happy with the way the setup is turning out.
Still waiting for the new Corvette style LT1 flanged crank hub to arrive from ATI to replace my Camaro hub, which will relocate the damper further forward and align it with the MP LT1 "Outward Mount" pulley system.
The Camaro LT1 hub I'm using here is temporarily located in a forward position in order to facilitate the fitting of these other MP components.
Lots More Pix HERE....
Aloha,
Willy
04-14-2016 #86
Registered User
- Join Date
- Feb 2007
- Location
- Hawaii
- Posts
- 225
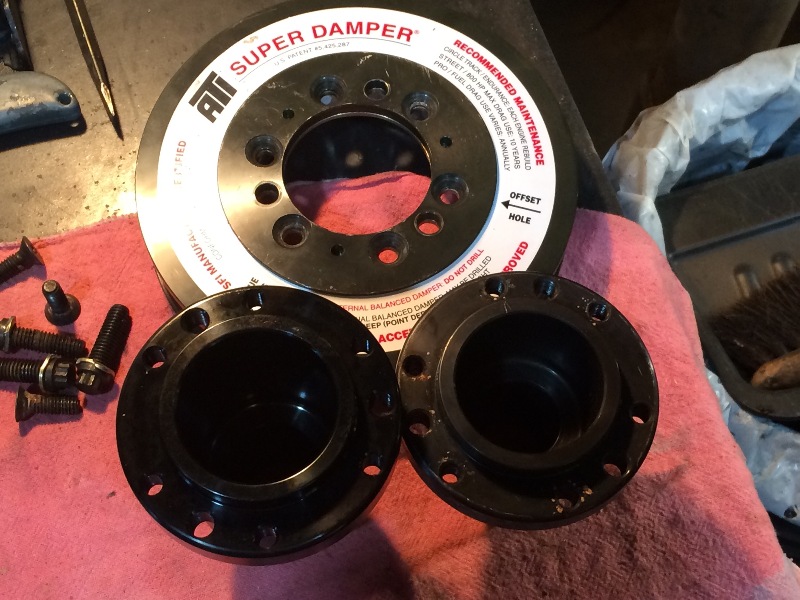
Meanwhile, ATI sent the wrong hub for the revised crank damper setup that I need....
My Camaro LT1 hub is on the right, according to ATI that left hub is a blower drive hub for a small block Ford, don't think I can get that to work here...
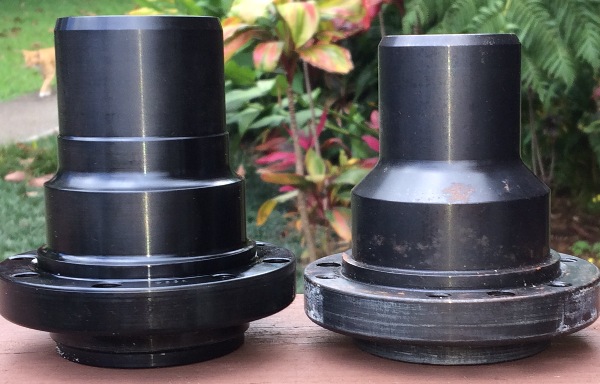
That's the Ford hub on the right in this pic....
Larger OD crank snout, different drill pattern for the damper mount....
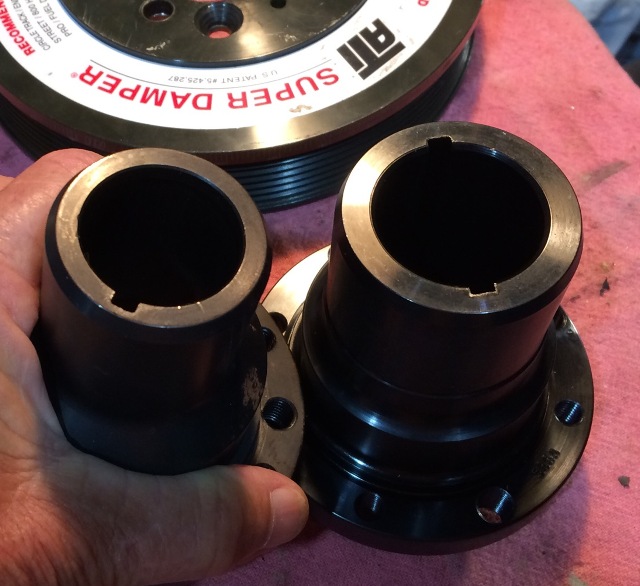
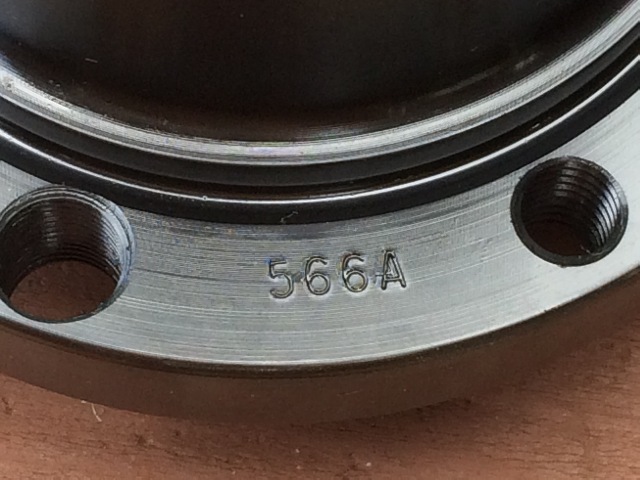
The give-away was this part number on the new ATI hub, ATI says it is a ford small block blower drive hub....
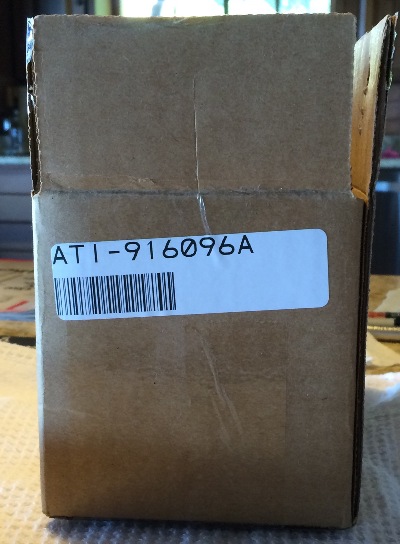
But the box it was shipped in had the correct part number on it for the flanged hub I need for the Corvette LT1 motor...
So now I have another delay while I ship this part back and wait for them to ship me the correct part...
Aaarrrhhhggg!!!
04-23-2016 #87
Registered User
- Join Date
- Feb 2007
- Location
- Hawaii
- Posts
- 225
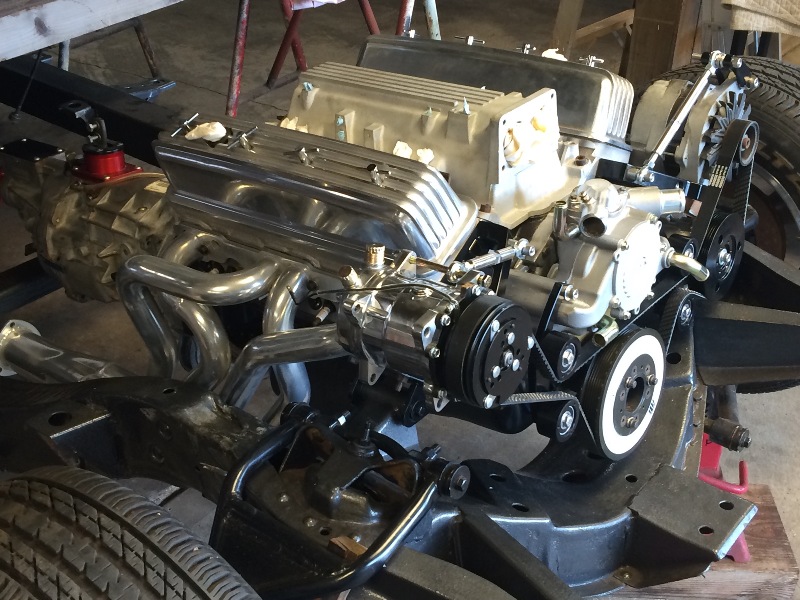
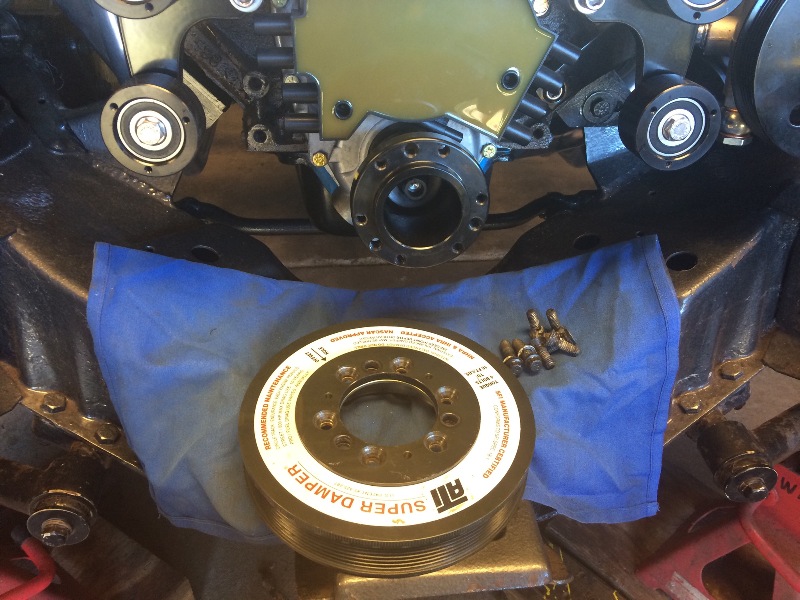
Finally got the correct ATI Corvette LT1 flanged crankshaft hub for the damper today. It is quite a bit longer than the Camaro hub...
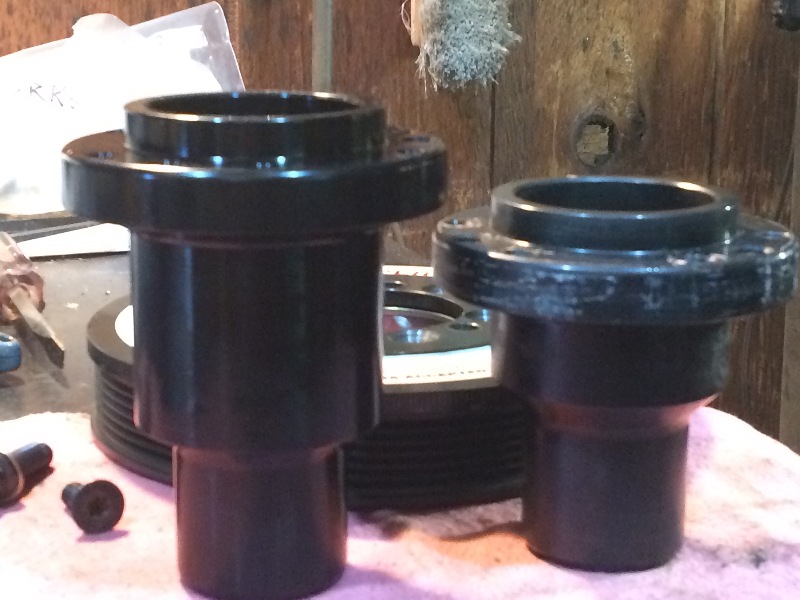
The holes were all in the correct location, and the damper bolted up to the hub correctly....
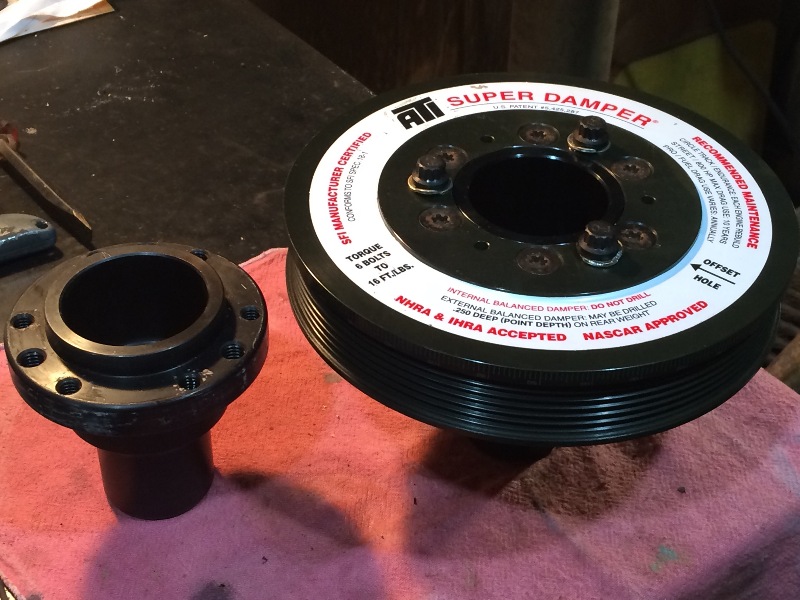
Now to see how well it aligns with the March accessories mounting system...
Aloha,
Willy
04-29-2016 #88
Registered User
- Join Date
- Feb 2007
- Location
- Hawaii
- Posts
- 225
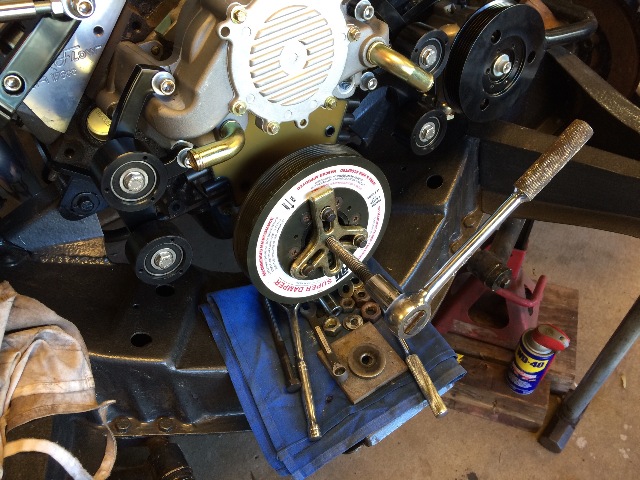
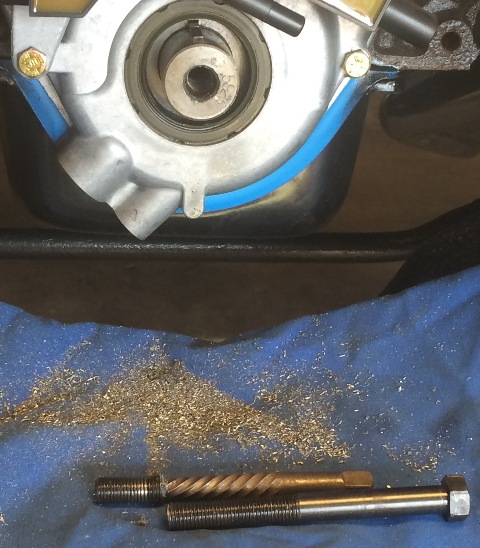
It turns out that this new ATI LT1 flanged hub is seriously too tight for the crankshaft.
As the older ATI LT1 (Camaro version) fits normally with no problems on this crankshaft snout, the problem is with the ATI hub.
Right now I have a broken bolt inside the crank from trying to install the assembled damper with the new hub, and a stripped damper puller from trying to remove this hub after breaking the installer bolt.

I've had this damper puller for many years,
it takes a serously too tight hub to cause this center bolt on this puller to strip the threads like it did on this one...
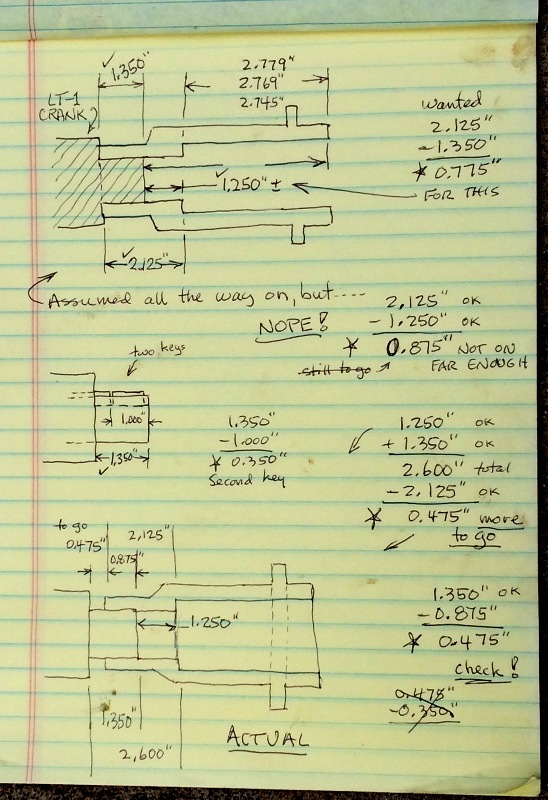
Here's some sketches from the first install attempt, showing that I still needed to go about another half inch to get it on all the way, that's why the crank pulley didn't line up with the accessory pulleys...
Now I have to disassemble the damper from the hub, and heat the hub to try to loosen and remove it, and then remove the broken bolt stub from the crankshaft...
Am I having fun yet???
Willy
More Photos HERE....
04-29-2016 #89
Registered User
- Join Date
- Feb 2007
- Location
- Hawaii
- Posts
- 225
Got the stuck dampner off and the busted bolt out of the crank today, so some progress...
04-30-2016 #90
Registered User
- Join Date
- Feb 2007
- Location
- Hawaii
- Posts
- 225
It turns out that ATI is making the latest "Super Damper"s with an "undersized" interference fit, requiring a machine shop to hone to fit on a Sunnen rod hone.
Here's an excerpt from a document on the ATI web site...
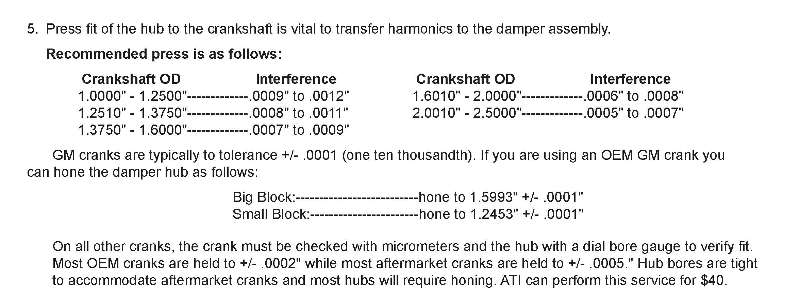
OK, a visit to my local machine shop on Monday...
Willy
05-01-2016 #91
Registered User
- Join Date
- Feb 2007
- Location
- Hawaii
- Posts
- 225
Here's the bolt that busted off in the crank while trying to pull the damper onto the crankshaft snout...
That's a grade 8 bolt...
More pix HERE...
05-03-2016 #92
Registered User
- Join Date
- Feb 2007
- Location
- Hawaii
- Posts
- 225
Today:
Quite a few hours with #100 gray wet/dry sand paper, then smoothing with #600, took out about 0/0008" to 0/0010", then did an assemble with just the flanged hub and assembly lube....
assembly lube on the 7/16 sae threads inside the crank snout also, used a 5" by 7/16" bolt and kept adding spacer to push this on, tight but not abnormal in my experience...
Update:
The balancer is now back on the hub, the serpentine belt is back on, and everything lines up just as it should...
more pix HERE (scroll down)....
07-24-2017 #93
Registered User
- Join Date
- Feb 2007
- Location
- Hawaii
- Posts
- 225
Had to drop this project for awhile, some health problems, and I managed to break my left arm, kinda slowed me down a bit....
As my arm gets stronger, and I'm feeling better, I'm starting to get back onto the '55 HT project...
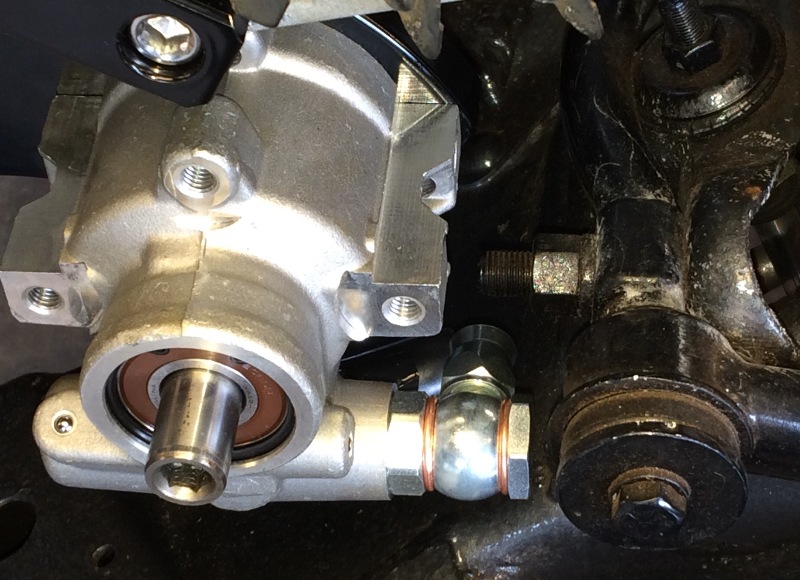
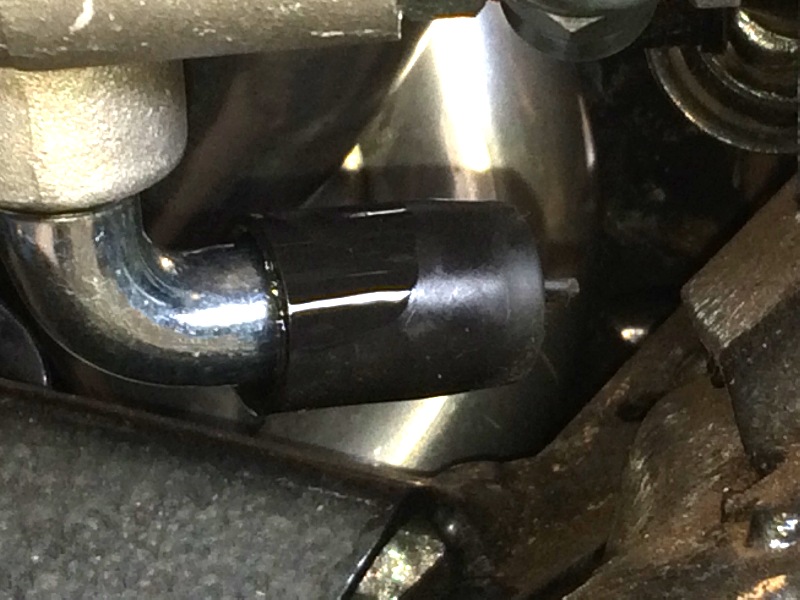
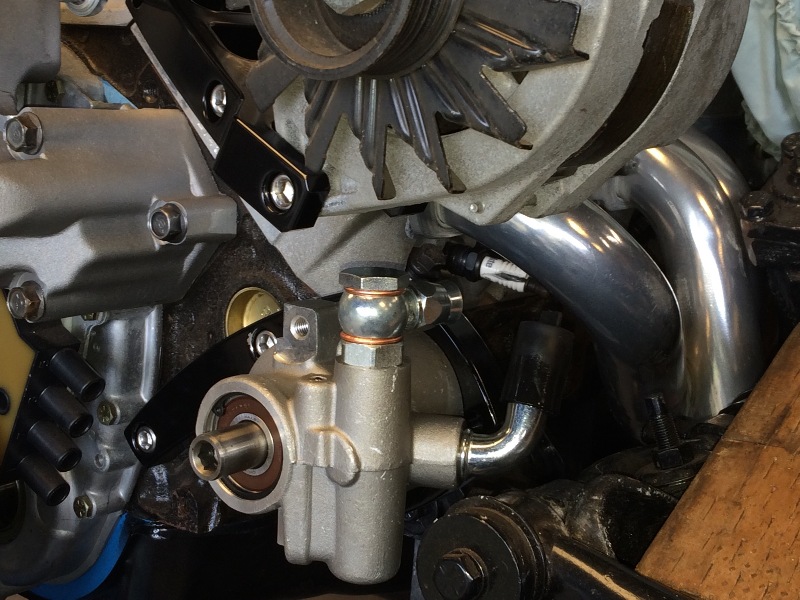
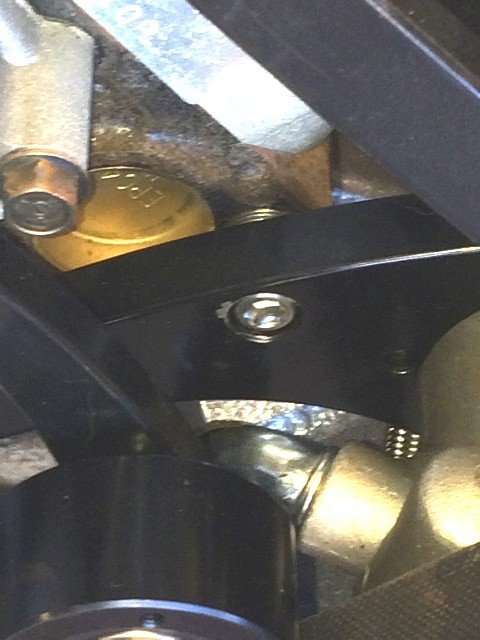
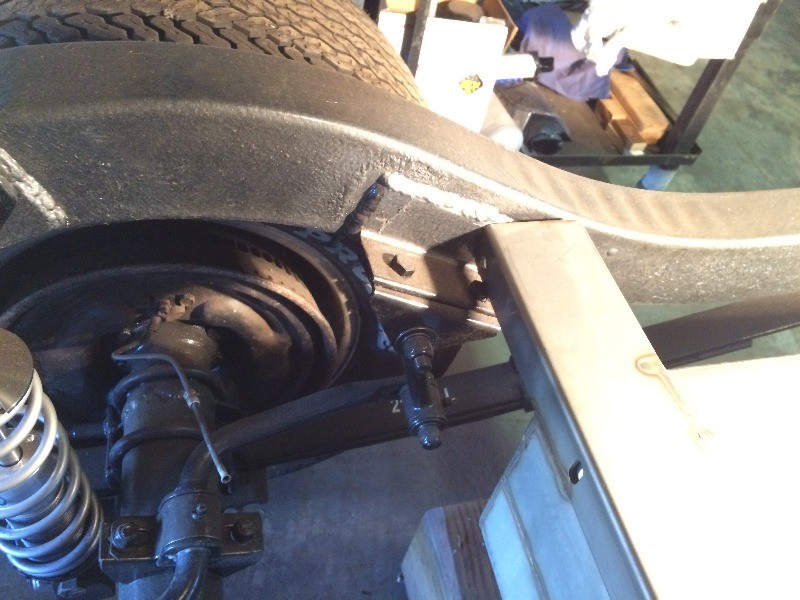
Lookin' closely at this front setup, and noticed that the power steering pump is slightly out of alignment, with this March Performance setup I bought...
The pump sits about 1/8" too far forward....
It sits just below the alternator, and closer to the motor in this pic...
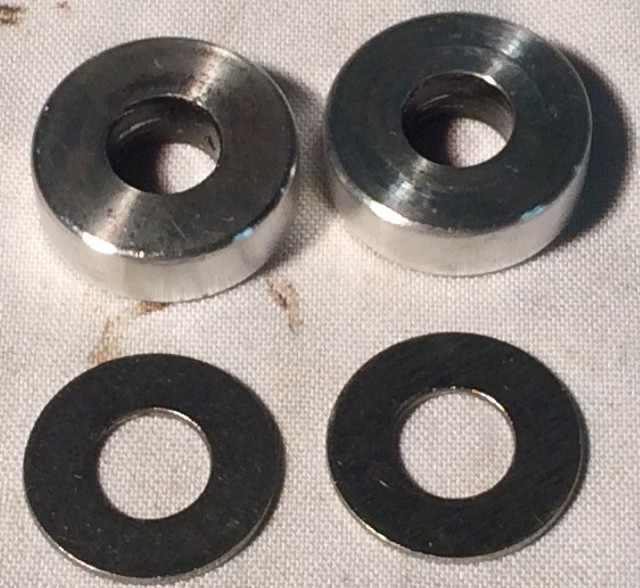
These spacers, 0.316" thick, came with the March Performance LT1
setup, but they are obviously too thick for this particular setup with
these particular heads and block. Everything else seems to fit just fine
now that I have the dampner problems sorted out....
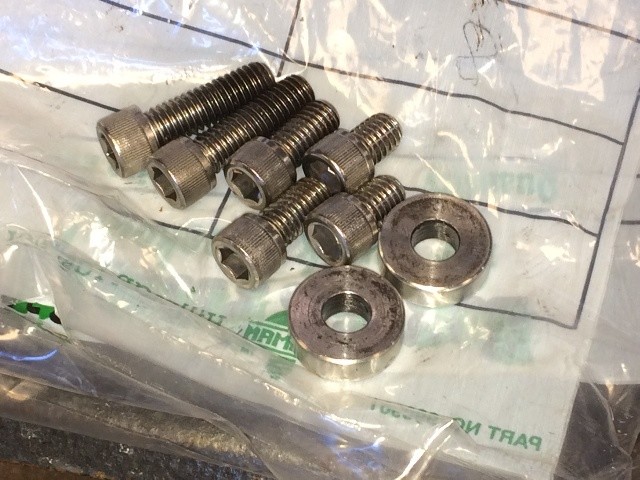
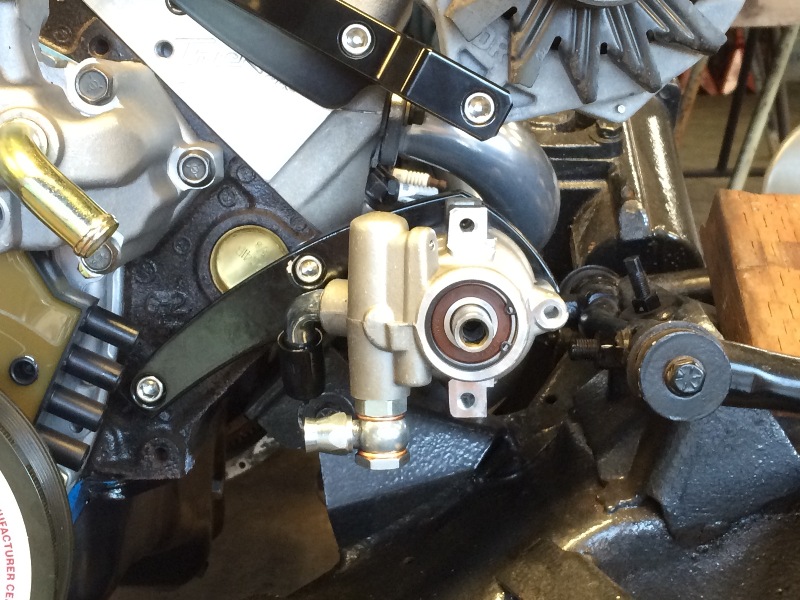
I had a variety of allen head bolt length available to get
a good fit with the proper spacers....
Picked up a dozen ss flat washers, these are 0.050" thick....
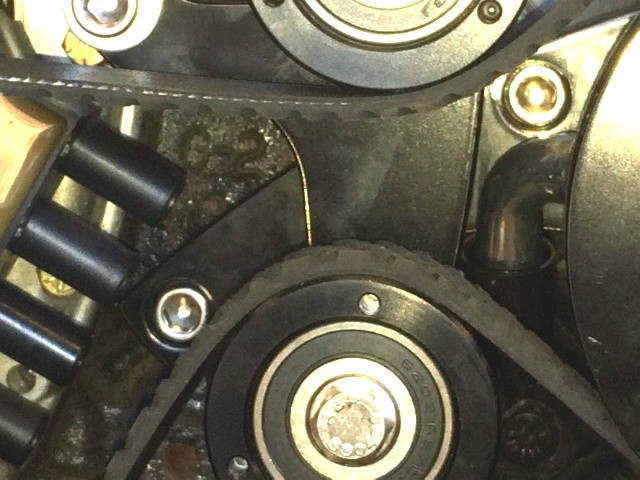
Behind the idler rollers and bracket, is the bracket for the PS pump,
that's where the spacers have to go to align the pump....
I started with two washers, 0.100" spacing, wasn't quite right,
added another washer to each location, 0.150" now....
It looks good, don't think I can get it much closer....
07-24-2017 #94 Registered User
- Join Date
- Mar 2007
- Location
- Florida
- Posts
- 2,391

Good to see you're back at it Willy! Hadn't seen ya over at Grumpys. Had a heart attack/stent operation myself a couple months ago, sucks gettin old.
10-19-2017 #95
Registered User
- Join Date
- Feb 2007
- Location
- Hawaii
- Posts
- 225
Well, hand (severed tendons) and arm (broken ulna in 2 places) injuries during the last 2 years have slowed me down considerably !!
Have tried to keep my personal web page up dated when I could....
More pix, etc. here (Link)
The tendons and broken arm are pretty well healed, but still quite a bit of pain, choosing to just ignore it and trying to get back to work on the Sport Coupe project....
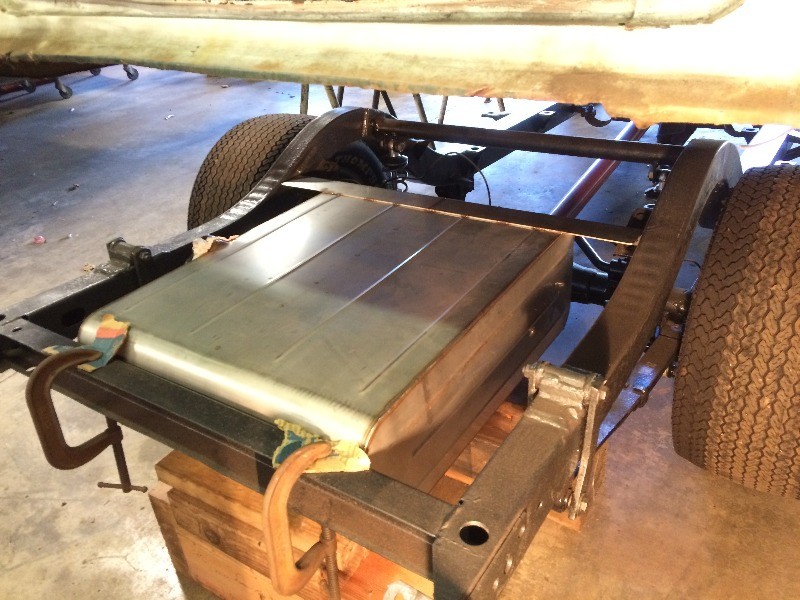
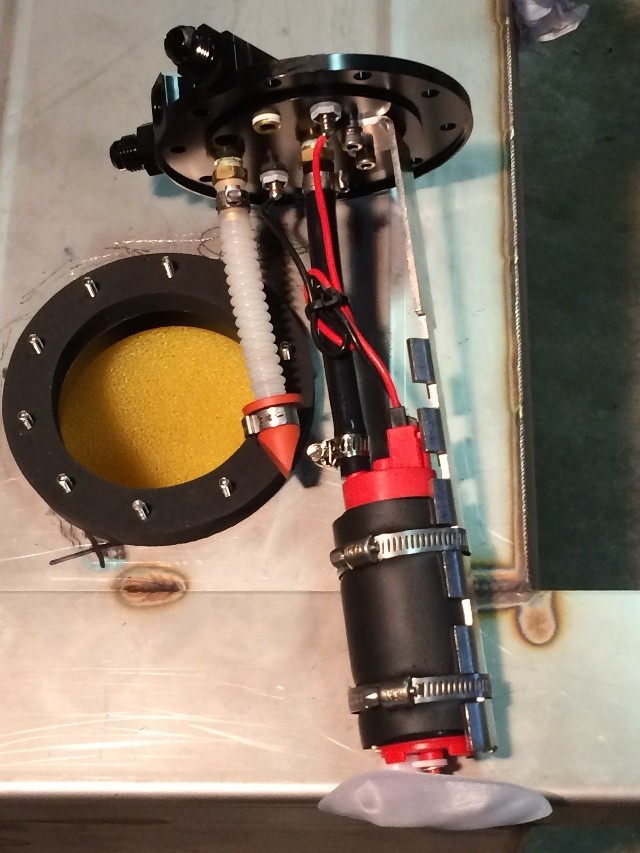
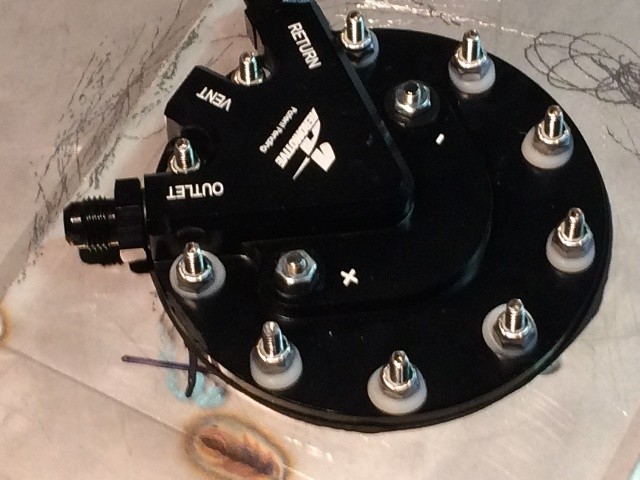
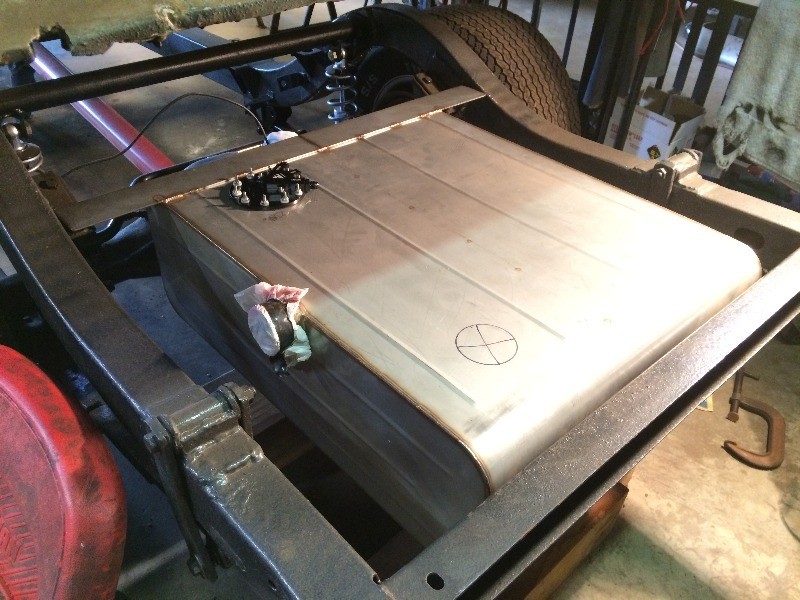
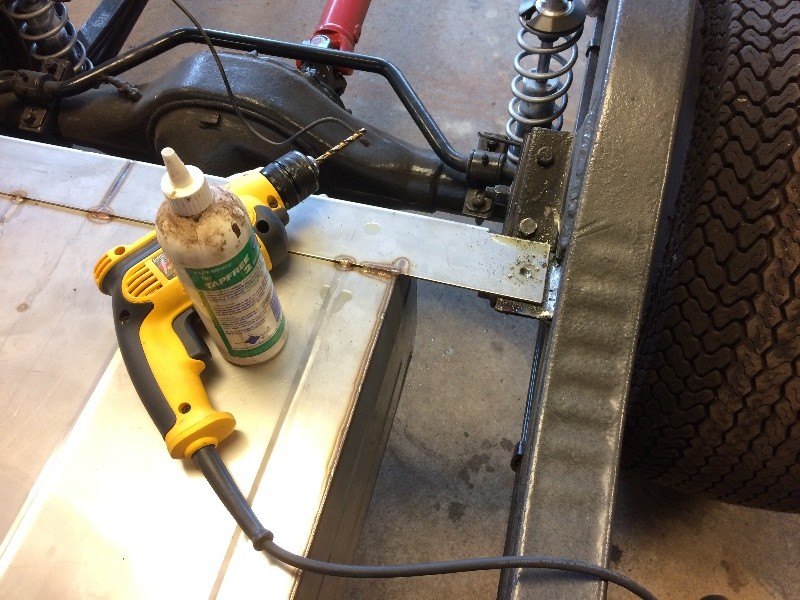
Time to hang the fuel tank and install the fuel system....
Dug out the fuel tank, pump and other parts I've had
in storage for some time now....
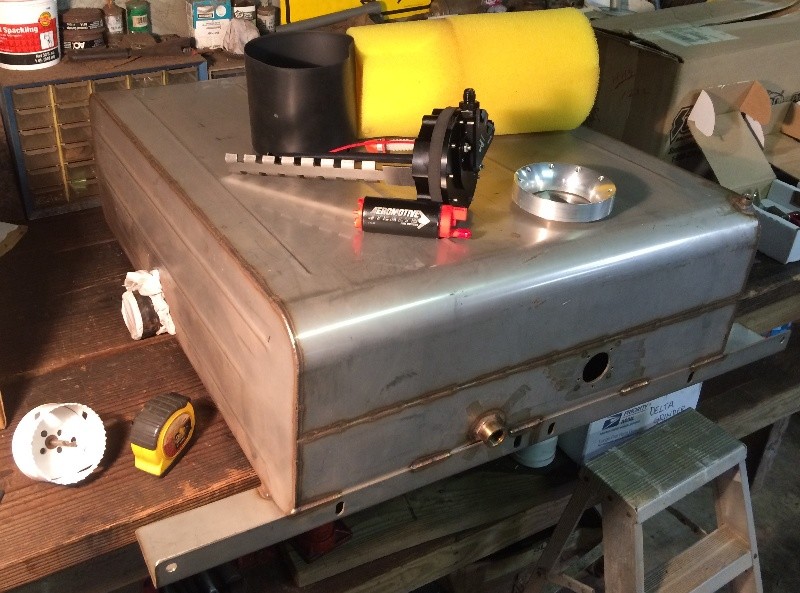
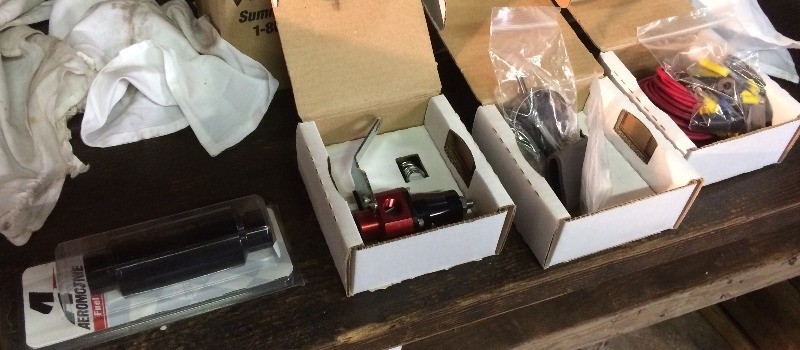
Using all Aeromotive parts for an intank efi style fuel pump system...
Glad to be back at it again....
Aloha to all...
Willy
10-21-2017 #96
Registered User
- Join Date
- Feb 2007
- Location
- Hawaii
- Posts
- 225
Finally figured out how it was supposed to fit....
The front mount will fit in nicely with my sway bar frame mounts....
Some slight modification required here....
Another view....
This will be easy....
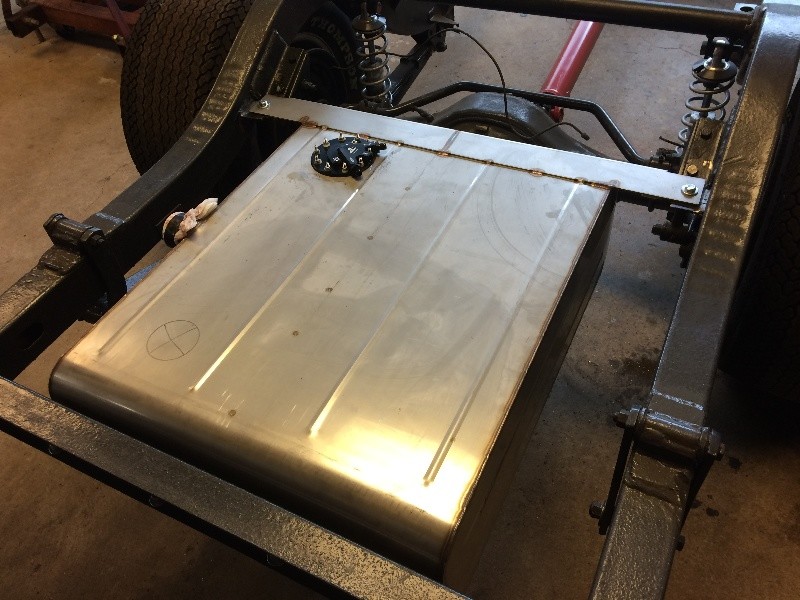
Gotta cut a 3-1/4" hole for the Aeromotive fuel pump and fuel well....
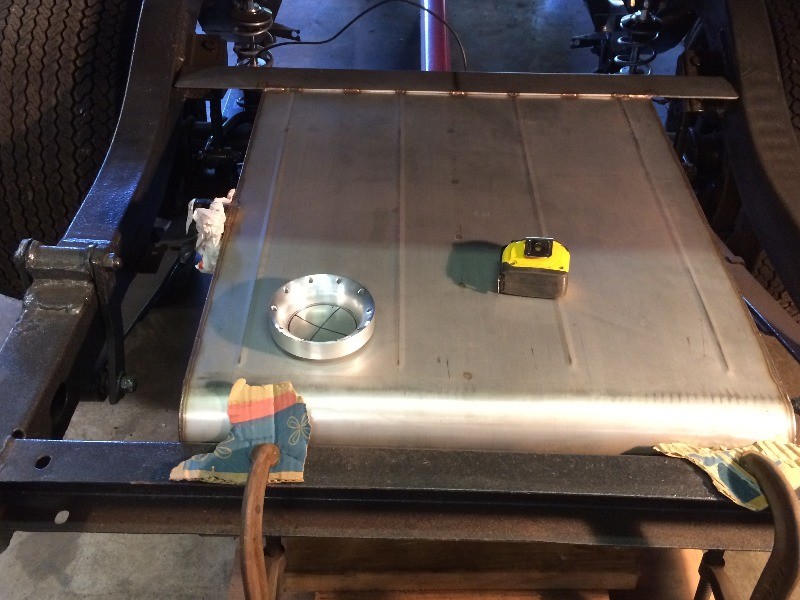
And will cut and fab a removable piece of the trunk floor over the fuel pump....
More Later....
Willy
10-27-2017 #97
Registered User
- Join Date
- Feb 2007
- Location
- Hawaii
- Posts
- 225
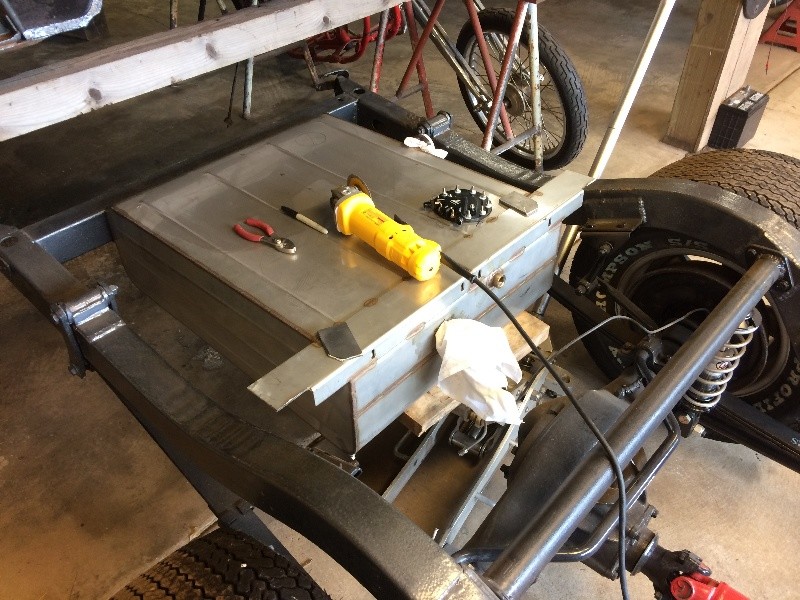
Got some more work done on the fuel tank....
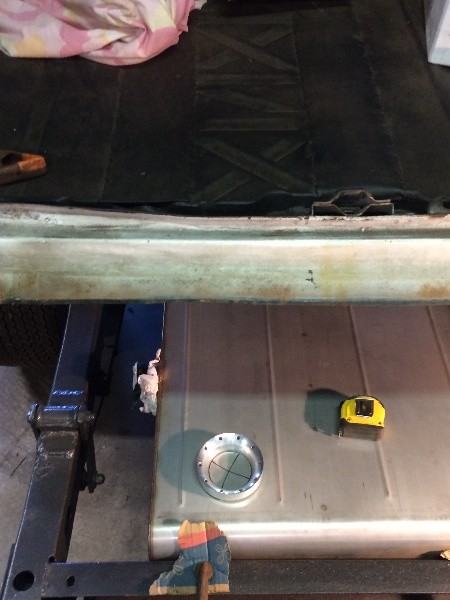
I trimmed the front support angle to get a better fit on the sway bar frame supports....
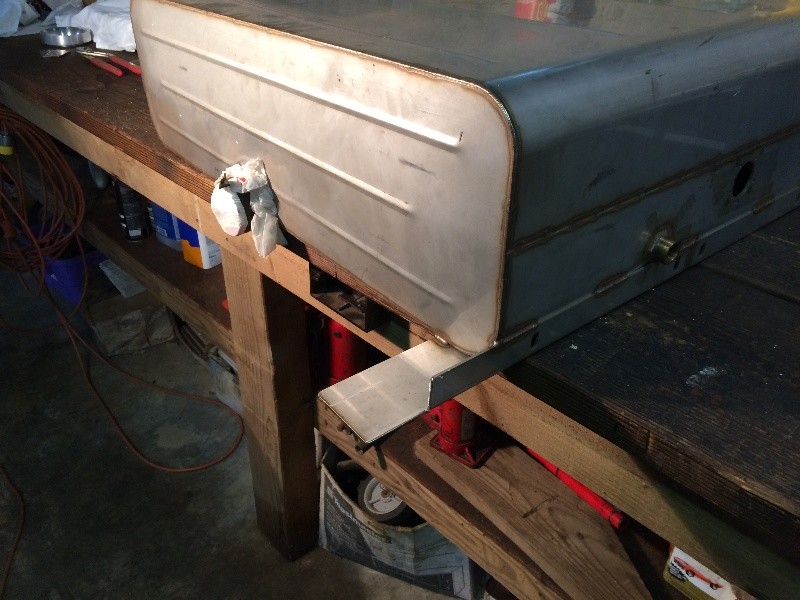
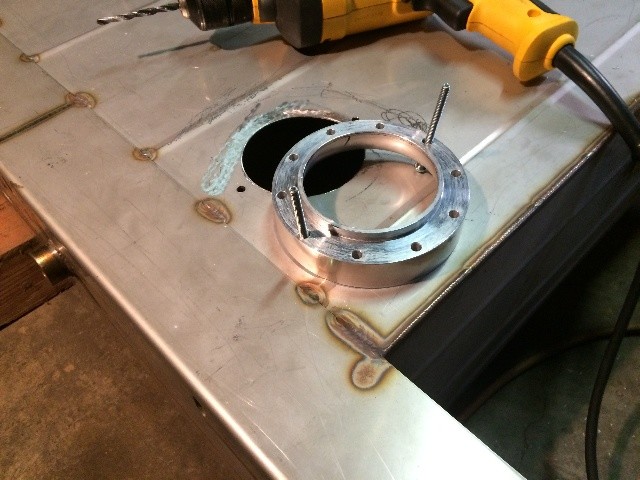
If I mount the fuel pump in the front of the tank, left side of the trunk floor is the easiest to cut an access hole for future removal and maintenance....
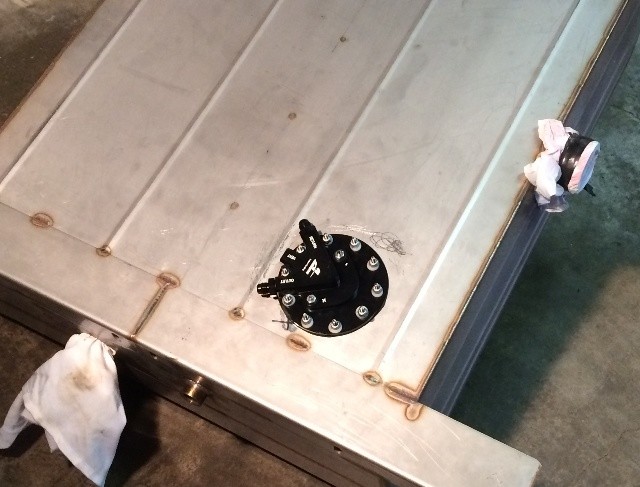
So I went ahead and cut the required 3-1/4" hole in the front left part of the tank....
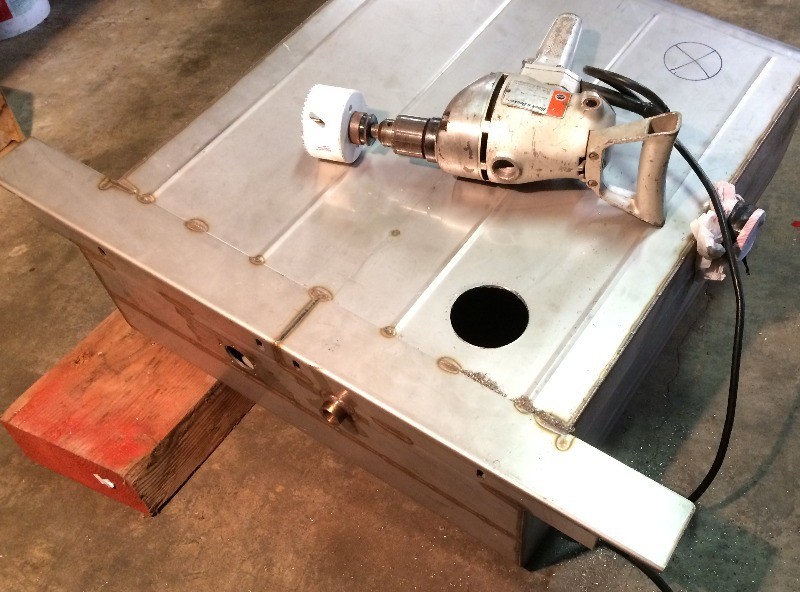
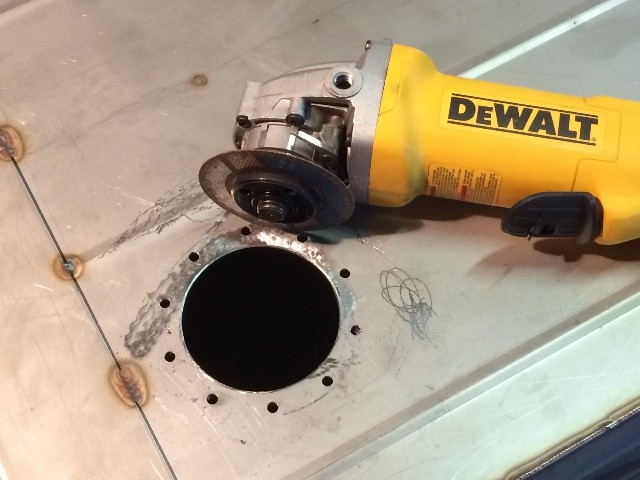
Cleaned up and smoothed the rough edges of the new hole....
I propped the tank up so that corner was lowest to keep the mess mostly located right under the hole, and it vacuumed out nicely....
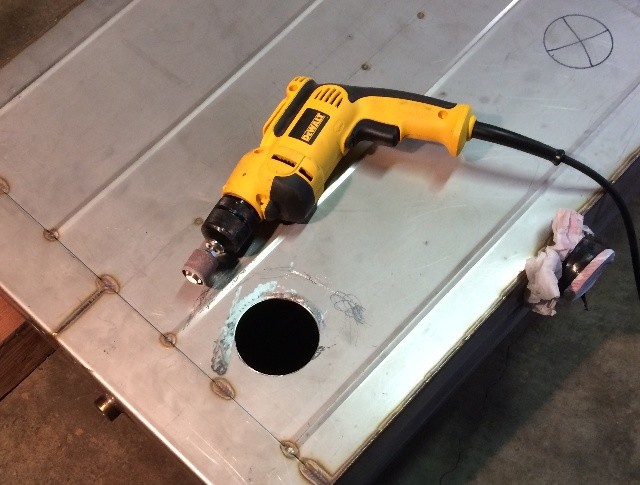
Aeromotive supplied a jig to drill the holes for the new fuel pump....
The idea was to drill two holes opposite each other, then keep it located with these two screws while drilling the rest of the holes...
However, my drill bit went 'south' on the second hole, so I'm going to have to resharpen this bit after each hole, or go buy a couple more bits....
Probably will end up doing both....
More Later...
Aloha,
Willy
10-27-2017 #98
Registered User
- Join Date
- Feb 2007
- Location
- Hawaii
- Posts
- 225
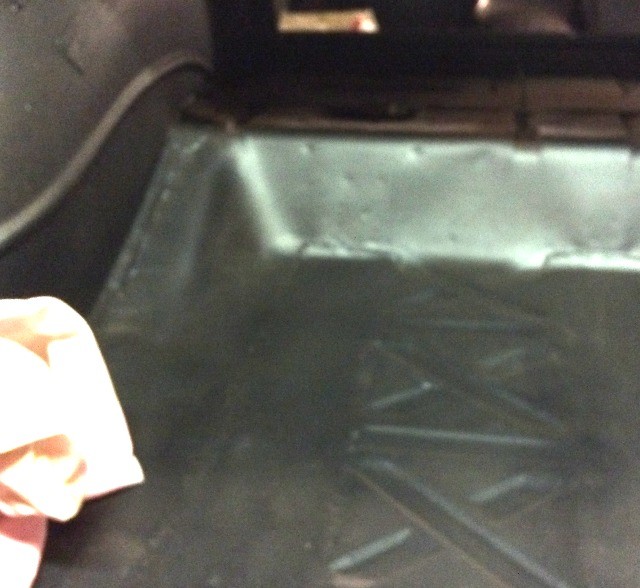
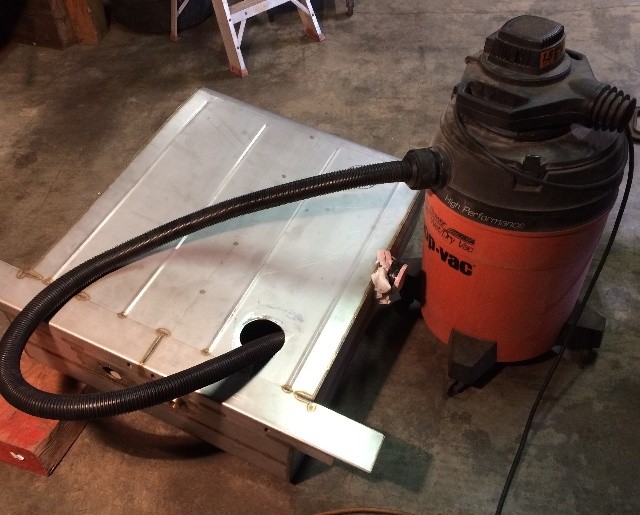
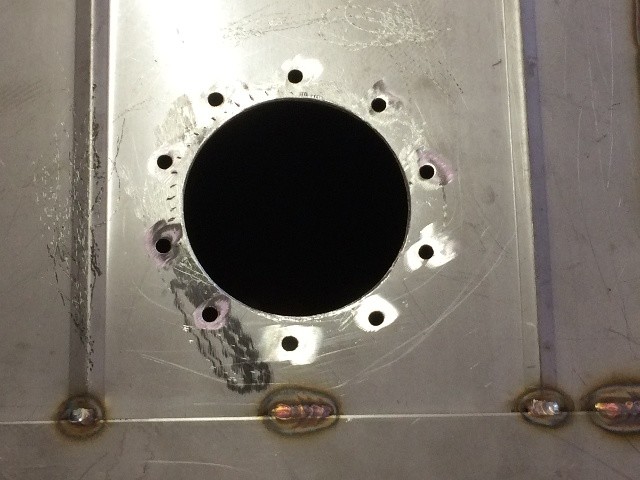
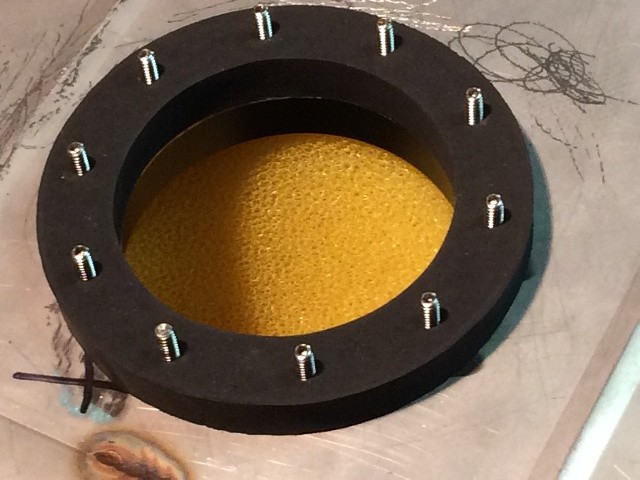
Cleaned up the drilled holes for the fuel pump, inside and out....
Used the shop vac to suck out all the debris....
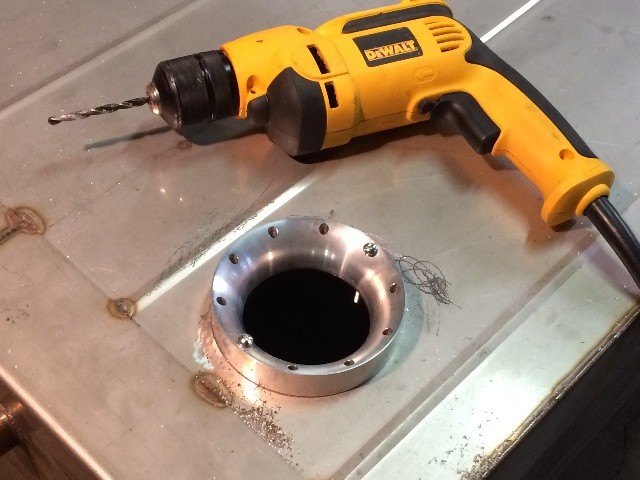
Put the inside ring with the screws in place,,,,
had to file some of the holes to get a good fit....
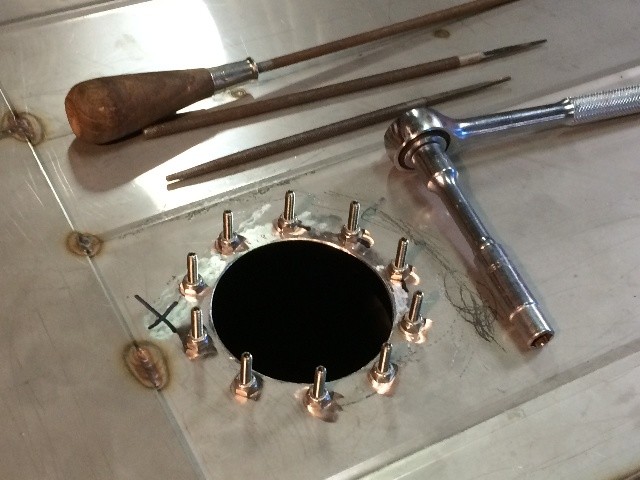
The nuts are removed after the inside ring is pulled into position...
It is a tight enough fit that it stayed in place....
The front of the tank is 9-1/2" deep (28 gallon tank)...
so the foam is cut to 10-1/2"....
The tank tapers to 9" deep in the rear....
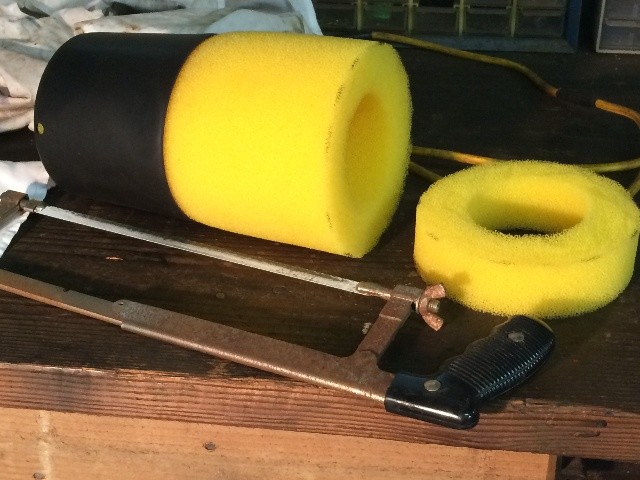
And stuffed down in the tank and massaged back into shape and into position
Then the foam gasket is put on top....
The pump assembly is also assembled to match the 9-1/2" depth...
Had to readjust the foam fuel well a couple of times to get it right....
I think it's good to go....
Now to work up some front mounting brackets....
Aloha,
Willy
10-31-2017 #99
Registered User
- Join Date
- Feb 2007
- Location
- Hawaii
- Posts
- 225
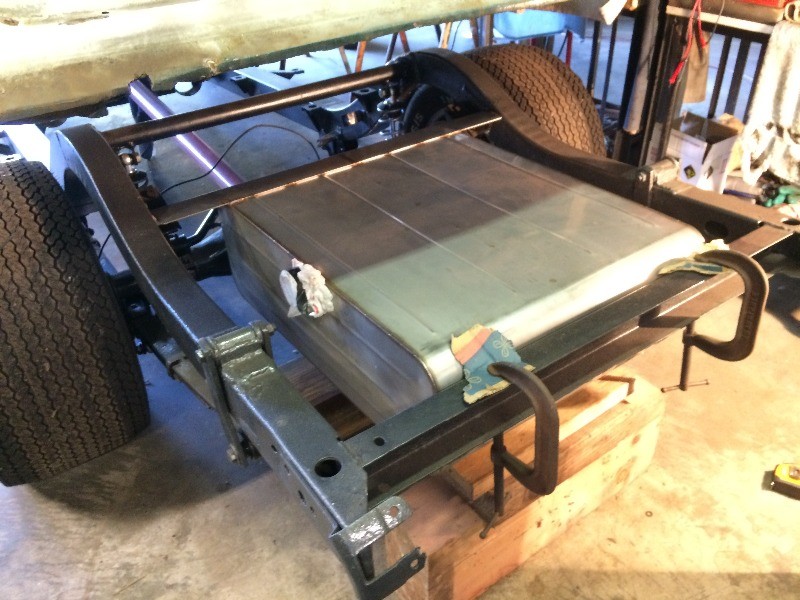
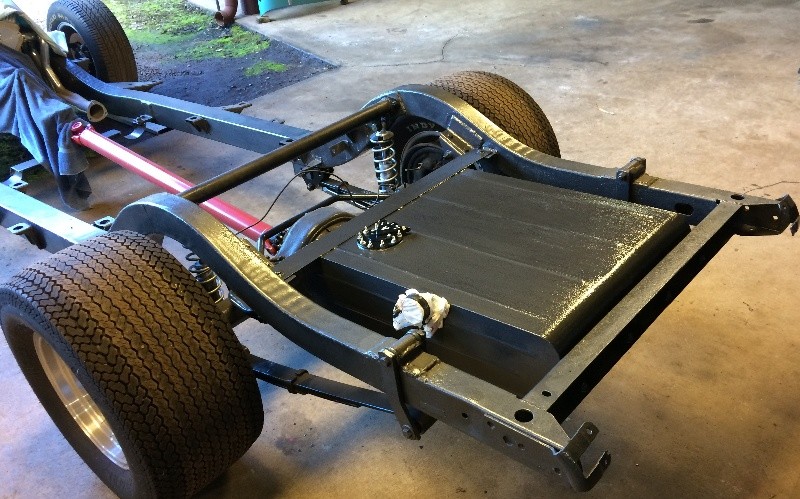
Rolled the chassis out from under the body,
easier to work on the fuel system....
Loosened up the bolts in back, jacked up the front to cut some more
metal off the front brackets on the tank for a better fit....
While it was up, got in there and ground off paint, cleaned up weld areas....
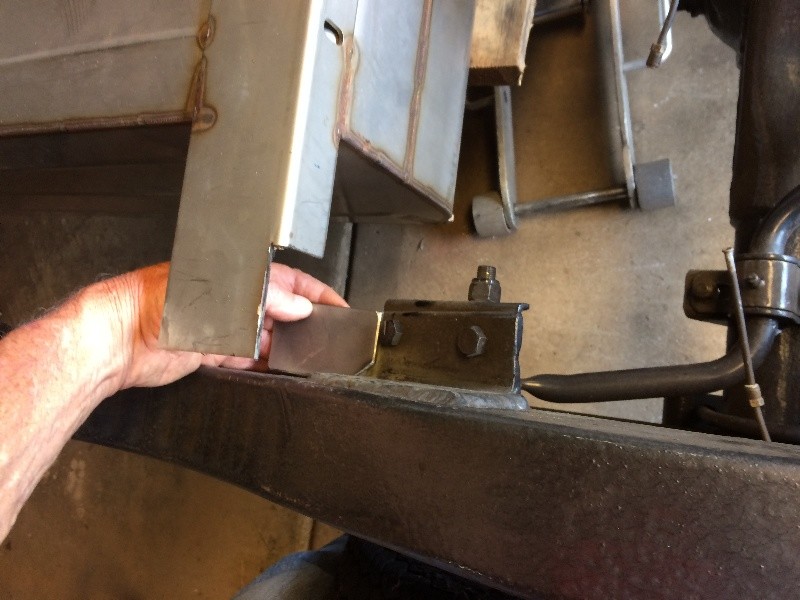
AND fitted a piece of 3/16 to weld on as a bracket on each side..
Both sides welded on, tacked on while
clamped to the fuel tank to keep then located...
Man, this SS was the toughest stuff to drill I've ever run across....
Using Ace's best bits, I went through 8- 1/4" bits, and 4- 3/8" bits
and that was with a drilling lube and running slow speed, and resharpening
bits with a "Drill Doctor"....
Using cad plated 3/8" bolts, 3/4" long, with flat washers, cad plated, both sides,
a lock washer and a regular nut.
Will pull it out to paint the recent welds,
and I want to coat the welds on this SS tank....
11-09-2017 #100
Registered User
- Join Date
- Feb 2007
- Location
- Hawaii
- Posts
- 225
Since I painted the frame with Rustoleum
Black Hammer Tone, decided to do the tank
with the same....
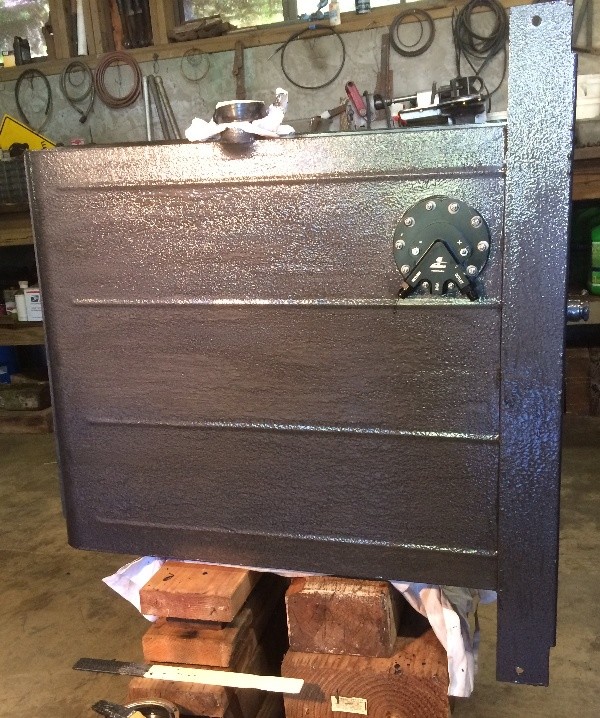
It took two coats plus a little bit here and there, but it looks good to go....
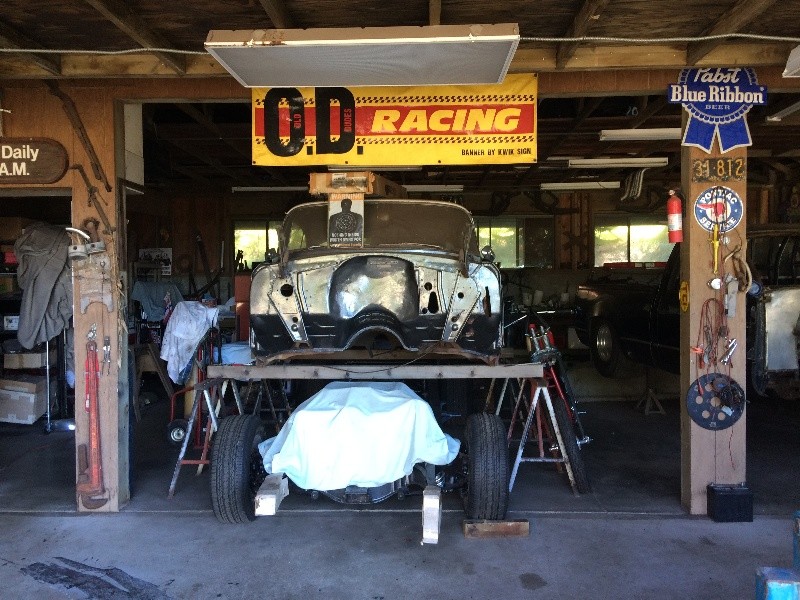
Just for grins, my shop space,
It's the OD Racing Team....
(Old Dudes....)
More Later
Willy

 Reply With Quote


