

Results 281 to 300 of 808
-
03-31-2018 #281
 Registered User
- Join Date
- Jun 2014
- Posts
- 160

There are a slew of 1st gens in the protouring community so many that I tend to skip those threads. This build is so great because it's realistic foe the average family guy. I reminds me of my build. Hopefully when I get done with school in May I can make some real progress too. Great job on the bodywork. Maybe I'm a little of but I love auto body lol.
-
04-02-2018 #282 Registered User
- Join Date
- Sep 2009
- Posts
- 2,713
Thanks 2ndround, I really appreciate that! If you want to come over this Saturday we're block sanding all day haha.

1955 Nomad project LC9, 4L80e, C5 brakes, Vision wheels
1968 Camaro 6.2 w/ LSA, TR6060-Magnum hybrid and etc SOLD
1976 T/A LS1 6 Speed, and etc. SOLD
Follow me on Instagram: ryeguy2006a
04-02-2018 #283
Registered User
- Join Date
- Sep 2009
- Posts
- 2,713
Knowing that my self imposed deadline to get the car to my buddies body-shop was looming, I made a big push on Thursday night to get some last minute things buttoned up. I didn't get any pictures, but I welded up the cut I made on the driver's fender to match the contour of the upper valance panel. I also had to cut, flatten and weld up an imperfection at the top center bodyline on the lower valance panel. Once welded up I smoothed it right back down with a flap disk. Looks like it was never touched.
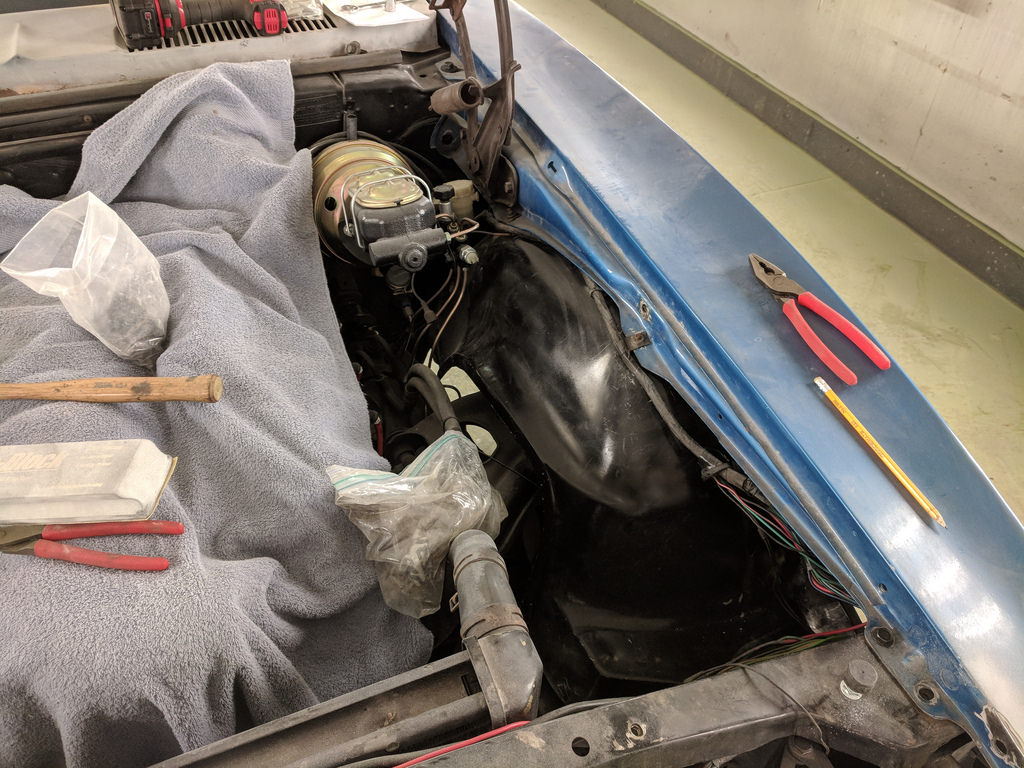
Next up was test fitting my new fiberglass inner fenders. They are so much lighter than the stock inners and they look almost identical to the stock ones. I had to drill the holes so they could bolt up to the fender, core support, and battery tray. I also had to cut holes for the RS headlight arm. Here it is all fit and installed. Very pleased with the fit and finish of the fenders.
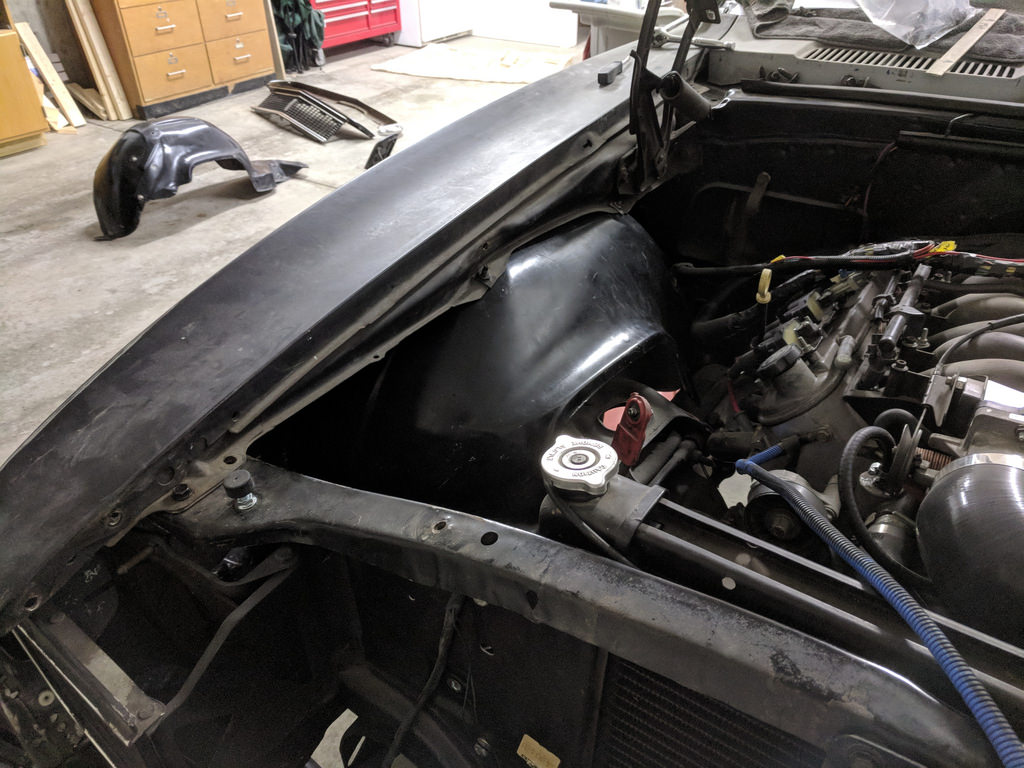
Finally got to use the hole saw kit that I bought 5 months ago. Very pleased as it does such a nice job.
Now it bolts up just like it should.
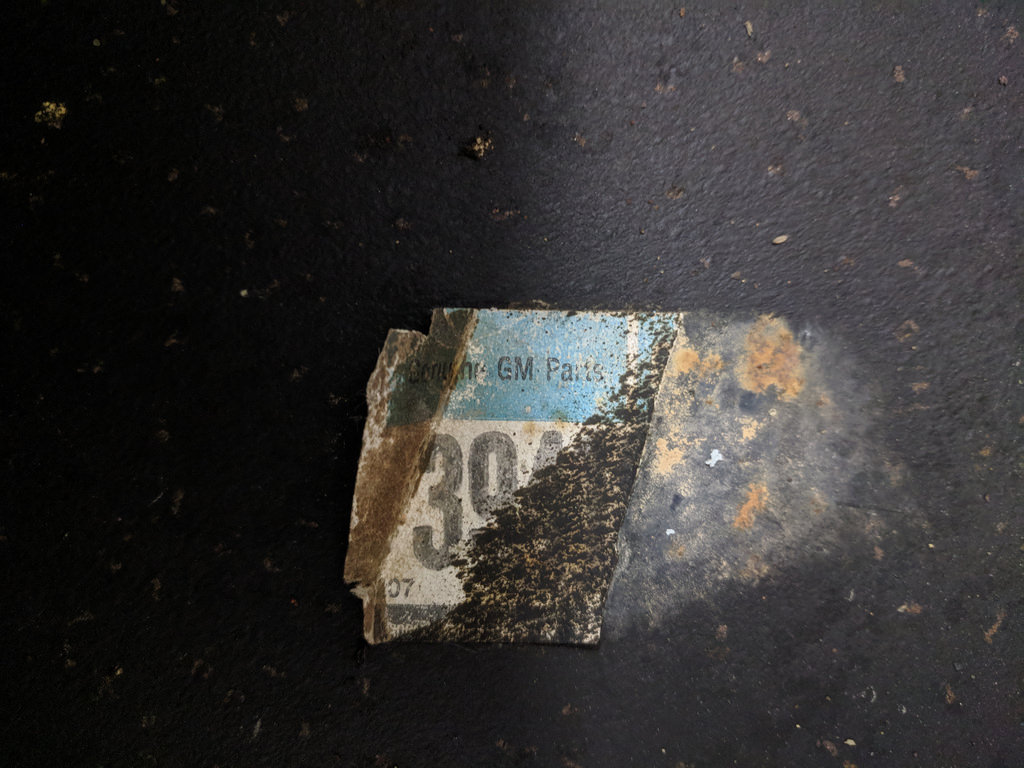
Then when I was pulling the passenger fender off one last time for final fitment of the inner, I noticed this little sticker. It's a NOS fender! This one fit the best out of the two and that is why. When I was sanding the outside of the front I saw where someone wrote on the outside "1968 Camaro NOS", but I assumed it wasn't a real one since someone primed right over it. Nice!
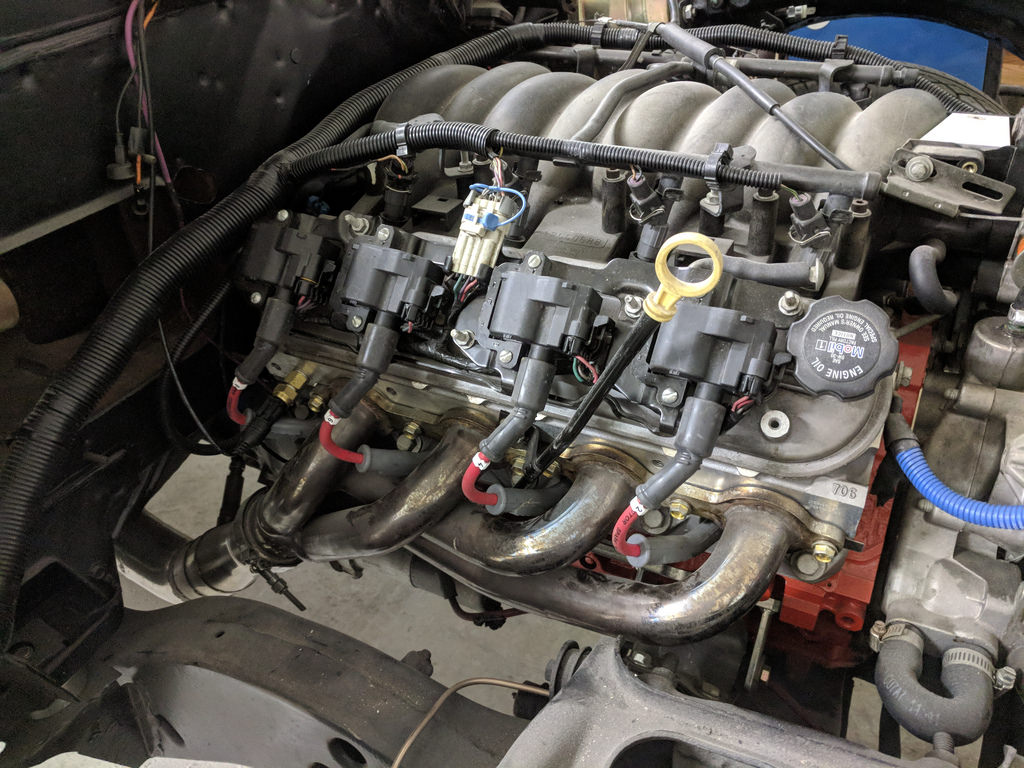
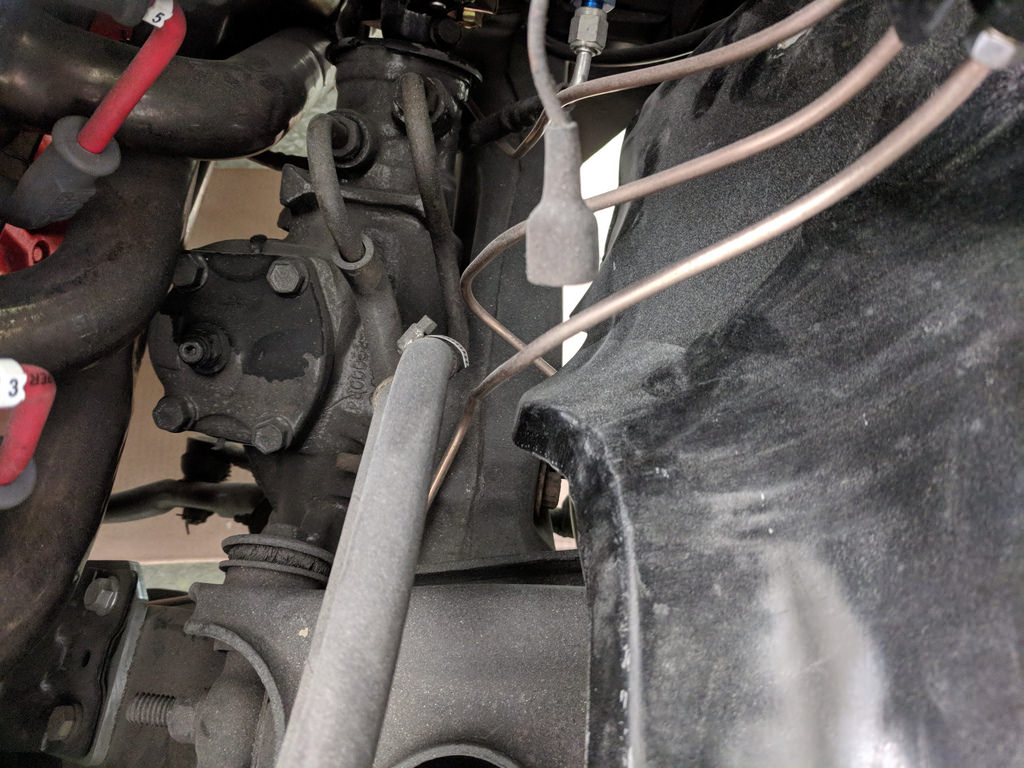
Since I sold the truck coils, I needed to get the LS1 coils on so that I could get the car running to drive it on the trailer. I also got to install the brand new MSD wires I have had for a while.
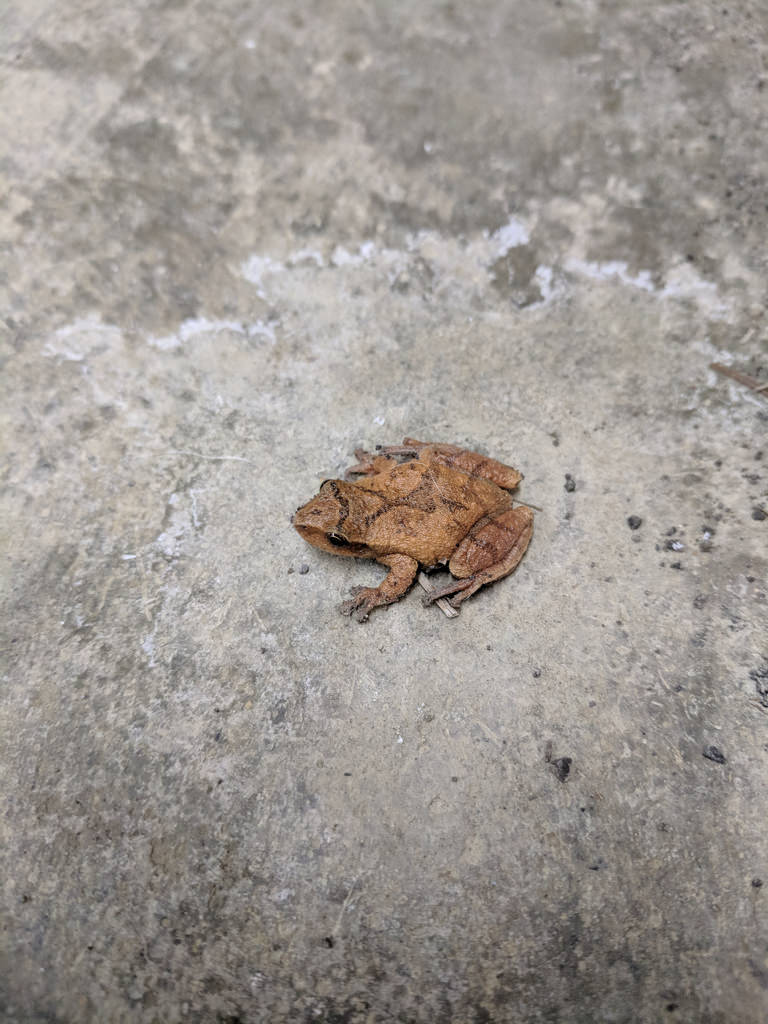
It was a really warm day on Thursday so I had the garage doors open, and when I was cleaning things up I noticed this little guy. I'm thinking he stopped in to wish me luck.
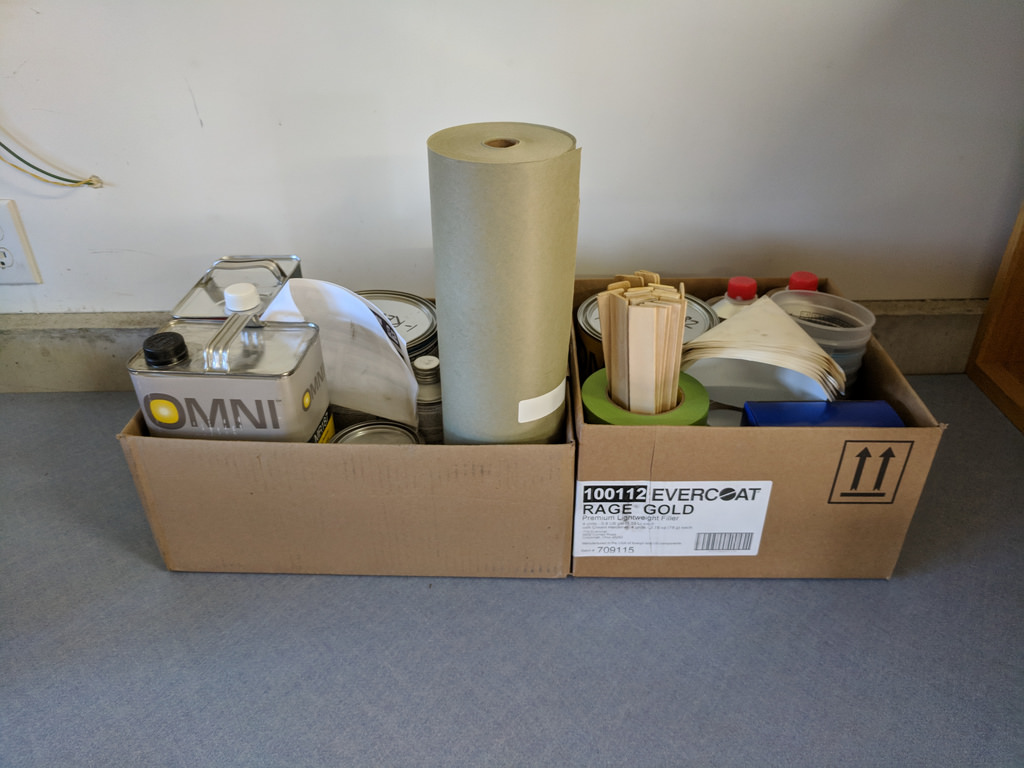
Then Friday after work I stopped by the paint shop and dropped off a bunch of cash. In return I picked up all of my paint supplies, 2k primer, paint, clear, and everything needed to mix them all up. I also got tape, masking paper, and enough black paint for my dash board.
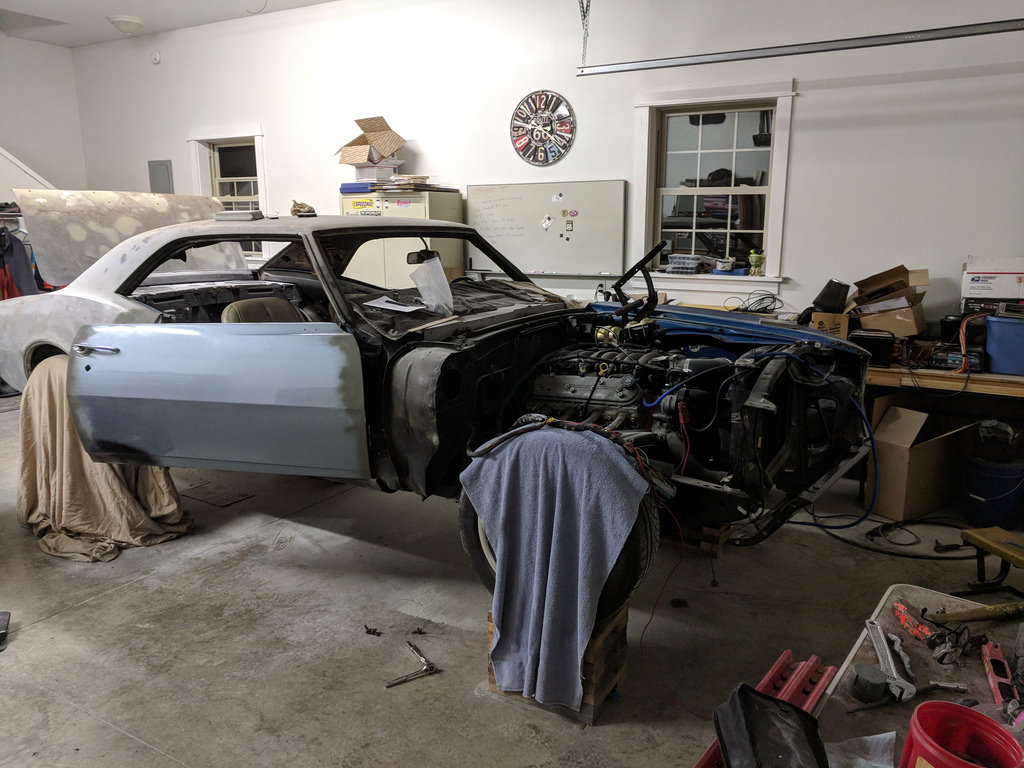
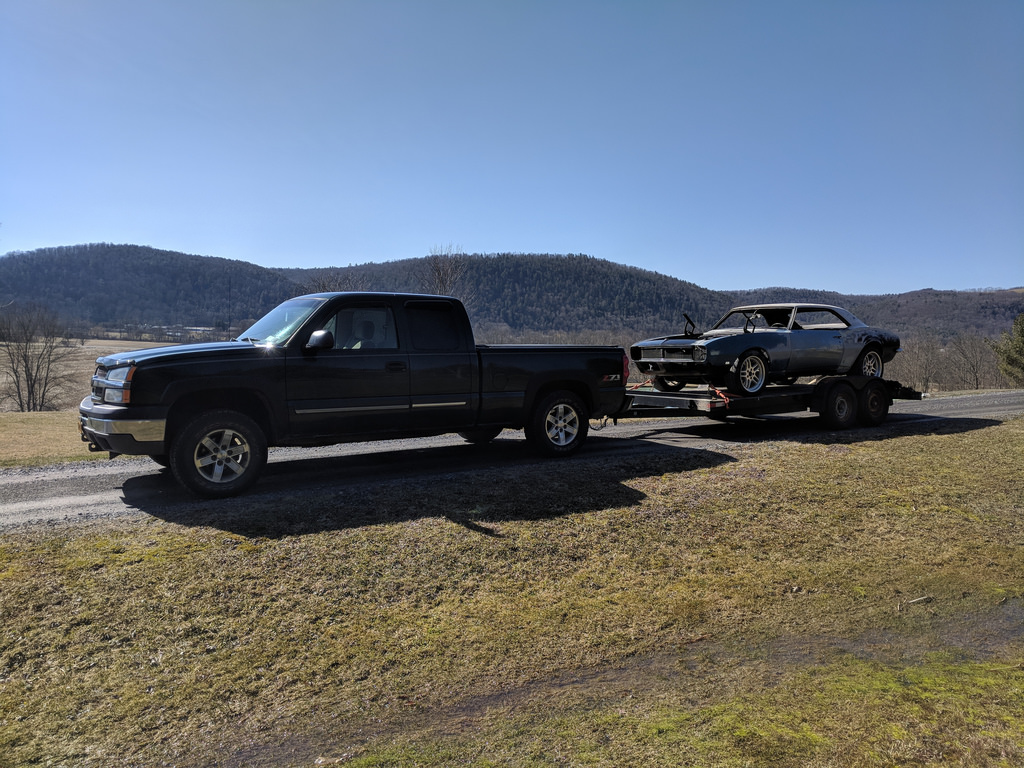
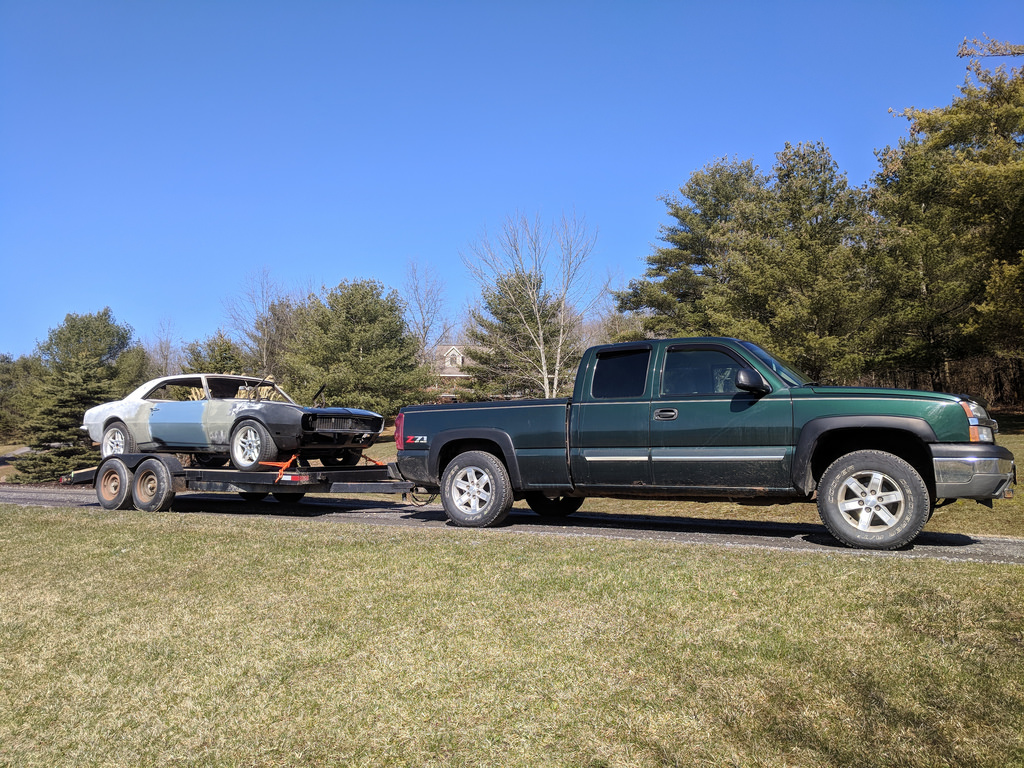
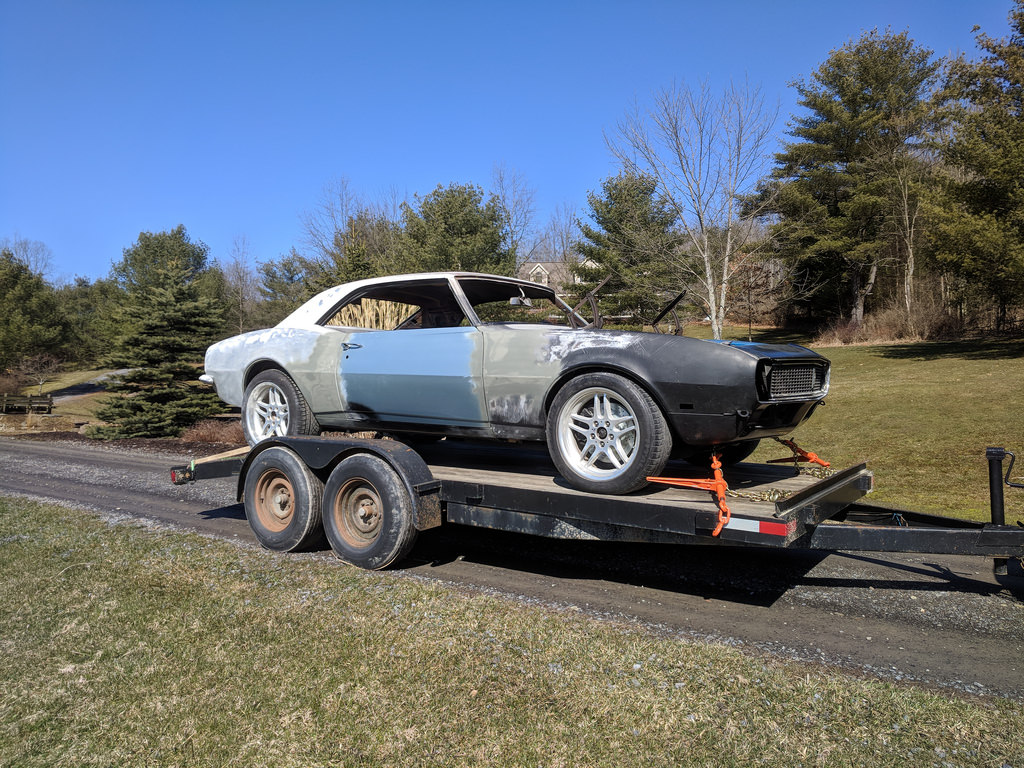
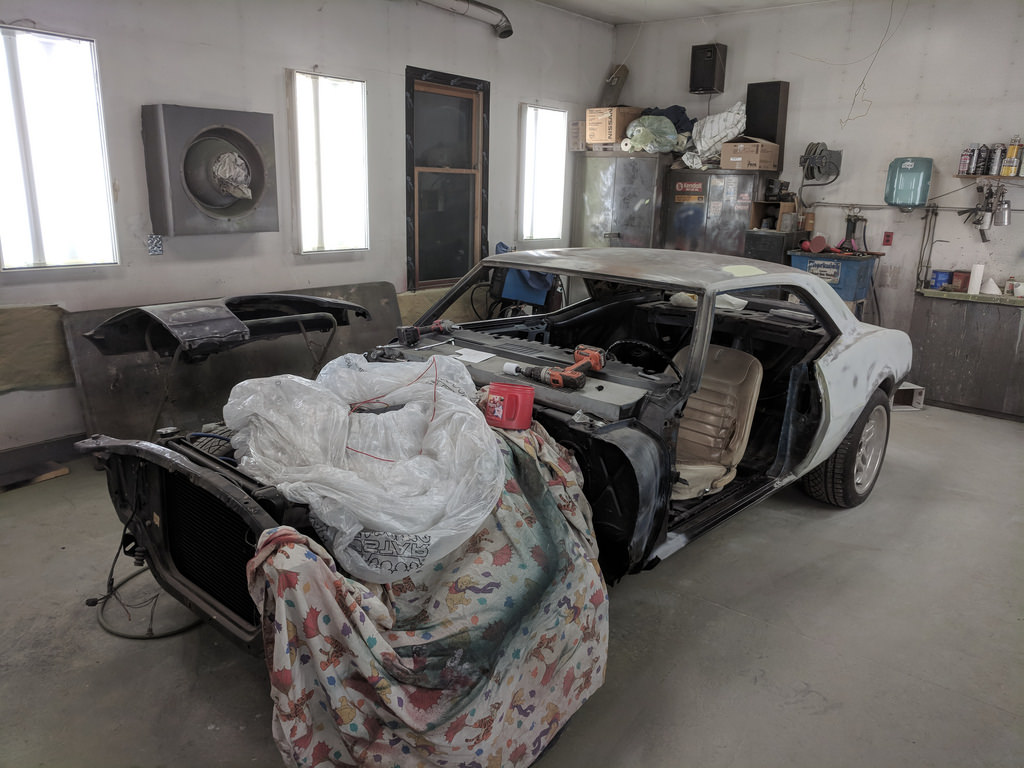
Then Saturday came and it was time to get the car to my buddies house. What a day... I had hoped that I could just swing by my Dad's pick up his trailer quick, drop my car off at my buddies and maybe get some primer on the car. Well it didn't work at all like that. Got to my dad's house, the trailer had a flat tire, turning signals didn't work and it wasn't registered. So after a half hour we fixed the flat and sorta got the signals working. I was only going about 5 miles down the road, so I wasn't overly concerned with just a trailer registration, but my Dad said he would try and register it online when I left. Then I get to the house, hook up my battery and the car will barely run. Sounds like it's running on about 4 cylinders. I check my scanner to see if there are any DTC's, and it has 10! 2 related to not having my cooling fans hooked up, and the other 8 are coil related codes. Something isn't right with those LS1 coils I swapped on... So not to be discouraged, I coasted my car down to the trailer and used the clutch to hold it in place. Lined it up on the trailer and used a ratchet strap to inch is up. Finally got it where I wanted it and strapped down and on my way, about 2.5 hours later than I wanted to be.
I got the car to a flat spot in my driveway and had to snap a few pictures as the sunshine was making for a perfect photo.
All in all, I can't really complain as I accomplished what I wanted to and after talking with my buddy we (me with his suggestive guidance) are going to bust ass to get this done by the end of April. Now she is sitting happy in someone else's garage. Not sure how I feel about that...

It feels really weird to have an empty spot in my garage.

I hate wishing away time, but I can't wait until the end of this month to see this car painted! It's so close I can almost taste it.
Cheers,
Ryan
1955 Nomad project LC9, 4L80e, C5 brakes, Vision wheels
1968 Camaro 6.2 w/ LSA, TR6060-Magnum hybrid and etc SOLD
1976 T/A LS1 6 Speed, and etc. SOLD
Follow me on Instagram: ryeguy2006a
04-02-2018 #284
Registered User
- Join Date
- Nov 2015
- Posts
- 23
Looking good. Can't wait to see it completed. Getting close on mine.
04-03-2018 #285
Registered User
- Join Date
- Aug 2014
- Posts
- 435
Awesome! Can't wait to see it in paint. I'd be itching to take vacation time to do it. lol
Jay
04-04-2018 #286
Registered User
- Join Date
- Sep 2009
- Posts
- 2,713
Thanks Tim! Jay, I am going to see what kind of progress I make working Wednesday's and Friday's after work while also taking the good part of Saturday's. I have a very understanding wife! If I'm not making the progress I want by mid month, I may become sick a few days...

1955 Nomad project LC9, 4L80e, C5 brakes, Vision wheels
1968 Camaro 6.2 w/ LSA, TR6060-Magnum hybrid and etc SOLD
1976 T/A LS1 6 Speed, and etc. SOLD
Follow me on Instagram: ryeguy2006a
04-04-2018 #287
Registered User
- Join Date
- Sep 2015
- Posts
- 13
Great progress and I can't wait to see the pics of her covered up with color
04-06-2018 #288
Registered User
- Join Date
- Sep 2009
- Posts
- 2,713
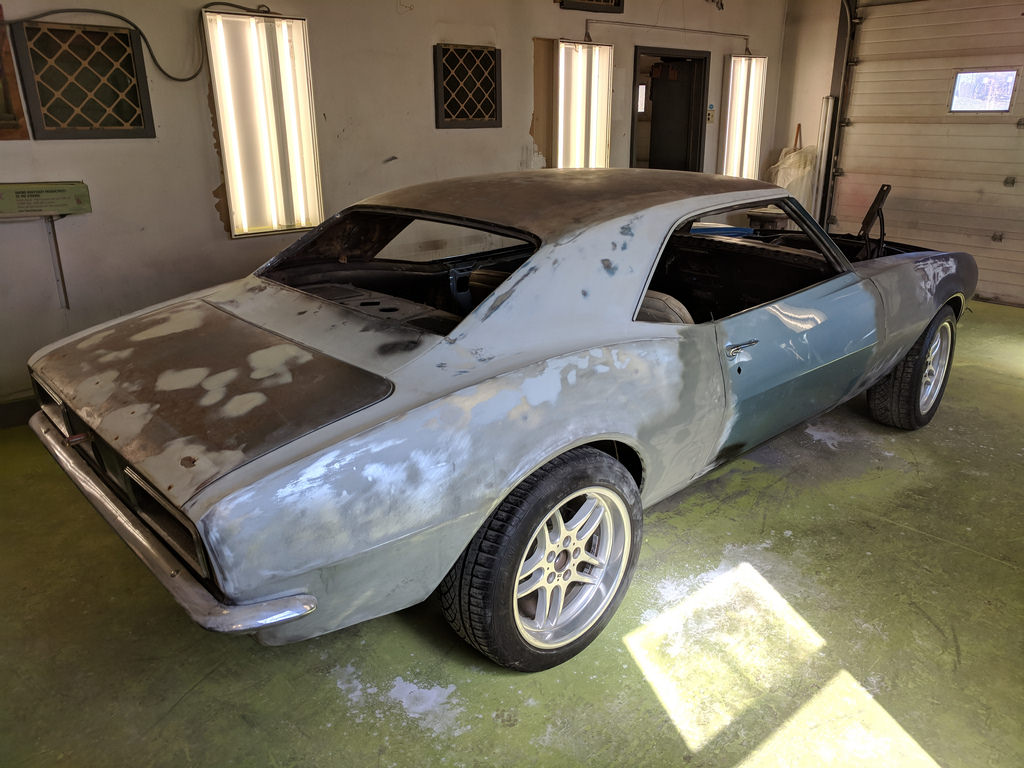
Worked on the car for a few hours Wednesday night. My buddy helped me by spreading out some filler to smooth out the wavy quarter panels and trunk panel. It was amazing to watch him work and spread out the filler. It really is an art form to watch an experienced person do bodywork. I helped him block sand and we got the body looking really good.
After he went to bed, I stayed for another few hours getting some little things done. First thing on my list was making sure that the driver's side inner fender fit correctly. Because the inners are fiberglass I had to drill many of the holes. So it took a while to fit the inner to the outer, then put back on the car to make sure it fit right. Then take it back off drill a few more holes, rinse/lather/repeat. Once all the holes were drilled, I could focus on getting the holes drilled for the RS headlight lever.
Driver's side fits and clears everything, Nice!

Hoping to have the shell in primer over this weekend, but time will tell. Just gotta keep on truckin'.
Cheers,
Ryan
1955 Nomad project LC9, 4L80e, C5 brakes, Vision wheels
1968 Camaro 6.2 w/ LSA, TR6060-Magnum hybrid and etc SOLD
1976 T/A LS1 6 Speed, and etc. SOLD
Follow me on Instagram: ryeguy2006a
04-06-2018 #289
Registered User
- Join Date
- Aug 2014
- Posts
- 435
Can't wait to see it in primer. I know when I do bodywork on things, I spray primer several times just to clearly see body lines and contours.
It's coming together, now!
Great work and good luck getting it in primer this weekend.
Jay
04-09-2018 #290
Registered User
- Join Date
- Aug 2014
- Posts
- 435
Any progress?
04-12-2018 #291
Registered User
- Join Date
- Sep 2009
- Posts
- 2,713
Jay, I didn't get a chance to work on my car at all last weekend (wife's grandfather passed), but I did get over to my buddies house last night. This time I made a list for myself to get things done if I get "lost".

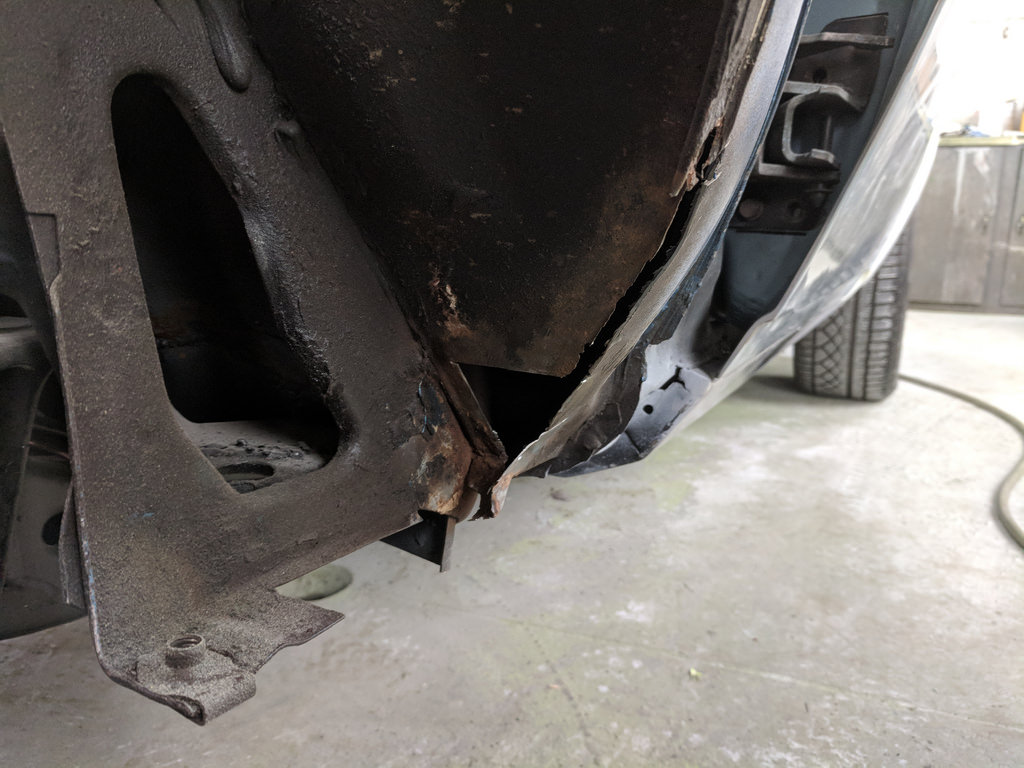
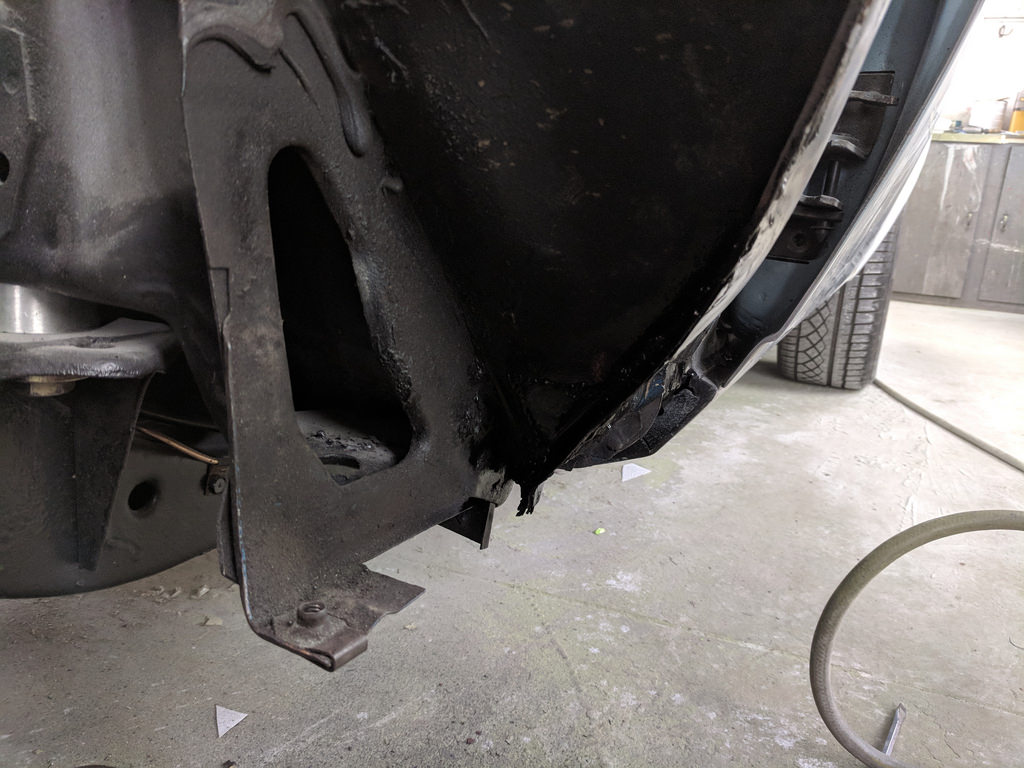
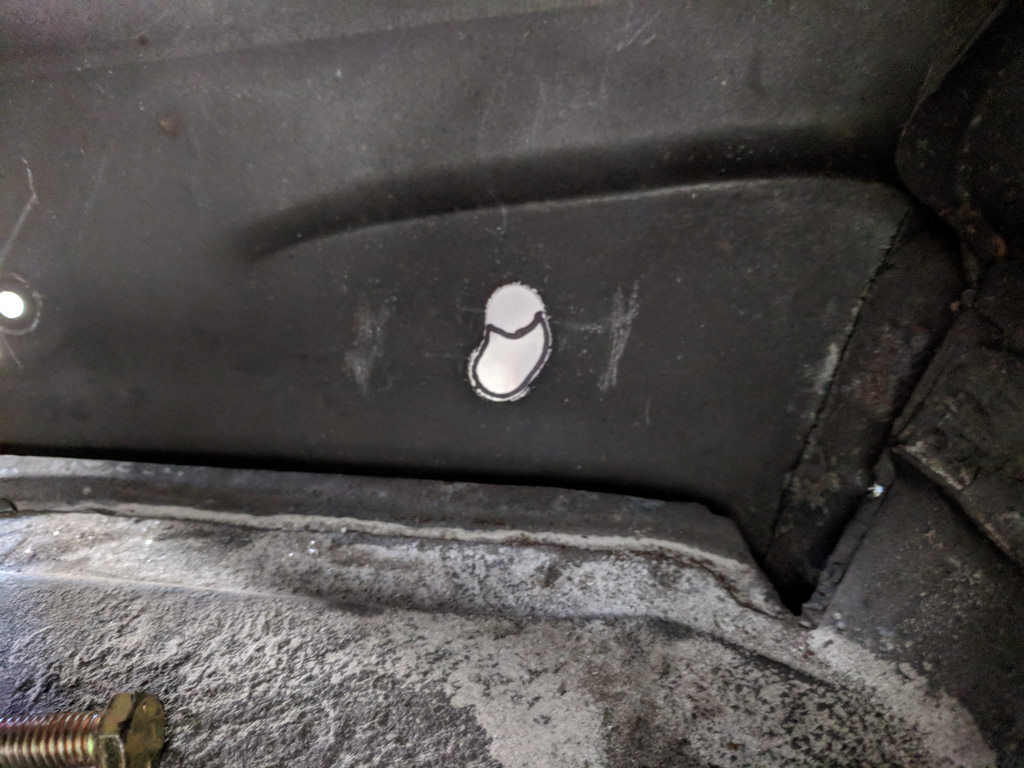
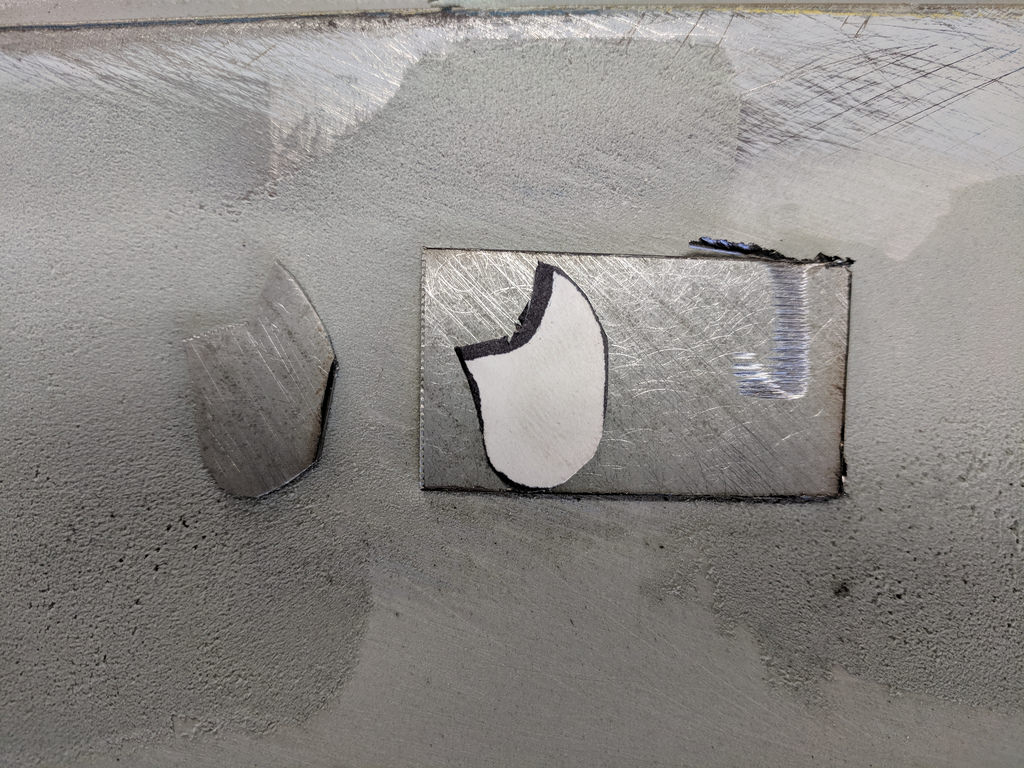
I started off by finally getting to the lower cowl patch that I have been putting off. The little bit of rust needed to be cut out and replaced with new metal. I started off by cutting out the rusted areas, made cardboard templates, then welded the patches in. It's so much nicer working in my buddies shop with all the metal working tools. Metals brake, large anvil, and large IR compressor.
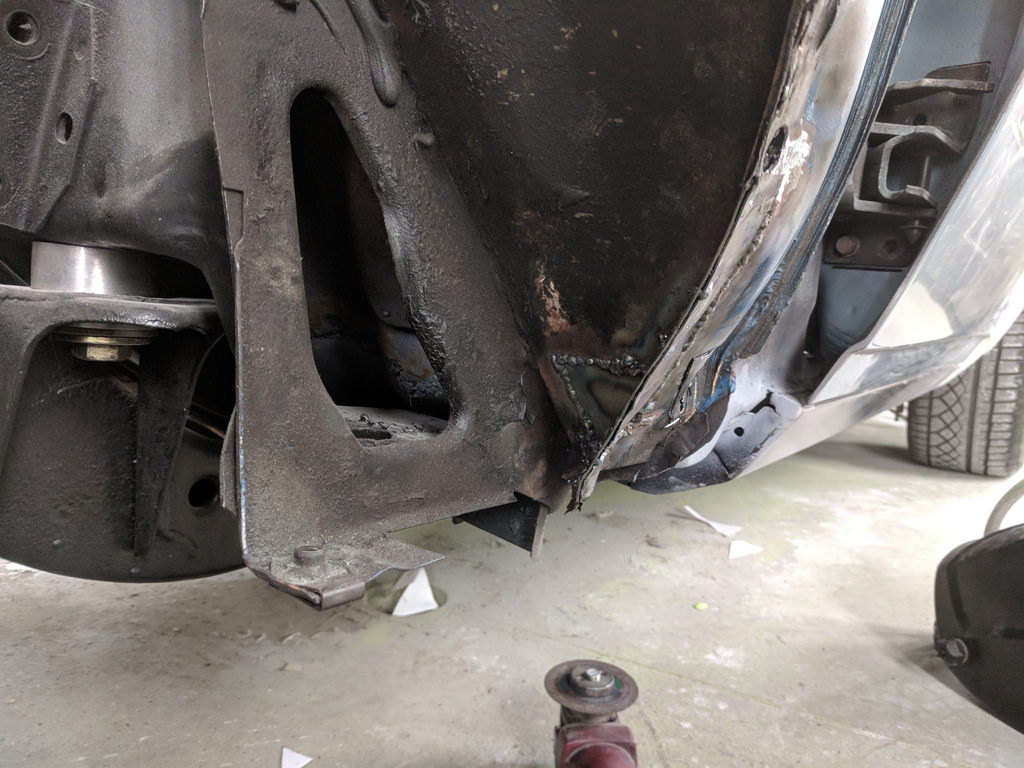
Then just when I thought I was done, I was wire wheeling this area and this popped up... Cut it out and make a little patch. I didn't bother grinding it down as nobody will see it.
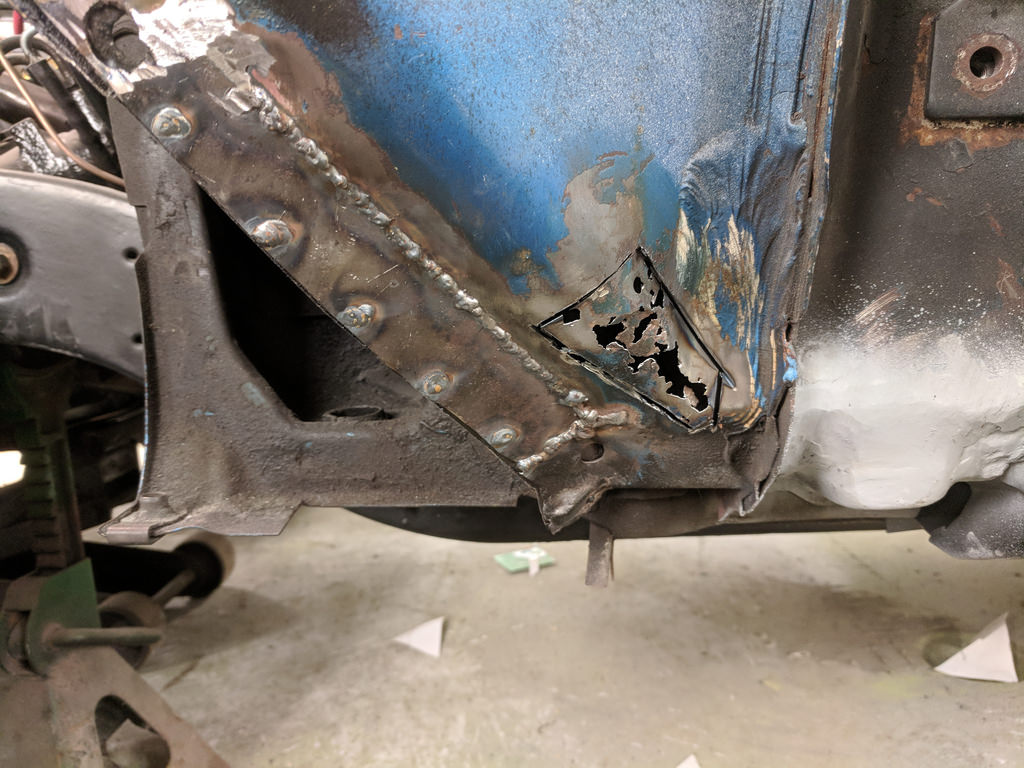

Kinda tough to see, but all painted now.
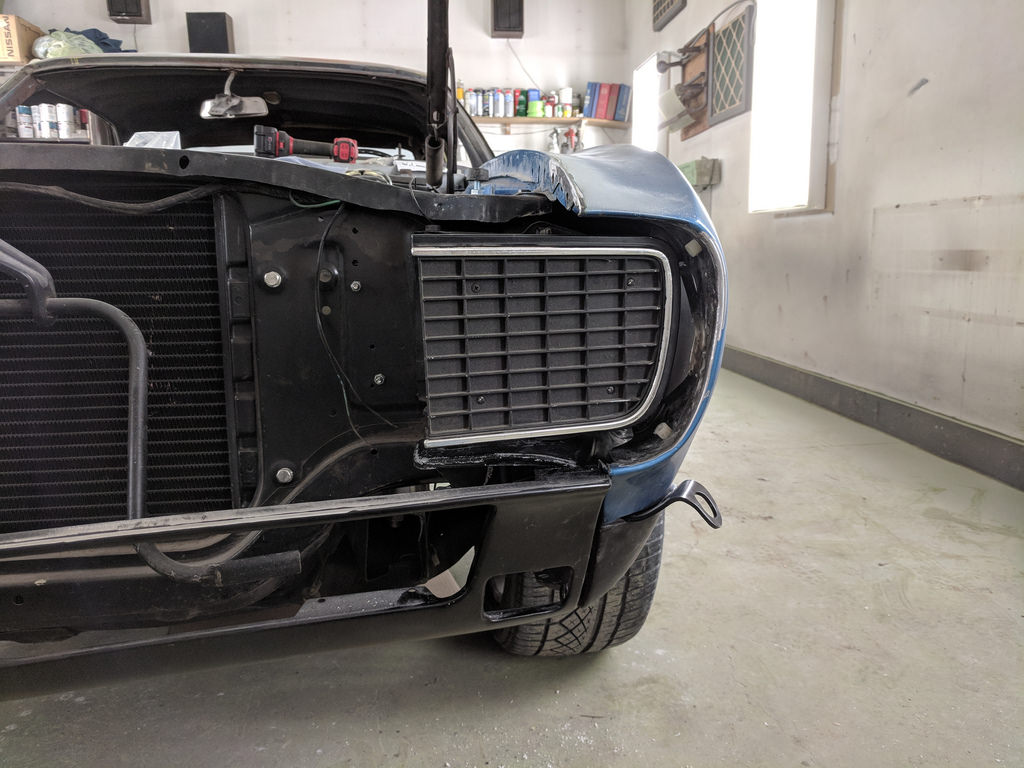
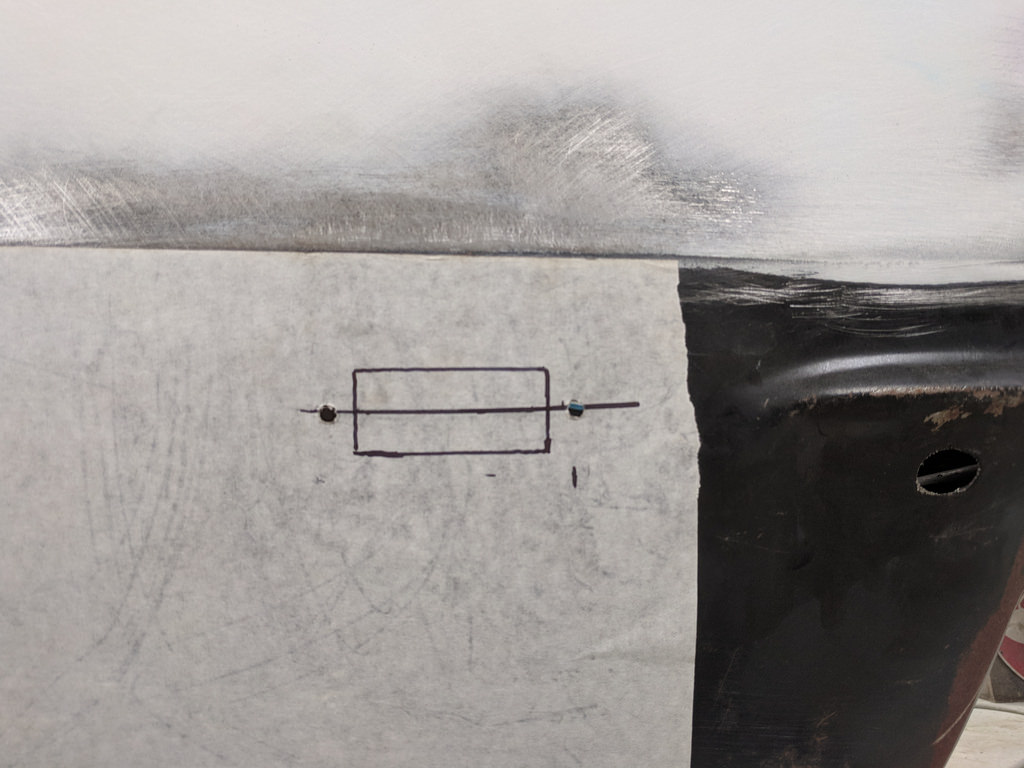
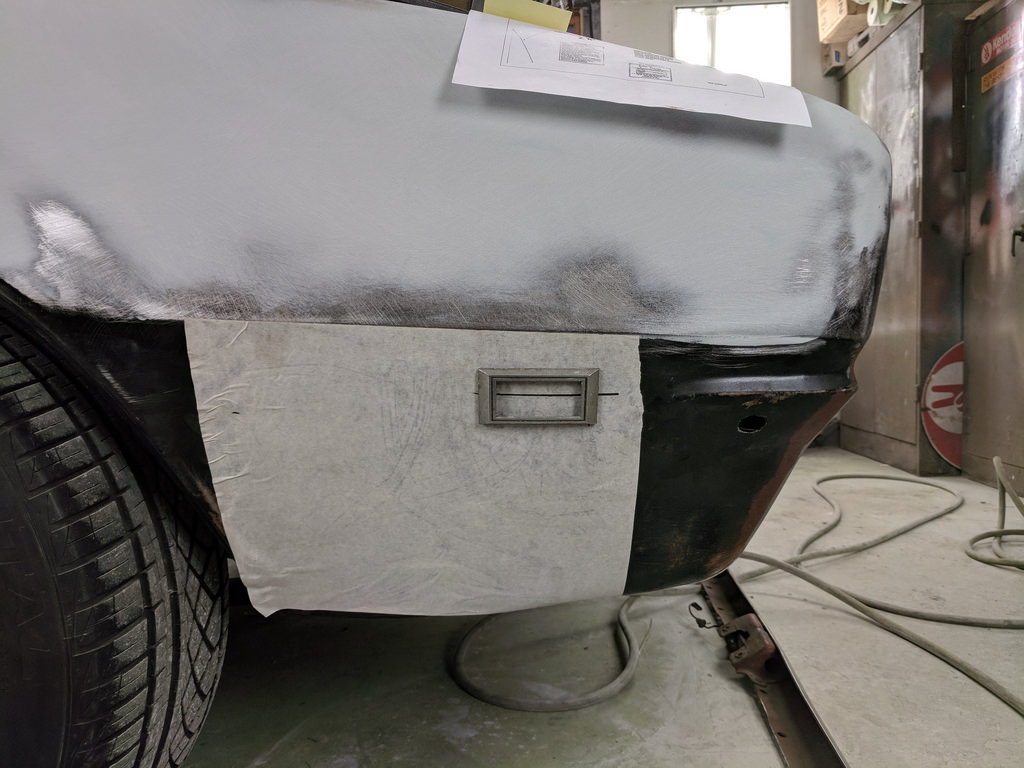
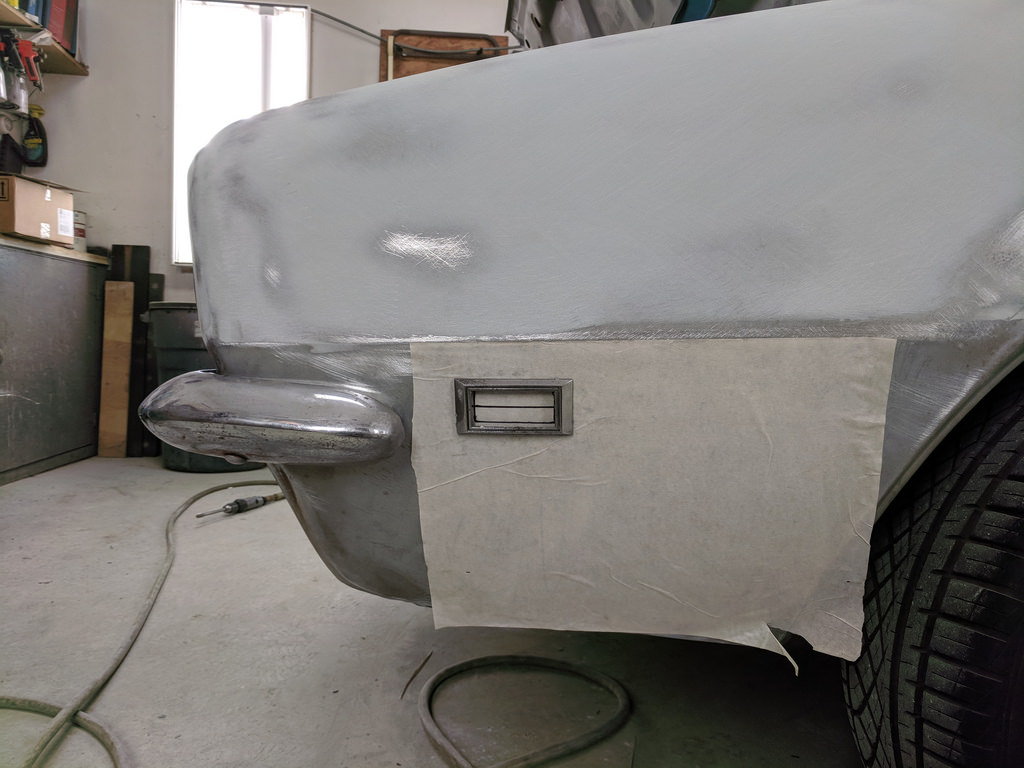
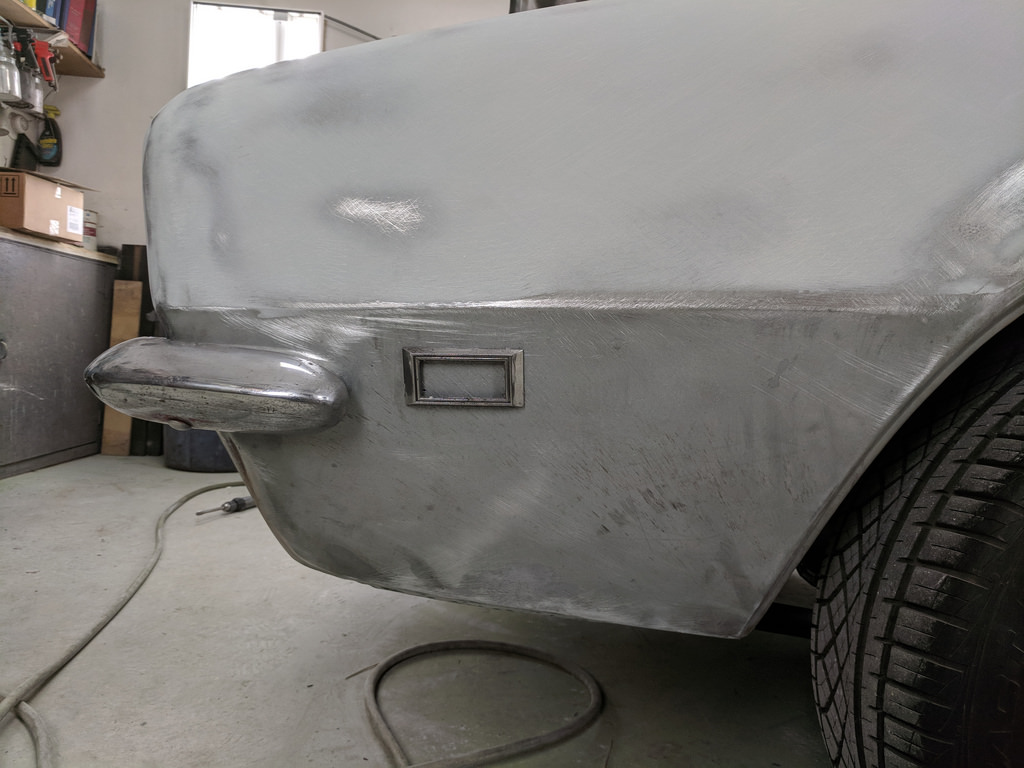
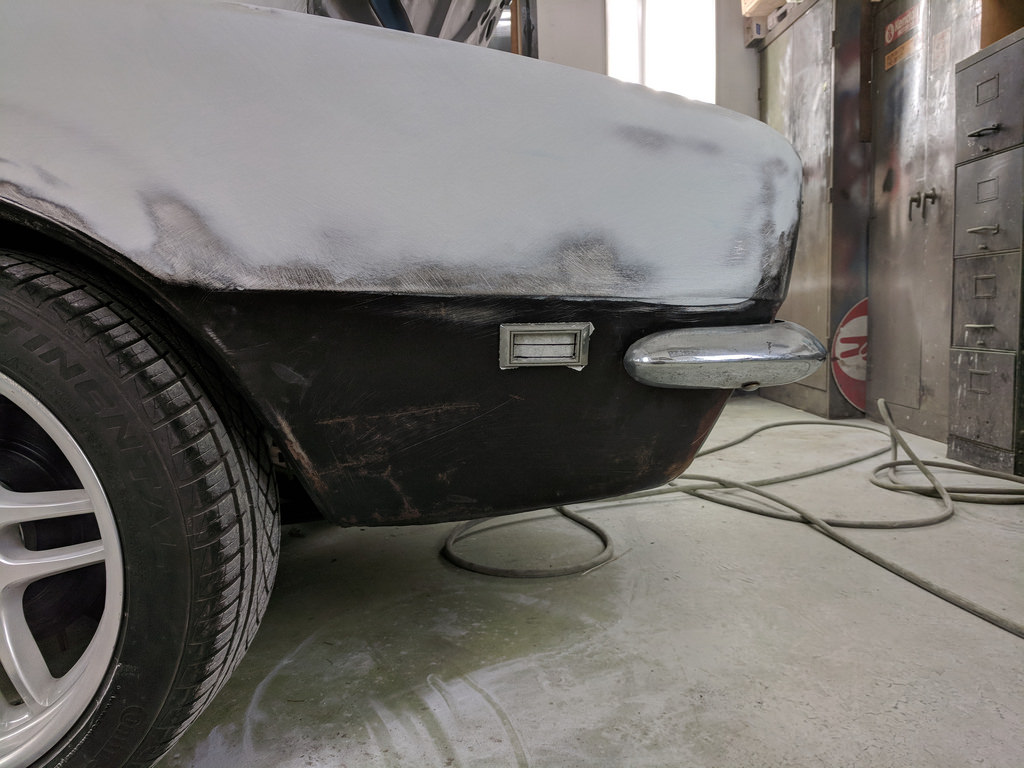
Then we did a final test fit the rear bumper to make sure that it was going to fit properly. So glad we did because the hole was way off on the passenger side. We ended up having to elongate the hole about 5/8" to the rear and 1/2" up. The driver's side was really good, but we did have to shift the hole forward about 1/4" to be centered.
Earlier I found this template on a google search and used it as a reference to cut my holes. I found two people on Camaros.net that confirmed that the distance between the bumper hole and the first stud hole on the marker light was 4 3/4". I used those measurements along with the template I found to calculate the locations for the holes. This should be useful for anyone else in my shoes.
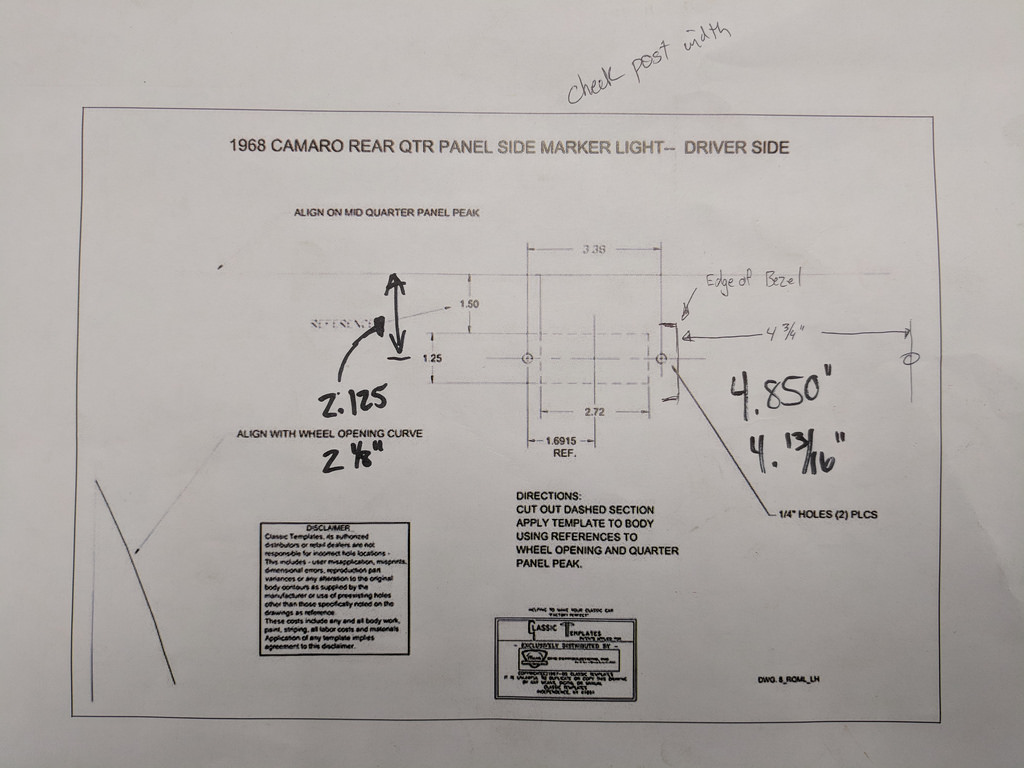
After taking several measurements from the body lines, bumpers and wheel openings I was able to determine that the holes and bumpers were within a close margin of being square. I felt comfortable enough to start drilling some holes. I started on the driver's side as it was the better fitting side.
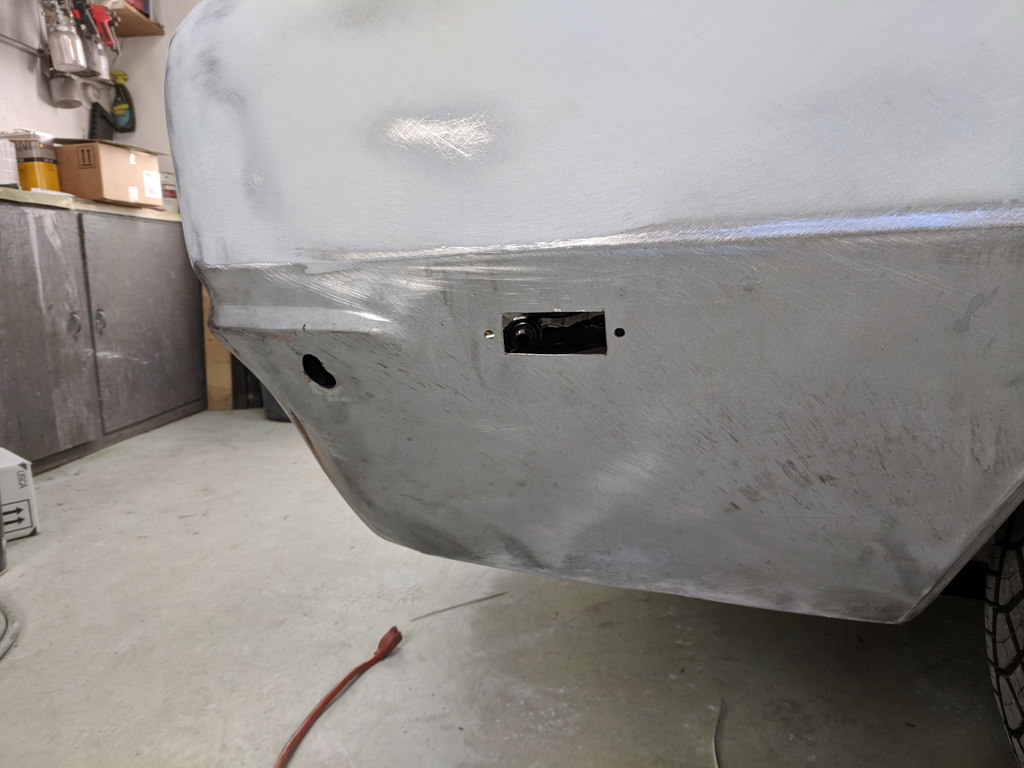
And the passenger side.
Once I had the two marker light bezel stud holes drilled, I traced out the holes I will need for the marker light itself. I drilled a tiny hole in each of the corners to use a guide to make my straight cuts. I held off on cutting those out until I could get someone's second opinion. Easier to fill a tiny hole than welding up a big hole and re-drilling and etc. After the holes were drilled I removed the sticky backed paper.
I'm planning on going back on Friday night to get the roof stripped and getting the shell a little bit closer to final sand before prime. I can't wait! Also, on a slightly related note, I was able to get the car running again. I found a good price on a set of used LS1 coils, so I thought I would give them a try. I swapped out the coils, and it fired right up! Not sure what the issue was with the other coils, but it's back to running/driving now!
Cheers,
Ryan
1955 Nomad project LC9, 4L80e, C5 brakes, Vision wheels
1968 Camaro 6.2 w/ LSA, TR6060-Magnum hybrid and etc SOLD
1976 T/A LS1 6 Speed, and etc. SOLD
Follow me on Instagram: ryeguy2006a
04-12-2018 #292
Registered User
- Join Date
- Sep 2015
- Posts
- 13
So Ryan did you purchase the template? I'm in need of one myself.
04-12-2018 #293
Registered User
- Join Date
- Sep 2009
- Posts
- 2,713
I found it when I was googling how to cut the marker light holes. Then I found the measurements from the bumper bolt hole from Camaros.net.
1955 Nomad project LC9, 4L80e, C5 brakes, Vision wheels
1968 Camaro 6.2 w/ LSA, TR6060-Magnum hybrid and etc SOLD
1976 T/A LS1 6 Speed, and etc. SOLD
Follow me on Instagram: ryeguy2006a
04-12-2018 #294
Registered User
- Join Date
- Aug 2014
- Posts
- 435
Sorry to hear that. My condolences. Originally Posted by ryeguy2006a

I took this weekend off (Th-Sun) to get some work done on my truck. I put the time off request in a little over a week ago and it was approved. I had last Friday off and went to the junkyard to get some parts for my steering column project, and the next day I was sick enough to miss work for the first time in close to 10 years. Worst 2 day weekend ever. I spent 24 hours in bed, and managed to move to the couch on Sunday.
Getting the Camaro in primer will be a huge milestone. When I build small pieces, it's always nice to get them in one color to make sure everything
is going to work/line up like you thought.
I think my tax return money might go toward an air compressor. But I want to put it outside the garage, so I'll have to put up a slab or something to set it on and build a little "shed" around it. I also want remote drain capability....and there's no wiring in my garage, so I'll have to put a sub box out there. Going to be a pricey project, but I'm getting sick of not having air. lol
Can't wait to see it in primer!
Jay
04-12-2018 #295
Registered User
- Join Date
- Sep 2015
- Posts
- 13
Great thanks!! Originally Posted by ryeguy2006a
Great progress and looking forward to the finish
04-16-2018 #296
Registered User
- Join Date
- Sep 2009
- Posts
- 2,713
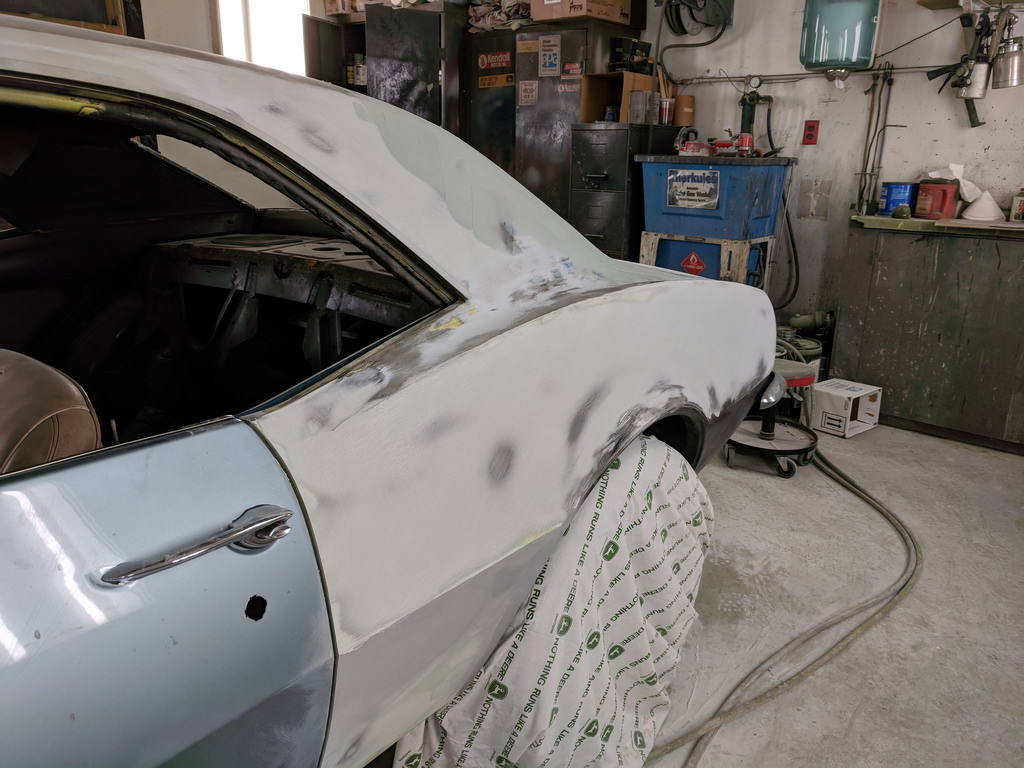
I hit it hard this weekend and I got a lot scratched off of my list. I have to say, I have really underestimated how much time it has taken to finish all of the little items on my list. I was hoping to be further along at this point, but just like always it takes longer than I think. I started right in on the car and didn't waste any time. I got my grinder hooked up and cut the holes out for the rear marker lights. I was very pleased with the results as they came out perfectly and the marker lights had a snug fit.
Next up was fixing this oblonged hole that I had to move because it didn't line up with the bumper mounts. I traced it to cardboard, traced my template to steel, fit it up and welded it solid. Made it sound easy, but this took some time.
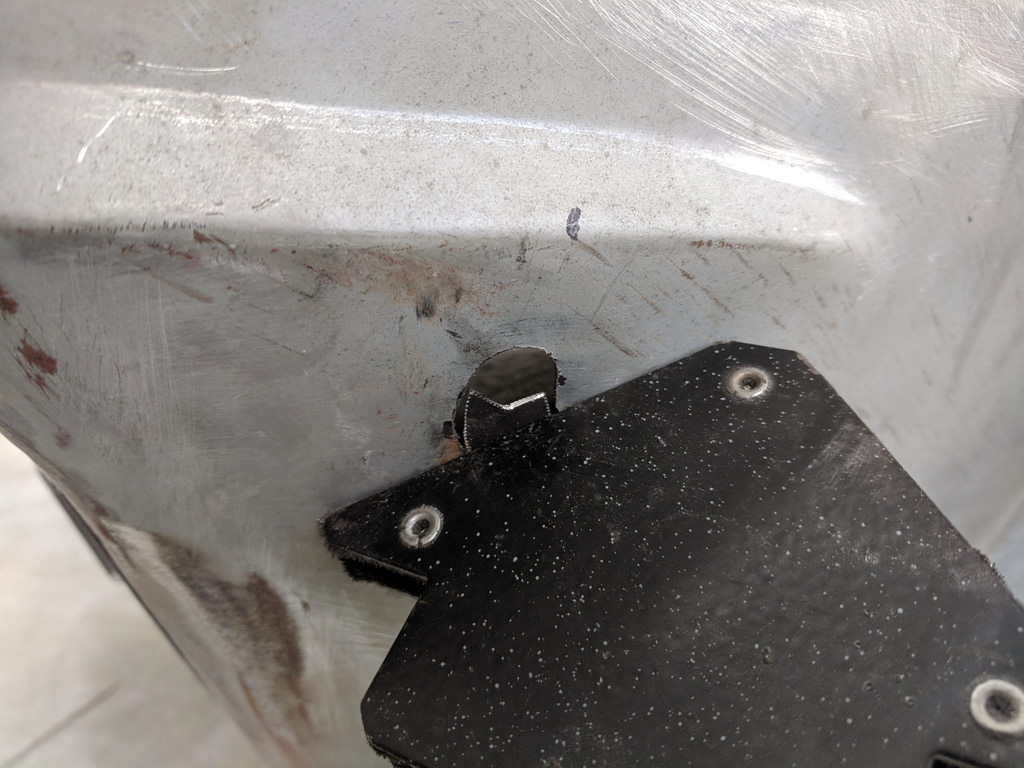
Pulled out the grinder and flap disk to smooth it out. Then I used a carbide bit to get the hole round again.

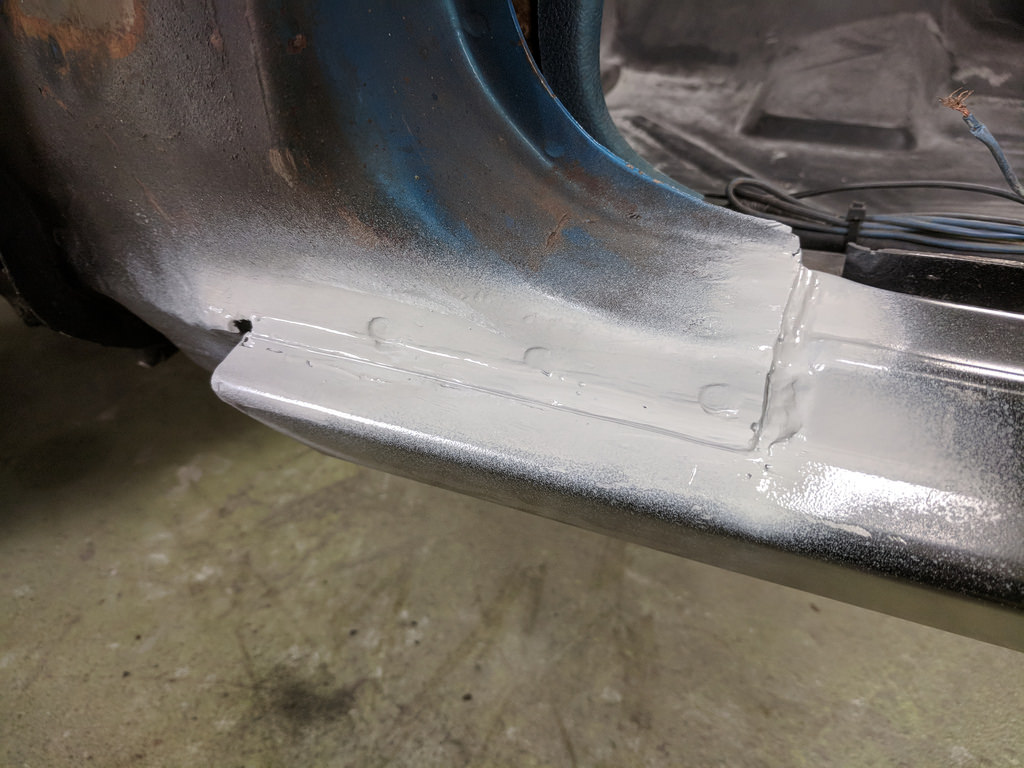
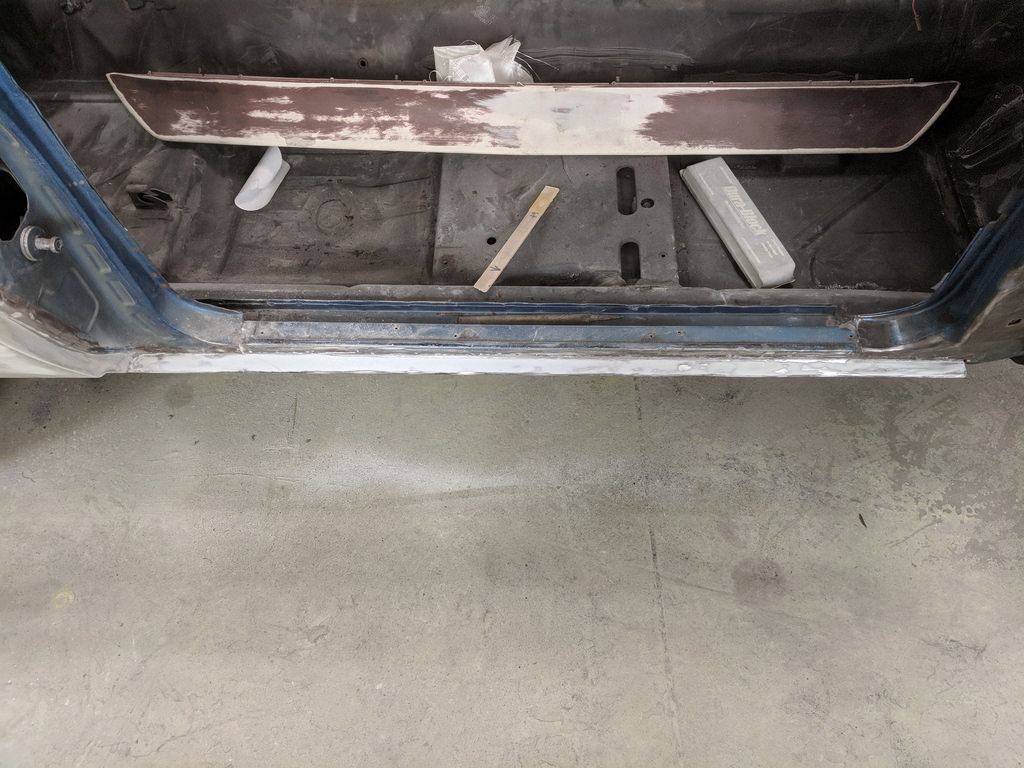
Next up was cleaning up and welding on the rocker panel where I couldn't reach when the door was on. It cleaned up really nice and just needs a little filler to disappear.
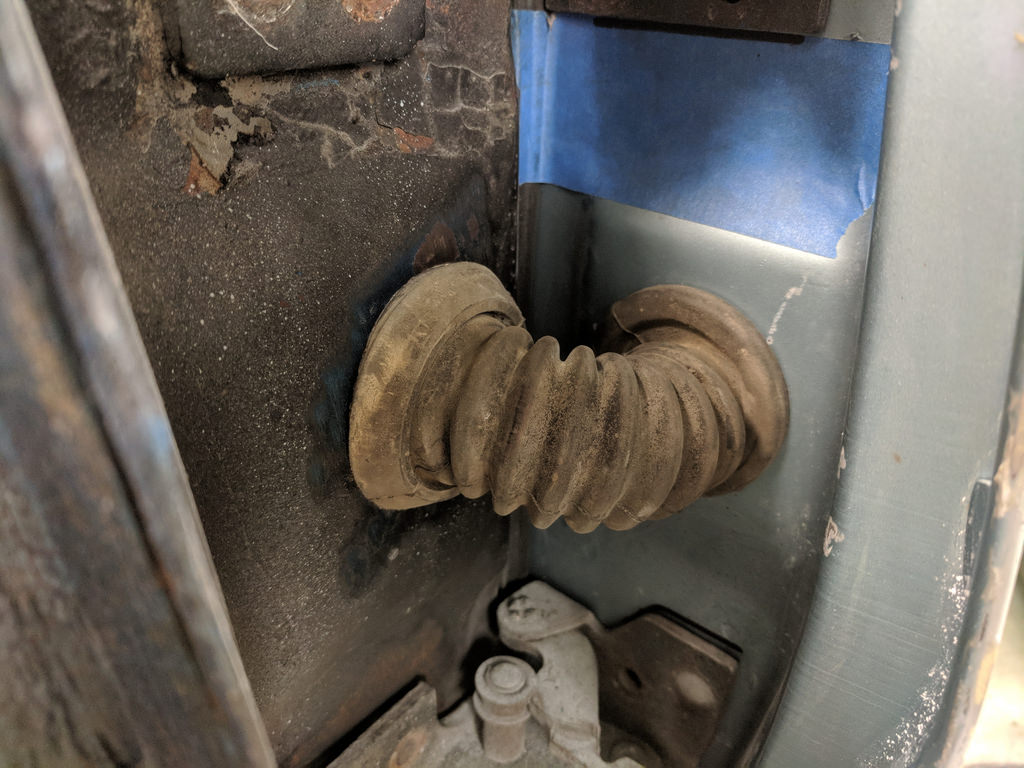
Knowing eventually I wanted to have power windows/locks/puddle lights?/etc. I had to cut some holes for rubber door boots. At the advice of others who have done this before with stock boots, I opted for the larger diameter 3rd gen Camaro boots. I heard feedback that when you add PW/PL and other components that the stock boots are too small of diameter and run out of room. The 3rd gen boots have tons of space and fit quite nicely.

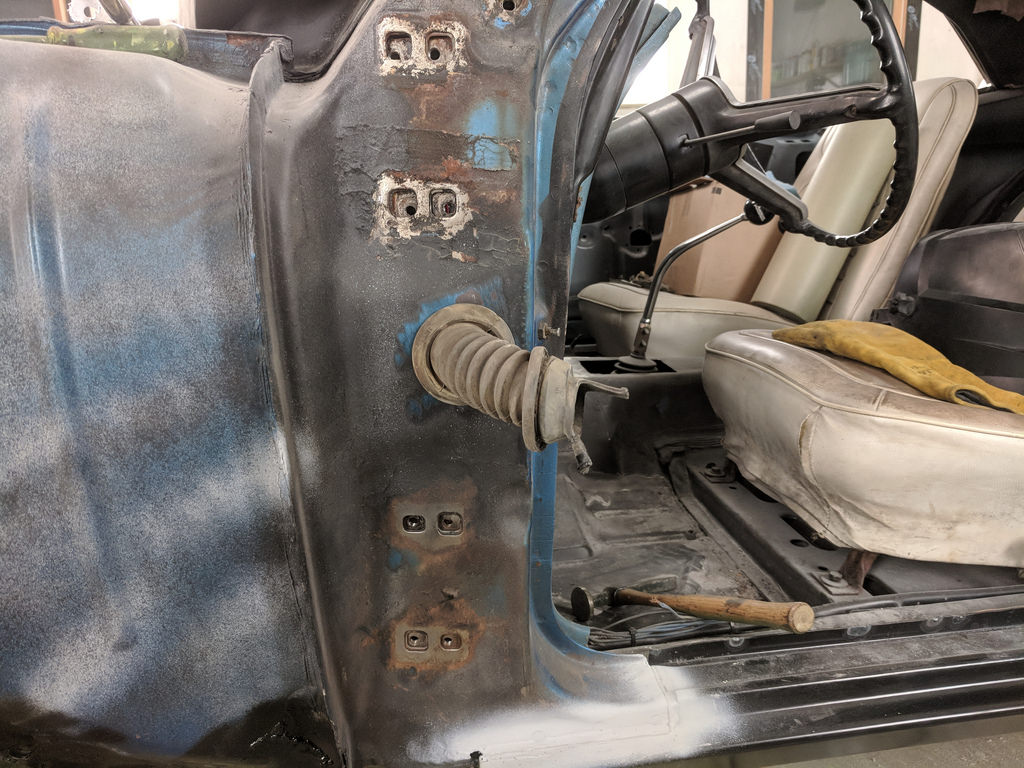
Drilled and fit the boot on the door side.

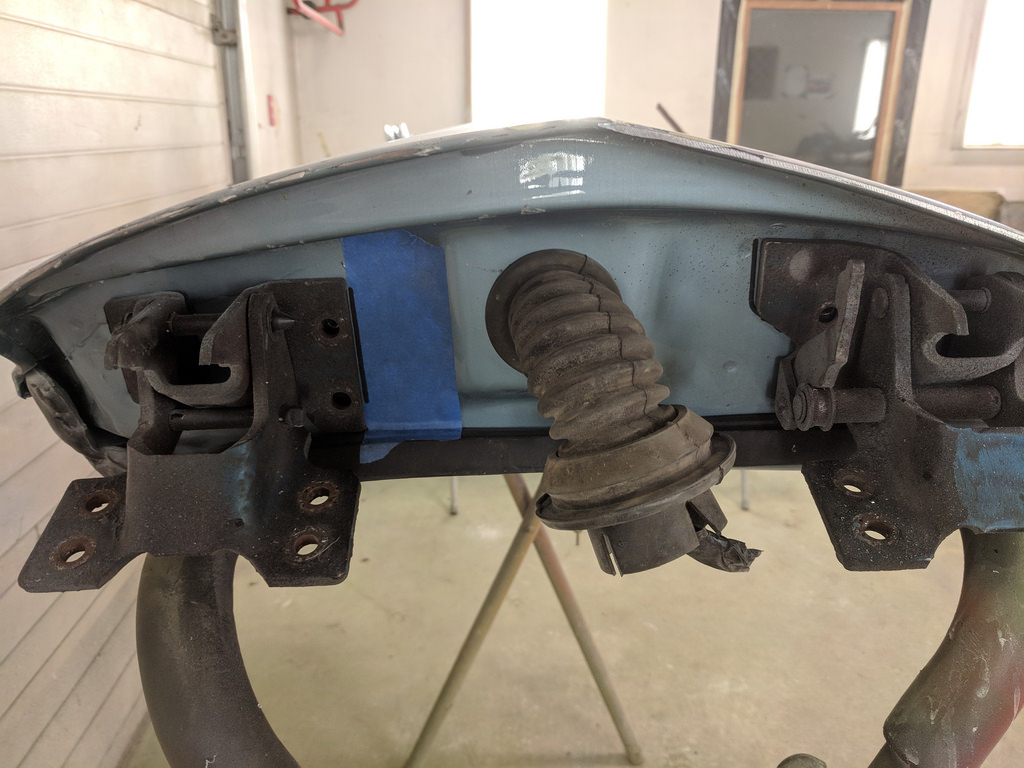
Everything looks and fits great.
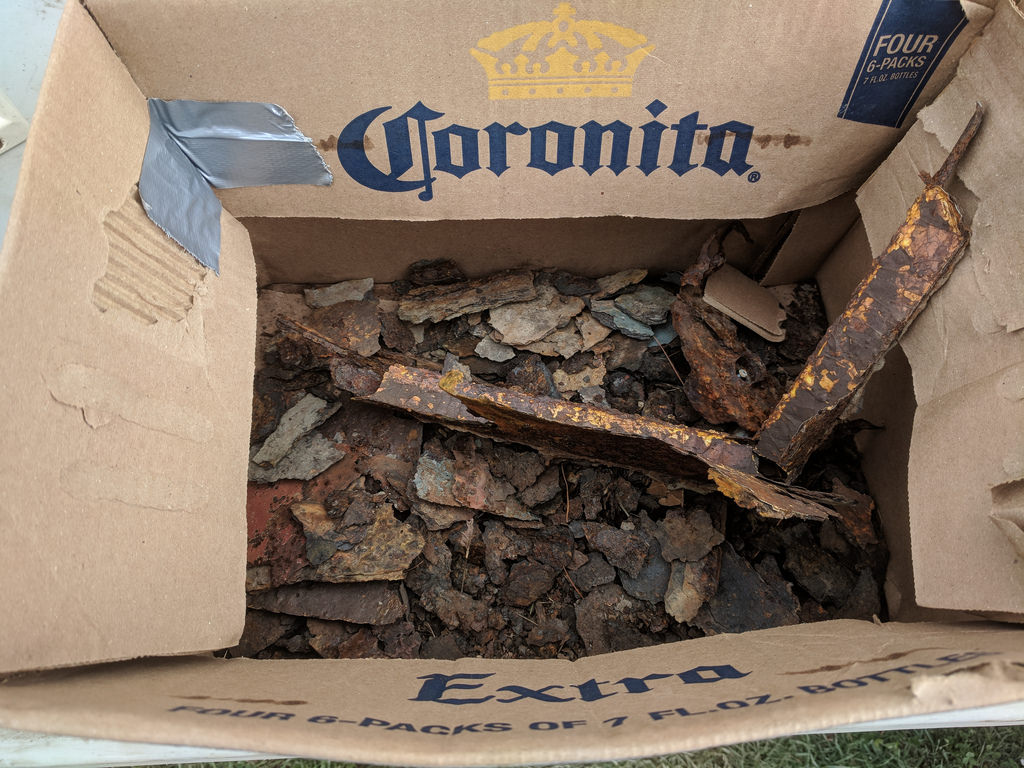
In between welding the quarter panel waiting for it to cool, I started stripping out the trim/lights/some wiring/etc. and thought I would share this. I thought it was pretty cool because this piece of trim has been here for 50 years and I'm the first one to take it off! Pretty amazing to me.
It was hard to get a picture with the bright lights, but you can see the original LeMans blue paint behind the trim!
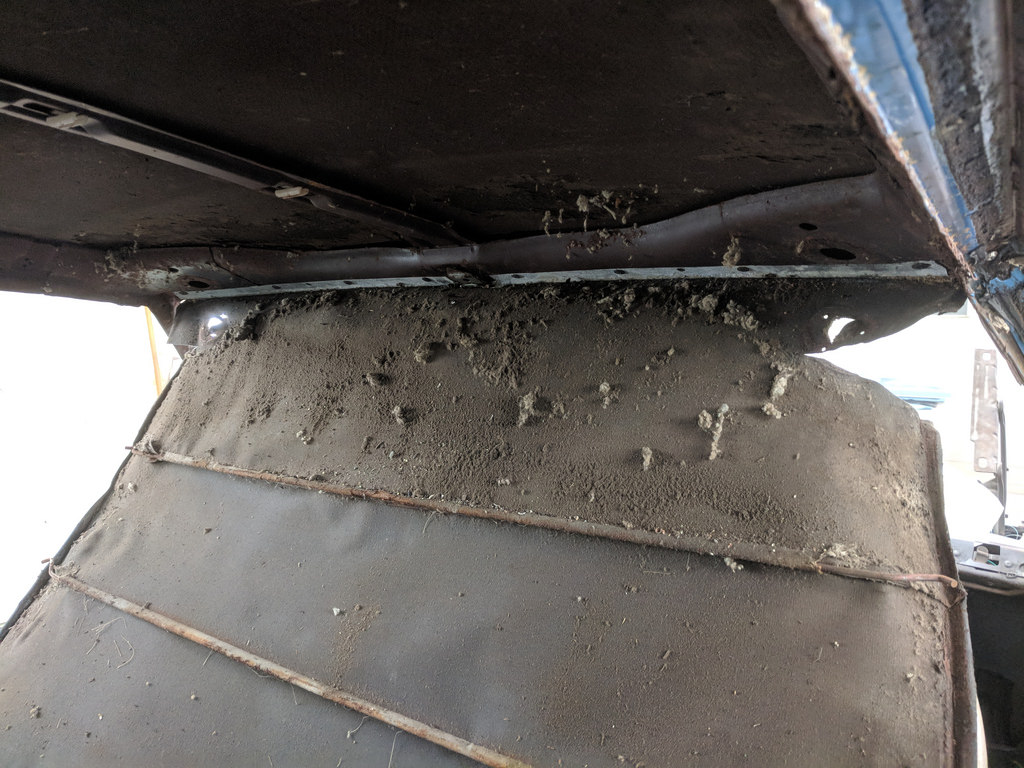
I also pulled the headliner and I was glad that I didn't find any other little rusty surprises. Just a rather large mouse nest.
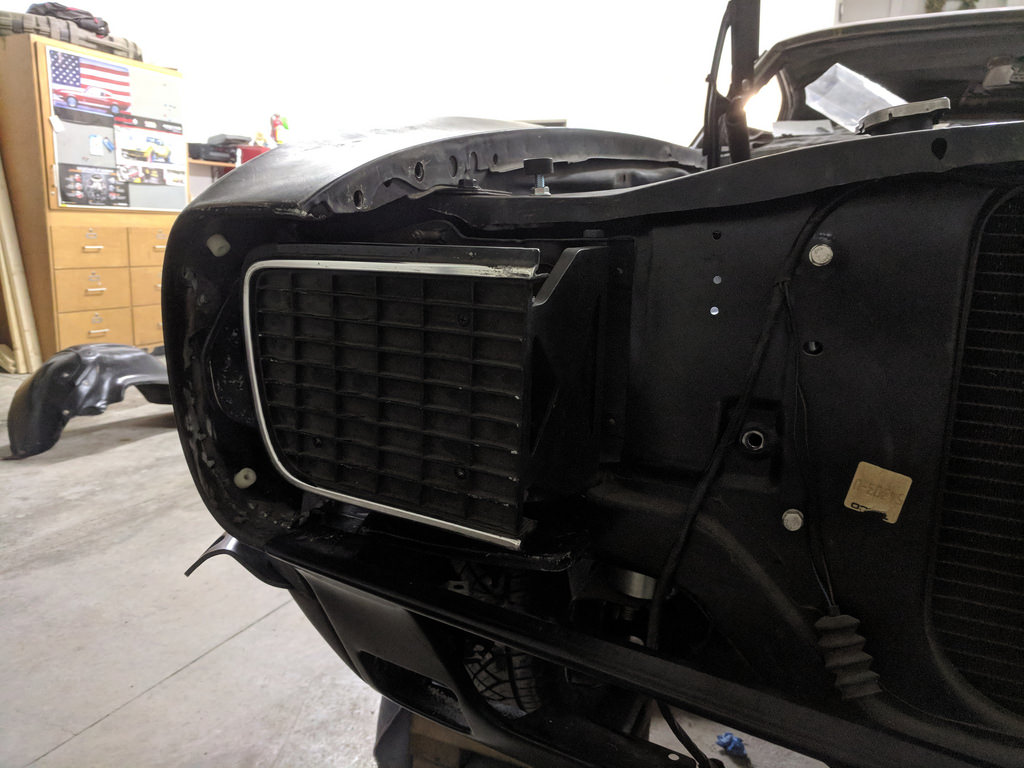
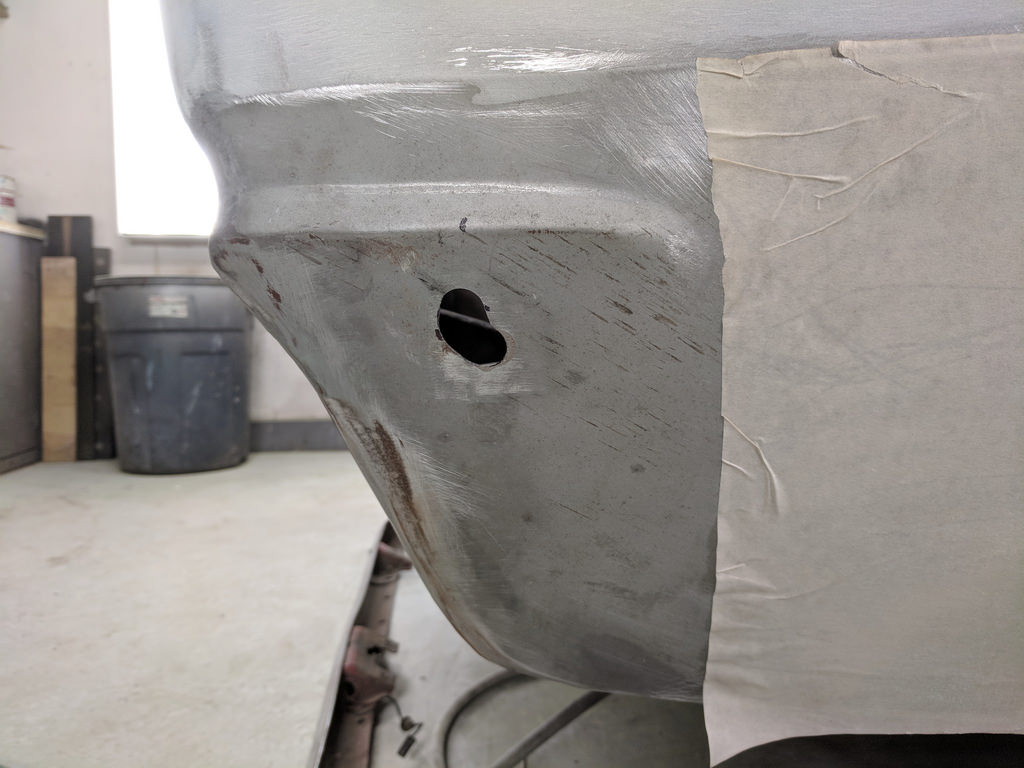
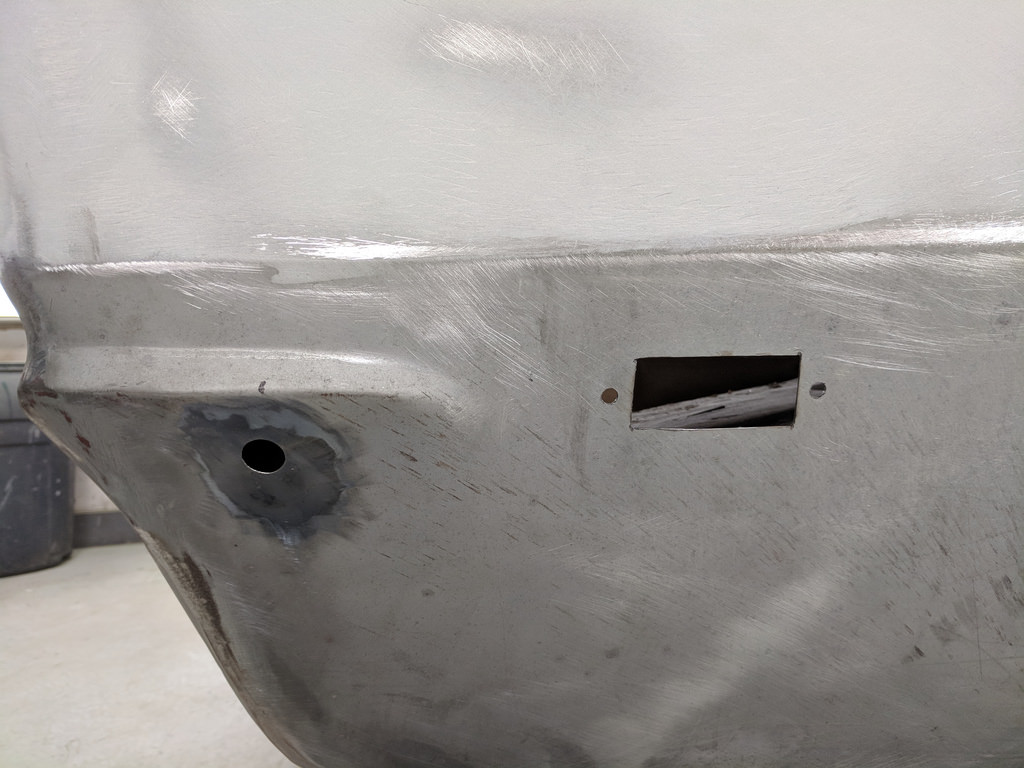
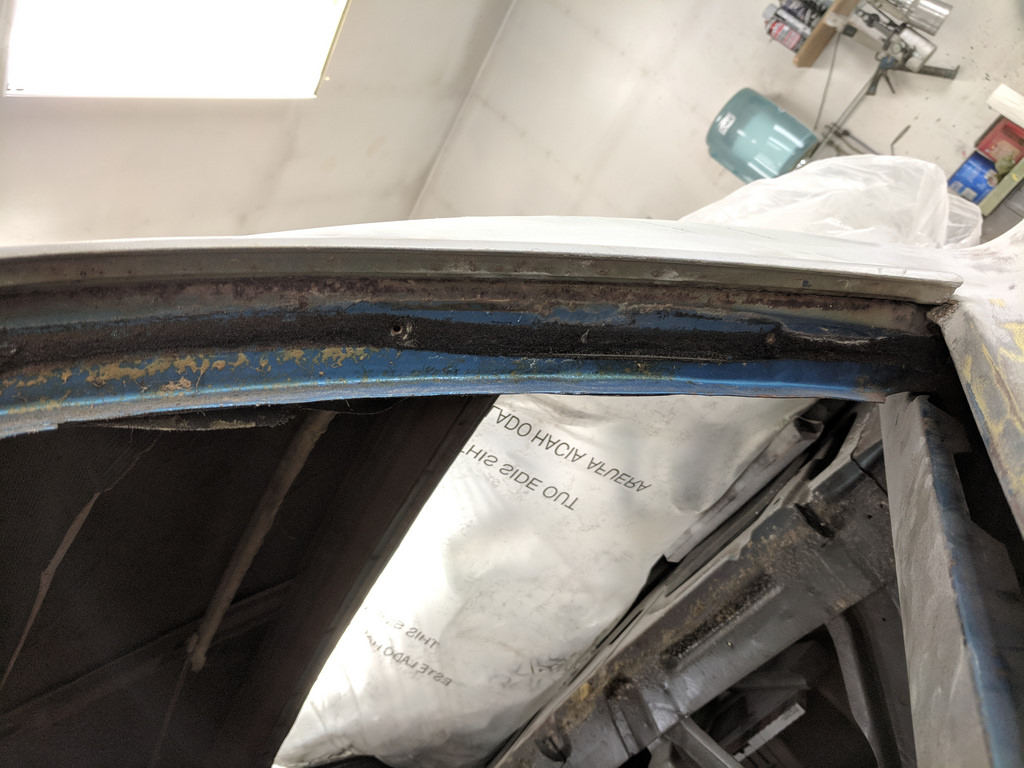
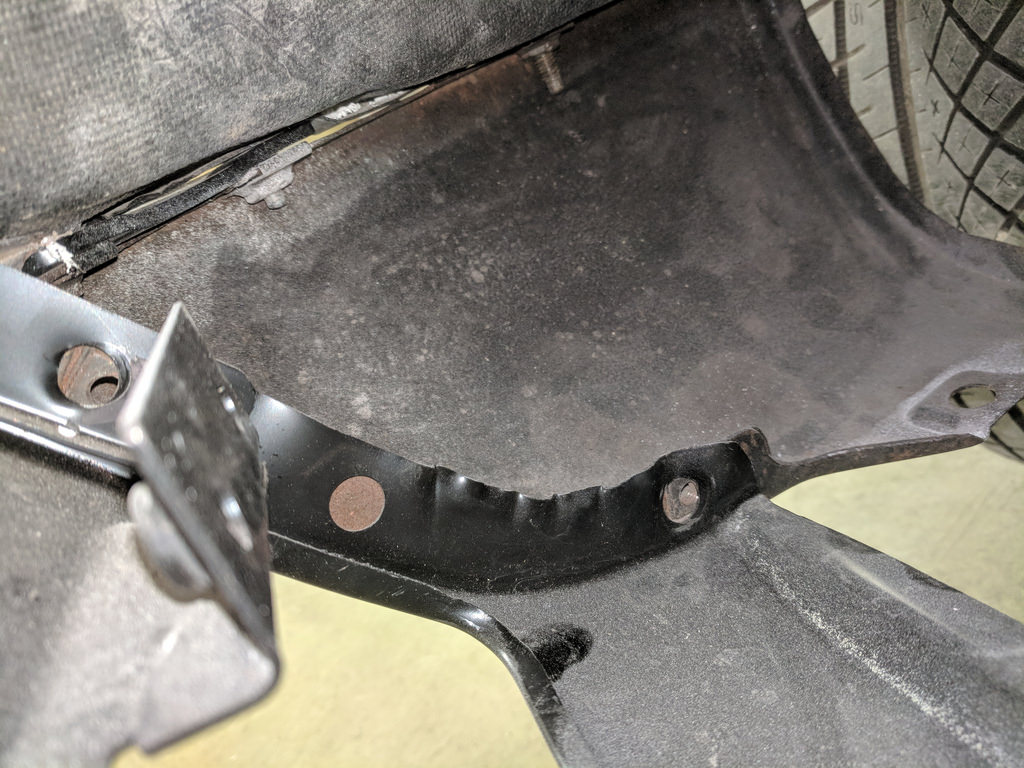
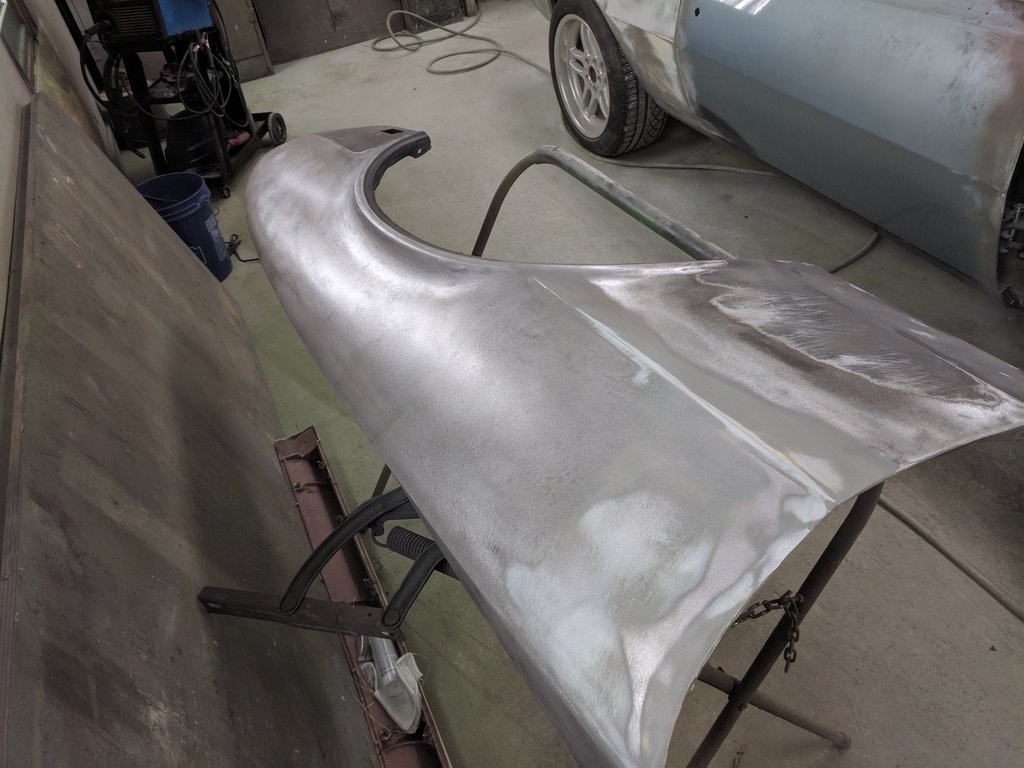
The pictures are kinda jumping around, but that is basically how I was working. Switching tasks rather quickly to try and maximize my time and efforts. I took care of a few other small fitment issues, like these holes on the lower valance. The driver's side fit great, but the passenger side needed the holes enlarged.
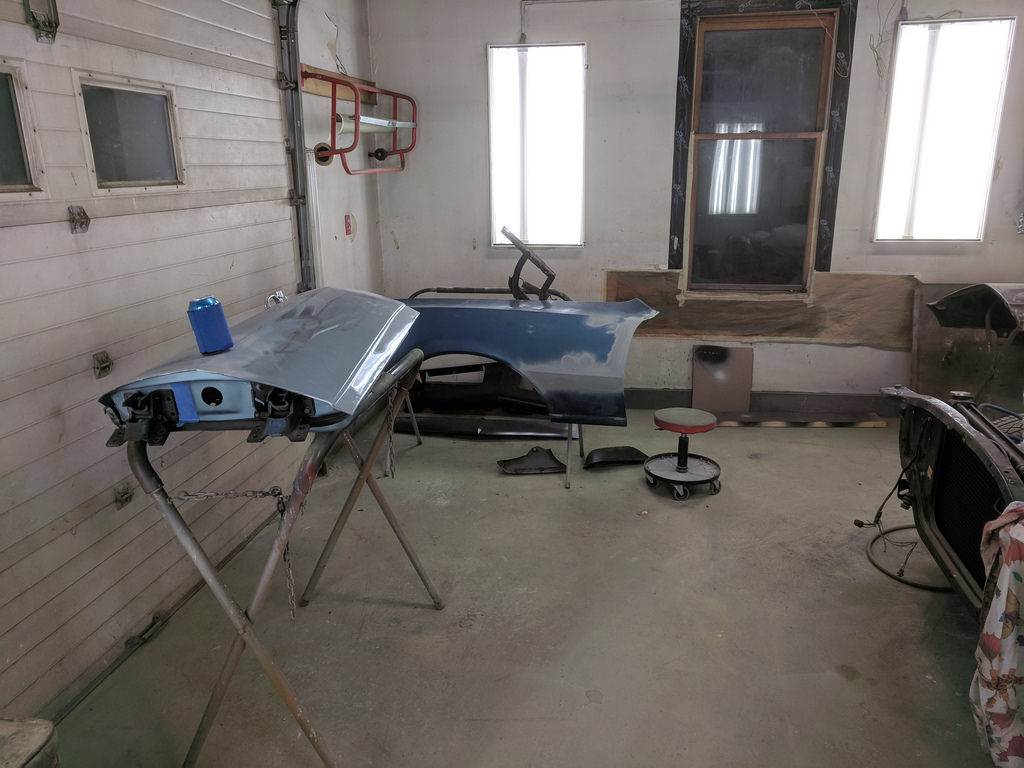
Moving on I stripped this fender as there was evidence that some light rust had either started through the original primer, or someone actually sprayed primer over some light surface rust. Either way it needed to be stripped.
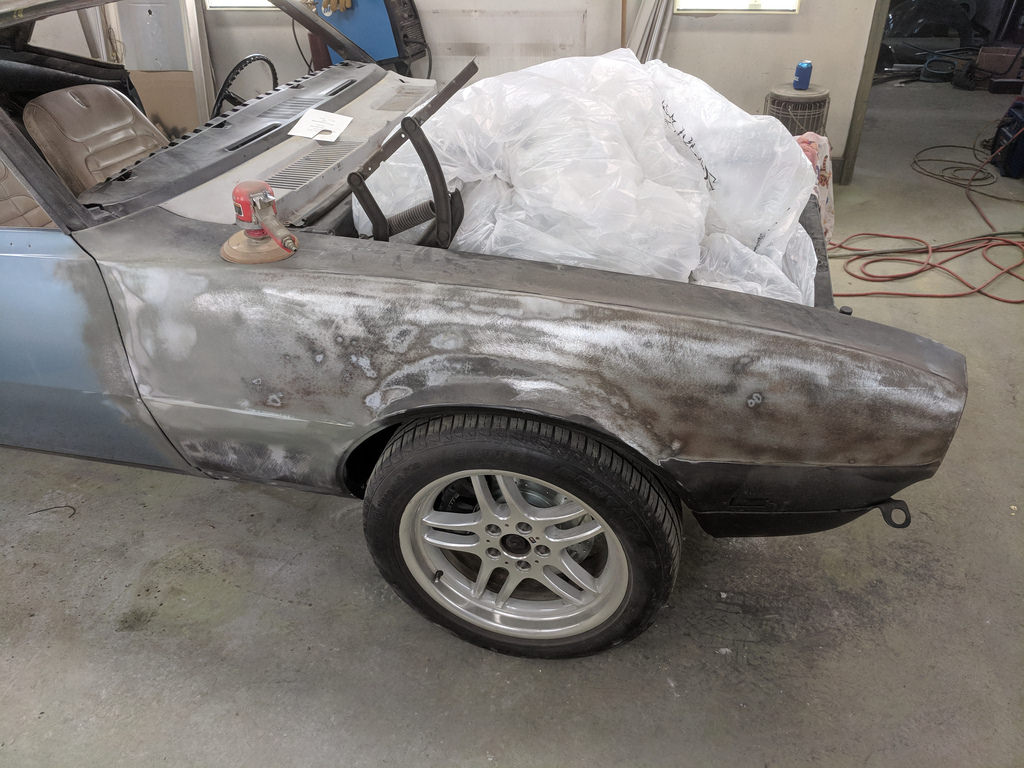
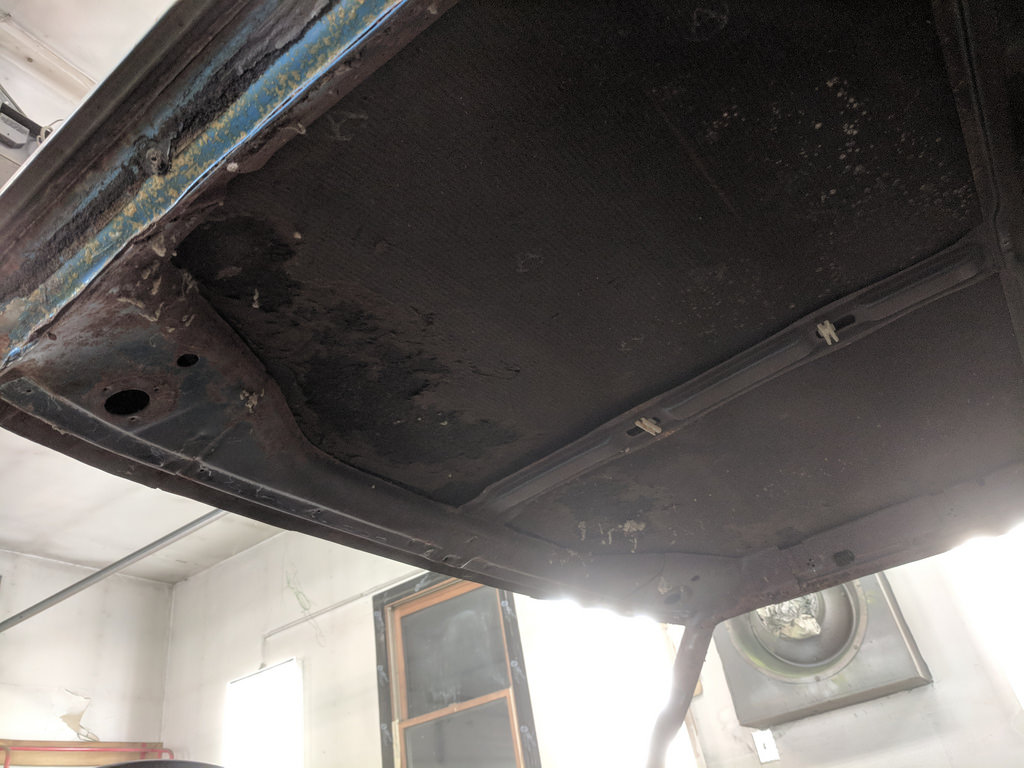
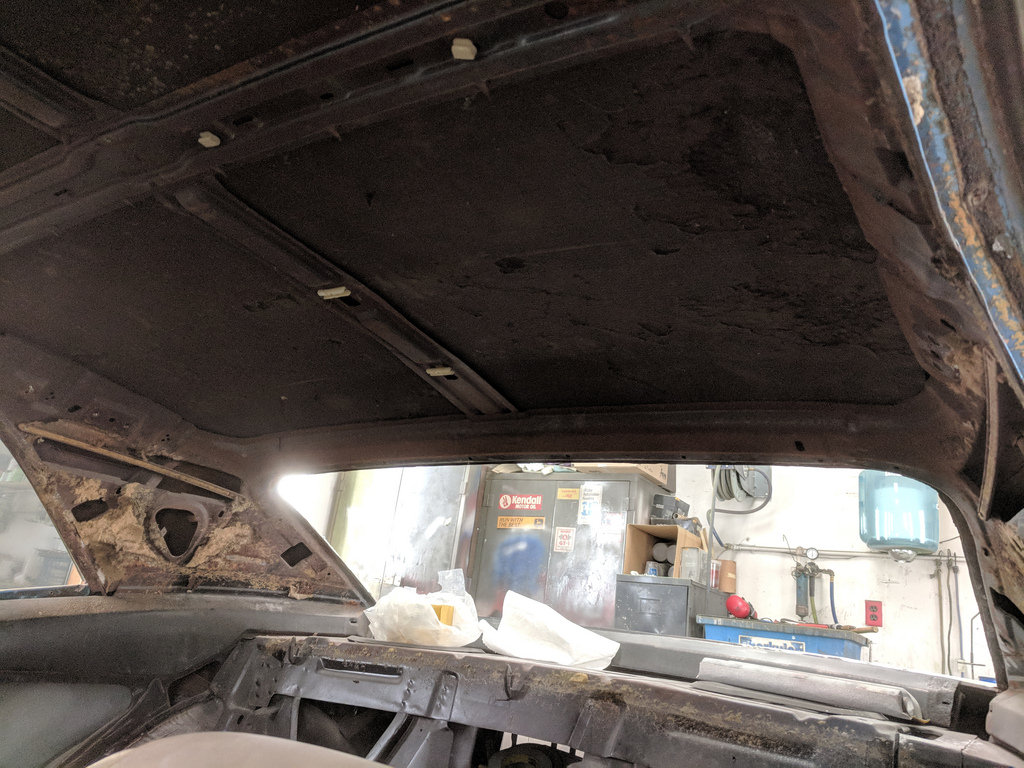
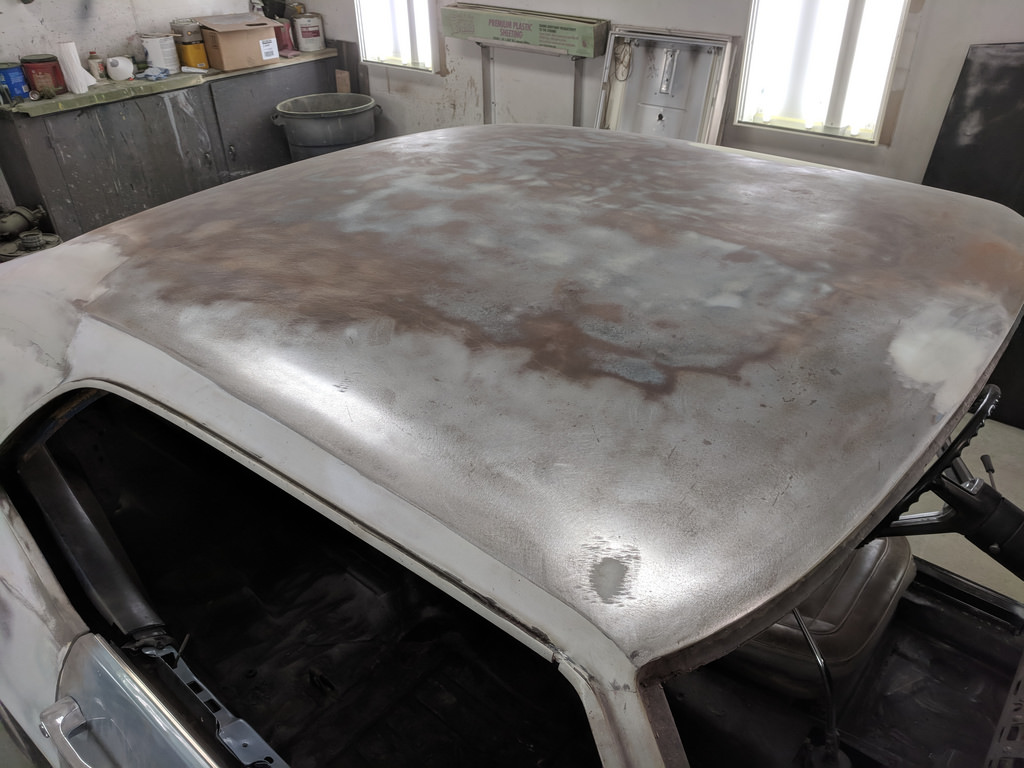
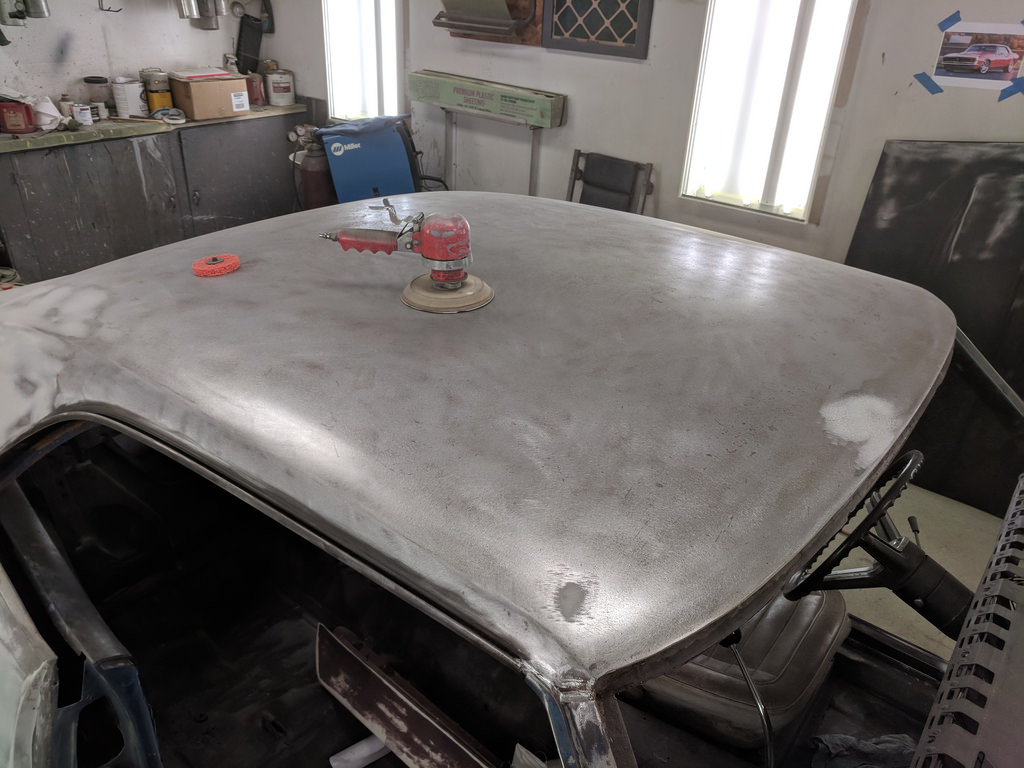
I kept the fender on the car while I stripped it so that it wouldn't move around. After it was good, I pulled it off to get to some other items on my list. I started stripping the roof, but at this point it was about 2am and I called it quits.
Here's a picture of the mess I made.
I went to sleep at ~2am Saturday and was back there at 8am. I worked until about noon, but didn't get any more photos because my phone only had 15% battery. I'll get some more hopefully this Wednesday night when I'm back there.
The next day I stacked up all the parts I striped off and stacked them in my storage closet in my basement. I'm hoping to have all of this cleared off in the next month or so!


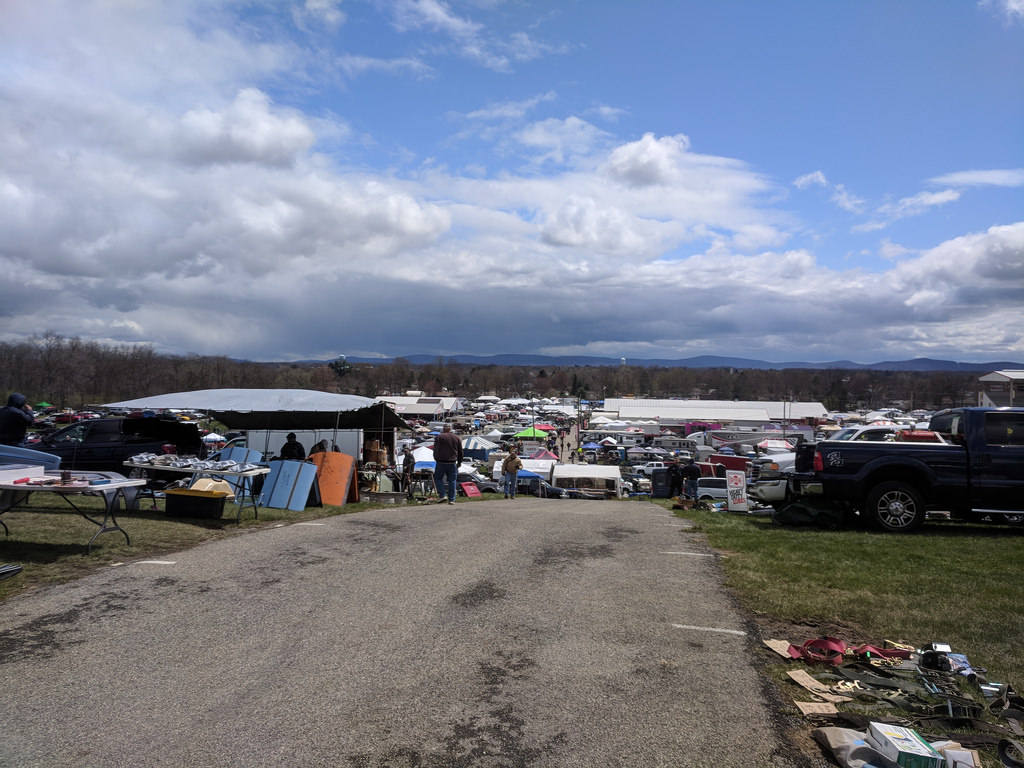
The Spring Carlisle show is this week and I plan on going Thursday and Friday with my dad. We have gone just about every year since I was about 18. Good time to spend together enjoying cars and the swap meets.
Cheers,
Ryan
1955 Nomad project LC9, 4L80e, C5 brakes, Vision wheels
1968 Camaro 6.2 w/ LSA, TR6060-Magnum hybrid and etc SOLD
1976 T/A LS1 6 Speed, and etc. SOLD
Follow me on Instagram: ryeguy2006a
04-16-2018 #297
Registered User
- Join Date
- Aug 2014
- Posts
- 435
Great to see progress. When this is all done, you'll be happy you didn't wrap it or PlastiDip it.
Coming along great!
Jay
04-23-2018 #298
Registered User
- Join Date
- Sep 2009
- Posts
- 2,713
My dad and I try to attend the car show and swap meet in Carlisle, PA every year as sort of a kickoff event for summer. Just like every time that we attend I'm sore, but come back with a ton of good parts. This year was no exception, and with that was no forward progress on my Camaro.
Getting breakfast and looked out to see this rod coming out of a trailer before we even got to the show.

Looks a lot warmer in this picture than it really was. Probably about 37* at that time
Ok, you have my attention!
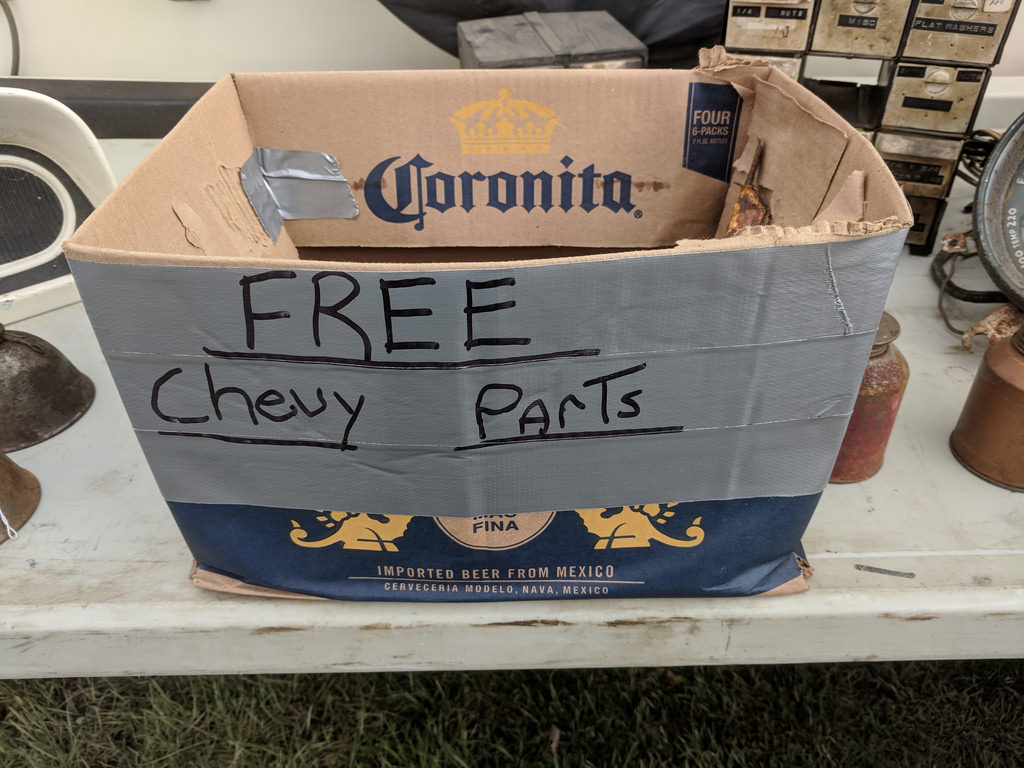
Pretty funny haha.
Thought this was cool. I found a take out 2016 LT1 motor and wanted to take some pictures of the bellhousing bolts. I knew that the upper mount was moved over to account for the DI pump, but otherwise it looks identical.

Here are all of my deals from the show and the beautiful 18 year old I picked up on the way back.
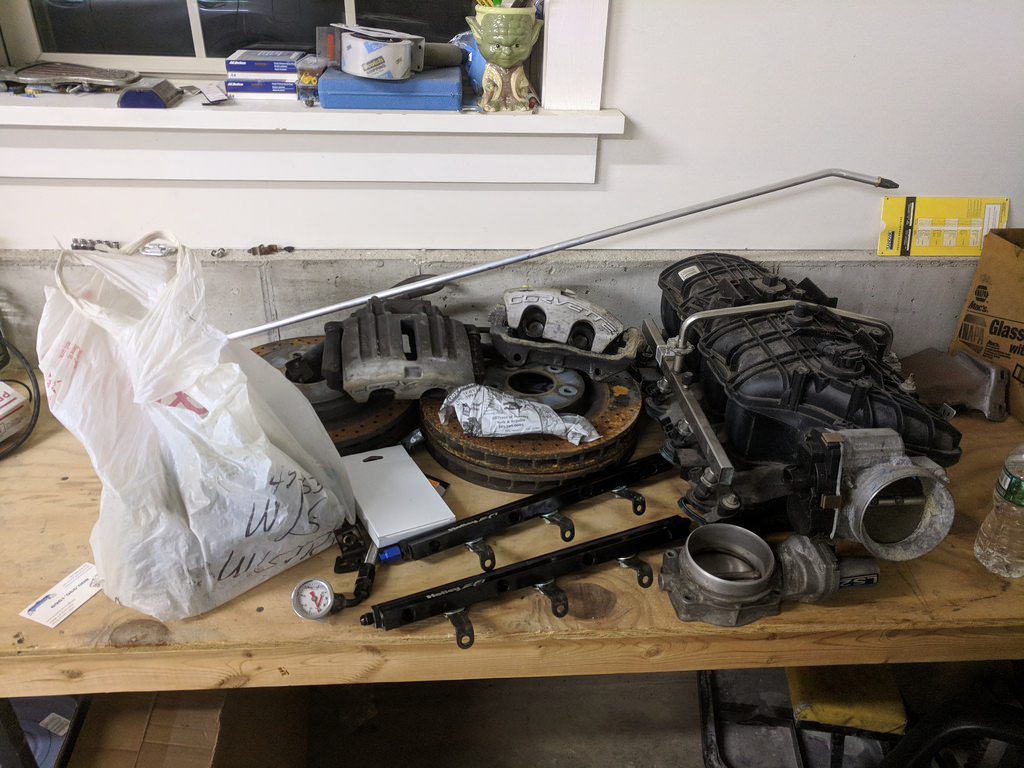
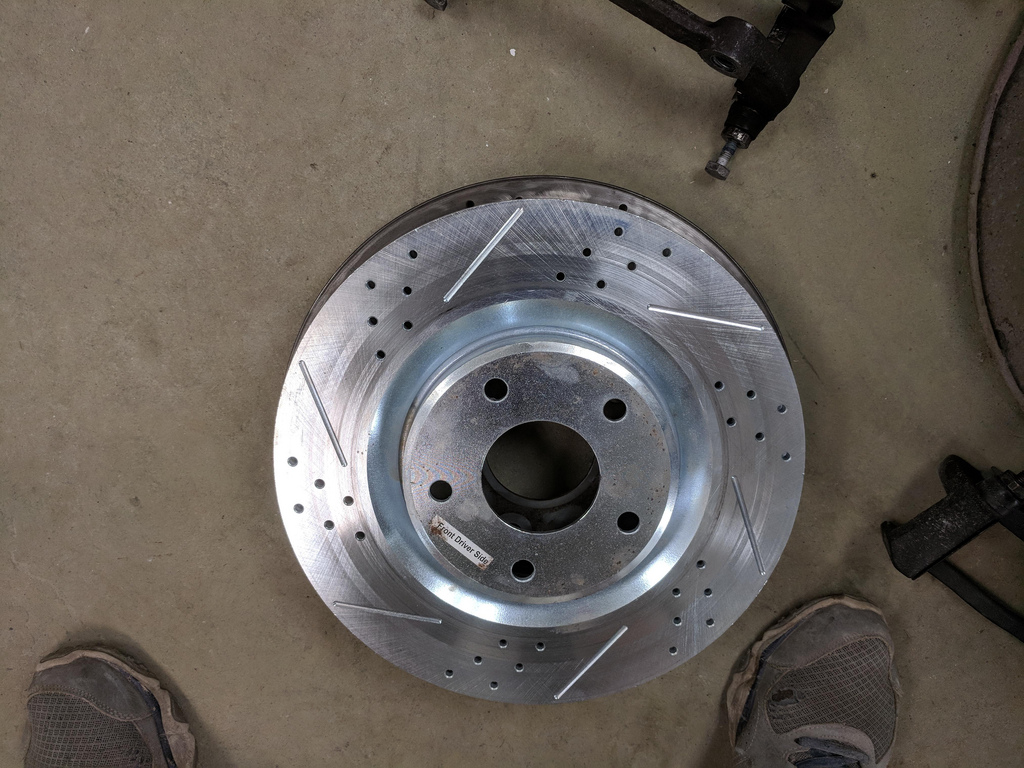
First up was a complete set of Z51 brakes off of a 2008 C6 Corvette. Lower mileage and the guy only took them off to upgrade to a Z06 brake package and widebody kit. When he was done upgrading his car, he wrecked it 1 week after it was all finished out of paint...
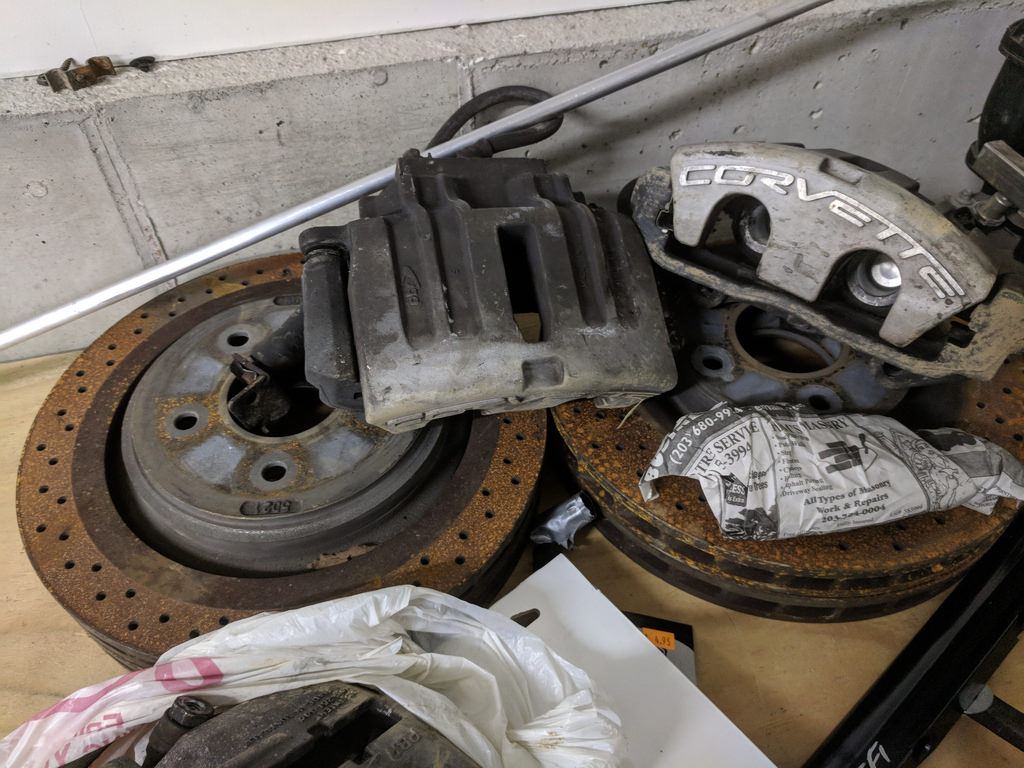
They cleaned up nicely! Just shy of 13.5".


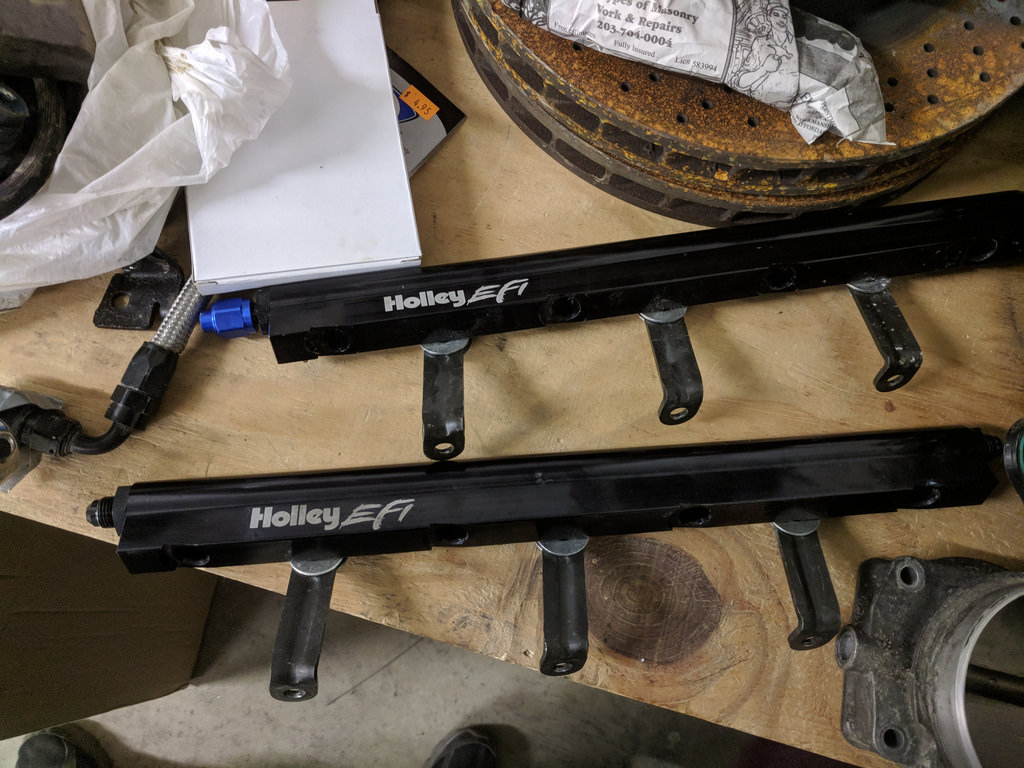
Next was a paint of Holley EFI fuel rails with a liquid filled gauge and braided crossover.
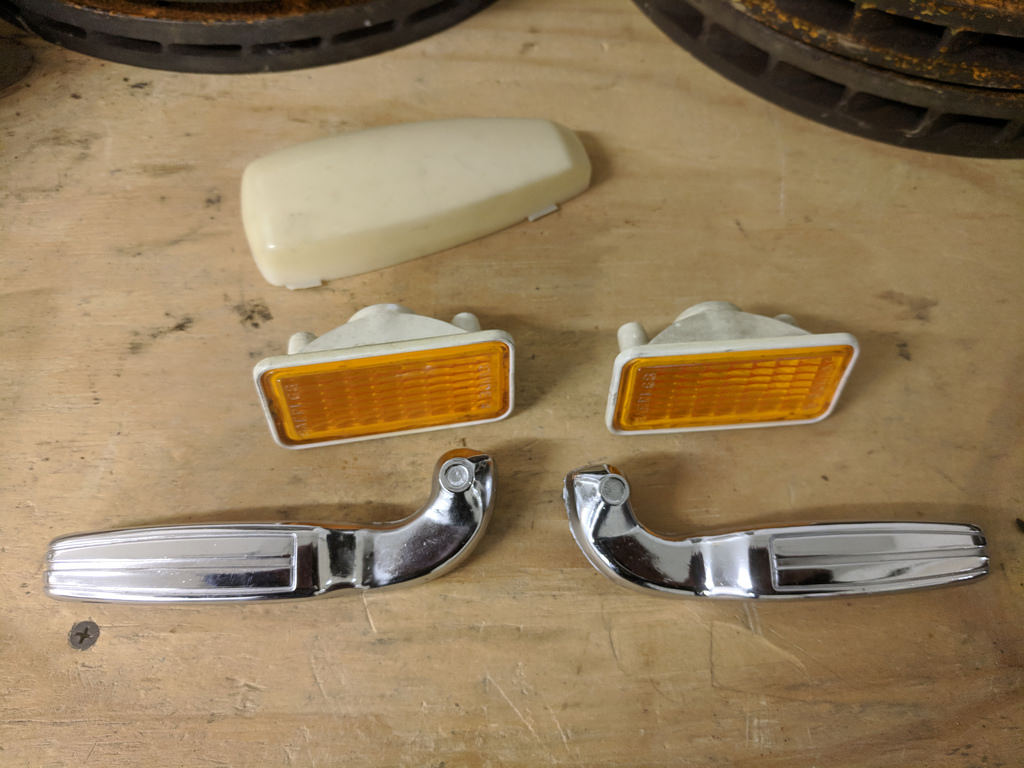
Pair of very good condition OEM door levers and 68 front marker lights. Although I found out later that mine are supposed to be clear. Oh well, maybe I'll try them and see what they look like.
This was one of my better deals of the day. Pair of brand new 67-68 RS reverse lights, lenses, gaskets, plus one 67 RH RS turn signal housing, pair of lenses and gaskets. Plus some kind of 67 RS front turning signal harness from American Autowire. $25 bucks

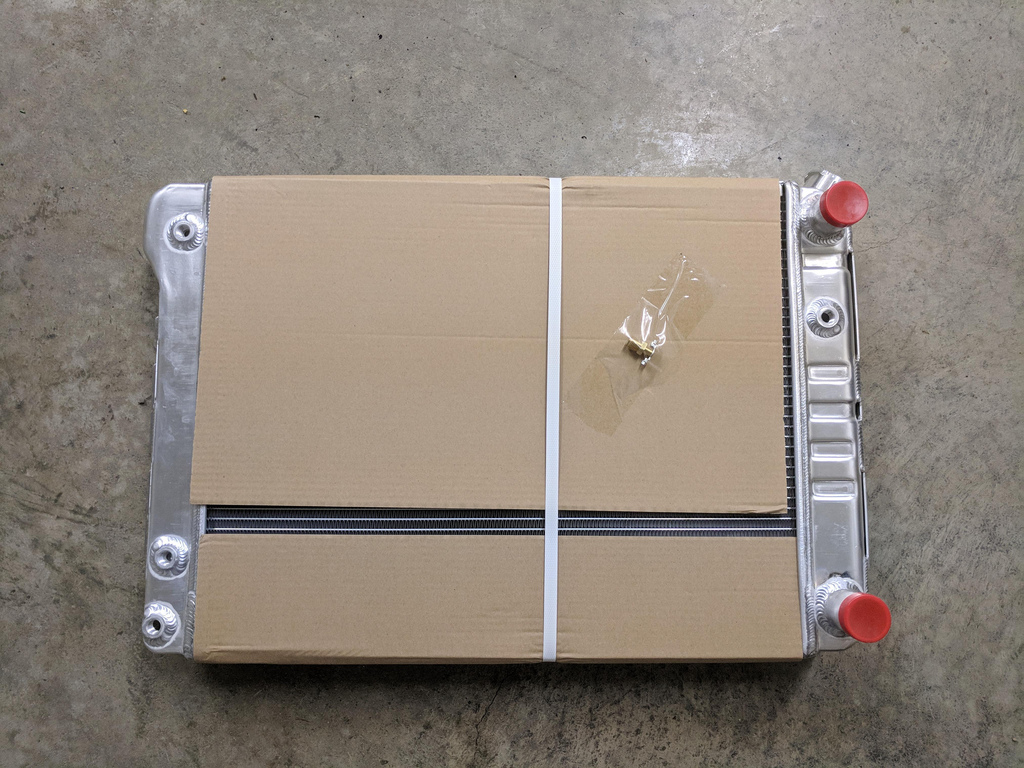
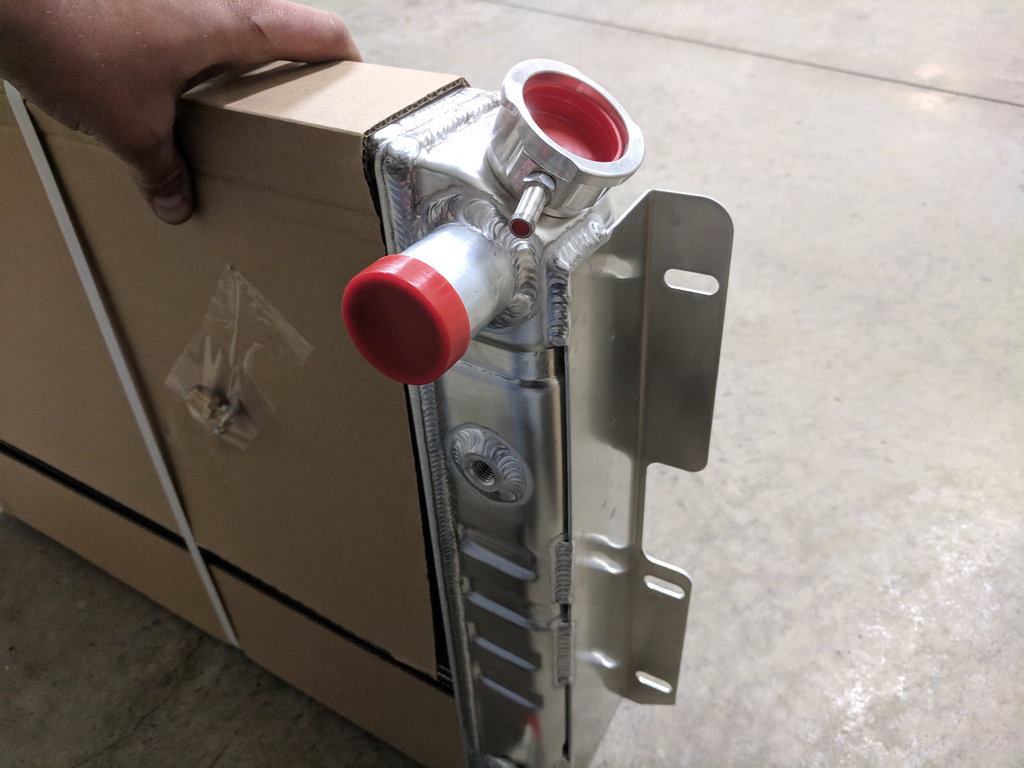
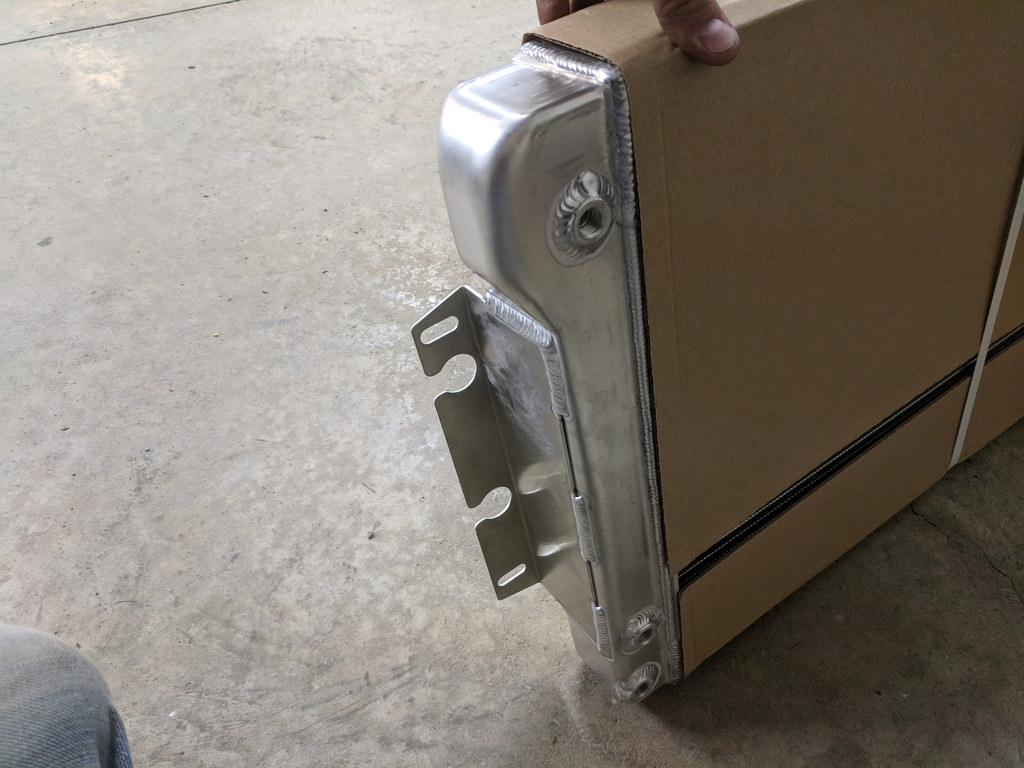
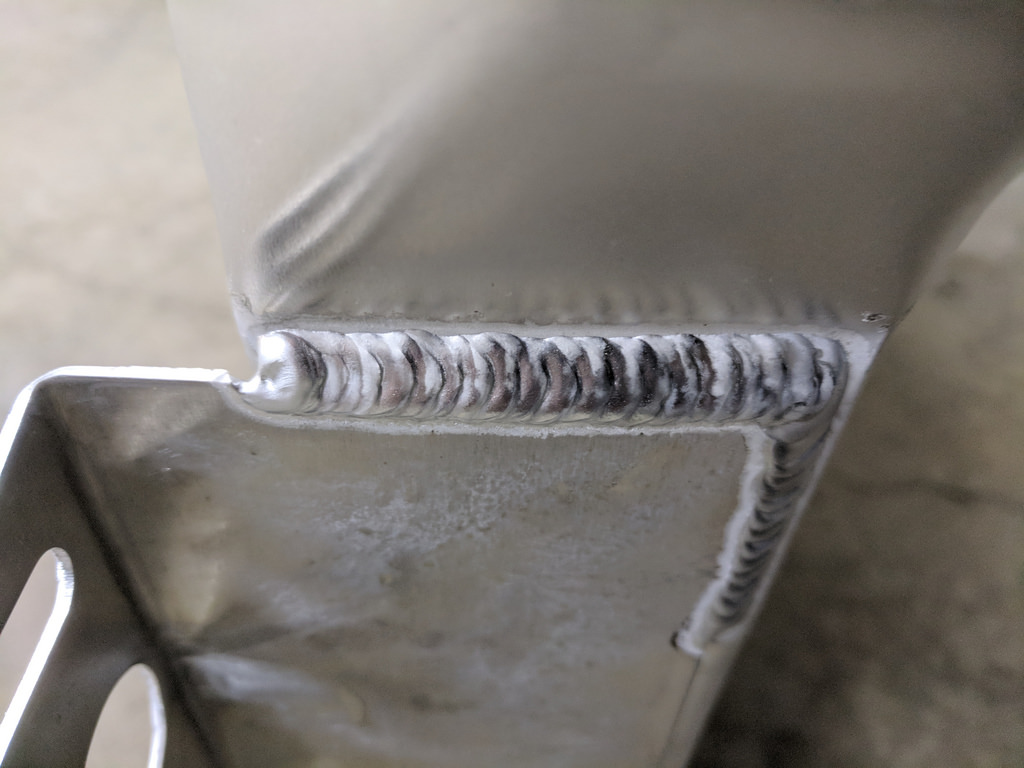
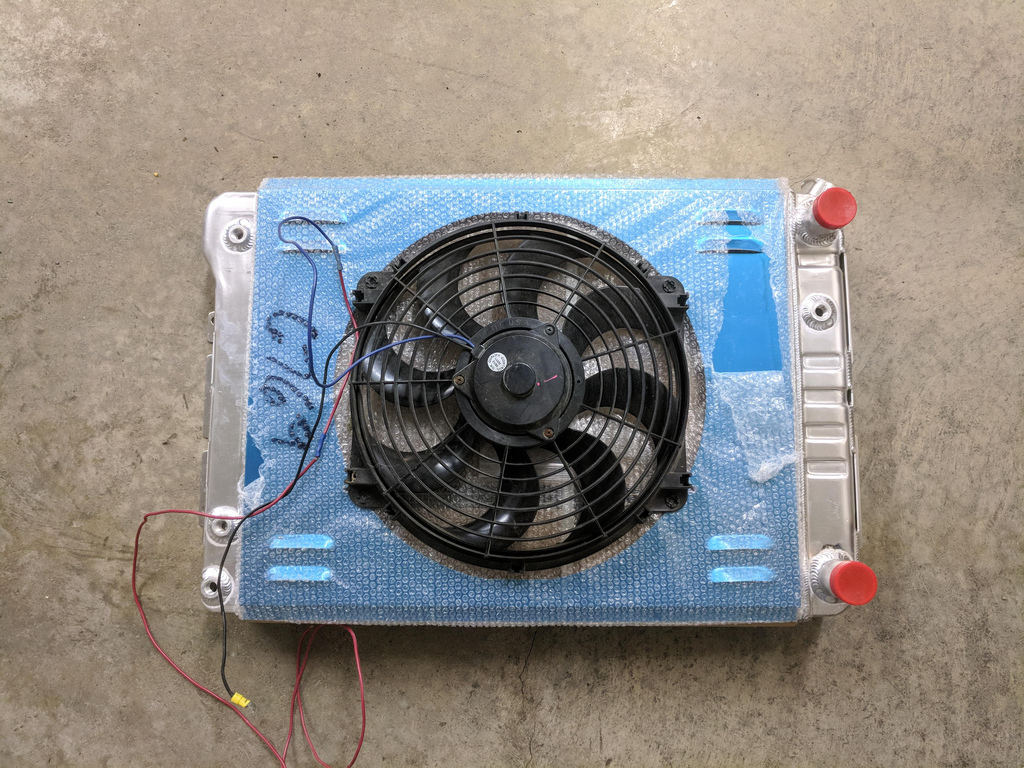
One of my bigger purchases was a new dual pass radiator. I didn't "need" one, but the dual pass radiator helps with my LS swap for many reasons. First reason is that the LS motors all have both coolant ports on the passenger side which eliminates my issue of the CAI and coolant return line trying to occupy the same space. Secondly it should help with my cooling as it comes with an integrated fan shroud. Lastly I just really like the way that it looks. Very pleased with the quality of it. This vendor was called Auto City Classics, and all of their stuff is made in house and came with a lifetime warranty! I saw several vendors there for the "eBay" radiators and they were what you would expect, but these are top notch in my opinion. There was another vendor there Cold Case, and to the untrained eye I thought they looked almost identical. Nice welds, laser cut brackets, and integrated fan shroud with vents. Best of all the guy mis-spoke and stuck to his word. Should have cost $290 ($230 radiator and $60 shroud), but he said $260 and stuck to it. The Penny Pincher thanks you ACC!

And this is the fan that I picked up last summer from a pick a part yard! Fits nicely.
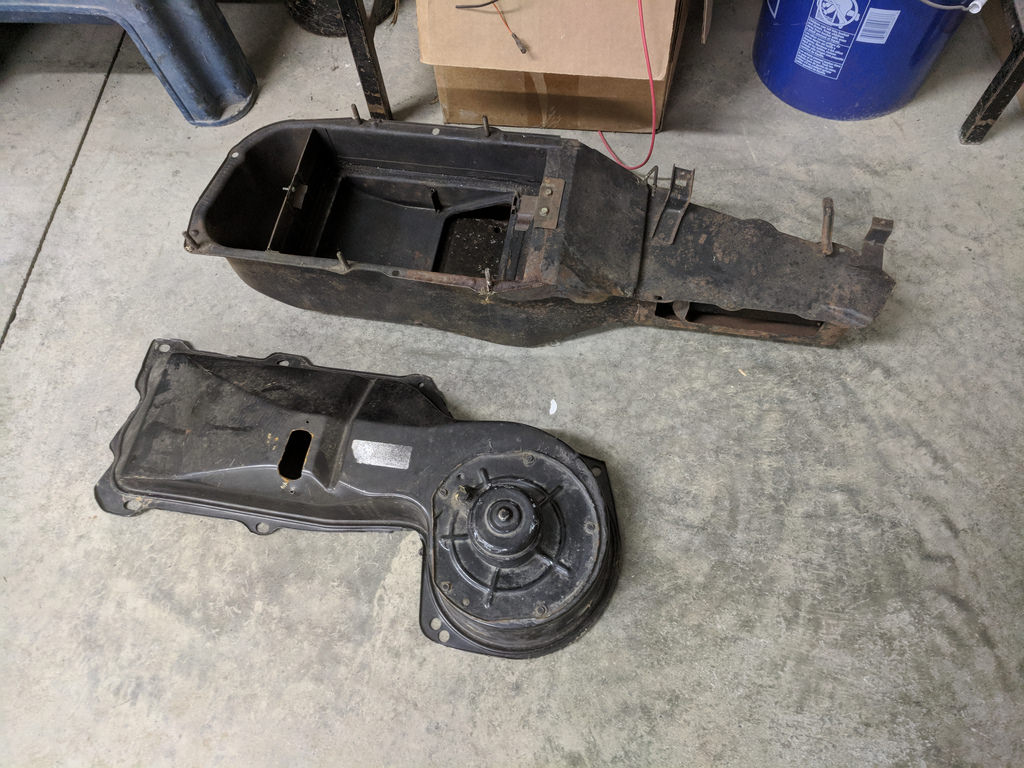
Inner and outer heater boxes. My inner box was very rusty, and I bought the outer box because it has a fan and was very cheap.
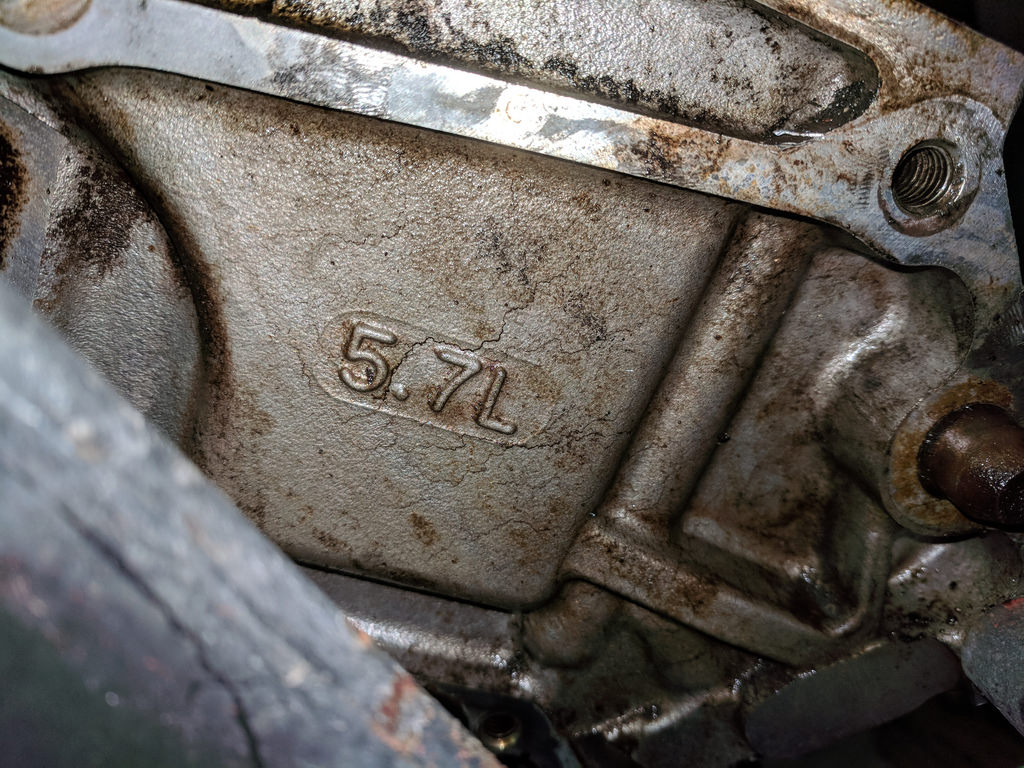
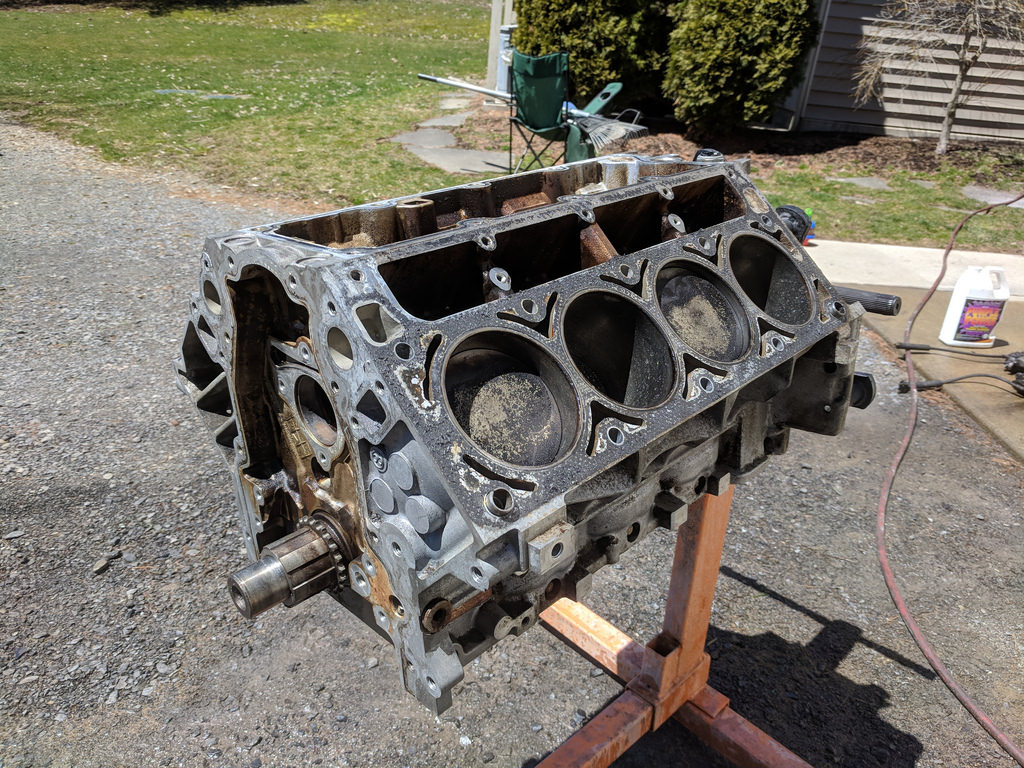
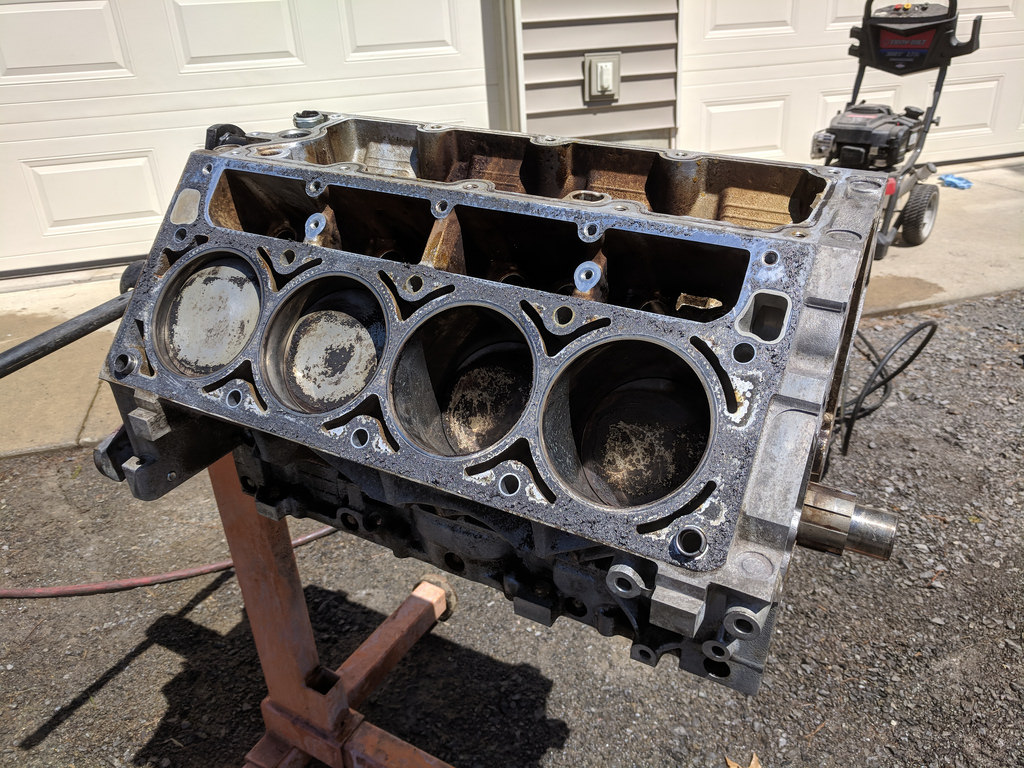
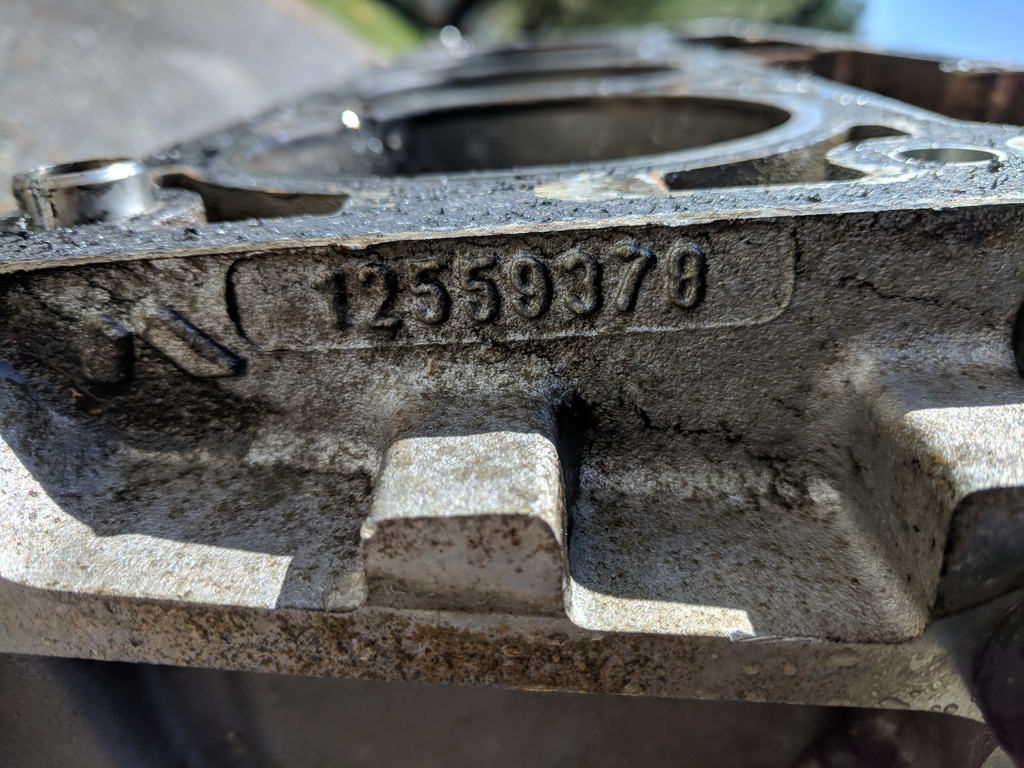
I also picked up some other misc. parts along the way but those were the big ones. Very successful show in my opinion and one of my best. I also picked up an LS2 throttlebody and TBSS intake manifold for good prices and will flip them to help offset my expensive trip. Then on the way home I had been texting a guy on LS1tech about a 70K mile LS1 shortblock and we made a deal. He was about 45 mins out of my way on the way home and I decided to swing over to pick it up. Definitely didn't need it but the price was right. It was a little grimy but cleaned up nicely.


Nice break from bodywork, but I do plan to hit it hard this week and maybe this week see it in one color!
Cheers,
Ryan
1955 Nomad project LC9, 4L80e, C5 brakes, Vision wheels
1968 Camaro 6.2 w/ LSA, TR6060-Magnum hybrid and etc SOLD
1976 T/A LS1 6 Speed, and etc. SOLD
Follow me on Instagram: ryeguy2006a
04-27-2018 #299
Registered User
- Join Date
- Sep 2009
- Posts
- 2,713
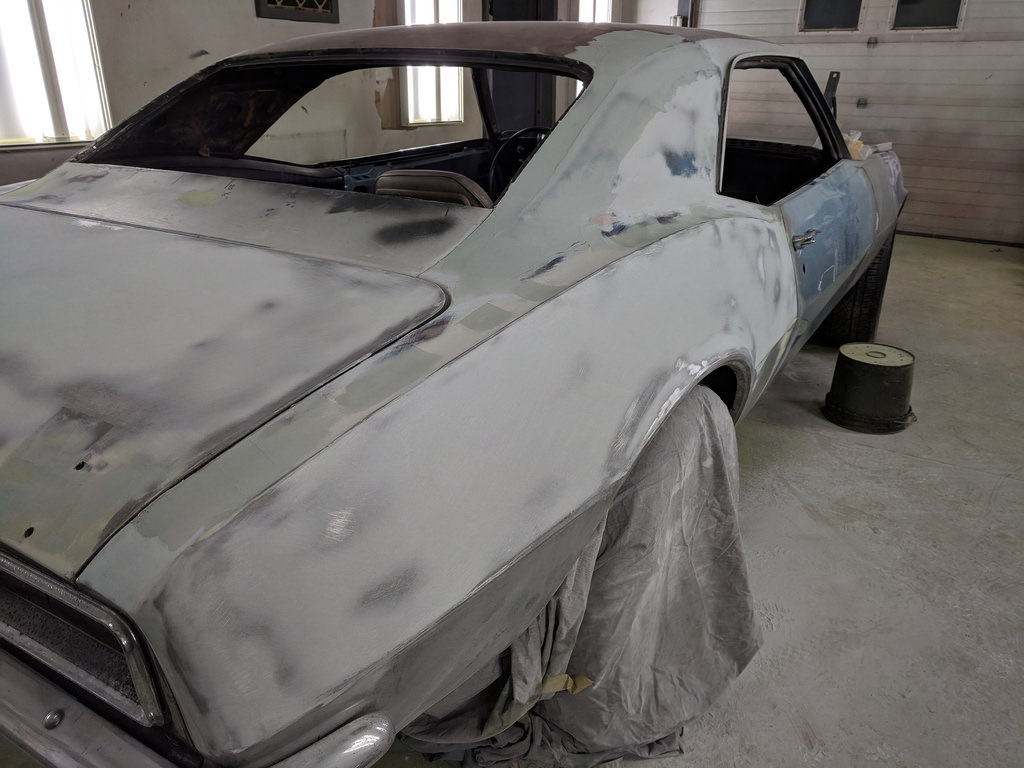
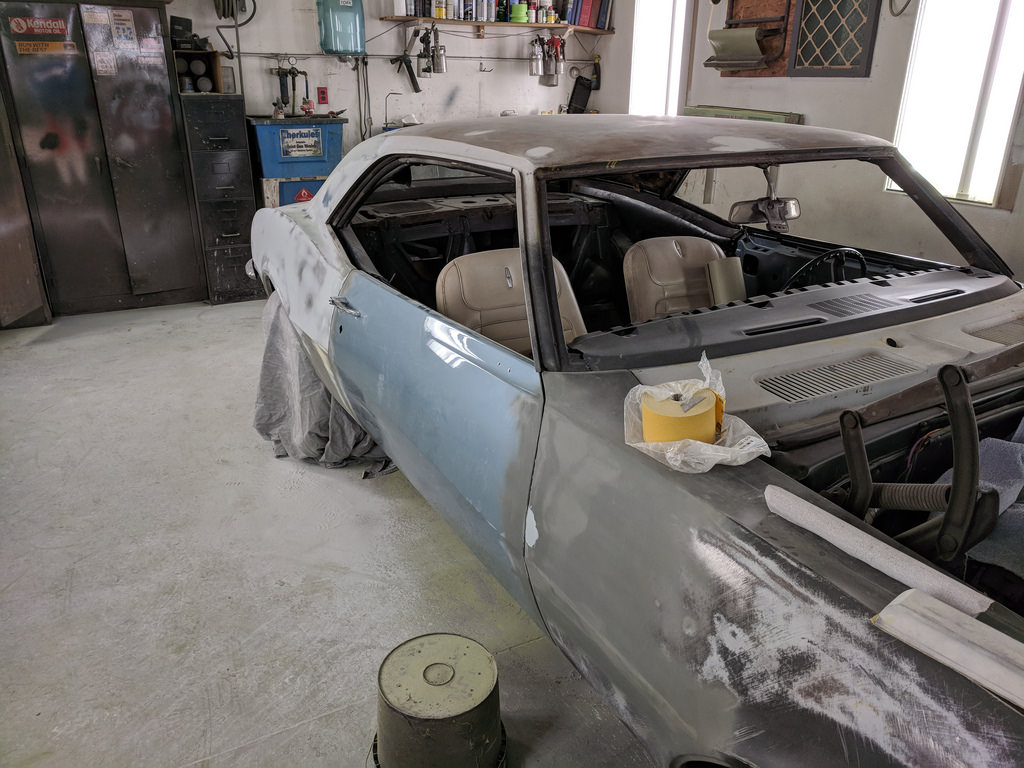
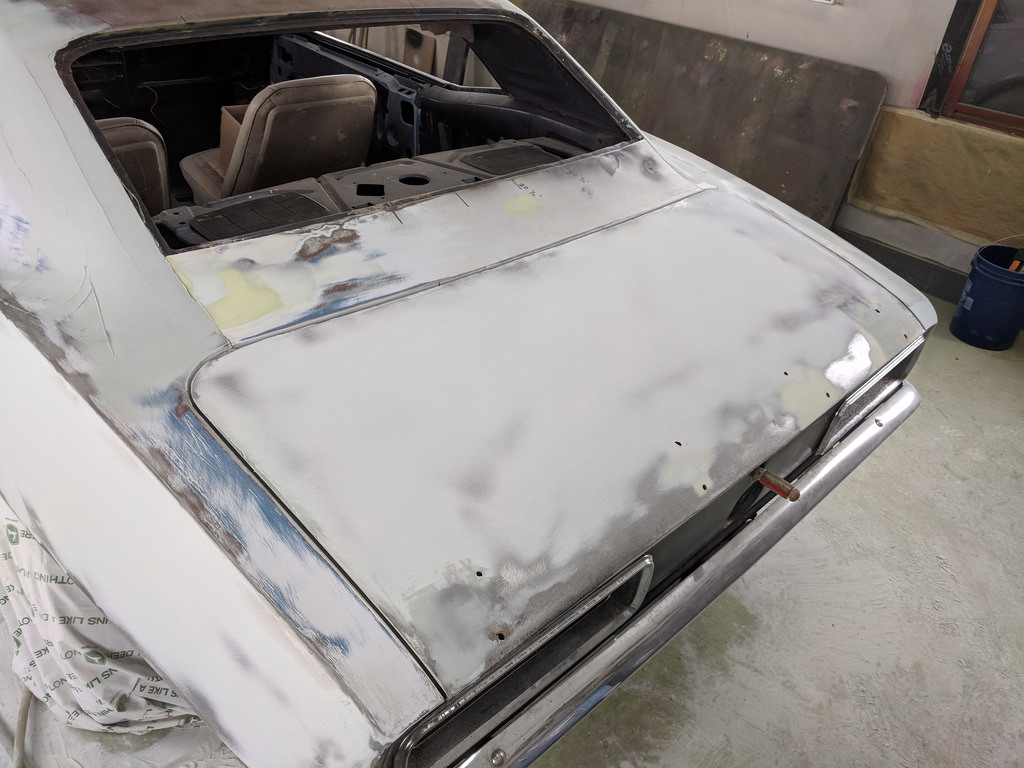
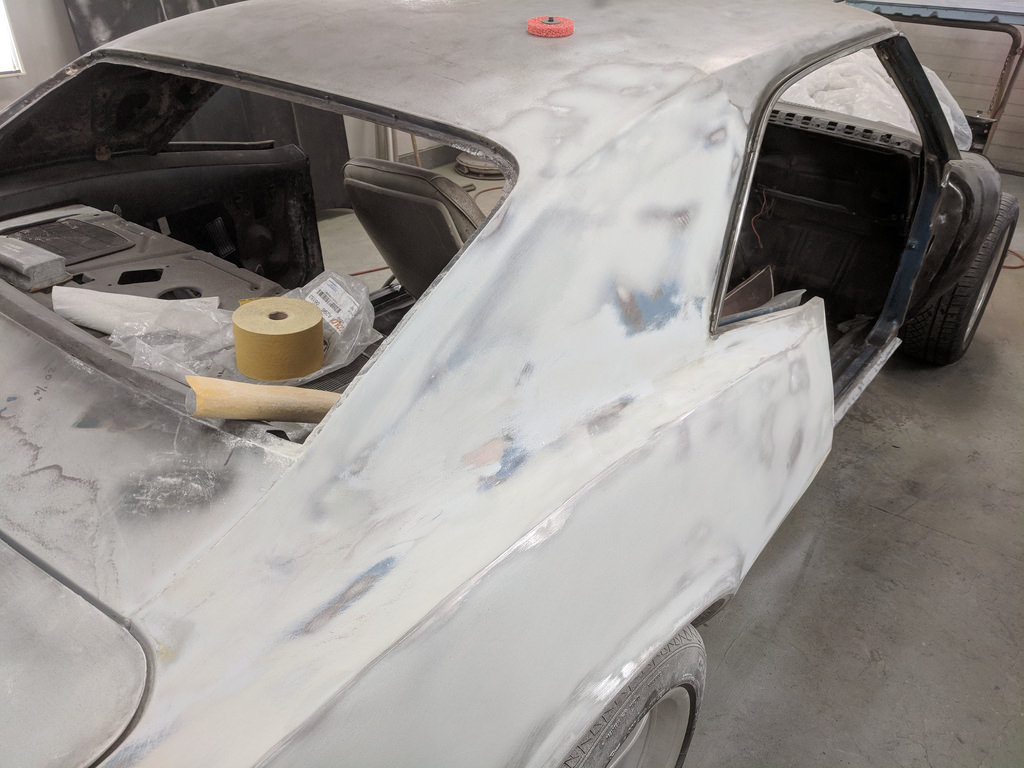
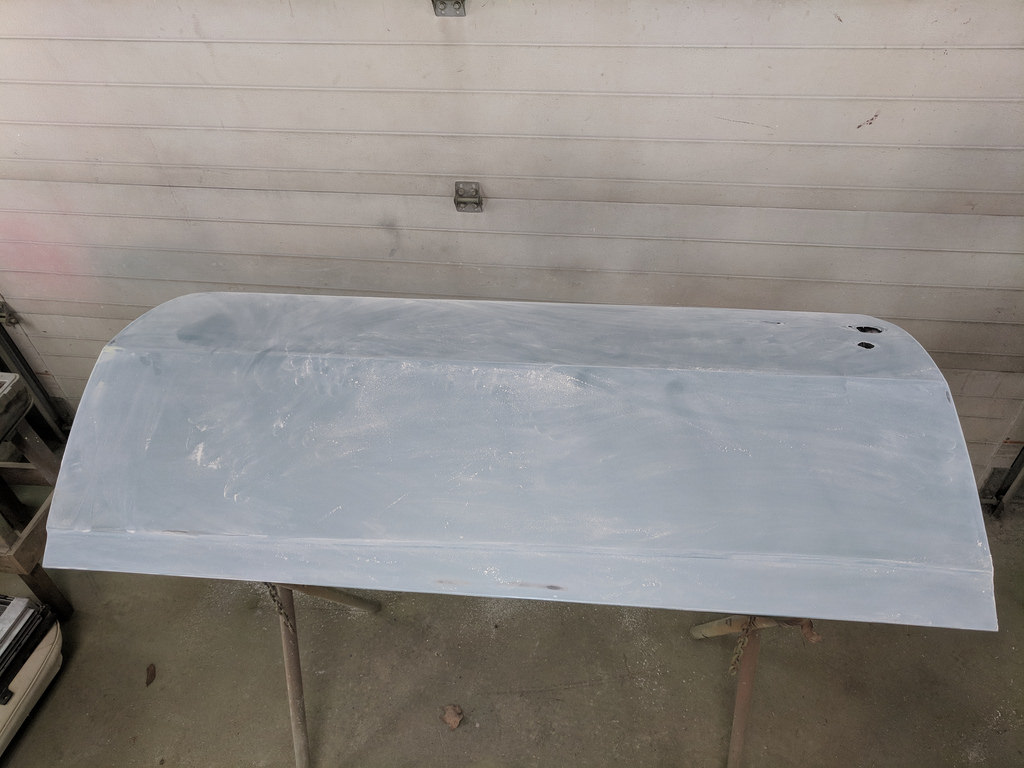
I went to work on the car after the family went to sleep Monday and last night. I haven't had much to take pictures of since the panels don't look much different. I did however snap some as most of the body panels are prepped for primer. I'm hoping that we can get some laid down tonight. I just need a little bit more filler in some places and final sand and we should be able to spray. Here's the panels right before I left.
Roof is stripped. Wow, this takes forever!
Quarter panel to roof lines looking very good.
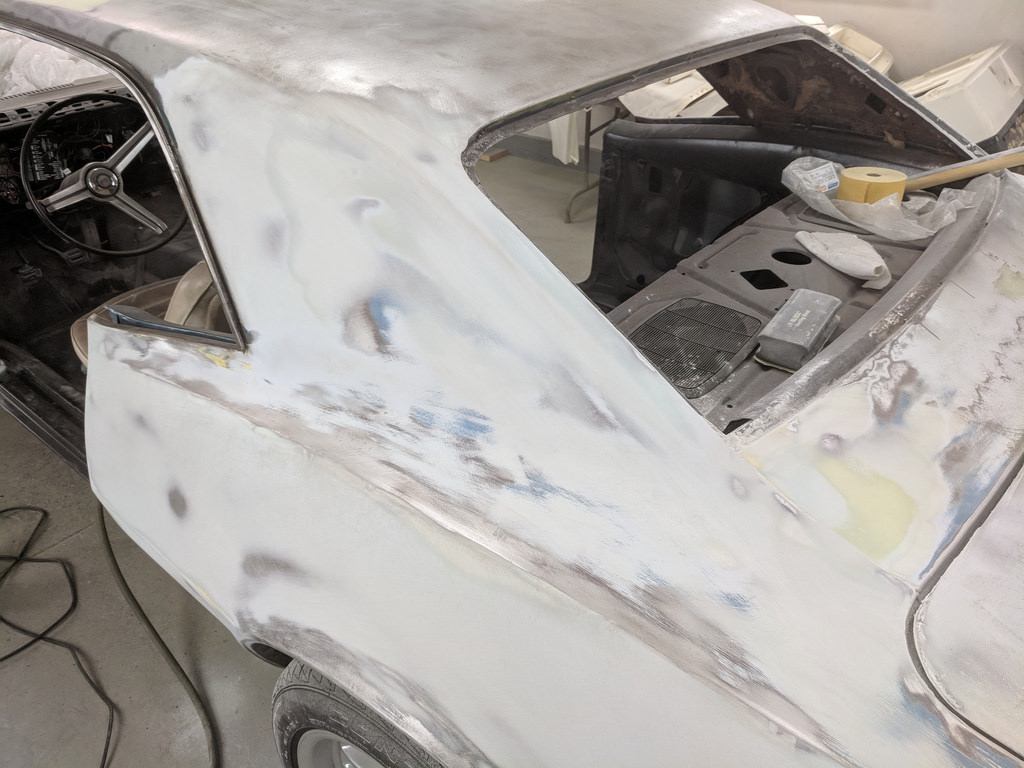
Doors are scuffed down with a DA sander and just need to be flipped over to scuff the inside.

I also added a skim coat to the rocker panel where I had to stitch it back together.
I stripped the passenger side fender and my buddy added a skim coat to some areas. Just need to block that down

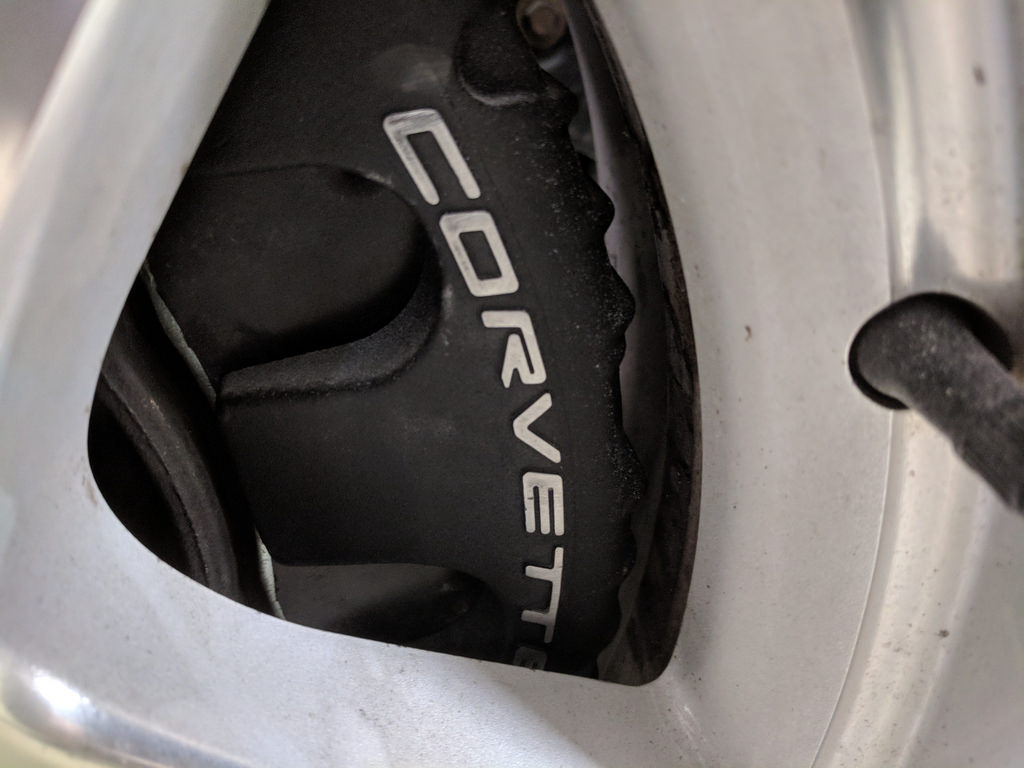
In other news, I test fit my new to me Z51 front brakes! For those that don't know, the new taller caliper abutment brackets and 13.4" factory drilled rotors are a brake package available on the C6 Corvette's. I ended up getting a complete set of front and rear brakes this year at Carlisle, but wanted to keep my C5 calipers. Great thing is since I already converted over to the C5 platform, I literally upgraded to the bigger brakes in about 20 mins total. It took me about 10 mins a side to swap over to C6 Big brakes! The C6 calipers and my old base C5 brackets are sold so I had to swap them out.
Size comparison, C5 vs. C6 Z51. I never had the car on the road with the C5 brakes, but I will report how the Z51 brakes feel soon.

Little tighter, but I knew they would fit as I had already tested them with the Kore3 template. Still plenty of room so no worries about them contacting the wheels.
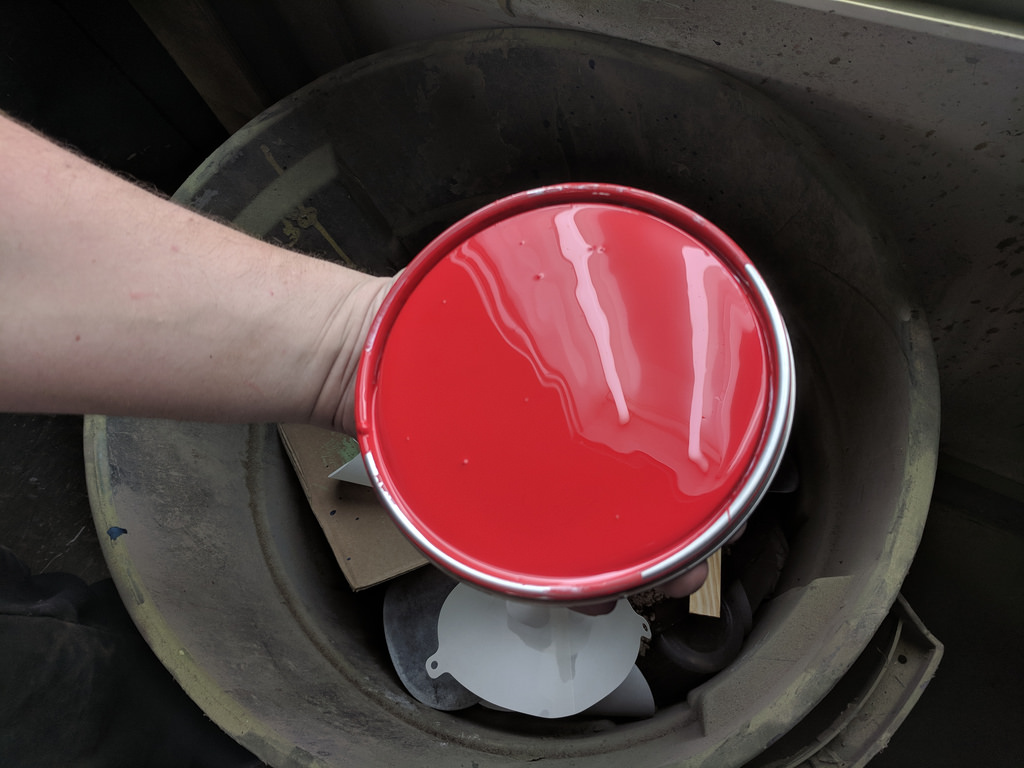
Lastly, a little teaser. I finally decided to crack open the paint to see what it looks like. So excited to get it sprayed on the car!
Cheers,
Ryan
1955 Nomad project LC9, 4L80e, C5 brakes, Vision wheels
1968 Camaro 6.2 w/ LSA, TR6060-Magnum hybrid and etc SOLD
1976 T/A LS1 6 Speed, and etc. SOLD
Follow me on Instagram: ryeguy2006a
04-27-2018 #300 Registered User
- Join Date
- Feb 2016
- Location
- SoCal
- Posts
- 475
Have your arms doubled in size after all that sanding? I know mine did when I did my car!
1970 VW Bug - Just your average mid engine Bug
Track toy - 06 Evo - E85 and lots of boost
Newest track toy - 2021 Supra

 Reply With Quote


