Results 21 to 40 of 586
Thread: 1968 Camaro (projekt 1sickT8)
-
02-12-2010 #21

 Registered User
- Join Date
- Dec 2005
- Location
- Portland Or.
- Posts
- 313
nice work you guys are making it look easy!
68 Camaro under construction
-Chris-
-
02-13-2010 #22
 Registered User
- Join Date
- Nov 2008
- Location
- Lawrenceburg, TN
- Posts
- 4,086

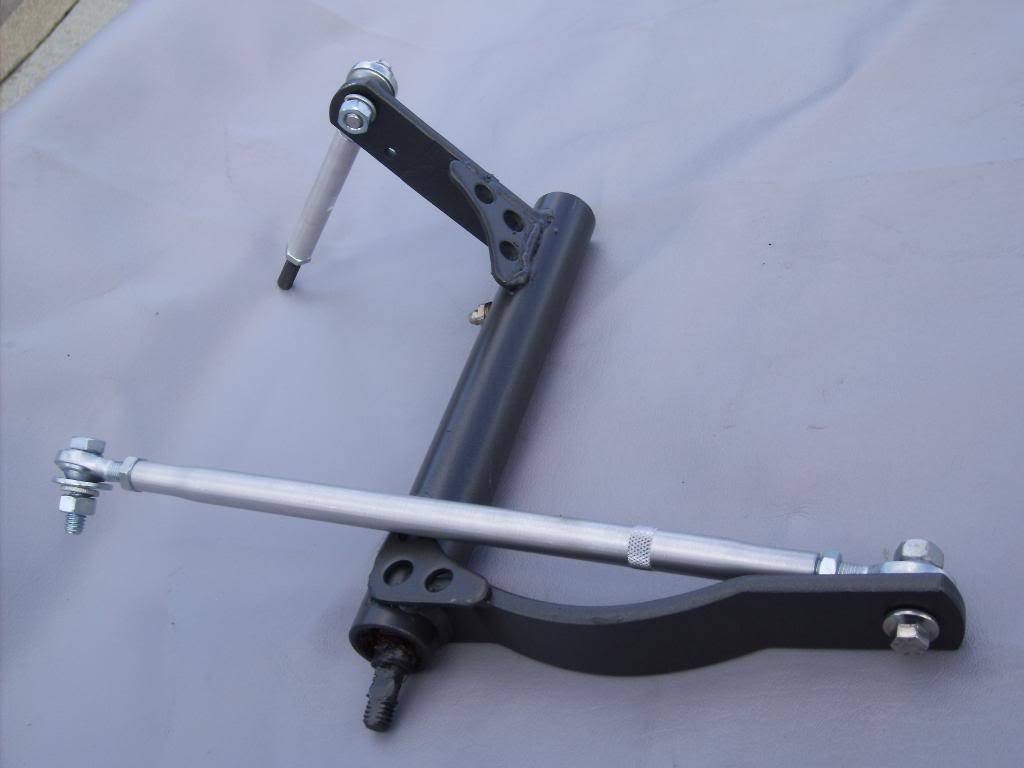
now that the motor and trans is in the car i had to find a shifter i like for this monster- the new hurst indy is short and very stiff with a very short throw

and build up a new clutch linkage with heim joints for complete adjustment possibility and gussets on the z-bar to stiffen up the entire set up

-
02-13-2010 #23
 Registered User
- Join Date
- Feb 2006
- Location
- Idaho Falls, Id
- Posts
- 1,342
I can't believe you bought a 68 Camaro for $100, last time I saw one under a few grand was a totally rusted out one about 10 years ago a guy wanted $500 for
Traven
-
02-13-2010 #24
Registered User
- Join Date
- Nov 2008
- Location
- Lawrenceburg, TN
- Posts
- 4,086
It was complete luck a friend of mine has 2 cars and his buddy has a car and an old lady (a friend of a friend) ask him if he wanted to buy her old car for 100 dollars(her crack head son had taken it apart), but they both thought it was a joke and didn't even look at the car for a week, they were arguing about going out to the casino or go look at the car, I over heard them and asked what car, "some 100 dollar junker some old lady wants to sell" I told him if you don't want it i will take it, he said "fine man its yours" but were not helping you tow that crap, and now it was mine Originally Posted by T_Raven

-
02-13-2010 #25
Registered User
- Join Date
- Feb 2006
- Location
- Idaho Falls, Id
- Posts
- 1,342
Originally Posted by rusty68
Nice, I bet your buddies are kicking themselvesTraven
02-13-2010 #26
Registered User
- Join Date
- Nov 2008
- Location
- Lawrenceburg, TN
- Posts
- 4,086
getting some headers on
First i wrapped them with Thermo Tecs exhaust wrap, and spayed them with there High heat paint and Spectre wire lock exhaust bolts
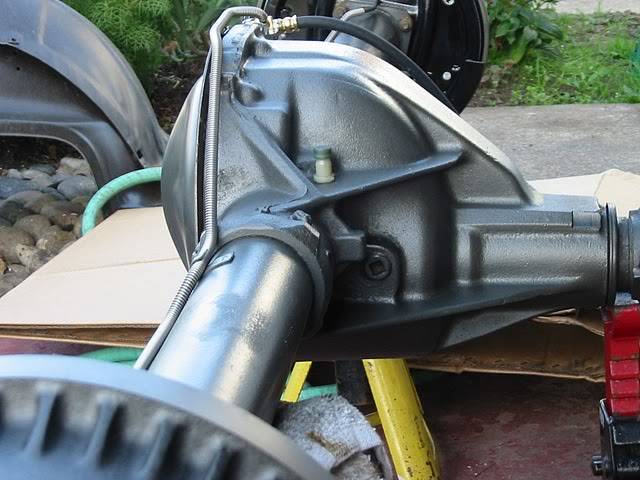
I cleaned up the rear end with new gaskets bearing, Axel seals and brake lines, for now (mock up) I will leave the rear drums till I get a rear disc kit together

02-14-2010 #27
Registered User
- Join Date
- Nov 2008
- Location
- Lawrenceburg, TN
- Posts
- 4,086
Now I am ready to put on the Hotckis rear leafs....you have to drill out everything for the huge 5/8 U-bolts


and while i was getting the rear together I found some sweet rims from a vette...these will look sweet

and my front suspension is coming together nicely also Using The hotchkis front coils springs with KYB GR-2 shocks

and the hotchkis Tie rod ends and sleeves to keep every thing stiff

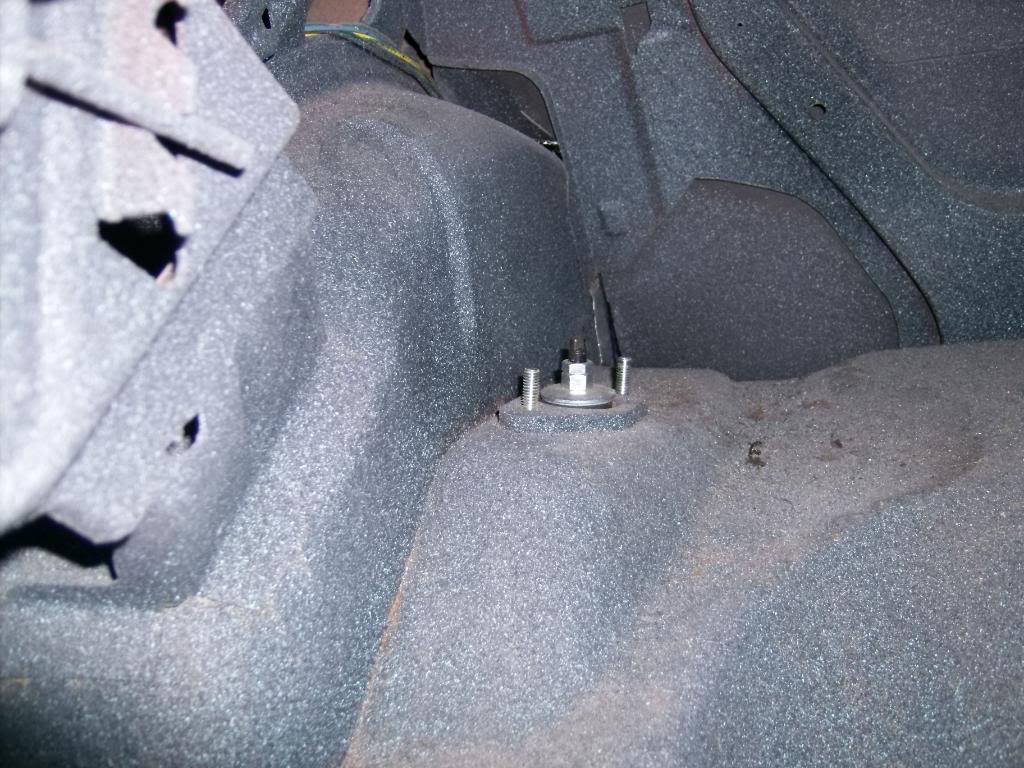
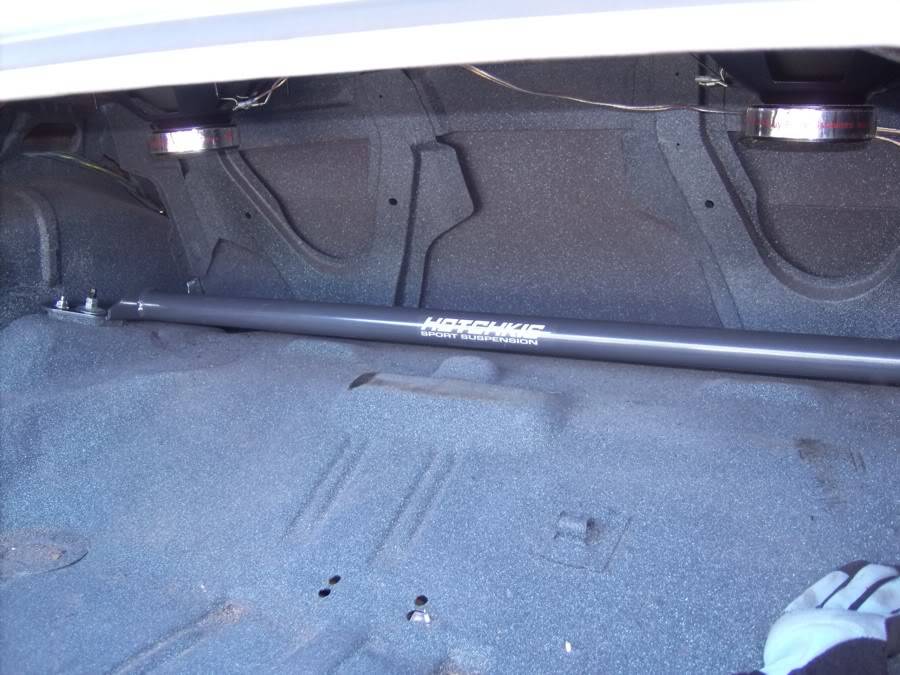
and added for the fun of it the rear hotchkis rear shock tower brace

super simple new shock bolts

now lay in trunk and bolt it in

Last edited by Rod; 02-14-2010 at 07:27 PM.
02-14-2010 #28
Registered User
- Join Date
- Nov 2008
- Location
- Lawrenceburg, TN
- Posts
- 4,086
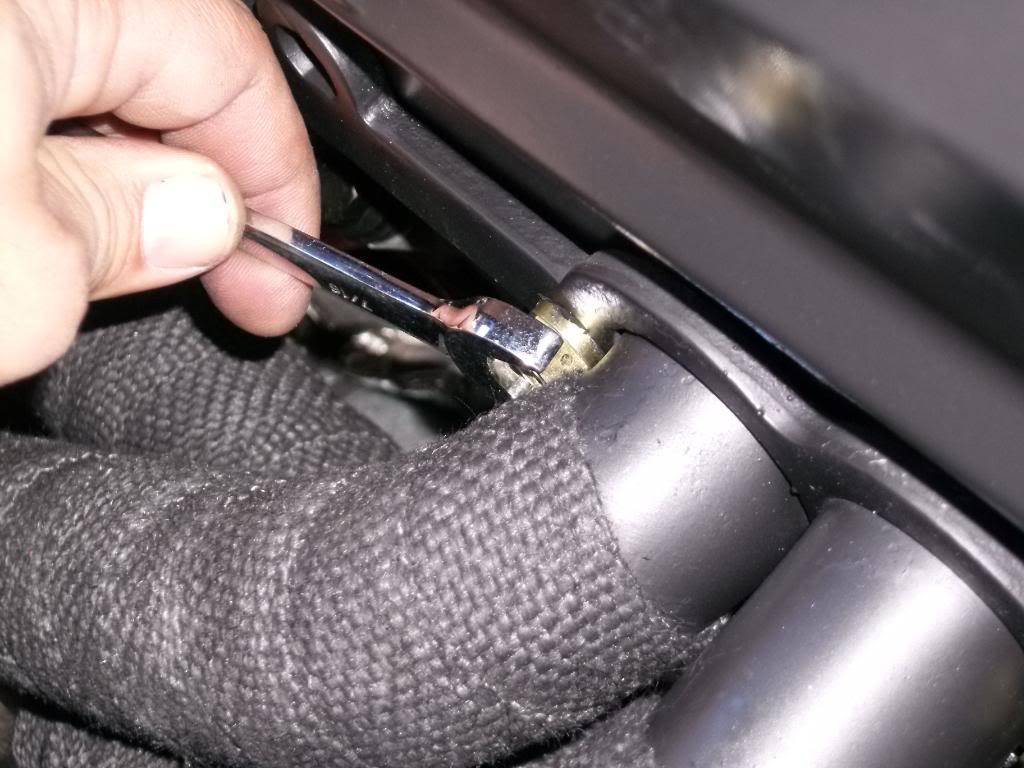
I got the rear disc brakes finally
Pull the pumpkin cover first
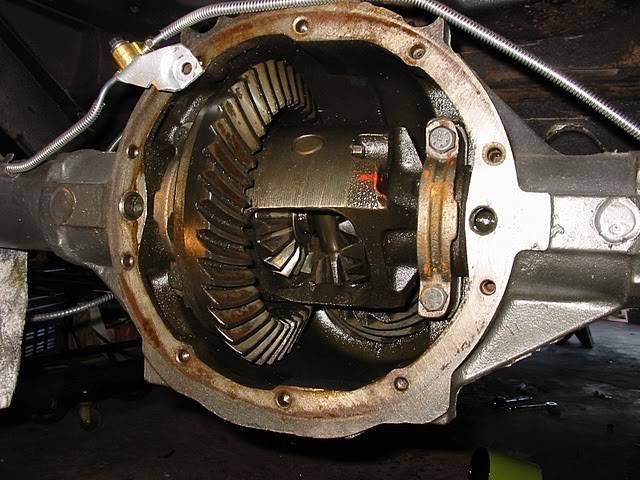
rotate the diff to find the retainer bolt

using a small (full circumference) brake bleeder wrench loosen

remove the bolt and set in a safe place

slowly remove the diff pin


now fish out the C-clip Axel retainers

and remove the axel

perfect time to replace rear bearings and rear seals

now remove the 4 bolts holding the rear drums in place

add rear brake brackets and rotor

add the caliper

reroute brake line and add retainer

add E-brake lines
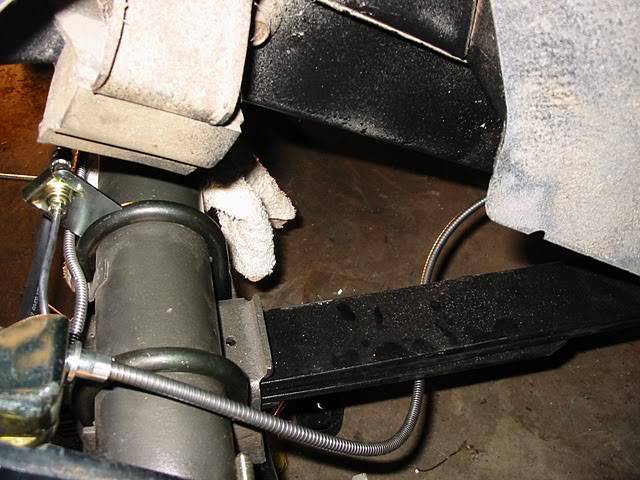
doesn't get any easier than that!!
04-07-2010 #29 Registered User
- Join Date
- May 2002
- Location
- Northern California
- Posts
- 10,716
Great project, nice to see everyone is willing to give a hand. Originally Posted by Nor-Cal Speed
Any new updates Rod?
Also what is the source of the AL linkage threaded tubes?
thanks, VinceMrQuick ΜΟΛ'ΩΝ ΛΑΒ'Ε
08-19-2010 #30
Registered User
- Join Date
- Nov 2008
- Location
- Lawrenceburg, TN
- Posts
- 4,086
Update to my build thread
over the last few months I have put my car back on the to do List!
so carpet went in first carpet from Trim parts

then the seat frames from Scat/ Pro car

a rear aluminum diamond plate safety wall

and sound deadened from Thermo tec
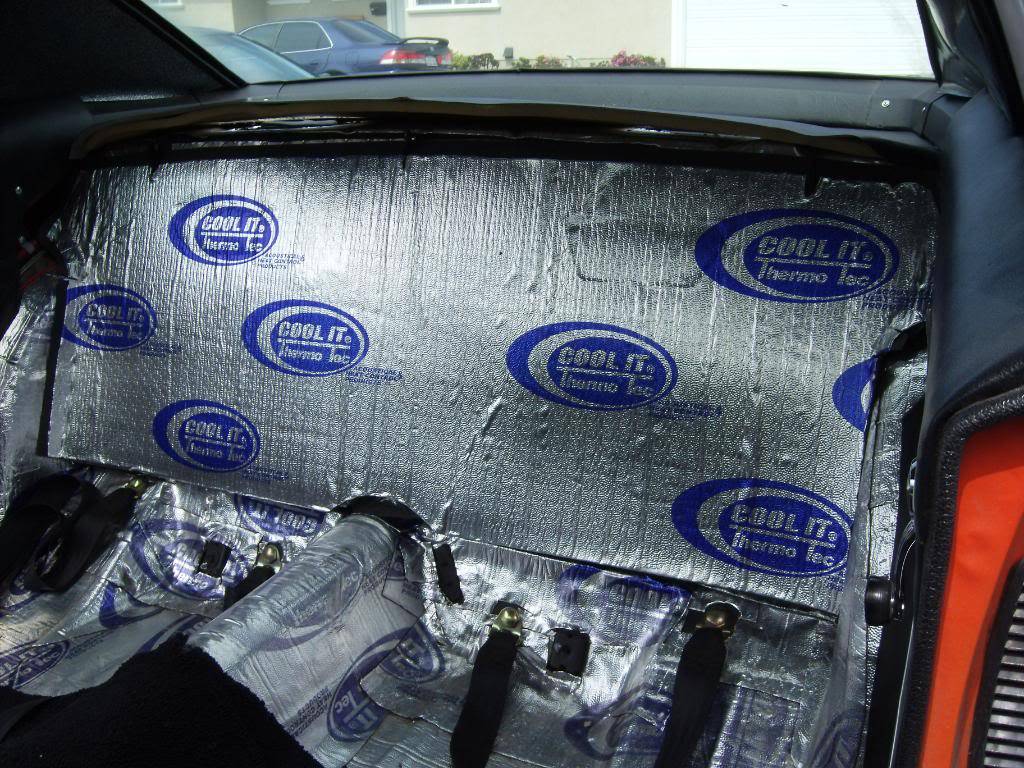
here's the Fast controller located under the seat for the air/fuel gauge

and then the seats from Scat/ Pro car

08-19-2010 #31
Registered User
- Join Date
- Nov 2008
- Location
- Lawrenceburg, TN
- Posts
- 4,086
Heres the motor 1.0 That I built in my garage, valve seat went very wrong with it time to update

pulled of the heads to install new ones!

clean up the fire wall

new heads from Patriot Racing

Comp cam rockers

Comp cams push rods

putting it together

In this picture I'm testing a new Distributor-less ignition I ran it a few auto cross events but it need some dialing of the computer

08-20-2010 #32 Registered User
- Join Date
- May 2009
- Posts
- 379
coming along nicely, what cam is in the engine?
Curious, as I might want to match the cam to the heads/rocker system that you upgraded to.
08-20-2010 #33
Registered User
- Join Date
- Aug 2008
- Posts
- 167
Quick question why did u remove the carb and switch to a different one?
08-20-2010 #34
Registered User
- Join Date
- Nov 2008
- Location
- Lawrenceburg, TN
- Posts
- 4,086
I had the demon Jr 500 and I couldn't get that thing to stop running rich, I rejetted it many times and still ran rich and sputtered, switched to a edelbrook 650, also tried a 750 edelbrook and the airflow meter ran close to optimal with the 650 with a mild rejett Originally Posted by 96t/acj
08-20-2010 #35
Registered User
- Join Date
- Nov 2008
- Location
- Lawrenceburg, TN
- Posts
- 4,086
now that the heads are done the owner of Gotelli's Speed Shop (Teddy) swung me a sweet deal on an aluminum radiator from BeCool so out with the old and in with the new


I shot the new one with radiator black from eastwood

the old radiator weighs nearly 30 pounds the new one is just 13 pounds!


08-21-2010 #36
Registered User
- Join Date
- Nov 2008
- Location
- Lawrenceburg, TN
- Posts
- 4,086
HEY? what happen to all my pictures? oh now there back
08-21-2010 #37 Registered User
- Join Date
- Aug 2004
- Location
- OK
- Posts
- 767
The car looks great! It sure has came a long way.
08-21-2010 #38
Registered User
- Join Date
- Nov 2008
- Location
- Lawrenceburg, TN
- Posts
- 4,086
Thanks Andrew!!! Originally Posted by Andrew McBride
08-21-2010 #39
Registered User
- Join Date
- Nov 2008
- Location
- Lawrenceburg, TN
- Posts
- 4,086
adding a Heater
I wanted a heater since I drive the car every day to the shop so i found a dual inlet for the heater lines
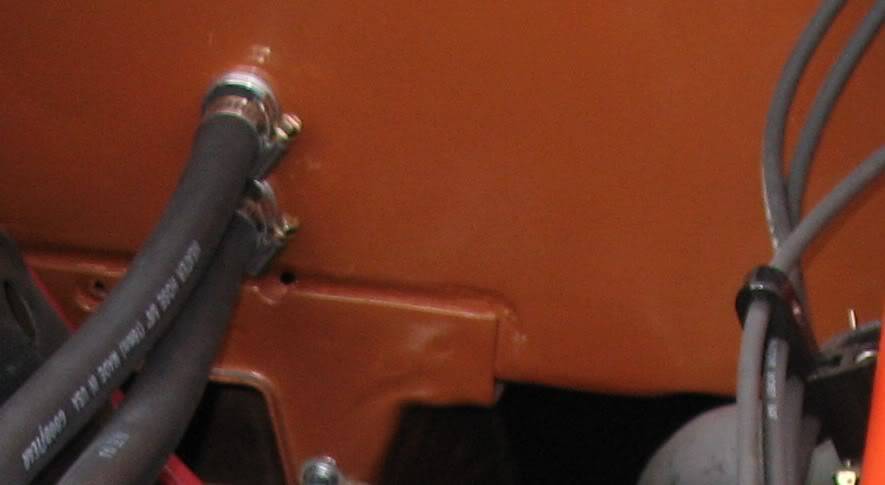
and then I ordered a under dash jeep heater from summit and ran some flexible hose to test it before I seal the heater ducts together

here's the heater lines coming thru the firewall

I placed the three speed switch in the cigarette lighter hole and used the factory bezel! for a cleaner look

and heres how the center dash looks

08-22-2010 #40 New to Pro-Touring
- Join Date
- Apr 2008
- Posts
- 73

Is it possible to get a pic from the rear showing the shocks? I'm curious on the emergency brake wire routing related to the shocks. I did this last year and had terrible problems with the wire running straight into the shock. Thanks

 Reply With Quote