
Results 1 to 20 of 89
-
03-25-2013 #1
 Registered User
- Join Date
- Mar 2008
- Location
- Janesville, WI
- Posts
- 566

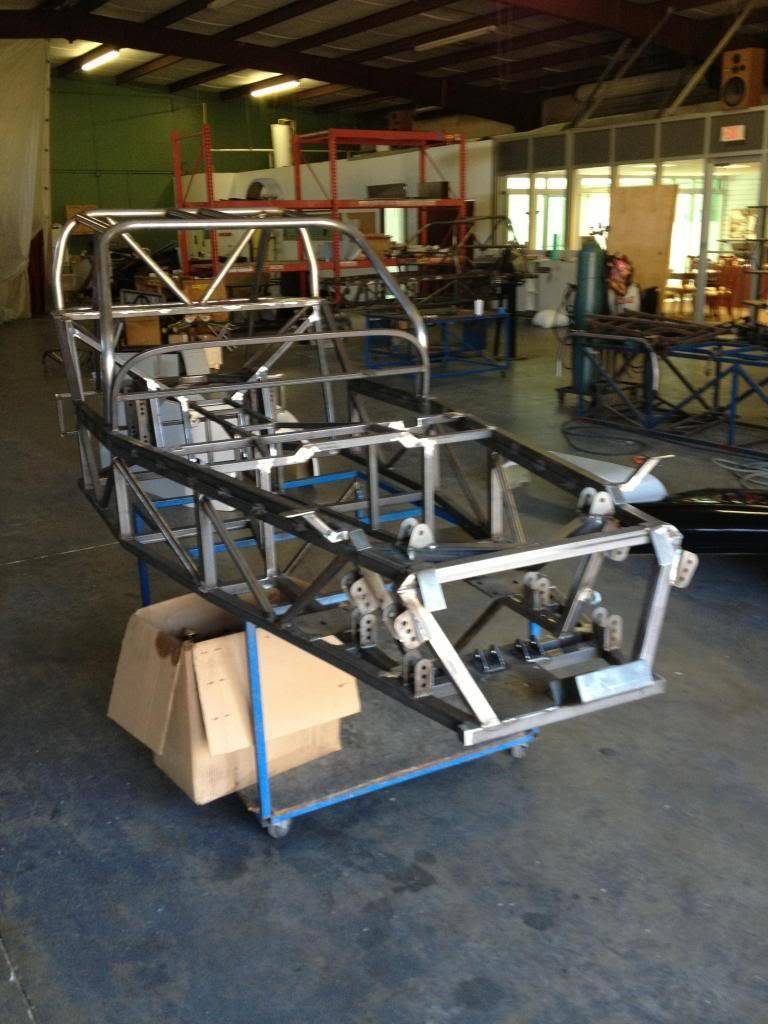
1,700 pounds and LS power!! Brunton M-spec
My first exposure to a Brunton Stalker was at a track event, several years ago. The particular car I saw was a Stalker with an LS3. It set fast time of day. It was light, simplistic, and it was powered my my favorite breed of engine. I was racing an LS1 powered 02 Z-28 at the time (the reason for my screen name). I loved the broad power band of the LS1, but wished I didn't have to carry all the Camaro's weight around corners and into braking zones. The Stalker was a car that was less than 1/2 the weight of my Camaro (3,600 pounds w driver), easier to work on, and undeniably faster. I was smitten.
After a couple years of messing with other projects, and even dabbling in off-road Jeeps and UTVs, it was time to get back to the road course. I looked into Cobra replicas, but after digging deeper into the Stalker idea, and speaking directly with one of the owners, Glen, it was clear that the Stalker better fit my wants. And after speaking with Glen, I knew their new M-spec chassis was the way to go. GM LS powertrain, independent suspension at all corners, and a real roll bar that looked like it belonged there. The canti-lever suspension was a huge deal to me. Plus, it is made right here in the good old USA!:flag:
The Classic Stalker uses as solid rear axle (out of an S-10) and front spindles form an S-10 or G-body. These parts are hung on a fabricated chassis on fabricated control arms. The new M-spec uses a CTS rear diff with Miata uprights. Front spindles on the M-spec are also Miata pieces. They good news is that makes consumables like bearings and rotors cheap. And the geometry of the Miata stuff is quite good. Though the pieces seem a bit small for us muscle car guys, remember they only have to suspend and stop 1/2 the weight of even an extremely light muscle car.
We worked out a deal and I flew down to Florida, rented a Penske truck, and met the Mineharts in person. It was great dealing directly with the owners of the company. Glen and Scott are enthusiasts, who know their stuff, and seem to enjoy sharing their product w like minded car nuts. They really made the whole purchase and pick up easy and personalized.
I got to tour the shop, and more importantly got a ride in an M-spec! A quick ride shotgun w Scott made it clear that I had made the right choice. I've had some fast cars, and have had friends w even faster cars. In fact I had just got to drive a friend's new ZL1 Camaro. This Brunton thing blew everything else out of the water! At the time their test car was running a stock, truck 5.3 liter LS engine, right down to the truck cam (though w LS1 intake and headers). My mind was struggling to comprehend what a 6.2 liter LS with say, 500 hp could do!
I couldn't wait to turn my new bare chassis into a running car to find out!!
We strapped it into the cube van, and my brother and I road tripped back to the frozen tundra of Wisconsin.
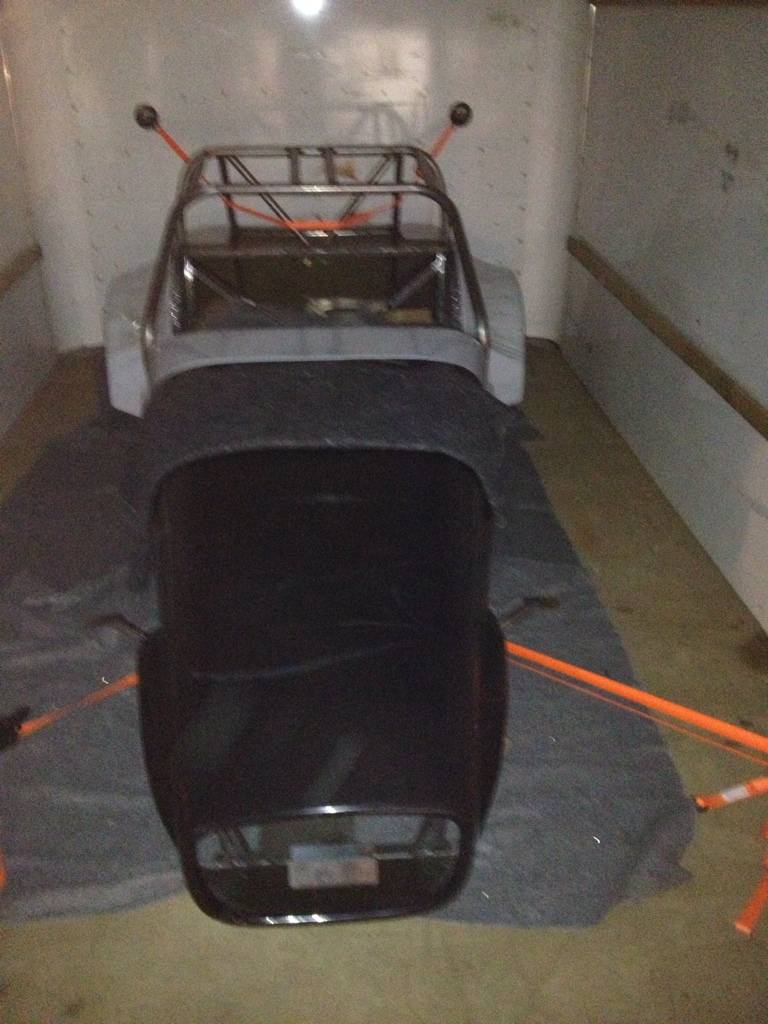
Picking it up in December meant family commitments kept me from getting started right away. Having it set idle in the clutter of the garage was difficult.

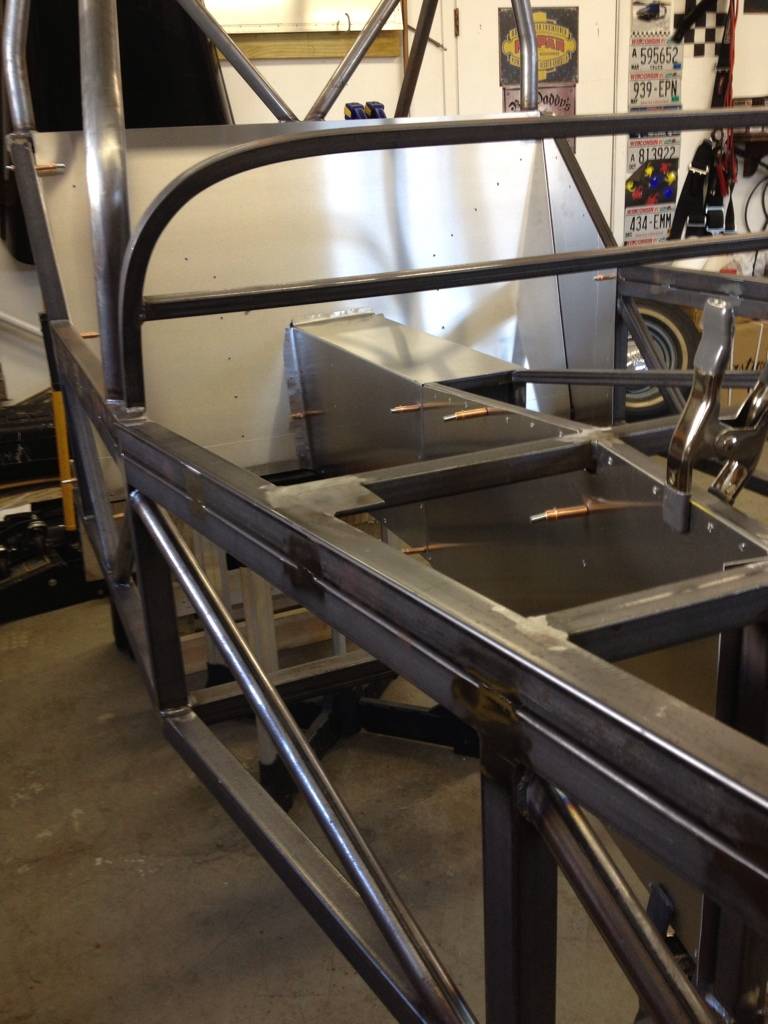
I spent what felt like forever organizing the garage and hanging the body work up on the walls, safe and out of the way. Eventually, I was able to start fabricating some aluminum panels.
Step one, flip it over, and build the floor:
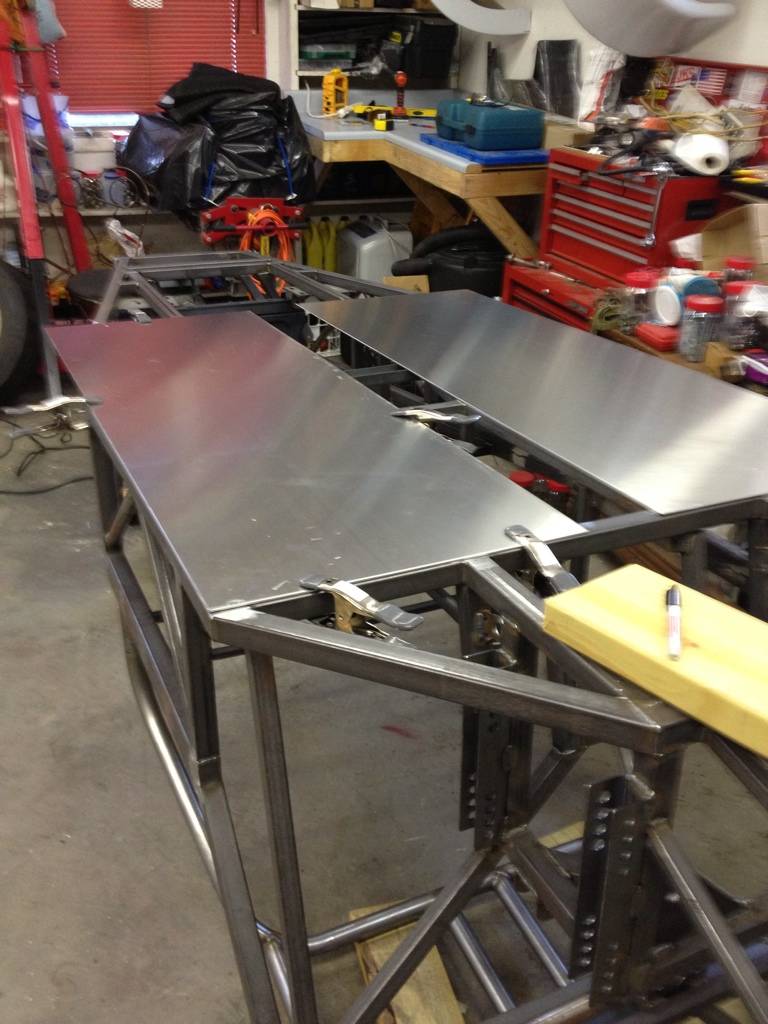
Working with the aluminum was well within the grasp of your basic, do-it-your-selfer.
The pretty bare aluminum and Clecos really made me feel like some pro race car builder. LOL
As a testament to just how light the Brunton chassis is, after building the floors, I was able to just roll the chassis over, and pick it up (one end at a time) and set it on saw horses!

Building the panels just takes patience and basic tools like a jig saw, drill, and clamps. Brunton has videos available to walk a new builder through the process, and are there to answer emails and even phone calls to help you though.
I've had a couple of friends helping me out from time to time, which really helps keep the motivation up. Just focusing on one task or panel at a time keeps you from getting overwhelmed.
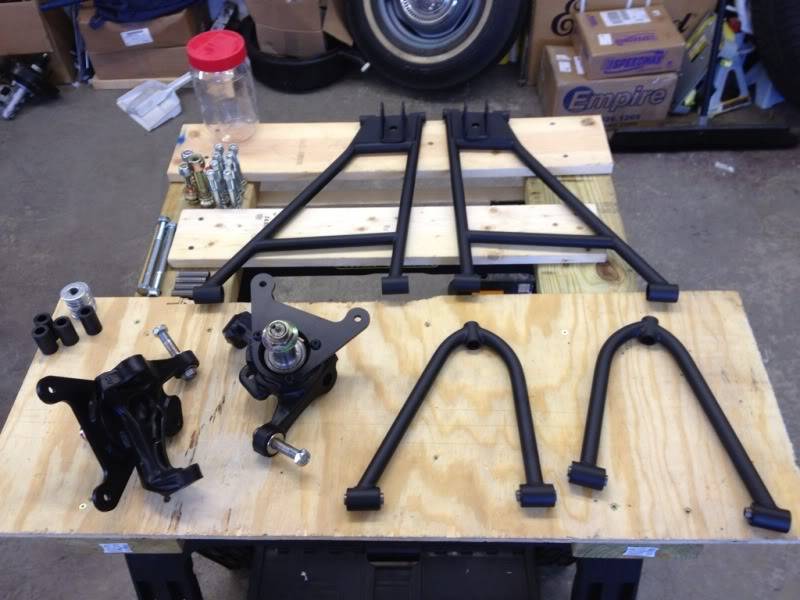
I bounced around a little and mocked up the front suspension:
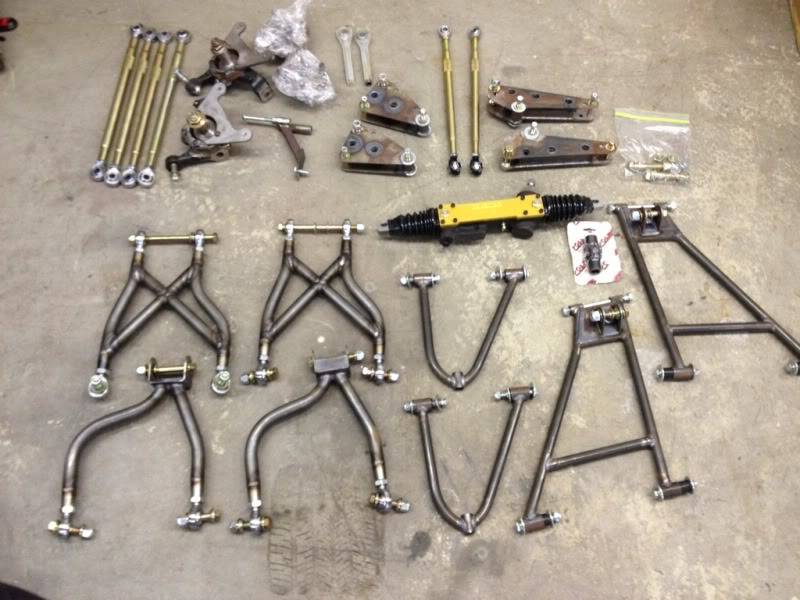
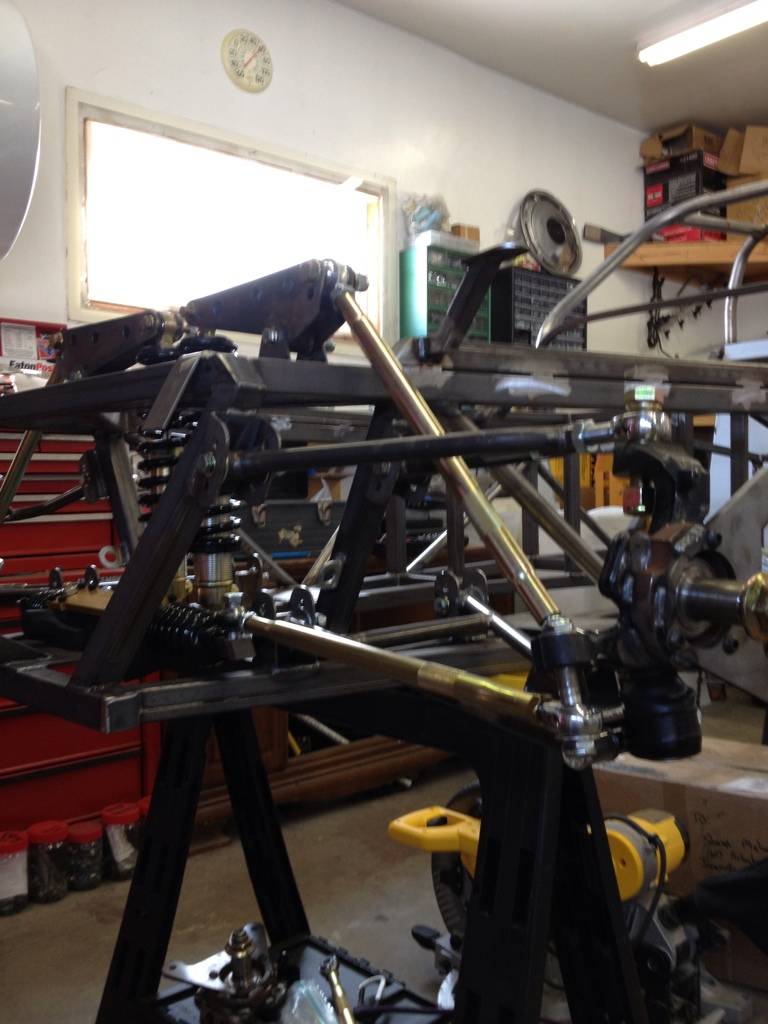
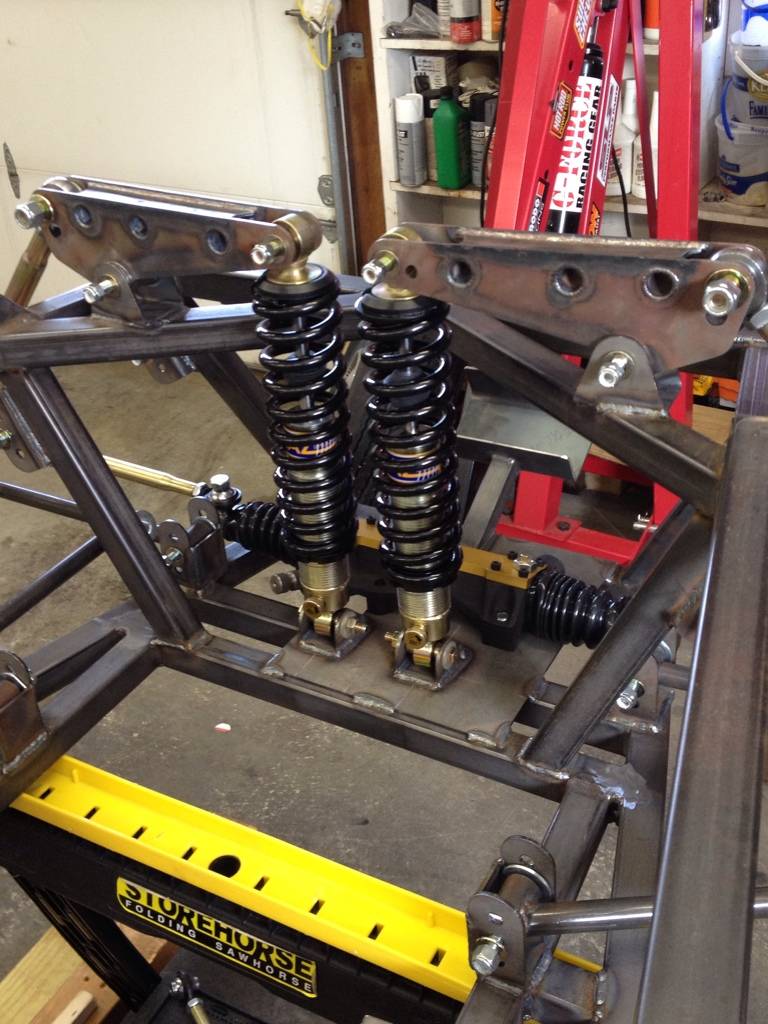
The canti-levers are so well fabricated, I cannot bring myself to paint them!
But I took the rest apart and another friend (networking is key) powder-coated the control arms and spindles.
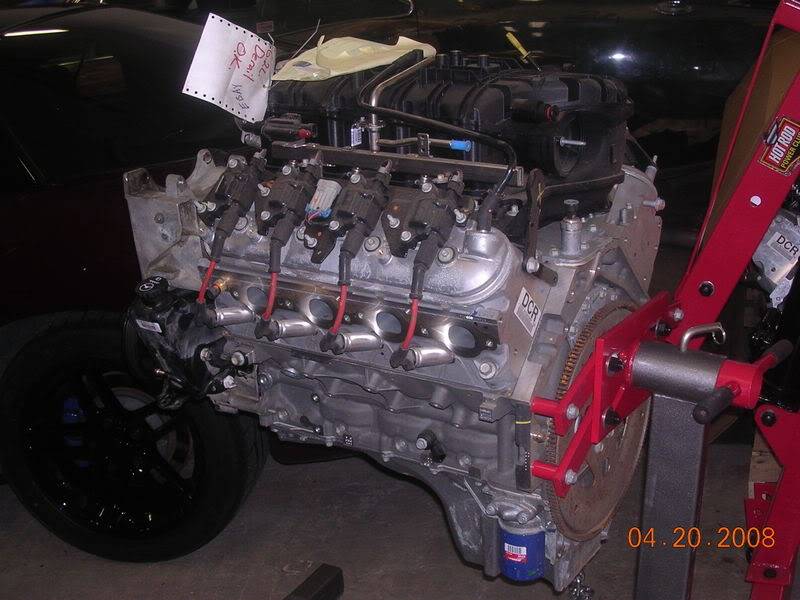
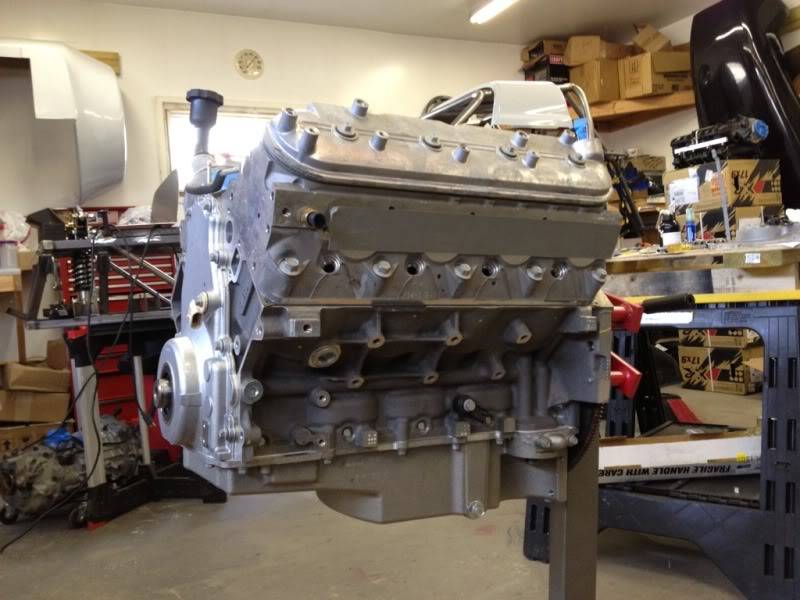
Wow, according to the date stamp on my photo, this 6.2L L92 has been waiting patiently on a stand for almost 5 years now!! For anyone unfamiliar w the L92 it is essentially the truck version of the LS3. It has the same aluminum block and cylinder heads (though w solid rather than sodium filled valves). The L92 uses VVT (variable valve timing) via a cam phaser. It makes 403 hp in stock form w truck accessories.
Due to the cramped nature of a Se7en chassis, the VVT had to go. That extra 1/2 inch that the cam phaser took up behind the water pump was just to much. The good news is that opens up pandora's box because a cam swap is necessary. I decided to go with a stock LS9 (the ZR1 Corvette's supercharged engine) cam. It is shockingly low priced ($120) and is similar in specs to an LS7 cam. Two friends of mine (andrewb70 and Bow Tie 67) are running LS7 cams in their L92 swapped muscle cars and got 420 RWHP (that should be more than 500 HP at the crank). I also picked up some Texas Speed valve springs.
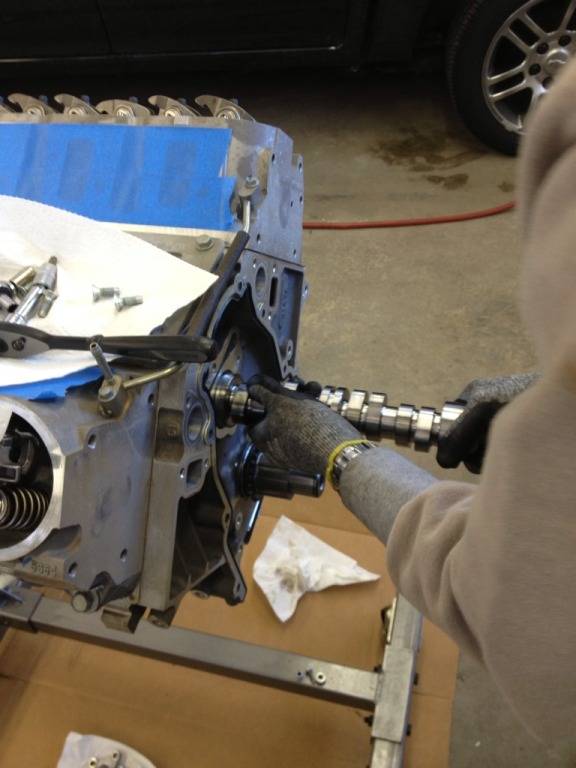
Bow Tie 67, came up to offer his experience w internal engine work.

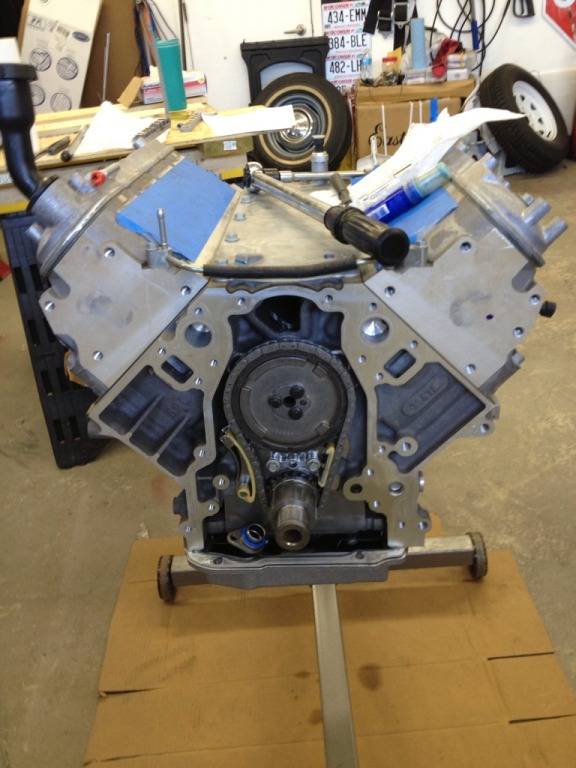
Here you can see the cam phaser with the timing cover removed:

Sadly, we were not able to put a cam back in. I had purchased a stock LS7 cam. But when I opened the box, it was not a GM cam, and it was damaged. So, I'm waiting on the new LS9 cam to arrive.
We were able to swap out the valve springs.

And we swapped out the stock rod bolts for Katech ones. This is a supposed weak point of LS engines, so I figure $200 on extreme quality rod bolts is reasonable insurance.
I also installed the Corvette style oil pan (loosely) and pick up. The engine will get a Corvette harmonic balancer and water pump also to clear the chassis.
Side note, I ordered LS9 push rods and timing chain with the cam. Further research shows them to be the same GM part numbers as the L92 timing chain and push rods. Looks like GM puts the good stuff in the truck engines too!
-
03-25-2013 #2 Registered User
- Join Date
- Jan 2013
- Location
- Mississippi
- Posts
- 156
Wow. I will be keeping up with this. Thanks for posting. Looks great so far.
03-25-2013 #3 -Moderator/Sponsor-
- Join Date
- Apr 2001
- Location
- The City of Fountains
- Posts
- 15,975
Hey Shaun,
Glad to see this posted here.
So what was the final verdict on the LS9 cam base circle? From the sound of it, the LS9 and the L92 share pushrods, which tells me that the came base circles are the same. Right?
Andrew1970 GTO Version 3.0
1967 Cougar build
GM High-Tech Performance feature
My YouTube Channel Please Subscribe!
Instagram @projectgattago
Dr. EFI
I deliver what EFI promises.
Remote Holley EFI tuning.
Please get in touch if I can be of service.
"You were the gun, your voice was the trigger, your bravery was the barrel, your eyes were the bullets." ~ Her
03-25-2013 #4
-Moderator/Sponsor-
- Join Date
- Apr 2001
- Location
- The City of Fountains
- Posts
- 15,975
Tip of the day: If you have the engine on a stand, you can flip it upside down and not sweat the lifters potentially falling down as you are swapping the cam. Originally Posted by subtlez28

Andrew1970 GTO Version 3.0
1967 Cougar build
GM High-Tech Performance feature
My YouTube Channel Please Subscribe!
Instagram @projectgattago
Dr. EFI
I deliver what EFI promises.
Remote Holley EFI tuning.
Please get in touch if I can be of service.
"You were the gun, your voice was the trigger, your bravery was the barrel, your eyes were the bullets." ~ Her
03-25-2013 #5
Registered User
- Join Date
- Mar 2008
- Location
- Janesville, WI
- Posts
- 566
Andrew, glad you saw it. I was about to send you a PM. I did not get an official answer on the base circle, but made the same conclusion based on same rockers and push rods. One odd thing though is the LS9 listed only one part number for rocker arms, while the L92 has two (you can see they are different - one matches the LS9). Not sure what is up with that, or if it was a database error... Originally Posted by andrewb70
Knowing the LS9 uses the same push rods, do you think I should trust them, or still get hardened push rods? I know there is room for improvement, but they would kind of be a cheap "fusible link" if something went wrong.
Did you run the stock timing chain set up? I have read some debate on which of the two factory types is better on Tech (tensioner vs dampener). The LS9 and L92 use the same style, but different from the LS2,3 etc.
Originally Posted by andrewb70
Good tip! Matt and I were discussing how you can spin the cam, and the plastic retainers hold the lifters up. But then, I'm not the trusting kind, so upside down would have been a good safety measure.
03-26-2013 #6
-Moderator/Sponsor-
- Join Date
- Apr 2001
- Location
- The City of Fountains
- Posts
- 15,975
Both the L92 and LS9 should list two different part numbers for the rocker arms, since the intake and the exhaust rockers are different. If the L92 and the LS9 pushrods are the same, I would just run them. Originally Posted by subtlez28
I know I kept the chain, and I think I installed the LS2/3 style dampeners. They were included in the "kit" that I got which had the proper cam gear.
Andrew1970 GTO Version 3.0
1967 Cougar build
GM High-Tech Performance feature
My YouTube Channel Please Subscribe!
Instagram @projectgattago
Dr. EFI
I deliver what EFI promises.
Remote Holley EFI tuning.
Please get in touch if I can be of service.
"You were the gun, your voice was the trigger, your bravery was the barrel, your eyes were the bullets." ~ Her
03-26-2013 #7 Registered User
- Join Date
- Jun 2012
- Location
- South Lyon, MI
- Posts
- 1,217
I am a big Locost 7 fan. I have always been impressed with the Brunton Stalker for its simplicity and use of common donor parts. With the engine you are building, this thing will need to be certified by the FAA.
I am planning to build a Locost 7 from scratch with my oldest son using his V8 Sonoma pickup as the donor.
Cool stuff! I am eager to see how your build turns out.Bill Harvey
Scope Creep - 1974 Nova - https://www.pro-touring.com/showthre...rit-of-America
Family Fun - 1955 Belair - https://www.pro-touring.com/showthre...hter-55-Belair
03-26-2013 #8
Starting The Transformation
- Join Date
- May 2008
- Location
- Toronto
- Posts
- 213

Love it, can't wait to see more progress.
Keith
03-27-2013 #9 Registered User
- Join Date
- Mar 2013
- Location
- Beaufort,SC
- Posts
- 329
Where are you getting your l92 engines from?
03-27-2013 #10
Registered User
- Join Date
- Mar 2008
- Location
- Janesville, WI
- Posts
- 566
Thanks! Originally Posted by keithq69
They actually used to build Escalades, Tahoes, Denalis and medium duty GM trucks here in Janesville. While shopping for a late model LS engine (now almost 5 years ago) I found out the local, late model salvage picked up several L92s from GM. A freight car derailed and they bumped into each-other damaging small plastic parts and intakes. I sold off a few to members here and on Tech. I kept one for me. I had hoped to keep the VVT (new at the time) and put it in my Buick. But, I've had enough of it sitting on a stand. Time to use it! Originally Posted by no go nova
My powder coater dropped off some more of his work. Engine mounts, rear control arms, and the fabricated piece to mount the master cylinder (reversed):
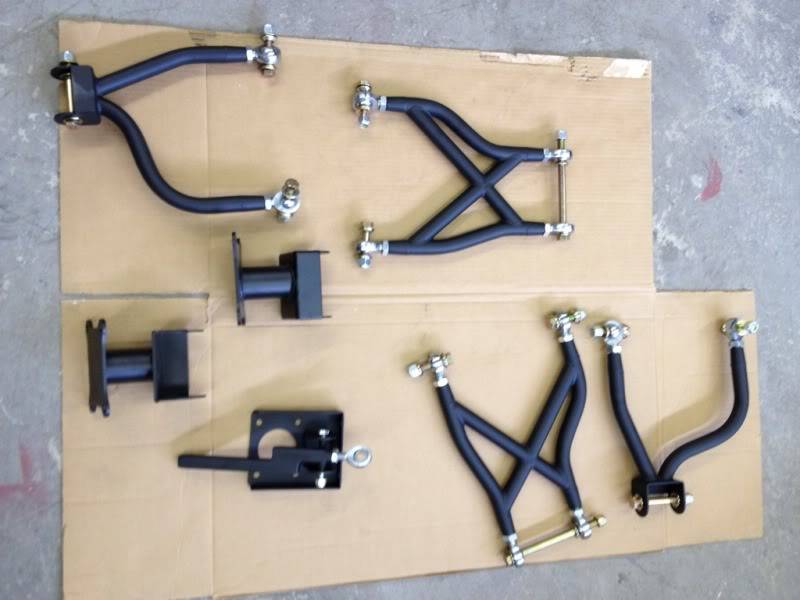
I sent him off with the pushrods and tie rods. They are gold anodized, but I have decided to black out most parts, leaving the fasteners as is for contrast.
A friend of mine who has been a huge help dropped over today. We made some progress. It is starting to look like a car!

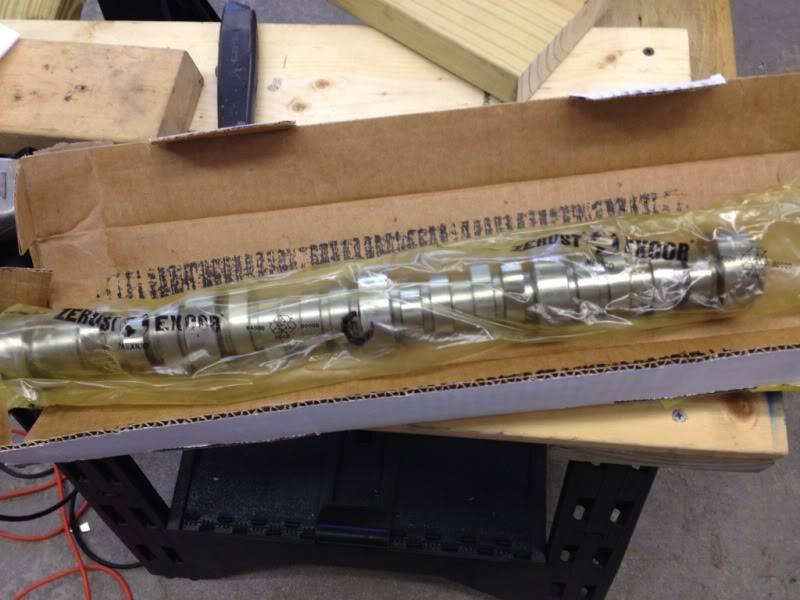
I also got some GM parts in. My LS9 cam, timing chain and pushrod...
I was surprised to see the timing chain was made in France of all places.
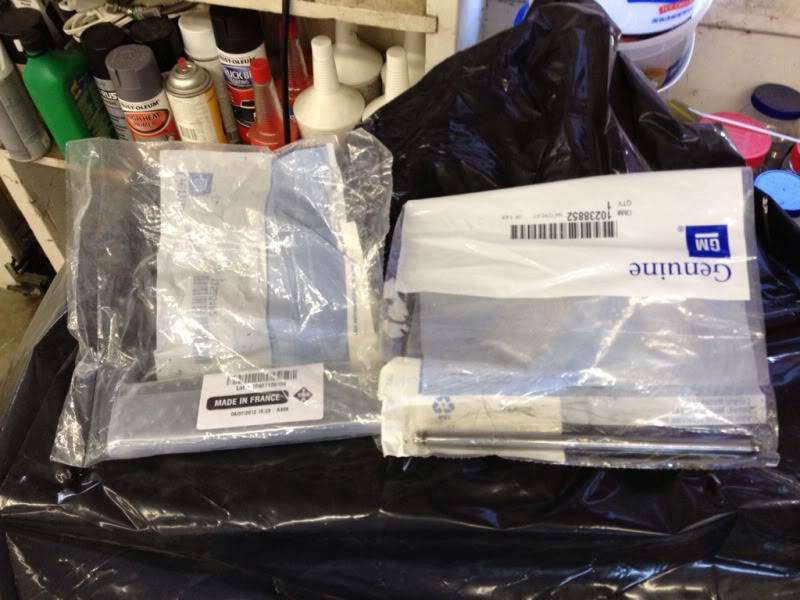
I was more surprised that ordering "PUSH RODS" at the discounted price of $15.29 netted me exactly one push rod! I thought it was too cheap to be a set of 16, but also to much to just be one. Especially considering the description label of "push rodS". Not a big deal though since I found out my L92 push rods are the same part number as the LS9s.
Hope to slap in the LS9 cam soon, and button up the engine!
To that end. Can someone advise what the substance is called that GM puts in the corner of the gaskets? It is an off white and stays tacky, sort of like plumbers' putty. Though I realize thats not what it is.
03-27-2013 #11
Registered User
- Join Date
- Mar 2008
- Location
- Janesville, WI
- Posts
- 566
Thanks! Originally Posted by cornfedbill
Building a Lotus 7 from scratch would be a really fun project. I'm betting the V-8 Sonoma is a lot of fun already! Put the power-train in what I like to think of as a T-bucket that handles... Now that is hot rodding!
03-28-2013 #12
-Moderator/Sponsor-
- Join Date
- Apr 2001
- Location
- The City of Fountains
- Posts
- 15,975
It's donkey spunk...LOL Originally Posted by subtlez28
I've used black RTV with success.
Andrew1970 GTO Version 3.0
1967 Cougar build
GM High-Tech Performance feature
My YouTube Channel Please Subscribe!
Instagram @projectgattago
Dr. EFI
I deliver what EFI promises.
Remote Holley EFI tuning.
Please get in touch if I can be of service.
"You were the gun, your voice was the trigger, your bravery was the barrel, your eyes were the bullets." ~ Her
03-28-2013 #13
Registered User
- Join Date
- Jan 2012
- Location
- Virginia
- Posts
- 237
This is awesome, can't wait to see the end product!
03-28-2013 #14
Registered User
- Join Date
- Mar 2008
- Location
- Janesville, WI
- Posts
- 566
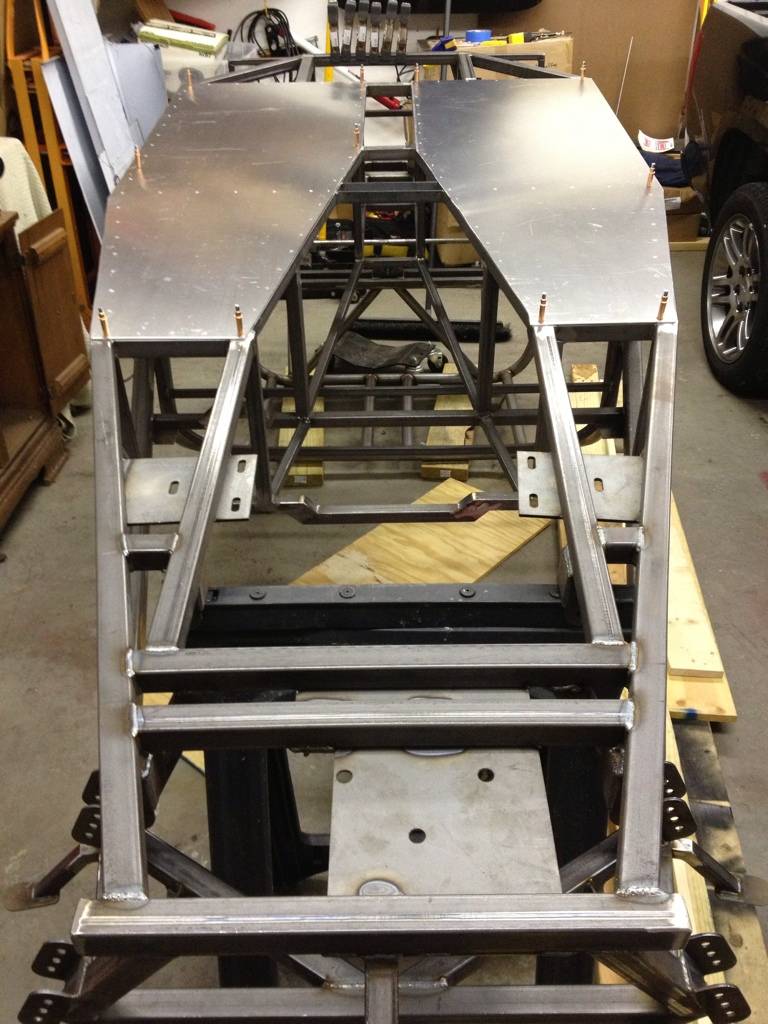
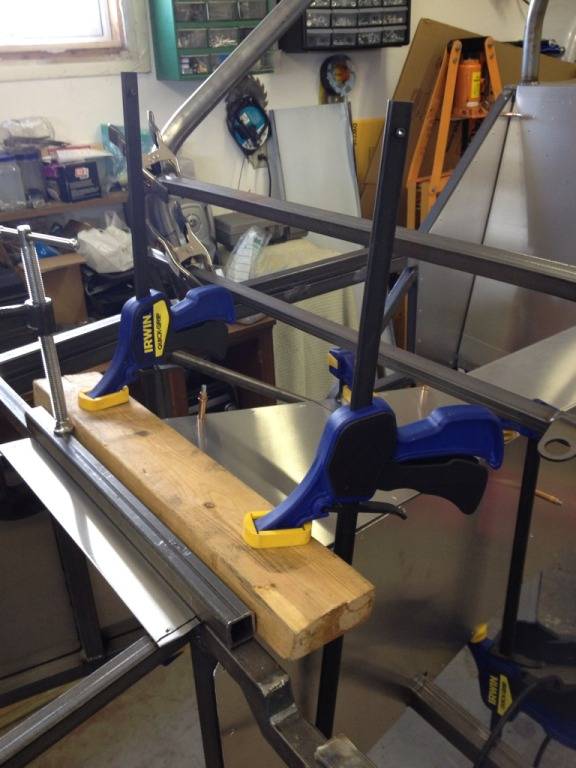
I got a little more work in today. I finished off the top of the trans tunnel. All the clamps, lumber, and square stock are to create the slight bend in the panel as it transitions to flat:
I cut in the rough shape of the scuttle onto the fire-wall shelf, and fit the fiberglass dash to the scuttle's rear side:
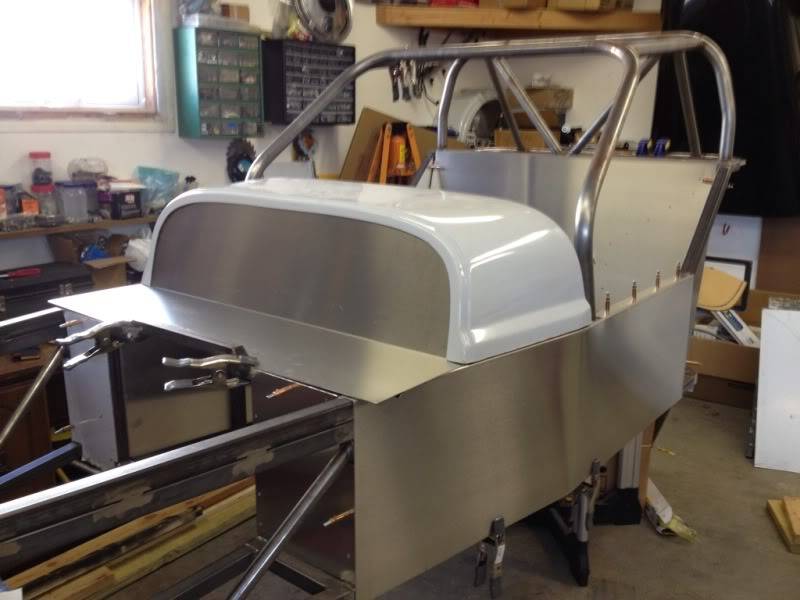
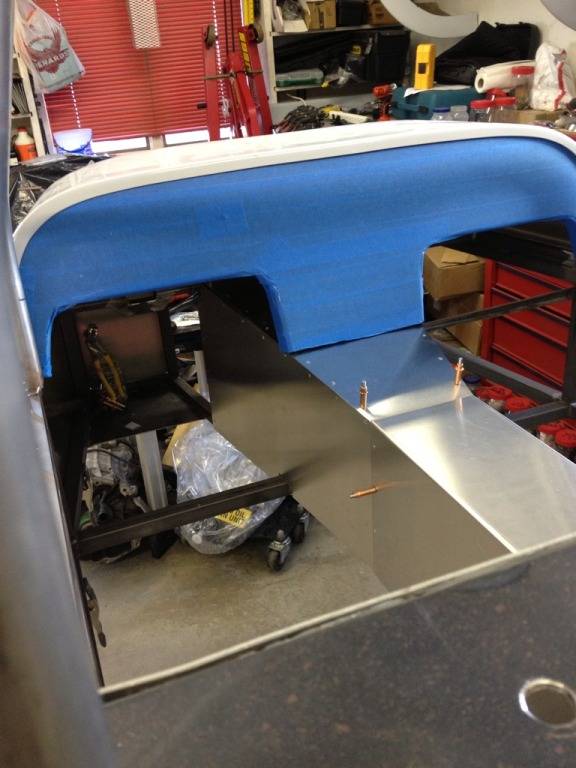
We made up templates out of cardboard yesterday. That really helped making the cuts to the shelf and dash.
I completely wrapped the fiberglass dash in painters tape to avoid scratching it.
I only have a couple more pieces of aluminum to fit (the other side panel, 2 trim pieces that go under the hood, and a simple foot well panel).
Now for the fun part! Test fitting the engine and bolting up the suspension and brakes!
03-28-2013 #15
Registered User
- Join Date
- Mar 2013
- Location
- Beaufort,SC
- Posts
- 329
Lucky you and i cant wait to see this in action.
03-29-2013 #16 Registered User
- Join Date
- Feb 2013
- Location
- Cambridge, MA
- Posts
- 71
I have looked into building an L7 based car a few times. I figure they are a good track day car and good for auto-x also. Will watch your build.
I think it is time pull out some of my old drawing and look it to building one of these myself.
04-06-2013 #17
Registered User
- Join Date
- Mar 2008
- Location
- Janesville, WI
- Posts
- 566
I was able to finish off the aluminum panels.
My LS9 cam came in. I have been asked, why use a cam intended for a forced induction engine. The reason is it is similar in specs to an LS7 cam, and I have friends who have had success w LS7 cams in L92s. The LS7 cam is more aggressive in an actual LS7 though due to its 1.8 rockers (as apposed to the 1.7s on most LS engines). Oh, and it is $120 new as apposed to around $400 for the LS7 or most any LS cam... Can anyone explain that?
LS9 cam specs: 211/230 .558/.552 (or.562 according to some internet sources...) 122.5 LSA
LS7 cam specs: 211/230 .560/.557 120 LSA
LS6 cam specs: 204/218 .551/.547 117 LSA
I re-used the L92 timing chain and tensioner as they were unused and the same part # as the LS9 pieces.
I purchased a VVT delete kit from Texas Speed that has an LS2 front cover, cam sprocket, and cam sensor.
I installed the oil pan w/out a gasket to align the front cover, and sprung for the GM sealant fro the corners.
04-14-2013 #18
Registered User
- Join Date
- Mar 2008
- Location
- Janesville, WI
- Posts
- 566
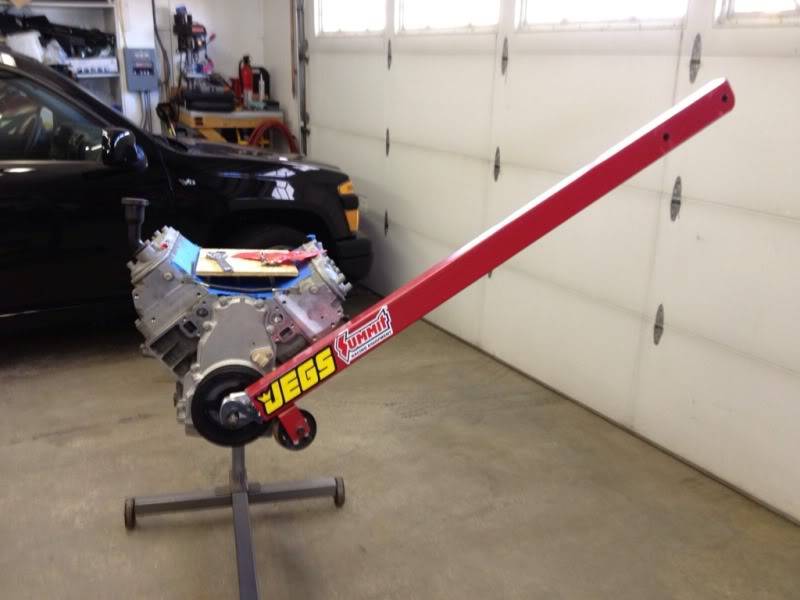
With more gracious help from friends I have pulled the L92 from the stand, and bolted up the bell housing to align the oil pan. As luck would have it my torque wrench crapped out. I'm glad I didn't trust it because it wanted to put down way more than the spec 18 ft/lbs on the oil pan bolts! That would have been a bad day stripping treads out of the aluminum block! But I snugged them down so at least it is aligned, and I picked up 2 new torque wrenches the other day. A 1/2" drive to replace the failed unit and a smaller 3/8" in/lb that will be better suited for most smaller fasteners. Hope the old torque wrench was accurate when we were doing the rod bolts!! I think it was though, just the low torque settings that seem to be an issue...
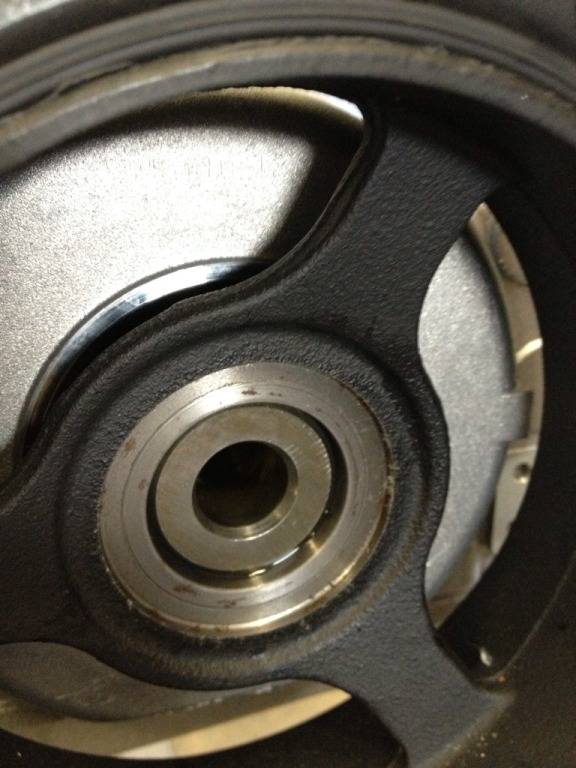
Then we put it back on the stand to install the corvette balancer. I skipped the trick of heating the balancer to make installation easier. That may have been a mistake as installation was quite difficult. In fact I ruined a specialized tool made to install LS balancers. After reading a bit on the inter-webs on how much torque to apply I found it to be 250 lb/ft! So I needed a cheater bar. Problem was the special tool required a large crescent wrench (as I didn't have a large enough open end wrench). So my usual cheater pipe would not fit. After some garage scrounging, we did find a suitable replacement that did fit over the wider wrench handle:
Who knows what that super specialized, high performance cheater bar is?
Lol
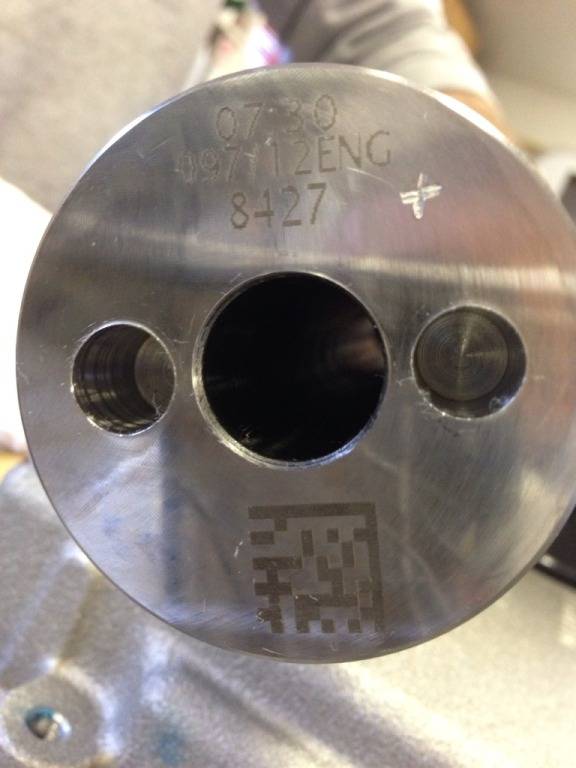
I was not able to research a definitive answer on just when the balancer is on fully. This is how the balancer is in relationship to the flange now. Any input would be helpful here. Needless to say we put a lot of torque to it and even went to the old bolt method after stripping the tool (thankfully not the crank!).
In order to run the LS3 intake in reverse orientation, the oil pressure sensor at the rear of the valley cover needs to be removed. After much speculation on just how to remove the bung and machine the surface flat, I went crude and just saw-zalled and flapper wheeled it down.


Now I have yet another decision to make. Katech makes a slick piece that bolts to the flat surface I have created, putting the stock sender at a 90 degree angle. In fact they already had an adaptor for the other LS engines, but the LS3 intake allows even less room than the others. Luckily for me they just released an LS3 specific part that is even more dramatically machined. The alternative is to drill and tap the cap over the oil filter or buy a pre tapped piece.
I'm currently leaning toward ponying up for the Katech piece to keep the harness relatively stock routed, and using the cap by the filer for an aftermarket sender.
04-14-2013 #19 Registered User
- Join Date
- May 2009
- Location
- Elkhart, IN
- Posts
- 54
Awesome, that thing is gonna be crazy.
Lots of Neon's
Harley NRS
Trx250r
69 Camaro: Under Construction Small Block (Soon LSxT)
http://www.cardomain.com/id/teamvpneon
Used to be known as teamvpneon
04-15-2013 #20
-Moderator/Sponsor-
- Join Date
- Apr 2001
- Location
- The City of Fountains
- Posts
- 15,975
Shaun, Originally Posted by subtlez28
Great progress.
For the oil sender, I suggest finding a part from C5 Corvettes or 4th gen f-bodies. I am talking about the piece that goes by the oil filter. They look like this:
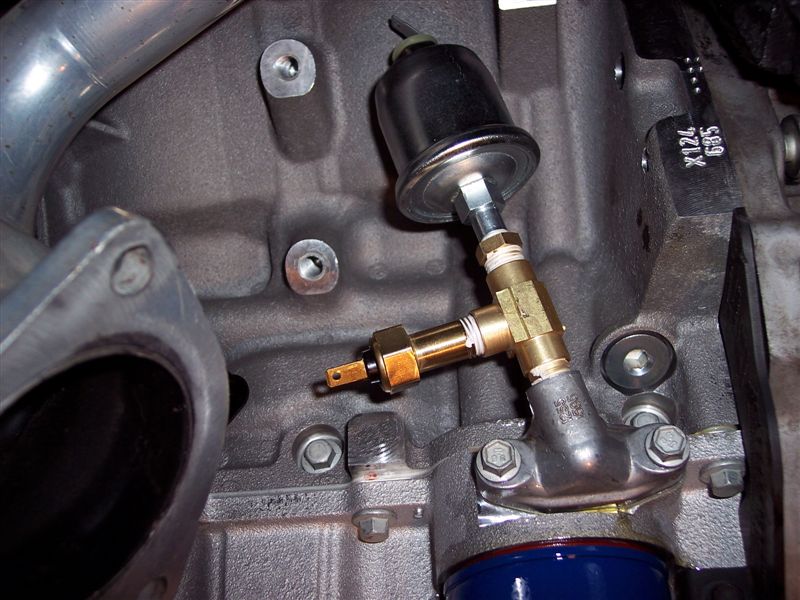
You don't need a t-fitting, unless you want to run a hobbs switch for some reason.
Andrew1970 GTO Version 3.0
1967 Cougar build
GM High-Tech Performance feature
My YouTube Channel Please Subscribe!
Instagram @projectgattago
Dr. EFI
I deliver what EFI promises.
Remote Holley EFI tuning.
Please get in touch if I can be of service.
"You were the gun, your voice was the trigger, your bravery was the barrel, your eyes were the bullets." ~ Her

 Reply With Quote


