

Results 1 to 17 of 17
-
02-16-2013 #1
 Registered User
- Join Date
- Aug 2009
- Posts
- 277
Custom Speedhut Gauges in a 66 GTO
I finally made my decision to go with some Speedhut gauges in my 66 GTO.
I know this has been done before in some way or fashion but I thought that it would be nice to share. I was under a bit of a time crunch to get it done because the car will be heading to the Race Products Expo in Chicago at the end of the month. Speedhut ensured that the gauges would be here on time and they delivered as promised.
Let me start this by saying that my goal of this project was to adapt aftermarket gauges to a factory dash with NO modifications to the dash what-so-ever. I love the look of the recessed gauges, just wanted the function of modern gauges. I chose the Speedhut gauges because I could get them made up in any configuration I wanted, the font I wanted and they would fit the openings in the dash pretty well.
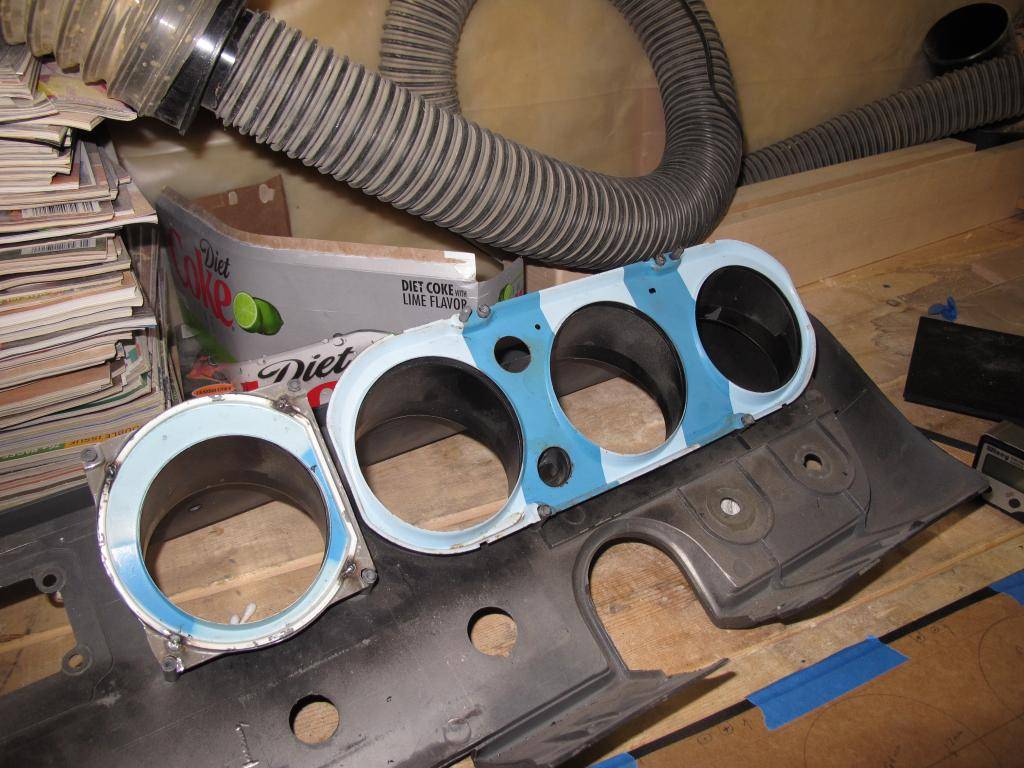
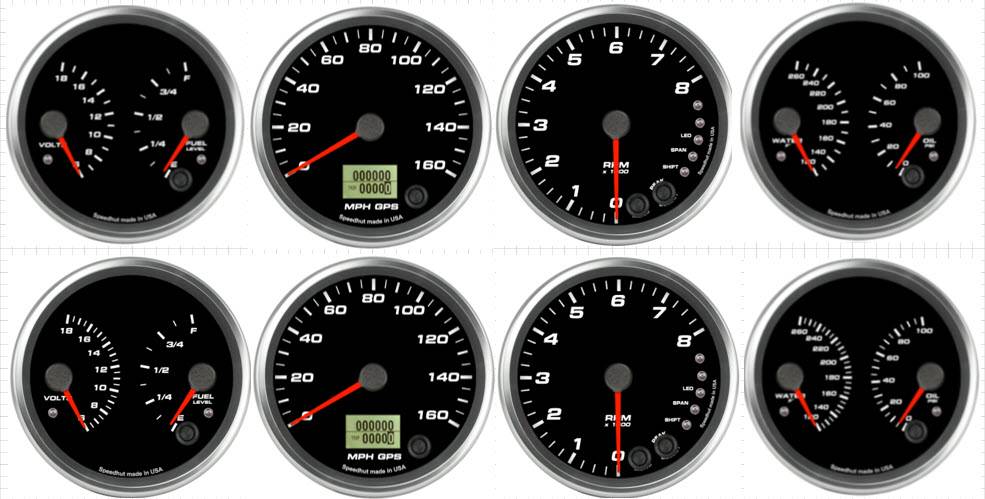
In order to speed up the fabrication part of this project, I had an old dash that I got out of a lemans years back that used for mockup purposes. The back side of 66 GTO dash is slanted and curved, making it tough to mount a standard aftermarket gauge to the back side of the dash. So, I needed a way to adapt this complex curve to fit the flat surface of the aftermarket gauges. I acquired a junk Lemans speedo and clock panel and I gutted out the gauges, saving the intermediate panel that would serve as the means to adapt a flat panel to the back side of the dash. The 4" Speedhut gauges were used because the ID of the Speedhut bezel is 3 1/2", which is the approximate ID of the factory intermediate clock bezel and the factory intermediate gas gauge bezel. The two factory inner gauges (speedo and tach) have a slightly larger opening of 3 11/16". However, because I chose the Speedhut low profile stealth bezels, I predicted that they would blend pretty well together.
I took my dremel and hogged out the existing mounting holes in the intermediate panels and welded some additional pieces to the clock panel to keep it from moving around. I also had to grind some material from the side of the bezel to clear the Speedhut bezels. After some modifications, I media blasted it, primed and used some SEM satin black to match the paint on the dash.
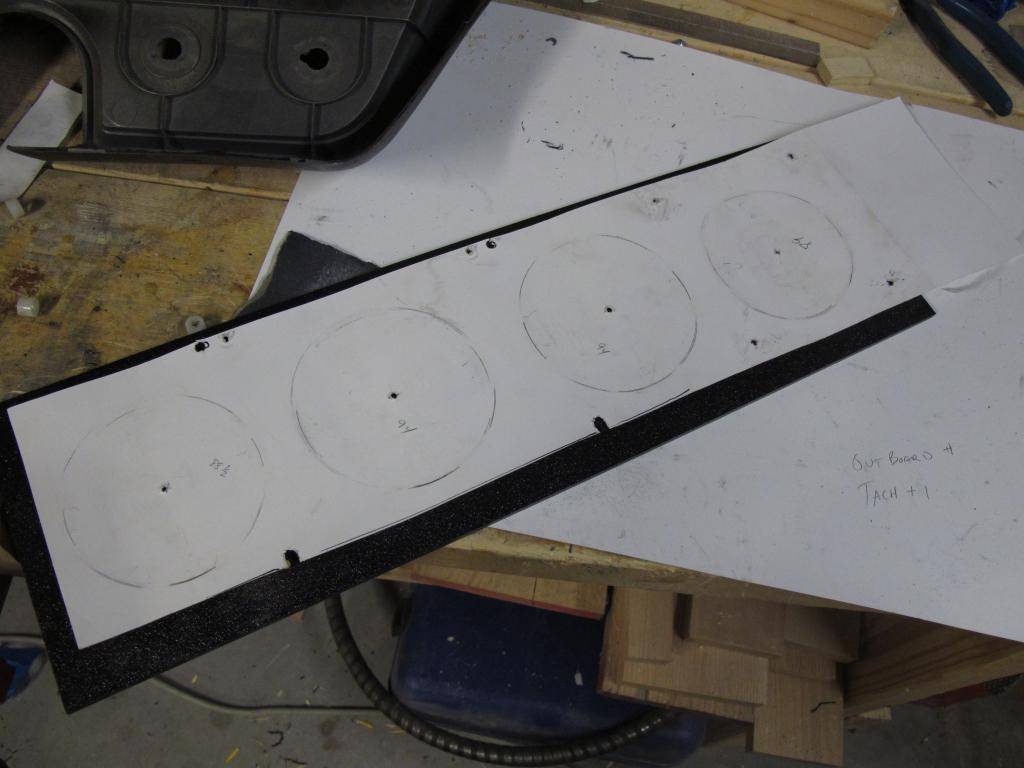
I then acquired some 3/16" ABS plastic from Grainger and cut a piece to fit the needs of the gauges. Using some poster board, I transferred the mounting hole locations from the back side of the dash to the paper and then laid these marks out on the plastic. Because the gauge mounting panel is at an angle in comparison to the mounting bosses on the back side of the dash, I used my drill press to drill the holes at a 15 degree angle. This kept me from having to hog out the holes to accommodate the screws going in at an angle.
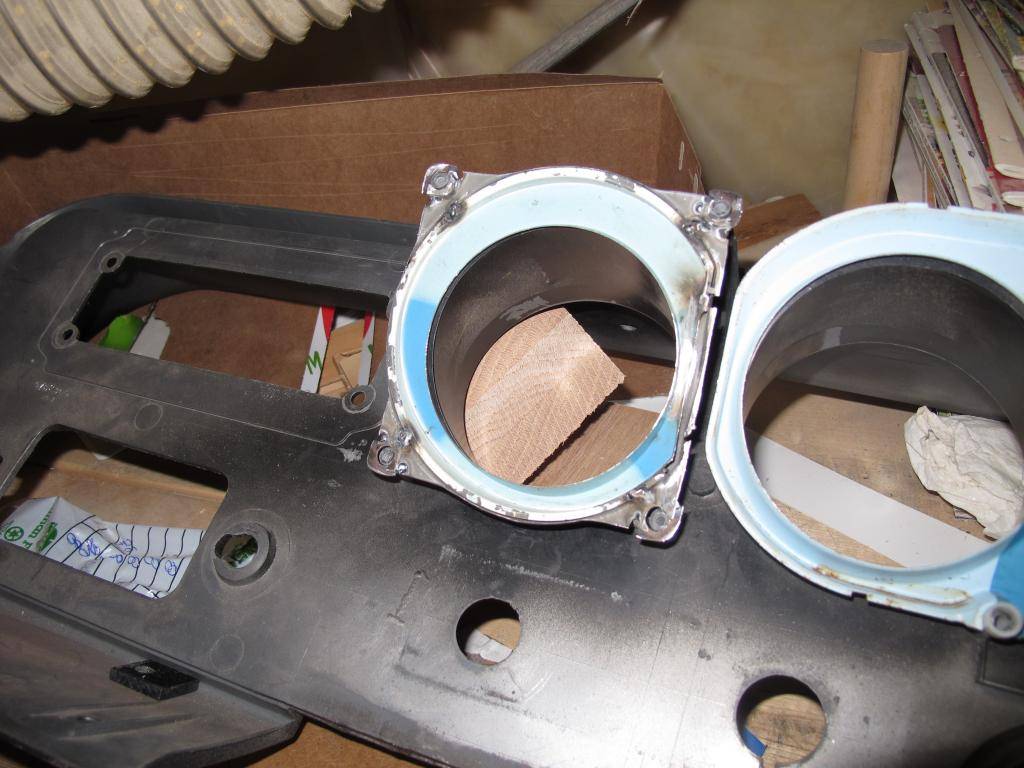
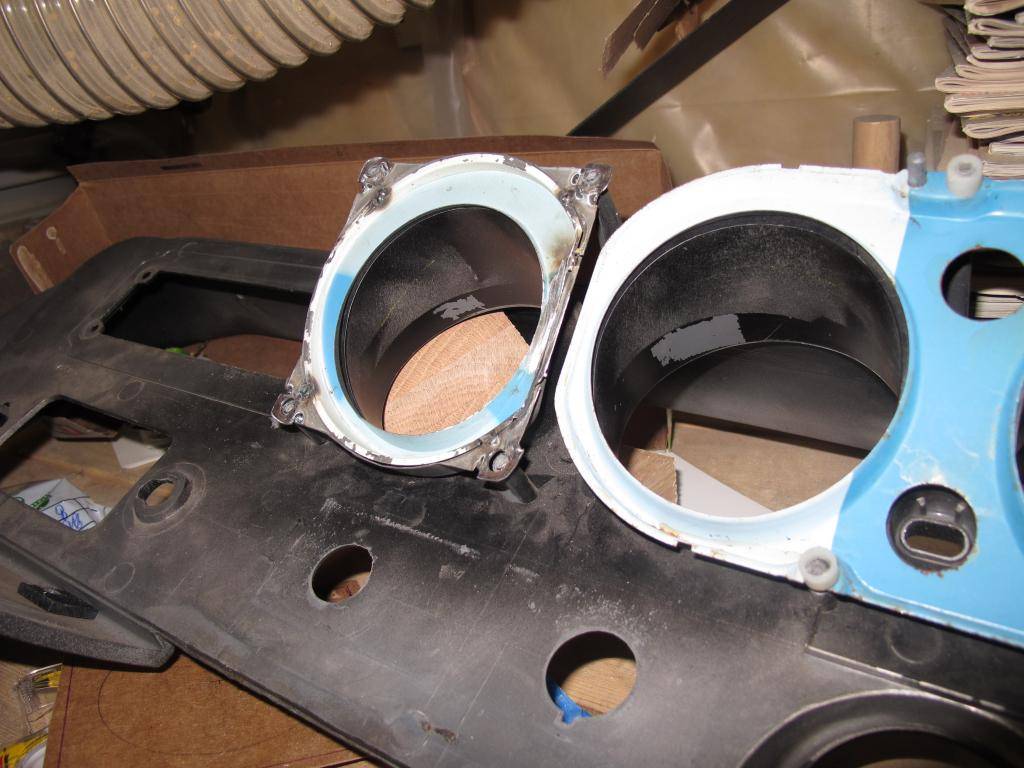
When I started this project, my plan was to make two gauge panels because I had two intermediate panels that I was working with for placing the gauges in the dash and it made sense to install the gauges independent of each other. Here is the first prototype with some cardboard used to layout the marks. After making the first prototype I noticed that the individual gauge panels seemed a little flimsy. Probably because the larger panel only used 4 mounting points. The single panel appears to be a little more stable because it is using all 8 mounting points to support the 4 gauges.
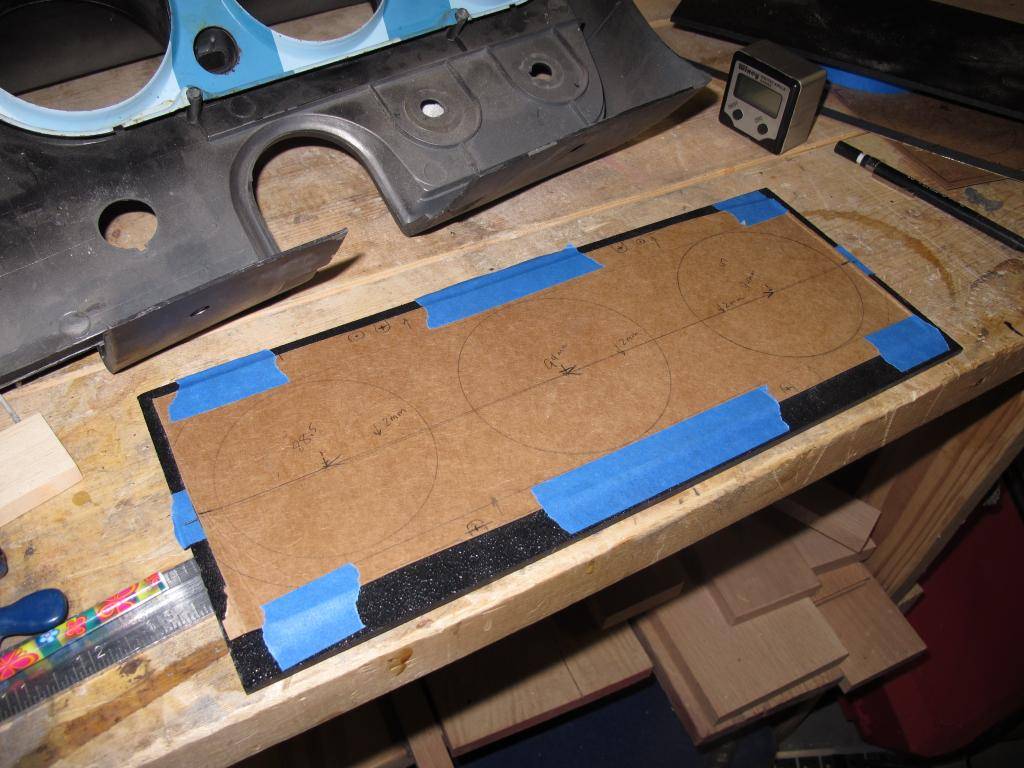
With the mounting holes drilled and double checked for accuracy, I taped a piece of poster board on the front of the gauge panel and installed the panel in the dash. Using a small piece of wood, I taped a piece of pencil lead on to a small block of wood and carefully traced the openings of the intermediate panel on to the poster board. This eliminated any variations that could have occurred when I drilled the mounting holes.
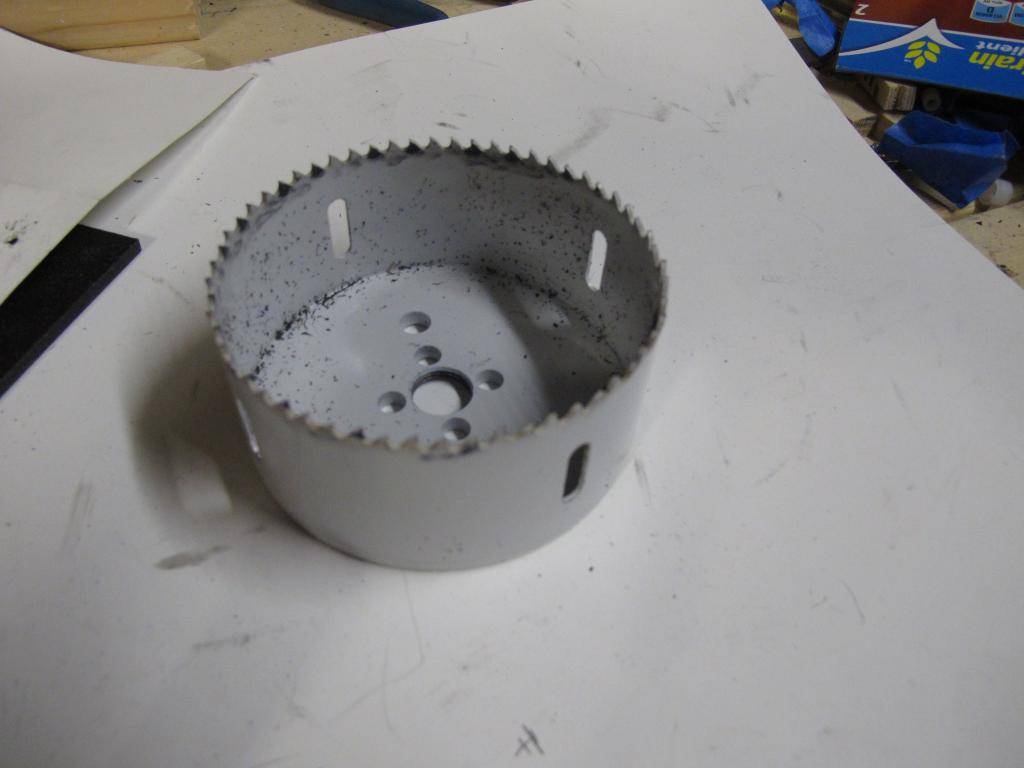
After finding the centers of the marks, I drilled out the mounting holes with a 3 7/8" hole saw that I bought from Amazon.
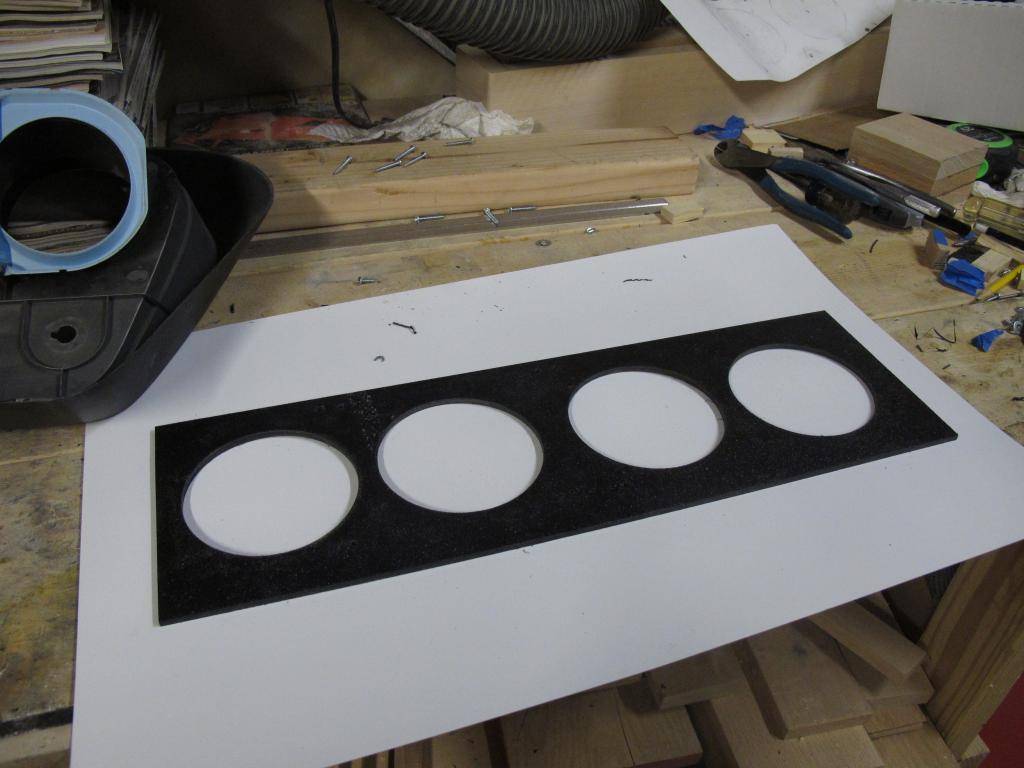
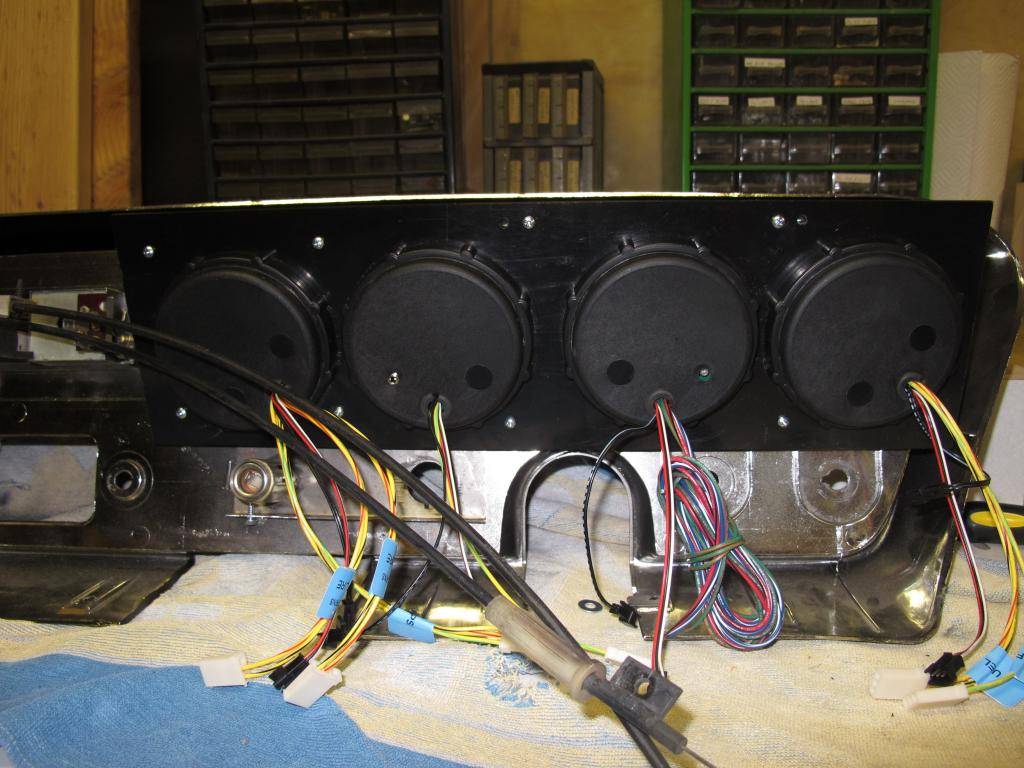
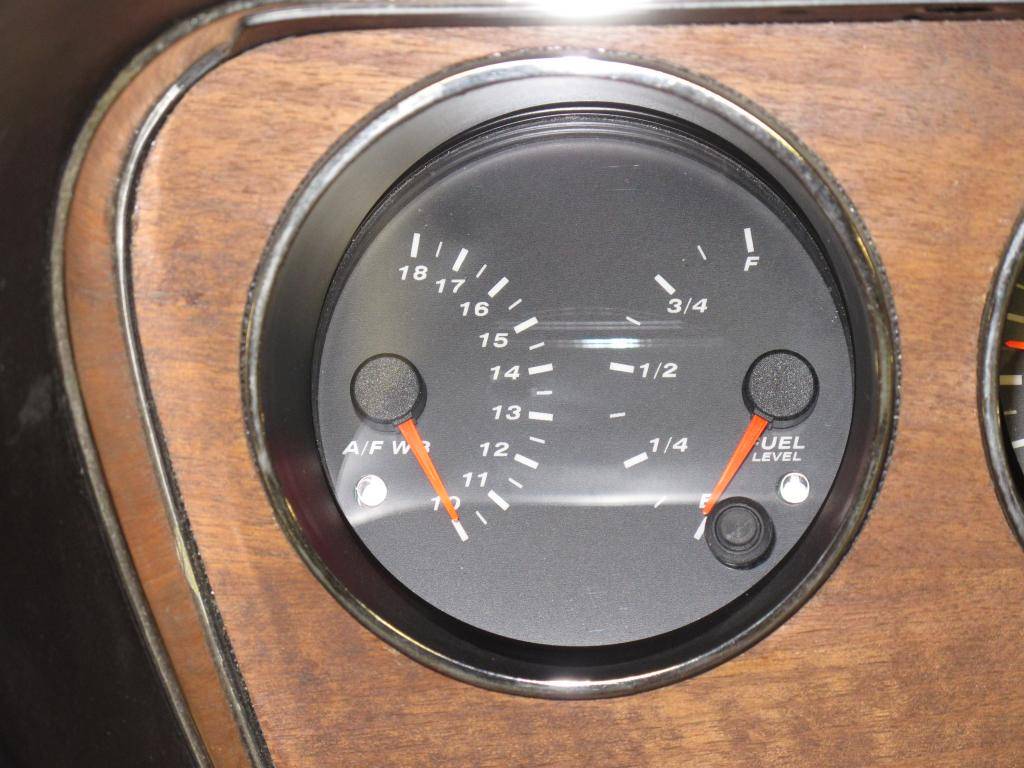
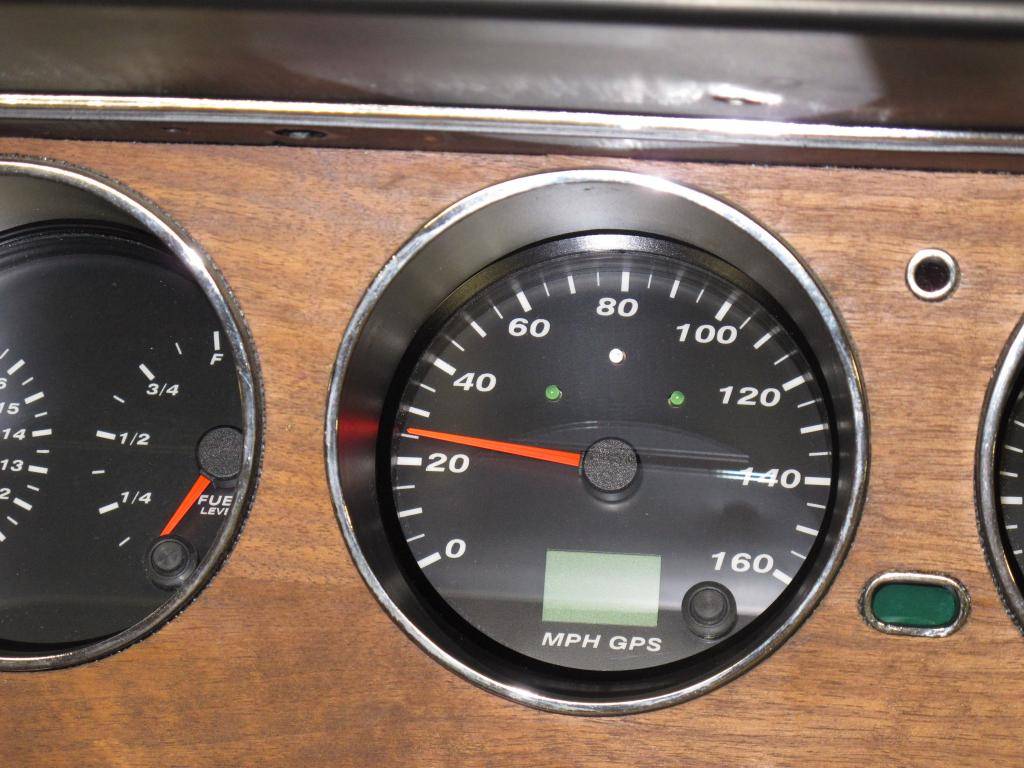
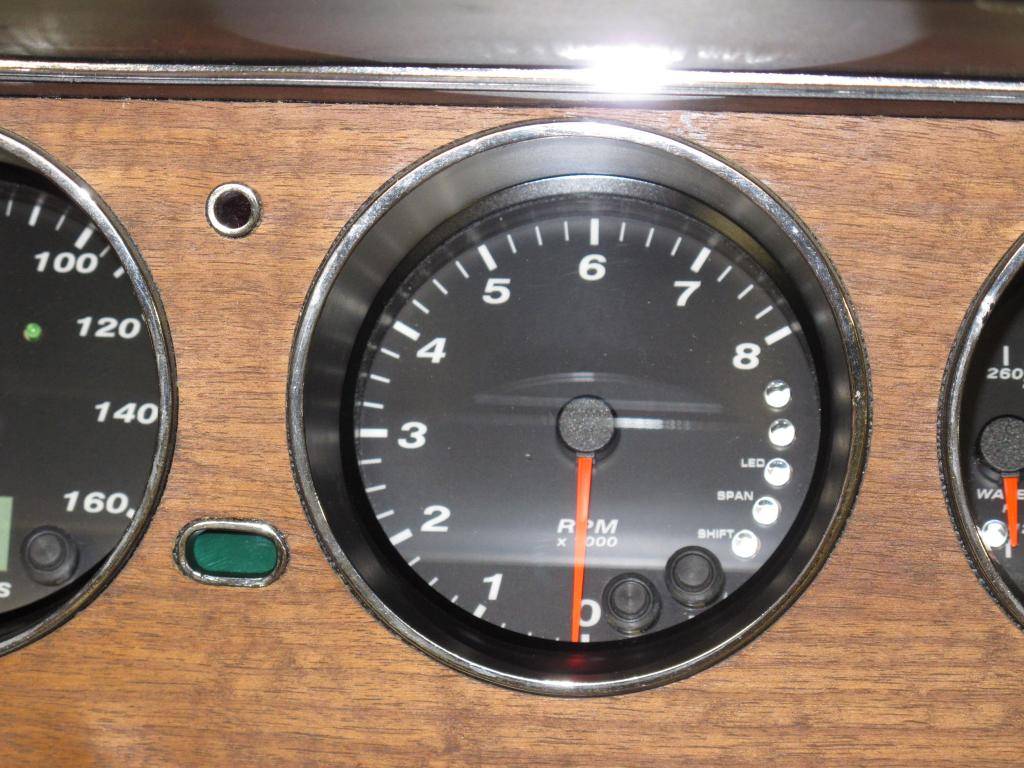
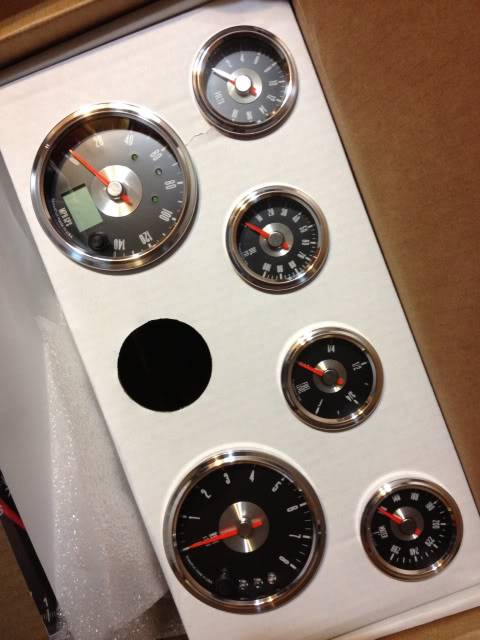
Here is a picture of the gauges mounted in the gauge panel.
Some more trial fitting and massaging of the gauge holes were necessary to get the alignment of the gauges just right.
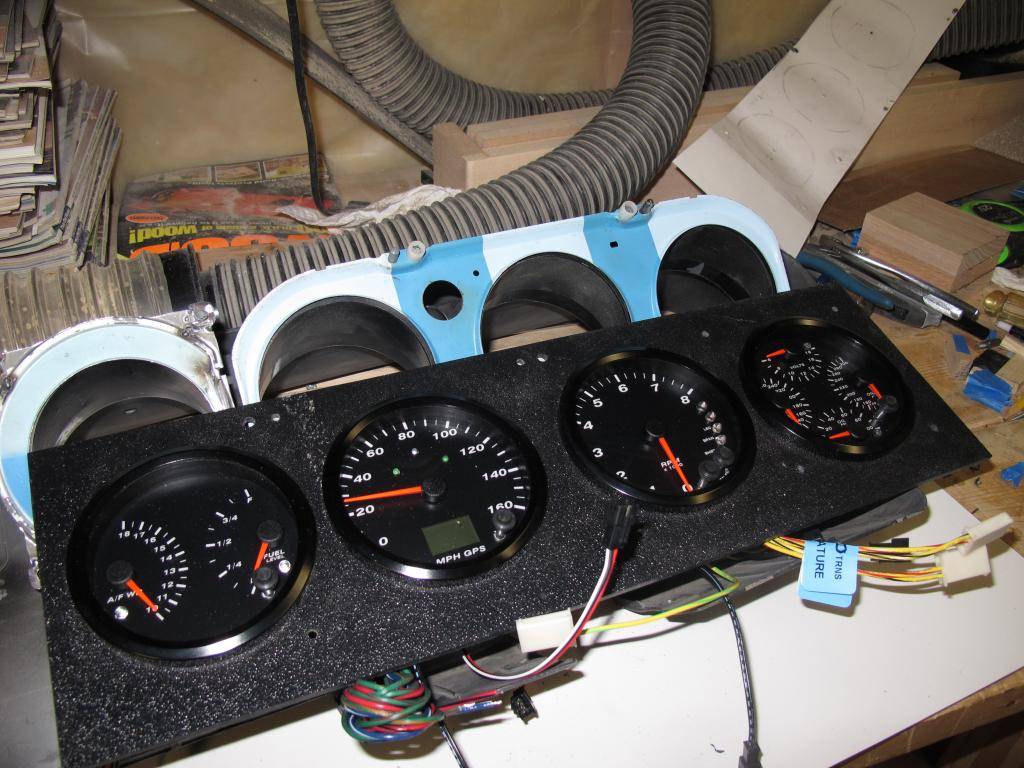
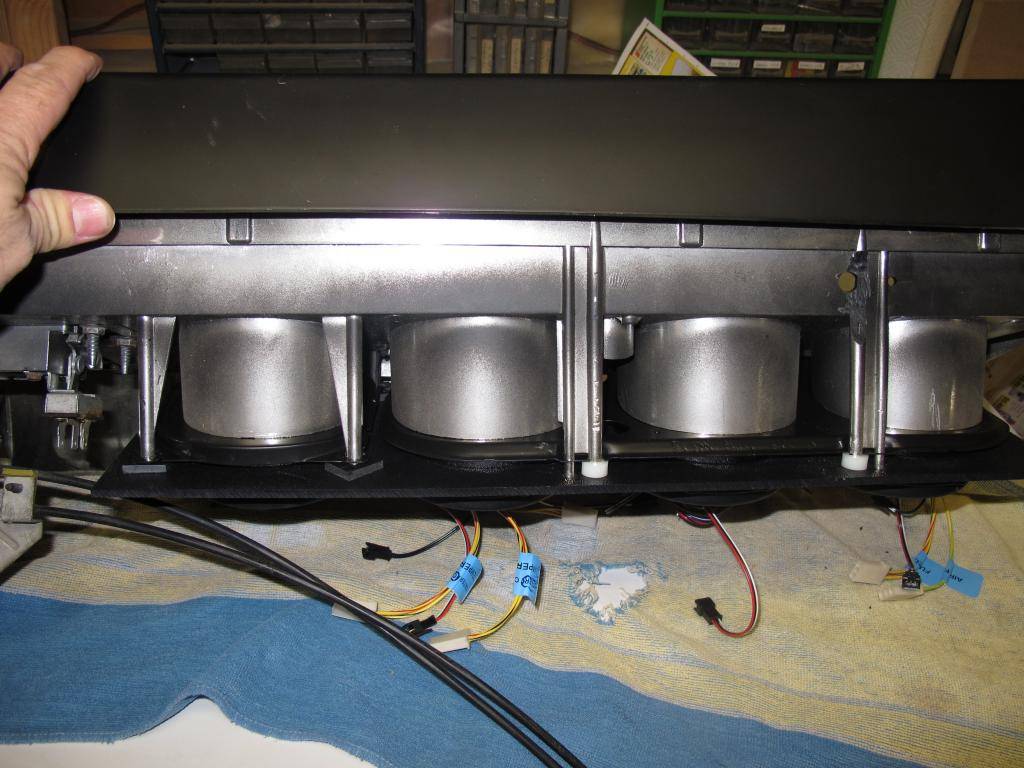
Picture of the back side of the dash with the panel installed.
There is a plate behind the ignition switch and the lighter that is used to stiffen and secure the ignition switch and provide a ground for the lighter. Because the factory plate is too big, I had to fabricate one of my own.
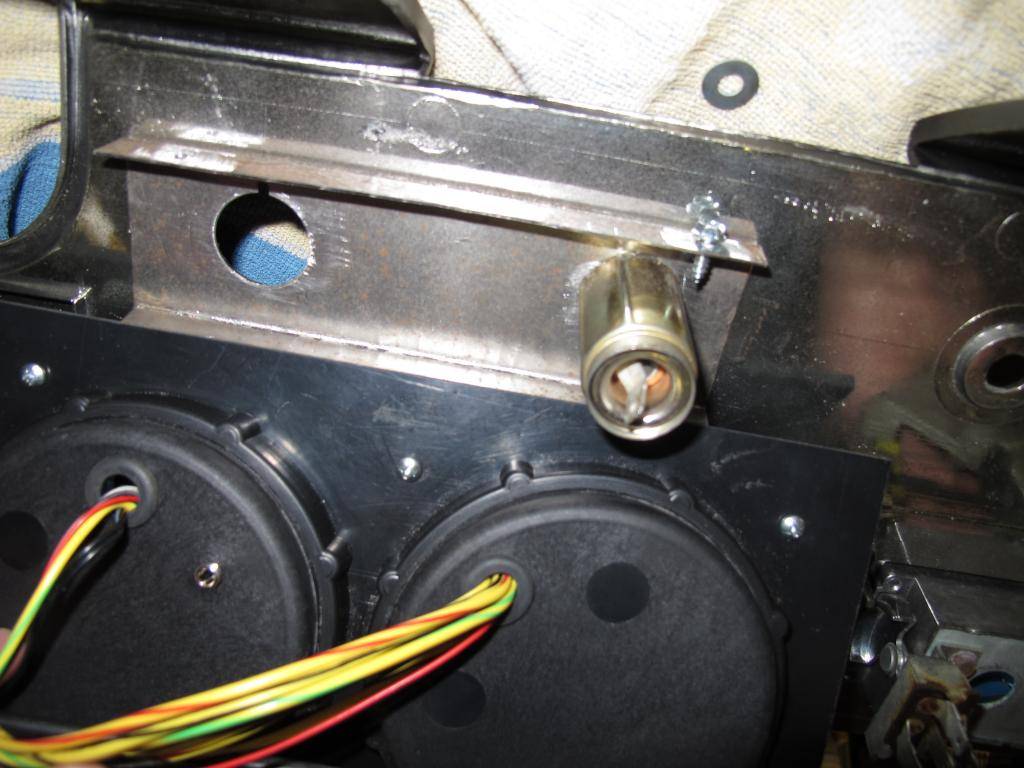
Here you can see the spacers required to set the depth of the panel just right so the gauges would mate up with the factory intermediate panel.
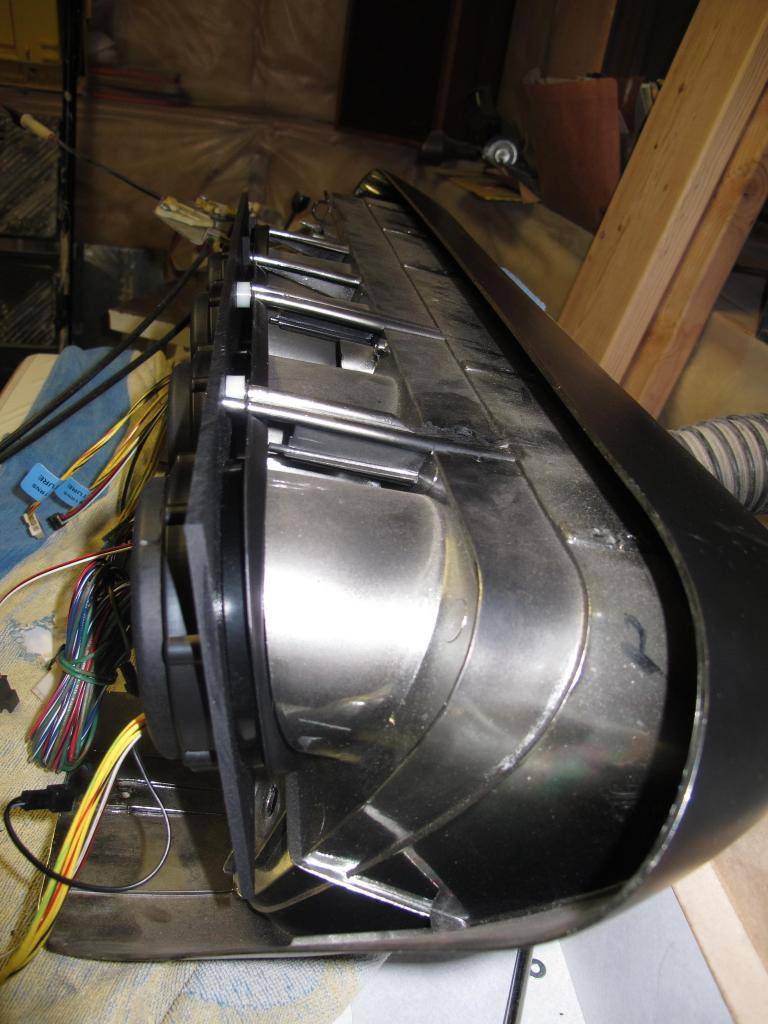
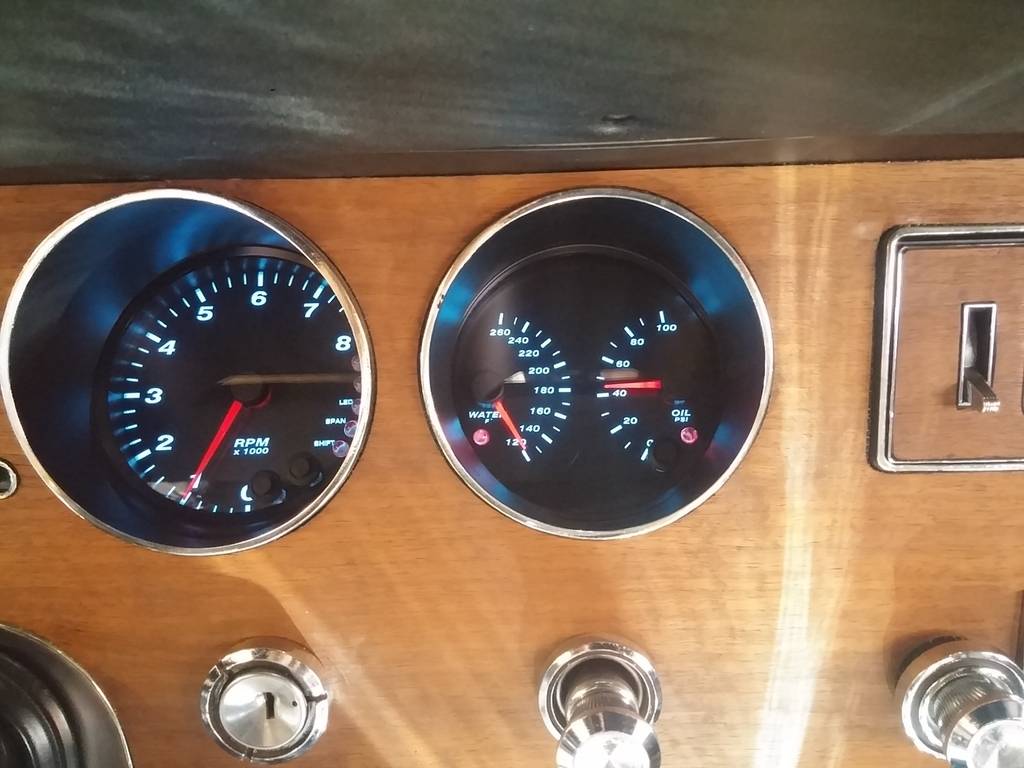
Here is a picture of the dash with the gauges installed.
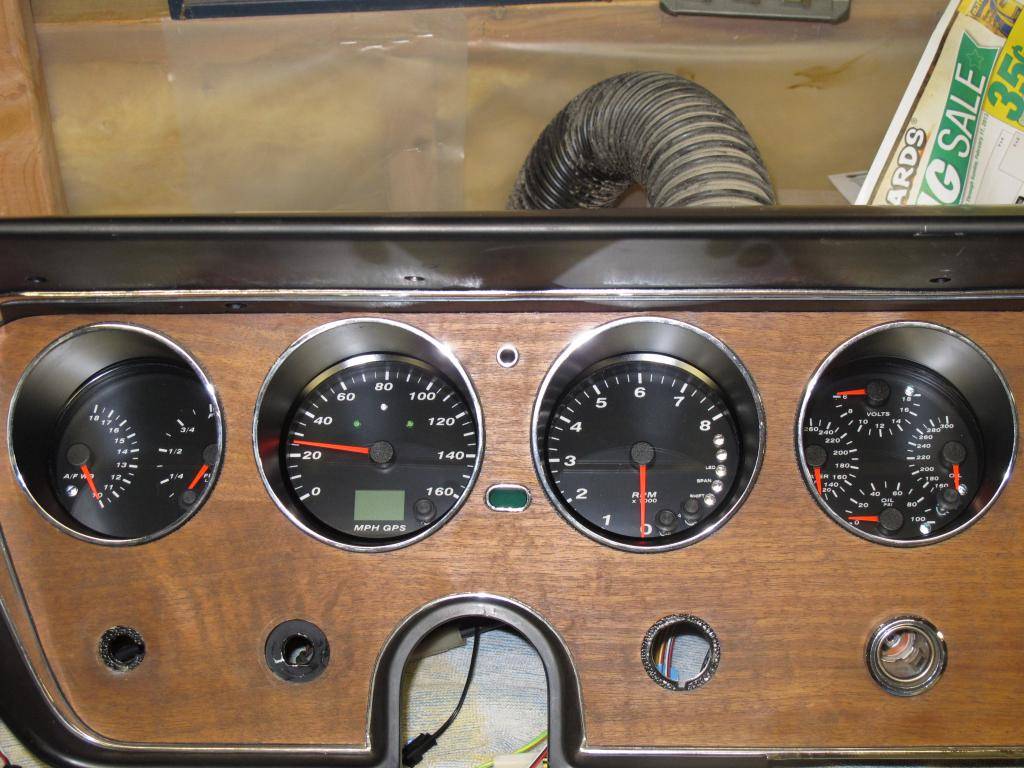
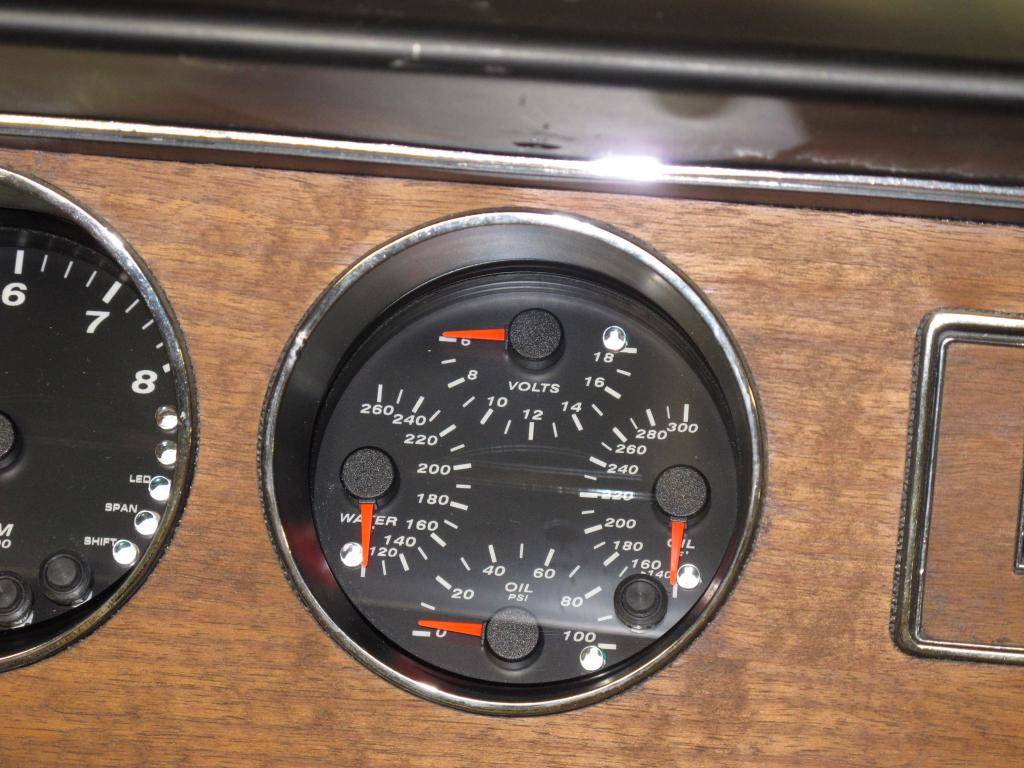
The Speedhut gauges are nice quality and the people there are top notch. I think that everything turned out real nice and I will keep on posting as I install them in the car.
-
02-16-2013 #2
Registered User
- Join Date
- Jan 2013
- Location
- Cypress, California
- Posts
- 381

Very nice. Job well done. I used a set of Speedhut gauges in my 1965 Buick Skylark.
02-19-2013 #3
Registered User
- Join Date
- Aug 2009
- Posts
- 277
Thanks. One thing I did not show was that I had to trim the gauge panel so the panel would clear the dash speakers and the angled edge of the dash opening. No biggie. Nice working with plastic.
03-31-2013 #4
Registered User
- Join Date
- Dec 2006
- Location
- Ridgeland, Ms
- Posts
- 59
Hey 1989GTA, how about some pictures of your Skylark dash? I am building one now and would love to see what you have done. Originally Posted by 1989GTA

03-31-2013 #5
Registered User
- Join Date
- Jan 2013
- Location
- Cypress, California
- Posts
- 381
Here is a picture of my dash with the Speedhut gauges. This is a 1965 Buick Skylark. The gauge on the far right is a Dakota Digital outside air temperature gauge. The others are Speedhut.
03-31-2013 #6 Registered User
- Join Date
- Nov 2011
- Location
- Tampa, Florida
- Posts
- 81
Very nice job! I was pretty impressed with speed hut when I called for some info on using them for a 67 mustang build. The amount of options to choose from is incredible. From the back ground colors or needle , fonts symbols sizes. On and on. Can't wait to get mine! Very nice job on yours.
04-01-2013 #7
Registered User
- Join Date
- Jan 2013
- Location
- Cypress, California
- Posts
- 381
Thank you. I am still looking for a nice factory dash pad for the 65. Just Dashes wants $900 to redo mine.
04-24-2013 #8
Registered User
- Join Date
- Apr 2010
- Location
- San Antonio, TEXAS
- Posts
- 202
Wow nice gauges, so do they include a sensor for the wideband?
2000 Pontiac Trans Am, Ls1/t56, SLP lid, LT's, cut-out, Borla cat-back.
1980 Pontiac Trans Am, soon to get Ls1/t56 transplant.
04-25-2013 #9 Registered User
- Join Date
- Feb 2008
- Location
- saint clair shores, michigan
- Posts
- 60
This is awesome, I wanted to do something very similar for my Cuda's rally gauges which are 4 gauges, only one of which is a clock. I was bummed when speed hut didn't have a 4 inch clock(but I understand) they were kind enough to agree to make a 4inch clock face sticker to match now I just have to find the clock or go with additional gauges like you did
04-25-2013 #10 Registered User
- Join Date
- Aug 2011
- Location
- North Platte,NE
- Posts
- 876
I dig my Speedhuts too!
04-26-2013 #11
Registered User
- Join Date
- Dec 2011
- Posts
- 18

My 67 Malibu
12-21-2016 #12
Registered User
- Join Date
- Aug 2009
- Posts
- 277
With the car properly tuned, I have no use for the AF gauge and I really don't use the oil temp gauge anymore. So...Time to re-work the gauges. Beauty of Speedhut stuff is that a re-work of an existing gauge is less than $50. Here are my two paint shop renderings. I am partial to the top one as it is simpler and matches the speedo and tach nicely.
12-21-2016 #13
Registered User
- Join Date
- Jan 2013
- Location
- Cypress, California
- Posts
- 381
Took me a couple of scans to see the difference. Now I see what you are talking about.
12-22-2016 #14 Registered User
- Join Date
- Sep 2014
- Location
- Sun City West, AZ
- Posts
- 672
I just ordered a several Speedhut gauges for my custom dash panel to fit an 89 C$ Corvette. JCG Customs will be doing my panel.
12-22-2016 #15
Registered User
- Join Date
- Aug 2009
- Posts
- 277
Yea...it's subtle
02-28-2017 #16
Registered User
- Join Date
- Aug 2009
- Posts
- 277
Finished. Turned out nice. Minimizing the size of the tick marks made a noticable difference on the final product.

03-19-2020 #17
Registered User
- Join Date
- Mar 2020
- Posts
- 1
Speedhut gauges
Hello I just joined this sight because I saw this old post on putting Speedhut gauges in an original dash, you did a great job and they look amazing! I'm want to put Speedhut gauges in my '65 gto and want them recessed like you did so I'm ordering my set this week. I'm going with the 4" black stealth bezel, any other suggestions besides what you already showed on your blog? Thanks

 Reply With Quote


