

Results 361 to 380 of 721
Thread: My 1985 Monte Carlo SS Barney...
-
10-31-2017 #361

 -Moderator/Sponsor-
- Join Date
- Apr 2001
- Location
- The City of Fountains
- Posts
- 15,975

Lance,
I don't know how to exactly ask this, but I will try. With the ackerman changes, are the tires more or less parallel in a turn? Hope that makes sense...
Andrew1970 GTO Version 3.0
1967 Cougar build
GM High-Tech Performance feature
My YouTube Channel Please Subscribe!
Instagram @projectgattago
Dr. EFI
I deliver what EFI promises.
Remote Holley EFI tuning.
Please get in touch if I can be of service.
"You were the gun, your voice was the trigger, your bravery was the barrel, your eyes were the bullets." ~ Her
-
10-31-2017 #362
 Registered User
- Join Date
- Aug 2012
- Location
- Peoria, AZ
- Posts
- 1,758
Say the toe is set at 0" so the front tires are both pointed straight ahead when steering wheel is straight (like mine). As you turn the steering wheel to the left, the driver side front tire turns at a faster rate than the passenger side front tire effectively increasing the toe out. This is Ackerman. I believe it is progressive so the further you turn the steering wheel, the more the toe out increases. The idea is to increase the slip angle of the inside tire so that it has more grip to the track.
The more Ackerman you add via geometry, the more the inside front tire turns at a greater rate than the outside front tire.
There are a couple different ways to increase Ackerman depending on what steering setup you have. On a front steer setup like mine, you can move the center link rearward or move the steering arm\tie rod end pivot point out to increase Ackerman (which we did on my car).Lance
1985 Monte Carlo SS Street Car
-
10-31-2017 #363
-Moderator/Sponsor-
- Join Date
- Apr 2001
- Location
- The City of Fountains
- Posts
- 15,975
Thanks! That makes sense...
Andrew1970 GTO Version 3.0
1967 Cougar build
GM High-Tech Performance feature
My YouTube Channel Please Subscribe!
Instagram @projectgattago
Dr. EFI
I deliver what EFI promises.
Remote Holley EFI tuning.
Please get in touch if I can be of service.
"You were the gun, your voice was the trigger, your bravery was the barrel, your eyes were the bullets." ~ Her
-
12-19-2017 #364
Registered User
- Join Date
- Aug 2012
- Location
- Peoria, AZ
- Posts
- 1,758
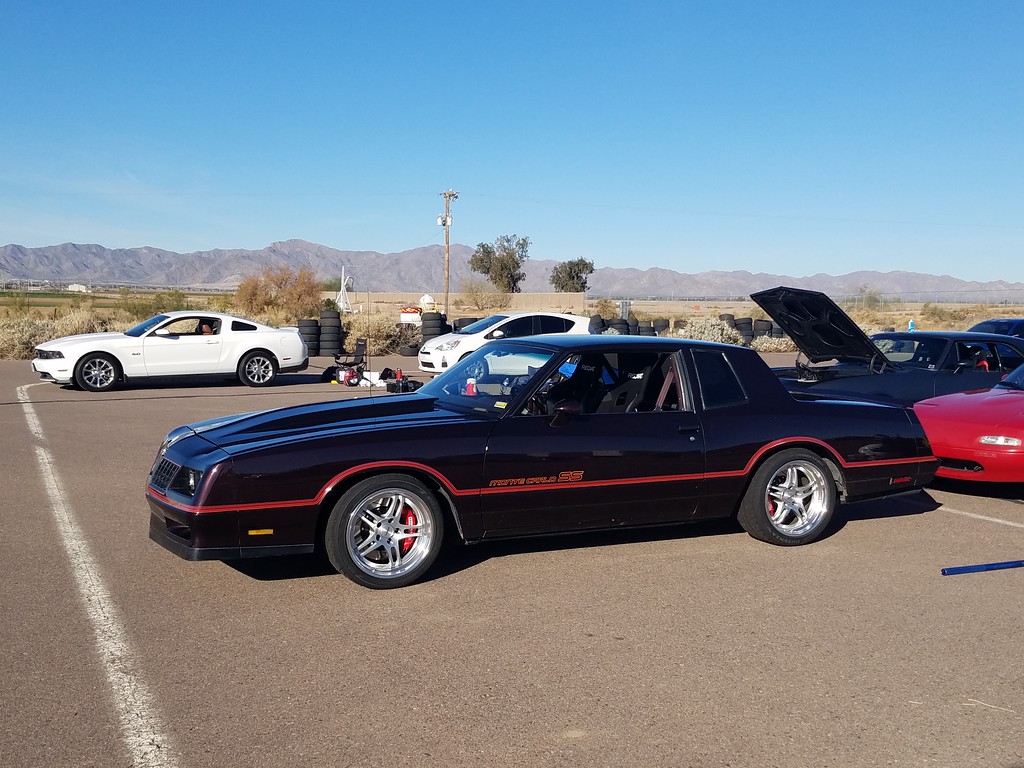
I drove Barney out to my first Arizona Region SCCA Autocross last Sunday and had a blast. AZR runs a tight ship, had us hoping from the time we got there til we left about 2:30 pm. Mike Hitt came up and co-drove Barney with me, he did great considering he'd never even rode in the car before Sunday morning. That is a testament to a Ron Sutton setup, balanced and friendly enough that anyone can get in one and go fast with it right away.
Still getting used to the awesome Stoptech brakes and the new RSRT valved ridetech shocks. I'm figuring out I can brake earlier and then get off the brakes before corner entry and the new Secret Sauce shocks will keep the front pinned down yet being off the brakes lets me carry WAY more speed into and thru the corner. There is more in it still, will just take time to learn to trust it'll stick.
Here was my best run of the day.
and here was Mike's best run of the day.
I finished a tenth off of Tommy Tomerdale in CAM T and Mike was right behind me. Tommy has an awesome 67 camaro with an LS6 and C5 front and rear suspension under it all on 315s. I'm pretty happy with how we did.
You can sort these by fast time and PAX...
http://www.azsolo.com/backup/index.p...s-info/results
Anyway, had fun racing in December...can't wait to do it again.Lance
1985 Monte Carlo SS Street Car
-
01-16-2018 #365
Registered User
- Join Date
- Aug 2012
- Location
- Peoria, AZ
- Posts
- 1,758
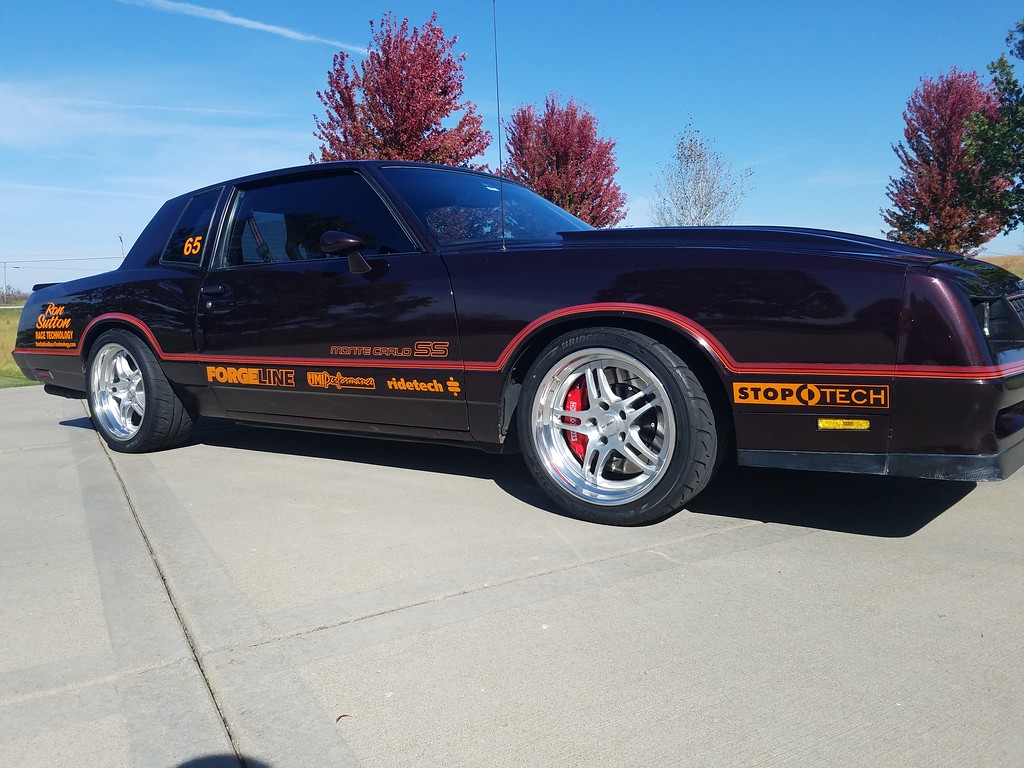
This is why I waited so long to upgrade the brakes on Barney, because I knew a spindle change was the only way to do that part right...but the spindle change was going to change the front end geometry that Ron and I spent so much time refining years ago.
The spindle pin height of the new ATS spindles was very close to the same as the original metric spindles they replaced after swapping the lower ball joint shorter pin in so I left all of the alignment adjustments as they were when installing new spindles. Handling both on the street and the track was awesome right away, these spindles gain camber faster and the result was even more turn in grip than before. They also push the wheel out 0.25" increasing track width by a half inch, also good for handling...but with the increased camber gain plus the track width, the outside edge of the front tire tread began to have significant contact with the inner fender in compression. The steering arm is also different which is great for additional Ackerman, but at full compression the tie rods were contacting the frame.
This is where putting race car geometry on a street car gets complicated...packaging. I am the only one that I am aware of that is putting this kind of tech onto a stock chassis G Body so sometimes it is trial and error until we get everything to play nice together.
Ron Sutton and I decided we'd try a stiffer front spring to keep the front from traveling so much, 600s to 700s. While I was making this change, I also raised the front ride height about a half inch higher than we had run it successfully before. More on this in a bit...
Thanks to coil overs these were both pretty simple changes to make in my storage unit garage. I did however have to run it to an alignment shop after to clean up after the adjustments. The shop was busy and I was short on time so we got the camber and caster set right where it was before then set the toe. The toe change was significant enough due to the ride height increase that it took the camber and caster settings out of our preferred range...but we didn't have time to redo it all once again.
Two days later I raced the car with Arizona SCCA Region on a fast wide open course with several fast slalom sections included. As I hit the first slalom section, I knew something was wrong right away. The car wouldn't turn in at all, just slid the front tires. This is something I haven't had happen since Stage 1 back in 2013. After braking for a normal autocross turn, the front was awesome...the whole balance was awesome. A bit tighter than before but very neutral. Basically the contact patch was great with the front compressed but when weight wasn't on the nose in a slalom not so much.
I made some shock adjustments and driving adjustments and got thru the day okay. The front is still traveling enough at extremes for the tire to just kiss the inner fender, not really an issue but close enough that if we lowered the car anymore, it would become an issue again. Our choice now to further refine the setup seems to be to either adjust the camber and caster at the current ride height back into our spec window or to lower the front some again, add bumps stops to keep tire off fender and tune alignment settings. I'll have to wait for Ron to finish moving his shop and get caught up again before making that decision. I'm good either way as I know where we want to be...I'm just not sure on the best path to get there.
This is where it's great to have a man like Sutton to help when venturing where no man has gone before... :D
Here is a pic of the current ride height...not quite 4x4 territory high but not slammed either.
This is where it was before
It is between 1/2 and 3/4s of an inch higher...wild how that little of a change can affect so much.
Here's a video of a couple of my runs from Saturday. Not too exciting but maybe a bit of a reward for those that read this far down... :D
Lance
1985 Monte Carlo SS Street Car
-
02-03-2018 #366
Registered User
- Join Date
- Aug 2012
- Location
- Peoria, AZ
- Posts
- 1,758
Well, Dr Ron has spoken... We had a chance to catch up the other day after he reviewed all of the detailed post race data I sent him.
Basically we made a front spring rate adjustment to (1) try to help keep the front tires off the fenders and (2) work on a loose condition post apex.
Those of you that were lucky enough to attend part 3 of his seminars knows that the majority of the track day tuning we learned about involved increasing or decreasing the amount of grip the inside rear tire has to adjust to conditions. This is assuming you have the rest of the geometry optimized of course which we did.
This spring rate change worked for #1 and helped #2 in braking turns but hurt slalom turns because the inside rear now had too much grip when not in pitch. I hate driving a car with a push, this was reiterated to me again at the last event.
The correct cure is multi-faceted...and will take me some time to implement. The good thing is I completely understand the whys and hows because I have a good teacher. This is just another part of the evolution of me as a driver and a tuner. 4 years ago when Ron and I started down this path, this would have been too much for me to comprehend, today though...I am ready for it.
#1 Mill 1/4" of hub of wheels to put them back where they were before the spindle change
#2 Put the 600# springs back in the front and put ride height in front back to where it was before to fix slalom turns
#3 Install bump stops in the front to limit travel to exactly where it is needed to fix balance in braking turns and use shims to tune these on race day.
#4 Ron thinks I have a little too much brake now and wants me to investigate MC sizing (or other options like manual MC or a driver mod).
Thankfully I'm pretty certain I have plenty of wheel hub material so taking 1/4" off of them shouldn't cause me any other issues. This will however correct the tire\fender contact issues the new spindles created and allow us to put the geometry back where it worked best. Difficult part of this is finding the time to dismount my pretty new rubber and then finding a machinist I trust here in the valley to love on the wheels a bit. This might not happen right away but I am aware it won't handle properly until this is done.
Meanwhile, I'll make whatever shock adjustments I can and lower the front ride height just a bit and race it next Saturday as is. With now understanding exactly what is going on maybe I can adjust the driver mod and get the most out of it I can until I can fix it properly.Lance
1985 Monte Carlo SS Street Car
-
03-18-2018 #367
Registered User
- Join Date
- Aug 2012
- Location
- Peoria, AZ
- Posts
- 1,758
I'll do a more complete update later but here's a taste of some Barney action on a Good Guys course. Had a great time in Scottsdale this weekend, got to meet a lot of internet friends in person and even better, race against them head to head. Can't wait to do it again...
Here are the Street Machine results
https://axwaresystems.com/axorm/live...olby=totaltime
And overall raw time results...
https://axwaresystems.com/axorm/live...rcolby=rawtimeLance
1985 Monte Carlo SS Street Car
-
03-26-2018 #368
Registered User
- Join Date
- Aug 2012
- Location
- Peoria, AZ
- Posts
- 1,758
Thought some of you might find this pretty interesting. Terri took 100 pics in burst mode of Barney in a turn during the challenge at Good Guys last weekend and I made a movie of them. I so need to do more of this when testing a new setup.
Lance
1985 Monte Carlo SS Street Car
-
05-17-2018 #369
Registered User
- Join Date
- Aug 2012
- Location
- Peoria, AZ
- Posts
- 1,758
Not really a Barney update but one that will make doing Barney updates a lot easier once again once finished....
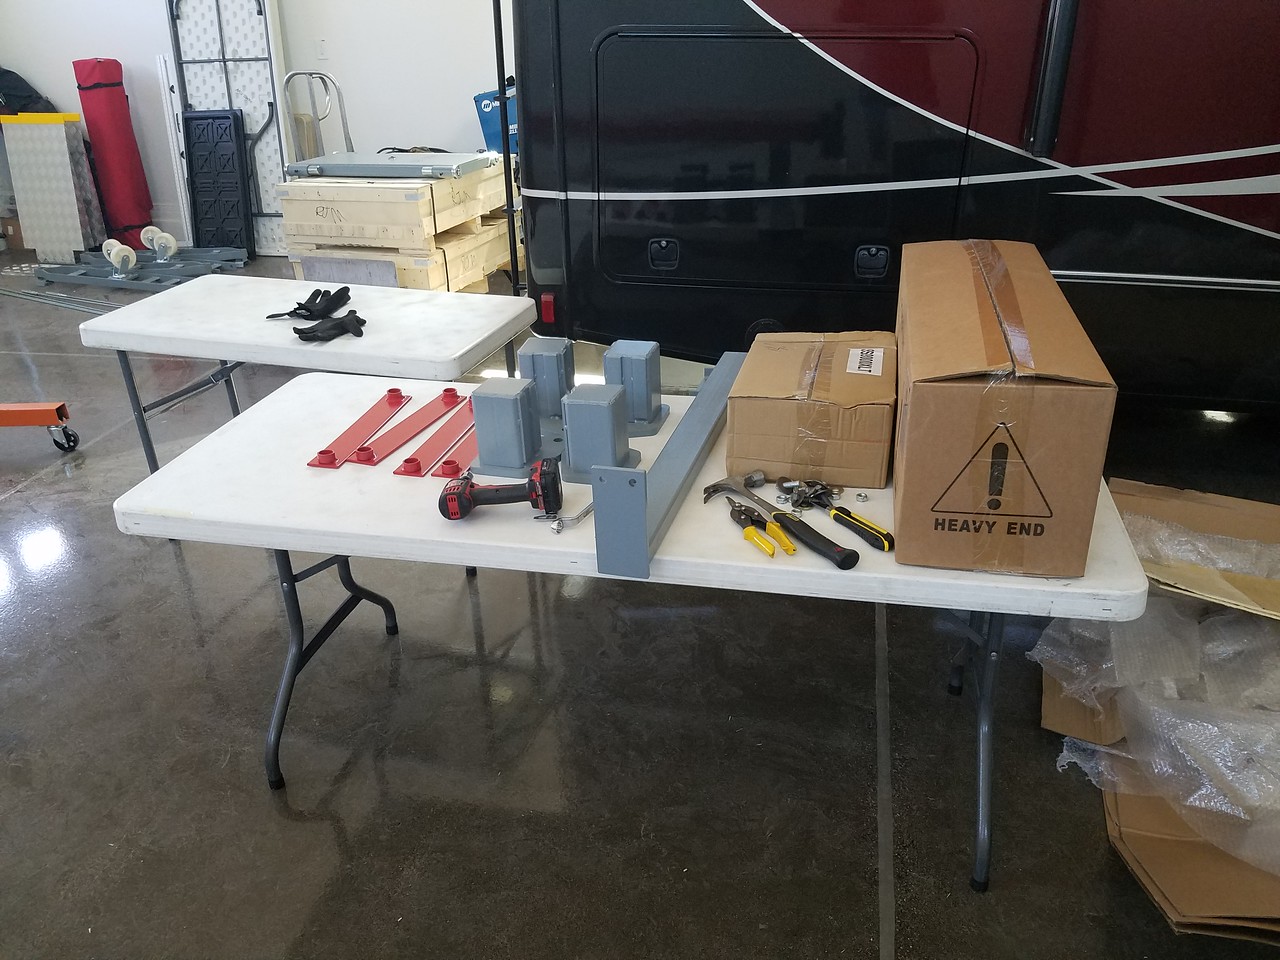
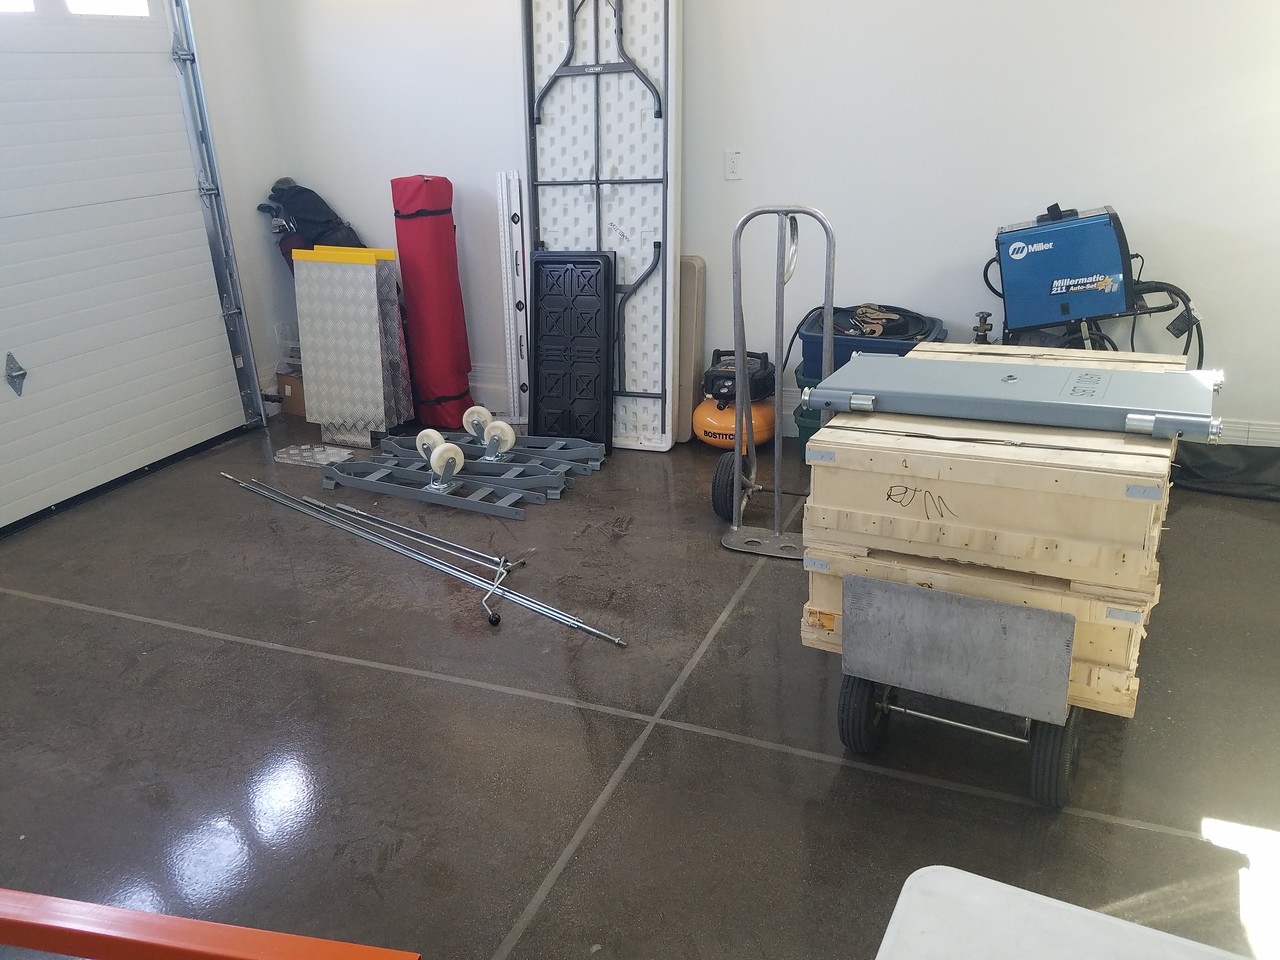
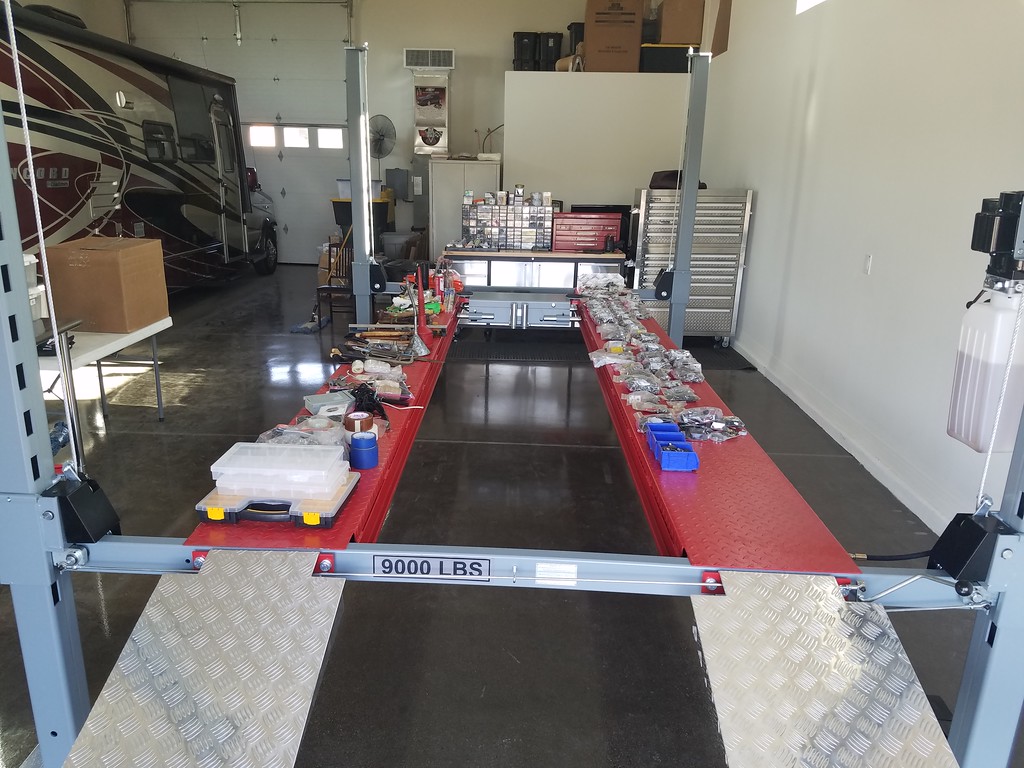
Picked this up about noon today. It's a 9000 XLT 4 post drive on lift with 2 manual rolling jacks.
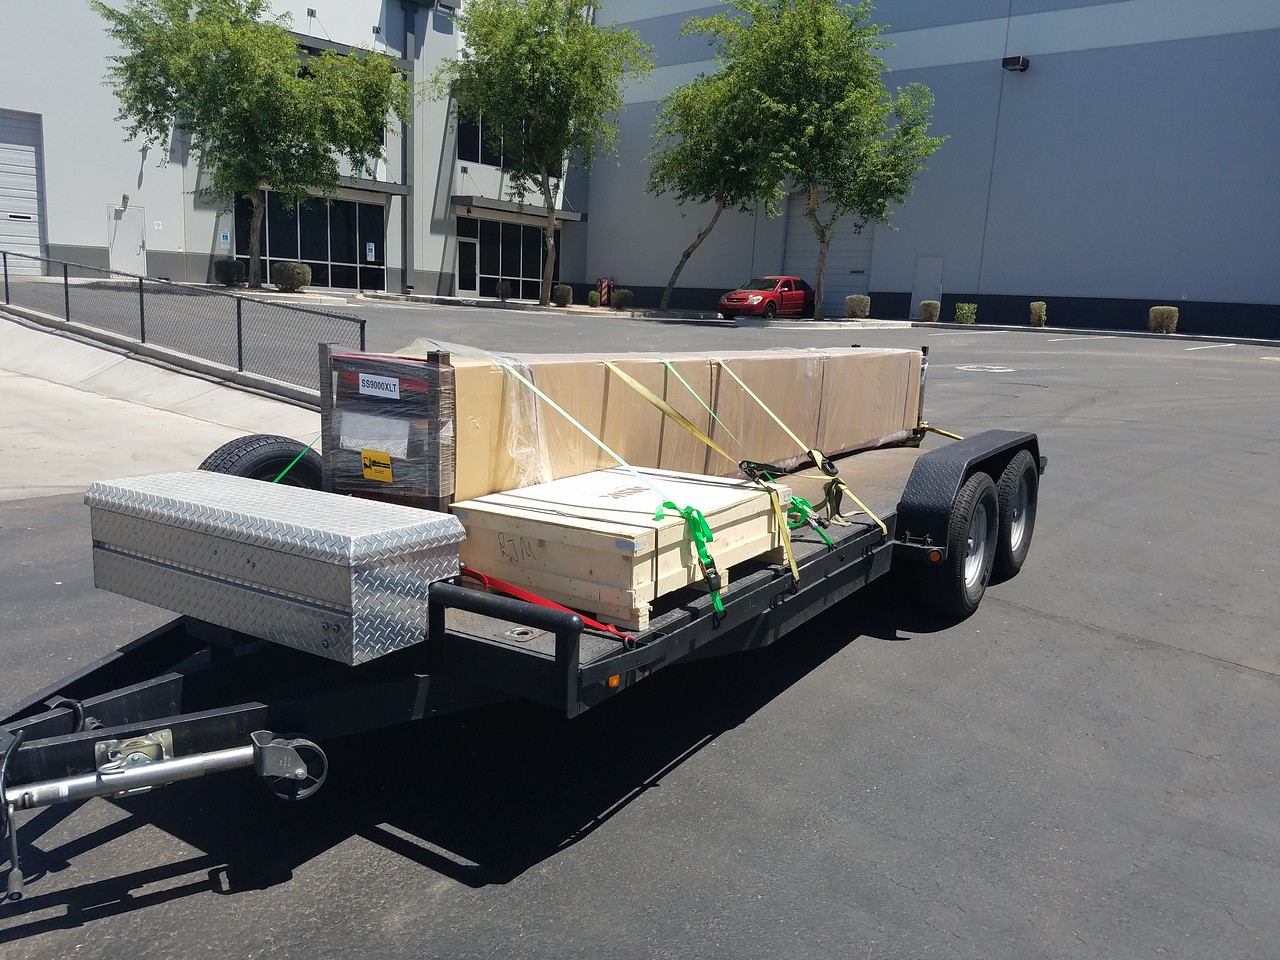
In the Air Conditioned shop ready to unload.
Most likely not OSHA approved method of lifting the 400# jacks off the trailer, but it worked...
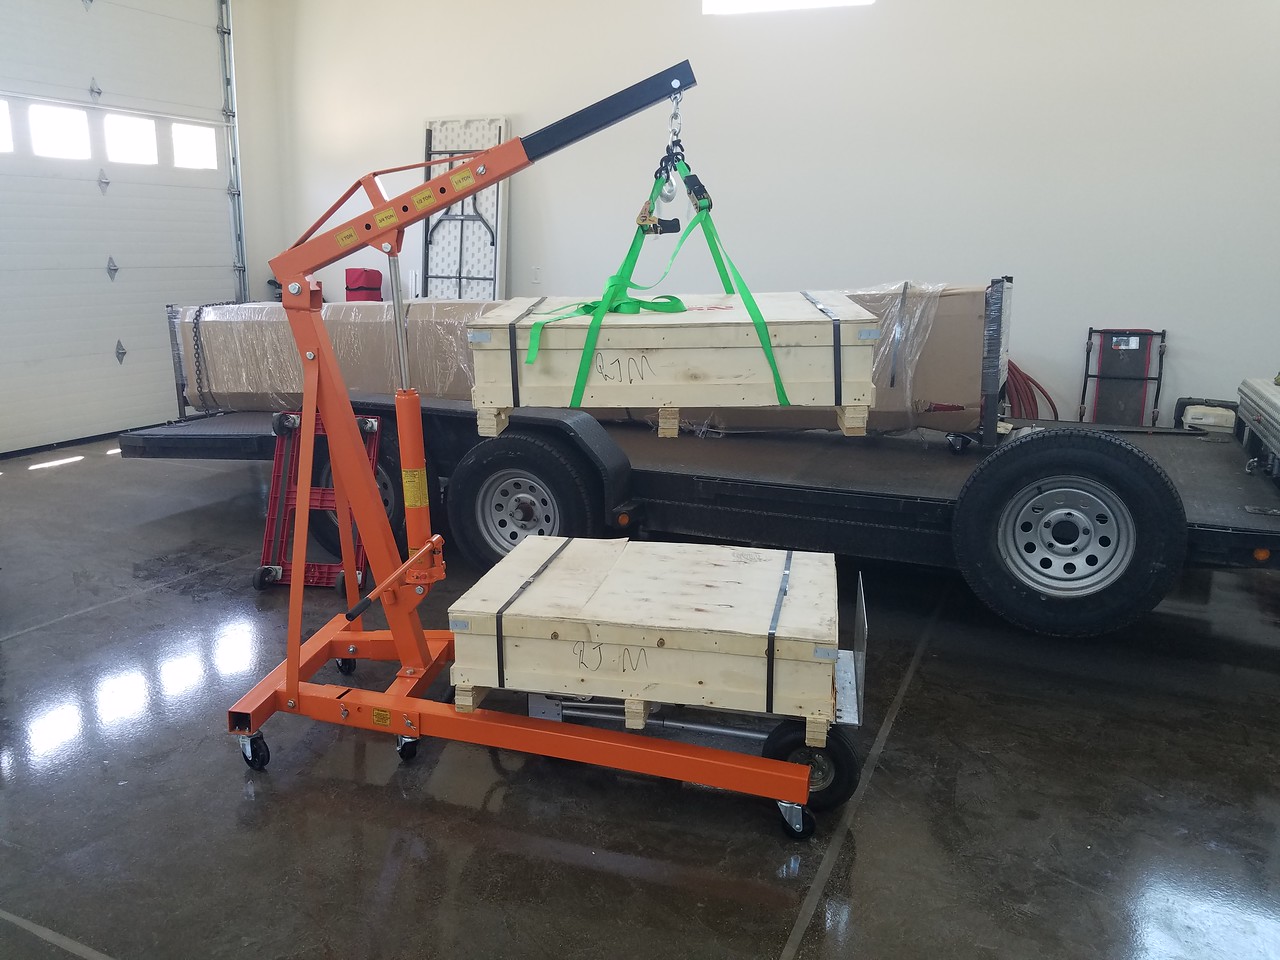
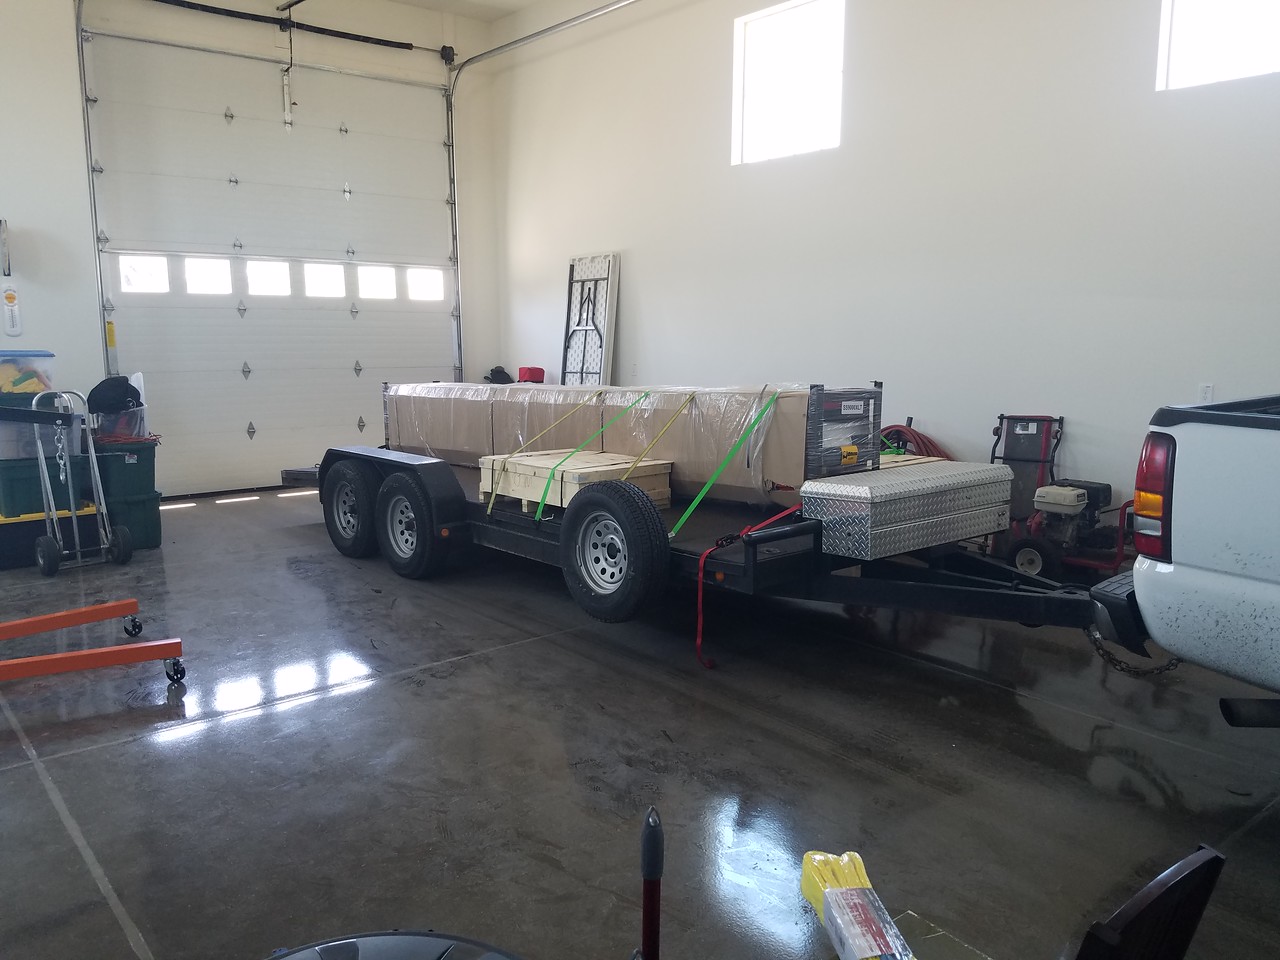
Getting the lift itself off was not bad. I put a car dolly under the front of it when loading it on trailer so all I did was lift the back of lift with engine hoist and drive the trailer out from under it. Once the dolly was near the end of the trailer I set the back end down on another dolly, lifted the front up with hoist then drove the trailer the rest of the way out. Here it is partially unpacked.
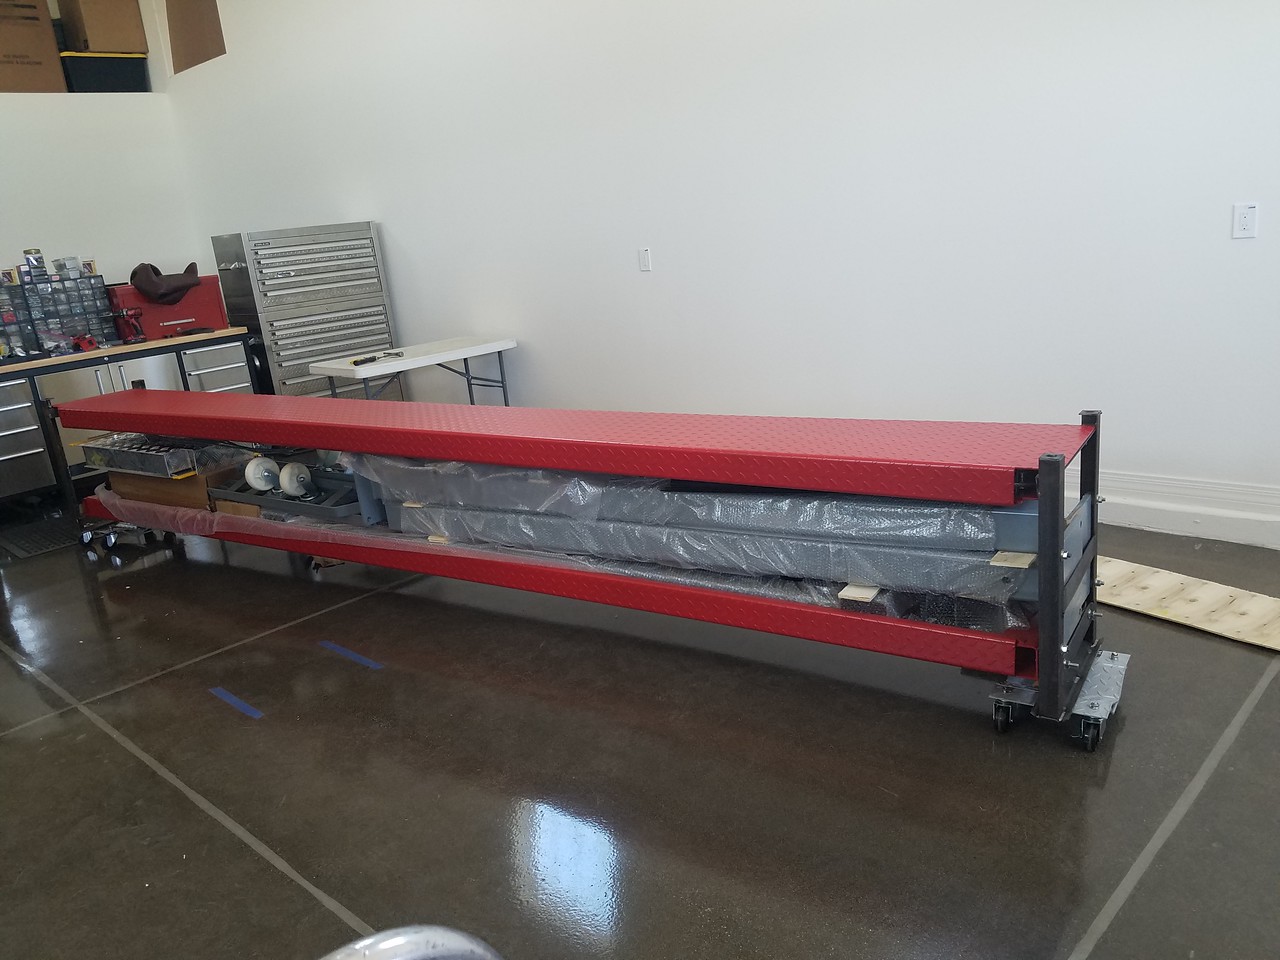
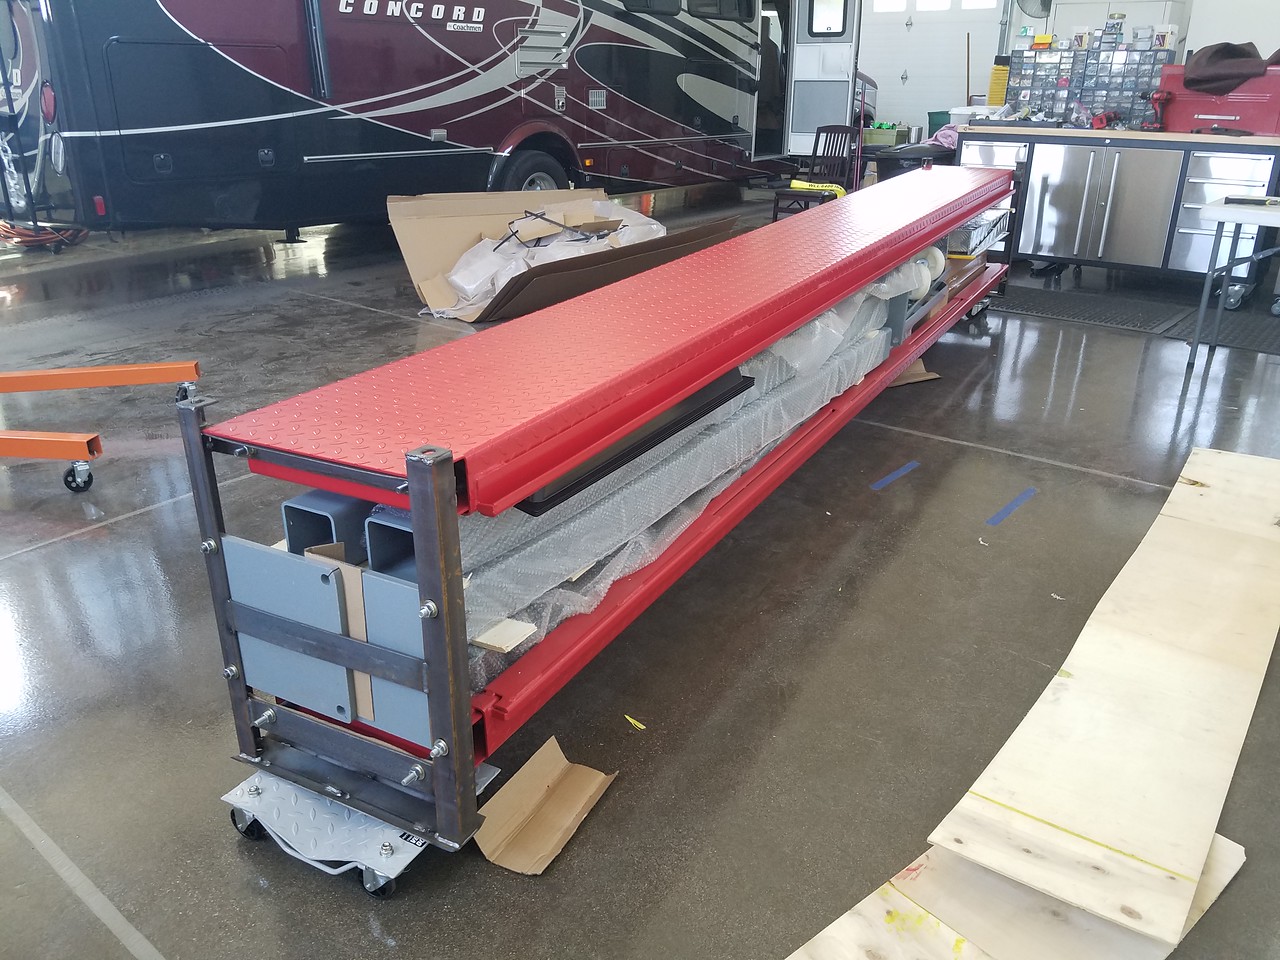
About 2 hours total got me this far.
 .
.
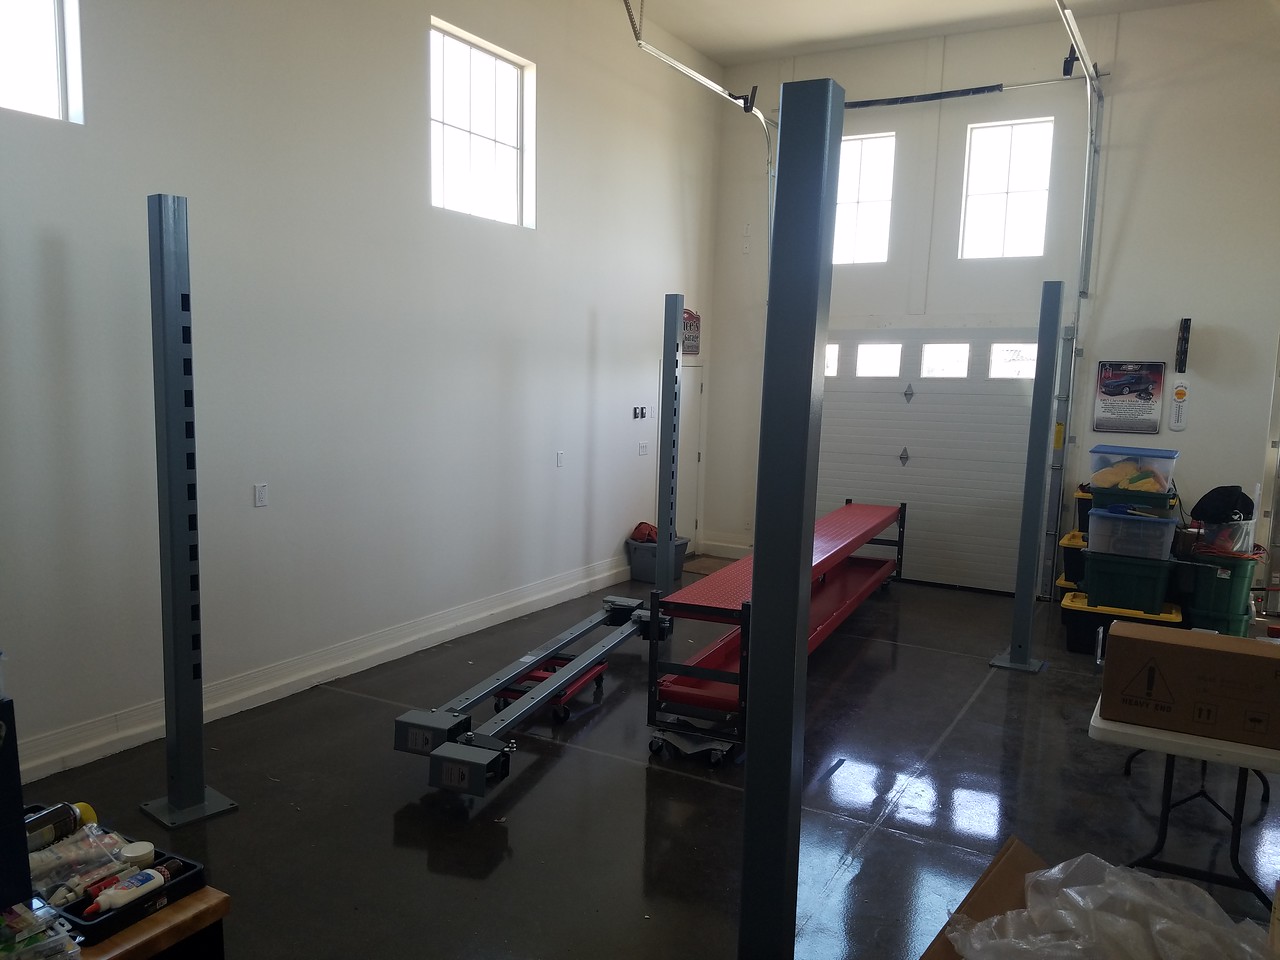
I've recruited the neighbors kid to help me stand up the ends tomorrow then putting the rest of it together shouldn't be that big of a deal. Can't wait to be able to work on cars and trucks once again without laying on the ground...Lance
1985 Monte Carlo SS Street Car
-
05-17-2018 #370
 Registered User
- Join Date
- Mar 2005
- Location
- Phoenix,AZ
- Posts
- 495
Wow, nice lift.
James W.
1987 Oldsmobile
-
05-17-2018 #371
Registered User
- Join Date
- Apr 2018
- Posts
- 23
Very nice
-
05-19-2018 #372
Registered User
- Join Date
- Jun 2017
- Location
- Edgewater Co.
- Posts
- 150
My next shop will have enough room for a lift, I'm getting too old for this sh--...
Joe
-
05-21-2018 #373
Registered User
- Join Date
- Aug 2012
- Location
- Peoria, AZ
- Posts
- 1,758
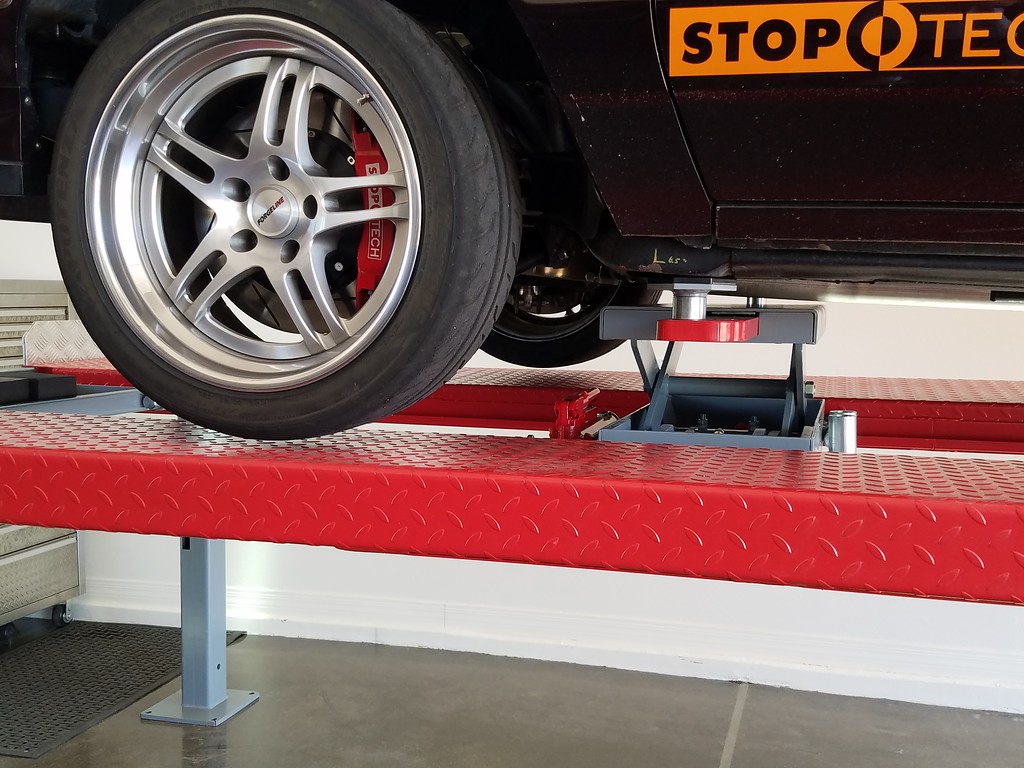
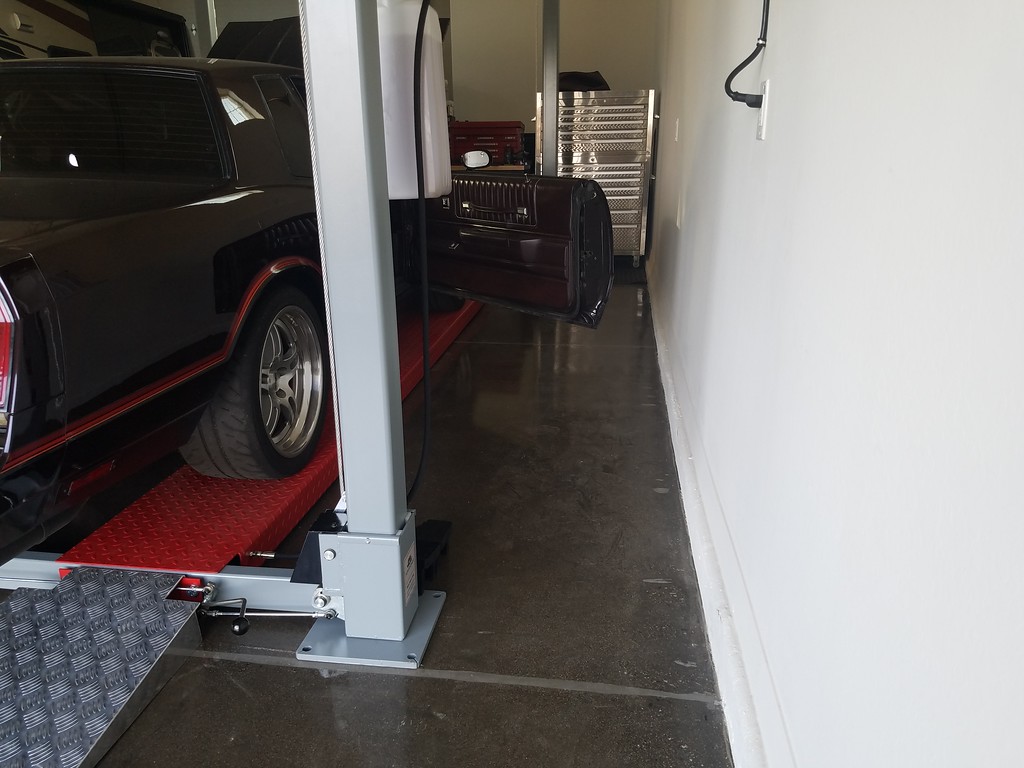
So, Barney fits on the lift...
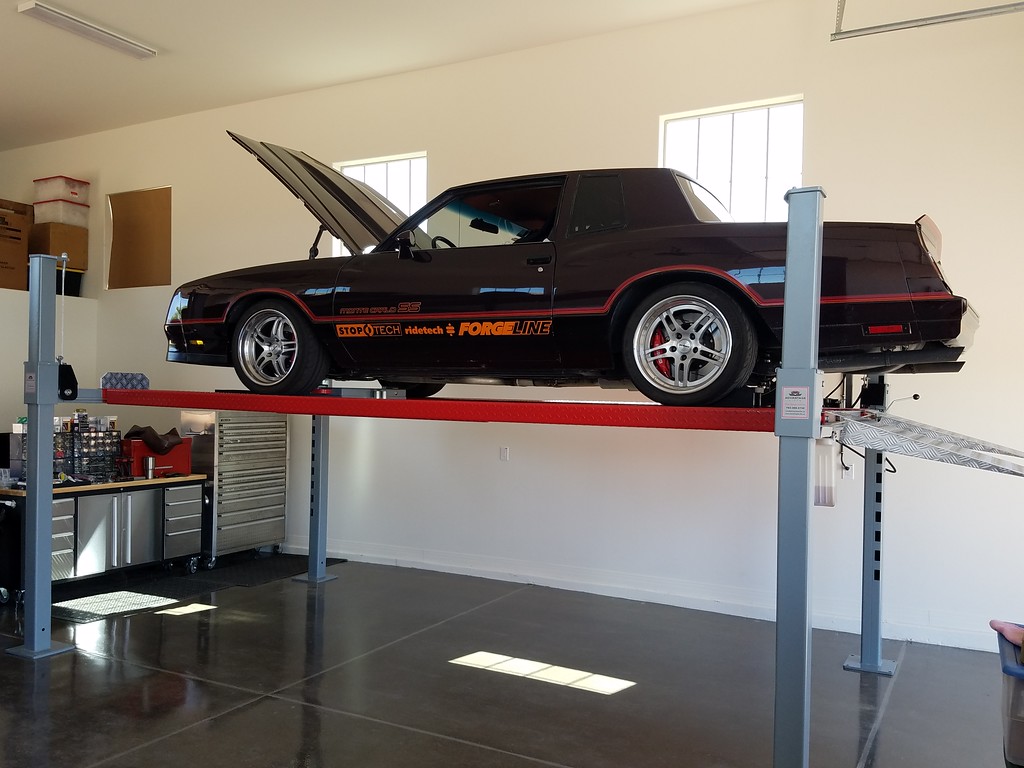
The rolling jack fits under the lower control arms but I do have to put the little jack pad extensions under pads so they contact the frame before the jack itself hits the exhaust. With the extension in place, they will not go past the lower control arms. Not a big deal...

There is plenty of room on the wall side of the lift. Here is Barney's door opened all the way up.
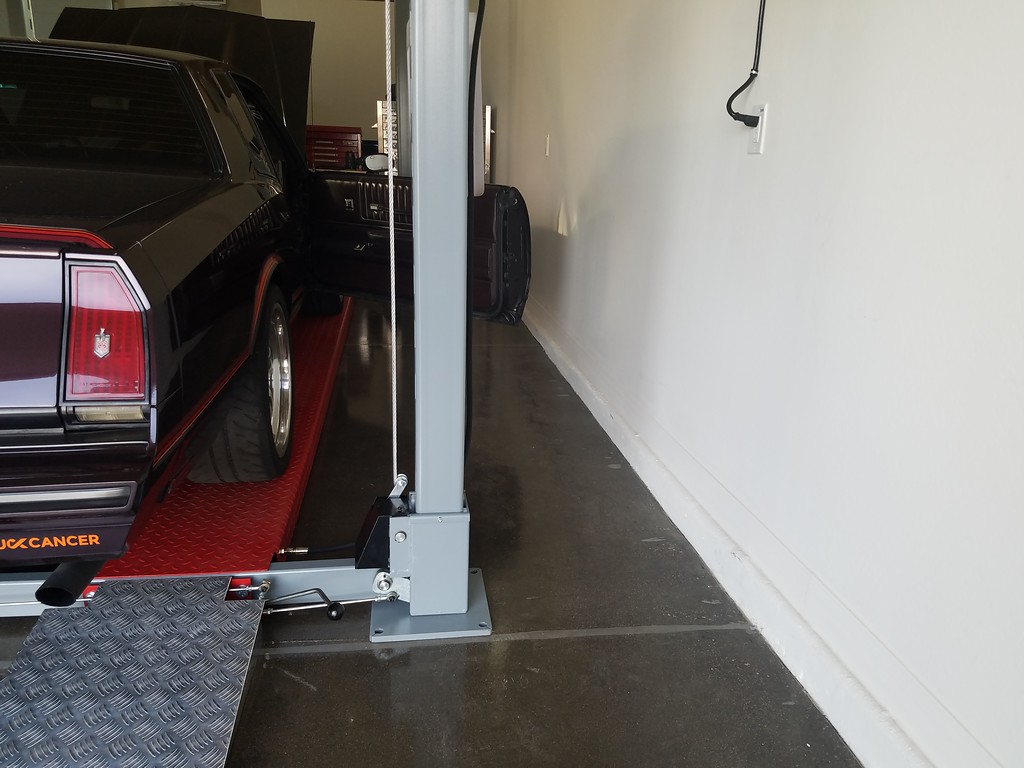
I am going to hang my nut and bolt bins and steel peg board for all of my hanging tools and supplies along the wall in between the posts. They'll be 6-8" out from the wall so it seems like a perfect place to me.
Pretty much all of this on the worlds most expensive workbench will be hanging on the wall next to it in a day or so.
 Lance
Lance
1985 Monte Carlo SS Street Car
-
05-21-2018 #374
Registered User
- Join Date
- Sep 2016
- Posts
- 44
very nice lift.
-
05-21-2018 #375
Registered User
- Join Date
- Mar 2005
- Location
- Phoenix,AZ
- Posts
- 495
Wow, that beats doing it in storage.
James W.
1987 Oldsmobile
-
05-21-2018 #376
Registered User
- Join Date
- Aug 2012
- Location
- Peoria, AZ
- Posts
- 1,758
Thanks!!! Originally Posted by focused313

Oh yeah!!! Originally Posted by olds87
Lance
1985 Monte Carlo SS Street Car
-
06-09-2018 #377
Registered User
- Join Date
- Aug 2012
- Location
- Peoria, AZ
- Posts
- 1,758
So I picked up another tool to help dial in alignment settings...well two of them actually...
A set of Longacre turn plates...
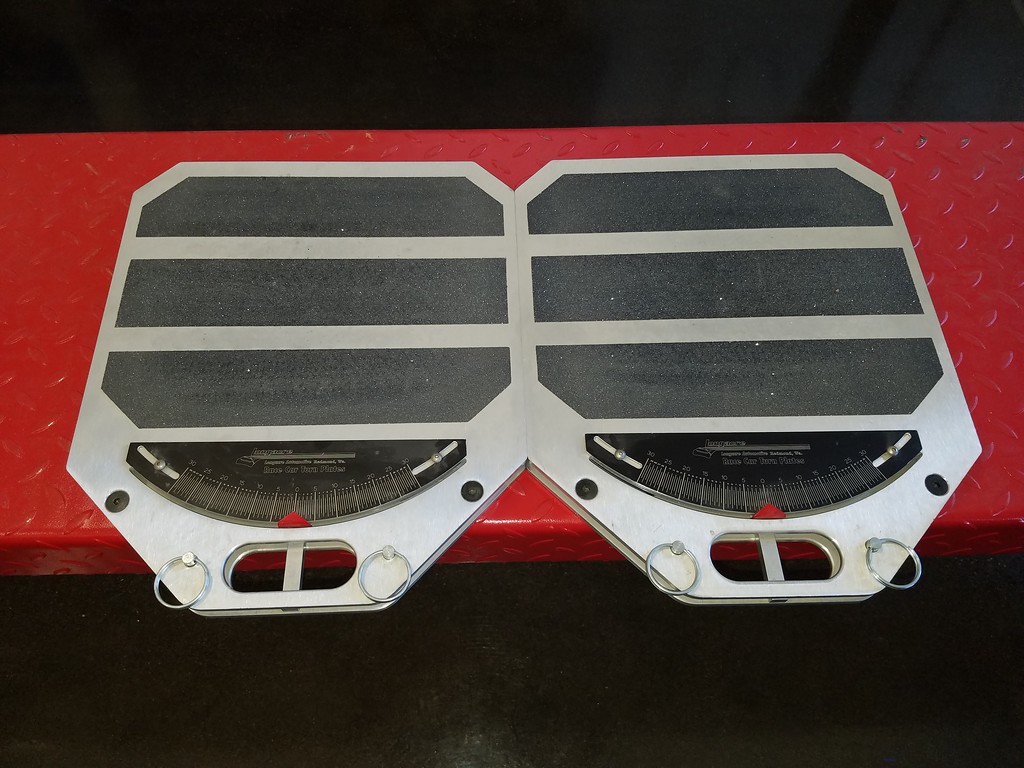
Working on a few more tools to outfit the new shop as well. Hopefully soon I'll have Barney back on the rack ready to fine tune a few things...Lance
1985 Monte Carlo SS Street Car
-
06-11-2018 #378
Registered User
- Join Date
- Aug 2011
- Location
- Granite City
- Posts
- 114
Not anchoring that lift to floor?
-
06-14-2018 #379
Registered User
- Join Date
- Mar 2005
- Location
- Phoenix,AZ
- Posts
- 495
Would this be for checking Ackerman? Originally Posted by SSLance
James W.
1987 Oldsmobile
-
06-15-2018 #380
Registered User
- Join Date
- Aug 2012
- Location
- Peoria, AZ
- Posts
- 1,758
No, it is not necessary nor can I drill into this post tension slab concrete floor. Originally Posted by beater65
- - - Updated - - -
That along with dialing in caster and camber more accurately. Originally Posted by olds87
Lance
1985 Monte Carlo SS Street Car
-

 Reply With Quote


