

Results 61 to 80 of 92
Thread: Mark D's 71 Camaro TT LS2
-
09-26-2012 #61
 Registered User
- Join Date
- Oct 2007
- Location
- New Westminster, B.C., Canada
- Posts
- 88

I decided to lower my radiator 3" so that I can put my intercooler piping over the top of the radiator and straight into the throttle body. On the procharger setup I used a side to side intercooler, but with the twin turbo's I decided to go with 2 seperate top to bottom 12"x12"x4" intercoolers (core size). I hope this doesn't end up getting filed under the "seemed like a good idea at the time" section. I've been taking lot's of pic's for this and will add them asap.
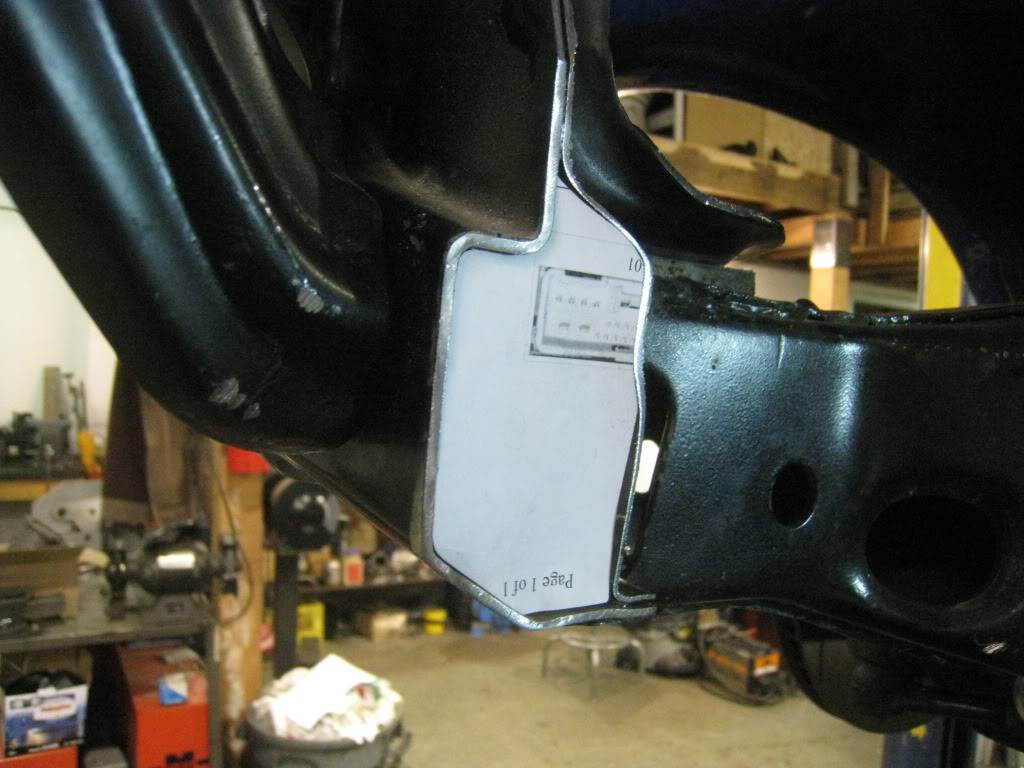
Ok, so here's what I am starting with. This shot shows the space between the upper rad support and the hood. It's about 5/8" to 3/4" at best. The hood latch is in the lower left corner of this shot. It isn't stock as I had to fabricate that as well to accomodate the old intercooler. I may still have to do something else for the hood latch, but am holding out until I actually have the new intercoolers in hand to mock them up and see where everything fits.
Here's the original intercooler. core size is 12"x24"x4"
Rad support
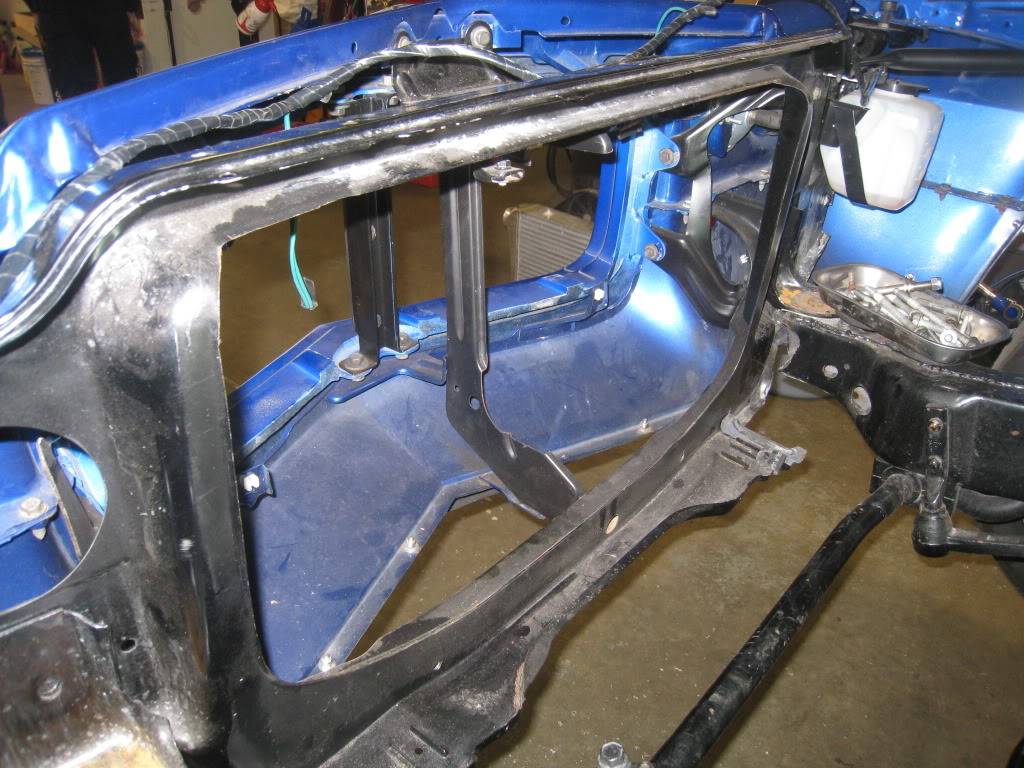
Here's what I cut out. I figured that I wanted to move my rad forward about 3" and down 3". This keeps it above the lip of the chin spoiler, and flush with the original rad support sheet metal after the formed part is cut out.
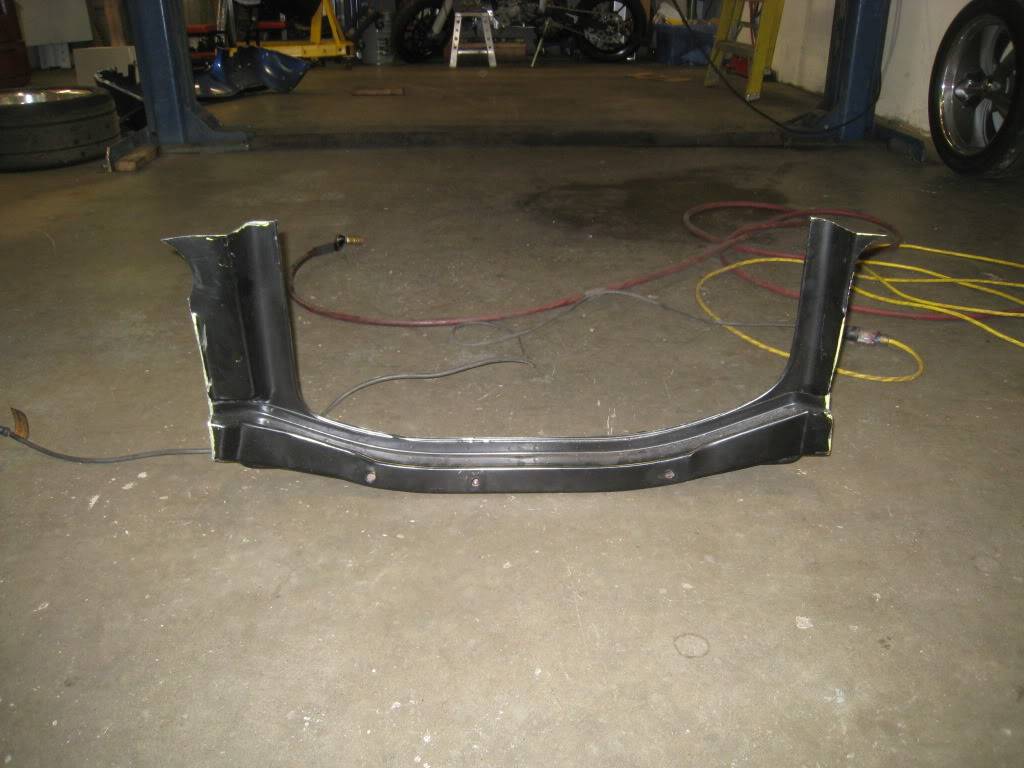
I removed the lower valance to cut out the rad support. Enter Sawzall!
-
09-26-2012 #62
Registered User
- Join Date
- Oct 2007
- Location
- New Westminster, B.C., Canada
- Posts
- 88
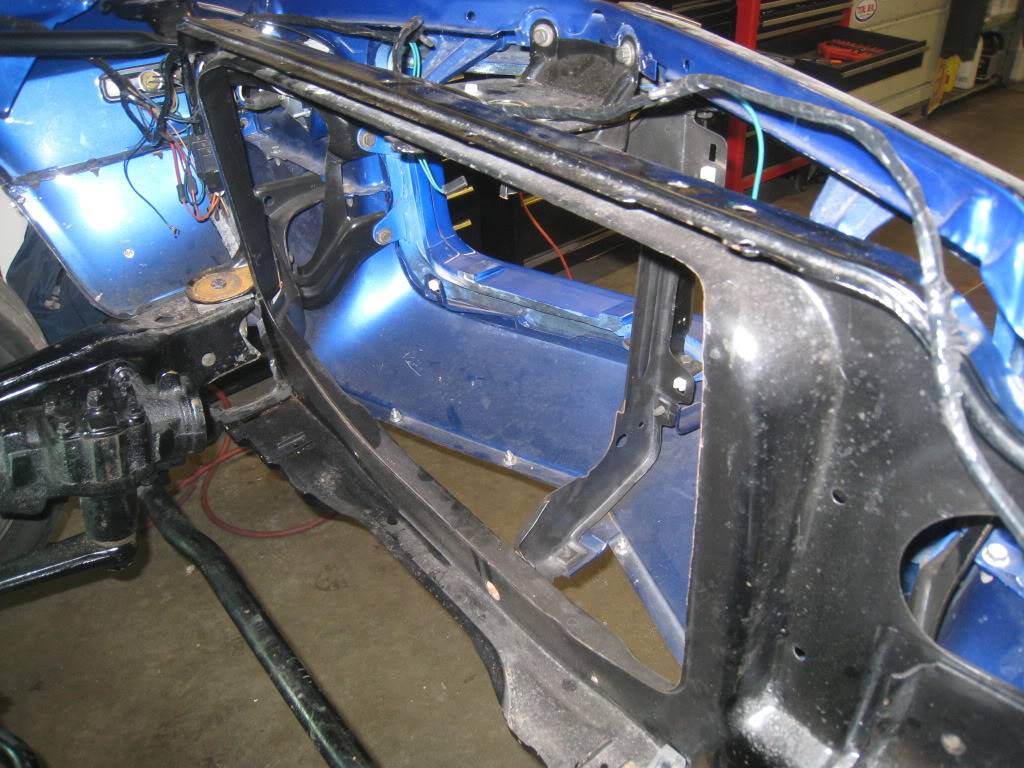
Next I used paper to trace out caps for the rad support frame ends. An easy way to do this which I use all the time is this. Hold a clean sheet of white paper over the shape you want to trace, and without moving the paper around too much, gently rub your dirty fingers across the paper over the edges of the object. I use this method when I need to make my own gaskets as well. In this case, I cut the tracing out through the middle of the image and then transferred the paper to 18 guage steel.
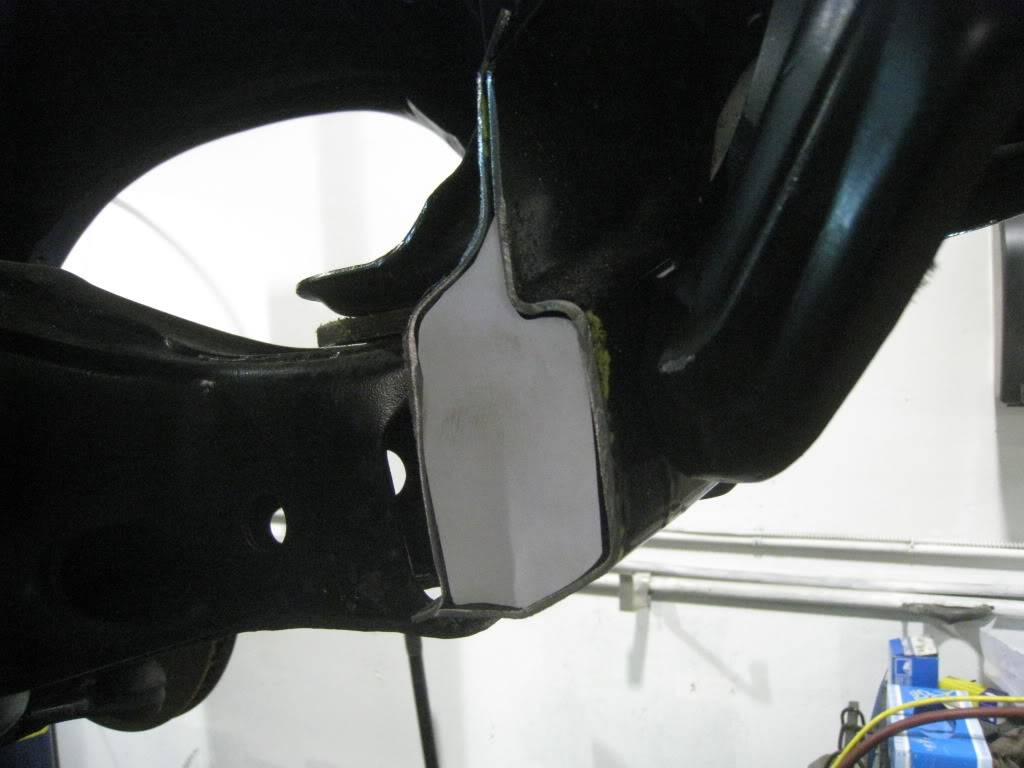
Steel caps tig welded in
More to come...
-
09-26-2012 #63
Registered User
- Join Date
- Oct 2007
- Location
- New Westminster, B.C., Canada
- Posts
- 88
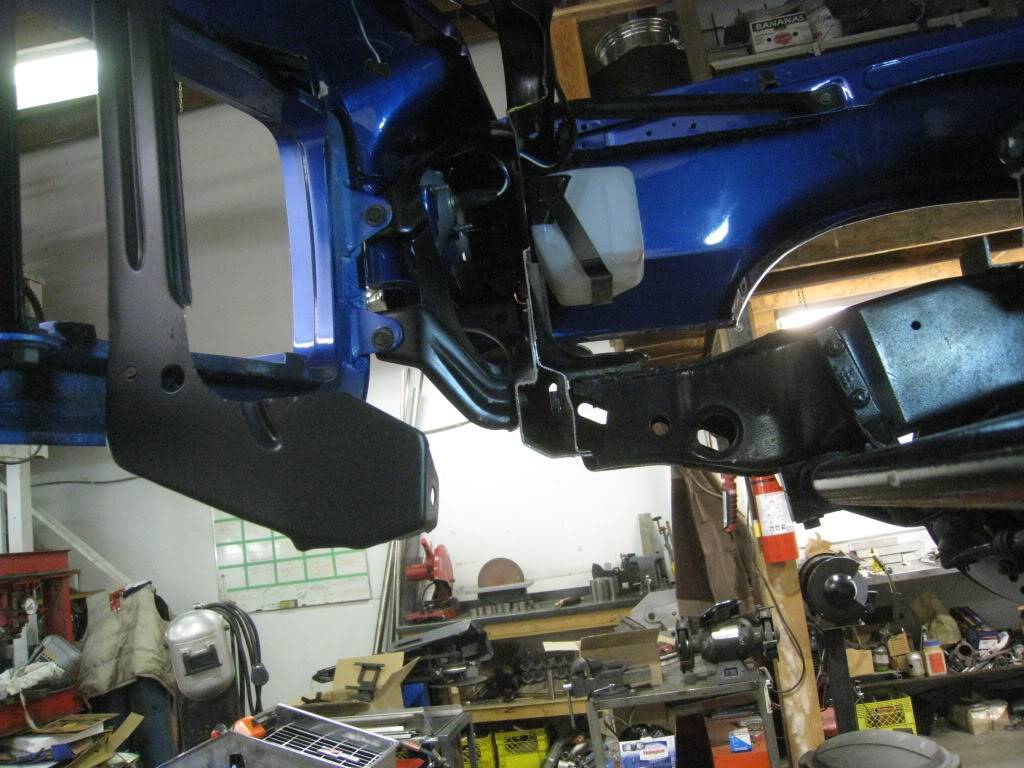
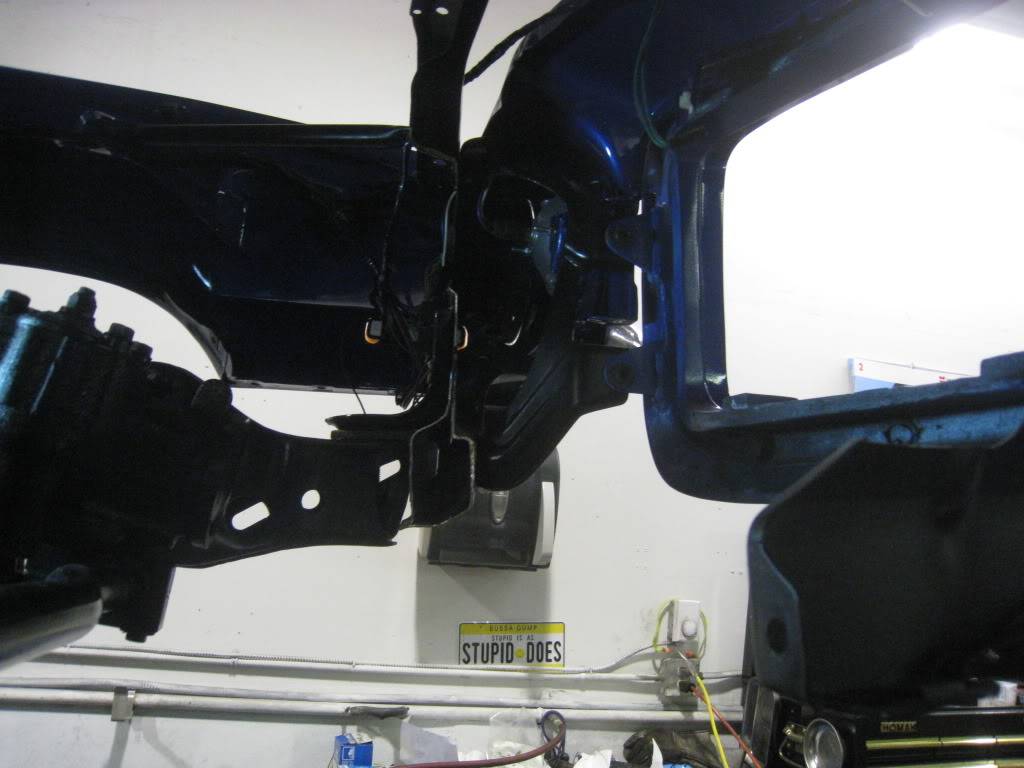
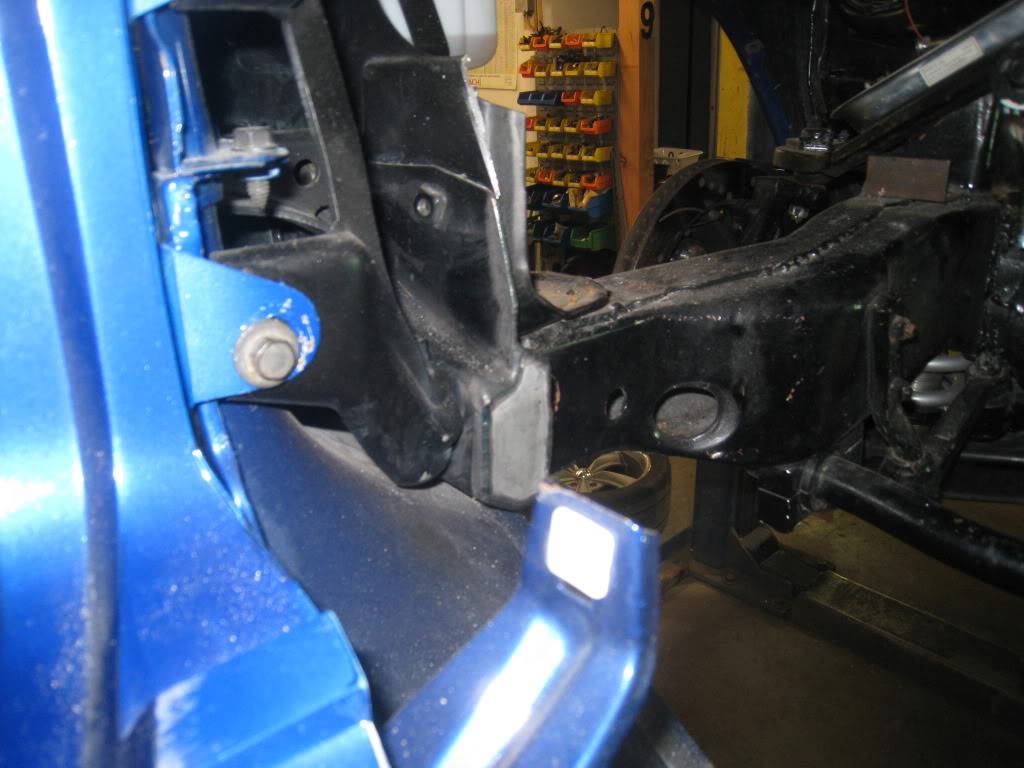
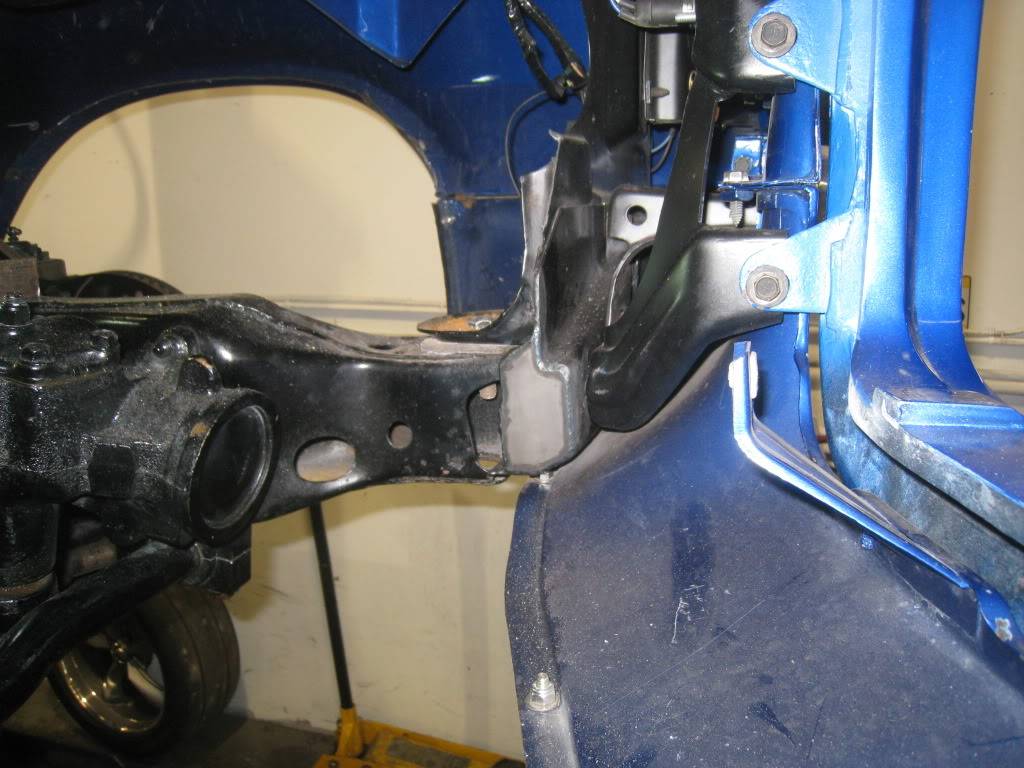
A little more progress... I took some 18 guage steel and formed it to hold the original rubber saddles. I then drilled 1/4" holes in the appropriate spots to locate the rubbers. I put the radiator in place on top of a pair of jackstands and lowered the car until I found my desired clearance. I used some welding rod and bent it to give me a guide for making the drop down brackets to support the formed piece. I cut these out of 14 guage. formed them and checked out the fit. I will be mounting these from the bottom bolted into the front subframe. I decided to stop at this point and wait until I can mock up the intercoolers just to be sure everything fits before welding anything.

-
09-26-2012 #64
Registered User
- Join Date
- Oct 2007
- Location
- New Westminster, B.C., Canada
- Posts
- 88
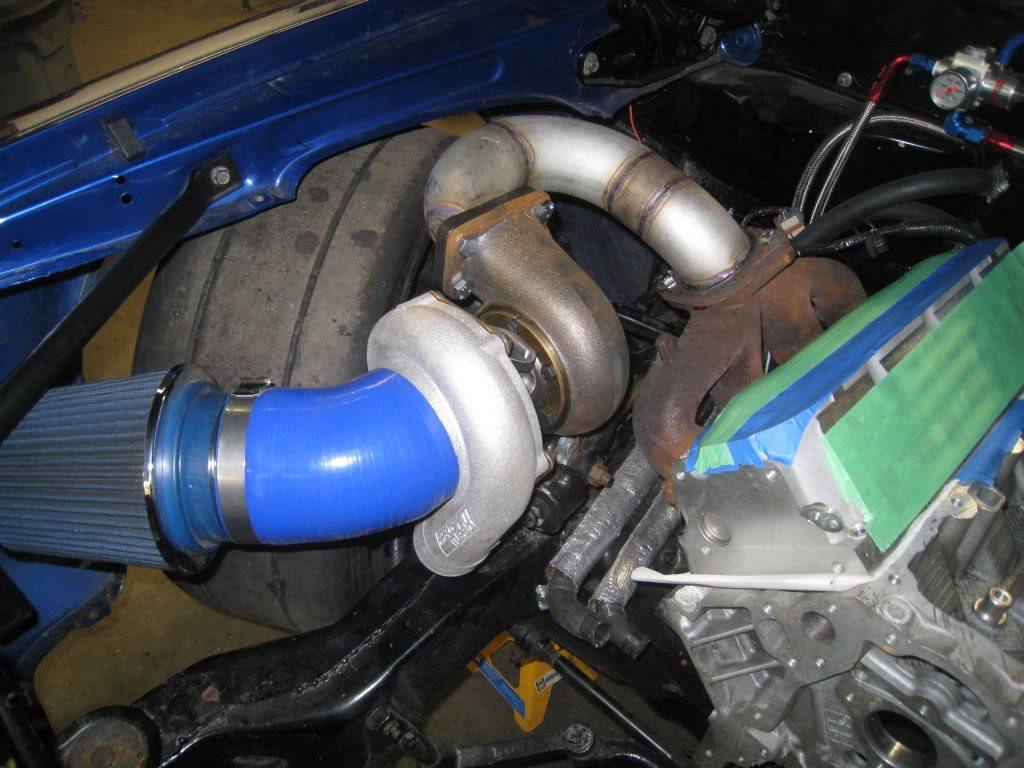
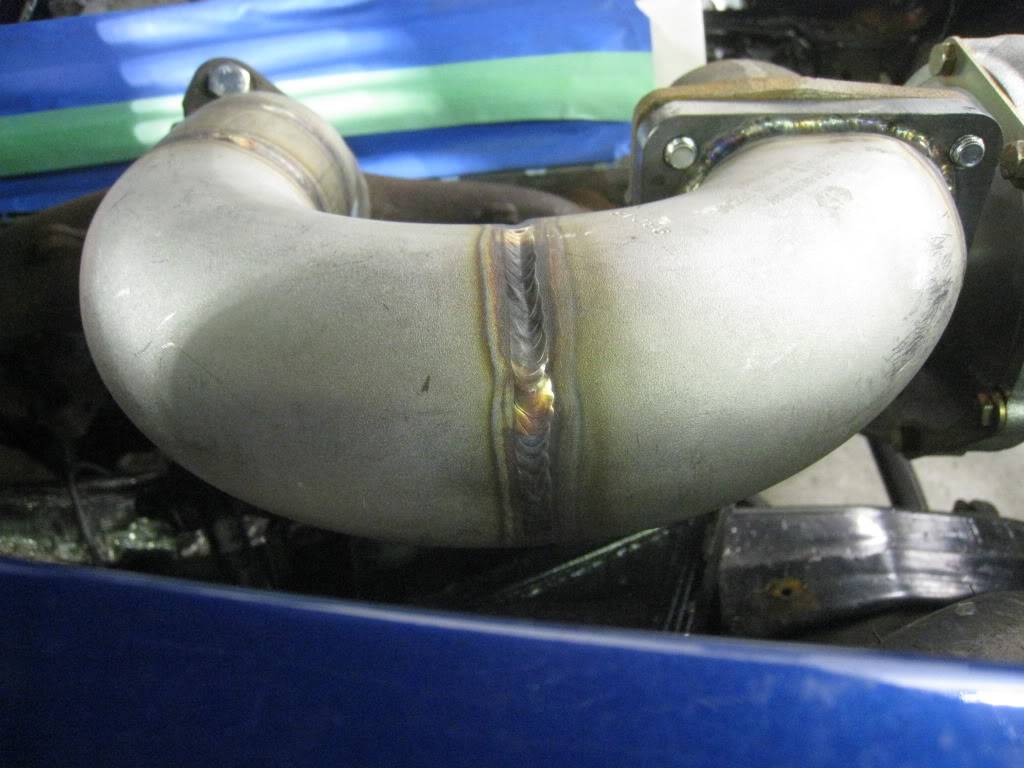
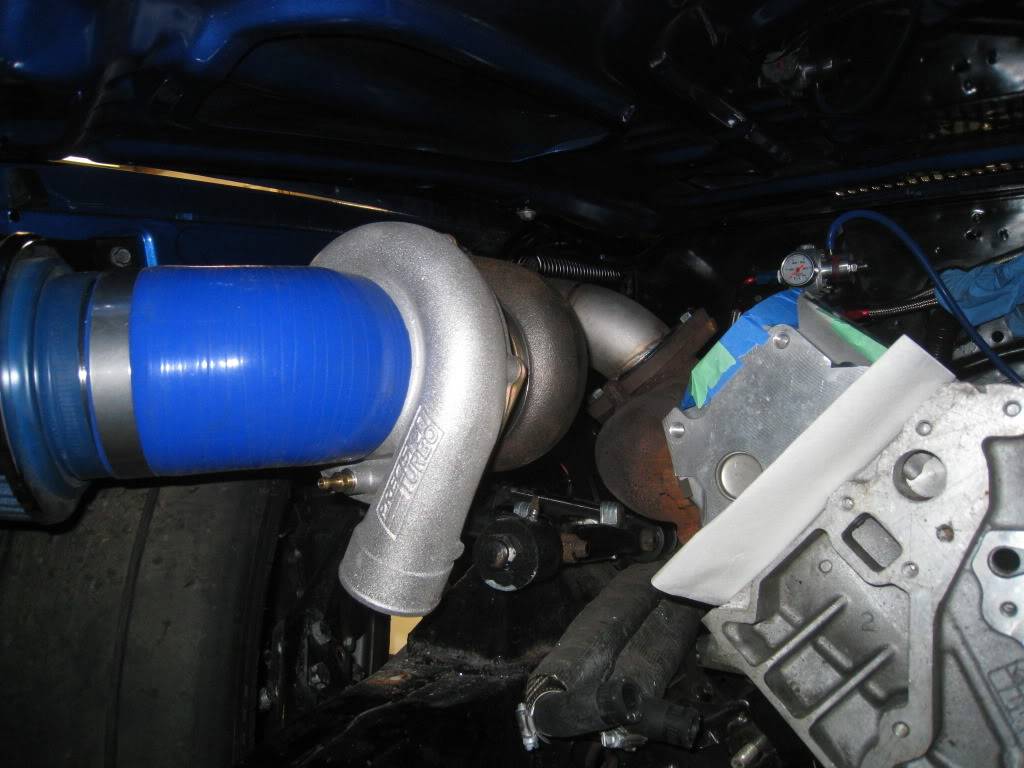
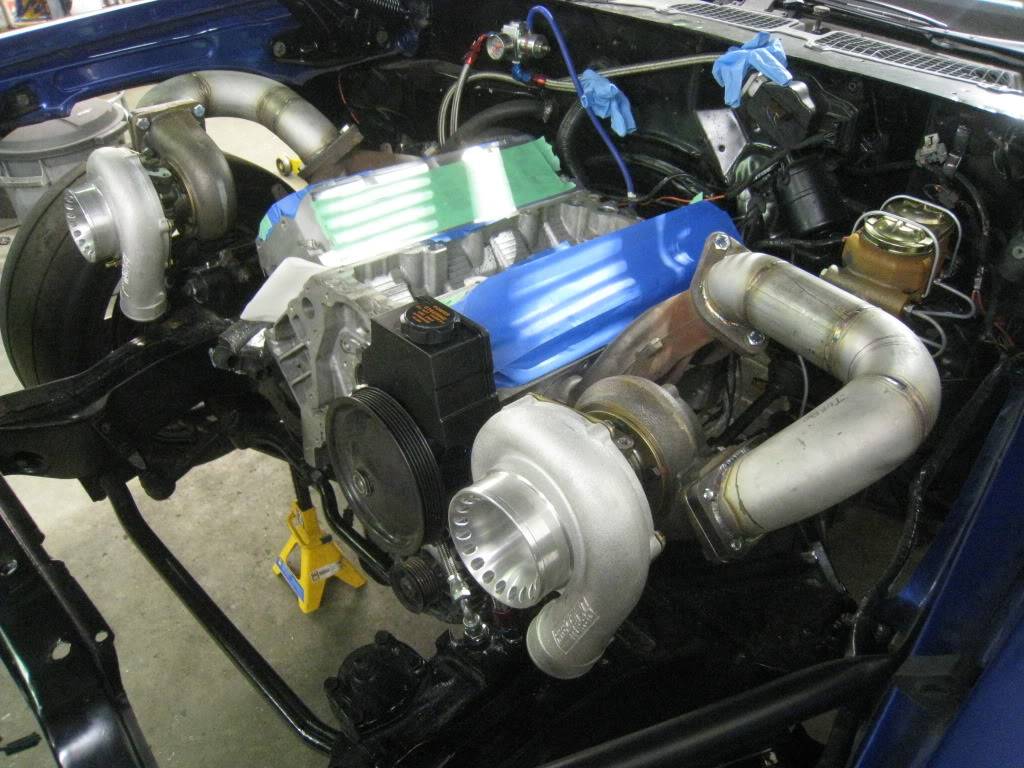
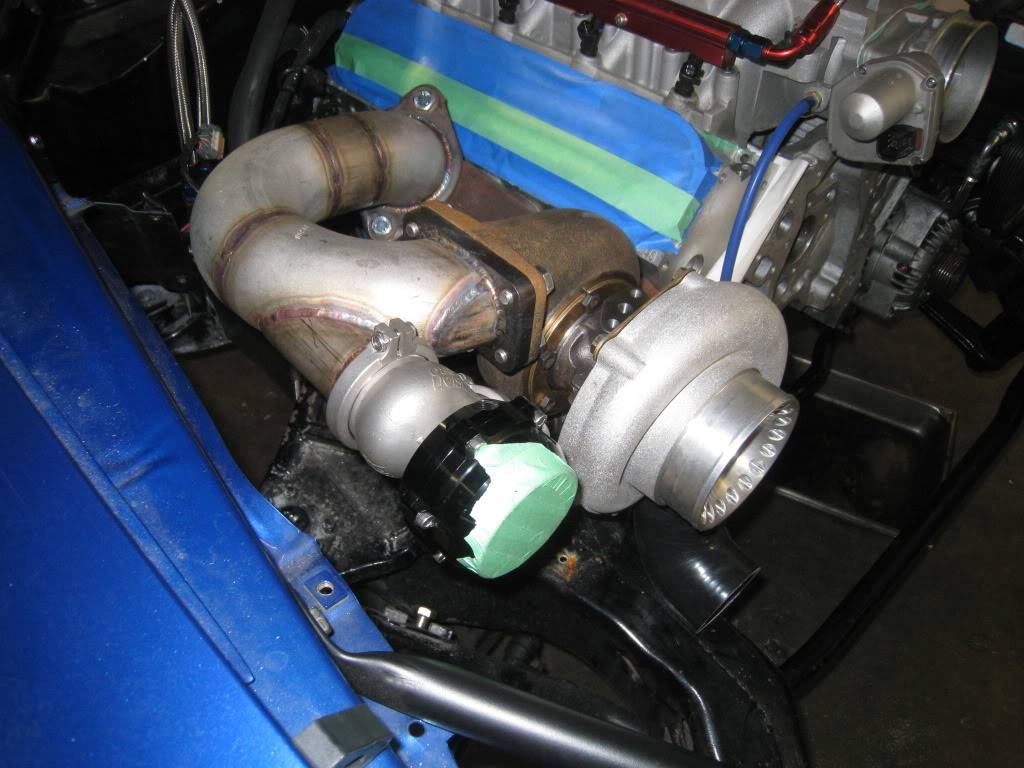
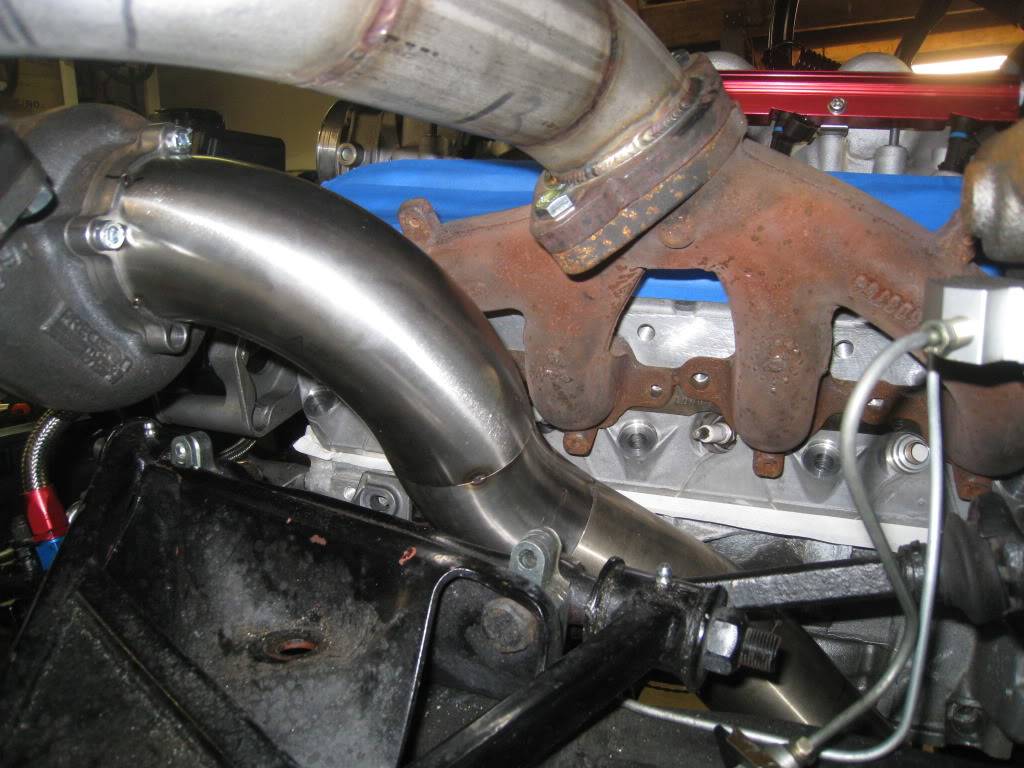
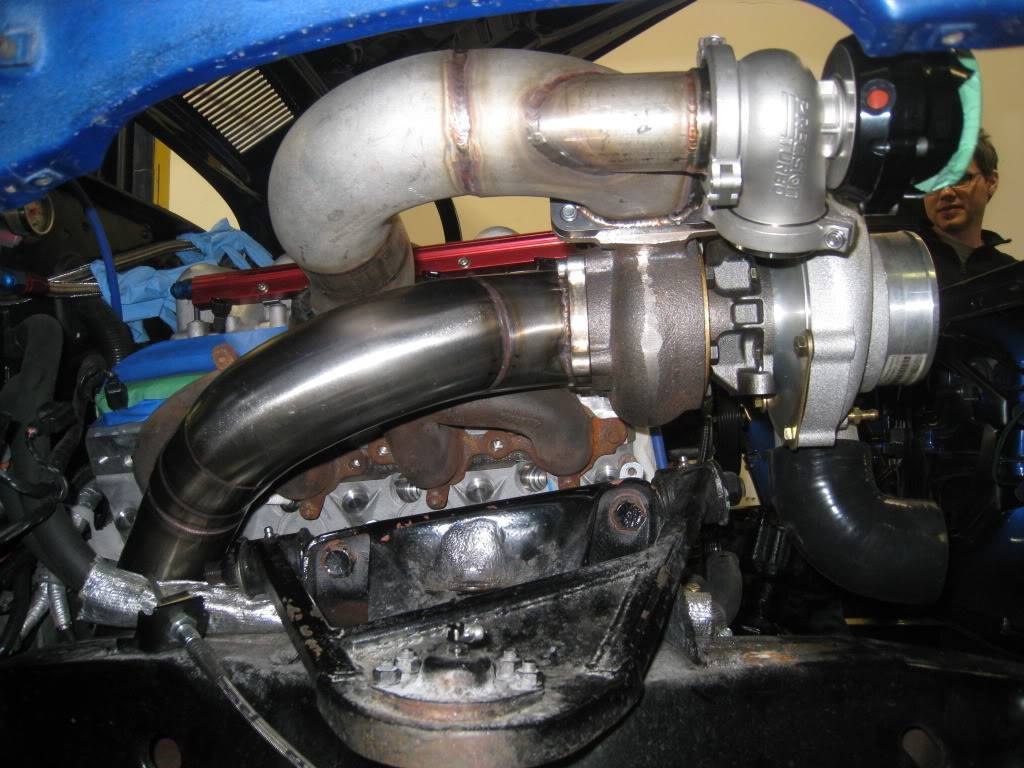
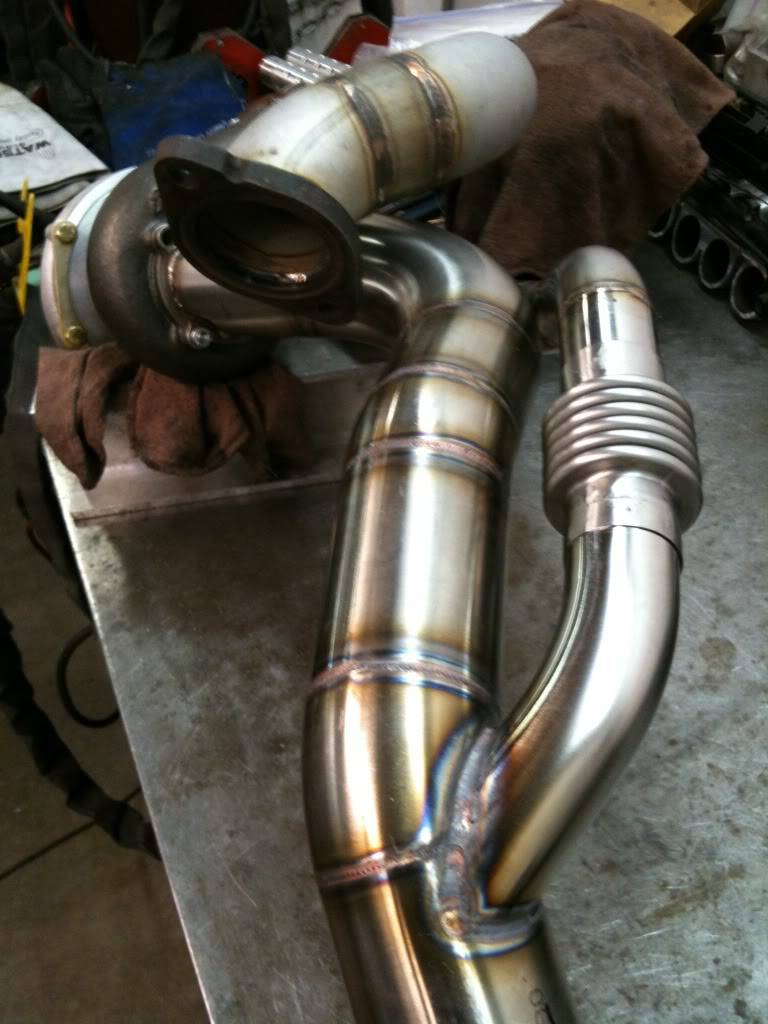
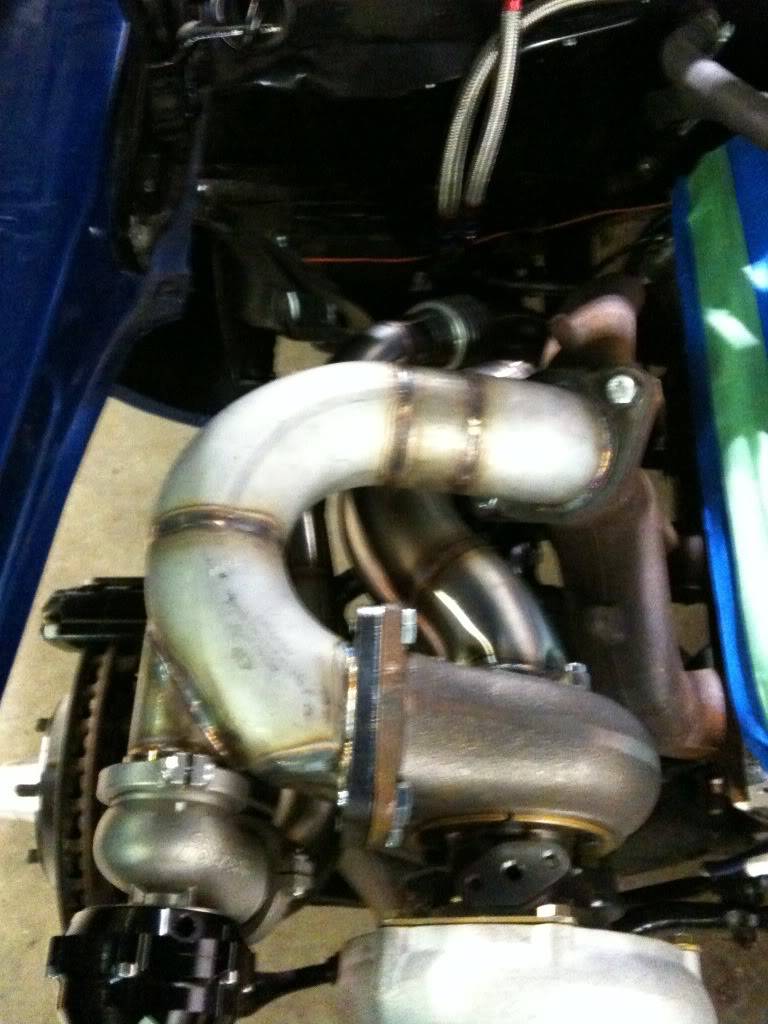
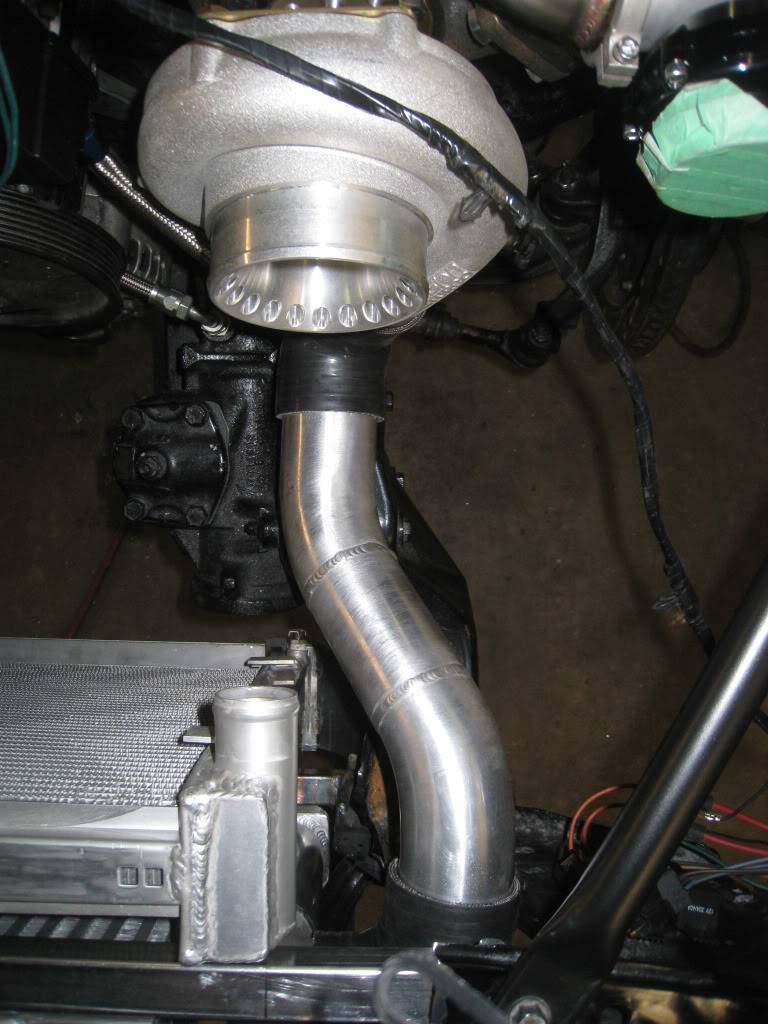
Got some work done today on the turbo to manifold pipes. I am using schedule 10 2.5" stainless steel pipe for these. As always a big thanks goes out to Mike and Ryan at Custom Metalcraft.
Turbos mocked up, passenger side was the more difficult side, so did that first.
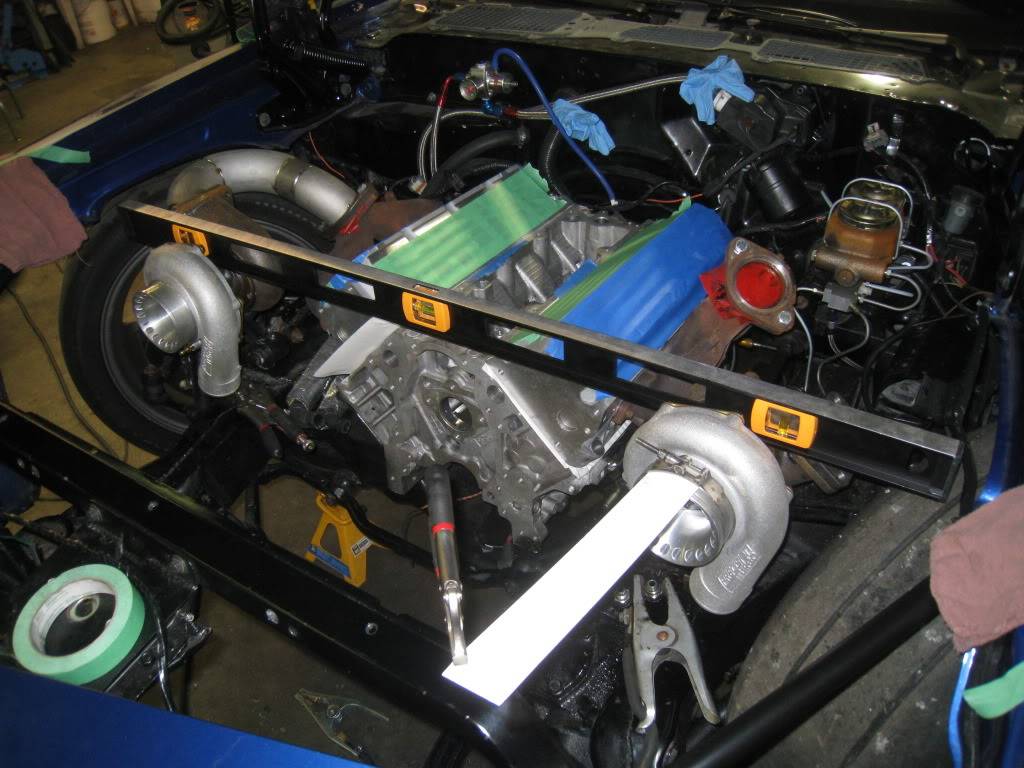
Some various pics of the process.

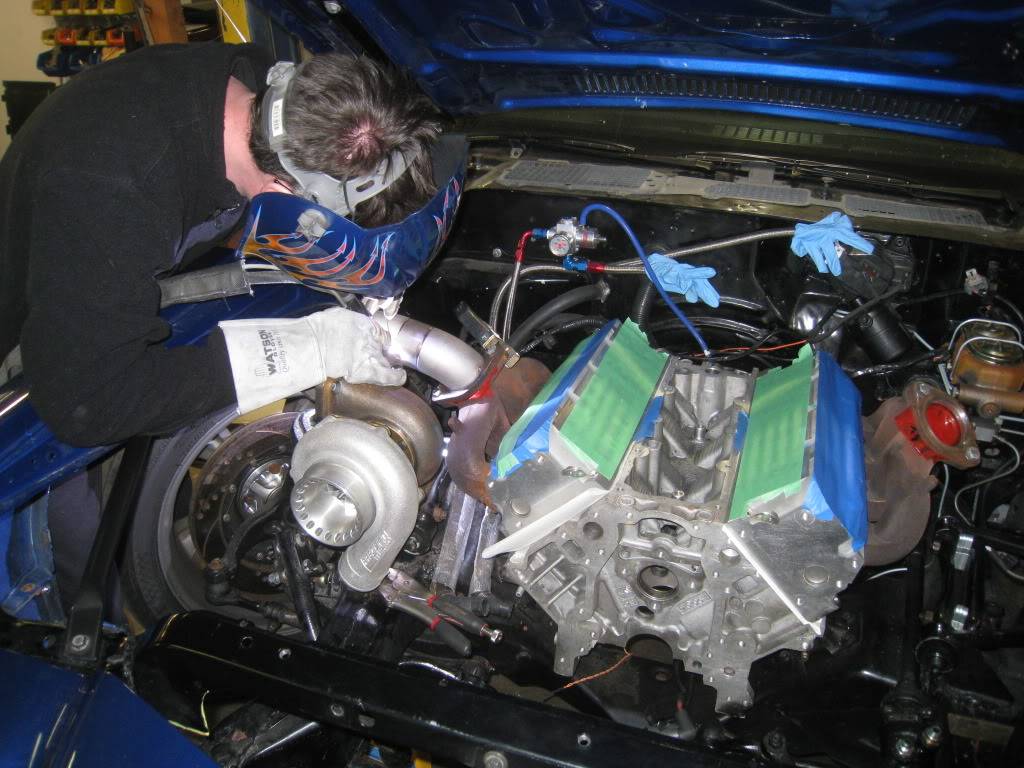
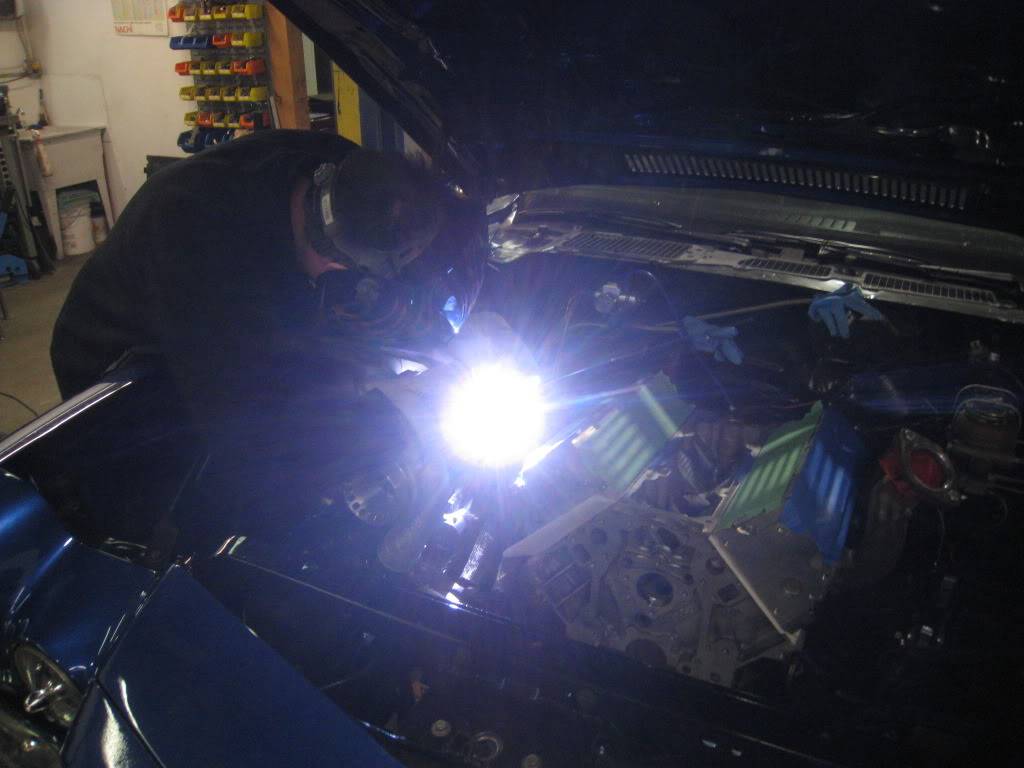
I did all the mock up with the springs removed from the front suspension, and the wheels on and jacked up to bottomoed out with the wheel turned both ways to be sure there would be no clearance issues later. I will be making my own inner fenders. I also continually checked the clearance to the hood.
-
09-26-2012 #65
Registered User
- Join Date
- Oct 2007
- Location
- New Westminster, B.C., Canada
- Posts
- 88
Its not all good, I'm broke. I can only do this stuff because I pre-bought all the parts when I was working. ***Lesson to be learned??? Stock up while you can!***
Some more pics...
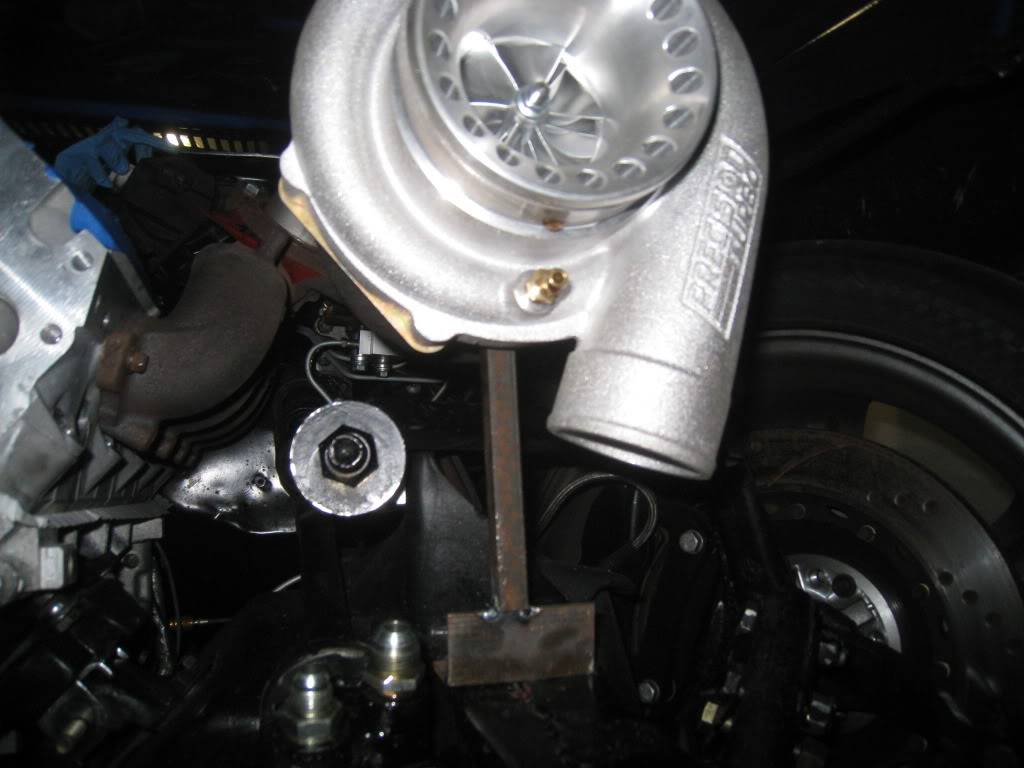

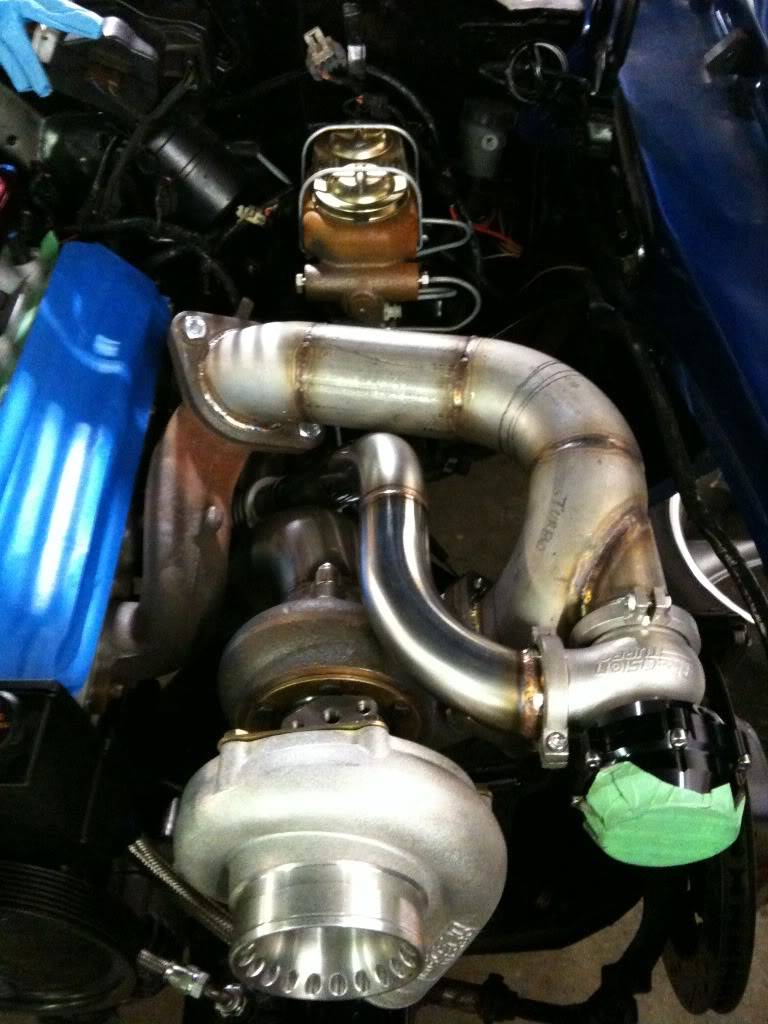
Trying to figure out exactly where to put the wastegates. These are Precision Turbo 46mm units.
-
09-26-2012 #66
Registered User
- Join Date
- Oct 2007
- Location
- New Westminster, B.C., Canada
- Posts
- 88
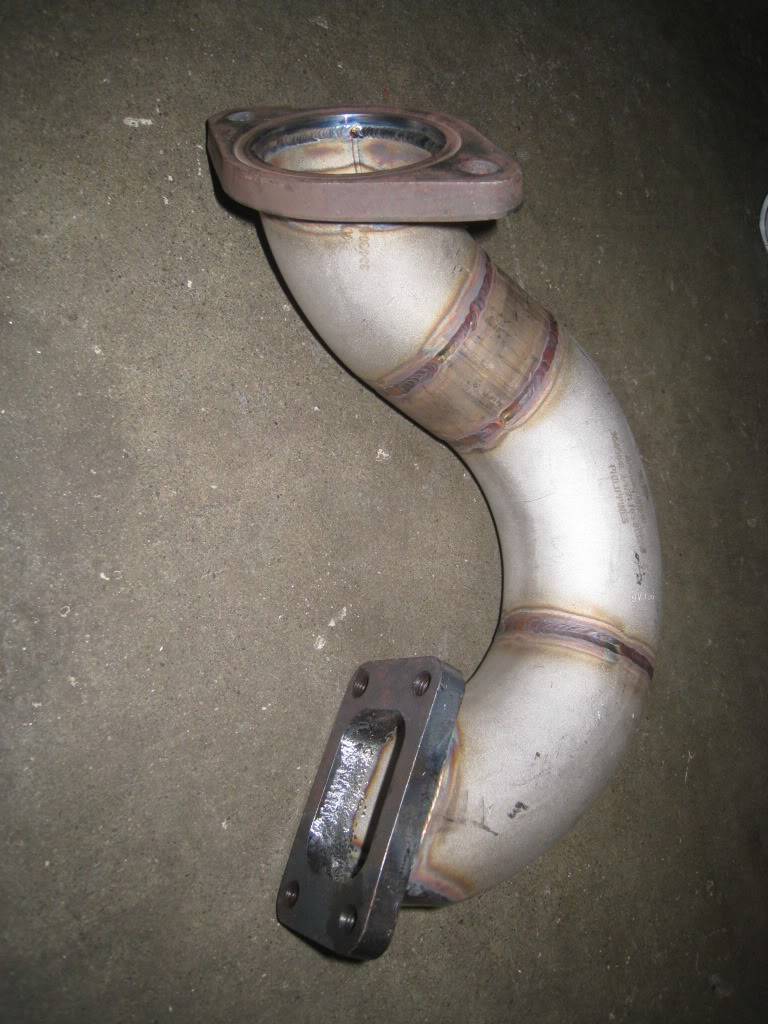
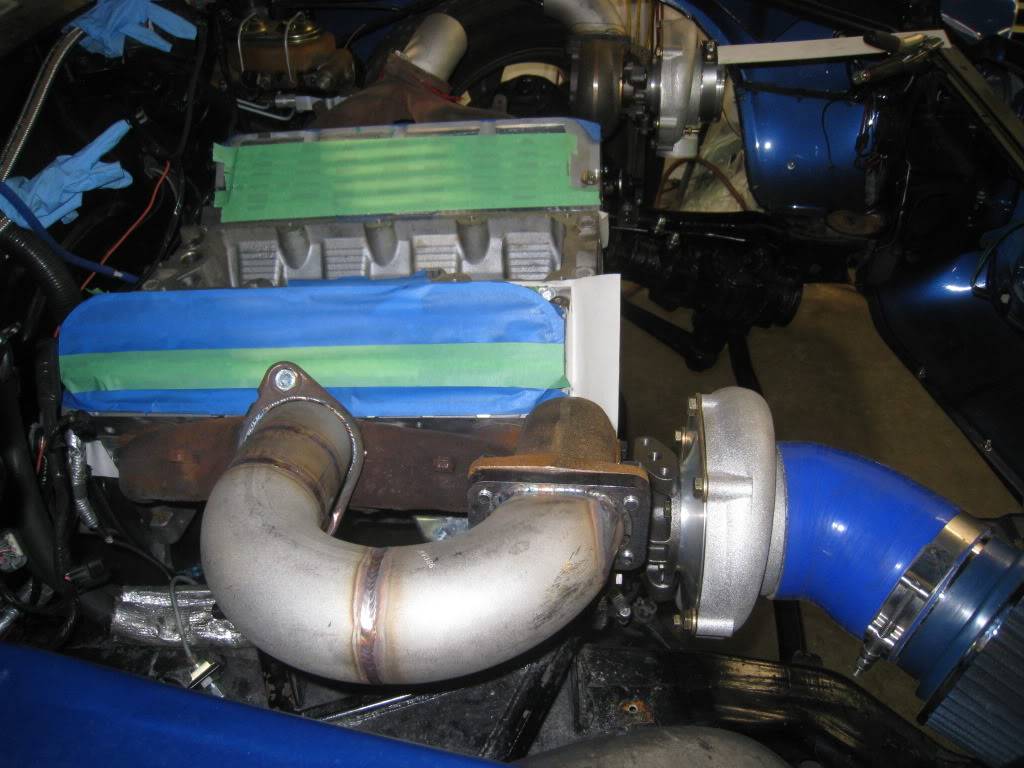
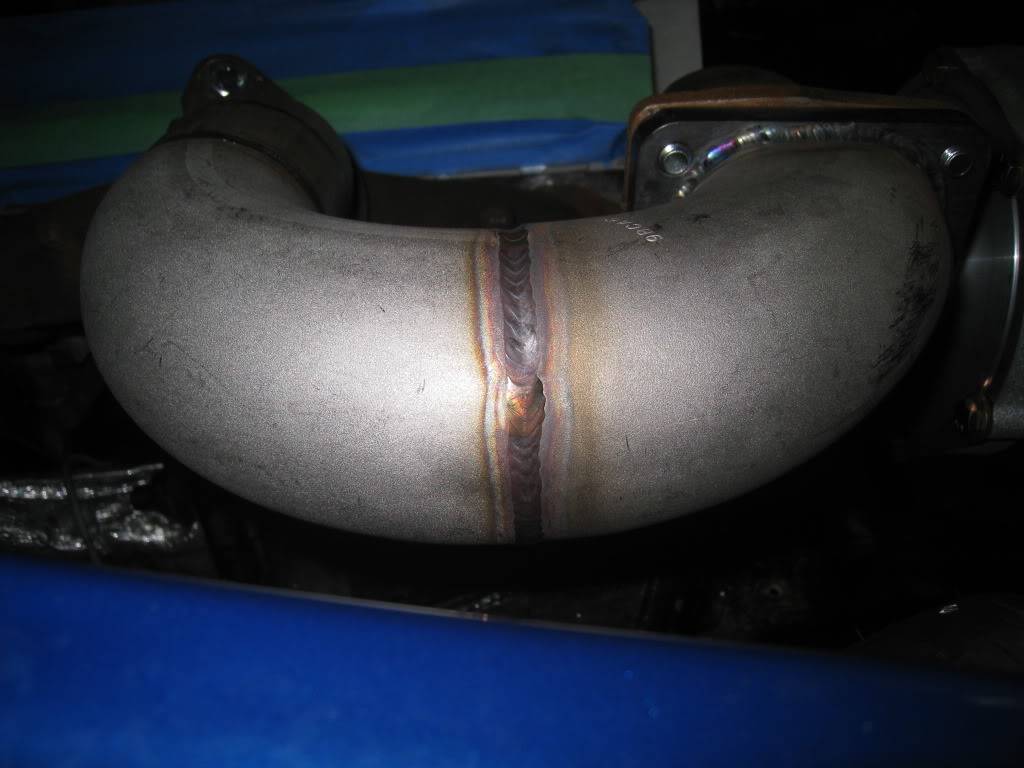
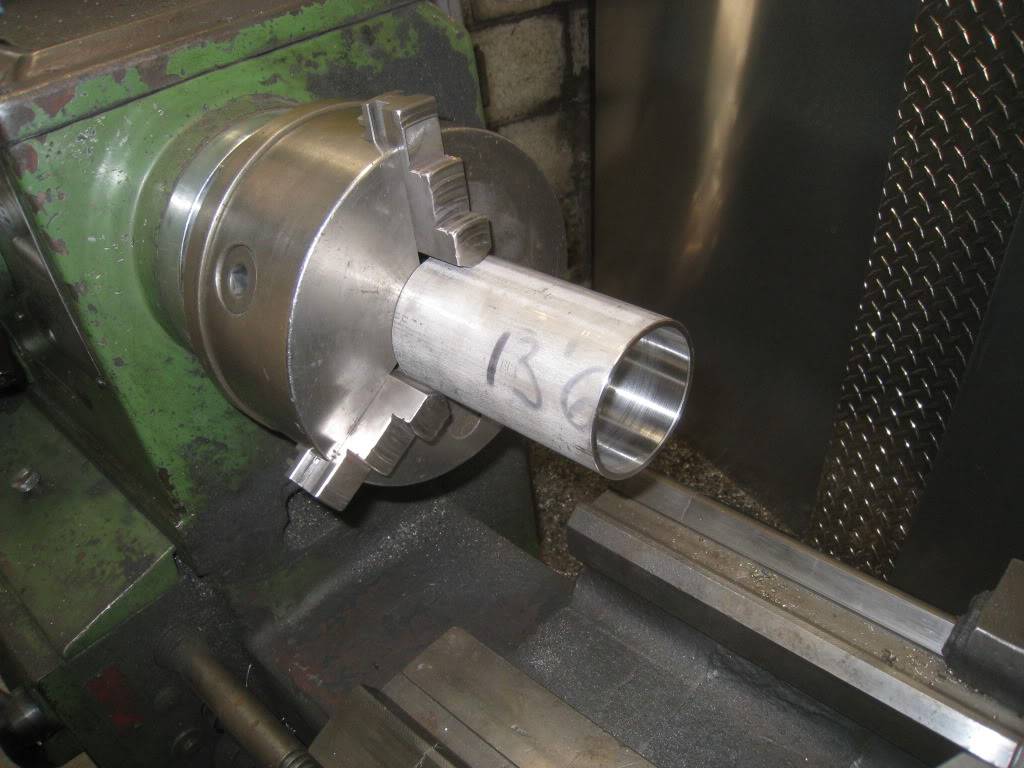
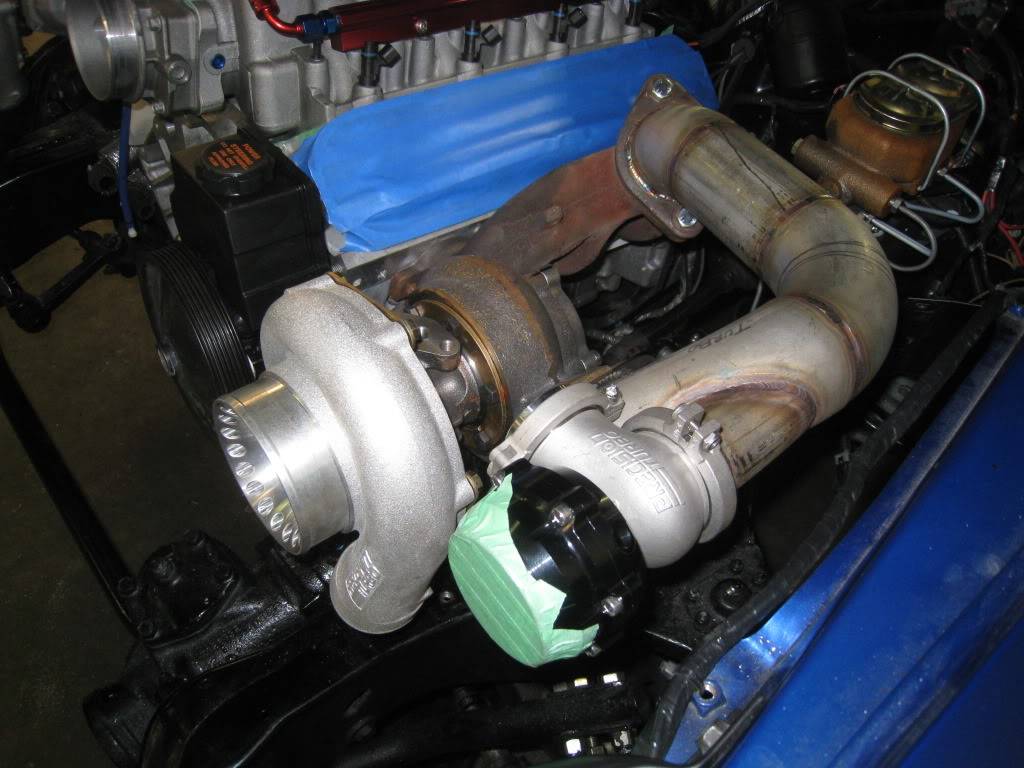
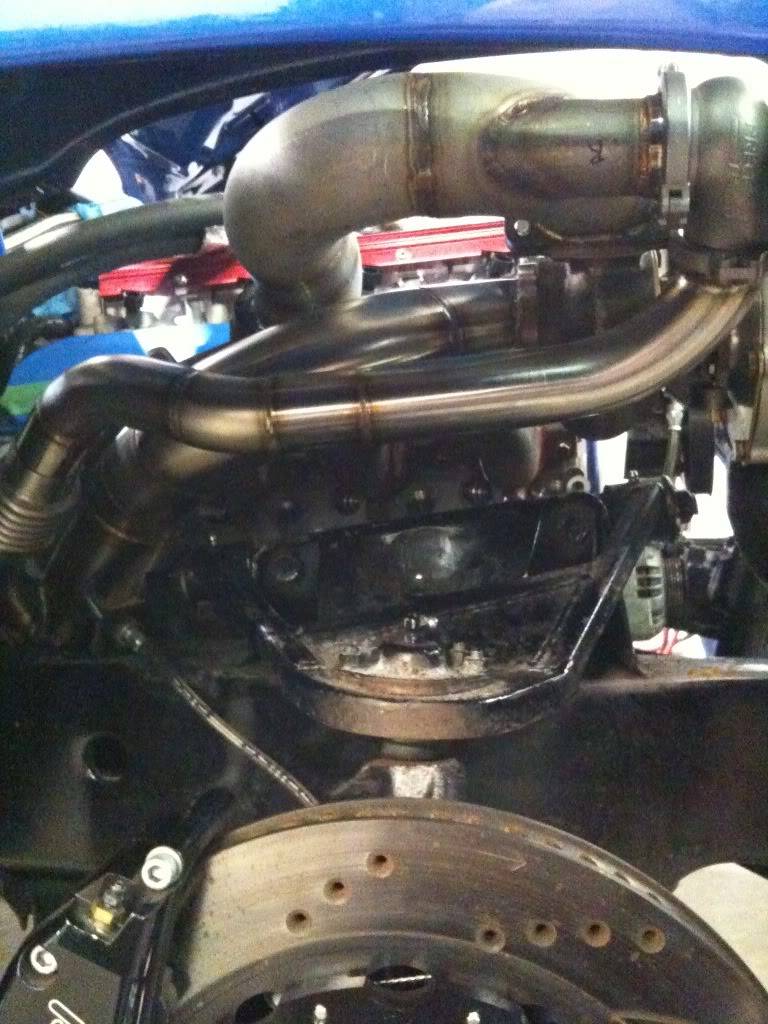
I got the other side done today... YAY!!! I ran into an issue with my pipe though. Trying to find schedule 10, 2.5" stainless steel straight pipe was tough. Especially when you only need 6 inches of it. So tough that no one had it. One guy could get it, but I would have to buy a 20 foot length and he would still have to order it. Solution? Bought 6 inches of schedule 40, 2.5" pipe and spent a good hour on the lathe boring it out. Problem solved.
Pipe in lathe
Drivers side pipe before final welding
All mocked up
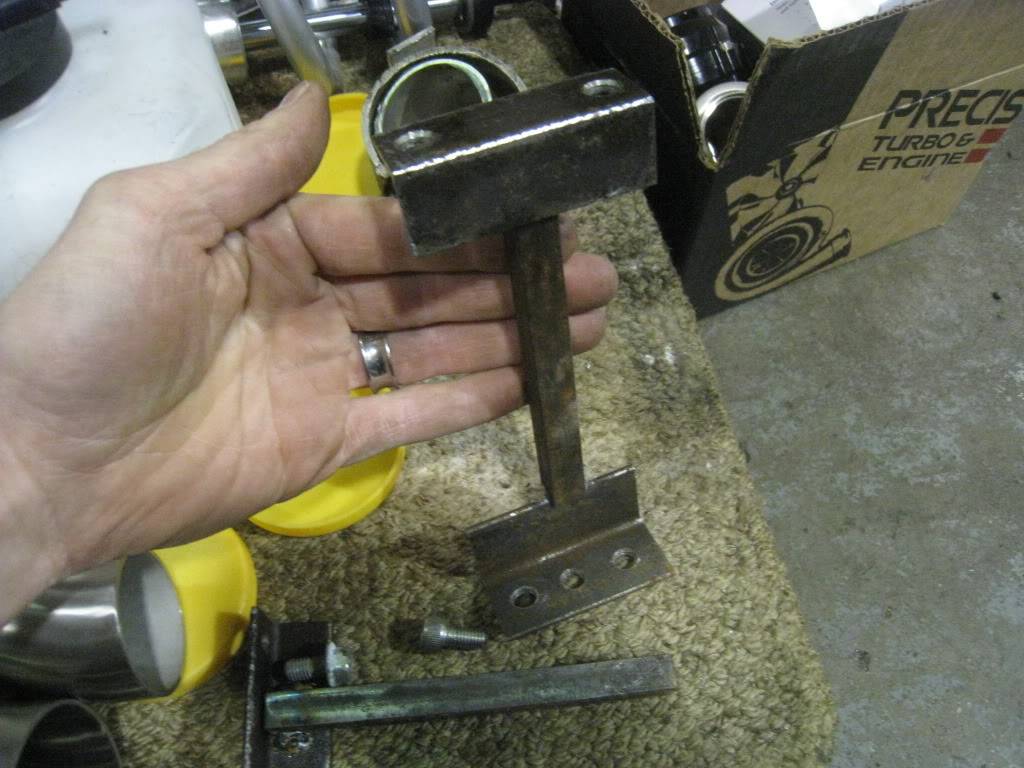
The stands I made to hold the turbo's in place while building pipe
-
09-26-2012 #67
Registered User
- Join Date
- Oct 2007
- Location
- New Westminster, B.C., Canada
- Posts
- 88
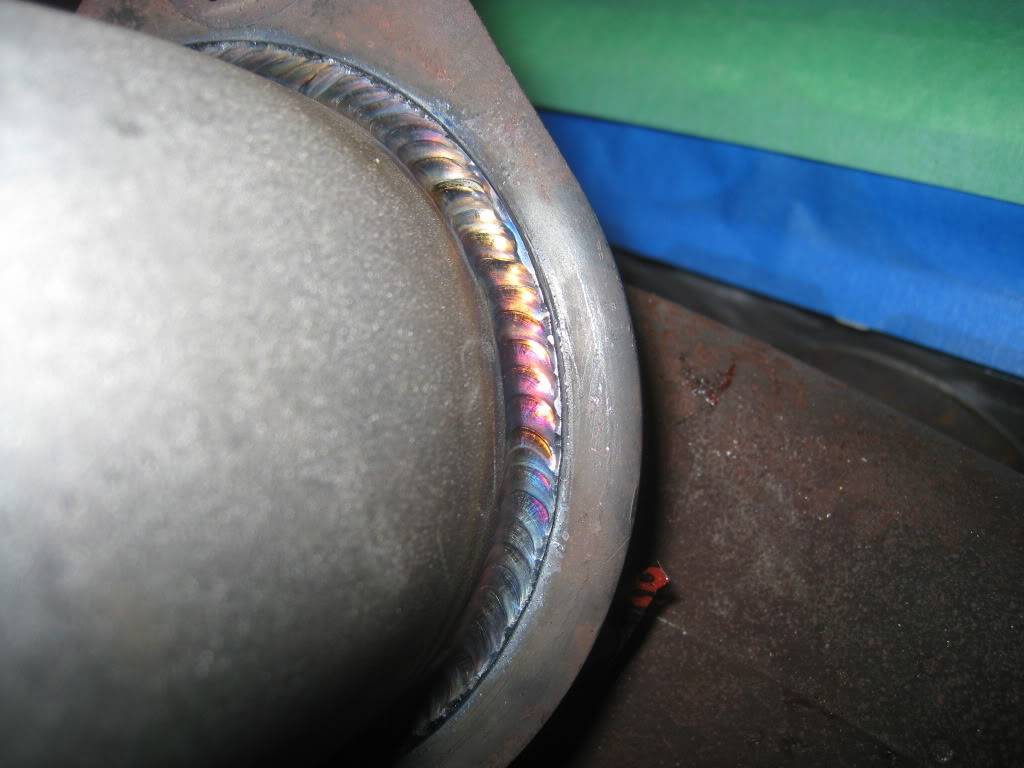
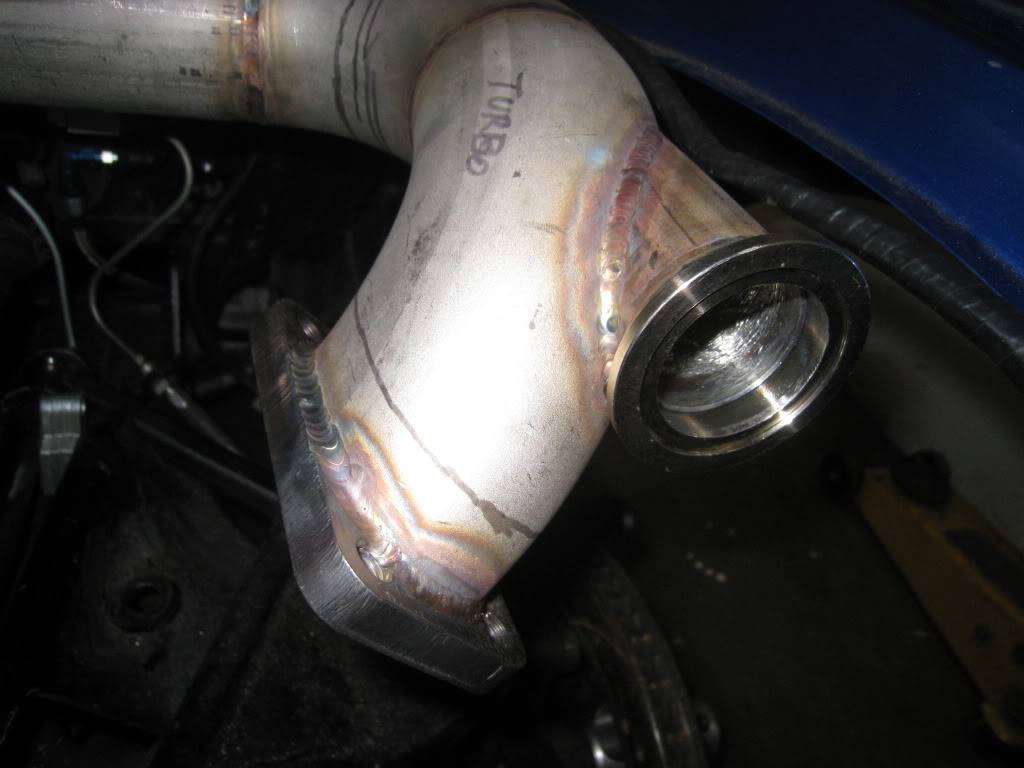
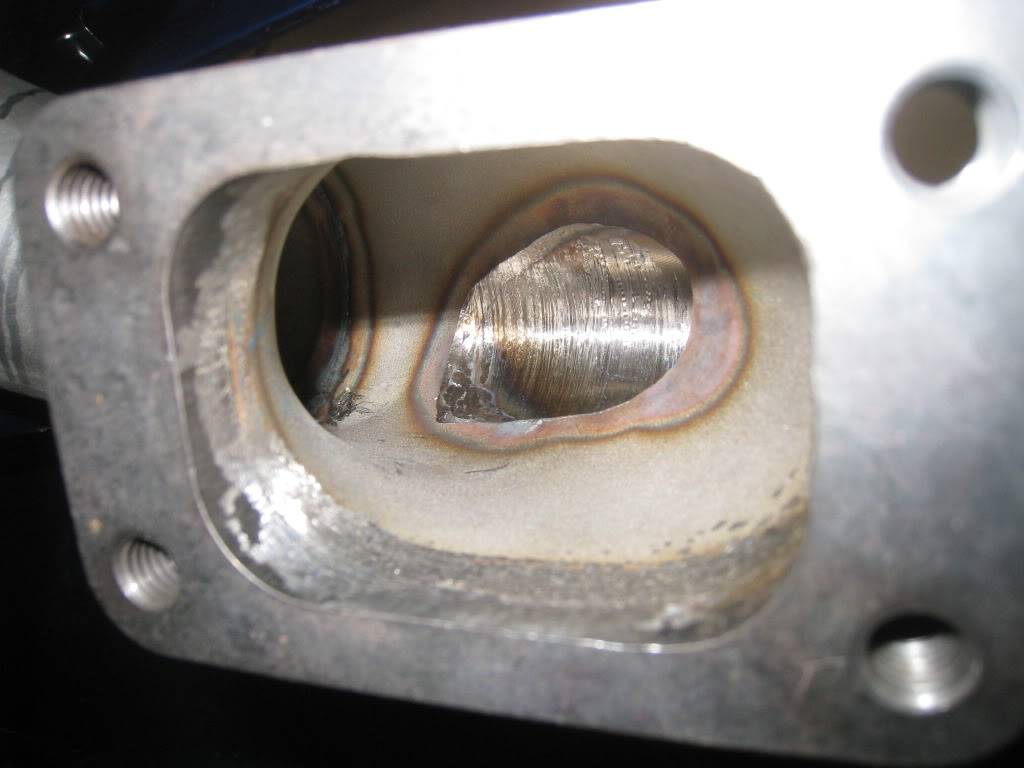
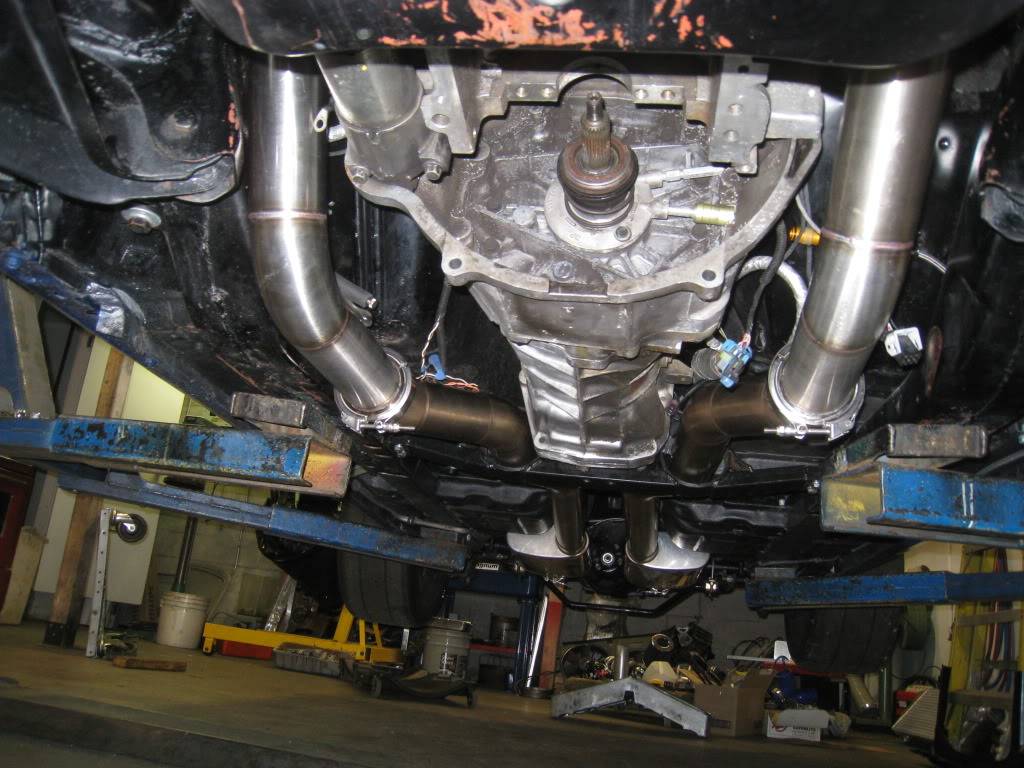
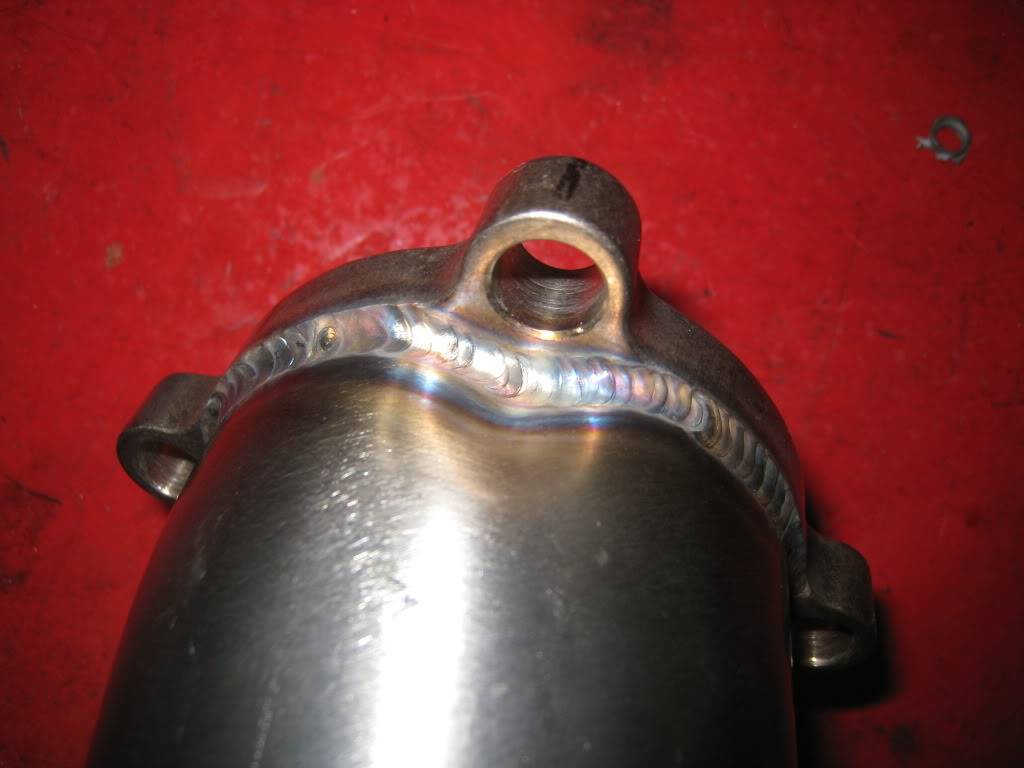
Mounted the wastegates today and built 1 downpipe. After the spiggot was welded onto the main pipe, I just ran a holesaw through the middle, then cleaned it up with a carbide bit die grinder.
09-26-2012 #68
Registered User
- Join Date
- Oct 2007
- Location
- New Westminster, B.C., Canada
- Posts
- 88
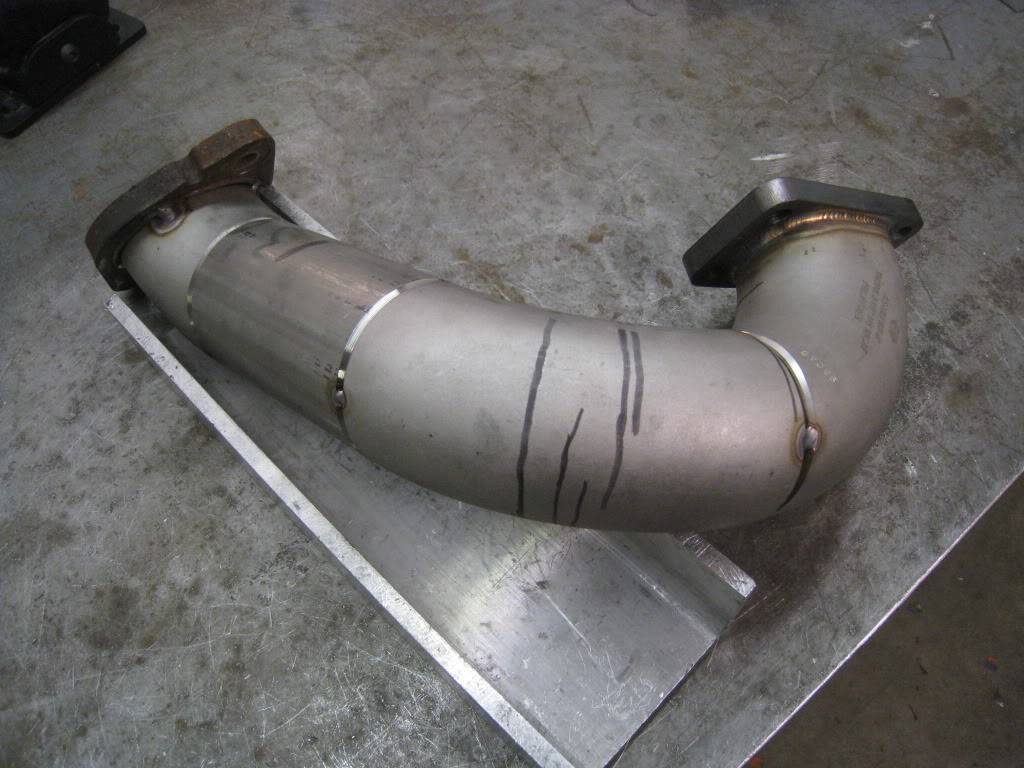
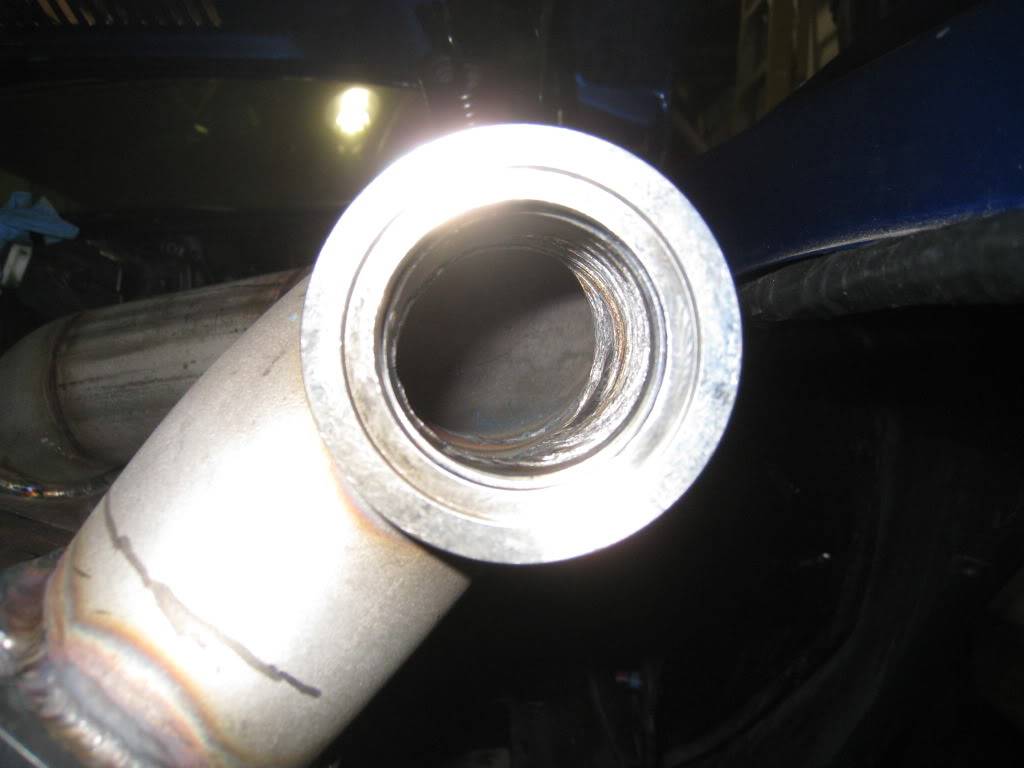
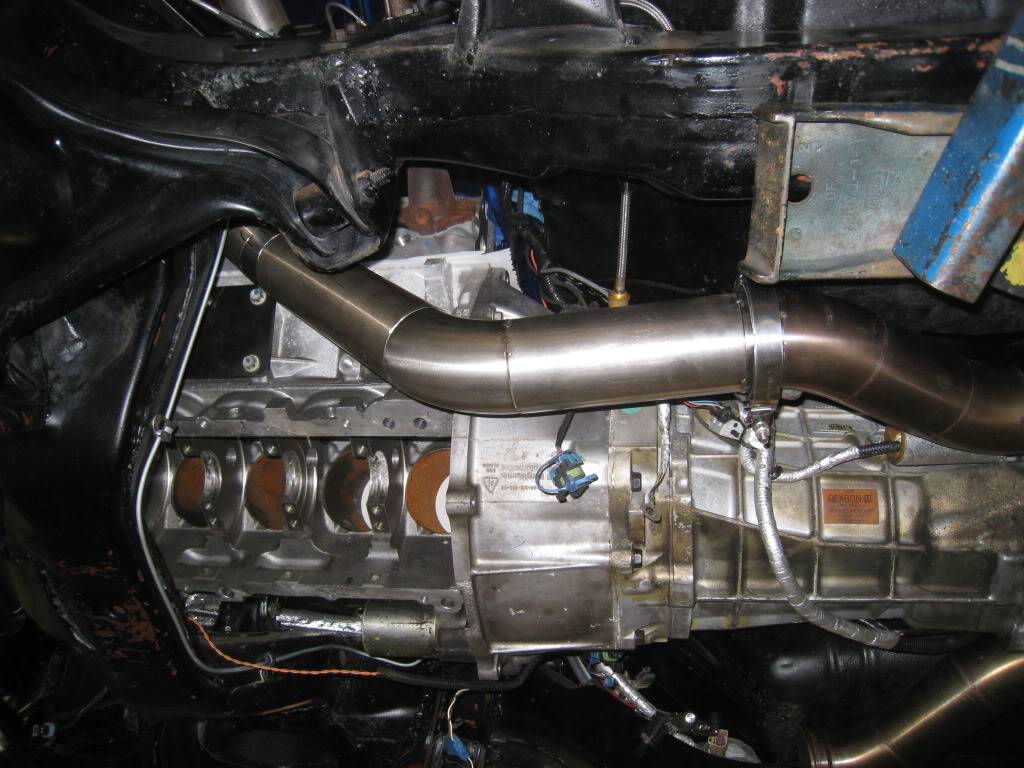
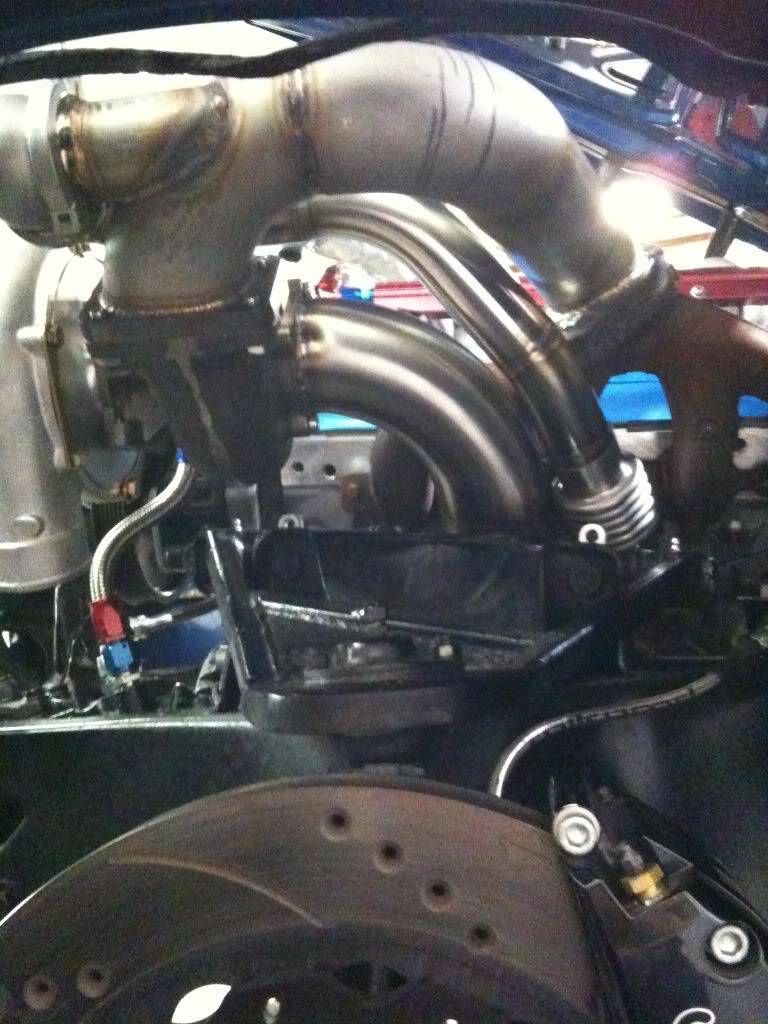
Completed the down pipes today. Just the dump pipes left to go on the hot side then it's on to the intercooler pipes.
09-26-2012 #69
Registered User
- Join Date
- Oct 2007
- Location
- New Westminster, B.C., Canada
- Posts
- 88
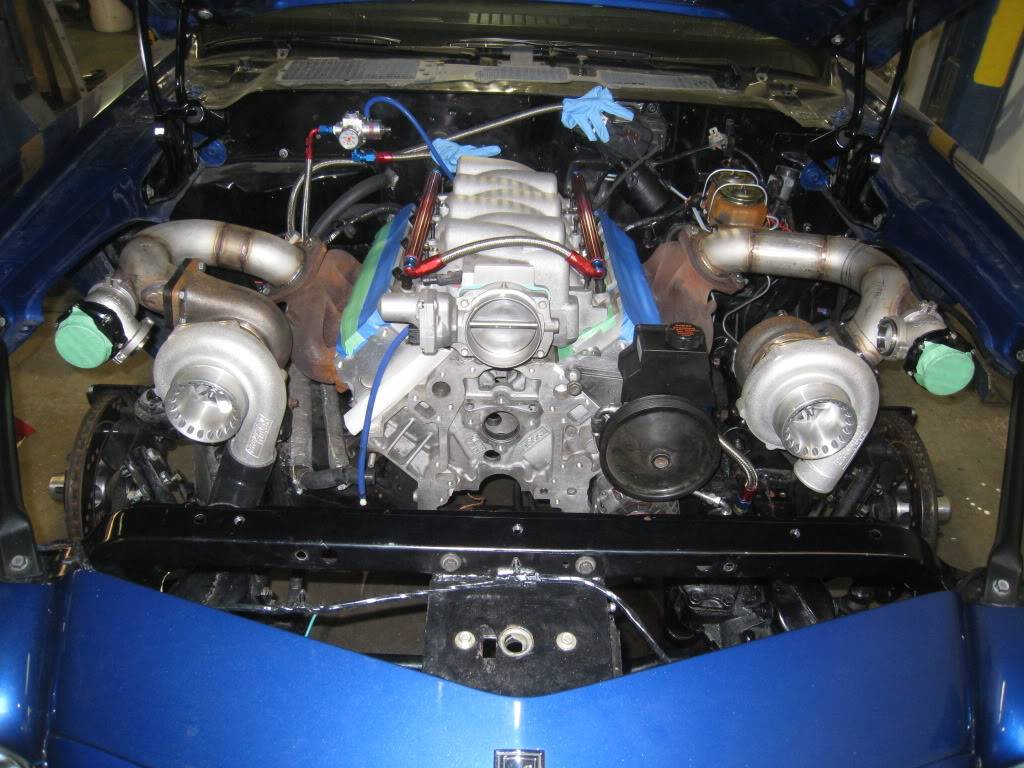
Hot side complete!!!
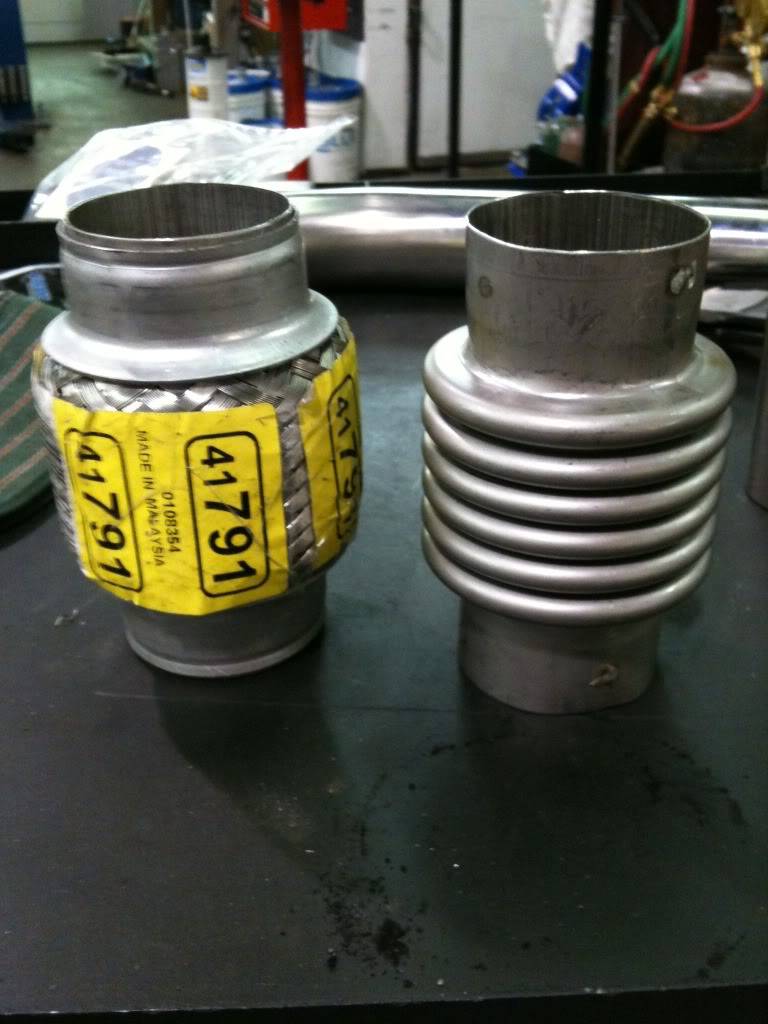
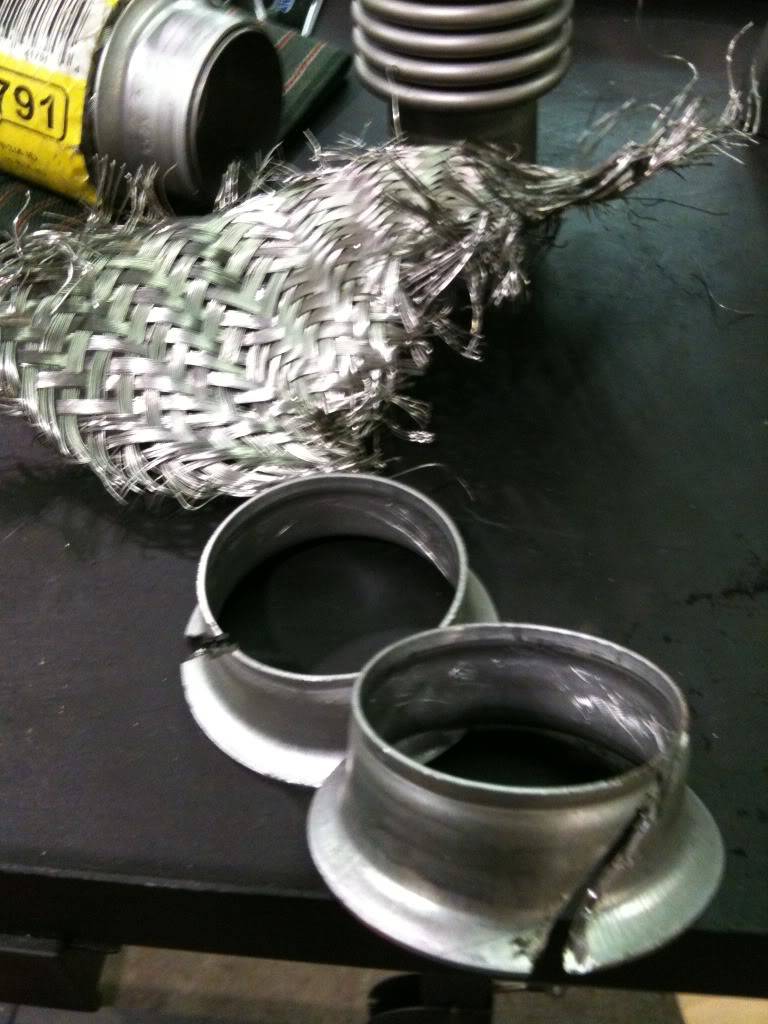
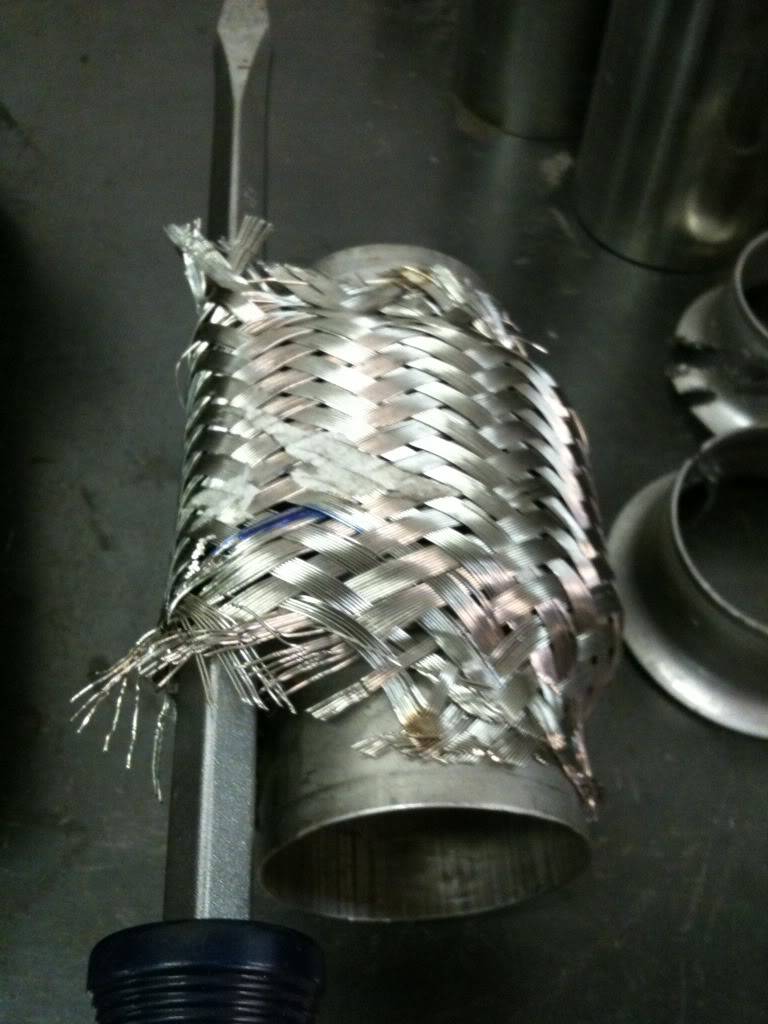
I finished the hot side of the turbo setup today. I needed some 1.75" flex pipes for the waste gate dump tubes. Vibrant makes them but there were none available locally, and they retail here at $58ea + $10 shipping. So, I thought, Hmmmm, I wonder whats inside those normal flex joints that are wrapped in braided stainless? I figured I could risk the $17ea, and at least cut one up and see. As soon as it arrived I looked inside it and it looked very similar to the Vibrant piece. Checked it with a magnet tool and sure enough, not sticky (=stainless steel). So I cut it up. The clamp rings on these are just crimped on so using a cutoff wheel I carefully broke the tension ring. I didn't cut all the way through, just most, then using a big screwdriver not to pry but to twist between the cut lines, it just popped the remaining steel and the ring slid off easily. The stainless wrap. I slid the big screwdriver under the skin then cutting disked through the wrap being carefull not to go too deep. the wrap is held in palce with a few spot welds, so I cut the wire with cutters, then dressed them clean with a grinder / dremmel.
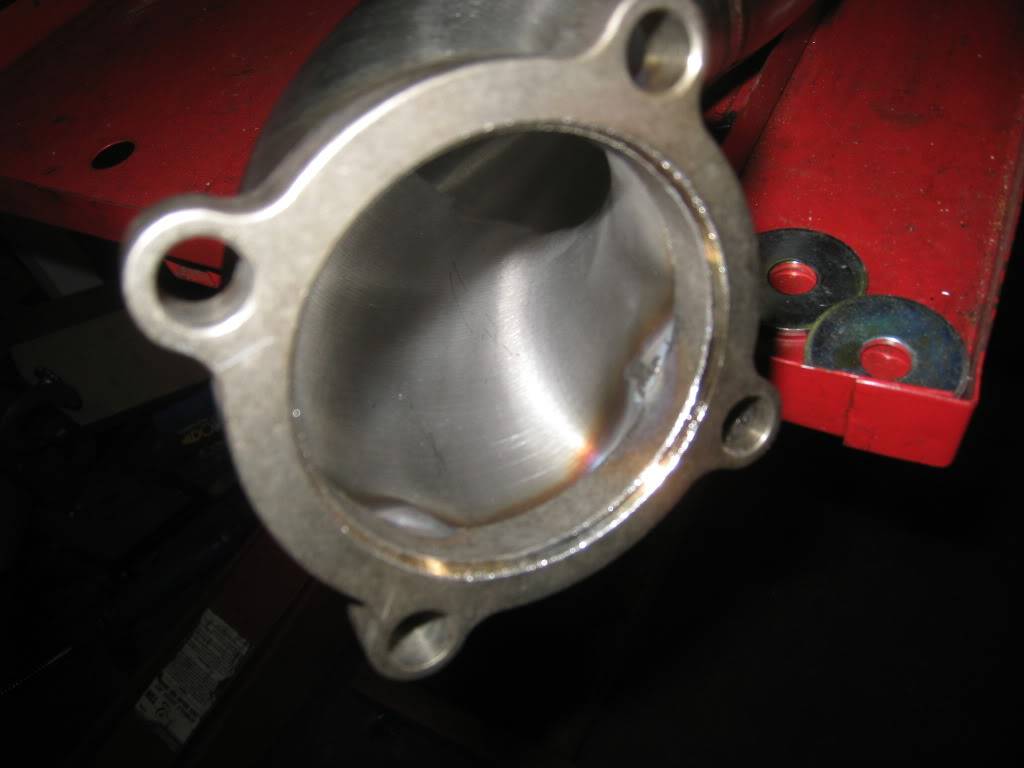
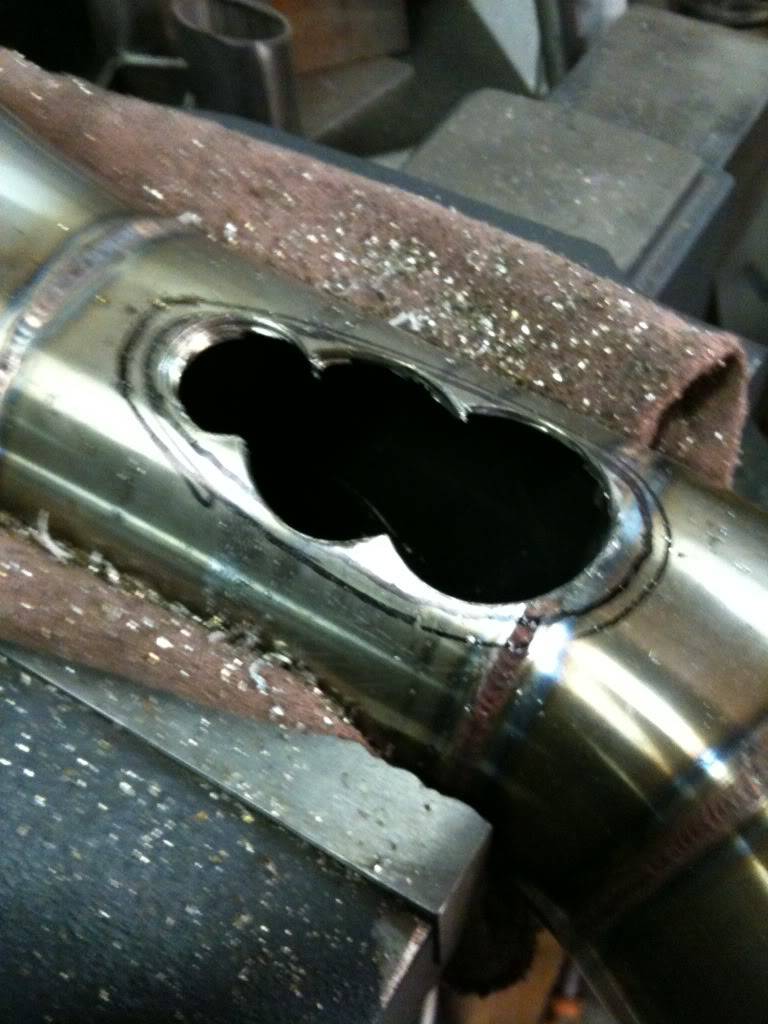
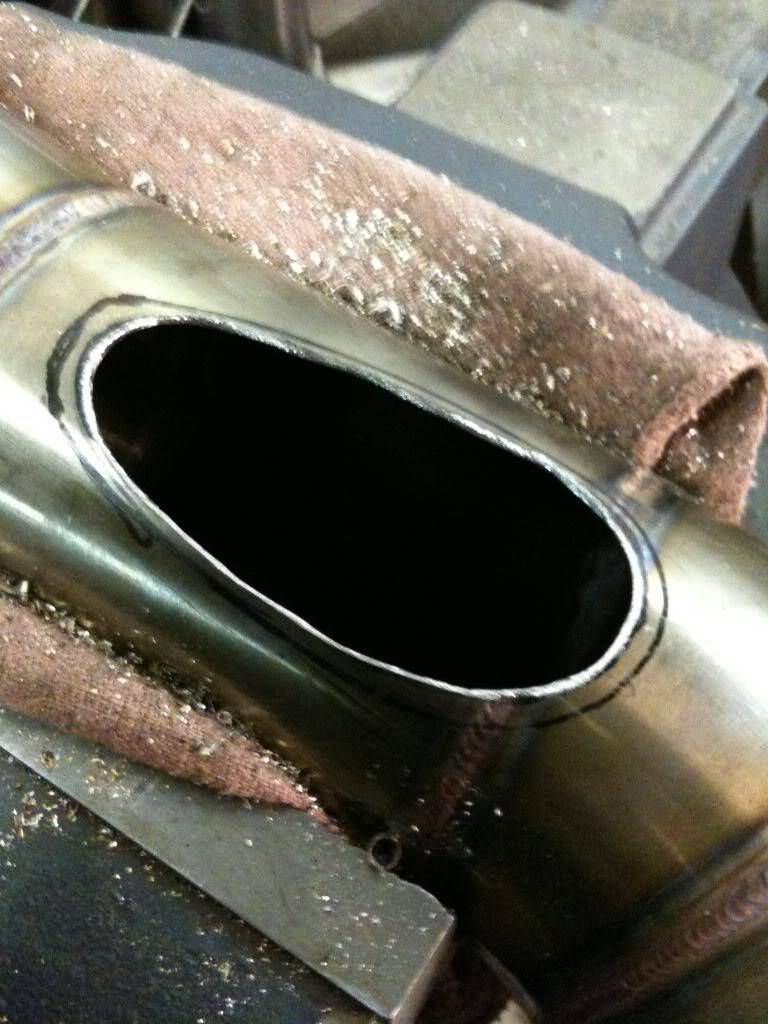
Here's where the dump pipes re-enter the exhaust down pipes. I used a hole saw after tracing out where the pipes meet. Then fine tuned it with a carbide and a file.
All welded up
Installed
09-26-2012 #70
Registered User
- Join Date
- Oct 2007
- Location
- New Westminster, B.C., Canada
- Posts
- 88
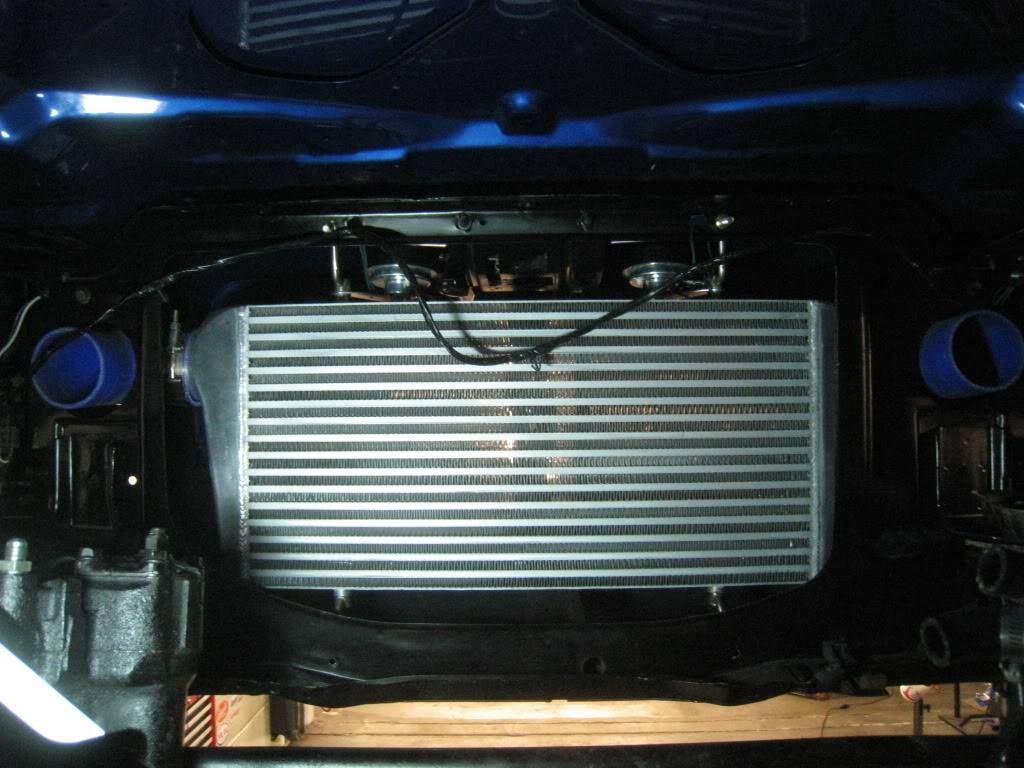
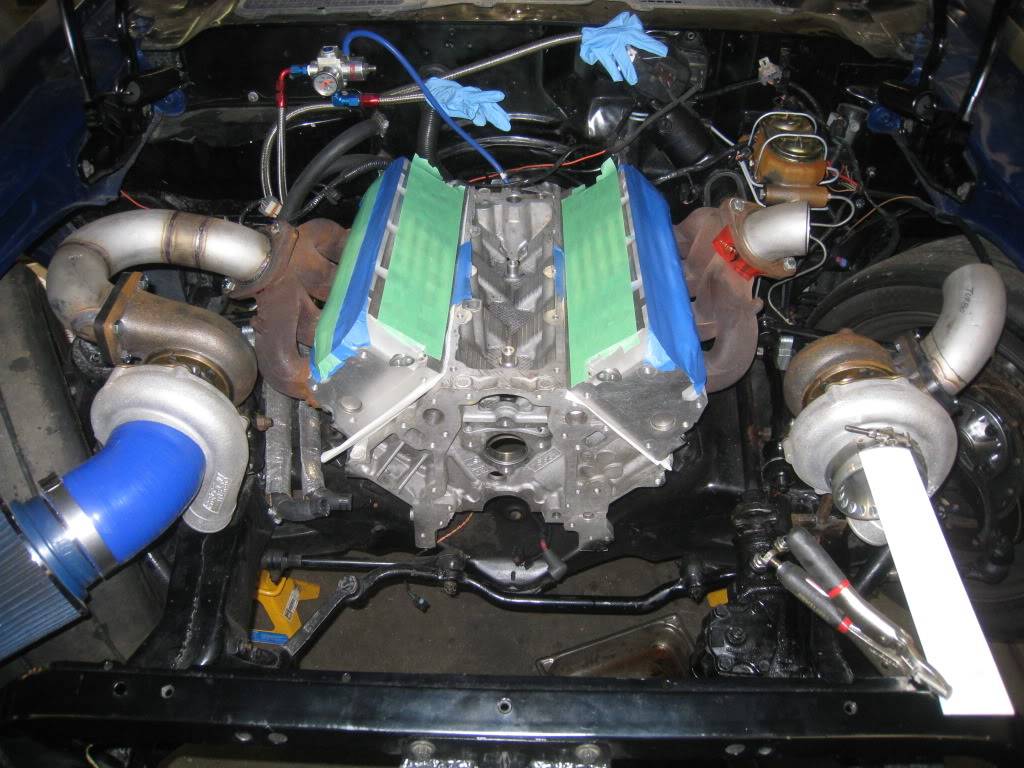
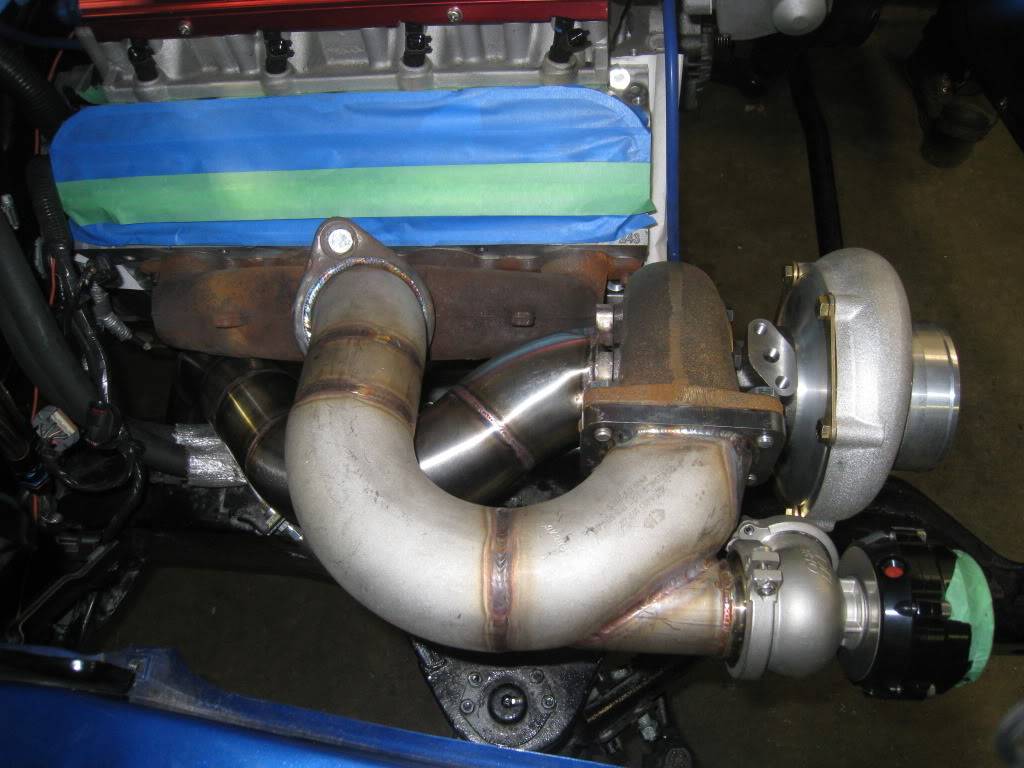
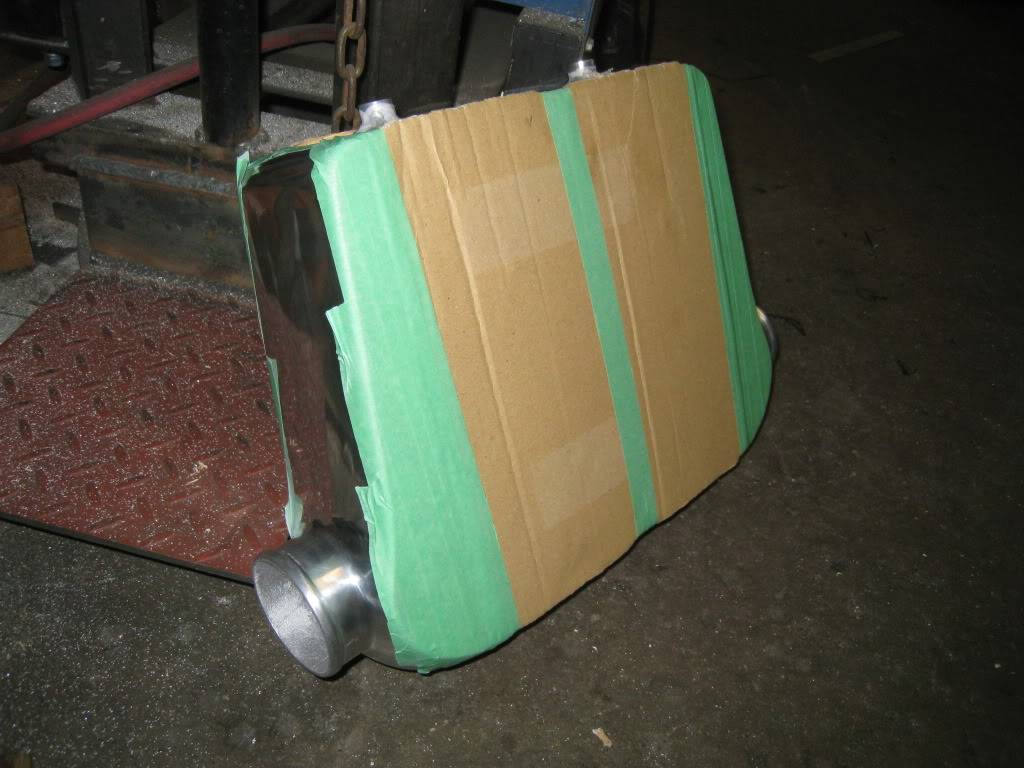
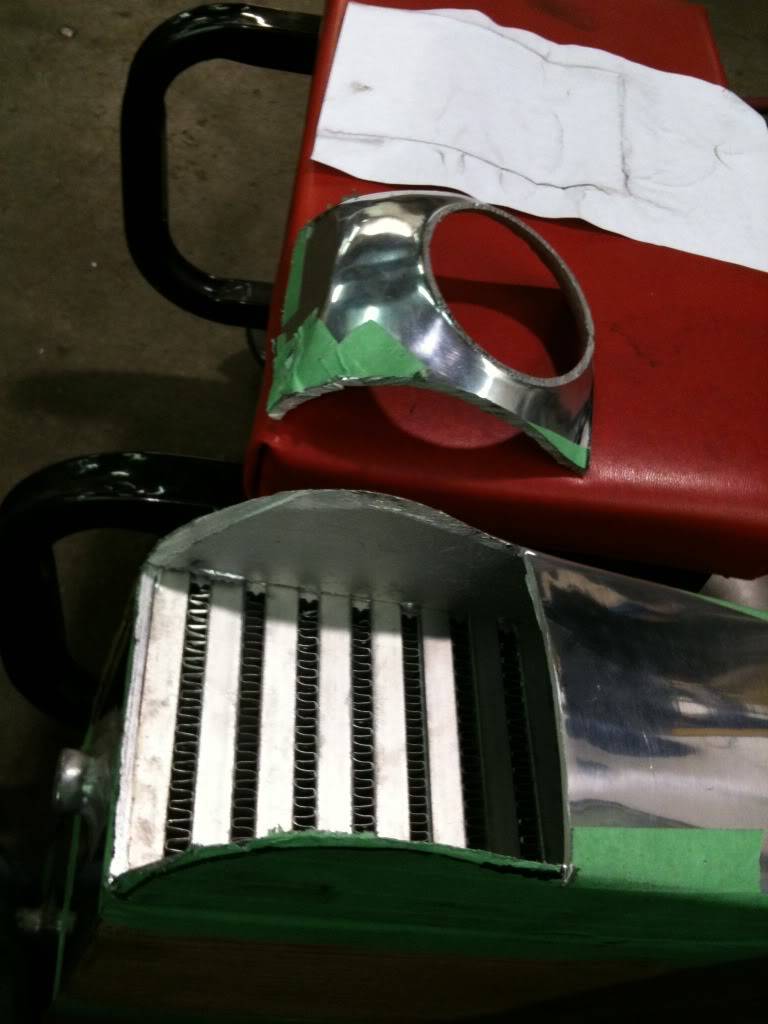
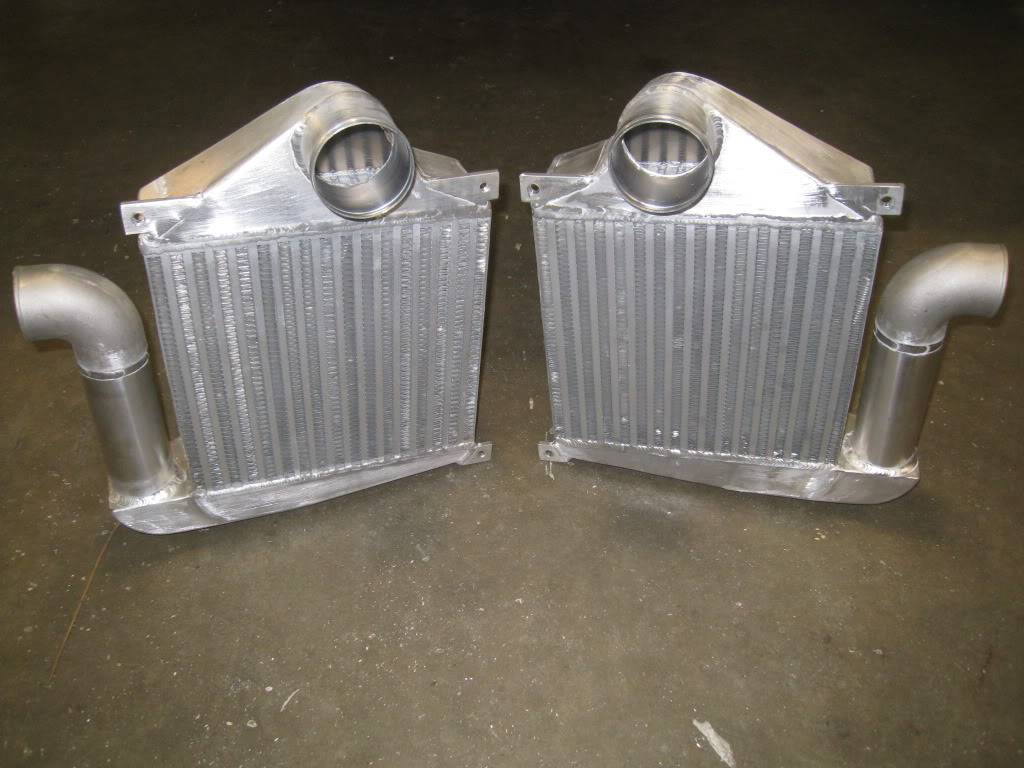
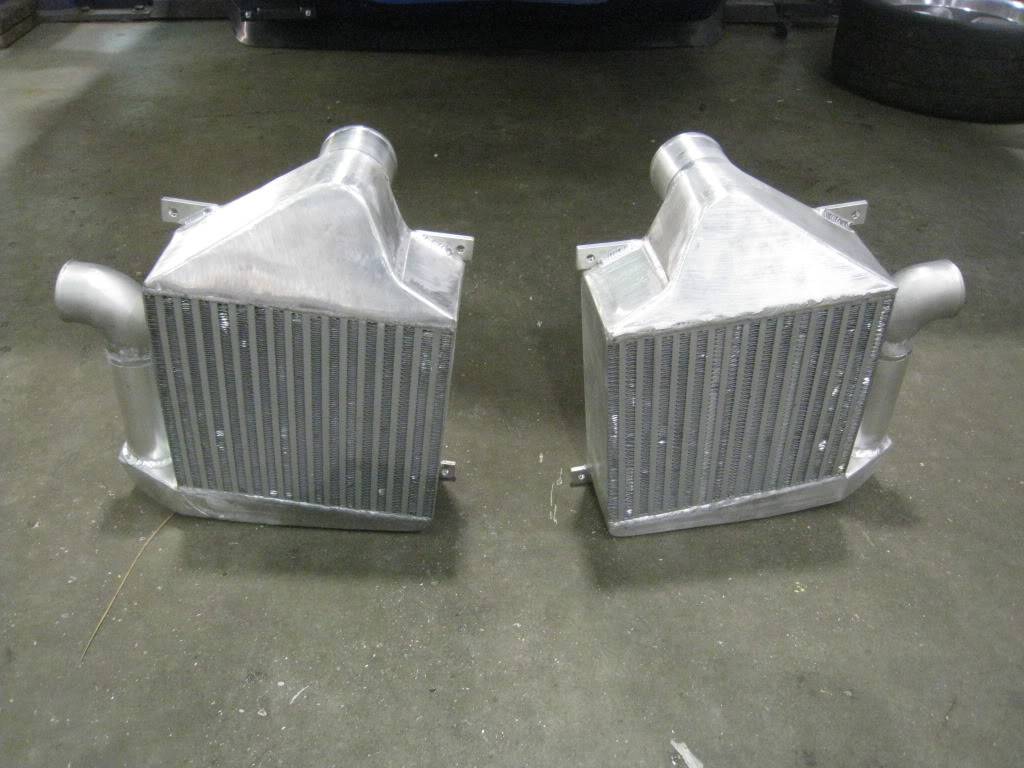
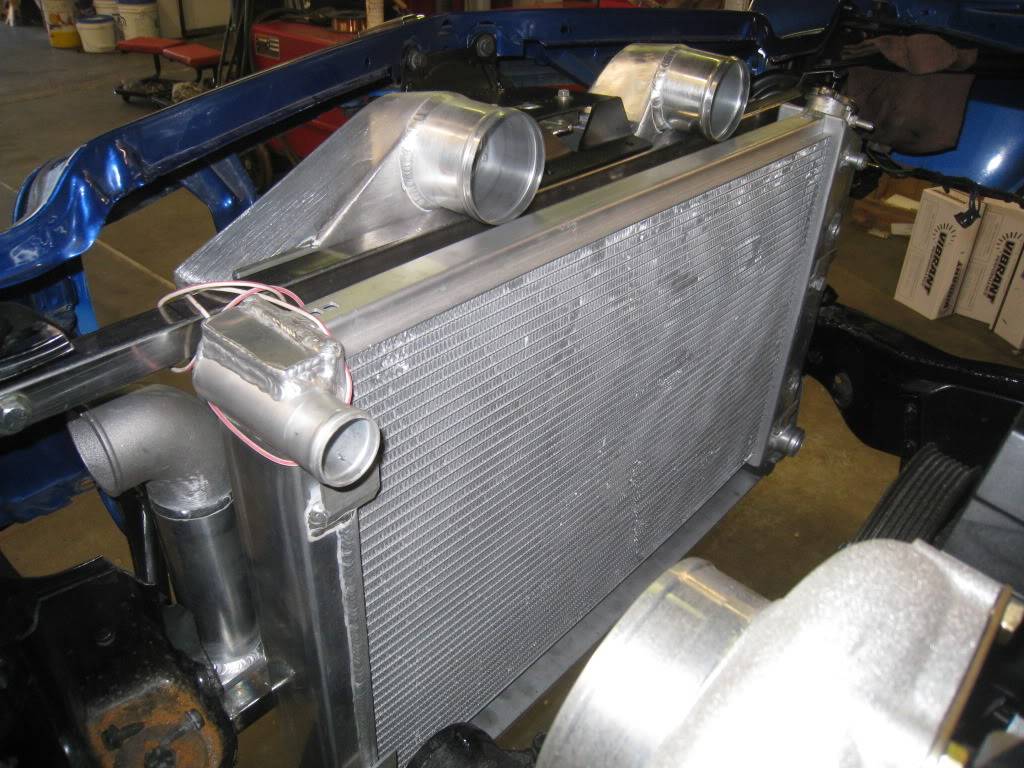
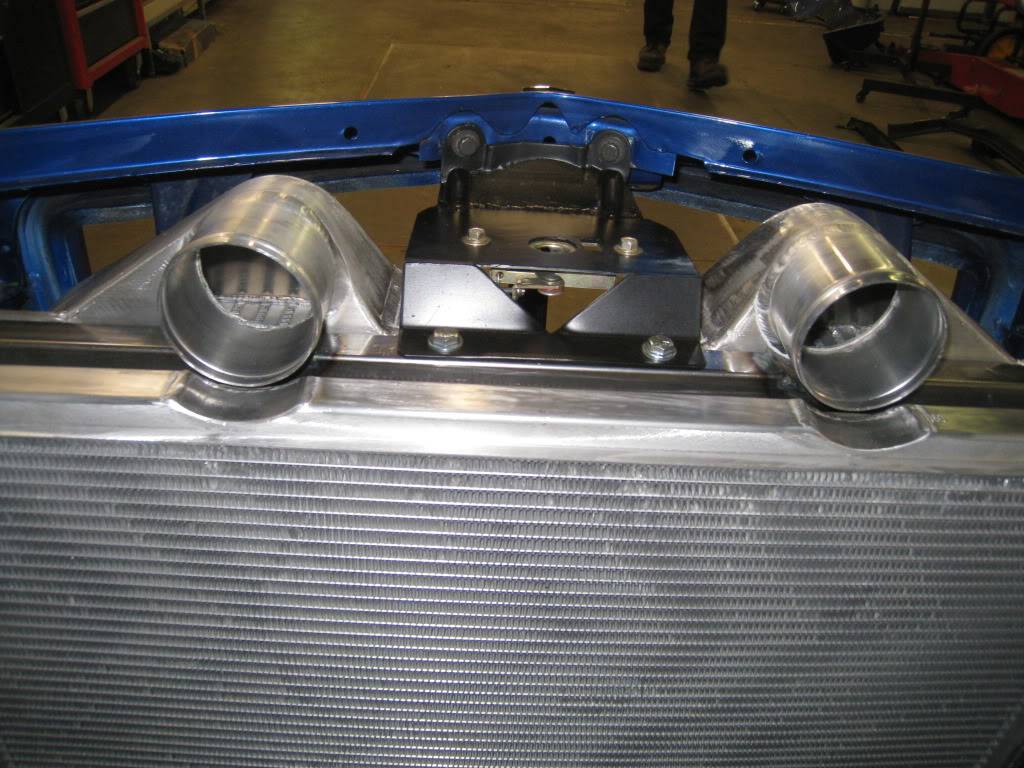
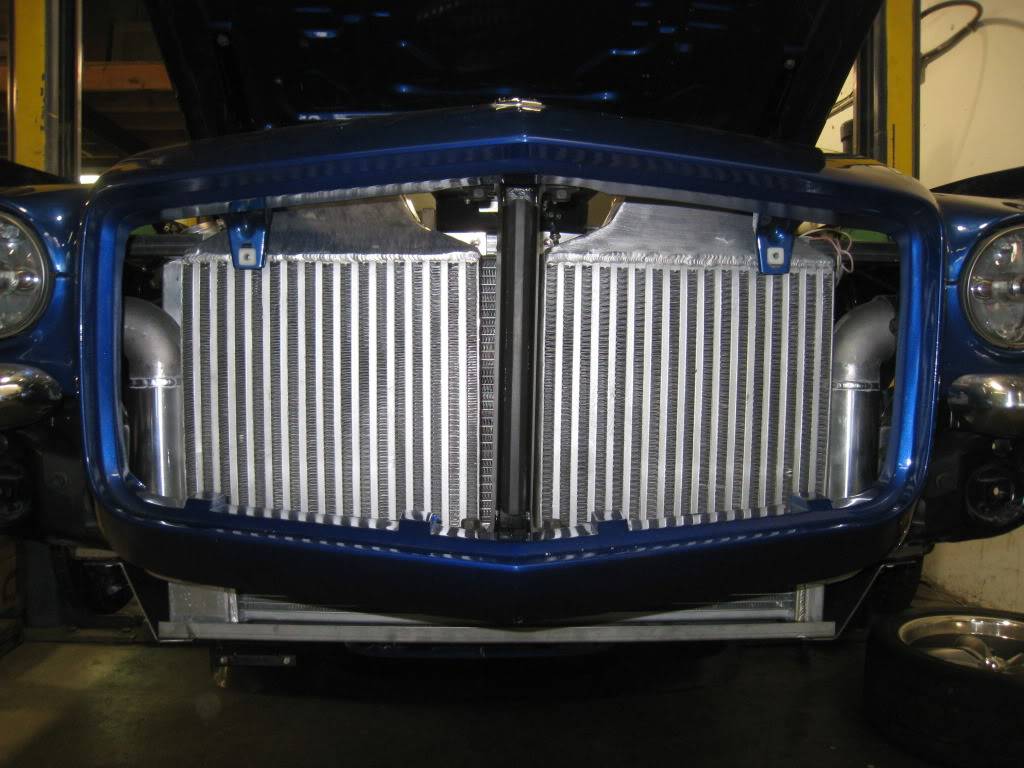
Working on the intercoolers. These are driving me nuts. How to mount, where to run pipes, clearance clearance clearance... Here's what I came up with. Hacked off the top tank and made my own, modified the bottom tank. Getting the top tank "lid" to follow the sides was a test of patience, it's not a consistent bend..
09-26-2012 #71
Registered User
- Join Date
- Oct 2007
- Location
- New Westminster, B.C., Canada
- Posts
- 88
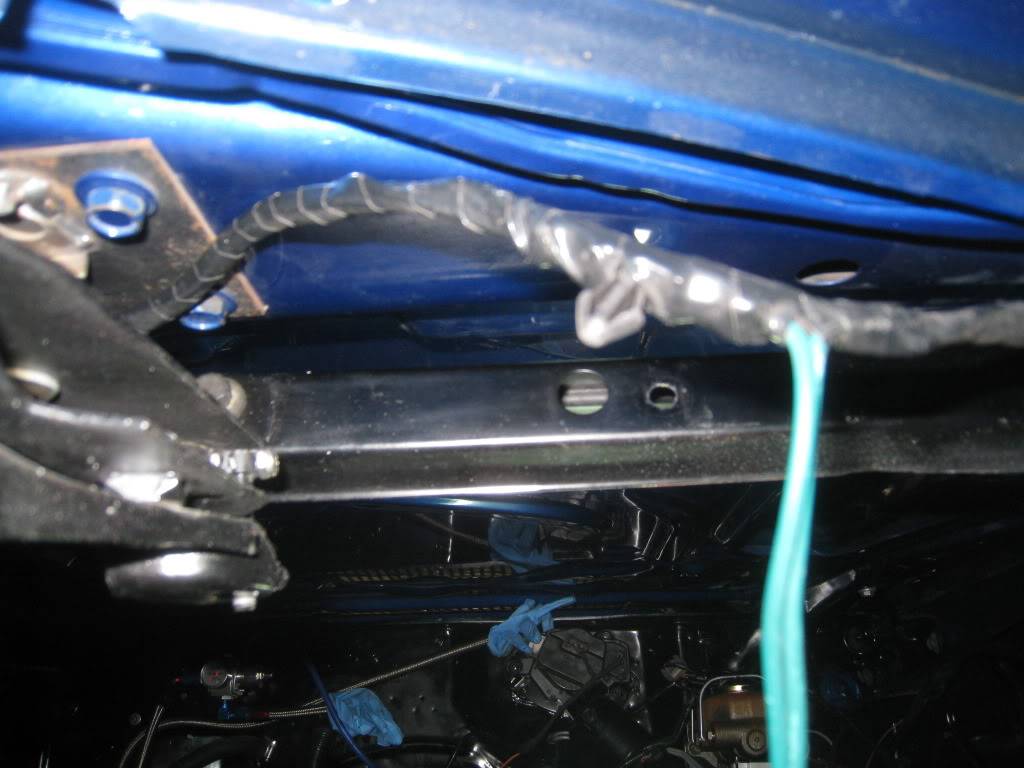
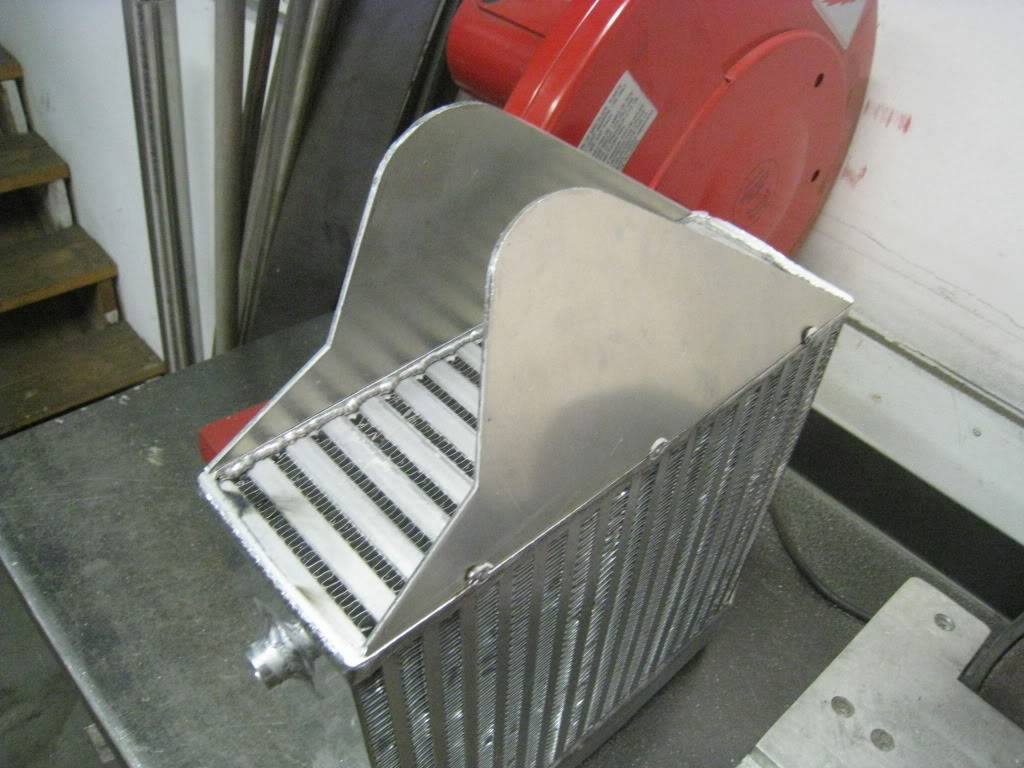
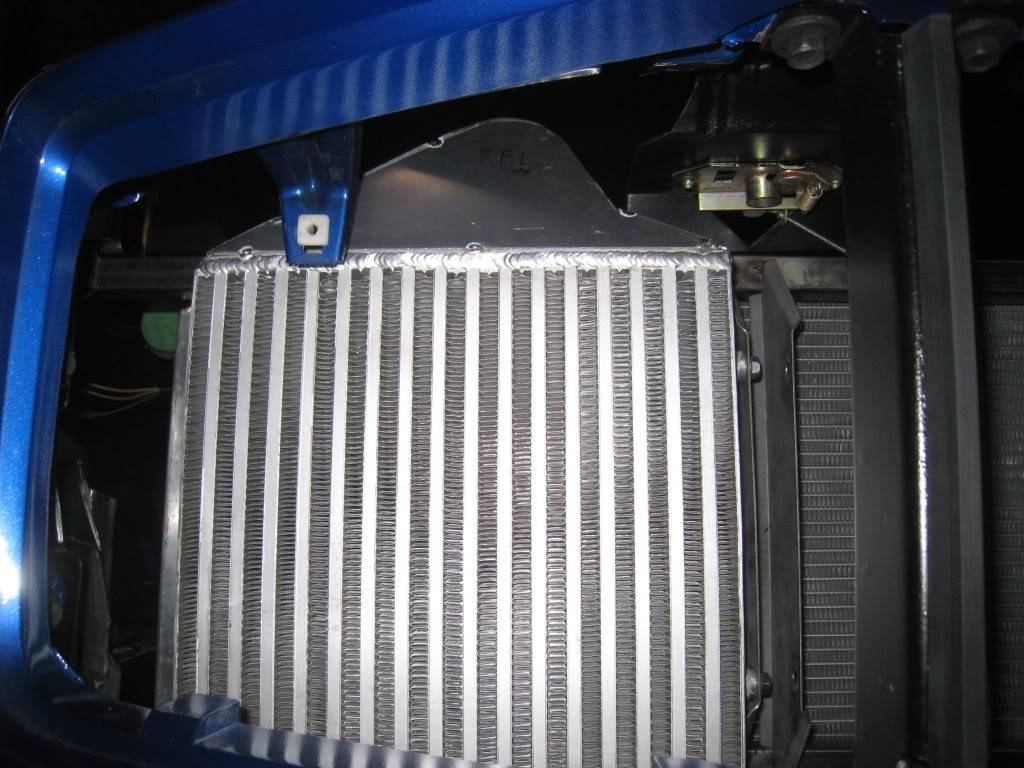
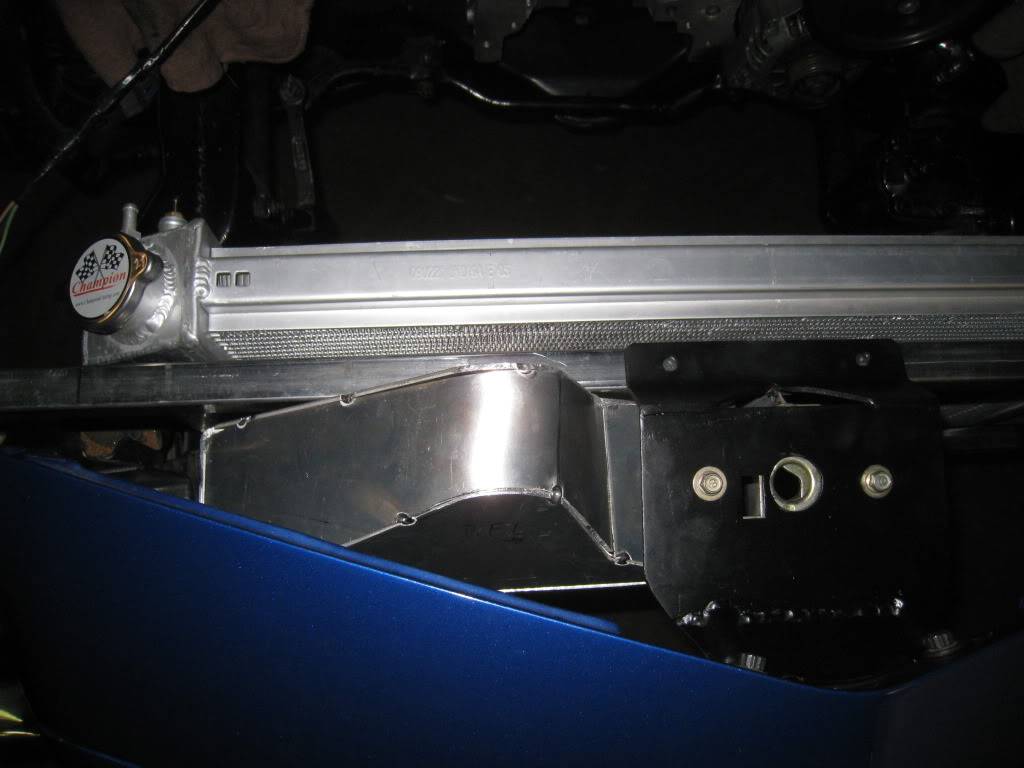
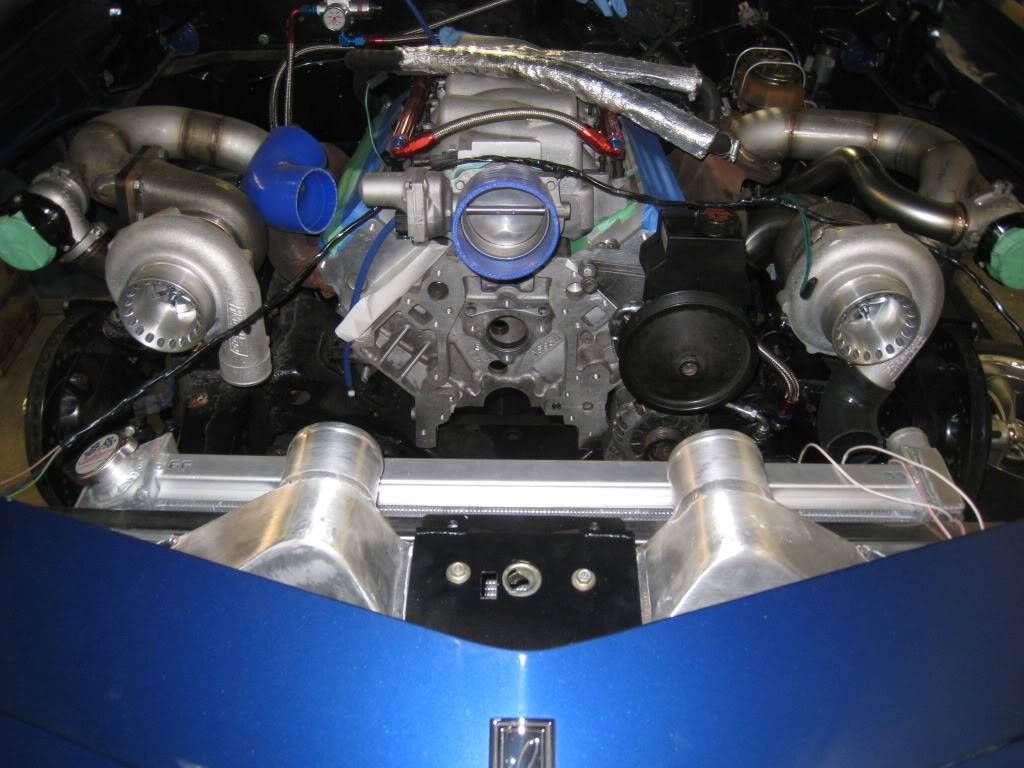
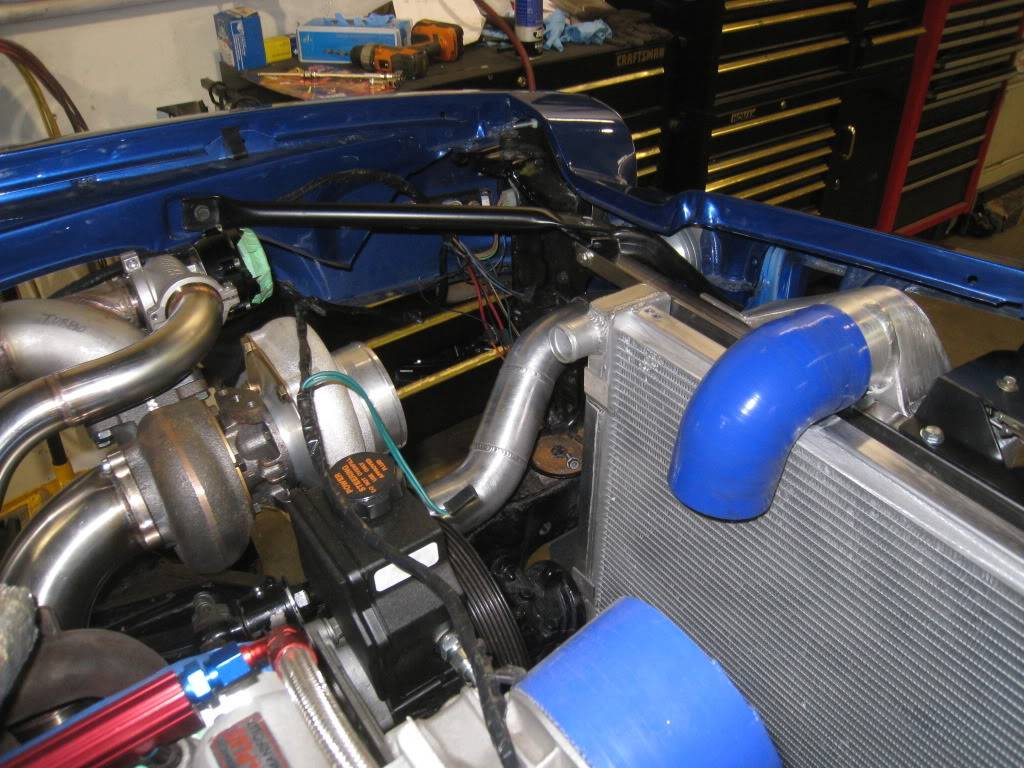
A bit more progress. Pretty happy with the layout, check out the "C notches" under the intercooler pipes on top of the radiator and rad support. The bottom 2 pics were before the notches and the intercoolers were not aligned. The blue silicone elbow was just holding the rad in place. There will be a Y pipe between there and the throttle body.
09-26-2012 #72
Registered User
- Join Date
- Oct 2007
- Location
- New Westminster, B.C., Canada
- Posts
- 88
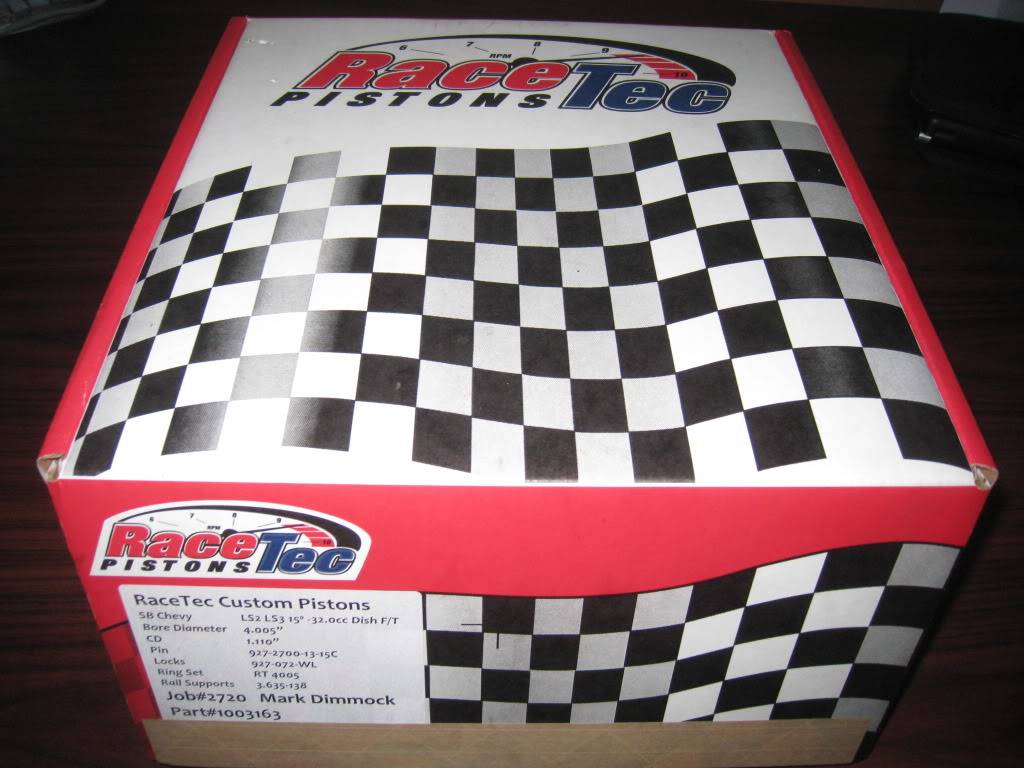
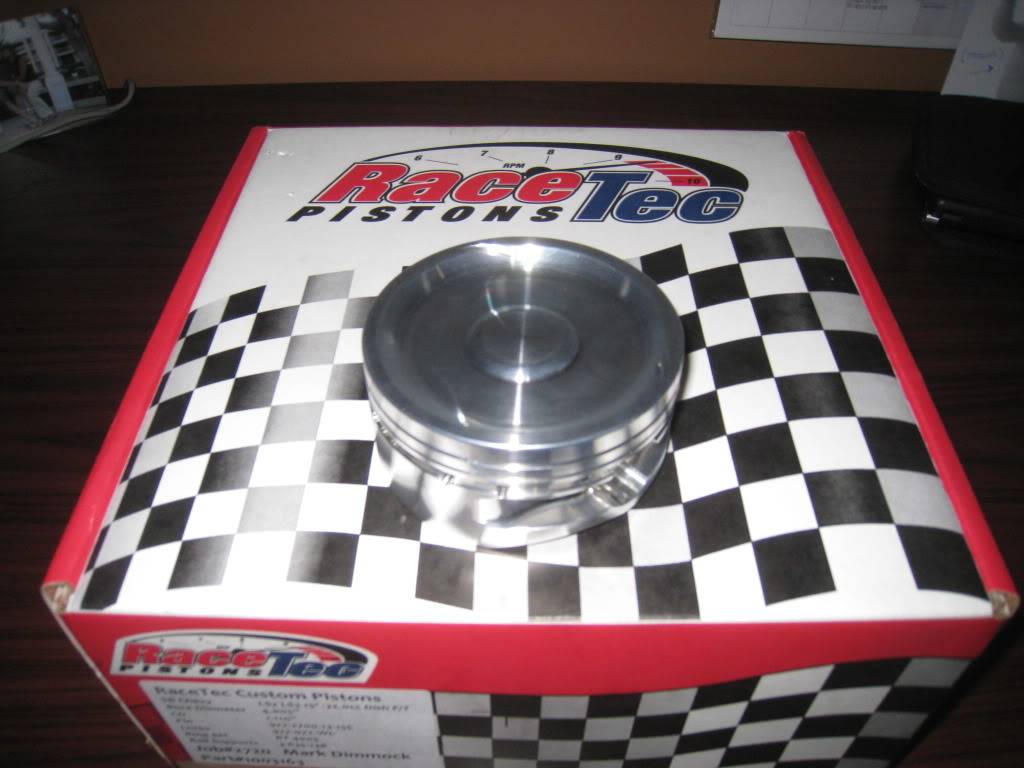
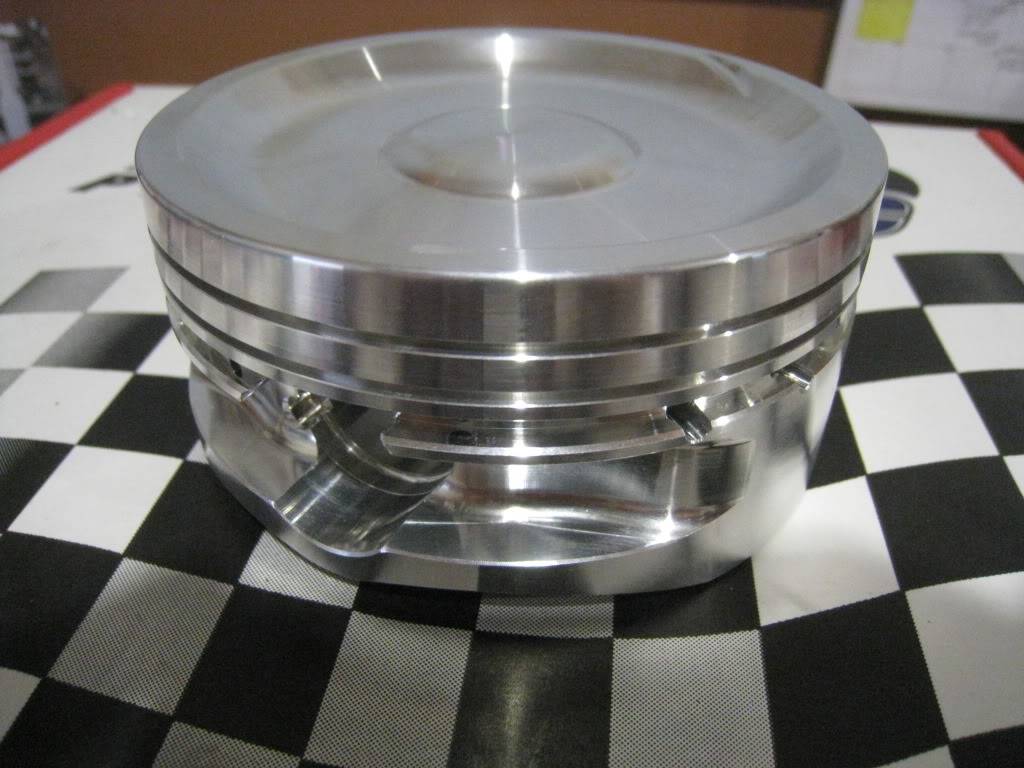
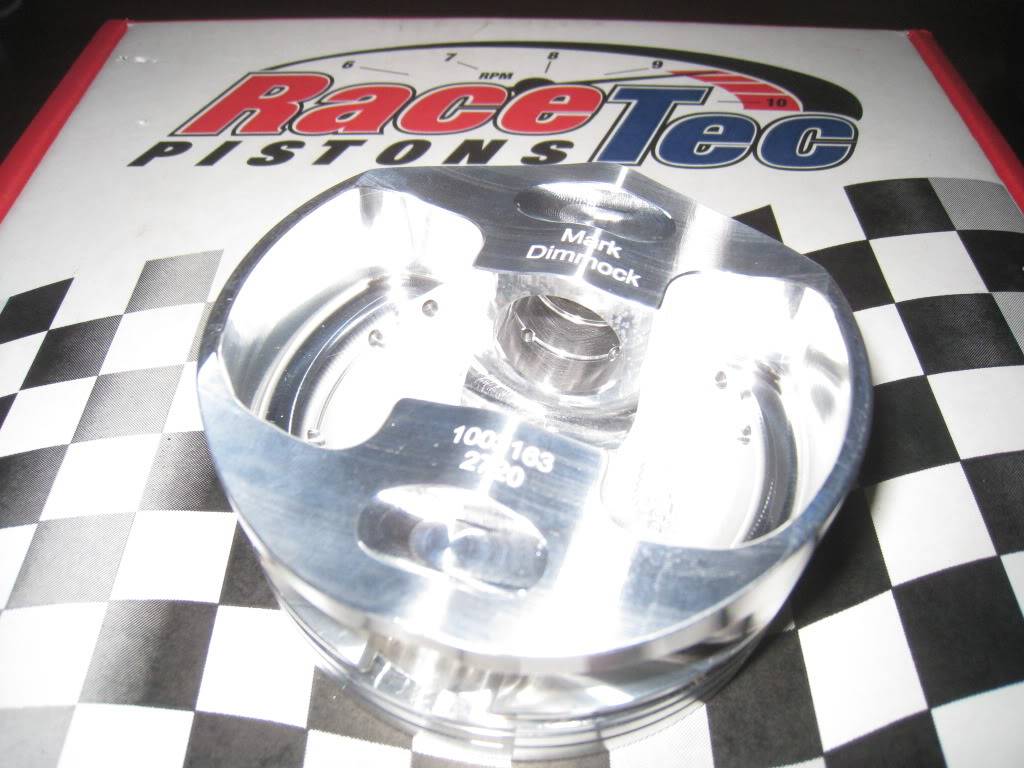
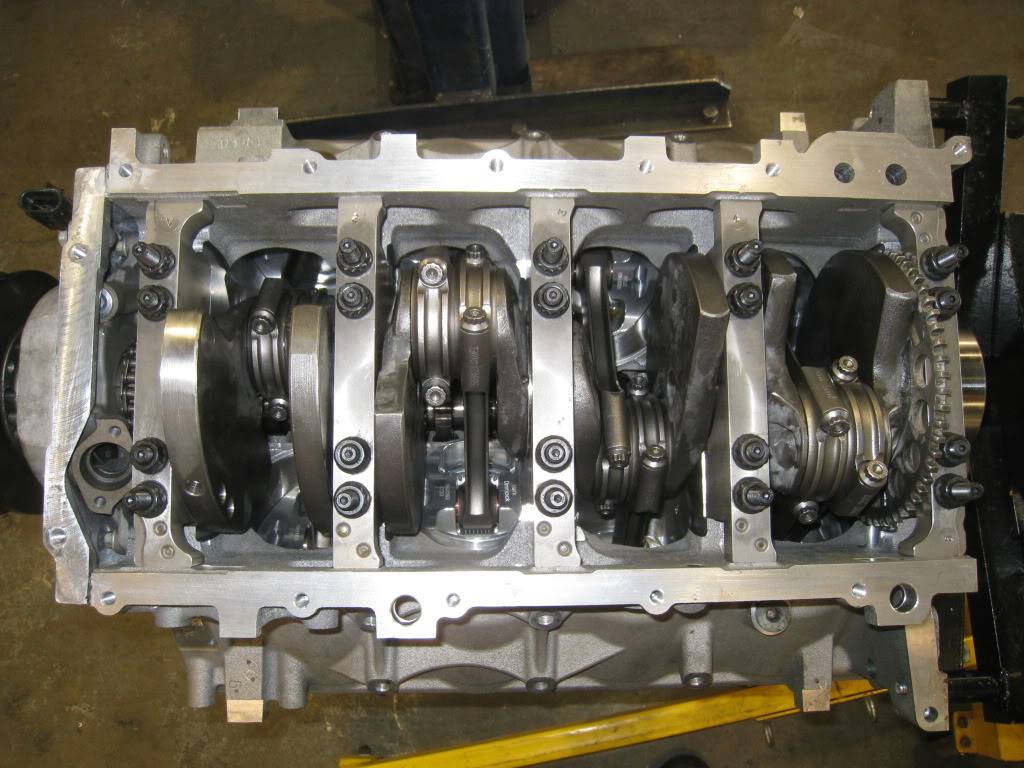
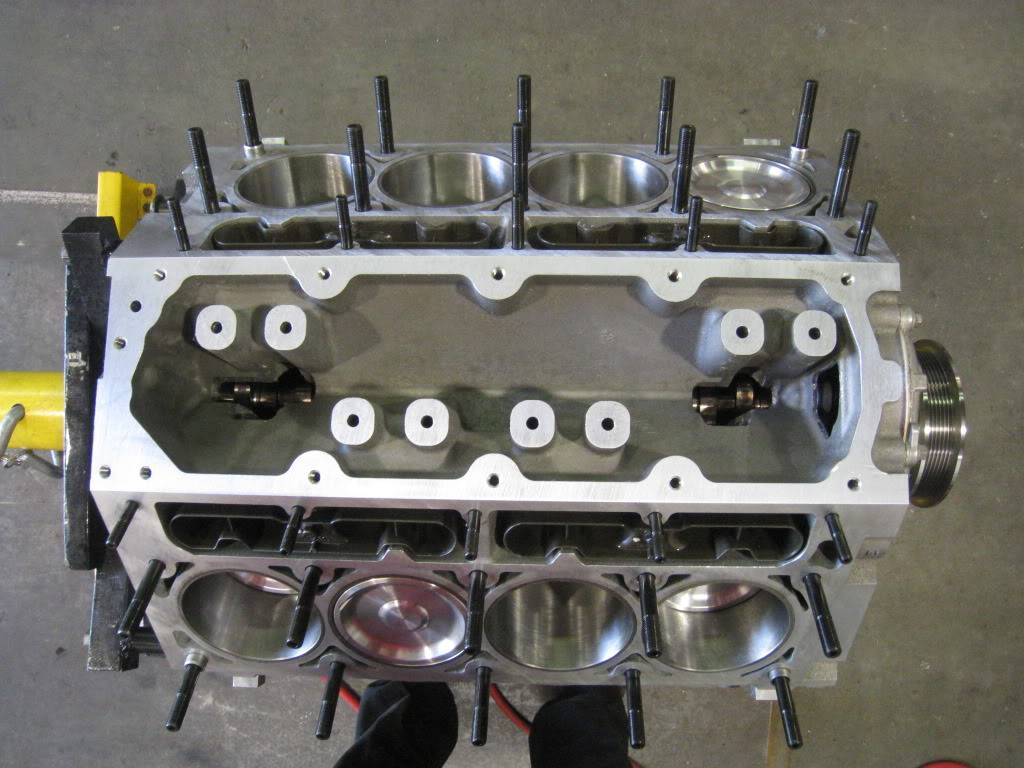
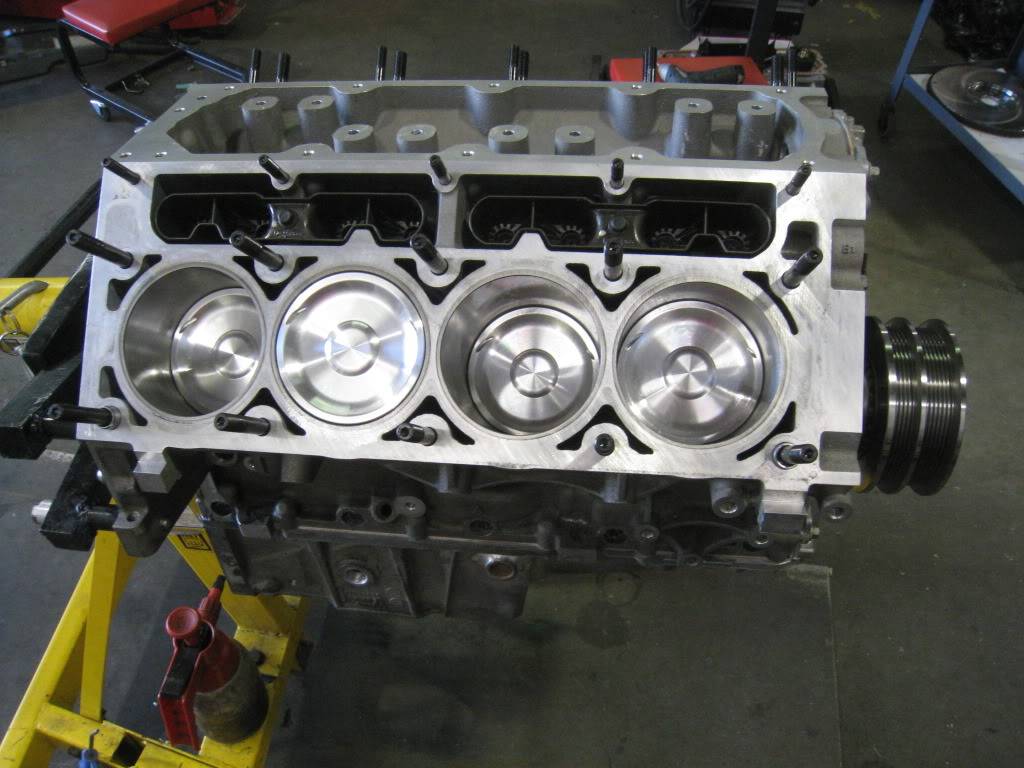
I got something special.... Big thanks goes out to Mike Callahan at RaceTec pistons. This guy knows his stuff and knows customer service! He went to great lengths to ensure that I got exactly what I needed and followed through on every aspect of the transaction. The pistons are so nice to look at it's a shame they get hidden away. Thanks for going the distance Mike, others failed, but not you.
09-26-2012 #73
Registered User
- Join Date
- Oct 2007
- Location
- New Westminster, B.C., Canada
- Posts
- 88
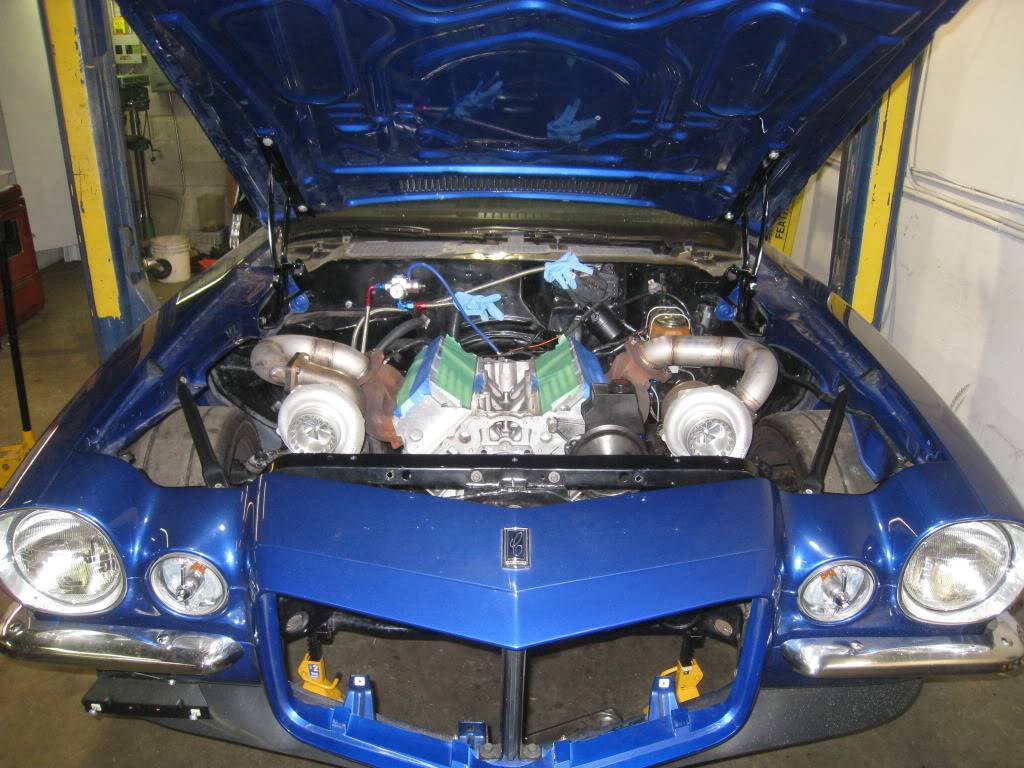
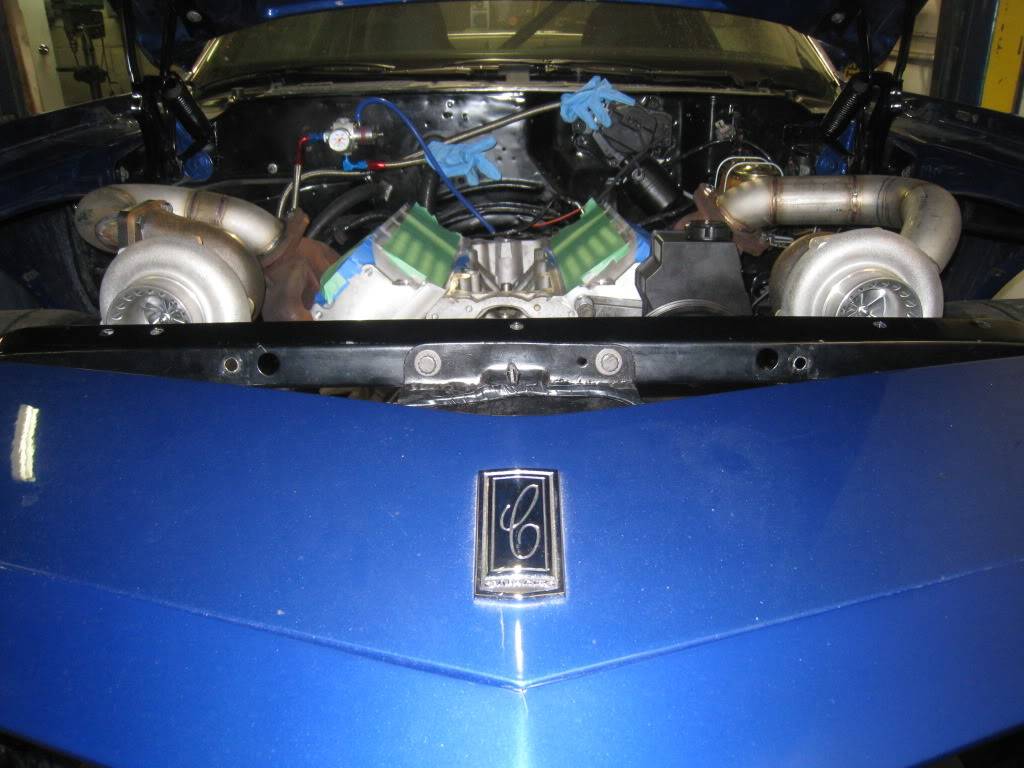
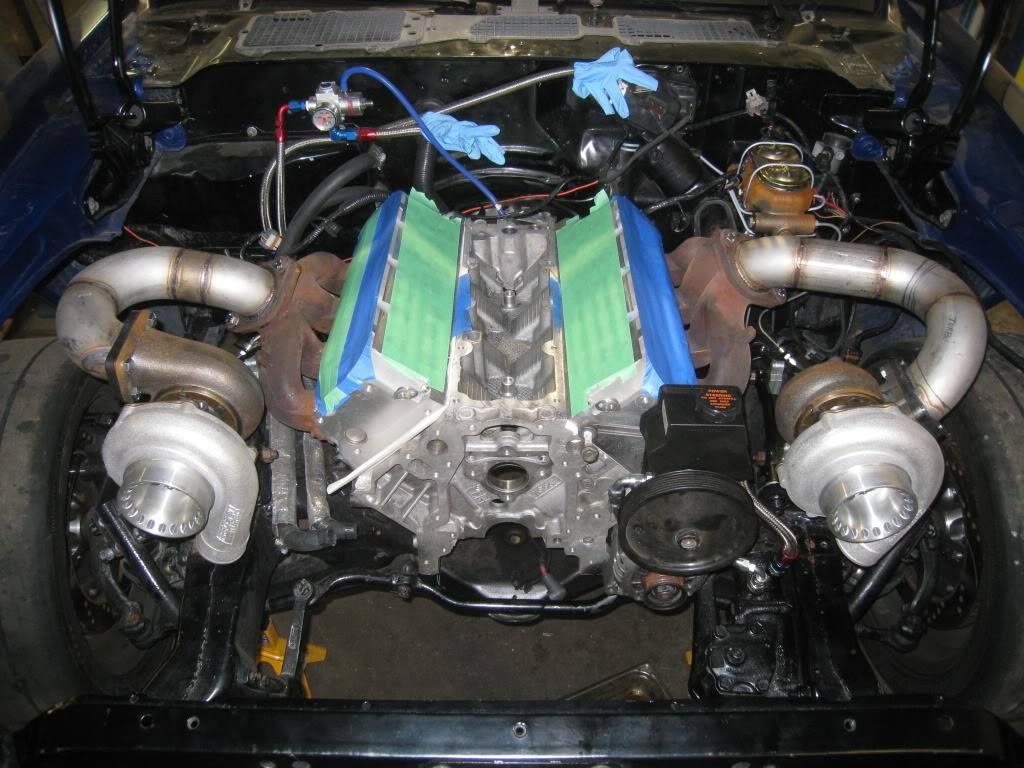
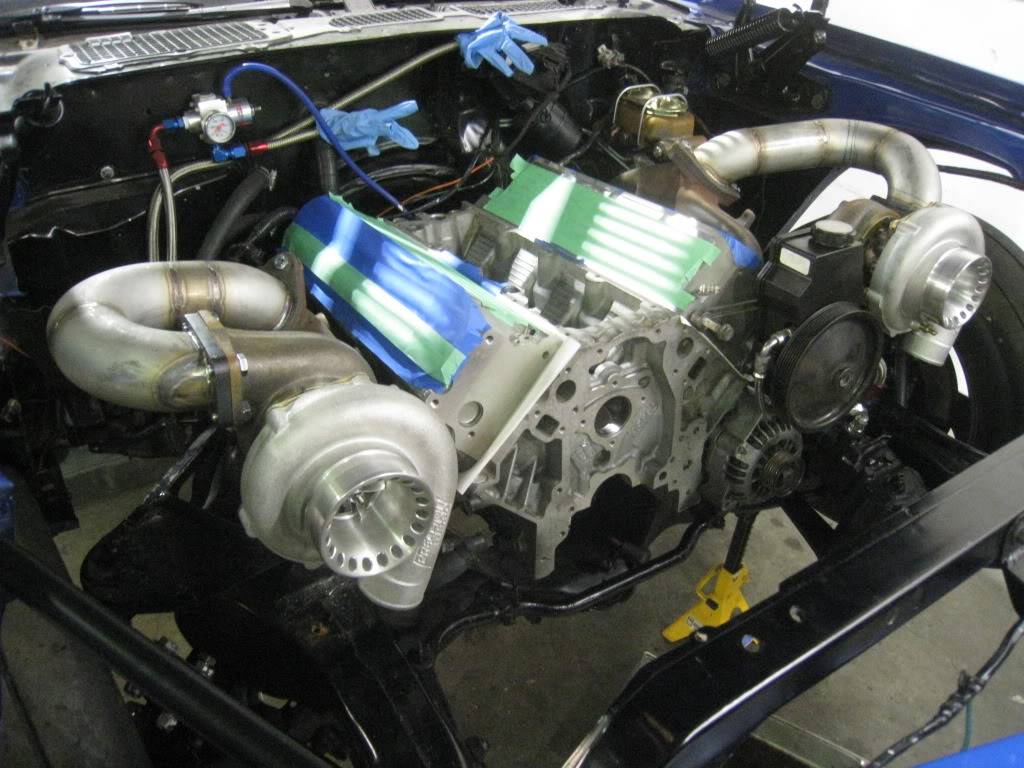
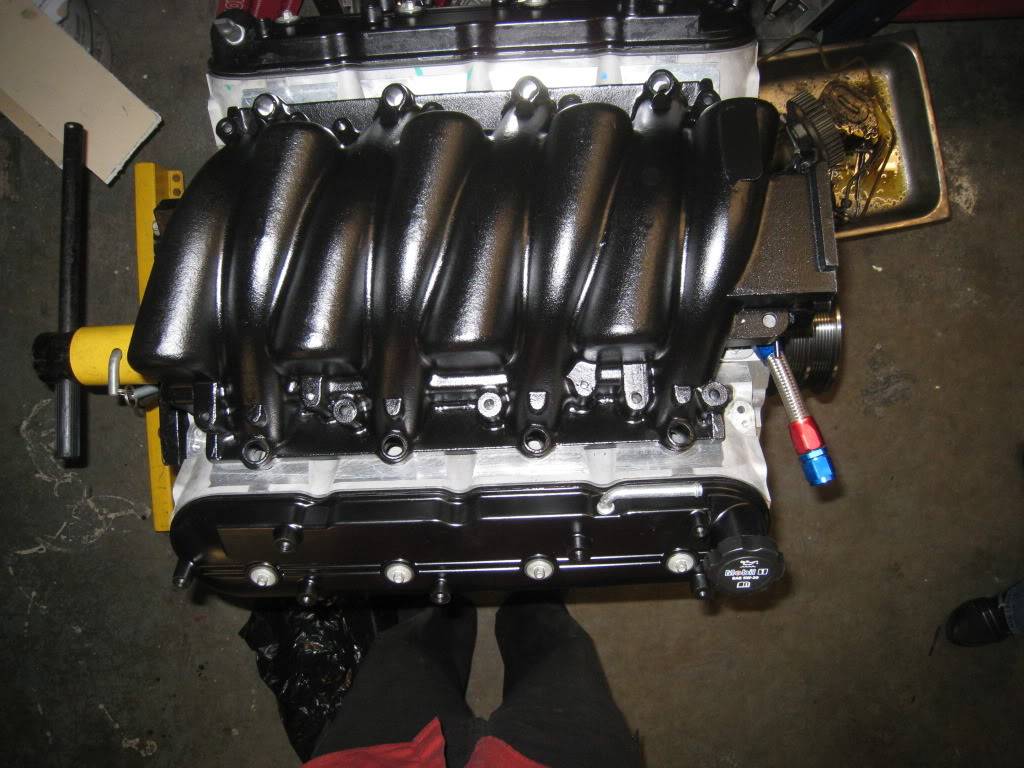
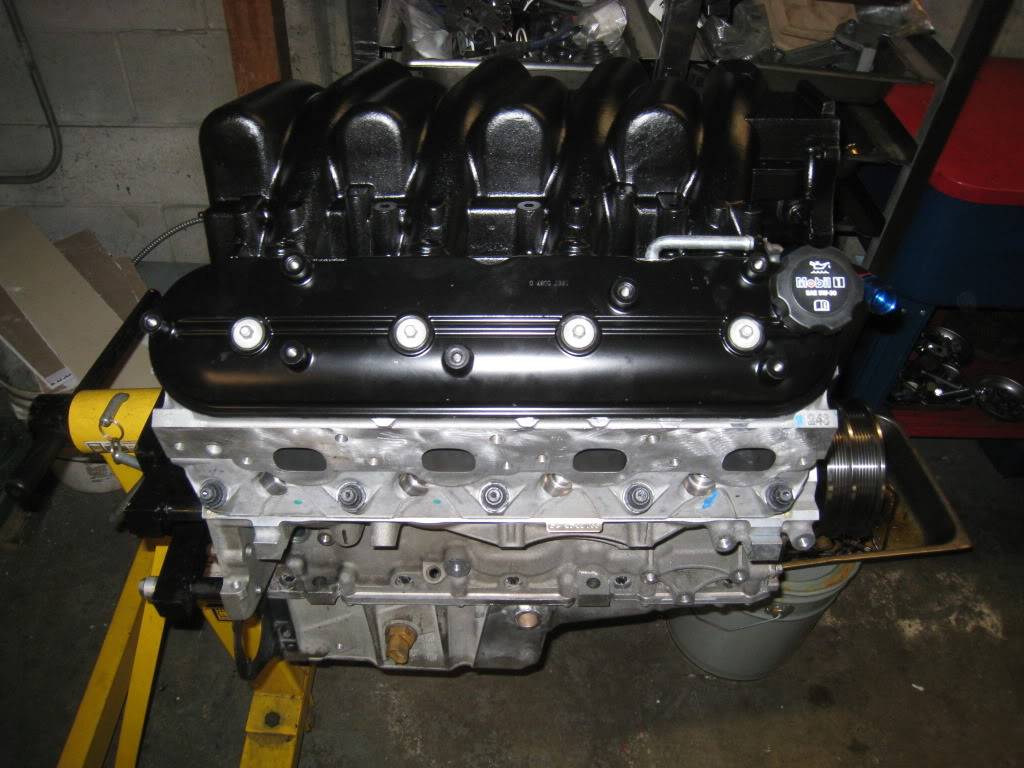
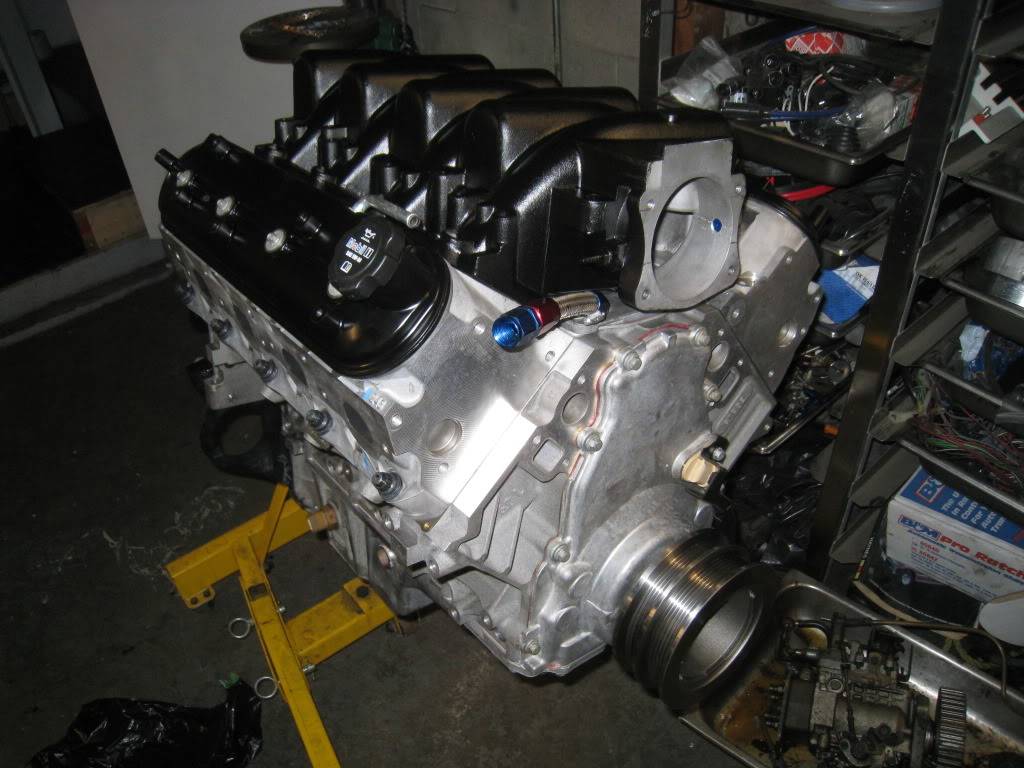
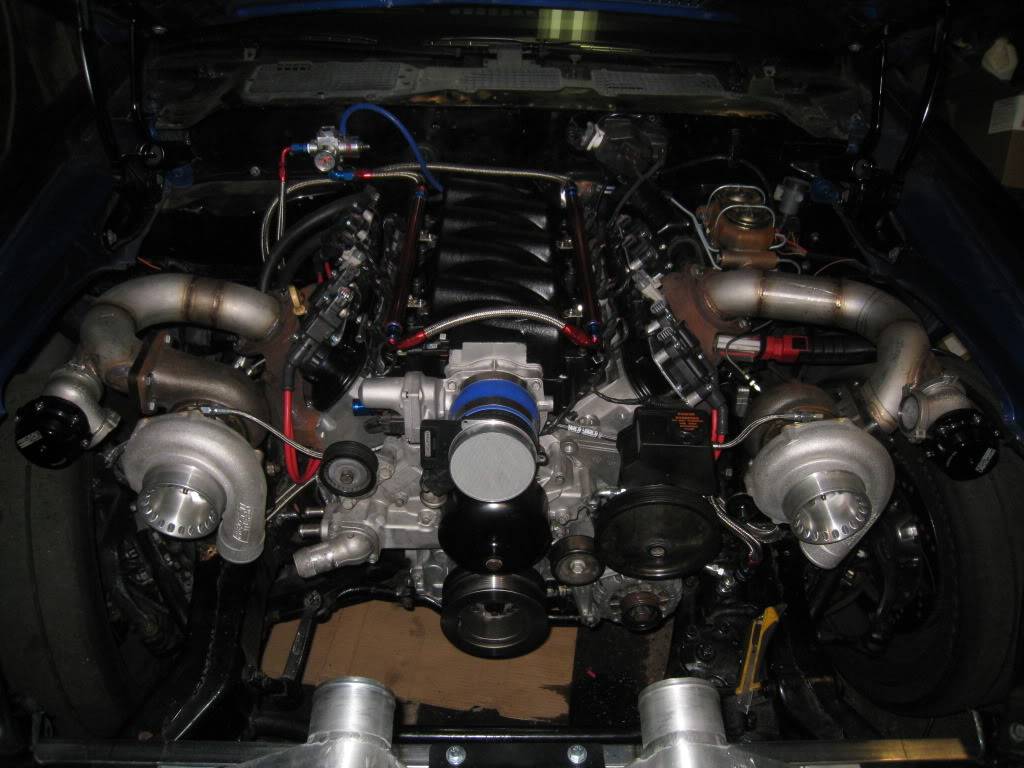
Engine is going together. Should have it back in the car in a few days, then on to plumbing oil feeds and drains, and some more pipe fab...decided to go the bare aluminum and black route this round...
09-26-2012 #74
Registered User
- Join Date
- Oct 2007
- Location
- New Westminster, B.C., Canada
- Posts
- 88
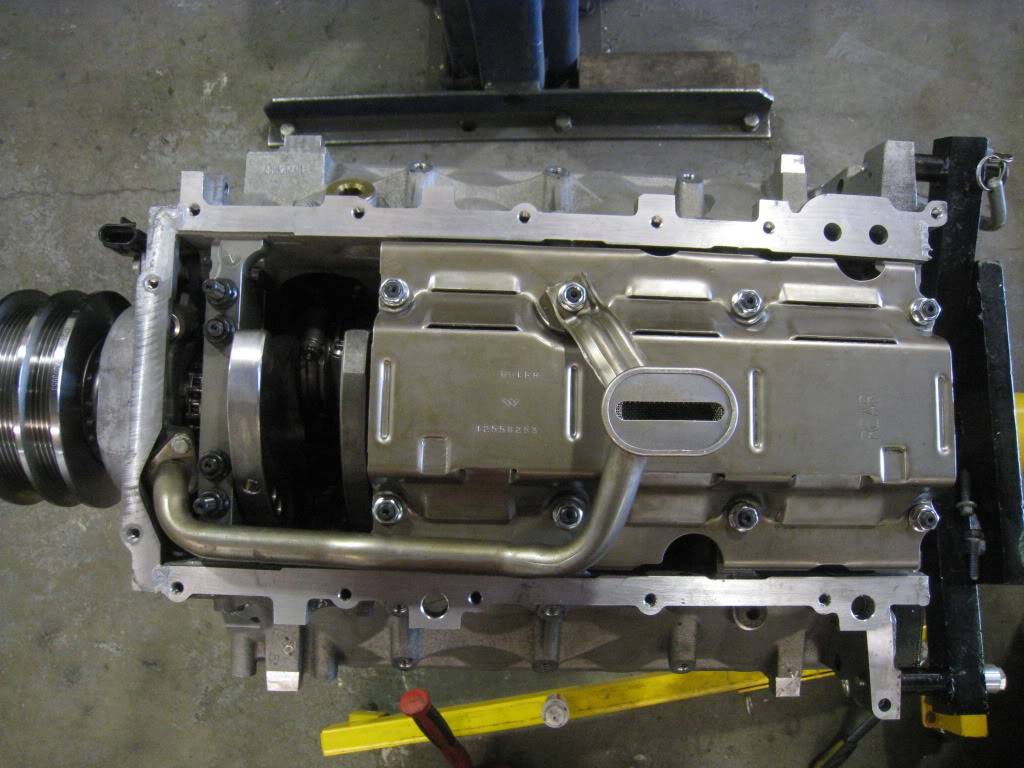
So the new motor is in. I got the Turbo oil drains and feeds hooked up, all the sensors are in, spark plugs are in, water pump installed, dipstick, alternator installed and wired, starter in and wired. I put in my 52pound injectors and am going to fire it up on my old supercharger tune. I need to do 500 miles to break in the clutch before I can dyno it anyway, and I figured that will give the motor some time to break in as well. I still have to mount my coils but have a pretty decent idea in mind. Need to spend some time working some more aluminum there. Hope to fire it up by the weekend even though I won't have the top intercooler pipe done yet. Gotta hear it run!
09-26-2012 #75
Registered User
- Join Date
- Oct 2007
- Location
- New Westminster, B.C., Canada
- Posts
- 88
Spent a good chunk of my day making brackets to hold my iginition coils. I'm so lucky to have access to a shop that has metalworking equipment. The notcher is one of my favorite tools right now. I still do a lot of hand filing though, as that is somehow really rewarding to me. It's as close to being an artist as I get. Can't draw to save my life, but give me a chunk of aluminum, the notcher, and a file, and I'll make something purdy!
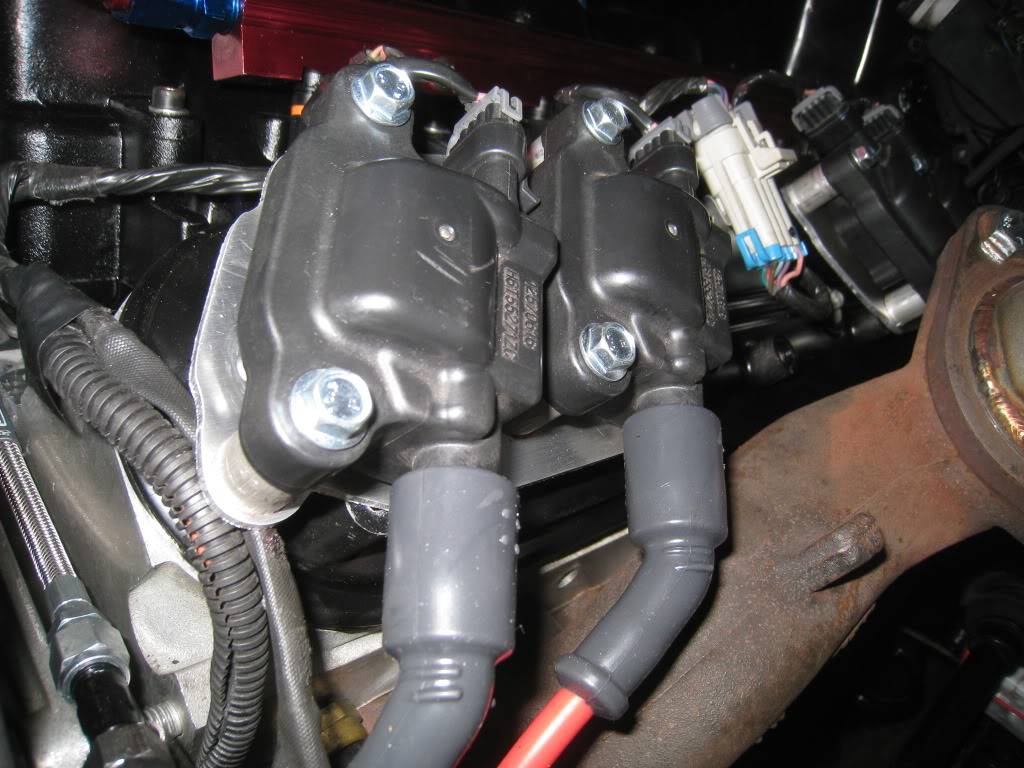

09-26-2012 #76
Registered User
- Join Date
- Oct 2007
- Location
- New Westminster, B.C., Canada
- Posts
- 88
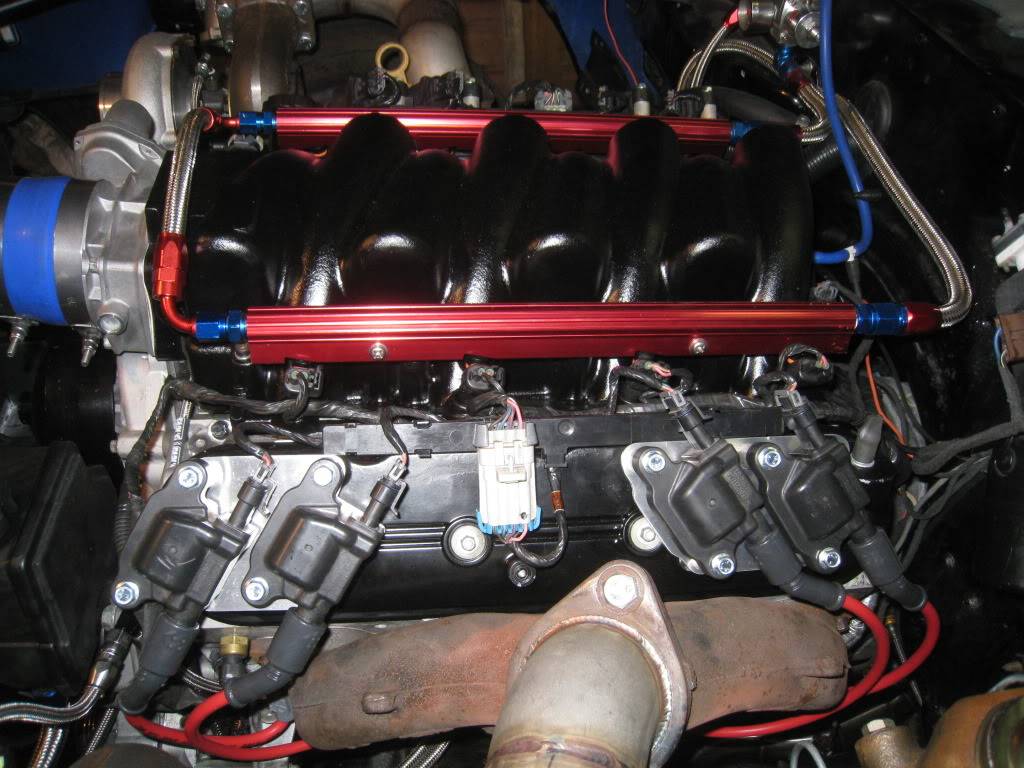
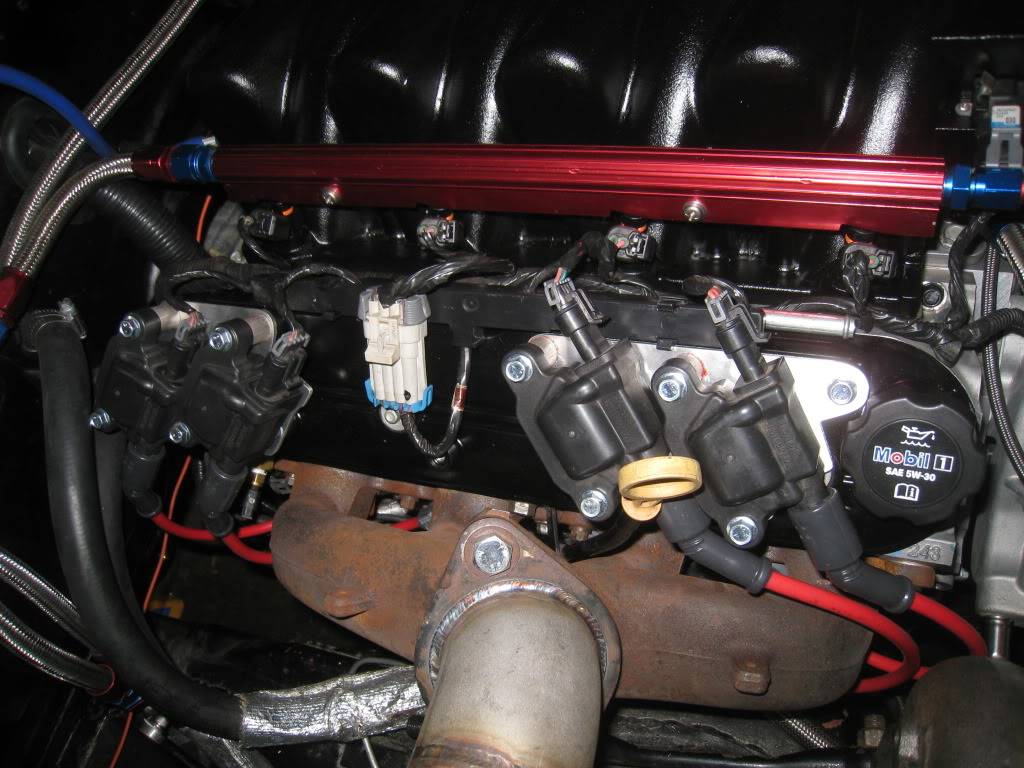
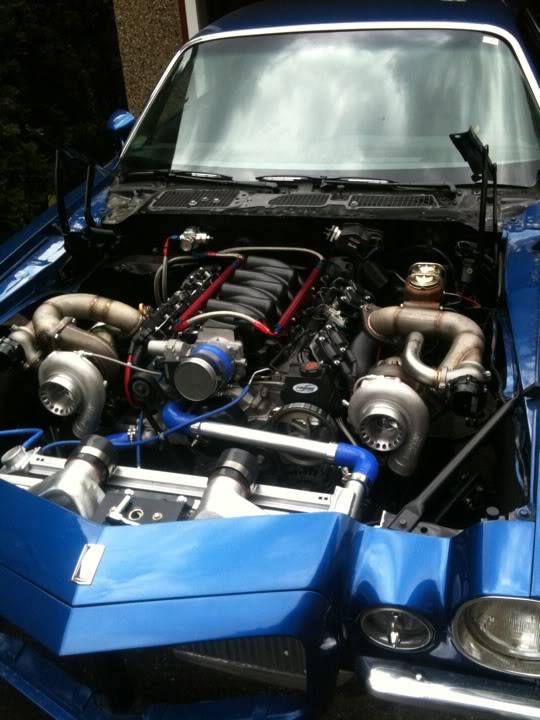
A bit more work, gotta get rid of the blue and red stuff though!
09-26-2012 #77
Registered User
- Join Date
- Oct 2007
- Location
- New Westminster, B.C., Canada
- Posts
- 88
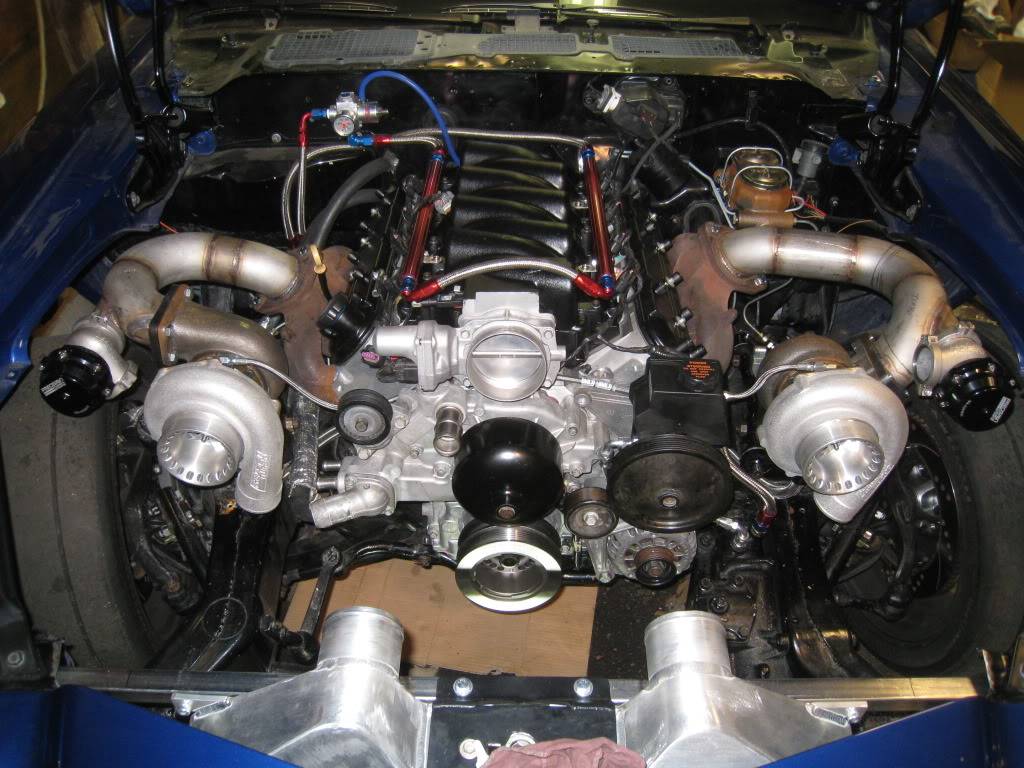
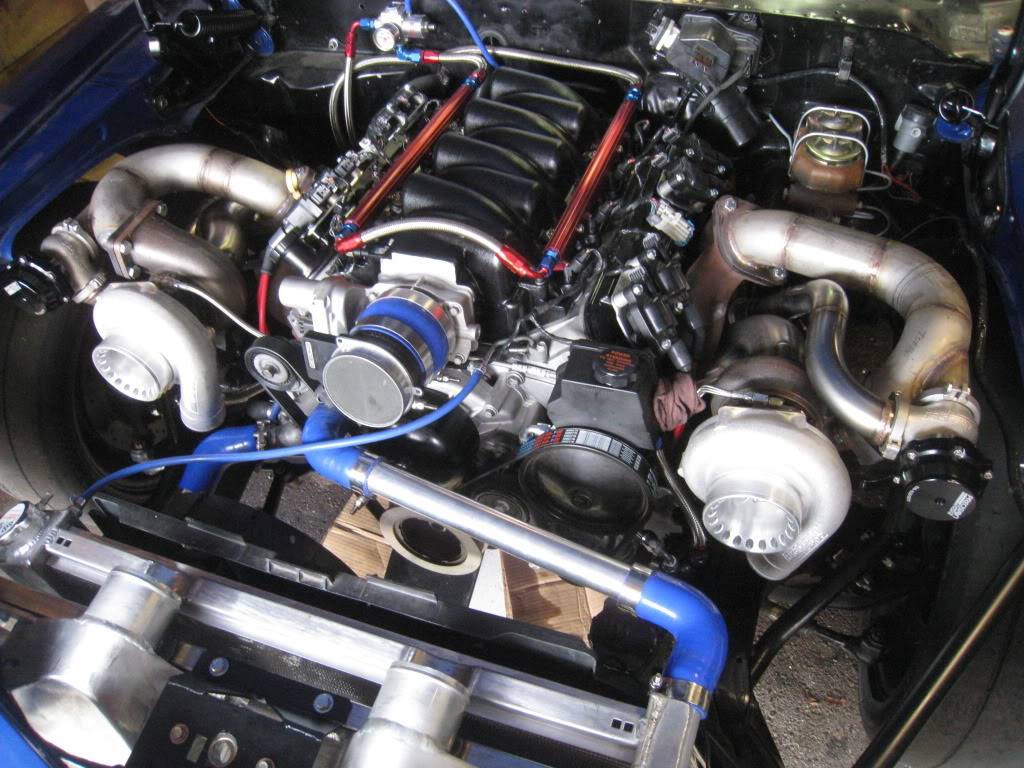
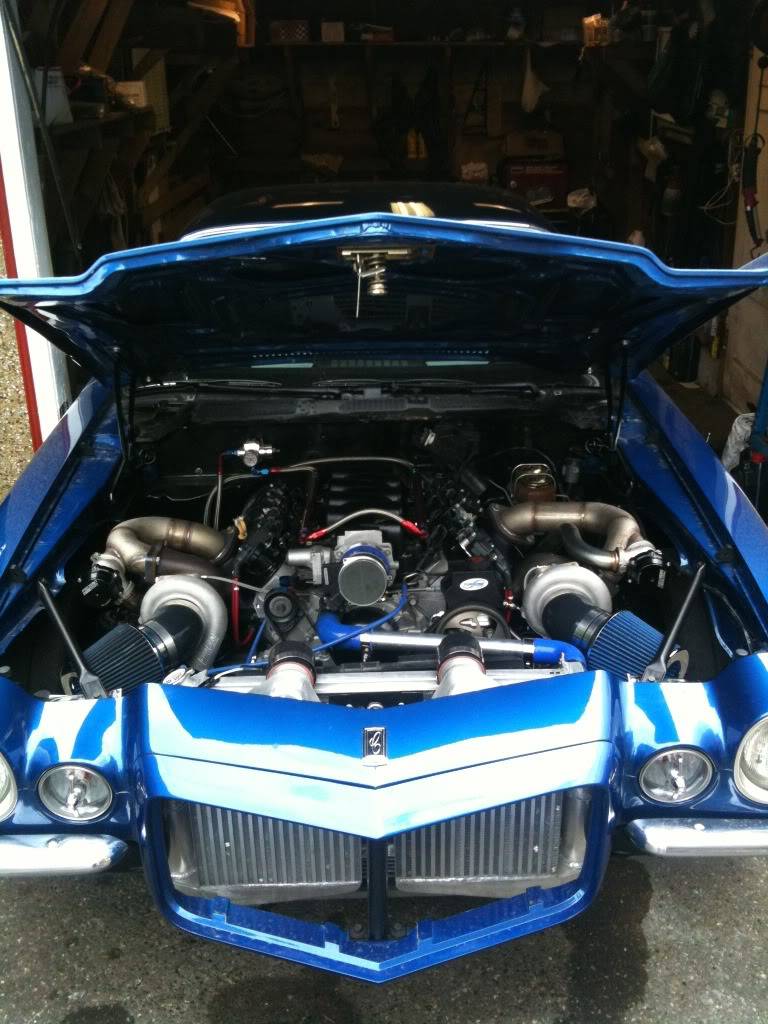
Here's some pics...note the koolcoat on the exhaust manifolds...going to wrap the turbo's and the pipes to the manifolds...
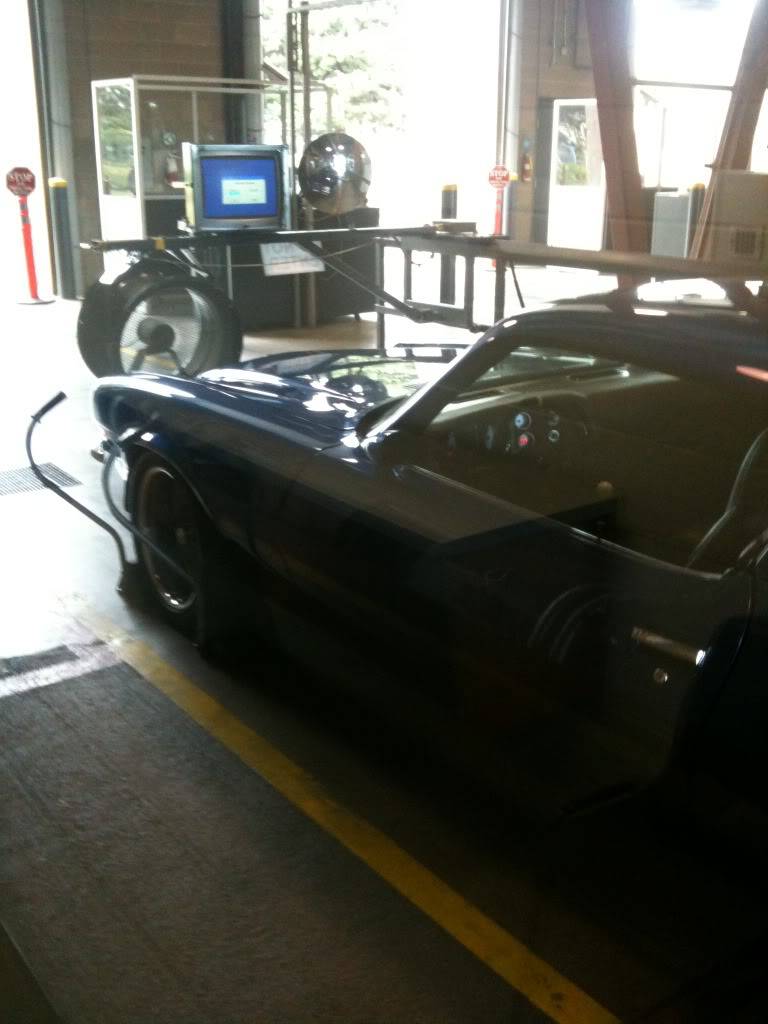
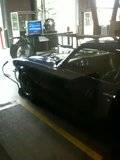
here's the car at aircare...(smog testing)...secret to pass? no charge pipes, stock tune, small injectors, testing for 1971 standards...result? CRAZY LOW NUMBERS = PASS :D
The one below is a video
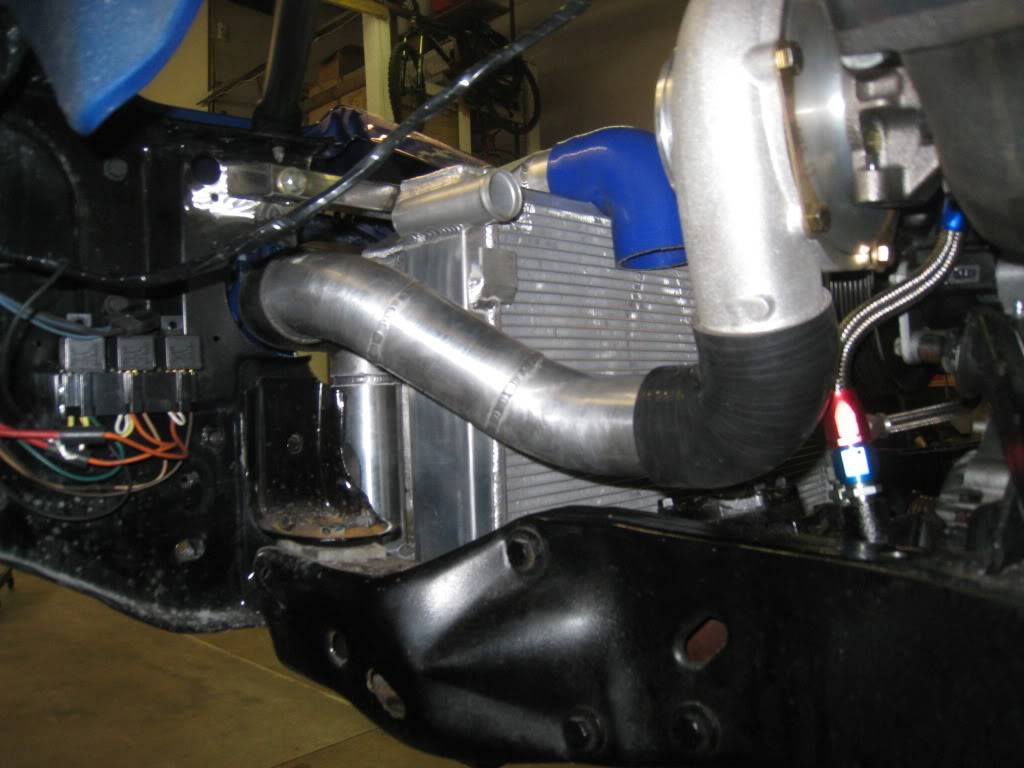
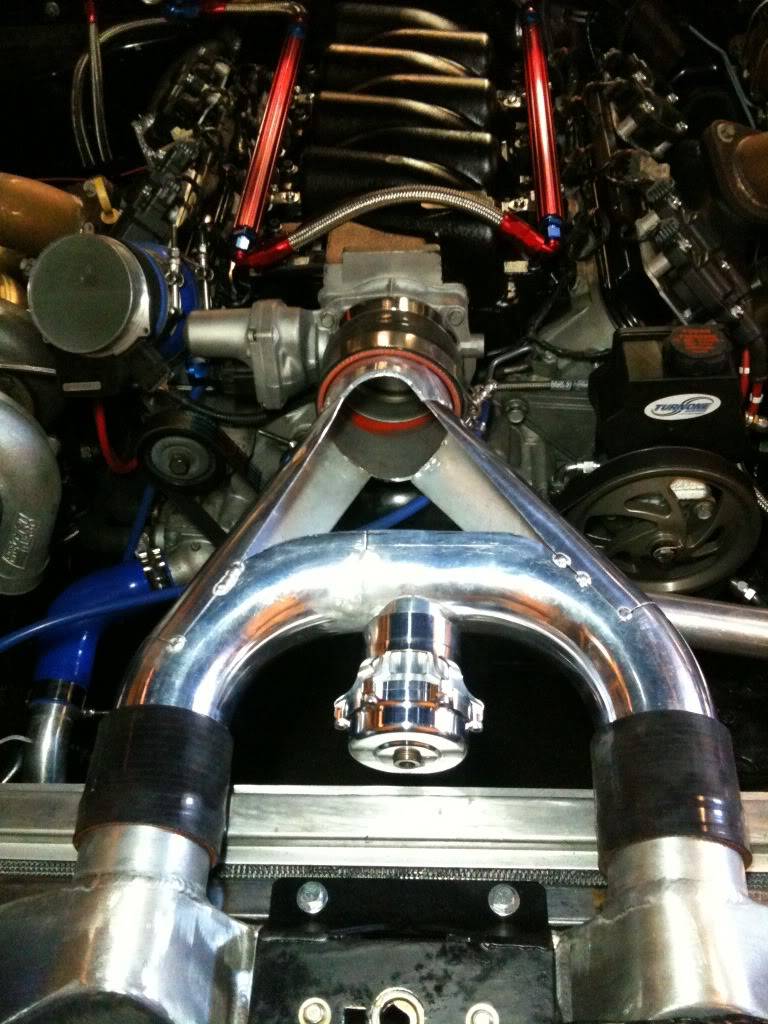
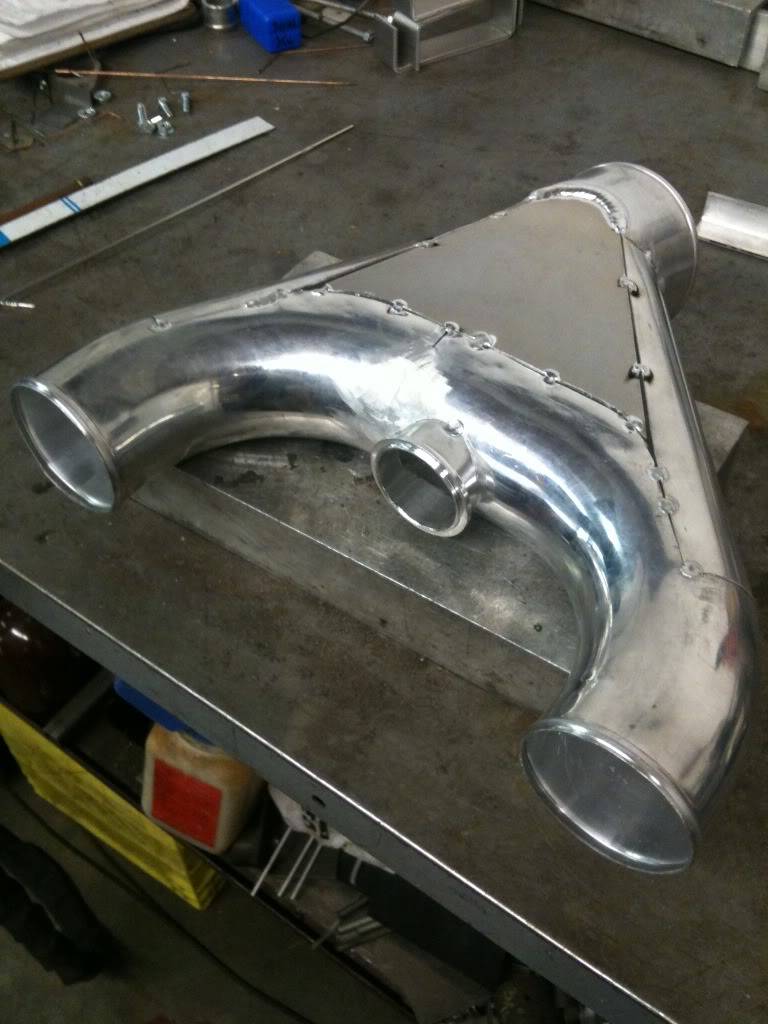
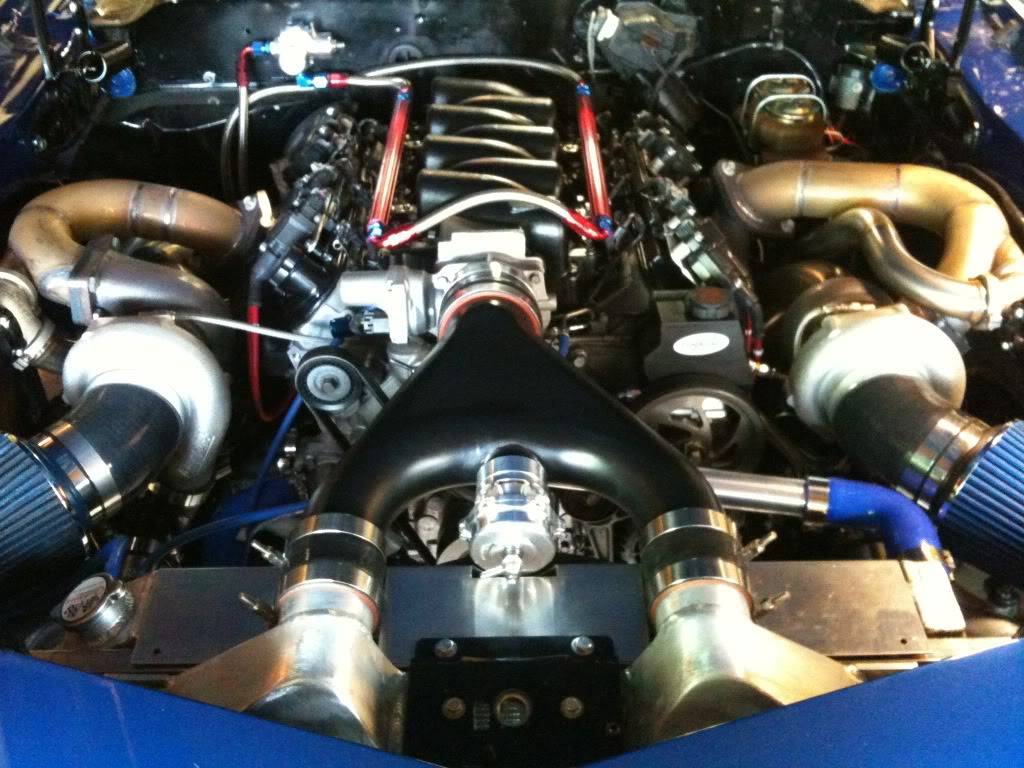
Here's the last piece of the plumbing puzzle...top merge pipe from intercoolers to manifold.
09-26-2012 #78
Registered User
- Join Date
- Oct 2007
- Location
- New Westminster, B.C., Canada
- Posts
- 88
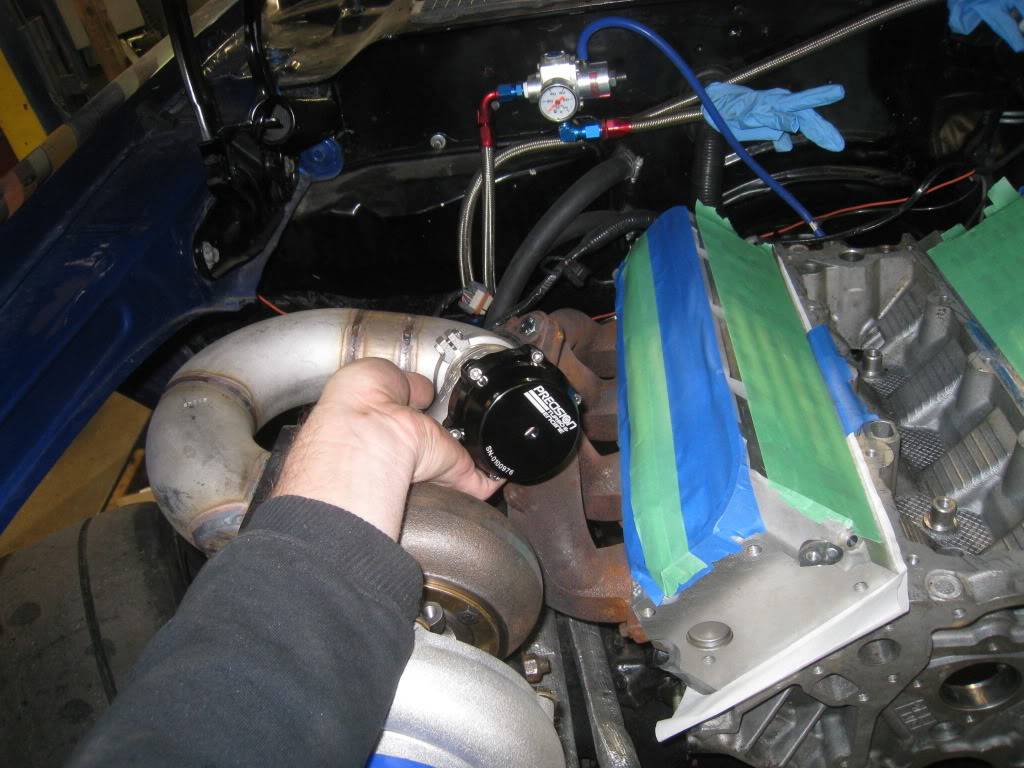
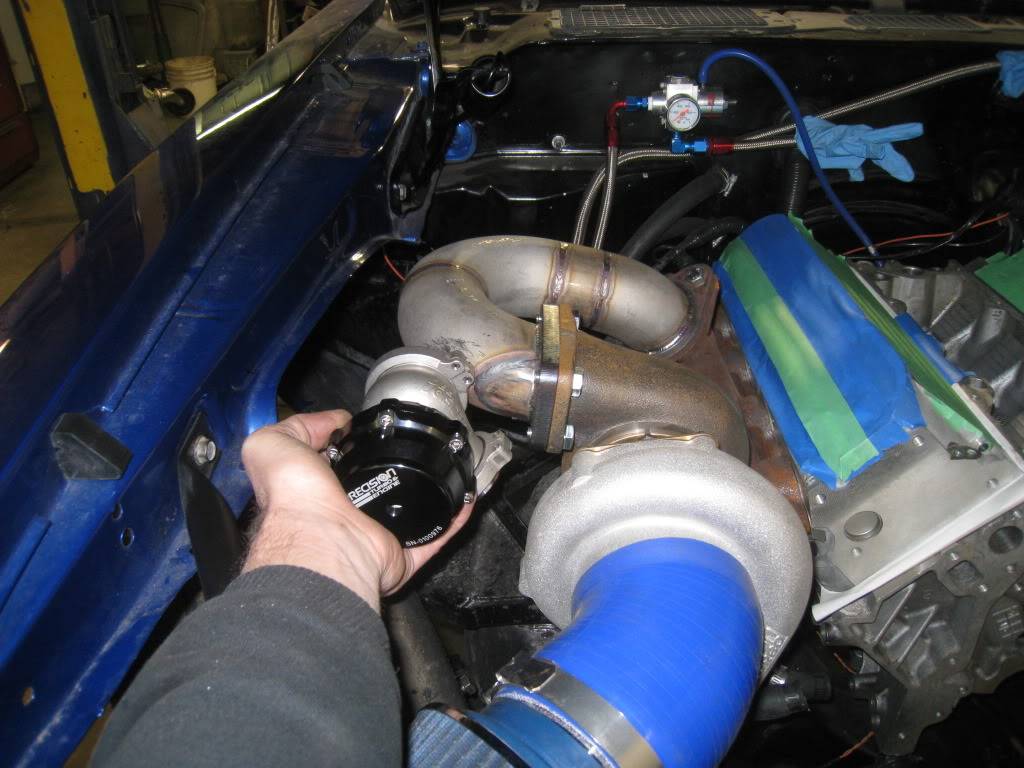
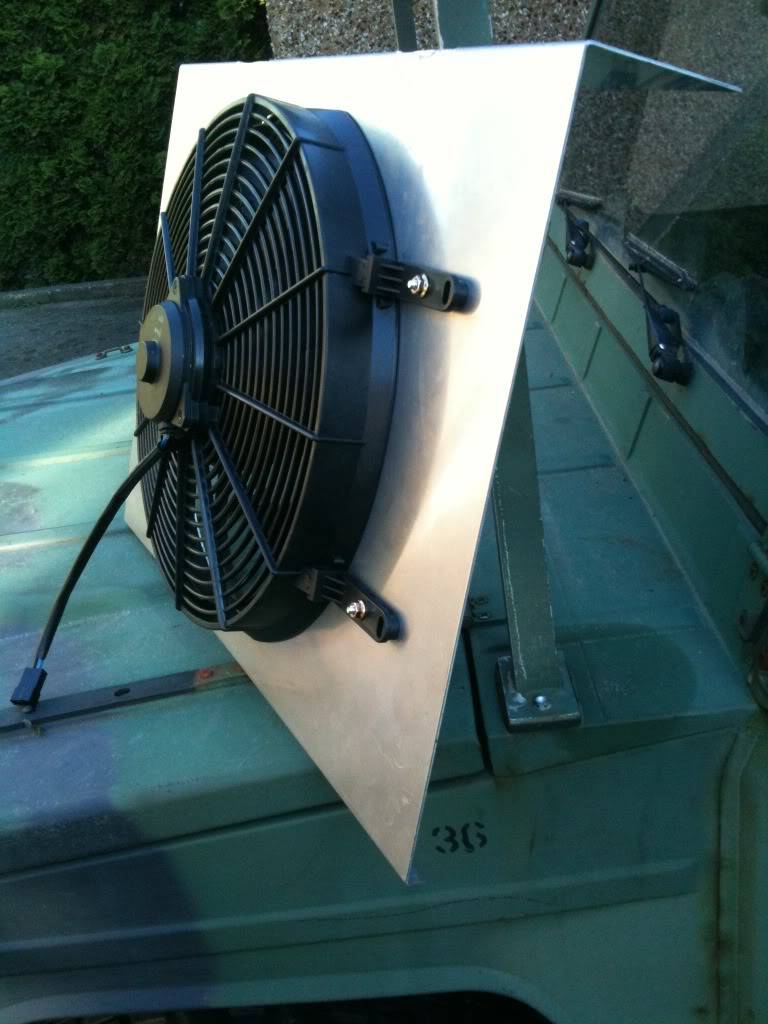
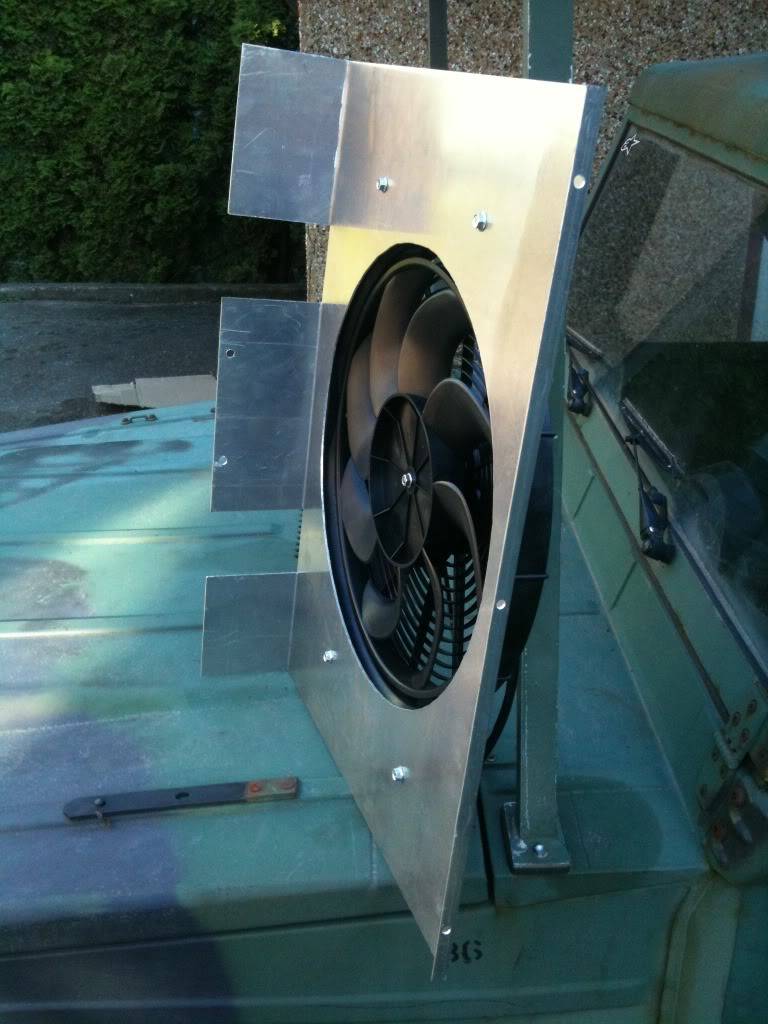
A bit more done tonight, I made a new fan shroud out of aluminum. Pretty straight forward, had to do a few notches for plumbing and the BOV.

Installed the intake merge pipe and BOV properly for the first time. Fits good. I painted it black but may go back to brushed finish.

09-26-2012 #79
Registered User
- Join Date
- Oct 2007
- Location
- New Westminster, B.C., Canada
- Posts
- 88
OK, you asked for it... Told my wife we were going out to get some ice cream after dinner... Funny, I could have sworn there was an ice cream shop somewhere in this industrial park ?!?? :pimp:

09-26-2012 #80
Registered User
- Join Date
- Oct 2007
- Location
- New Westminster, B.C., Canada
- Posts
- 88
DYNO NUMBERS...
Mustang Dyno, 15 psi boost, pump gas (chevron 94), very conservative A/R and Timing for road racing.....
622 RWHP 630 RWLBFT torque.
I ran out of time and money on the dyno to go any further. The tuner figured that on any other dyno it would be in the 700's. We had to spray the tires at one point because the power hit so hard it was breaking the tires loose.
In a couple of weeks I hope to return and turn the boost up a bit more. On a side note, with 1 degree more of ignition advance I was seeing 10 extra HP, but it would have an occasional knock. The curve was insane, full torque by 4200rpm, and it felt like there was a second torque curve from there to redline. (my tuners words)

 Reply With Quote


