

Results 1 to 20 of 115
Thread: Wide body 1965 Mustang Fastback
-
08-30-2012 #1

 Registered User
- Join Date
- Jan 2009
- Posts
- 606
Wide body 1965 Mustang Fastback
Hi all, I figured it was time to share my latest project which is being built with help and guidance from the guys over at Best of Show Coach Works in San Diego/Escondido. Some of you may know me from the '69 Camaro we built over there. Building that car was a great experience, but I really wanted to build a car. With that said, I bought a '65 Fastback from Mark of Lateral Dynamics fame. I was initially looking for a '67-'69, but for the price, I figured I couldn't go wrong. I sat on the car for about a year before figuring out a plan of attack. Originally I thought of a fairly stock bodied car with all of the pro-touring goods. Then I started thinking about adding flares because the early cars can't fit that much tire under them compared to the later years. grafted, or bolted on flares really didn't look the part compared to the likes of Ron S's blue Mustang. I don't know why, maybe it was because everyone seems to be widening cars these days, but I figured if others could do it, so could I.
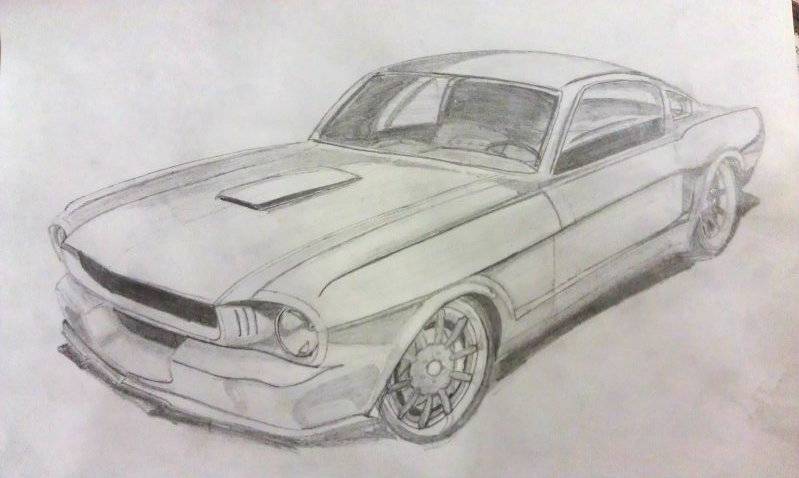
I didn't want to blatantly copy Ron's car, but I did want to to make my Mustang a little more "shapely." While I love killing cones as much as the next guy, I tend to obsess on design. As such, I've done my best to attempt to blend form and function to try and create something that doesn't look like a "car show custom," where you can tell what is factory, and what isn't. Overall, I want the car to pay homage to the GT350s of yesteryear with a little European influence, albeit of the vintage variety. What it actually ends up looking like is anyone's guess. I tend to revise little decisions every step of the way to fit the direction the car is heading in.
Okay, time for photos!
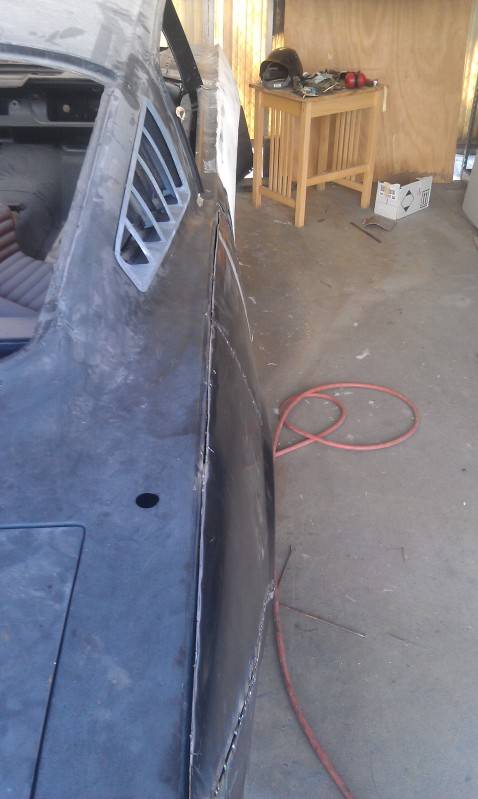
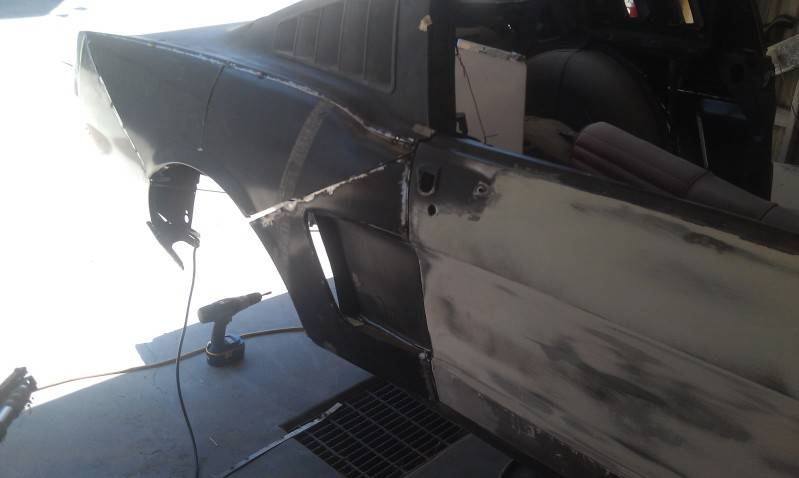
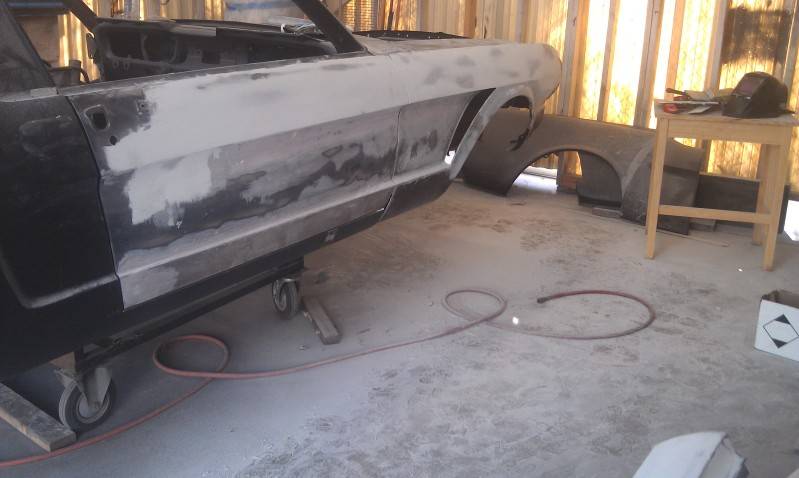
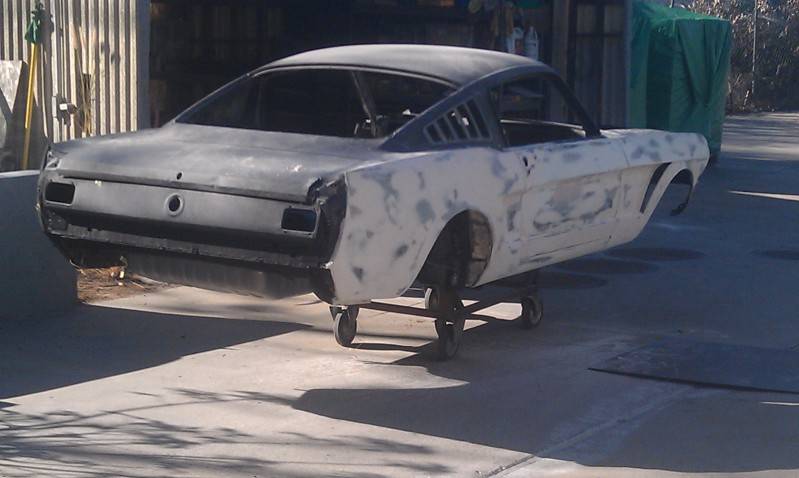
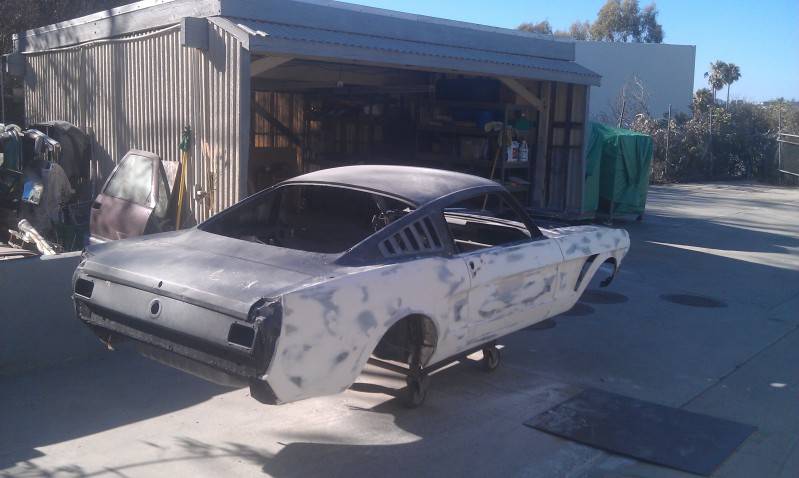
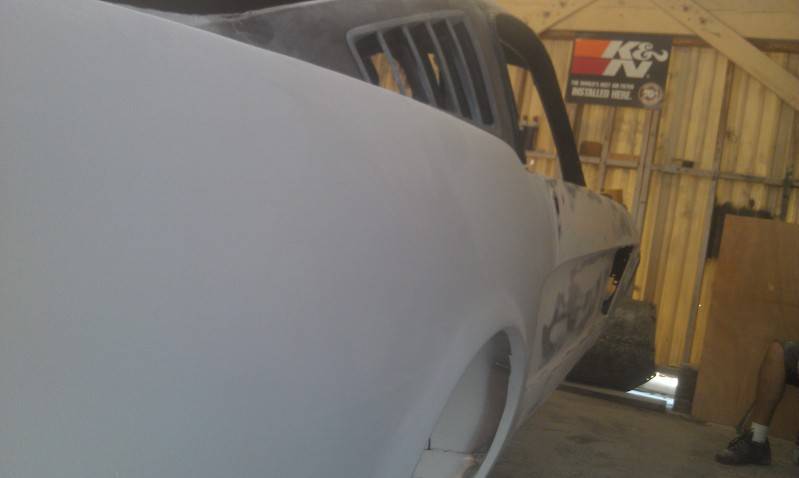
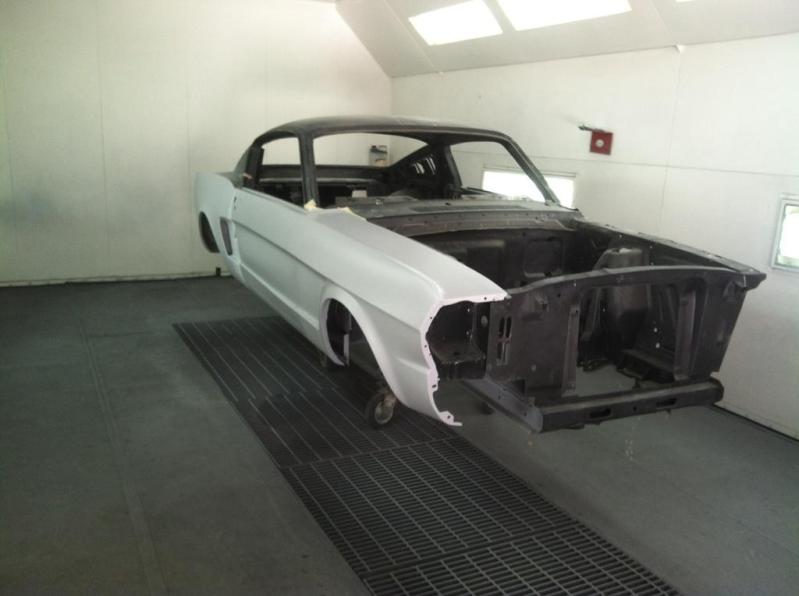
First thing I did was to to cut the fenders and doors to pull the top out and give the car a coke bottle shape. To keep the height, and gentle curve of the body line in place I had to add in some sections of sheet metal.
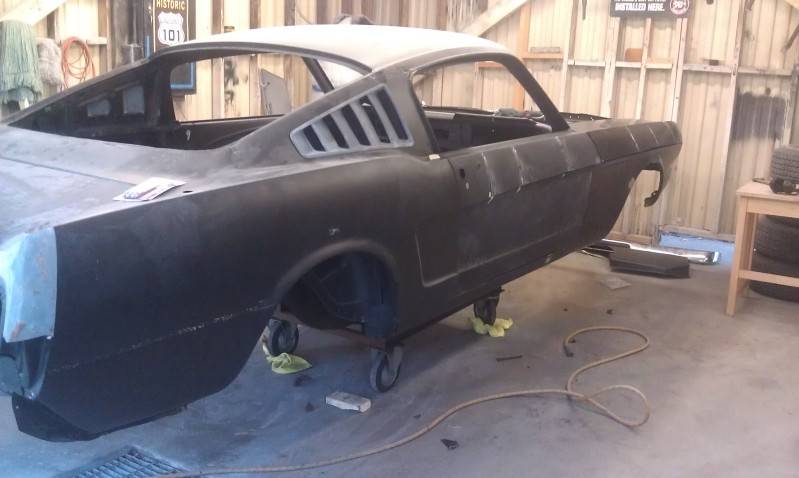
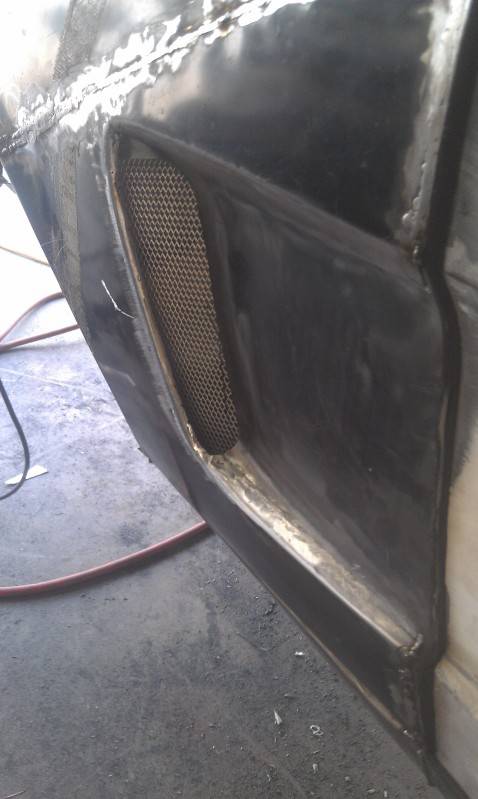
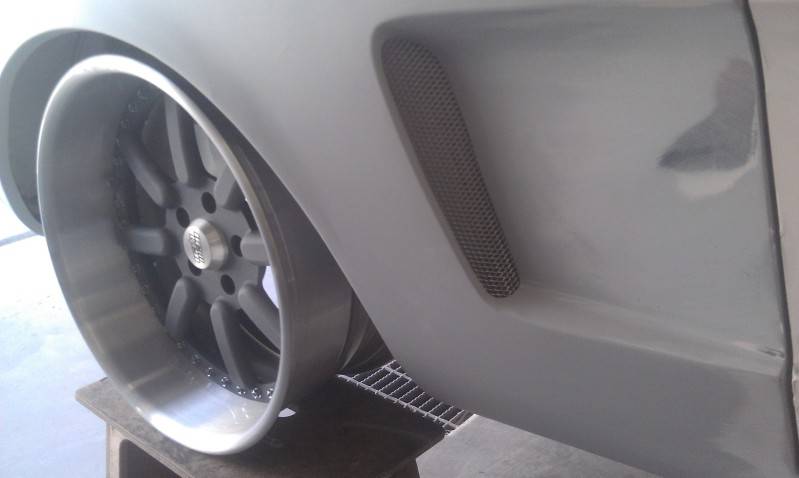
Next step was to build an air vent behind the front wheel well. This was done for two reasons. First, to try to help get a little hot air out from the wheel wells, and second, because it looks kind of cool. Without out this, the stretch might actually be pretty inconspicuous. Even with the vent. some people visiting the shop don't realize it is stretched 2.25"
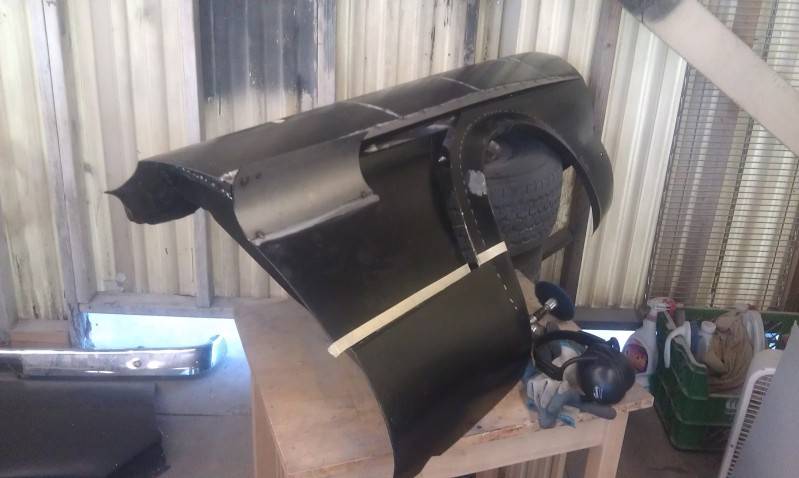

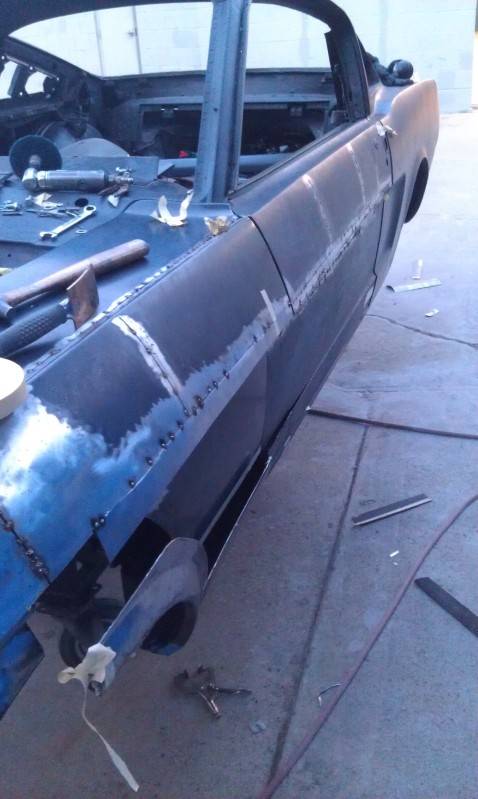
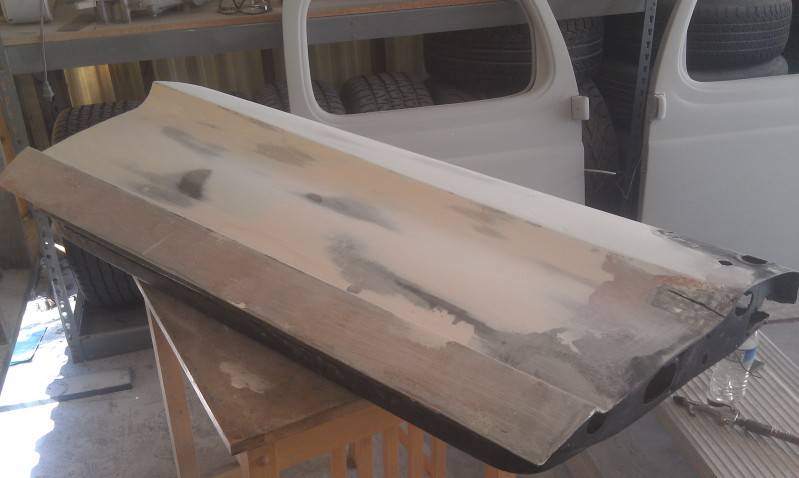
Doors. The bottoms of the doors suffered from the usual rust spots. Not a problem here. In this case, cutting out the entire bottom of the doors proved to be the easiest way to modify things.
...And that is it for tonight. More will follow soon. If you guys have any questions, please don't hesitate to ask, I will do my best to answer them!
Matt
-
08-30-2012 #2 Registered User
- Join Date
- Mar 2009
- Location
- SoCal
- Posts
- 1,240

That looks like a really cool approach, Matt. Another Mustang backup car is always welcome!
Brett H.
1979 Pontiac Firebird Trans Am
1991 Mazda Miata
2005 Ford Mustang GT
1987 Ford Mustang GT - Sold 06-29-2014
1988 Oldsmobile Cutlass Ciera - RIP 9-17-2011
1992 Chevrolet Corvette - Sold 10-12-2017
08-31-2012 #3 Registered User
- Join Date
- Dec 2010
- Posts
- 104
I remember meeting you and your car at best of show your mustang is gonna be killer and pretty unique too!
I've been waiting for a build thread on this Can't wait to see more!
08-31-2012 #4
Registered User
- Join Date
- Nov 2010
- Location
- Wharton, Tx
- Posts
- 113
Definitely subbing in for this. I like how you sectioned the fenders and doors!
08-31-2012 #5
Registered User
- Join Date
- Dec 2007
- Location
- Bakersfield,CA.
- Posts
- 120
Good stuff. More please.
08-31-2012 #6 Registered User
- Join Date
- Dec 2005
- Location
- Birmingham, AL
- Posts
- 3,356
Bring on the pics. I love the idea of doing some stretching and flaring and I have been tempted to go ahead and spend the money. I think it would make my budget suffer elsewhere so I am exercising restraint. It will be fun to live vicariously through you though.
Stephen
08-31-2012 #7 Registered User
- Join Date
- Dec 2010
- Location
- Kinston, NC
- Posts
- 118
Subscribed
 1957 Chevy Bel Air sold
1972 Chevy Chevelle sold
1974 Porsche 911 Carrera sold
1968 Ford Mustang coupe
"That's a hell of a cam for the street son."
http://www.youtube.com/watch?v=xhBtRMtpgzE
http://www.cardomain.com/ride/3873446/1968-ford-mustang
08-31-2012 #8
Registered User
- Join Date
- Jan 2009
- Posts
- 606
Hey Brett, this one might not be the backup car when its done. If it turns out too nice, I might sell it, if it turns out just the way I like, I'll probably sell the current Mustang backup car, and make the Camaro the backup car, or just the over powered fun car. Originally Posted by 79-TA

Anyway, on to more pictures.
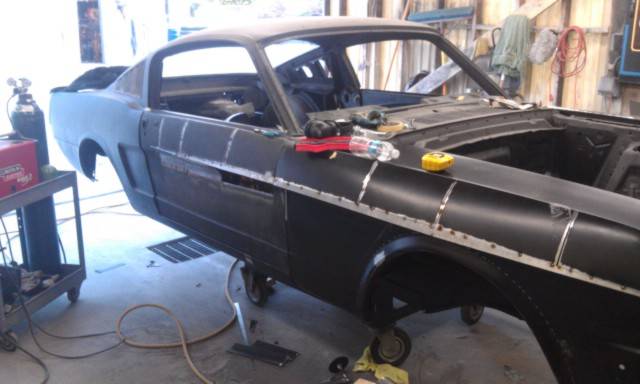
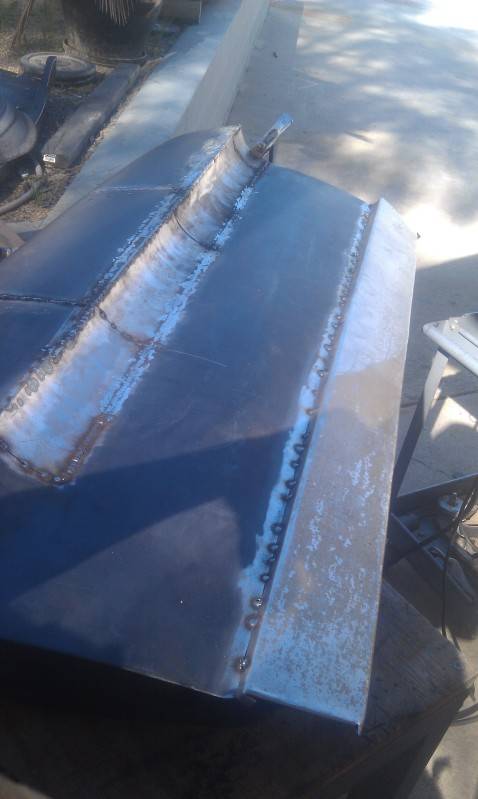
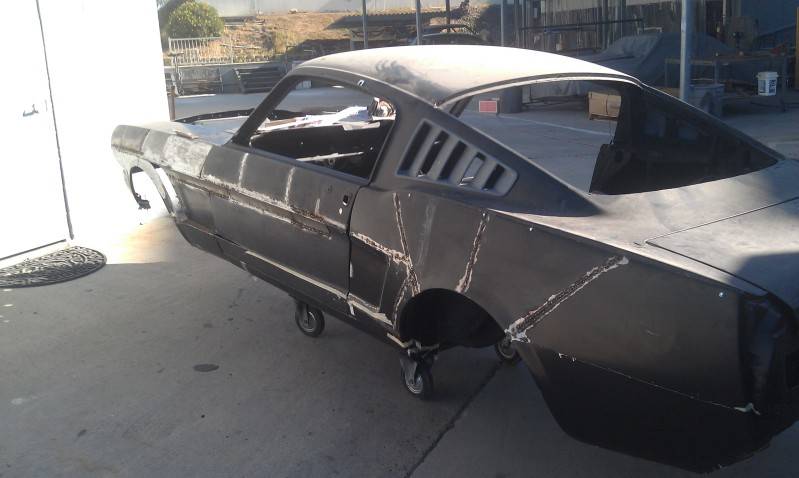
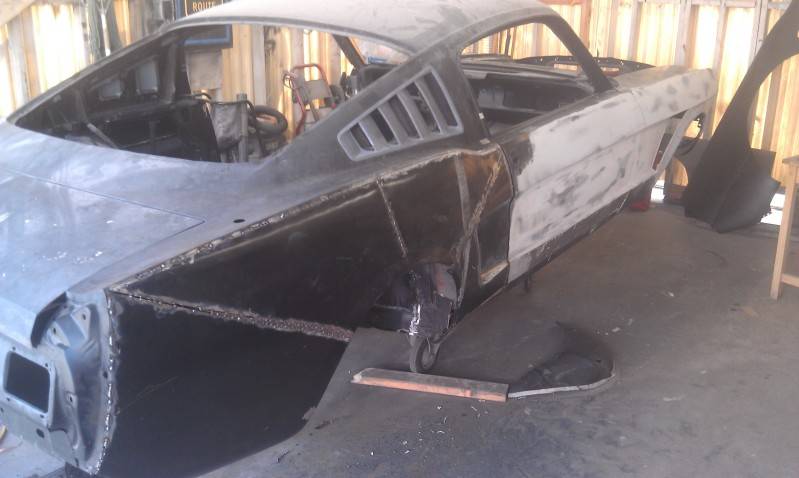
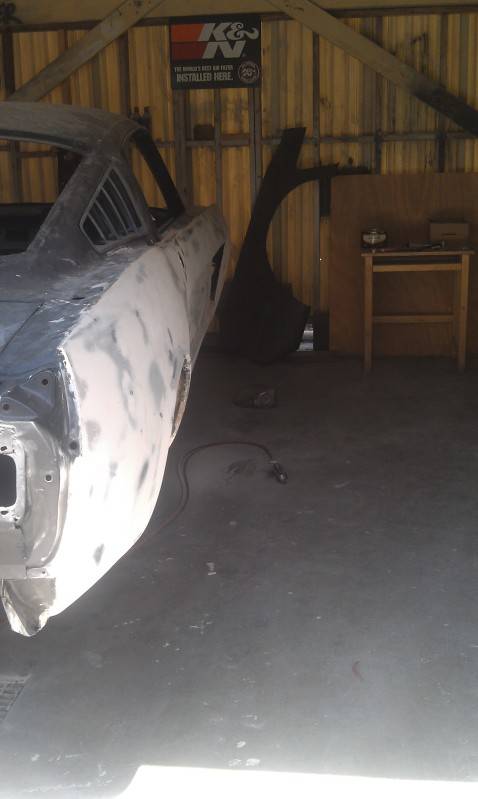
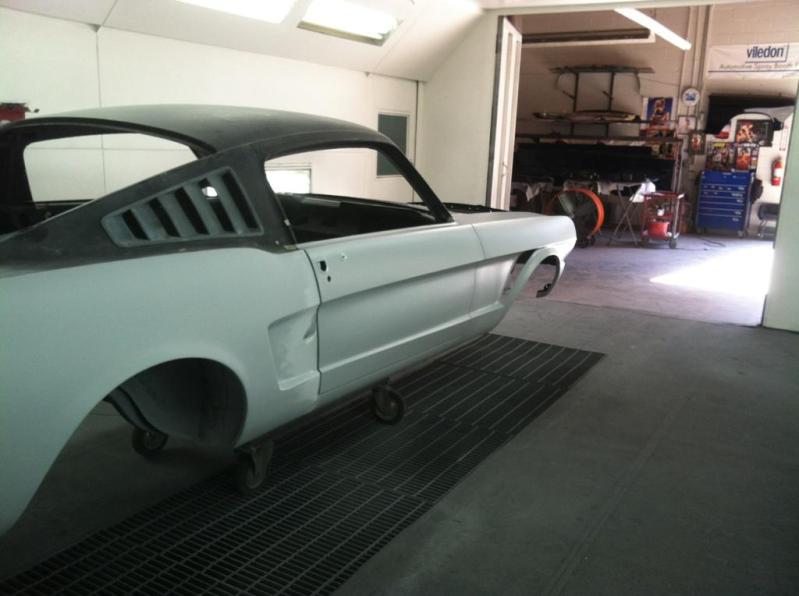
The goal with flaring the back of the car is to get a 315 or 335 fit without having to cut into the frame rails. This means I'm not not opposed to both mini tubbing it and stretching the quarter panel. From an aesthetic stand point, doing looks best because it keeps the quarters from sticking out too much and looking really fat, not to mention the fact that I don't really want the rear of the car wider than the front.
figuring out how and where to cut proved a little bit of a challenge. Here is the first go around


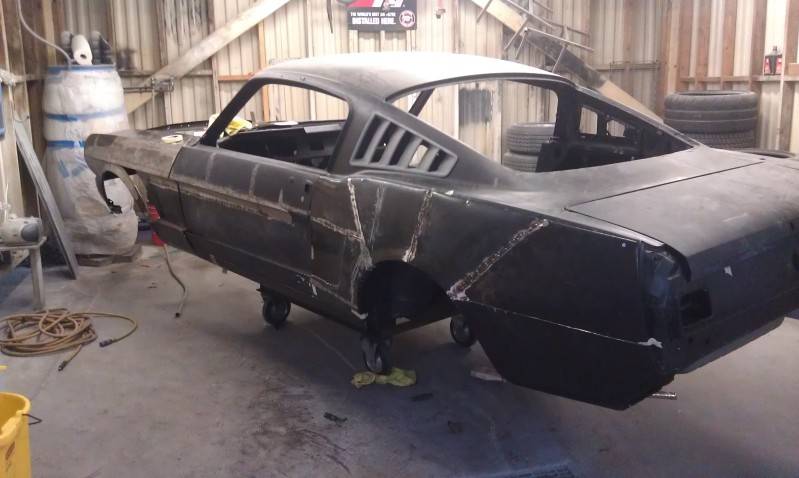
Turns out I had an extra unnecessary cut, not to mention the fact that I butchered the panel up trying to get the body lines to fit. Still, it is slowly starting to take shape. Some of the regulars at Best of Show have taken it upon themselves to call the car Frankenstein.
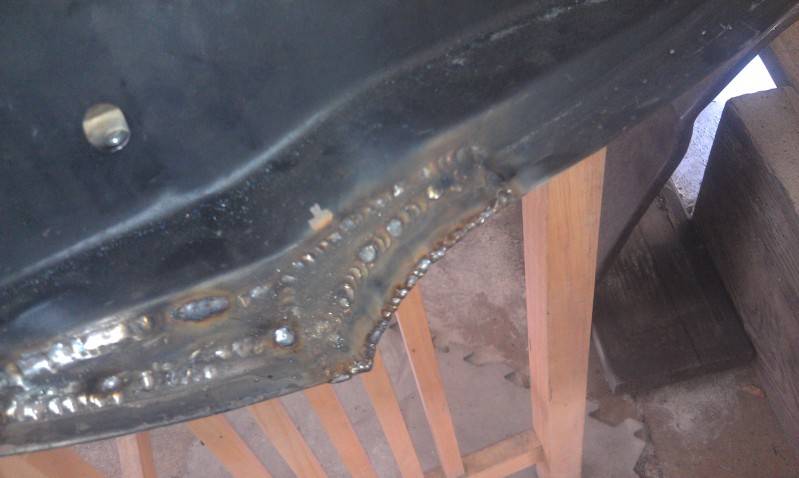
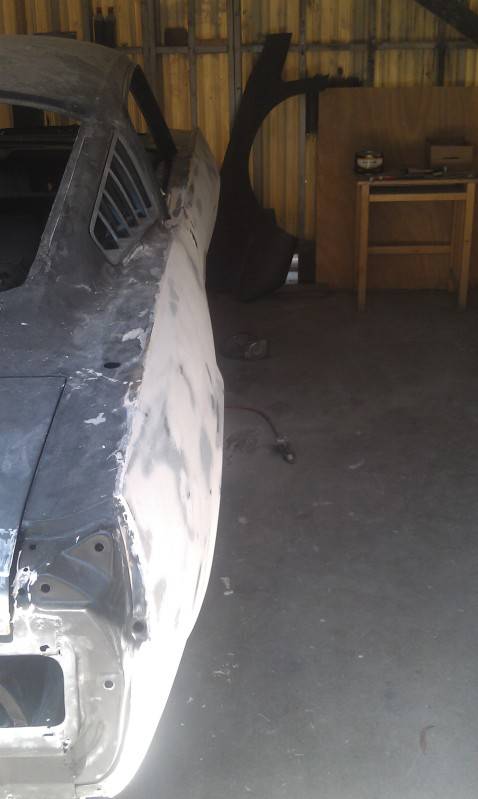
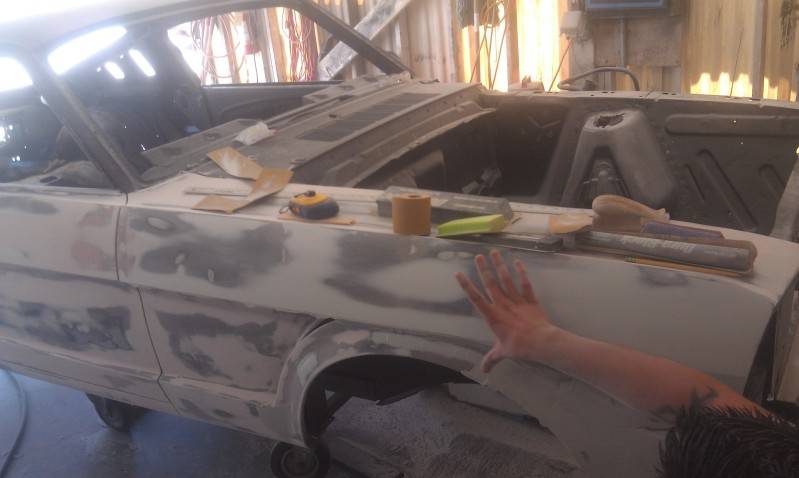
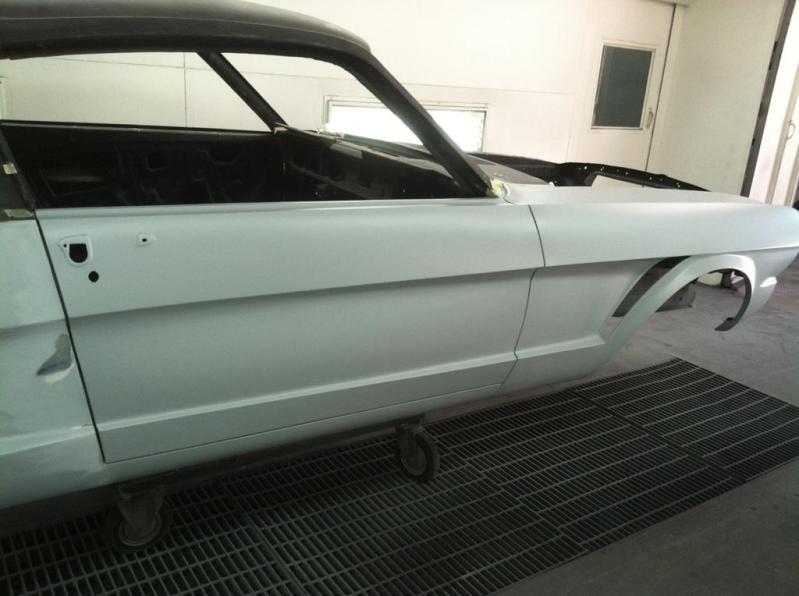
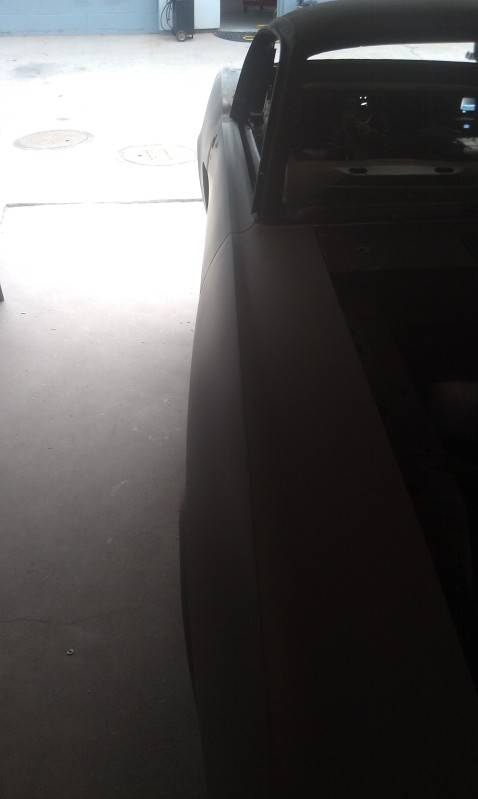
With the driver side tacked up, I decided to move around to the passenger side and see if I could manage a cleaner install. Oh, and I also started doing bodywork on the doors and fenders at this time to surface rust from popping up all over the place.
I found the best way to hang the quarter skin was to leave about 1/2 to 3/4 of an inch of the old panel to work the new panel onto. This gave me reference points to fit the new panel to, as opposed to just hanging it, which would have, for lack of better words, just made a mess of things since the stampings were so far off from the originals.
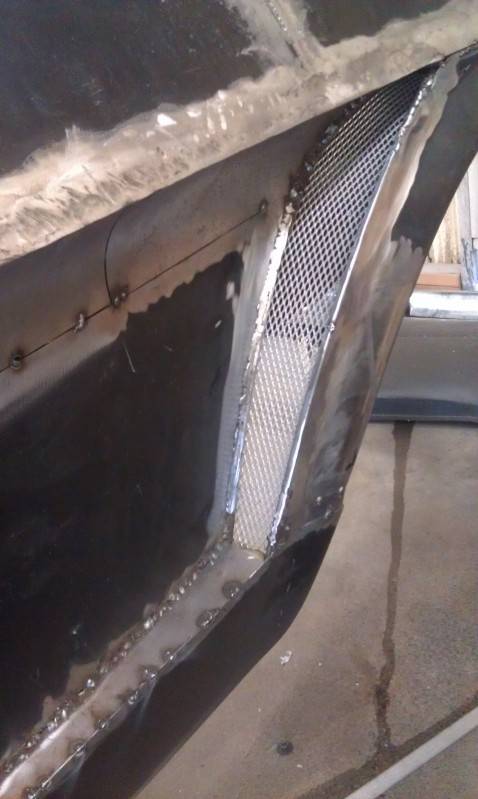
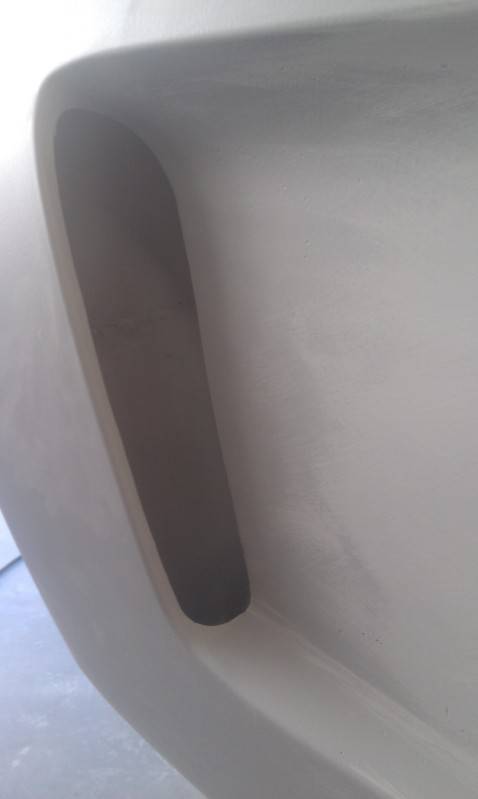
One of the shortcomings I noticed on my Camaro was that it really wasn't designed for 15-30 minute track sessions. It handles just fine, but once you're out there, you realize how hot everything gets, and you start noticing all kinds of fluids leaking. With this in mind, I wanted to incorporate a rear diff cooler, and possibly even a transmission cooler (for a T56 or 6060). So, off I went cutting out the openings where the old Shelby GT350s had brake ducts. I've done my best not to make them look tacked on. I'm pretty happy with the way they came out.
Alright, that concludes today's update. Gotta warn you guys, progress will soon start to slow down as I'm still doing body work on the car.
Matt
09-01-2012 #9 Registered User
- Join Date
- May 2002
- Location
- Northern California
- Posts
- 10,716
looking good.... when does the mud slinging start?
MrQuick ΜΟΛ'ΩΝ ΛΑΒ'Ε
09-02-2012 #10
Registered User
- Join Date
- Jan 2009
- Posts
- 606
I am well into the thick of the mud slinging. Each successive panel has got a little less filler on it though. Wonder what it will do for weight distribution, lol. Originally Posted by MrQuick
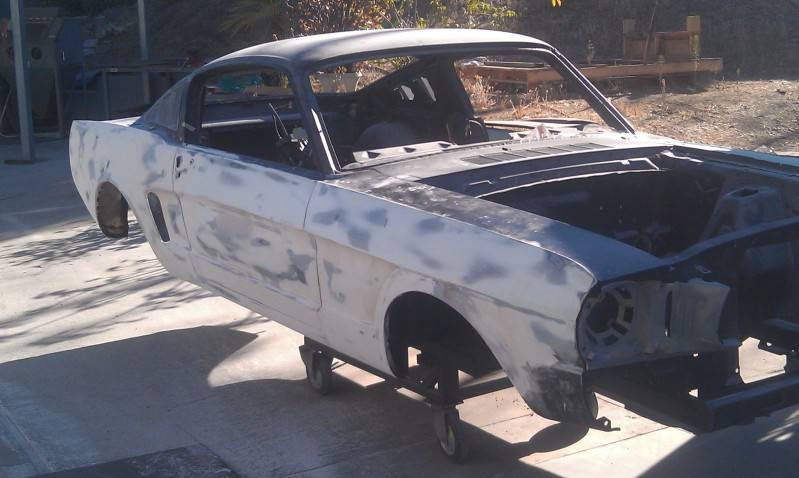
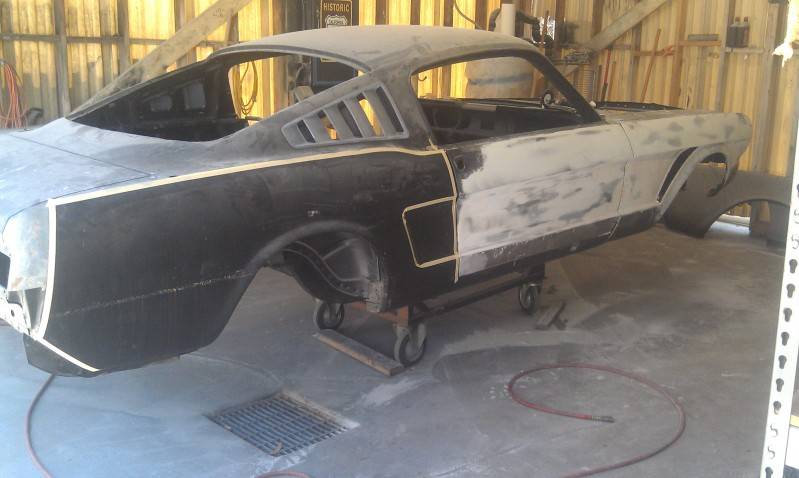
And here is Jesus fixing all of my amateur body work. I kinda got carried away trying to make things smooth, and ended up making things more blob like.
After Jesus was finished getting sheetmetal aligned perfectly he went to work getting the passenger side of the car smooth, and the body lines crisp and straight. After than, he primed the side so that it could be left untouched for a while as I finished up the driver side of the car.
Given the look I'm after, the car really needs this wheel!
Matt
09-02-2012 #11
Registered User
- Join Date
- Jan 2009
- Posts
- 606
Oh, and I don't think I mentioned any of the parts that will being going under the car, but here is a teaser. I'll give you guys a hint, this pallet just came from Mooresville, NC.

Matt
09-02-2012 #12 Registered User
- Join Date
- Sep 2010
- Location
- Beach Park IL
- Posts
- 2,849
I got a similar pallet....I'll be watching this one.
Donny
Support your local hot rod shop!
09-02-2012 #13
Registered User
- Join Date
- Dec 2005
- Location
- Birmingham, AL
- Posts
- 3,356
It is suprising how subtle that looks now that it is in primer. The New Gen Lite is a great wheel. I am hopeful that New Gen can make a comeback because they designed some killer wheels and I had a project designed in my head based around at least 3-4 of their designs. Rushforth's lineup has the same effect on me.
Stephen
09-02-2012 #14 Registered User
- Join Date
- Aug 2012
- Location
- Pennsylvania
- Posts
- 254
Looks like a very cool (badass) project you have there. I love to see fellow hot rodder and custom car builders show off their talents!!!
09-02-2012 #15
Registered User
- Join Date
- Dec 2010
- Location
- Apex, NC
- Posts
- 1,020
Me Likee!
09-02-2012 #16 Registered User
- Join Date
- Mar 2010
- Location
- Orlando, FL
- Posts
- 266
Nice work. i love widebody classics. i will be keeping an eye on this build. keep us posted
Live for today, tomorrow is never promised.
Project Eternity: https://www.pro-touring.com/showthre...rs-convertible
09-03-2012 #17 Registered User
- Join Date
- May 2007
- Posts
- 117
Tagging this thread, so I can follow along!
Tim'65 2+2
347 - RetroTek EFI - 471 fwhp
JBA shorty's, 2.5" tubes, Dr Gas X-pipe
T-5 world class 5 speed, w/ .80 OD
9" with 3.70's & T-loc
4 wheel disc brakes
17" Torq-Thrust D's, 225/45 & 245/45
TCP/Global West suspension
OpenTracker roller spring perches
subframe connectors, Traction Masters, Panhard bar
TCP manual rack & pinion
power windows & power door locks w/ keyless entry
10-14-2012 #18
Registered User
- Join Date
- Jul 2012
- Posts
- 96
DSE Aluma-frame or QUADRA-link
Brandon
2003 f250 powerstroke 2/4 drop daily driver
1979 f250 crew cab on superduty axles
1947 dodge 5 window coupe
10-14-2012 #19
Registered User
- Join Date
- Jul 2012
- Posts
- 96
DSE aluma-frame/ DSE quadra-link Originally Posted by 69MSA
Brandon
2003 f250 powerstroke 2/4 drop daily driver
1979 f250 crew cab on superduty axles
1947 dodge 5 window coupe
10-14-2012 #20 Registered User
- Join Date
- Apr 2011
- Location
- mass
- Posts
- 493
Great looking build! Have you picked out a power plant?
Paul
1966 Buick Skylark GS
Turbo 401 Buick Nailhead
Build Thread
https://www.pro-touring.com/showthre...uild&highlight=
http://s917.photobucket.com/user/66l...rbo%20nailhead

 Reply With Quote


