Results 81 to 100 of 107
-
07-25-2013 #81

 Registered User
- Join Date
- Oct 2012
- Posts
- 132

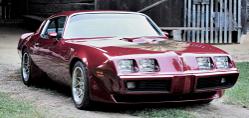
That is one great looking car!!
Gordon in Calgary
-
11-01-2013 #82
Registered User
- Join Date
- Aug 2013
- Posts
- 9

Any updates? Please!
-
11-04-2013 #83
Registered User
- Join Date
- Nov 2010
- Posts
- 44
One of the best build threads of a 2nd gen f-body. too bad the update has stopped!
-
11-05-2013 #84
 Registered User
- Join Date
- Apr 2005
- Location
- IN/MI border
- Posts
- 1,904
I like the blue, the wheels look great! Keep it up!
-
12-15-2013 #85
 Registered User
- Join Date
- May 2008
- Location
- Burleson
- Posts
- 130
After 5 months of not updating I figure I need to put in an update of what has been accomplished. Since my last update I have gotten the 4-link finished up and the car now rolls!!! We have also got some Dart Pro 1 heads for the car. I have just finished up welding in the subframe connectors. Later today we are going to repaint the engine and heads since we have changed them. Tomorrow I plan on modifying my gas tank to hold in the 4th Gen fuel pump. I hope to at least have the car start by next weekend, we'll see if we make it.
Time for pictures!
Here is the 4 link just tacked in.
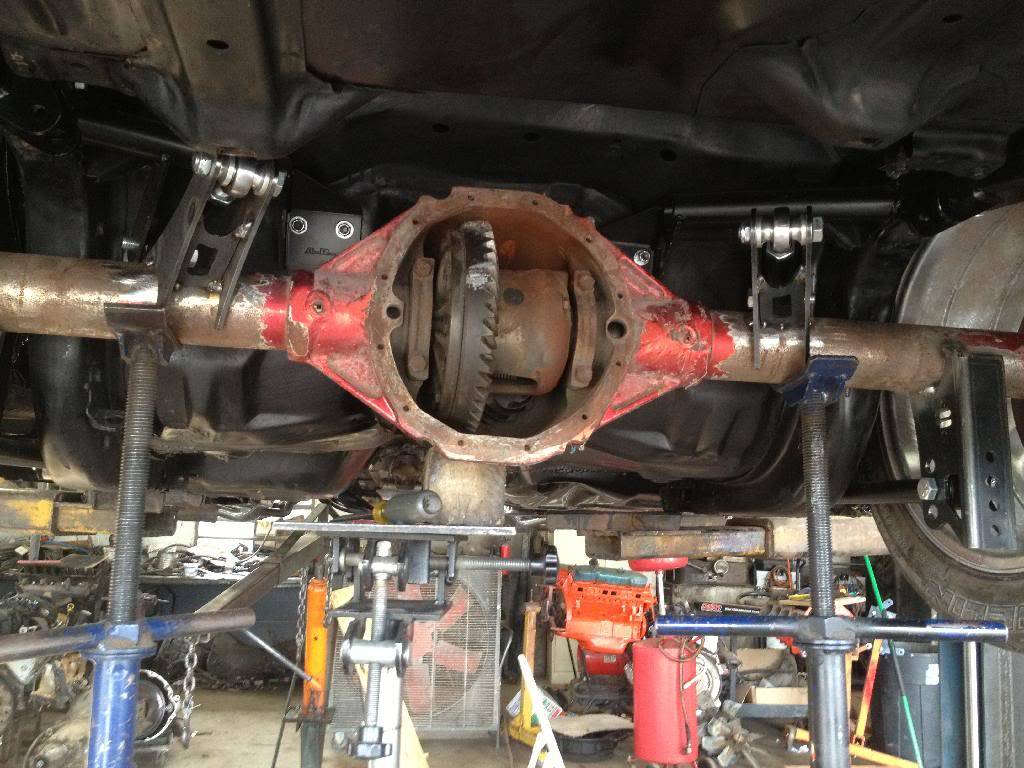
The bars were still too close to the tires so we had to pocket the bracket to move the bars in a half inch more. we got our buddy to machine us some half inch spacers.
Shes all welded up and bolted in the car!
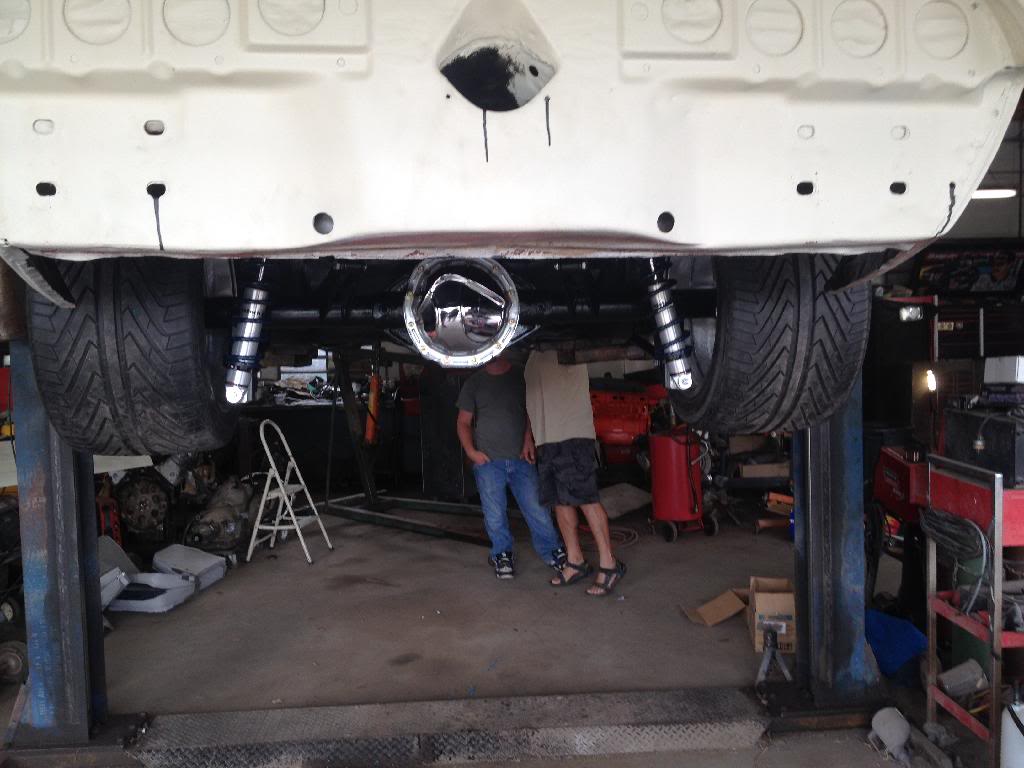
On the ground from behind
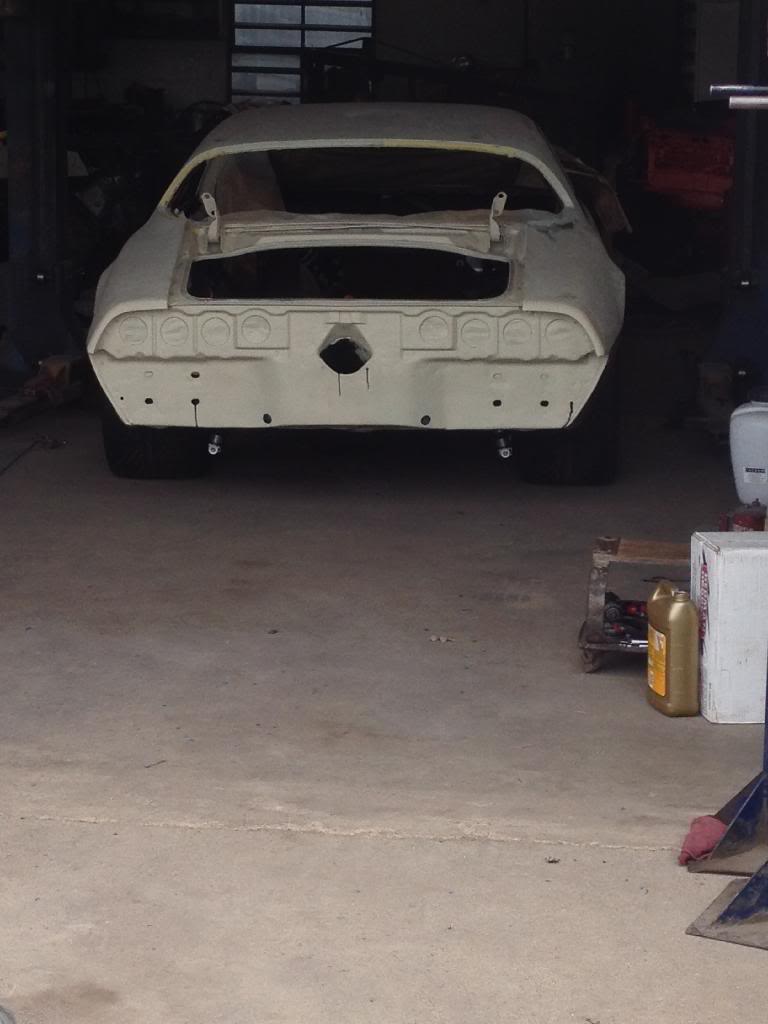
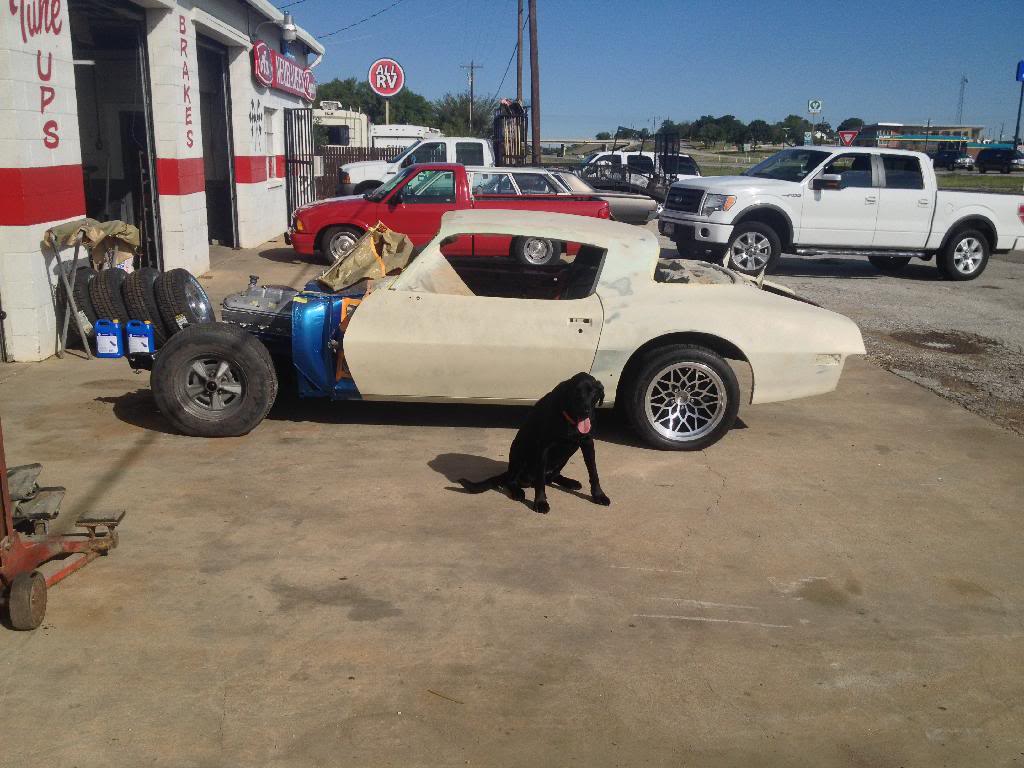
Outside on the ground
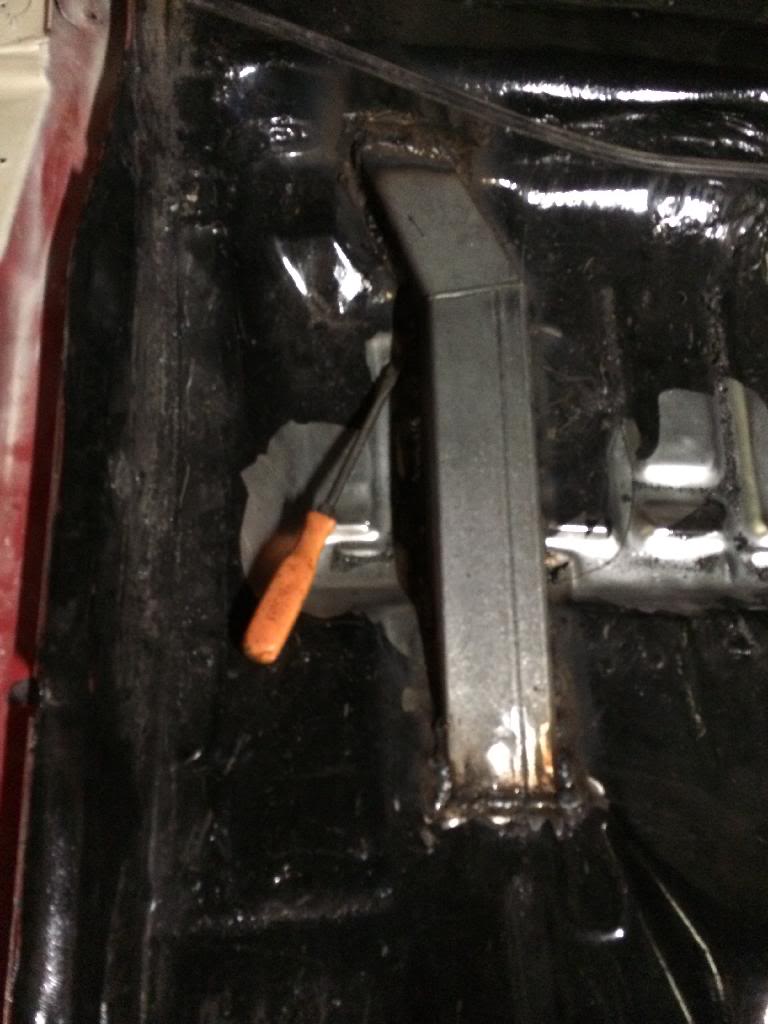
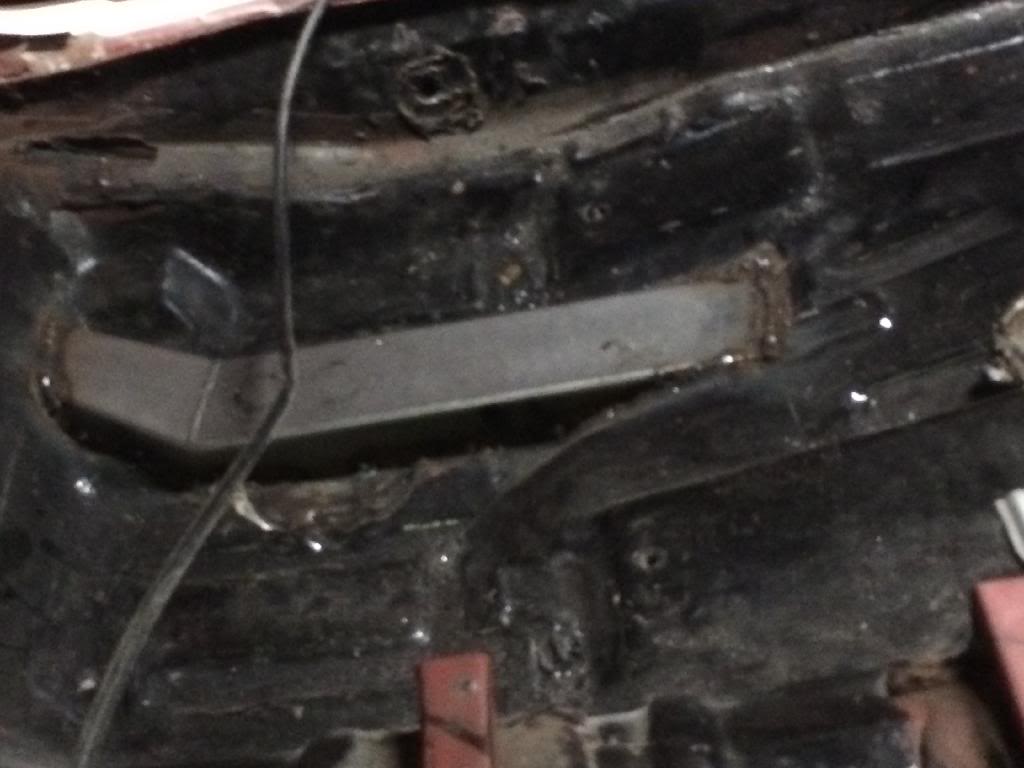
Now on to the subframe connectors. They were pretty simple just follow the instructions.
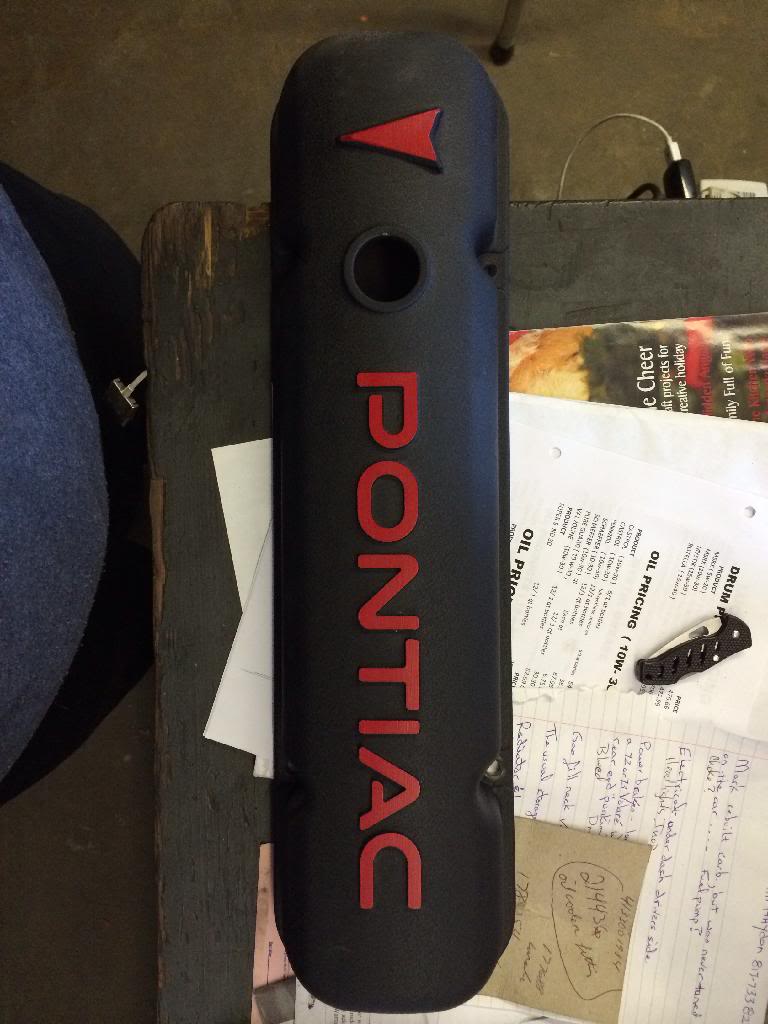
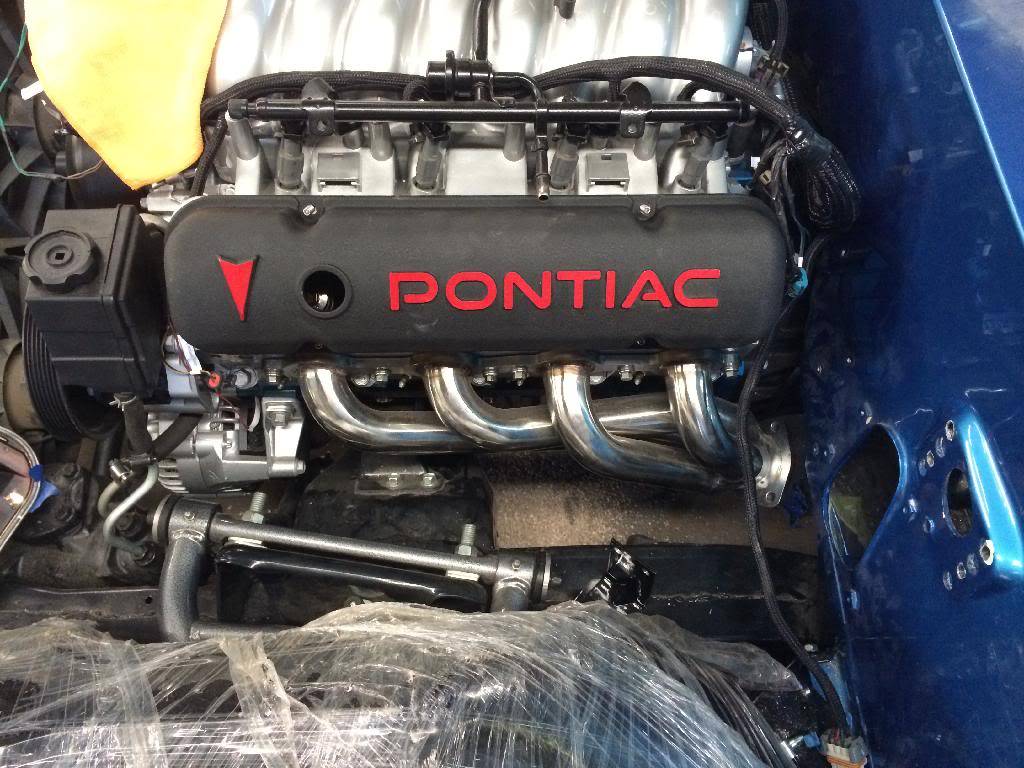
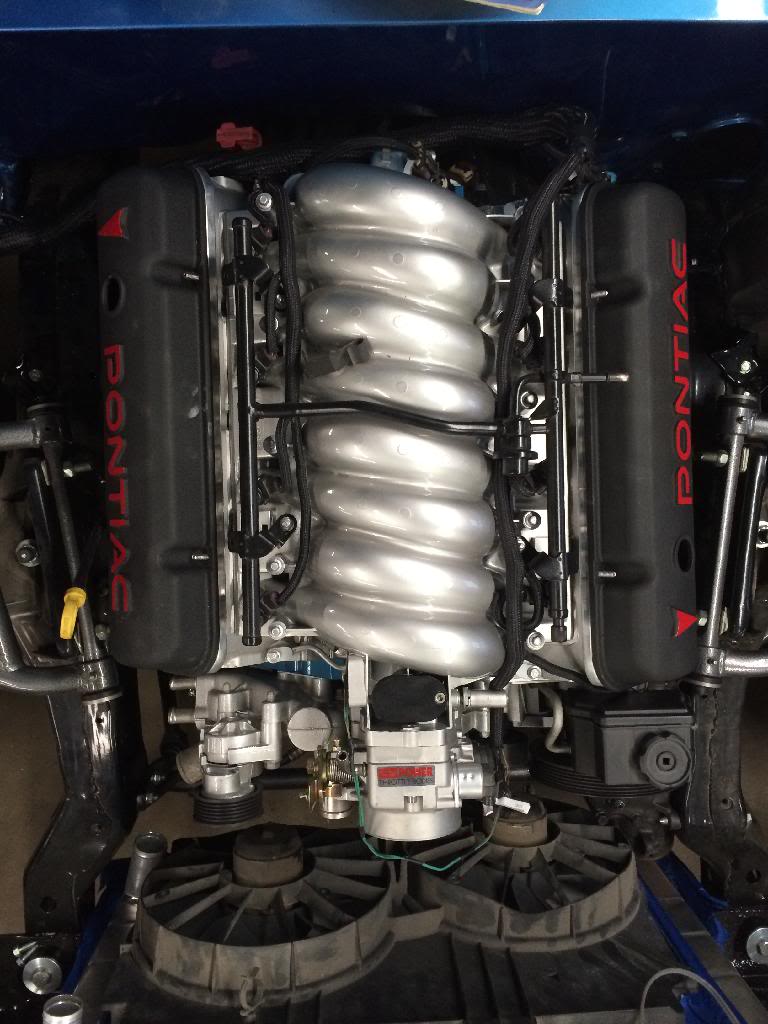
We are going to use an adaptor that allows you to use sb chevy valve covers with the ls1. we are going to modify it a little to make our Pontiac 400 valve covers work. We are thinking of leaving the "PONTIAC" red but have thought about painting the letters blue like the car. What are yalls thoughts on color there?
-
12-20-2013 #86
Registered User
- Join Date
- Jan 2005
- Location
- Burleson Tx
- Posts
- 268
Come on you have more info than that about the cars progress. How the plans for the engine changed. Fill every body in.
Kenny
-
12-22-2013 #87
 Registered User
- Join Date
- Sep 2009
- Posts
- 2,707
That is some great progress you have made. Can you give more details about the 4 link system? It looks like ridetech, but I want to be sure. Also, when you do the front coilovers could you please shed some light as to how they mount the shocks? Lots of pictures please!!

1955 Nomad project LC9, 4L80e, C5 brakes, Vision wheels
1968 Camaro 6.2 w/ LSA, TR6060-Magnum hybrid and etc SOLD
1976 T/A LS1 6 Speed, and etc. SOLD
Follow me on Instagram: ryeguy2006a
-
12-22-2013 #88
 Registered User
- Join Date
- Aug 2006
- Location
- austin
- Posts
- 358
Tell us more about your four link. I don't recognize the brackets. Is is homemade or did you buy the parts/kit from someone. I see you're using heim joints instead of the more street-friendly delrin joints. What else?
I like your leaf spring pockets! I had to do the same on mine to fit my 335s.Greg
1976 Trans Am SacrilEdge
twin turbo 455
Ttops and 4spd
one of 110 made
https://www.pro-touring.com/showthre...ect&highlight=
https://www.pro-touring.com/showthre...ilEdge-is-free!
-
12-22-2013 #89
Registered User
- Join Date
- Jan 2005
- Location
- Burleson Tx
- Posts
- 268
I have to give credit where credit is due. Your build is where we got the idea to do the spring hanger mod. The 4 link is a bolt in ride tech unit with weld on lower axle brackets.
Kenny
-
12-25-2013 #90
Registered User
- Join Date
- May 2008
- Location
- Burleson
- Posts
- 130
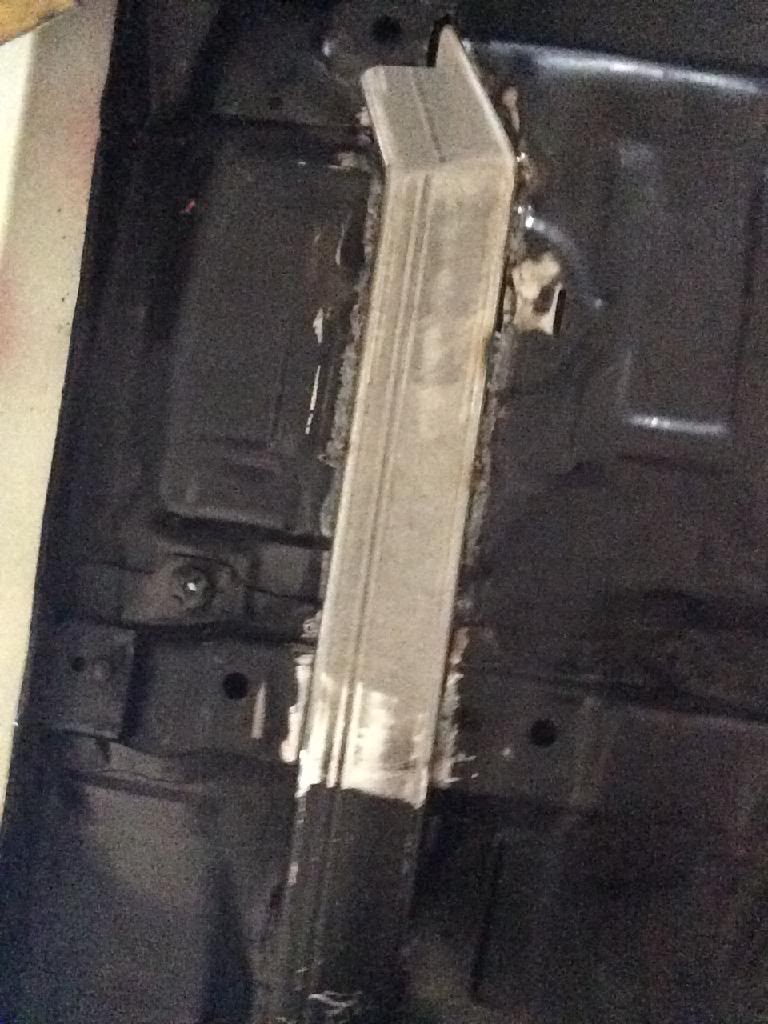
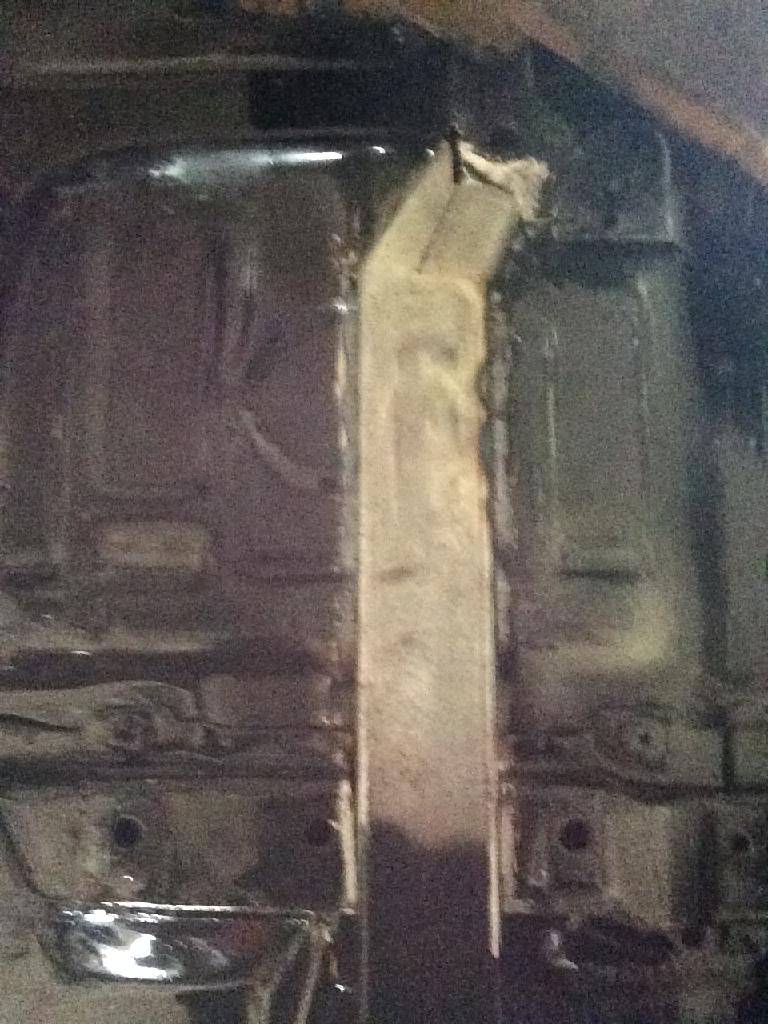
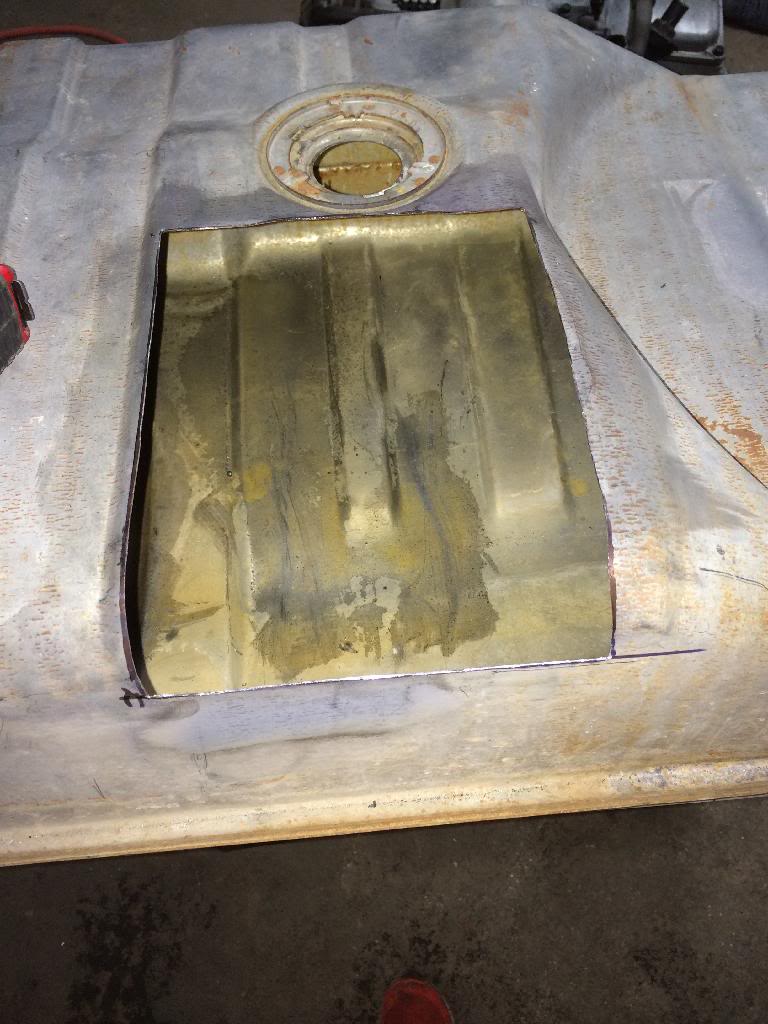
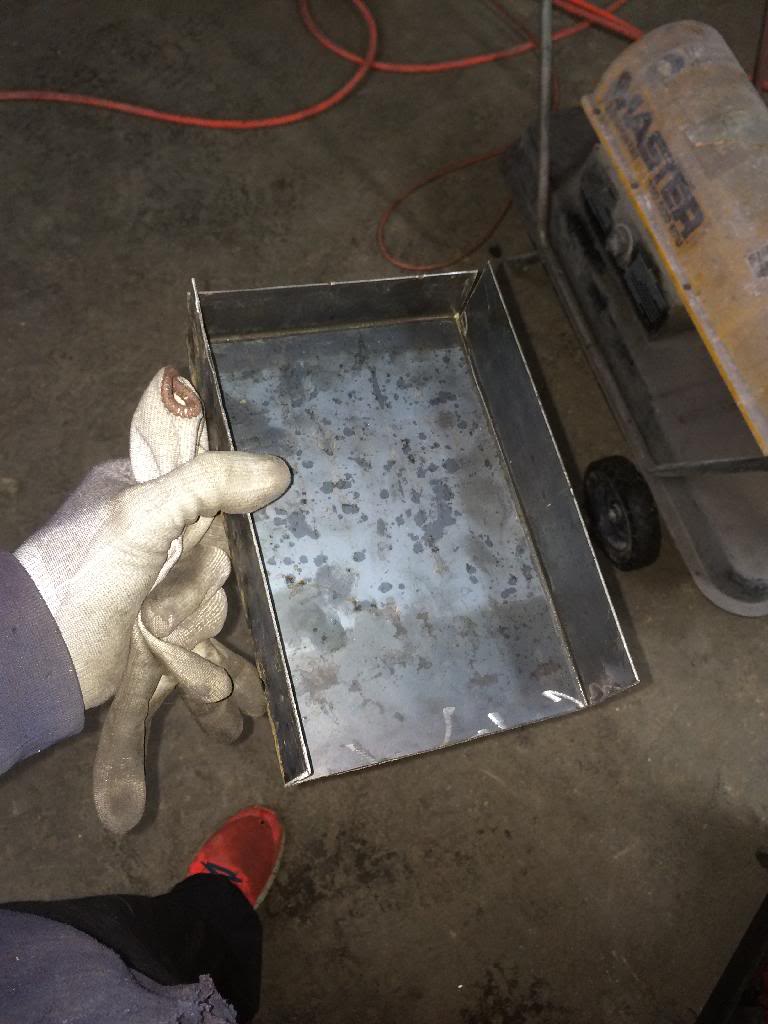
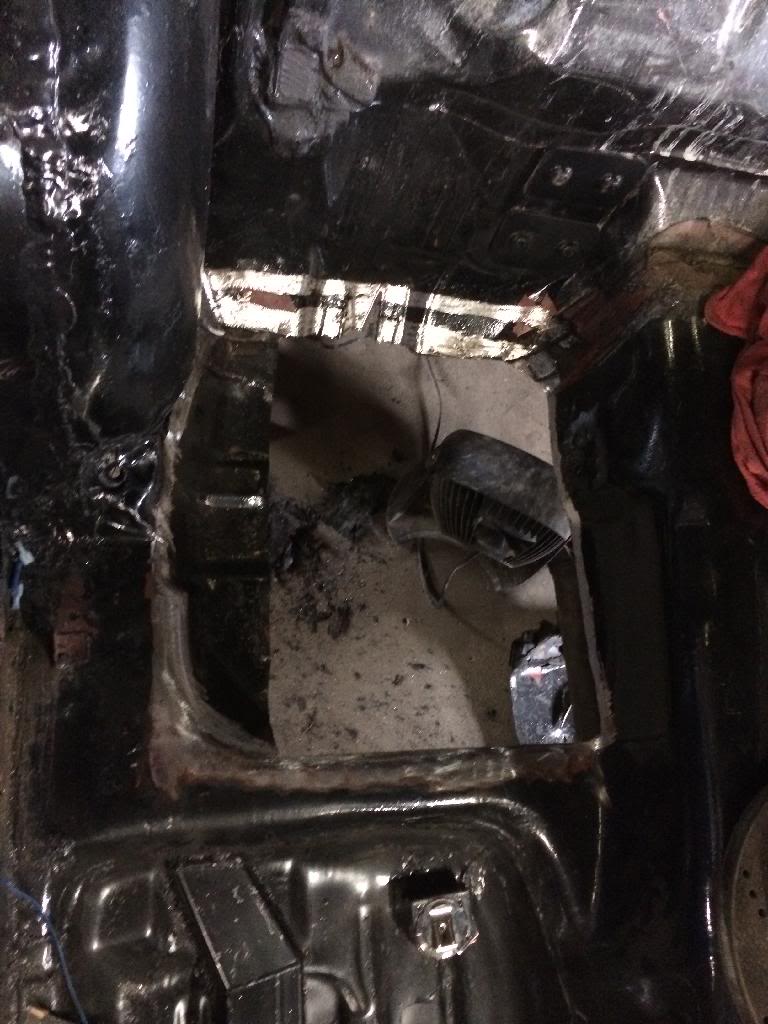
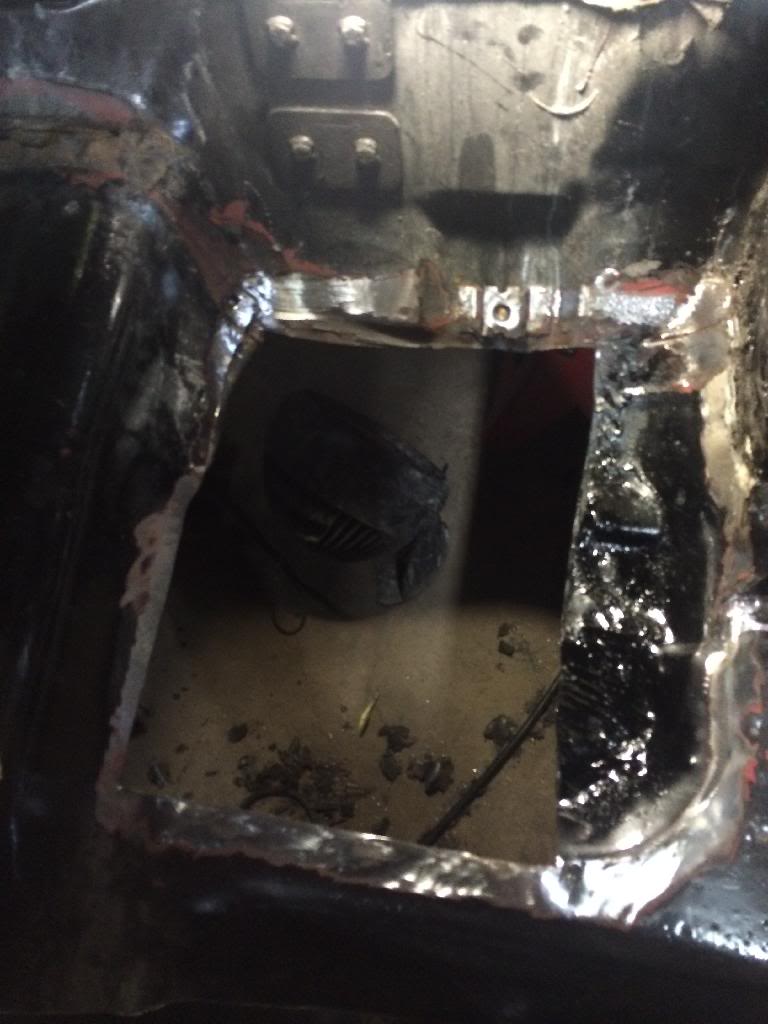
In the past months plans have changed for the better, I am now going fuel injected. I got also got some Dart pro 1 heads for the car. So in order to fuel inject it we had to modify the gas tank to fit the 4th gen fuel pump. We didn't want to cut a hole in the trunk so we just built a box to recess the pump in the tank. it was fairly simple to do just a little help from a sheet metal break and a welder. Come the first of the year I will run some fuel lines and hope to hear it run. We are waiting to get the ls wiring harness and computer back from the guy doing the tune.
The hole in the tank for the box
The box I made to fit the pump
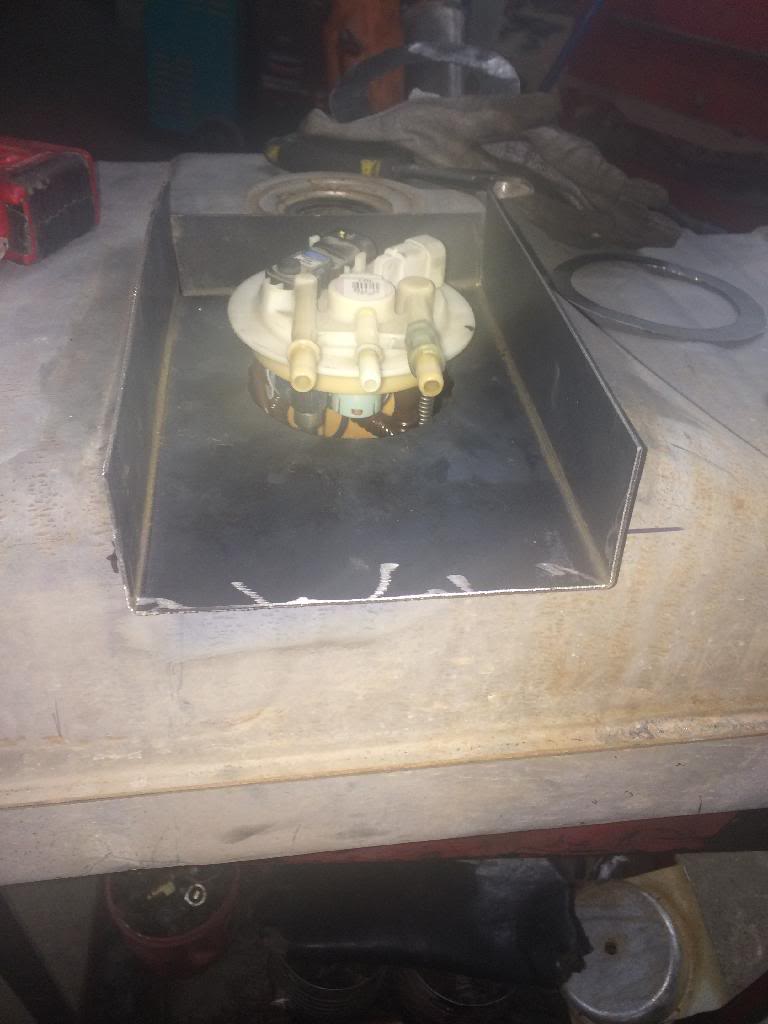
Finished product
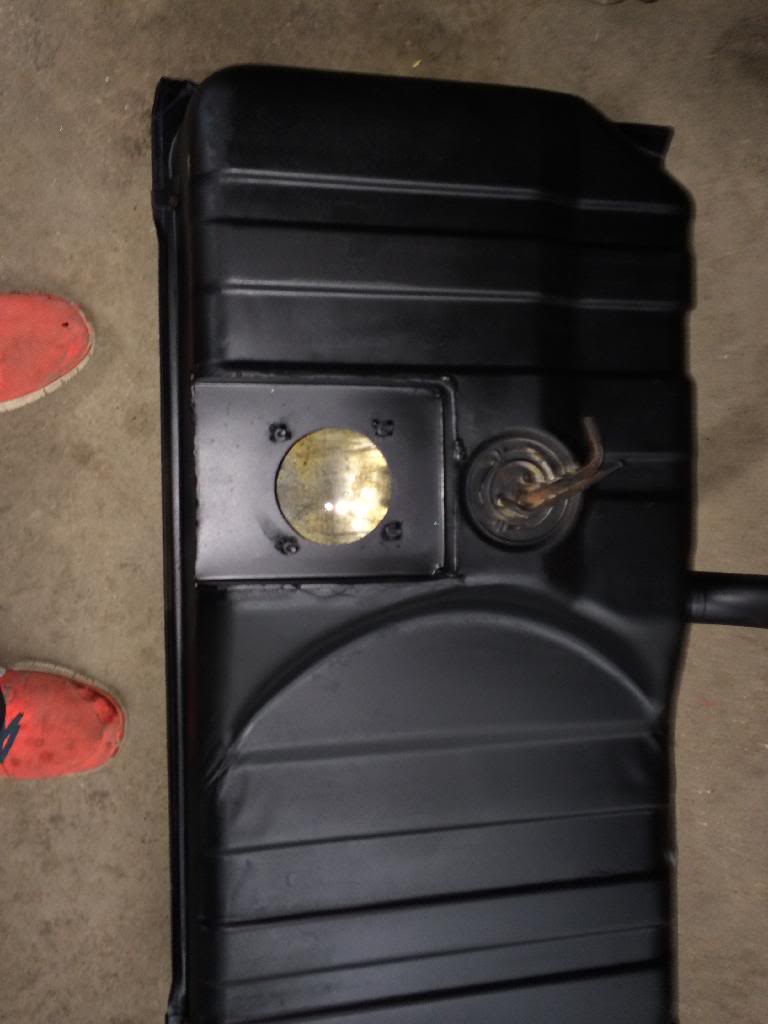
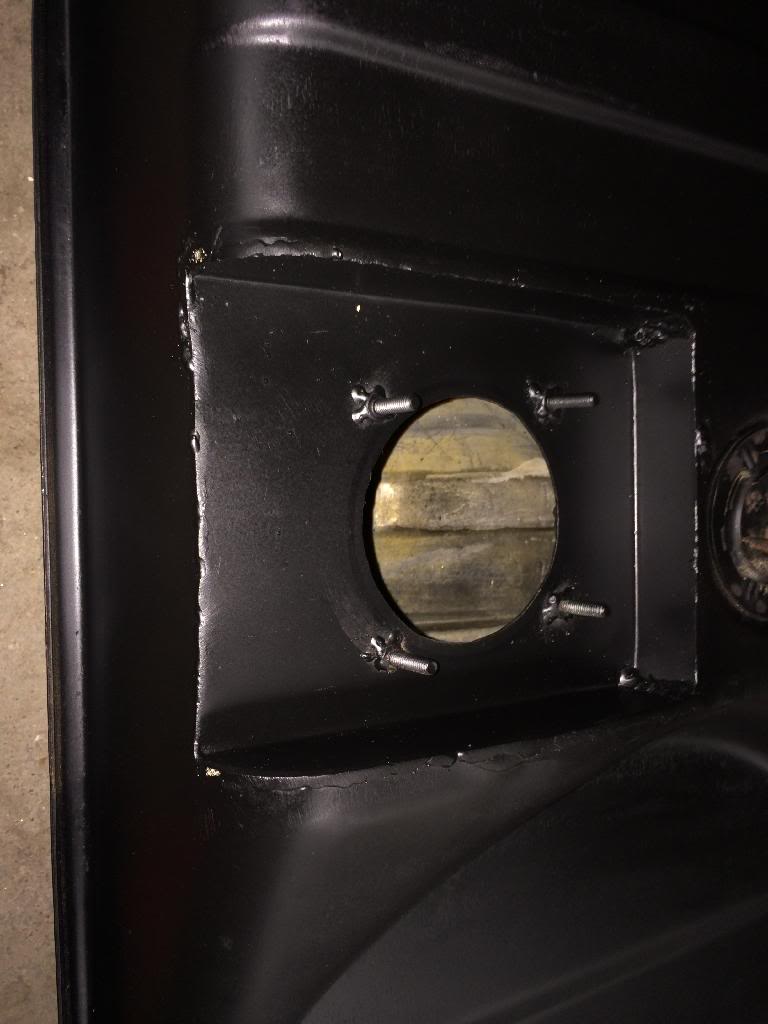
If the 4th gen pump will work with our gauges then we are going to fill in the old hole.
-
12-25-2013 #91
Registered User
- Join Date
- May 2008
- Location
- Burleson
- Posts
- 130
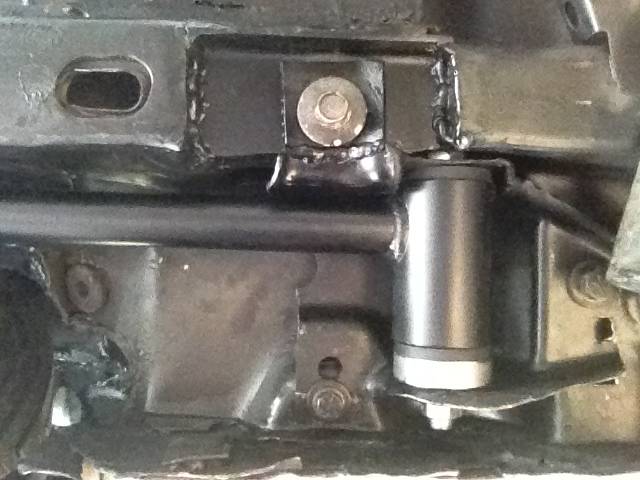
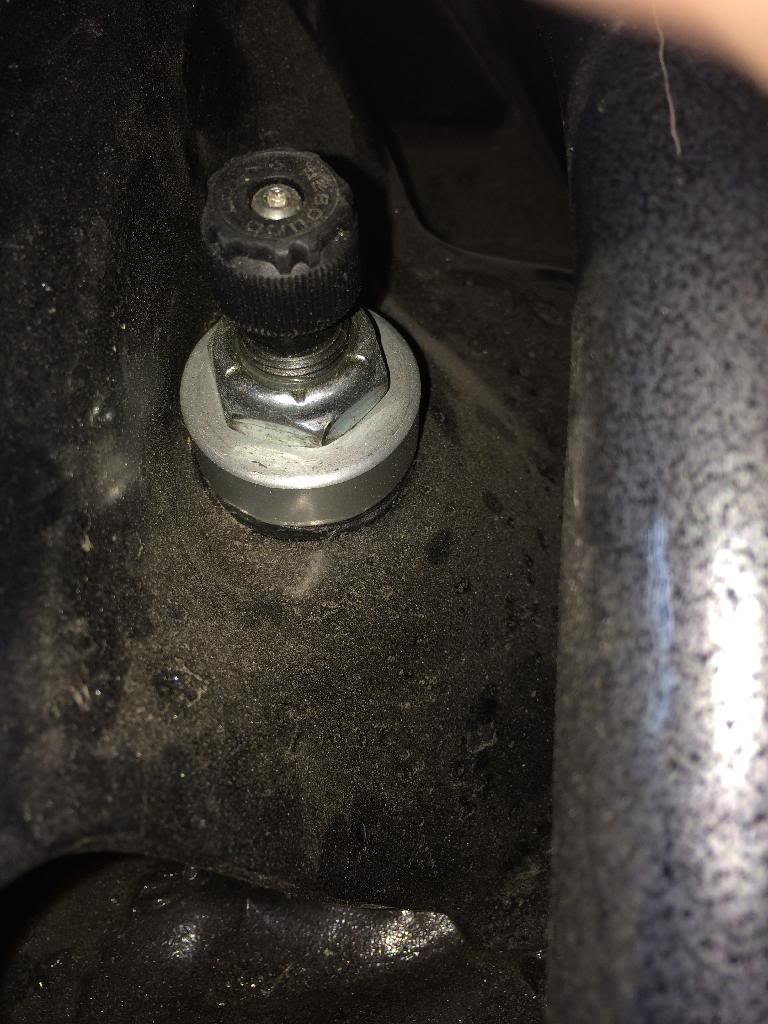
The front coil overs just bolted right in
Here is how the coil over mounts to the bottom of the control arm
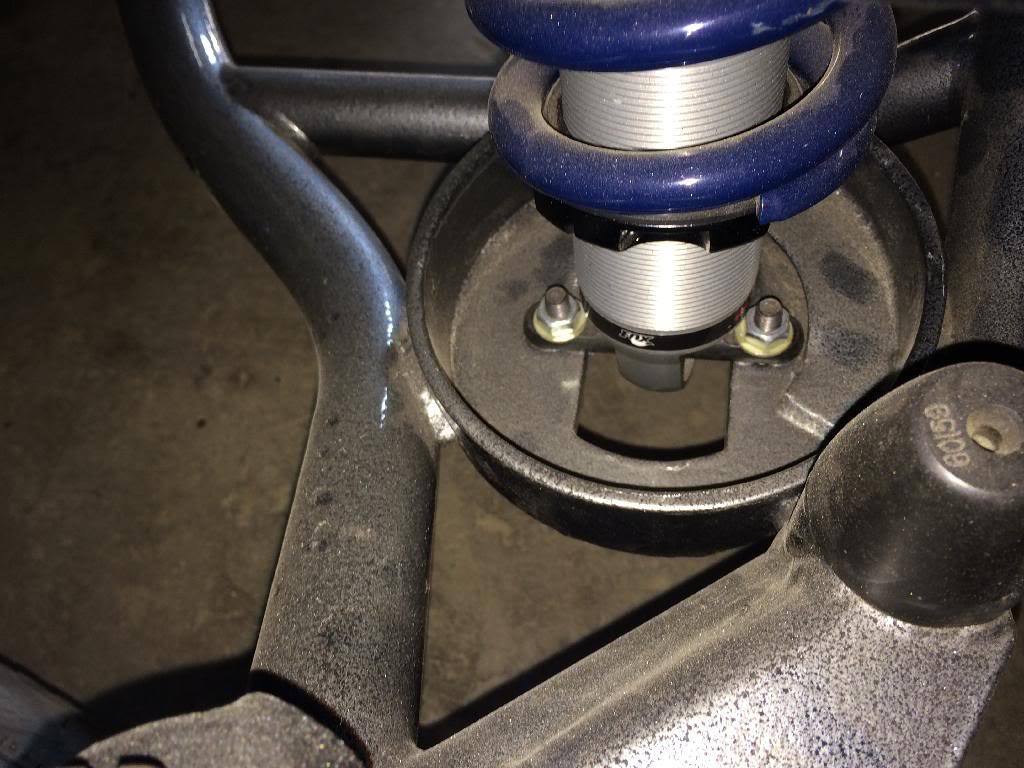
To put the top in you just unscrew the screw on the knob and then the nut is on the coil over
-
12-26-2013 #92
 Registered User
- Join Date
- Feb 2005
- Location
- Sydney, Australia
- Posts
- 1,798

Hard to tell from the angle of the pics, but do you have a surge box around the pump inside the tank?
Without one, she'll cut out on corners with anything less than 1/3 or a tank......had a 70 Camaro with EFI, and the guys who set it up didn't think about a surge tank......PITA going quick around corners, lol.Regards,
Leigh
Sydney, Australia
1971 Firebird 455
https://www.pro-touring.com/showthre...Project/page27
-
12-27-2013 #93
Registered User
- Join Date
- Jun 2010
- Location
- Painted post NY
- Posts
- 115
Leigh, he won't need a surge tank....the 4th gen fuel bucket "is" in itself a surge tank. I'm using this exact setup...I too recessed the pump so I would not have to cut the trunk. Works great! I've run it down to 1/8 a tank without any issues. I'm using the built in fuel regulator too.
When I installed my setup, I did not want to run the used pump that came with the bucket. I had no idea how many miles or hours were on it. For piece of mind, I disassembled the bucket and put a new GM pump in. While I had the bucket apart, I shortened the fuel lines so I could compress the spring on the fuel bucket the most without kinking the lines. I could not use the 4th gen sender...wrong ohm setup for my guage. I reused my 78 (0-90 ohm) sender....I did have to bend the guage arm a little to work with the 4th gen bucket in there. Car looks great! Good luck,
LeonLeon Reed
1978 Trans Am
LS1/4L60E
my build..updated 11-21-13 https://www.pro-touring.com/showthre...8-TA-LS1-build
-
03-31-2014 #94
Registered User
- Join Date
- May 2008
- Location
- Burleson
- Posts
- 130
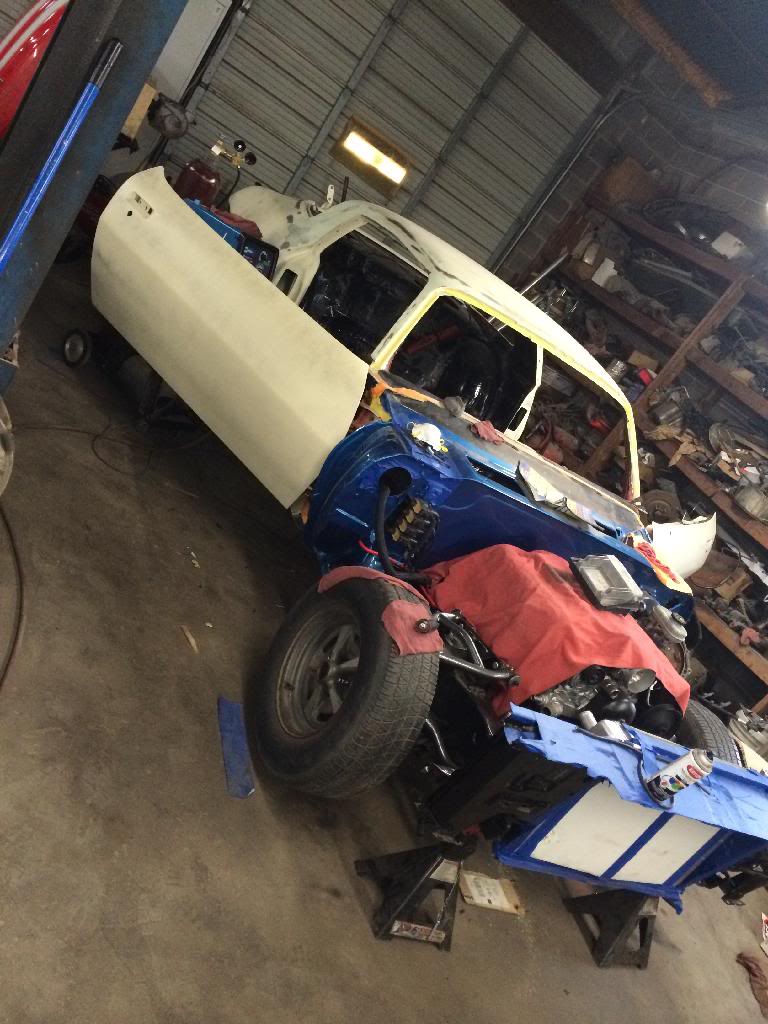
Since my last update I have have gotten a lot of little things done on the car. The biggest of the things is that it now runs. I am currently working on the brakes so we can make it move under its own power.
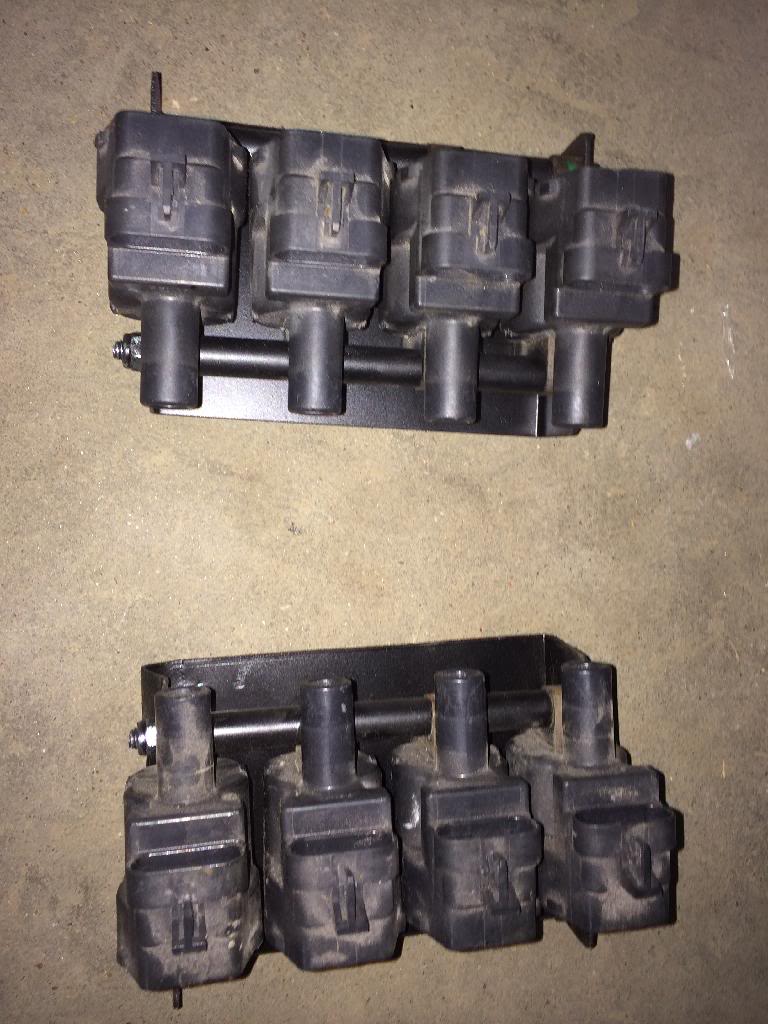
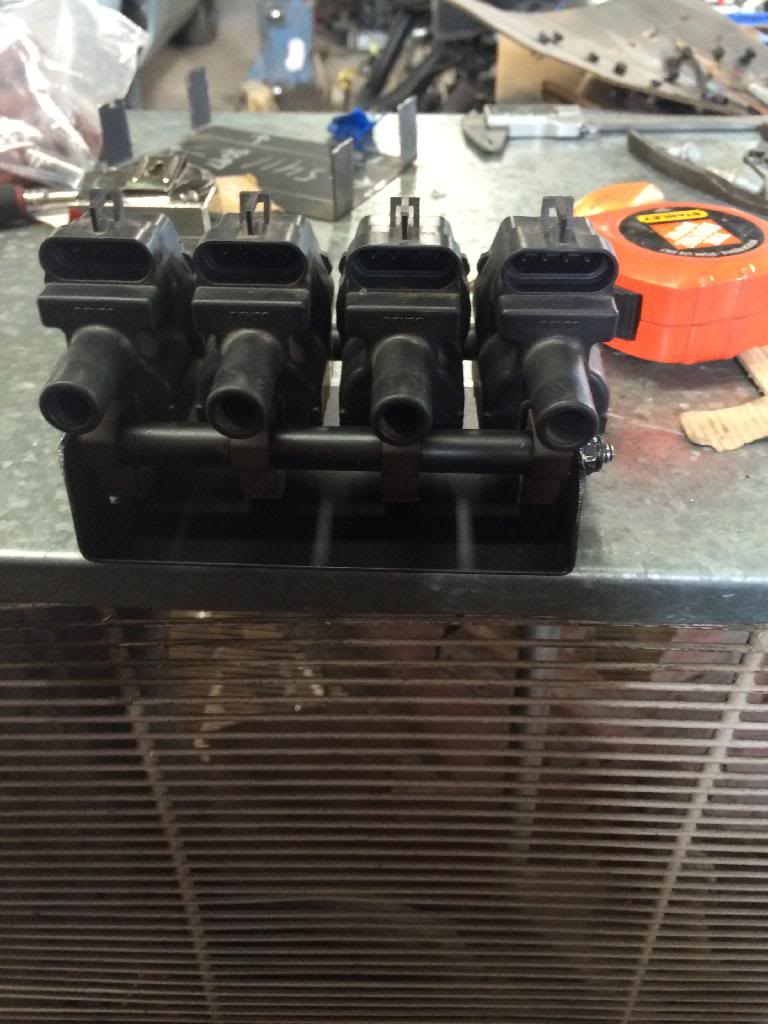
Engine: To get the car running I got the harness all plugged in, made plug wires since I relocated the coils. I relocated the coils behind the fenders. To do so I built some brackets to hold the coils, I also machined the spacers between the coils. I then mounted them to the firewall using riv nuts. Once the fenders are on and inner fenders in the car you will hardly see them at all. While cleaning up the engine compartment I also decided to shorten the dipsticks for both the oil and trans. We also made some lines for the power steering pump. I also got my valve covers to fit. The adapters we got had to be modified to run the 400 valve covers instead of the sbc ones. We had to weld some aluminum blocks to the bottom of the adapter so we could drill into them and still have something to mount them too. After all that was done we were ready to fire it up. When we first fired it up it ran for maybe 15 seconds and didnt have any oil pressure. To get oil pressure we drained all the oil out and put it all back it through the oil pressure sending unit to get it primed. once it was all back in we started it back up and the pressure started climbing up to 60psi. Its just running straight headers right now. I also relocated the battery.
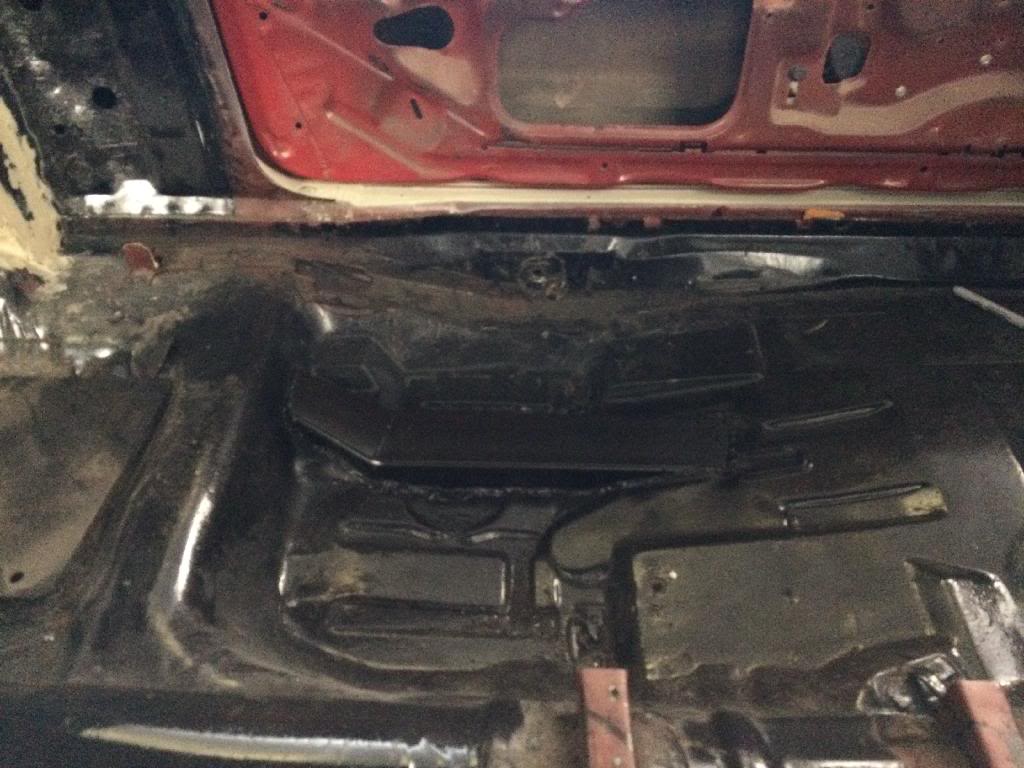
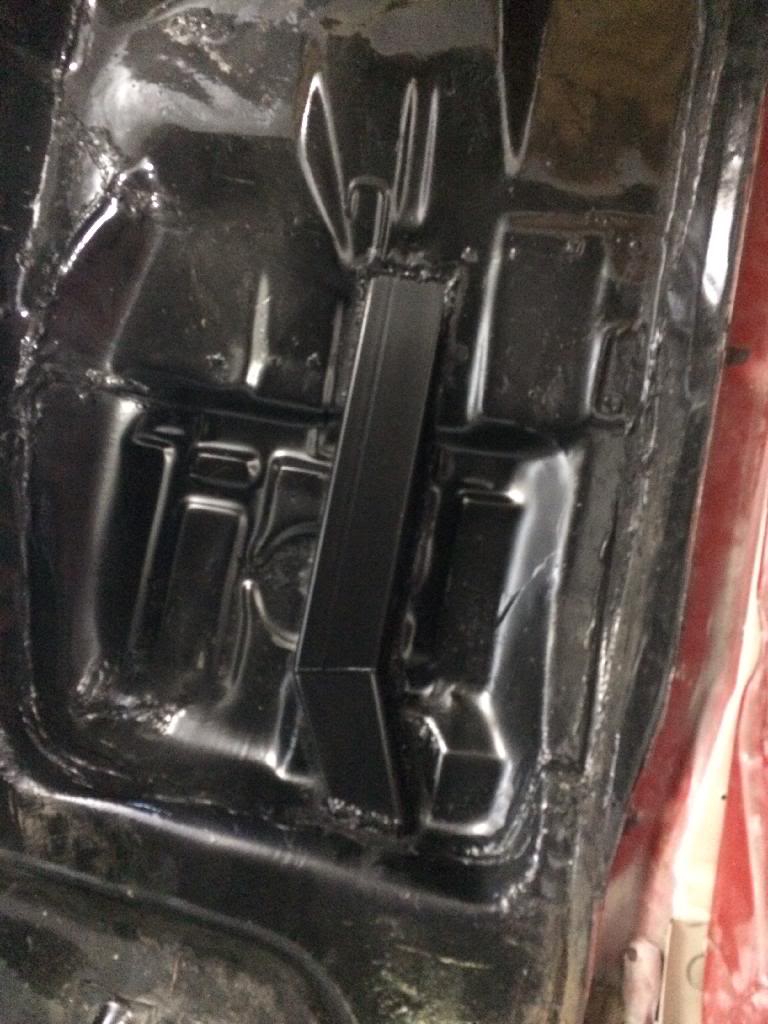
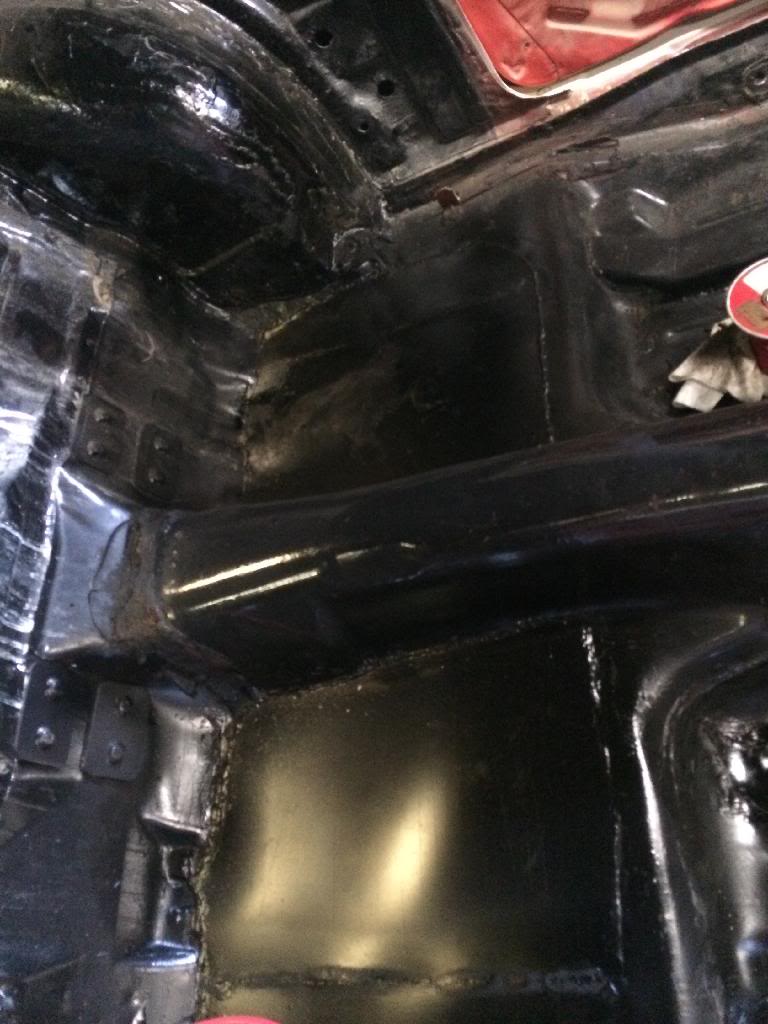
Floor Pans: Since the car is going to be low and we don't want anything dragging or hanging down we decided to lift the floor pan under the rear seat. We ended up lifting it about 3 inches. To do so we cut out the old pan, then I made a new template out of cardboard. I then traced it onto a flat sheet of metal and used the plasma cutter and cut it out. Once welded in I made another piece for the bottom to fill in the gap between the lifted floor and where the old floor was that was on top of the frame rail. Now I can tuck my mufflers up higher in the car so they don't hang down.
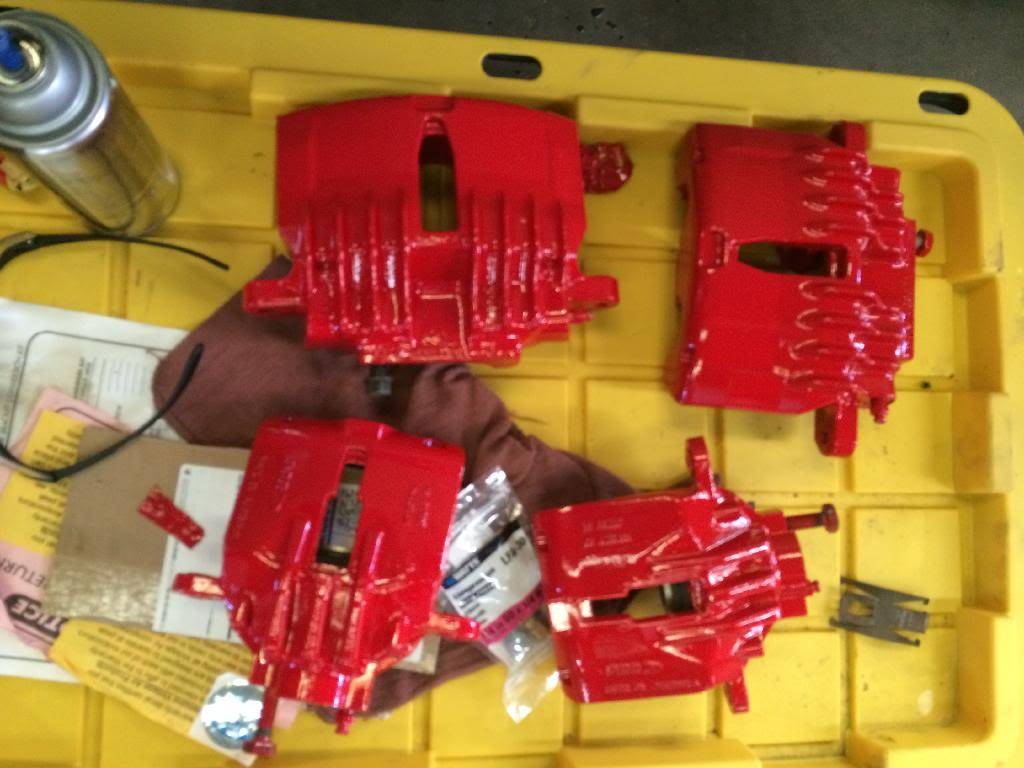
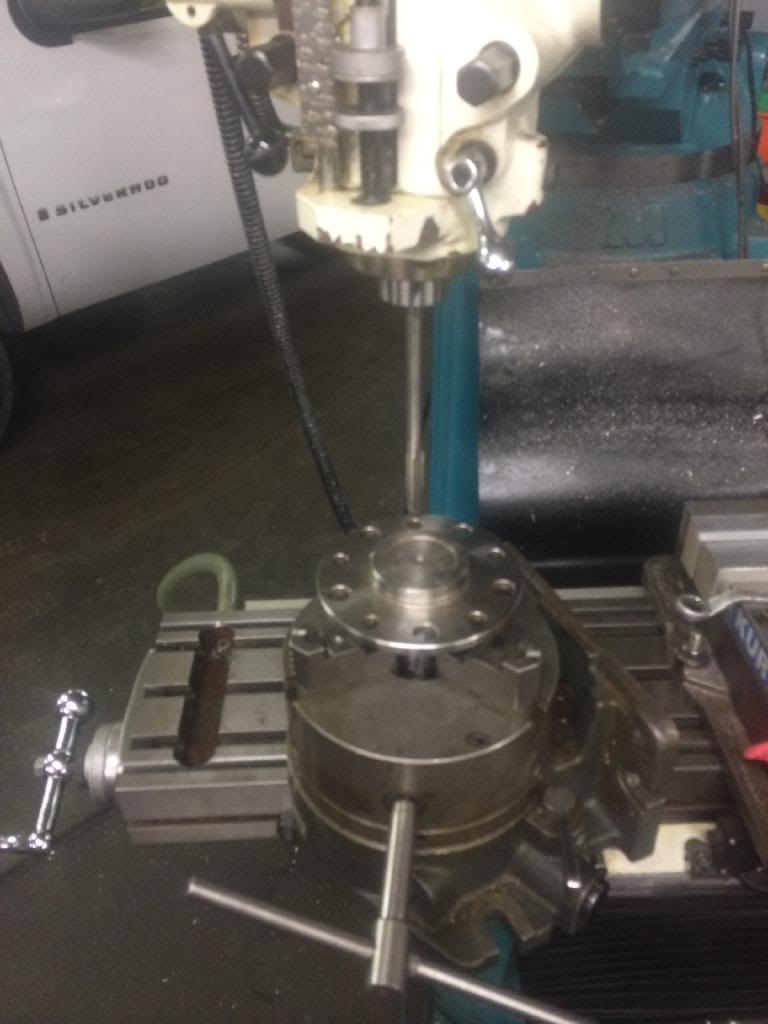
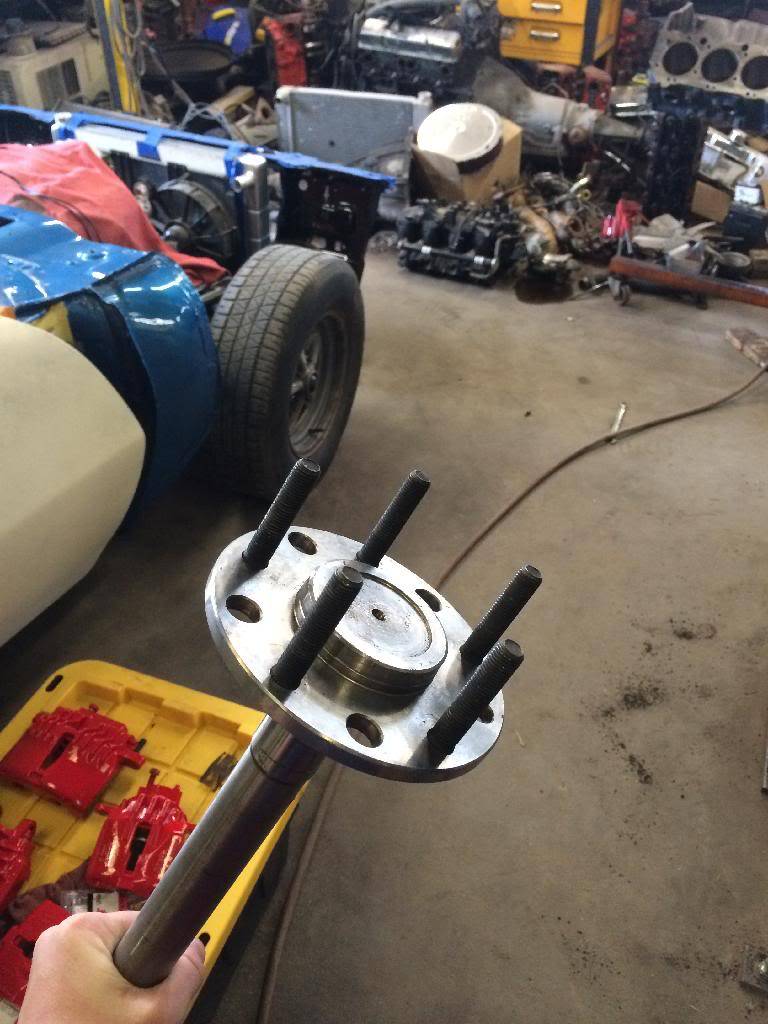
Brakes: I am currently working on the brakes. I have gotten all of mocked up, we have to make a few changes. The rear rotors are not sitting flush on the axle so we are going to machine the axle down a little bit so the rotor will fit flush. After we get that done I will get them all put on and start running brake lines. While I had the axles out a couple weeks ago I wanted to put longer wheel stud on them. I think they look cool is why I wanted to change them. We could not find any to fit the holes in the axle so we got some that we a bit bigger. To make them fit we went up to the machine shop and reamed them out to where they would fit. The holes are within .001 in of being center.
We are also having the driveshaft shorten 2 1/2 inches. All this is what has been done in the past 3 months.
-
04-14-2014 #95
Registered User
- Join Date
- May 2008
- Location
- Burleson
- Posts
- 130
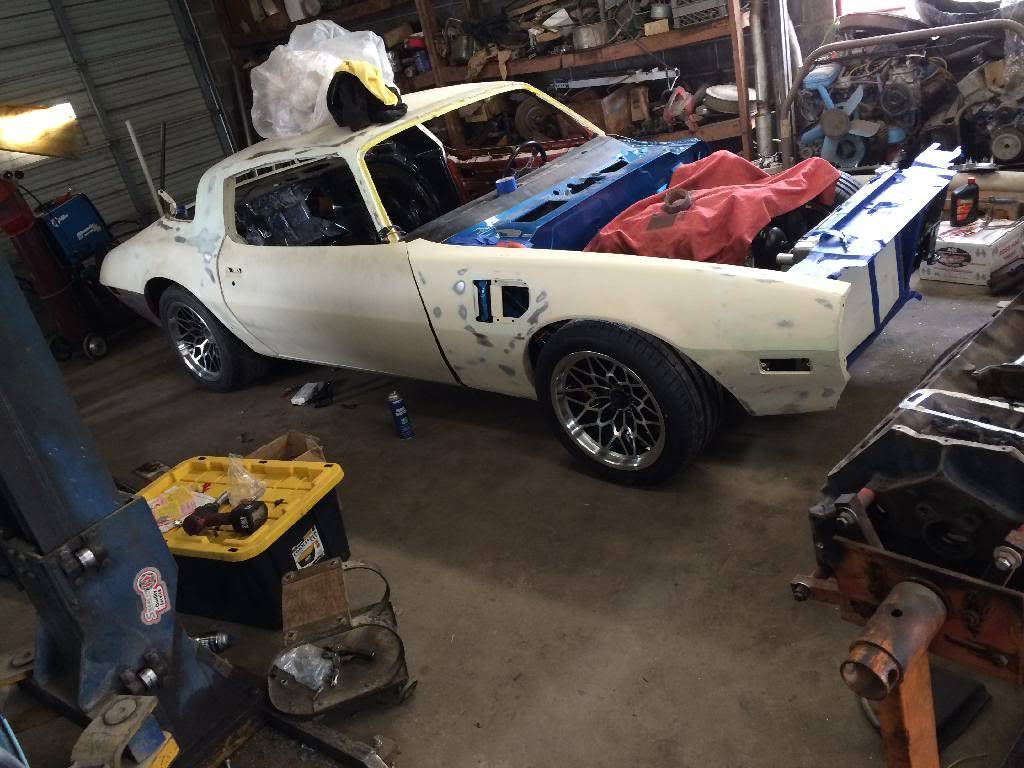
Bought some front tires today. We bought some Falken 275/40/17s, now we can roll the car around. We were using some 15's on the front to roll it around but when i put on my new brakes that wheel was too small lol. hoping to have it roll under its own power this weekend. I just have to run some more brake line and it should be good to roll on its own. NO MORE PUSHING.
-
04-15-2014 #96
 Registered User
- Join Date
- Jan 2008
- Location
- Houston, TX
- Posts
- 192
Nice project. Keep up the good work.
Asa Walker
Houston, TX
-
04-15-2014 #97
Registered User
- Join Date
- Apr 2010
- Location
- San Antonio, TEXAS
- Posts
- 202
Very nice. What's your front brake set up? I have a kore3 c5 kit for mine and wondering if these wheels would fit without an issue.
2000 Pontiac Trans Am, Ls1/t56, SLP lid, LT's, cut-out, Borla cat-back.
1980 Pontiac Trans Am, soon to get Ls1/t56 transplant.
-
04-15-2014 #98
 Registered User
- Join Date
- Mar 2006
- Location
- California City Ca.
- Posts
- 398
those pontac valve covers look good one the LS motor.
Dale Hayes
87 turbo t
turbonetics t60, pet stock location intercooler, ride tech coilovers, rjc exhaust, 60lb injectors with tt chip, ported heads and intake, ported tb, baer brakes, roh 17 inch wheels....now need to finish paint and get it put back together.
-
04-16-2014 #99
 Registered User
- Join Date
- Dec 2005
- Location
- Birmingham, AL
- Posts
- 3,356
Agreed, I may have to borrow that look. Great build. Originally Posted by instro84
 Stephen
-
04-16-2014 #100

 Registered User
- Join Date
- Feb 2013
- Posts
- 1,416
Great job man, this is exactly what I'm wanting to do.
-

 Reply With Quote