

Results 41 to 60 of 86
-
08-31-2012 #41

 Registered User
- Join Date
- Jan 2008
- Location
- Charlotte
- Posts
- 1,295
How much was the chassis?
2005 LeMans Blue Corvette w/ T56 & Z51 & C6Z06 Brakes, Build Thread: https://www.pro-touring.com/showthread.php?64496
2005 GMC Sierra 2500HD LLY / Allison
2014 Chevy SS LS3 / 4 Door
-
09-09-2012 #42
Registered User
- Join Date
- Jun 2012
- Posts
- 63

1964 Corvette Roadster on Street Shop C6 Chassis - Project Update
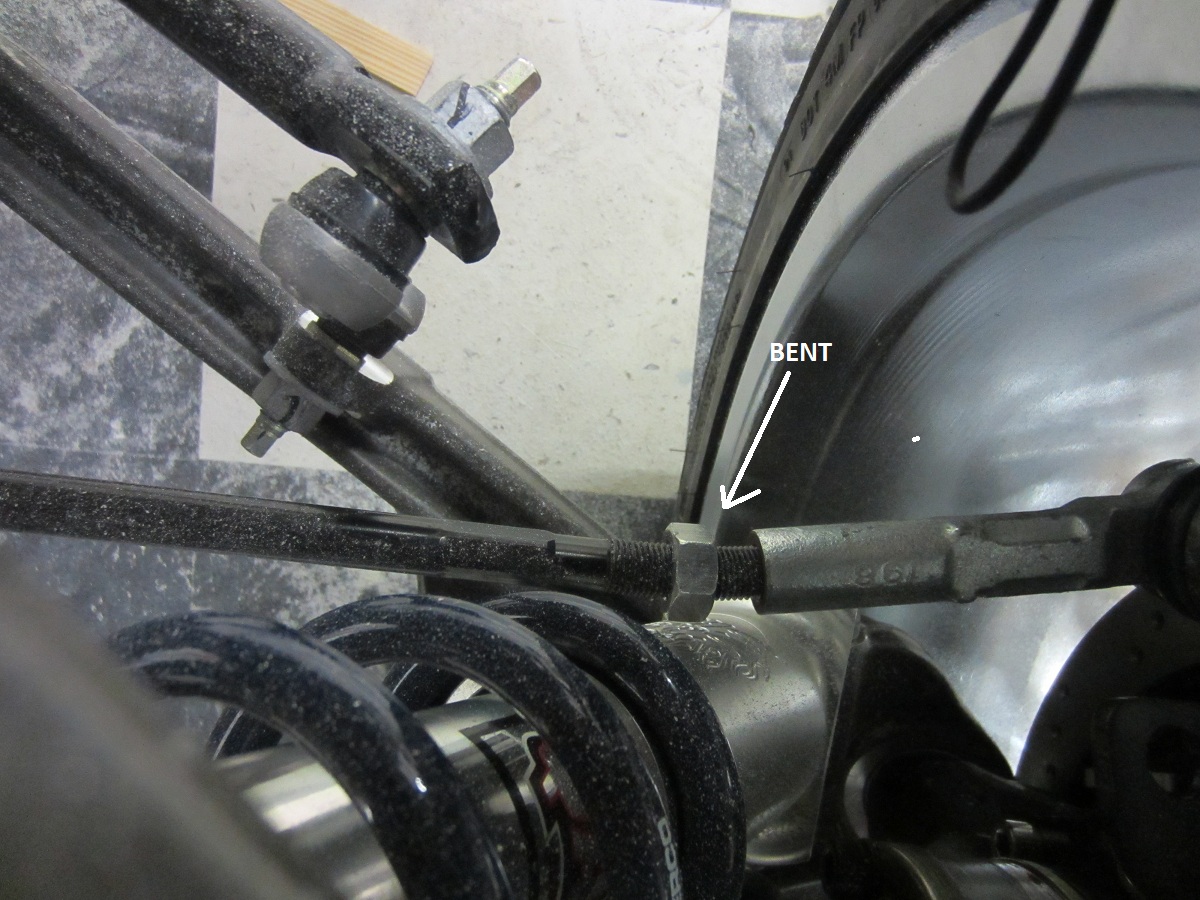
After a brief appearance at the Carlisle 2012 show, the chassis has finally made its way from Street Shop to Florida where it will finally meet up with the body. Unfortunately, the chassis arrived with a bent rear toe bar – arghh.
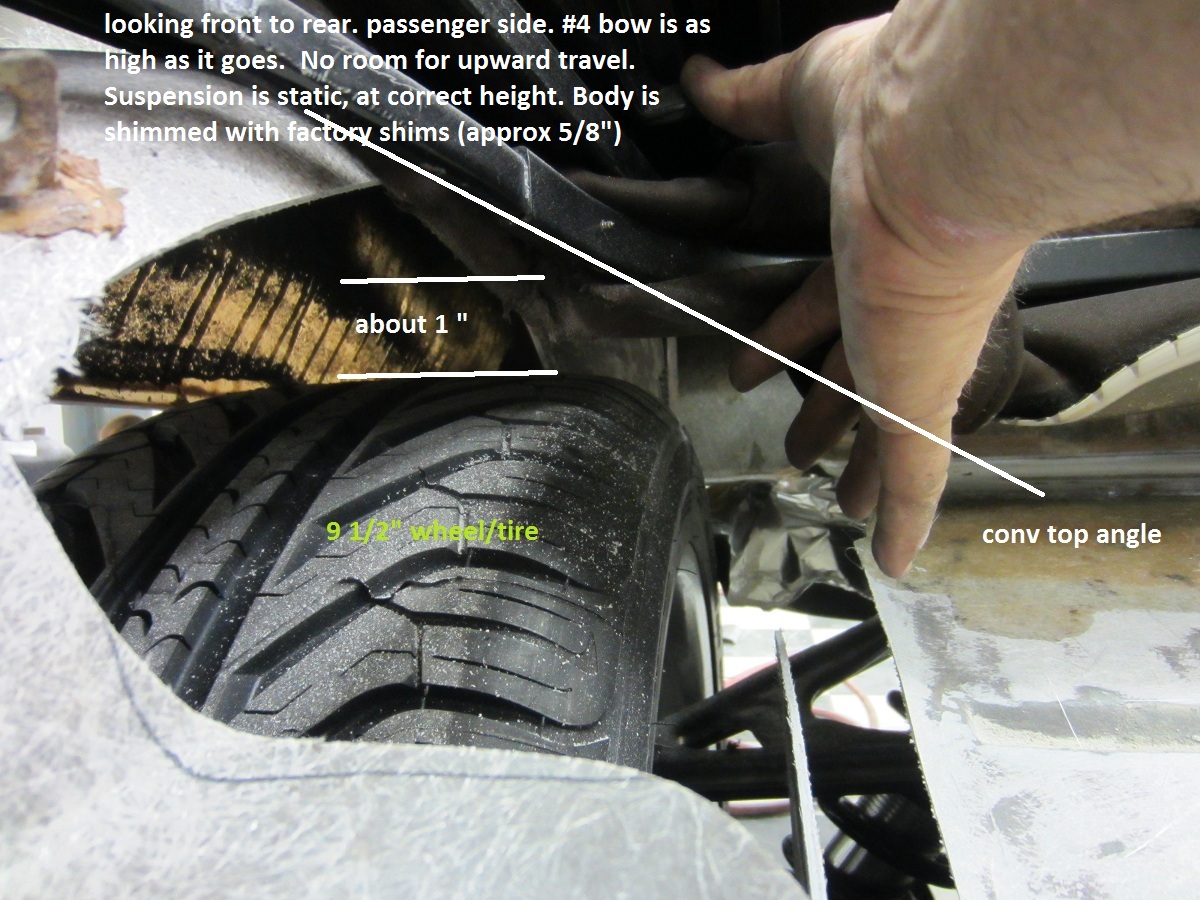
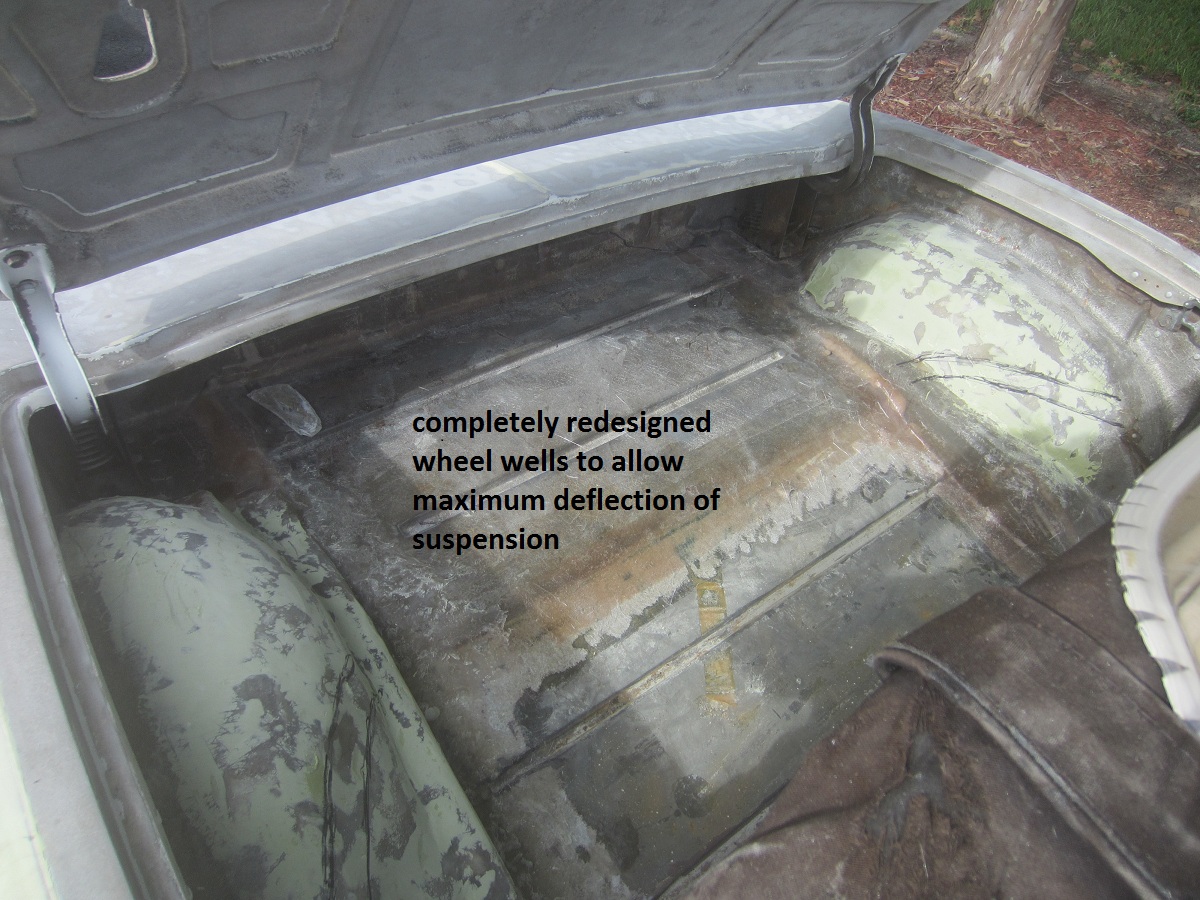
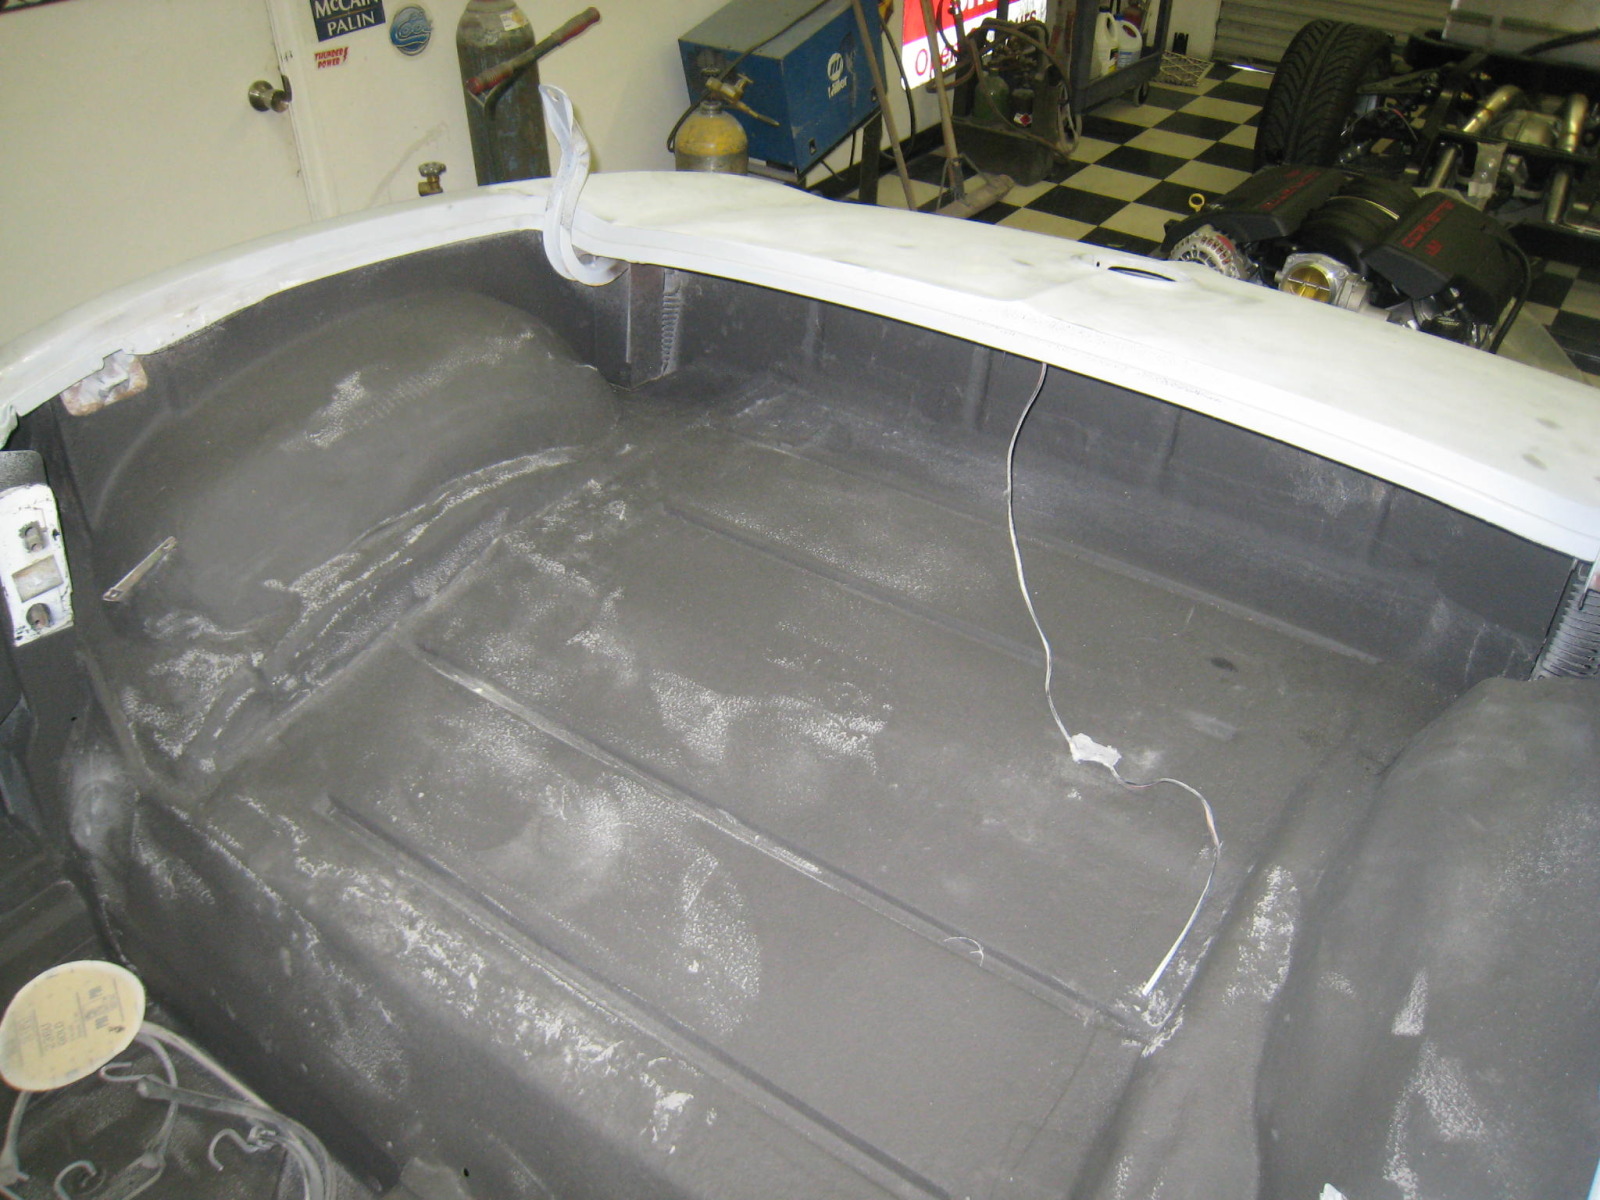
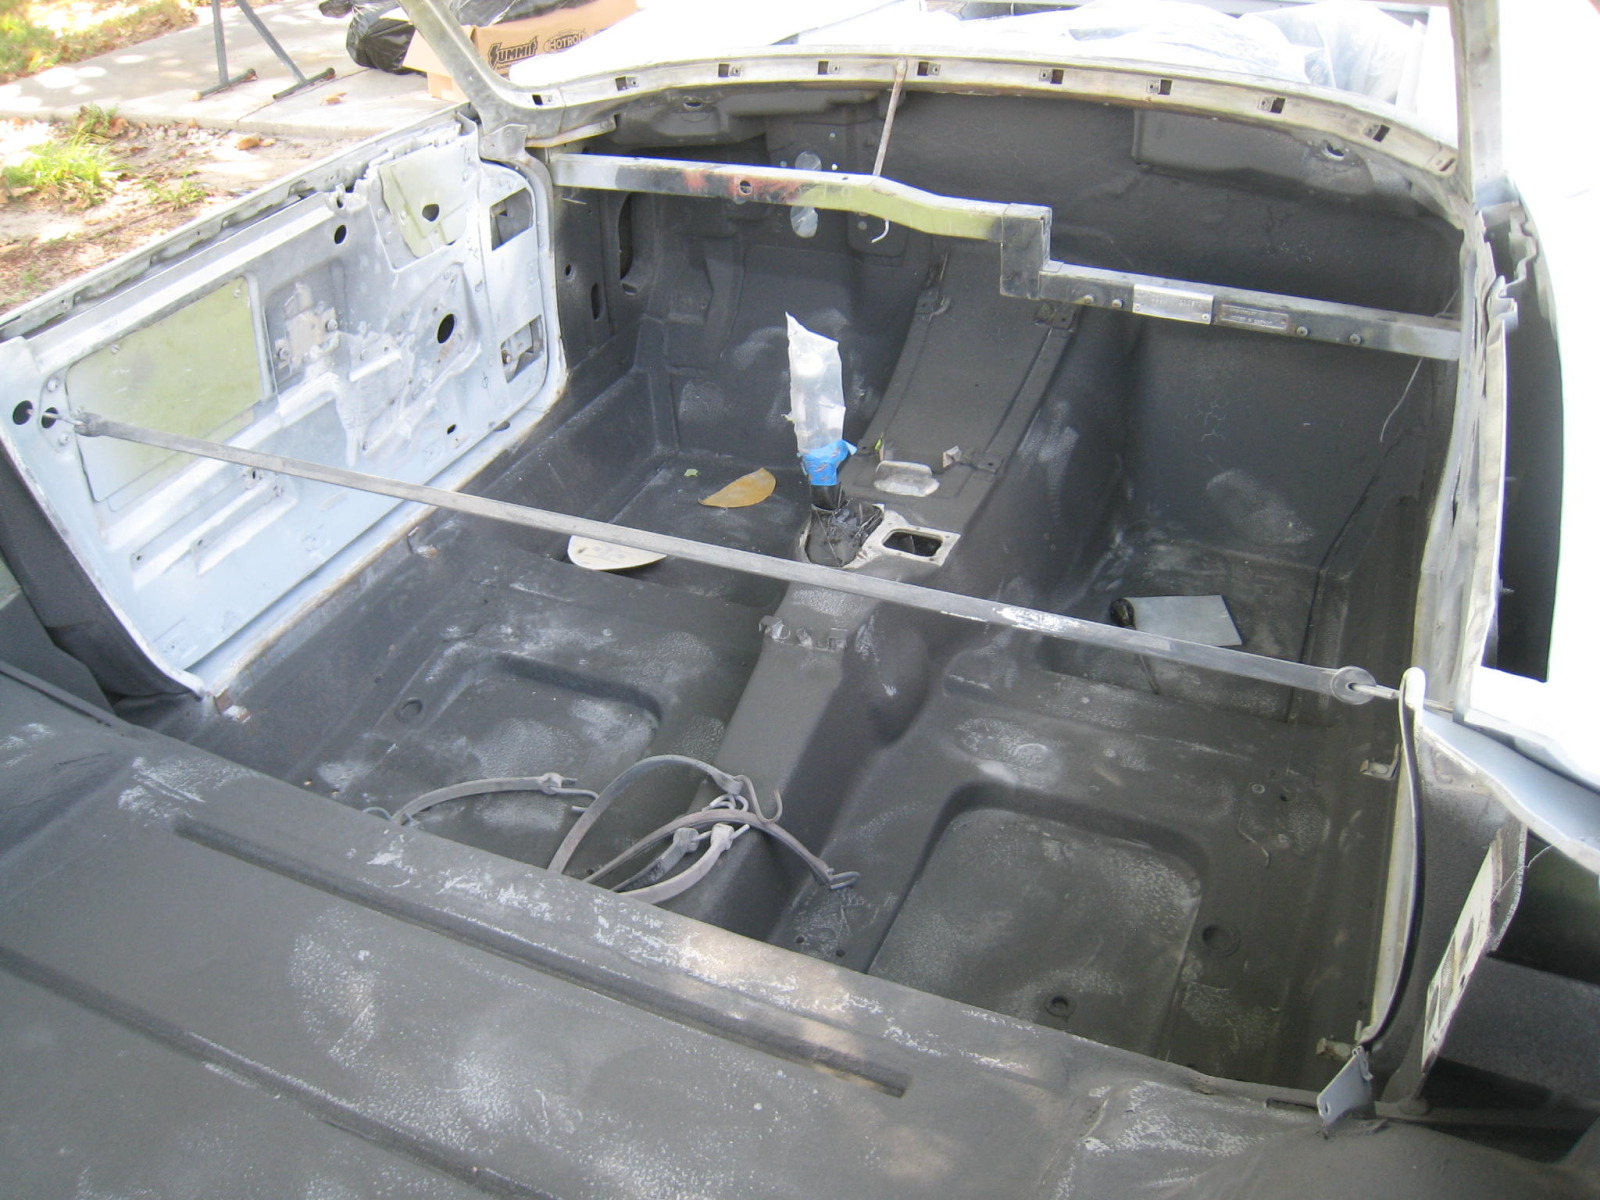
Our first challenge was to cut out the rear floor to allow for the rear C6 suspension and Viper rear end. The rear wheels are 18" x 9.5 with a 56 offset that has proven to be some work to allow for the wheel to work with suspension travel as well as allowing the convertible top frame to lay flat. With the Street Shop C6 chassis, the company states you can fit 10.5 or even wider wheels (which is true), but this is not a plug and play scenario. With Coupes – no problem, you have plenty of room, with convertibles you have to be careful to allow for the convertible frame to fit as the 63-67 convertibles do have different wheel wells and limited room as it is shared with the convertible top bow. In the end, new wheel wells were formed to allow about 3” of total up and down movement.
Had I purchased 8.5 wheels versus 9.5, I would not have had this issue.
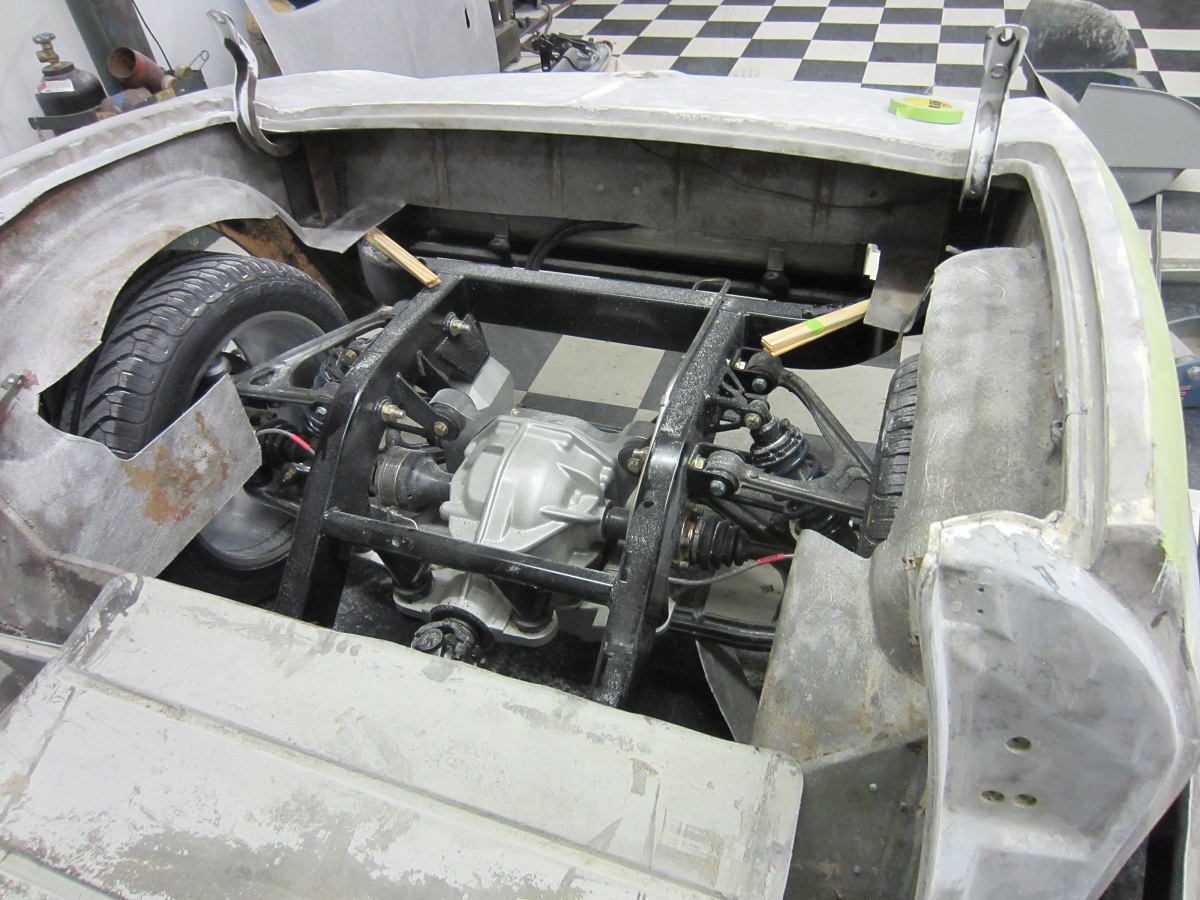
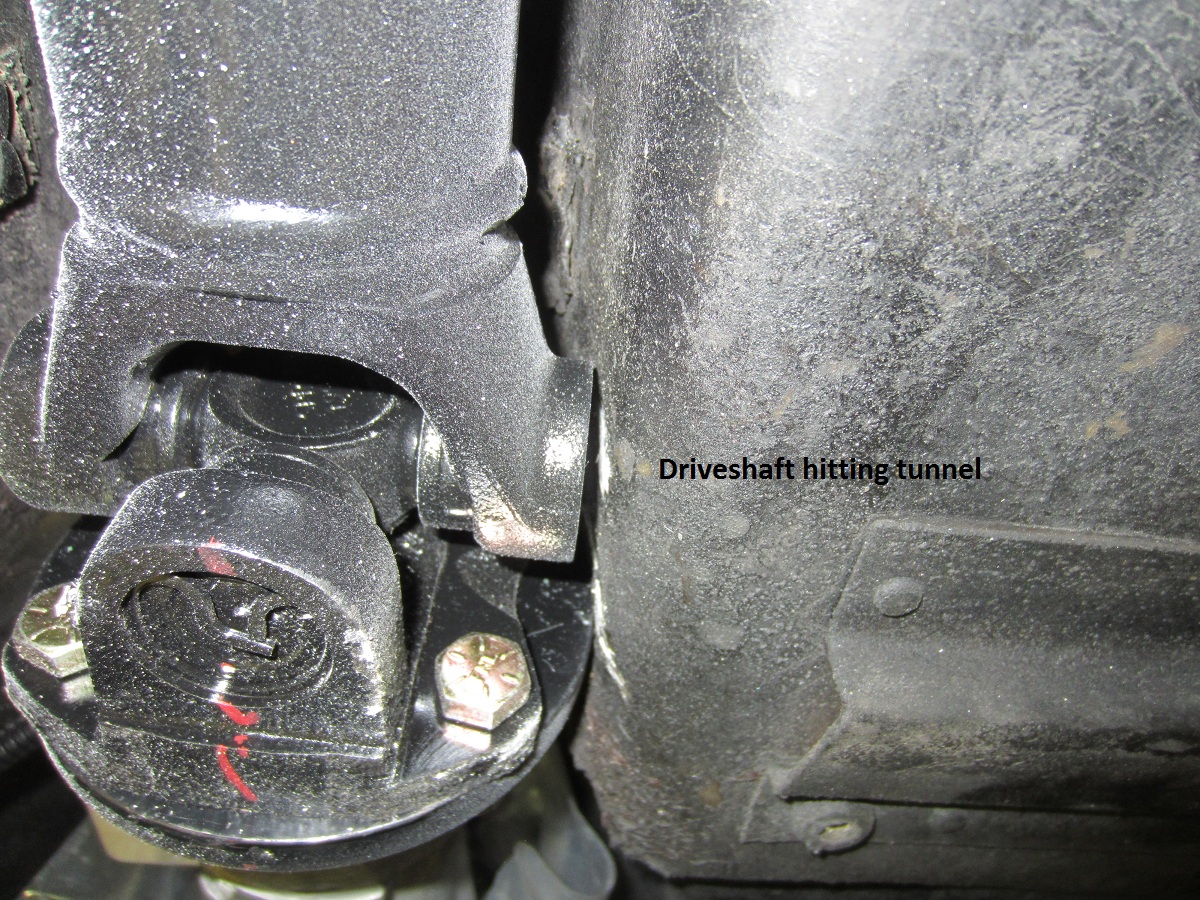
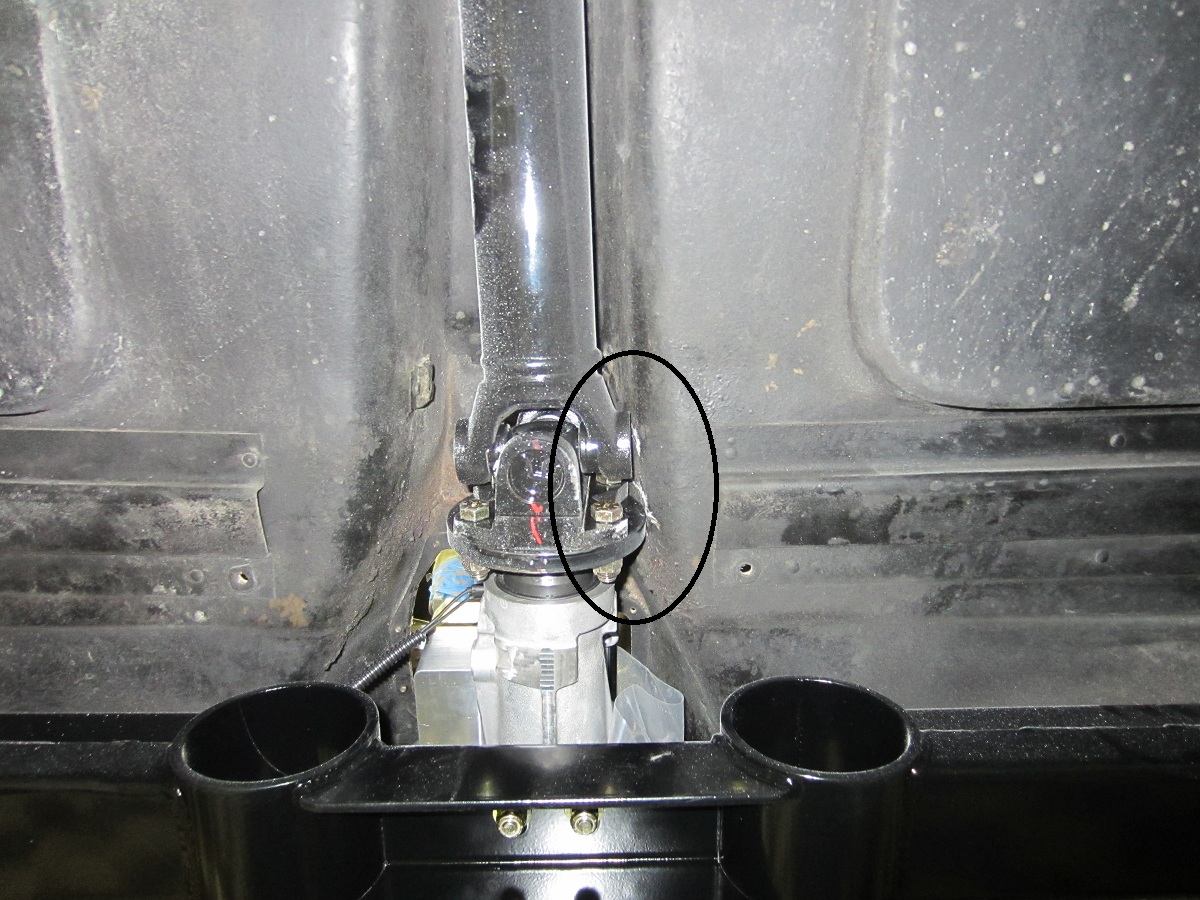
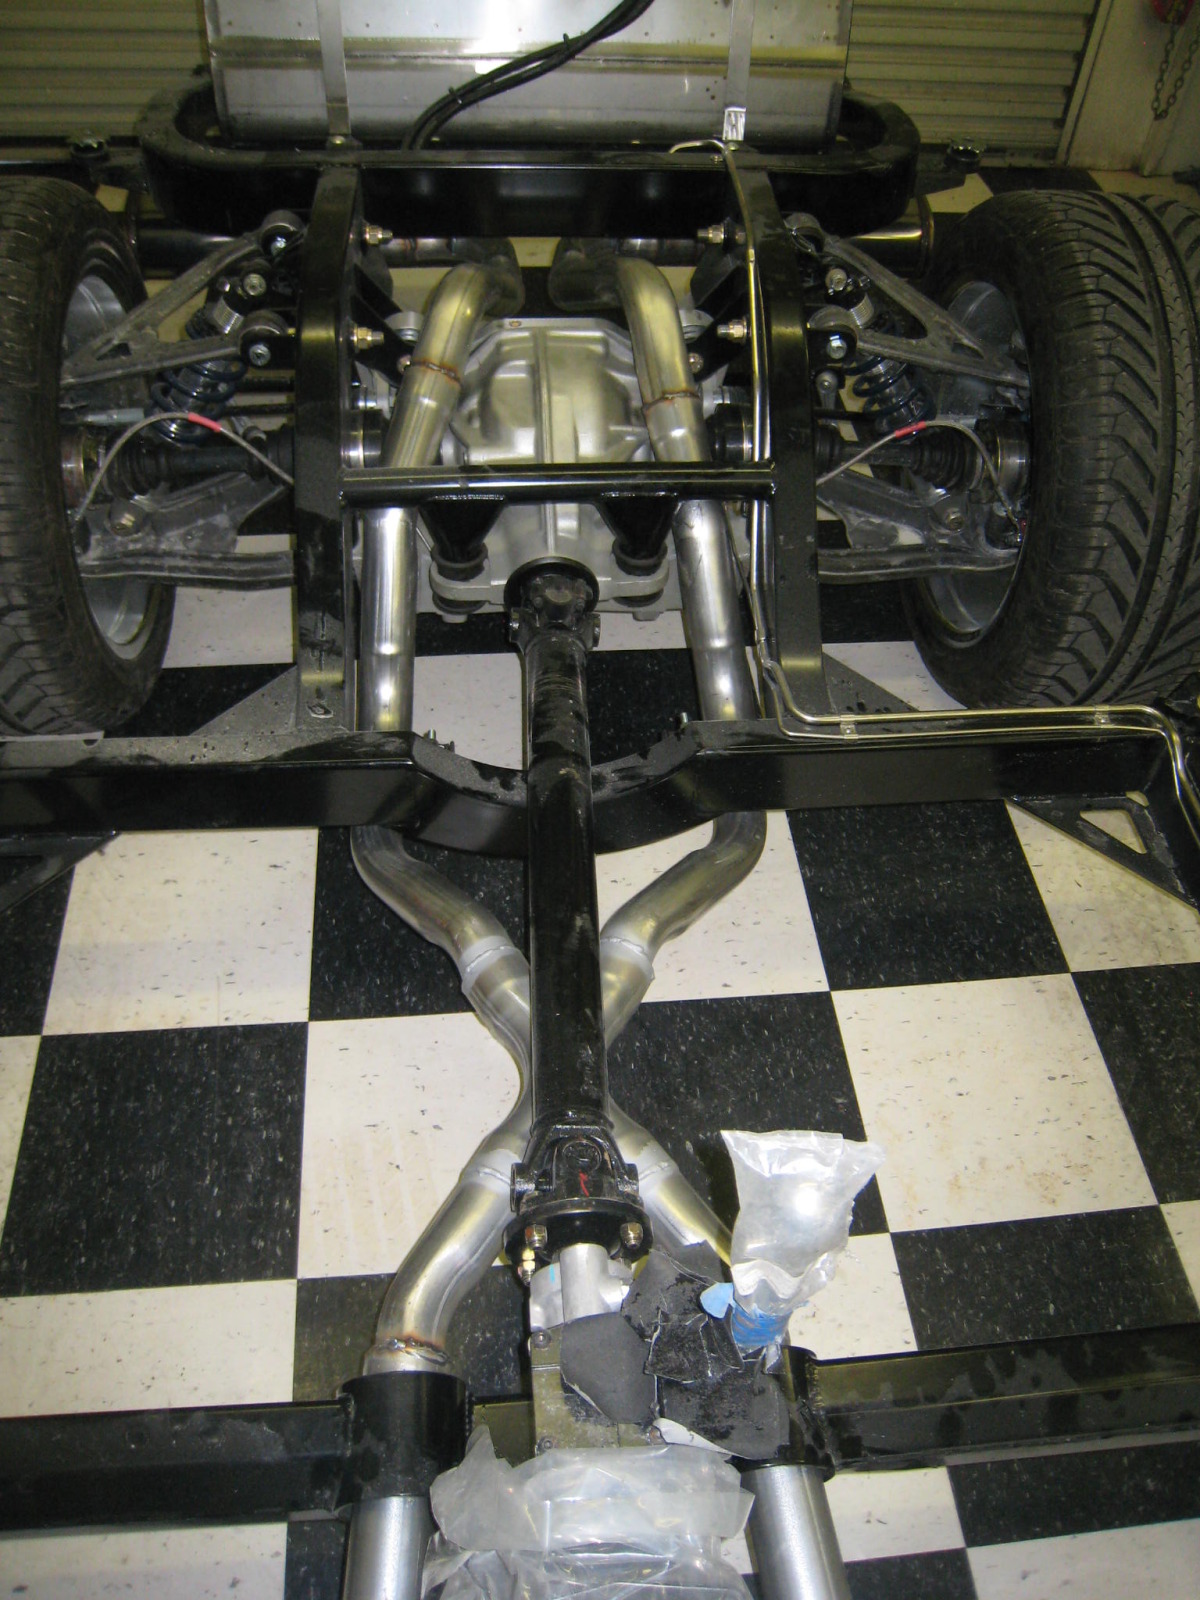
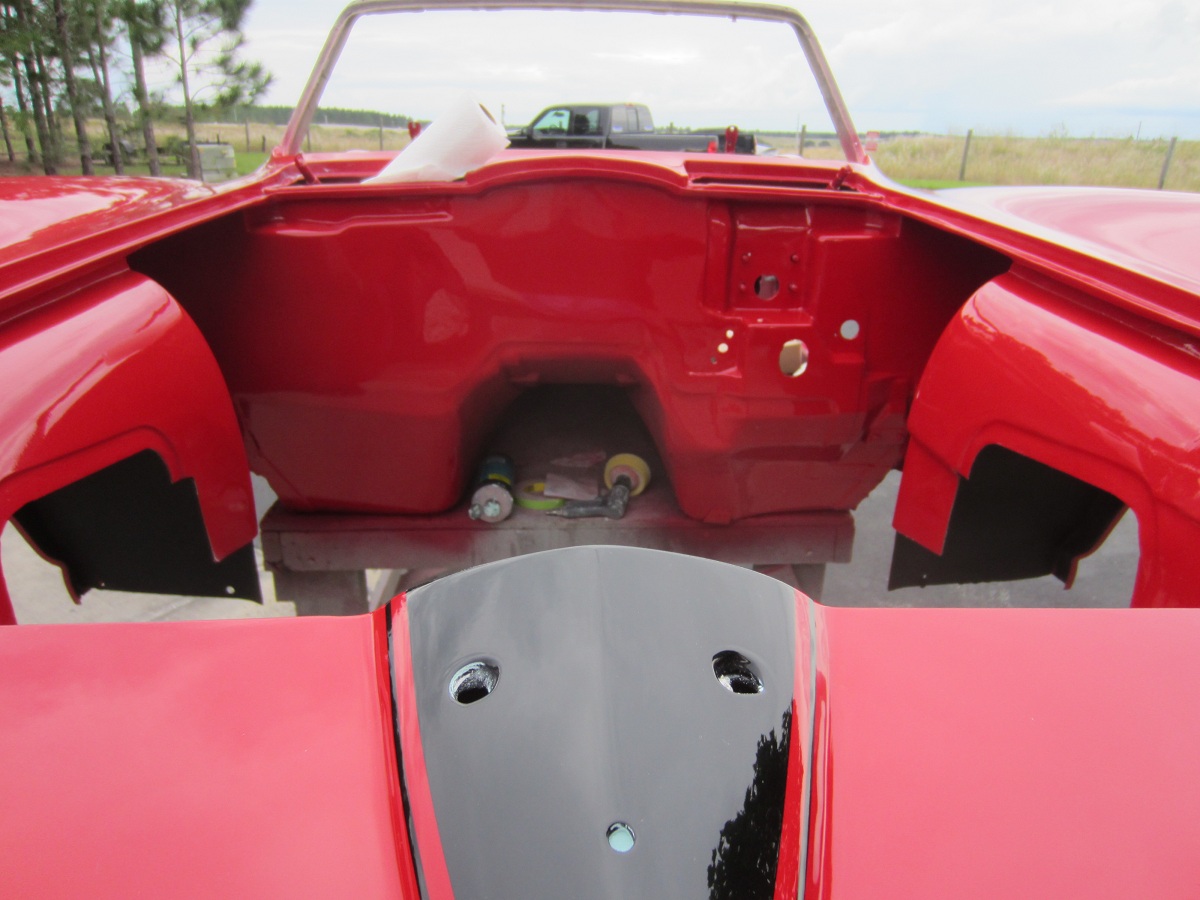
Next was a minor issue with the driveshaft setup provided by Street Shop Inc. As you can see from this underside picture, it rubs against the body (the body is completely centered onto the frame). A small pocket was created to accommodate the driveshaft.

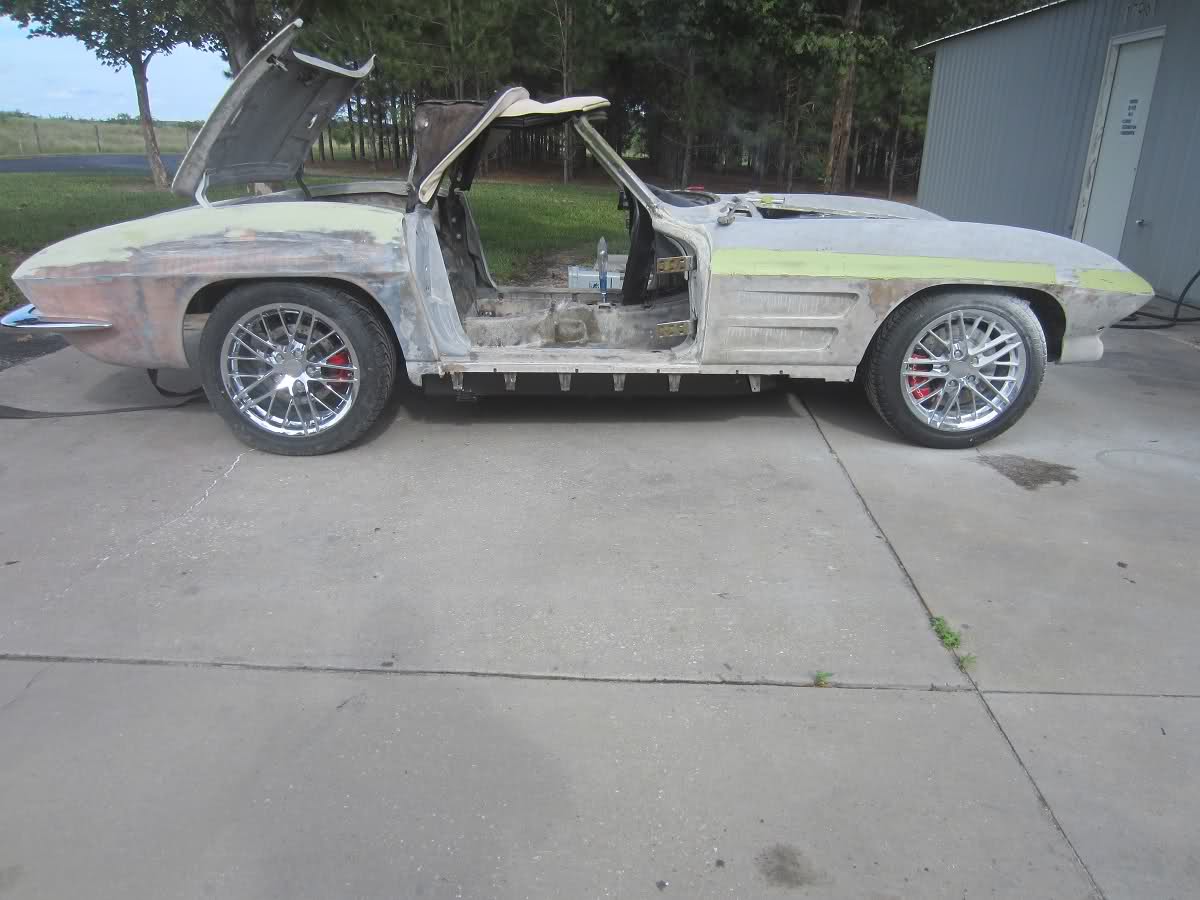
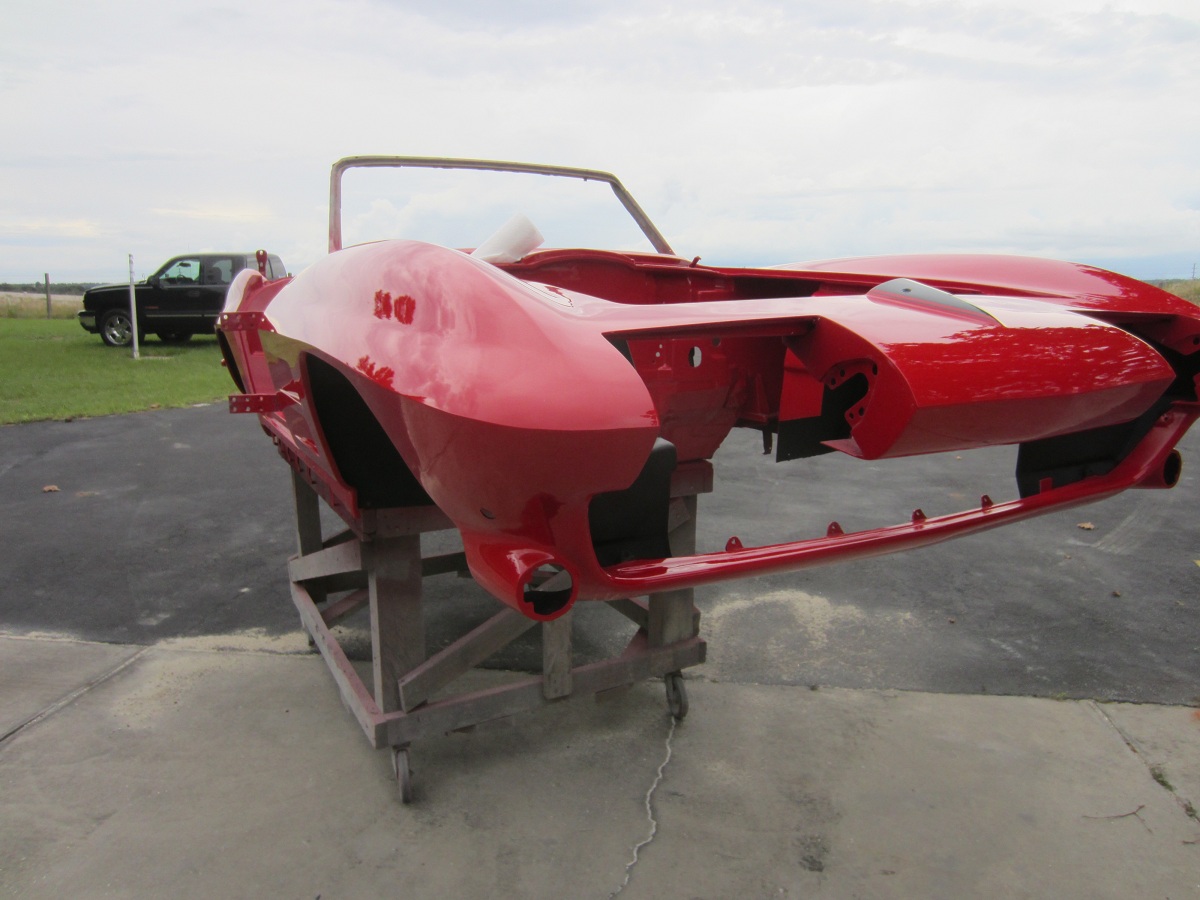
This is how the body now fits on the Street Shop Inc chassis.
09-09-2012 #43 Registered User
- Join Date
- Oct 2004
- Location
- Garden Ridge TX
- Posts
- 60
Dan, I am at the same point on my C3 build. I am also using the street shop chassis and will be doing major rework to the rear floor area to fit the wide tires and the convertible top. I found that Jeff over at Heartland customs has a mold for the rear floor already made. I should get it this week and start grafting it in. Lots of work but way cool to be able to run some super wide tires. Im using 335s on the rear.
Evan Q.
09-09-2012 #44
Registered User
- Join Date
- Jun 2012
- Posts
- 63
Evan:
You recognize that the floor work takes a little work to get right and is not a simple floor cut out and raise as marketed.
Street Shop makes an incredible product and I love it. Anyone contemplating this project must have some skills or have someone who has the skills to properly place this body onto the new chassis. For those that do not, I suggest the C4 rear end version where no floors are to be cut.
Cool project - for a moment I thought I was looking at mine! We are definitely at the same point!!!
09-15-2012 #45
Registered User
- Join Date
- Jun 2012
- Posts
- 63
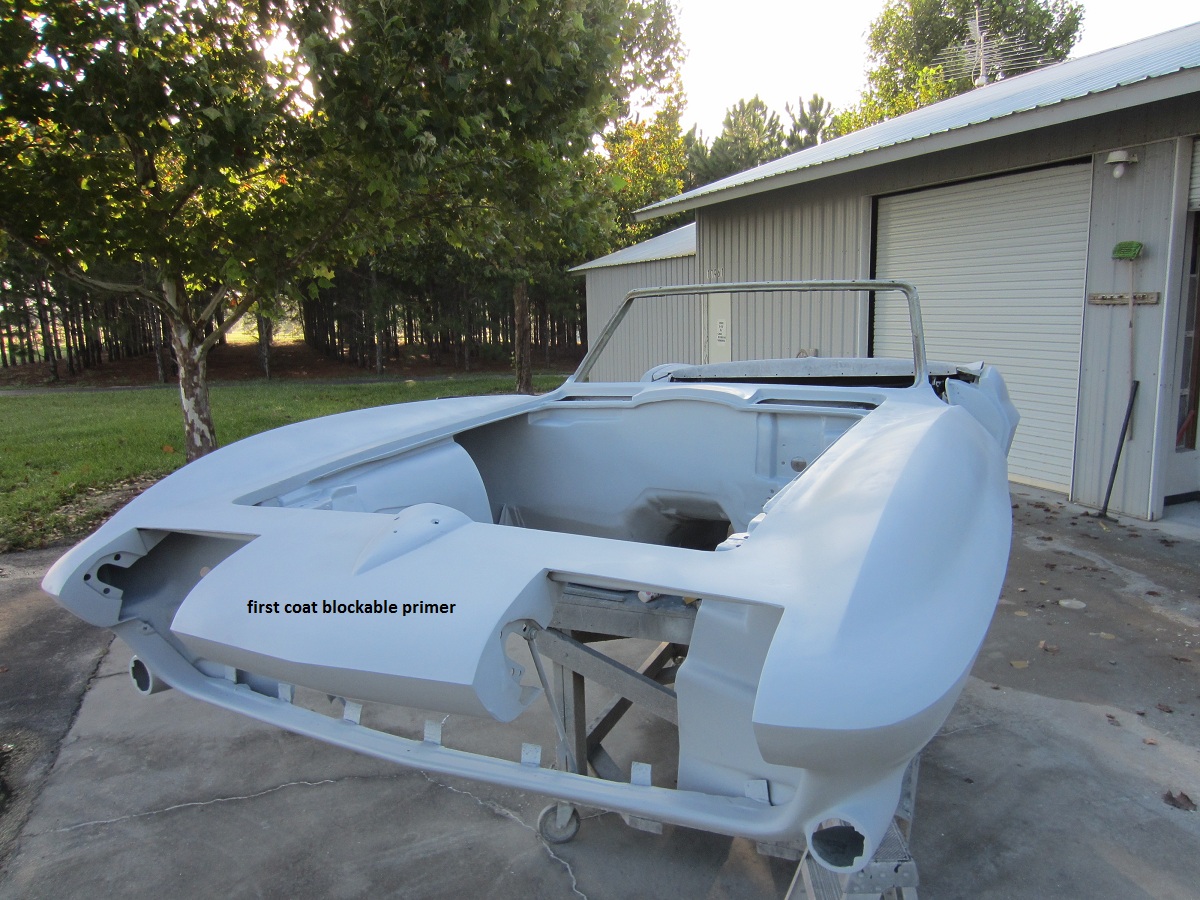
The body work continues on the 64 Convertible.
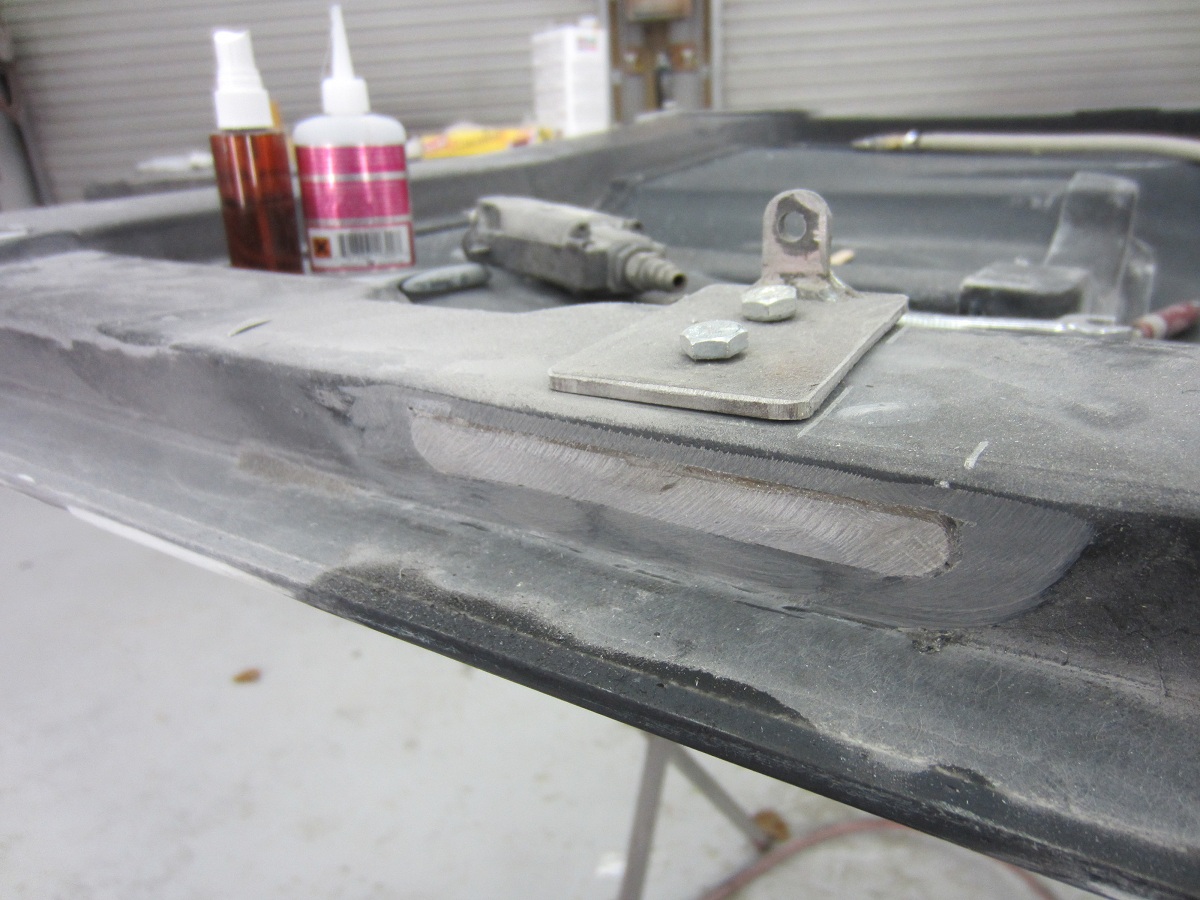
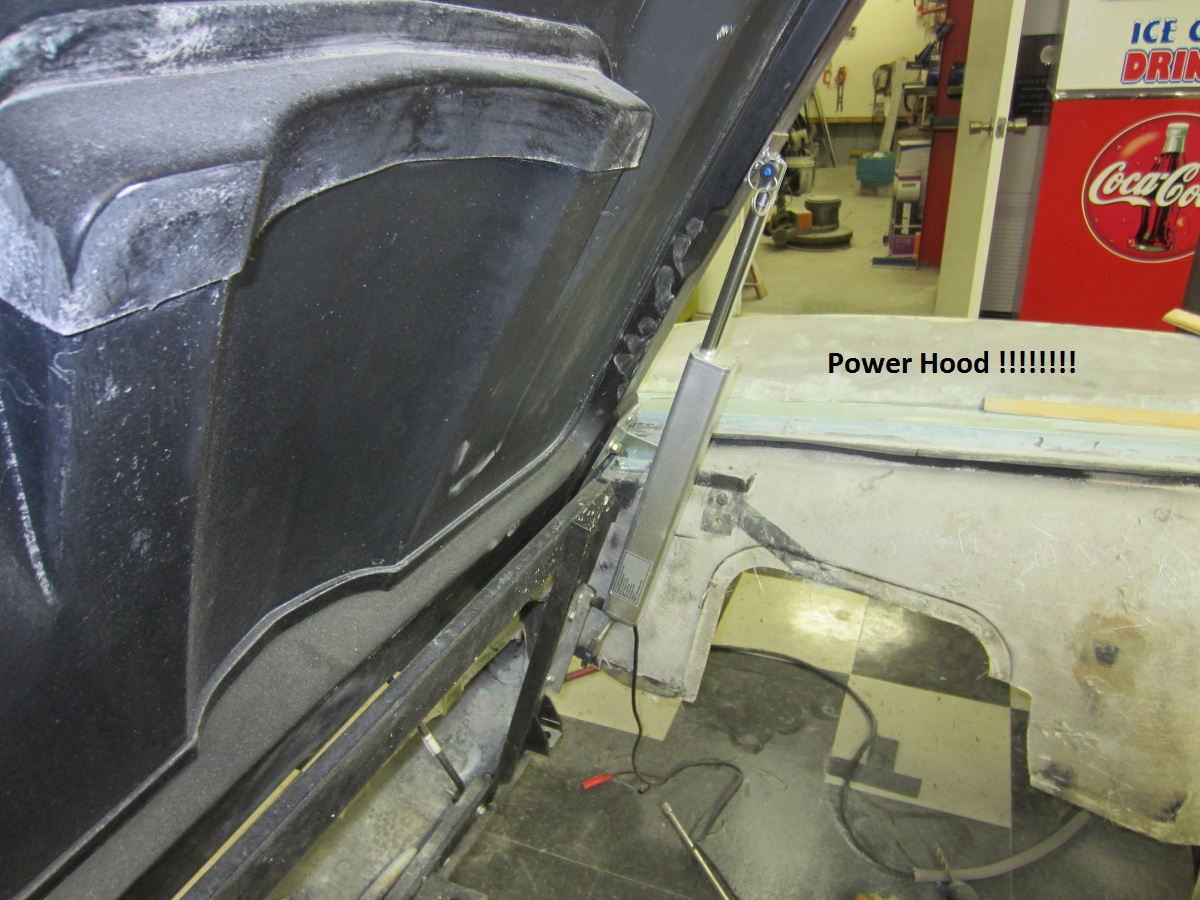
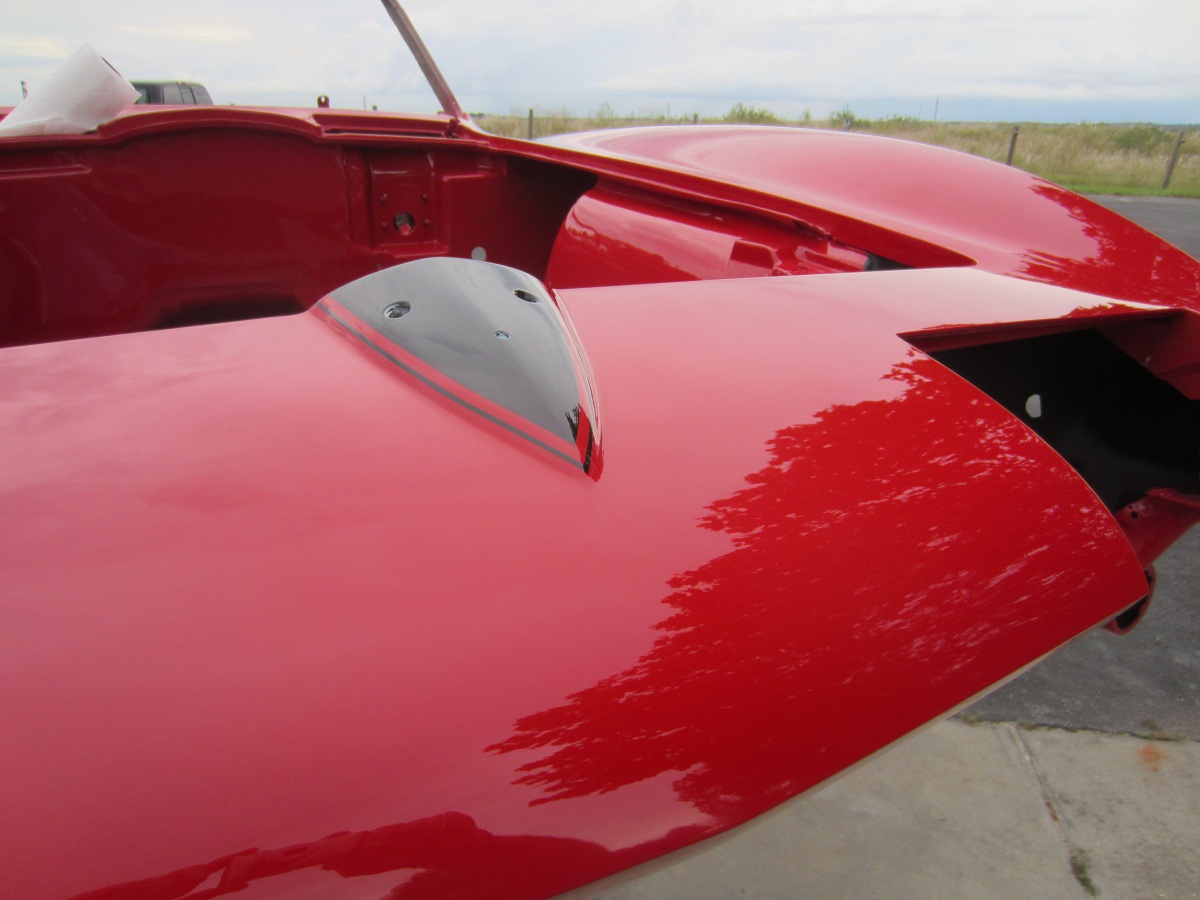
A nice touch is the POWERED hood lift now being fitted
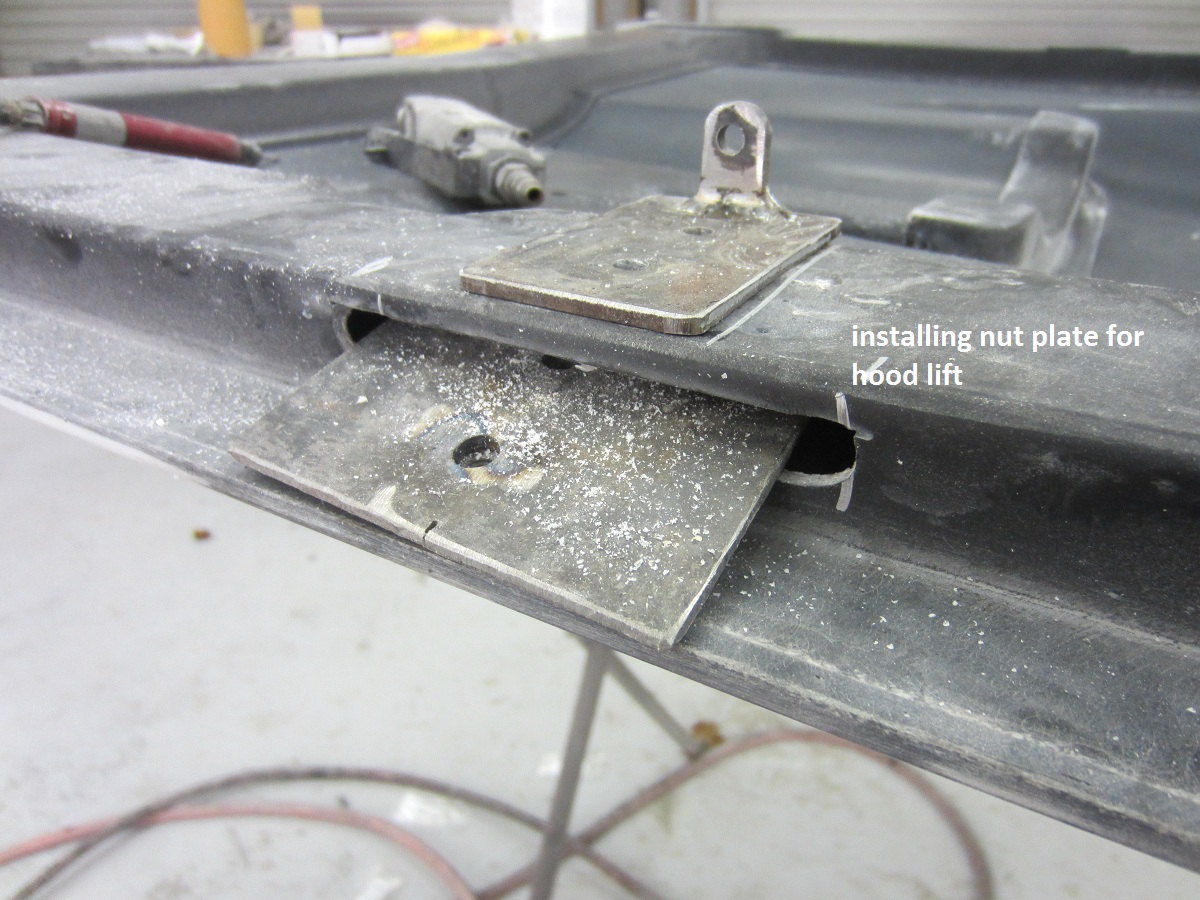
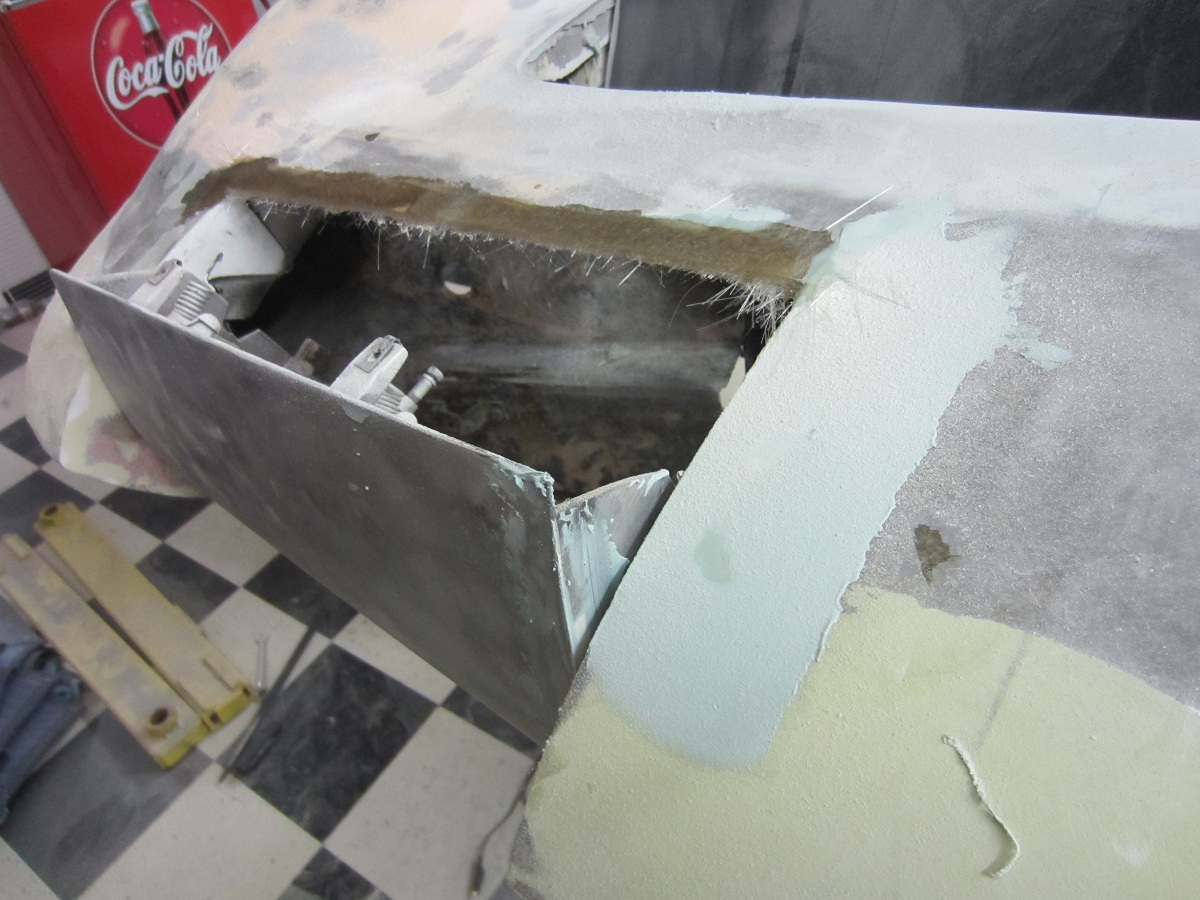
Mike is also working on the gaps to insure the perfect fit and finish. In these pictures you can see the work being done to the front end in conjunction to the headlight buckets so that the fit and gapping is just right
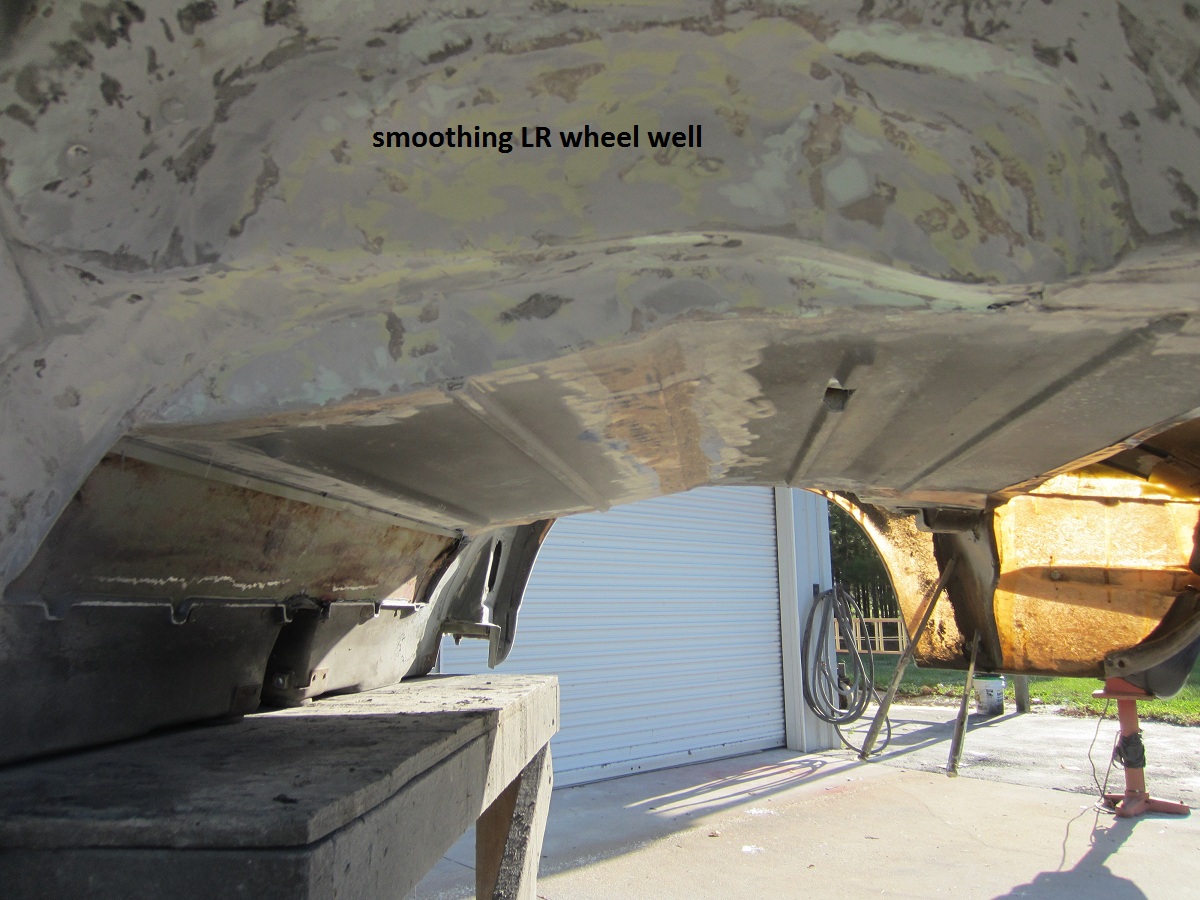
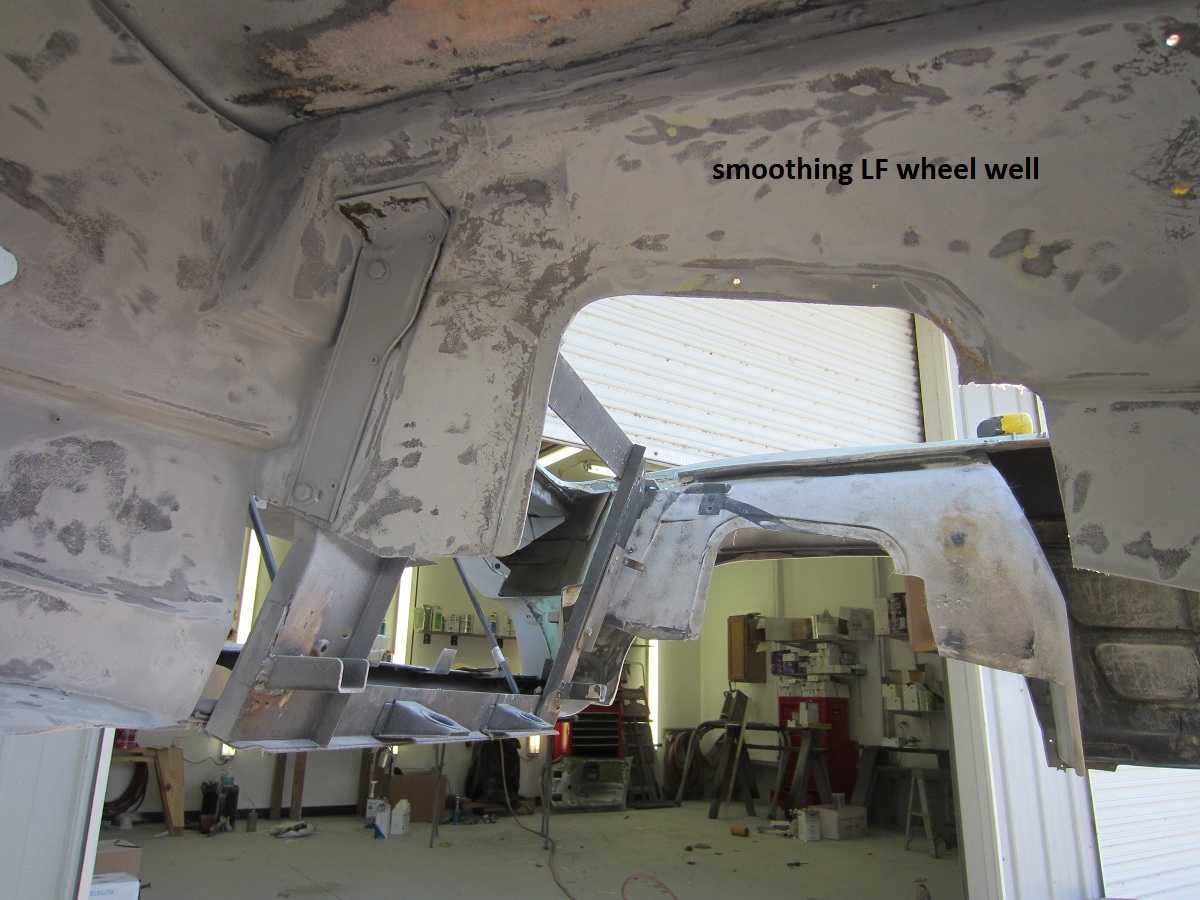
Now that the rear wheel wells have been custom made to fit my wheels, allowing the folding convertible top to fit in place, the body is once again off the Street Shop Chassis to continue the body work
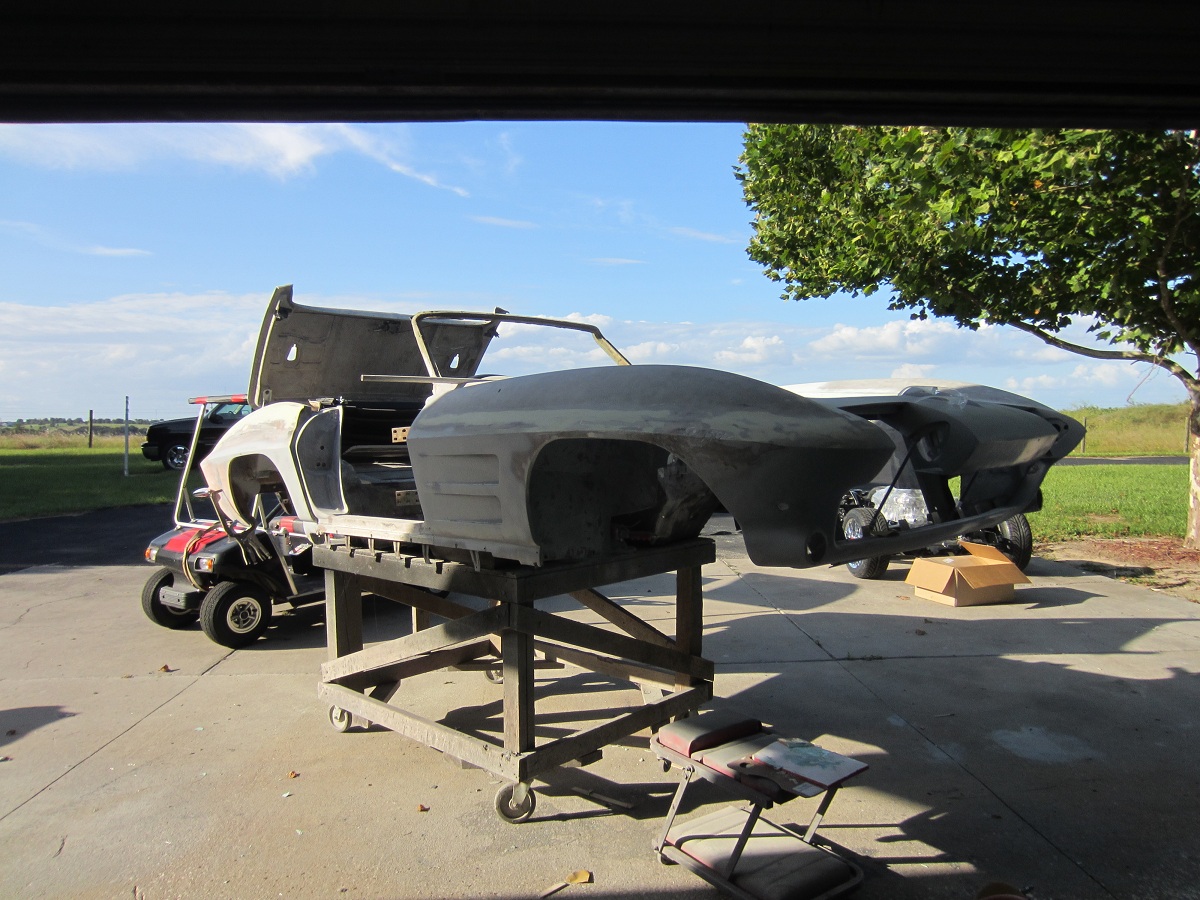
Starting from the bottom, Mike is smoothing out the underside of the wheel wells:
From my last conversation with Mike, the Corvette is nearing the point for the primer to be sprayed!!
09-17-2012 #46
Registered User
- Join Date
- Jan 2008
- Location
- Charlotte
- Posts
- 1,295
After seeing this image:
Are these the final wheels you are going with?
I just dont think they flow well with the design of the car.2005 LeMans Blue Corvette w/ T56 & Z51 & C6Z06 Brakes, Build Thread: https://www.pro-touring.com/showthread.php?64496
2005 GMC Sierra 2500HD LLY / Allison
2014 Chevy SS LS3 / 4 Door
09-18-2012 #47
Registered User
- Join Date
- Jun 2012
- Posts
- 63
Sorry you do not like the wheels but I actually do! These are Corvette ZR1 wheels. Wait until the car is painted and judge. I did not want old school wheels on this Resto Mod. Originally Posted by bonecrrusher

09-21-2012 #48 Registered User
- Join Date
- Nov 2007
- Location
- northern california
- Posts
- 388
Awesome project, we just started a 62 for a customer that has an identical chassis and drive train. Where did you find the power hood? I wish the guy that welded your chassis welded ours. Very nice and I bet it will perform better than it looks
Scotts Speed and Custom
norcal1320.com
09-21-2012 #49
Registered User
- Join Date
- Jun 2012
- Posts
- 63
THANKS! Originally Posted by scotzilla
The power hood is custom fabricated as there is no "kit" for the Corvettes. The brackets are custom fabricated and the electric-powered actuator (various suppliers carry these) has to be set for the closed and open positions. It will all work off of a button on the dash as well as a remote.
09-21-2012 #50
Registered User
- Join Date
- Jun 2012
- Posts
- 63
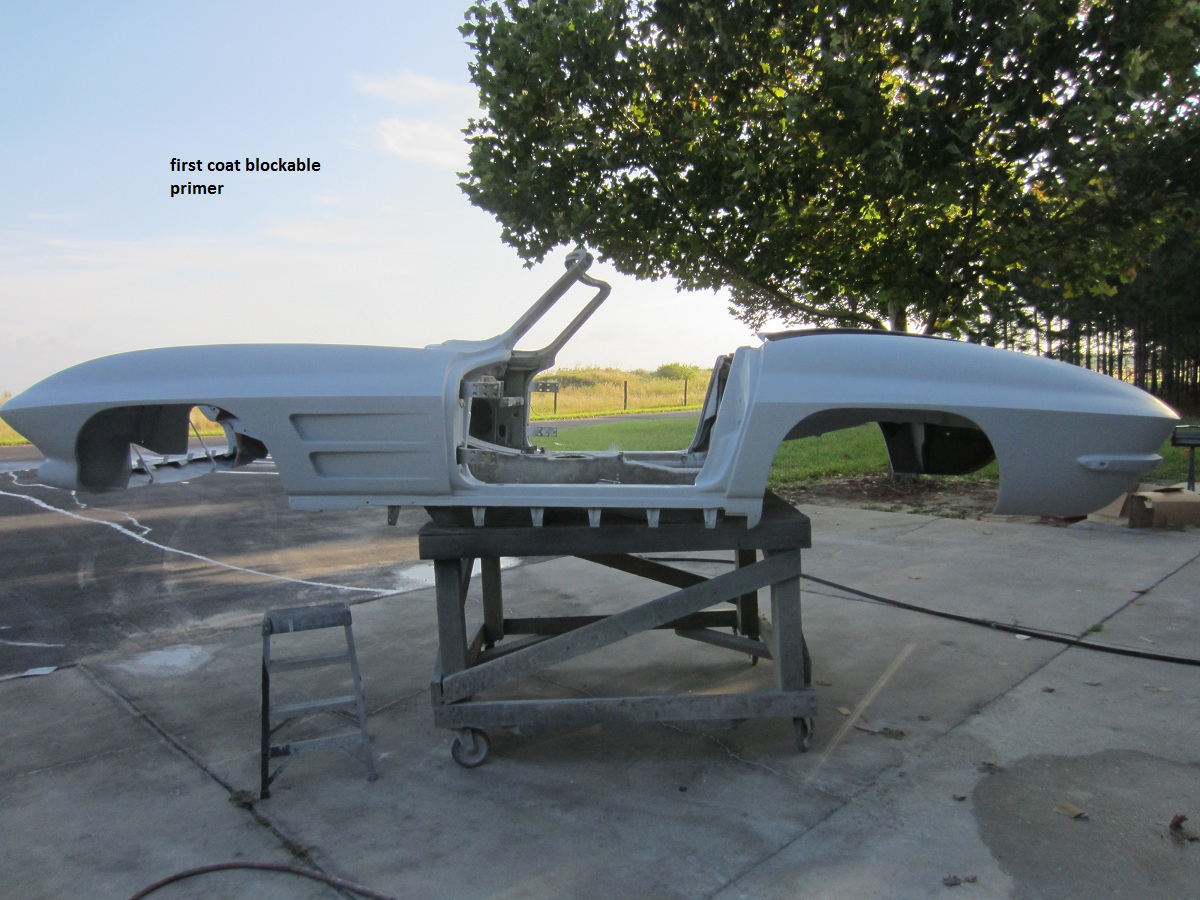
The Roadster body is nearing completion. There are many hours of hard work to massage the fiberglass back to perfection. If all goes well, it will be in the paint booth within the next 7 to 10 days (doors and deck lid will be fitted to finish off) !!!!
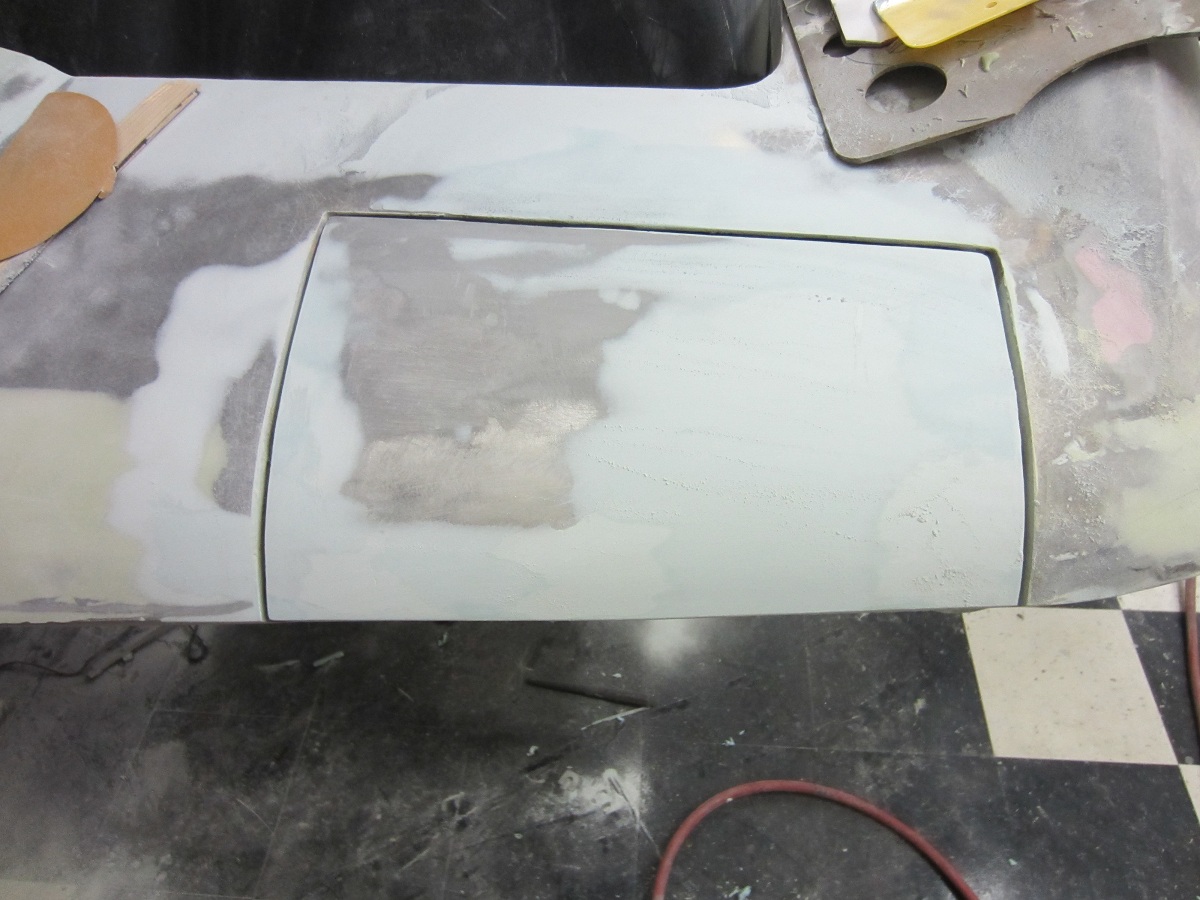
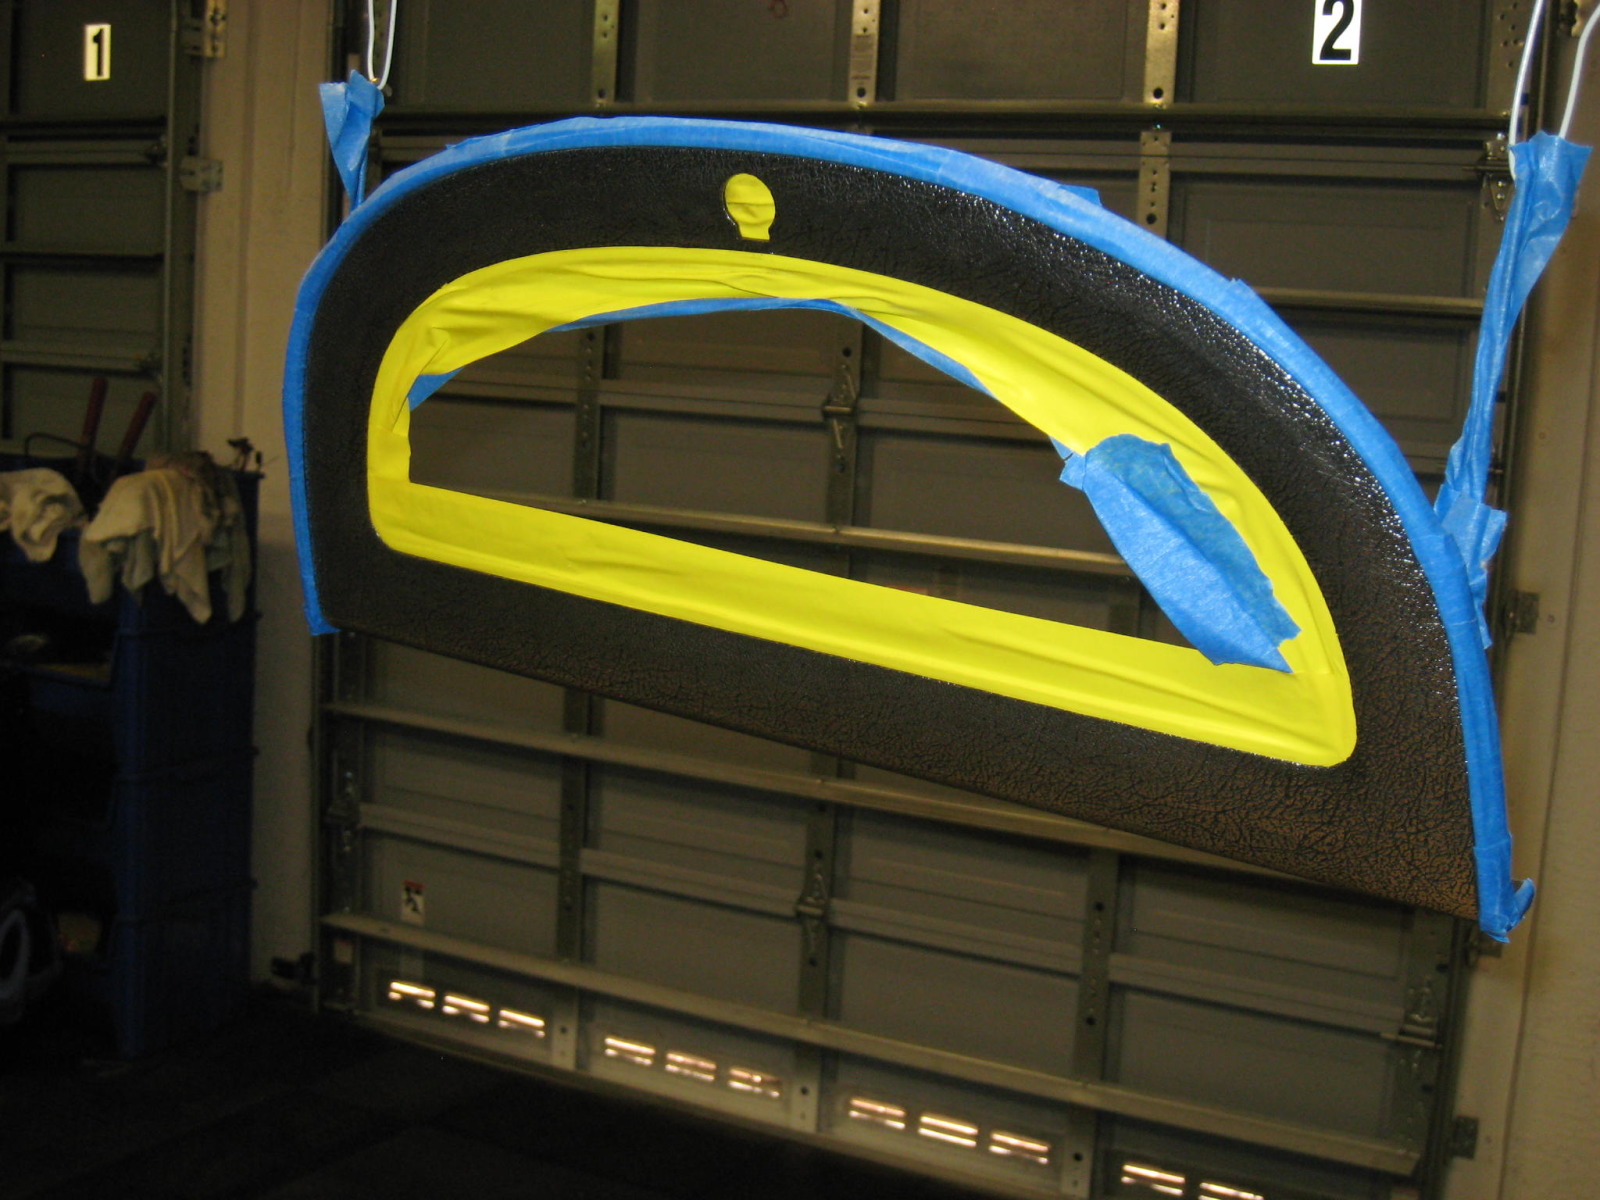
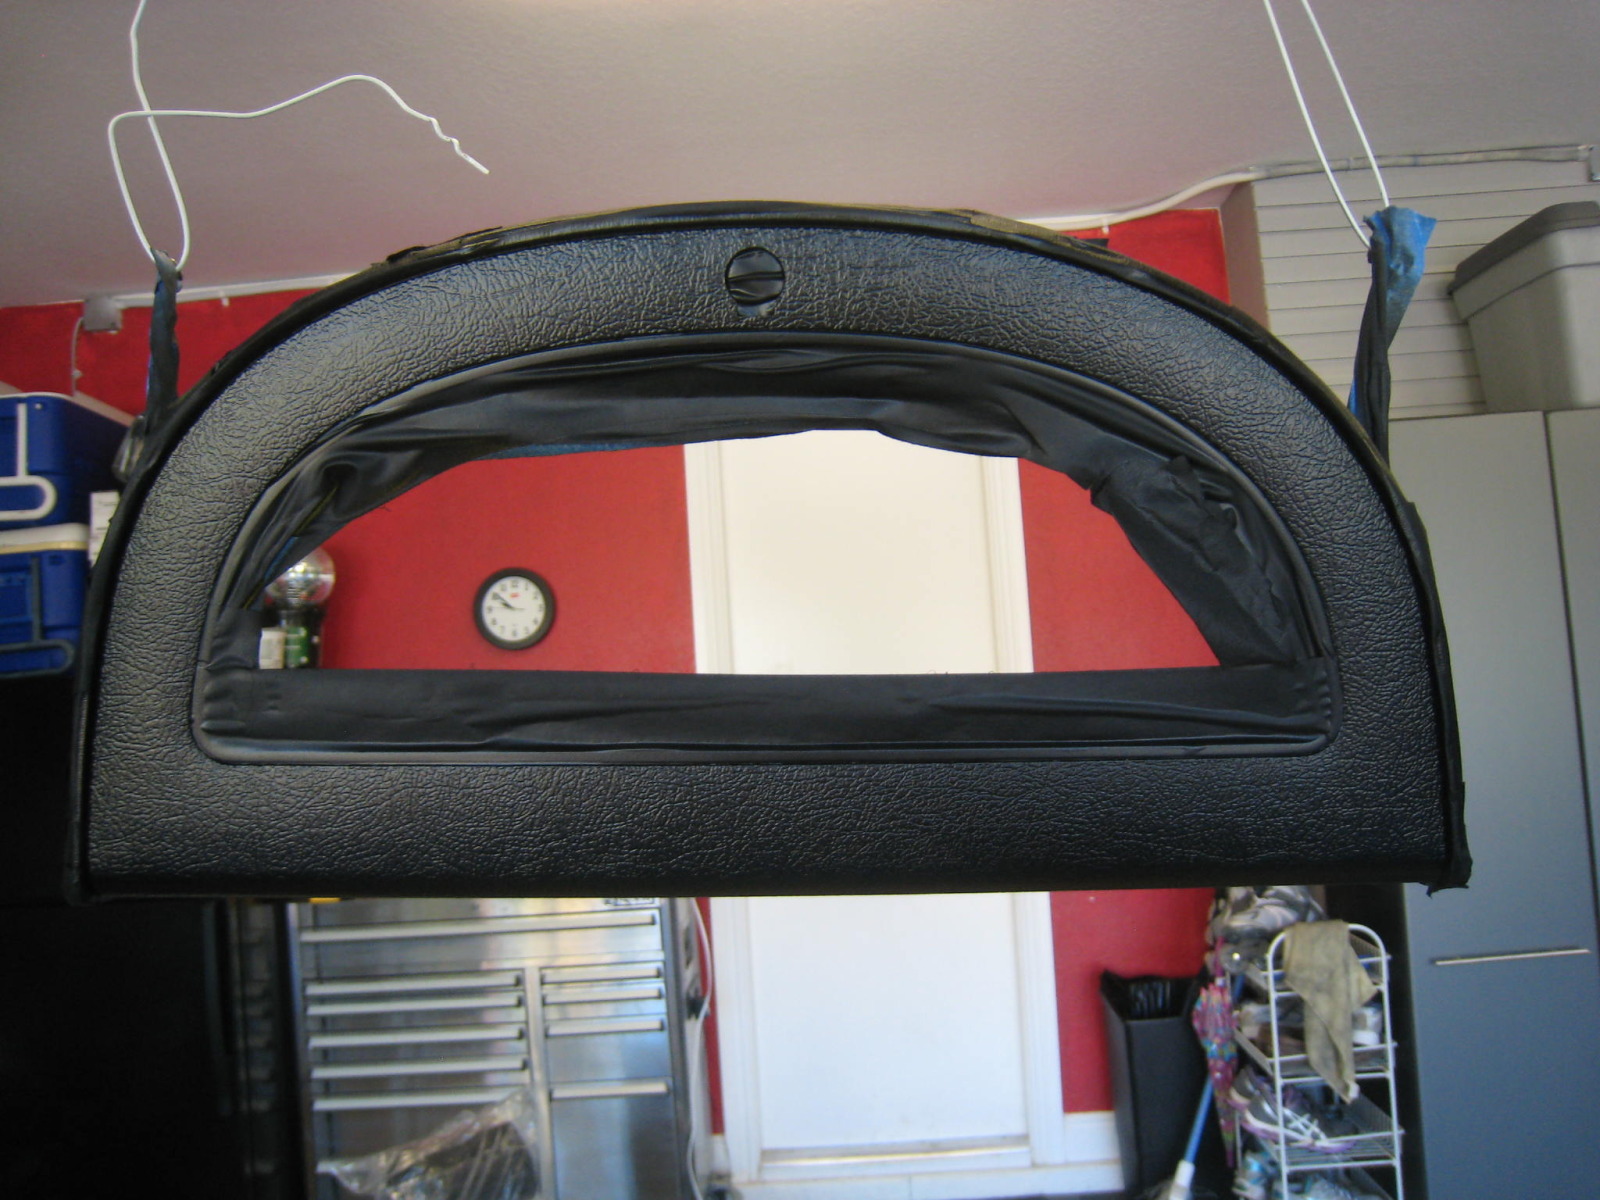
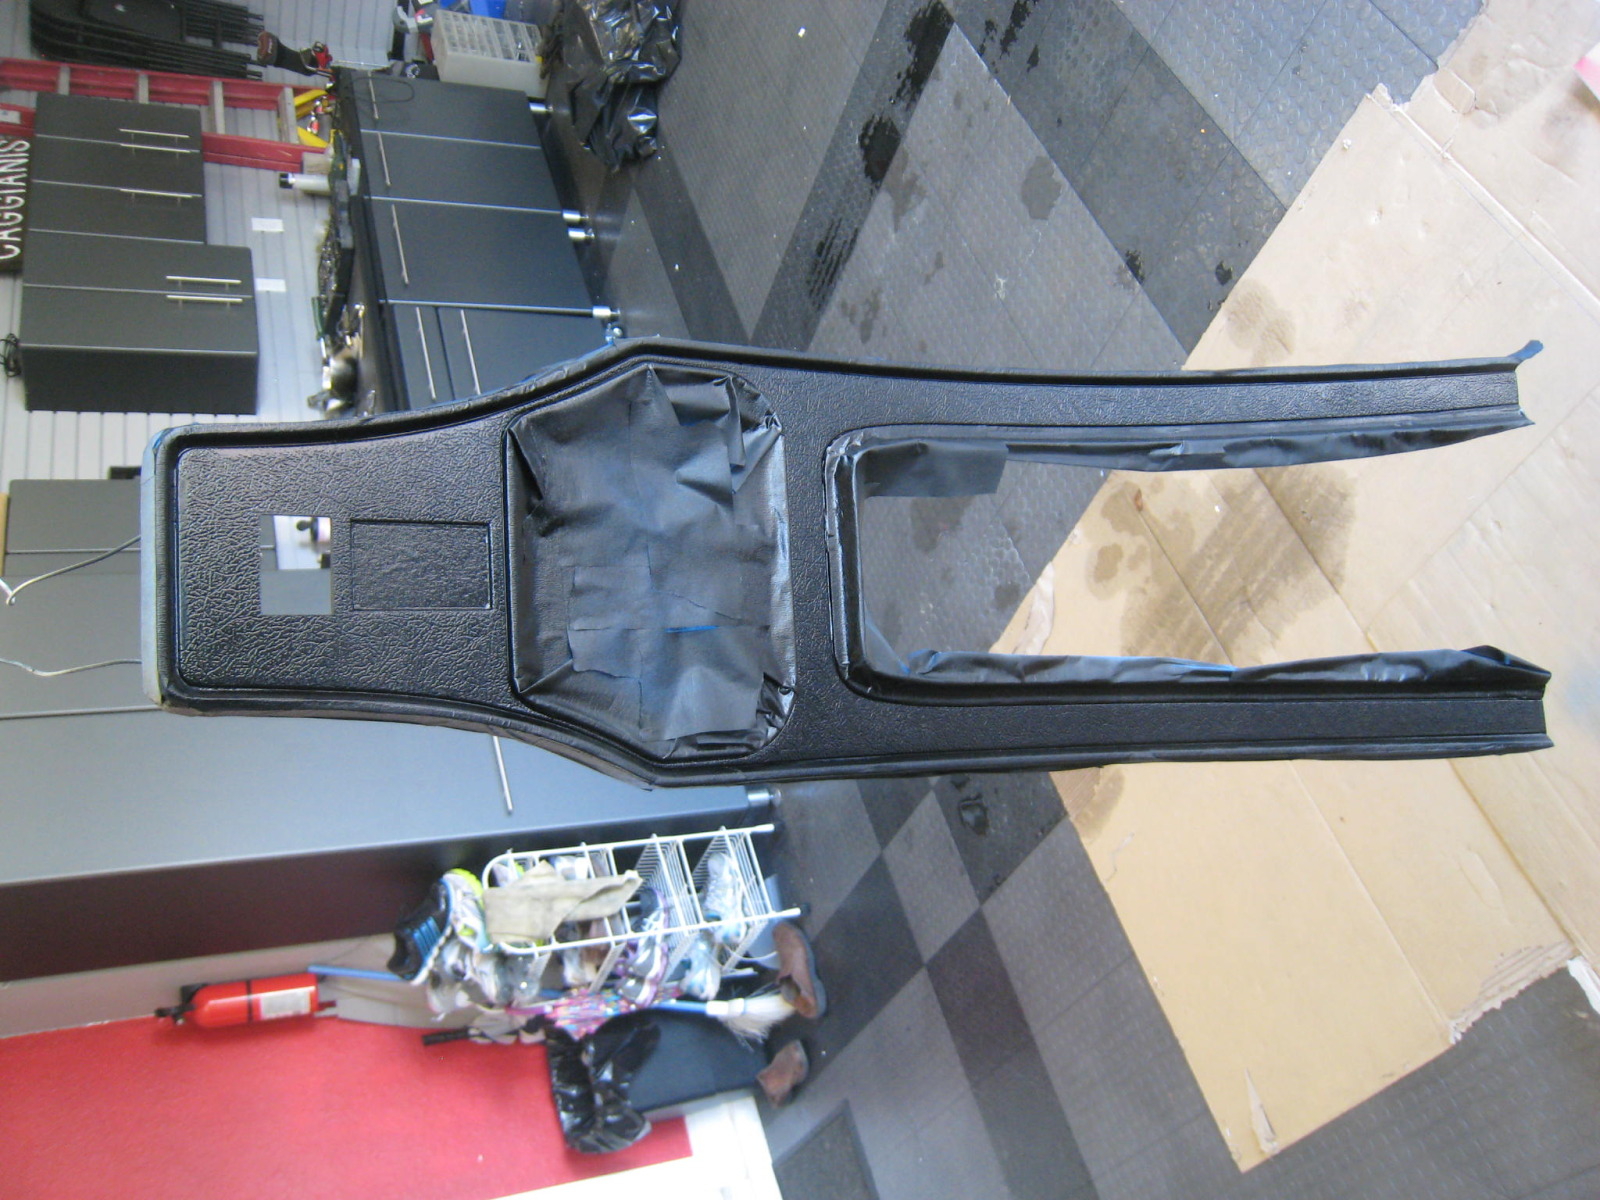
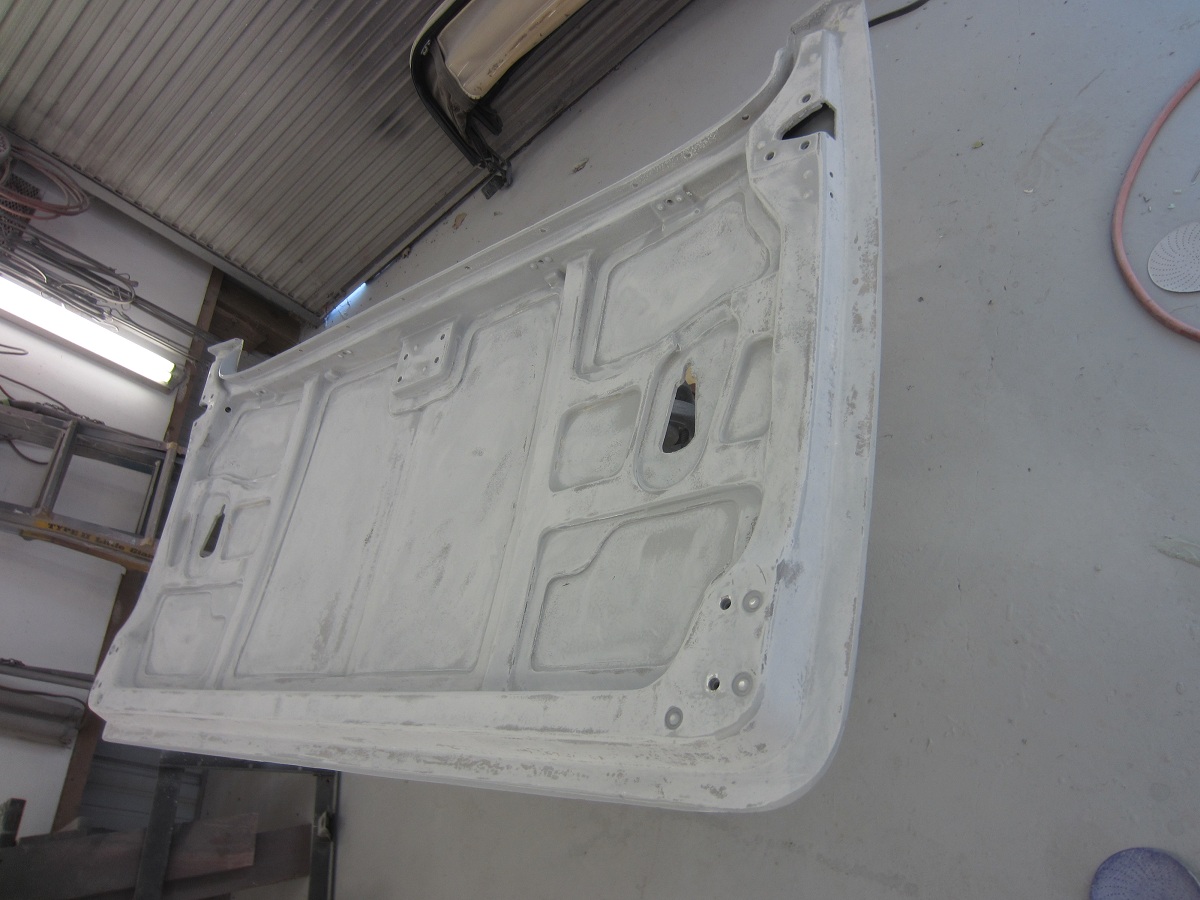
In the meantime, I am working on the restoration of the interior dash items. I began with the glove box door restoration.
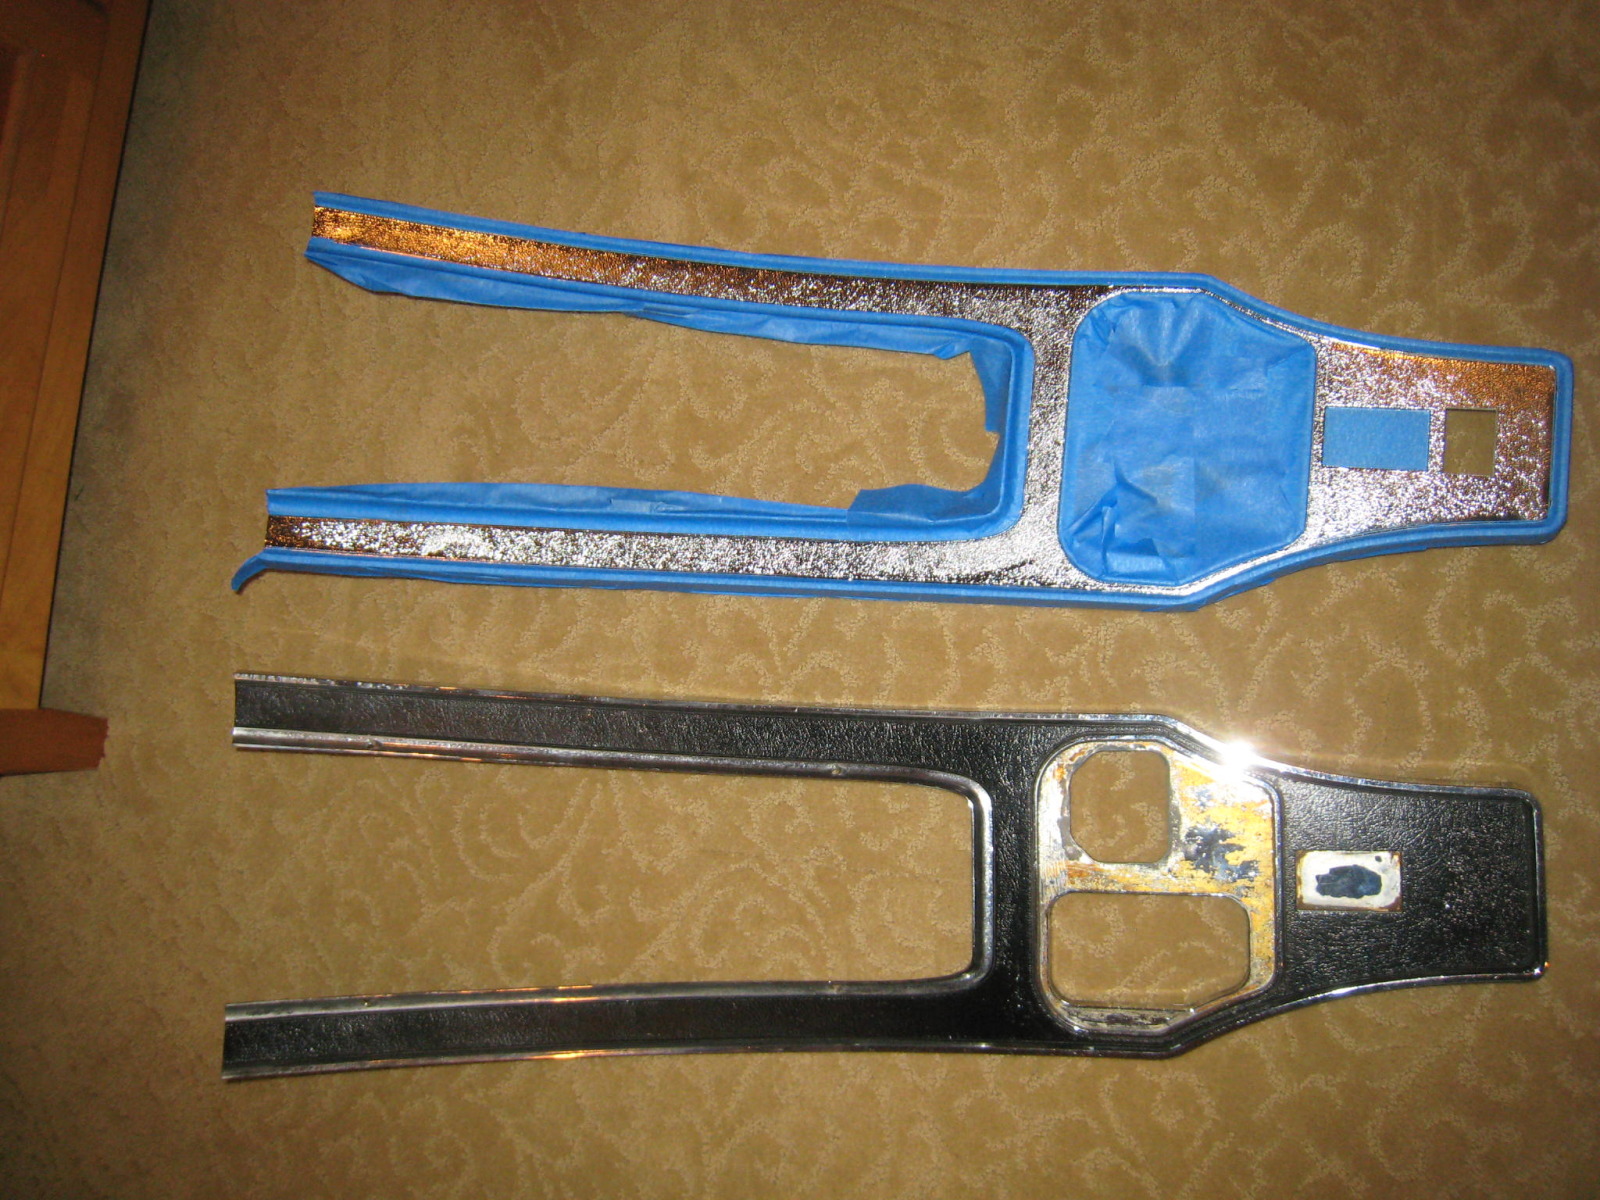
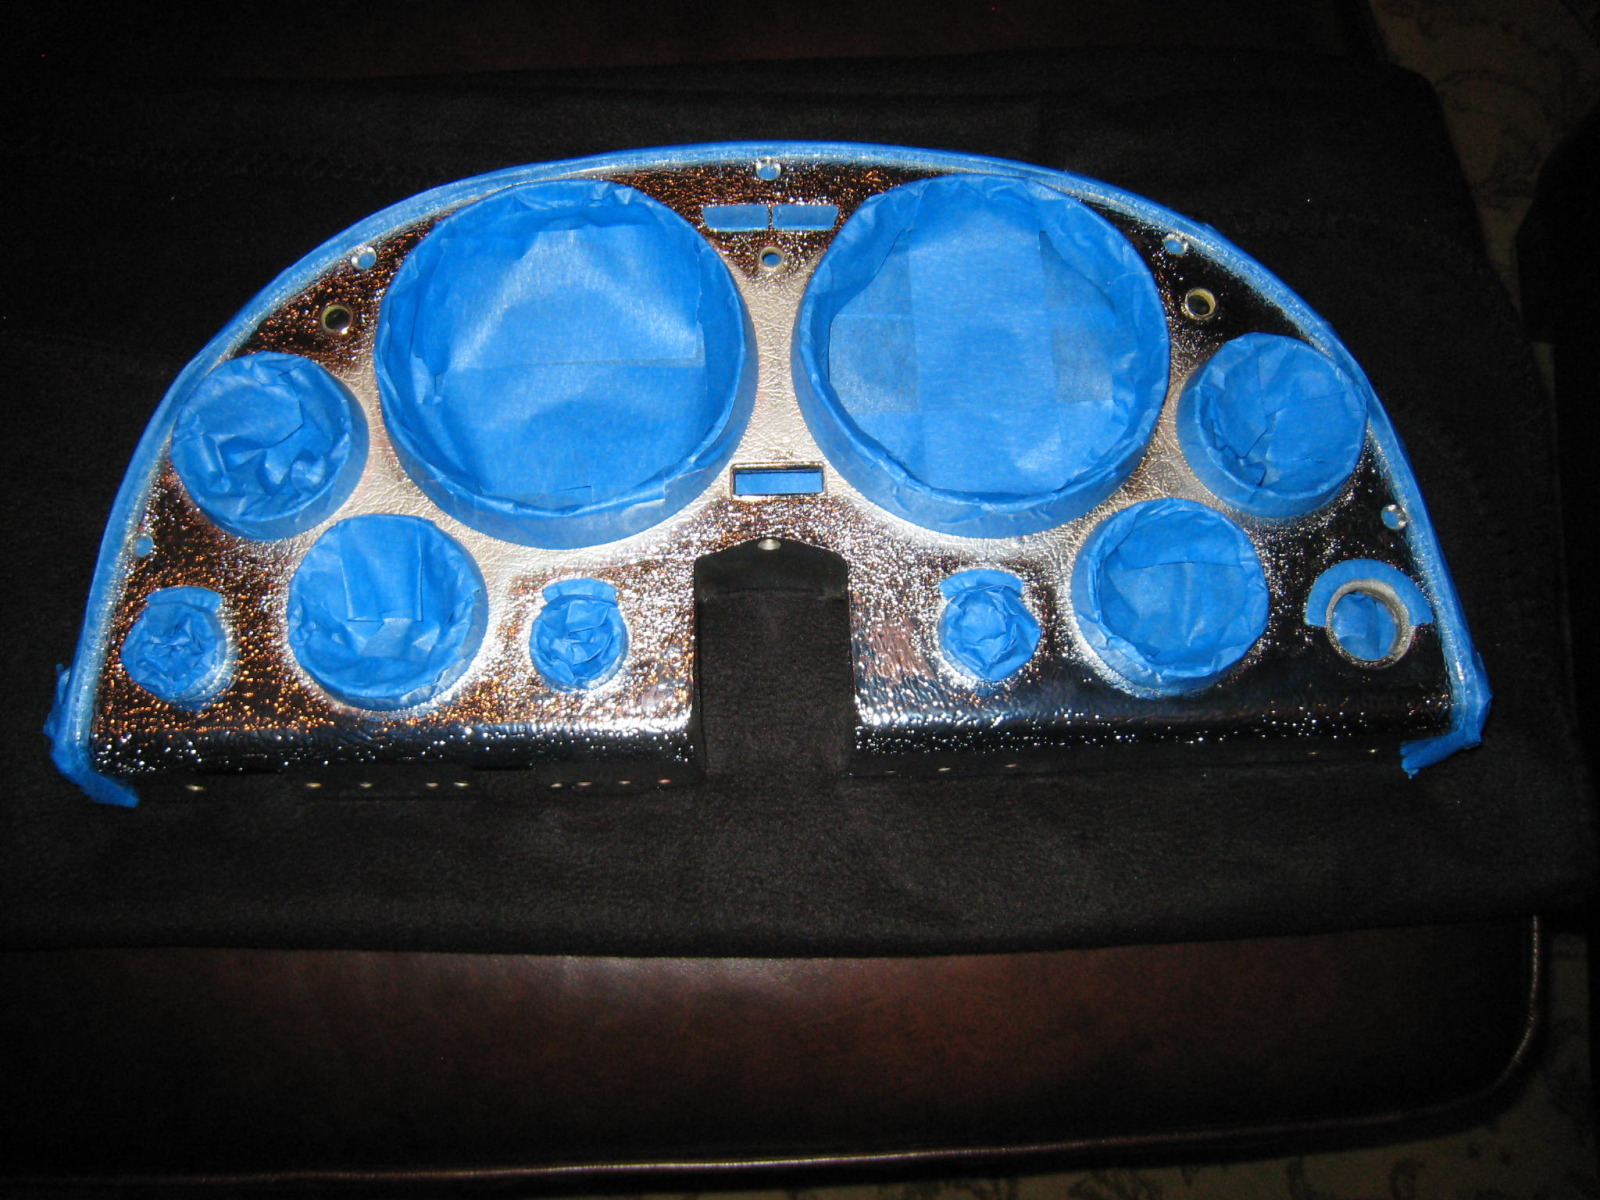
The chrome surround is in decent shape so I spent a couple of hours carefully masking the chrome, particularly around the edges. While not a hard task, it is a tedious one.
Here are a couple of pictures of the door masked with the old paint removed:
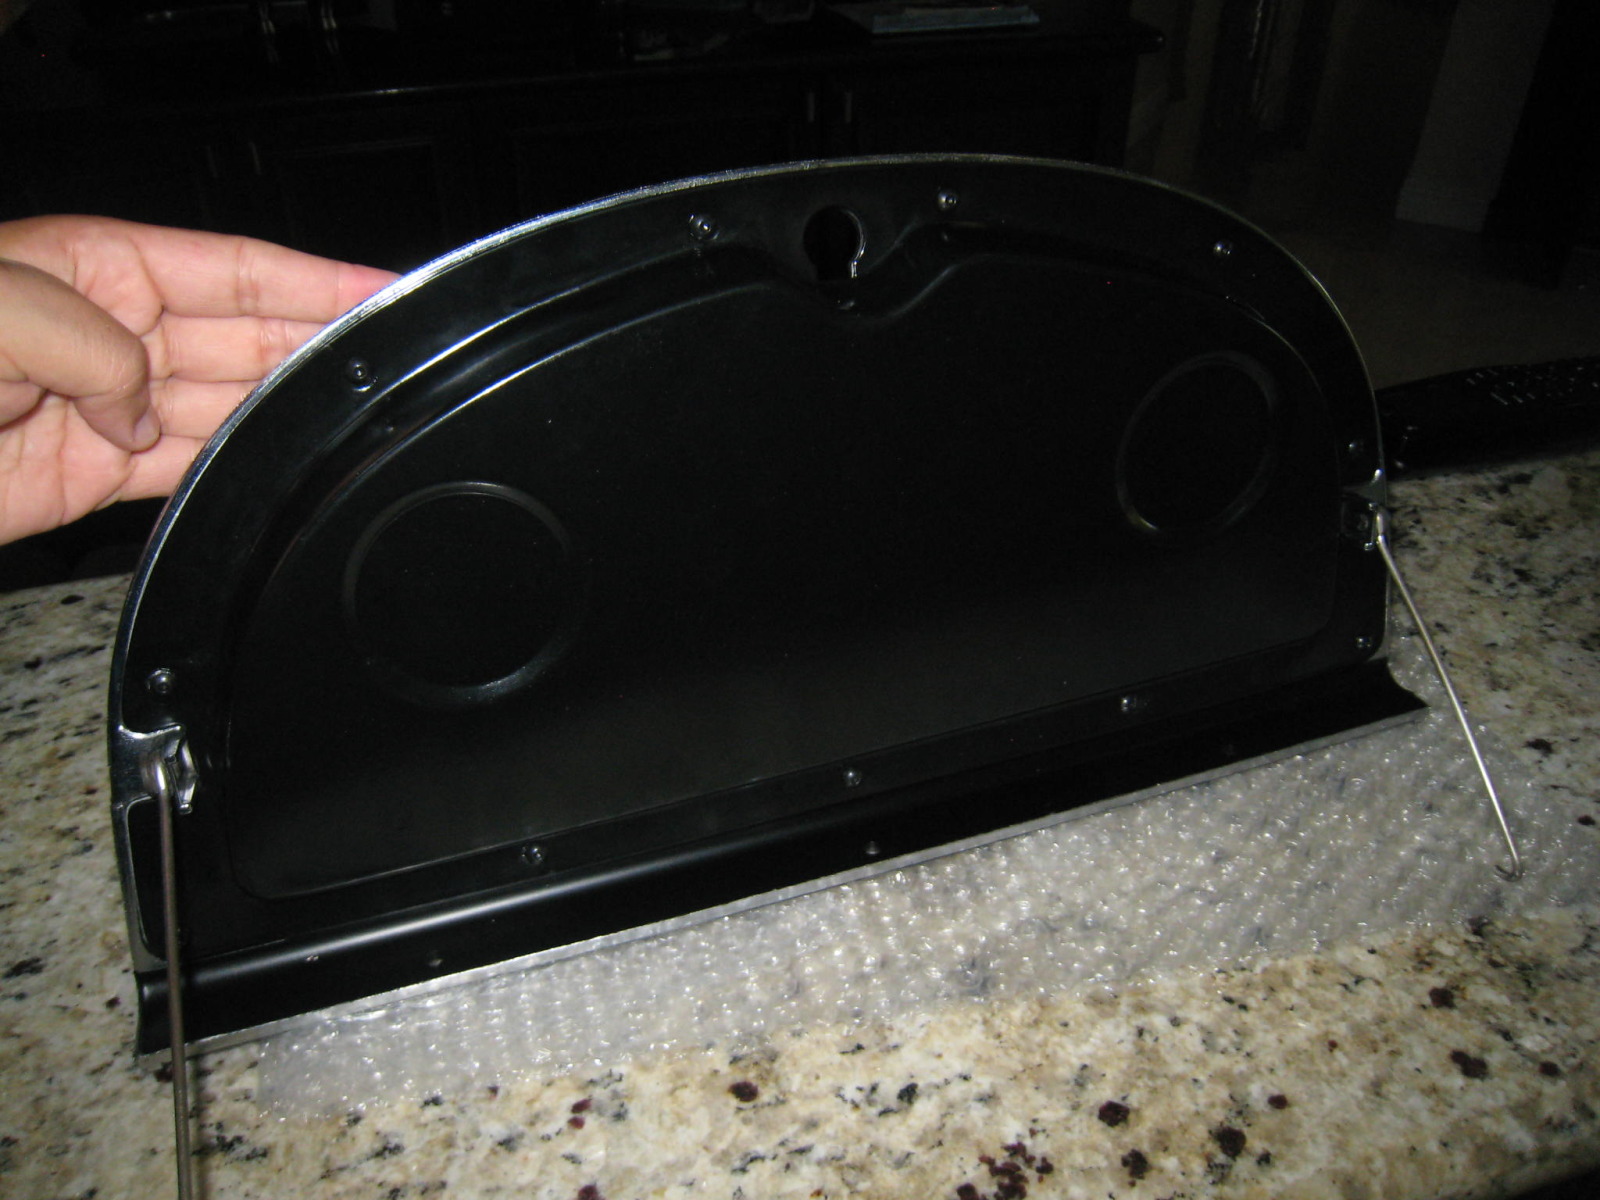
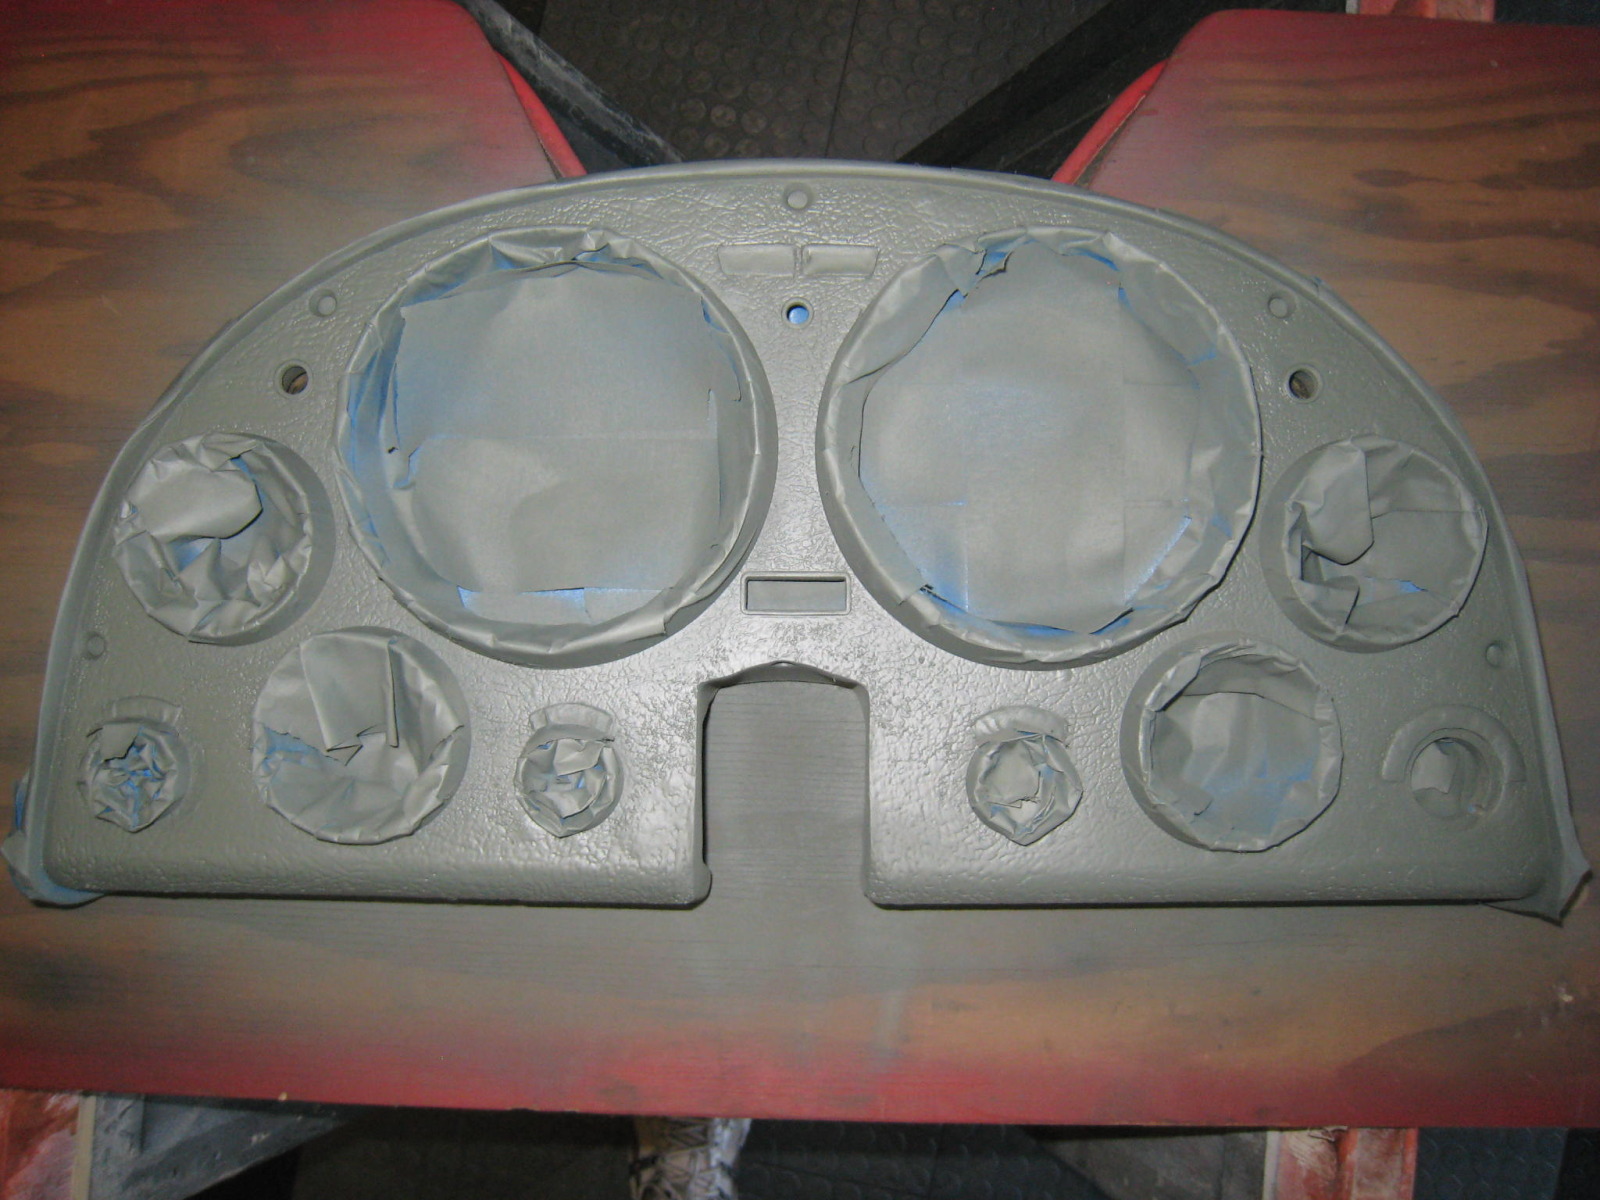
Now in Primer:

And finished with SEM Euro Trim (a satin black finish);

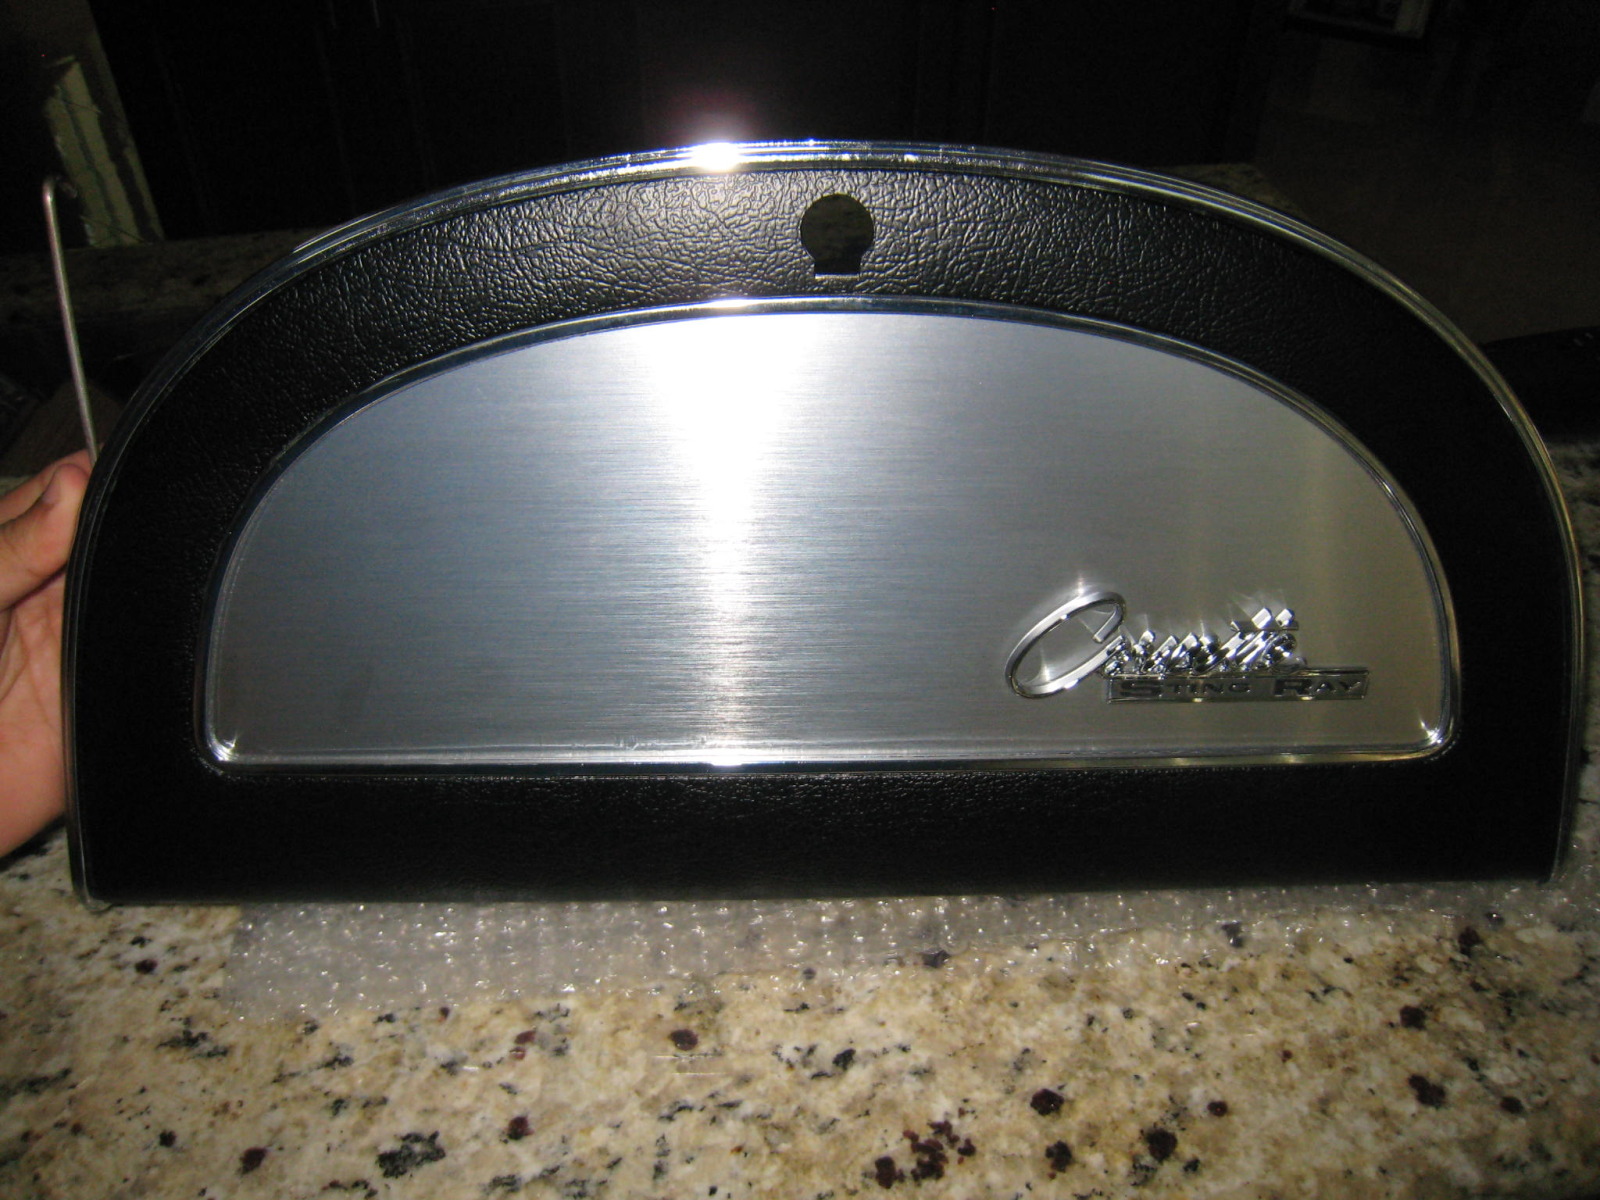
With the paint completed and the other parts back from black powder coating, it was time to re-assemble the glove box door with the new aluminum piece and emblem.
Tomorrow, the shift console will be masked in preparation for paint. And, if I have the chance, the chrome shop has finally finished my dash cluster so I may run up to pick it up first thing in the morning.
Dan
---------------------------------
www.vetterodder.com
www.facebook.com/vetterodder.com
09-27-2012 #51
Registered User
- Join Date
- Jan 2008
- Location
- Charlotte
- Posts
- 1,295
I had ZR1's on my C6 - and after cleaning them for a year - I learned to hate them.
Hawk HPS pads dust quite a bit - and thats why I went with a set of OEM Speedline Z06 wheels in Competition grey.
Car is looking good - keep posting the updates.2005 LeMans Blue Corvette w/ T56 & Z51 & C6Z06 Brakes, Build Thread: https://www.pro-touring.com/showthread.php?64496
2005 GMC Sierra 2500HD LLY / Allison
2014 Chevy SS LS3 / 4 Door
09-28-2012 #52
Registered User
- Join Date
- Jun 2012
- Posts
- 63
Now that the rear floor has been completed, the interior cabin has been sprayed with Lizard Skin for both ceramic (heat reducing) and sound deadening using both products as allowed by the manufacturer. The underbody will receive the same treatment with exception of the wheel wells that will have a smooth black finish.
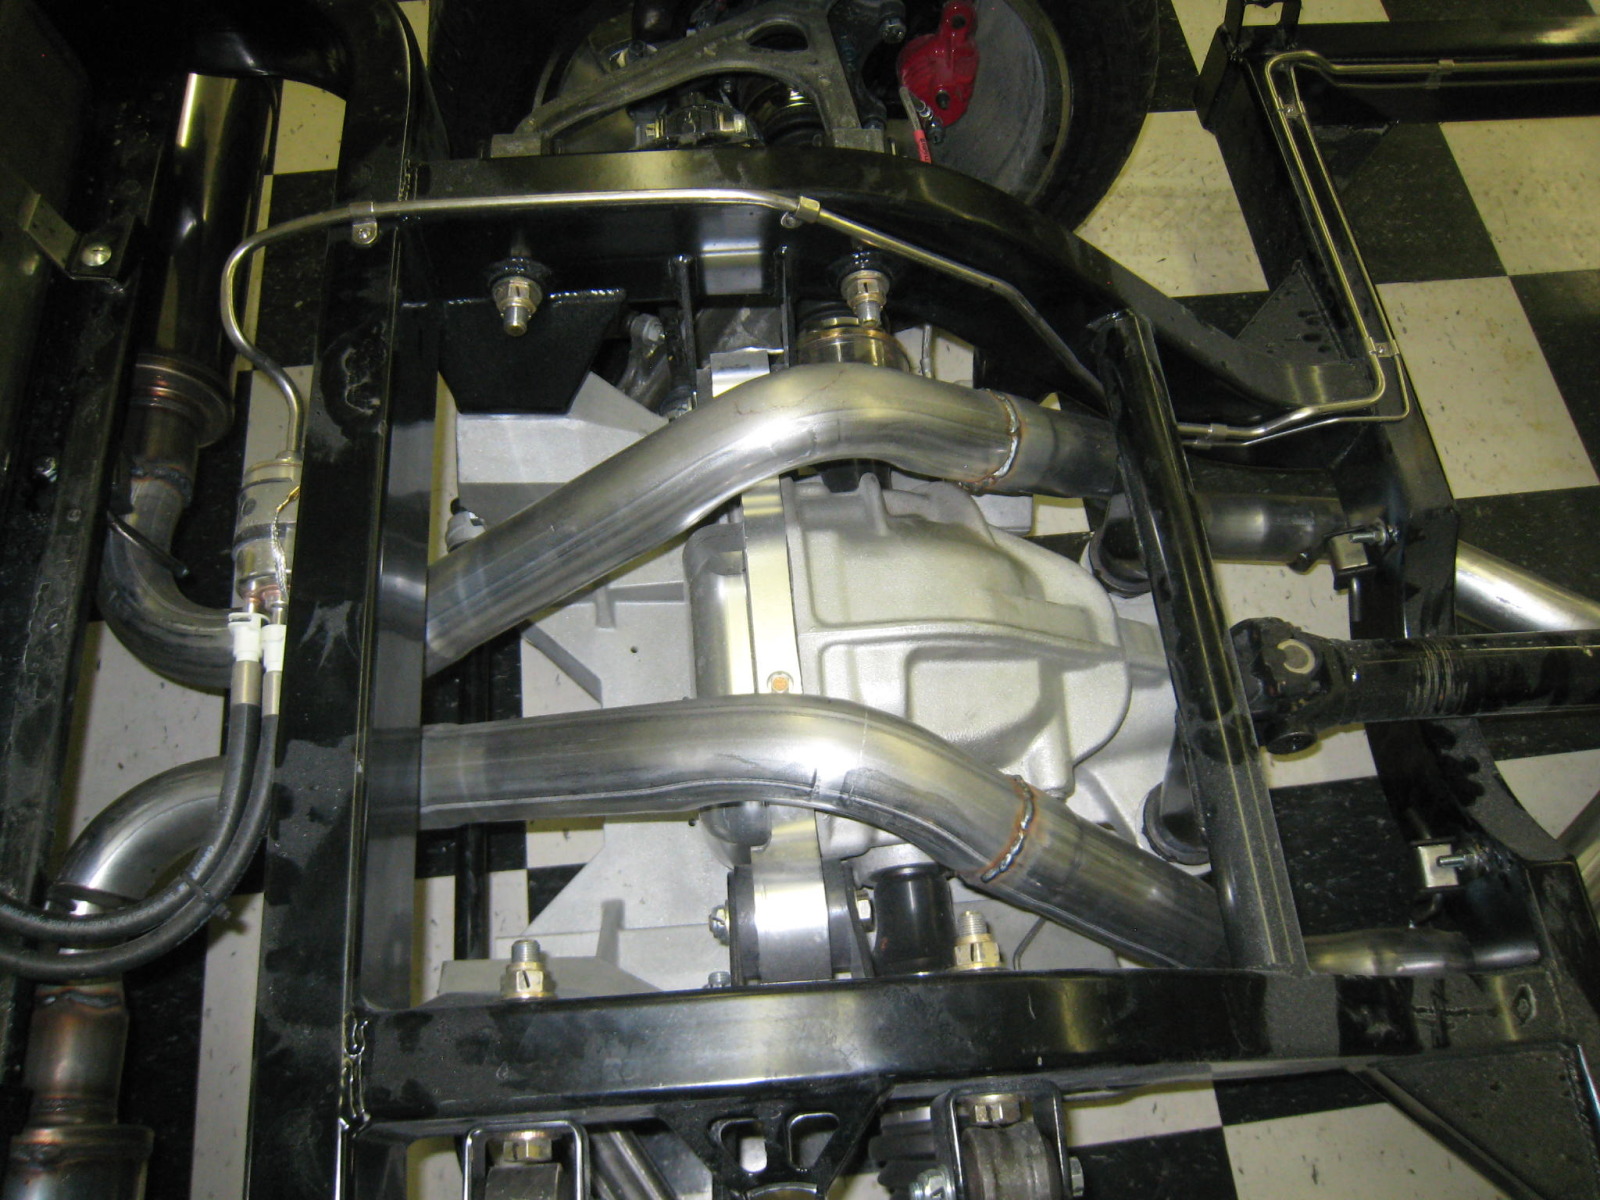
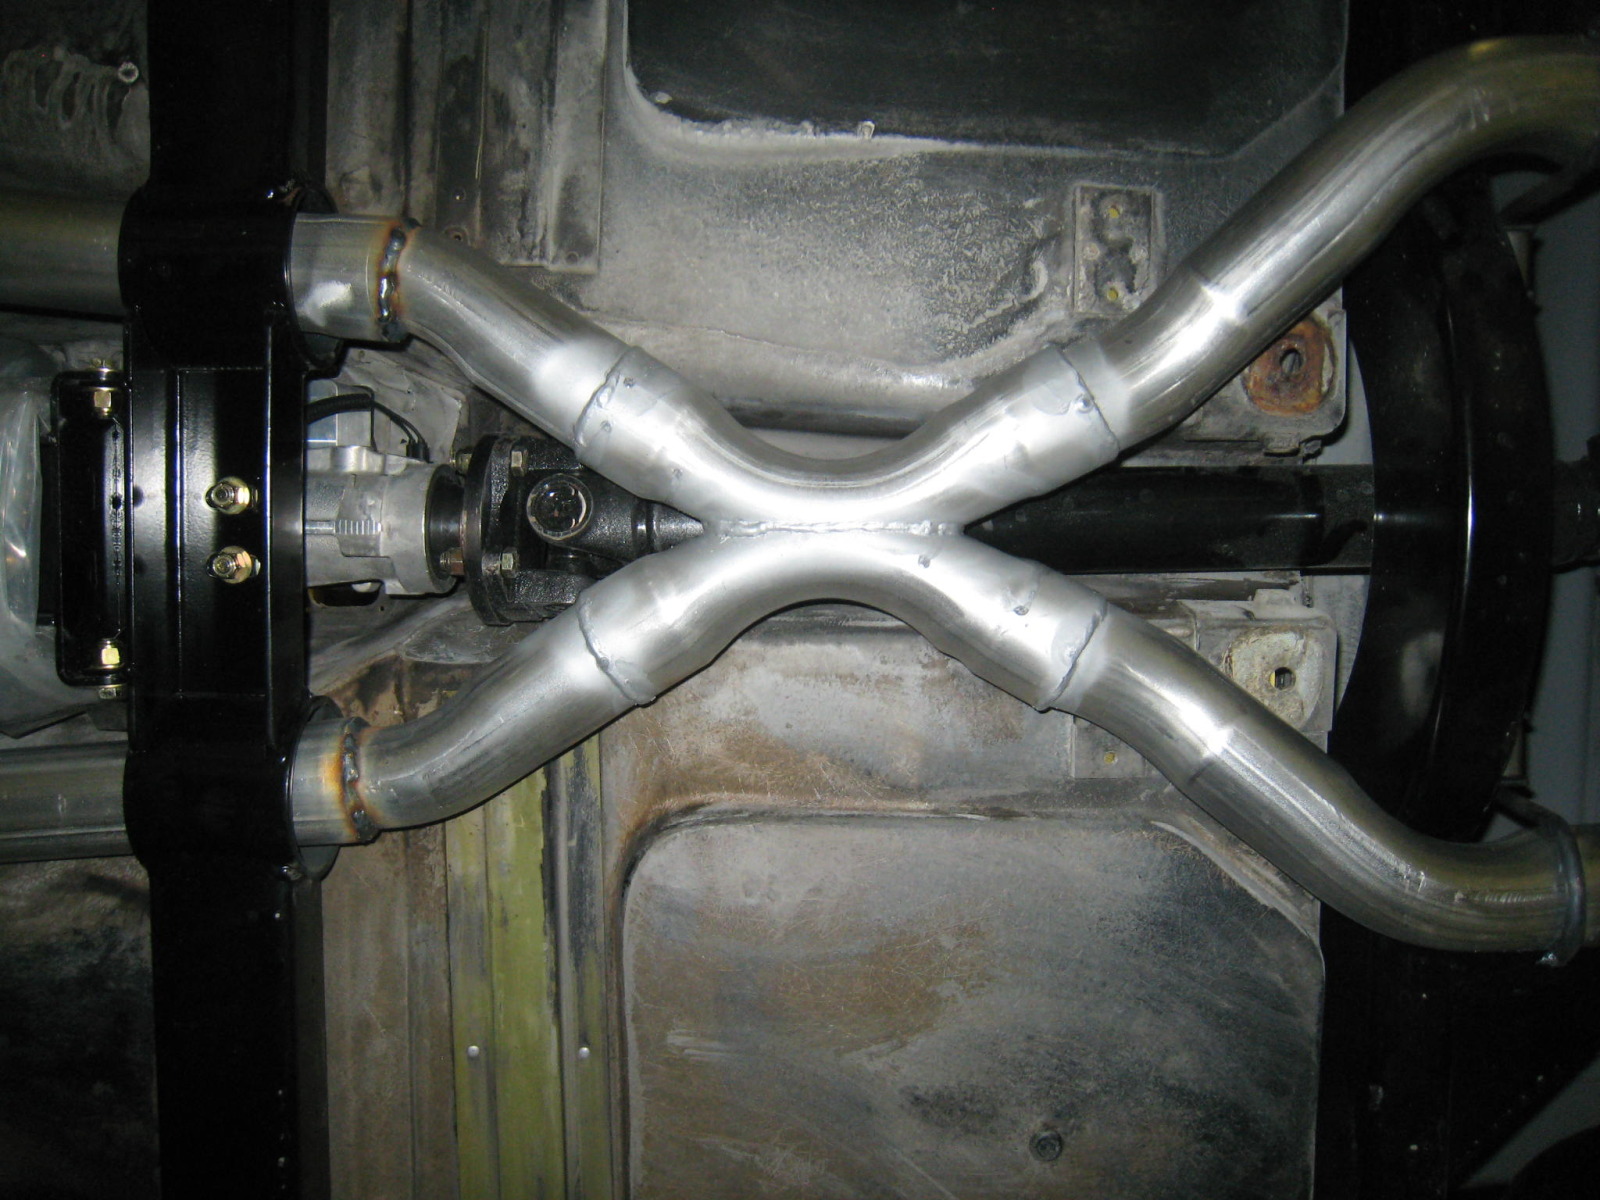
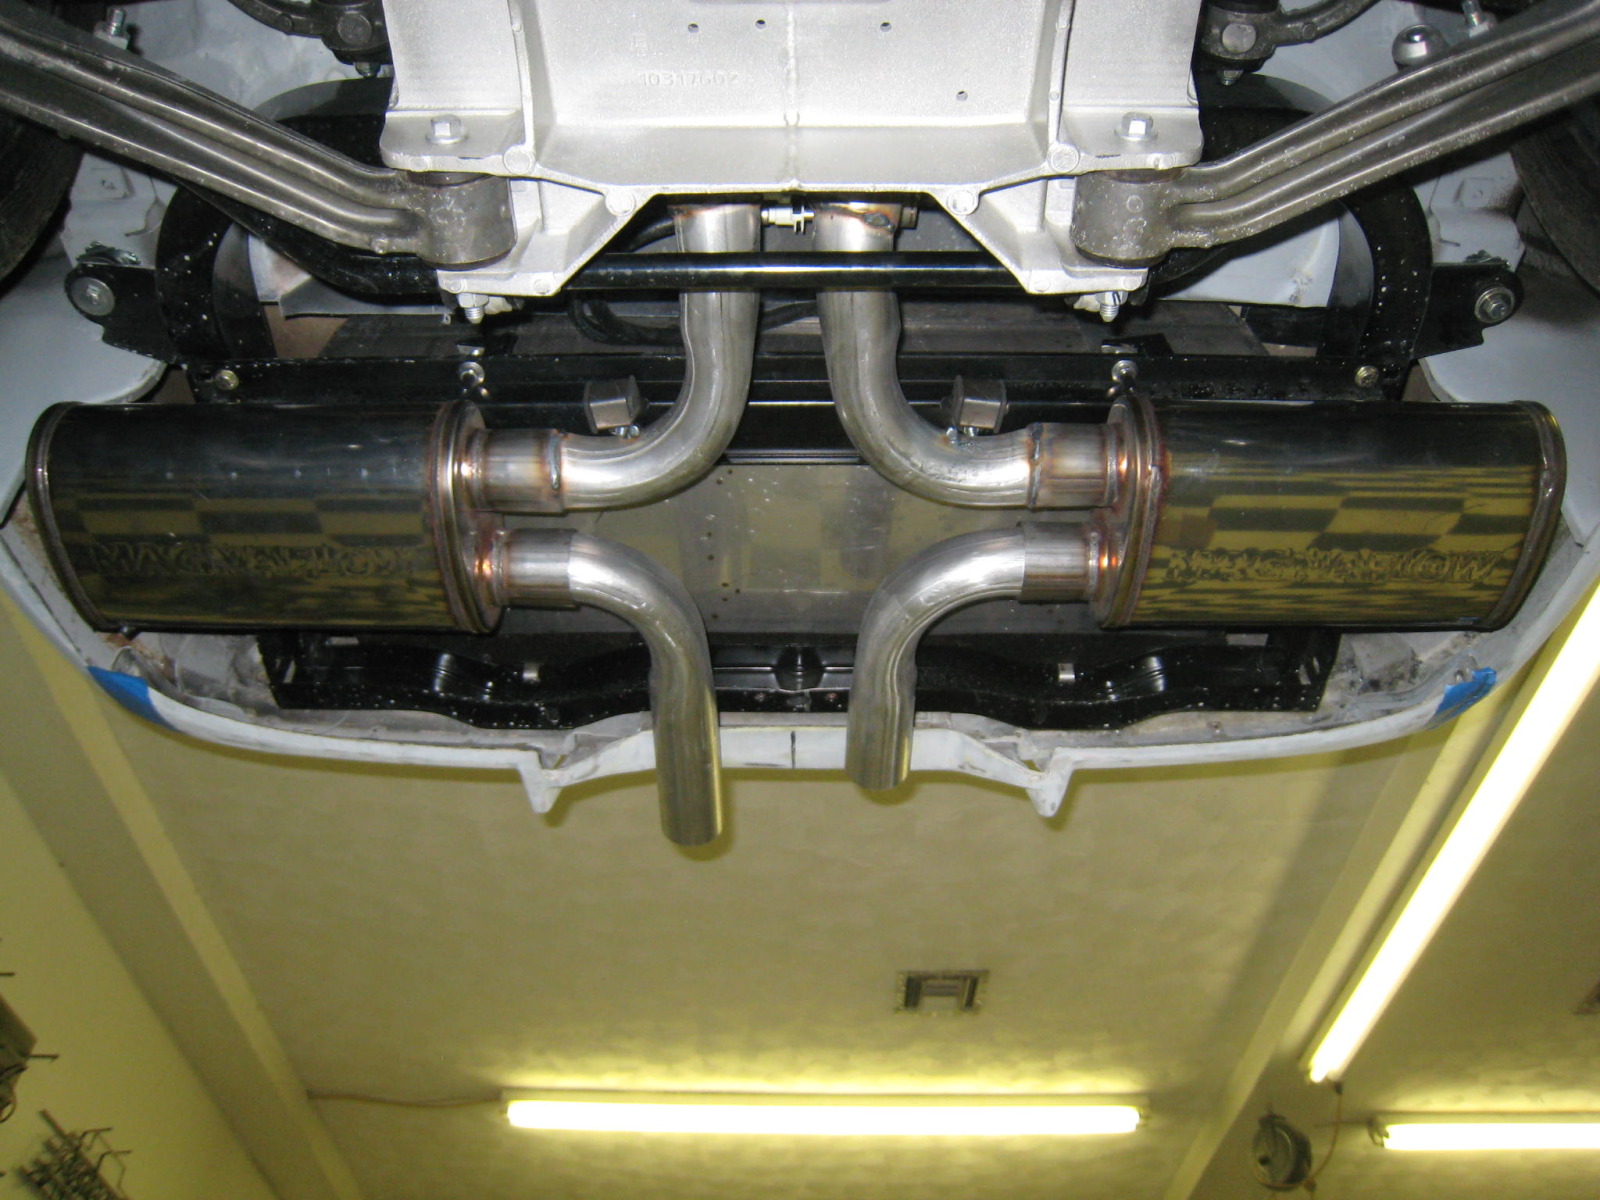
The chassis has just come back from the muffler shop. Thanks to fellow Corvette forum member PW2006 for sharing his ideas from his 63 Roadster RestoMod. The pipes on my 64 are 2.5” aluminized and custom bent to fit the Street Shop C6 chassis. My concern from the onset was getting the pipes over the rear end but as you will see from the pictures, the guys were able to achieve it. From the rear, Magnaflow stainless steel mufflers are used and will later be finished off with 2x2 Magnaflow stainless tips that will come out the center of the customized rear valence.


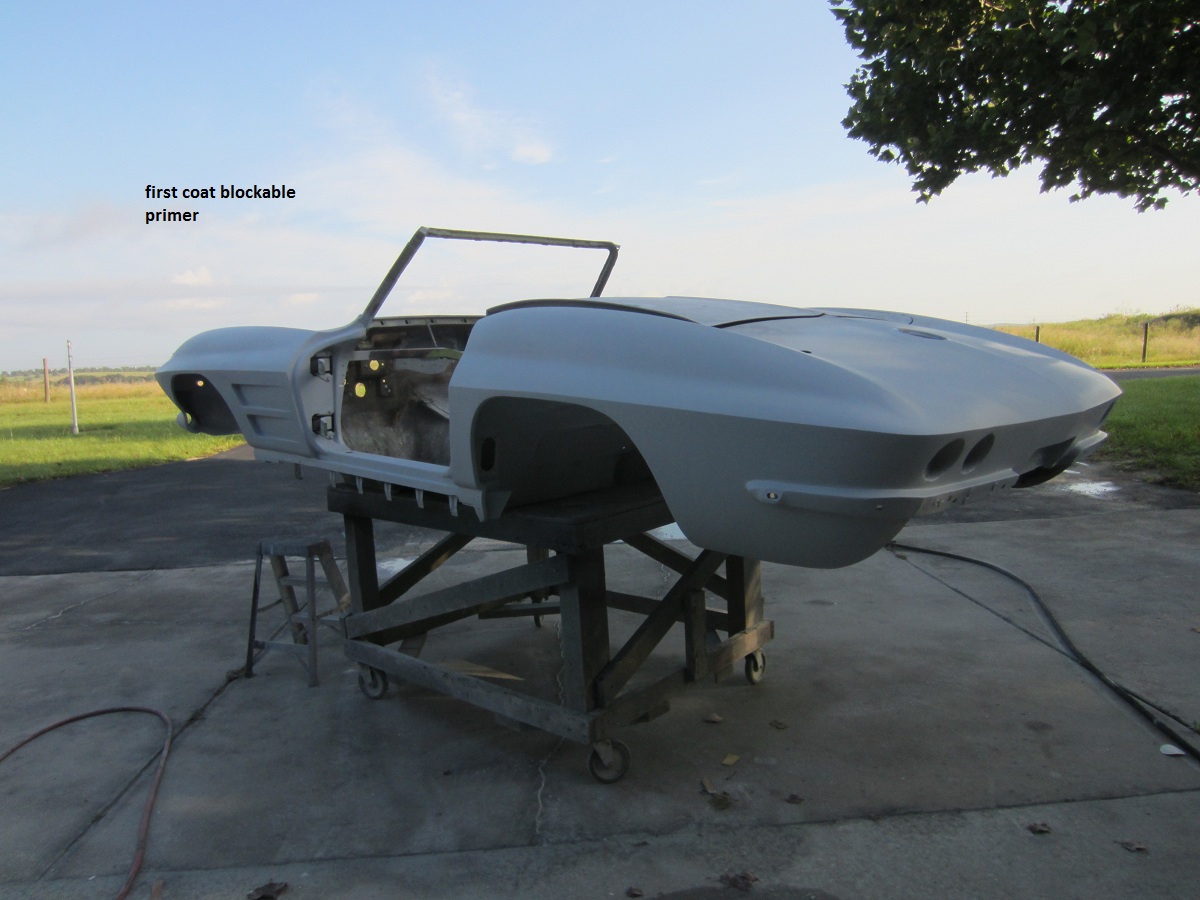
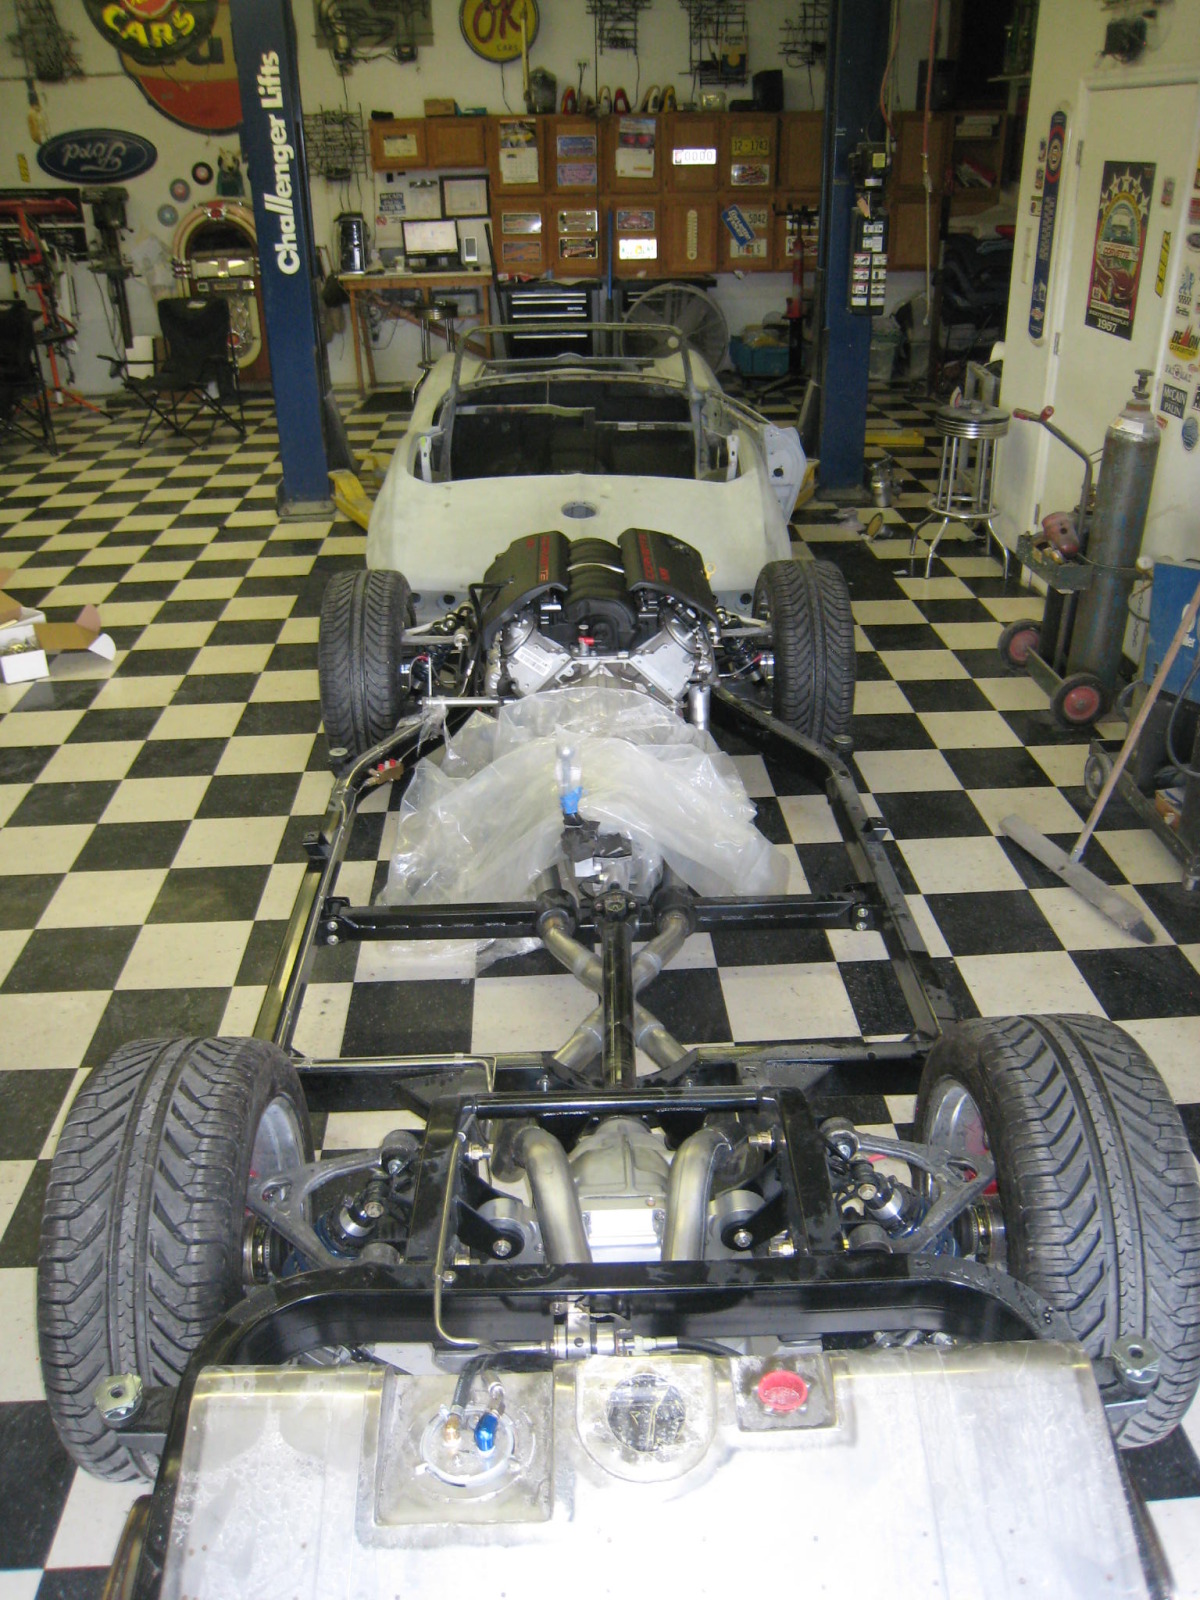
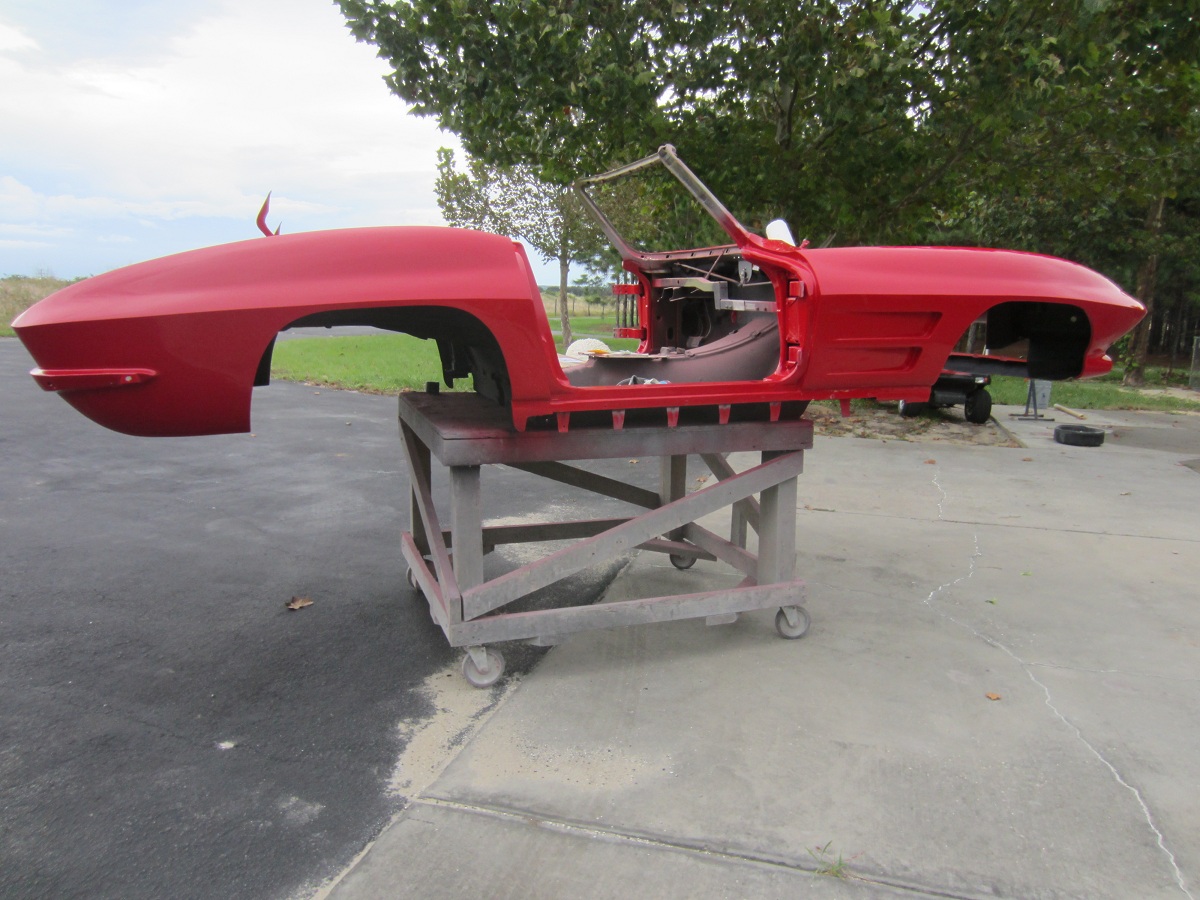
Here is a neat shot of the body off the chassis. The body will be painted within a week or so now that I have decided on the color – VICTORY RED (Corvette color).
10-05-2012 #53
Registered User
- Join Date
- Jun 2012
- Posts
- 63
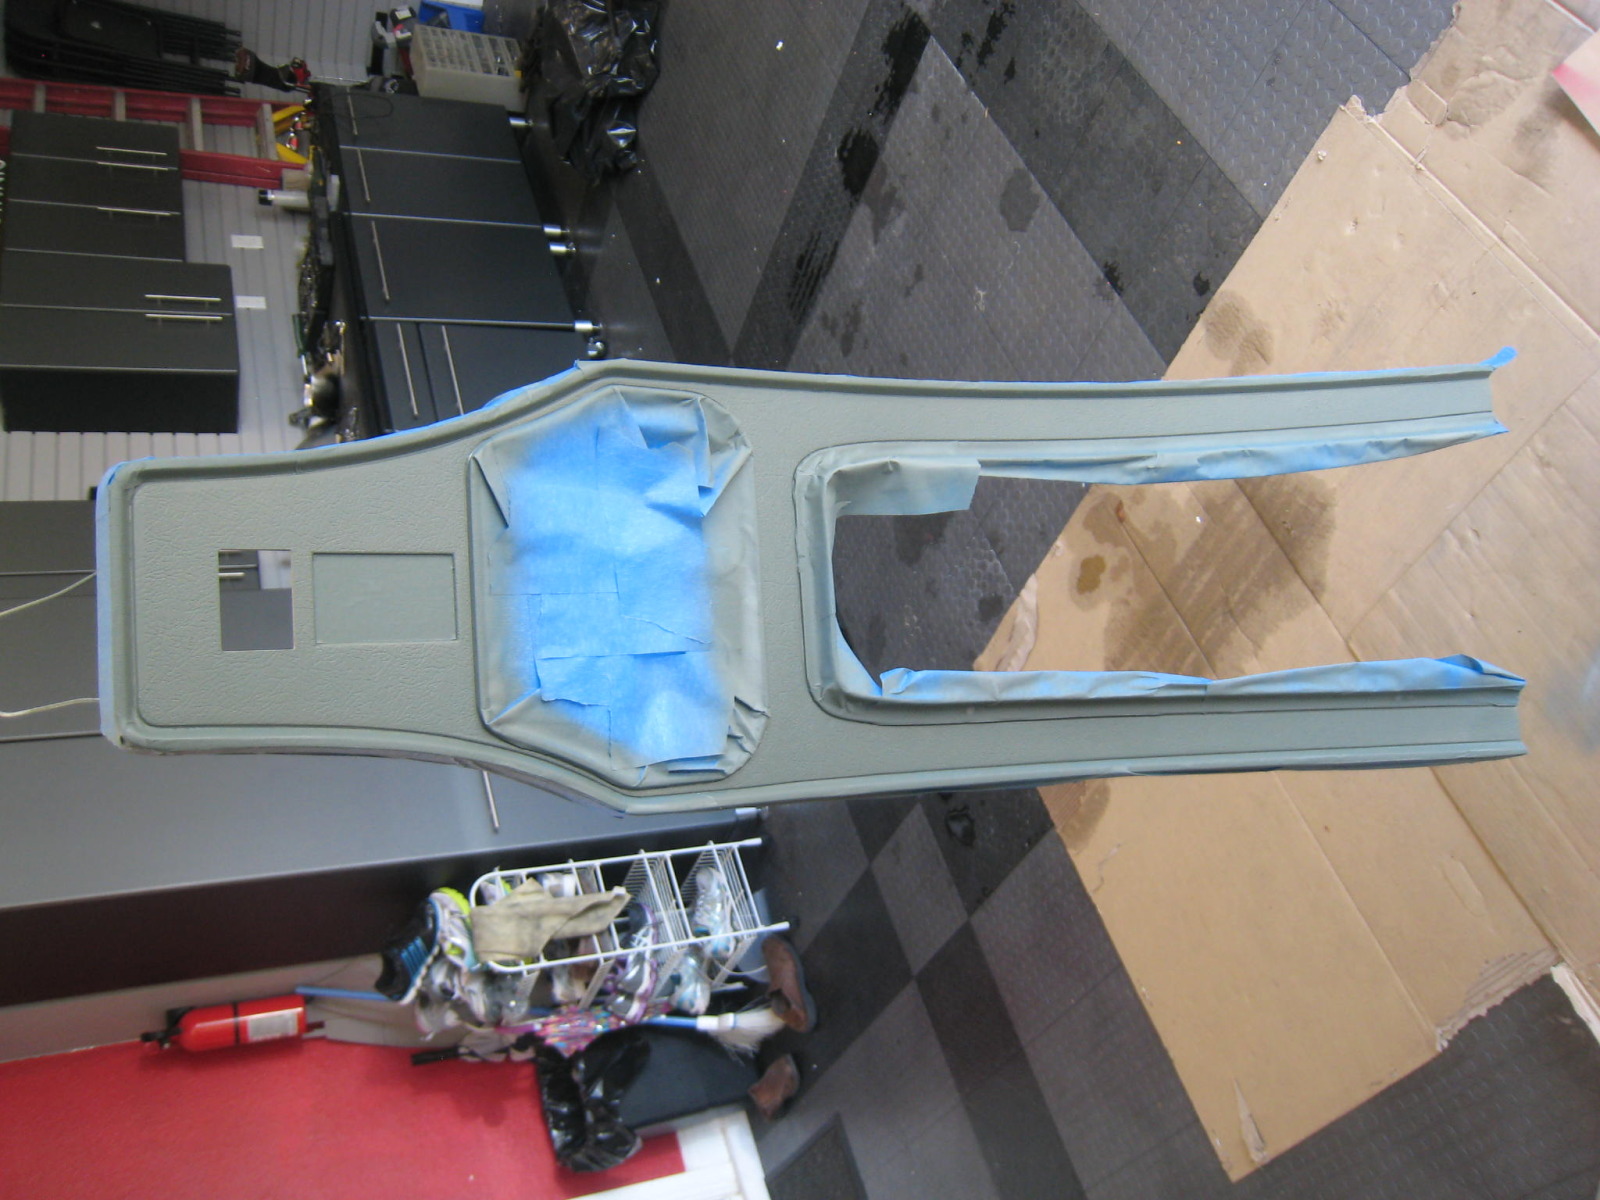
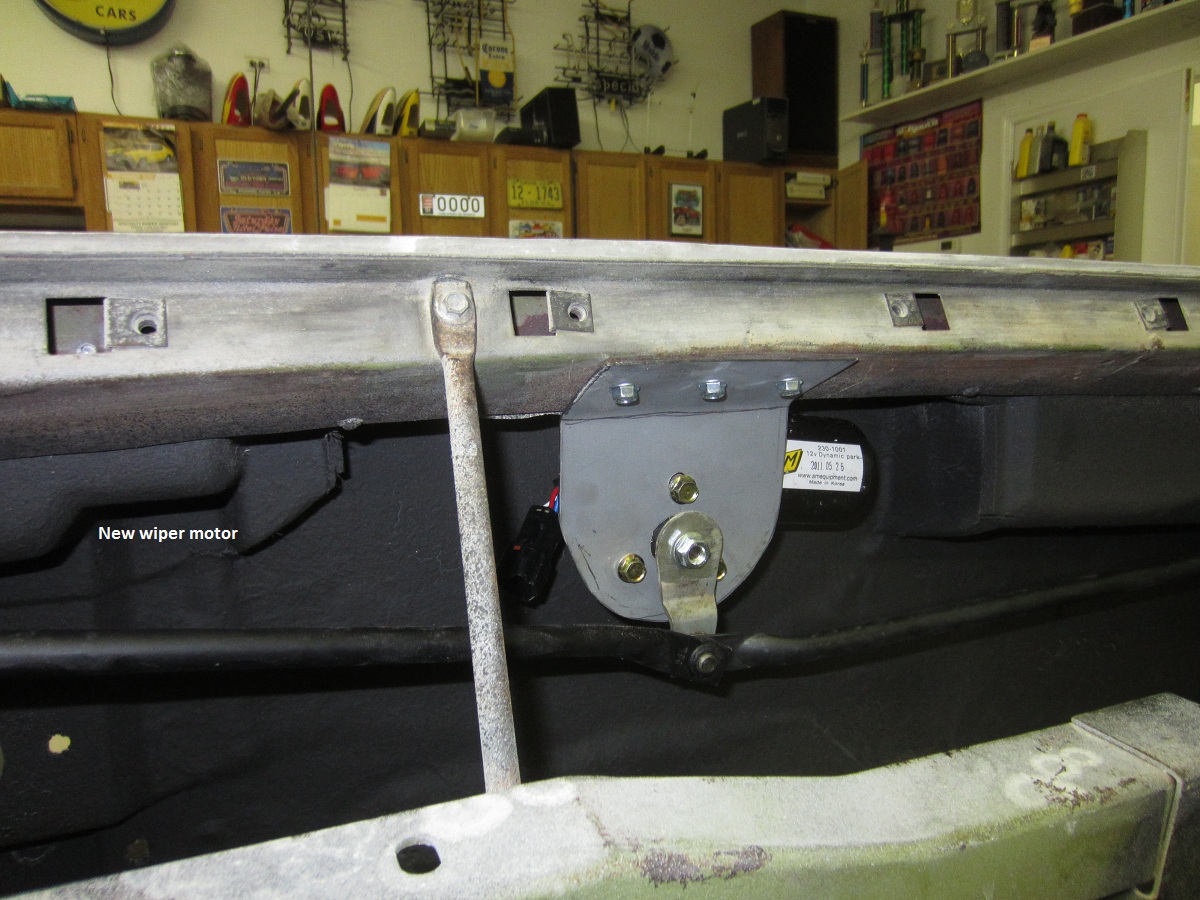
While the body is finished at Mike Coletta’s shop, I continue to work on the trim items. The new shifter center panel arrived. I have masked the chrome trim and applied the primer and satin black paint.
The new Raingear windshield wiper motor was mounted inside the firewall as you can see from this picture:
And (drum roll please)…….
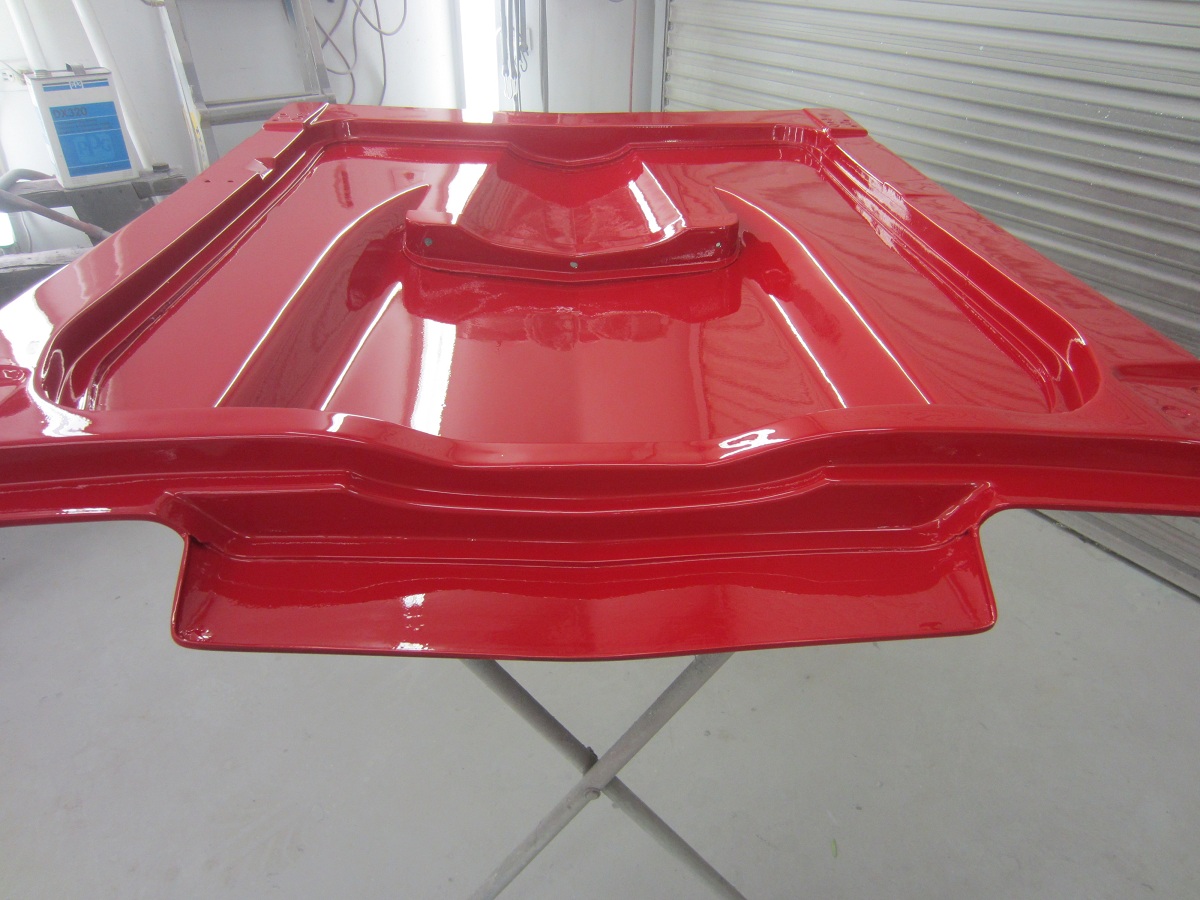
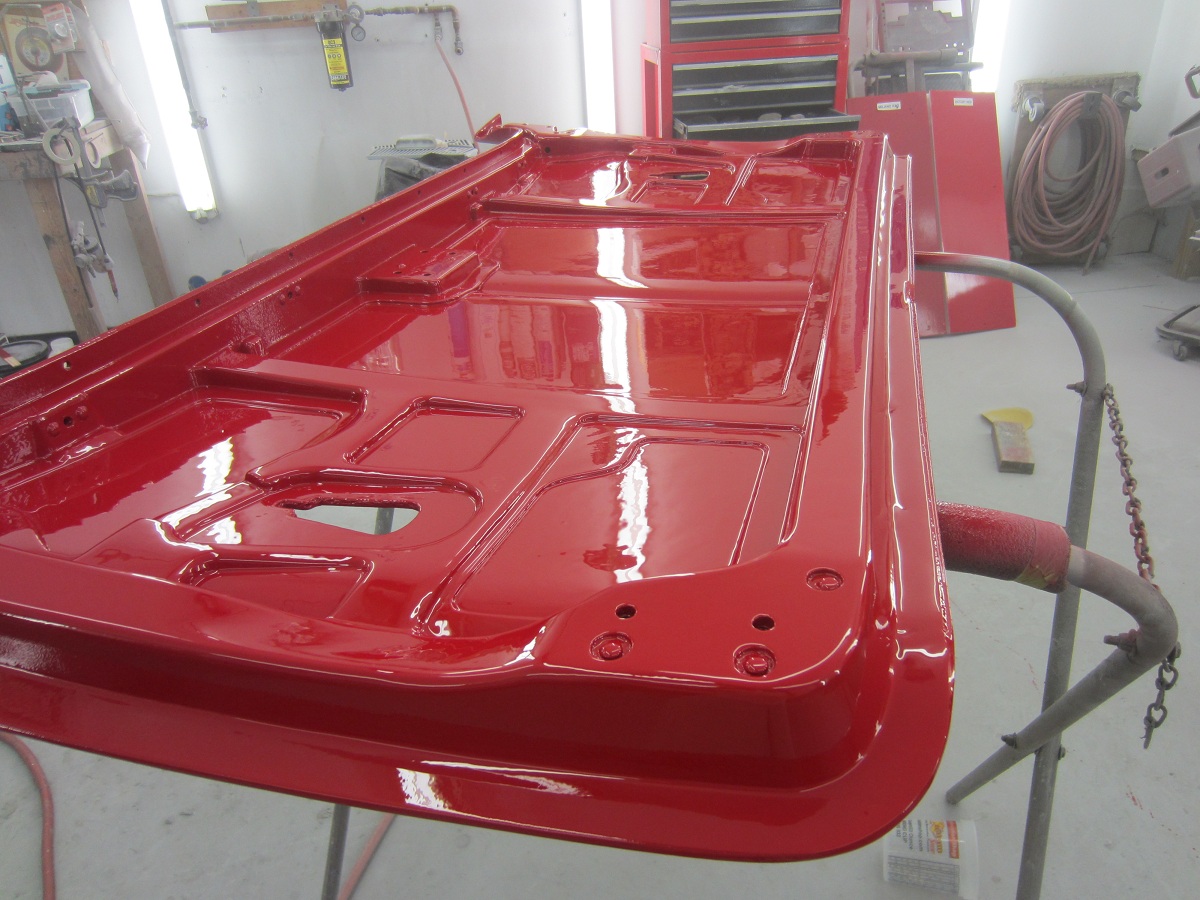
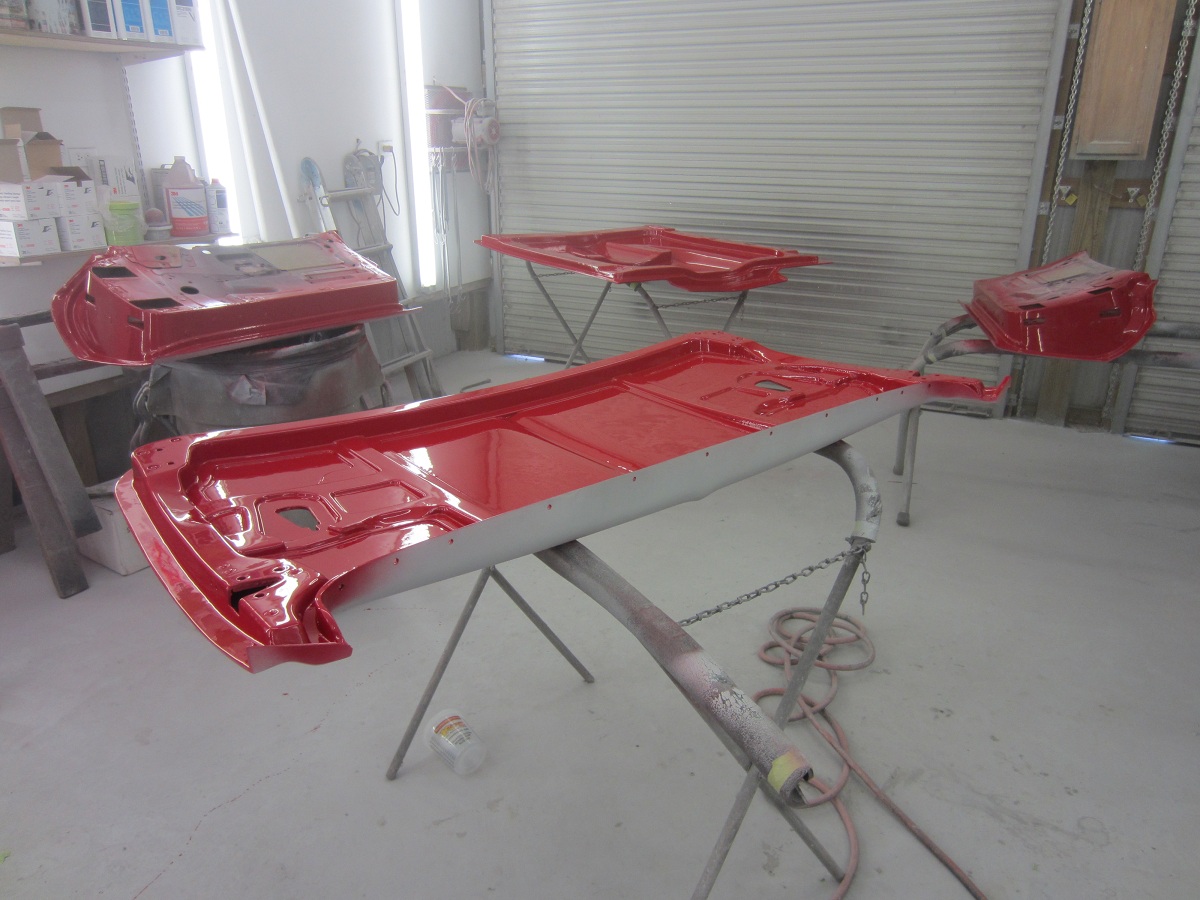
The painting begins! As you can see, the Victory Red is being applied to the underside of the hood and deck lid as well as the doors
10-05-2012 #54 Registered User
- Join Date
- Apr 2010
- Location
- STUDIO CITY, CA
- Posts
- 139
Looking good!
10-06-2012 #55 Registered User
- Join Date
- Jul 2010
- Location
- OREGON
- Posts
- 365
Good looking car....
10-08-2012 #56
Registered User
- Join Date
- Jun 2012
- Posts
- 63
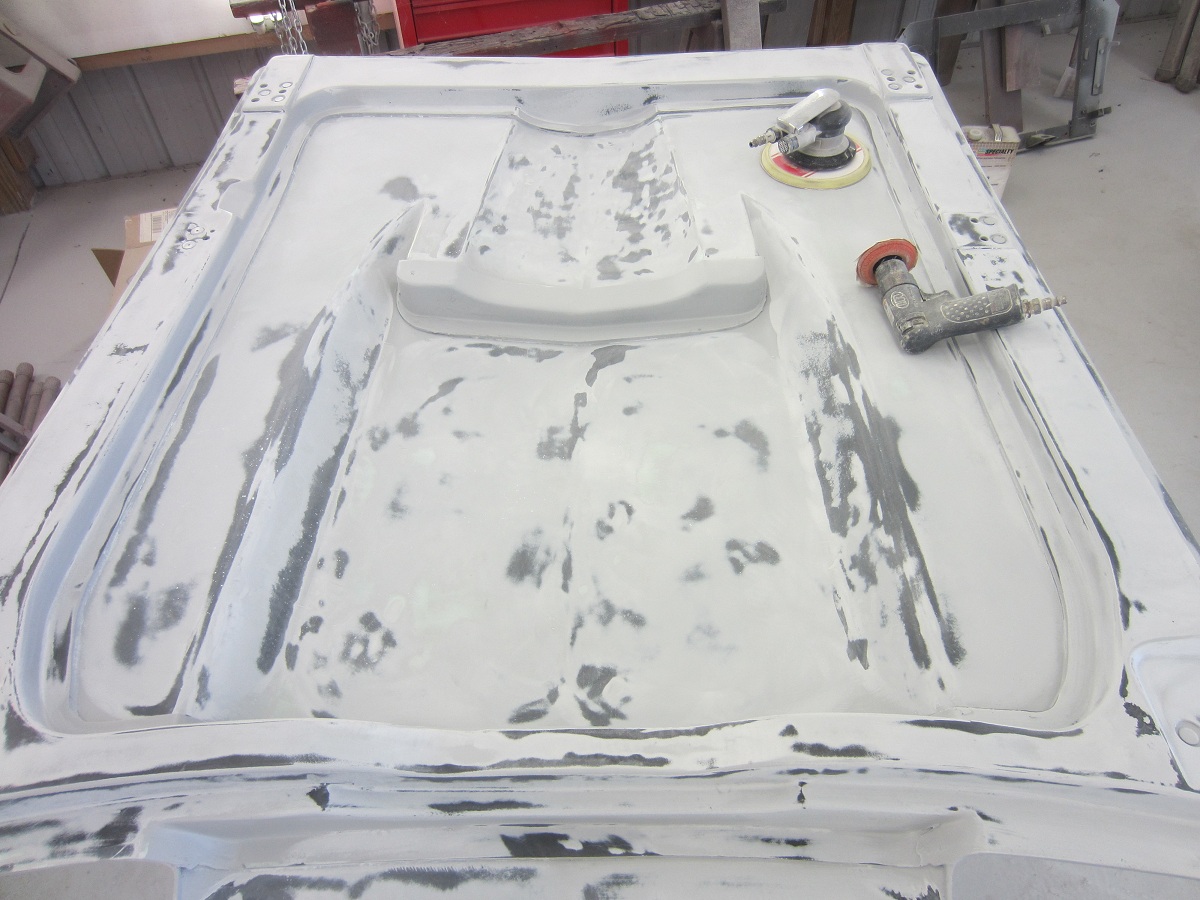
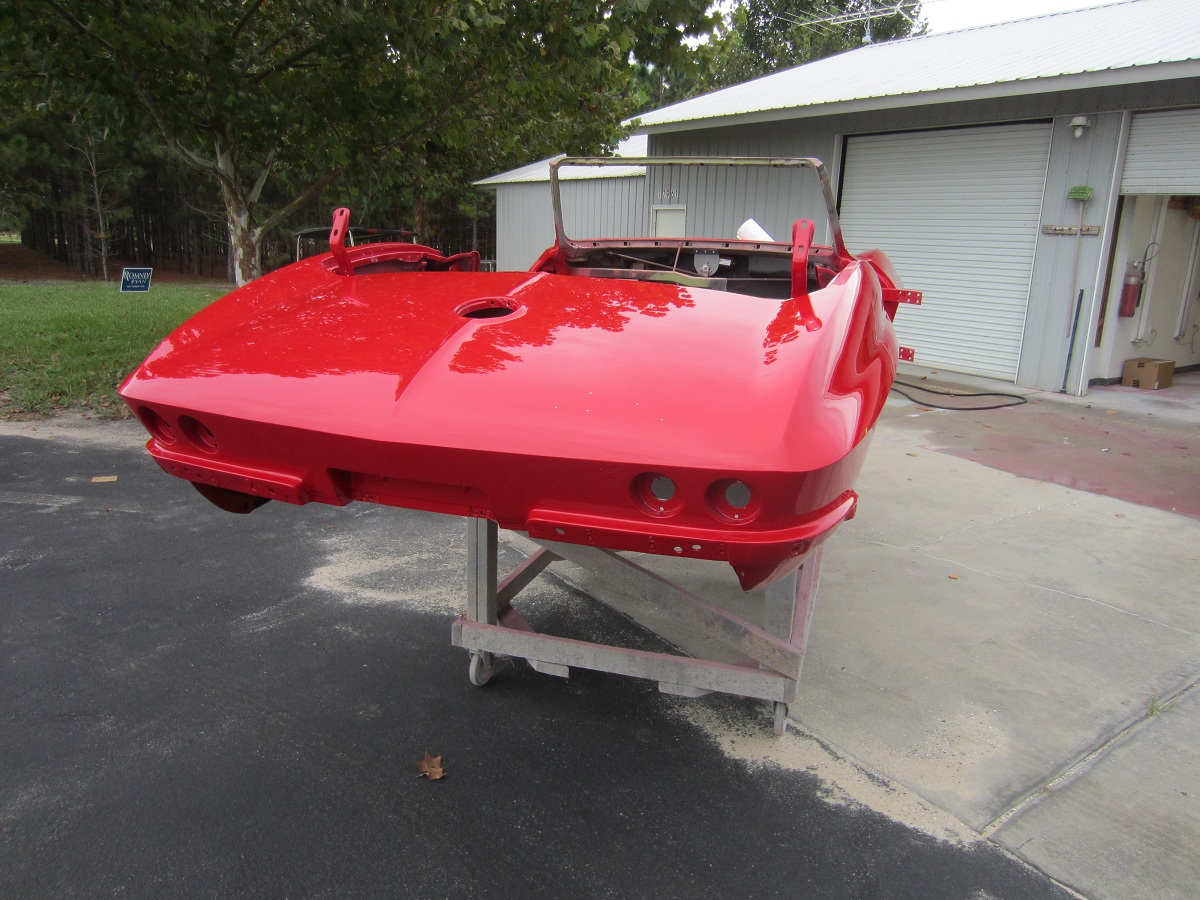
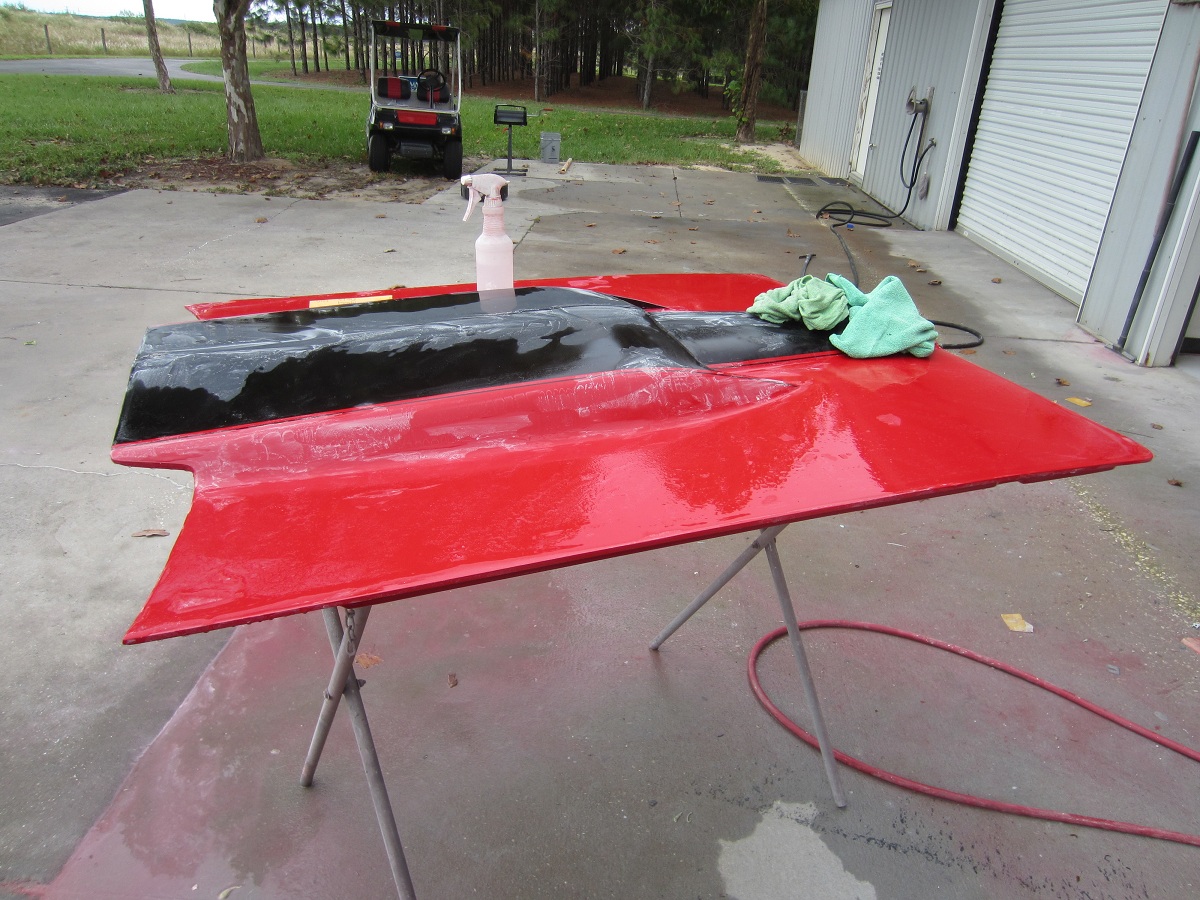
Well, after the much needed body work, primer and often under-appreciated block sanding, the time has come to squirt the Victory Red on the body. Without further ado, here is the 64 Roadster after paint (cut & buff to be done next).
Mike Coletta – you have outdone yourself!!
10-08-2012 #57 Registered User
- Join Date
- Nov 2006
- Location
- Ma.
- Posts
- 5,567
It looks great! I love the color, nice work.
Wayne
Car FINALLY home !!!!!! lol
Project FNQUIK https://www.pro-touring.com/showthre...ghlight=FNQUIK
10-13-2012 #58
Registered User
- Join Date
- Jun 2012
- Posts
- 63
As a crazy man, I decided to re-chrome my 1964 Dash Cluster. This was quite an ordeal and although I am happy now, the last month and a half dealing with the chrome shop was challenging. The following shows the restoration of the dash cluster and the installation of the custom AutoMeter gauges using the clever installation hardware developed by Joe Lutz at Hot Rod Dynamics (thanks Joe).
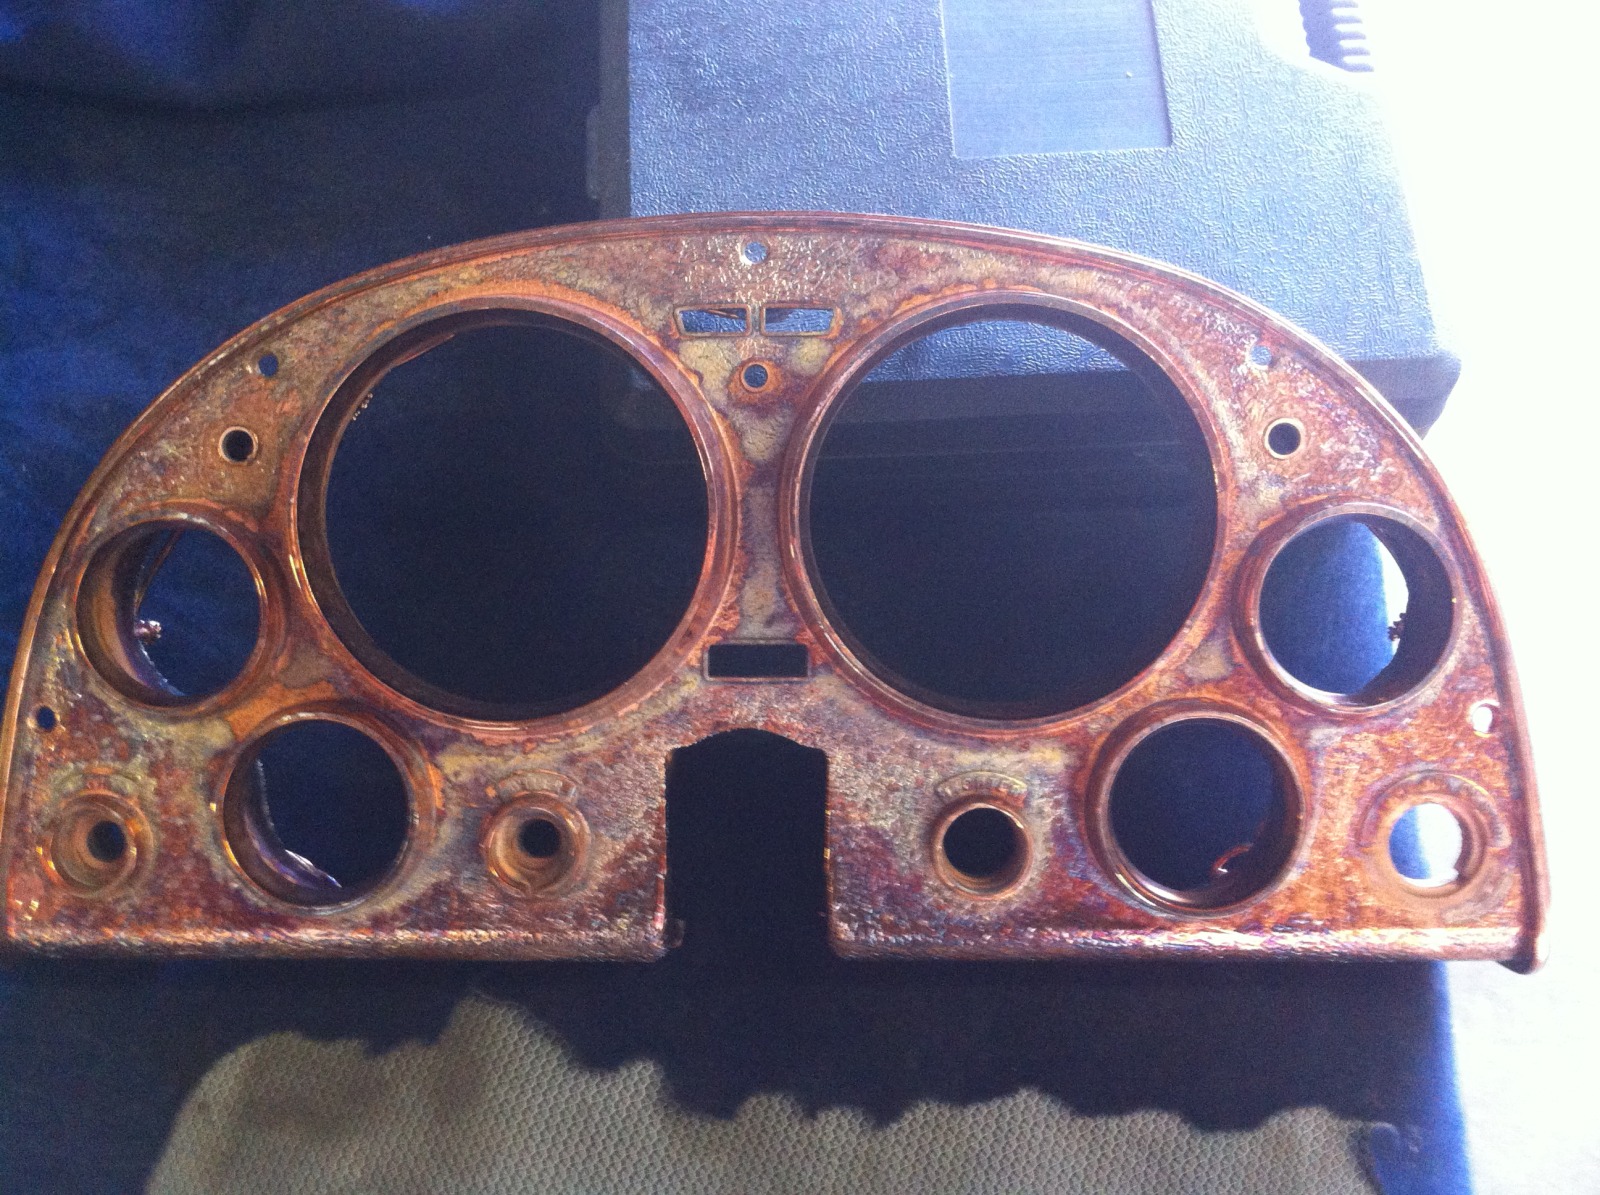
The bezels were pitted so I bead blasted the cluster to assess the overall condition. At this point I had decided for the chrome versus just painting the bezels. Unfortunately, the chrome shop went a bit overboard on the copper in an effort to fill in the pits. Working with the shop, I brought in the gauges to show how they would not even fit in the holes. The shop was willing to work with me and began to grind and shape this cluster back into shape.
This is what it looked like after the copper bath without the grinding/shaping:
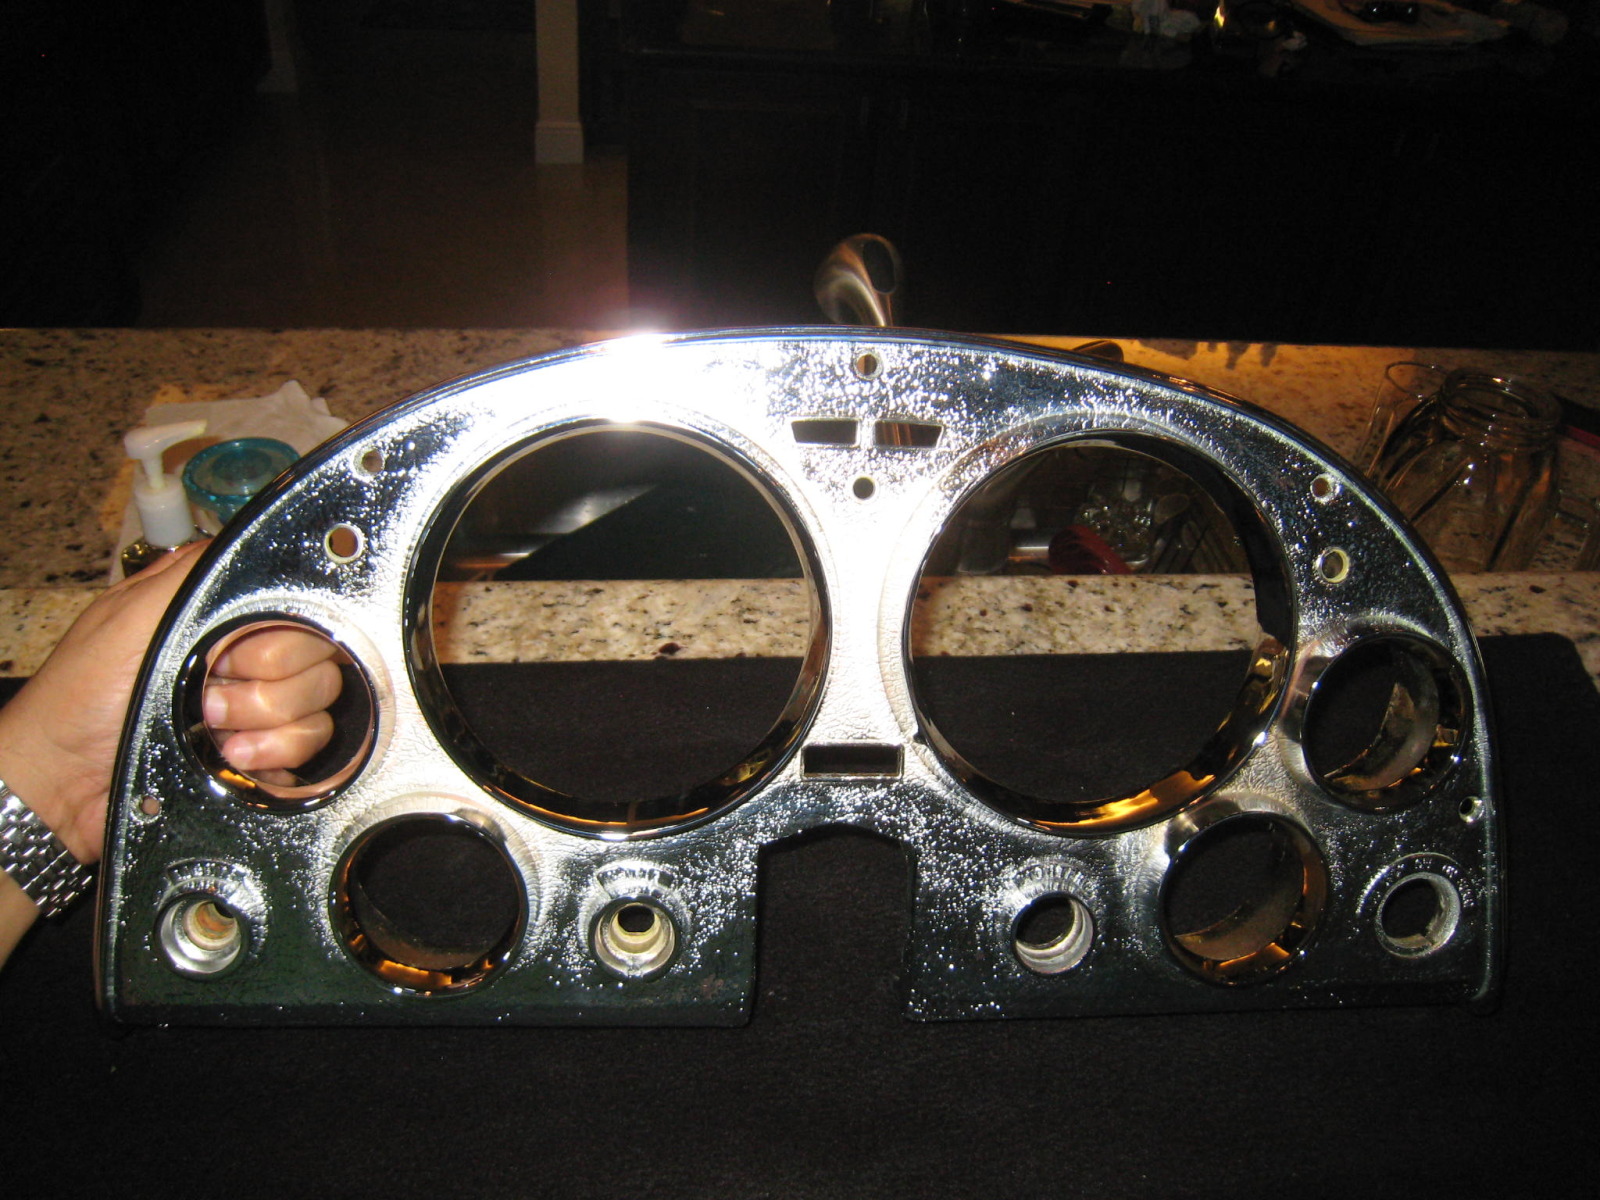
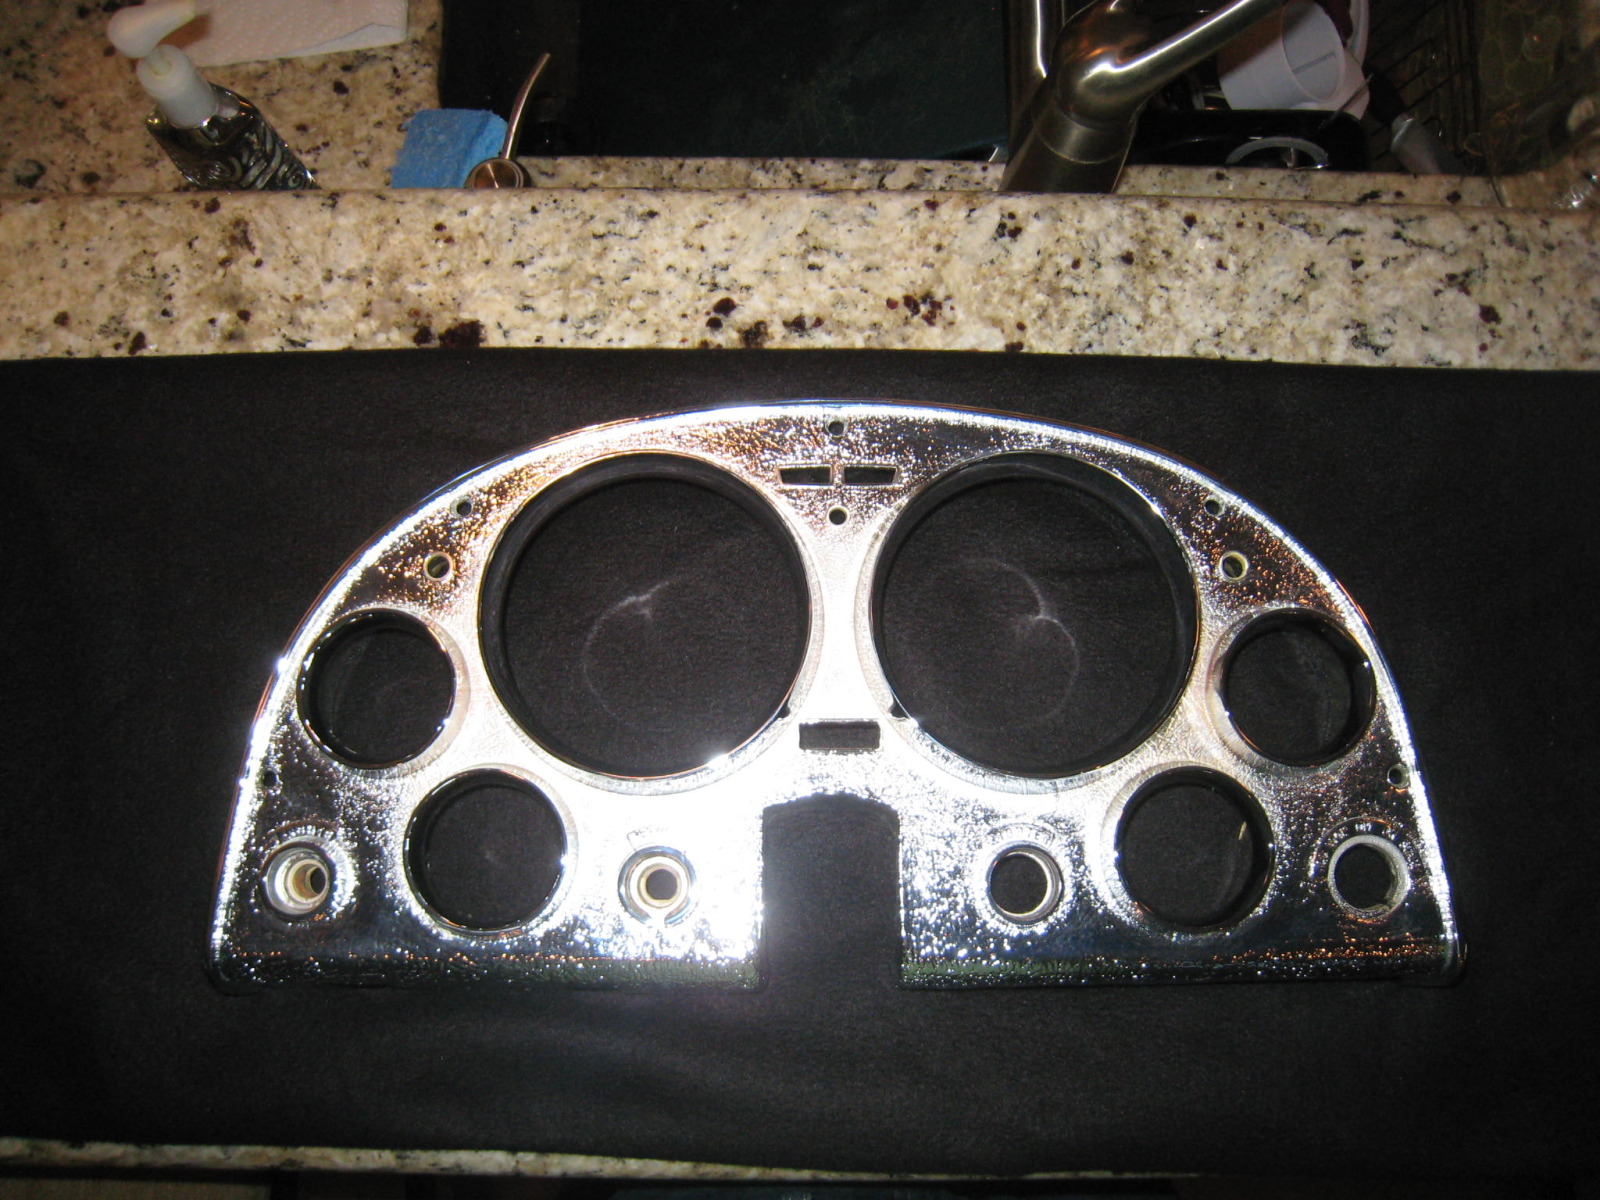
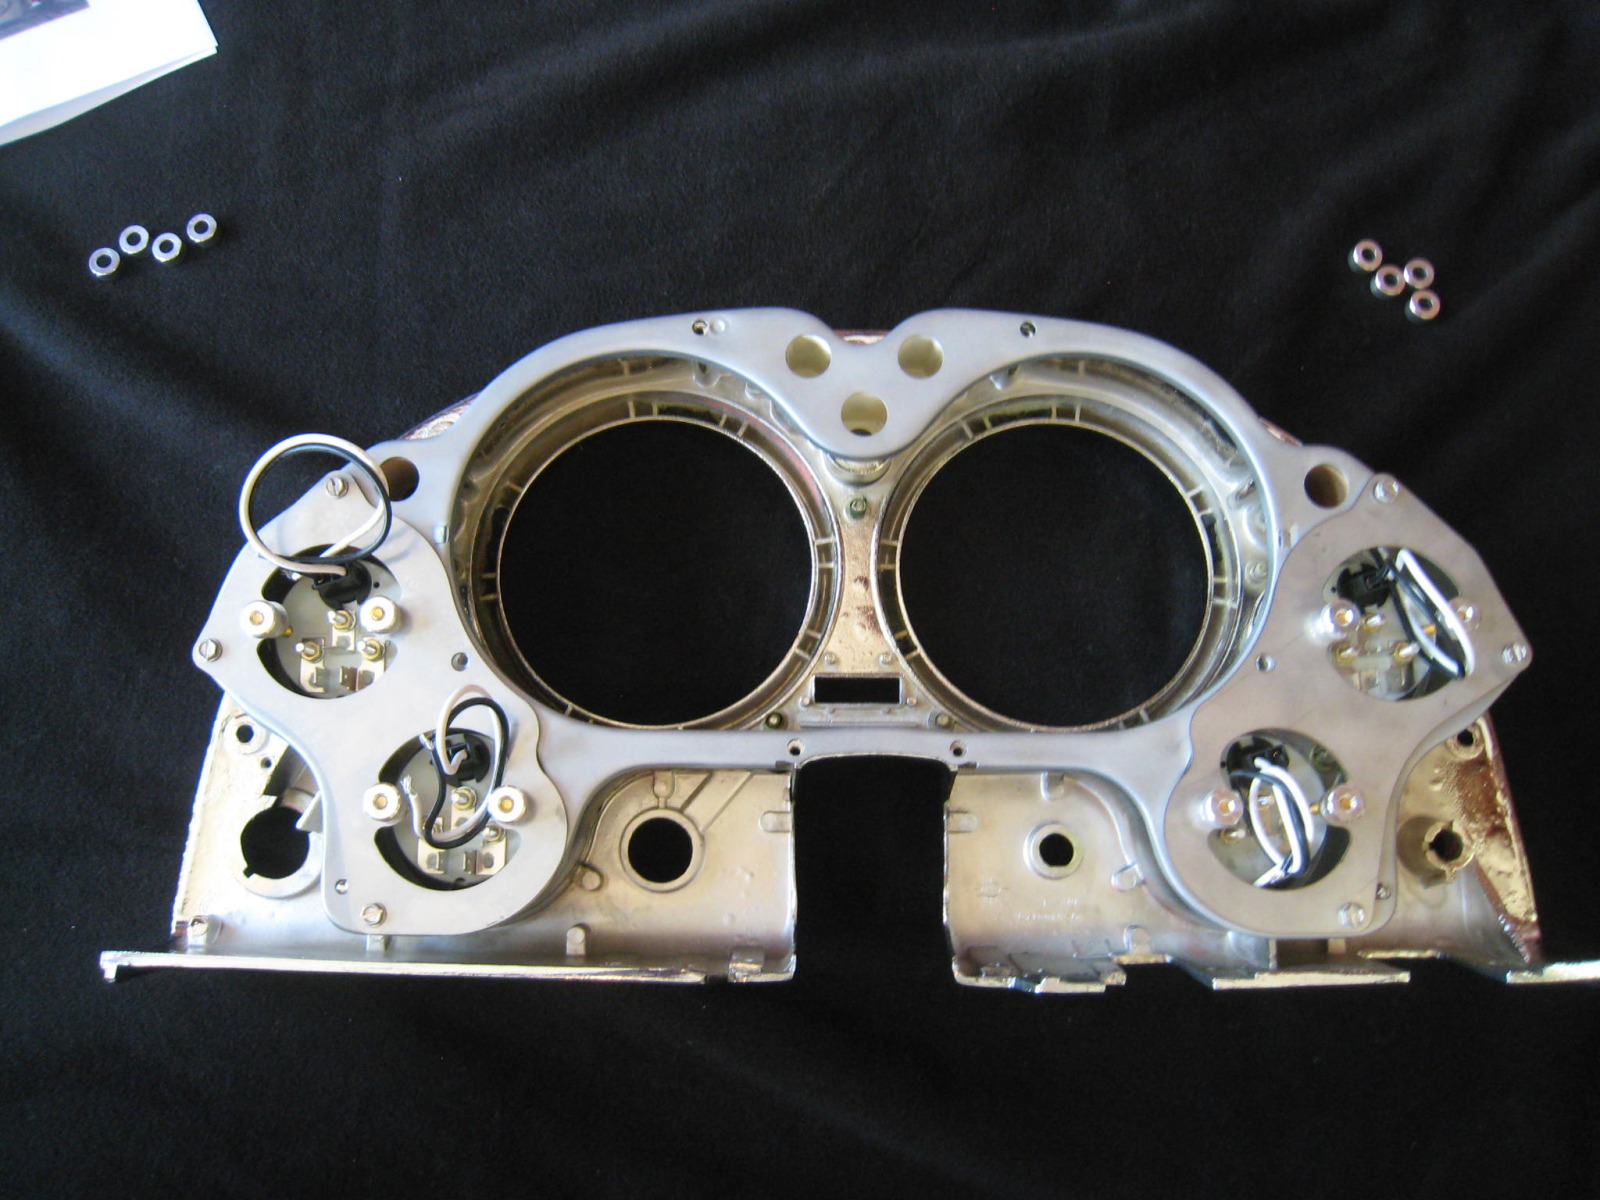
After much work, here is what the cluster looks like after the chrome process:
Time to mask it up, prime and paint:

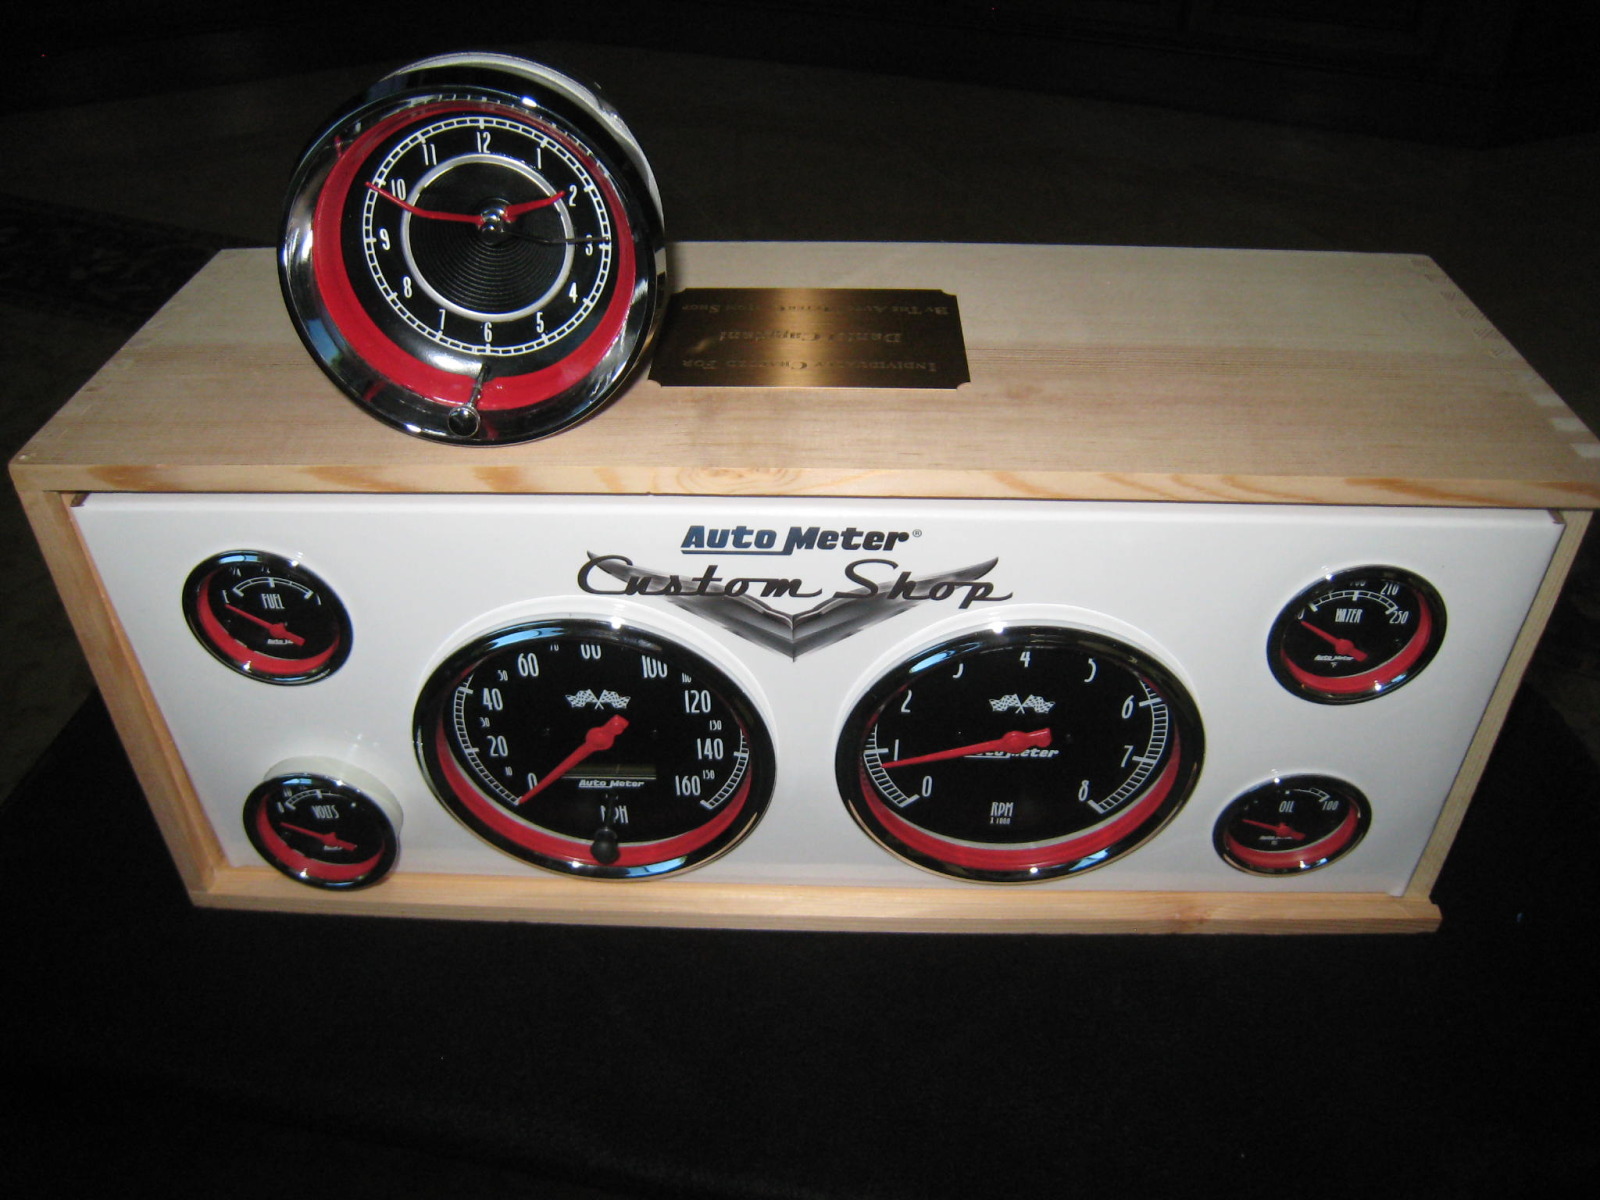
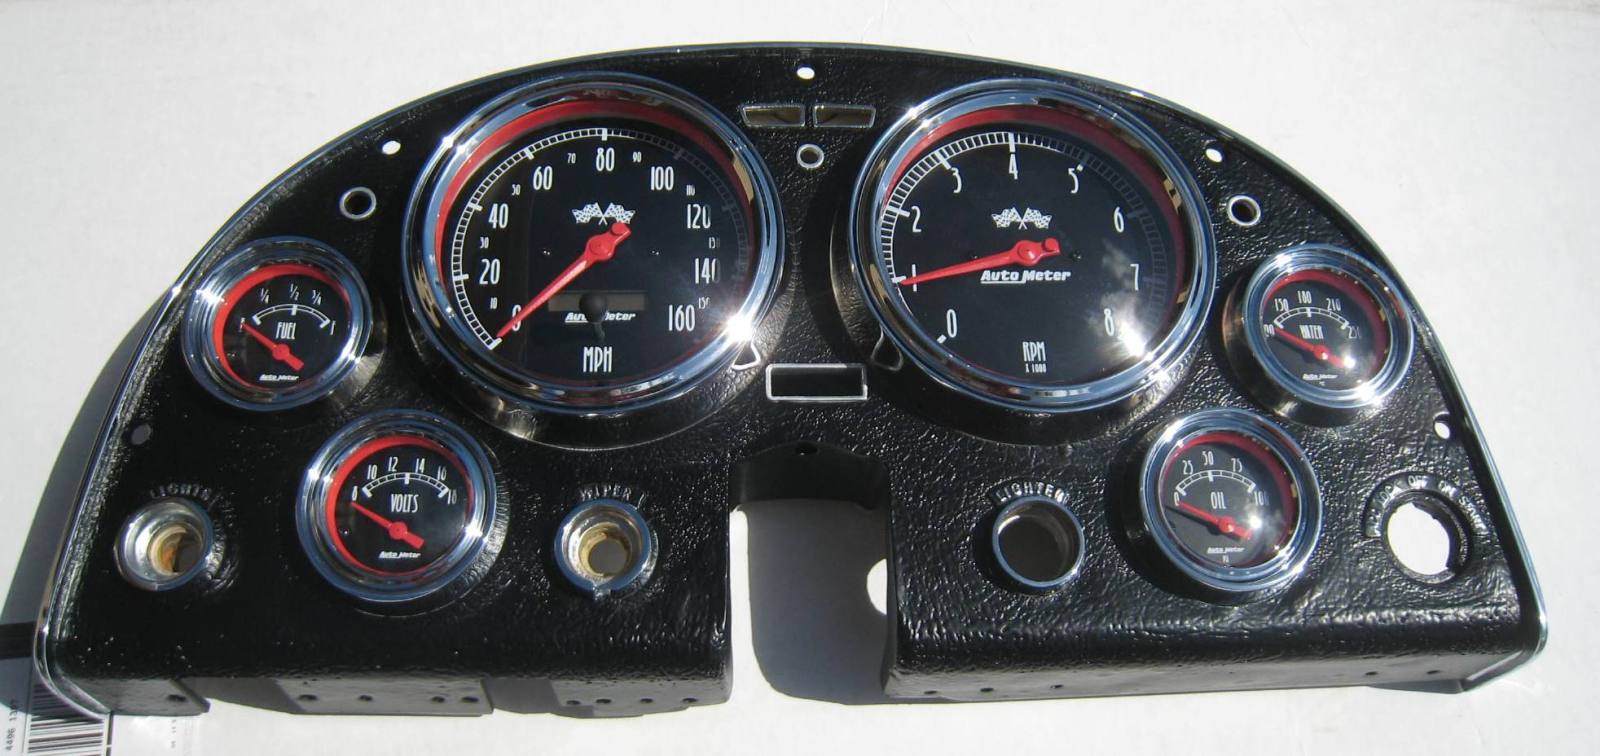
These are my custom AutoMeter Gauges for the 1964 RestoMod. I also had the clock modified to match the gauges:
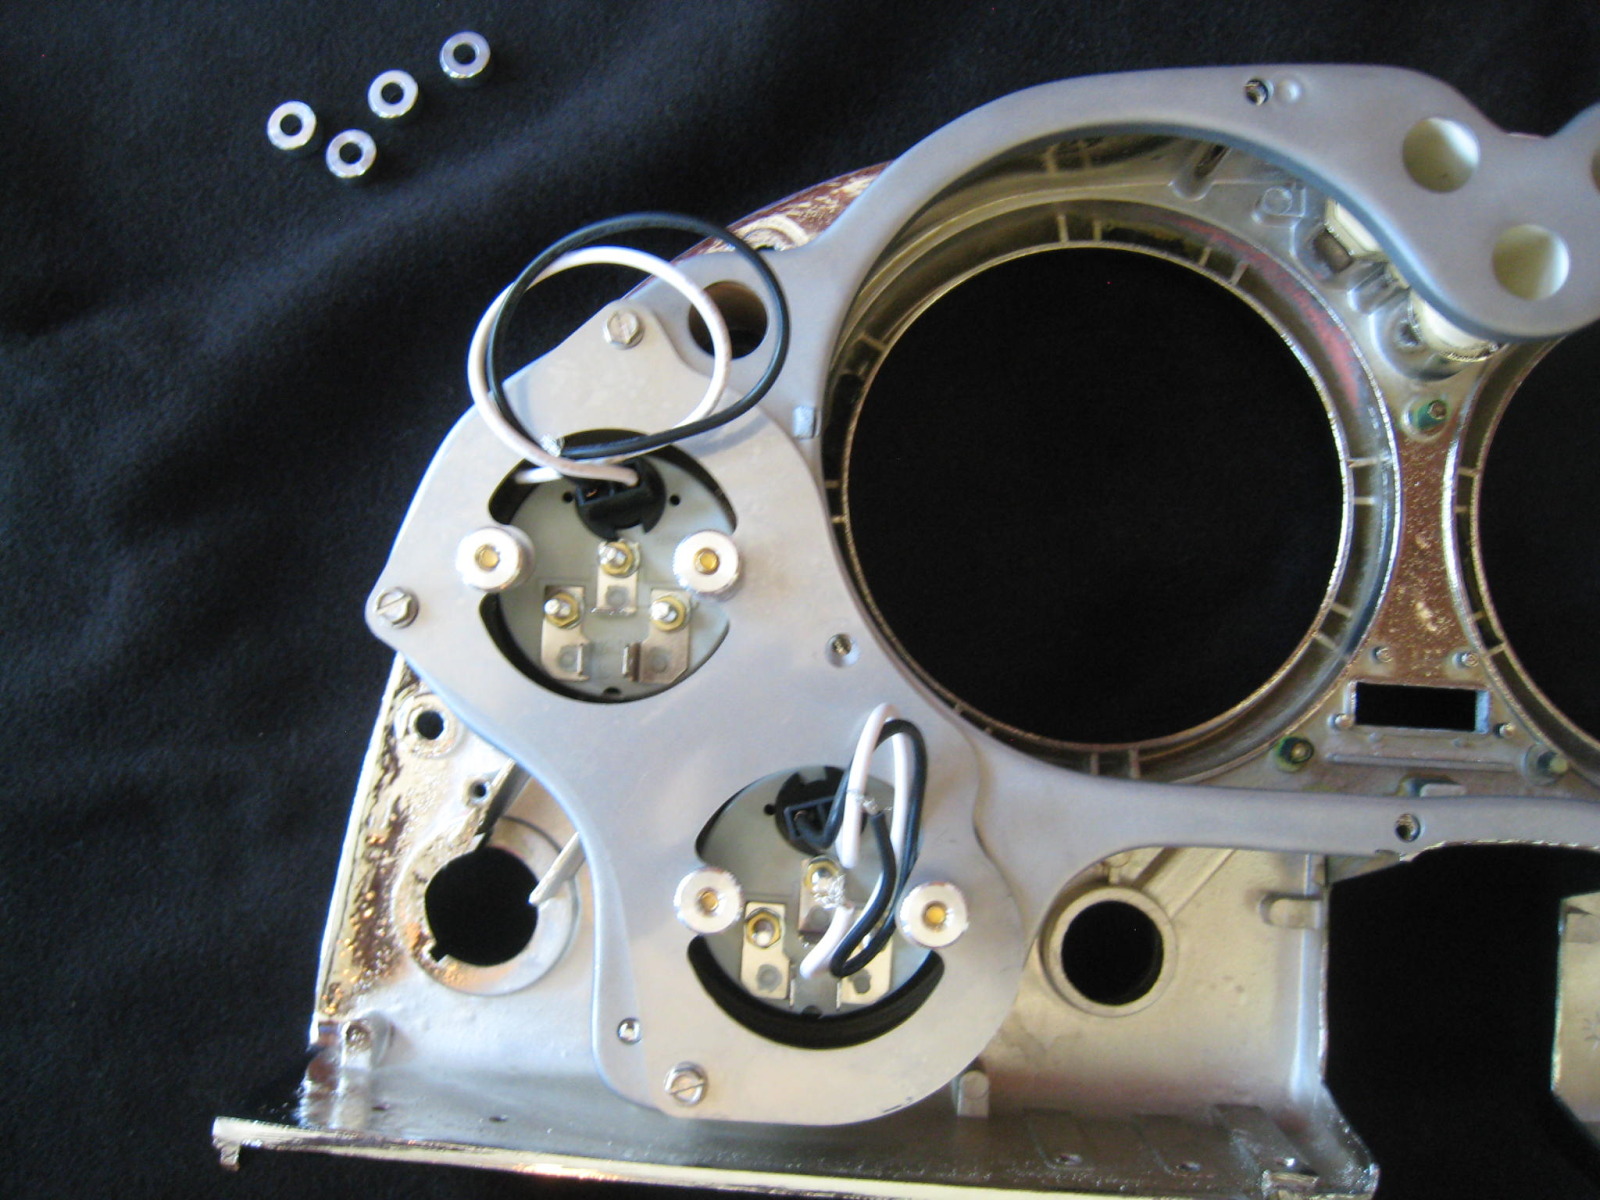
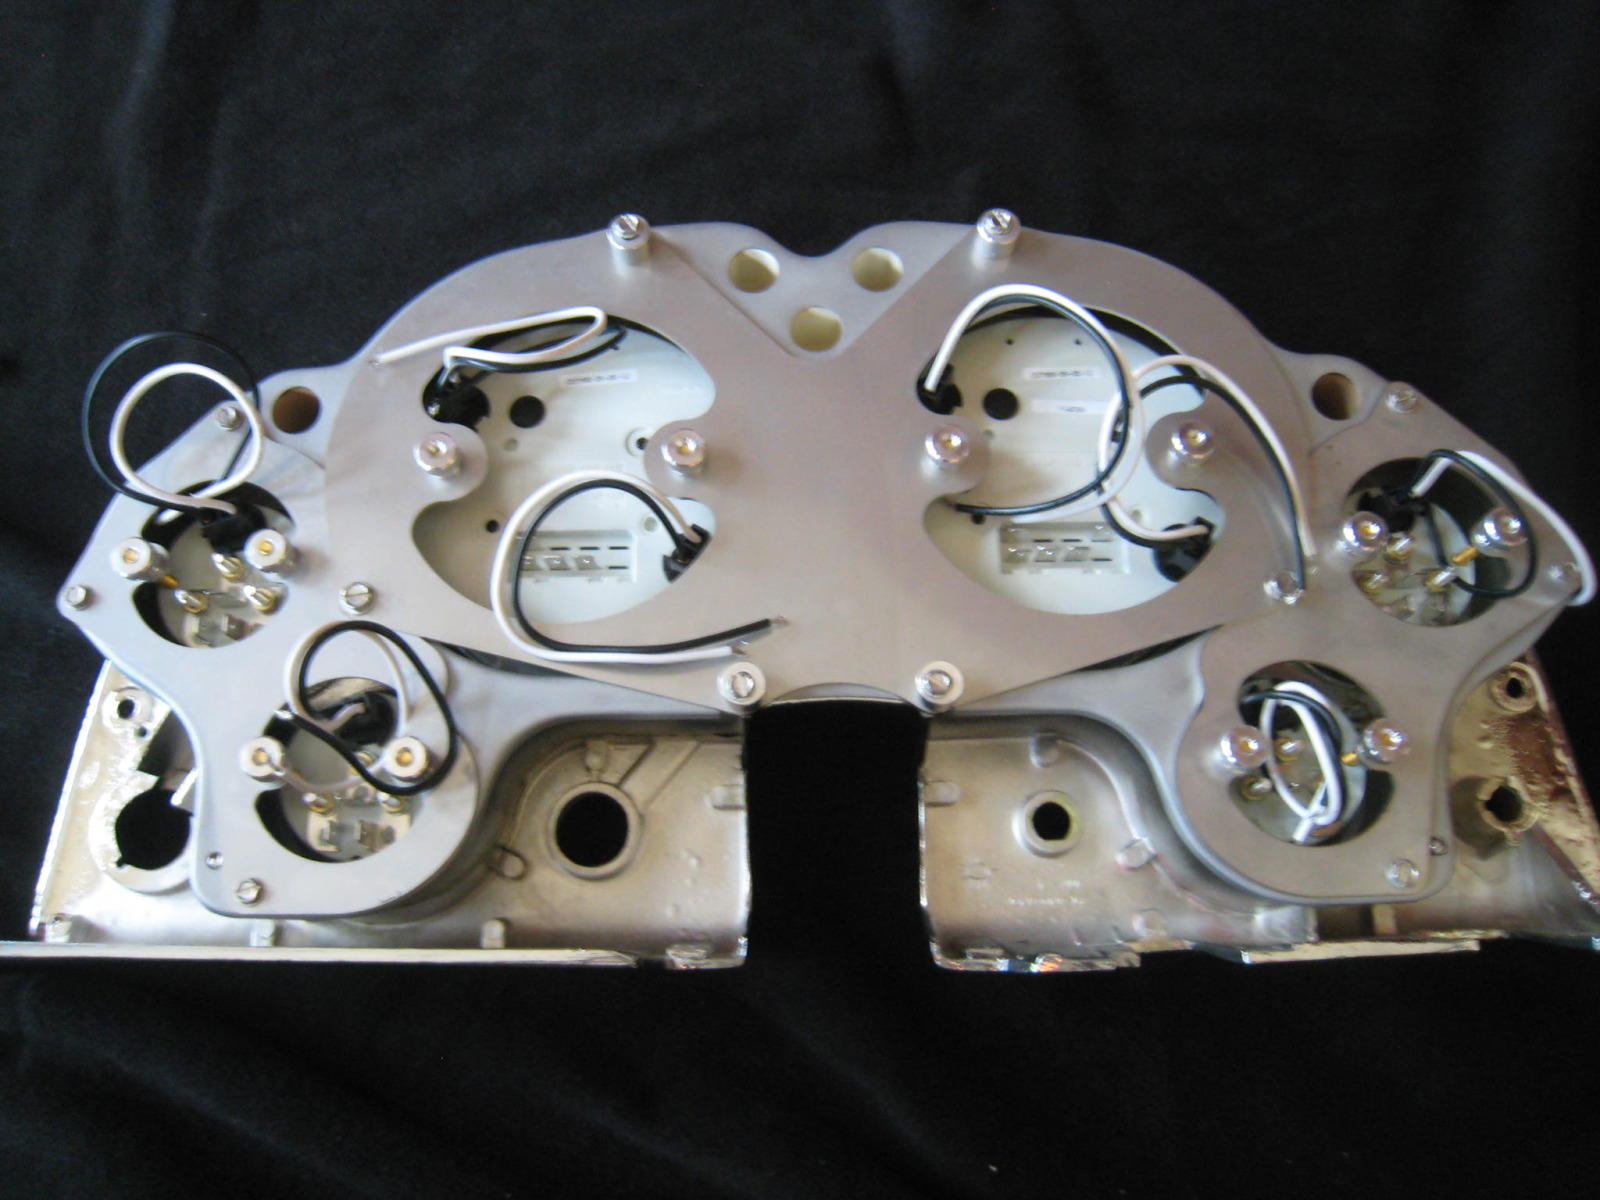
Here you can see part of the Hot Rod Dynamics kit that allows the installation of the AutoMeter gauges. It consists of 3 stainless plates that are perfectly fabricated to fit the back of the dash cluster using existing mount locations. The kit comes with all the mounting hardware, spacers, and a complete set of instructions to make this install very straight forward:
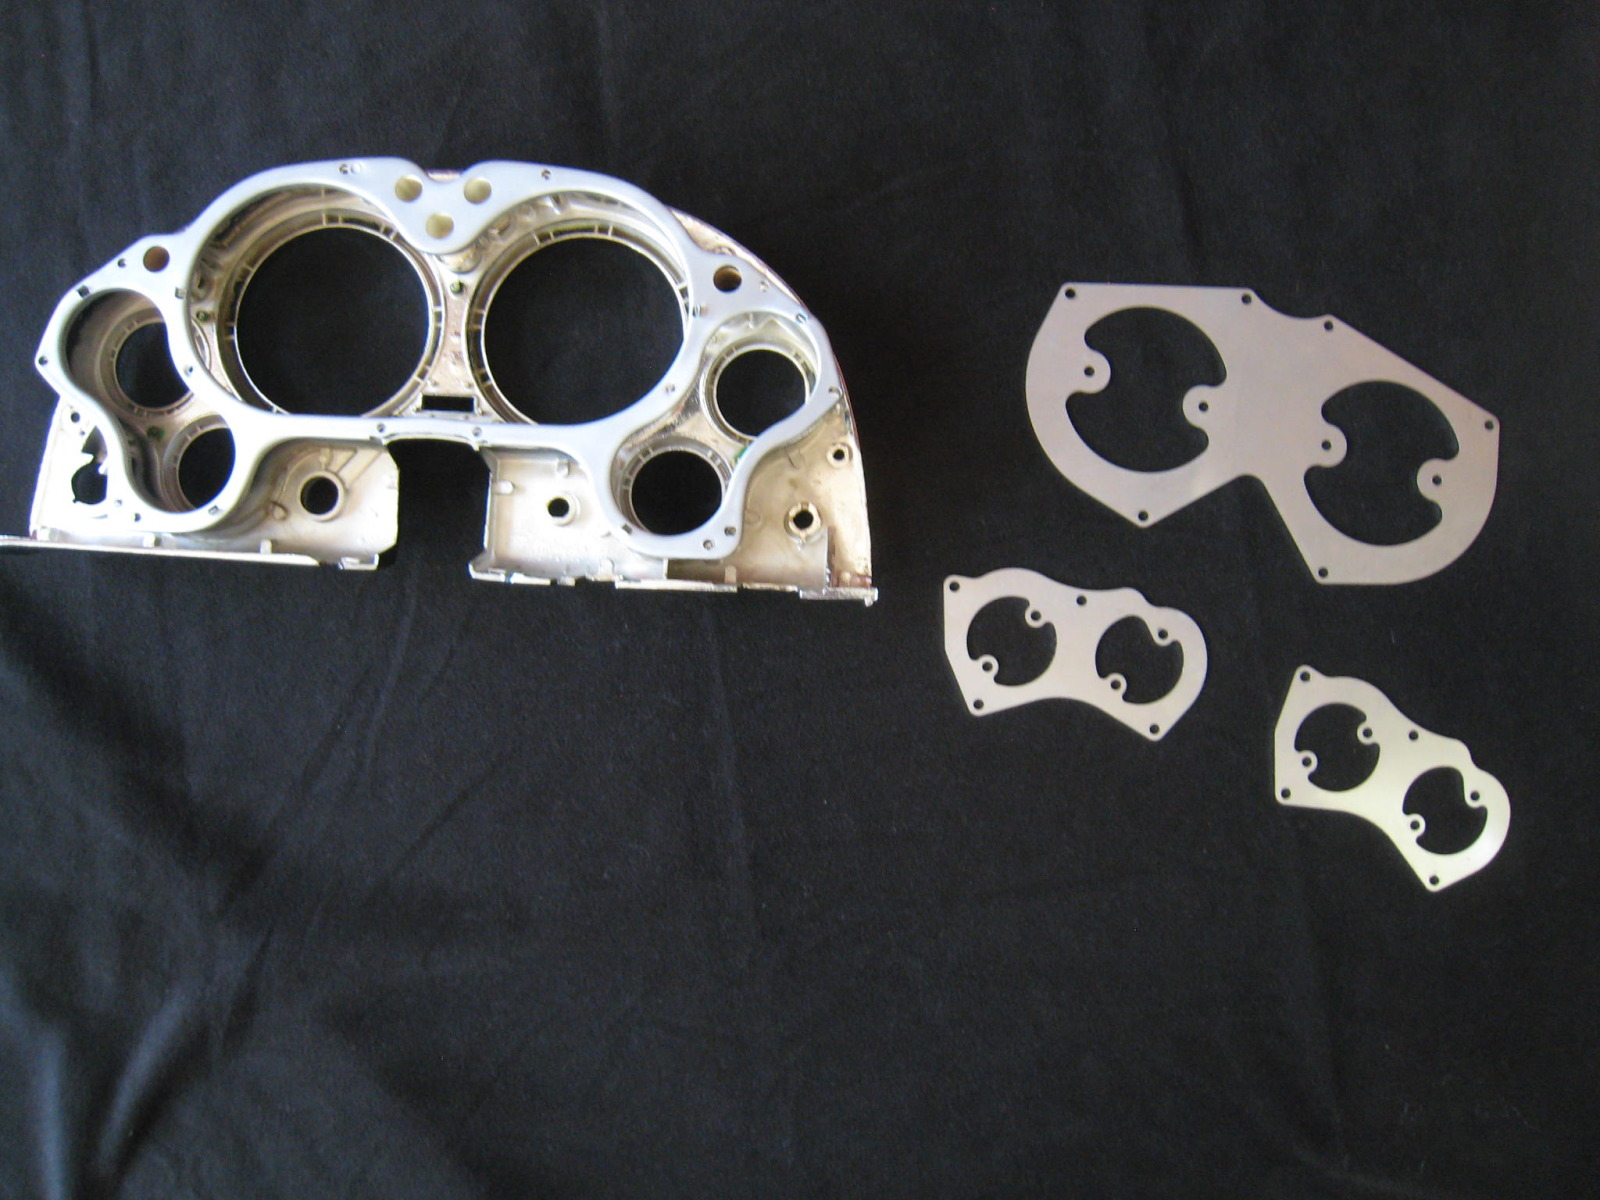
Given the chrome build up, for my installation I needed to eliminate the use of the provided spacers in order to have the spacing allowing the instruments to properly screw into the brackets.
And here is the finished product:
10-13-2012 #59
Registered User
- Join Date
- Jul 2012
- Posts
- 96
that is a just plain beautiful car i love the paint scheme
Brandon
2003 f250 powerstroke 2/4 drop daily driver
1979 f250 crew cab on superduty axles
1947 dodge 5 window coupe
10-14-2012 #60
Registered User
- Join Date
- Nov 2006
- Location
- Ma.
- Posts
- 5,567
It came out great, Nice work.
Wayne
Car FINALLY home !!!!!! lol
Project FNQUIK https://www.pro-touring.com/showthre...ghlight=FNQUIK
Tags for this Thread

 Reply With Quote


