

Results 61 to 80 of 252
-
01-04-2013 #61

 Registered User
- Join Date
- Mar 2007
- Location
- Florida
- Posts
- 2,391

I'm working on a taller rear spoiler at the moment Toby. Then I'll probably work on the spoiler extension/splitter and diffuser.
-
01-05-2013 #62 Registered User
- Join Date
- Dec 2012
- Location
- Boise, Idaho
- Posts
- 84
Awesome. Thanks John. Originally Posted by NOT A TA

Can't wait to see the finished product.Toby D.
IronDougal racing
I race Me, Myself, and Iron.
https://www.pro-touring.com/showthre...-1973-Trans-Am
FaceBookME
02-04-2013 #63
Registered User
- Join Date
- Mar 2007
- Location
- Florida
- Posts
- 2,391
Not finished yet but I'm working on it. I decided to modify a rear spoiler with the hope of increasing downforce. I will be making a front spoiler extension & splitter so hopefully this will balance it out a bit. I'm adding fiberglass to a stock rear 3 piece spoiler to make it about 1" - 1 1/4" taller. Originally Posted by IronDougal
So far I've got about 80 bucks in materials and it looks like it'll work. I used some roofing flashing to make a sort of mold on one side of the spoiler to support the fiberglass & resin.

After building up one side with several layers of fiberglass I removed the flashing and added several layers to the other side.
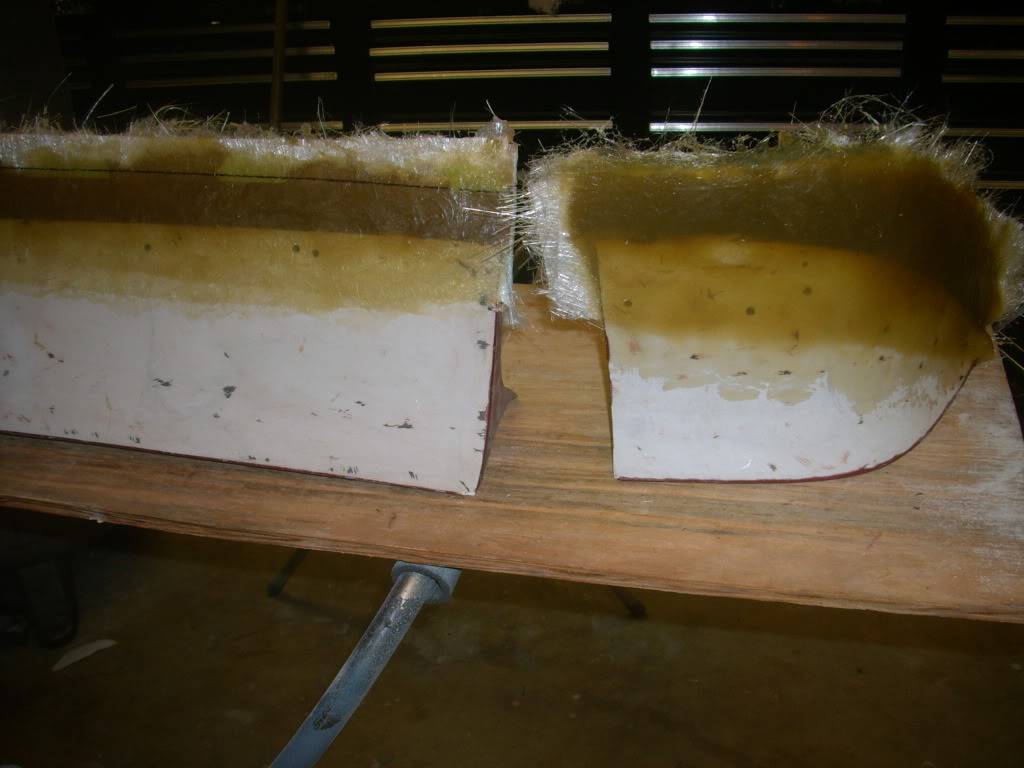
Then sanded with an air tool with rough twist lock 3" pads to create the curves and zip off the excess.

After another coat of fiberglass resin and another rough sanding *I'll smooth out the surface with a skim coat of bondo and prep for paint.Last edited by NOT A TA; 05-13-2014 at 08:32 PM.
02-05-2013 #64 Registered User
- Join Date
- Feb 2005
- Location
- Sydney, Australia
- Posts
- 1,798

Watch out you don't go too high, John....you'll end up causing more parasitic drag than the extra downforce is worth. I like the idea of the front splitter...can't wait to see pics.
 Regards,
Leigh
Sydney, Australia
1971 Firebird 455
https://www.pro-touring.com/showthre...Project/page27
02-05-2013 #65 Registered User
- Join Date
- Jan 2006
- Location
- McKinney, TX
- Posts
- 1,625
I dig the 'glass work. Should be pretty cool.
66 Mustang "Project: Ballin on a budget"
89 Mustang "Box Wine"
02-05-2013 #66 Registered User
- Join Date
- Dec 2005
- Location
- Birmingham, AL
- Posts
- 3,356
I think that looks pretty good. I have some ideas for my rear spoiler, but it will probably be more form than function.
Stephen
07-30-2013 #67
Registered User
- Join Date
- Mar 2007
- Location
- Florida
- Posts
- 2,391
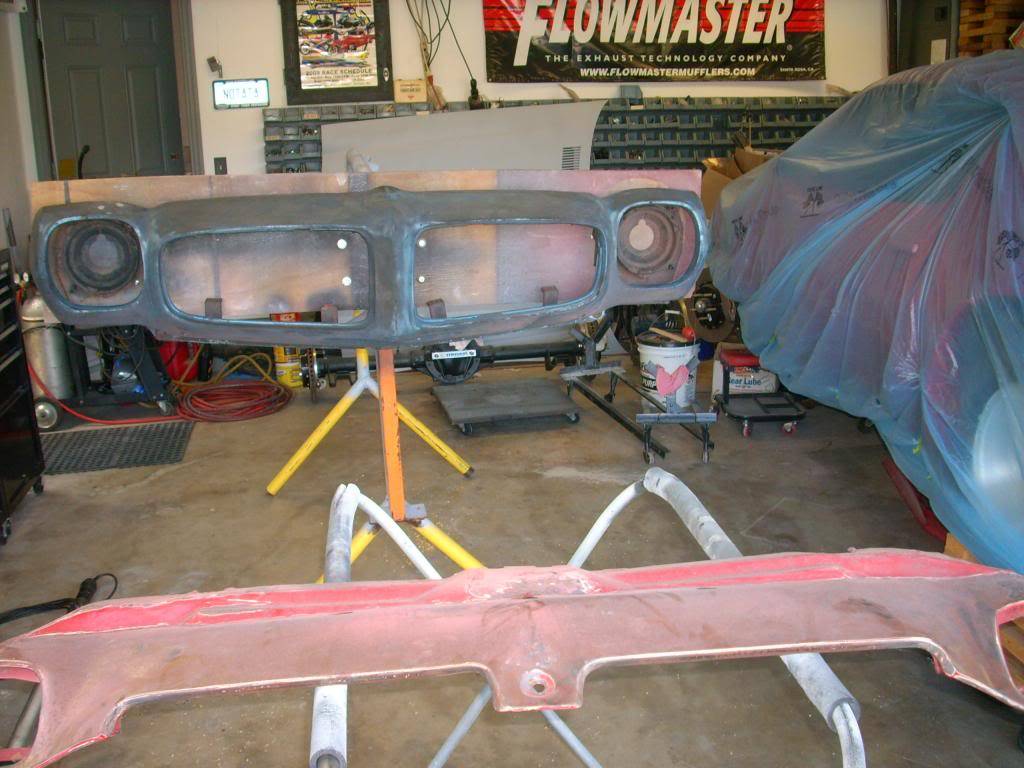
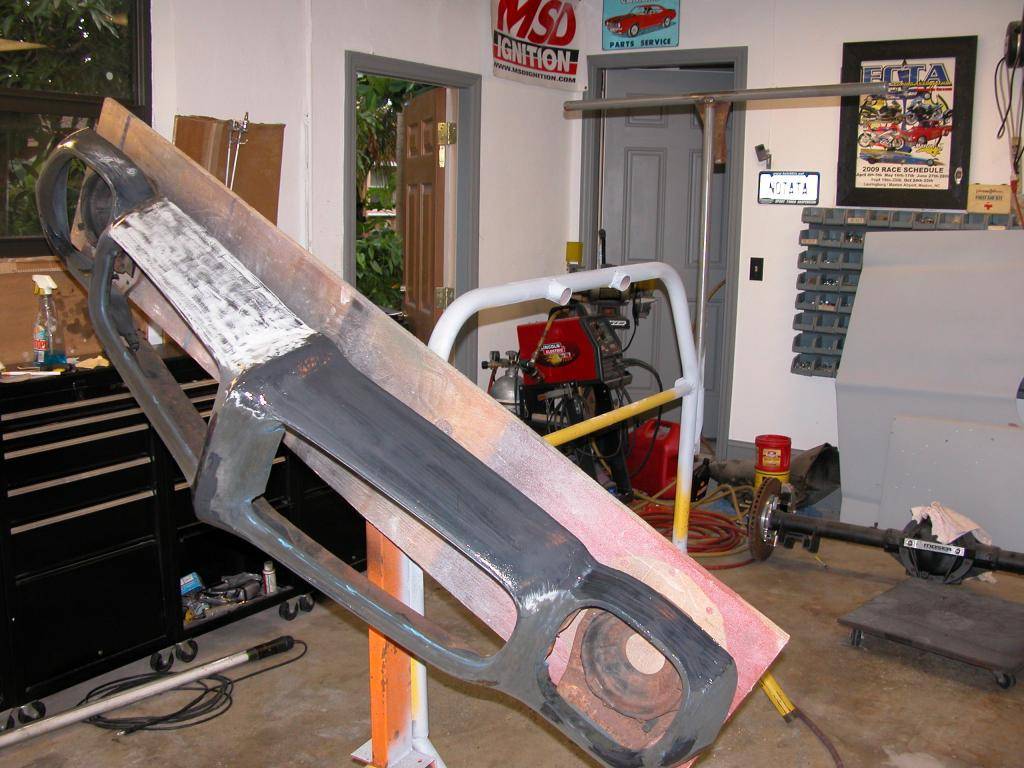
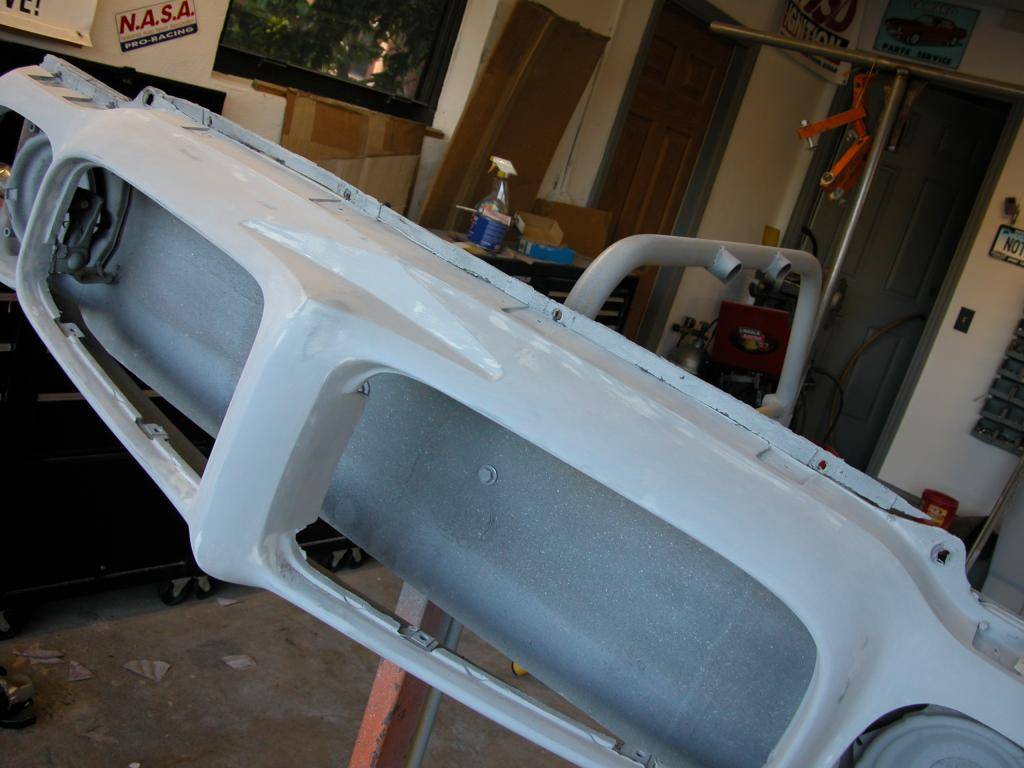
Got sidetracked from the bird project for a few months but I'm working on it again. The rear spoiler is roughed in and will get finish work done later while mounted to the car. I started working on the front bumper I'll be using. I want a bumper without the jack hole slots for a cleaner look.
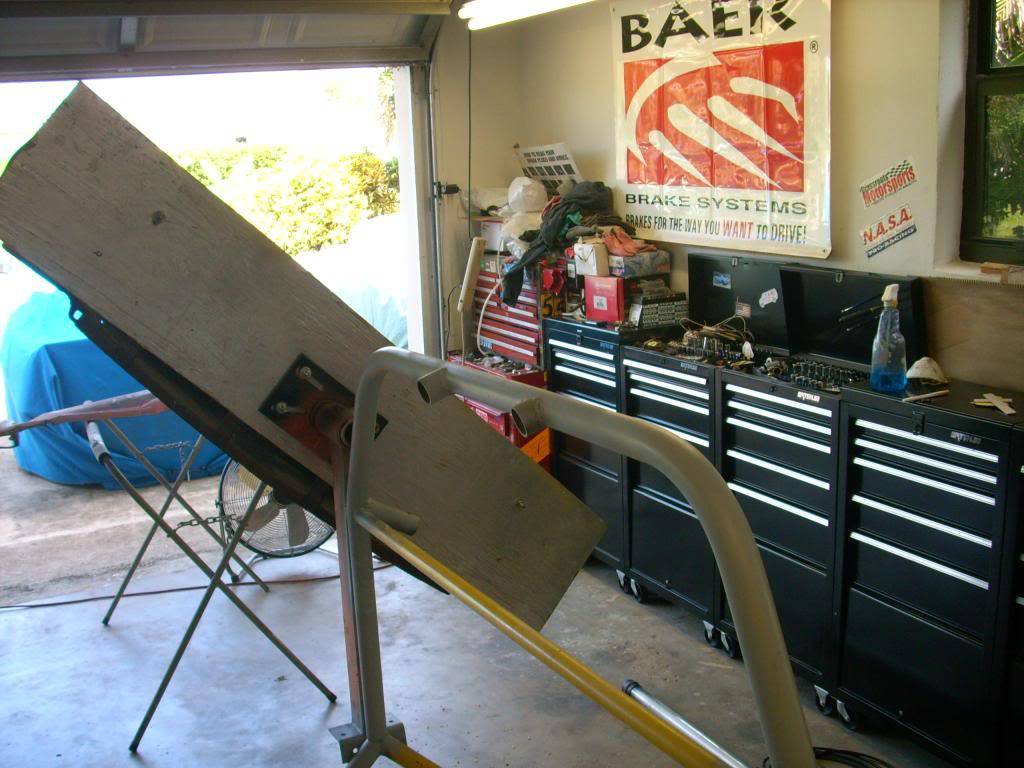
Starting with a core I bought many years ago I soda blasted it to get off most of the old primer & paint that someone put on it. Then mounted it to my "whatdayacallit" body/paint contraption while bolted to a board to make it easy to work on. This way I can spin the bumper to work on top/bottom and the part doesn't keep flexing like they do when trying to work on regular bodywork stands.
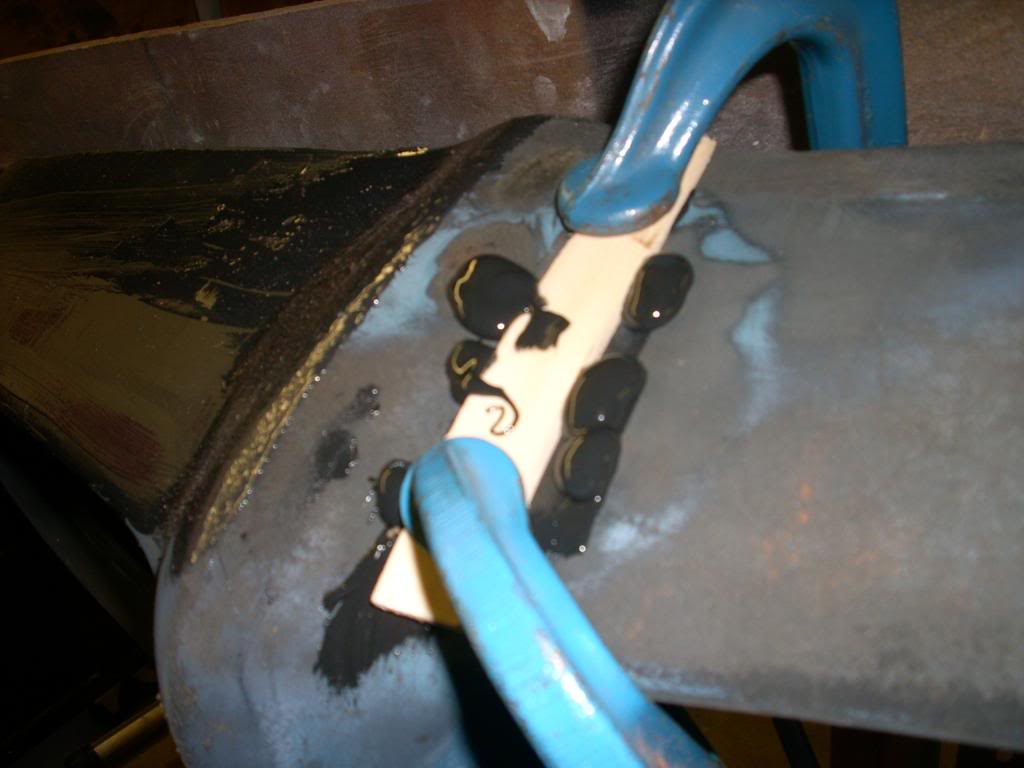
There was a section that had lifted from the metal core which happens to many of the 70-73 bumpers. So I drilled holes in the affected area, scraped inside to loosen rust/dirt etc. and then blew out the junk with an air hose. Then pumped panel bond into the void through the holes and clamped overnight.
After the panel bond was dry I ground off the paint sticks and excess panel bond and used 3M flexible parts repair material to fill the voids and other bumps cuts etc. on the bumper.
Last edited by NOT A TA; 05-13-2014 at 08:33 PM.
07-30-2013 #68
Registered User
- Join Date
- Mar 2007
- Location
- Florida
- Posts
- 2,391
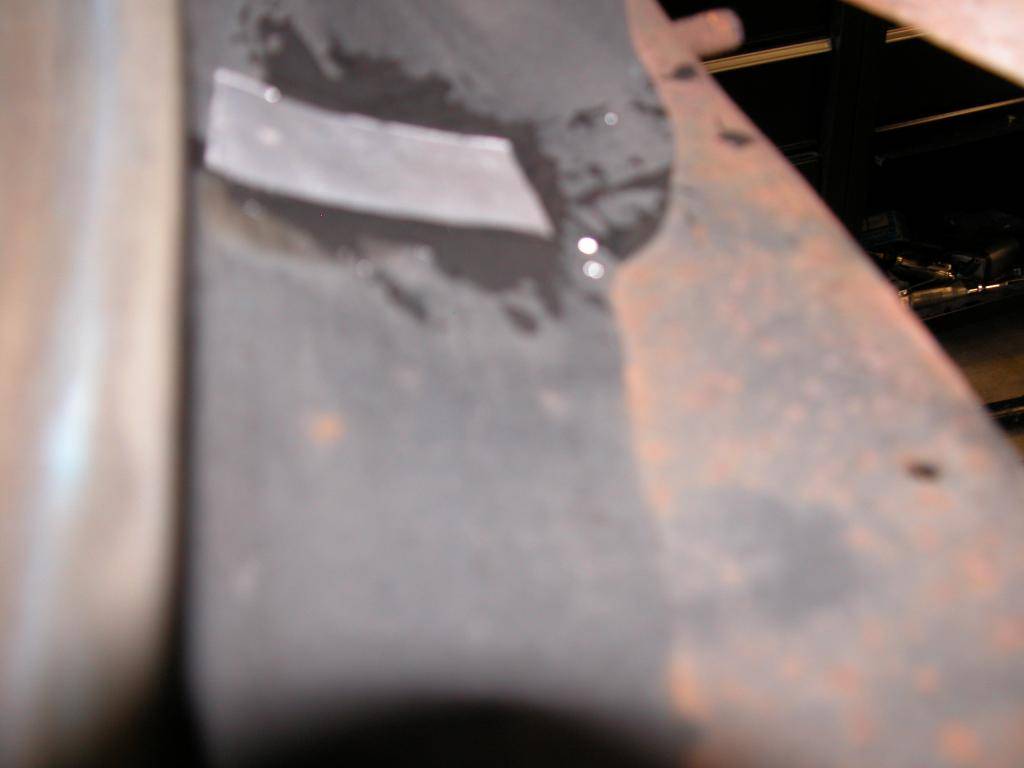
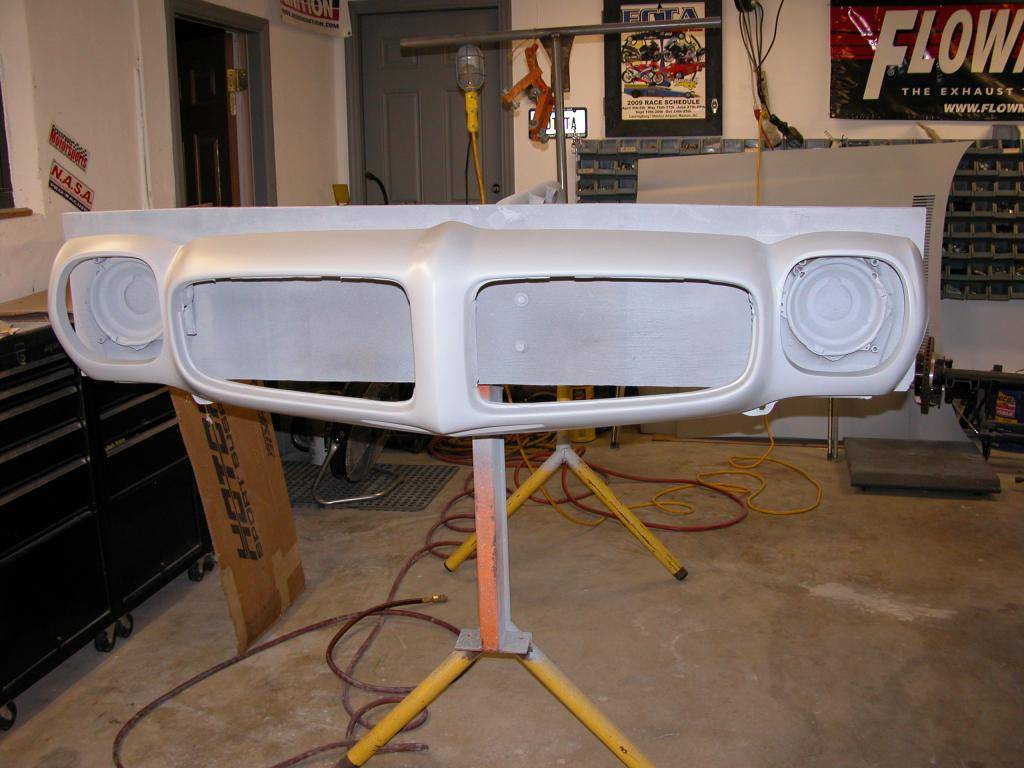
Jack hole slot removal. Prep slots by roughing up and chamfering the rubber around the slots with dremel tool. Panel bonded a thin piece of aluminum to inside of bumper, let dry. Filled slots 1/2 way with panel bond , let dry. rough up panel bond and use #M flexible part repair material, let dry. Sand & fill with 3M till smooth.

Last edited by NOT A TA; 05-13-2014 at 08:35 PM.
07-30-2013 #69
Registered User
- Join Date
- Mar 2007
- Location
- Florida
- Posts
- 2,391
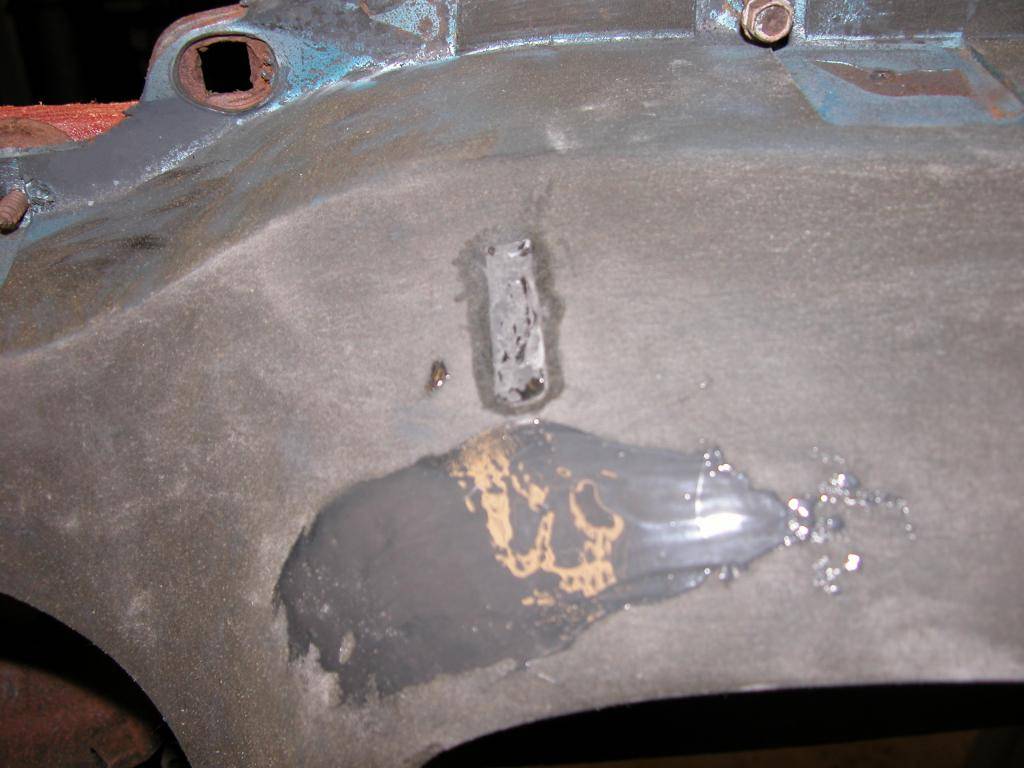
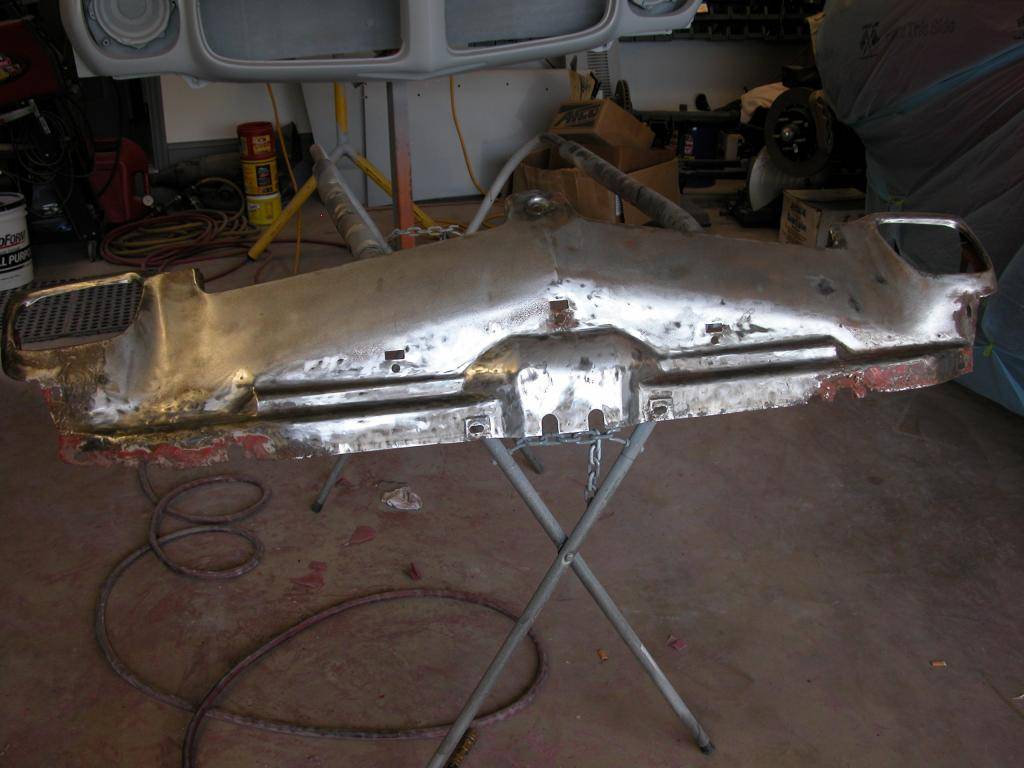
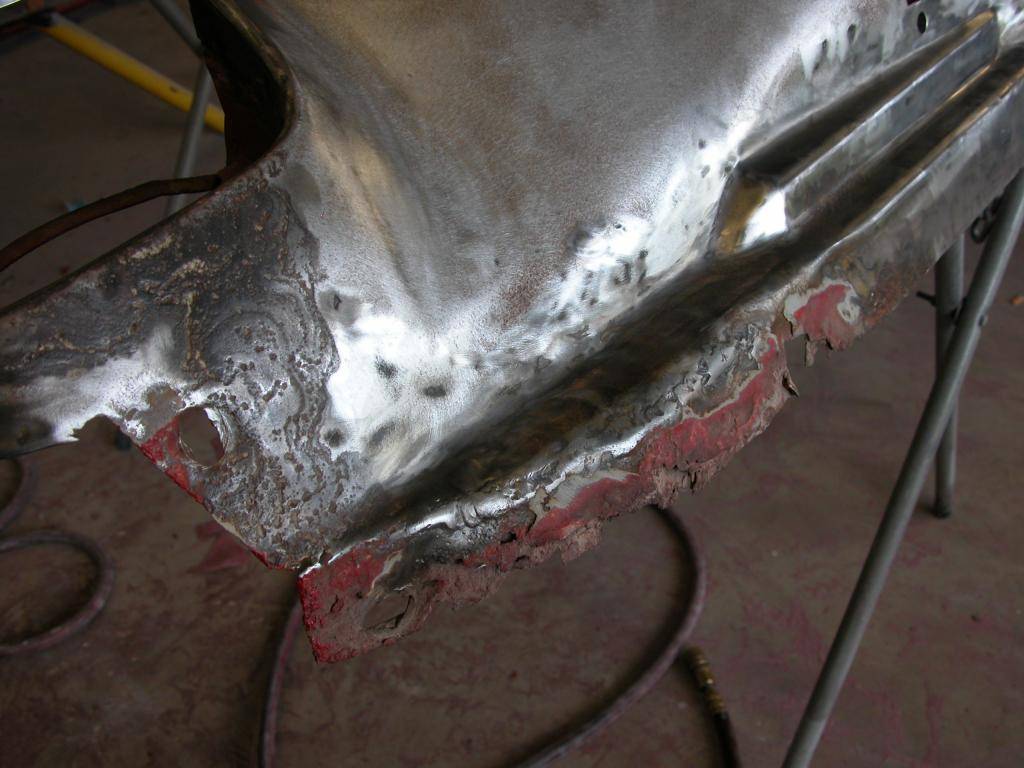
Another thing that annoys me about the early 2nd gen front bumpers is the strip across the bottom where the grill supports attach. It's ugly and is seen from the front so I painted that section of my other bumper flat black in an attempt to make it disappear in the shadow. For this bumper I've cut it off and will make new lower supports for the grills.
I've got 2 front splash pans and am currently working on the one that was on the car before stripping, doing some metal work, and prepping for paint as it was stock. The other one will be modified later to see if an idea I have will work.
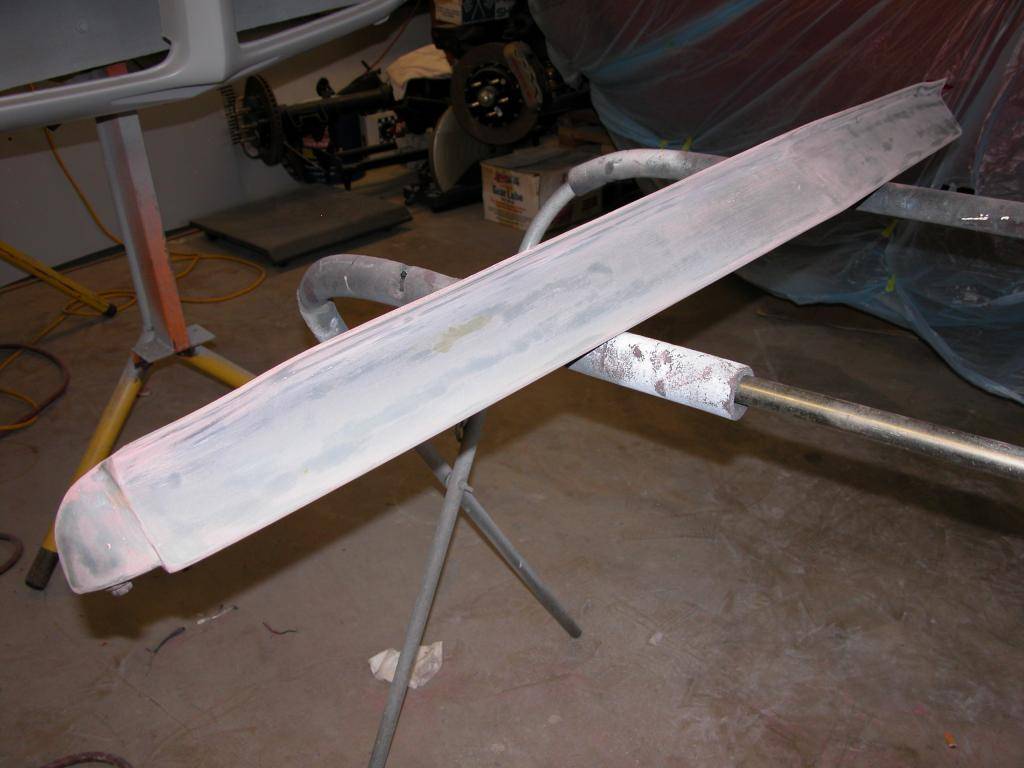
I Also stripped the center section of the front spoiler for paint prep. Over the past 20 years it had gotten a few bumps & bruises and seen a lot of flexing at high speed events from air pressure. The angle of the spoiler would be straight down over about 125 MPH and the repeated flexing caused paint cracking/peeling problems. I will be adding reinforcements to prevent the flexing in the future..
Last edited by NOT A TA; 05-14-2014 at 12:21 PM.
07-30-2013 #70 Registered User
- Join Date
- Jul 2008
- Location
- ohio
- Posts
- 1,135
nice to see you back on the bird john.......cant wait to see more progress
keep the wheels a spinning and the Beavers a grinning (burt reynolds-smokey and the bandit)
10-07-2013 #71
Registered User
- Join Date
- Mar 2007
- Location
- Florida
- Posts
- 2,391
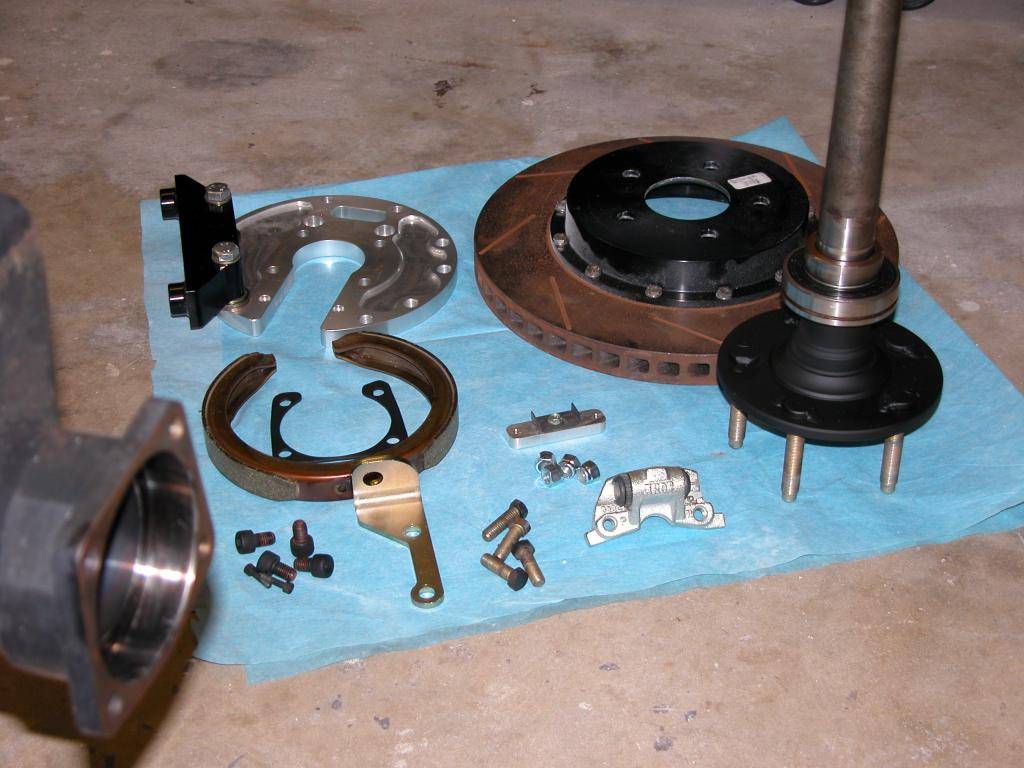
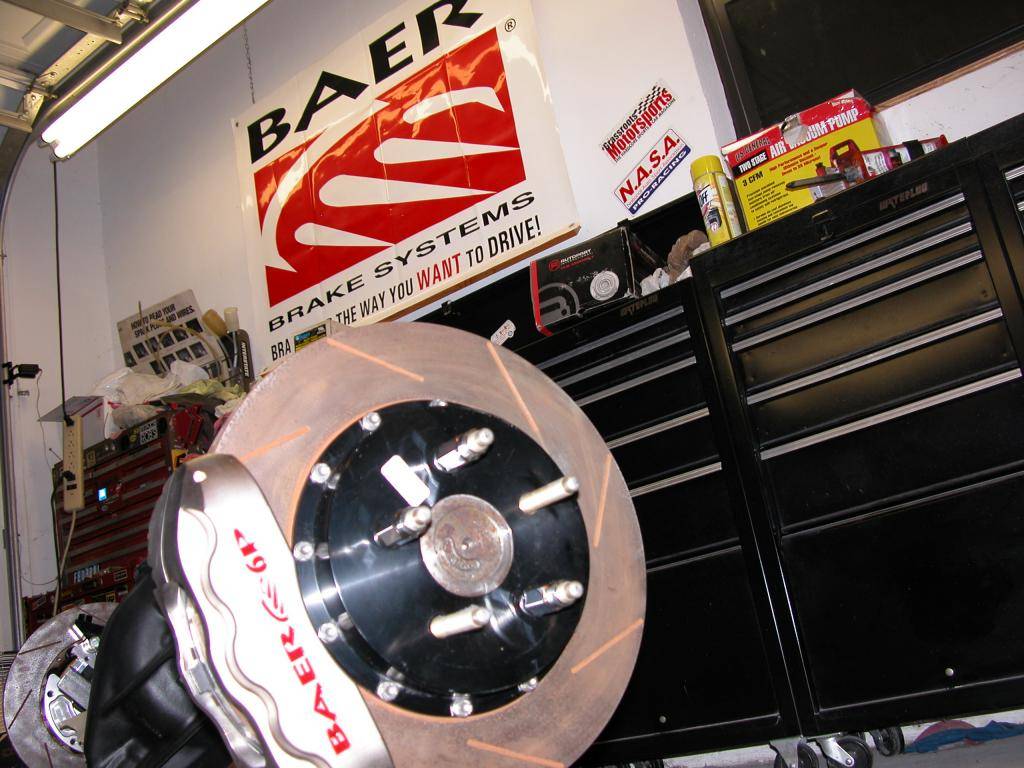
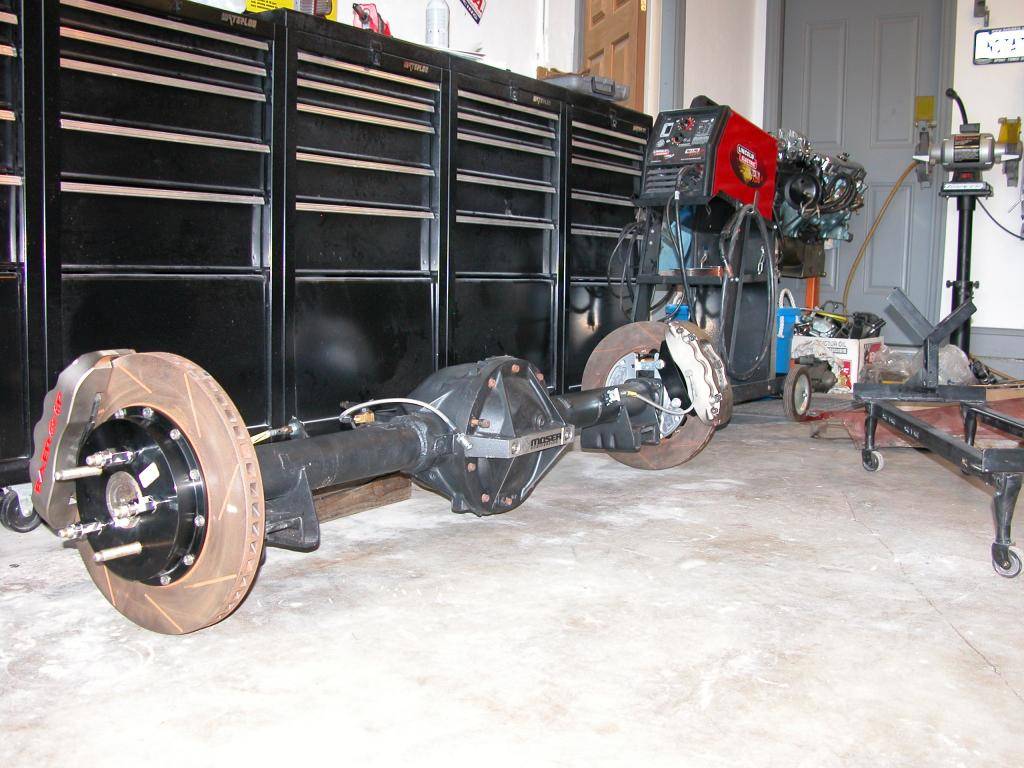
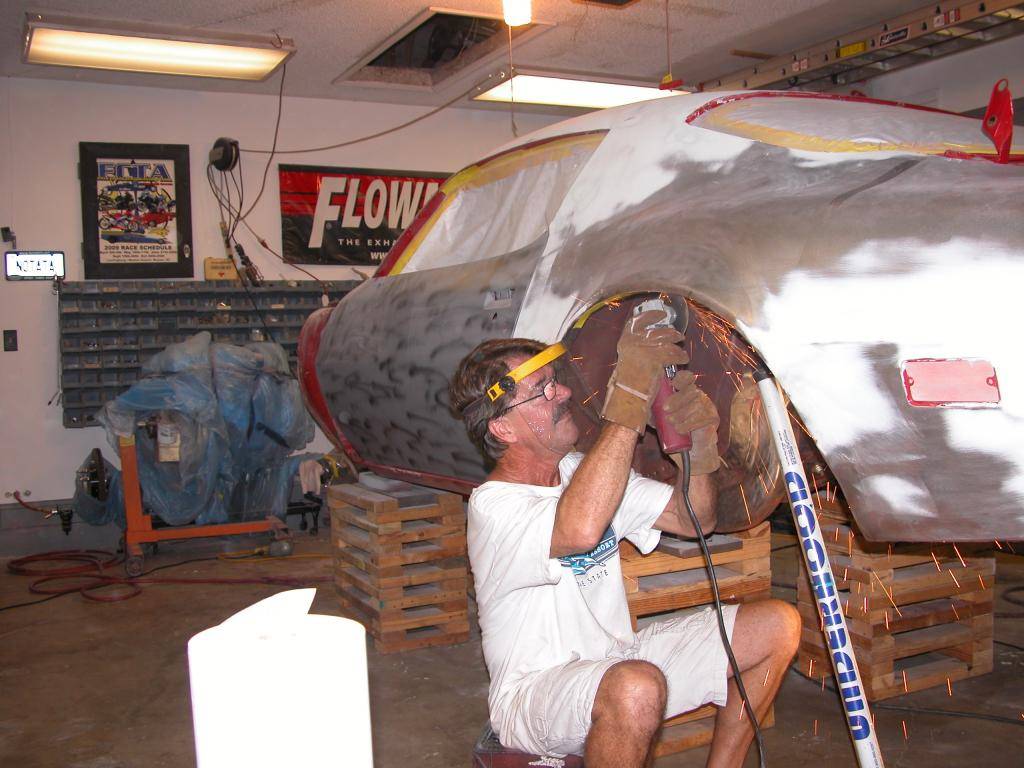
I'd installed 1/2" wheel studs in the rear axles a while back so while working on body panels I also got everything together to install the Baer discs on the rear. I had Moser tapered axles with Moser Ford style housing ends for drum brake application welded to a 8.5" GM housing so switching to disc brakes with an internal drum parking brake in the rotor hats is an unusual swap.
It turned out to be a bit of a puzzle to figure out how to actually assemble and required some minor fabrication to make it all work. Rather than explain I'll just post pics since it's unlikely very many people will be in the same situation since most people do the disc upgrade at the time they install axles etc. and wouldn't be in my situation since they'd get housing ends welded on for disc brake applications.
Last edited by NOT A TA; 05-14-2014 at 12:22 PM.
10-09-2013 #72
Registered User
- Join Date
- Mar 2007
- Location
- Florida
- Posts
- 2,391
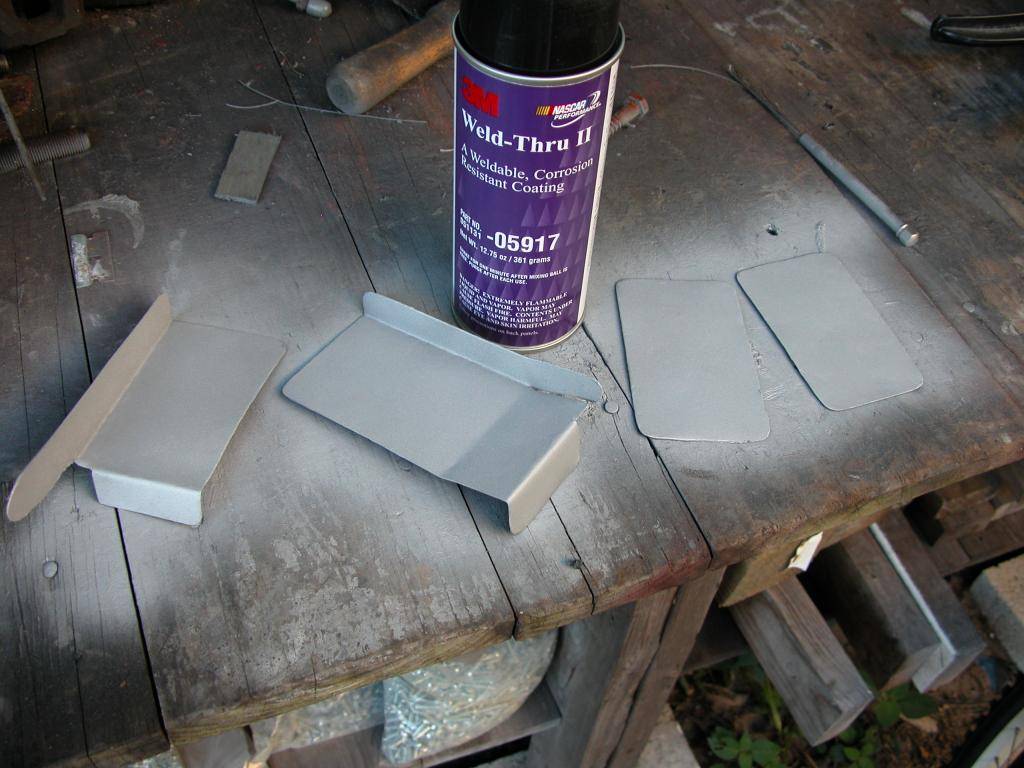
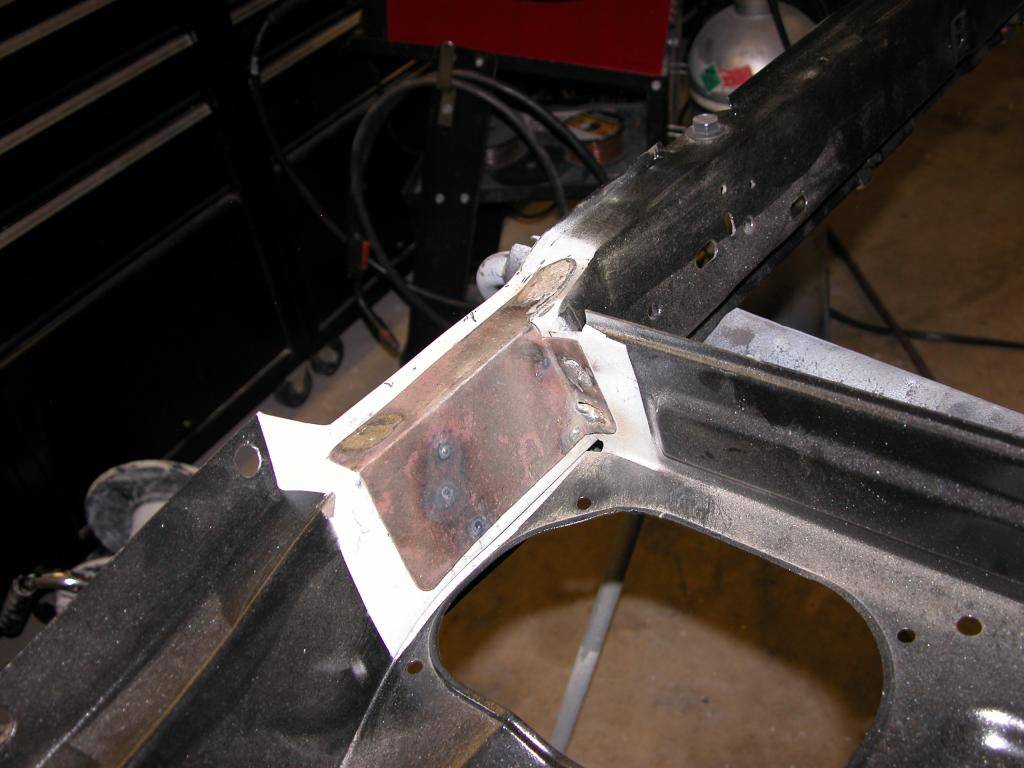
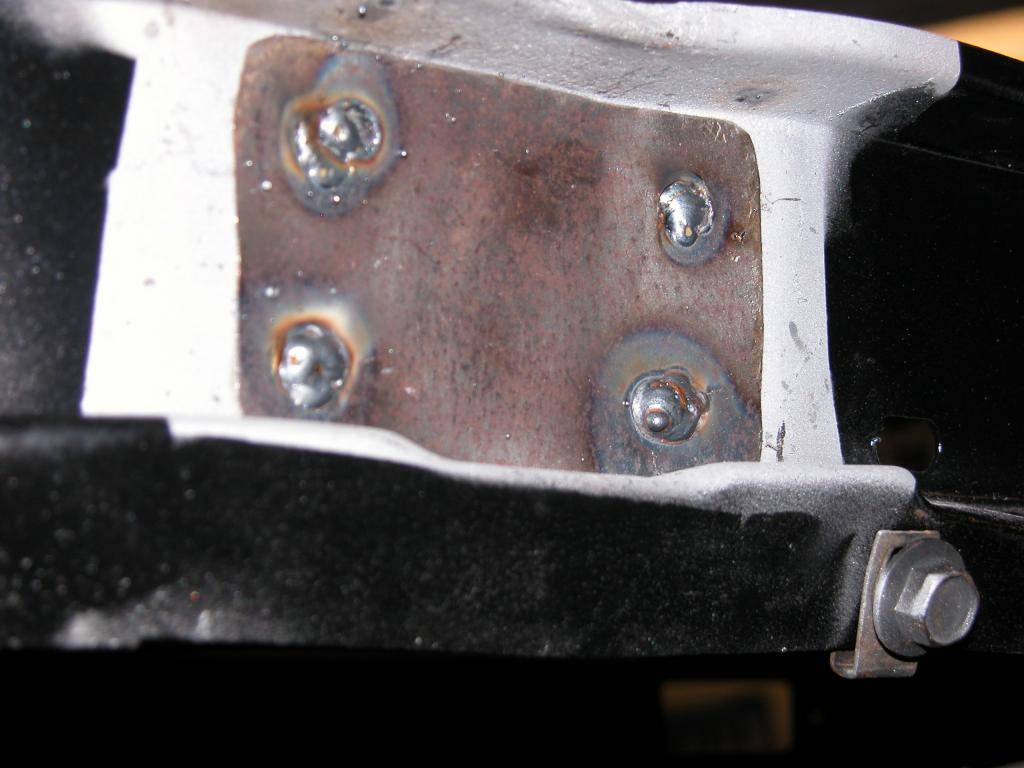
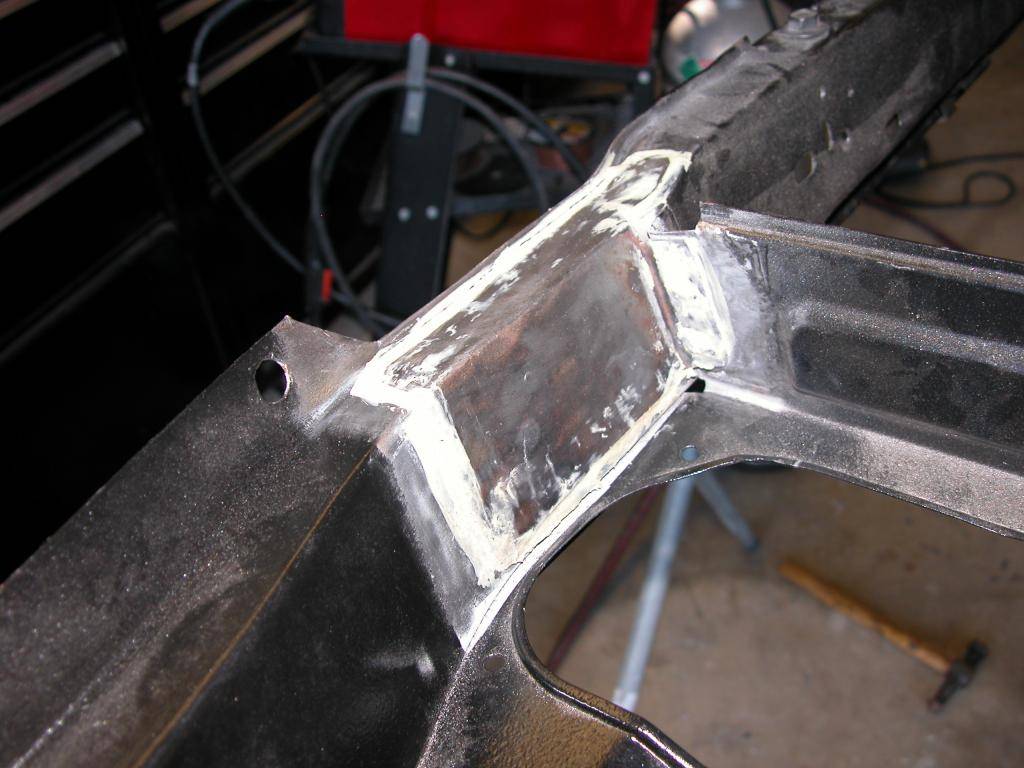
Back in the beginning of this thread I mentioned i was going to reinforce the core support where the body mounts attach. They typically get rusty & soft on the early 2nd gen bird core supports. The one I'm using is one of the best I've seen but it had started rusting there like they all do. I decided to make a sheet metal patch panel for above & below the original sheetmetal and plug weld them in to make the piece stronger than the original.


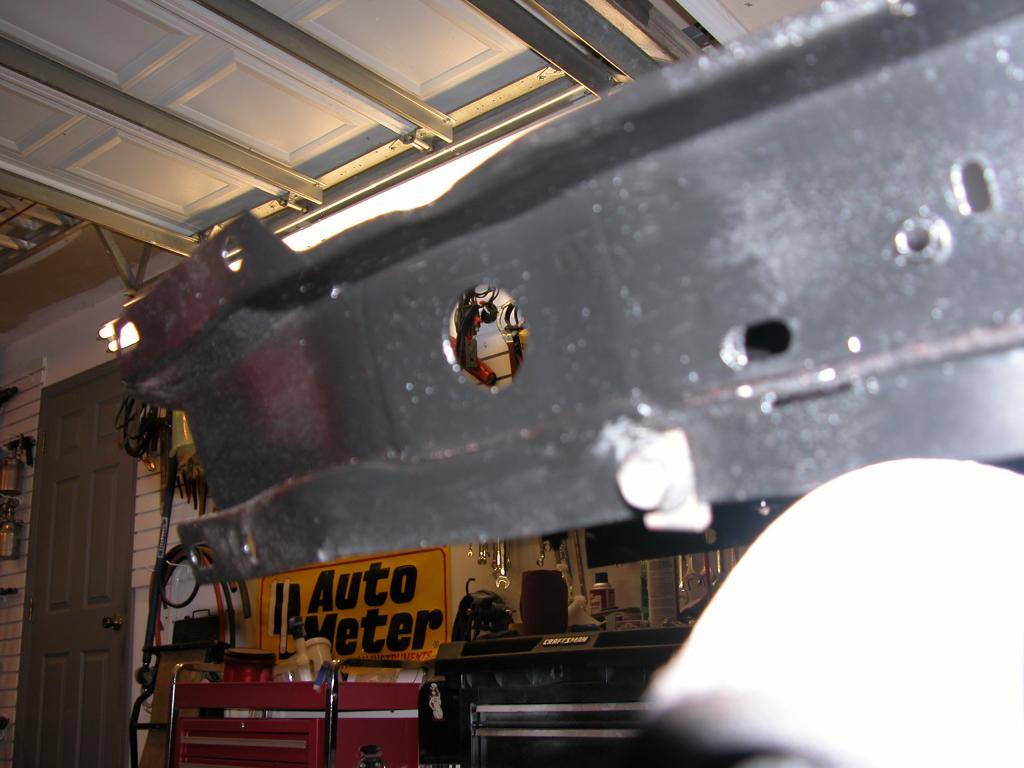
Last edited by NOT A TA; 05-14-2014 at 12:22 PM.
10-10-2013 #73 Registered User
- Join Date
- Apr 2005
- Location
- IN/MI border
- Posts
- 1,904
Front clip turned out nice!! Keep it up!
10-11-2013 #74
Registered User
- Join Date
- Mar 2007
- Location
- Florida
- Posts
- 2,391
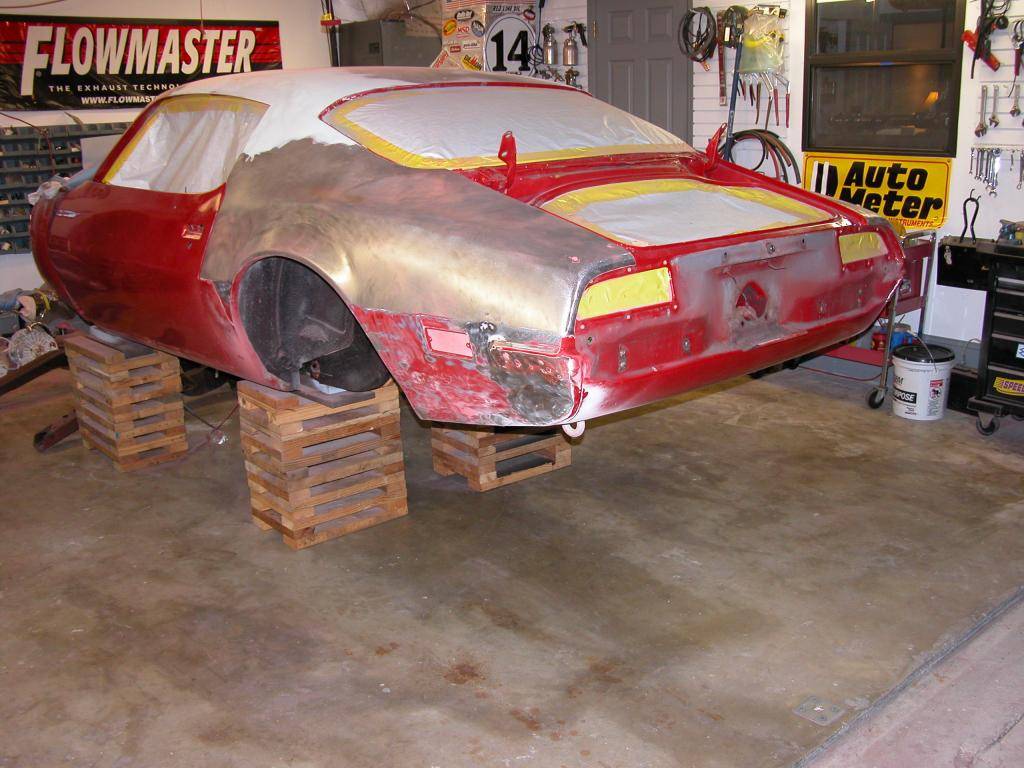
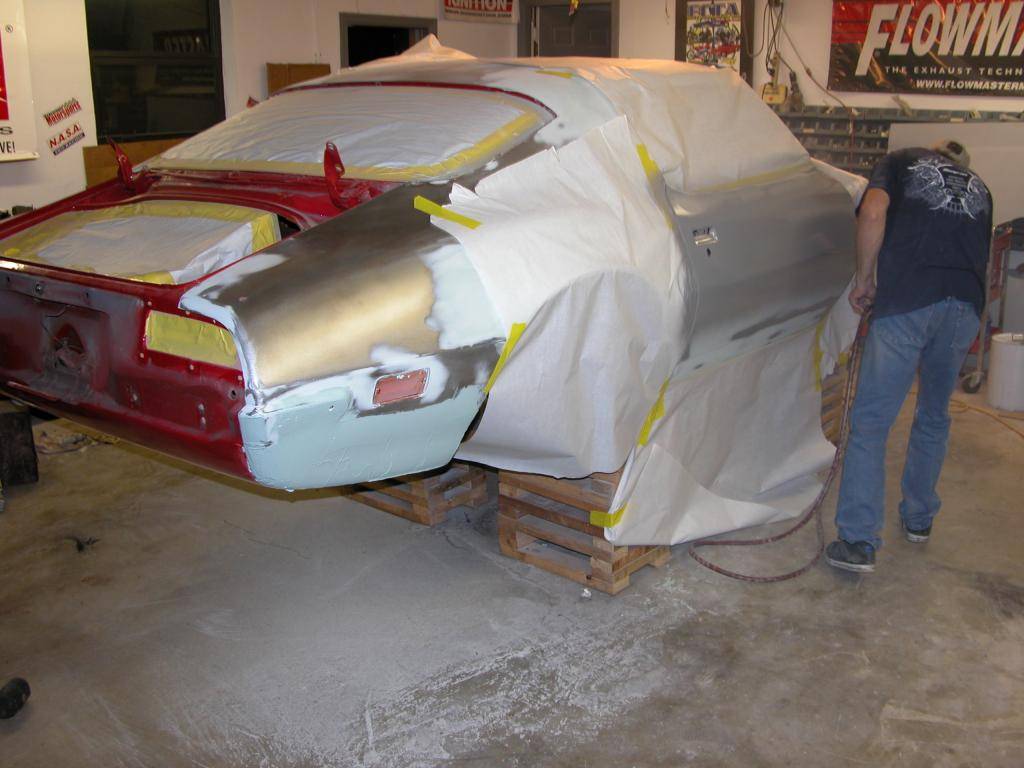
When it comes to projects, scope creep is inevitable. We start out thinking "I'll just do this and this" and before ya know it you've gone waaay beyond what you planned. In my case I had the front end off and drive line out with new body panels needing paint that would never match the 20+ year old paint from when I first did the car. And since I'm gonna put solid body mounts in to replace the polys I installed years ago anyway......... I figured, Just get it over with and do the whole damn car!
Last edited by NOT A TA; 05-14-2014 at 12:23 PM.
10-12-2013 #75
Registered User
- Join Date
- Jul 2008
- Location
- ohio
- Posts
- 1,135
now ya just need to get some dse tubs lol
keep the wheels a spinning and the Beavers a grinning(burt reynolds-smokey and the bandit)
10-14-2013 #76
Registered User
- Join Date
- Mar 2007
- Location
- Florida
- Posts
- 2,391
AHAHAHA, NO tubs! I've already got enough to do! And besides a early 2nd gen can fit 315's like I had before. Not really worth all the time and $ to me to do tubs.
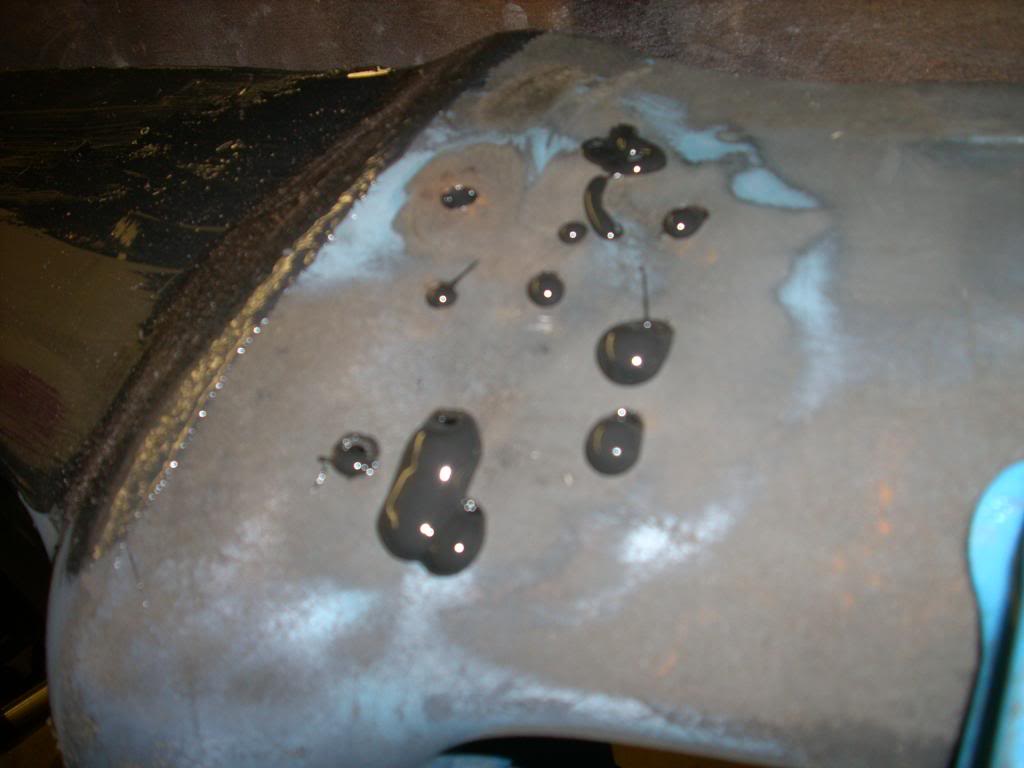
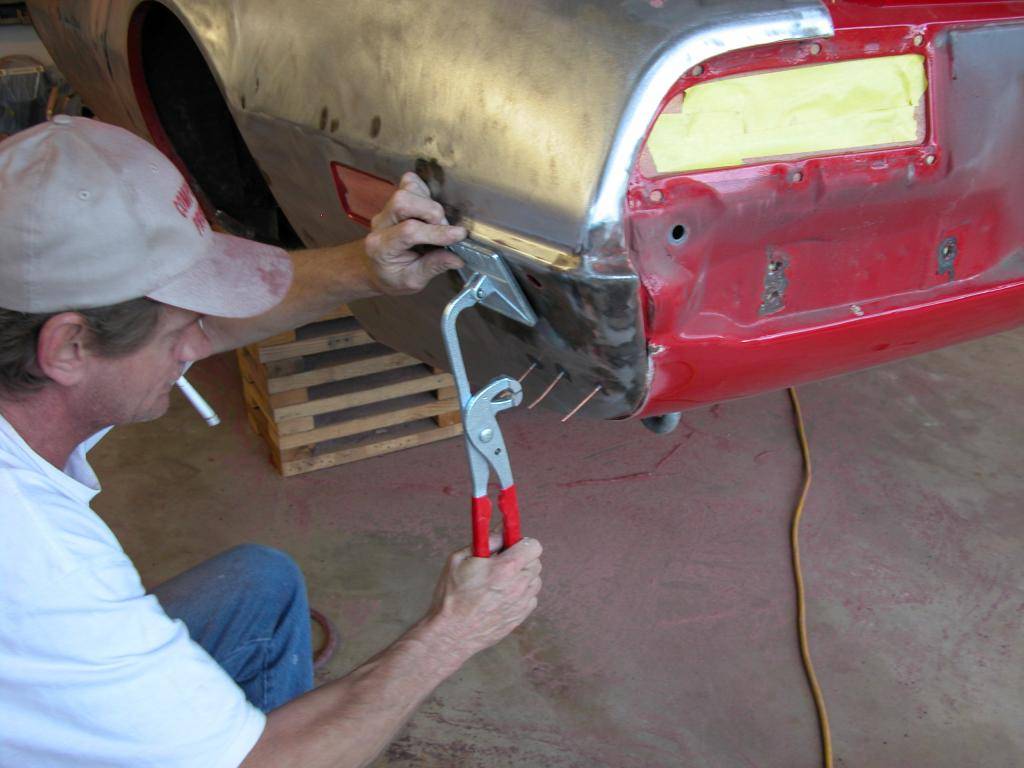
While stripping the body for new paint ( I didn't strip to metal the first time 20 years ago) we found a couple previous repairs. Among them was a dent that was filled with bondo instead of pulling it out. The dent was in a spot where you can't get to the inside of the sheet metal and whoever did the work must not have had access to a stud gun. So for those who never saw one or saw one used here's how it works.
This is a stud gun which is sort of a 110V spot welder that attaches a stud to the body. The stud is loaded into the gun, pressed to the body, pull the trigger, and the tip of the stud glows red welding itself to the body.
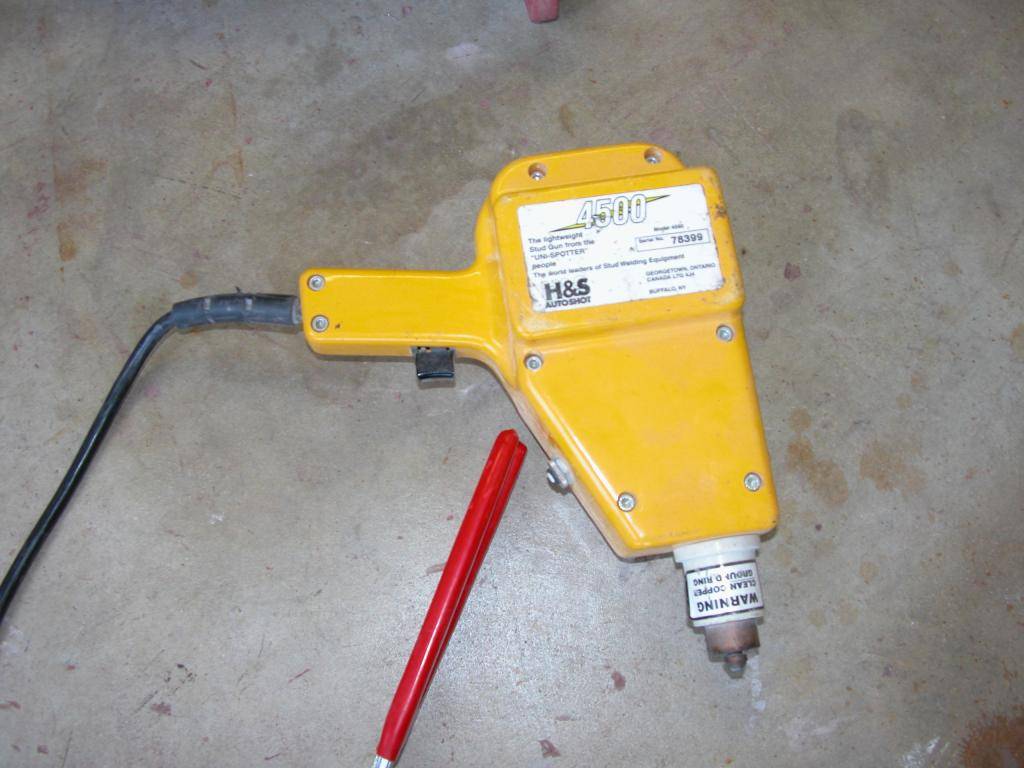
There's a couple sizes of the studs but even the small ones will burn through most modern cars because the metal is much thinner than the old cars so the guns aren't used much by collision shops any more.The studs shown are the larger size which work great on old cars.
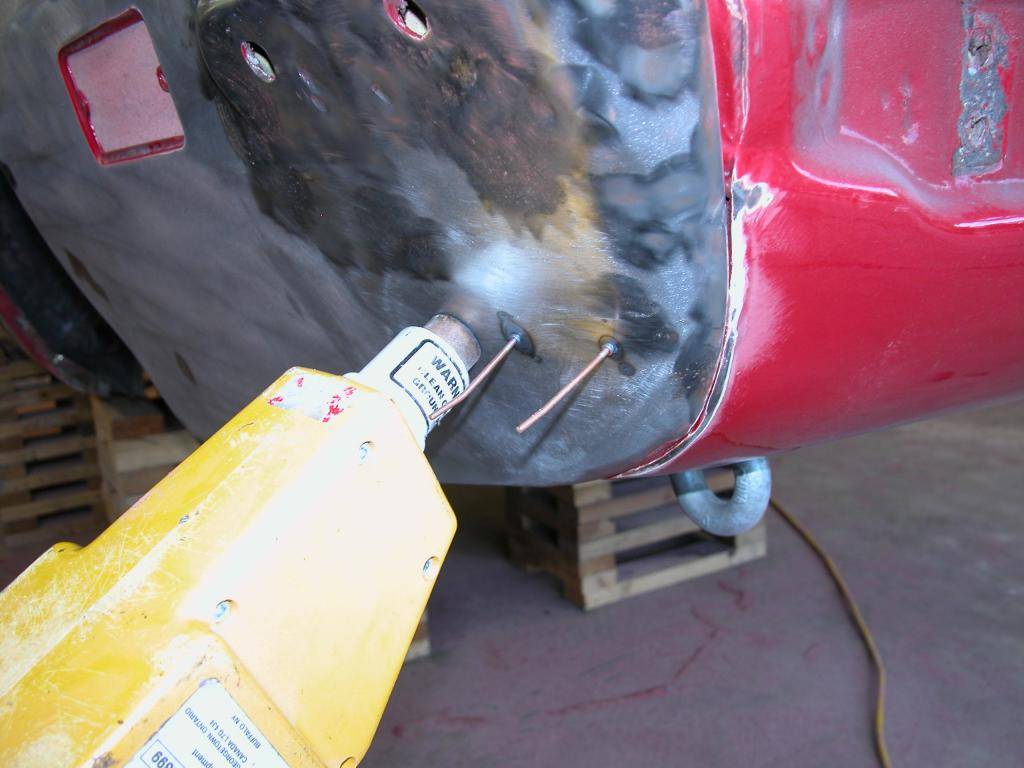
My buddy Jeff shows how the tool that pulls the studs works. He's been a body man all his life so he's got the technique down from working on cars like mine since they were new. Jeff's helping me do the car as part of a trade deal. So he's doing the exterior bodywork & paint which is really going to speed up my project since I can do the subframe, underside, and other things while he's making the car straight. We do jobs together and it works out well.
Last edited by NOT A TA; 05-14-2014 at 12:40 PM.
10-14-2013 #77 Registered User
- Join Date
- Aug 2004
- Location
- Mesa, Az
- Posts
- 196
Do not take this the wrong way! In my 40 plus years of being around mechanics and body guys, Jeff looks like the real deal. Cigarette hanging down is for sure the real deal.
-Paul
1969 Camaro "Reckn8"- LS7/C4 Front and Rear
1965 Oldsmobile F/85 LS6 W/Maggie, 6-speed,Ride Tech, Baer brakes
1978 Blazer 2 wheel drive with LS power
1965 VW bug. All original
1968 GMC short box
1964 Buick Riviera
10-14-2013 #78
Registered User
- Join Date
- Mar 2007
- Location
- Florida
- Posts
- 2,391
While I wrote "Jeff shows how the tool works" I should have written "I got this pic quick while Jeff was pulling the dent" because he was through working the dent, clipping off the studs, and was grinding off the stubs in less than a minute while the dent had virtually disappeared. Ya he's the real deal, been a body/paint guy doing restoration & collision work well over 30 years. Everything from early cars to Lambo's. Originally Posted by Reckn8
10-23-2013 #79
Registered User
- Join Date
- Mar 2007
- Location
- Florida
- Posts
- 2,391
Since I've recruited Jeff to pick up and continue from where I was on the exterior bodywork I've been stripping the underside and doing other things. I never trimmed the rear wheel lips or rolled them before and since now's the best time to do it I cut them and Jeff rolled them so they're tucked out of the way. They'll be epoxied and seam sealed to keep anything out of the rolled section. Jeff's got the outside of the doors in primer and is working on making the roof & quarters straight by skim coating & blocking some areas.
Last edited by NOT A TA; 05-14-2014 at 04:50 PM.
10-24-2013 #80
Registered User
- Join Date
- Mar 2007
- Location
- Florida
- Posts
- 2,391
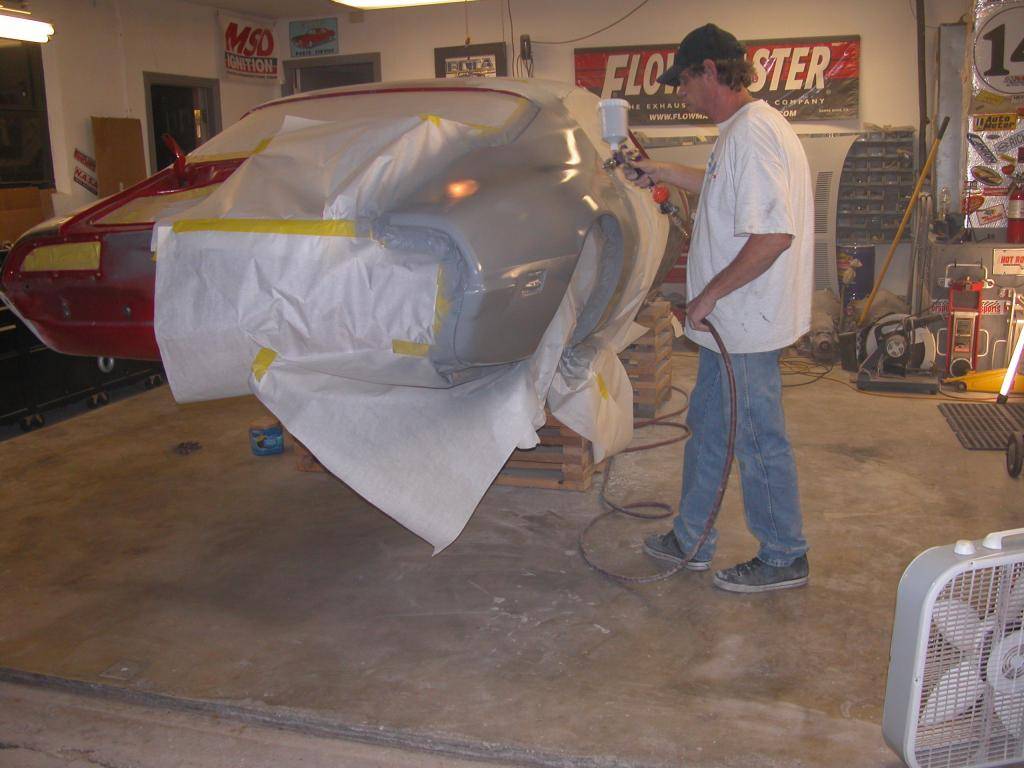
It's more humid here in South FL than most parts of the country even this time of year. So as soon as a panel is ready for primer it gets shot to prevent rust.
Last edited by NOT A TA; 05-14-2014 at 04:50 PM.

 Reply With Quote


