Results 41 to 60 of 252
-
11-26-2011 #41

 Registered User
- Join Date
- Mar 2007
- Location
- Florida
- Posts
- 2,391

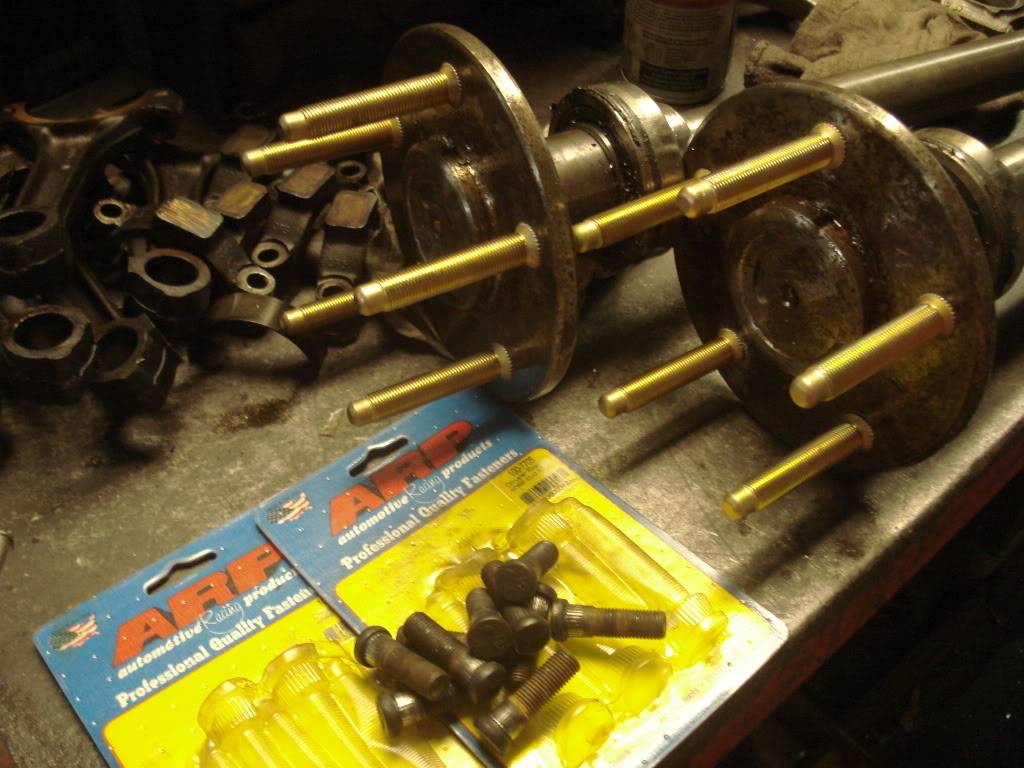
While most of you were watching football and eating leftover turkey sandwiches Thanksgiving night I went over to the machine shop to drill out my rear axles for 1/2" wheel studs. The race classes I plan on running in require 1/2" studs so that's what I asked Baer to send my set ready for. The fronts were already installed in the new assemblies. I called Baer tach support to be sure I got the same style ones for my Moser axles. Don't want the hassles others have gone through with different thread size or appearance of front vs. rear studs.The gentleman on the tech line that day conferred with a bud at ARP and they decided which studs I needed which I then ordered. The steps below are the old school way of doing this and modern machines can do this much more quickly but if you've got access to a big drill press like I do and want to do it yourself, here's how.
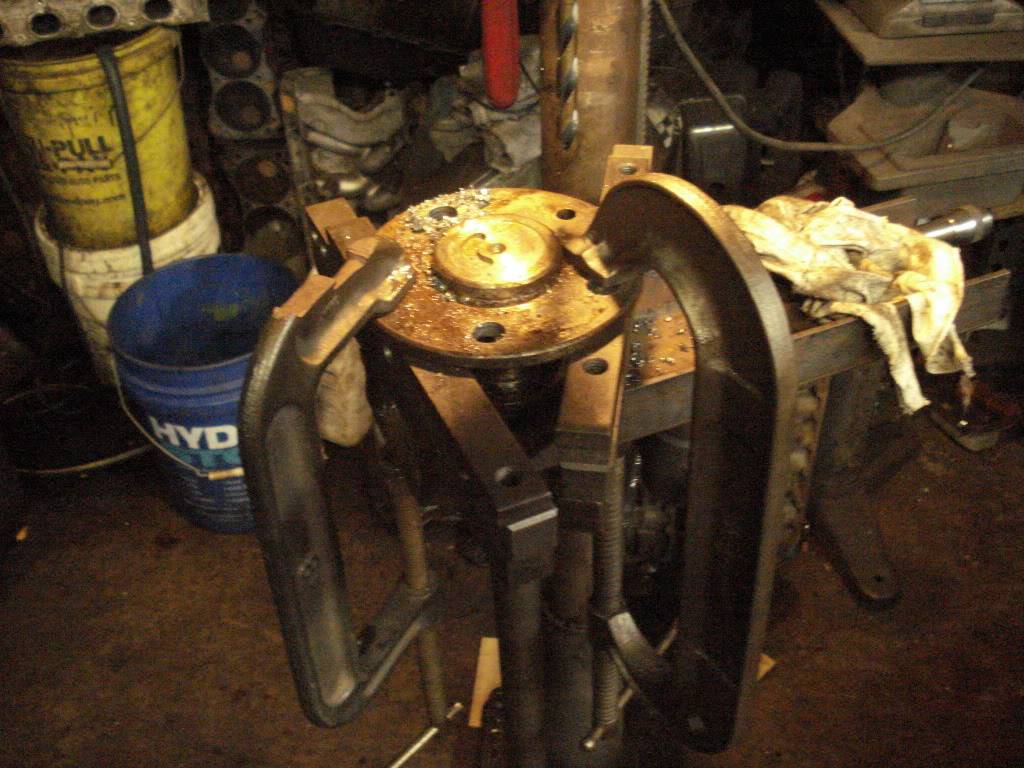
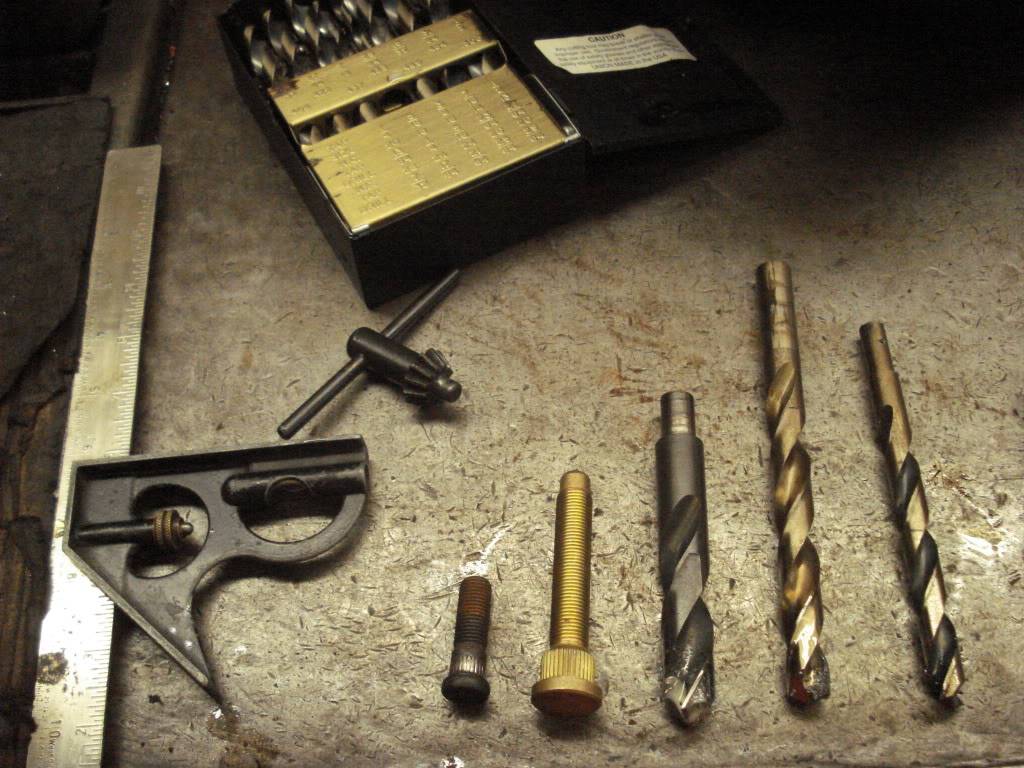
At the machine shop there's a big ole freestanding drill press that's rarely used. Many years ago the shop owner made an adapter to allow drilling out axle flanges which he told me about when I asked about drilling mine. Neither looked like they've been used in 10 years and I've been there 3 and haven't seen anyone use them. Anyway since I knew they were available I figured I'd use them.
First step drag out the press and shim it at the bottom so the drill bit would be straight up and down. I used a small square and a level on the drill bit at 2 sides 90 degrees apart. Shimmed the press at the floor with wood shingles till the drill bit was square with the world.
Next I set the table adapter that would support the axle flange so it too would be flat and square with the world. The table adapter has a couple holes in it that allow offsetting the axle shaft so the hole that needs to be drilled can be lined up with the drill bit.
First step is taking out the "little" 7/16" studs. Support axle flange on a vice and plink them out with a big hammer.
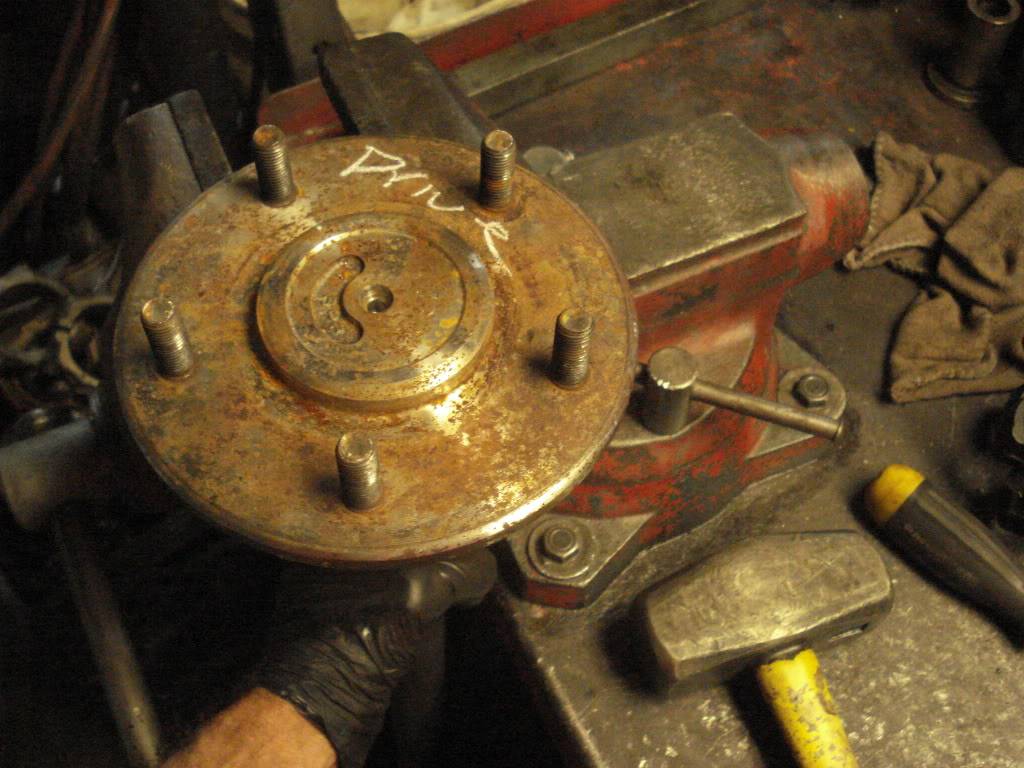
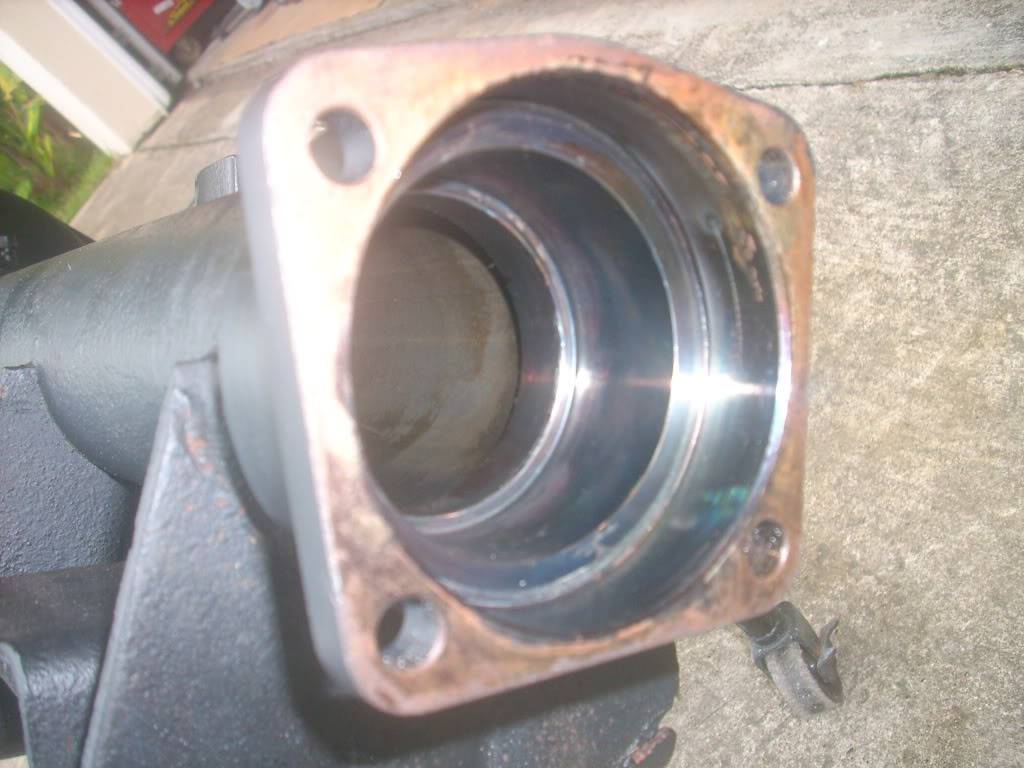
Next set up the axle on the press adapter and install a bit the size of the original holes (7/16" in my case) in the chuck. Then double check the axle flange and bit to be sure they are square to each other. Because I'm reusing the axle bearings I had to use apacers to support the axle flange because the bearings wouldn't fit through the axle hole in the table adapter. For each hole the 7/16" bit gets lowered and lined up through a hole to be drilled and then the flange is clamped in place. To be sure the hole is lined up perfectly with the bit after clamping, release the bit, then lower it again and make sure it slides cleanly through the hole.
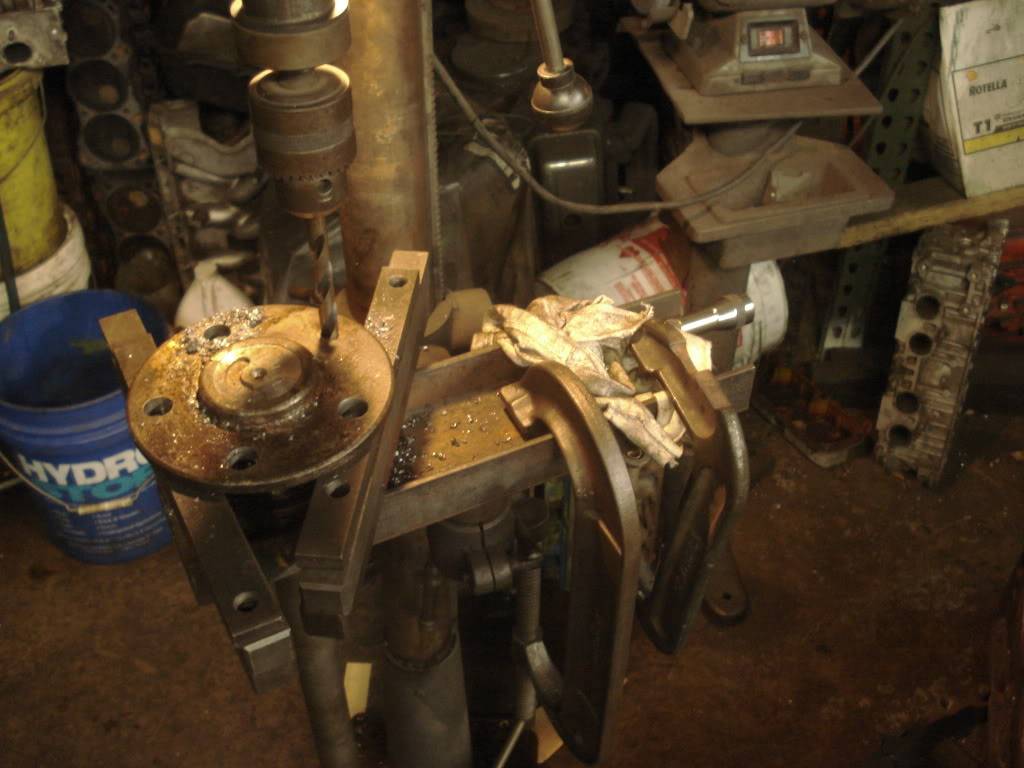
With an intermediate sized bit the hole is opened up. Go gentle at the touch off and check the cut to be sure the bit is centered. Use cutting oil to lube the bit. After the intermediate hole is finished repeate the process using the final bit which should be sized for a 10 thousandths interference fit.
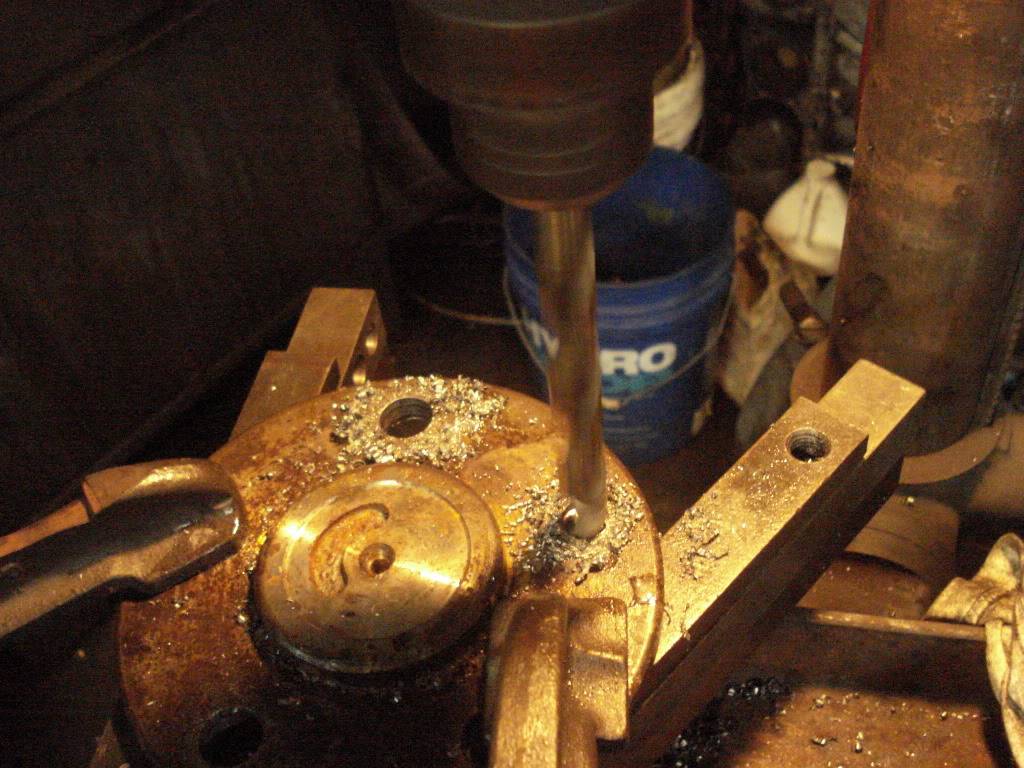
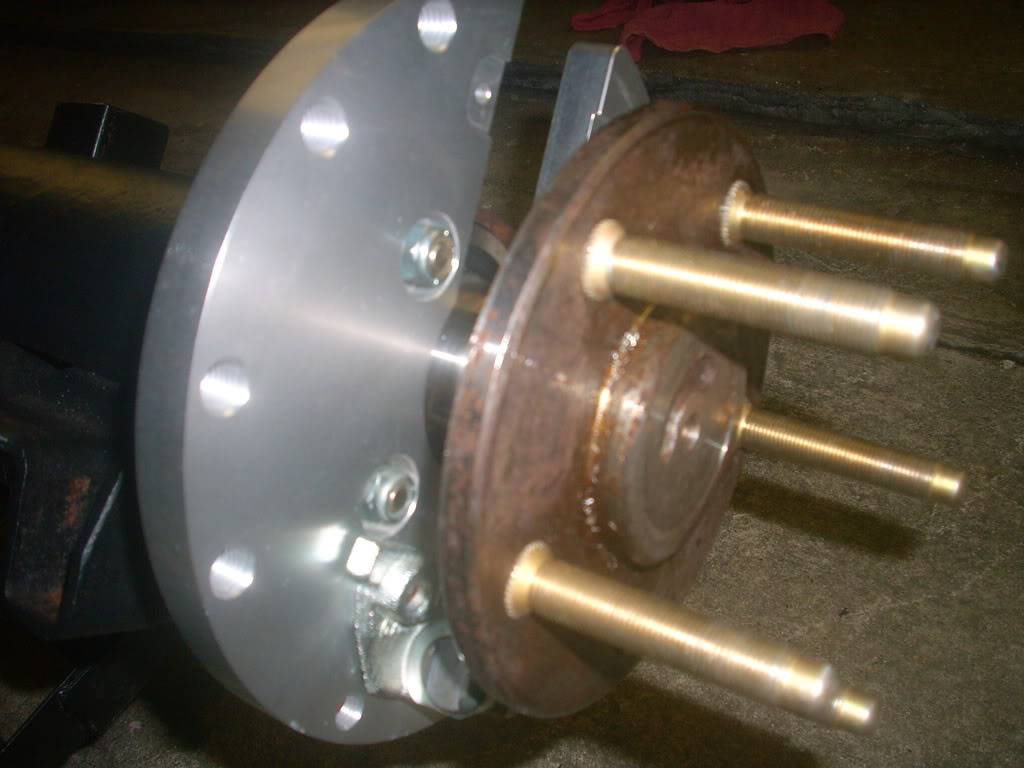
Once all the holes are drilled use a flat file on the flange to clean off the burrs from drilling. Then Install the new studs by supporting the axle flange on a vice and using the big hammer to plink them in. If you did everything right the studs should all be parallel. Check out the size difference in the studs in the bottom pic! I'll put a spot of weld on each stud when I get a minute during the next couple days, it was late by the time I finished so I figured I'd do that later
.
Last edited by NOT A TA; 05-12-2014 at 07:39 PM.
-
09-29-2012 #42
Registered User
- Join Date
- Mar 2007
- Location
- Florida
- Posts
- 2,391
So, after almost a year I'm finally updating this thread. I've been busy working on other peoples projects and some of my own other projects however it's time to get some work done on my bird and get it back together! The only part of the prizes I hadn't ordered yet were the Rushforth wheels.
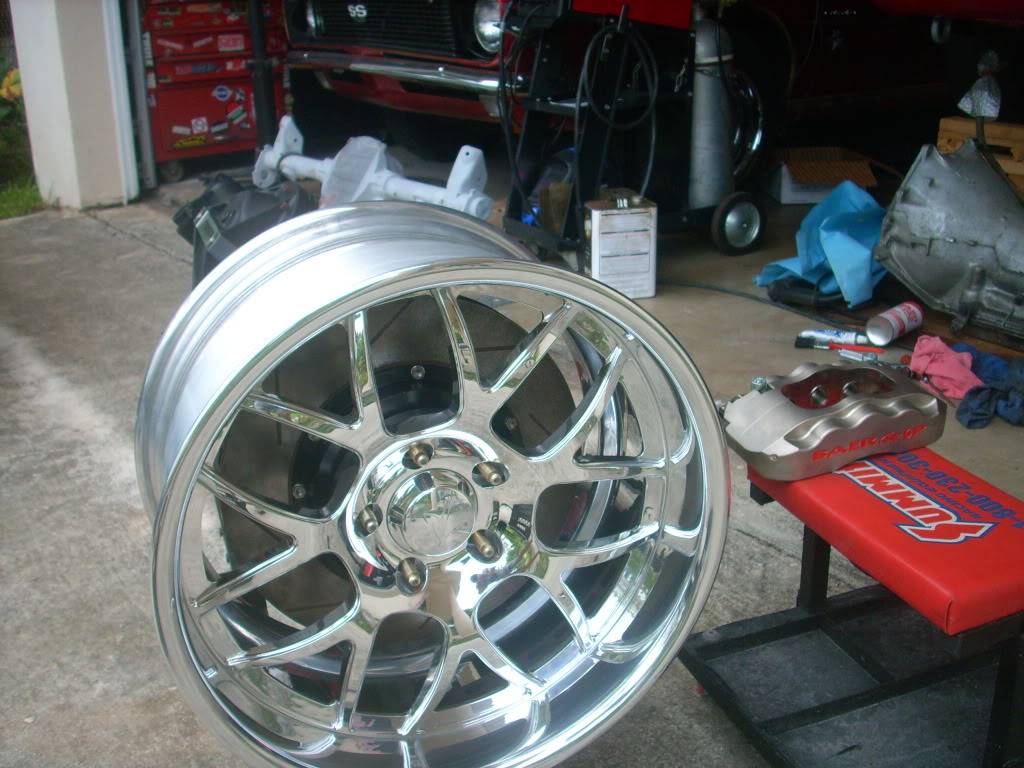
I decided that figuring out the backspacing I think will work for the new wheels and ordering them would give me incentive. So I ordered 18 X 10's with 6" backspacing up front and 5.5 backspacing in the rear. The 285/295 tires are Yokohama AO 48's which are a DOT legal race compound tire designed for track day use. I expected a wait time of 8-10 weeks which is not unusual for custom wheels and figured I'd use the time to start working on the car. Imagine my surprise when I got a tracking # within a week! I better get moving!
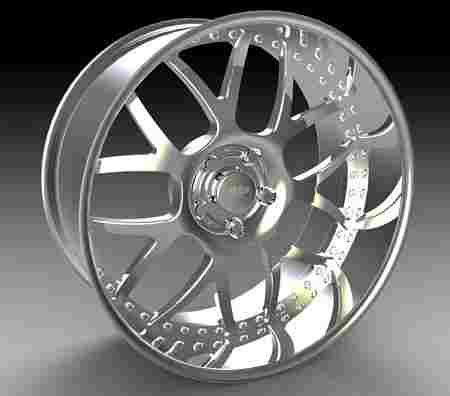
For those who've never bought custom aftermarket wheels like these Rushforth Night Trains there are other options besides the backspacing. You can get different finishes/colors, regular or hidden valve stems, exposed or hidden hardware etc. My wheels are the model shown below but will appear a bit different. Will post pics of mine when I get them.
Last edited by NOT A TA; 05-12-2014 at 07:40 PM.
09-30-2012 #43 Registered User
- Join Date
- Dec 2005
- Location
- Birmingham, AL
- Posts
- 3,356
Glad you are back on this one. I like the choice of the Night Trains. I have thought about the idea of the Overkill wheel when I get ready for a custom set. It has a nice Trans Am Honeycomb vibe to it, but we all know your car is not a TA.
Stephen
10-19-2012 #44
Registered User
- Join Date
- Mar 2007
- Location
- Florida
- Posts
- 2,391
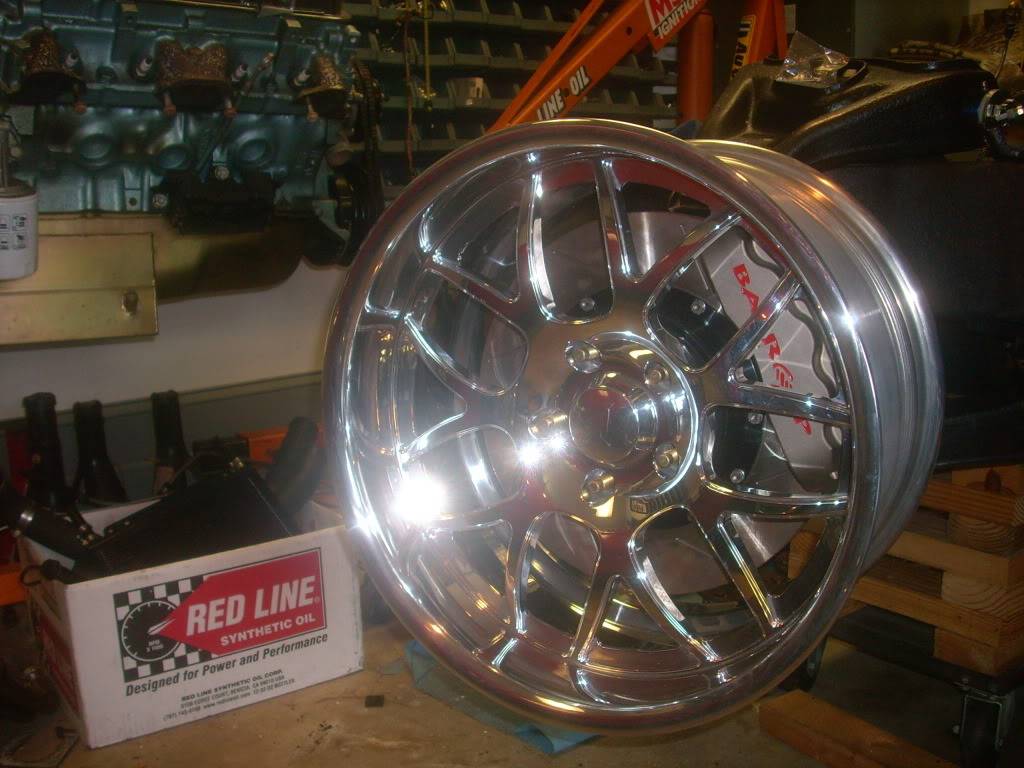
I test fitted one of the Rushforth Night Trains on the front to check clearance of the 18 X 10's and so far it looks like they'll work out nicely.
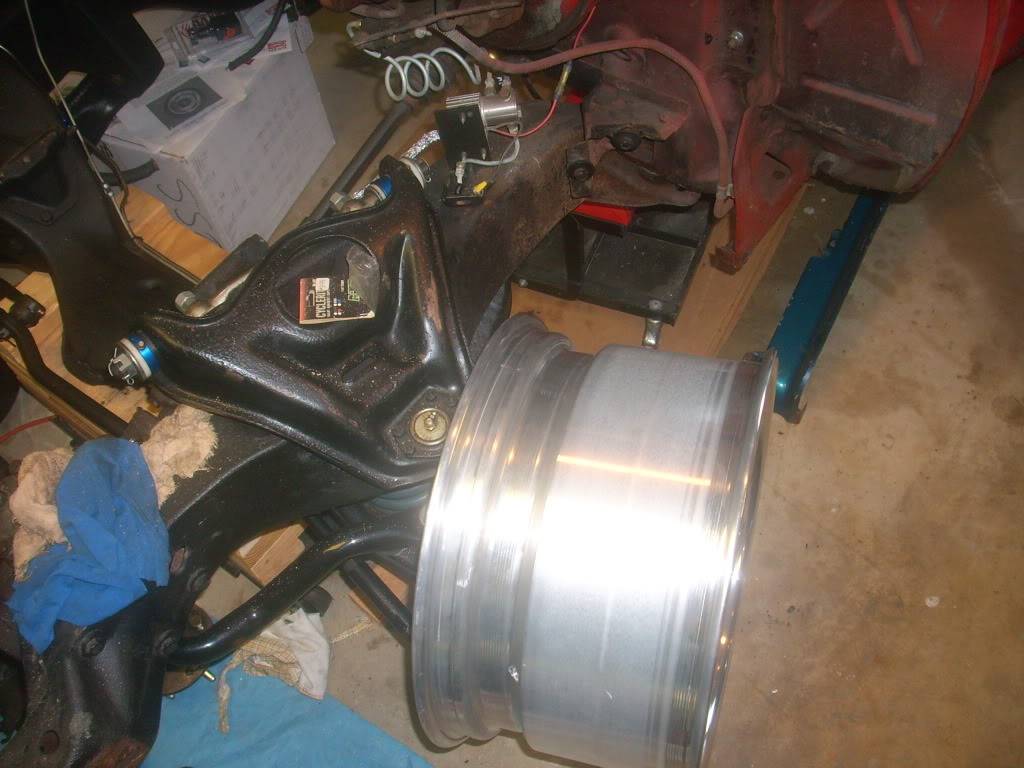
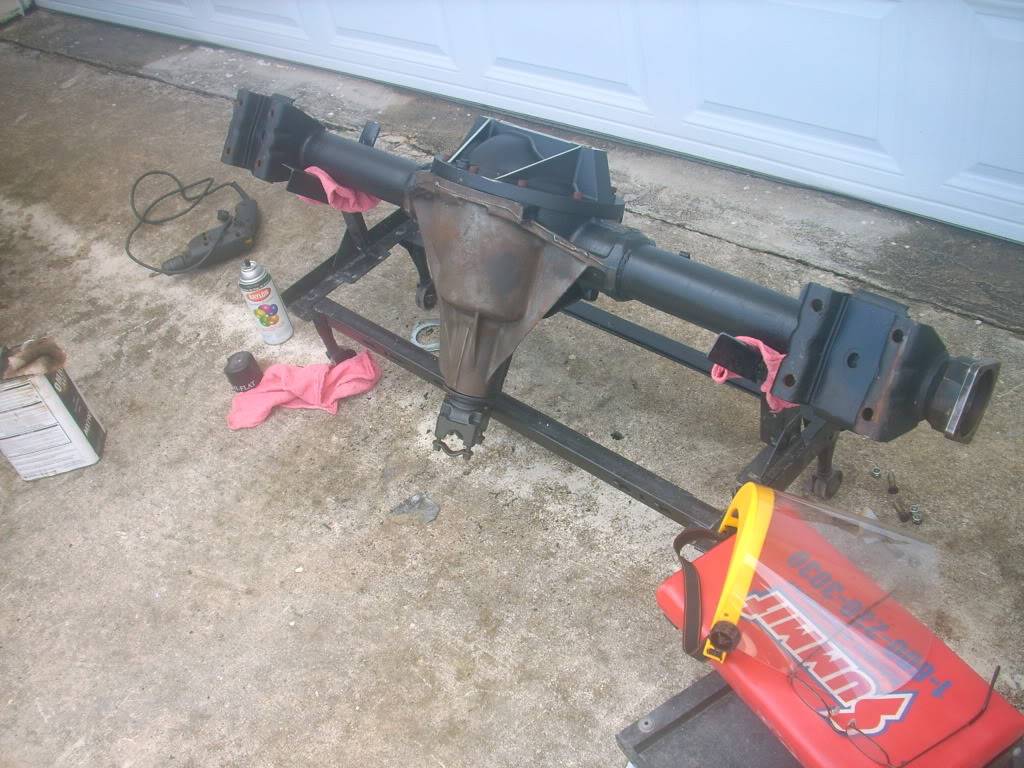
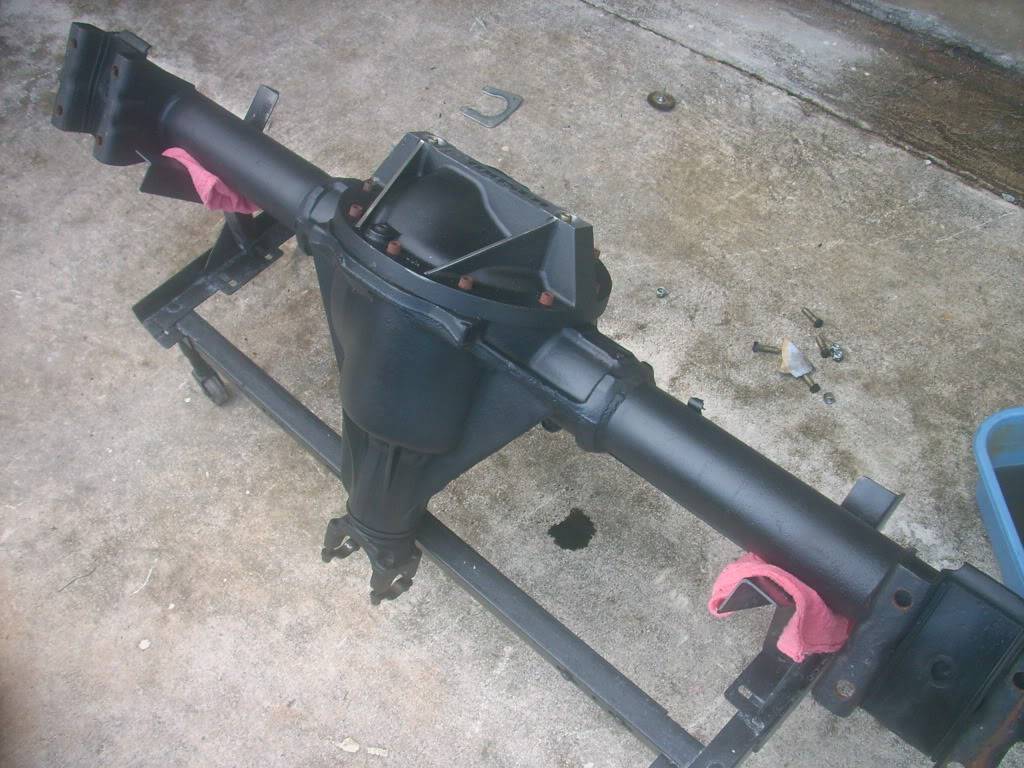
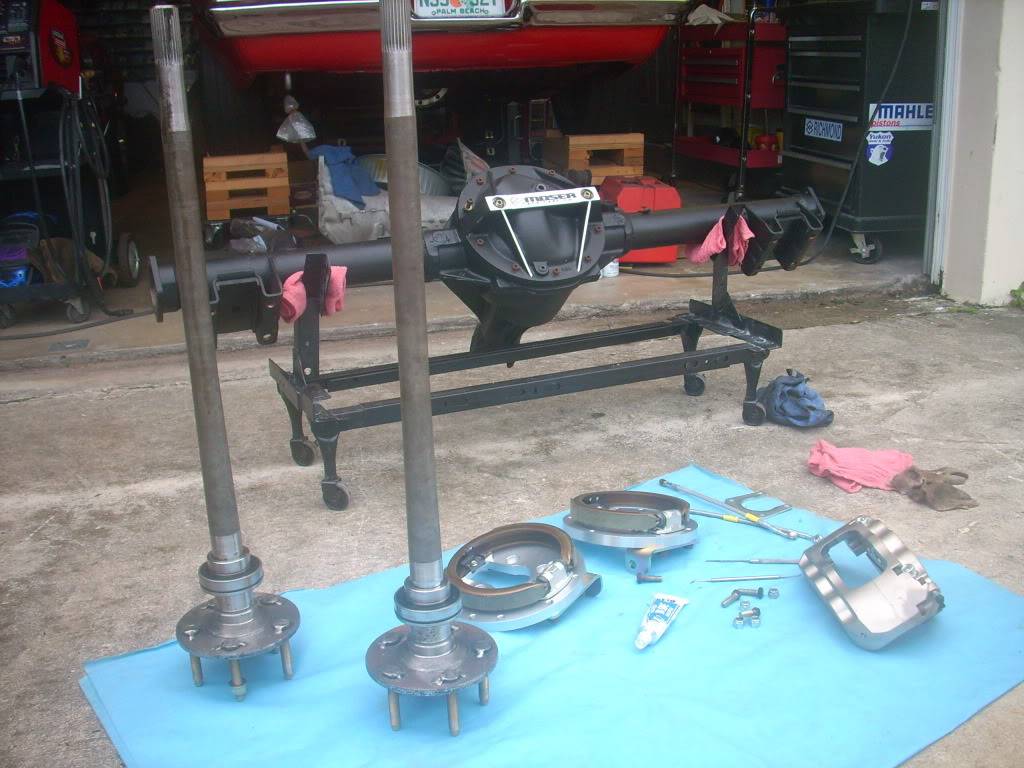
Haven't gotten the tires mounted yet but been working a bit on the rear disc install. First thing was to spruce up the paint from jacking the car on the rear. Since this car gets tracked and I might wreck it one day I just make the underside look nice but no powder coating or more expensive appearance things. So I "fixed" the paint by giving the affected areas the Krylon touch with the same semi flat black I've been using on the car the last 20 years.
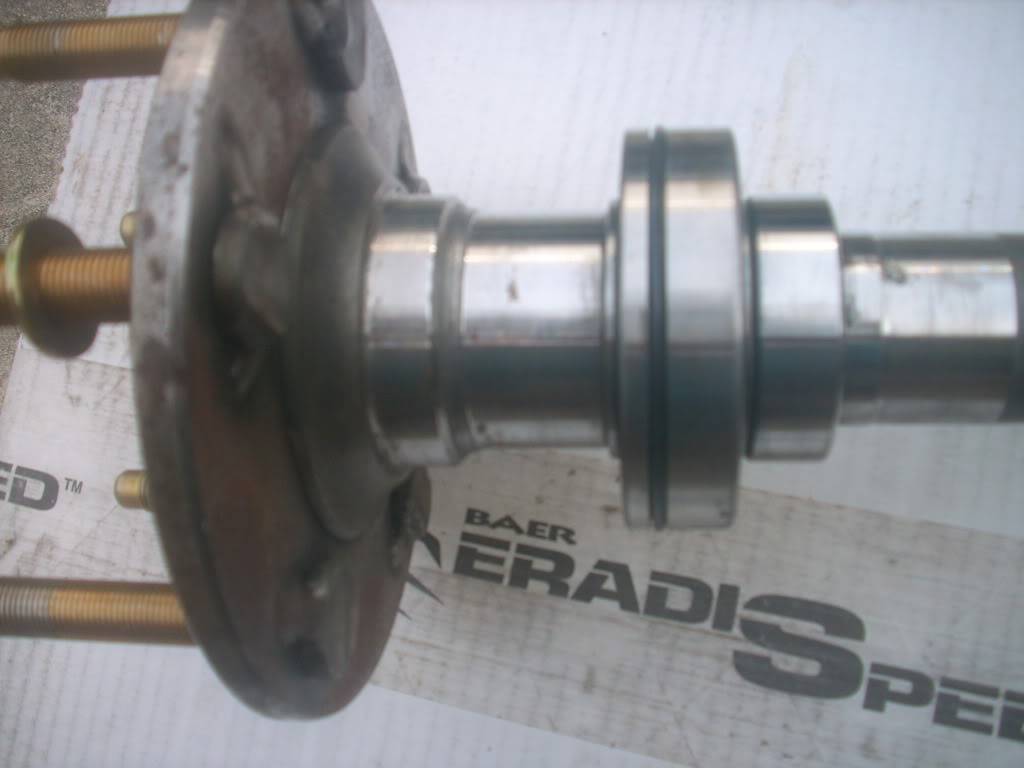
It's going to be very tricky getting the parking brakes installed with Moser tapered axles and big Ford axle housing ends on a GM 10 bolt. I'm contemplating removing the axle bearings and trying to slide the complete backing plate/park brake assembly on as a unit then reinstall the bearing and then install the whole shabang at once. Anyone who's ever tried this combo please let me know if you've got a tip to make the install easier.

Last edited by NOT A TA; 05-12-2014 at 07:42 PM.
10-19-2012 #45
Banned
- Join Date
- Aug 2012
- Posts
- 82
i cant say anything bad because its a bird nice ride!
12-26-2012 #46
Registered User
- Join Date
- Mar 2007
- Location
- Florida
- Posts
- 2,391
I have been working on the car. I was working on the rear axle doing the rear disc install (more on that later) and then our weather here turned to the time of year where it's the best time to do bodywork so I shelved everything else temporarily to concentrate on the bodywork portion of the project.
I'm replacing several pieces on my car with "better" ones than I could find (or afford) when I first painted the car 20 years ago. I collected these pieces over 20 years and am finally painting them since the cars apart anyway.
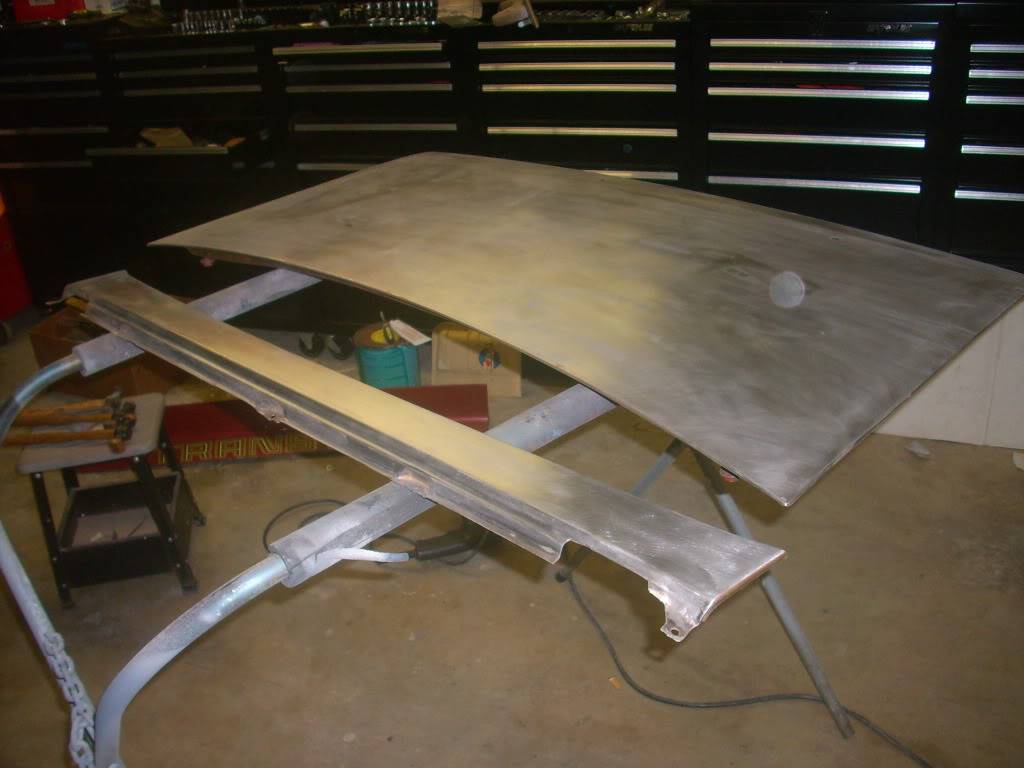
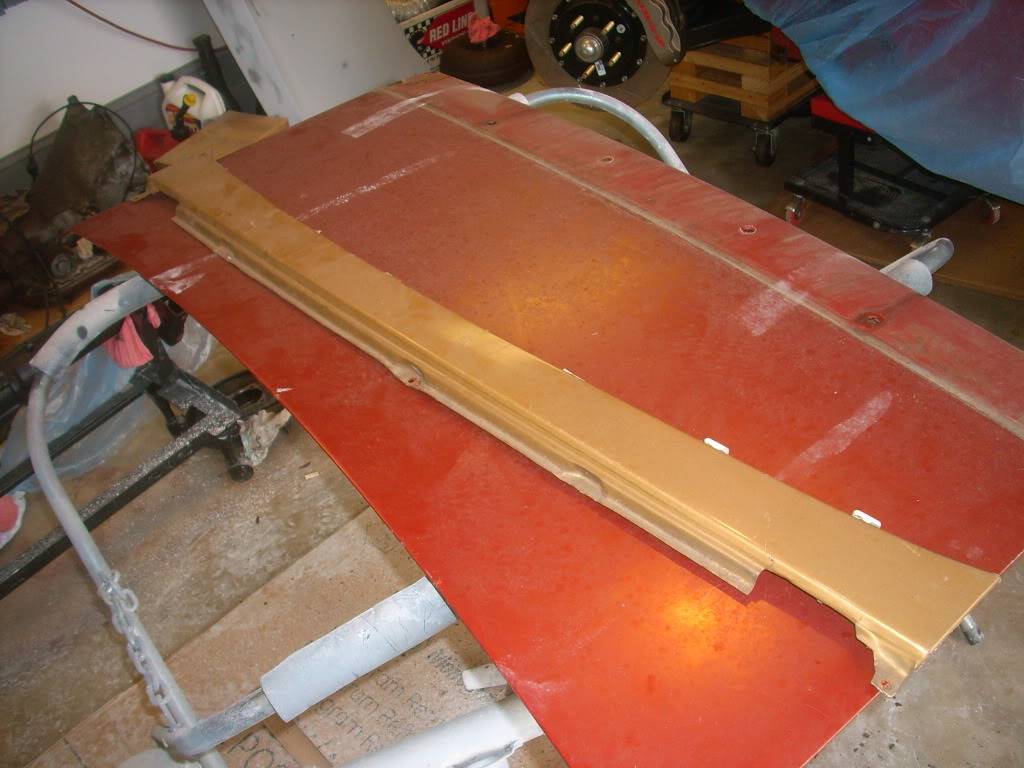
1st up is a deck lid. The one on my car now was the original esprit lid without spoiler which isn't as straight as I'd like. I had drilled holes and mounted pieces from 3 different spoilers on the car at the time. I parted a 76? TA back in the 90's and saved the deck lid and spoiler for use now. Spoiler will be modified. I didn't completely strip the inside of the trunk because it's a lot of work few will ever see and not being in the sun the paint isn't cracked. I did strip the edge and smoothed a dew dents.

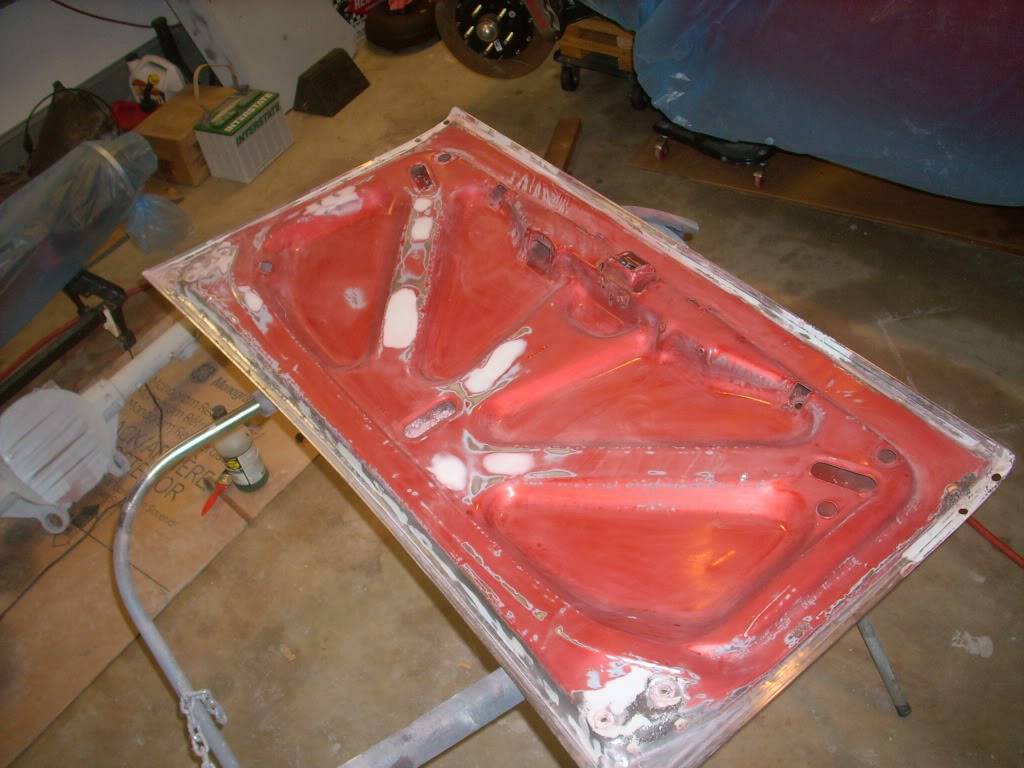
The trunk filler on my car wasn't as good as the one on the parted car so it came along for the ride and got stripped as well.
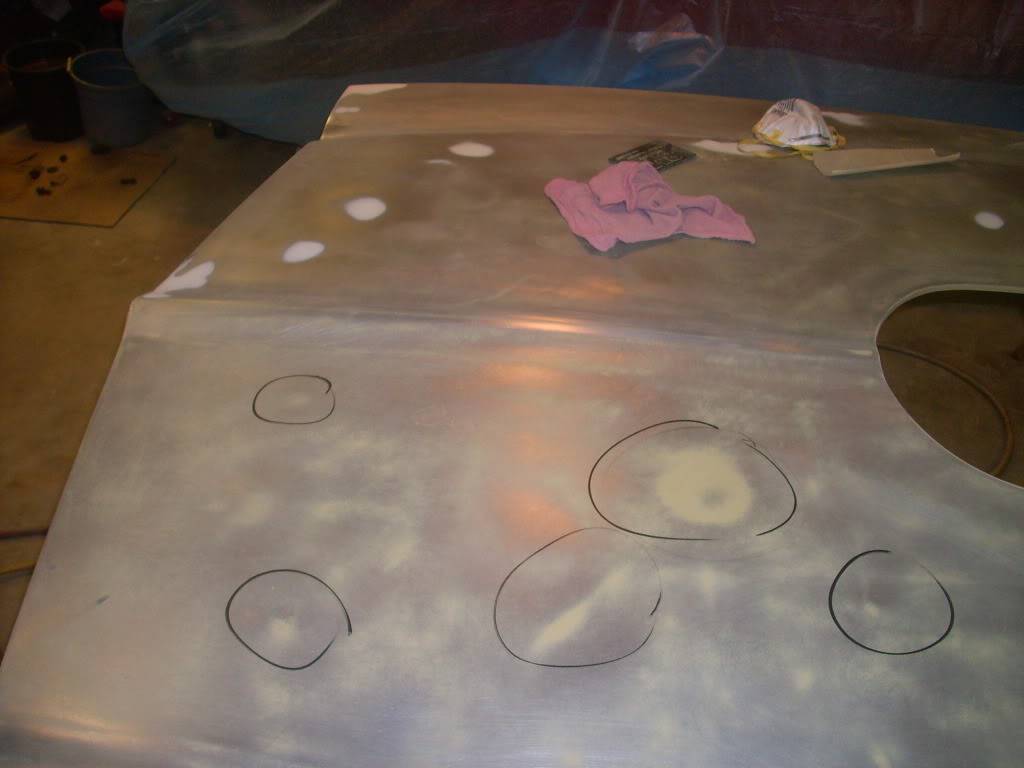
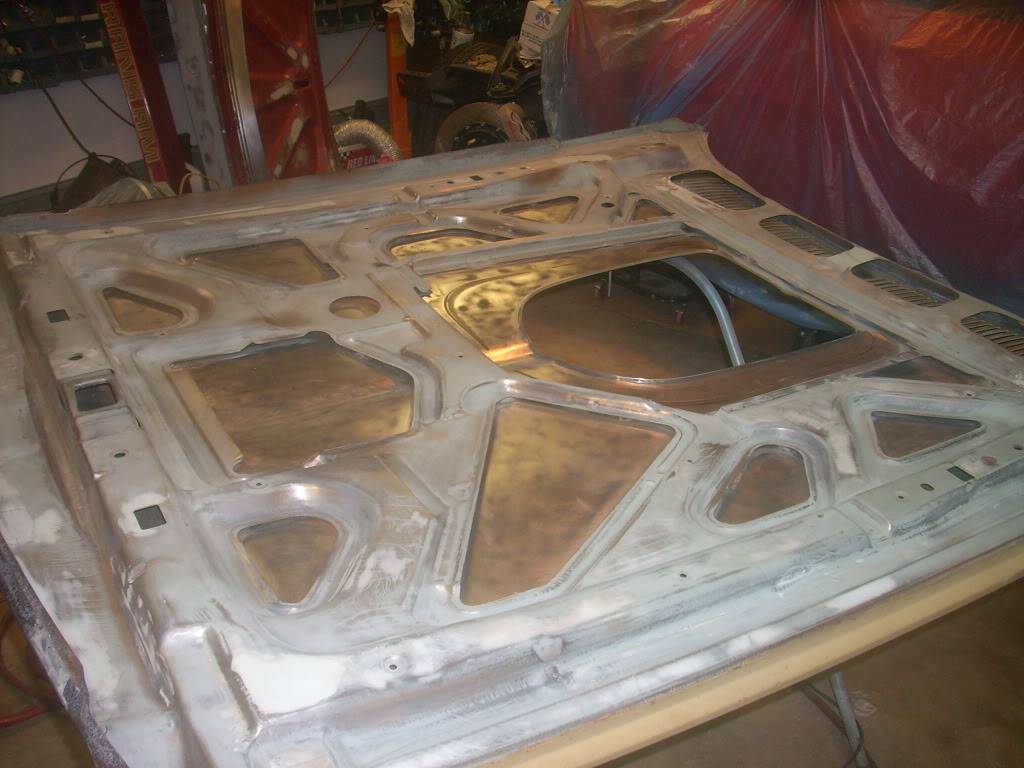
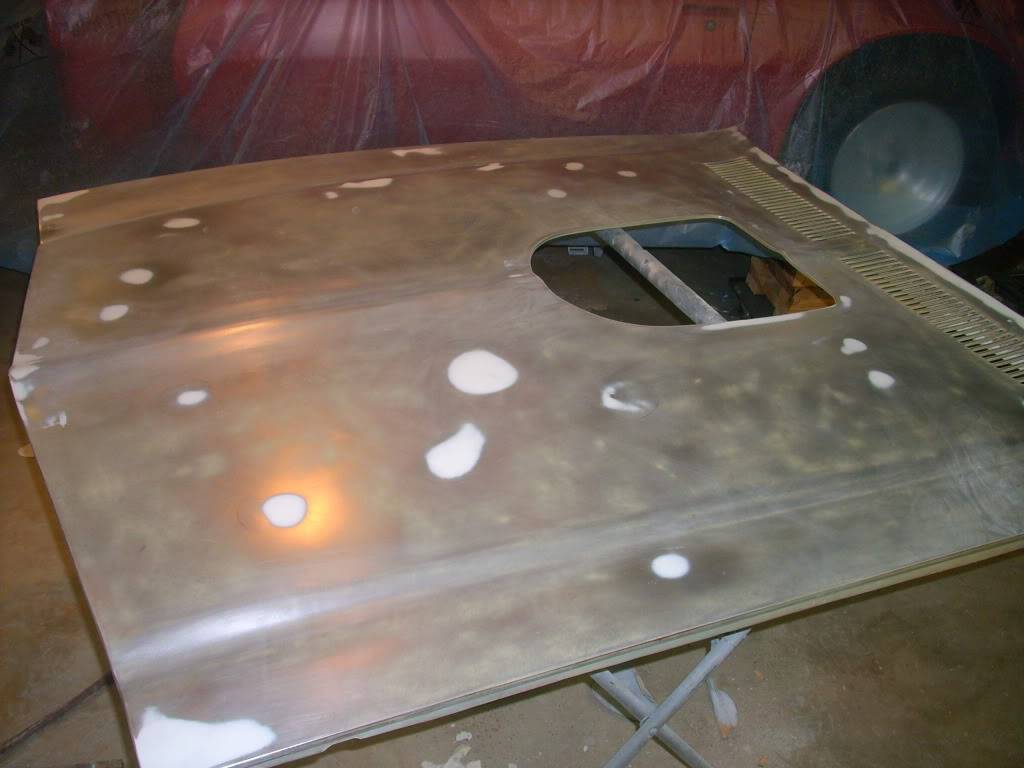
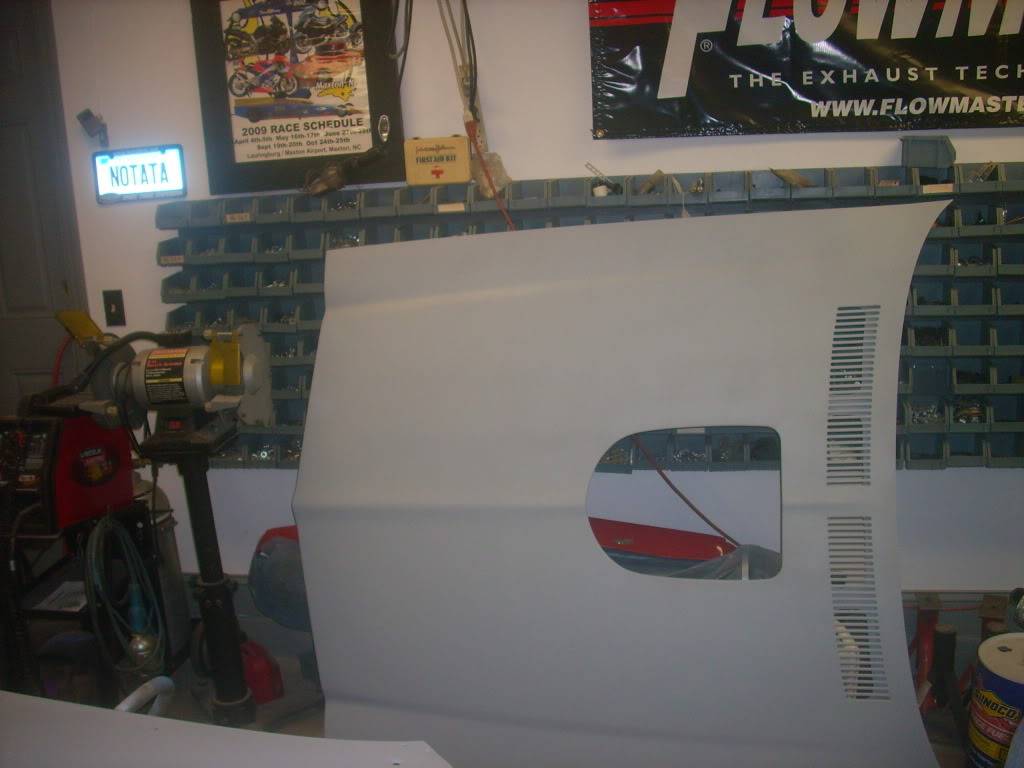
The hood on my car was originally a stock flat hood someone did a nice job of cutting a shaker hole in before I ever had it. I bought a stock TA hood long ago and have kept it waiting for paint. Because my job involves a lot of underhood restoration projects and customers will want a peek at my own car I'm kinda forced to do a nicer job than I would normally do to a car that might get stuffed into a tire wall at a track. So I stripped and smoothed the complete inside and outside of the hood. I've got over 20 hours in it so far!
The hood was media blasted and primed before I bought it a long time ago so I wanted to start with bare metal. While using a DA to strip it I mark all the high and low spots so I don't miss any then sand out the paint before hammer/dolly work and thin filler.
12-26-2012 #47 Registered User
- Join Date
- Jul 2008
- Location
- ohio
- Posts
- 1,135
looking good john....
keep the wheels a spinning and the Beavers a grinning (burt reynolds-smokey and the bandit)
12-27-2012 #48
Registered User
- Join Date
- Apr 2010
- Location
- Portland, OR
- Posts
- 357
Can't wait to see the car with the night trains on there!
1973 Firebird 466 Pontiac, T56, C5 Brakes, PTFB and Hotchkis suspension
2011 Camaro SS Supercharged, ZL1 body and brakes, Z28 suspension.
12-27-2012 #49 Registered User
- Join Date
- Jul 2010
- Location
- OREGON
- Posts
- 365
Those night trains are sweet..
12-27-2012 #50
Registered User
- Join Date
- Mar 2007
- Location
- Florida
- Posts
- 2,391
Ya I think the night Trains will look awesome. Of course I had to see what one looked like on the rear when I was working on the brake install! Just to check fit ya know! Ahahahaha
12-27-2012 #51
Registered User
- Join Date
- Dec 2005
- Location
- Birmingham, AL
- Posts
- 3,356
So far, I have liked the Night Train in every color, but that chrome takes the cake. It looks great in chrome.
Stephen
12-27-2012 #52
Registered User
- Join Date
- Aug 2011
- Posts
- 130
And you rag on me for swapping valve covers as soon as the engine is in the car? You mounted your new wheels, without tires, on a rear end that isn't even in the car! You're busted, Murf! All about performance? Seems to me you get some bling and you do like we all do- put it in the car and see how it looks!!! You'll take it out later and make it work right, but for now- bling, bling, bling!!! The wheels are bad a$$, though your sleeper status is shot!
12-28-2012 #53 Registered User
- Join Date
- Apr 2006
- Location
- Atlanta GA
- Posts
- 7,477
oooooh shoot!!
gonna get interesting in here!
12-28-2012 #54
Registered User
- Join Date
- Aug 2011
- Posts
- 130
It's been interesting beyond what you could know! He's doing a great job helping me build my car, so he get's to critique my choices all the time. This is my first chance to critique his, aside from his funny colored Malibu we like to debate the color choice on- and as we all know, payback's a, ummmm female dog...
12-28-2012 #55
Registered User
- Join Date
- Mar 2007
- Location
- Florida
- Posts
- 2,391
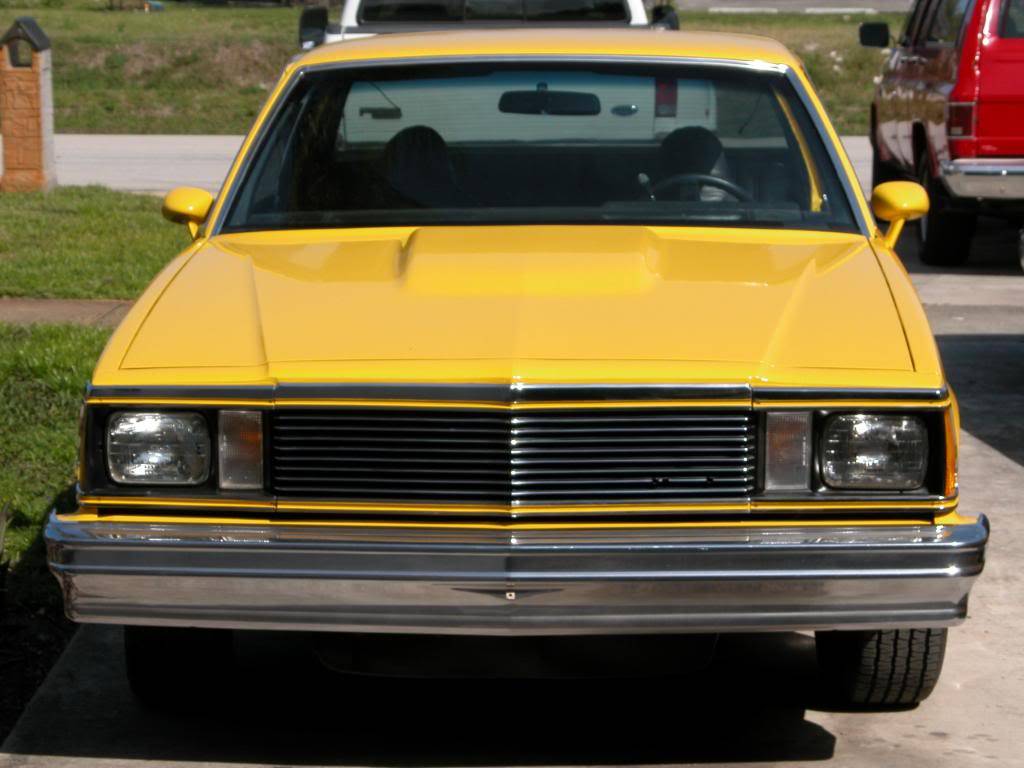
I'm getting old and can't see as well! Need to be able to find the bu in the parking lot at the grocery store since my memory's going to be fading soon too and I won't be able to remember where I parked! There's no antenna so I can't put a tennis ball or something on it! And, I LIKE the yellow! ahahaha Gotta get it back on the road just so I can park it in front of your house. Here it is for your viewing pleasure! Oh ya, clean the bench!
Amir, we agree to disagree and move on. We do get along well and are having fun building him a bitchin Camaro.
OK, break time's over and I'm off to the garage to do bodywork.
12-28-2012 #56
Registered User
- Join Date
- Aug 2011
- Posts
- 130
The Wee Wee Mobile!!!
Good thing NOTATA has a crappy eye surgeon and can't see ***** (or apparently, pee pee, for that matter...)
At least that "time of the month red" 14 car's color is bearable!
OK that's enough body fluid color discussion. Gross.
Those Rushford Chromes are beautiful, though. Maybe his eyes are gettin' better with this new eye doc?
;^)
12-28-2012 #57 Registered User
- Join Date
- Dec 2012
- Location
- Las Vegas, Nevada
- Posts
- 109
Great write up !! keep them coming. your bird will no doubt be awesome when you get it back on the road
12-29-2012 #58 Registered User
- Join Date
- Dec 2012
- Location
- Boise, Idaho
- Posts
- 84
B-E-A-Utiful!!!! You have the right ideas with this sweet Bird.
01-03-2013 #59
Registered User
- Join Date
- Mar 2007
- Location
- Florida
- Posts
- 2,391
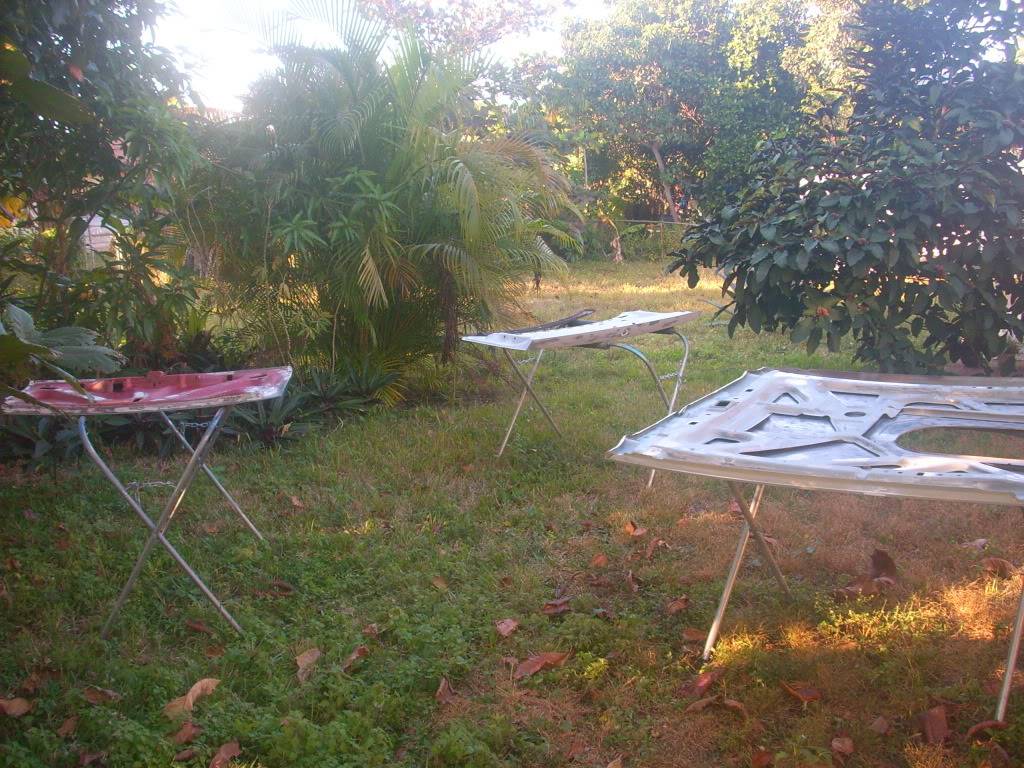
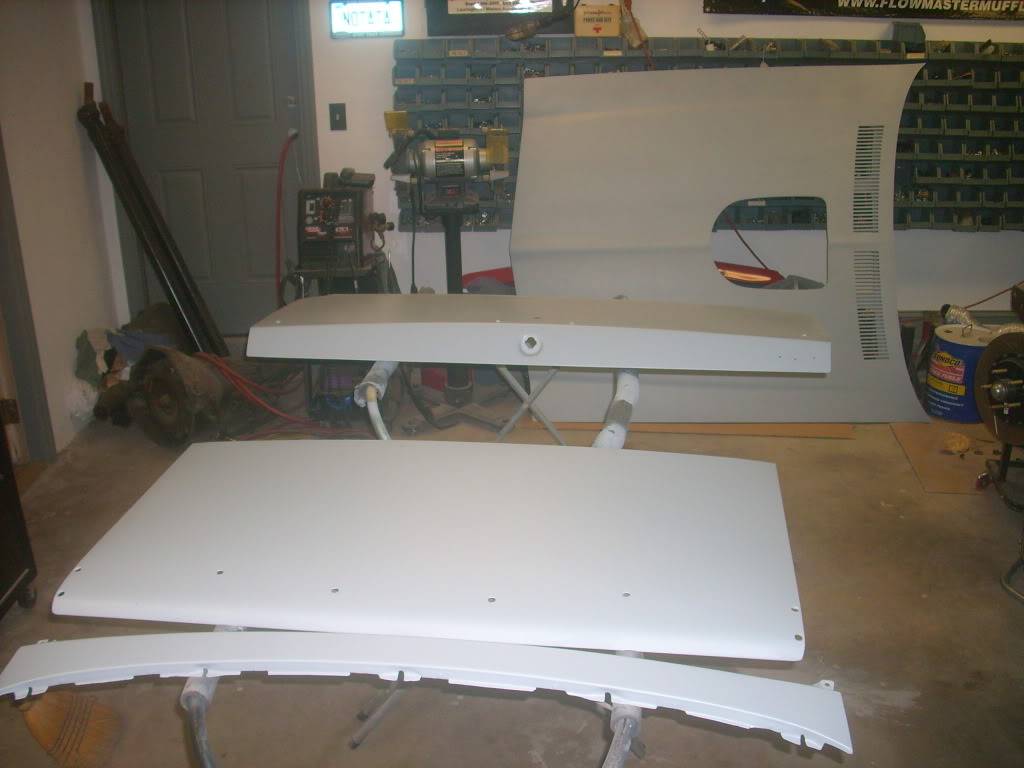
Living close to the Atlantic we get an ocean breeze most days. Since it was calm today I took the opportunity to spray some primer on pieces that were ready for some paint.
My high tech mixing station.
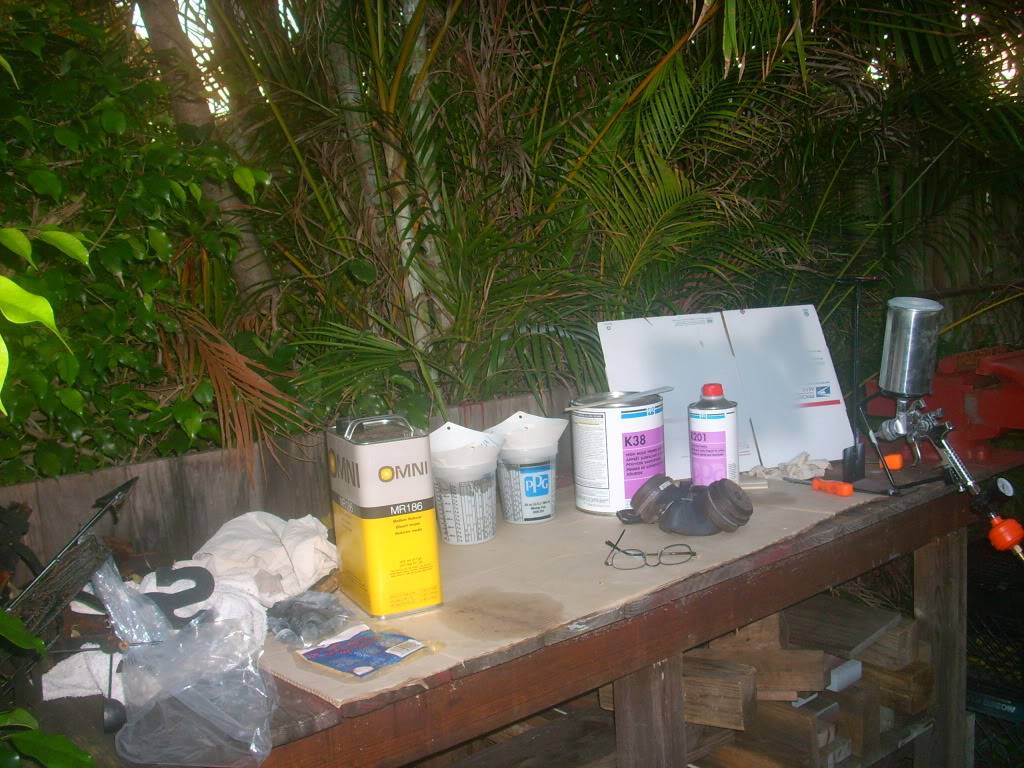
My fabulous tropical spray booth. Yes, I need to mow the lawn (weeds) but it's bodywork season!
Some neighborhood quacks stopped by to offer assistance (beg for food). While some guys have a shop dog or cat the ducks have decided it's fun to stop by my house get a bread snack and check out whatever I'm working on. They'll stand in front of the garage if the doors open but not come in, however if I'm outside they get underfoot and sometimes get banished like they did today ahahaha.
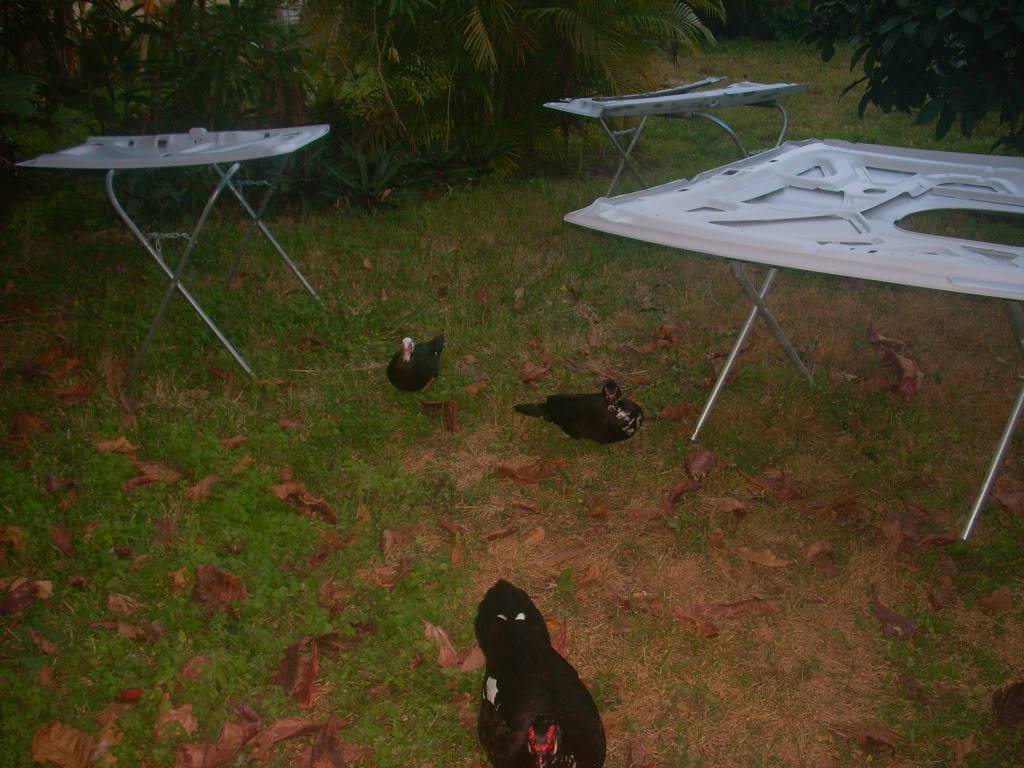
All primed inside and out with high build sandable primer. Ya ya I know "Whats that Fox body notch trunklid doing in the mix?" It snuck in and will be painted white.
Last edited by NOT A TA; 05-13-2014 at 08:31 PM.
01-03-2013 #60
Registered User
- Join Date
- Dec 2012
- Location
- Boise, Idaho
- Posts
- 84
Hey there NotATA guy. I have been checking out your car for a little while now. Saw it first on the StreetFighter site. (love those rides too)
I am intrested in these plans you have:
4. Spoiler extension and splitter. Aerodynamic benefit and the supports will keep the stock spoiler from flexing so much at speed. Another thing I've been saying I'll get to. Since I'll have everything apart and be painting, now's the time. I've been working on a design, will try to make it a reality.
5. Custom front valance. Already have a spare valance to work with that's better than the one on my car. Gotta design in mind, will try to make it a reality.
6. Rear diffuser. Again I have a design in mind and will see how it works out.
I am also attempting a design for a rear diffuser on my TA and can't wait to see what you come up with.
The mods on my car are a little tuffer to cut into since my car is a real TA and also limited production number.
As in: standard interior. NO A/C. 4speed 455. Real basic but semi original.
Anyway I can't wait to see what you get put together.
Toby...

 Reply With Quote