Results 1 to 20 of 65
-
03-30-2009 #1
 Registered User
- Join Date
- Feb 2008
- Location
- Detroit
- Posts
- 206

'72 GTO - Project 'Just-A-Driver'...
I haven't provided project updates since joining as I was sorting out the direction for this project, and how to proceed.
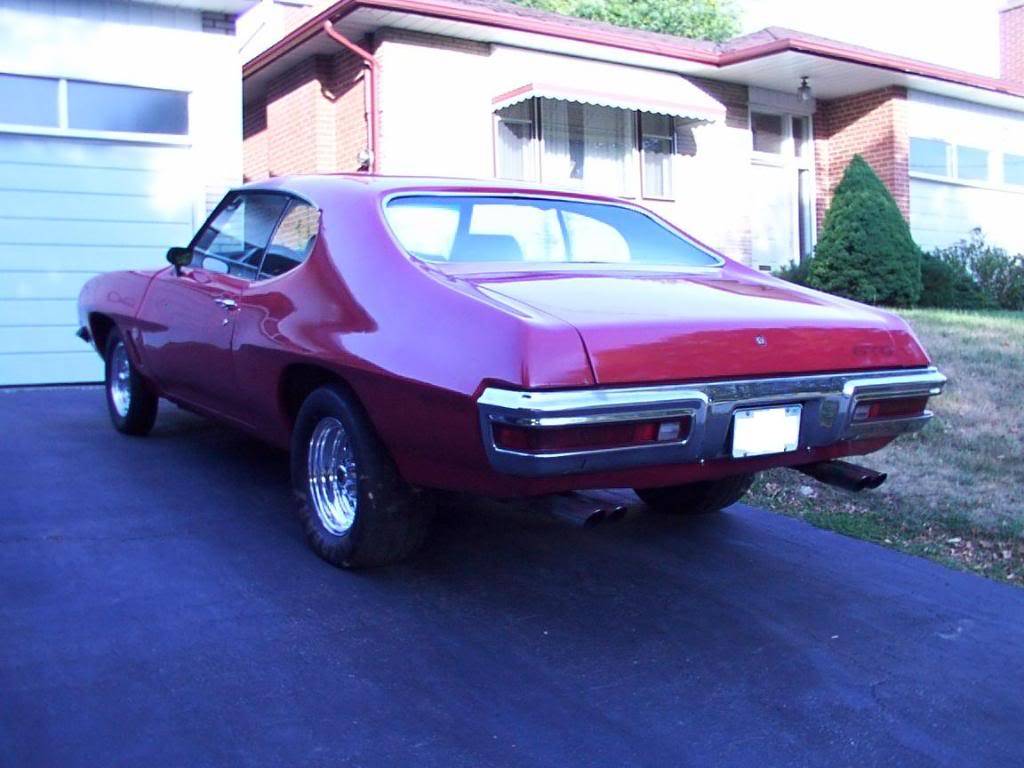
I decided to reincarnate the car as a 'clean driver' - a car with decent ability to go, steer, and stop while remaining true to the original car that Pontiac built.
This car had a frame-off in 1991, but I never finished the body and was not happy with the final product.
After moving, I had a double garage not fit for working in. First step was to get the garage in shape (strapped walls, insulation, wiring, drywall, paint/trim) followed by electrical (110v panel), air-lines, etc.
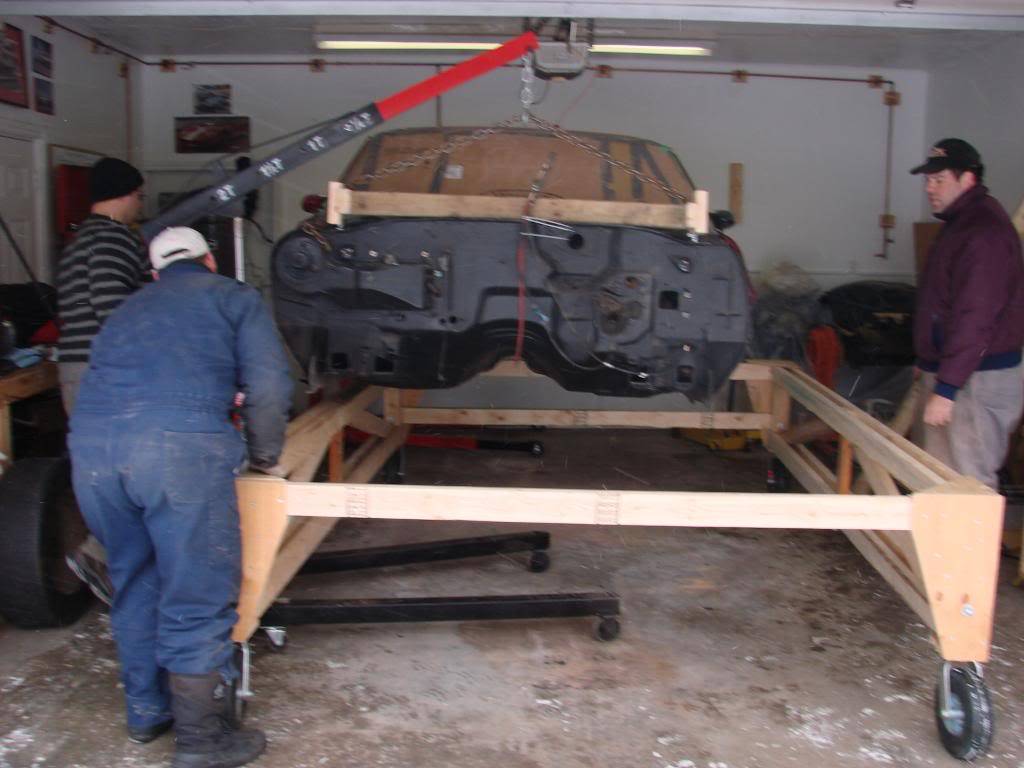
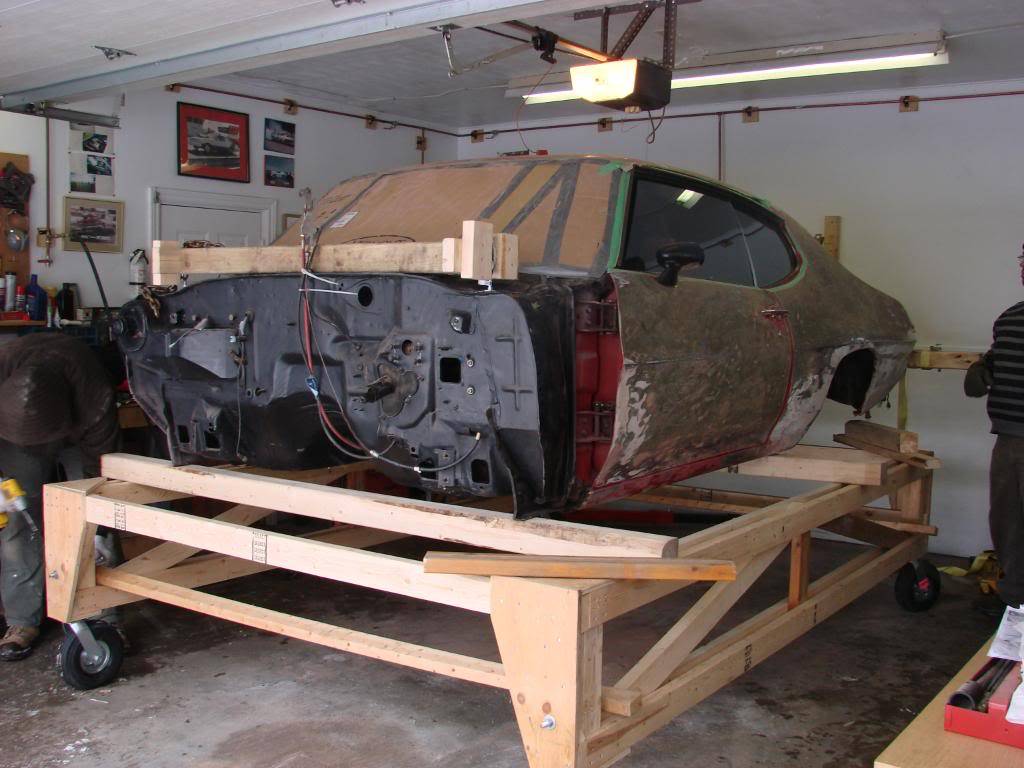
In the past few months where/when I have time (as I travel for work) I have been working (with some help) to get the body off. It was a little farther than I originally thought I would take the car, but I believe it will be easier to assemble the chassis and give me a better result. We built a body jig (which moves) out of wood, after I realized a full steel rotisserie was just over the top for my needs. Plans are to reuse this on a couple of cars a friend of mine has - that we will work on next.
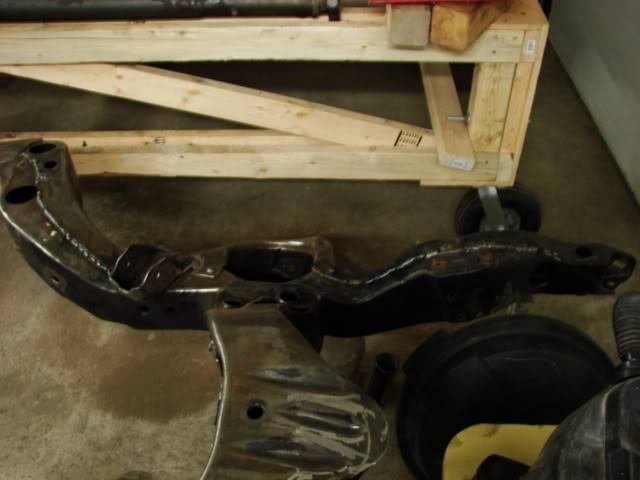
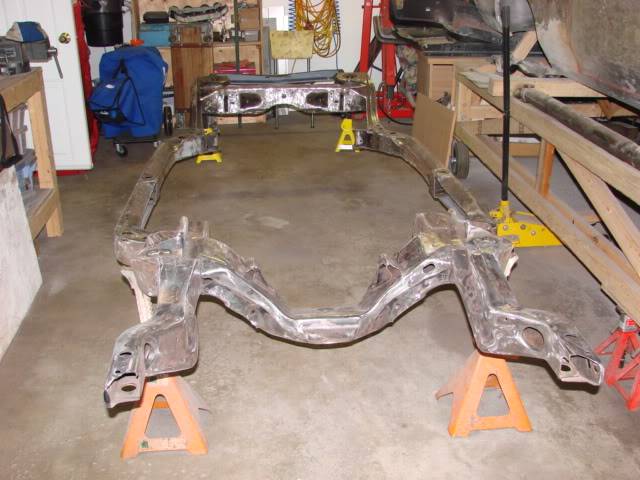
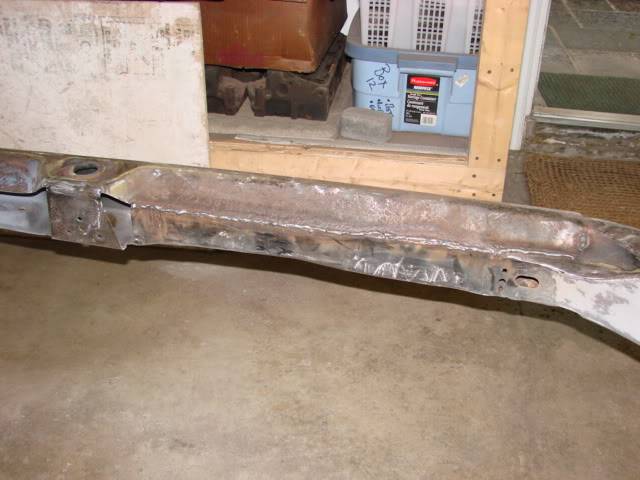
Frame and underside of car were blasted in 1991 so I am not going that route again, I am just cleaning up 'rough spots'. The frame was painted in a rust-oxide primer, followed by an acrylic enamel. Plans are to weld up the frame, add some support (box the rear parts of the channel), primer/sealer then shoot it with a Nason chassis black. Also, where applicable I am using a corrosion converter on some of the frame. Got my Miller 210 a couple of weeks back, and after some re-orging in the garage, I have begun work on the frame.
Also managed to get the front window, and interior out of the car.
I will have to stagger my build a bit (next step once frame is ready is 'tuck' it under the jig and switch to the body. Tasks include sanding the car down to bare metal (with a D/A) and then pulling those doors off (to replace them with my clean California doors I purchased two years ago). Following that, we will cut out and repair any rotten metal. So far, it looks like the quarters are our only bad spot (I have one small metal patch to put in the firewall). Suprisingly clean for a 30+ year old Canadian car.
Hope you enjoy the pic's
Will start with a 'before' pic when I had the car on the road back in 2001.


Cheers,
Brian.
-
03-30-2009 #2
Registered User
- Join Date
- Feb 2008
- Location
- Detroit
- Posts
- 206
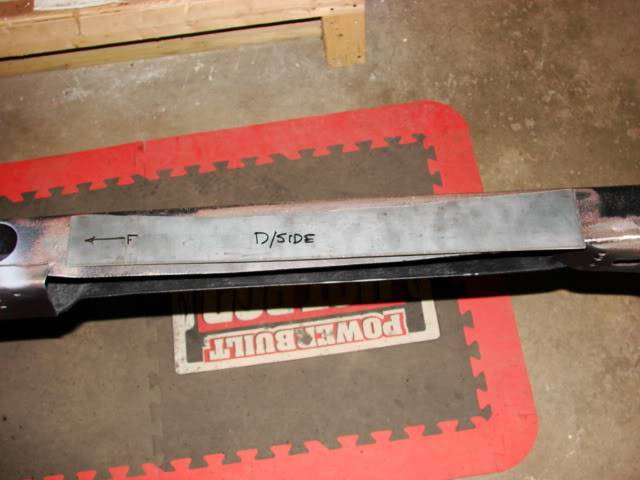
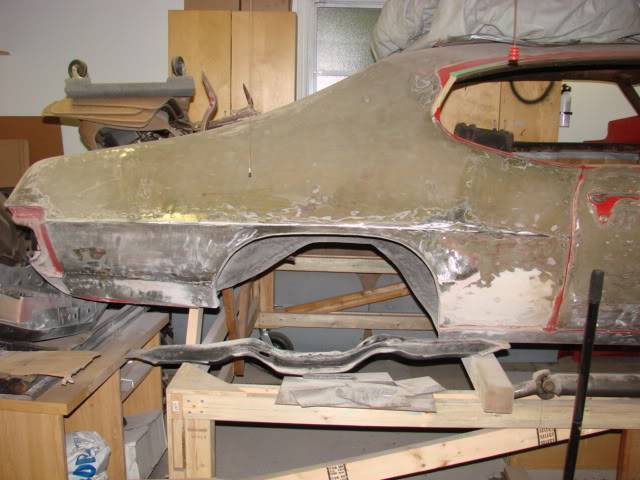
Some additional snaps of the body lift and where we are at currently:
Lifting body:

On the cart:
Welding frame seams:
Box plate driver/side (ready to weld-in):
03-30-2009 #3
Registered User
- Join Date
- Feb 2008
- Location
- Detroit
- Posts
- 206
Suspension components include:
- Global west tubular upper/lower ctrl-arms w/Del-A-Lums
- Global west lowering springs (frt+rear) 1" drop (frt) .75" drop (rear)
- Global west tie-rod connecting sleeves
- 4 wheel disc-brake (Right-stuff/Matt's Classic system)
- AGR Billet 12:1 fast-ratio steering box
- Metco Racing rear upper/lower control arms
- Will be running stock frame bushings
- Plan is to run stock 15" Honeycomb wheels with a BF-Goodrich or possibly Dunlop GT Qualifier radial (likely a 235 in the front and a 255 or 265 out back)
- All new front steering tie rods, centre-link, pitman and idler arm
- Original 72 Numbers match 400 (punched .030) with a Comp-Cams P-280H
- Pontiac #62 castings, mild port work with an Edelbrock aluminum P4B, and a Quadrajet carb
03-30-2009 #4 Registered User
- Join Date
- Mar 2009
- Location
- overseas
- Posts
- 3,433
very nice project! looks good
 Kevin S. (overseas in Germany)
1963 Chevrolet Impala 2d ht Coupe
www.CruznArt.com
CRUZN - Automotive Artworks
03-31-2009 #5 Registered User
- Join Date
- Jun 2007
- Location
- Dayton Ohio
- Posts
- 1,283
good luck on the goat
GTO Project https://www.pro-touring.com/showthre...-The-Great-One
Colorado Project https://www.pro-touring.com/showthre...cab-CodeRedZQ8
Check Out My YouTube Channel http://www.youtube.com/c/geedsgarage
03-31-2009 #6
Registered User
- Join Date
- Feb 2008
- Location
- Detroit
- Posts
- 206
Many thanks CruizinKev and CodeRed. I appreciate it!
03-31-2009 #7 Registered User
- Join Date
- Nov 2008
- Location
- iceland
- Posts
- 1,859

nice project
Bjarni B
My Chevelle project The Awakening
http://www.1971chevelle.net/

http://www.kvartmila.is/smf/index.php?topic=27028.0
CHEVY POWER RULES!
03-31-2009 #8
Registered User
- Join Date
- Oct 2007
- Posts
- 81
Looking good,can't wait to see more pics!
1971 GTO convert currently getting the pro touring treatment
1974 nova streetcar 9.65@143
1987 s-10 on air,18s tpi 305
03-31-2009 #9
Registered User
- Join Date
- Feb 2008
- Location
- Detroit
- Posts
- 206
Thanks guys, one more update pic I forgot to add...
Interior OUT, and front windshield removed:

Novaracer_2K, I plan to go a little different route, and box the rear part of the frame with some knee braces (of 11 ga. hot-rolled steel sheet). I plan to mimic what Lou Santiago (formerly of Muscle-Car) did to that '67 Lemans frame, they built. I am trying to leave enough space for the exhaust system, brake cables and driveshaft. With nothing currently attached to the frame, I guess I am getting a bit paranoid in terms of causing an unforeseen problem when I re-assemble. I should have taken better measurements of the existing exhaust/cables etc. when I was taking it apart. A learning experience for sure 8^)
Cheers,
Brian.
04-21-2009 #10 Registered User
- Join Date
- Jan 2008
- Location
- Houston, TX
- Posts
- 192
Any updates??? Doing a 72 lemans myself and could use some inspiration...
04-21-2009 #11
Registered User
- Join Date
- Feb 2008
- Location
- Detroit
- Posts
- 206
Hi acegto,
Yes! Pics to come soon (unfortunately I am in Europe on business).
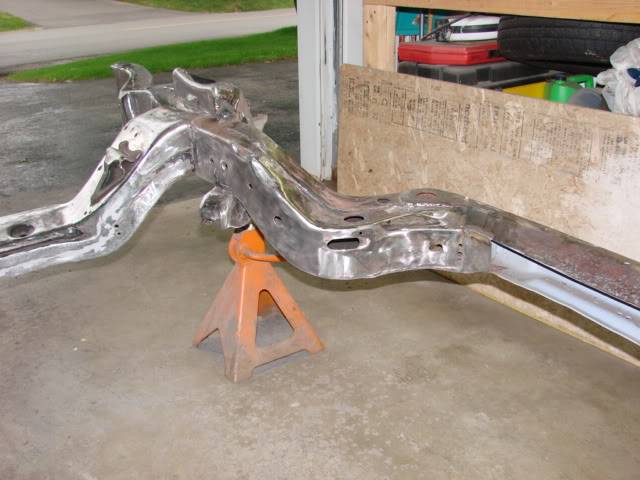
We have finished boxing the side frame rails, and also added some supporting welds to the bottom front portion of the frame (right under the cowl area, where the body mounts are located). We also plasma cut the rear snubber plate, and have welded in a gusset for the snubber.
As far as doing the 'box welds' for the rear frame section (a-la Muscle-Car '67 Lemans) we abandoned this and plan to go with a home-made trailing arm-brace (similar to what Novaracer_2k installed on his frame).
We also got the rear window out, and removed all remaining wiring (rear trunk harness, and the wiring for the interior dome light). The body is now completely stripped down.
Our next step is to finish weld everything, do a final clean-up on the frame, and paint it. We then plan on switching to the body to sand out the bondo on those rear-1/4's to see what is really hiding up in there.
I will hopefully have some more pic's up the week of April 27th.
Cheers,
Brian.
06-14-2009 #12
Registered User
- Join Date
- Feb 2008
- Location
- Detroit
- Posts
- 206
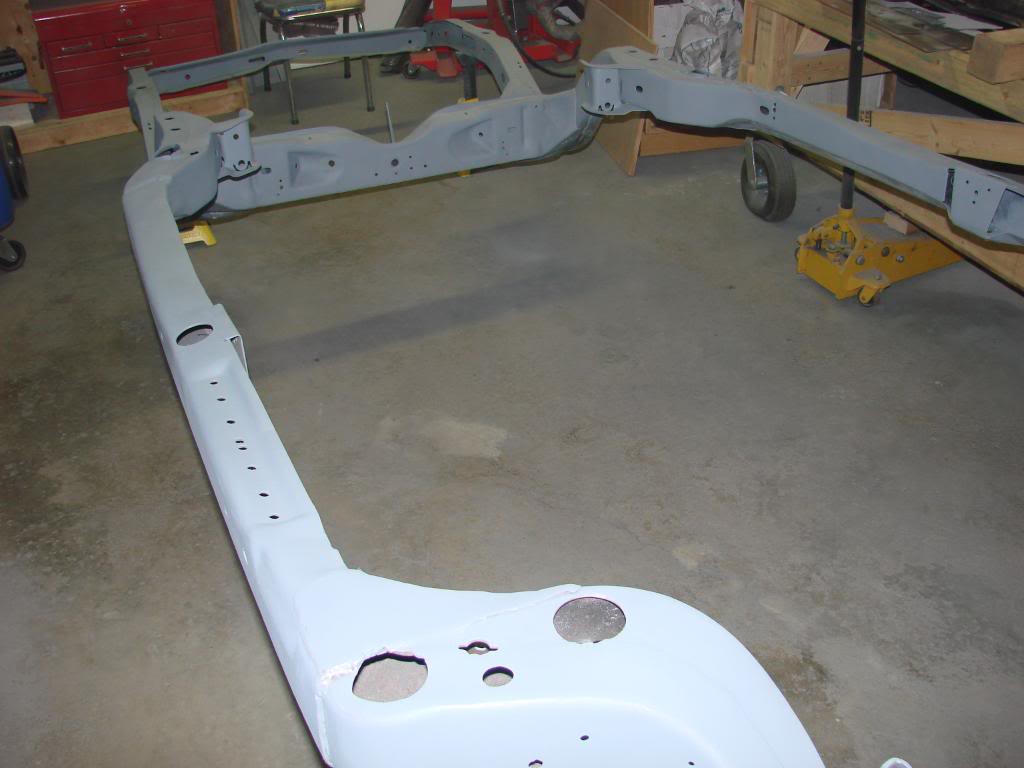
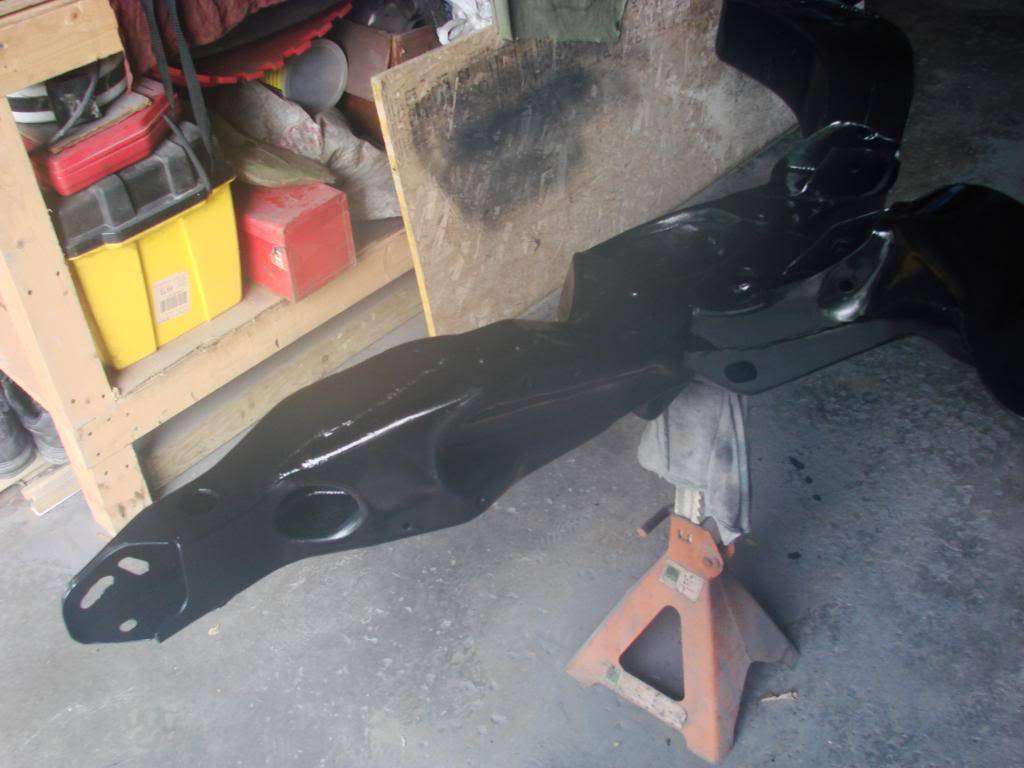
Small update - still working on the frame! Sanding, welding, sanding, more sanding. Decided to take the frame back to bare metal. Also decided to try and fill some of the pitting left by the previous media blasting we did on the car back in the early 90's. This is adding a lot of work (and additional time) to complete the frame.
We finally flipped it over the other day, and I got to work sanding/filling the top. I still have to weld in the snubber plate but hopefully that won't take too much additional time.
The grinding/sanding/filling seems to be what takes hours/hours. Hopefully I have this much energy left when I get to the body. When I really get sick of sanding on the frame, I move over to the body and continue to try and remove/sand off more paint. It is starting to disappear as well.
A couple of photo's to whet your whistle.
Cheers,
Brian.
06-14-2009 #13
Registered User
- Join Date
- Jun 2007
- Location
- Dayton Ohio
- Posts
- 1,283
looks like fun ;-)
GTO Project https://www.pro-touring.com/showthre...-The-Great-One
Colorado Project https://www.pro-touring.com/showthre...cab-CodeRedZQ8
Check Out My YouTube Channel http://www.youtube.com/c/geedsgarage
06-14-2009 #14 Registered User
- Join Date
- Apr 2006
- Location
- Atlanta GA
- Posts
- 7,477
good to see more goats...
06-14-2009 #15 Registered User
- Join Date
- Nov 2005
- Location
- RI
- Posts
- 740
Nice love the pontiacs, your doing iot the right way keep us posted.
06-17-2009 #16 Registered User
- Join Date
- Apr 2007
- Location
- SEBRING, FL
- Posts
- 160
Nice project. IM partial to that body style since a 71 Lemans 2dr hardtop was my first car.
Travis L
07-23-2009 #17
Registered User
- Join Date
- Feb 2008
- Location
- Detroit
- Posts
- 206
Another update: been working away (yes still!) on the frame.
- Grinding/welding (more grinding/welding)
- Metal fill/sanding (more sanding)
Also got a great deal on a set of rear trailing arm braces (PMT Fab) off e-Bay, as well as stock replacement body mount kit (with hardware).
Hopefully, I will be priming/painting the frame this week and chassis assembly can begin (whoa-whoa)!
Cheers.
07-23-2009 #18 Registered User
- Join Date
- Apr 2005
- Location
- dayton, oh
- Posts
- 952
what are you using for metal filling?
07-23-2009 #19
Registered User
- Join Date
- Feb 2008
- Location
- Detroit
- Posts
- 206
Hi Dave,
I am making use of metal - to metal (http://www.tooltopia.com/index.asp?P...googlebase_18u).
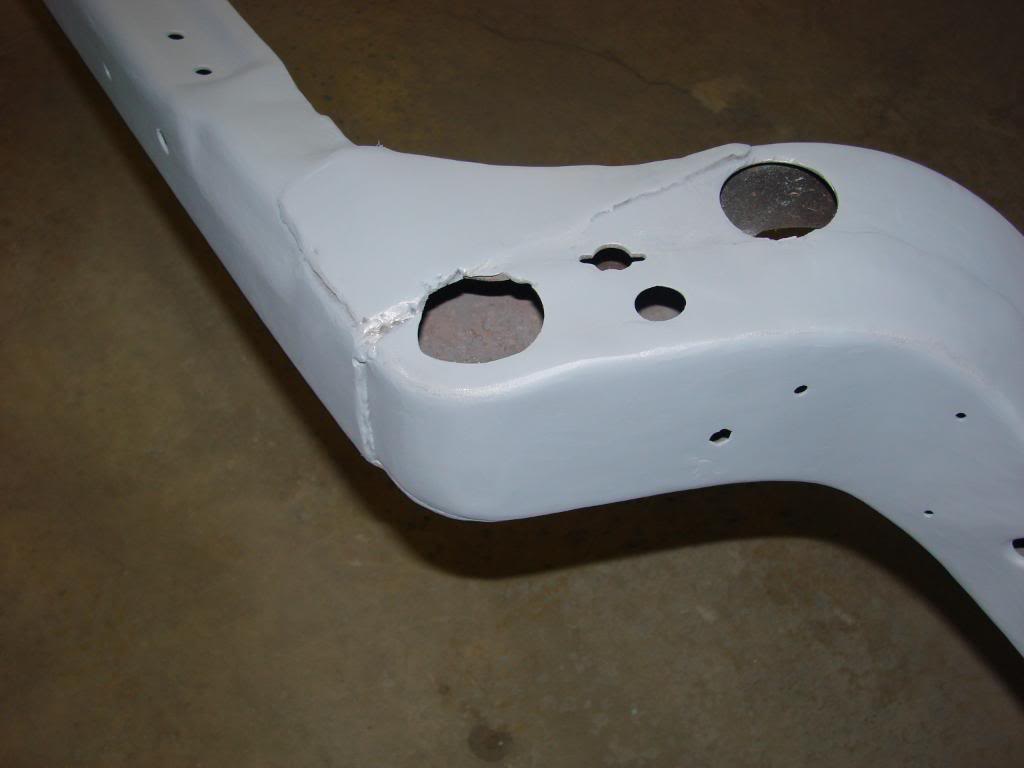
I am keeping it very 'thin' (i.e. most of it is ground off). It is just helping to 'fill' some of the pits left on the frame from the surface rust/sandblasting I did many moons ago (i.e. back in the early 90's).
It won't be perfect, but it has smoothed it out alot more. Note, I had a gap in the rear snubber plate and had to throw a little more of the filler than I would have liked. I welded the gap up using a technique I read about on one of the welding sites - i.e. running a bead down either side of the gap, then doing one time spot-welds over the gap and finally one last pass. However I just couldn't get it 'smooth' in the end so I added some filler. Photo's added above.
Hope this Helps,
Brian.
08-09-2009 #20
Registered User
- Join Date
- Feb 2008
- Location
- Detroit
- Posts
- 206
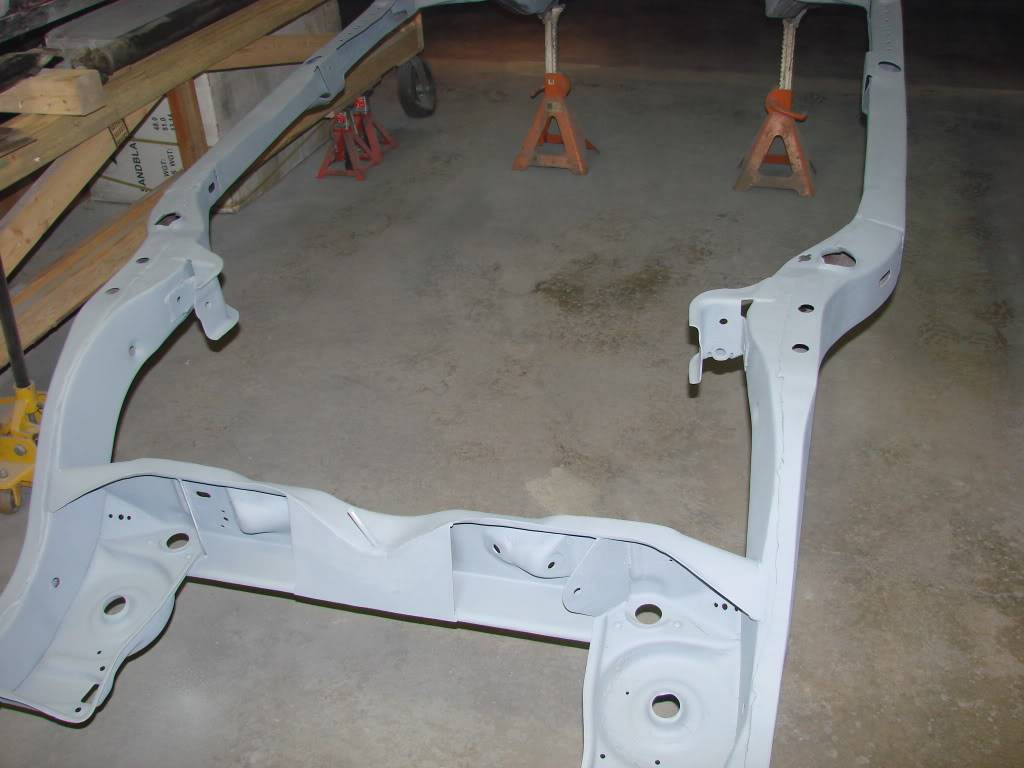
Ok, finally got the frame painted! A few shots to whet your whistle:

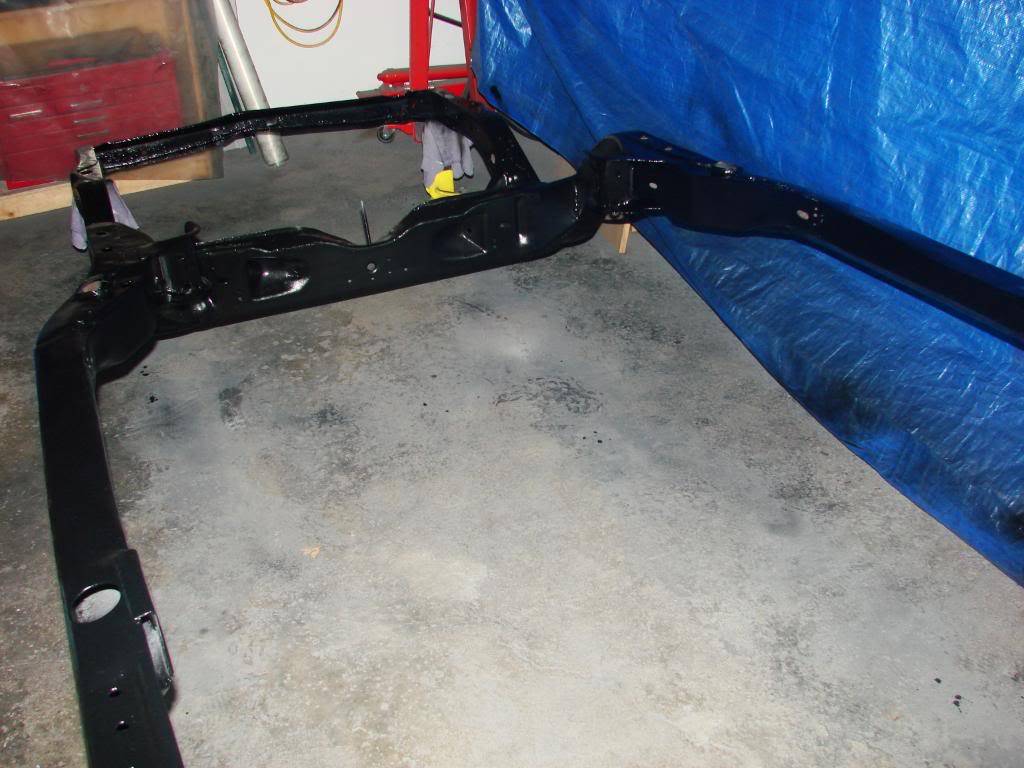
Next step is to get the body mobile and shoot it out of the garage (perhaps for body, metal-work and paint). I can then center the frame in the garage, and begin getting parts ready to install.
Feels good to be going forward again, after going backwards for so long. The Nason chassis paint, while not being 'orig' leaves a nice hard glossy finish, and was a breeze to shoot with the HVLP. The HVLP had barely any overspray either.
Cheers,
Brian.

 Reply With Quote