

View Poll Results: Which dash layout do you like?
- Voters
- 28. You may not vote on this poll
Results 1 to 20 of 36
Thread: Advice on dash layout
-
02-08-2009 #1

 Registered User
- Join Date
- Aug 2008
- Location
- Pgh, PA
- Posts
- 2,177
Advice on dash layout
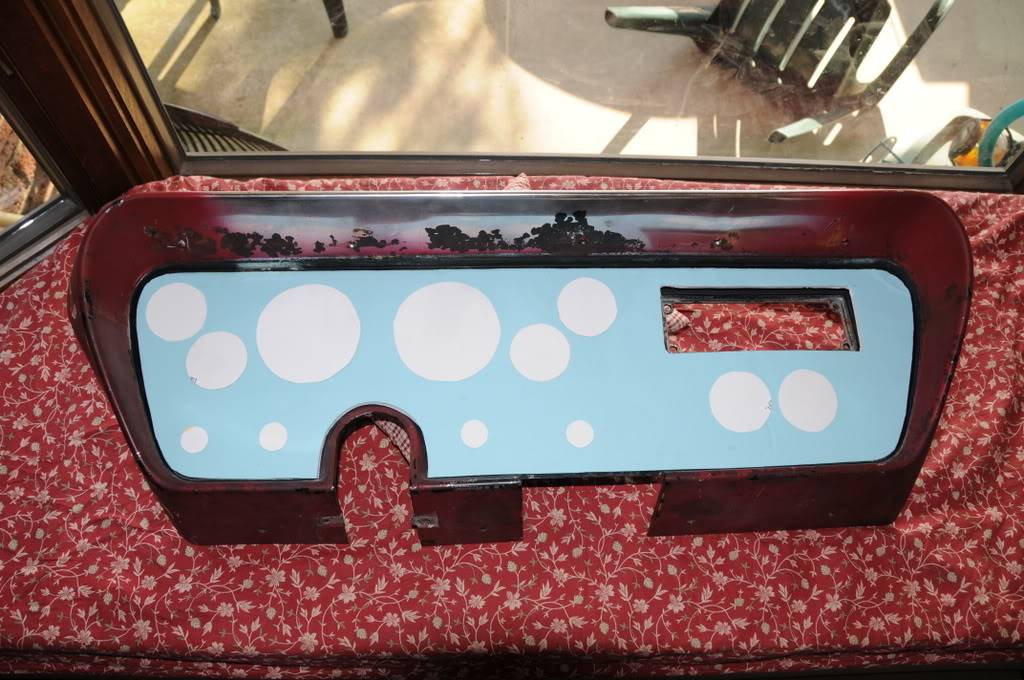
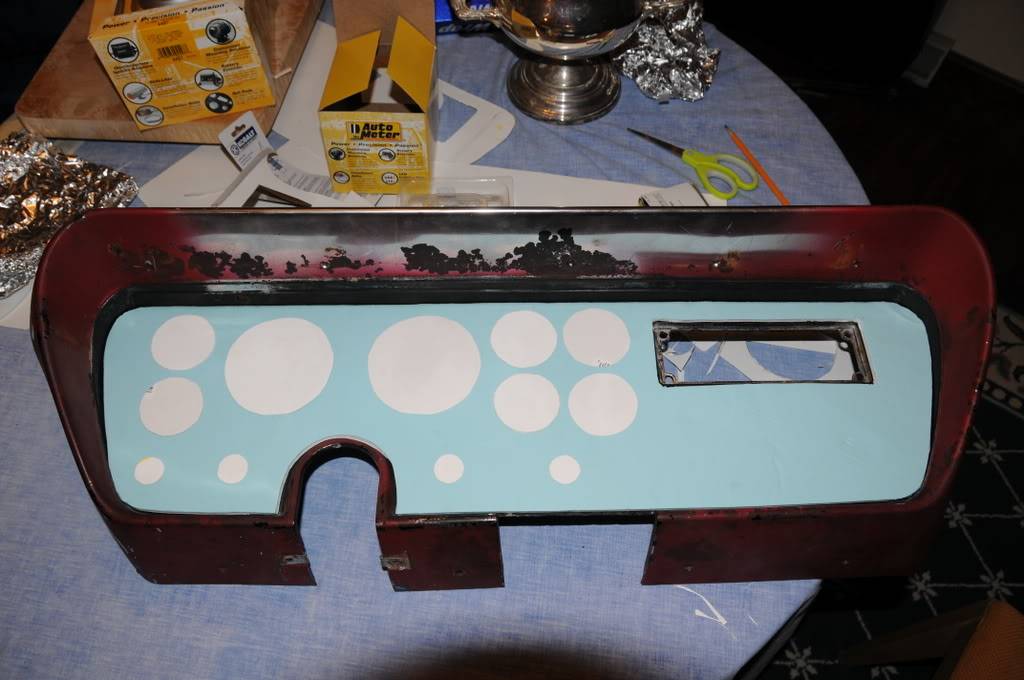
I'm working on making a custom dash using autometer gauges for my '66 GTO Vert restomod. I'm using 8 gauges (speedo, tach, volt, h20 temp, fuel level, oil pressure, oil temp and fuel pressure). I have .063" engine turned aluminum I'm making the face from, and will use "factory type" chrome knobs and chrome heater/fan controls.
I was going to use a Custom Autosound USA630 vintage type radio in the normal radio mounting location, and then mount the remaining two gauges below the dash in a mounting pod.
However, I can also use the readio opening to mount the remaining two gauges and then use a Secret Audio SS (w/RF remote) for the radio.
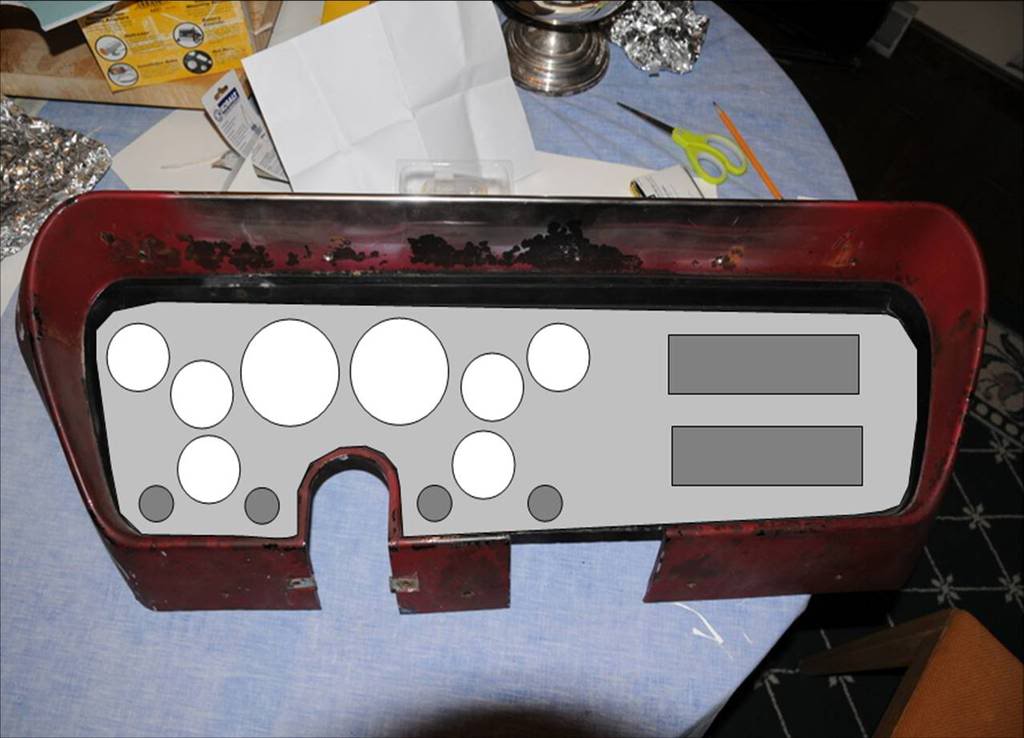
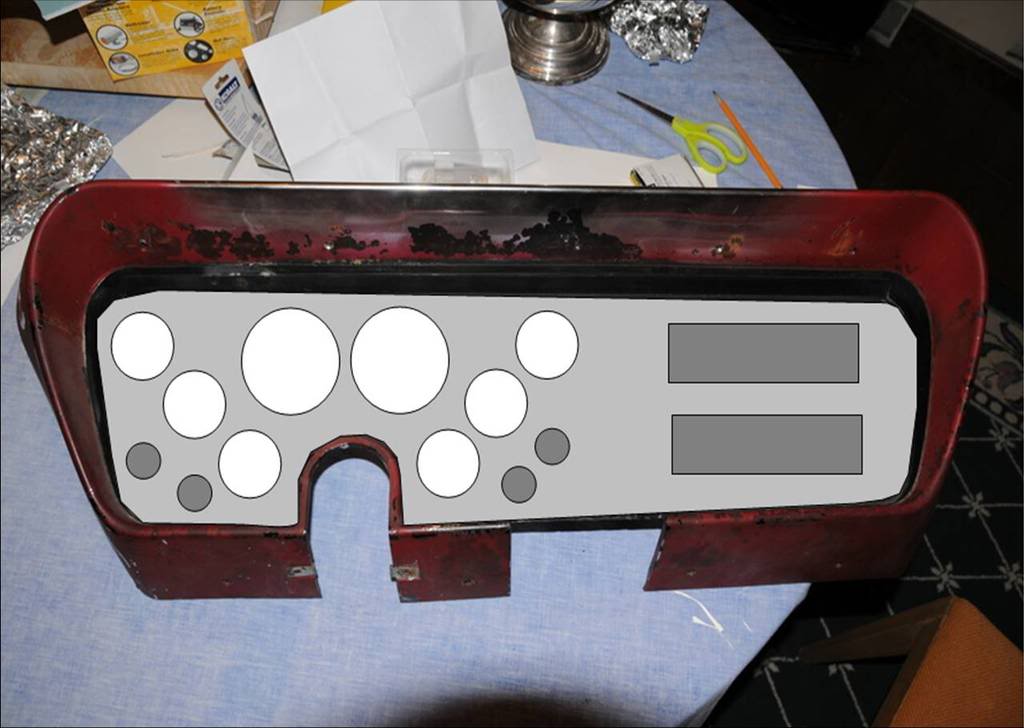
Here are a couple images. One is with the exact layout retaining the radio, though the radio measurements will be different because of the radio size. The backing material will be different of course. Remember that the remaining 2 gauges will need to mount below the dash on the one with the radio. The other pic with the template shows blue where it's engined turn aluminum, and white where gauges and switches go. The opening is for the heater/fan controls go (chrome).
Please let me know your opinions. I'm kind of leaning toward getting all the gauges in the dash right now.
-
02-08-2009 #2 Registered User
- Join Date
- Aug 2004
- Location
- Harriman, Tennessee
- Posts
- 1,290

I say option 3 is the best, put all of the gauges in the dash, put the radio in the dash, and hang the ignition switch, headlight switch, etc either under the dash, or in the console.
Shiny Side Up!
BillWhy do termites eat houses?
Because they have Munchausen Syndrome.
02-08-2009 #3
Registered User
- Join Date
- Aug 2008
- Location
- Pgh, PA
- Posts
- 2,177
Thanks, but not an option. The way the plastic dash bezel (what the aluminum and gauges go into) is constructed, cutting out all the material where the switches are would weaken the assembly far too much. Also, I am not going to put a console in this car. Originally Posted by ProTouring442

02-08-2009 #4
Registered User
- Join Date
- Jan 2009
- Location
- Van Nuys, CA
- Posts
- 198
I would suggest that you put the four gauges in a square next to the tach then put the a/c controls where they are then put the radio where it is in the finished dash. Then on the speedo side move the two gauges so that they are stacked on top of each other.
So It would go two 2 1/16" then the Speedo, then the tach, Then the four gauge cluster then the a/c controls, below that the radio. leave the ignition light and other switches where they are.
Mike
02-08-2009 #5
Registered User
- Join Date
- Aug 2008
- Location
- Pgh, PA
- Posts
- 2,177
Mike, thanks but I'm very concerned that this would not work. The problem is that there is very little material to secure the switches, etc and maintain the strength of the assembly on the bottom. I think a rough idea of what you're talking about is: Originally Posted by mjoc1
But the problem is that when you look at the image below, you can see that I'd have to remove even more plastic on the bottom. I'd be creating real risk that it will start to crack from stress. It's also a bit busy and I still then need to determine enough space for turn signal and high beam lights. Thoughts?
02-09-2009 #6 Registered User
- Join Date
- Oct 2008
- Location
- texas
- Posts
- 529
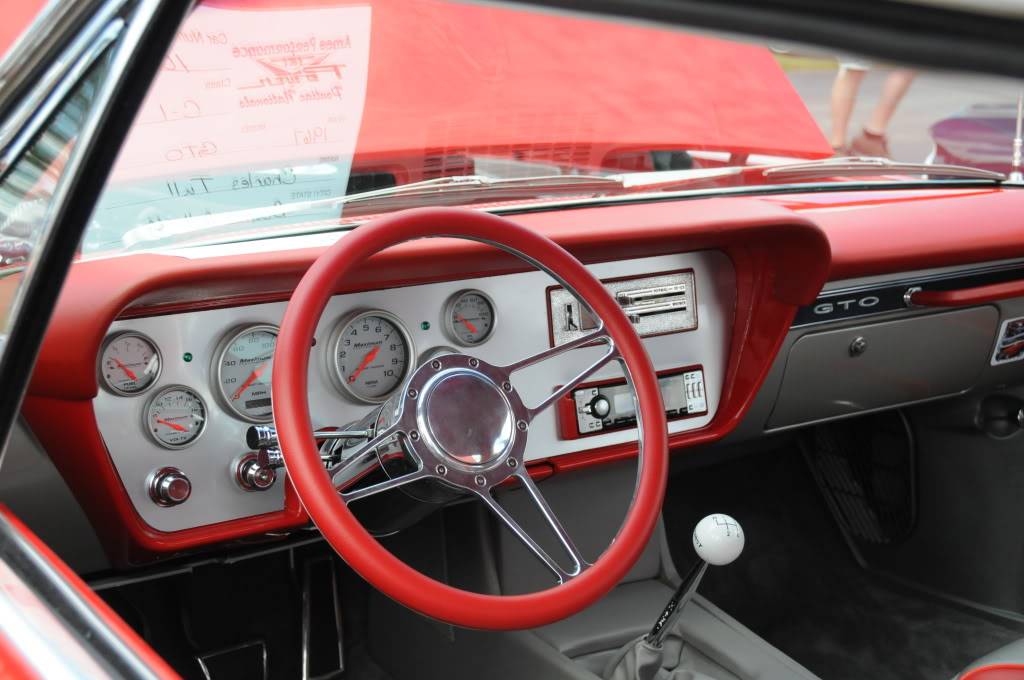
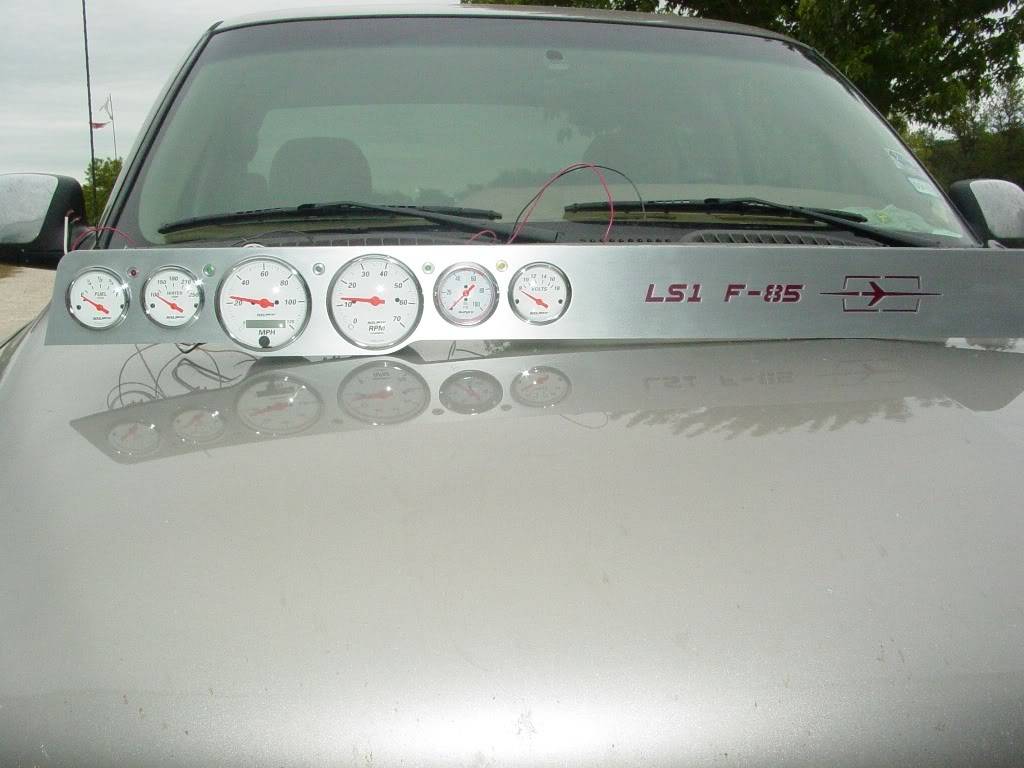
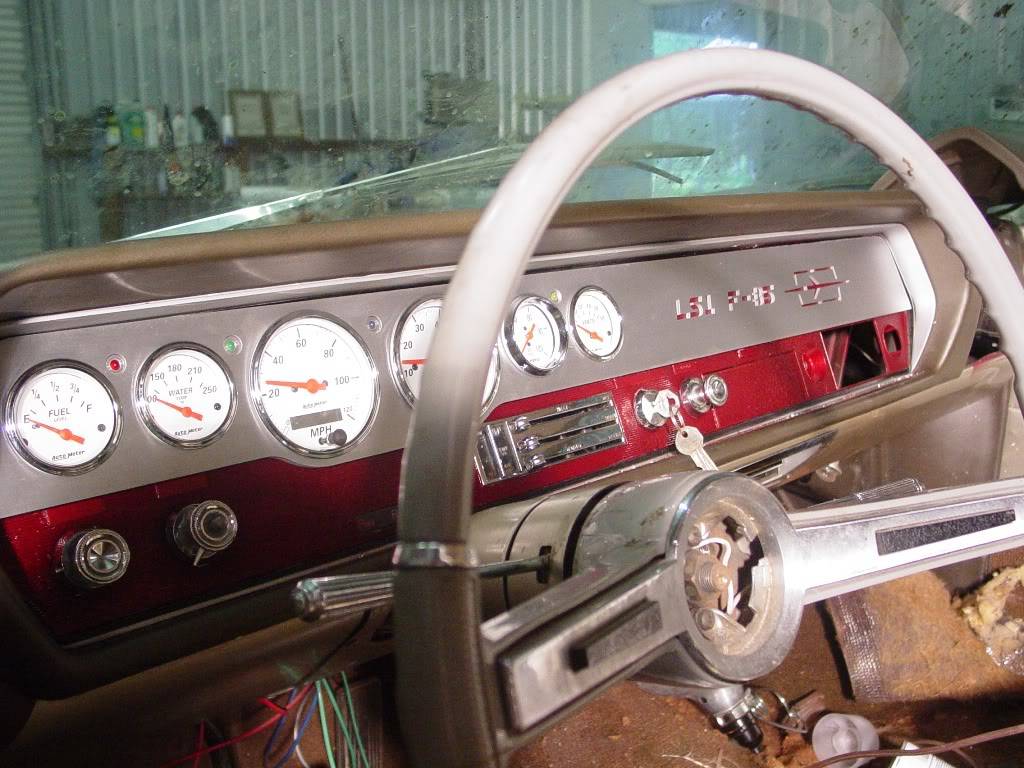
This is the dash I created for my 65 LS1 F-85 project with autometer gauges.
How about a layout like this.
Or this
You could use thicker aluminum behind your finished mated panel allowing you to rearrange the controls and support the removal of the plastic to avoid cracking the bezel.
I have 3d cad and water jet if you need any help give me a shout.
Good luck with your project
RockyThis is Larry Callahan adding to Rocky's profile.
I'm sorry to say that we have lost Rocky.
RIP....
02-09-2009 #7
Registered User
- Join Date
- Aug 2008
- Location
- Pgh, PA
- Posts
- 2,177
Rocky, your dash looks great! I wish I could go that route. That's one advantage of the '65 over the '66 in the Poncho.
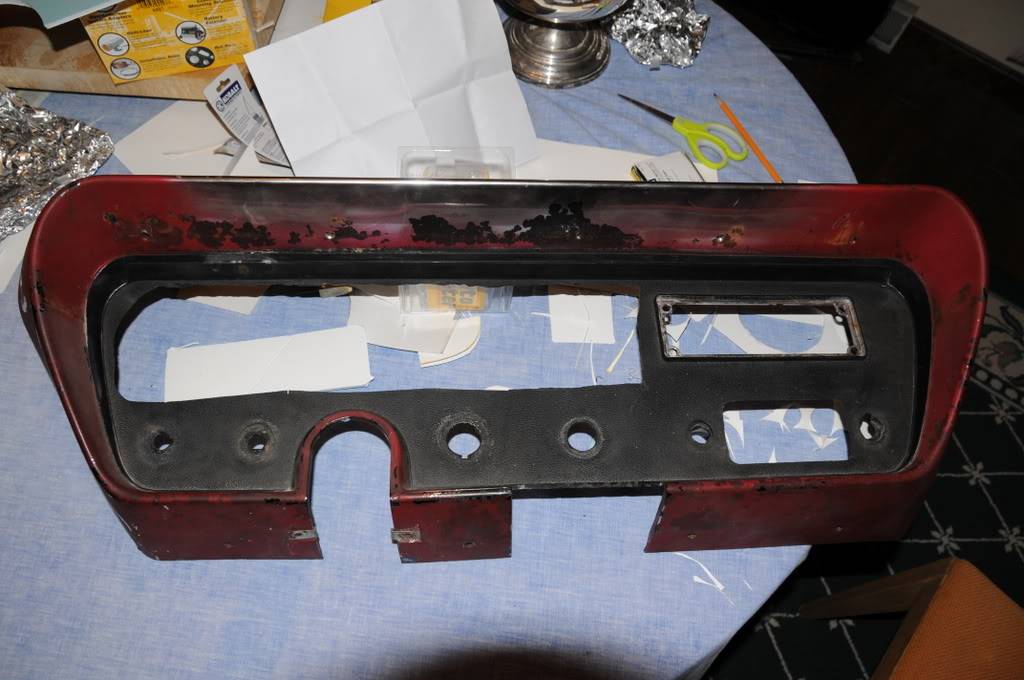
In my case I'm planning to use the .063" aluminum in the front, and probably something similar in the back. But I've got to be very careful. As opposed to how the dash in your Olds is constructed, you can see that my dash has very tenuous mounting points where the plastic dash bezel mounts to the actual metal dash. Further, the plastic bezel itself is the "rim" or "exterior" along with the mounts for switches. So, I have a few things to keep in mind. They are:
1) By removing plastic from the interior of the bezel (as I already have) I reduce torsional stability, and increase how much it might flex. I have already planned to use the heavier .063 in the front, and then use a somewhat smaller footprint of .063 in the back (only behind in the gauge area and not elsewhere), effectively sandwiching at least some plastic in between.
2) There are only very small screws which secure the plastic bezel to the dash itself. By adding the weight of the metal in the front and behind, I'm putting more stress on those mounting points. I need to keep that in mind and balance weight vs strength. This is 43 year old plastic, and they don't make this dash bezel as a repop. They make a 67 but it's different.
3) I also need to keep some room between the switches and the gauge cups. The headlight and wiper switches in particular are not tiny.
It is for these reasons I'm trying to be a little cautious here and retain as much plastic as I reasonably can.
02-09-2009 #8 Starting The Transformation
- Join Date
- Apr 2005
- Location
- Erie, PA
- Posts
- 349
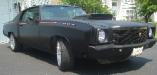
Why not put the two remaining gauges into a gauge pod on the A-pillar? They would be at eye level and you would not have anything 'hanging' below the dash...
Just an idea, this is the dash in my Monte:

http://www.popularhotrodding.com/hot...nte_carlo.html
Andreas
President First Gen Monte Carlo Club
www.fgmcc.com
02-09-2009 #9
Registered User
- Join Date
- Oct 2008
- Location
- texas
- Posts
- 529
can you use maybe .125 thick aluminum on the back panel and counter sink screws in it into the metal dash so that it is caring the load and not the plastic part? You can then bond the exterior finsihed piece over it to cover the screws. That is how mine is constructed.
This is Larry Callahan adding to Rocky's profile.
I'm sorry to say that we have lost Rocky.
RIP....
02-09-2009 #10
Registered User
- Join Date
- Aug 2008
- Location
- Pgh, PA
- Posts
- 2,177
On a '66 GTO Convertible, there is really no "A-Pillar" suitable to hang a pod on. There is no A-pillar molding - it's just bare body painted steel. IMHO it would be butt ugly and require either drilling through the metal pillar or running wires visibly down on top of the fact that they would really stick out a lot. Originally Posted by FULMNTE
02-09-2009 #11
Registered User
- Join Date
- Aug 2008
- Location
- Pgh, PA
- Posts
- 2,177
Not really. If you look closely at the bezel in one of the pics I showed earlier you can see the upper screws are in the "lip" or "front top" of the bezel. There would be no aluminum there. When you move back to where the AL would be, you would be screwing into the exposed top of the metal dash - so the screws would mar the top surface of the dash. I suppose it's possible I could figure out where and weld mounts underneath the top surface, but I'm trying not to make this a ridiculous project. Plus, it would be REALLY REALLY hard to get at those screws then. The back part is not covered by anything on top. The metal is exposed. The dash pad is actually relatively small and I don't think it would help to hide any of this stuff. Originally Posted by rockytopper
The real problem is the original design of the dash bezel on these things. I don't want to completely eliminate it - that would mean custom forming of the entire enclosure.
02-09-2009 #12
Registered User
- Join Date
- Aug 2008
- Location
- Pgh, PA
- Posts
- 2,177
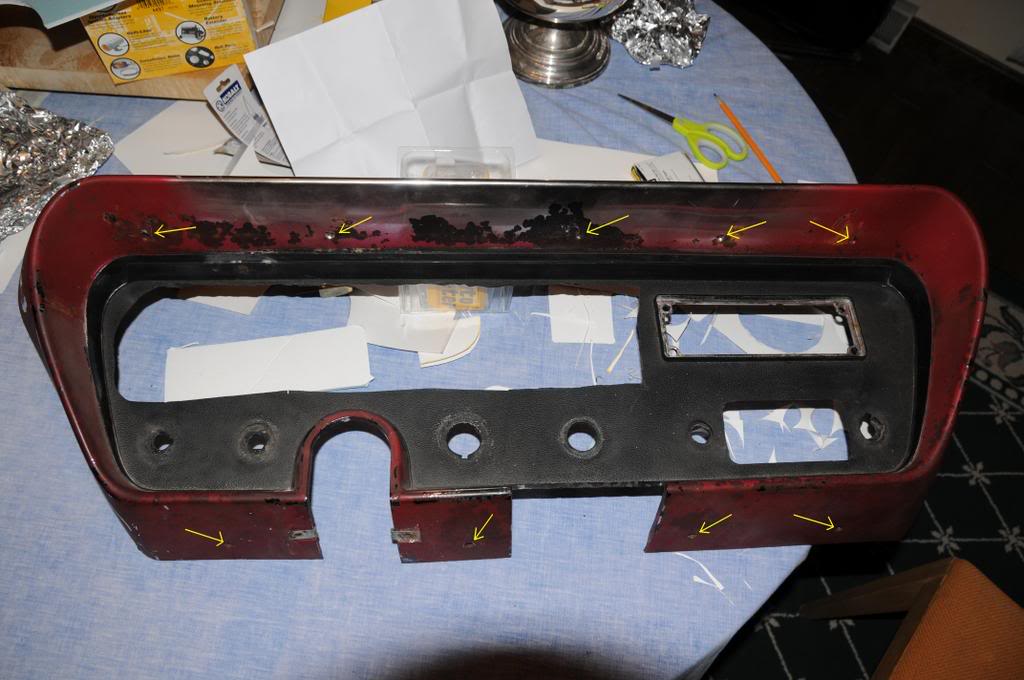
Here I've tried to point out the (few and fragile) mouting locations for the dash bezel itself with yellow arrows. Those are the only mounting points. Please note that the entire top and sides stick out with nothing covering them. The entire assembly (minus the engine turned aluminum facing) will be painted body color.
02-09-2009 #13
Starting The Transformation
- Join Date
- Apr 2005
- Location
- Erie, PA
- Posts
- 349
Oh OK.... Originally Posted by wmhjr
http://www.popularhotrodding.com/hot...nte_carlo.html
Andreas
President First Gen Monte Carlo Club
www.fgmcc.com
02-09-2009 #14
Registered User
- Join Date
- Oct 2008
- Location
- texas
- Posts
- 529
I don't really think that bezel is all that wimpy. Unless it is hard, bridal and subject to crack no matter what. I mean it originally hung the weight of a factory radio, hvac controls and instruments. What you’re adding will weight less than the factory stuff. If you screw a panel to the back and front of the flat instrument section and bond it to it as well it will only strengthen this original part. Don’t cut any plastic until you have added the panels to the plastic bezel as noted. If you still thank it want carry the load screw the thing thru the flat part into the metal structure underneath. If there isn’t any add it. I know my auto meter gauges weigh far less than the factory instrument cluster I removed.
This is Larry Callahan adding to Rocky's profile.
I'm sorry to say that we have lost Rocky.
RIP....
02-09-2009 #15 Registered User
- Join Date
- Dec 2006
- Location
- Out of the Burbs of Detroit to SoCal, then onto my ancestral homeland, the woods of Cascadia
- Posts
- 1,753
Also- remember if you have A/C you may want to put a couple face level vents in the panel
Greg Fast
(yes, the last name is spelled correctly)
1970 Camaro RS Clone
1984 el Camino
1973 MGB vintage E/Prod race car
(Soon to be an SCCA H/Prod limited prep)
02-09-2009 #16
Registered User
- Join Date
- Aug 2008
- Location
- Pgh, PA
- Posts
- 2,177
The factory unit does not support the radio for example. On the radio and heater side, there is steel behind the bezel and that's what the radio for example is supported by. It is a full metal panel on the right. On the gauge/steering wheel side, there is not. There is nothing to "screw the aluminum panel" to - especially on the top. It will be bonded and you can see the small rim that it will go onto. That, along with the gauges (bezel to rear cup) are what will secure the panel. Originally Posted by rockytopper
The bezel is kind of dry and somehat brittle especially on the rims. I'm not going to weld more steel behind it. Like I said, I'm trying to make this nice but don't want major fabrication even BEHIND this panel. That's why I came up with a couple options that will allow for the safe use of the bezel in two different configurations. When you consider the weight of the metal panels, this will certainly be carrying more weight than the factory setup. As seen by the photo, the plastic had to be cut before the panels are in place. That's because of the "tubes" molded into the plastic to begin with that would prevent anything from being placed on it (either on the front or the rear).
Make sense?
02-09-2009 #17
Registered User
- Join Date
- Aug 2008
- Location
- Pgh, PA
- Posts
- 2,177
No air on this ride! Other than the convertible top when it's down. Originally Posted by Twentyover
02-09-2009 #18 Registered User
- Join Date
- Nov 2004
- Location
- Memphis,Tn
- Posts
- 72
Here's another option, I have not finished mine but I will probably put the radio in the factory spot. I wish I would have done a vintage air ac or at least used their ac control.
 Harley Thordson
02-09-2009 #19
Registered User
- Join Date
- Aug 2008
- Location
- Pgh, PA
- Posts
- 2,177
Is that one of the new Covan Thunder Road dashes?
02-10-2009 #20
Registered User
- Join Date
- Nov 2004
- Location
- Memphis,Tn
- Posts
- 72
No, it's not a covan. I made it out of 3/8 alum on one of our mills at work. It took a couple of tries first out of plastic to get the hole spacing correct.
Harley Thordson

 Reply With Quote


