

Results 1 to 20 of 133
-
09-27-2008 #1

 Registered User
- Join Date
- Mar 2007
- Location
- Florida
- Posts
- 2,391

The 14 Car safety thread, Roll Cage, Kirkey seats,Fire systems
It seems a lot of us build our cars for more speed,better handling,better braking, more comfort and what we feel is a better appearance than what was stock. However safety seems to take a backseat because it's not as much "fun". Increased safety measures seem to be considered necessary only to "pass tech" at whatever type of events we plan on using the car for or to meet state minimum standards for registration.
I myself was somewhat guilty of that and showed up at my first track event on a road course with a motorcycle helmet and only lap belts for restraints! The first instructor assigned to me wouldn't even get in my car!
I've attended drag races, HPDE road course track days with a couple different groups, the ECTA (top speed events) and I drive the car on the street. The car can run at about 150 MPH on the long straights on certain road tracks and was only allowed to run 135 at the ECTA due to lack of a bar/cage.
We can't play anymore if we're in a hospital or kill ourselves so this thread will detail my efforts to keep myself and passengers as safe as possible given my financial constraints, events I plan on attending in the future and timetable. If it keeps just one person from getting hurt unnecessarily it will have been worth the time I spend posting. About a year ago I promised myself I wouldn't track the 14 car anymore or make it faster till some serious safety upgrades were completed.
After adding it up I'll spend more than half of what I currently have invested in the car to do these upgrades. But I'm worth it!
1 Personal safety devices
Good helmet W/hans type device, firesuit and related gloves shoes etc
2 Full roll cage that excedes the requirements for the classes I will be running. door net etc as recommended by sanctioning bodies
3 racing seats designed to protect the occupants, not just seats that look "racy" and offer the ability to use racing harnesses
4 fire system that excedes the requirements for classes I will run
5 Fuel system modifications to reduce risk of fire if I wreck
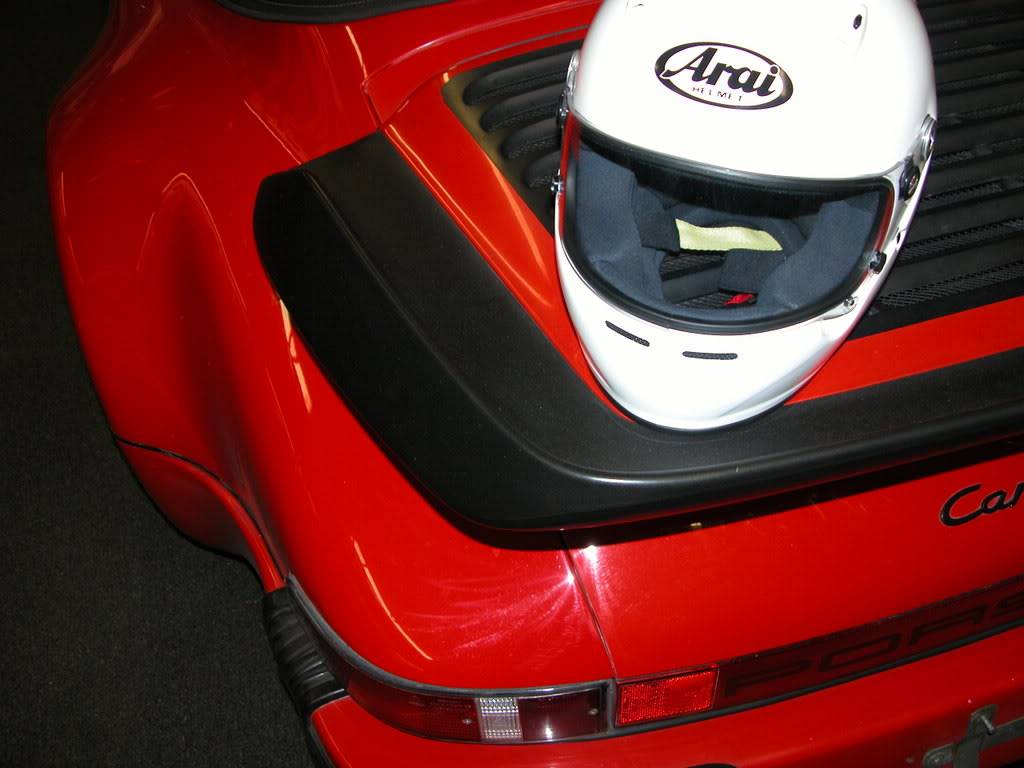
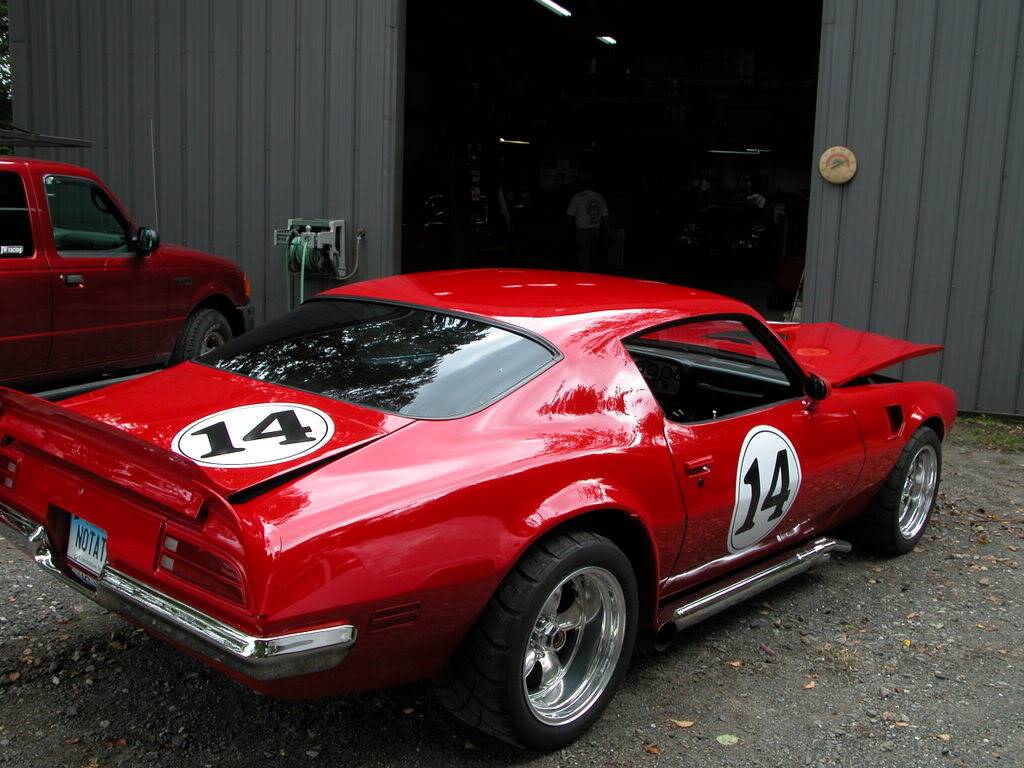
Here's the car that will be recieving the upgrades

Last edited by NOT A TA; 09-28-2008 at 06:02 PM. Reason: change in title
-
09-28-2008 #2
Registered User
- Join Date
- Mar 2007
- Location
- Florida
- Posts
- 2,391
My first purchase toward my safety goals was an ARAI GP5W helmet. I was using a motorcycle helmet because we sold them in my store and could "pass tech" in the enty level classes at track events. Rule changes during the couple years I was using it make it obsolete for automotive duties. Motorcycle helments don't need to be fire safe because the rider is usually thrown. Most of the automotive sanctioning bodies are no longer allowing motorcycle helmets.
You can function without a hand, arm, foot, leg,etc but not your head. I may go to tracks in a different car or with someone else so my first purchase for myself was an ARAI GP5W. It is Hans compatable, carries the most recent certifications, and can be used for several years before it's outdated. The W is for the wide eyeport, which allows glasses to be worn inside the helmet more easily.
This helmet now costs $700.00-$800.00. Much less expensive helmets will "pass tech" at most events and carry the same certifications. Is the Arai better at protecting? I don't know, but it's a quality piece that fits well from a company with a good reputation. My heads worth it!
09-28-2008 #3
Registered User
- Join Date
- Mar 2007
- Location
- Florida
- Posts
- 2,391
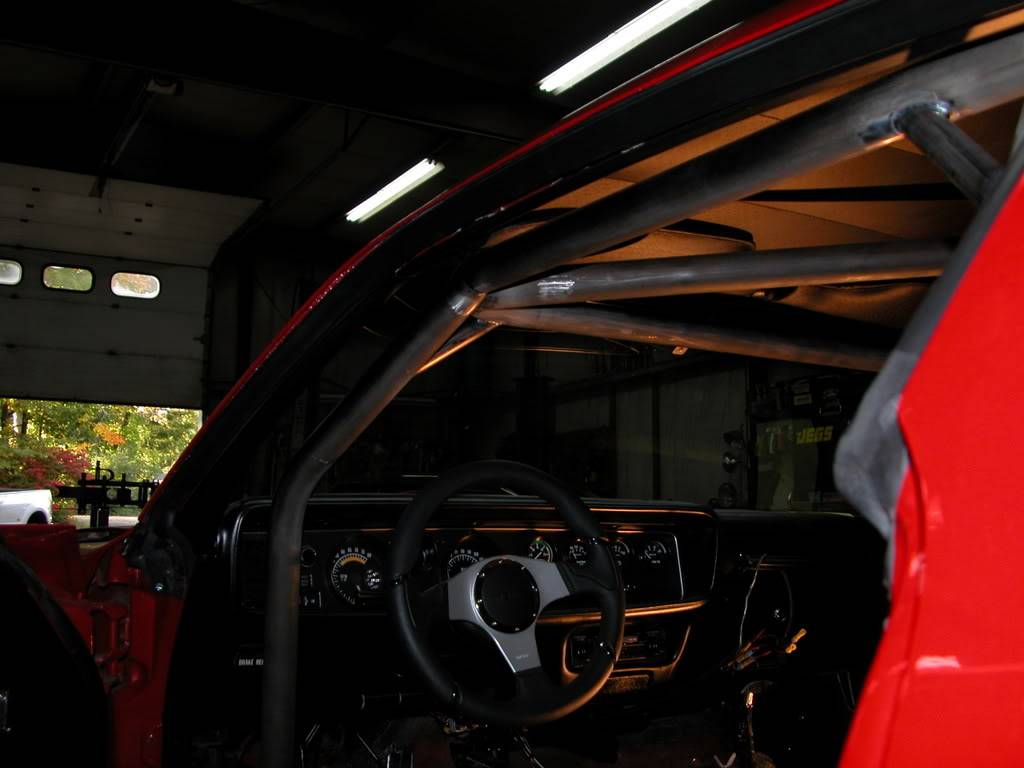
Next up on the agenda is the roll cage. I will be using the car in at least 4 different types of sanctioned events. Unfortunatly they all have various requirements for the construction of cages depending on the classes the vehicle will be competing in. This required getting rulebooks from each group to be sure that the cage will excede the requirements for the classes I intend on running in. The event types are as follows.
1 N.A.S.A. Events at road courses. I am in the HPDE groups and hope to eventually run the Time Trials. I will not be racing fender to fender.
2 E.C.T.A. / S.C.T.A./BNI Top speed events. I will hopefully make at trip west in 09 or 10 to run Bonniville or California and will go to the E.C.T.A. in Maxton NC whenever I can.
3 N.H.R.A.- N.M.C.A. drag racing. Test and tunes as well as True Street type events I've run previously.
4 SSCC The Silver State Challenge. An open road race on 90 miles of public highway when I make my trip out west.
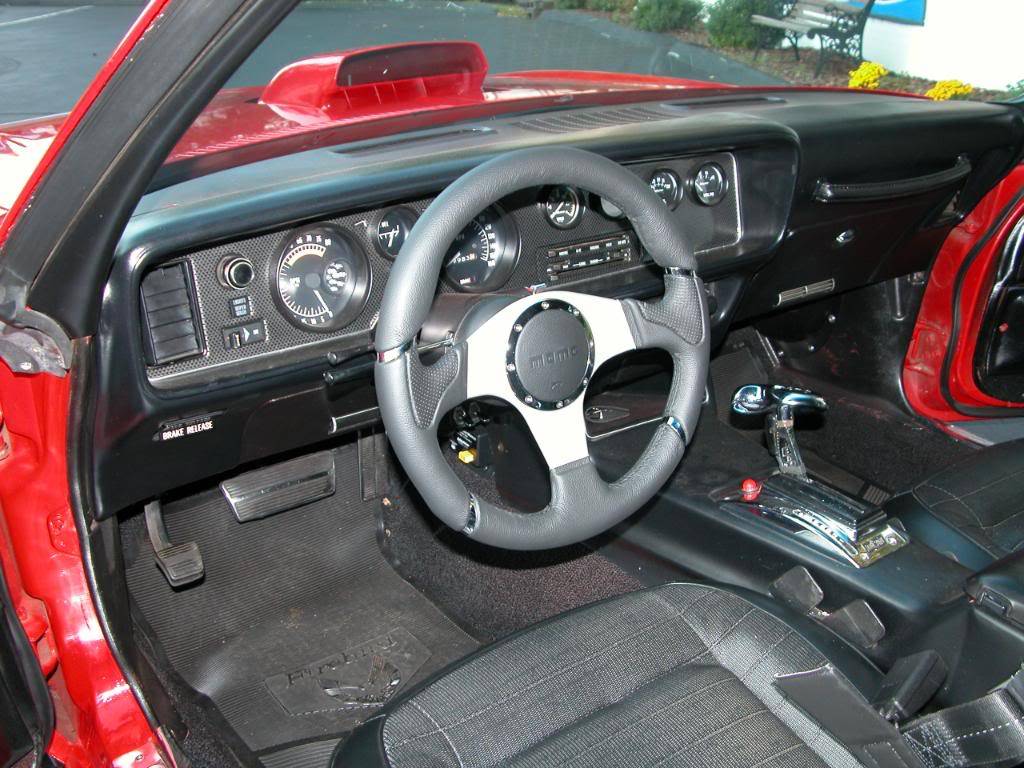
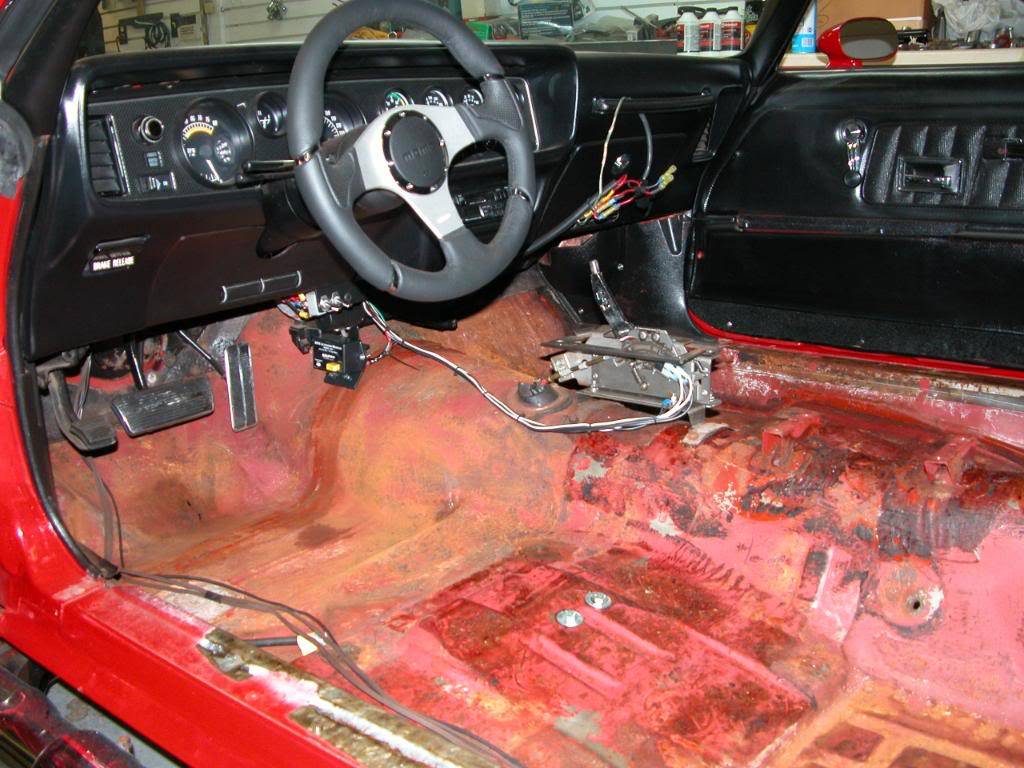
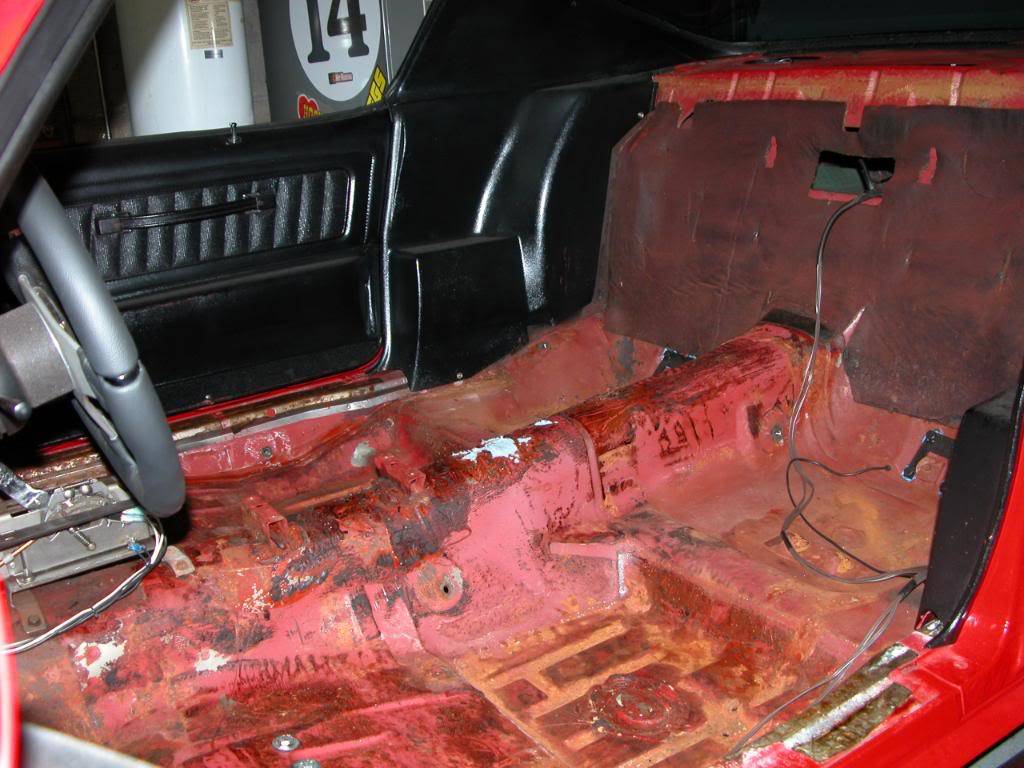
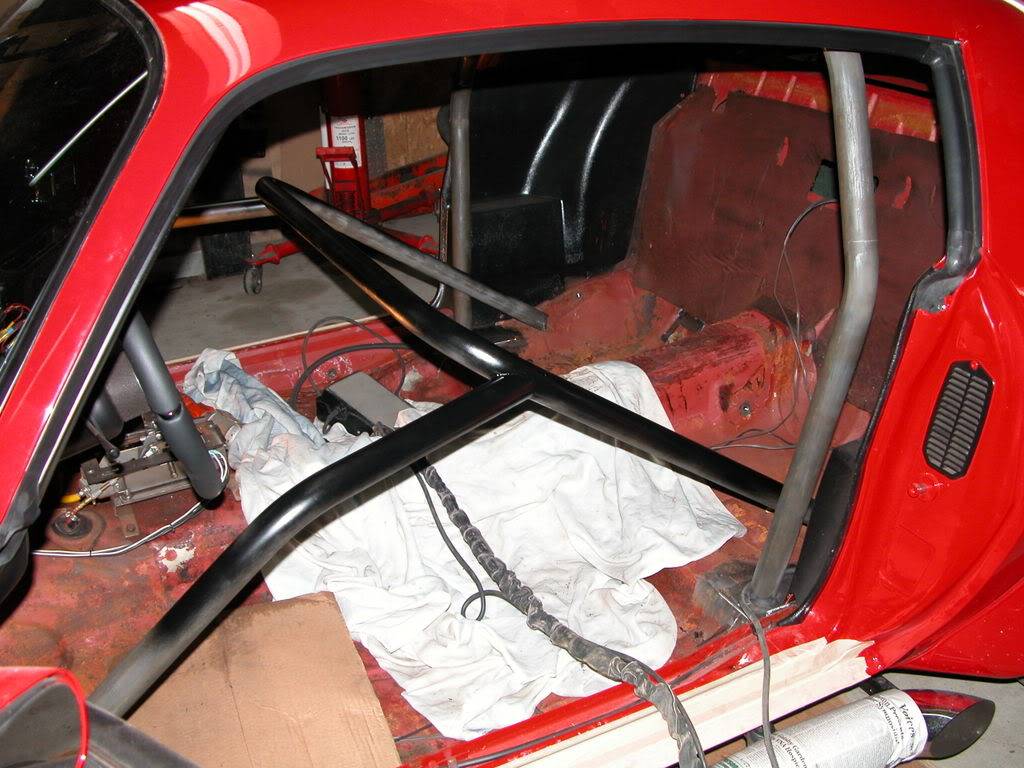
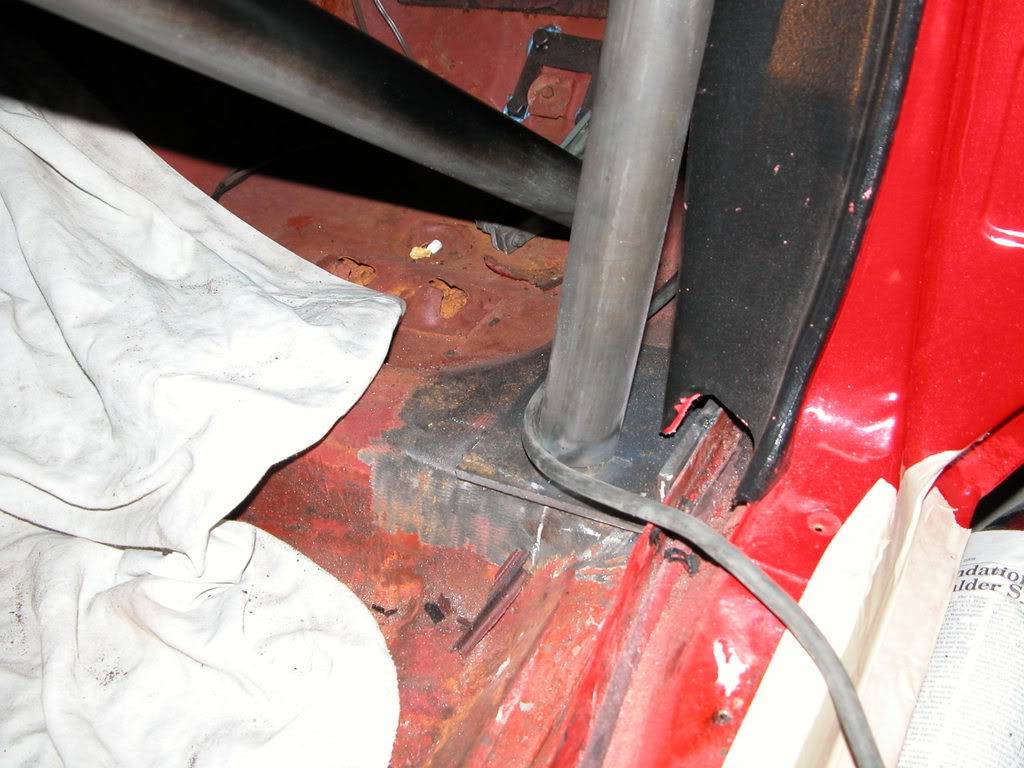
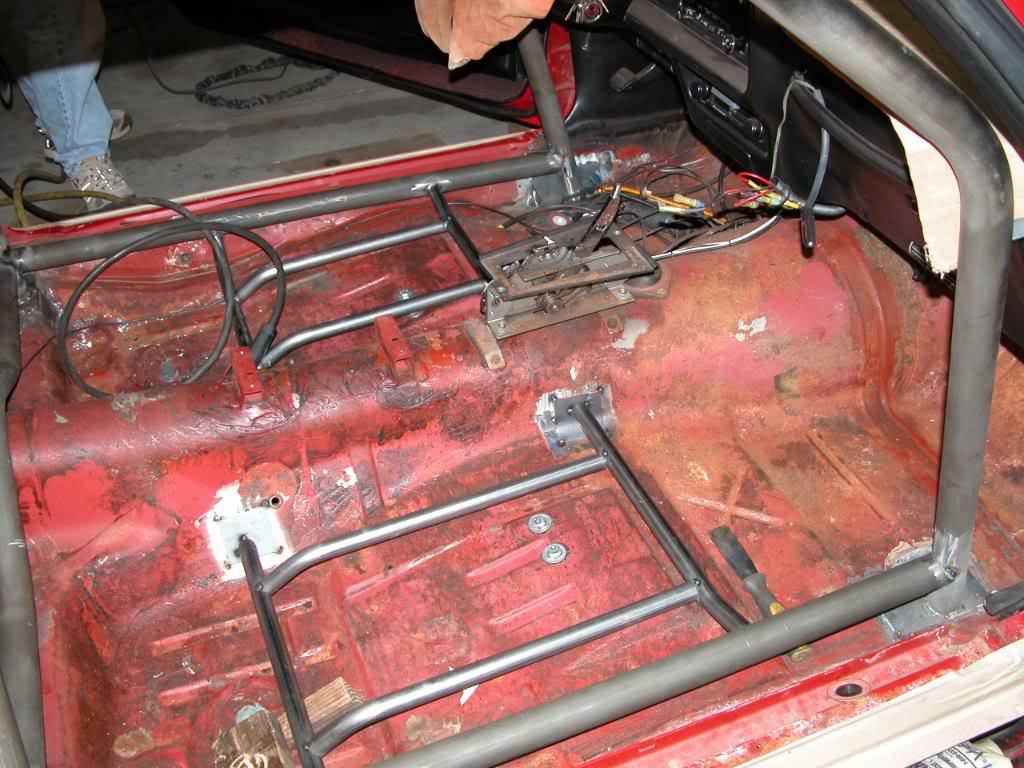
To get the ball rolling I stripped out most of the interior of the car other than interior panels that require clearance when the cage is finished. It was hard to do as I'd finally gotten the interior just the way I wanted it, other than a compromise on harness anchoring points. New harnesses will be used after the cage install with Harness bar cage attachment points.
The 4 point harnesses shown in the "before" pics feature Schroths ASM technology and are designed for use in cars without bar/cage harness attachment points. They were a TEMPORARY measure for me so I could use my car and be safer than the 30+ year old lap only belts I had been using. I'd been warned at tech inspection at several events that the Schroth harnesses were not "legal" however they always let me race.
Before
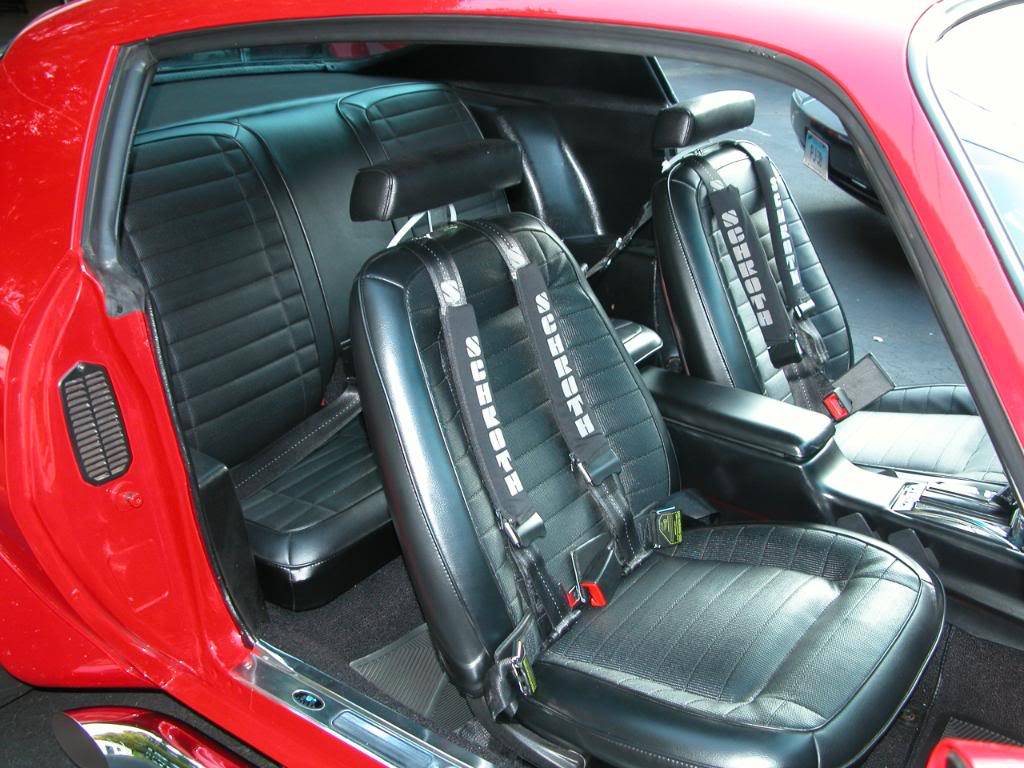
Pics after removing interior pieces and 25 lbs of floor sound deadening material. I'll prep and paint the floor after all welding is done before carpet goes back in.
09-28-2008 #4
Registered User
- Join Date
- Mar 2007
- Location
- Florida
- Posts
- 2,391
Once the cage is welded in the frame/unibody can't be easily straightened or adjusted. So before any cage work I took the car to a buddies body shop where they'll check the car and if need be, put it up on the frame table and tweak it a little.
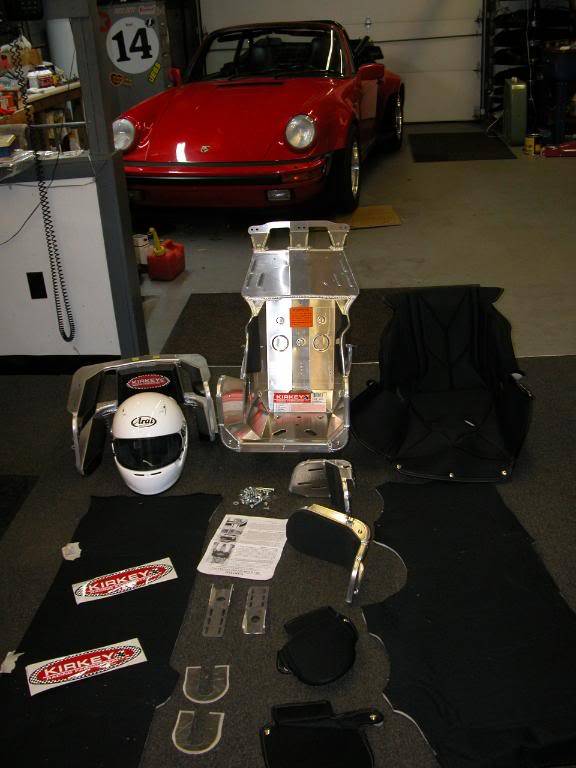
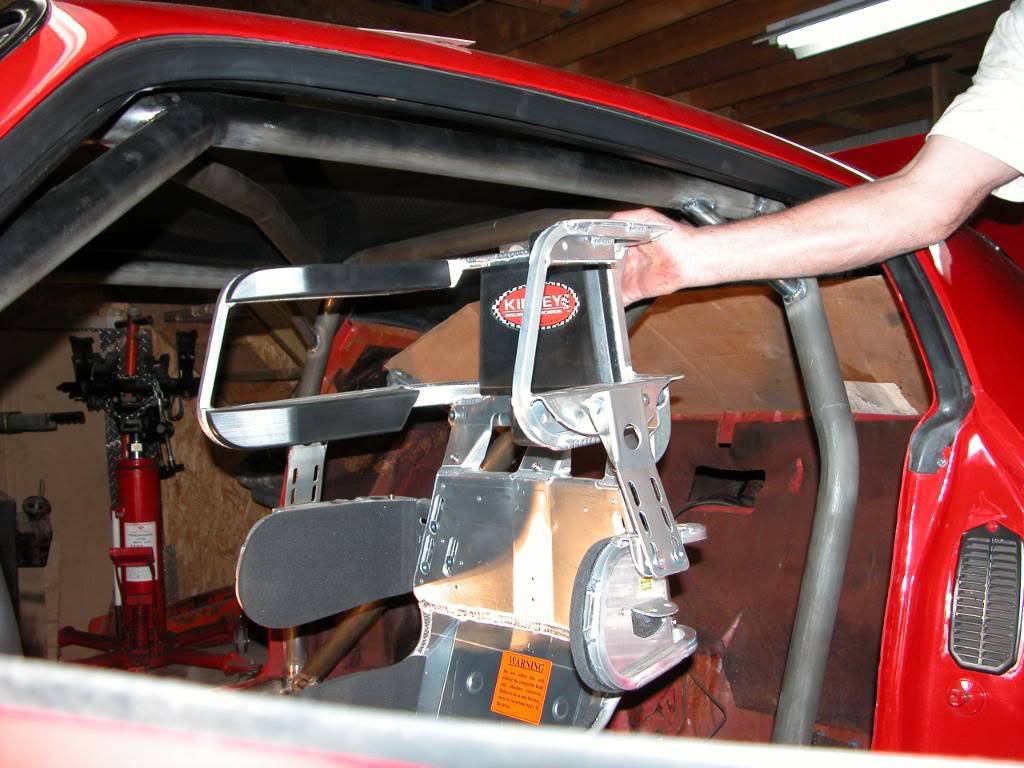
The Fab shop doing the cage needs the drivers seat in order to fabricate the mounts within the cage structure and weld in supports for the shoulder/head restraints. After some research I decided on a Kirkey#63 seat. It's a "full containment" seat with shoulder supports and head brace. http://www.kirkeyracing.com/index.ph...&code=Series63 We'll try to figure a way to allow reinstallation of the stock buckets for normal street driving but I doubt thats going to be possible.
At about $1,000.00 for a seat they're by no means cheap. And as if thats not bad enough I also need one for the passenger side! N.A.S.A. HPDE's and the open road races with a navigator want the same equipment for instructors/co-pilots that the driver has but I would have done it anyway.
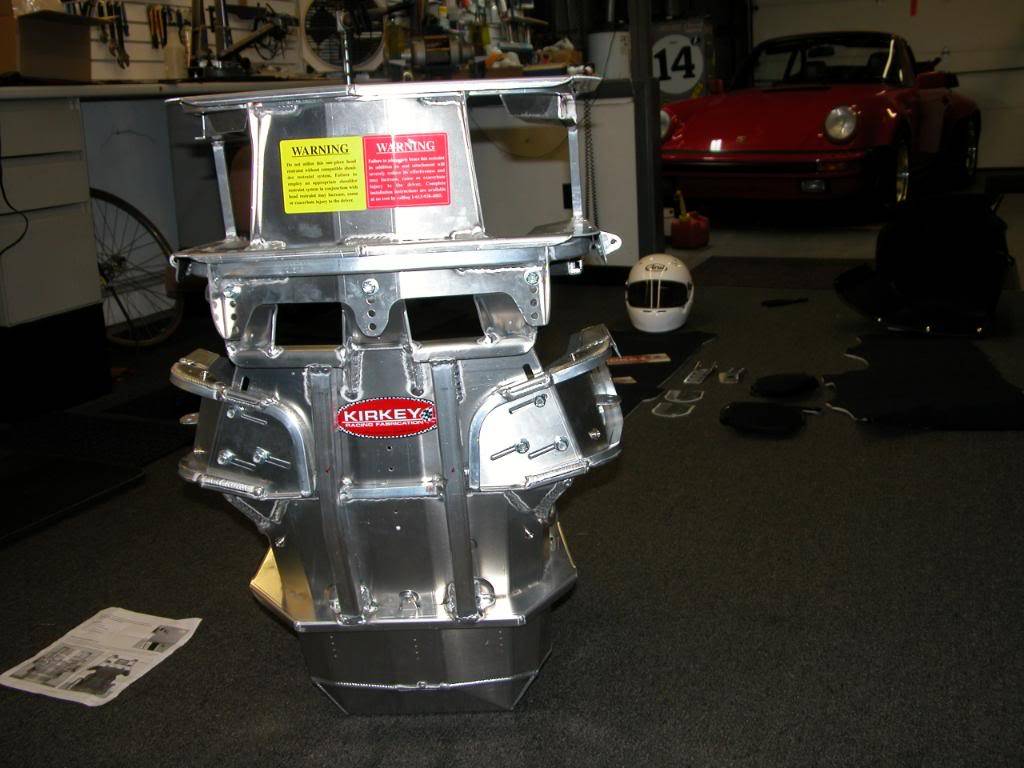
Here's a pic of the seat as it arrives unassembled
Assembled loosely and not adjusted for me
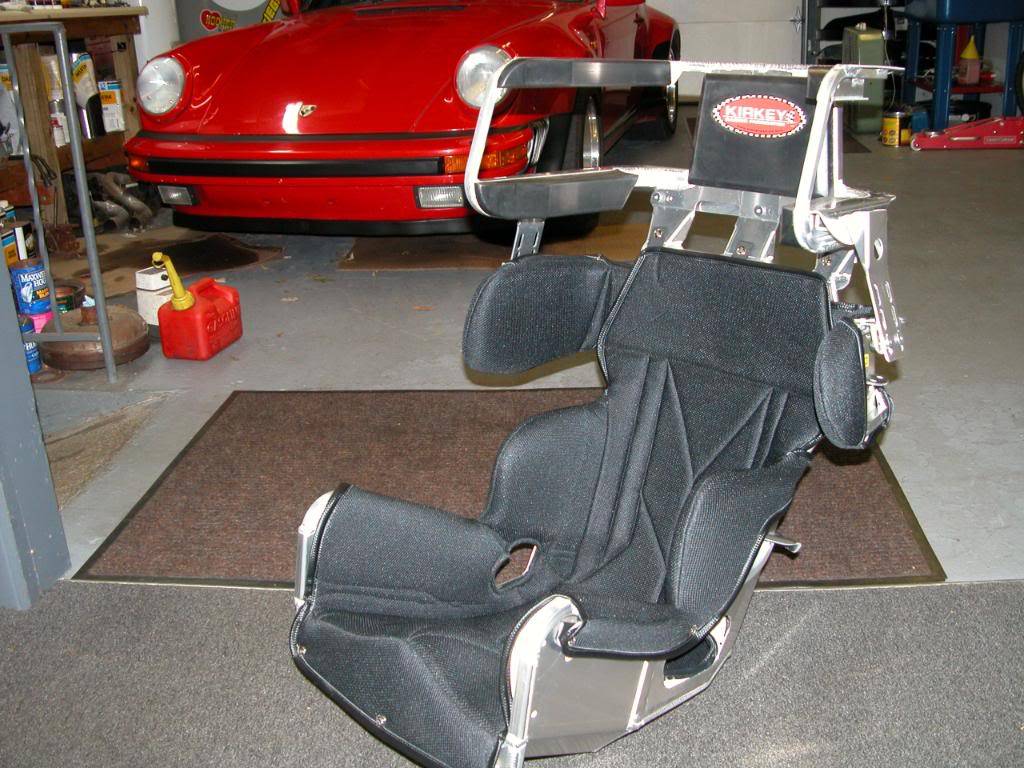
Back side
09-28-2008 #5 Registered User
- Join Date
- Dec 2002
- Location
- Lost Wages, Nevada
- Posts
- 2,683
O u t s t a n d i n g...
It is the best investiment you will ever make. Nice seat selection... I too love my 63 series. Just remember to attach the top of the halo to the main hoop... and dont use the supplied alloy 'u' plates, I believe it would be of great benifit to solidly mount the halo to the main hoop on both the upper and lower flanges.
The best thing is... that your gonna make it a weekend bolt in... and keep your normal seats in the car the rest of the time. Great multi-purpose car idea.
Keep the updates coming !! There will be a lot to learn from your efforts that will help the masses !!
09-29-2008 #6
Registered User
- Join Date
- Mar 2007
- Location
- Florida
- Posts
- 2,391
Well the body guys checked out the car. They said the unibody was straight and the car did not have to go on the frame straightening table. So now the cage can be welded in place! My buddy at the body shop played with my front end sheetmetal a little and aligned my front bumper a little better than I had when I did the bodywork and painted the car over 15 years ago. Sweet peace of mind deal for $50.00 and better bumper fit to boot!
So I dropped the car off at the fabrication shop today. http://www.jwracing-fab.com/ We discussed the cage now that we've got all the info from the various sanctioning bodies. The classes I may eventually run in do not allow removable door or harness bars so my original thoughts about going that route are out. We're still hoping that with a little planning I may be able to run the stock seats on the street, we'll see.
dropping it off at JW Fab. I always open the hood, trunk if anyone else has to touch the car. This avoids any probs
Might be able to see the blown maverick in the shop. A bunch of fast drag cars go through this shop.
09-29-2008 #7 Registered User
- Join Date
- Jul 2003
- Location
- Anaheim Hills, CA
- Posts
- 11,967
nice...
 "A ship in port is safe, but that's not what ships are built for."
1968 Track Rat Camaro:
https://www.youtube.com/watch?v=SGHJ5c1yLIo&t=2s
1971 Chevelle Wagon with a few mods:
https://www.youtube.com/watch?v=WBVPR3sRgyU
09-30-2008 #8
Registered User
- Join Date
- Mar 2007
- Location
- Florida
- Posts
- 2,391
Well the 4th thing on my "to do" list is the Fire System. I hate fires!
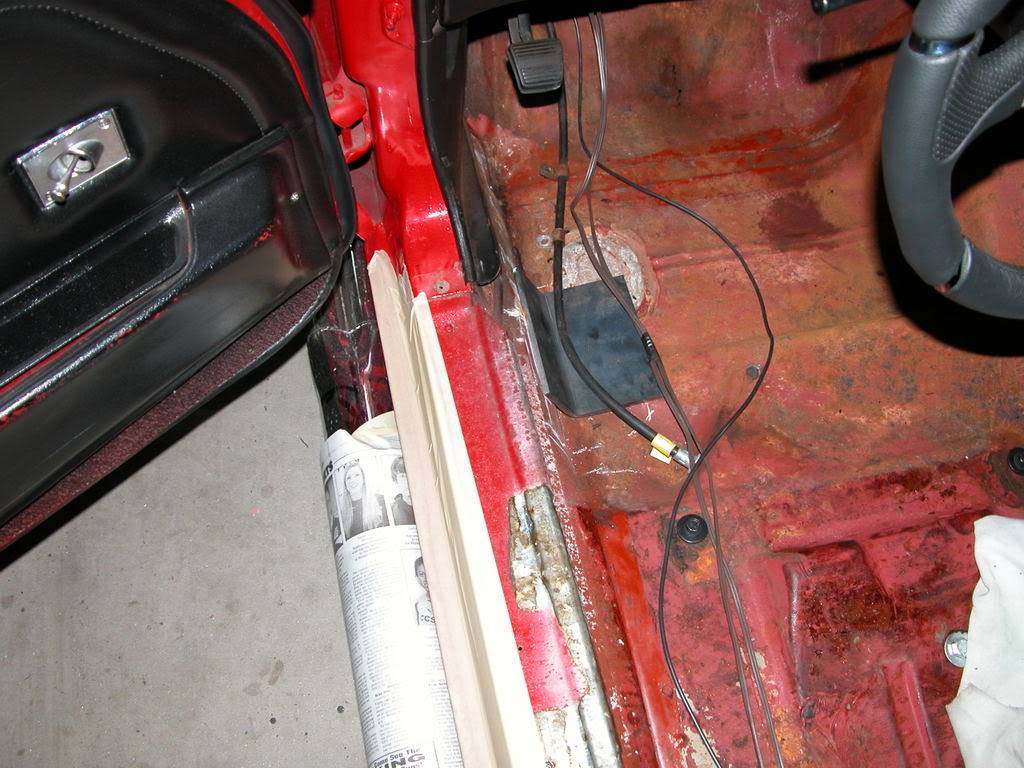
While working for a company my "company car" burned on the side of a suburban street while I waited for the FD to arrive. Engine compartment
My stepsons 79 Z28 burned in front of our house 50' from the fire station. Engine compartment
The engine I currently run in my firebird came out of a GTO clone parts car I purchased after.... you guessed it, a fire! Passenger compartment
Also I work next to a service/towing operation and I've seen enough badly burned cars to last me a lifetime.
I carry a handheld extinguisher in every car I own and have had occasion to use them on other peoples cars. (don't expect that someone will replace it for you if you help them)
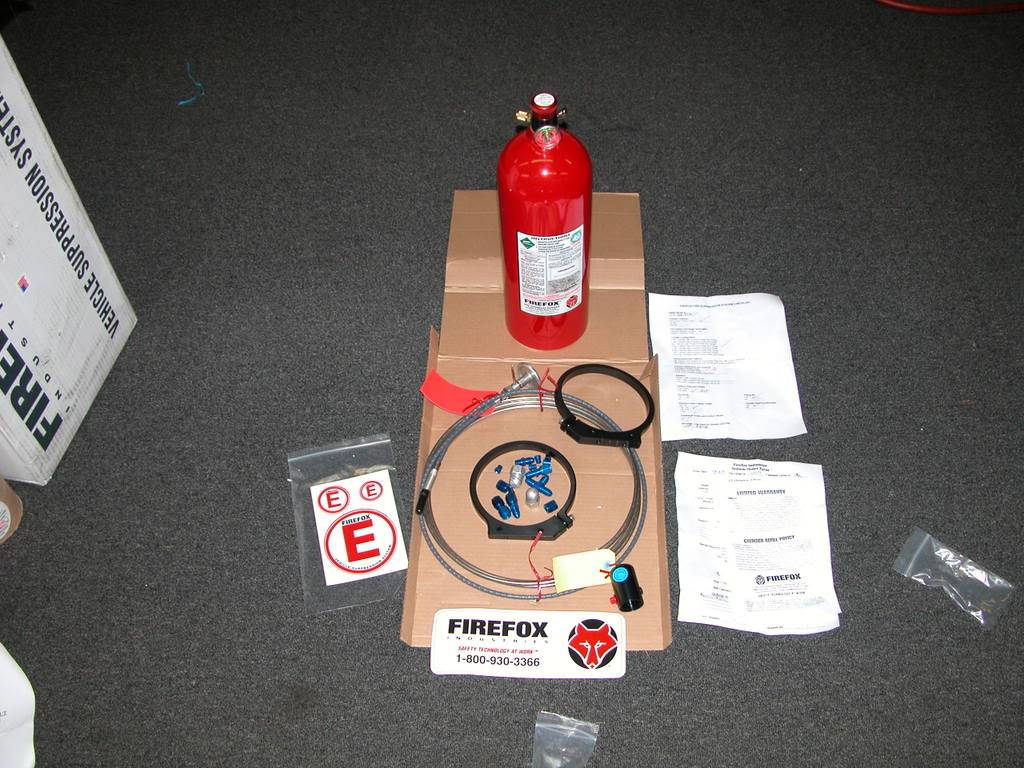
I read everything I could find and ended up deciding on Firefox Systems. http://firefoxind.com/firefox.html While there are other very effective systems in the end it's a personal decision.
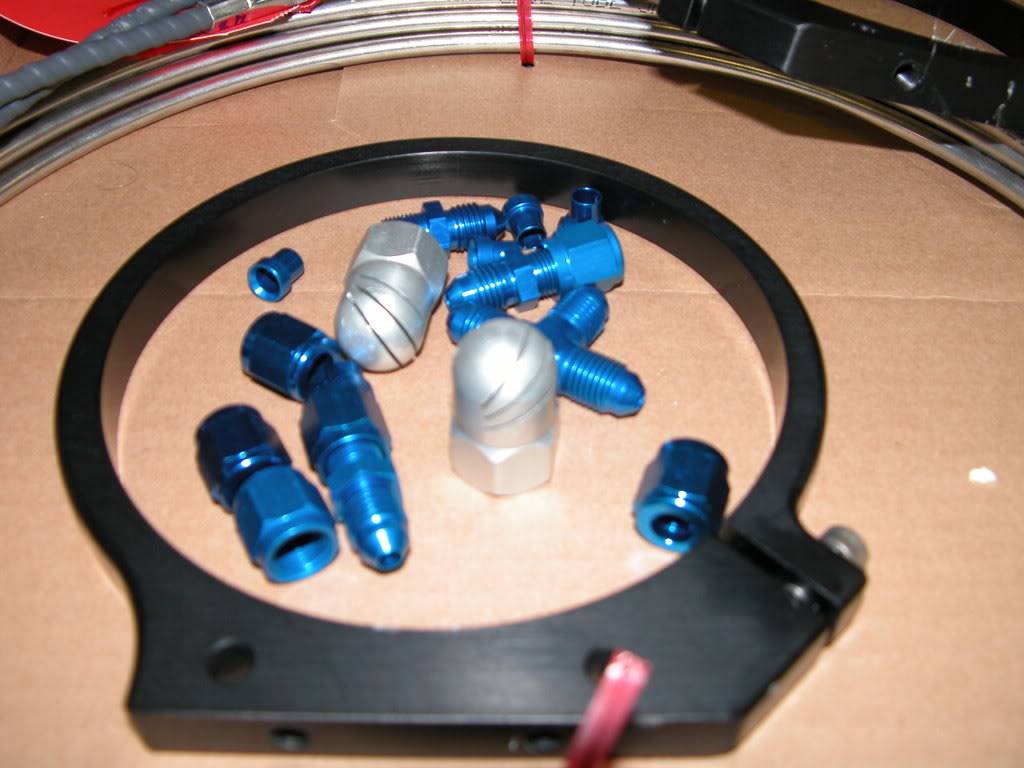
The Firefox systems I am installing use a bladder type system using Fire X Plus/Gem Foam. I will have 2 systems in the car. A 6.5 lb. 2 nozzle will take care of the passenger compartment (Kinda overkill) and a 10 lb. 3 nozzle system for the engine compartment and fuel tank area. I will use the pull type activator located within easy reach while harnessed in accessible by both the driver and navigator. The systems are about $400.00 and $600.00 respectivly.
The open road event I plan on attending is 90 miles on the open Highway in Nevada and while they have safety equipment available I don't know how long it might take to arrive at an incident and don't want to be BBQed in the desert should fire be a problem.
I haven't decided yet where I'll mount the cylinders but I'm thinking either in the trunk just behind the rear seat firewall or on the transmission tunnel where the rear seats are. No one will be allowed in the rear seat area after the cage is installed anyway.
If I have to add weight to the car then I don't want it to have a negative affect on the cars handling. I feel putting it back beyond the rear axle while good for traction at a dragstrip would be a negative when carving corners.
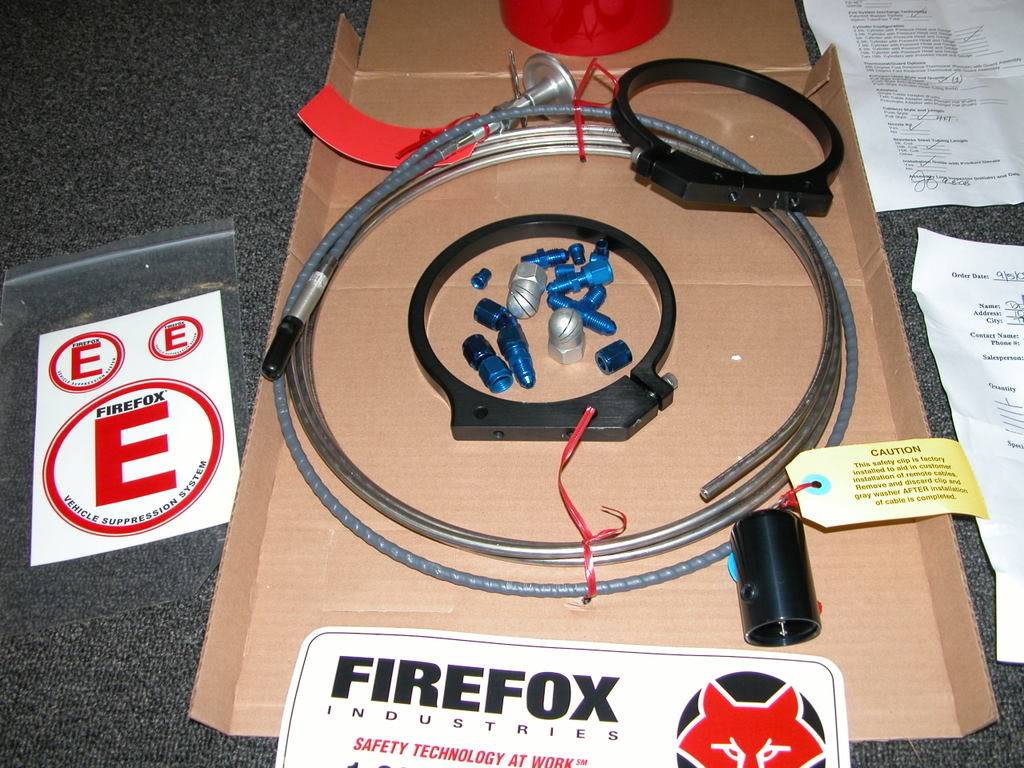
Here's the 6.5 lb system. It comes with 2 nozzles, Activator head, 4' pull style activatorcable, 10' of stainless tubing, a fitting kit, mounting brackets, and of course the cylinder w/gauge.
09-30-2008 #9
Registered User
- Join Date
- Jul 2005
- Location
- Cumberland, Maryland
- Posts
- 552
http://www.corner-carvers.com/forums...ad.php?t=27556
check it out for some quality cage input.
10-01-2008 #10
Registered User
- Join Date
- Apr 2006
- Location
- Huntington Beach, CA
- Posts
- 2,415
Neat thread. And that is a really nice looking car, especially for a 15 year old paint job.
Please Subscribe to the AutoXandTrack YouTube Channel
Autocross and track blog about running autocross and track events with pro touring cars
10-02-2008 #11
Registered User
- Join Date
- Mar 2007
- Location
- Florida
- Posts
- 2,391
Blyth18md that was one of the threads I read through trying to decide how far I wanted to go with the cage lots of stuff there.
Chad Thanks for the compliment, Painted it myself in the backyard on a dirt driveway. Where there's a will there's a way!
When I first got the car I was going to paint it (without TA body parts) and throw a set of Crager SS wheels on it and use it as a daily driver. It's come a long long way since then
10-06-2008 #12
Registered User
- Join Date
- Mar 2007
- Location
- Florida
- Posts
- 2,391
Well the guys at JW Fabrication started my car today.
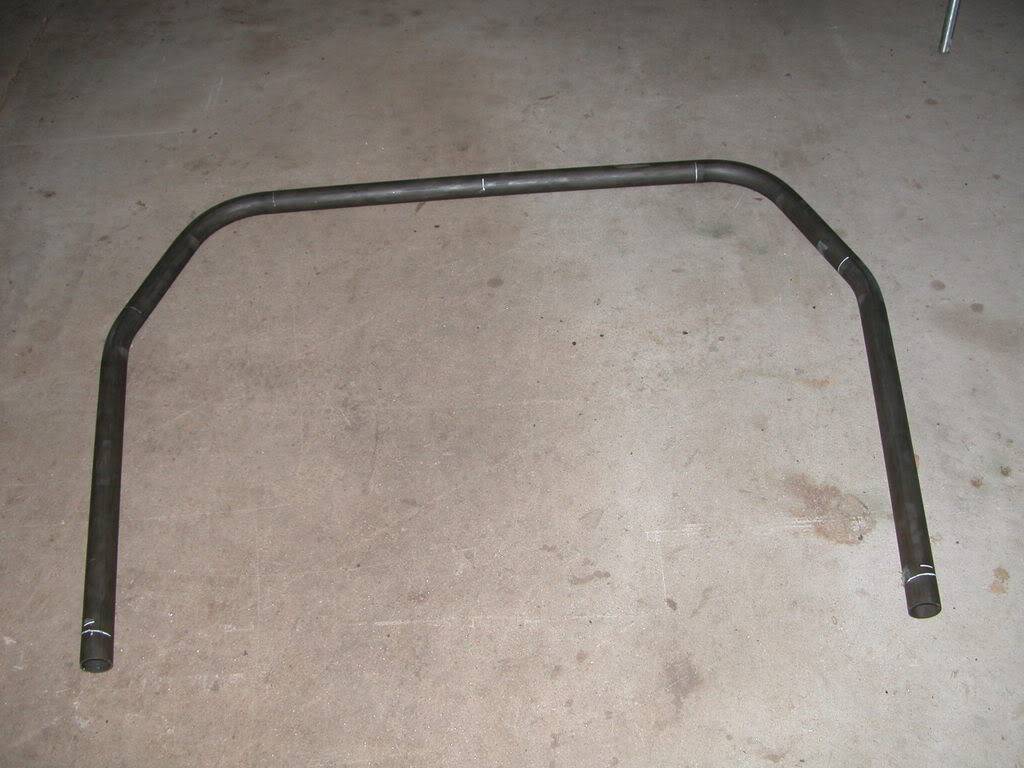
I was at a Porsche club track day that got pretty rainy by late morning so I left. Figured I'd swing by the shop and take a couple pics. They had made floor plates out of 1/4" and had bent up the main hoop out of the 1 3/4" .120 DOM tubing. So here's the pics!
Floor plates front and rear.

Yes the rear plastic wheelwell panel will be out when they weld. It's just there in the pics because they were checking clearance for reinstalling it after the cage is finished.
Main hoop (bar that goes up from the floor by the rear of the door, across the roof, and down the other side behind the door)
10-07-2008 #13
Registered User
- Join Date
- Mar 2007
- Location
- Florida
- Posts
- 2,391
Today Joe at http://www.jwracing-fab.com/ had been busy bending/fitting tubing and welding up pieces and was waiting for paint to dry when I got there. Perfect time to take pics and get the lowdown on some of the steps involved.
The car had been lifted up on scissor jacks and leveled front to rear and side to side using the inner rockers as a referance guide. This way they can get things level and straight using magnetic levels when setting up the tubing and doing the actual welding. Pic 1
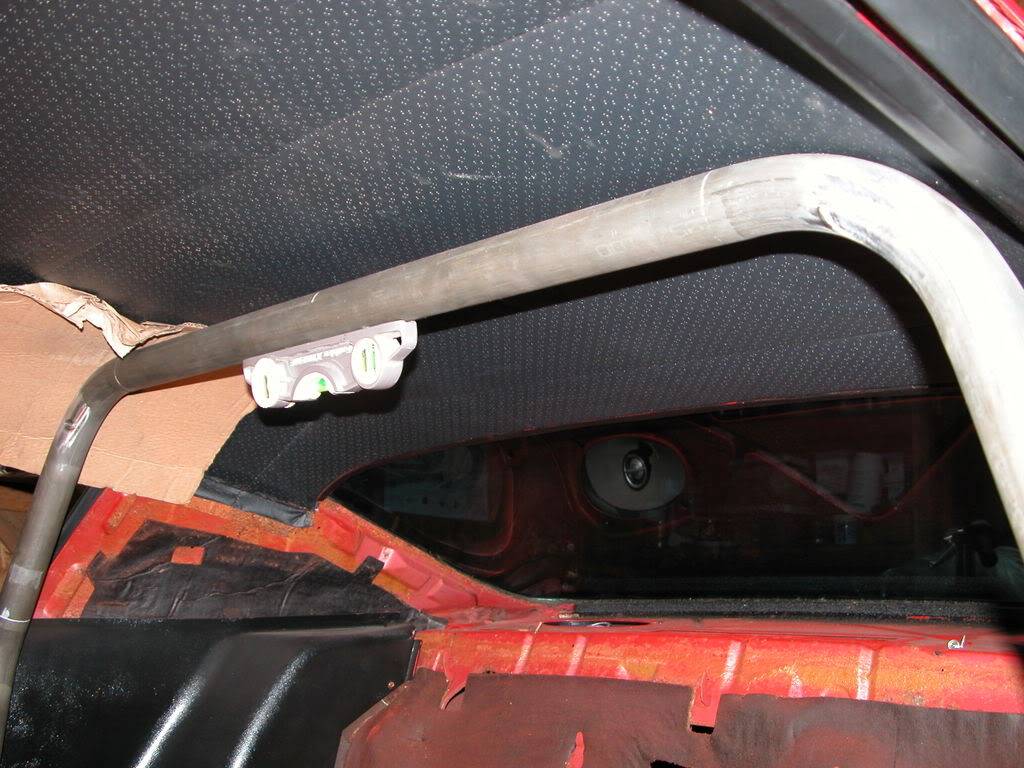
Any tubing that will be very close to finished body parts (Headliner etc) that will be hard to reach when spray painting in an already "done" car are given a quick coat of paint in the hard to reach areas which makes it easier to get a good look later when giving the cage it's final paint. I'm going to paint the cage black after I get the car back so thats what they used. pic2
The floor plates are in place along with the main hoop and the wheelwell plastic trim is again checked to make sure it can be removed/reinstalled. I'll be removing the heavy factory sound deadening material behind those panels in my efforts to minimize the weight gain of the roll cage. pic 3
10-08-2008 #14
Registered User
- Join Date
- Mar 2007
- Location
- Florida
- Posts
- 2,391
It's killin me to know someone's working on my car during the day and I'm not there, since I usually do everything myself. So I ditched work for a few minutes to run over to the shop and see what they were doing. They were done working on my car for the day and packing up their stuff to go to a dragstrip tomorrow for a track day. Joes Mustang has run low 8's and he's hoping to hit 7's tomorrow!
The first pic looks like a "set up" shot but thats just what it looked like when I drove up so I got the pic. Other pics show the cage work.

10-09-2008 #15
New to Pro-Touring
- Join Date
- Aug 2007
- Posts
- 35
I can't wait to see it!
I get first ride!!!
10-10-2008 #16
Registered User
- Join Date
- Mar 2007
- Location
- Florida
- Posts
- 2,391
Passenger seat arrived today, it's substantially wider than the drivers seat since I'm not a very big guy. My navigators for the open road races I want to go to are big guys so I got a big seat to accomodate them. Smaller passengers will require extra padding in the seat when needed. This may occur at road track track days etc or on the street. The passenger seat will also be set much farther back and there will be multiple mounting locations on the harness bar which will allow changing the shoulder strap height to obtain the correct angles the straps should be at for various torso/height passengers. I'll explain more when we get to the Harnesses we'll be installing.
Kirkey seats like the seats I'm using come in 14,15,16,17, and 18 inch sizes. This is based on a measurement taken across the hips according to the fitment instructions on their website. The passenger seat is an 18" and is going to present a challenge because of the way the 2nd gen cars windows angle. The shoulder braces for the passenger are going to be a tight fit on that side.
These are full containment seats with a provision to prevent the helmet from moving more than a couple inches side to side and so the top of the "seat" so to speak is much wider where the sides of the head brace are than the usual "racing" seats we're accustomed to seeing/using. This is another challenge for Joe building the cage and seat supports since the 2nd gen side windows angle in quite a bit.
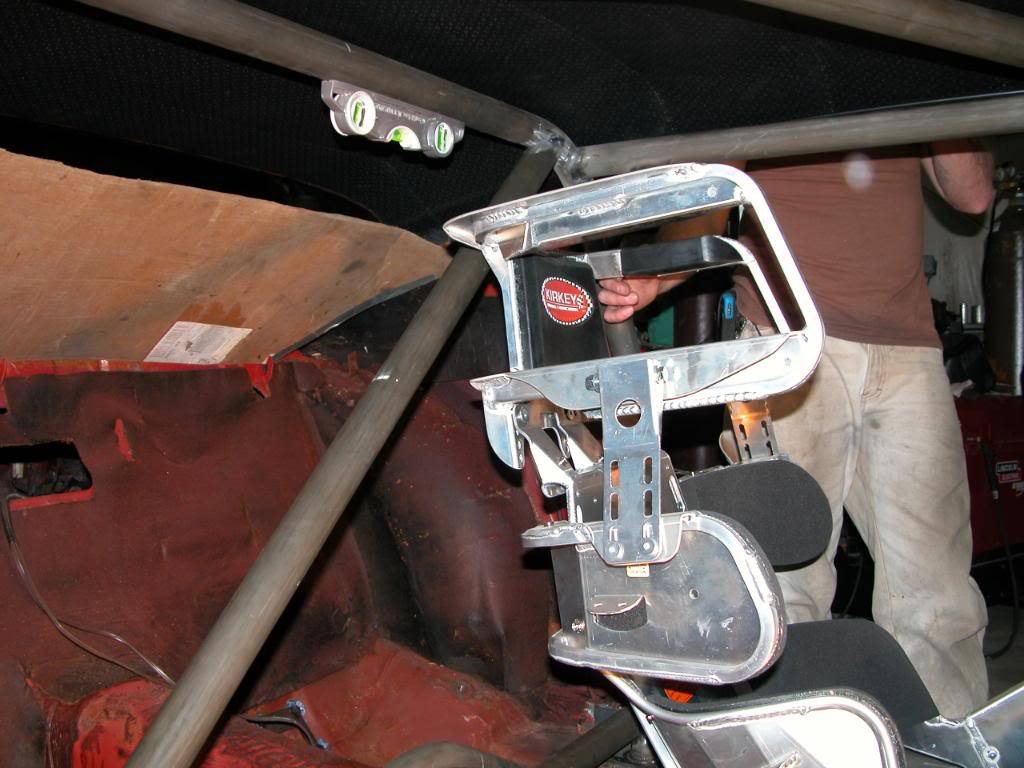
This pics show the 14" drivers seat being held in position (although approx 4" lower than it will be) and you can see how big the head braces are. These seats were designed for circle track guys so the right side head brace is extended to help when they hit the wall in corners. We discussed the possibility of modifying the right sides of the head supports by shortening them to match the left side since I'd like to be able to see when making right turns. I'm going to check with the tech guys to be sure this will be OK before attempting it.
It's not looking good for the possibility of running the stock seats after the cage is in but we'll try when it's done. The driver and passenger entry openings that the seats would have to fit through may not be big enough. The Kirkey seats can be assembled in the car so the opening can be smaller. We also discussed the possibility of fabricating a more street friendly head support to replace the helmet brace section of the seat for normal street driving if I can't get the stock seats back in the car when the cage is complete.
10-10-2008 #17
Registered User
- Join Date
- Mar 2007
- Location
- Florida
- Posts
- 2,391
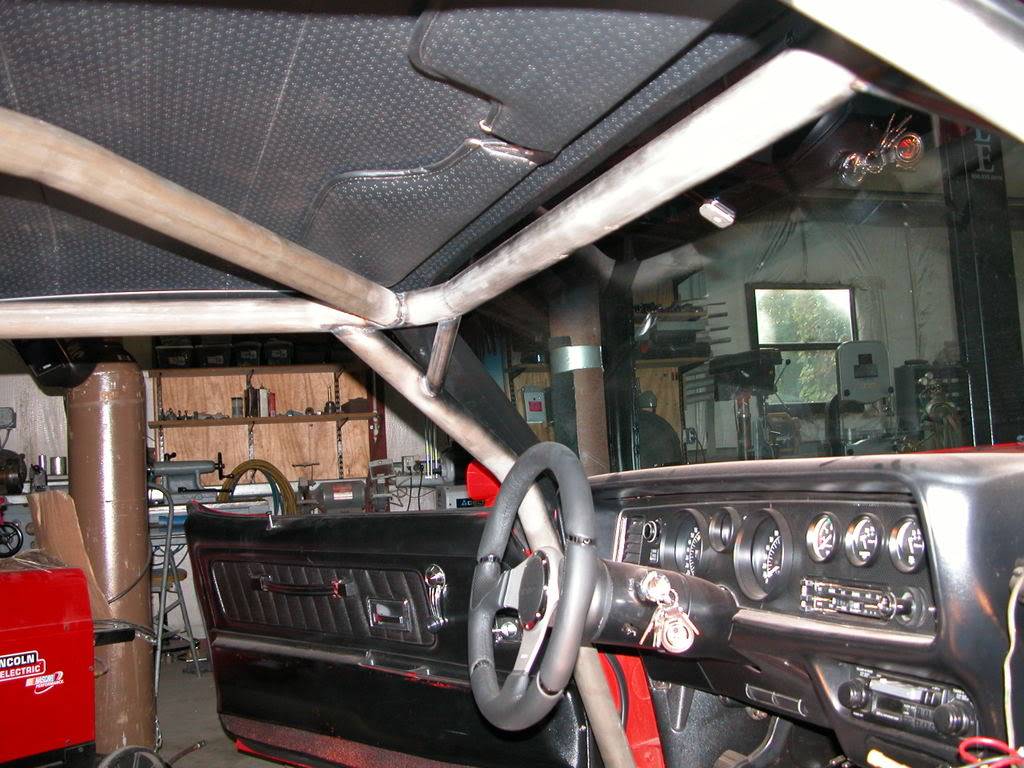
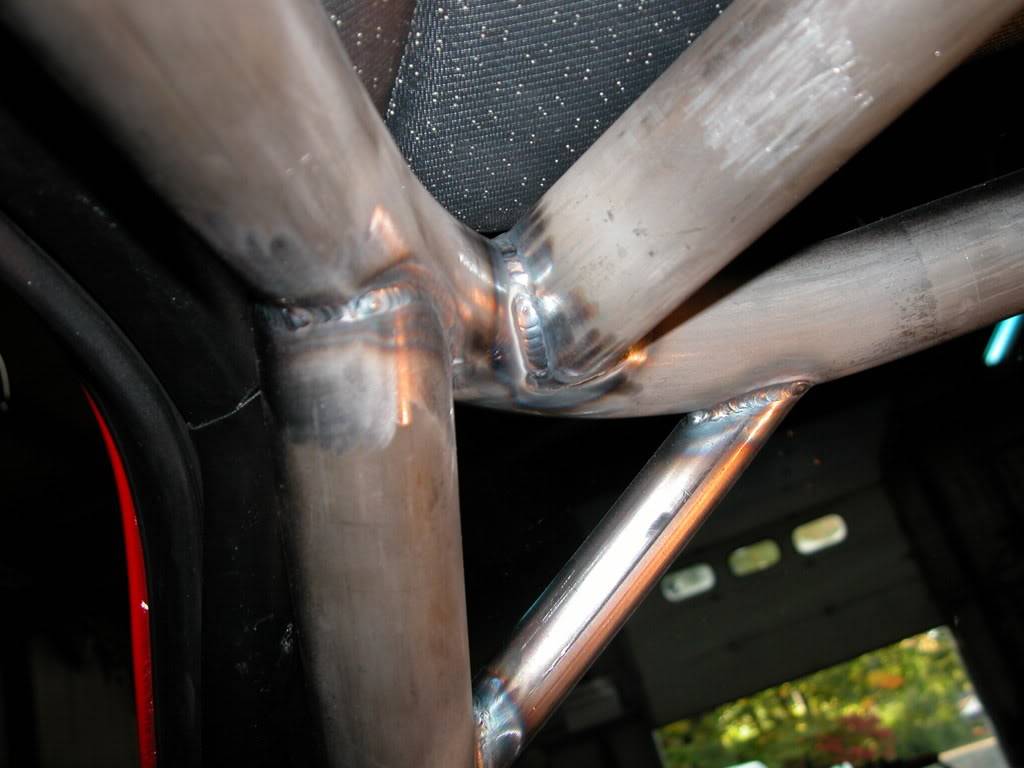
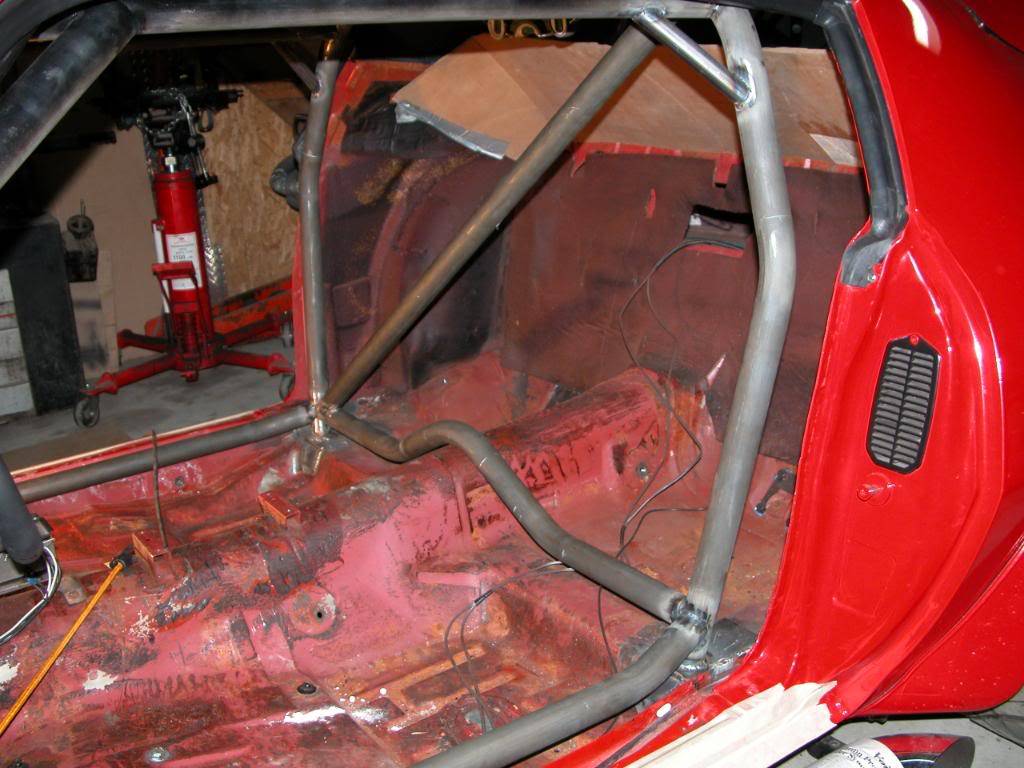
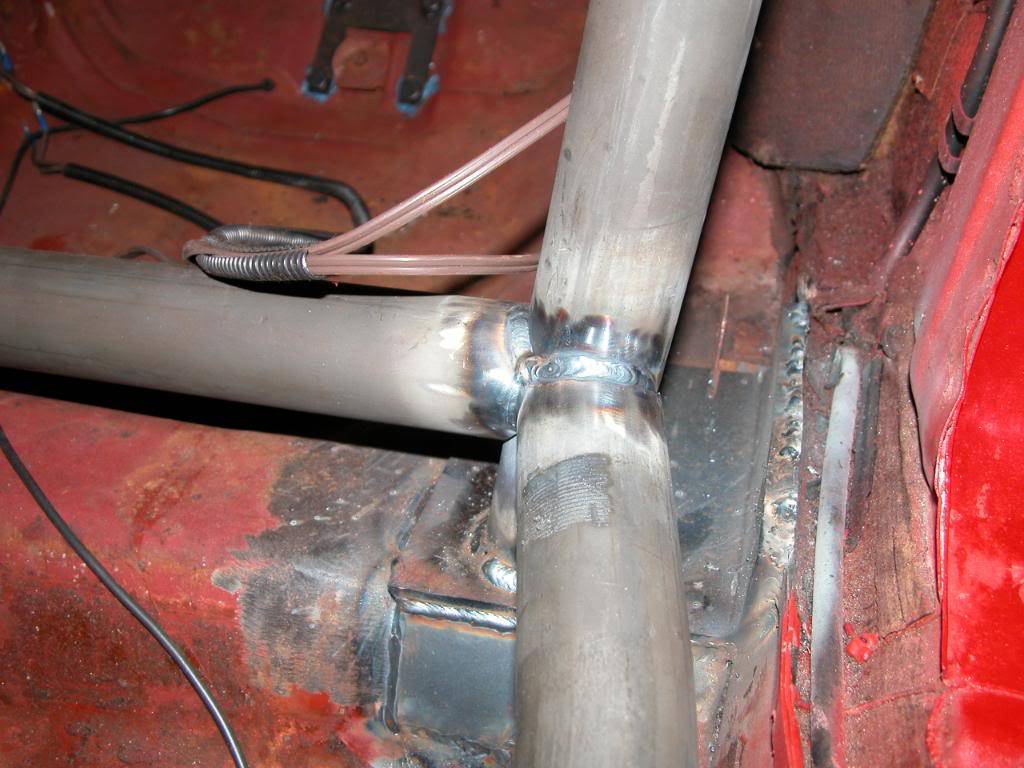
Cage is coming together nicely! Triangulation is the key to strength. you may have noticed the the tubing running from the drivers front corner to the passengers rear corner on the ceiling. Perhaps you've also noted the smaller gusset bars at the tubing intersections.
Now we see a diagnal bar from above/behind the driver to below/behind the passenger which when combined with the floor pan bar over the hump, divides the main hoop into essentially 2 large triangles. This bar will also be met by the harness bar tubing creating even smaller triangles which are very very strong.
The rocker bars are tacked in place in these pics. The shoulder bars will angle down from the main hoop behind the occupants to the lower front corner near the door hinges. They will be positioned so they pass the by occupants between the shoulder and elbow.
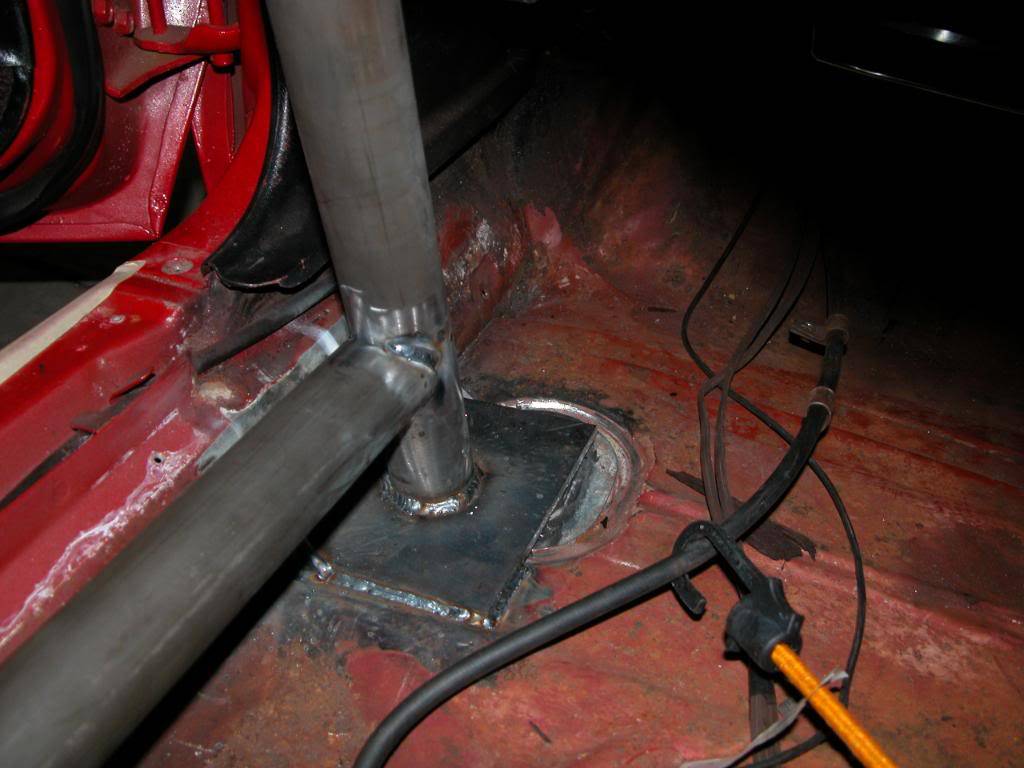
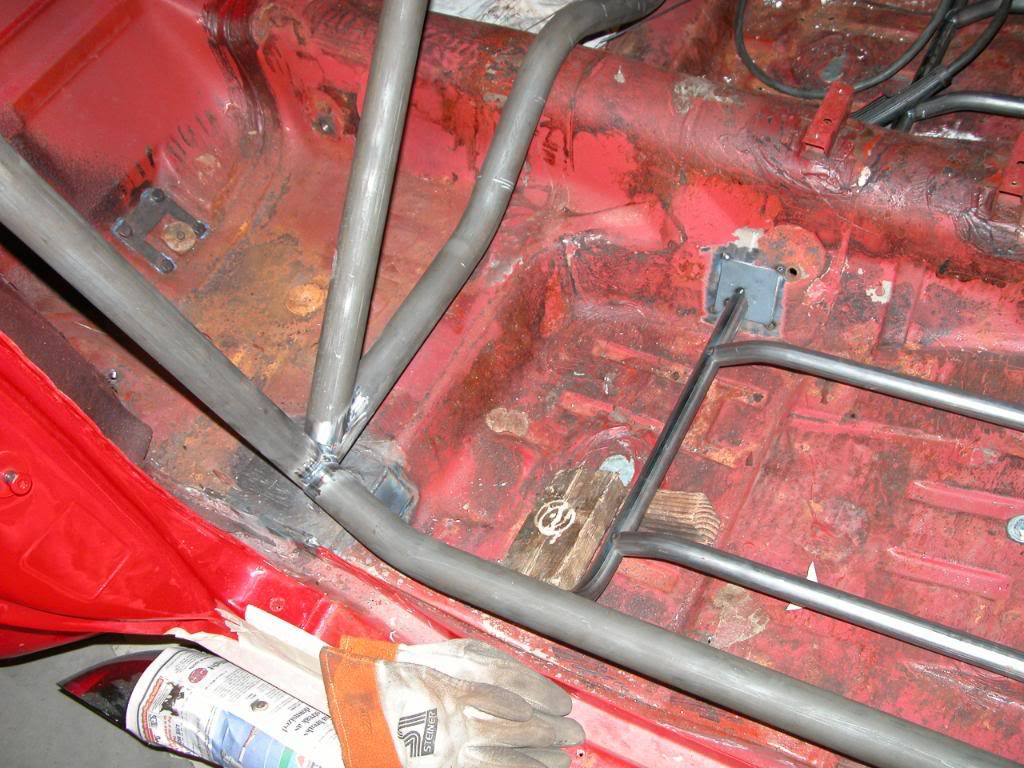
These pics show rocker bar and floor plate mounting
10-10-2008 #18
Registered User
- Join Date
- Dec 2002
- Location
- Lost Wages, Nevada
- Posts
- 2,683
I love to see progress... proper tubing for the right application... angle braces (hoop gussets) that are also structural... ... nice.
I'd call Kevin (at Kirkey) and see if he can make you up a passenger side seat, head rest. (And while your on the phone, if you could... ask him if he is still going to do a road race style head rest for the 63 series seat as well. We have been trying to work on him to get optional head rests for the 63 series... Kevin just didn't think there was going to be any interest.)
I don't believe that you will want to modify the head restraint to be any shorter.... that would reduce it's safety intent. You will have plenty of visibility with the tube head restraint... that is why that specific device was made. Plus... you will only need to run the tube head support when you are at an event that requires it. That is another reason I was hoping that if you talk to Kevin... you could impress him with making the road race style head rest for the 63 series... as we could then run them when a tube halo was not required (like in street and auto-cross driving as well.)
The only reason that the left side is shorter is to help getting out of the car... and the window net is the secondary to that and the "rules" people think that is enough. If you did shorten the right side I would definitely add a "C6R" right side net. But, I think that you will be fine without shortening the head restraint and without the right side net. I though I would just throw the side net idea out there if you do end up with a different direction. The next in consideration looks like this:

I would also entertain the use of a wide angle rear-view mirror. It almost negates the need for side-view mirrors all together. Plus with it being a bolt in/on... it makes it easier for installation and removal if you didn't need it on the street. Something like this.
And hopefully this well help in the thought process for the shoulder restraint mounting.
Cant wait to see the backhalf getting done... that means your almost done !!
10-14-2008 #19
Registered User
- Join Date
- Mar 2007
- Location
- Florida
- Posts
- 2,391
The Kirkey seats http://www.kirkeyracing.com/index.ph...&code=Series63 need to be bolted to something! In this example they'll be bolted to a special framework welded to the cage at the rocker bar and to the body at the transmission tunnel. This will further reduce flex in the unibody while providing a solid platform for the seats. Kirkey does not recommend the use of stock style sliders or adjusters as they might not withstand a high impact crash at high speeds.
10-14-2008 #20
Registered User
- Join Date
- Mar 2007
- Location
- Florida
- Posts
- 2,391
I'm not a big guy so I need the seat forward more than most of the potential passengers. Here we see the passenger seat platform is longer and extends farther back. They're just tacked into place so we can do some test fitting. For inquiring minds, the 2 shiny bolts located in the floor on each side are for the driveshaft loop ( a must have for any hot rod) and the wire hanging on the dash grab bar is for the Hurst line lock which gets mounted on the shifter.

 Reply With Quote


