

Results 321 to 340 of 679
Thread: Project FNQUIK
-
09-16-2015 #321
 Registered User
- Join Date
- Sep 2013
- Location
- sw Kansas
- Posts
- 1,645

Cool!
-
09-16-2015 #322
Registered User
- Join Date
- Apr 2014
- Posts
- 803
Congrats on the great test fit of your motor! looks awesome!
Pat
-
09-16-2015 #323
 Registered User
- Join Date
- Nov 2006
- Location
- Ma.
- Posts
- 5,567
Thanks guys I got the 4l85 in today but it's to far to the drivers side of the tunnel. Tomorrow I'm going to loosen the engine mounts to see if I can shift it to the center.
Wayne
Car FINALLY home !!!!!! lol
Project FNQUIK https://www.pro-touring.com/showthre...ghlight=FNQUIK
-
09-18-2015 #324
Registered User
- Join Date
- Nov 2006
- Location
- Ma.
- Posts
- 5,567
A little update for today. We relieved some pressure on the frame mounts with the engine crane and got the mounts loosened and got enough slack to push the trans over to center it. I bought a used X Factor cross member a while back and never realized how its made. It's two maybe 3/16" thick pieces sandwiched together on each side of the trans mount platform. Different for sure. Its for a T 56 but it lines up pretty well. It will take some mods to get it to work but it will let me hold the trans up for us to get my drive line angle figured out.
__________________Wayne
Car FINALLY home !!!!!! lol
Project FNQUIK https://www.pro-touring.com/showthre...ghlight=FNQUIK
-
09-21-2015 #325
 Registered User
- Join Date
- Jun 2014
- Posts
- 177

Looks to be coming together really well. Keep it up!
-
09-21-2015 #326
 -Moderator/Sponsor-
- Join Date
- Apr 2001
- Location
- The City of Fountains
- Posts
- 15,975
Wayne, Originally Posted by Motown 454

Did you get a 4L85e that GM sells?
Andrew1970 GTO Version 3.0
1967 Cougar build
GM High-Tech Performance feature
My YouTube Channel Please Subscribe!
Instagram @projectgattago
Dr. EFI
I deliver what EFI promises.
Remote Holley EFI tuning.
Please get in touch if I can be of service.
"You were the gun, your voice was the trigger, your bravery was the barrel, your eyes were the bullets." ~ Her
-
09-21-2015 #327
Registered User
- Join Date
- Aug 2015
- Location
- Madrid Iowa
- Posts
- 116
Man that's one hell of a nice car man. I love the undercoat inside the panels. Good choice on the lsa drive line. I wish I could tear my Buick down as far as you did, but they don't make panels for mine. I'm impressed by what you've done.
-
09-21-2015 #328
Registered User
- Join Date
- Nov 2006
- Location
- Ma.
- Posts
- 5,567
Thanks guys ! Andrew, yes its the 4l85E that comes with the Connect and cruise kit. Its made to take the power of the 720hp 572 they sell. It has 5 gear planetary set to help take the power.
Wayne
Car FINALLY home !!!!!! lol
Project FNQUIK https://www.pro-touring.com/showthre...ghlight=FNQUIK
-
10-03-2015 #329
Registered User
- Join Date
- Nov 2006
- Location
- Ma.
- Posts
- 5,567
I have a small update but first a question
If I drop my motor mount point down 1/4"-3/8" will this give me any difference in my tranny mount height or will it just carry the same amount I drop to the mount? How many degrees could I gain either way if dropping the same amount if from the engine mount to the trans mount is 44" ? Or is this a crazy question?
Thanks in advance
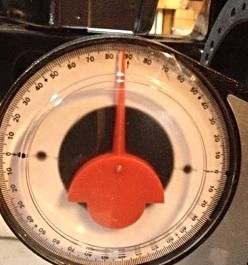
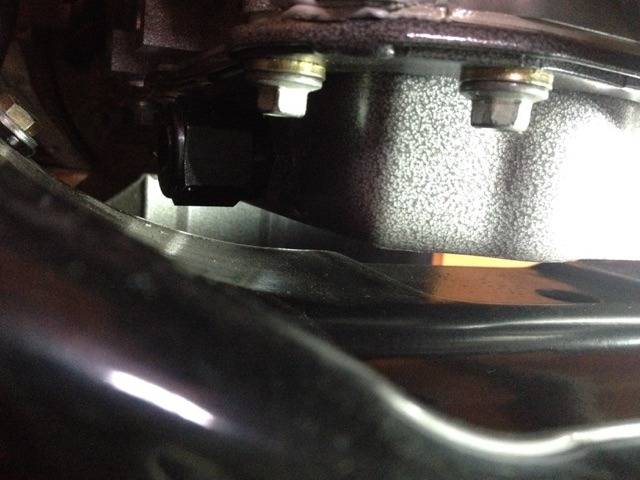
Here's the reason why I ask.
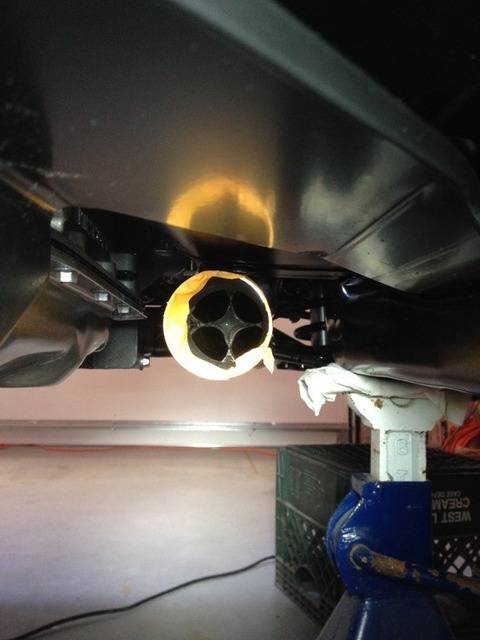
This is what I have for space under the oil pan to my frame. about 5/8" I'm close to 3.5 - 4 degrees down now.
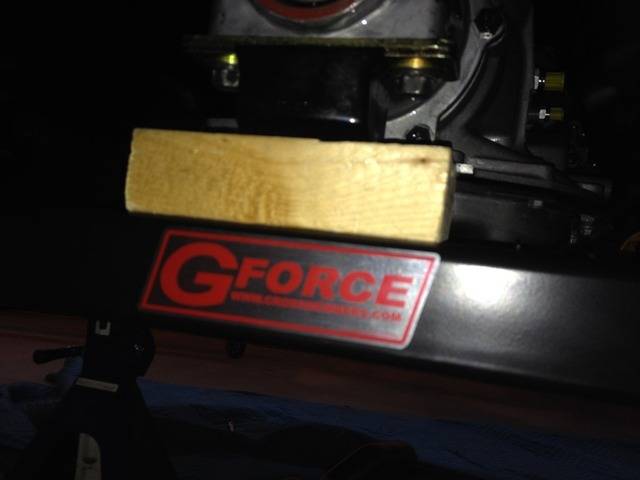
Here is what I have between my G Force cross member and the transmission mount. (That's a 2x4 on the flat) I could also use more room to keep the 4l85 lower in the tunnel. I need room for a connection on the drivers side.
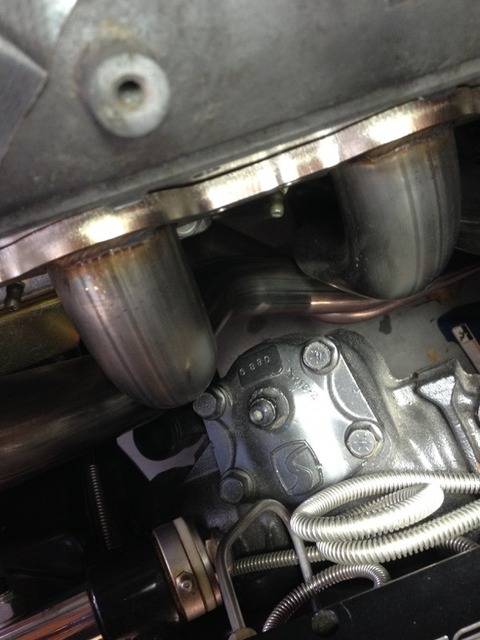
Spaceman and I fit the passenger header in and it fits with nothing hitting but some are close. collector to the floor is about 3/8" and to the idler arm is a c hair.
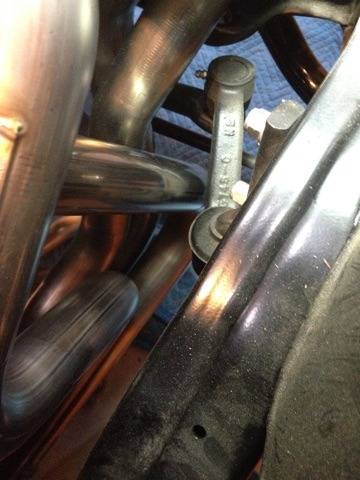
02 sensor is a no go for sure it will have to be moved to the outside of the collector.
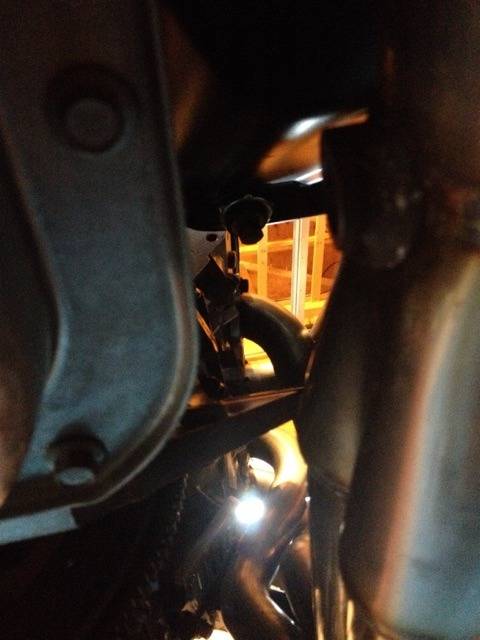
The frame mount it almost touching the header tube it will be trimmed.
 Wayne
Wayne
Car FINALLY home !!!!!! lol
Project FNQUIK https://www.pro-touring.com/showthre...ghlight=FNQUIK
-
10-03-2015 #330
Registered User
- Join Date
- Feb 2011
- Location
- dallas, tx
- Posts
- 1,730
If you drop the motor down the rear of the transmission doesn't change but the angle does. That would really bring your driveline angle to 3 degrees. The issue with that then is the other clearance issues you have already noticed. Another thing that will pop up the increase in header angle might place the header collector into the floor. Honestly based off of what I'm seeing on that oil pan i wouldn't drop the engine anymore. Go to amazon and buy yourself a digital angle finder for about $40. Get it close to 3 degrees and you will be plenty fine
10-07-2015 #331
Registered User
- Join Date
- Nov 2006
- Location
- Ma.
- Posts
- 5,567
Worked in the garage again yesterday. We lifted the motor to get the drivers side header in and put the metal spacer under the trans mount for the test. I got 3.80 degrees down the way it is. The best guess on the frame for level is .40 degrees down so 3.40 for the final angle. The rear needs to be worked on we changed shocks and didn't set ride height.
Both of the ARH headers are in and there is a ton of room on the drivers side, at least an inch away from any tube to the steering box. The collector is within 3/8" of the drivers side floor. The passenger side has plenty of room accept the idler arm was touching at full right lock. I adjusted the stop on the A arm and it's taken care of. The passenger side frame mount needs the upper rear corner trimmed, we will remove 1/2" diagonally. The headers look to have enough room to go back an inch without a problem which would probably take care of the frame mount and idler touching, but make the collector closer to the floor. with the 4l80 it would make the trans even tighter in the tunnel. Moving it forward the idler would prevent it. One thing is the 02 sensors won't fit where they have the bungs on the inside towards the trans on the 4l80 which has a very wide pan on it, but with the narrower T56 should fit. ?
I used a G Force 4l80 cross member and the trans mount needed a spacer. Spaceman made it from 1" square tubing. The only thing is, the cross member is the lowest piece under the car. I can see it being a problem when we hit the road. (figuratively I hope. ).
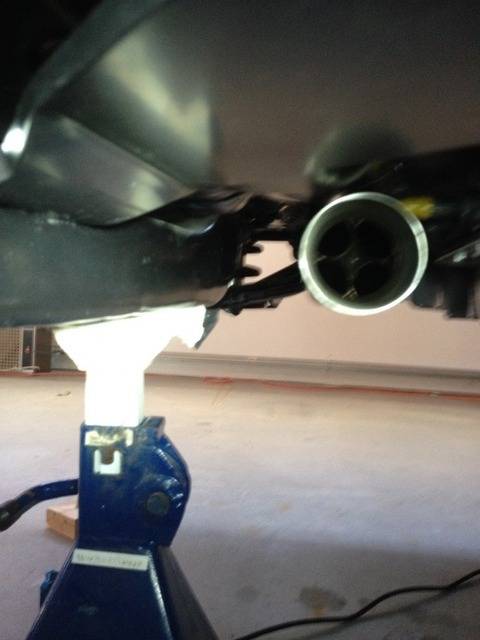
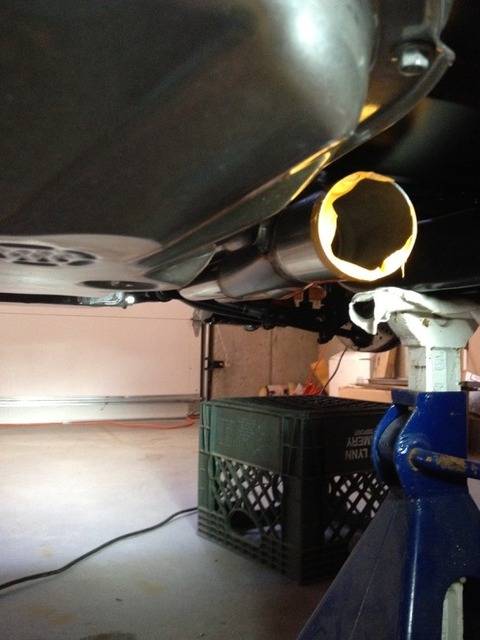
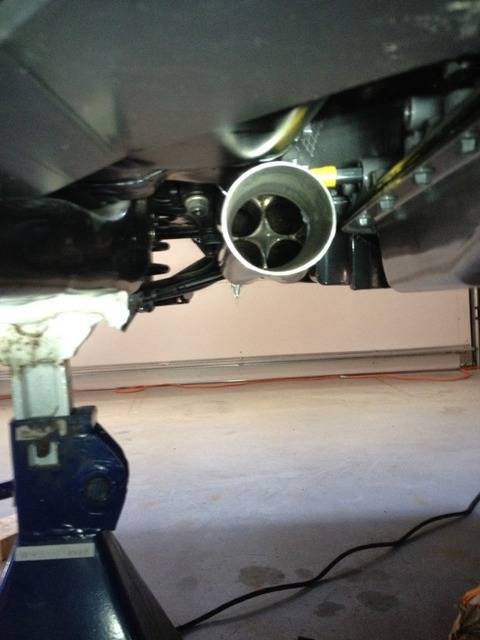
Here are a few pictures from underneath the car. The headers are even or maybe a little above the bottom of the sub frame.
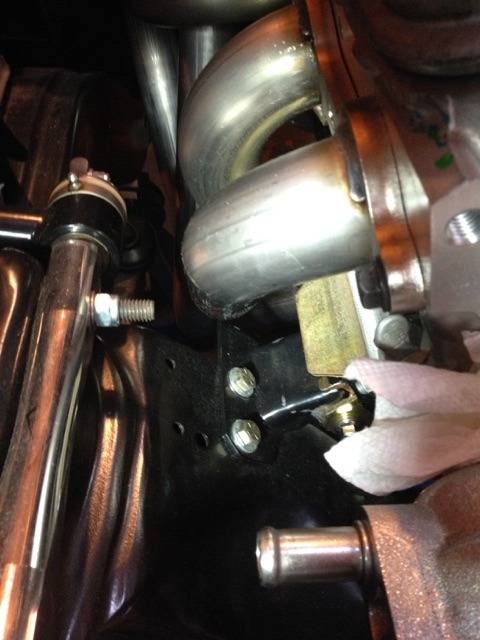
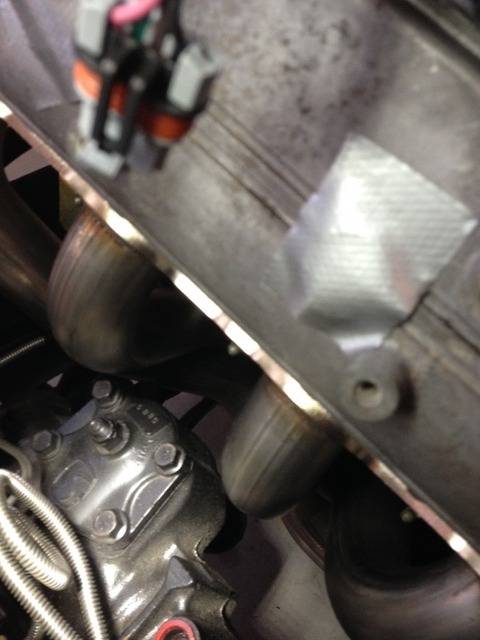
From above near steering box.
This is deceiving there is 1" from every tube.

This swap has
S&P swap plates to keep the bellhousing mount surface in the same place
American Racing Headers 1-7/8" 3" collectors. Very well made.
Energy suspension motor mounts to fit the 69, 350 SBC frame mounts.
An AuotKraft oil pan kit.
A G Force 4l80 cross member. Super Beefy.Wayne
Car FINALLY home !!!!!! lol
Project FNQUIK https://www.pro-touring.com/showthre...ghlight=FNQUIK
10-14-2015 #332
Registered User
- Join Date
- Nov 2006
- Location
- Ma.
- Posts
- 5,567
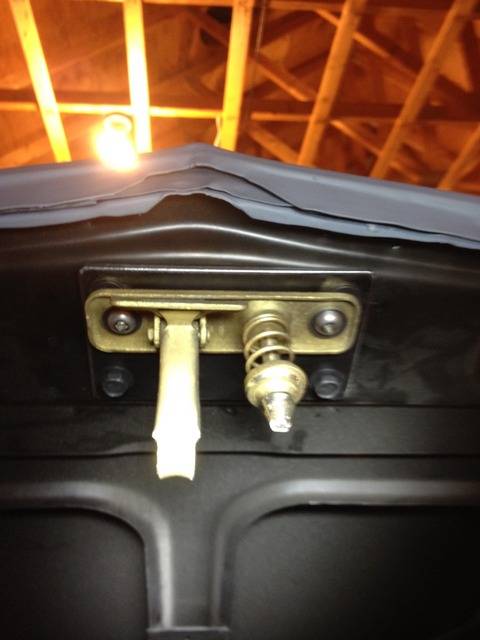
My buddy Spaceman and I started the cable hood latch conversion (He did all the welding and a lot of the figuring) and got the top part of the latch in place and are lining the bottom up to find the final location. We'll set and mount it.
Here's the starting location.
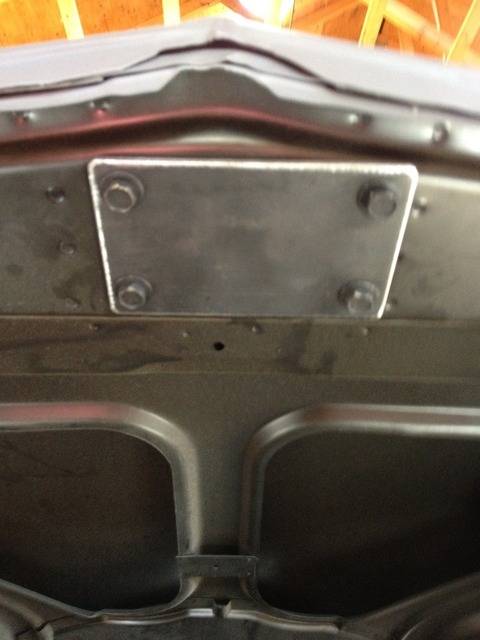
Test fitting the plate
First mark up
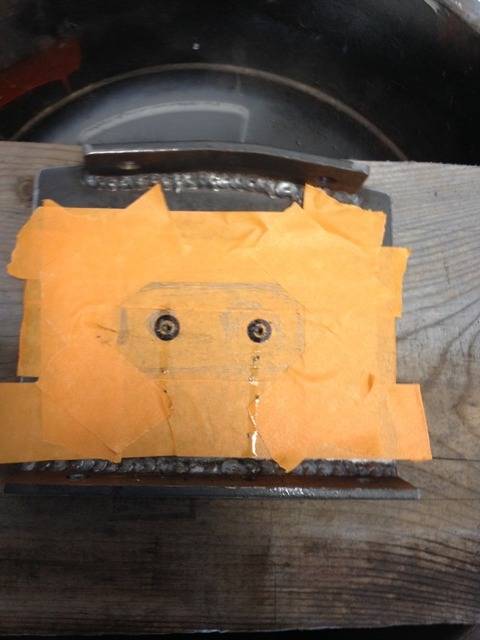
First actual test fit.
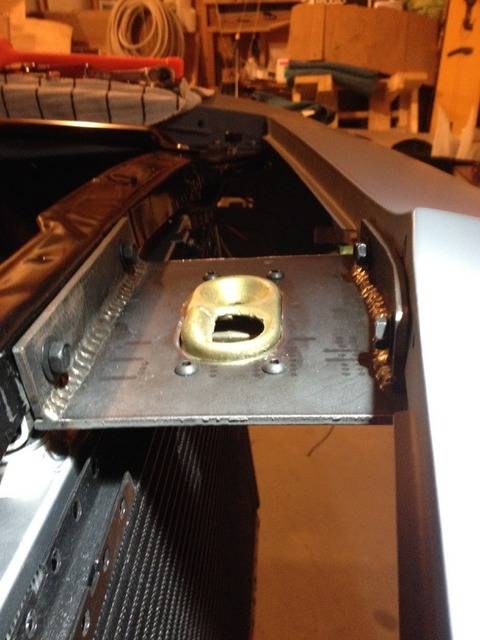
I tried to clearance the holes on the radiator side to move the plate to the drivers side but it threw off the front piece that bolts to the header panel. Thank god for finish washers. Luckily I stopped before needing them.
Thanks 1967LS2Wayne
Car FINALLY home !!!!!! lol
Project FNQUIK https://www.pro-touring.com/showthre...ghlight=FNQUIK
10-14-2015 #333 Registered User
- Join Date
- Oct 2010
- Location
- Mena, AR
- Posts
- 287
Wayne been a while since I looked at this thread. WOW!! I love the power combo you are using, I want a 6 speed for mine but we will see. So much has been accomplished on this car. Amazing work and planning. Looking forward to one day seeing video of you driving it. Me, well I need to get back to plugging away at my son's truck. Lol
Chris
Chris
1967 ElCamino
2004 Chevy SSR (my sons)
1951 Chevy pickup(my sons)
1967 Elky https://www.pro-touring.com/showthre...587-Evil-Angel
1951 truck https://www.pro-touring.com/threads/...3-year-old-son
10-15-2015 #334
Registered User
- Join Date
- Nov 2006
- Location
- Ma.
- Posts
- 5,567
Thanks, I'm trying. All the little things add up, with a big project sometimes it's tough to imagine.
Wayne
Car FINALLY home !!!!!! lol
Project FNQUIK https://www.pro-touring.com/showthre...ghlight=FNQUIK
10-18-2015 #335 Registered User
- Join Date
- Oct 2015
- Posts
- 122
That ought to hold the hood down nice and tight. I really like the quality of your build. Outstanding!
10-18-2015 #336 -Moderator/Sponsor-
- Join Date
- Jun 2001
- Location
- Orlando, FL
- Posts
- 10,603
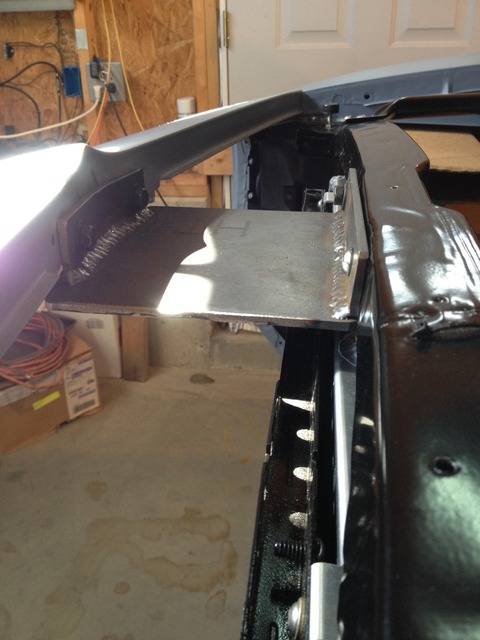
I like the hood latch! Don't go much farther without test-fitting the header/valance panel brace. You might need to do some work there.
John Parsons
UnRivaled Rides -- Modern upgrades for your ride.
UnRivaled Rides recent project -- LS9-powered 69 Camaro
10-18-2015 #337
Registered User
- Join Date
- Nov 2006
- Location
- Ma.
- Posts
- 5,567
Thanks for the heads up John we bolted it in to the core support and header panel. It fit, but we haven't tried the lower panel yet. Right now I have a piece of aluminum fuel line as a spacer. I looked on line for some real spacer with a thicker wall. I'll be ordering that soon.
Thanks windows.Wayne
Car FINALLY home !!!!!! lol
Project FNQUIK https://www.pro-touring.com/showthre...ghlight=FNQUIK
10-25-2015 #338 Registered User
- Join Date
- Dec 2011
- Location
- Spokane, WA
- Posts
- 19
Amazing to see such a tear down and rebuild. Fantastic project. Keep up the great work.
68 Camaro SS/RS
67 C10 stepside
69 K10 shortbed
79 Malibu
10-25-2015 #339
Registered User
- Join Date
- Nov 2006
- Location
- Ma.
- Posts
- 5,567
Thanks 68TT, we're being help up right now but for a good reason. Tomorrow I have a plumber coming to install both the pipe and the heater in the garage. It needs to be tapped in to the existing pipe and my wife is terrified of fire since my mother in law had one in the 70's. So for her piece of mind its getting done by the plumber.
Plus after moving my parts around the house for 7 years its like a treasure hunt when I need something.
I use a product for rust removal called Safest Rust Remover it has always done a great job and is safe, unless you move the container for the wife's car to come in for the winter and forget a piece in it over the winter and summer like I did. It ate right through the metal. I think it was the 120 degree days when I didn't go in the garage and open windows. I was amazed. A new one is on its way.Wayne
Car FINALLY home !!!!!! lol
Project FNQUIK https://www.pro-touring.com/showthre...ghlight=FNQUIK
10-25-2015 #340 Registered User
- Join Date
- Aug 2009
- Location
- Chandler, Az (from west NE)
- Posts
- 240
That's great to hear. Hope it all works and you both can hit the road! Originally Posted by 454bug
Ric
2002 s10, DD and AutoX.
1966 Malibu owned since 1971. Drag car converting to track toy!

 Reply With Quote


