Results 121 to 139 of 139
-
04-30-2017 #121

 Registered User
- Join Date
- Mar 2005
- Location
- Walton, NY
- Posts
- 737
 Originally Posted by woody80z28, post: 3467626, member: 12782
post Originally Posted by woody80z28, post: 3467884, member: 12782
Originally Posted by woody80z28, post: 3467626, member: 12782
post Originally Posted by woody80z28, post: 3467884, member: 12782
- - - Updated - - -
Originally Posted by woody80z28, post: 3493137, member: 12782
post Originally Posted by woody80z28, post: 3494833, member: 12782
-
04-30-2017 #122
Registered User
- Join Date
- Mar 2005
- Location
- Walton, NY
- Posts
- 737
post Originally Posted by woody80z28, post: 3501675, member: 12782
- - - Updated - - -
Originally Posted by woody80z28, post: 3506326, member: 12782
post Originally Posted by woody80z28, post: 3510464, member: 12782
-
04-30-2017 #123
Registered User
- Join Date
- Mar 2005
- Location
- Walton, NY
- Posts
- 737
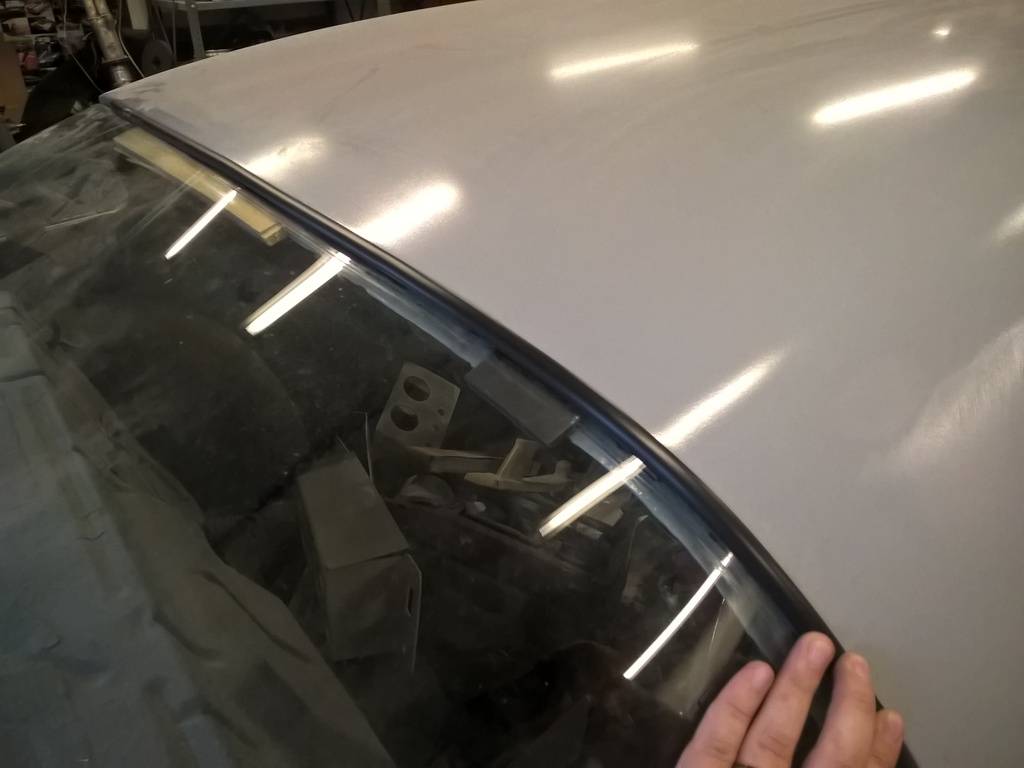
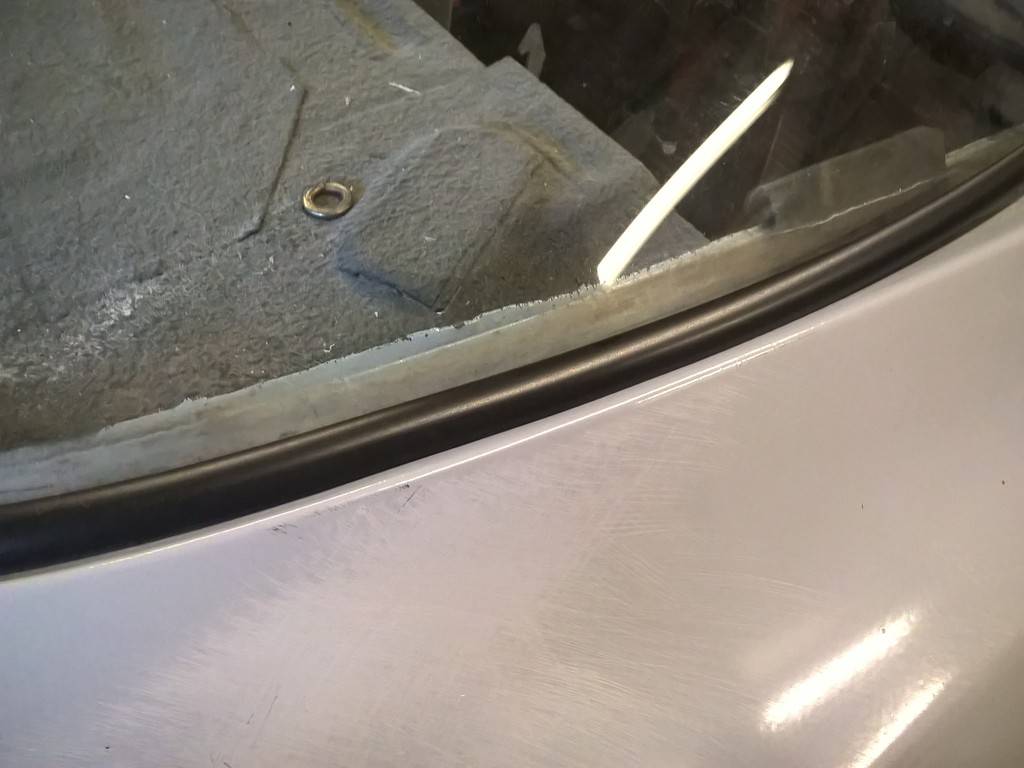
postI saw Fesler just released a flush mount glass kit for 70-74 with a the rear in the works for 75-81 and it got me all excited! Then I looked at the price and decided to see what other options there are... haha
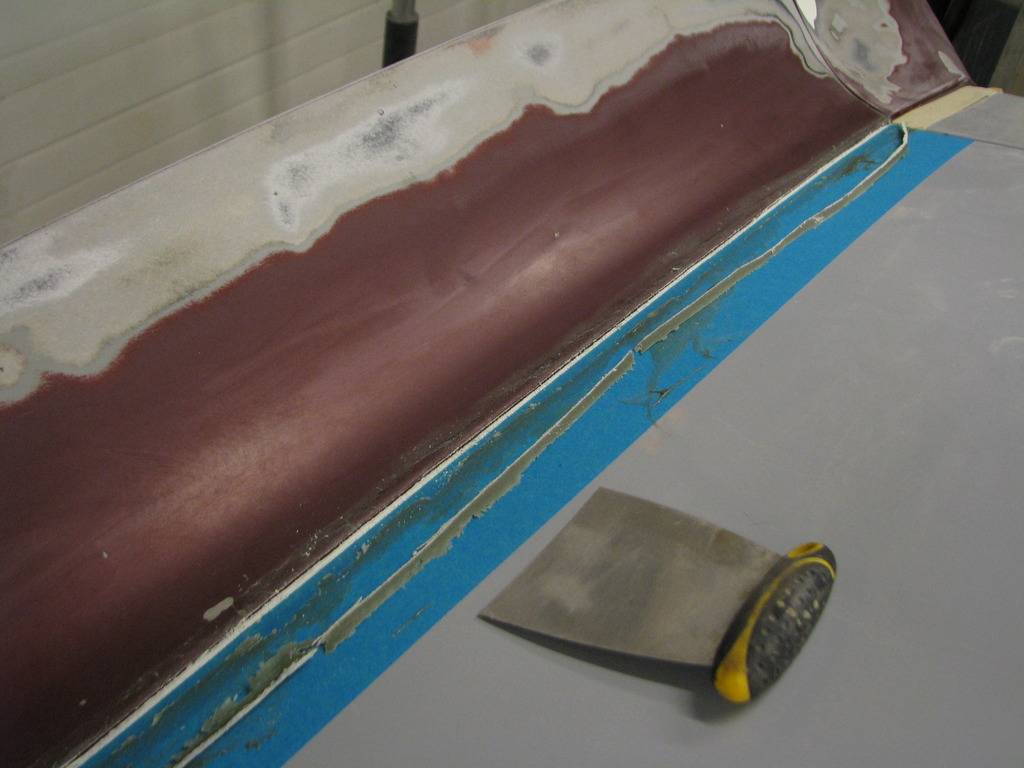
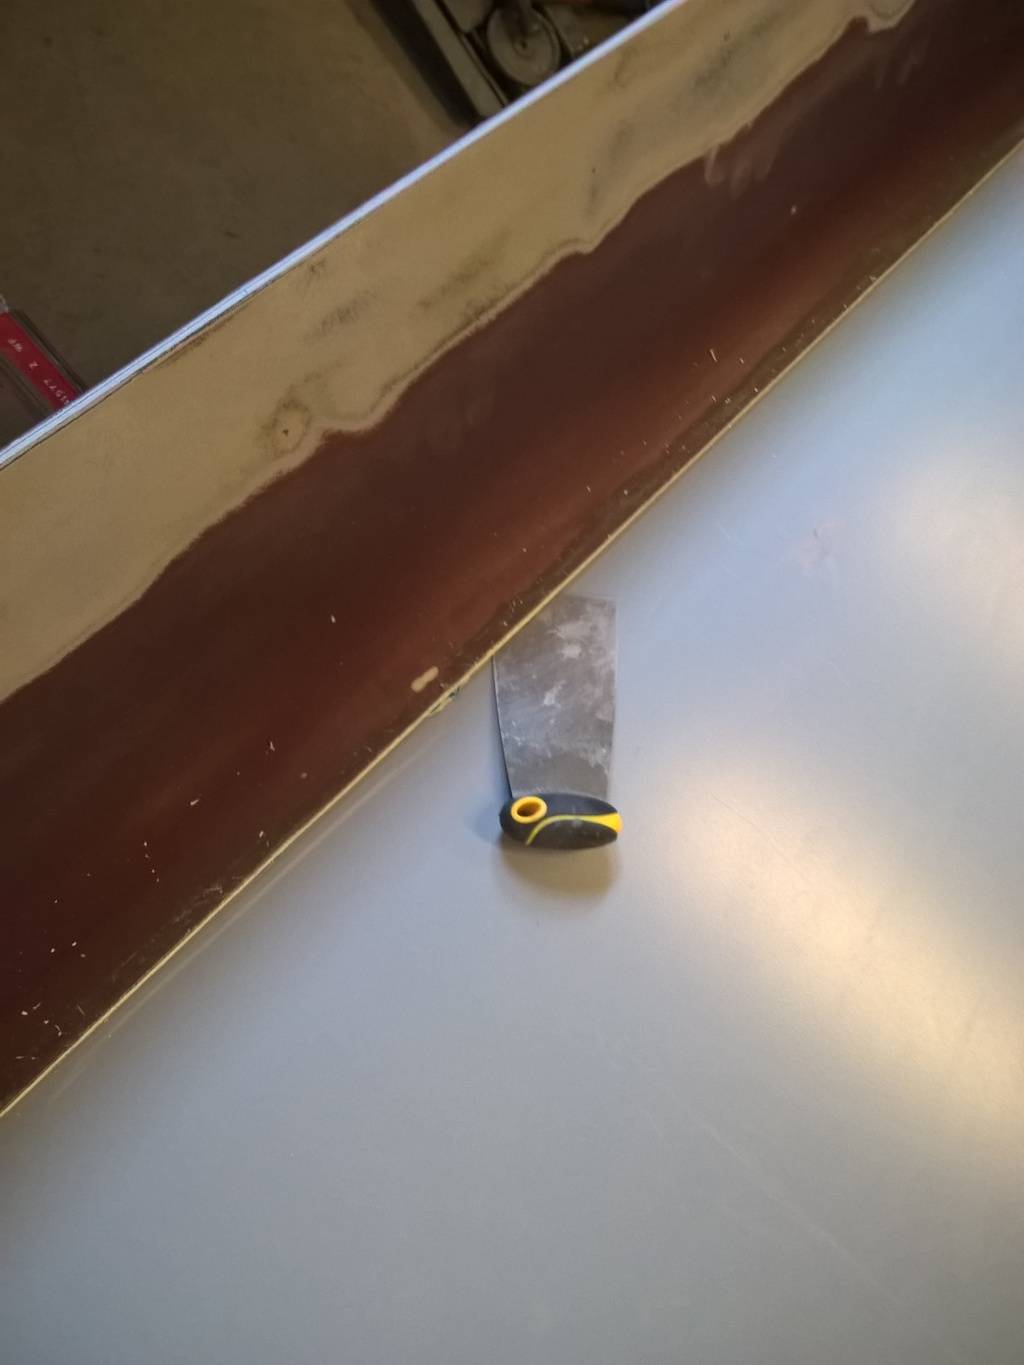
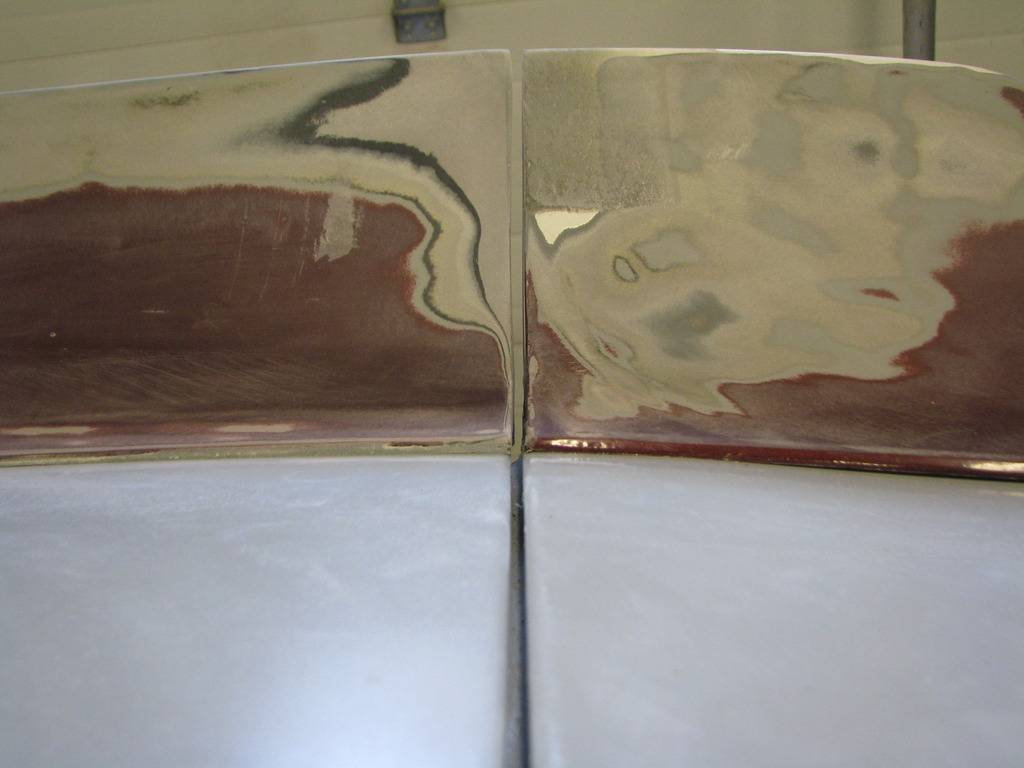
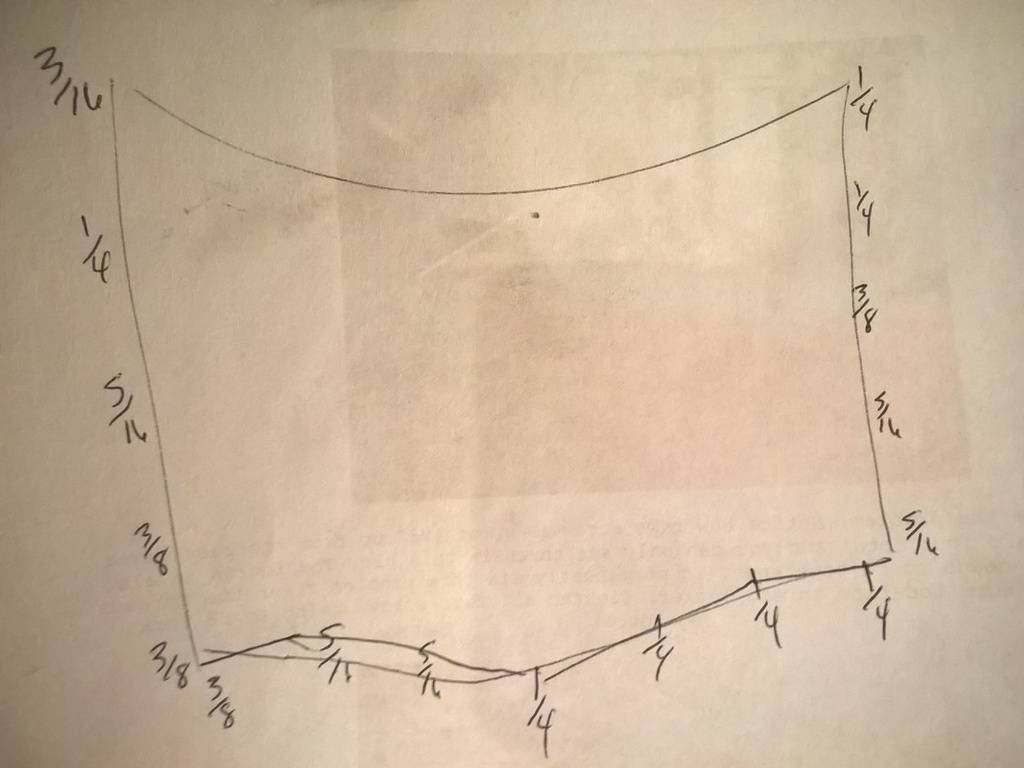
This is a roll of T-trim that I used on my Beretta. It's a Dodge Dakota spec that is used as a universal. I'm going to check to see if there is something similar available that is slightly wider than 1/2". To set it up like the first picture I will have to weld additional metal to 3 of the 4 dimensions. To set it up like the second pic I may be able to use a 3/4 or something and have it look pretty good.
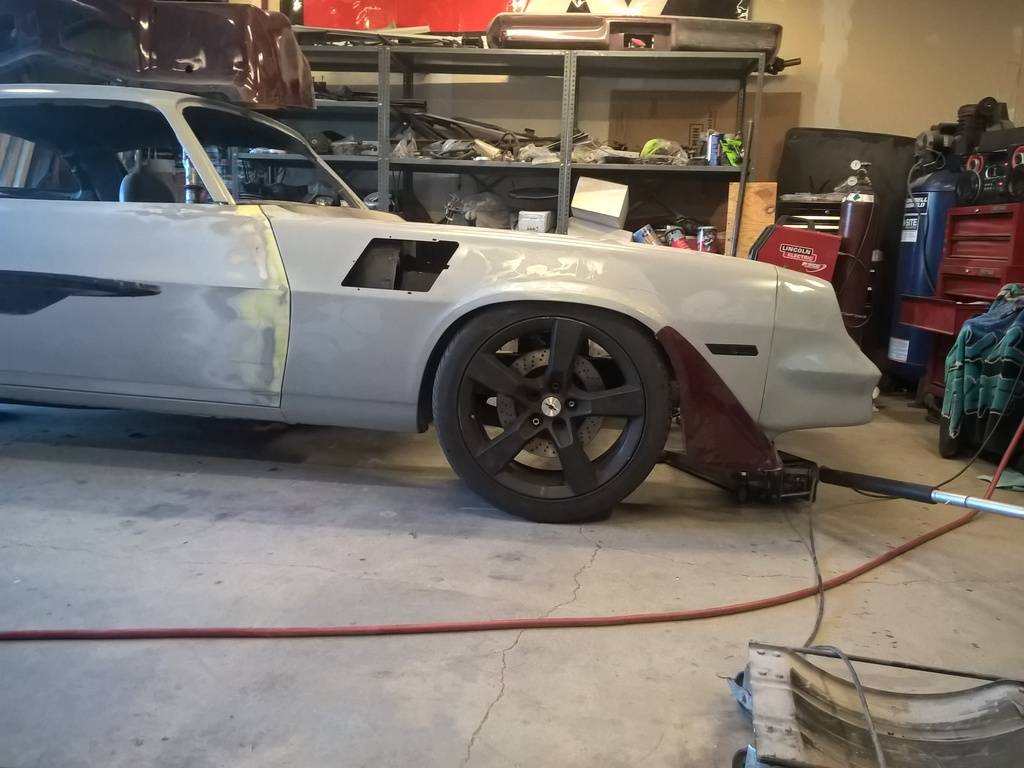
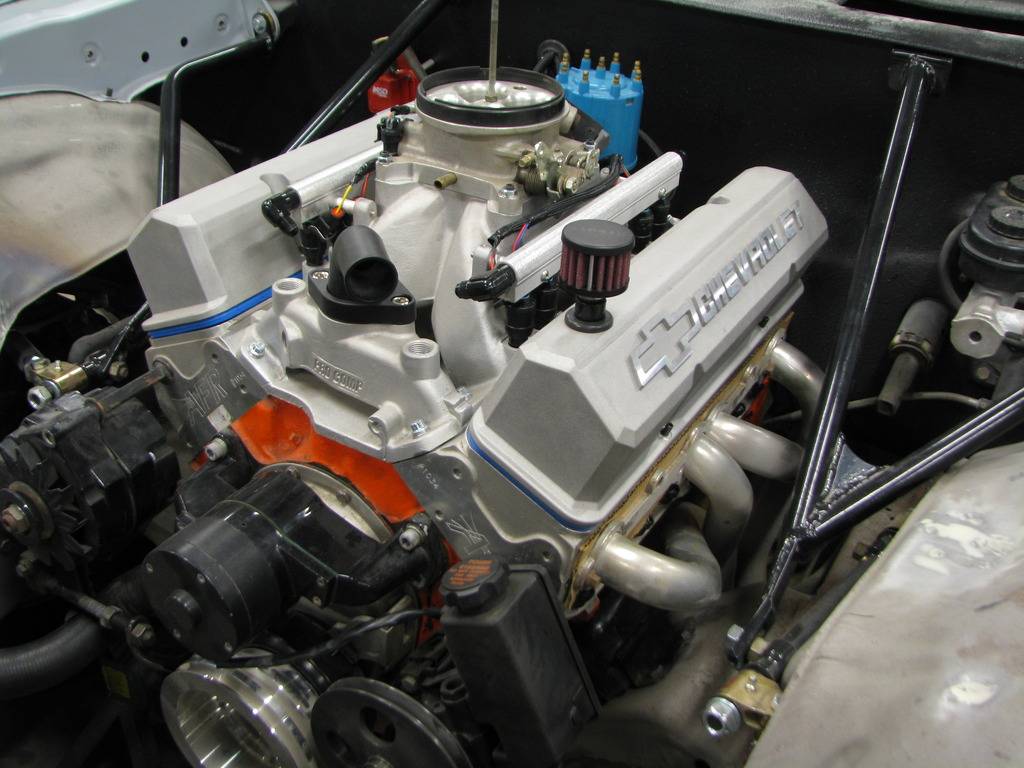
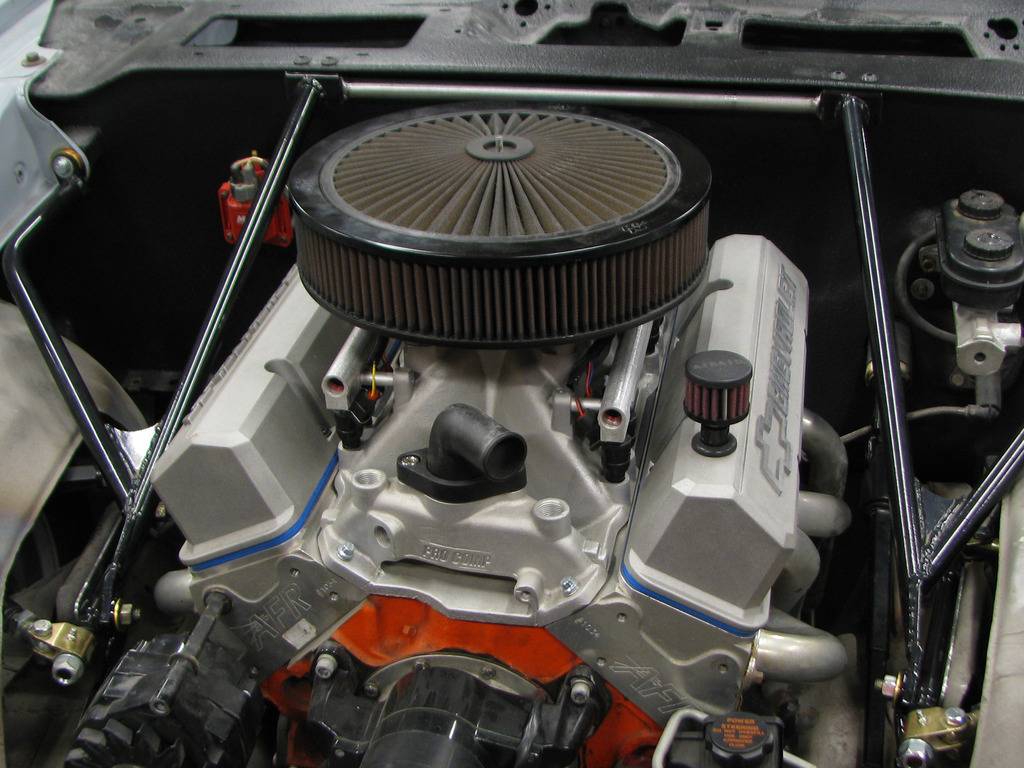
I'm pretty damn sick of body work though. And I do need to spray my subframe and inner fenders, and probably reshoot the firewall. So I dropped the engine in to do some final mockup.
Going to gusset the rear LCA mounting ears (since stock LCA brace doesn't fit with headers) and modify the G-braces to fit under the cowl instead of on top. Also hoping there is enough floor clearance to cut off the 3-bolt flanges and replace them with V-band clamps (did my whole truck exhaust with V-bands and love it).
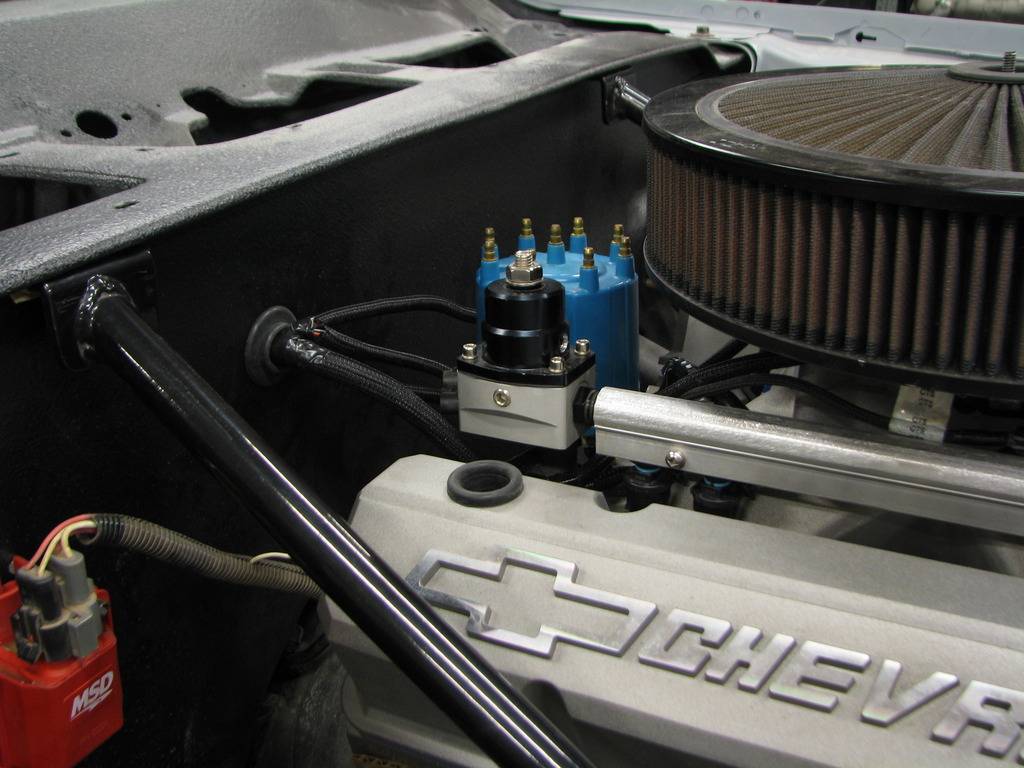
I wanted to get all the EFI wiring harness stuff finalized, too. I'm adjusting wire length for a cleaner fit and I'll need at least one more hole in the firewall and a different disconnect for the distributor. Mounted my ignition coil on stand offs and really like the look. Also mounted the type-2 PS pump with my bracket and pulley from Speedway. Seems like pretty good stuff.
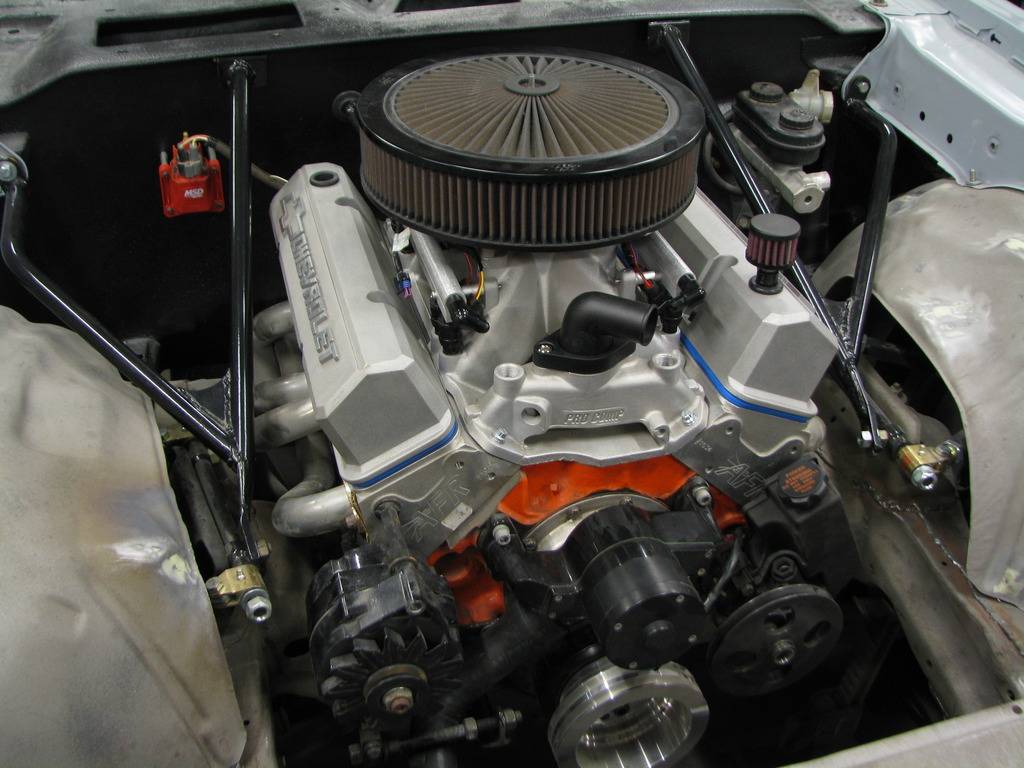
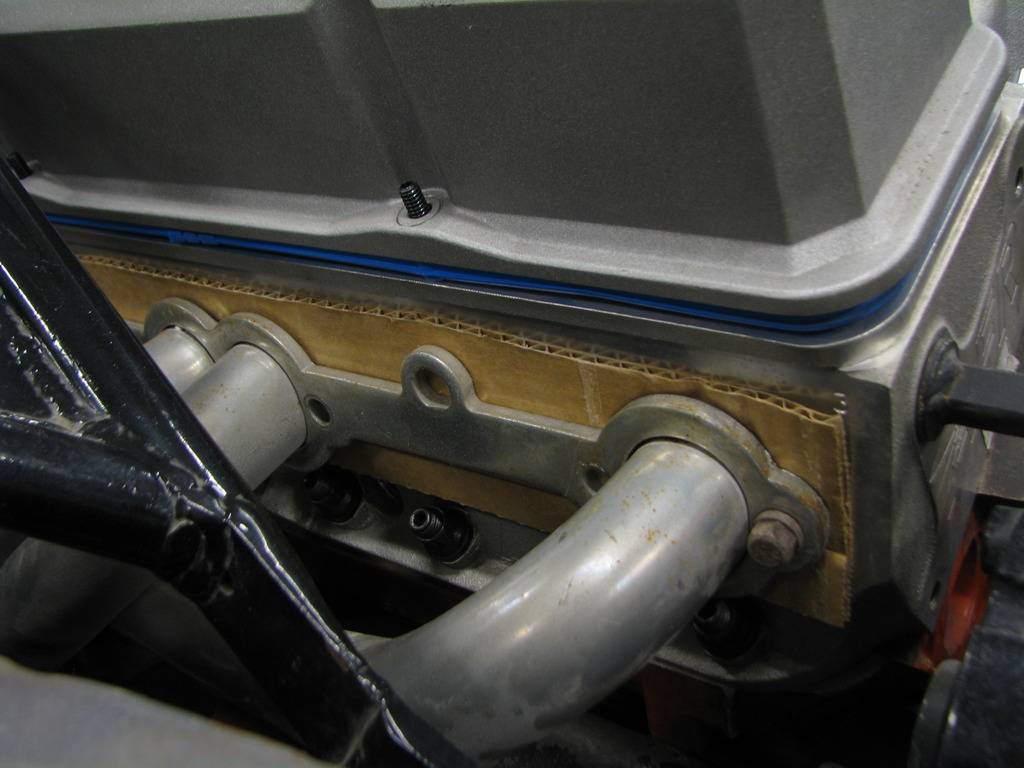
Cardboard header gaskets to keep from chewing up the alum heads. haha
First time with this engine in the car and the pan is pretty damn low.
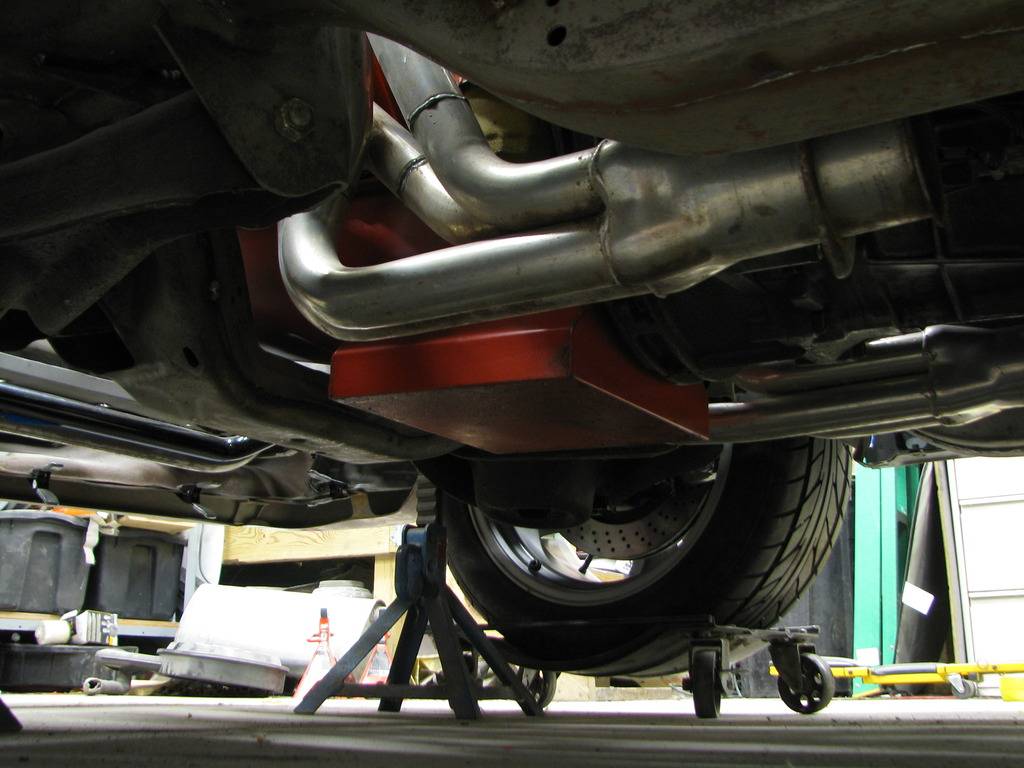
This pic exaggerates it, but the pan looks to be about the lowest point for ground clearance. So that's not good. I did some research and found out it's a Summit pan with a 8.25 depth. So I'll be fine to cut it up and raise the sump an inch. Probably take me from 7qts to 5.5 or 6. I'll figure out the math.
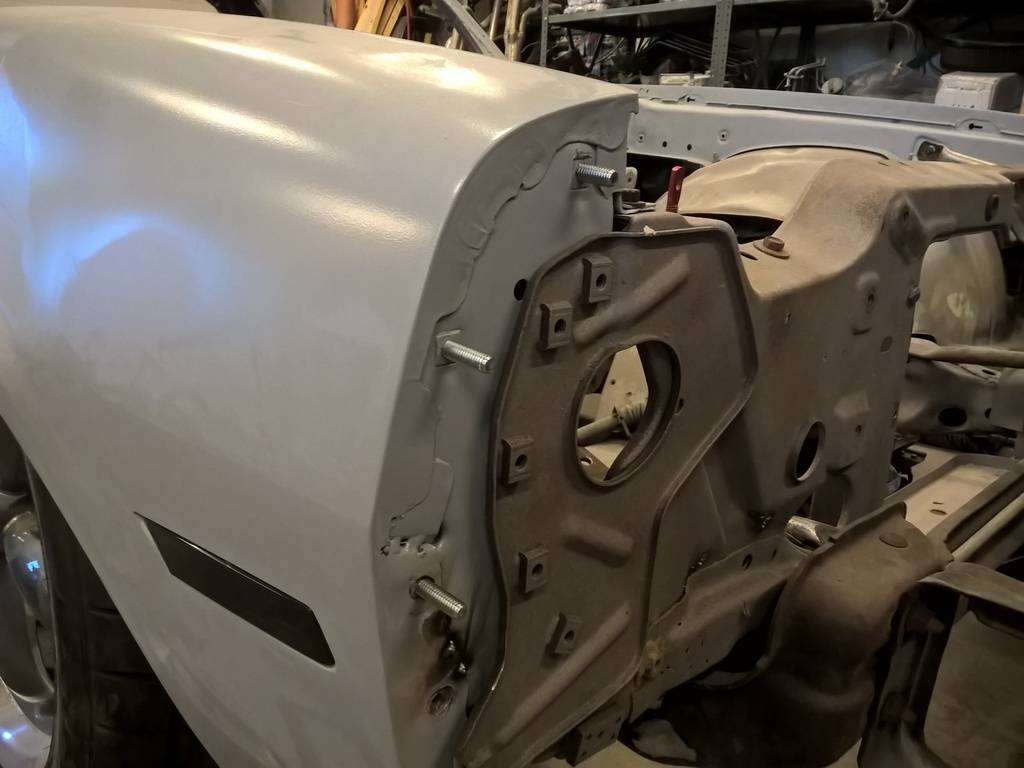
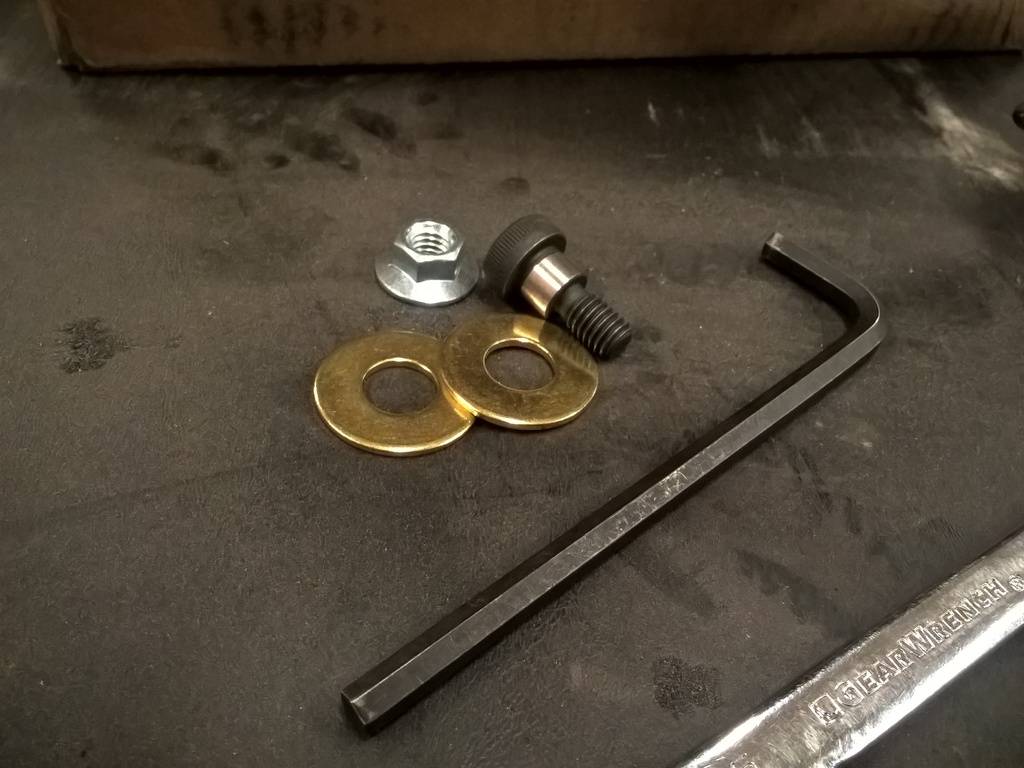
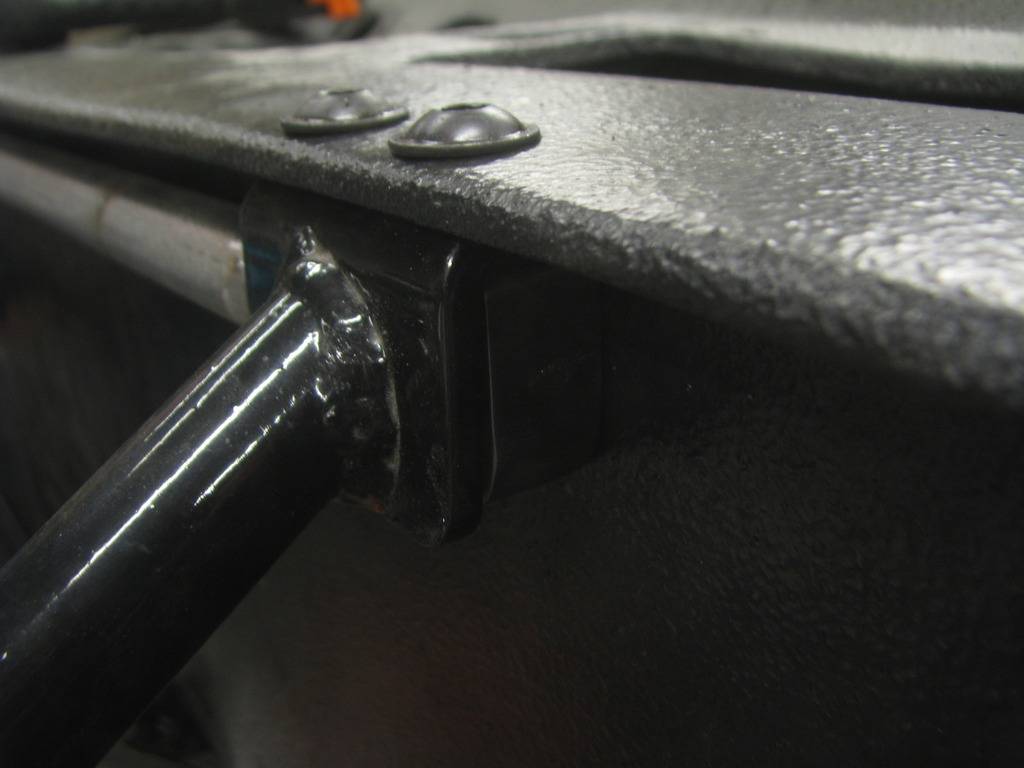
Fabbed a cowl brace for the g-braces. I moved the g-braces under the cowl to gain some hood clearance, new hood is tight. I used some 3/4 x 1-1/2" bar stock as nuts and welded them to a thick wall gas pipe. Button head bolts keep hood clearance maxed out. I already have 1/8" plate welded under the cowl for some extra strength. Got some big washers I'm going to weld to the fenders too- there needs to be spacers for the g-brace mounts anyway.
I also drilled holes in the tunnel for wiring. Going to weld the stock wiring hole in the firewall shut. Decided after mocking stuff up that one wiring hole looks out of place with everything else being so clean.
04-30-2017 #124
Registered User
- Join Date
- Mar 2005
- Location
- Walton, NY
- Posts
- 737
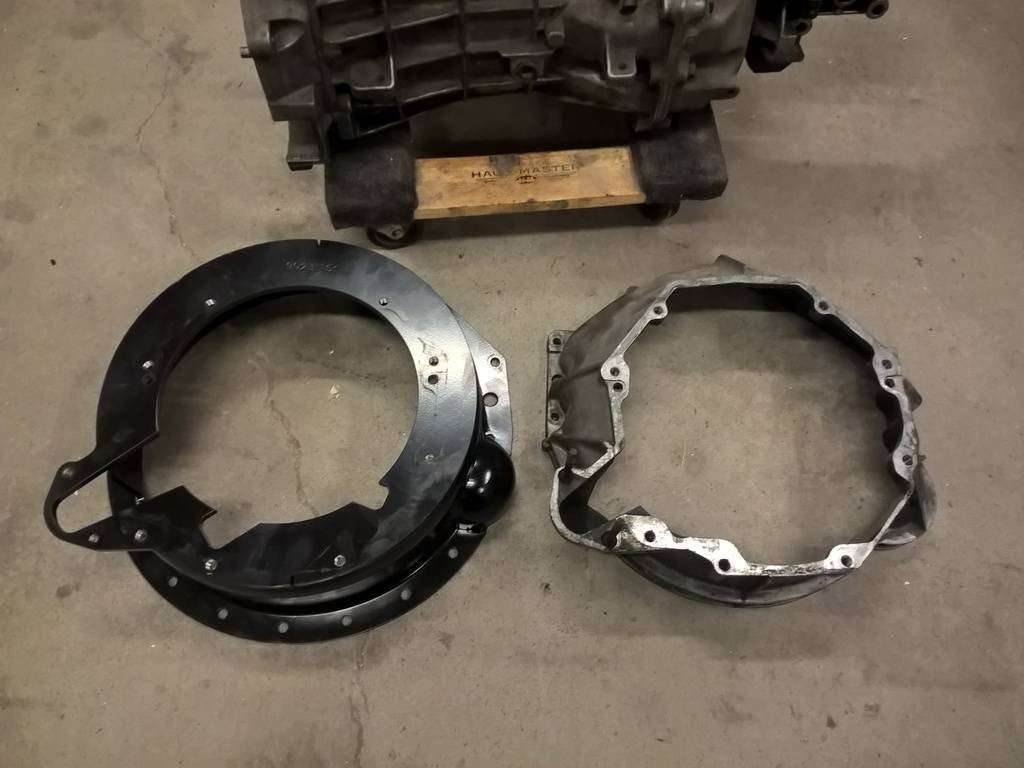
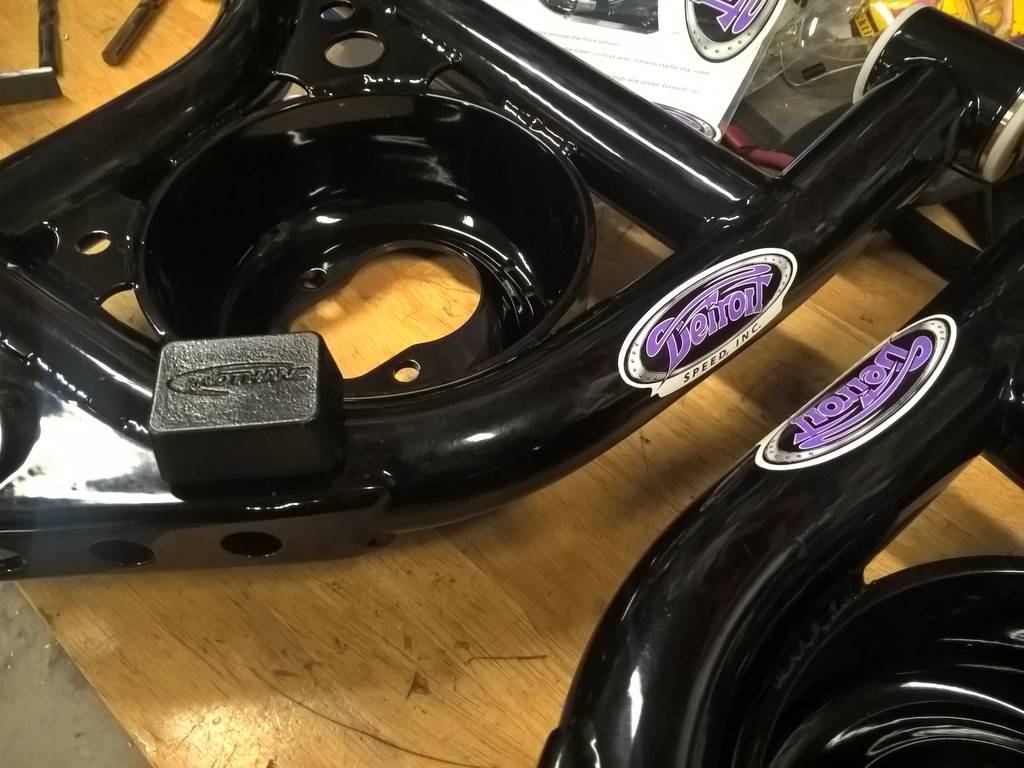
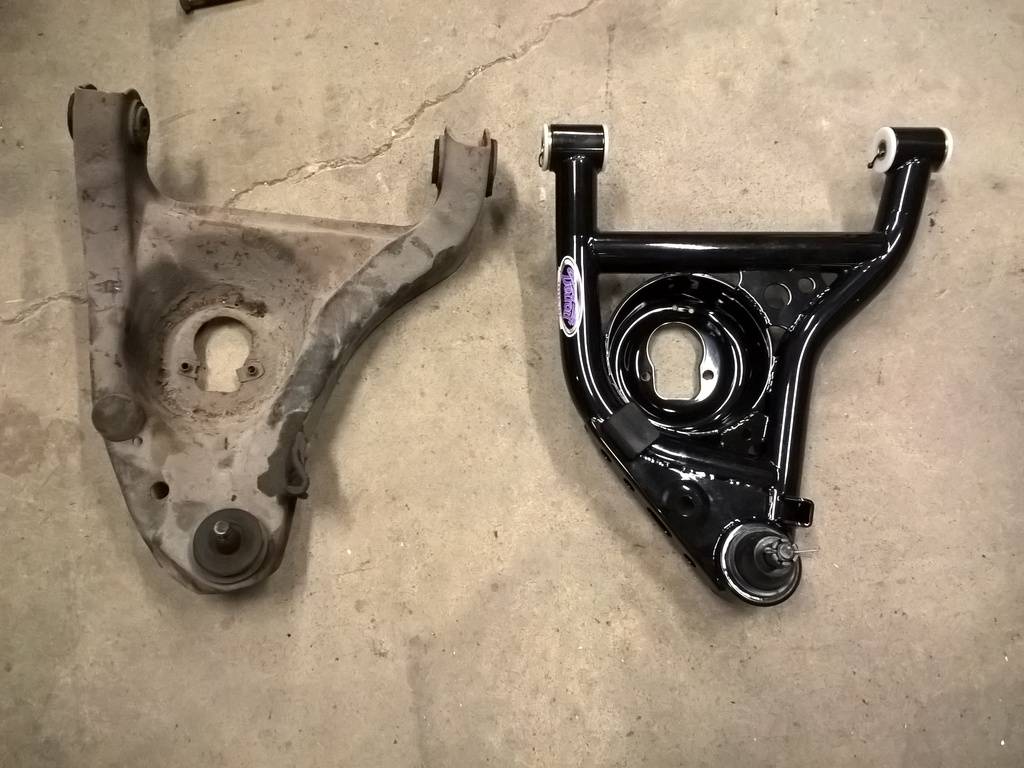
Picked up some more parts on Black Friday sales...mainly DSE lower arms, QuickTime scatter shield and a Wilwood 7/8 master.
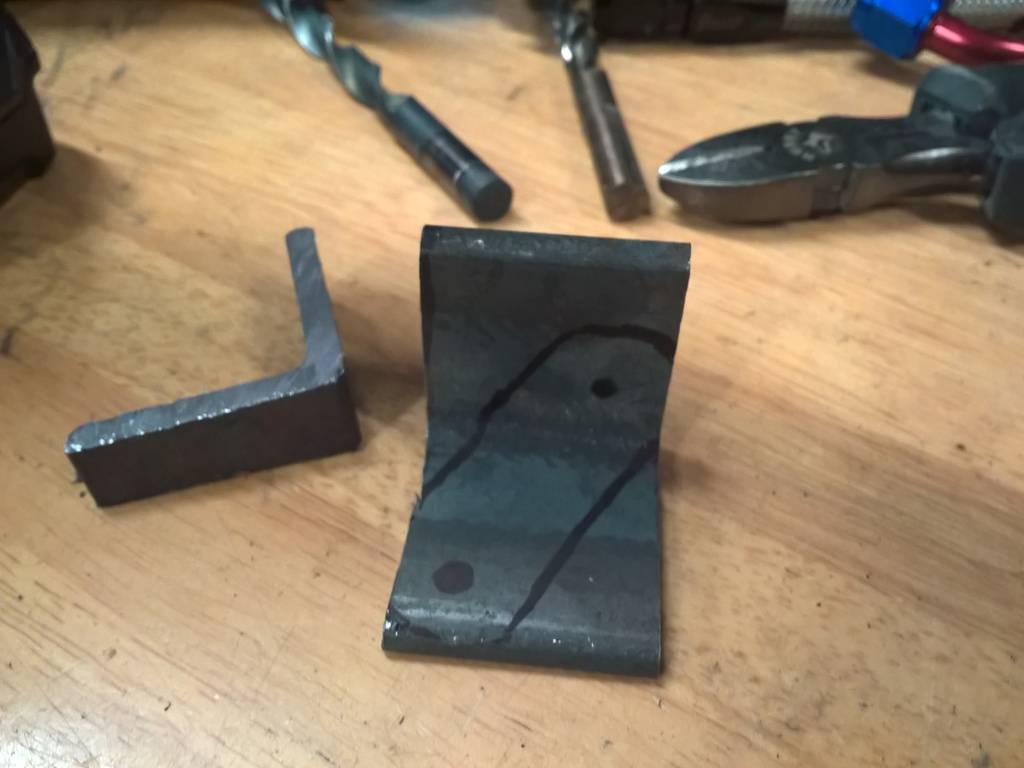
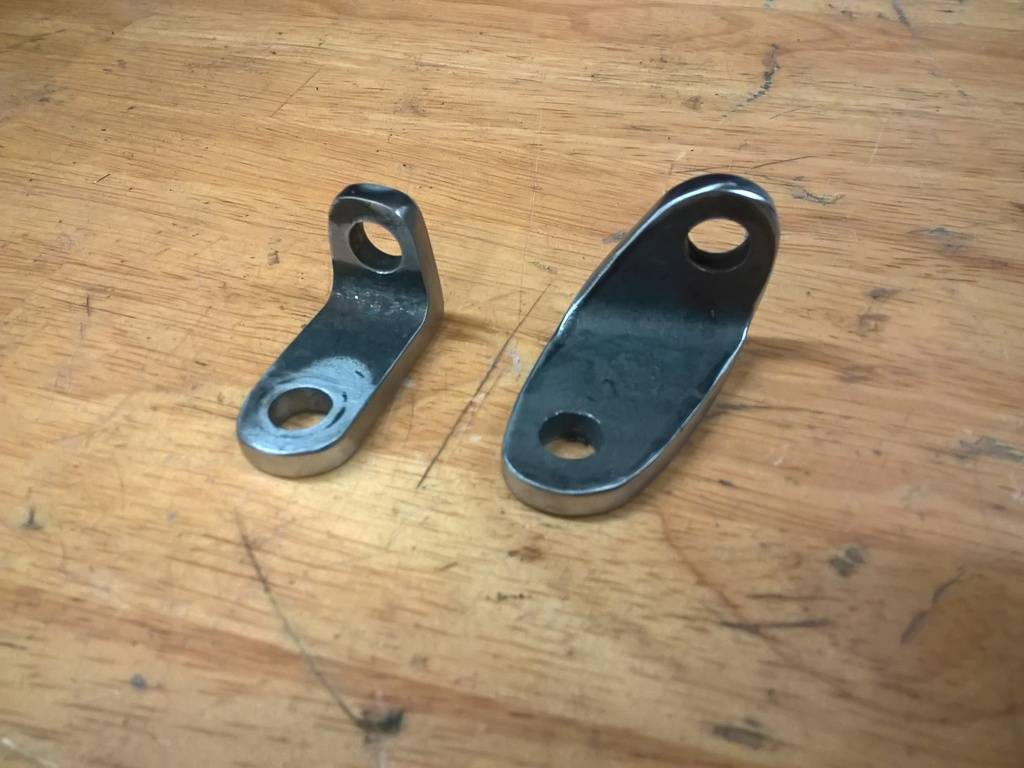
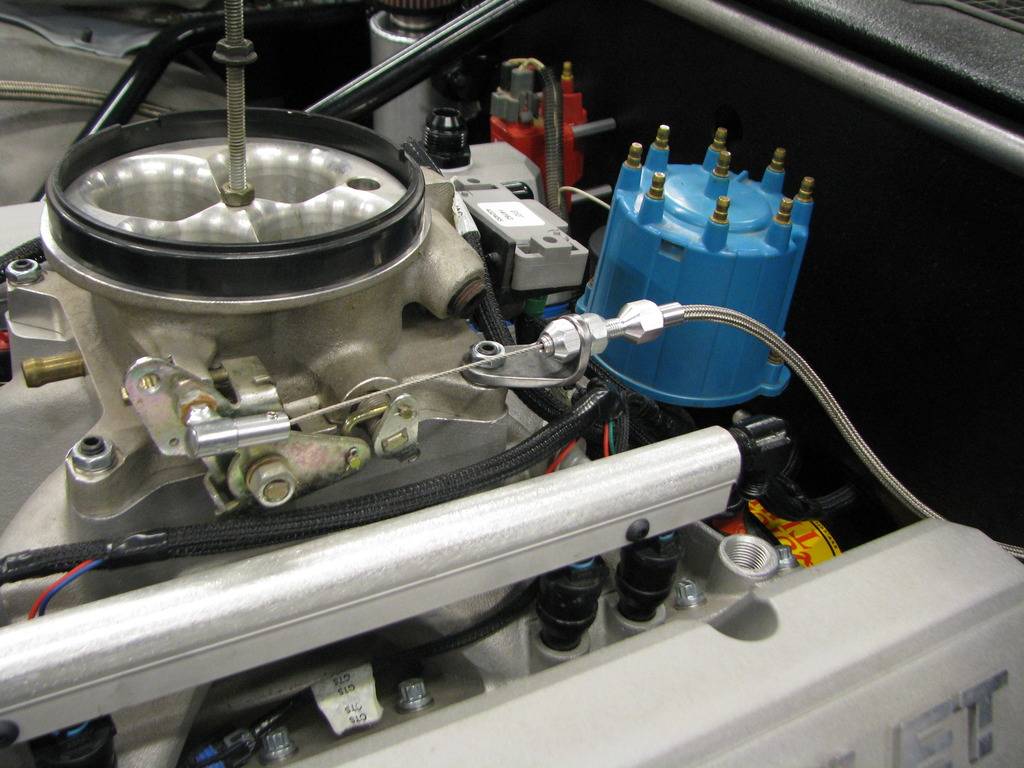
Fabbed a bracket and ran the throttle cable. First bracket didn't line up well so I offset it. Angle iron looks good when you clean it up! Going in the powdercoat pile.
The SFI bell is a big heavy SOB. I put it in to make sure my planned wiring routes would still be ok. Looks like it will.
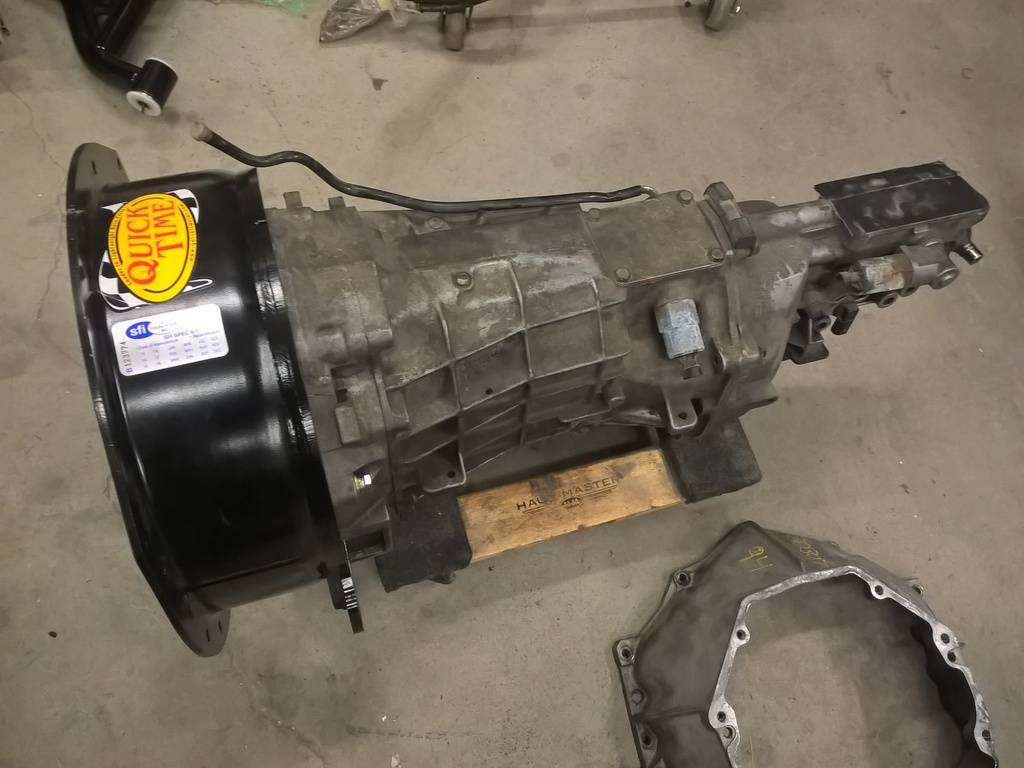

DSE arms are like jewelry. Be a shame when they're all full of road grime. haha (Stockers are for sale in the swap meet section, with delrin bushings). What I really wanted was the added caster.
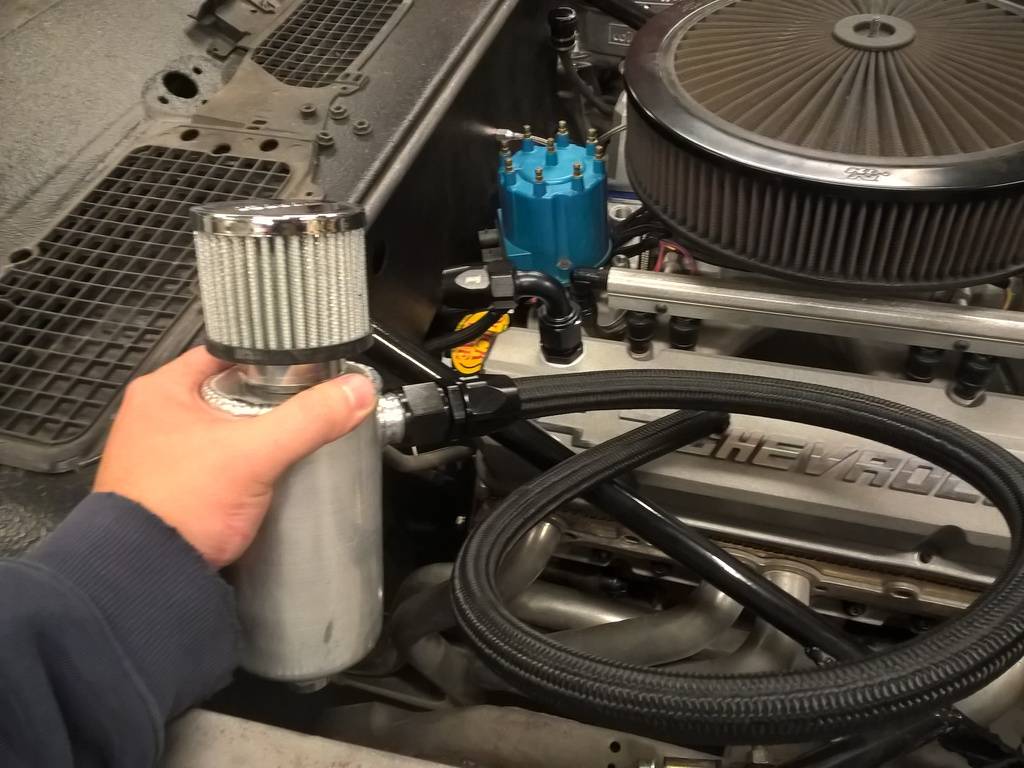
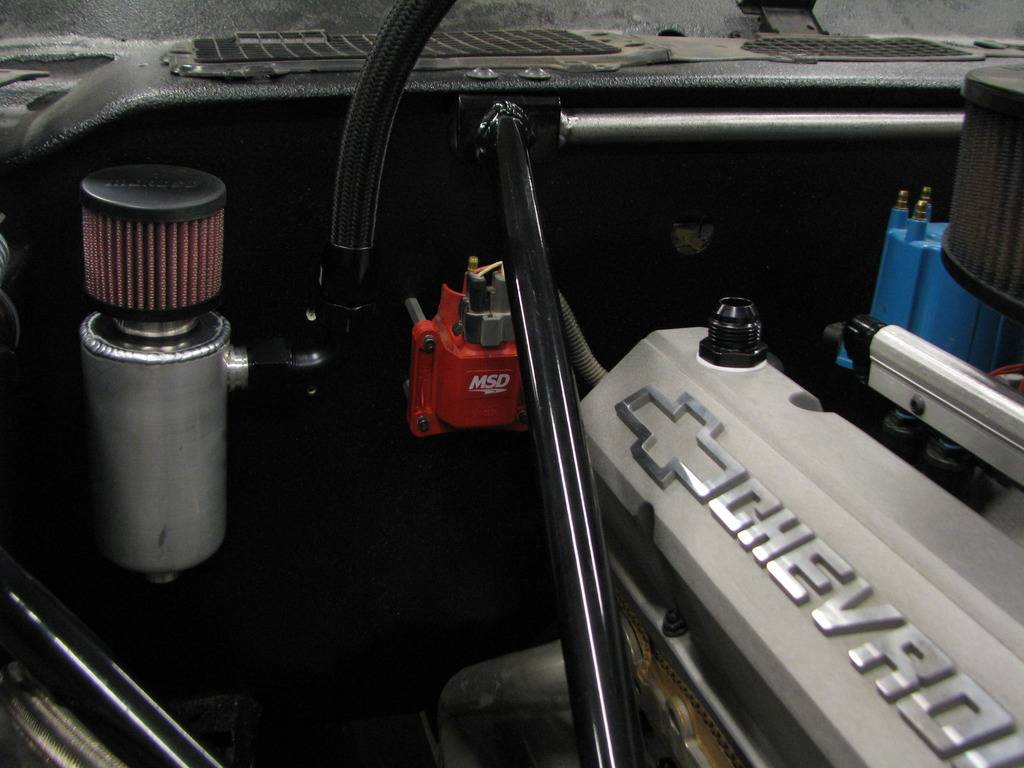
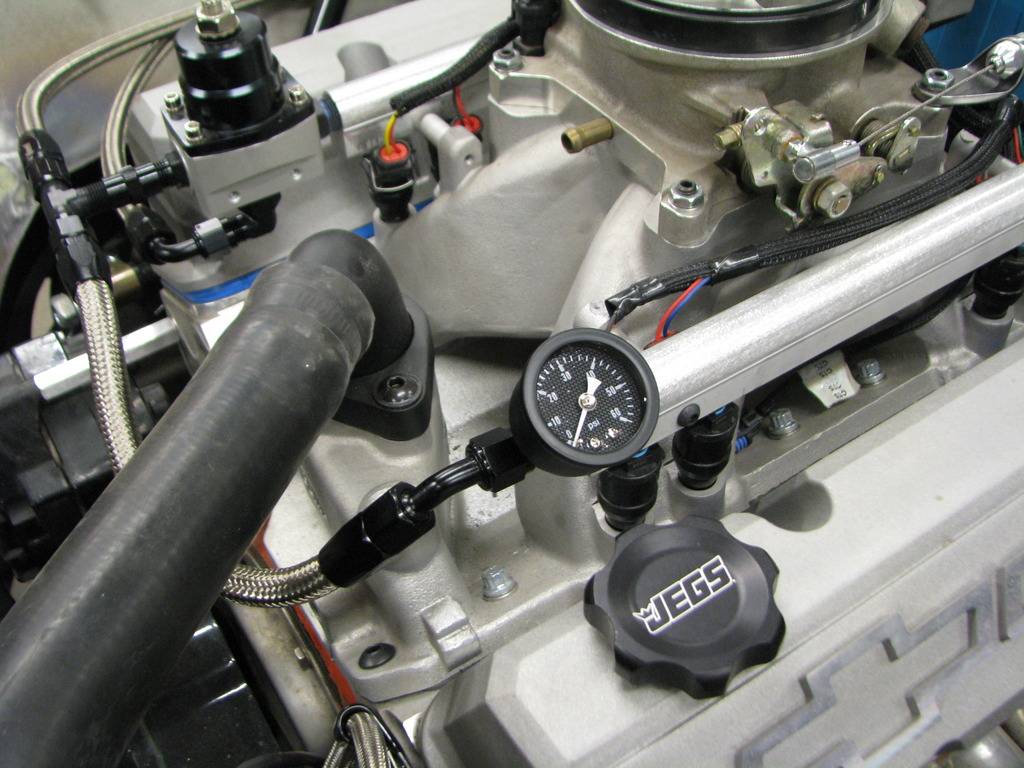
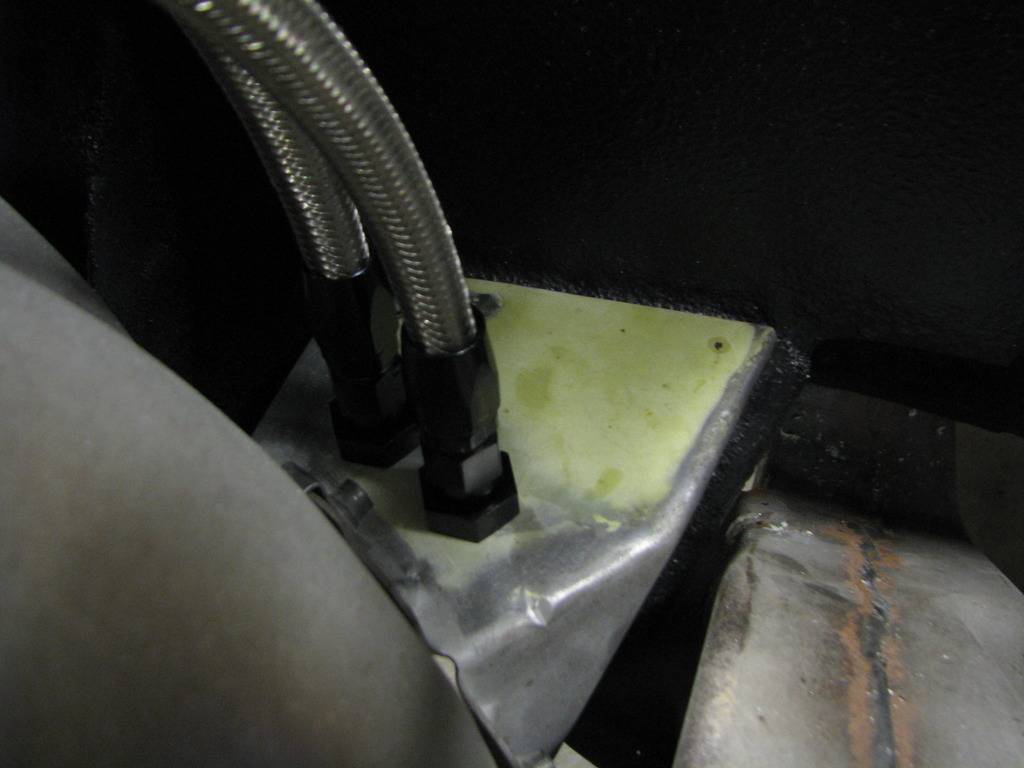
Plumbing in a puke tank to eliminate the PCV. At 11:1, I don't need oil reducing the effective octane of the fuel. Area was tight, so I'm doing a pair of 90s looping forward to clear the MSD coil and the g-brace.
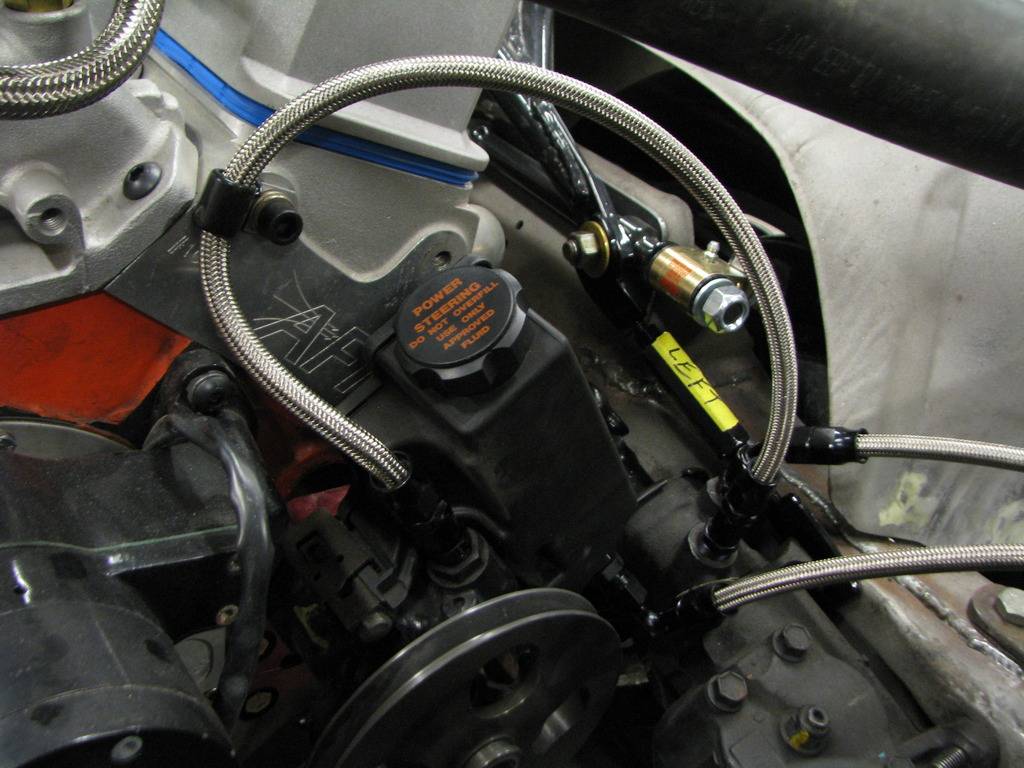
Assembled the PTFE lines for the power steering with the S10 TypeII pump.
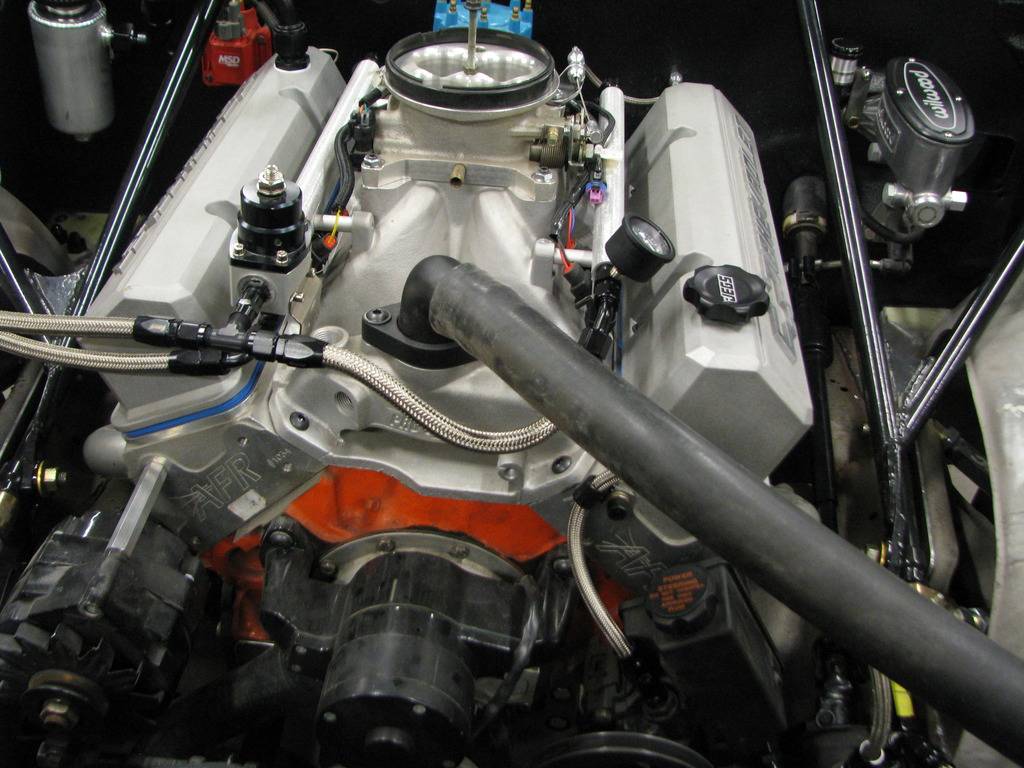
Also think I've decided on a fuel line solution. Regulator up front for accessibility with crossovers front and rear to minimize any pressure spikes from injectors firing (especially in MPFI batch mode). The regulator being so close to the rails should also help with that. Routing the lines far away from the headers should minimize any problems with heat soak. Have a couple fittings in the mail to finalize the plumbing, but this should be it:
- - - Updated - - -
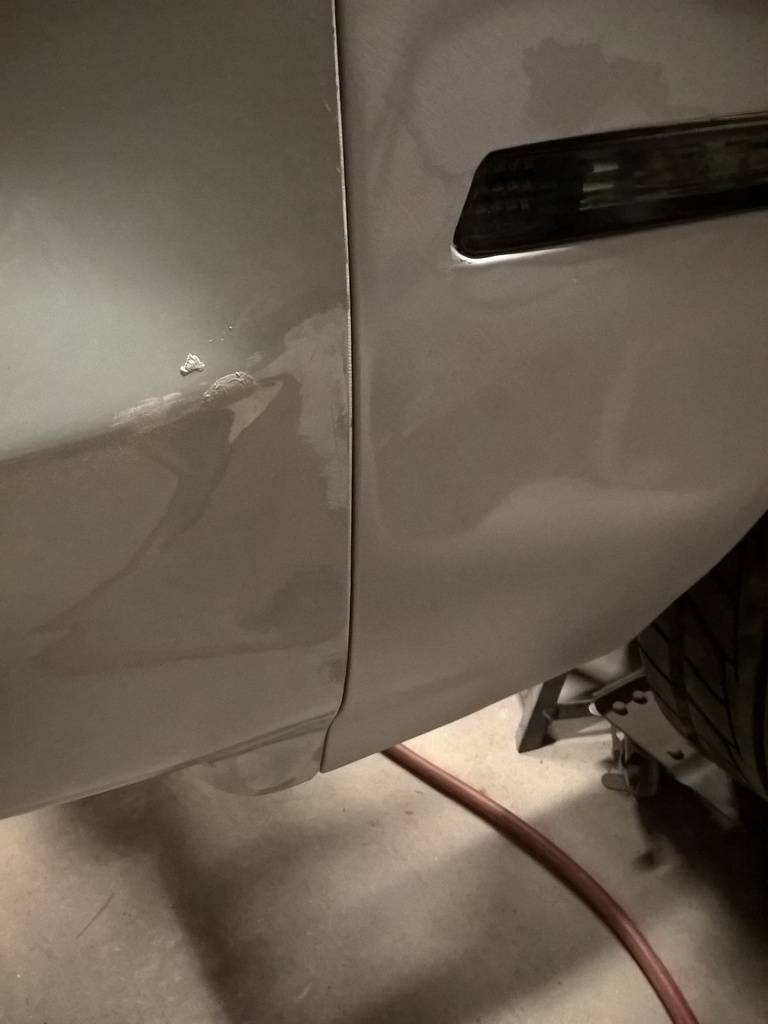
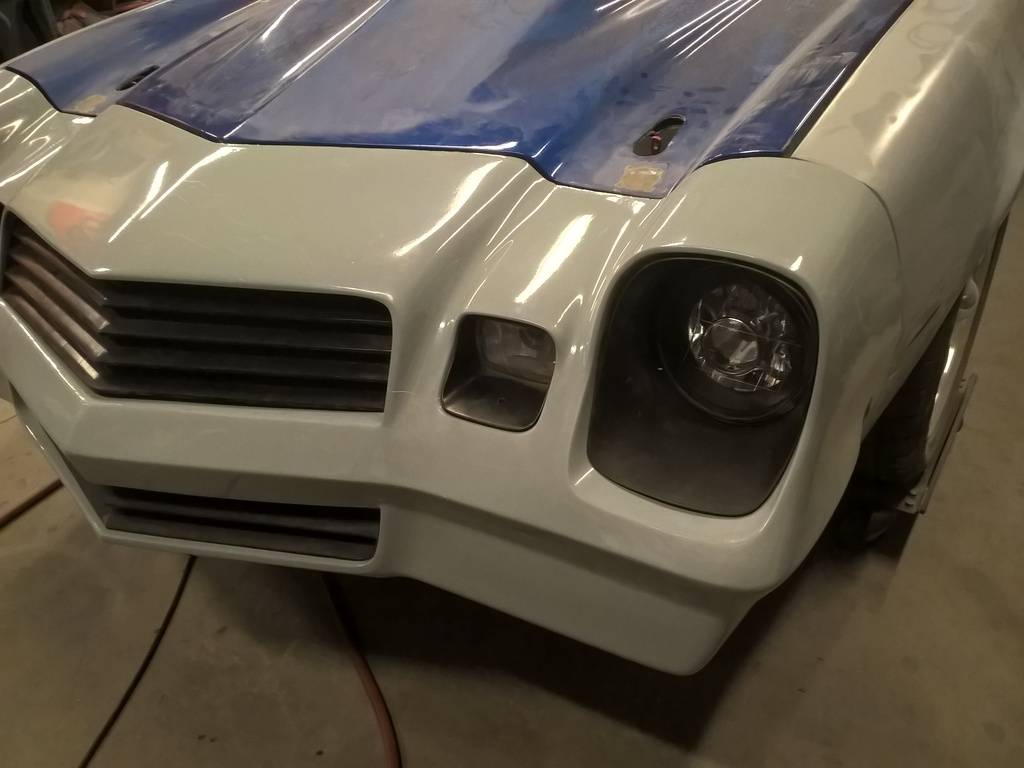
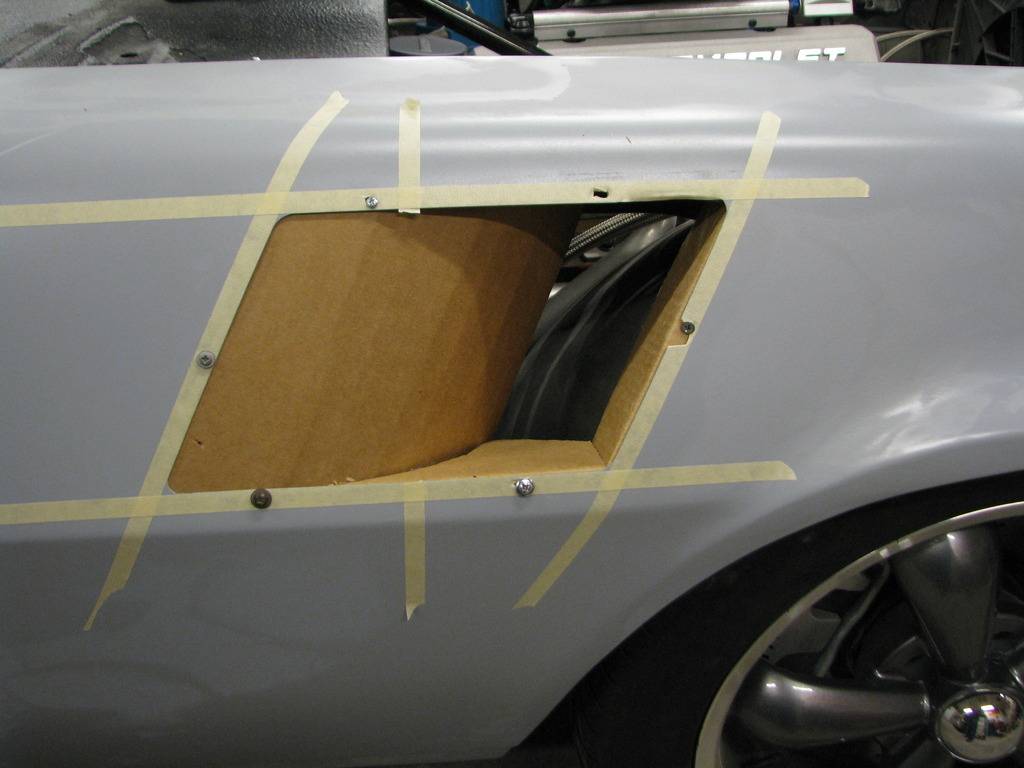
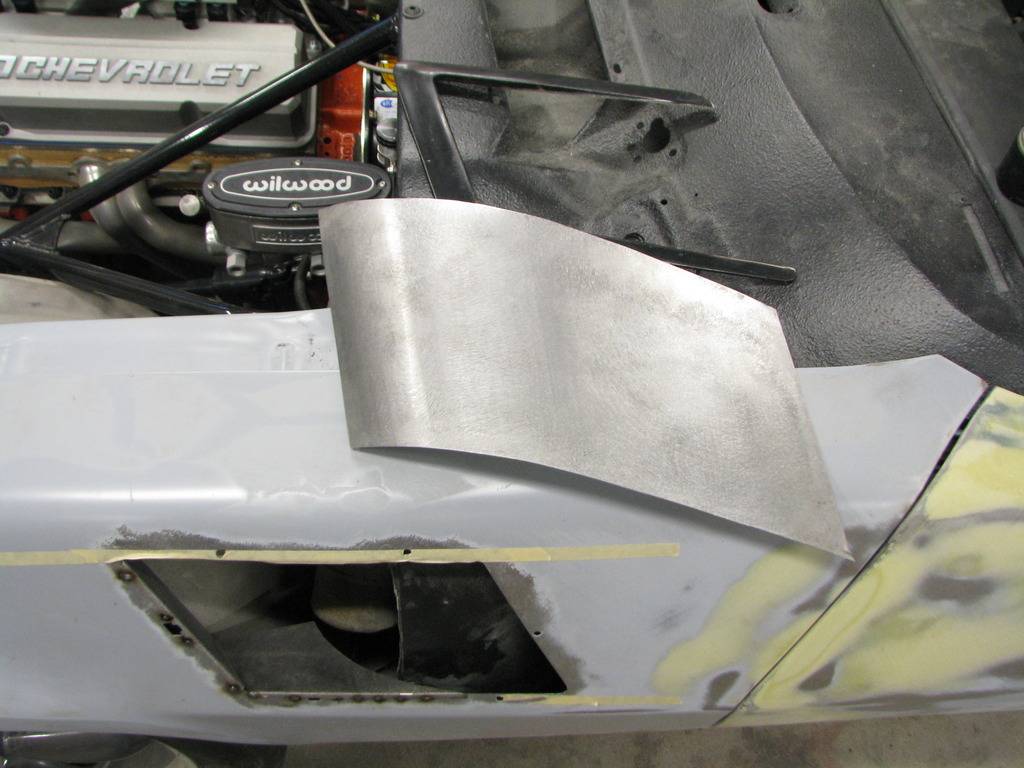
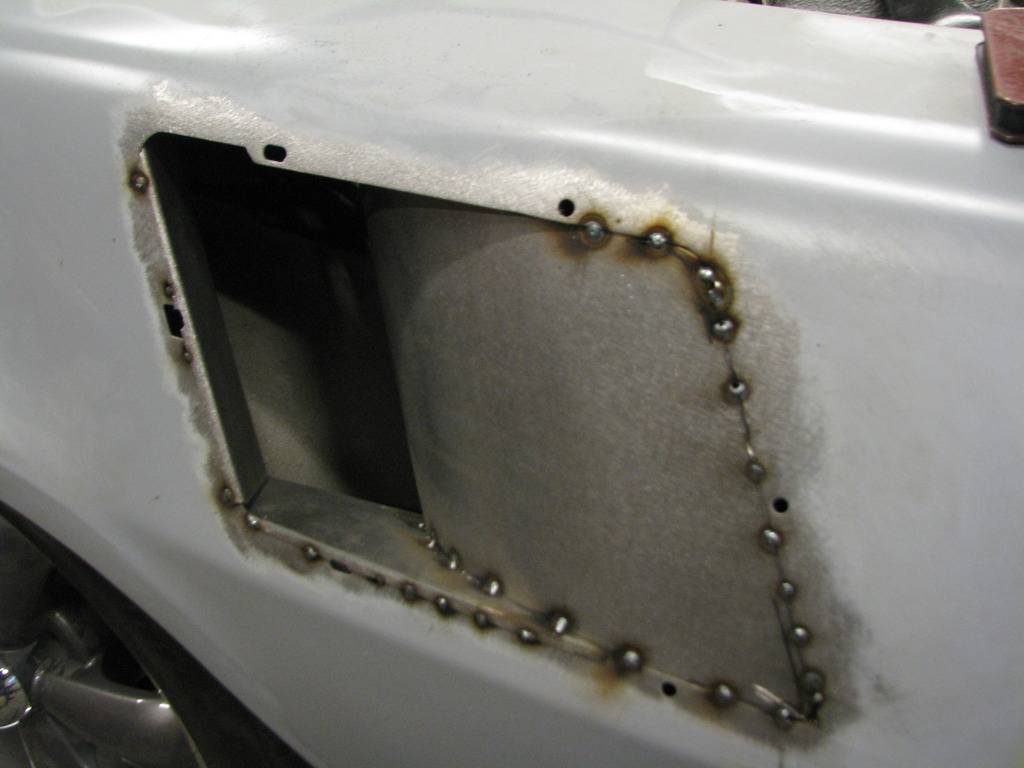
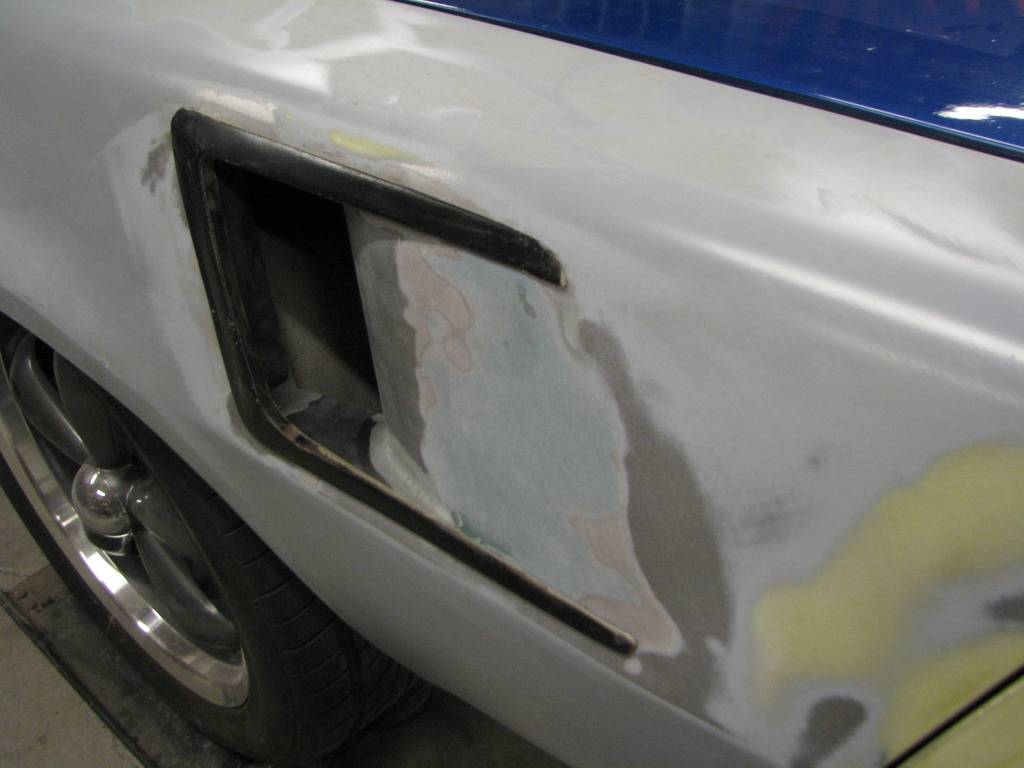
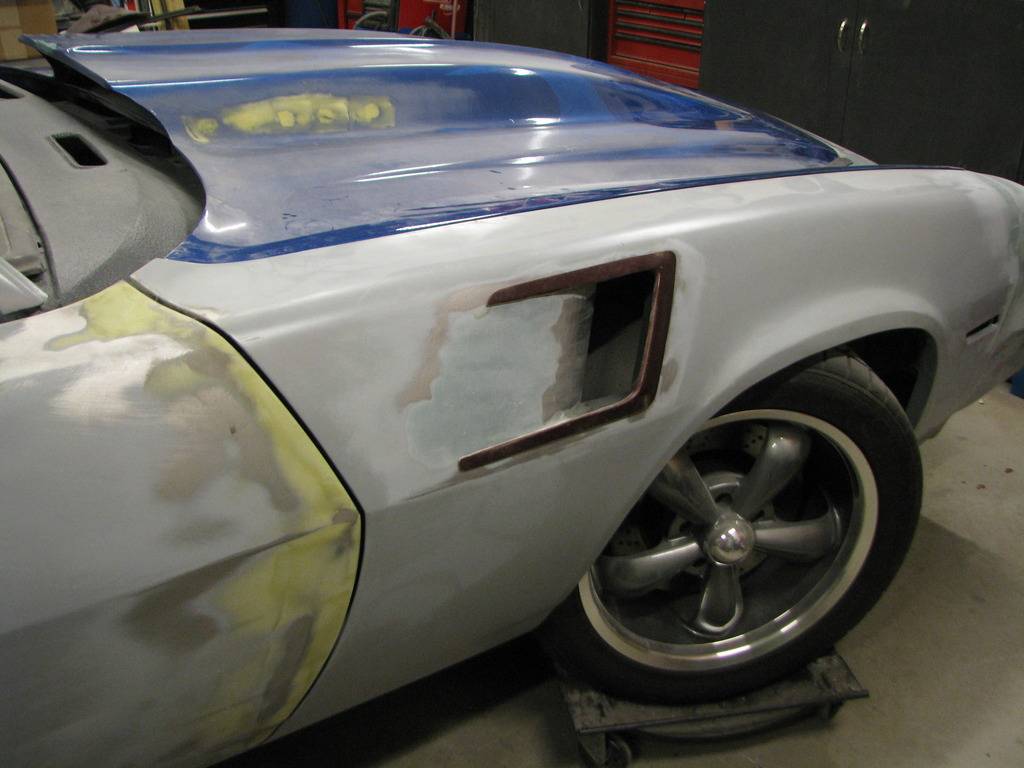
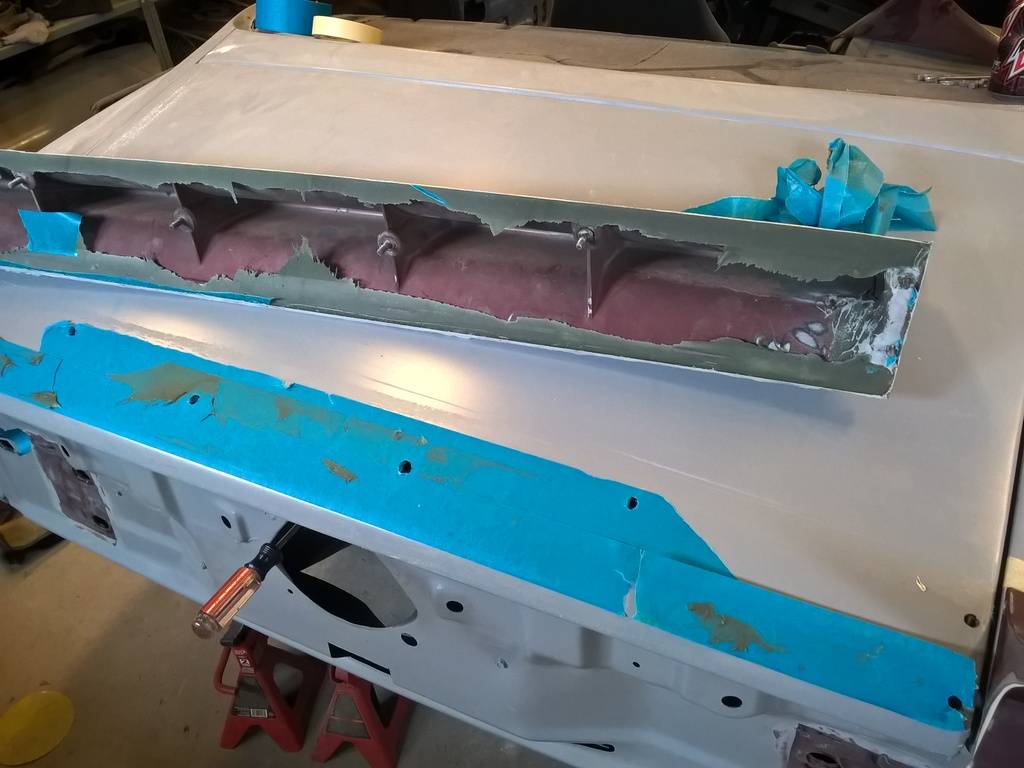
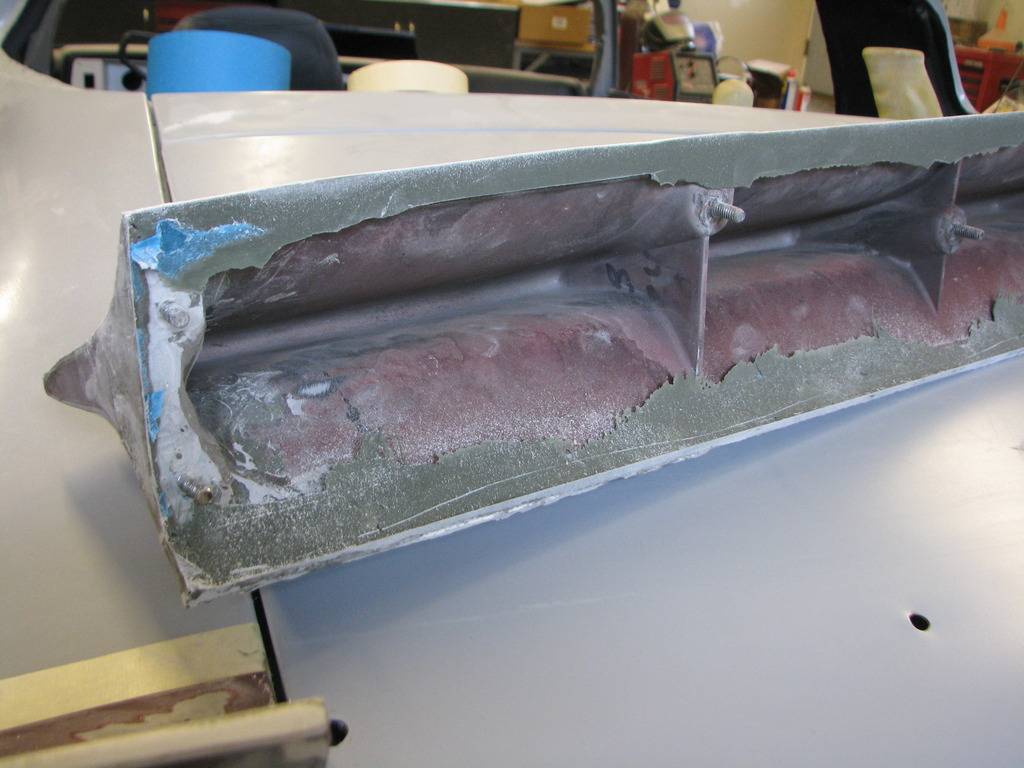
Working on a project I started because of the aero thread on p-t. I've always wanted to smooth the fender vents, but they're pot metal. So I'm going to cut up the stock vent to use as a trim ring and fab the actual scoop out of the sheet metal. It's also going to quadruple the area for underhood air to exit (theoretically reducing drag and aiding in cooling).
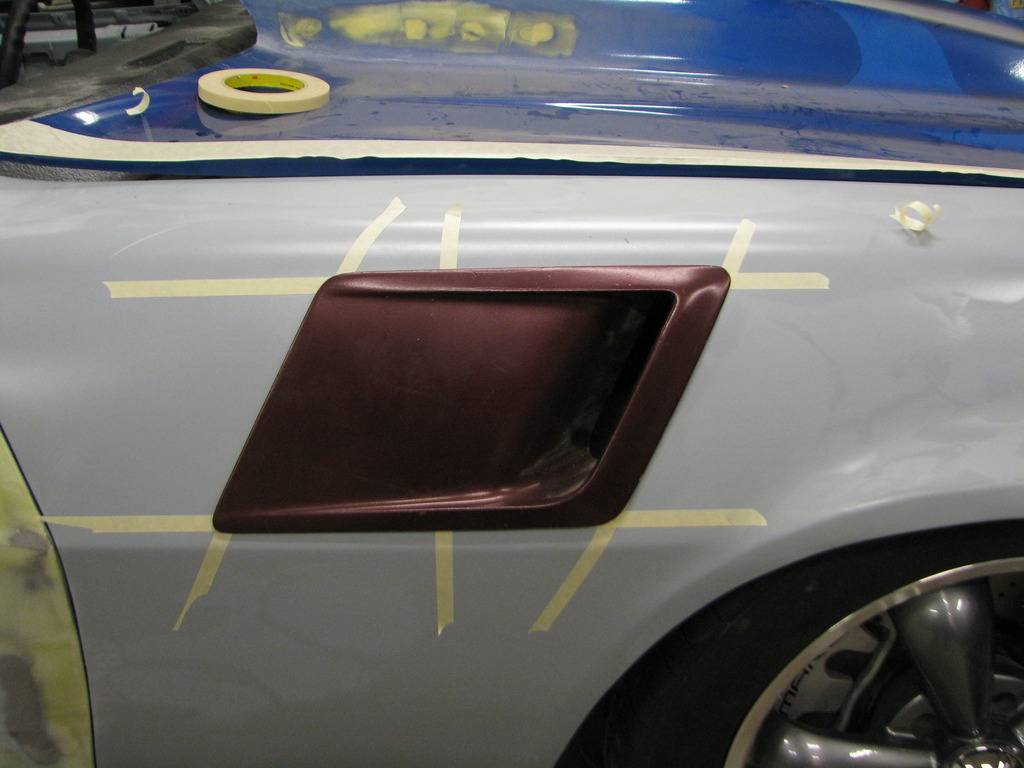
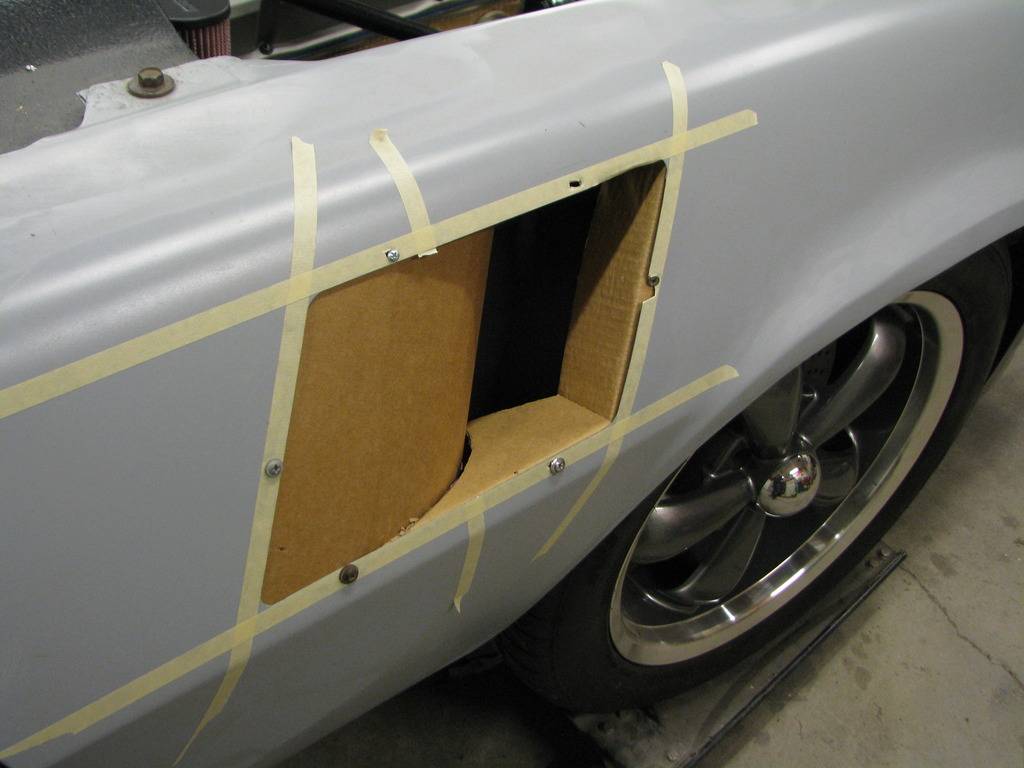

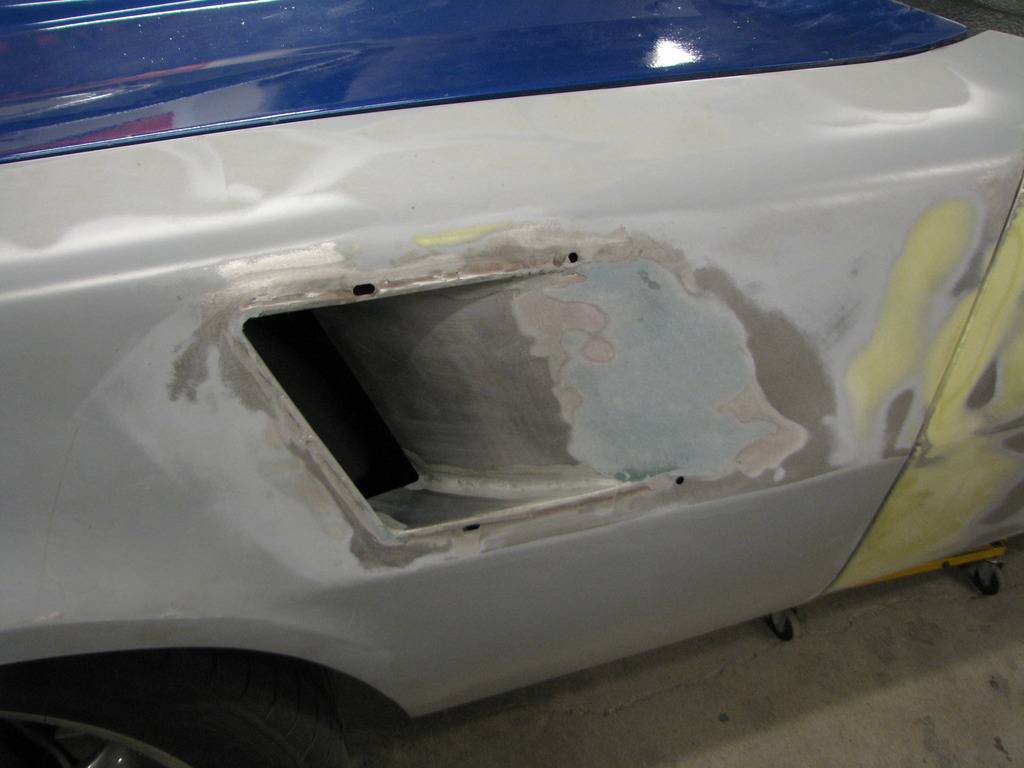
Made a date with my body guy to get this damn thing painted! And he's running behind schedule...so I'll post these for now. But it's in queue. I have the body work done to basically the best of my ability and he's going to finish everything up perfect and spray it. (I did my Beretta last year and a couple spots that I thought were perfect showed slight flaws a few months after fresh paint).
I really like how the fender vents came out. It was difficult to get a good decreasing radius bend that was smooth. My old landlord has an English wheel that I used and that's pretty tedious, but it worked ok.

04-30-2017 #125
Registered User
- Join Date
- Mar 2005
- Location
- Walton, NY
- Posts
- 737
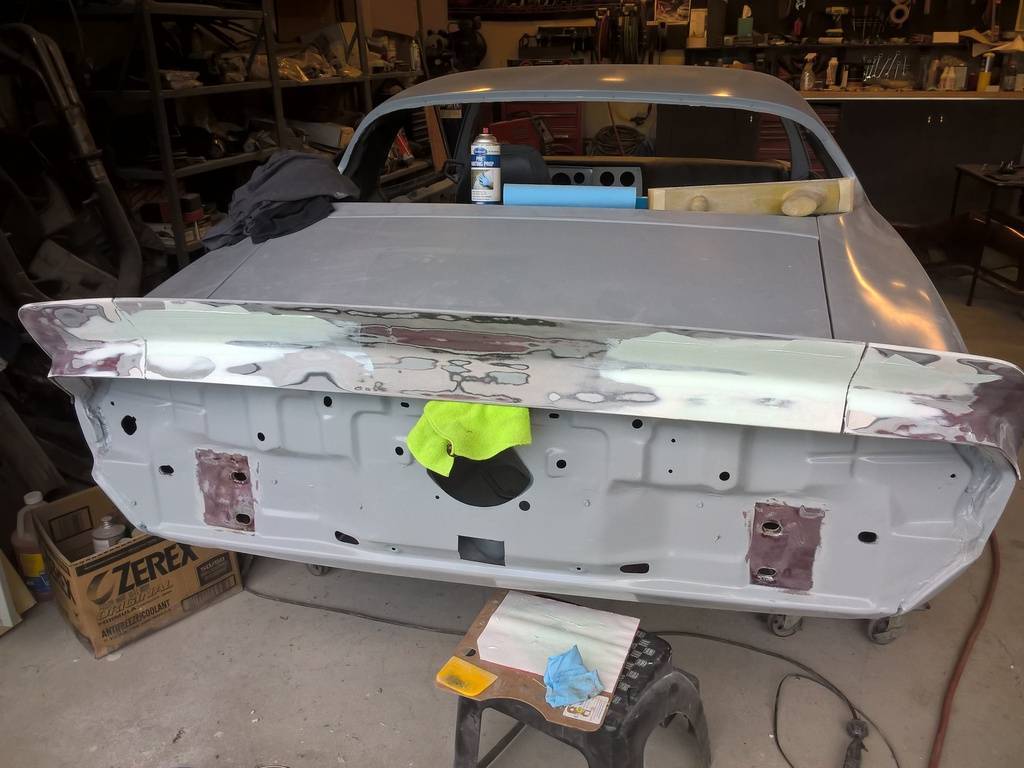
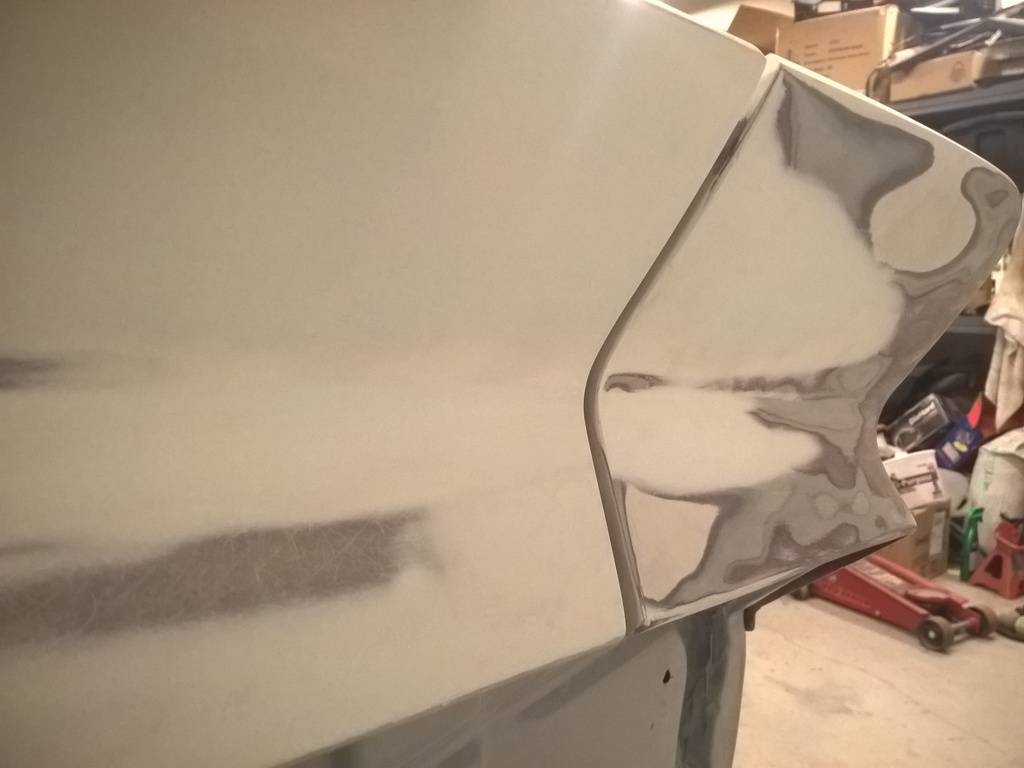
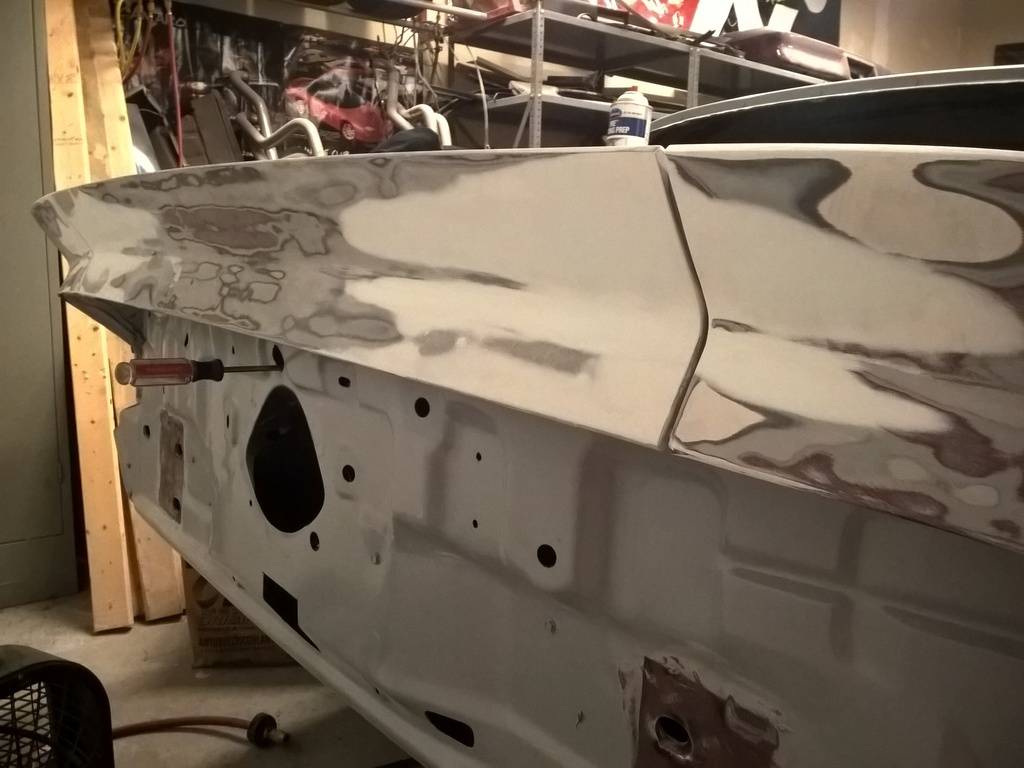
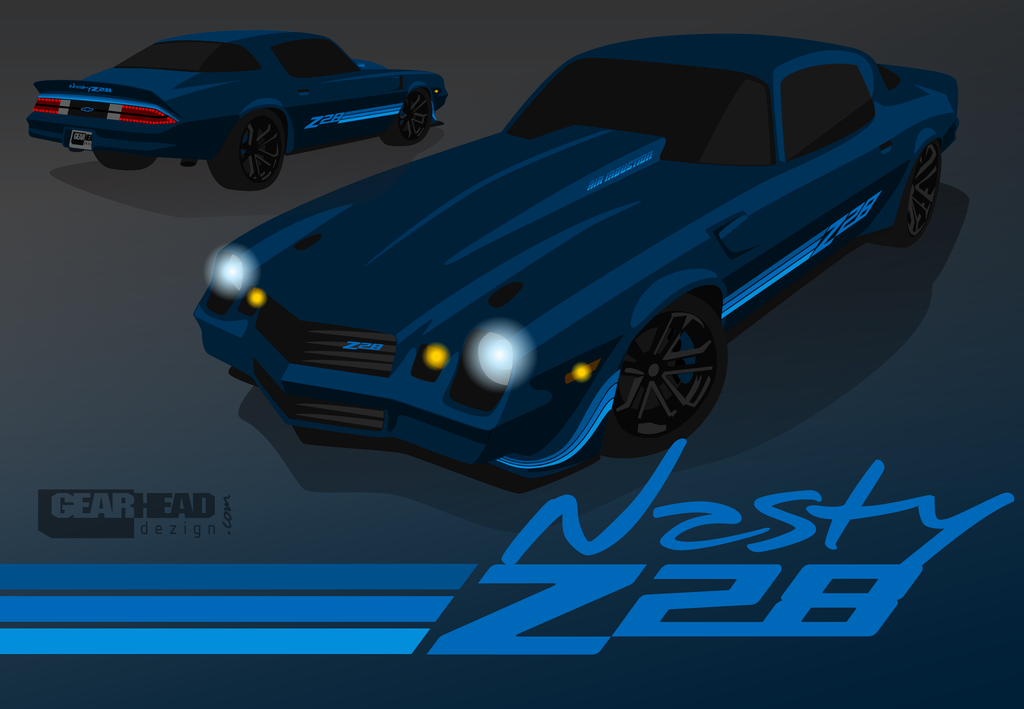
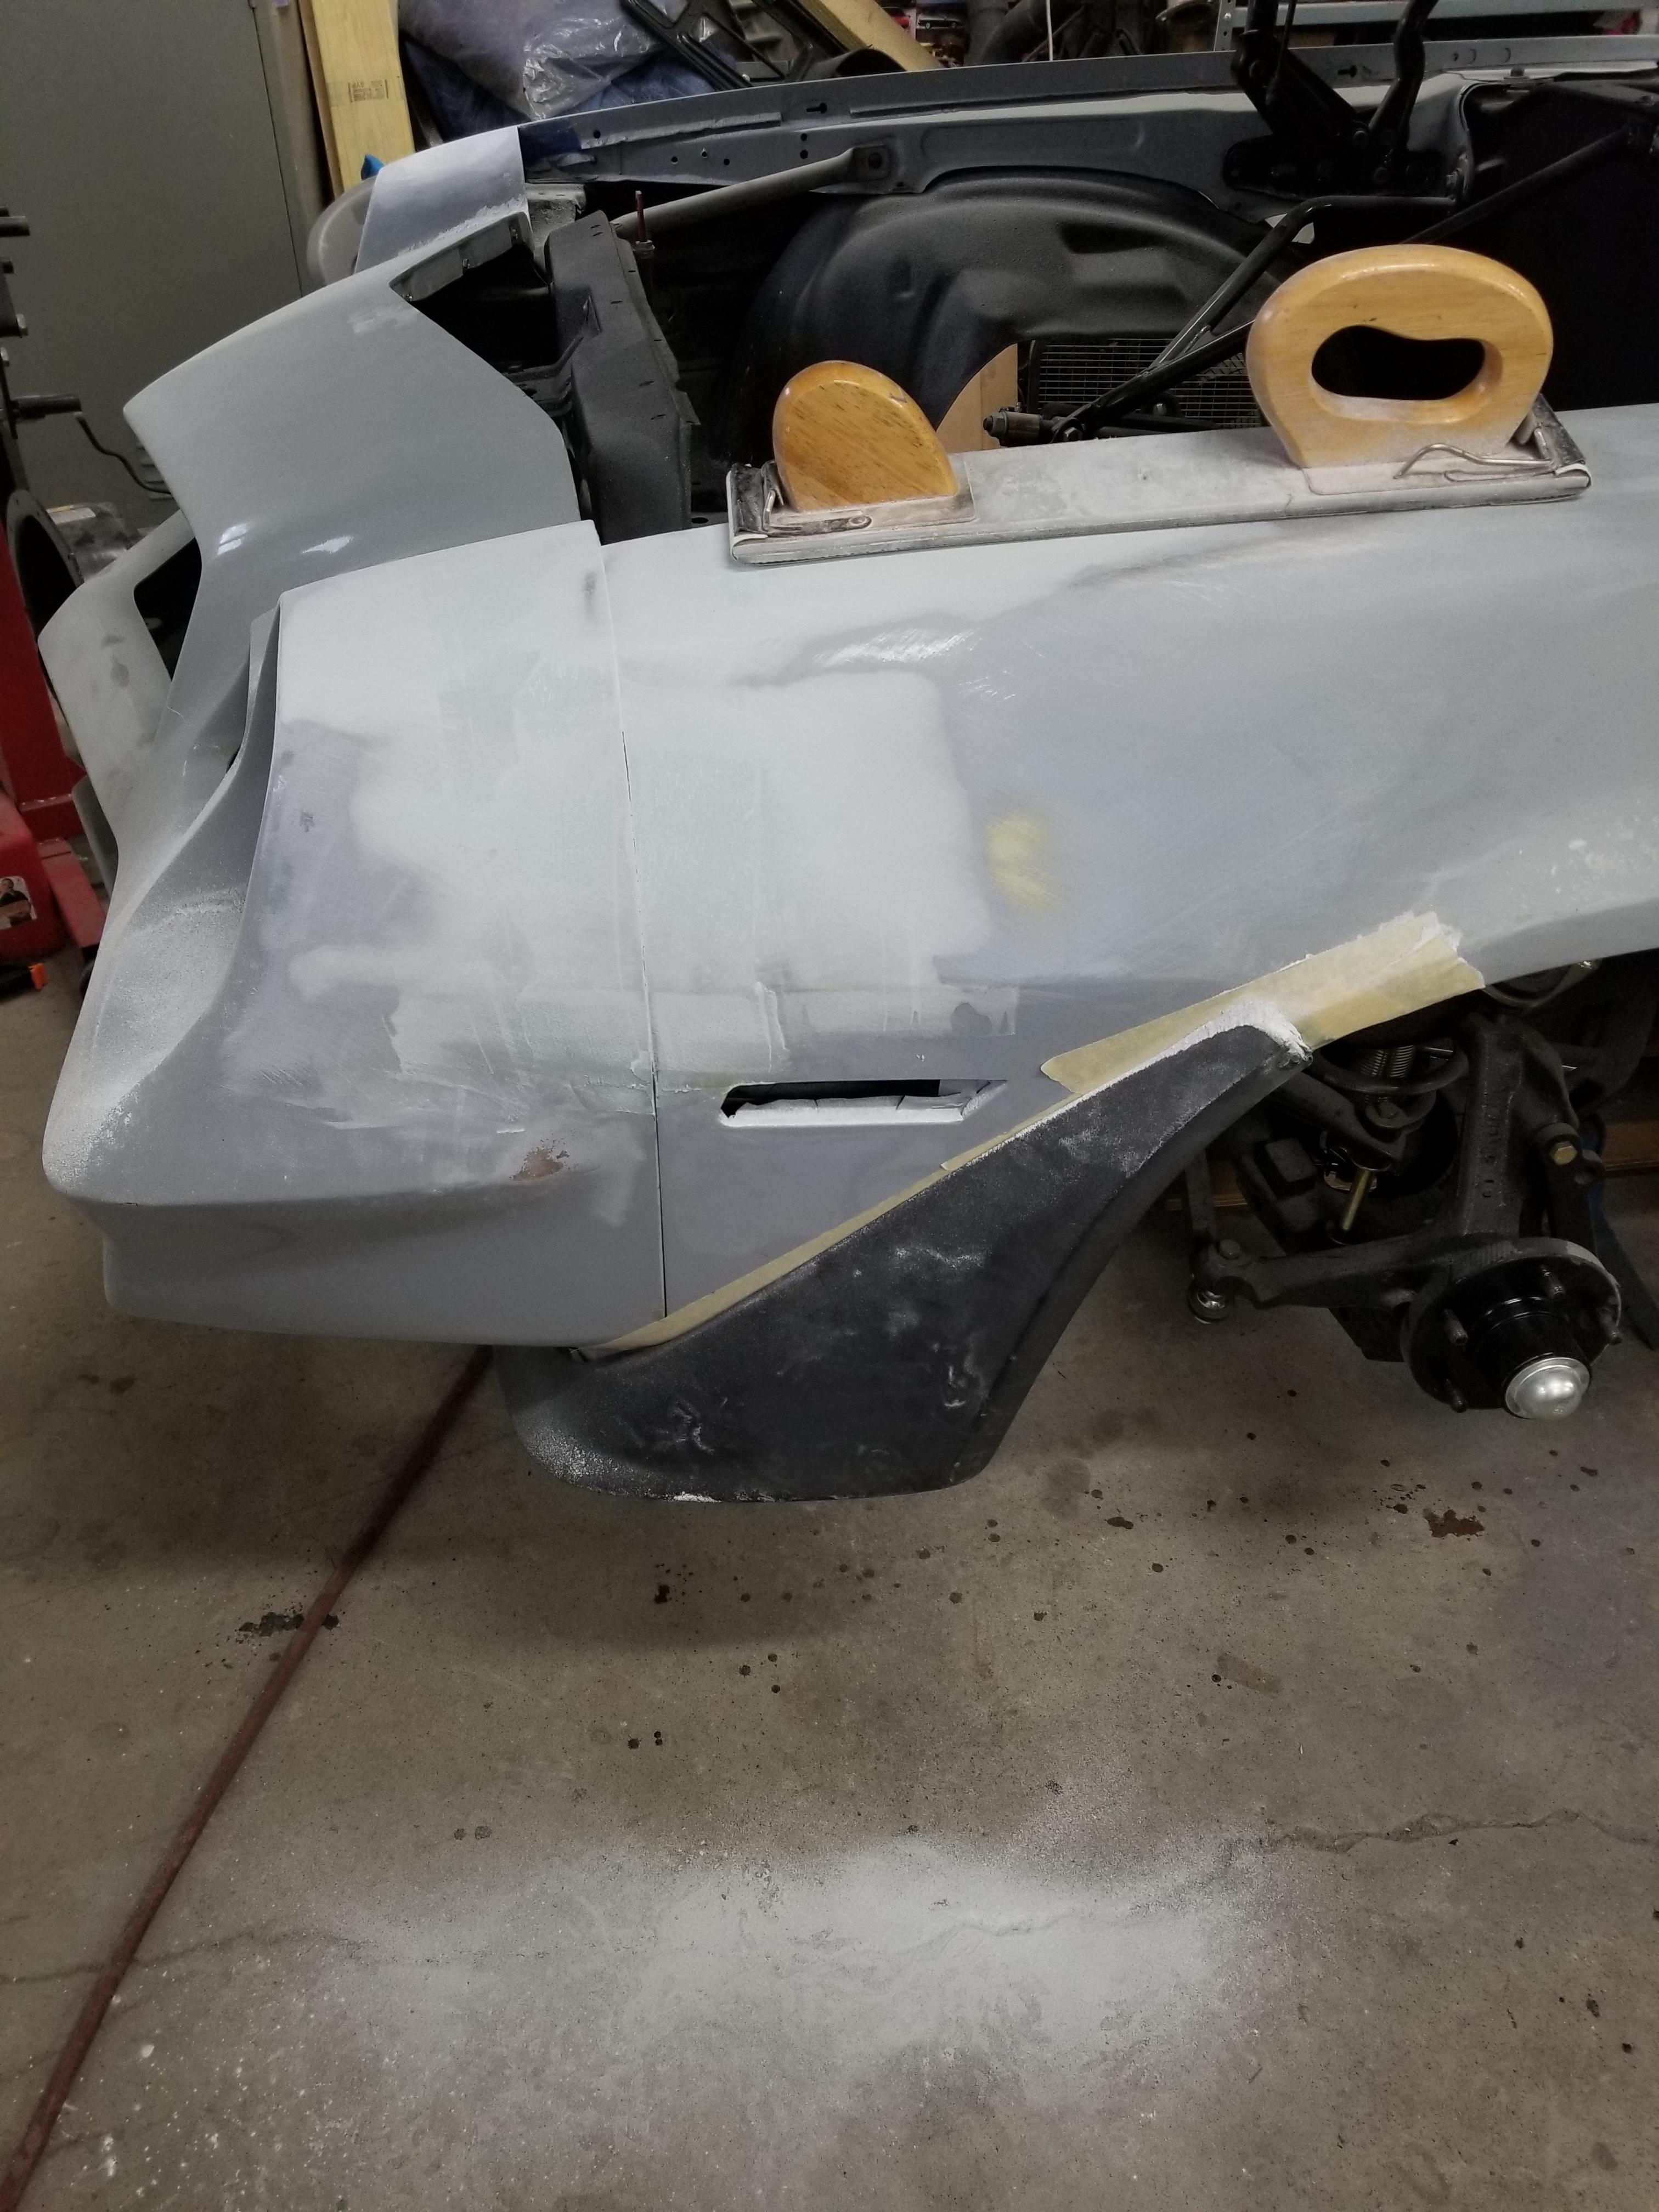
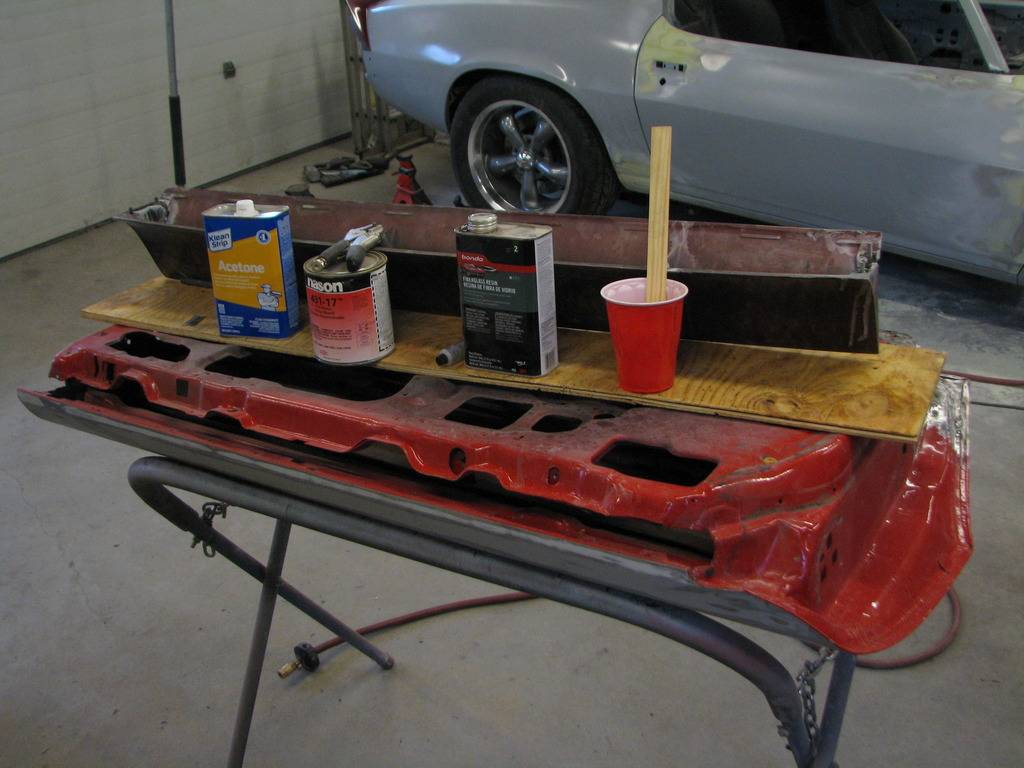
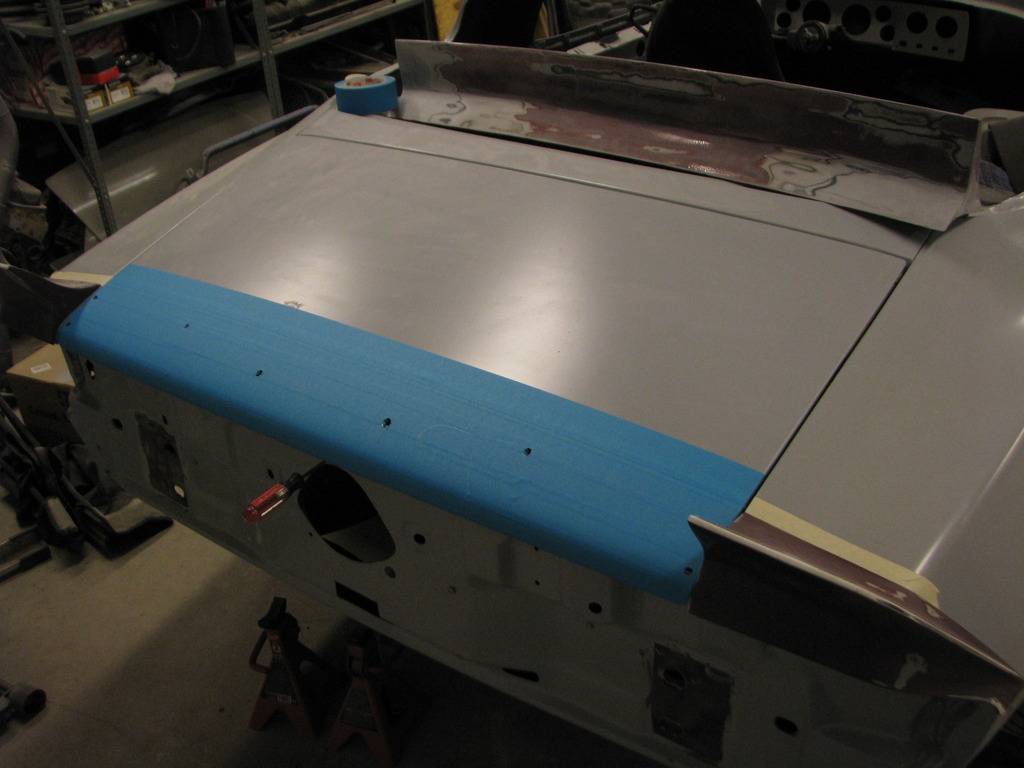
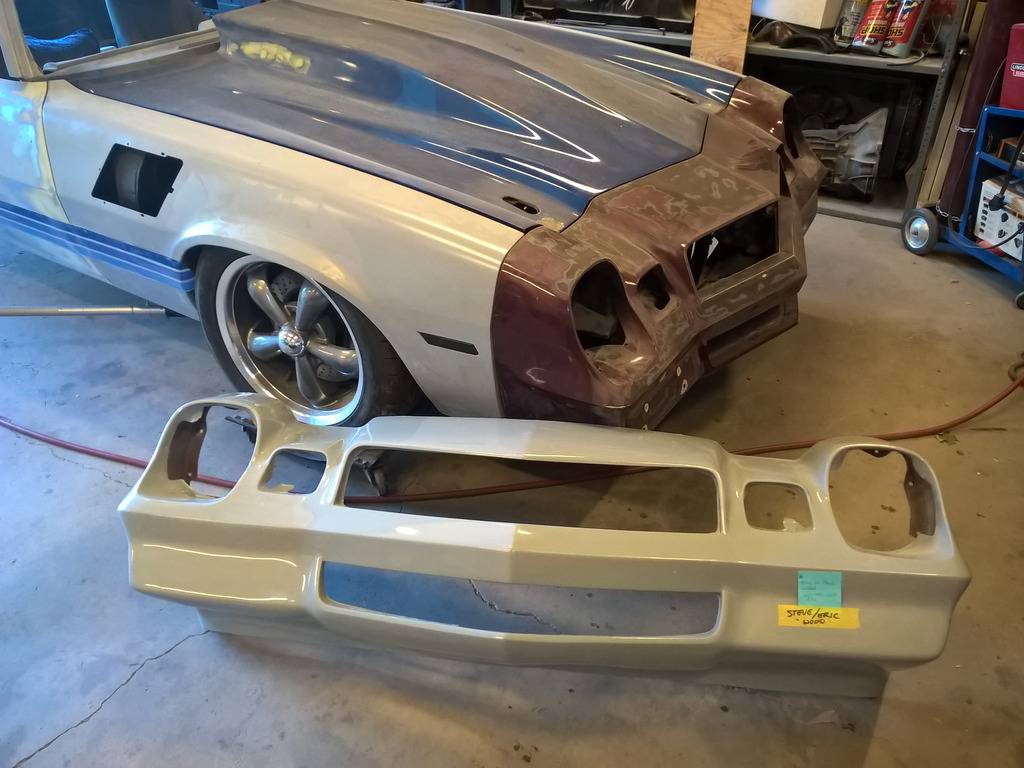
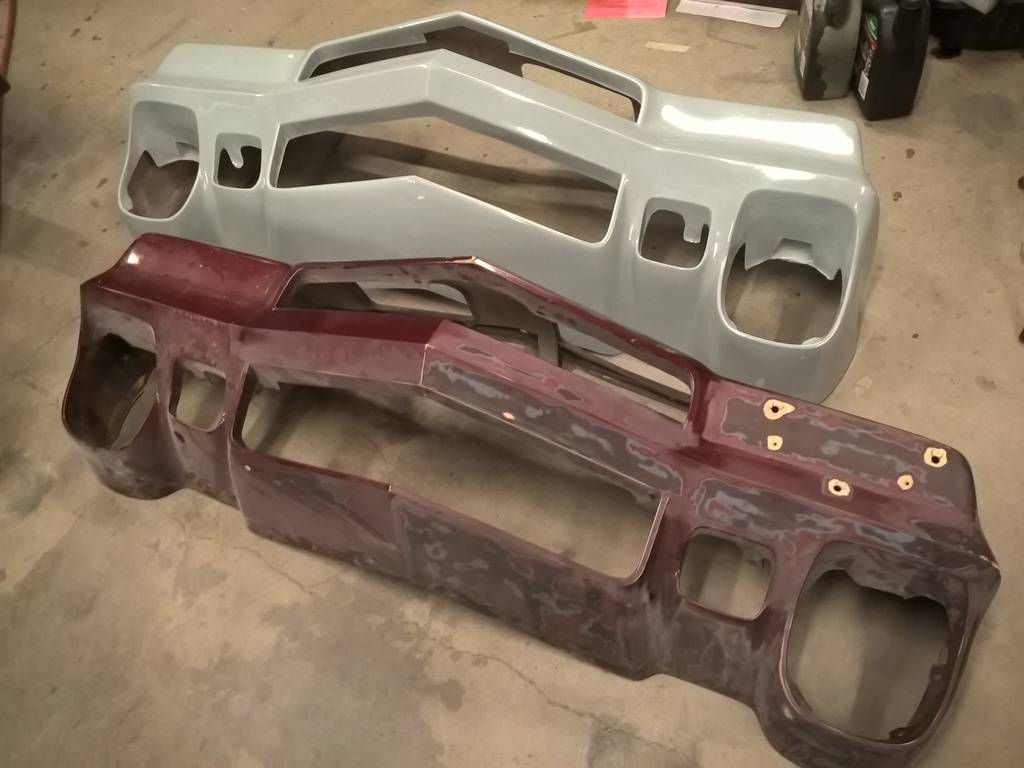
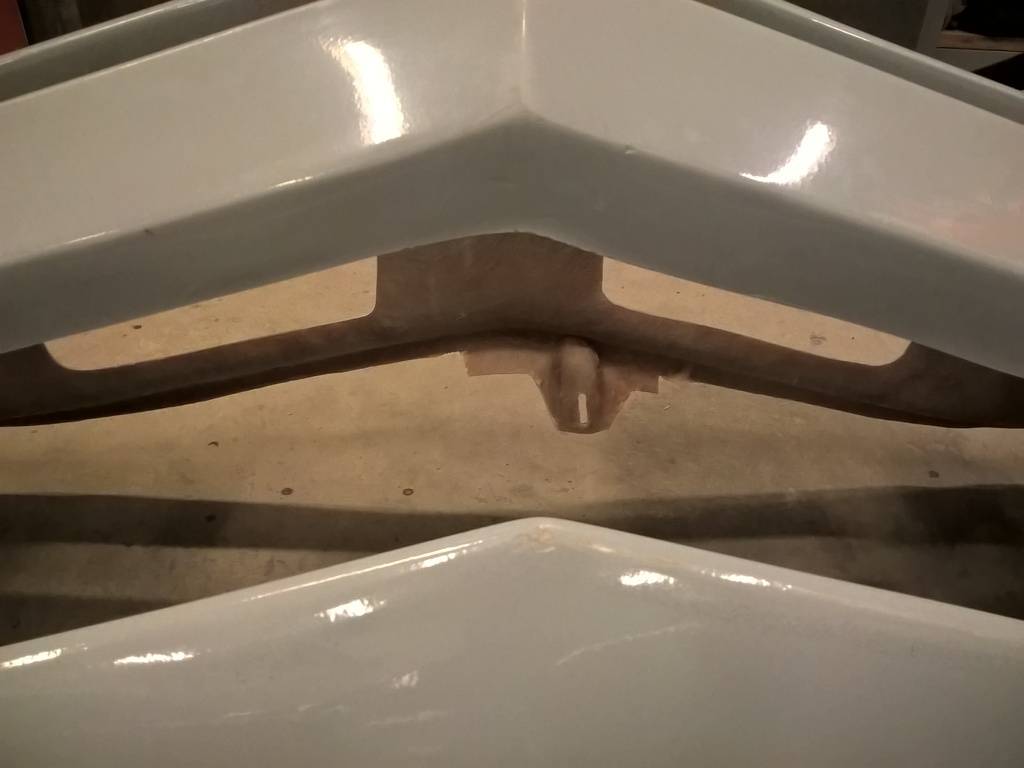
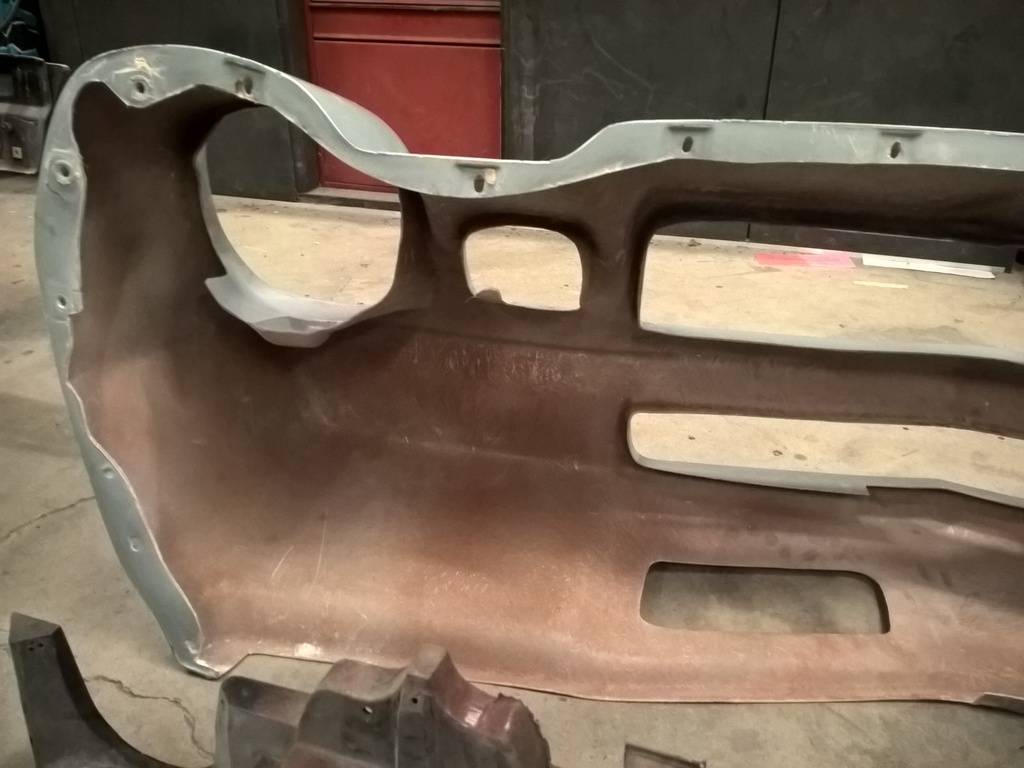
I also got my rear bumper project done. It's something I've thought about for quite a while. It has always driven me nuts that the bottom of the rear bumper isn't on the same plane as the bottom of the quarter. I photoshopped it to match and it looks so much better. So I cut up the stock one to try it out and fit a basic rear diffuser idea to match the aero package I'm going to do in a year or two.
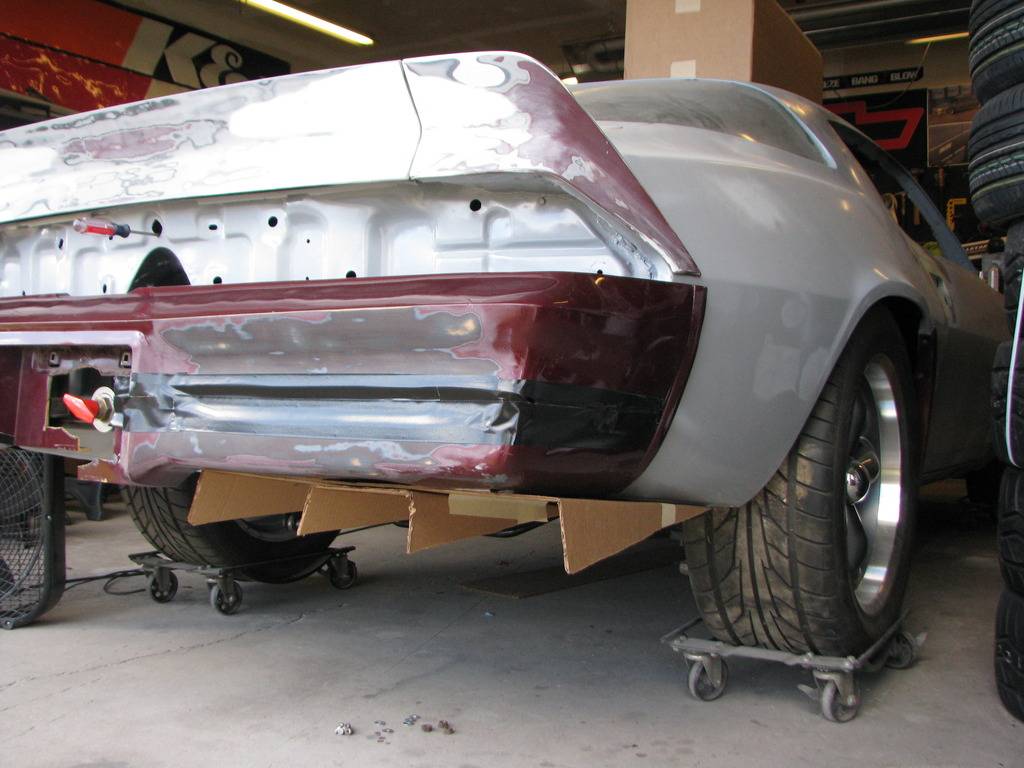
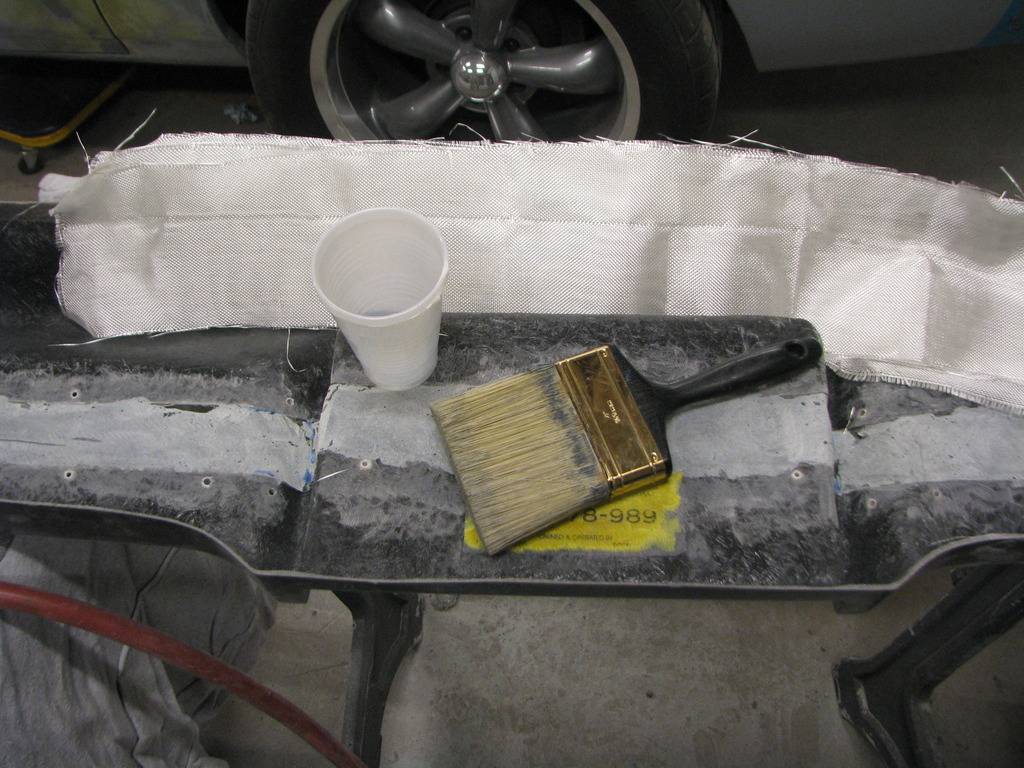
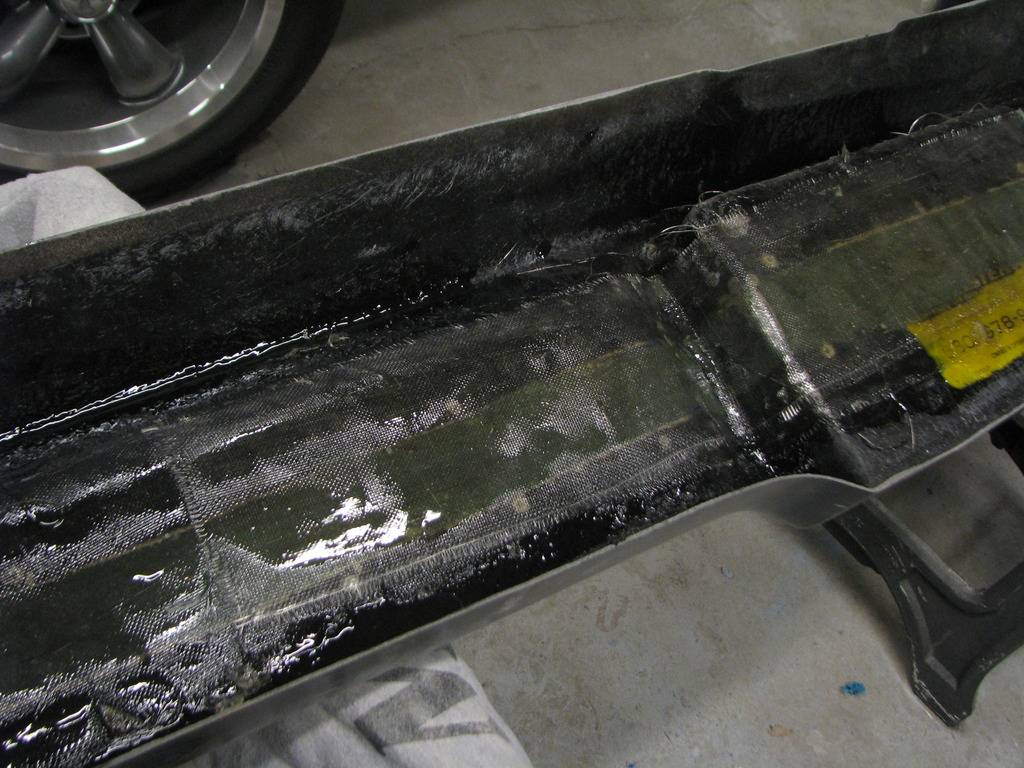
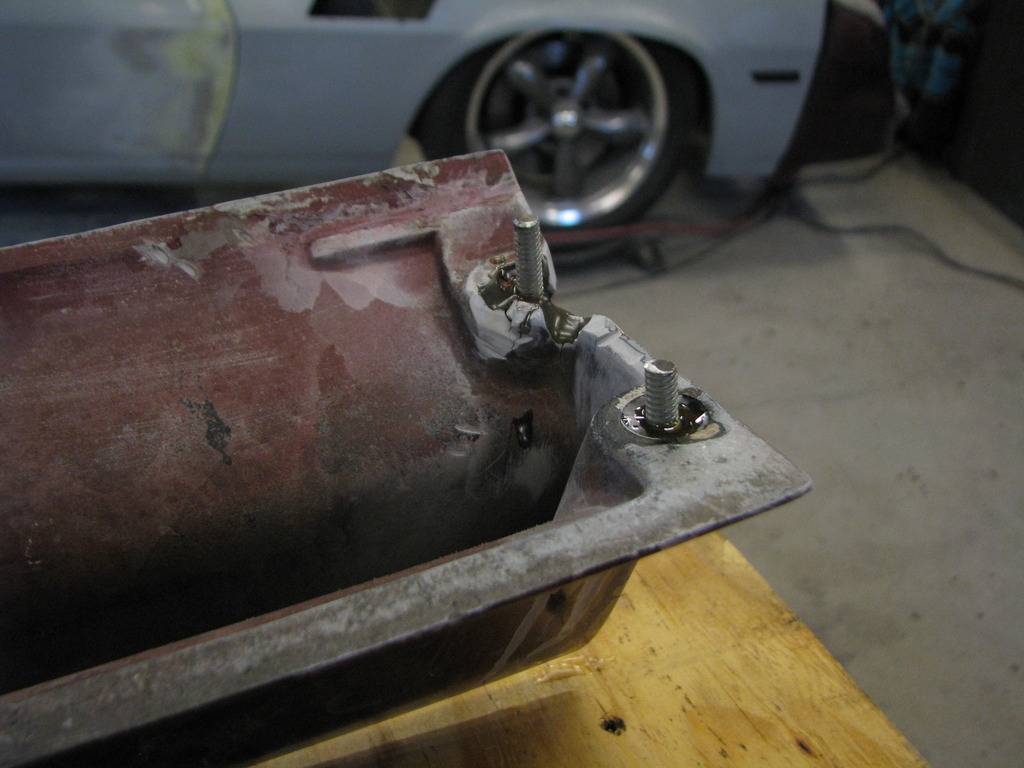
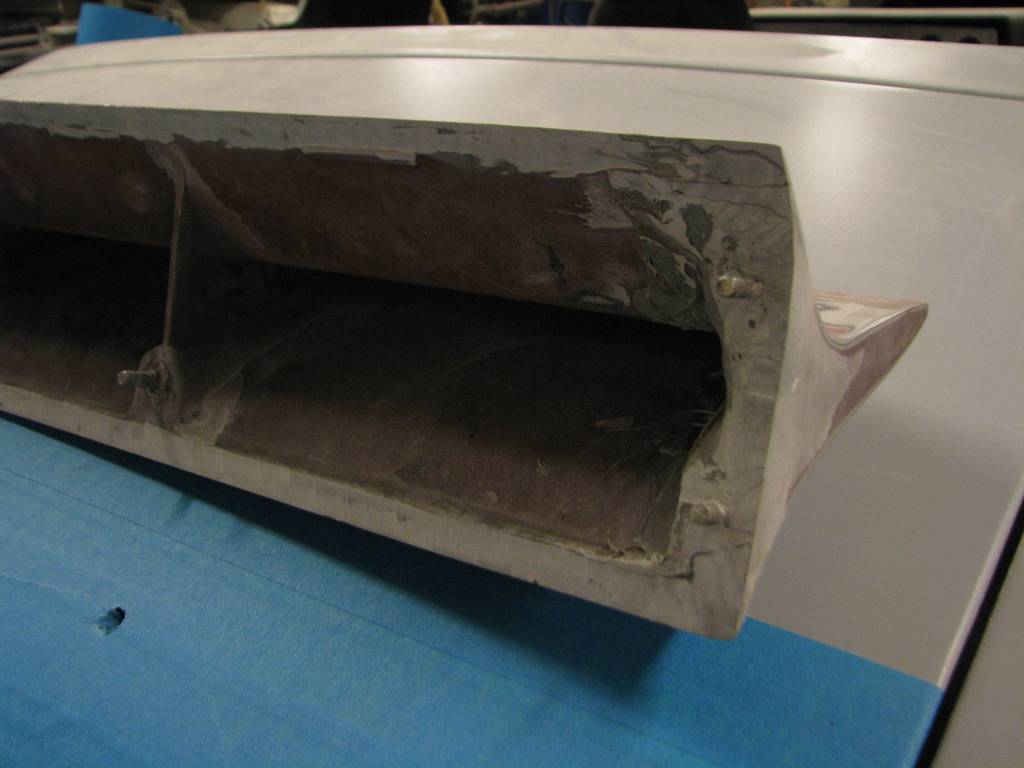
I was happy with the results, so I bought a Glasstek rear bumper and cut it up. I used the car as my jig and some ABS sheet as a backer to slop some kitty hair on it and make it one piece again. I also made some studded steel plates to eliminate the metal "straps" for the urethane bumper ends and duraglassed them in. Then I took it off the car, removed the self tappers and peeled the ABS off and hit it with fiberglass cloth and resin to give it some strength.
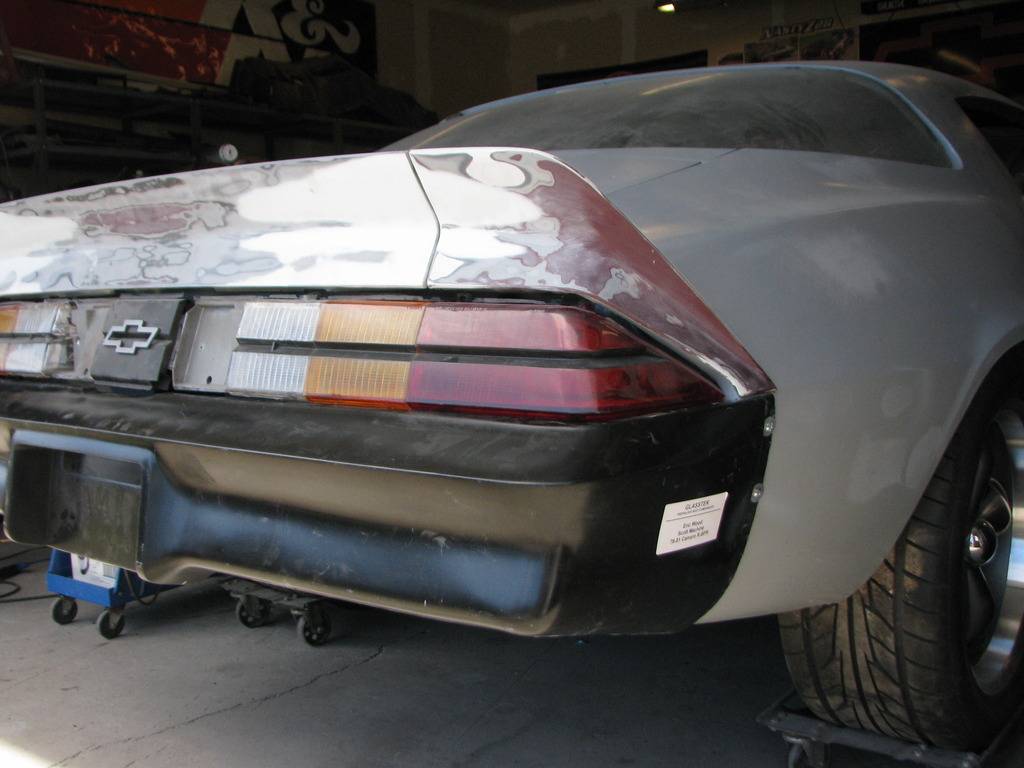

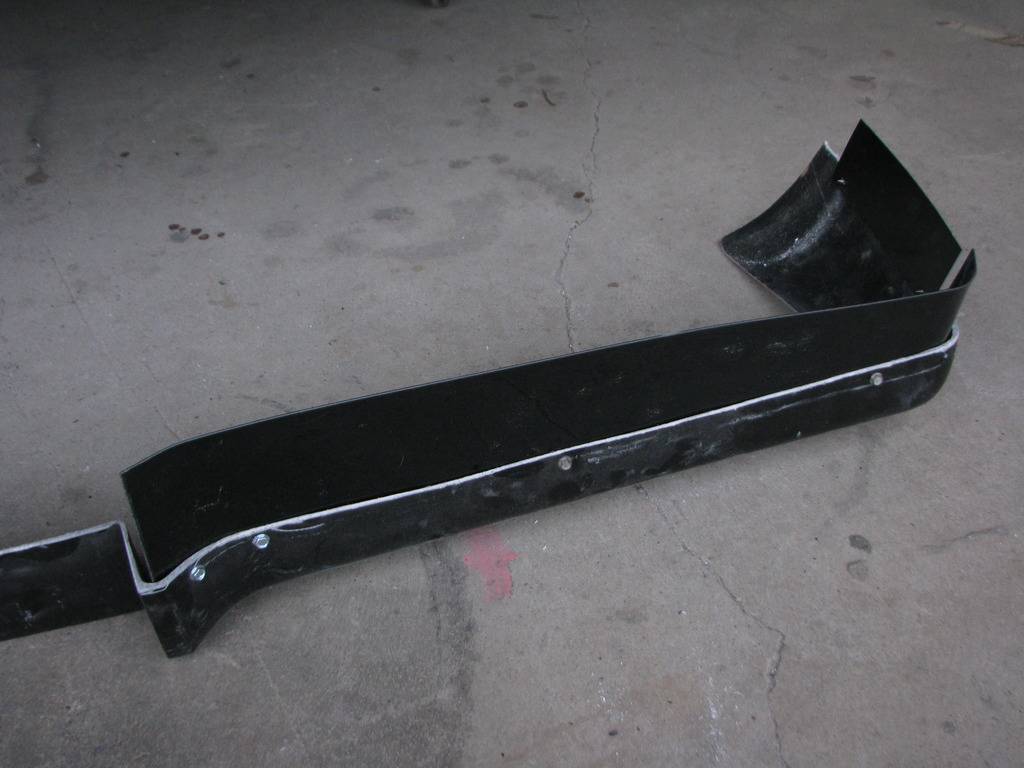
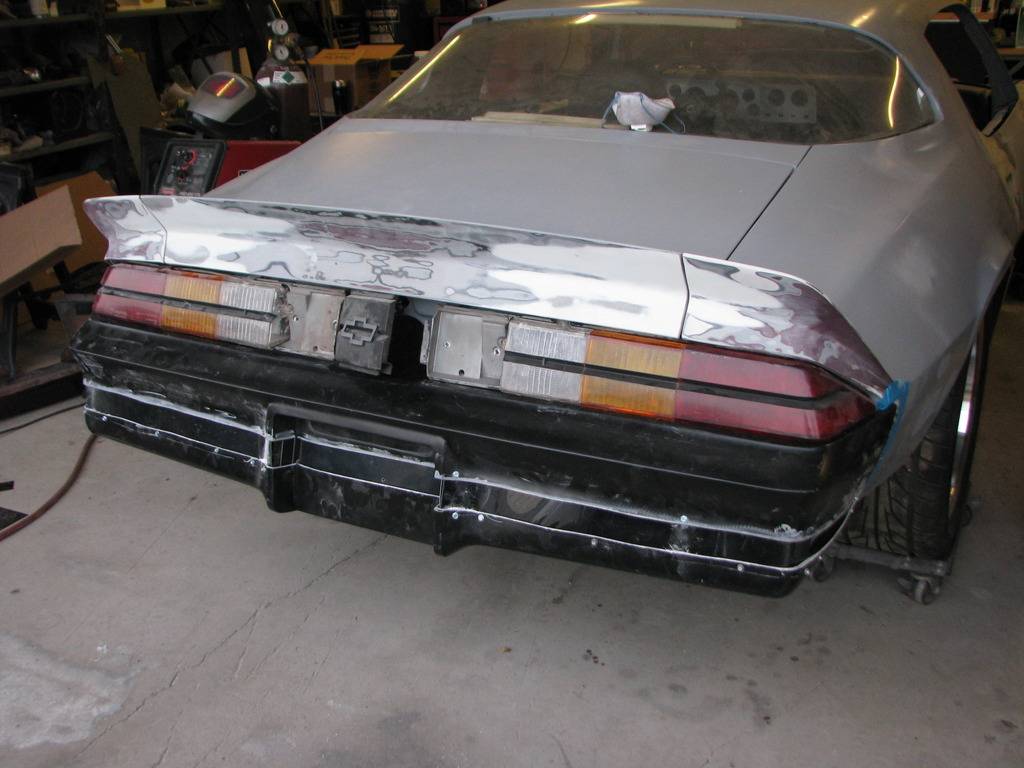

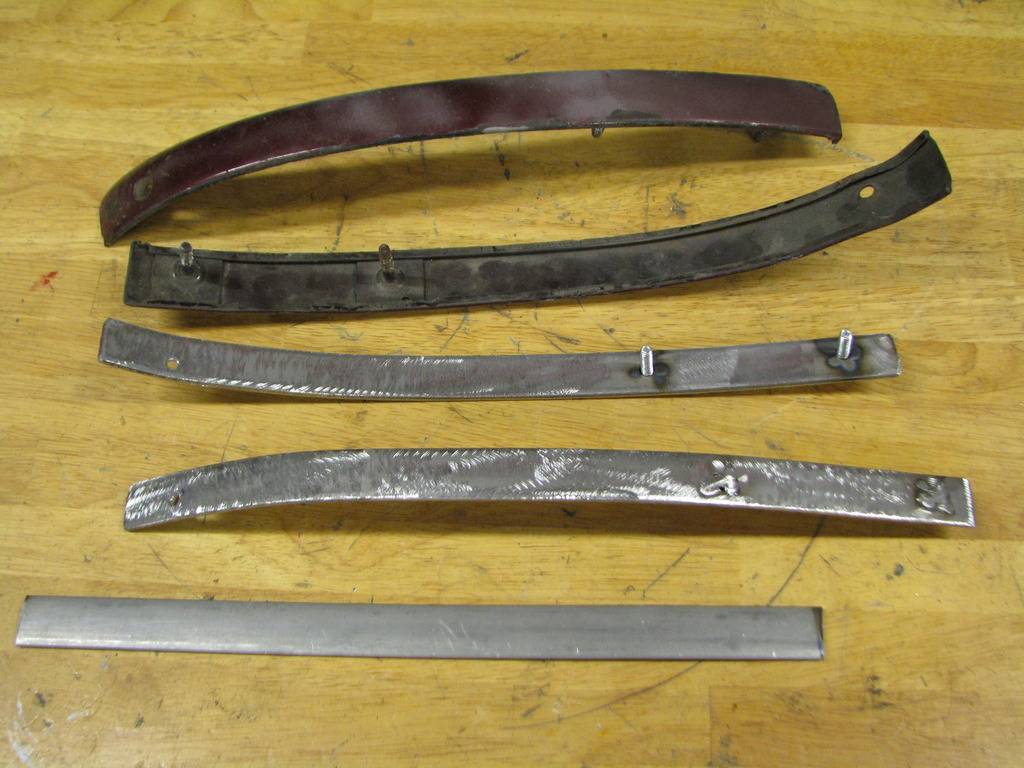
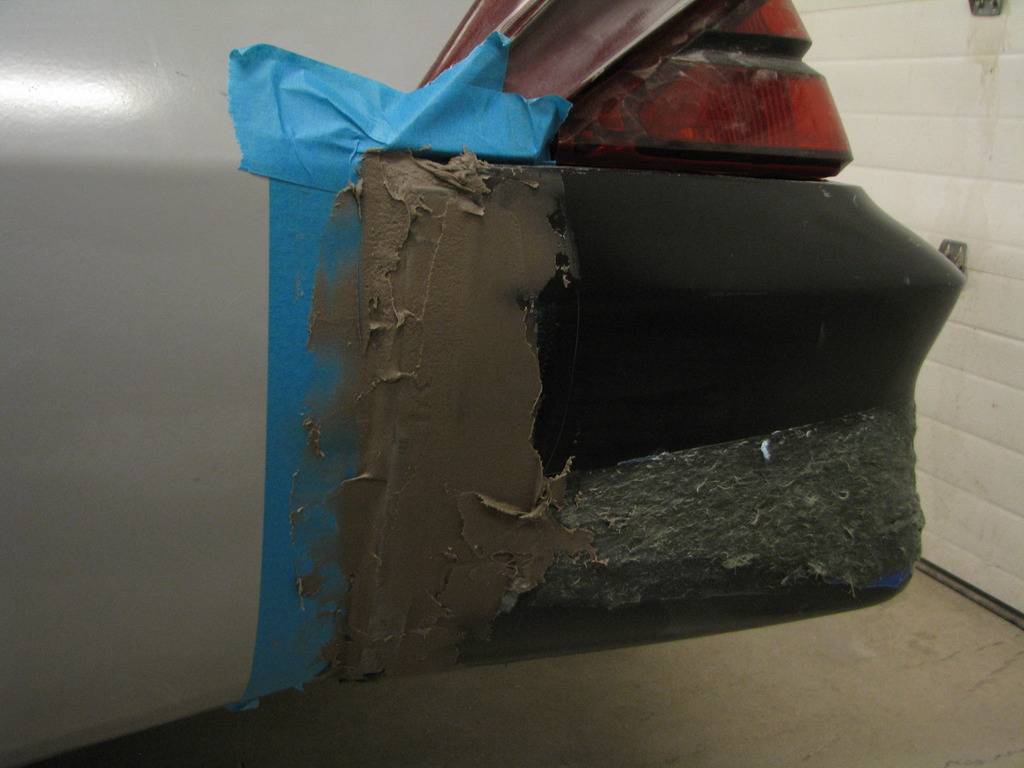
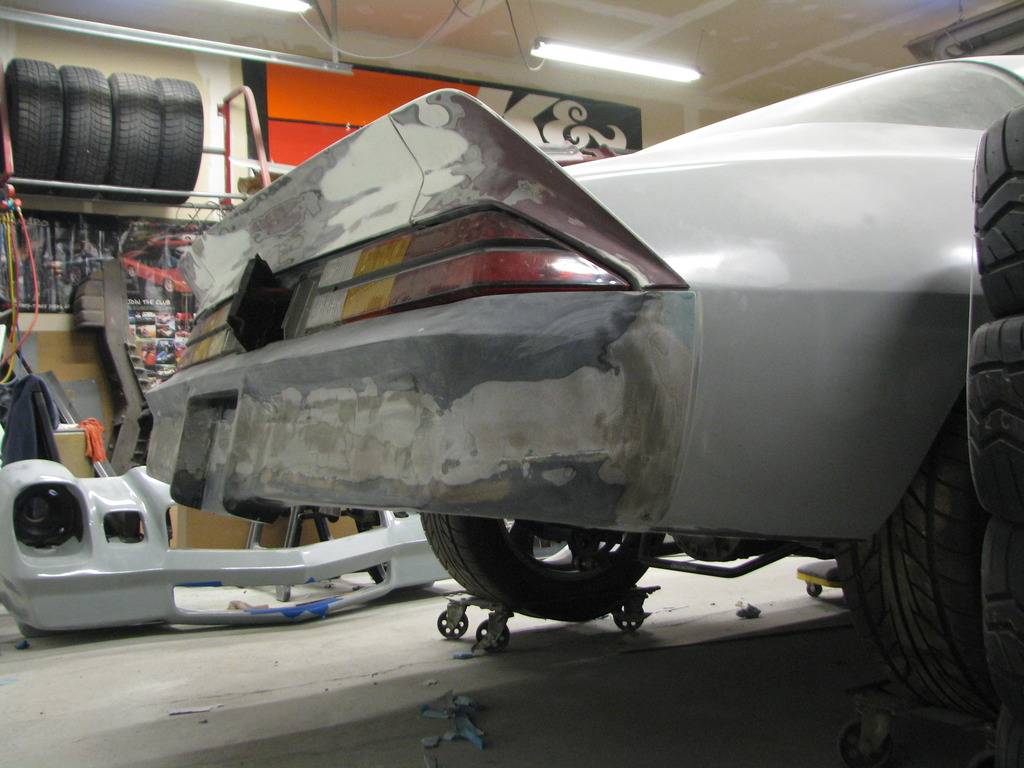
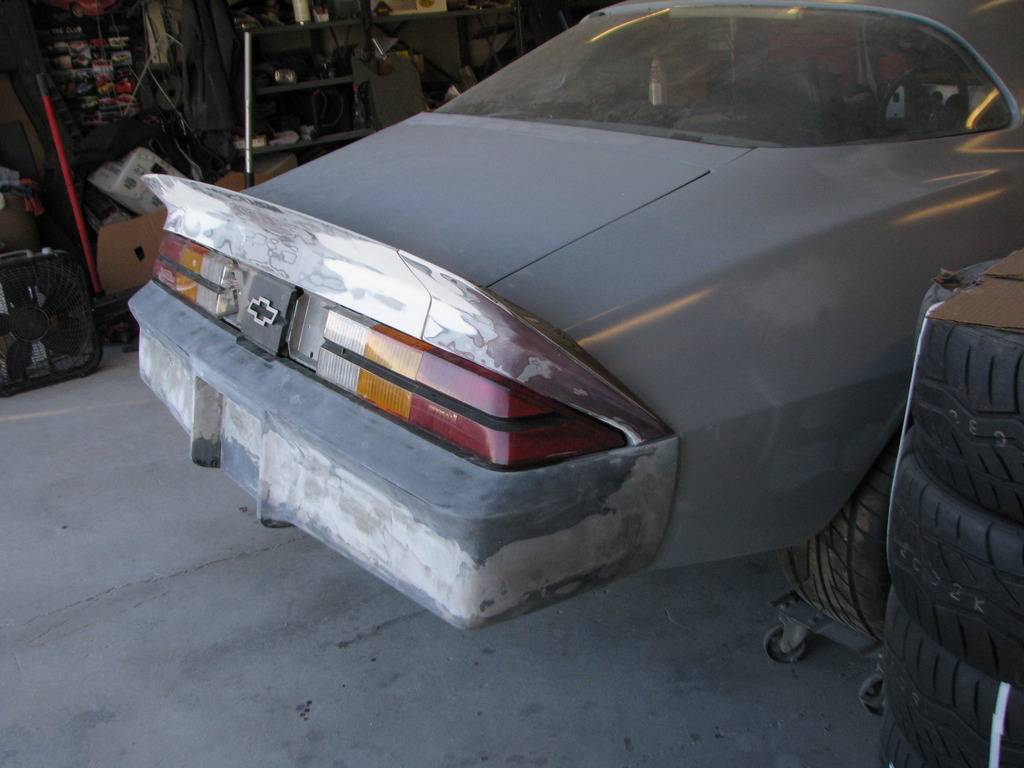
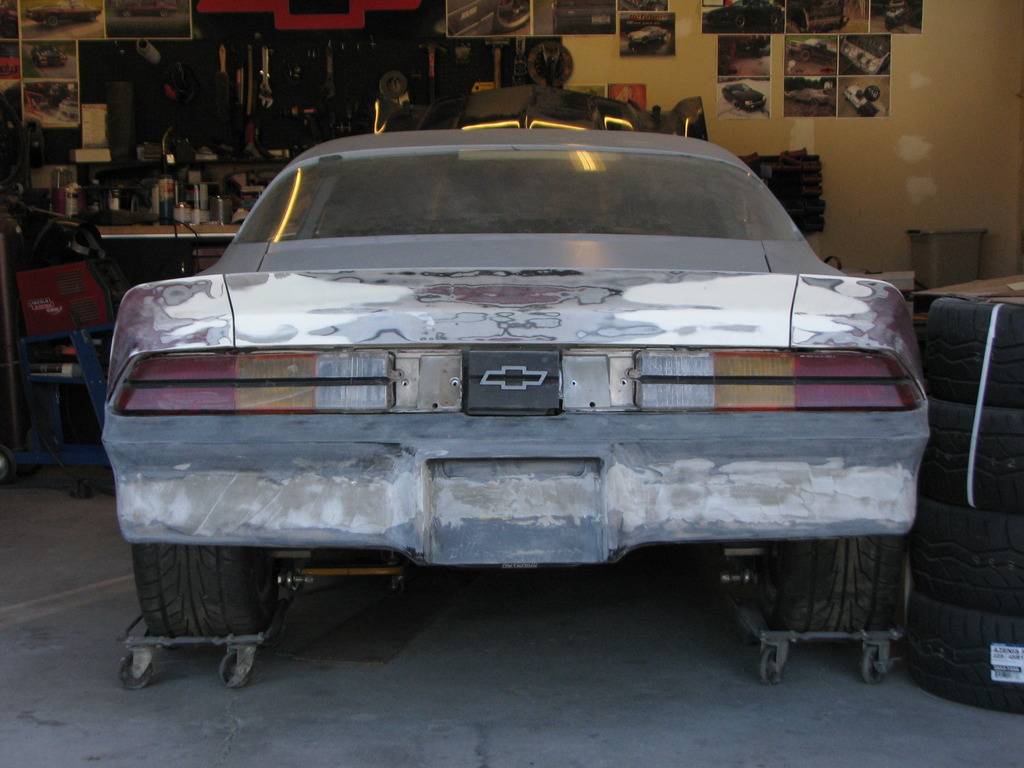
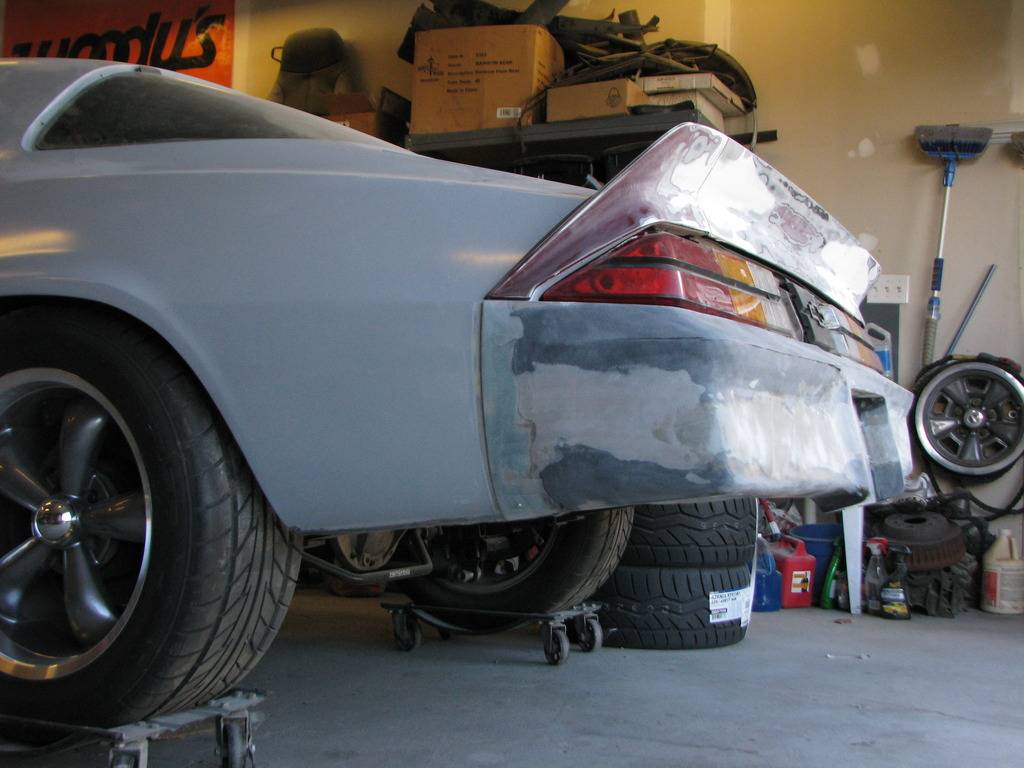
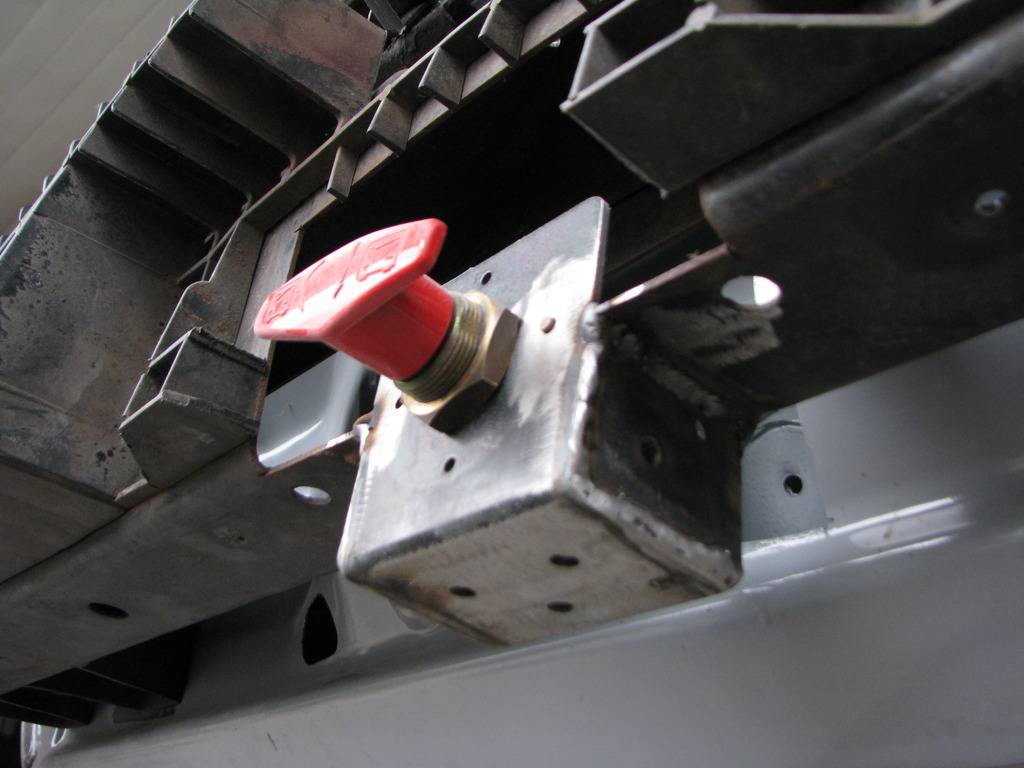
I really like the "fatass" look. I think it helps with the really short and wide back end. I also like how the metal strap delete cleans it up. I got a 12" LED bar that will serve as the reverse lights right above the license plate and it can tint the whole taillight lens smoke red which will work with my "amber delete" tail idea. I also welded a much better mount for my kill switch than the one I cobbed when I was 20. haha. I'm going to make a license plate holder/trim piece out of ABS that looks much better when the plate is off and the switch is exposed.
05-01-2017 #126 Registered User
- Join Date
- Apr 2001
- Location
- The Netherlands
- Posts
- 1,509

Nice work! I like what you're building there :-)
09-09-2017 #127
Registered User
- Join Date
- Mar 2005
- Location
- Walton, NY
- Posts
- 737
Been too long since an update...but it's coming along. I need to quit racing the Beretta! haha Well, after this month...cause I'm taking it back to the strip. I figure if I break it again it will be a kick in the ass to get this car done.
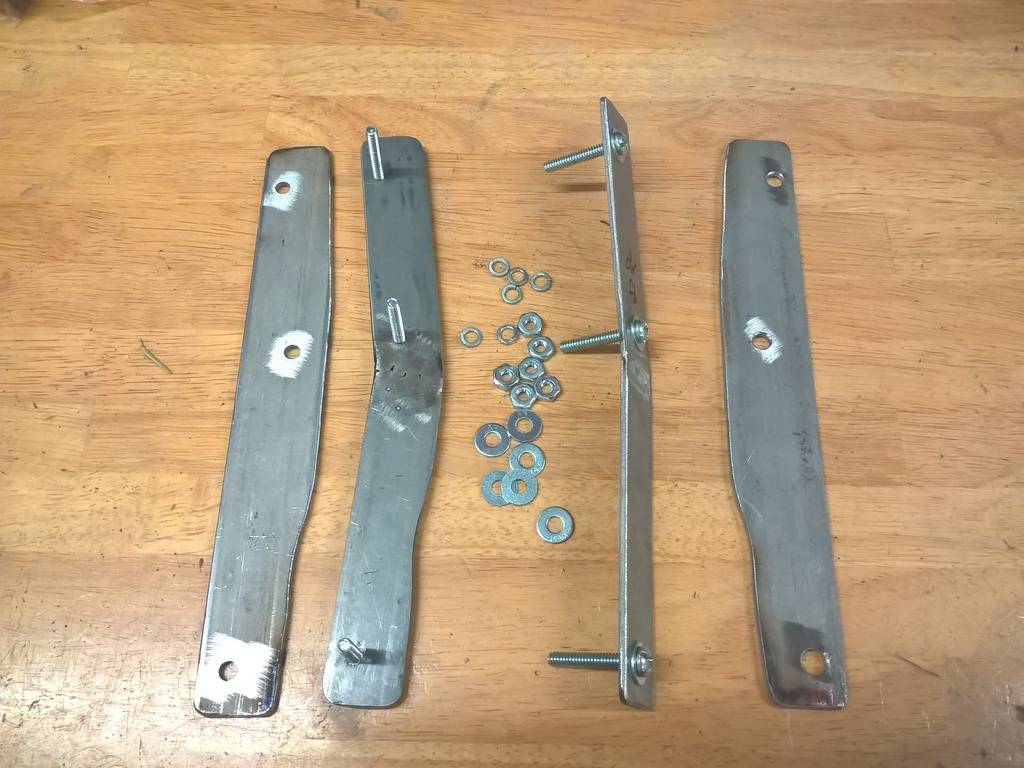
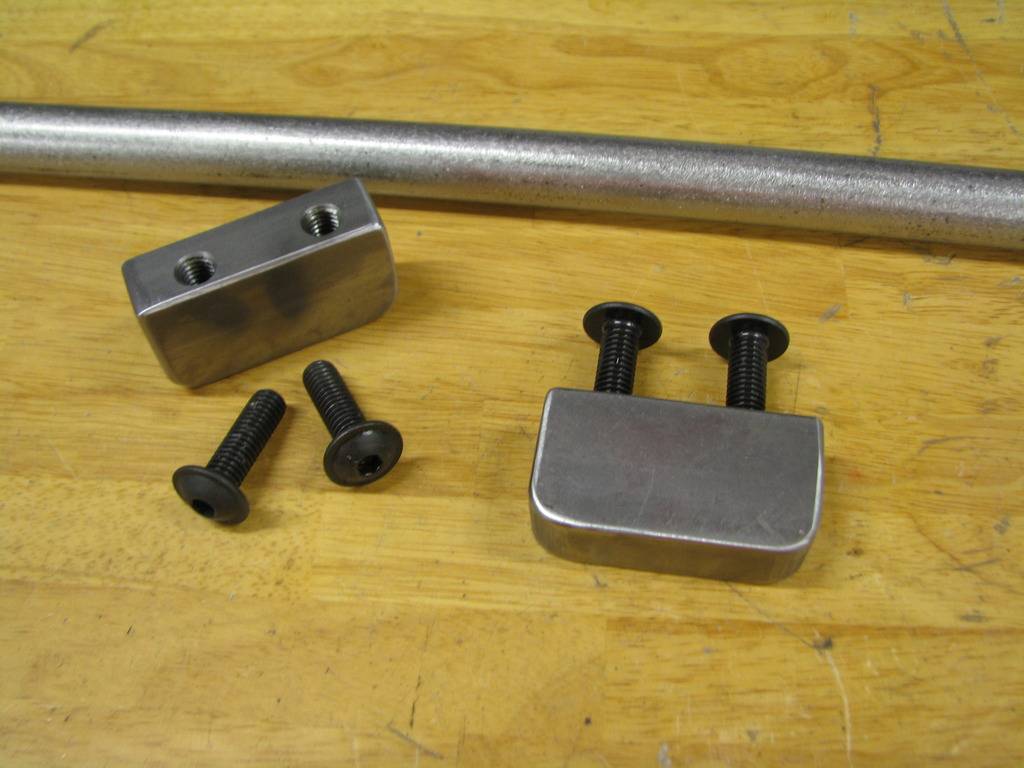
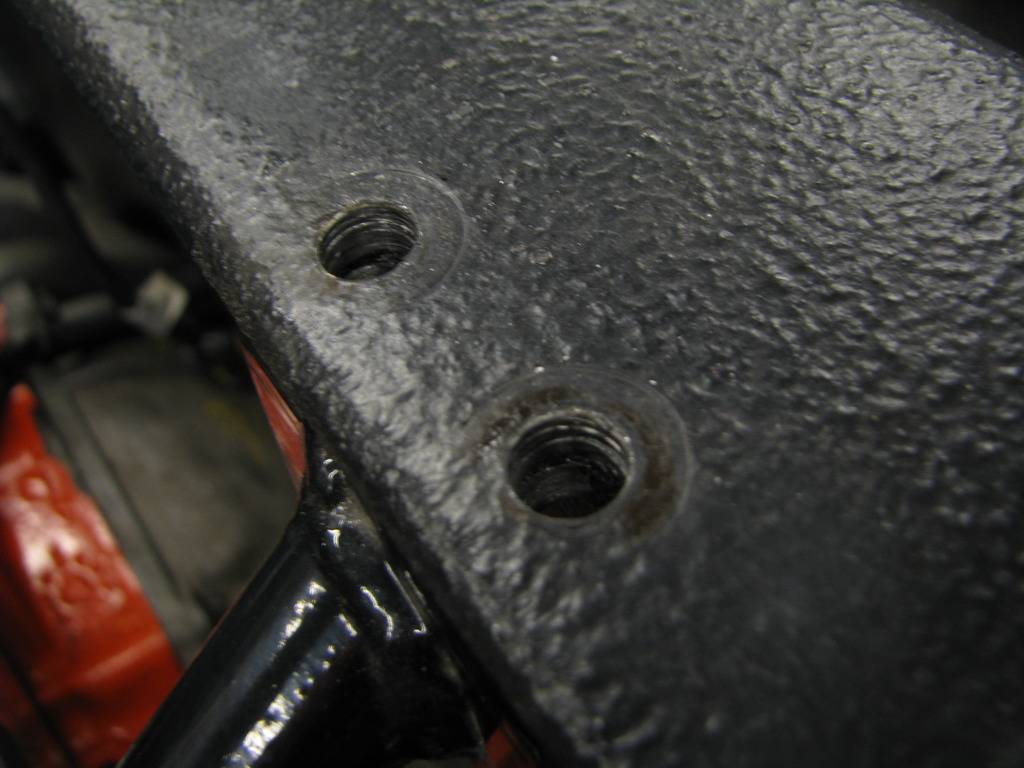
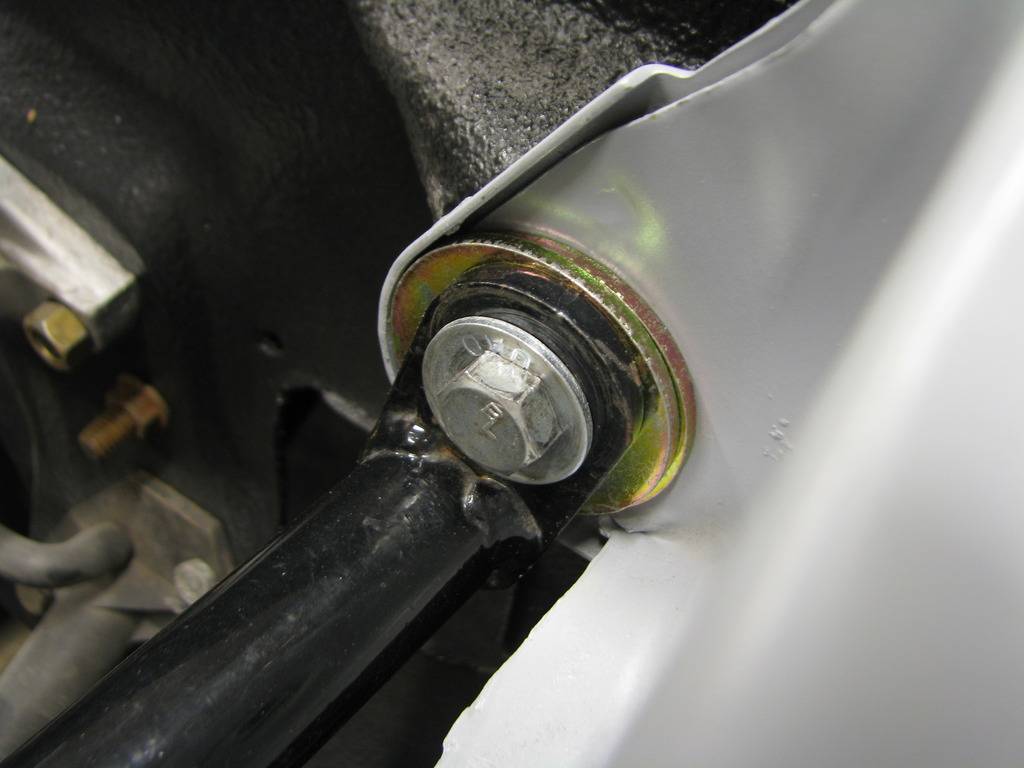
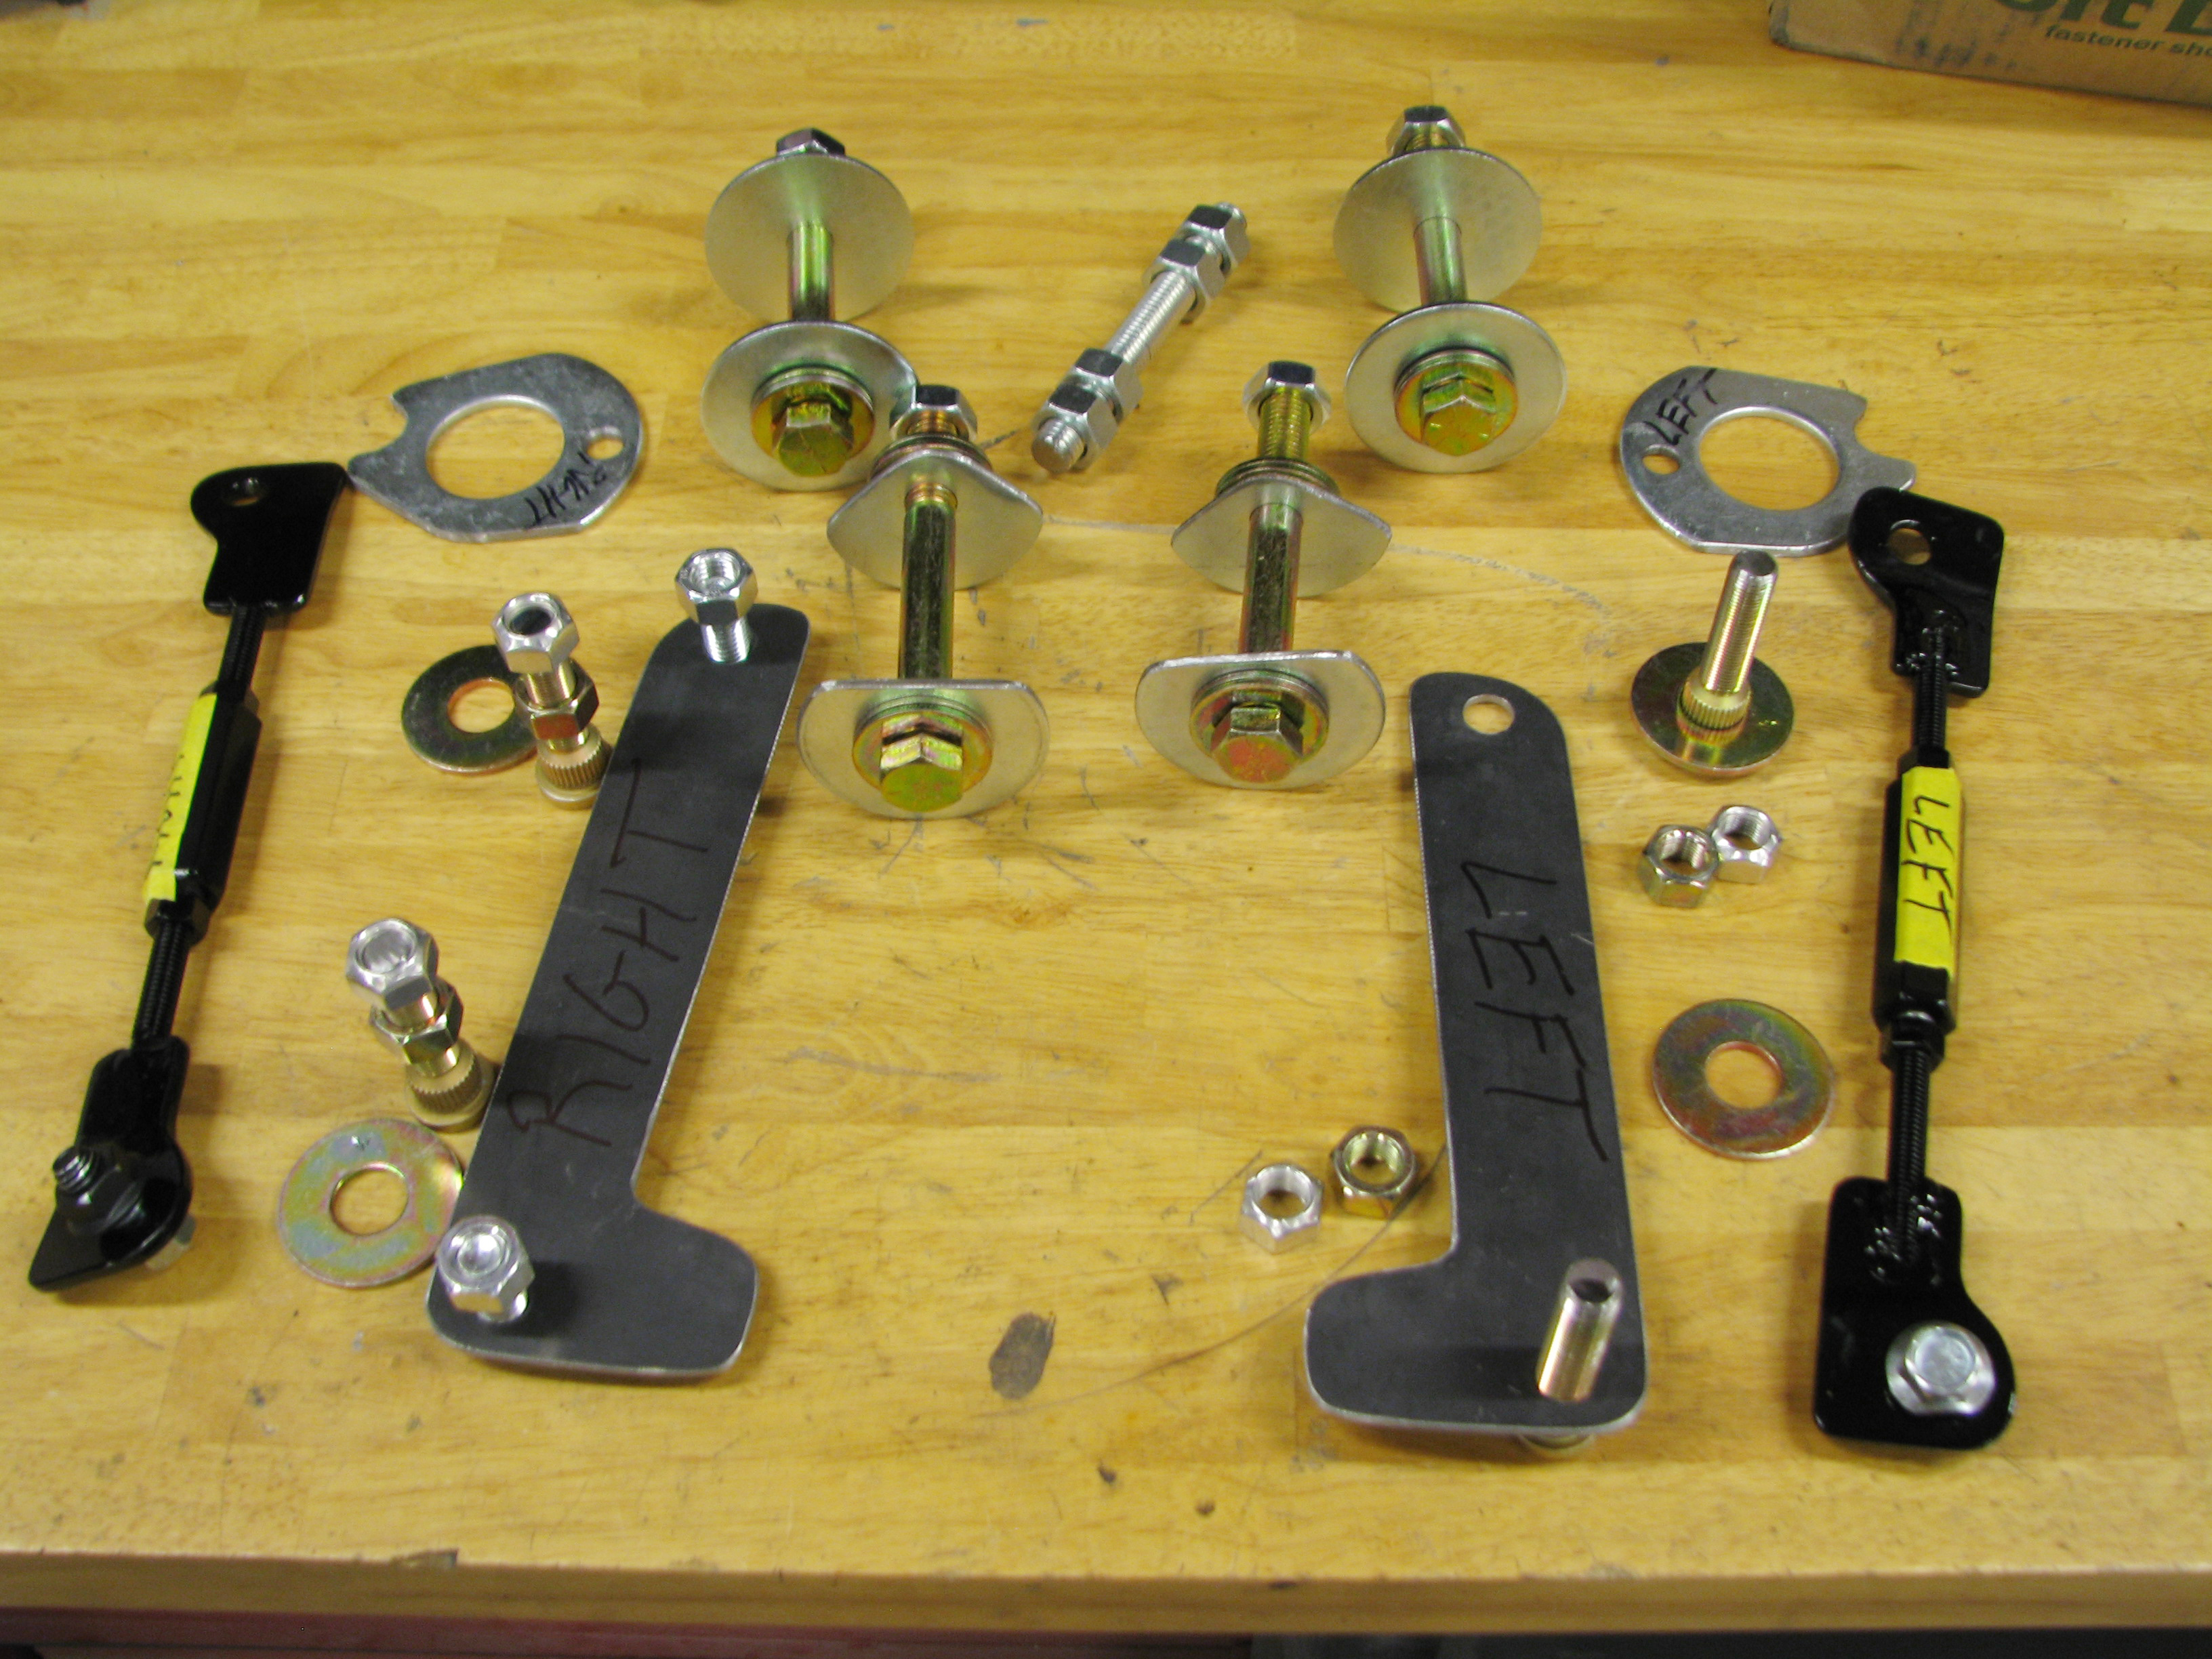
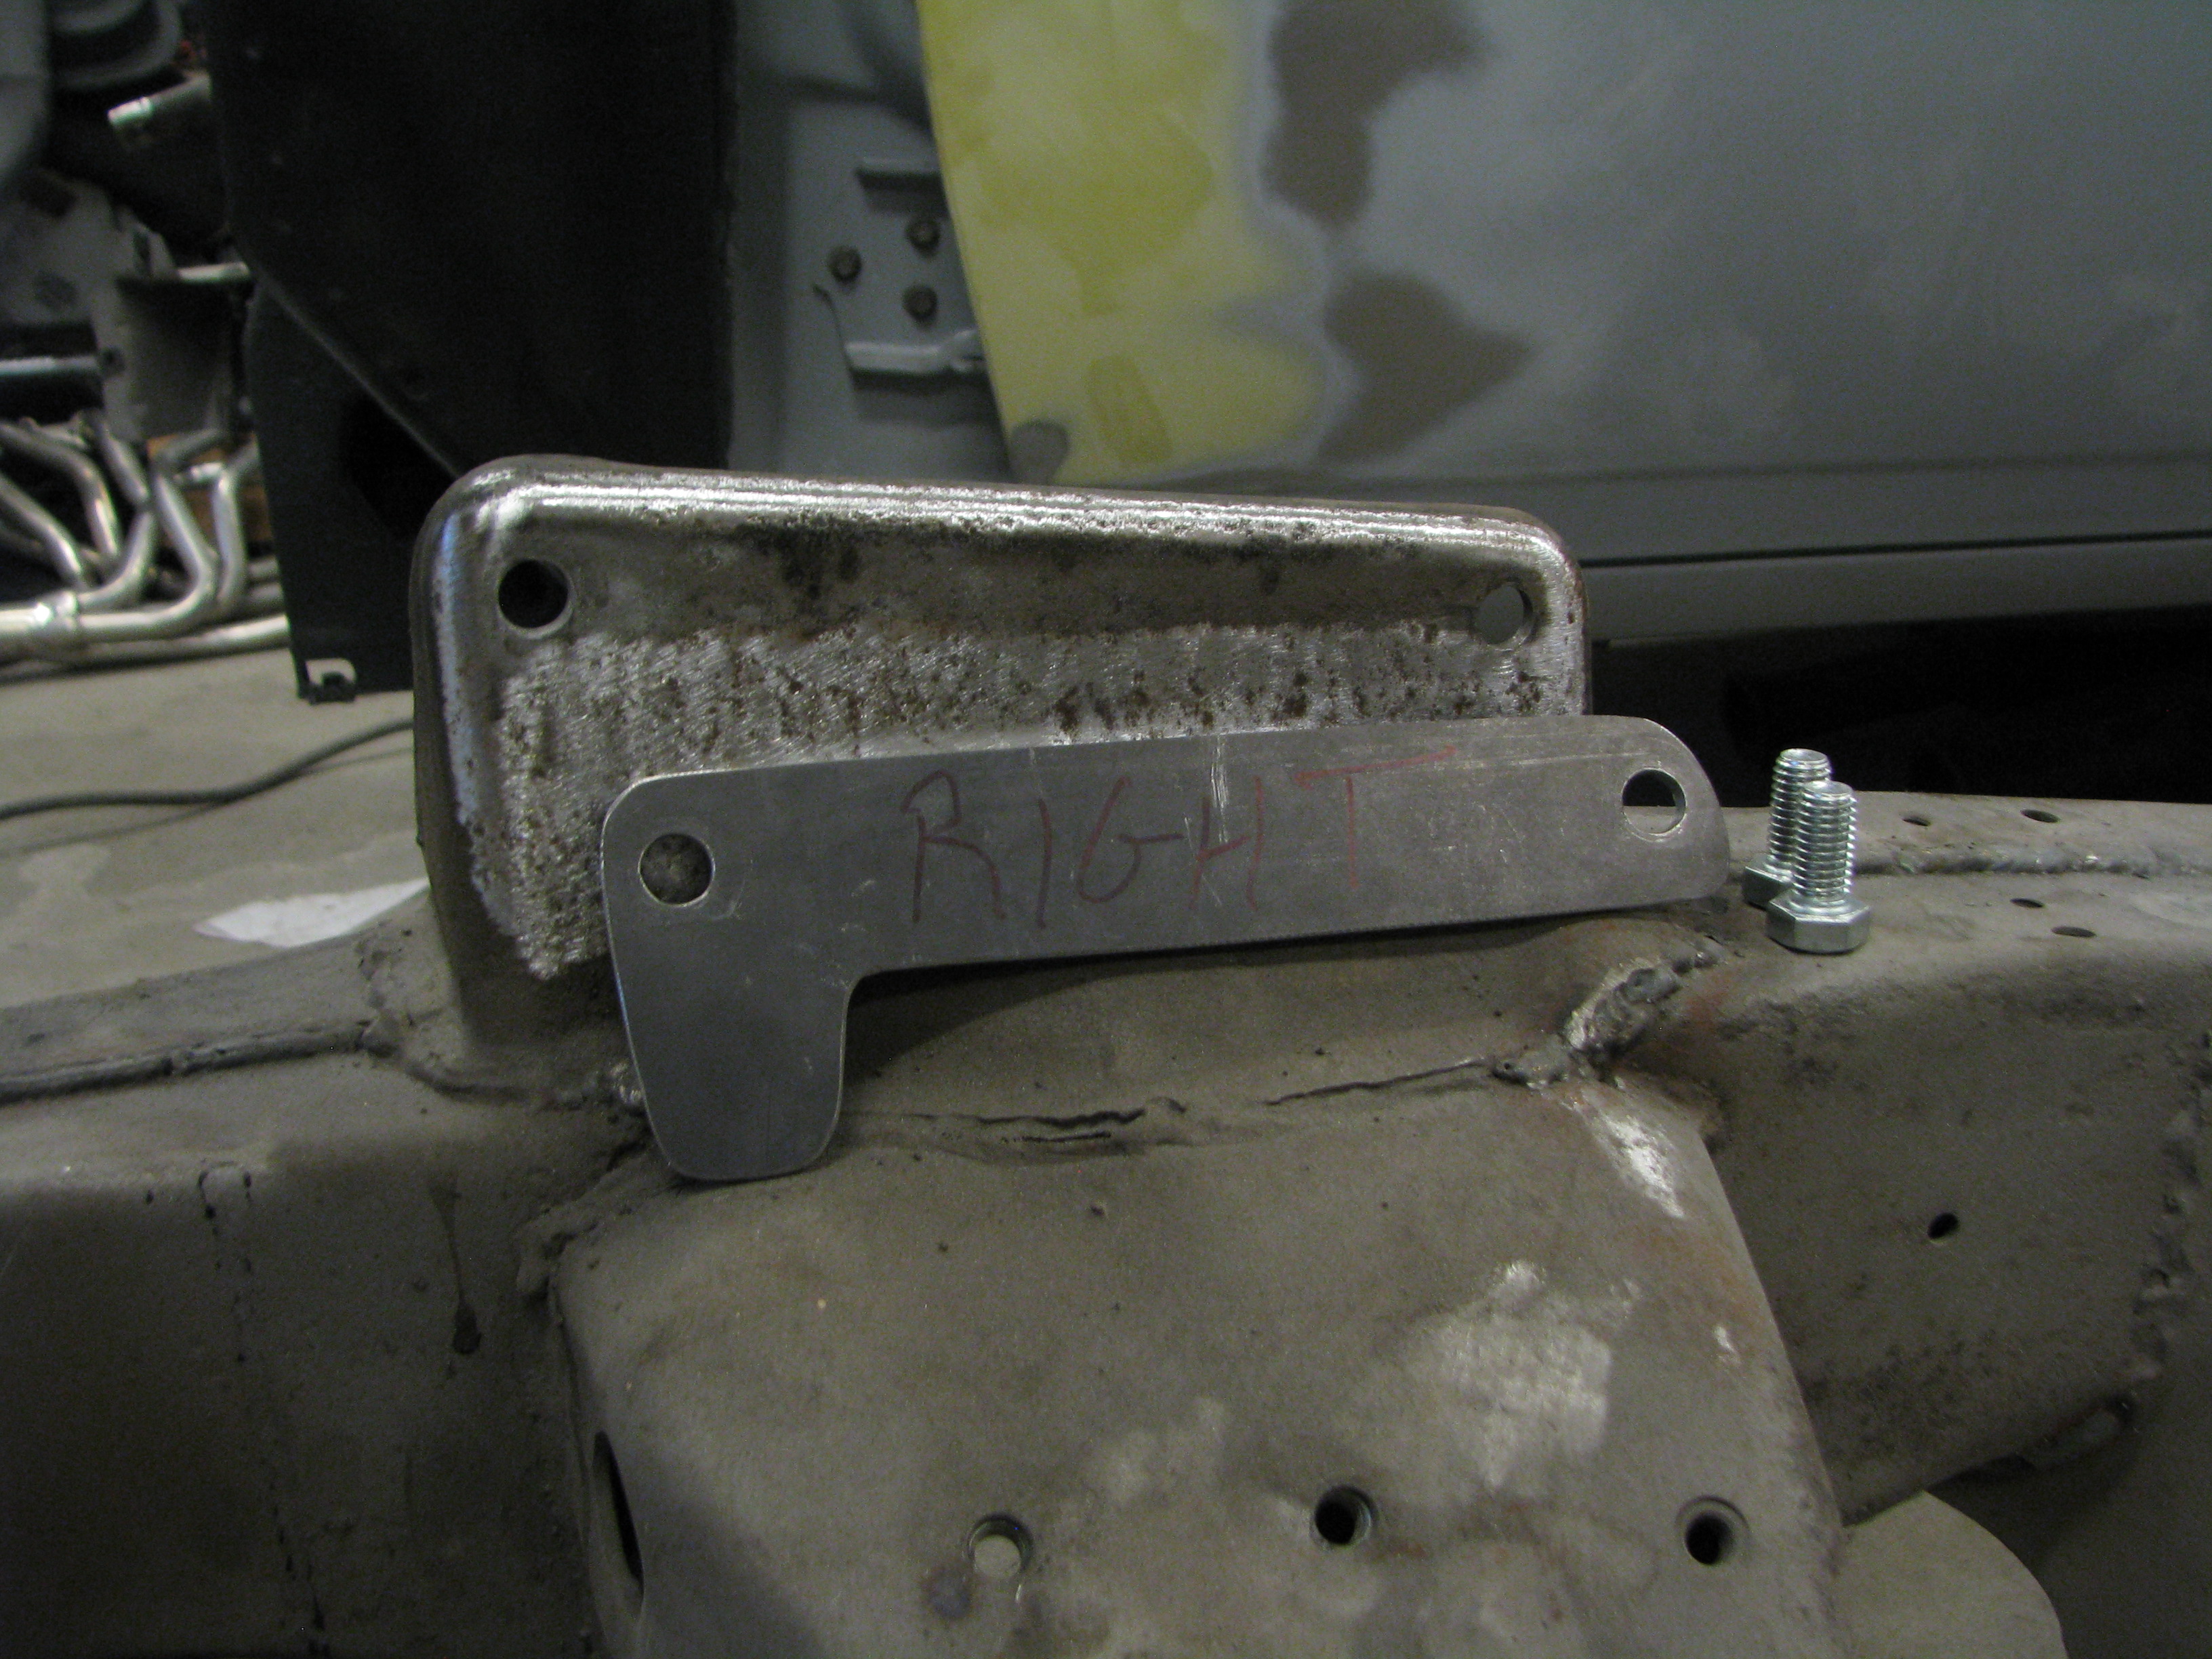
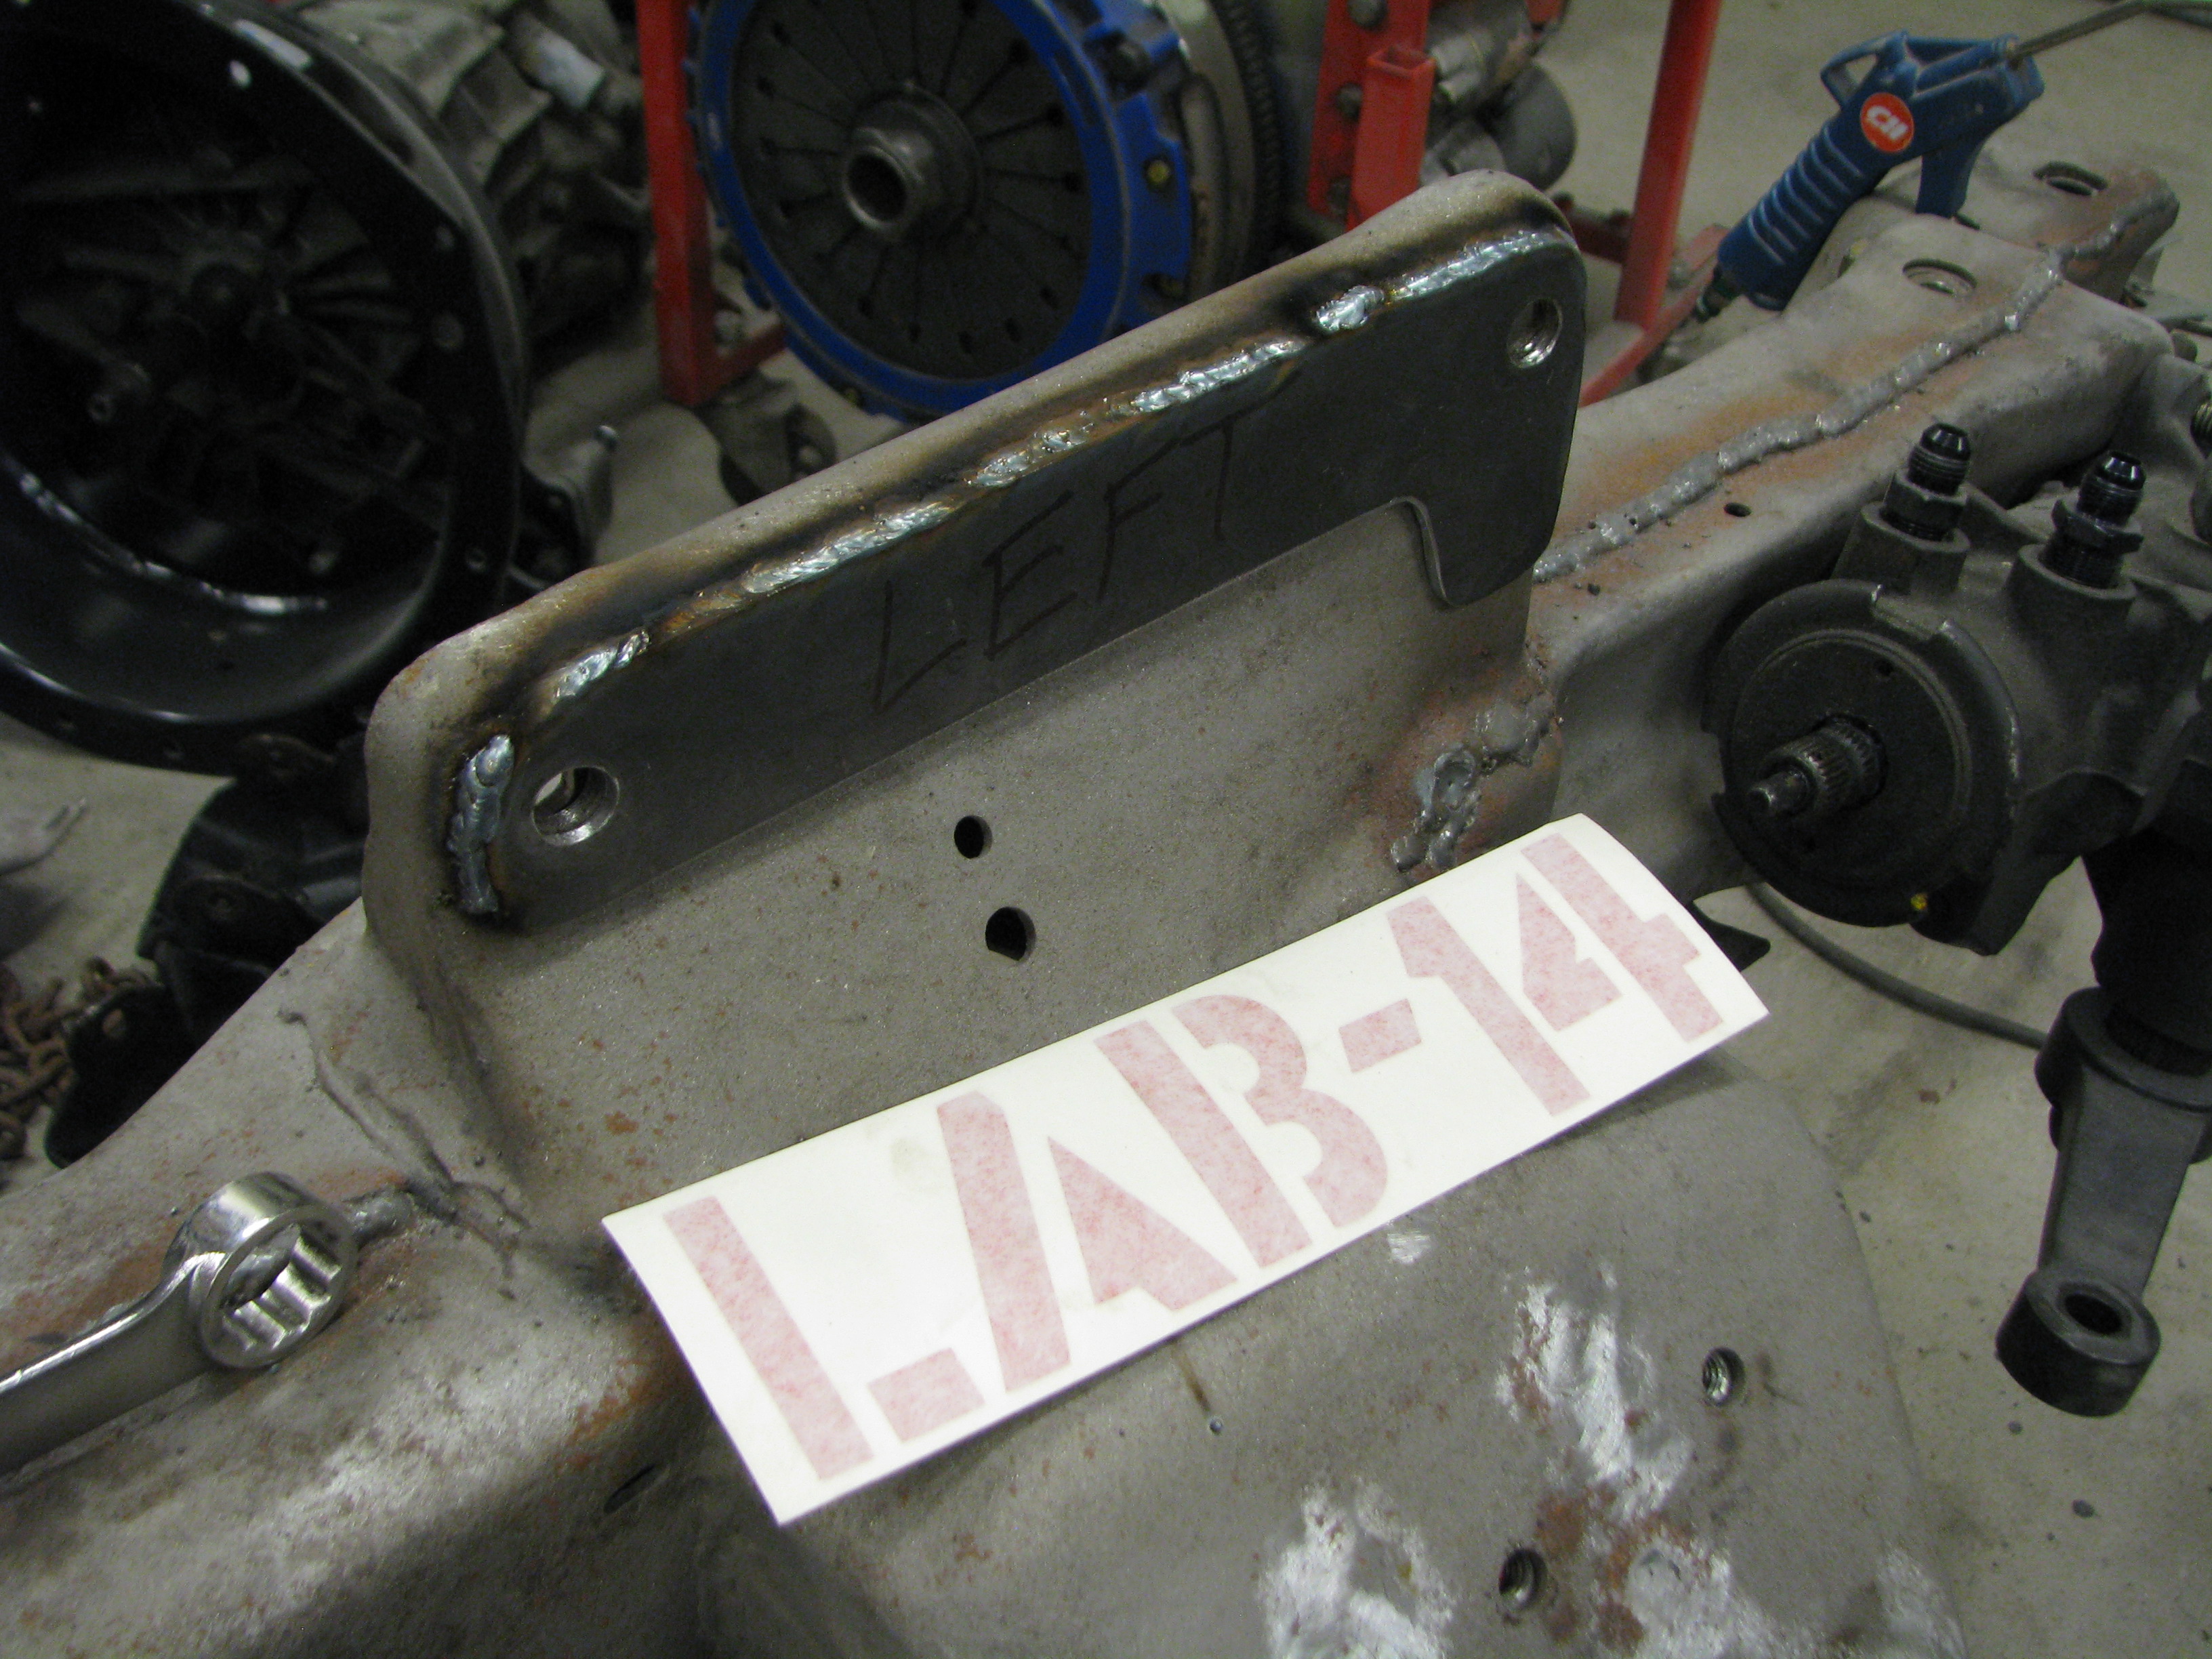
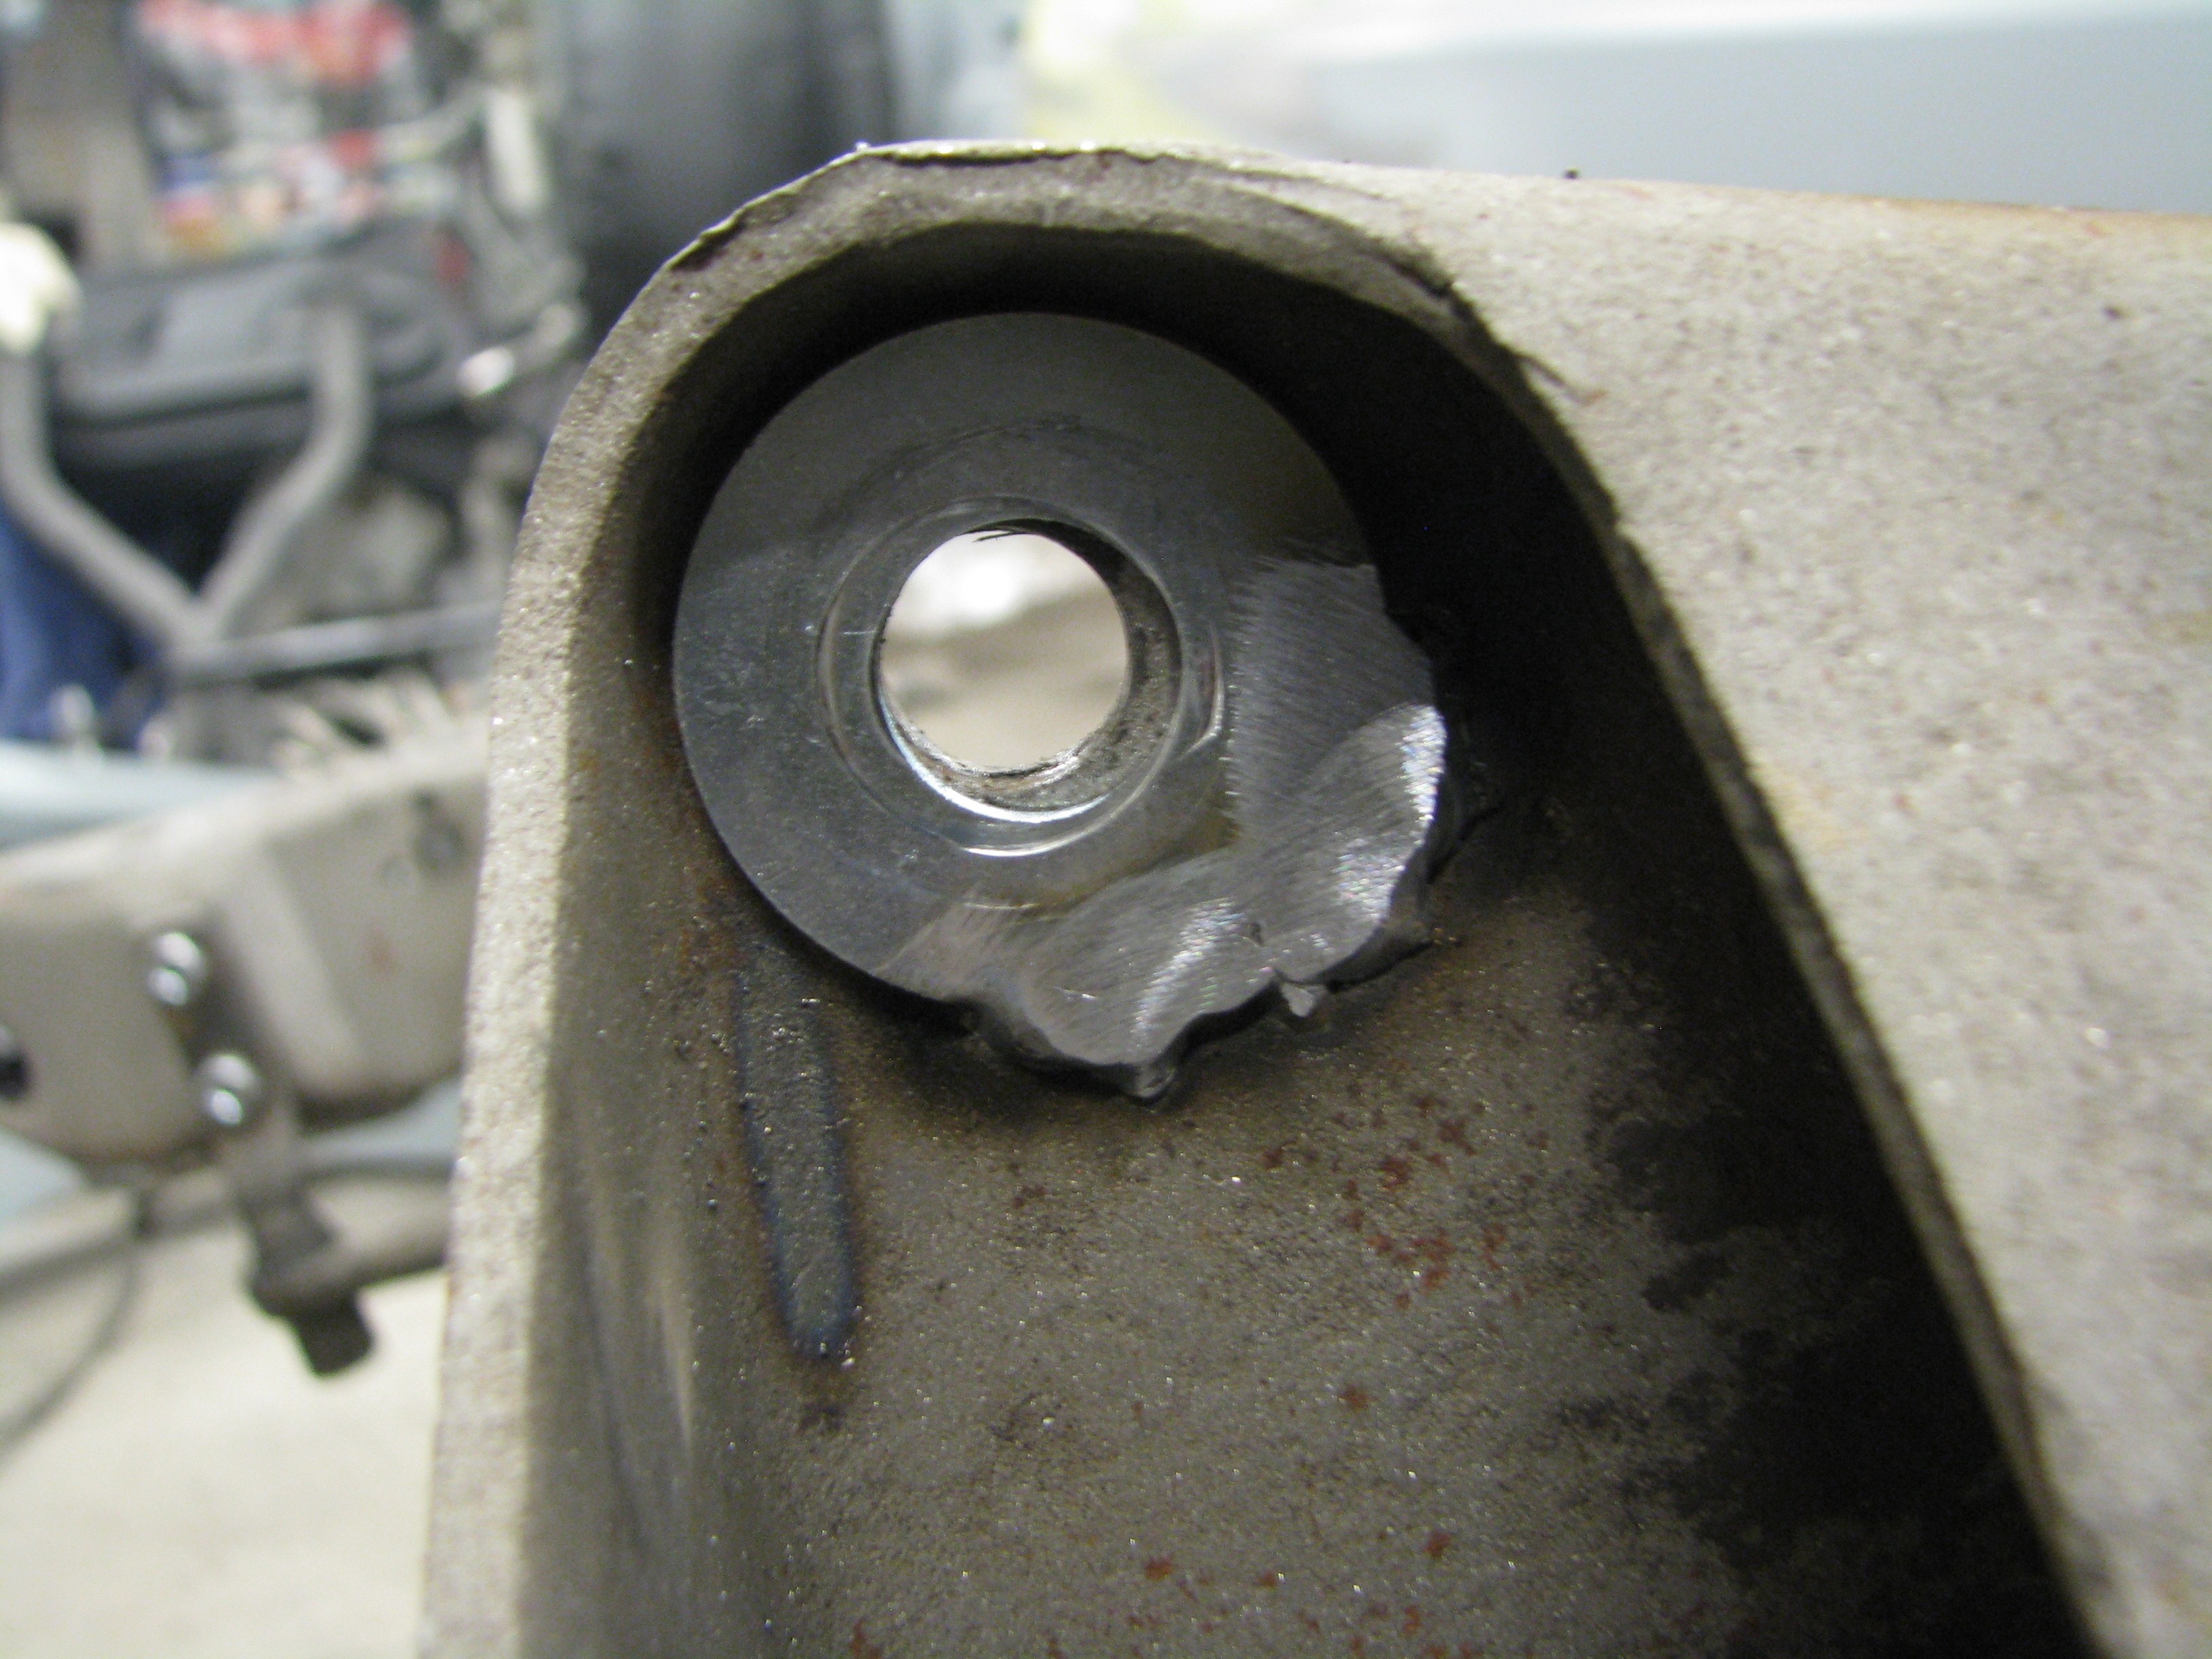
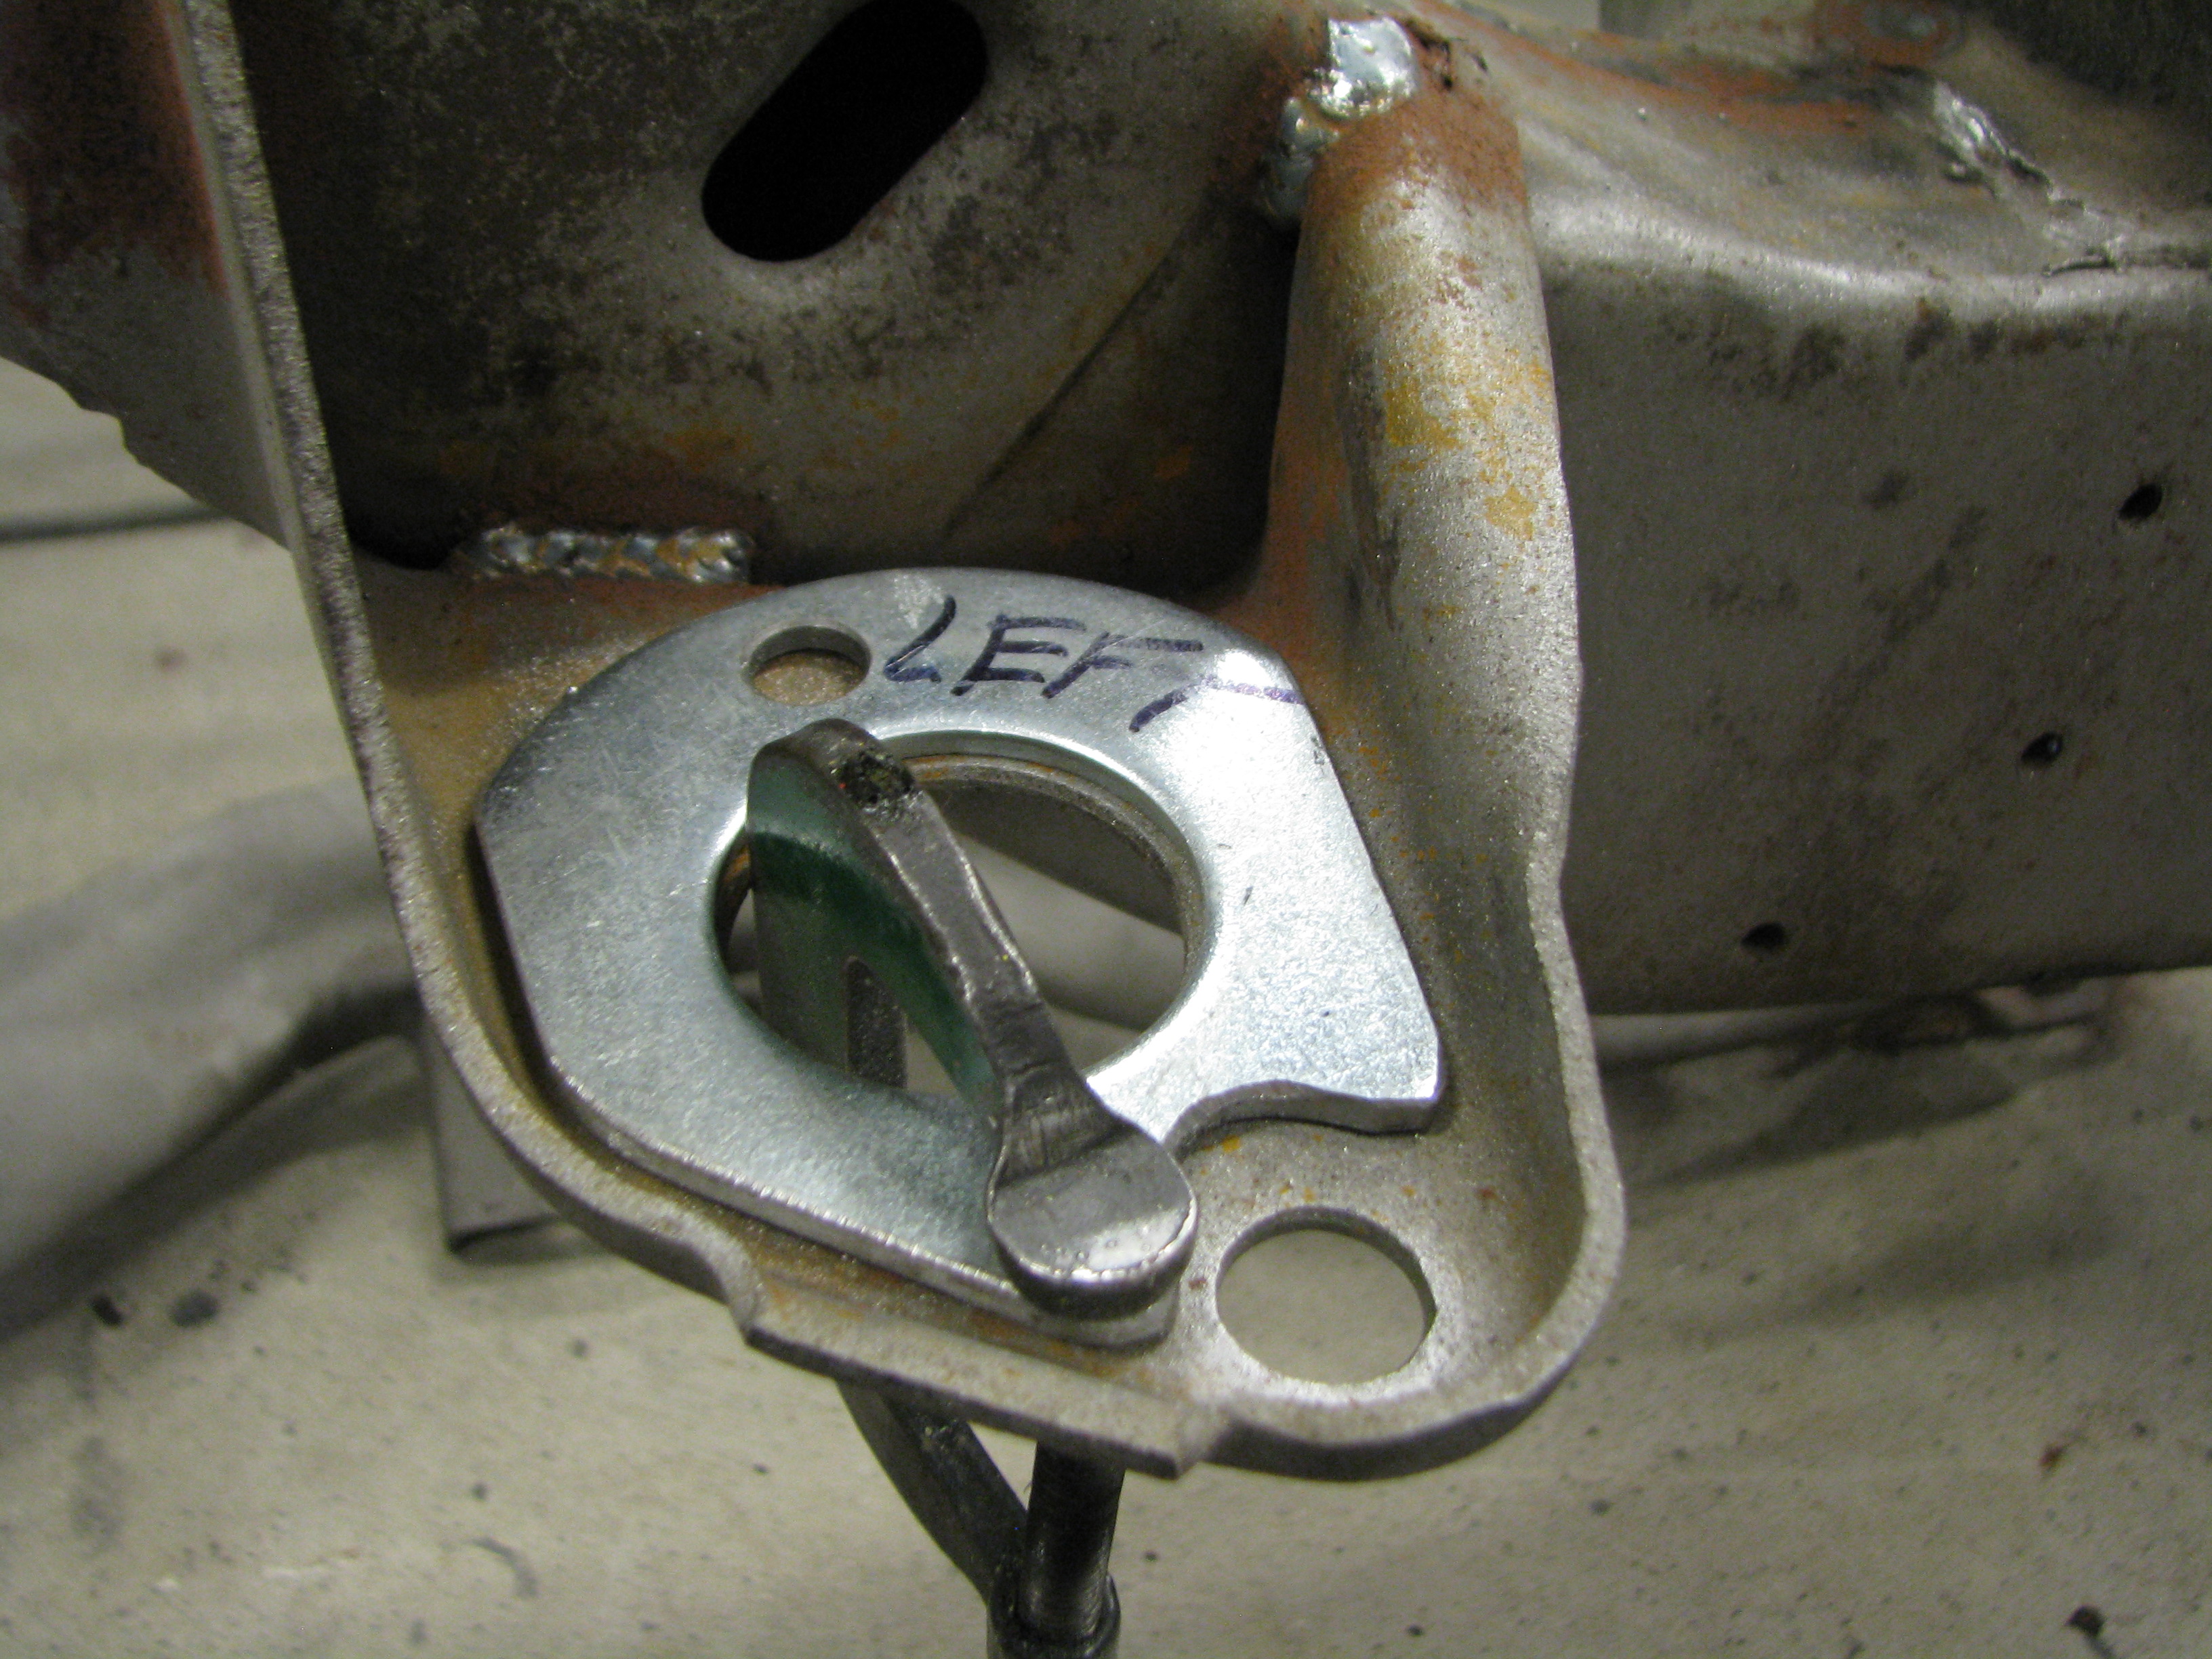
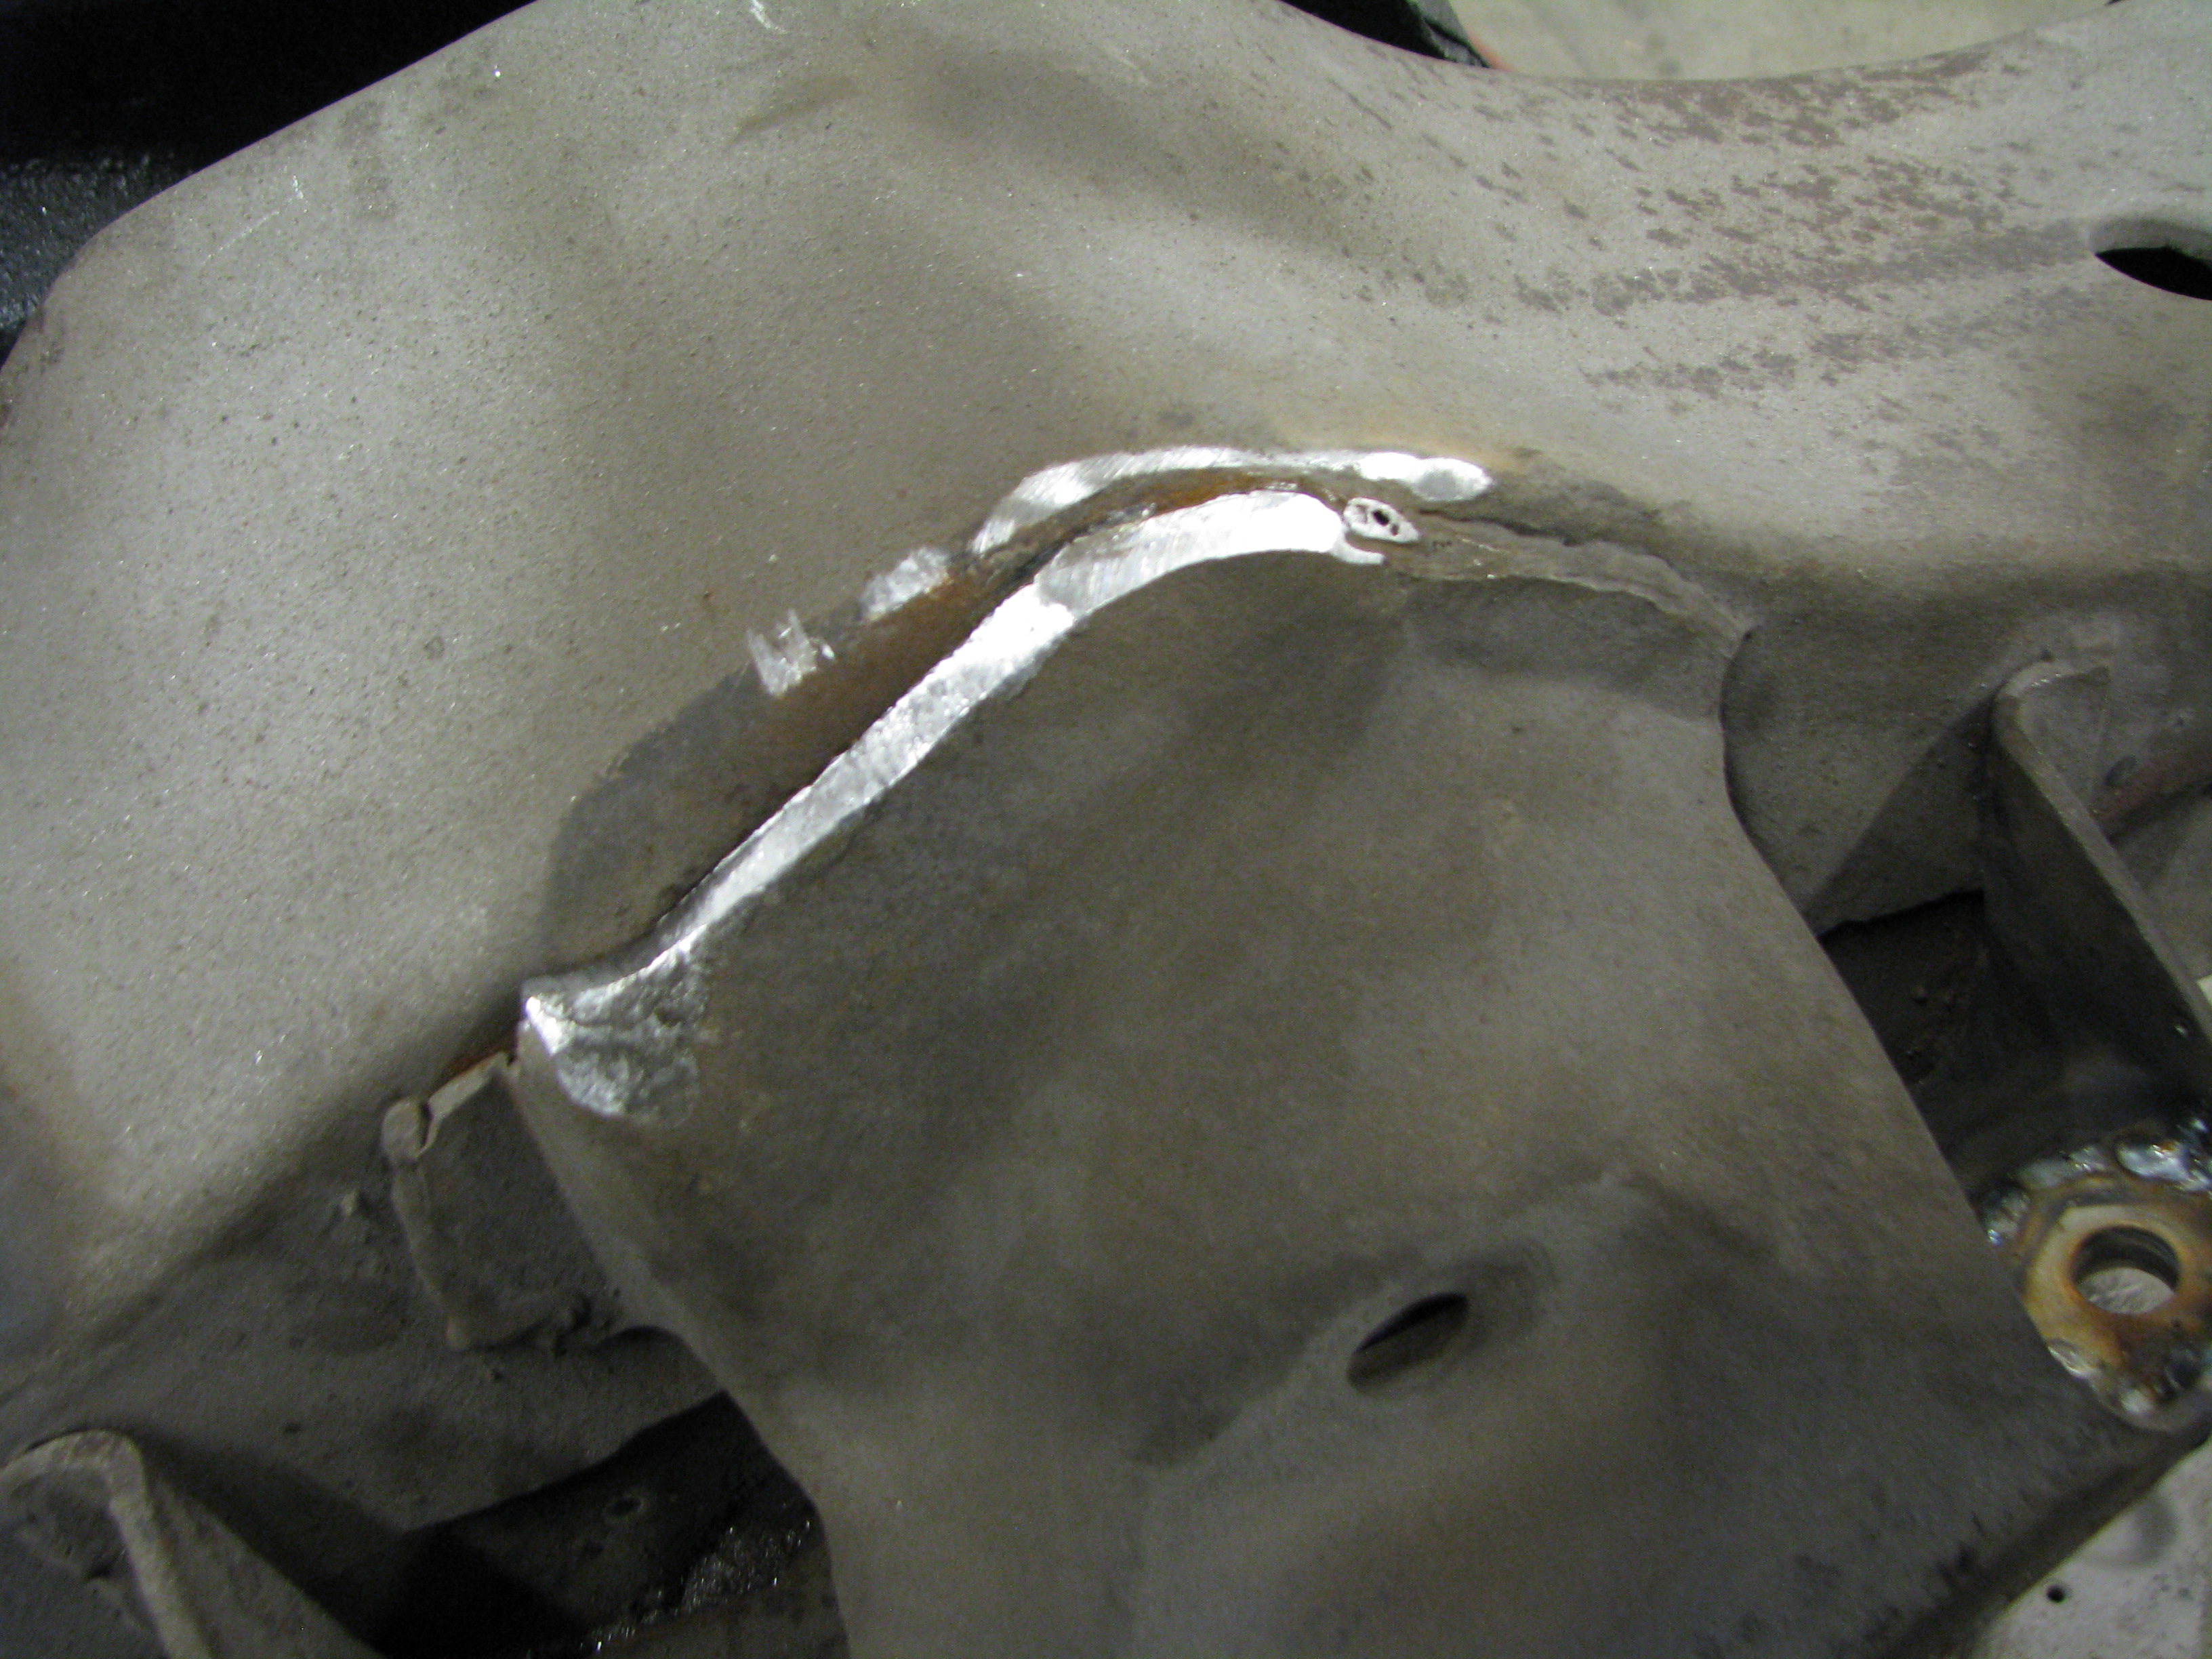
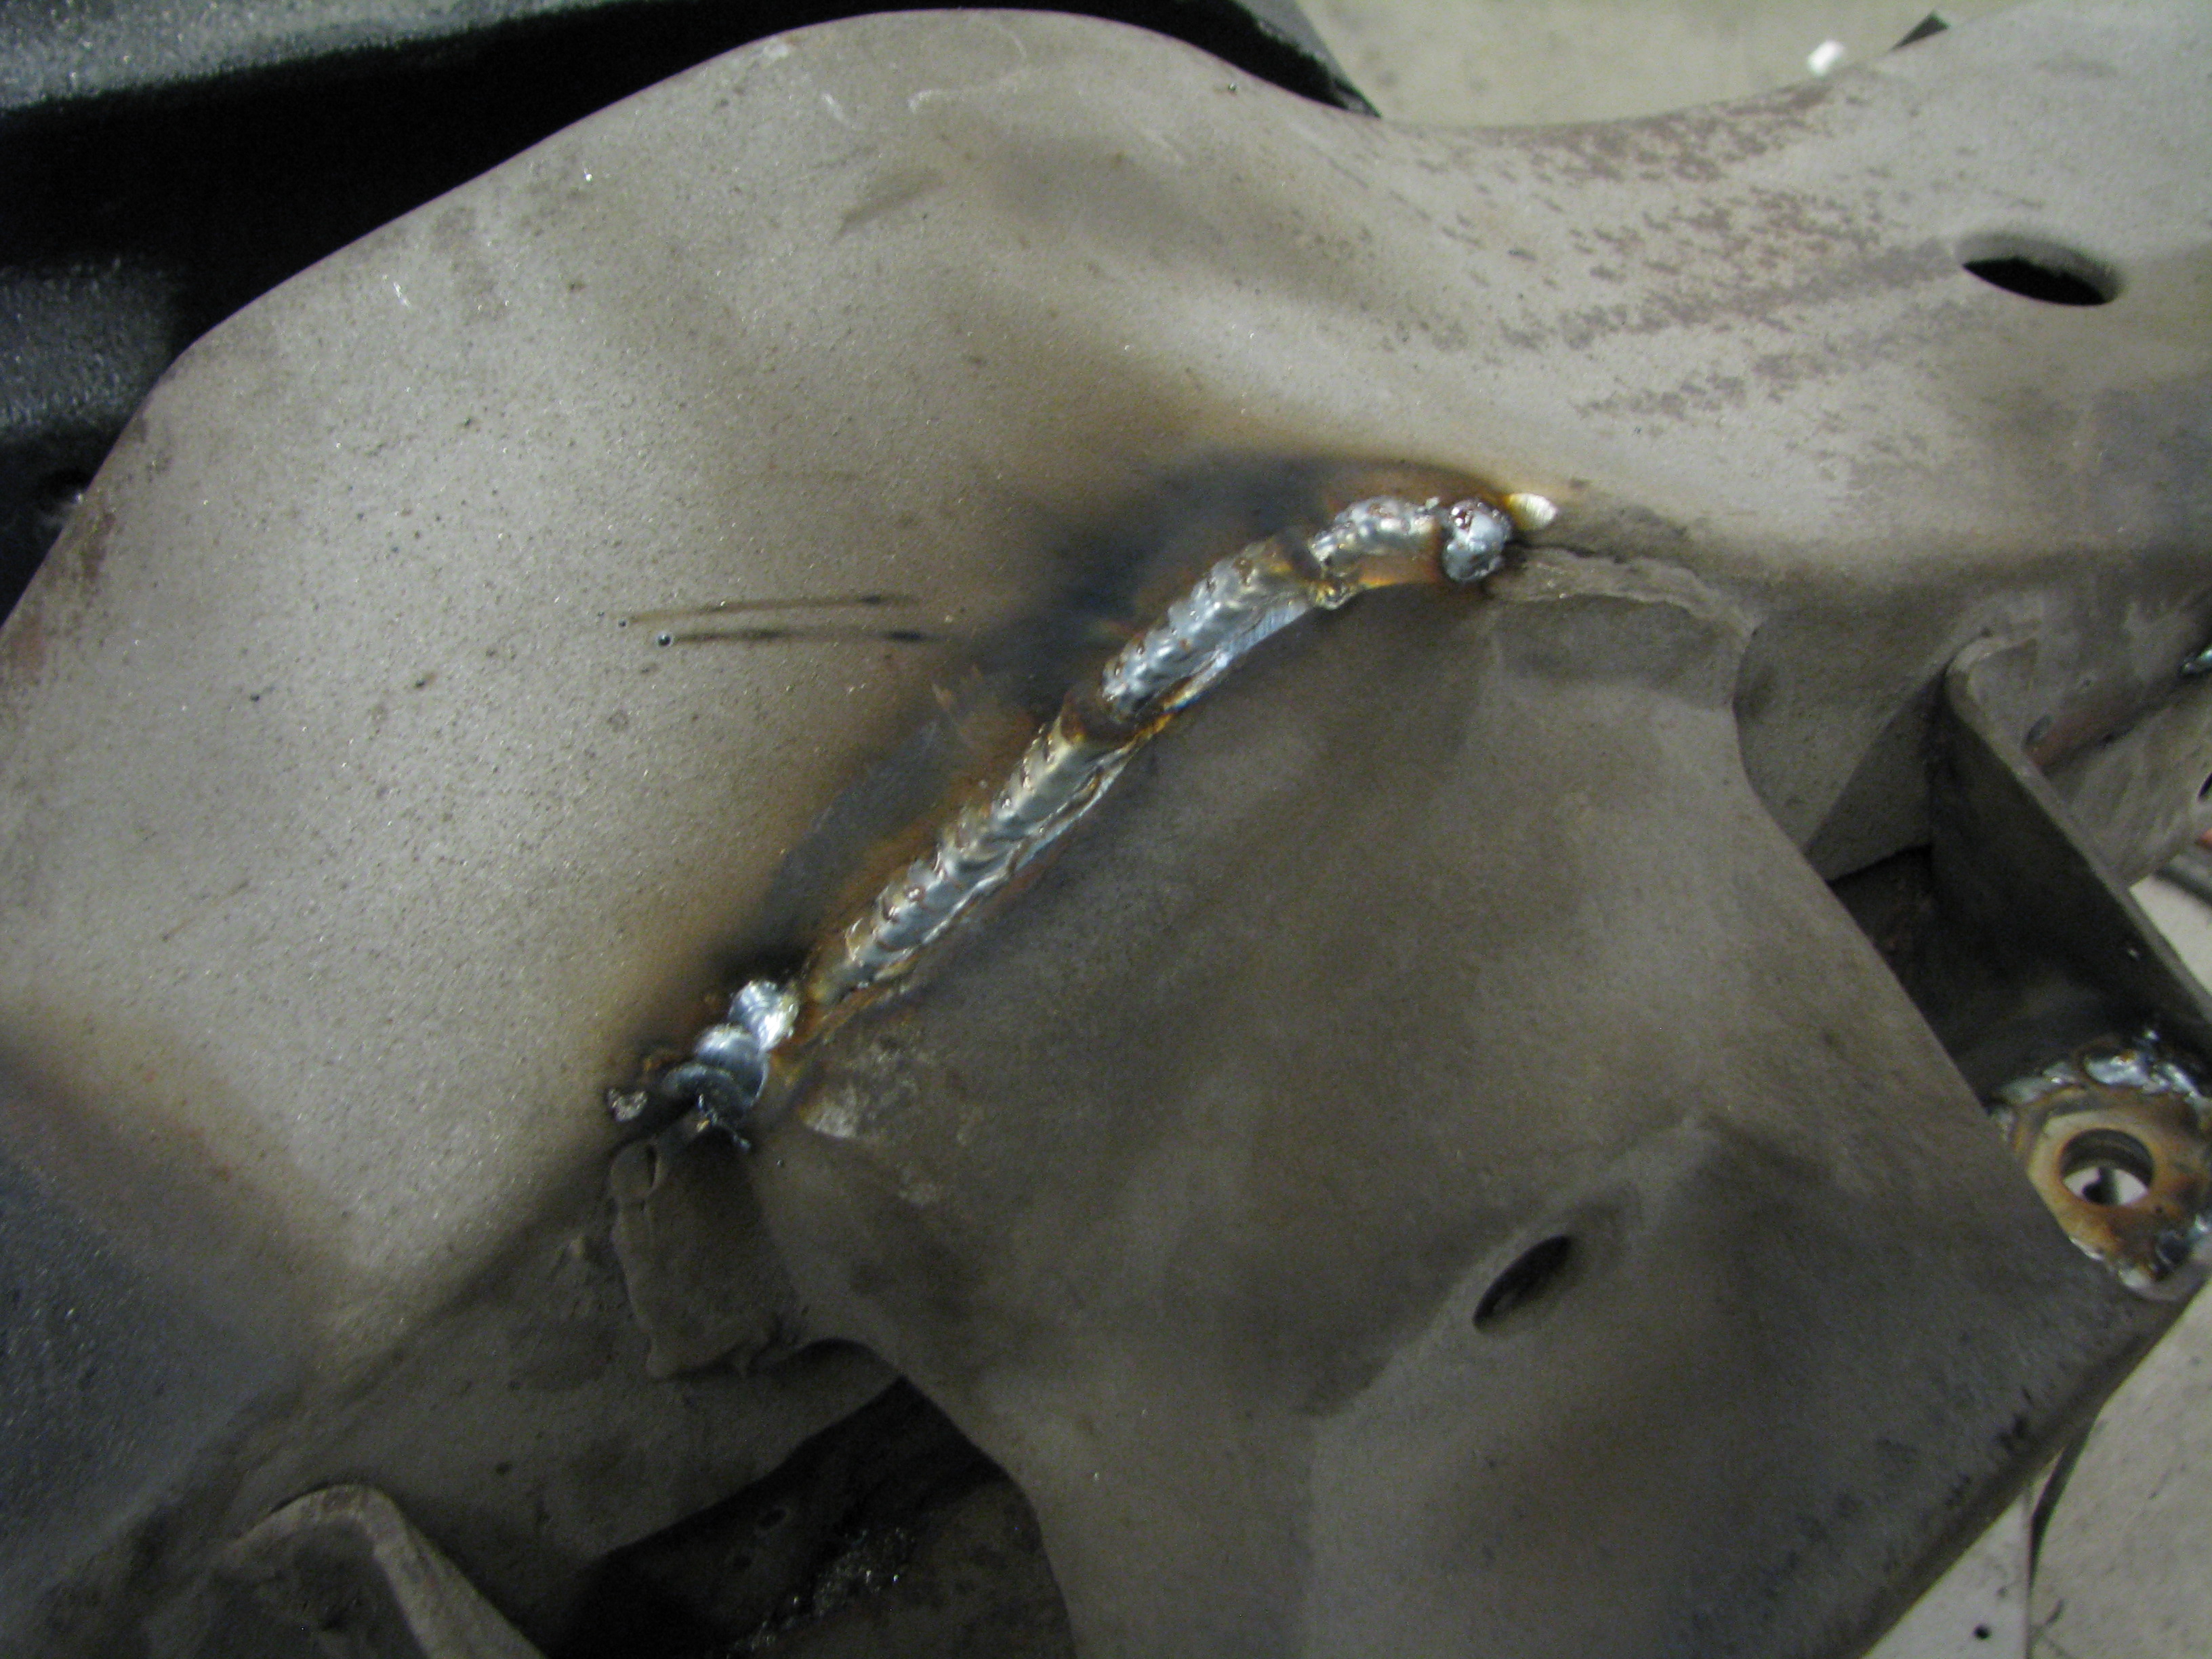
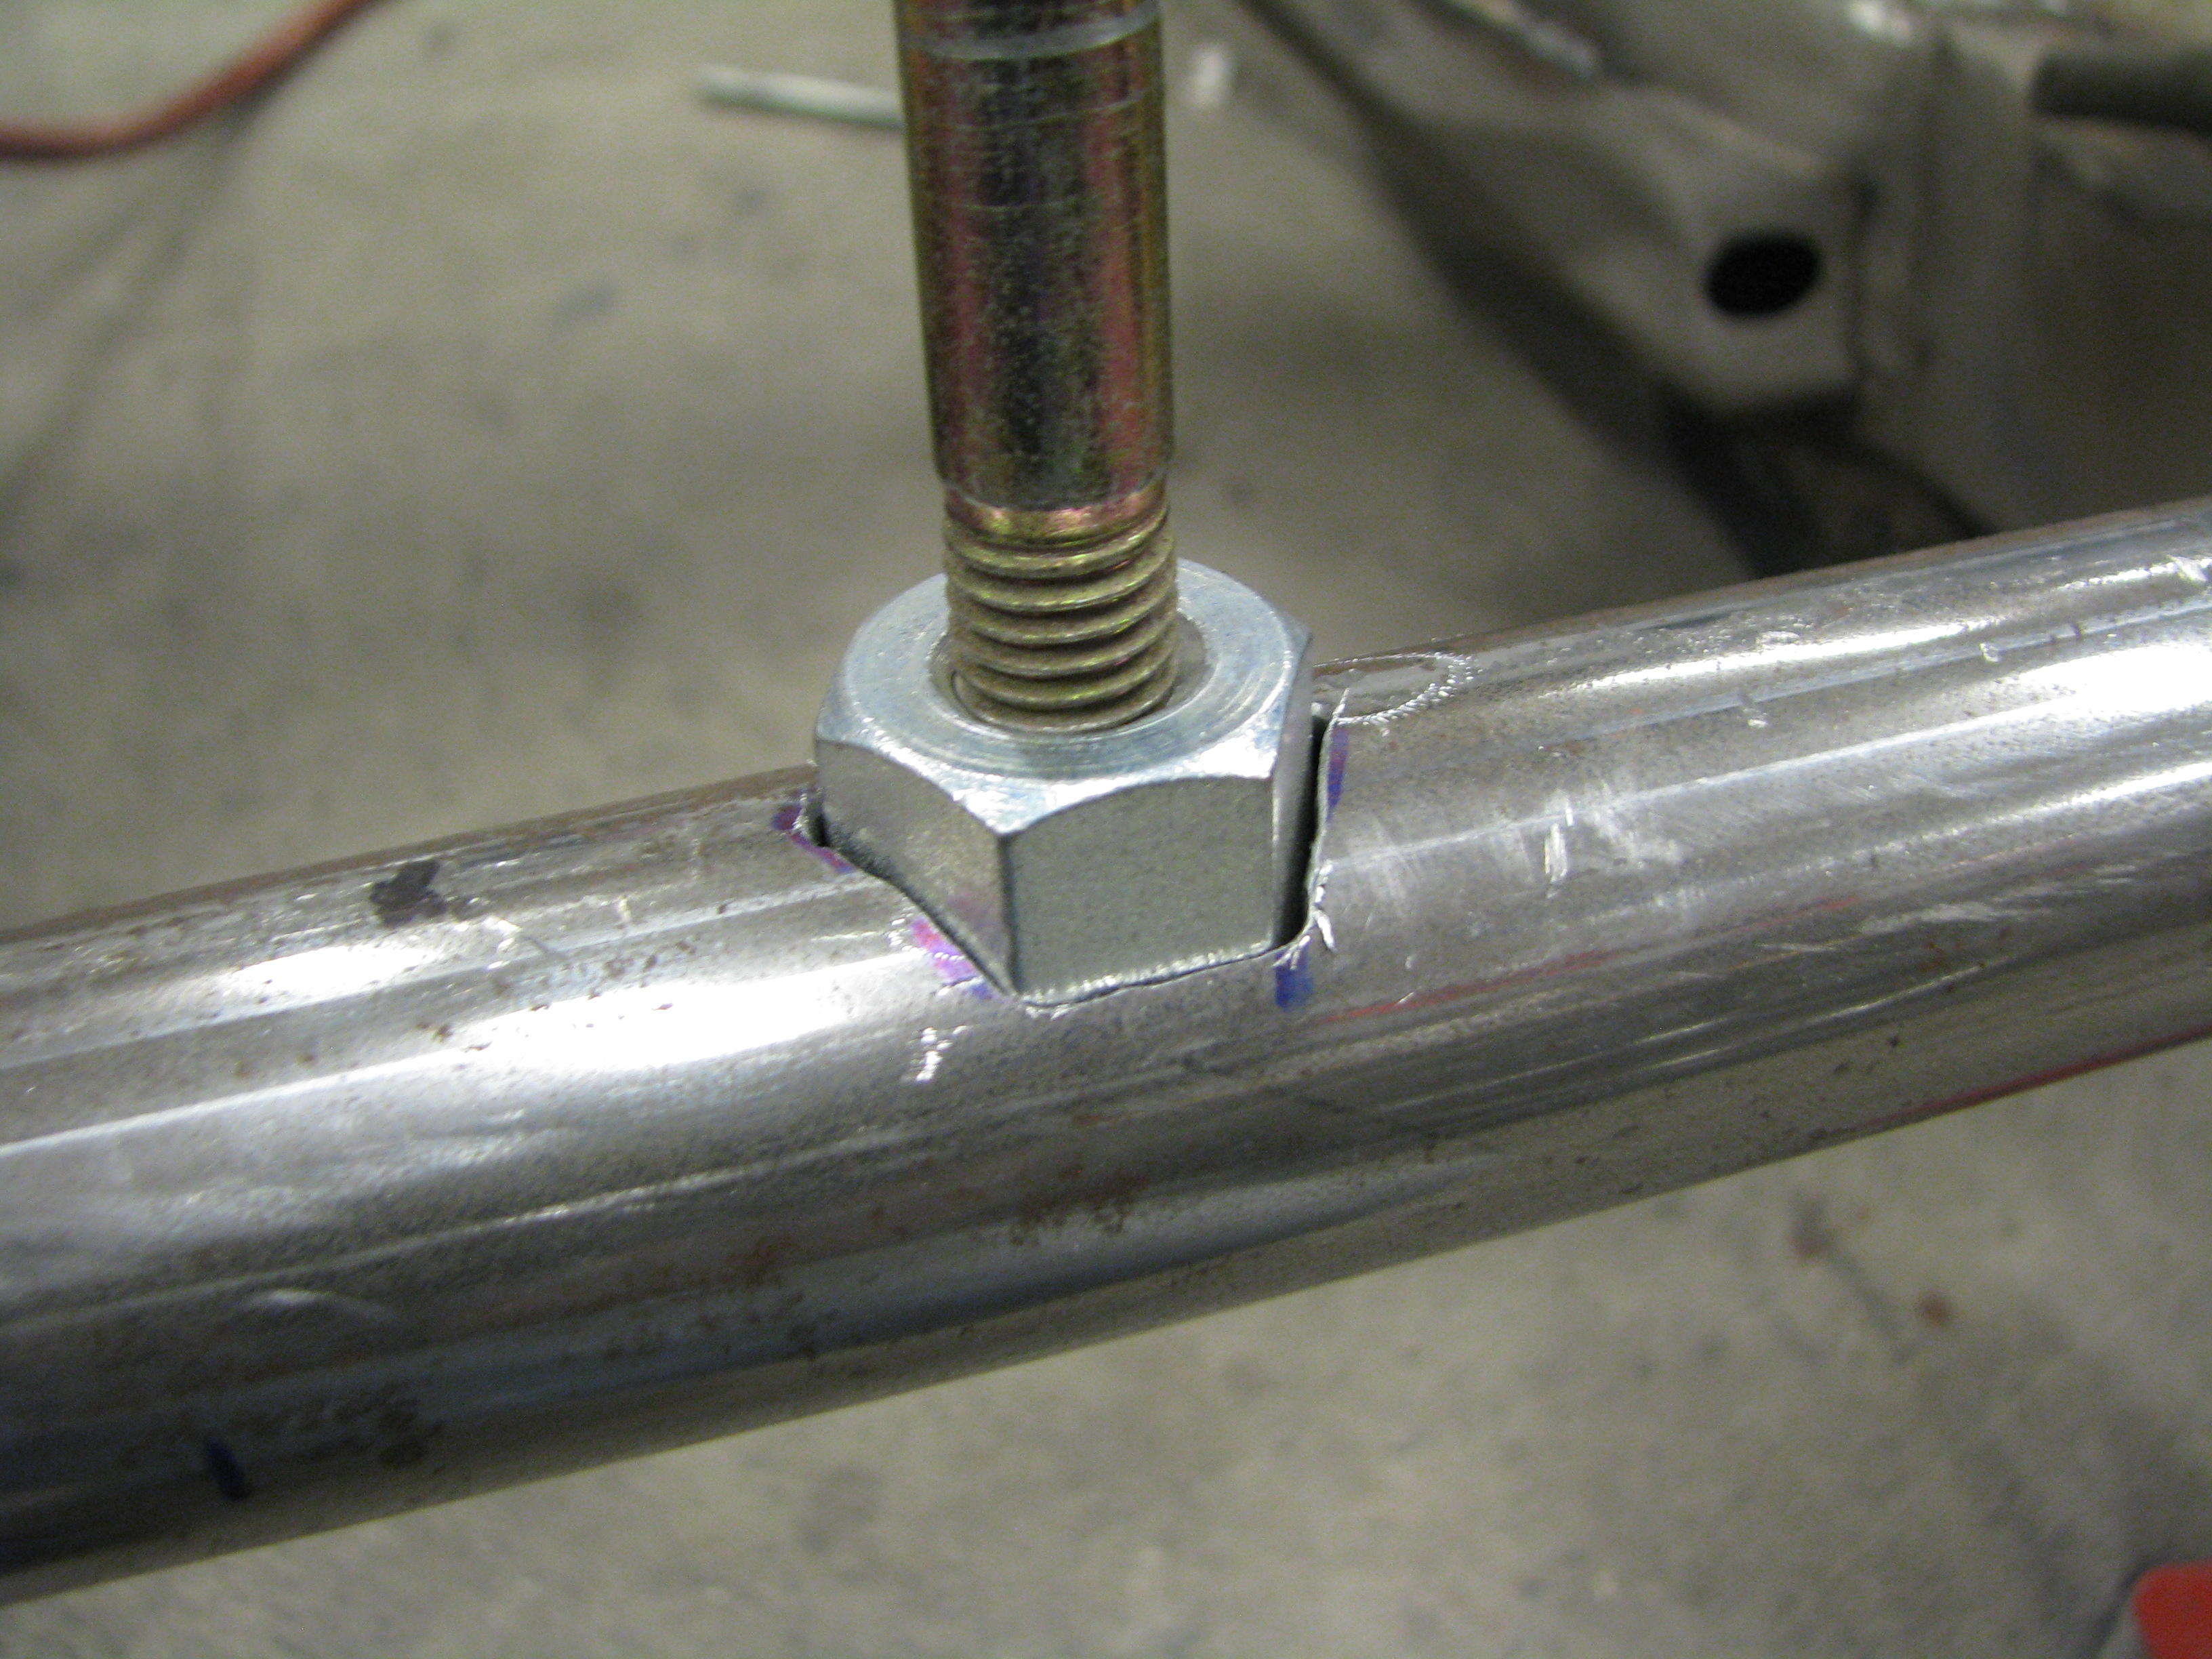
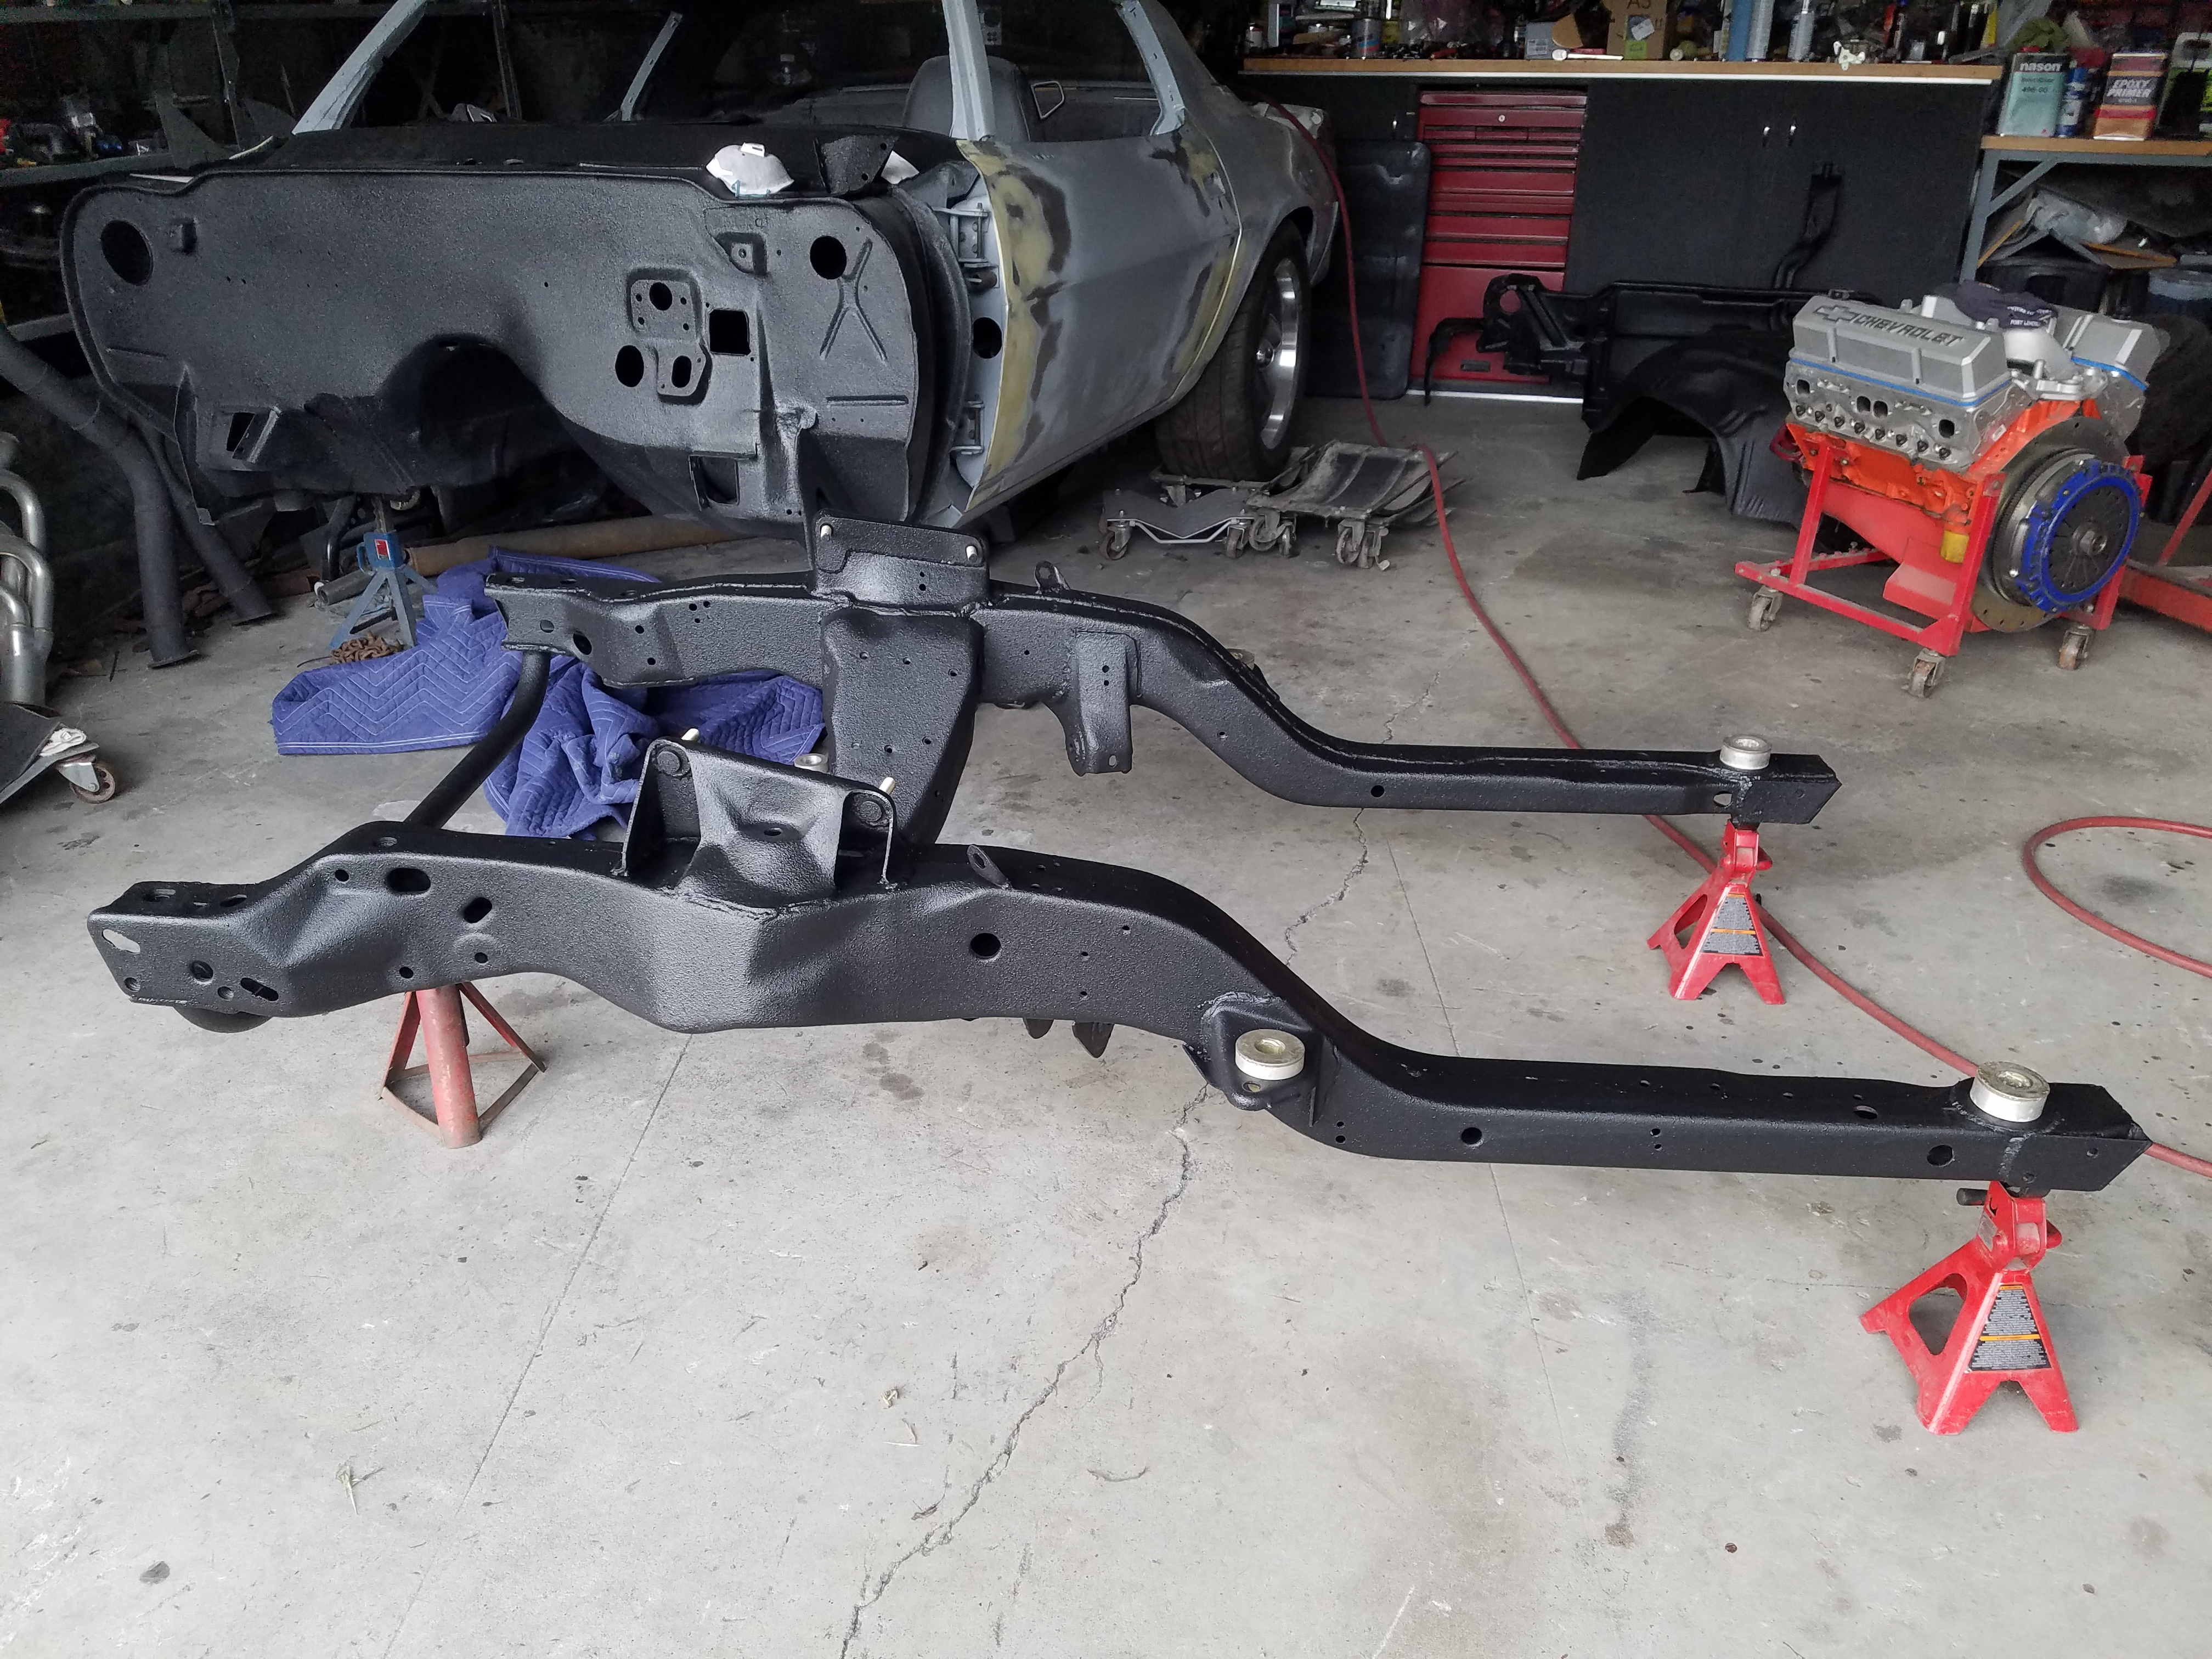
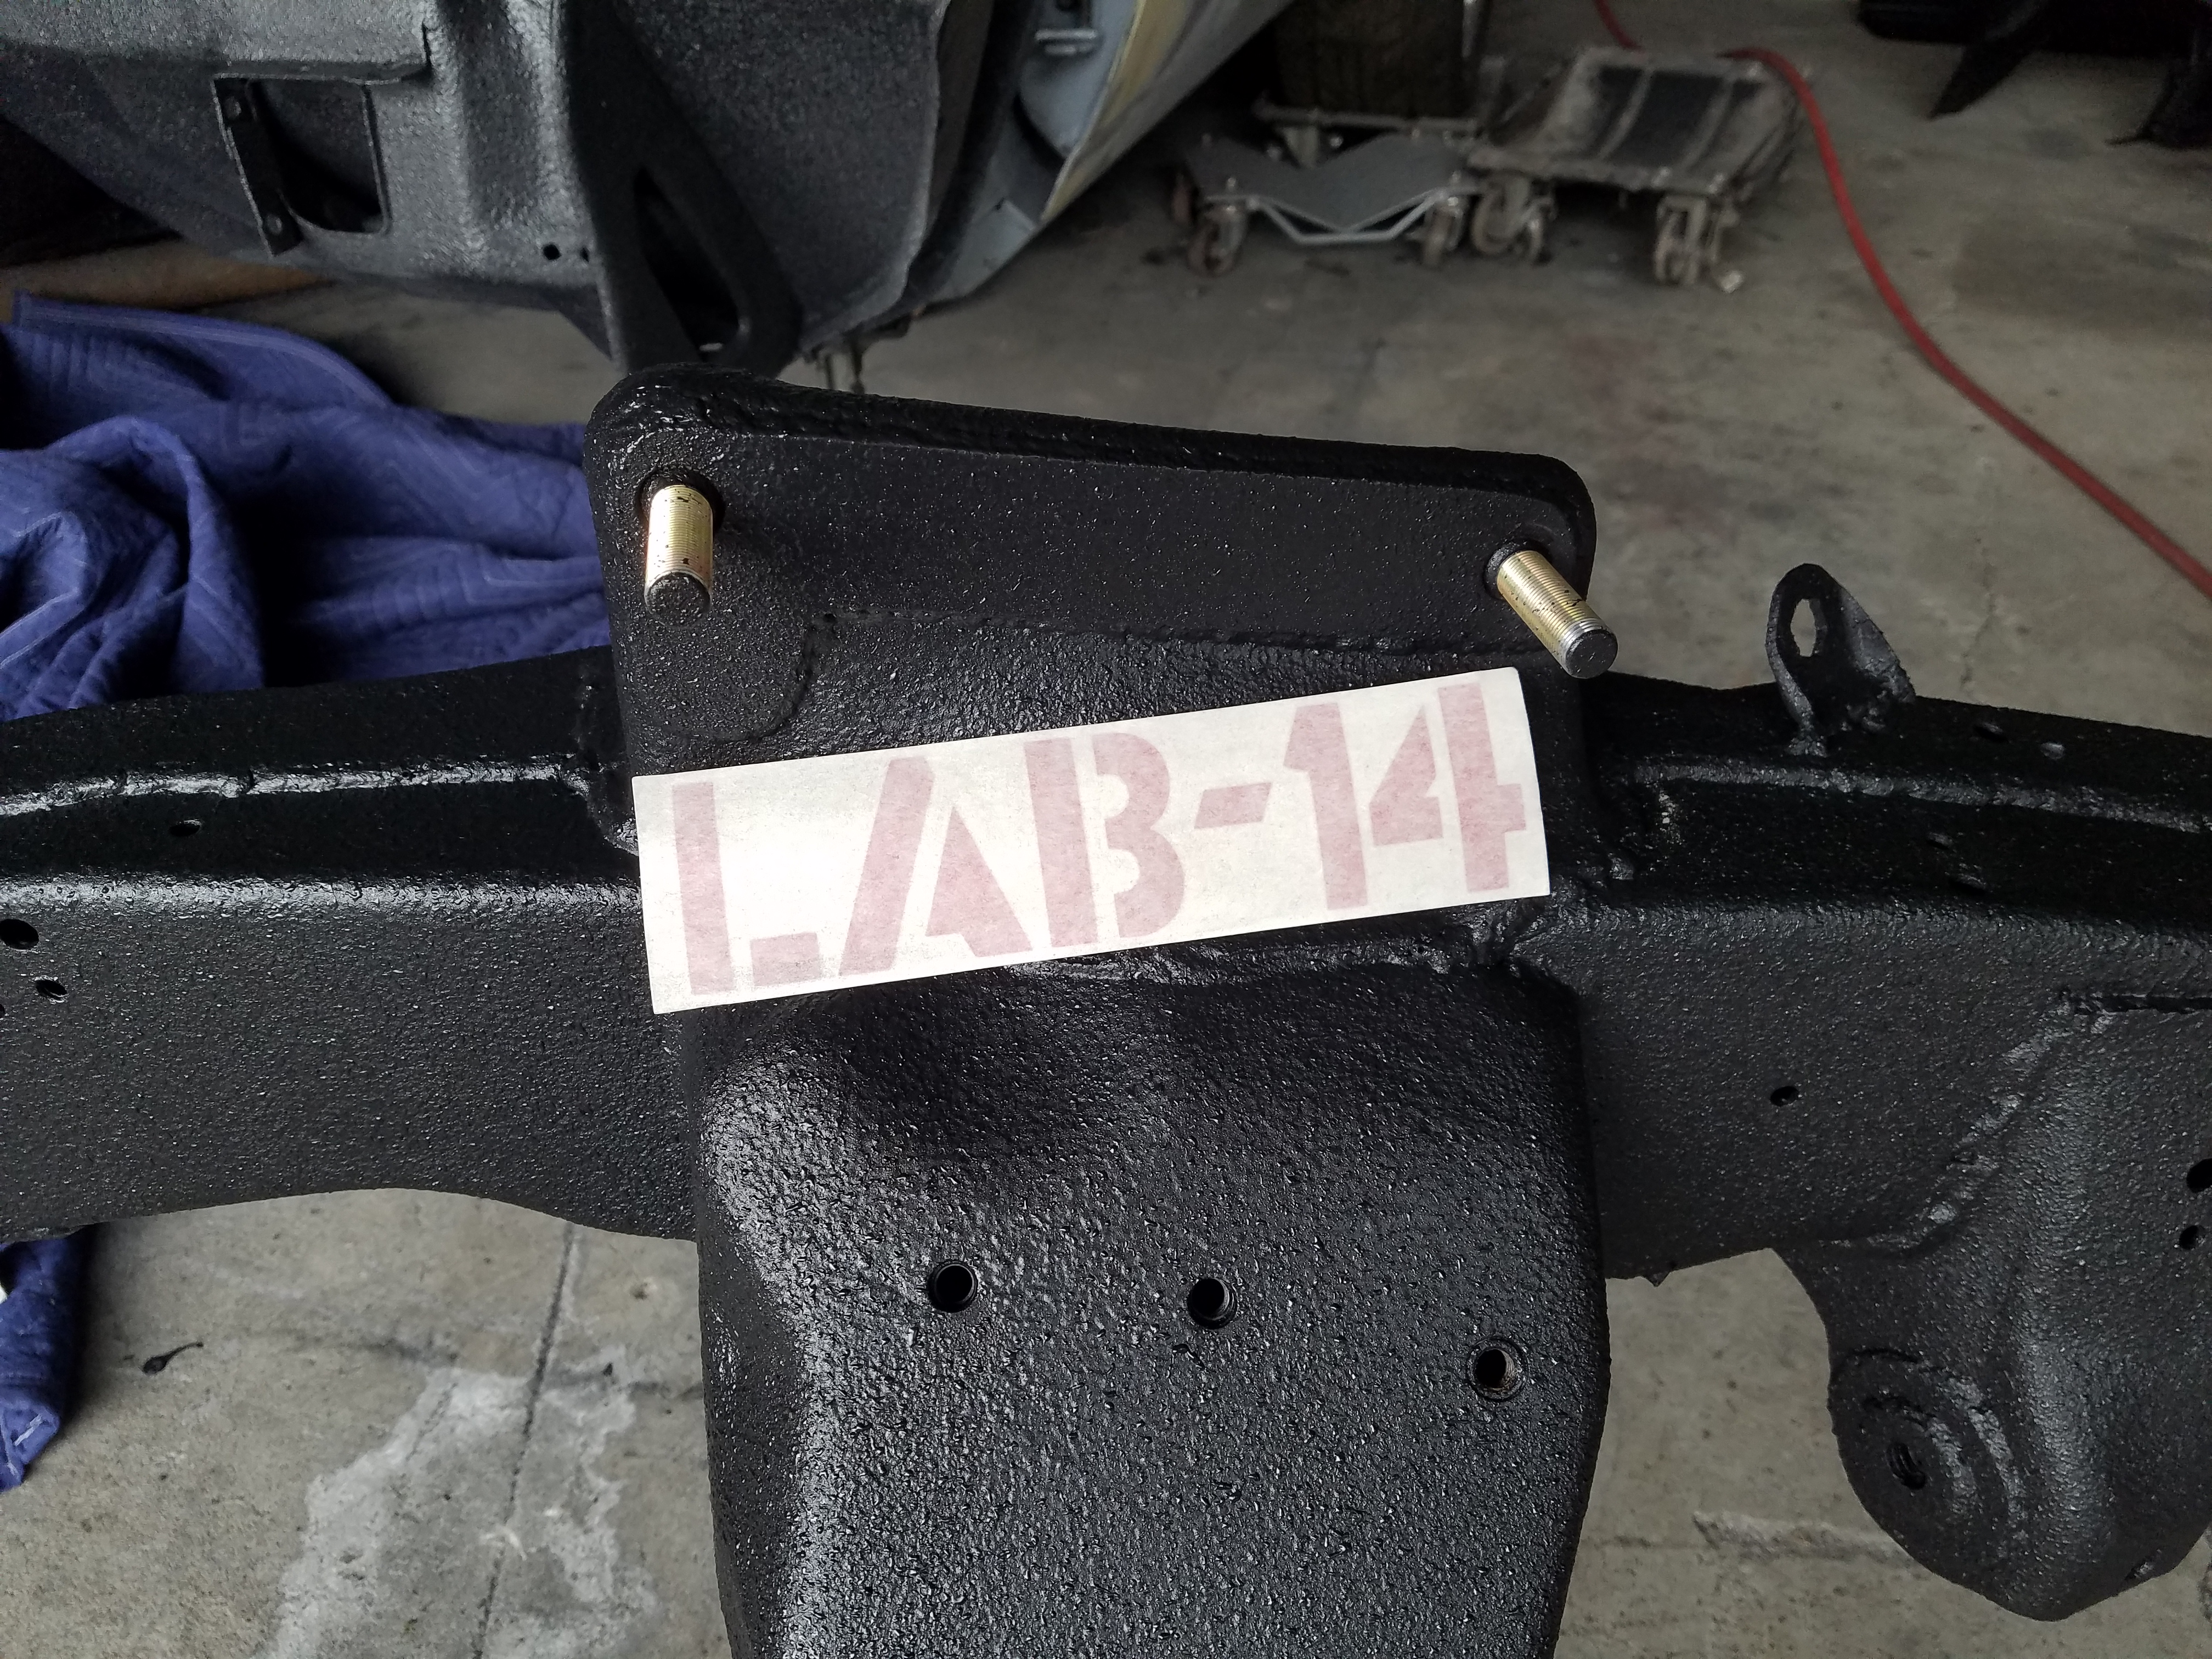
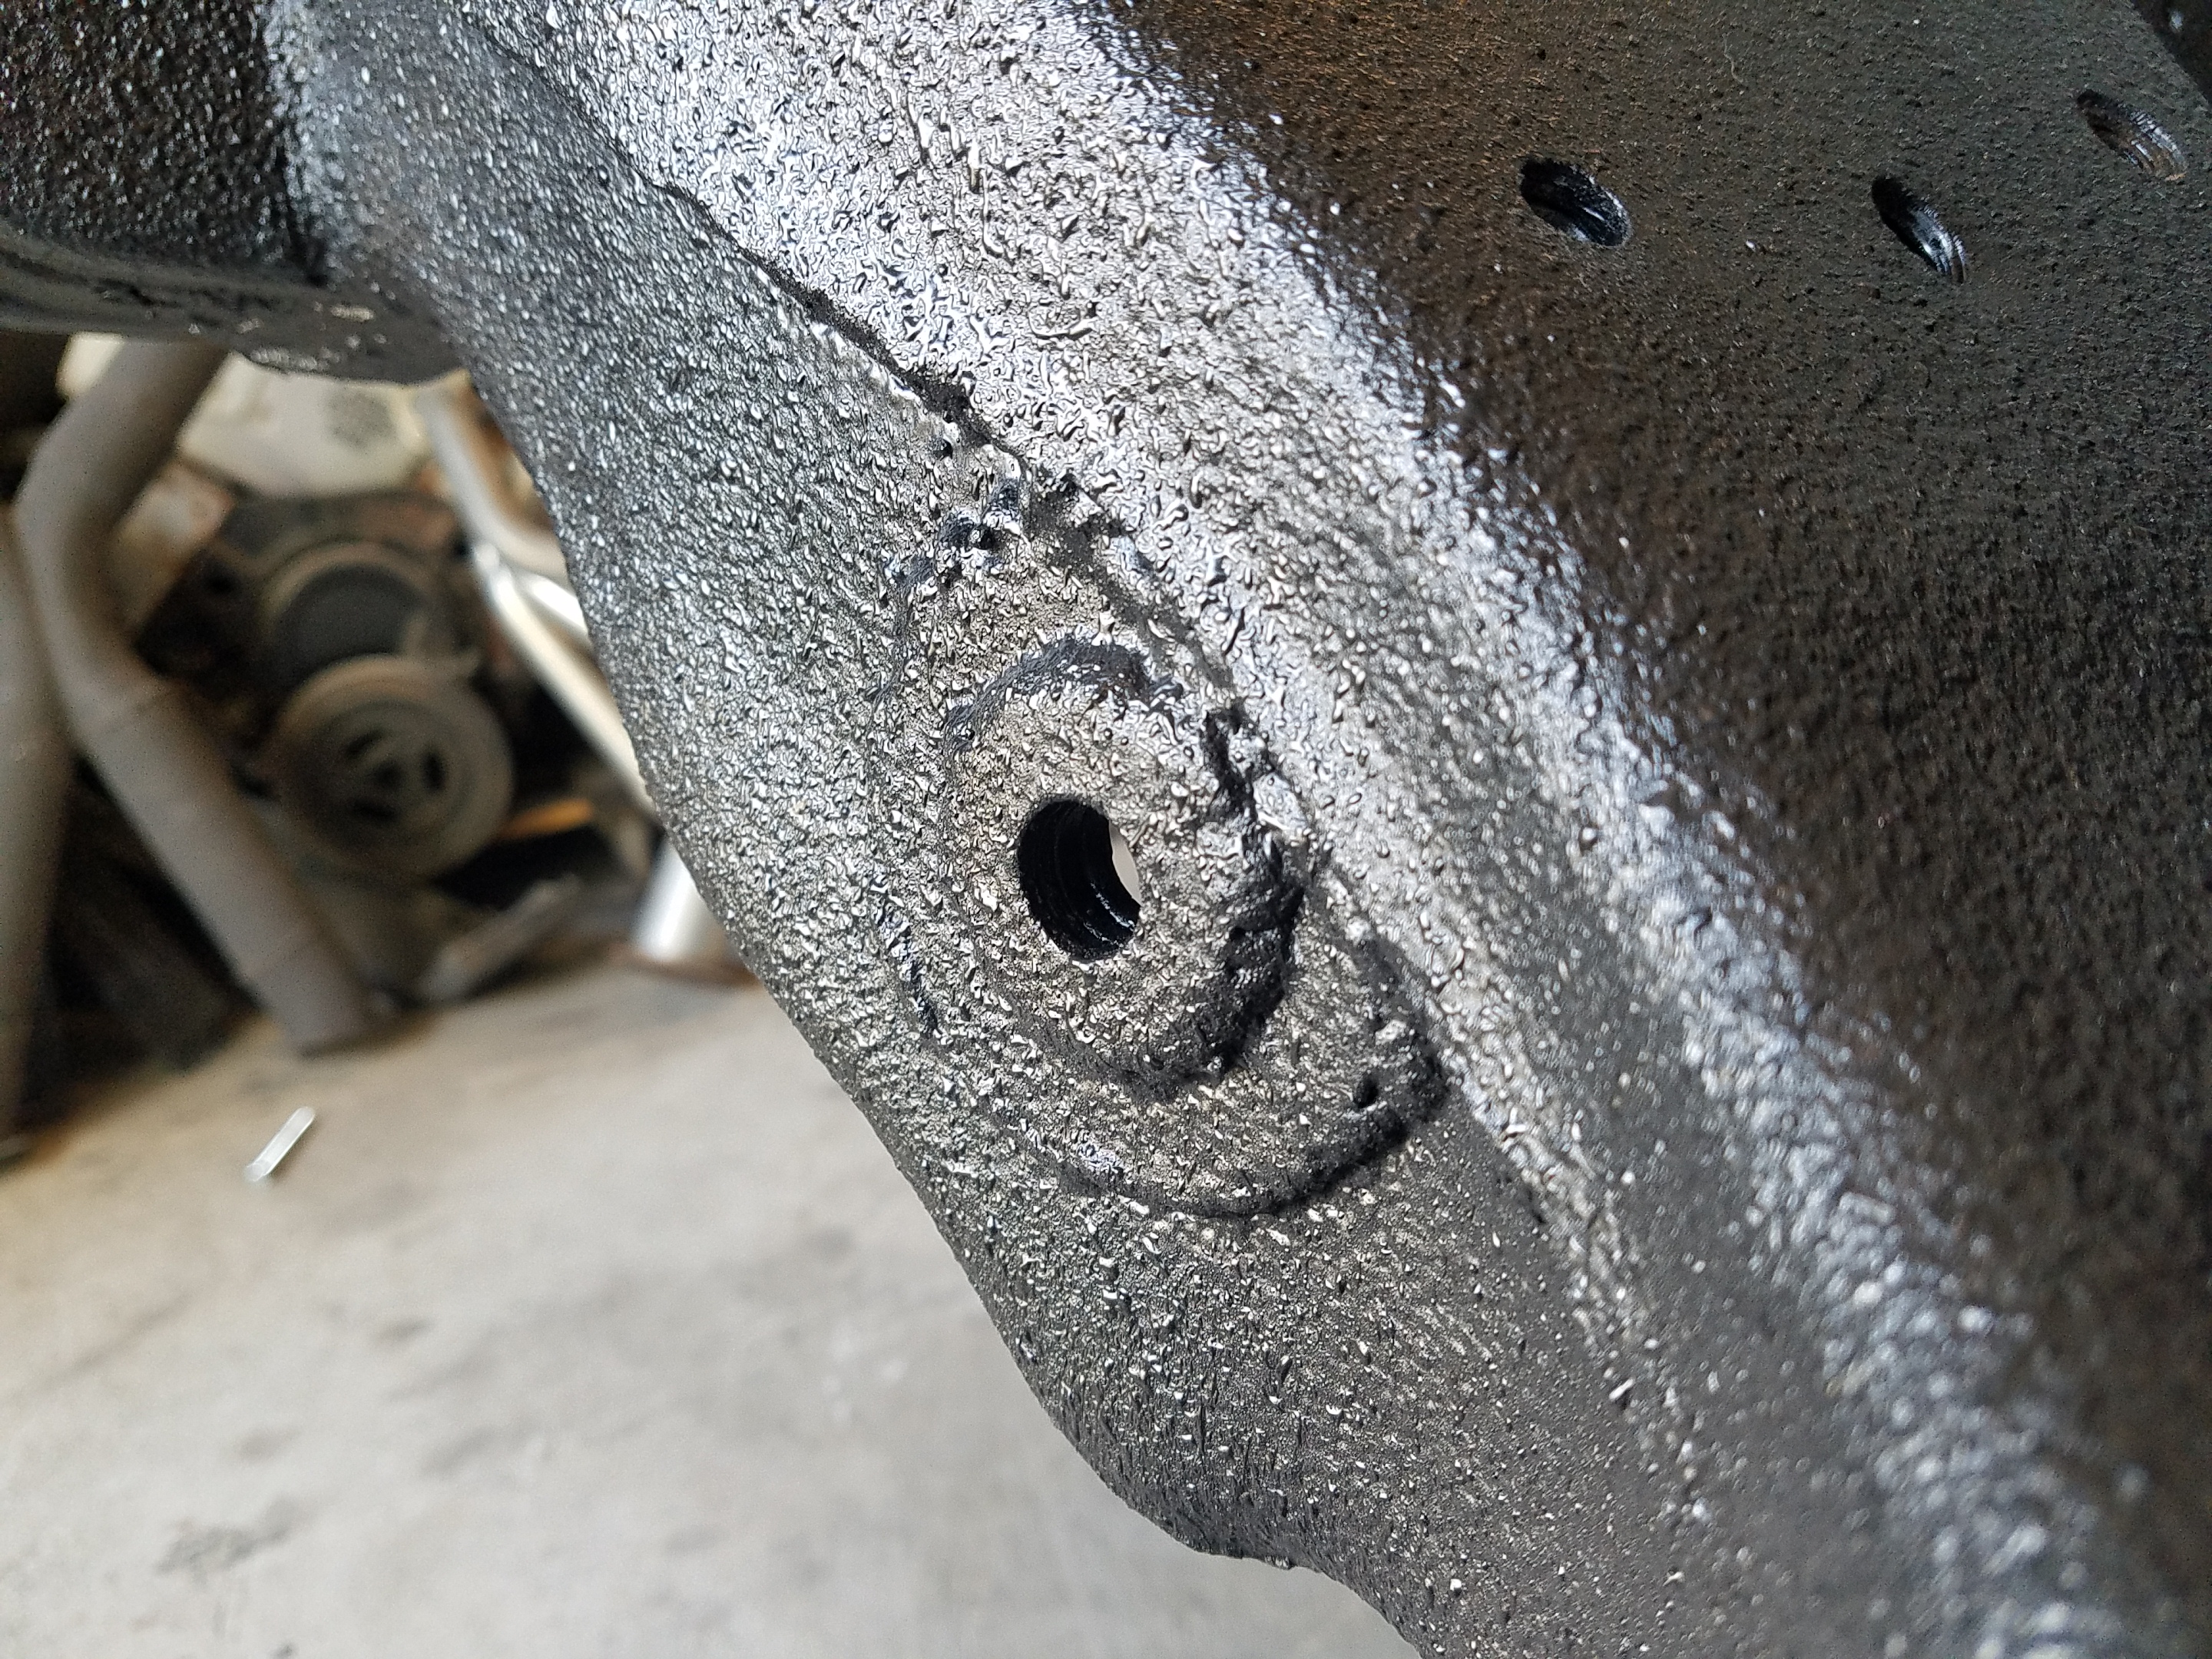
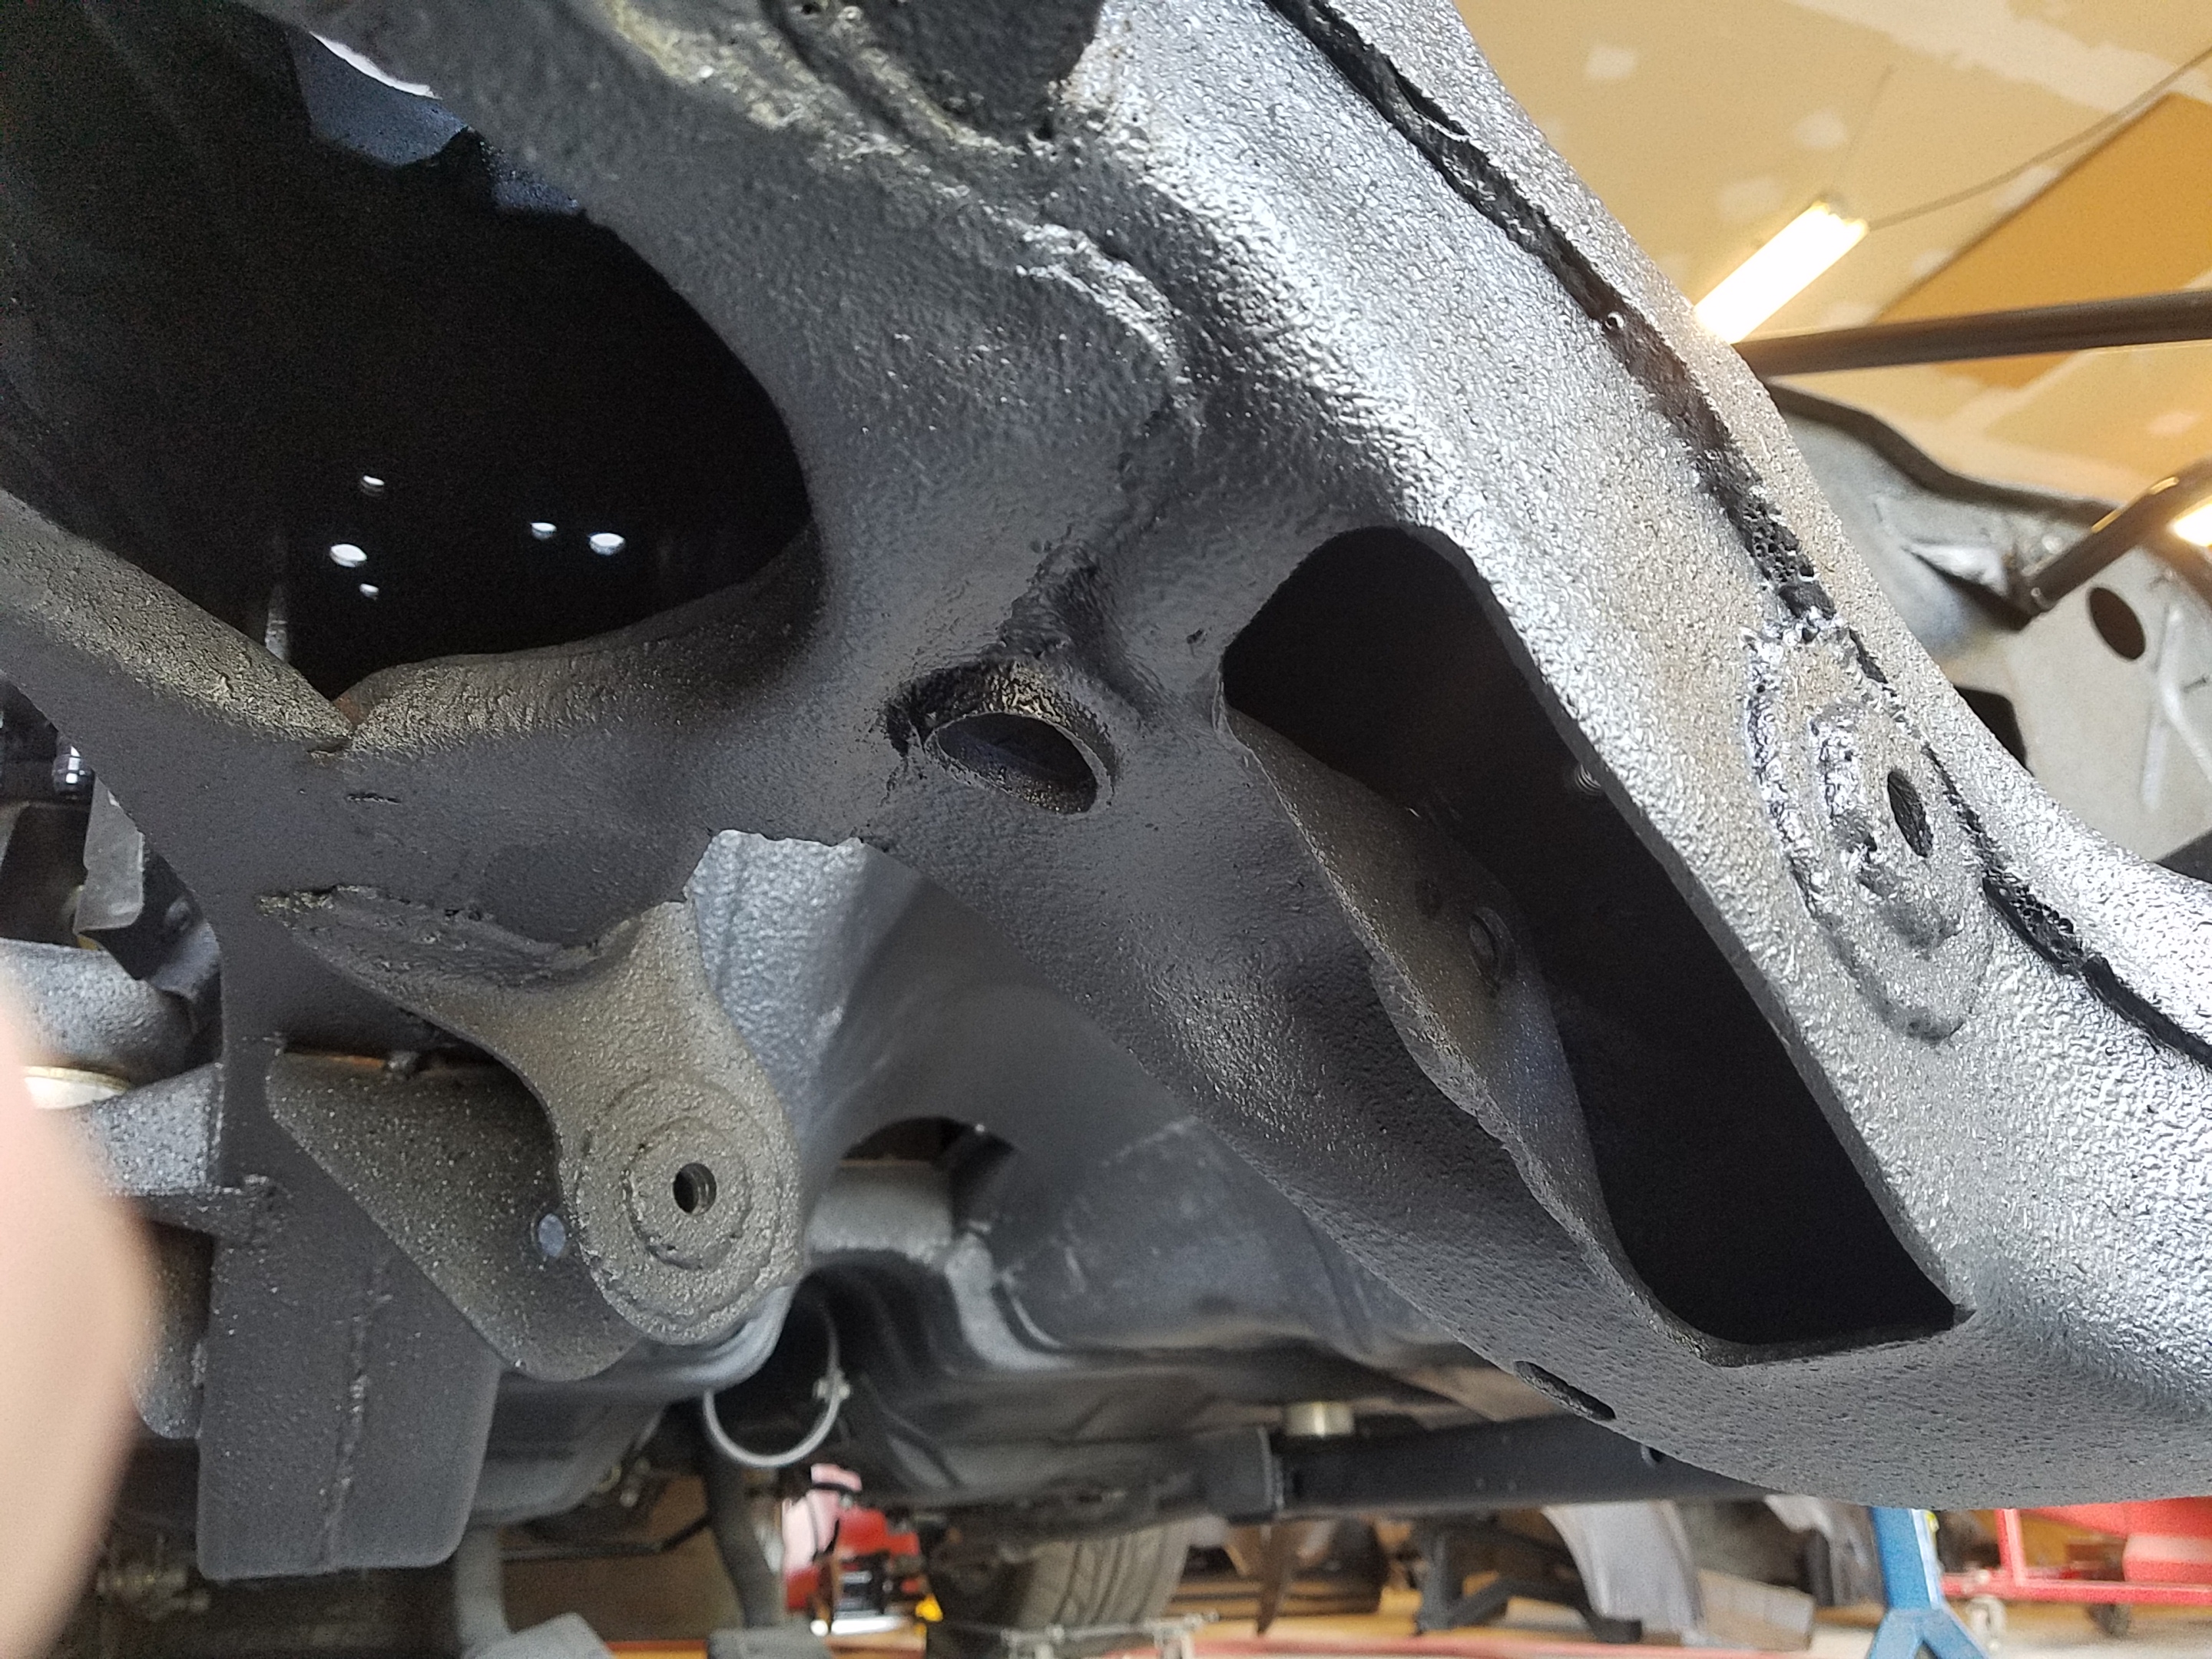
Finally got some time to finish modifying my subframe. Got a bunch of stuff from John at Lab-14.com to strengthen it. Plates and studs for the UCA mounts, thick washers for the LCA mounts, plates for the body mounts, adjustable braces for the UCA studs. Saved a ton of time. I wish I had seen his site before I had done so much of the same stuff myself. I wanted to do the sway bar plate because I think a welded nut is a better solution than drilling and tapping a plate like I did, but I was not cutting off the plate I already fully welded on. But I did cut and weld the big UCA/shock mount as suggested.


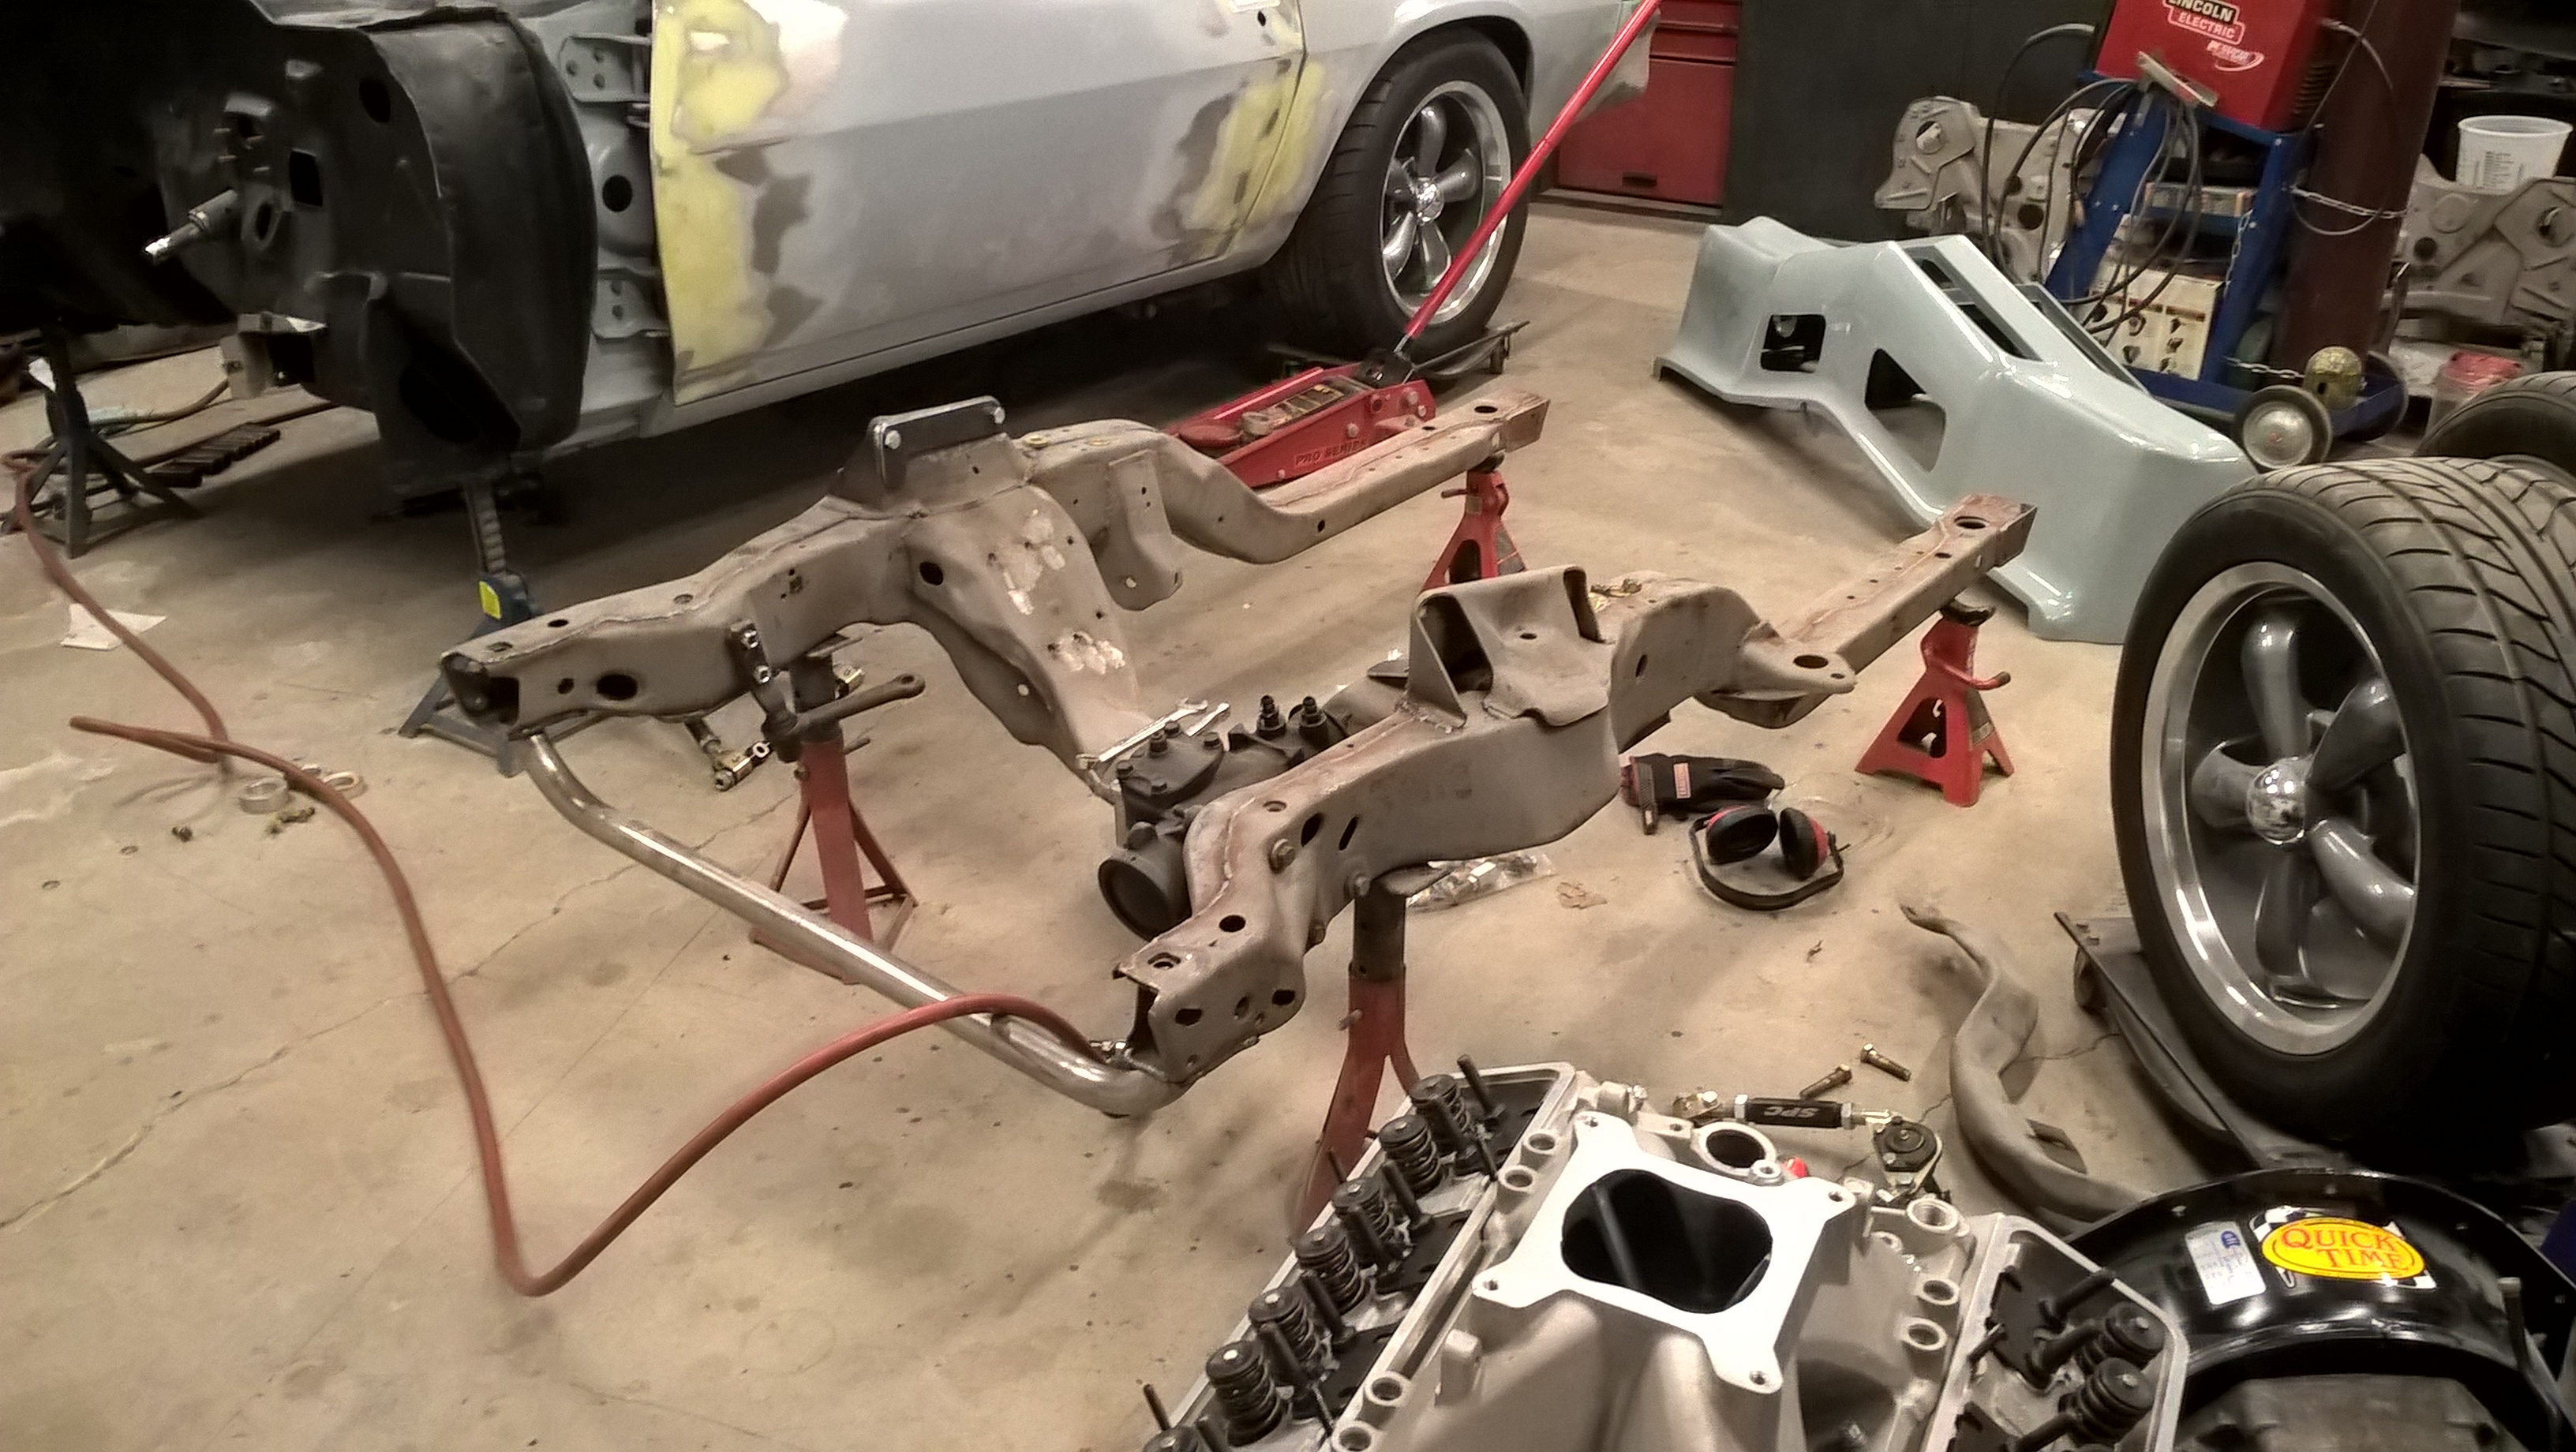
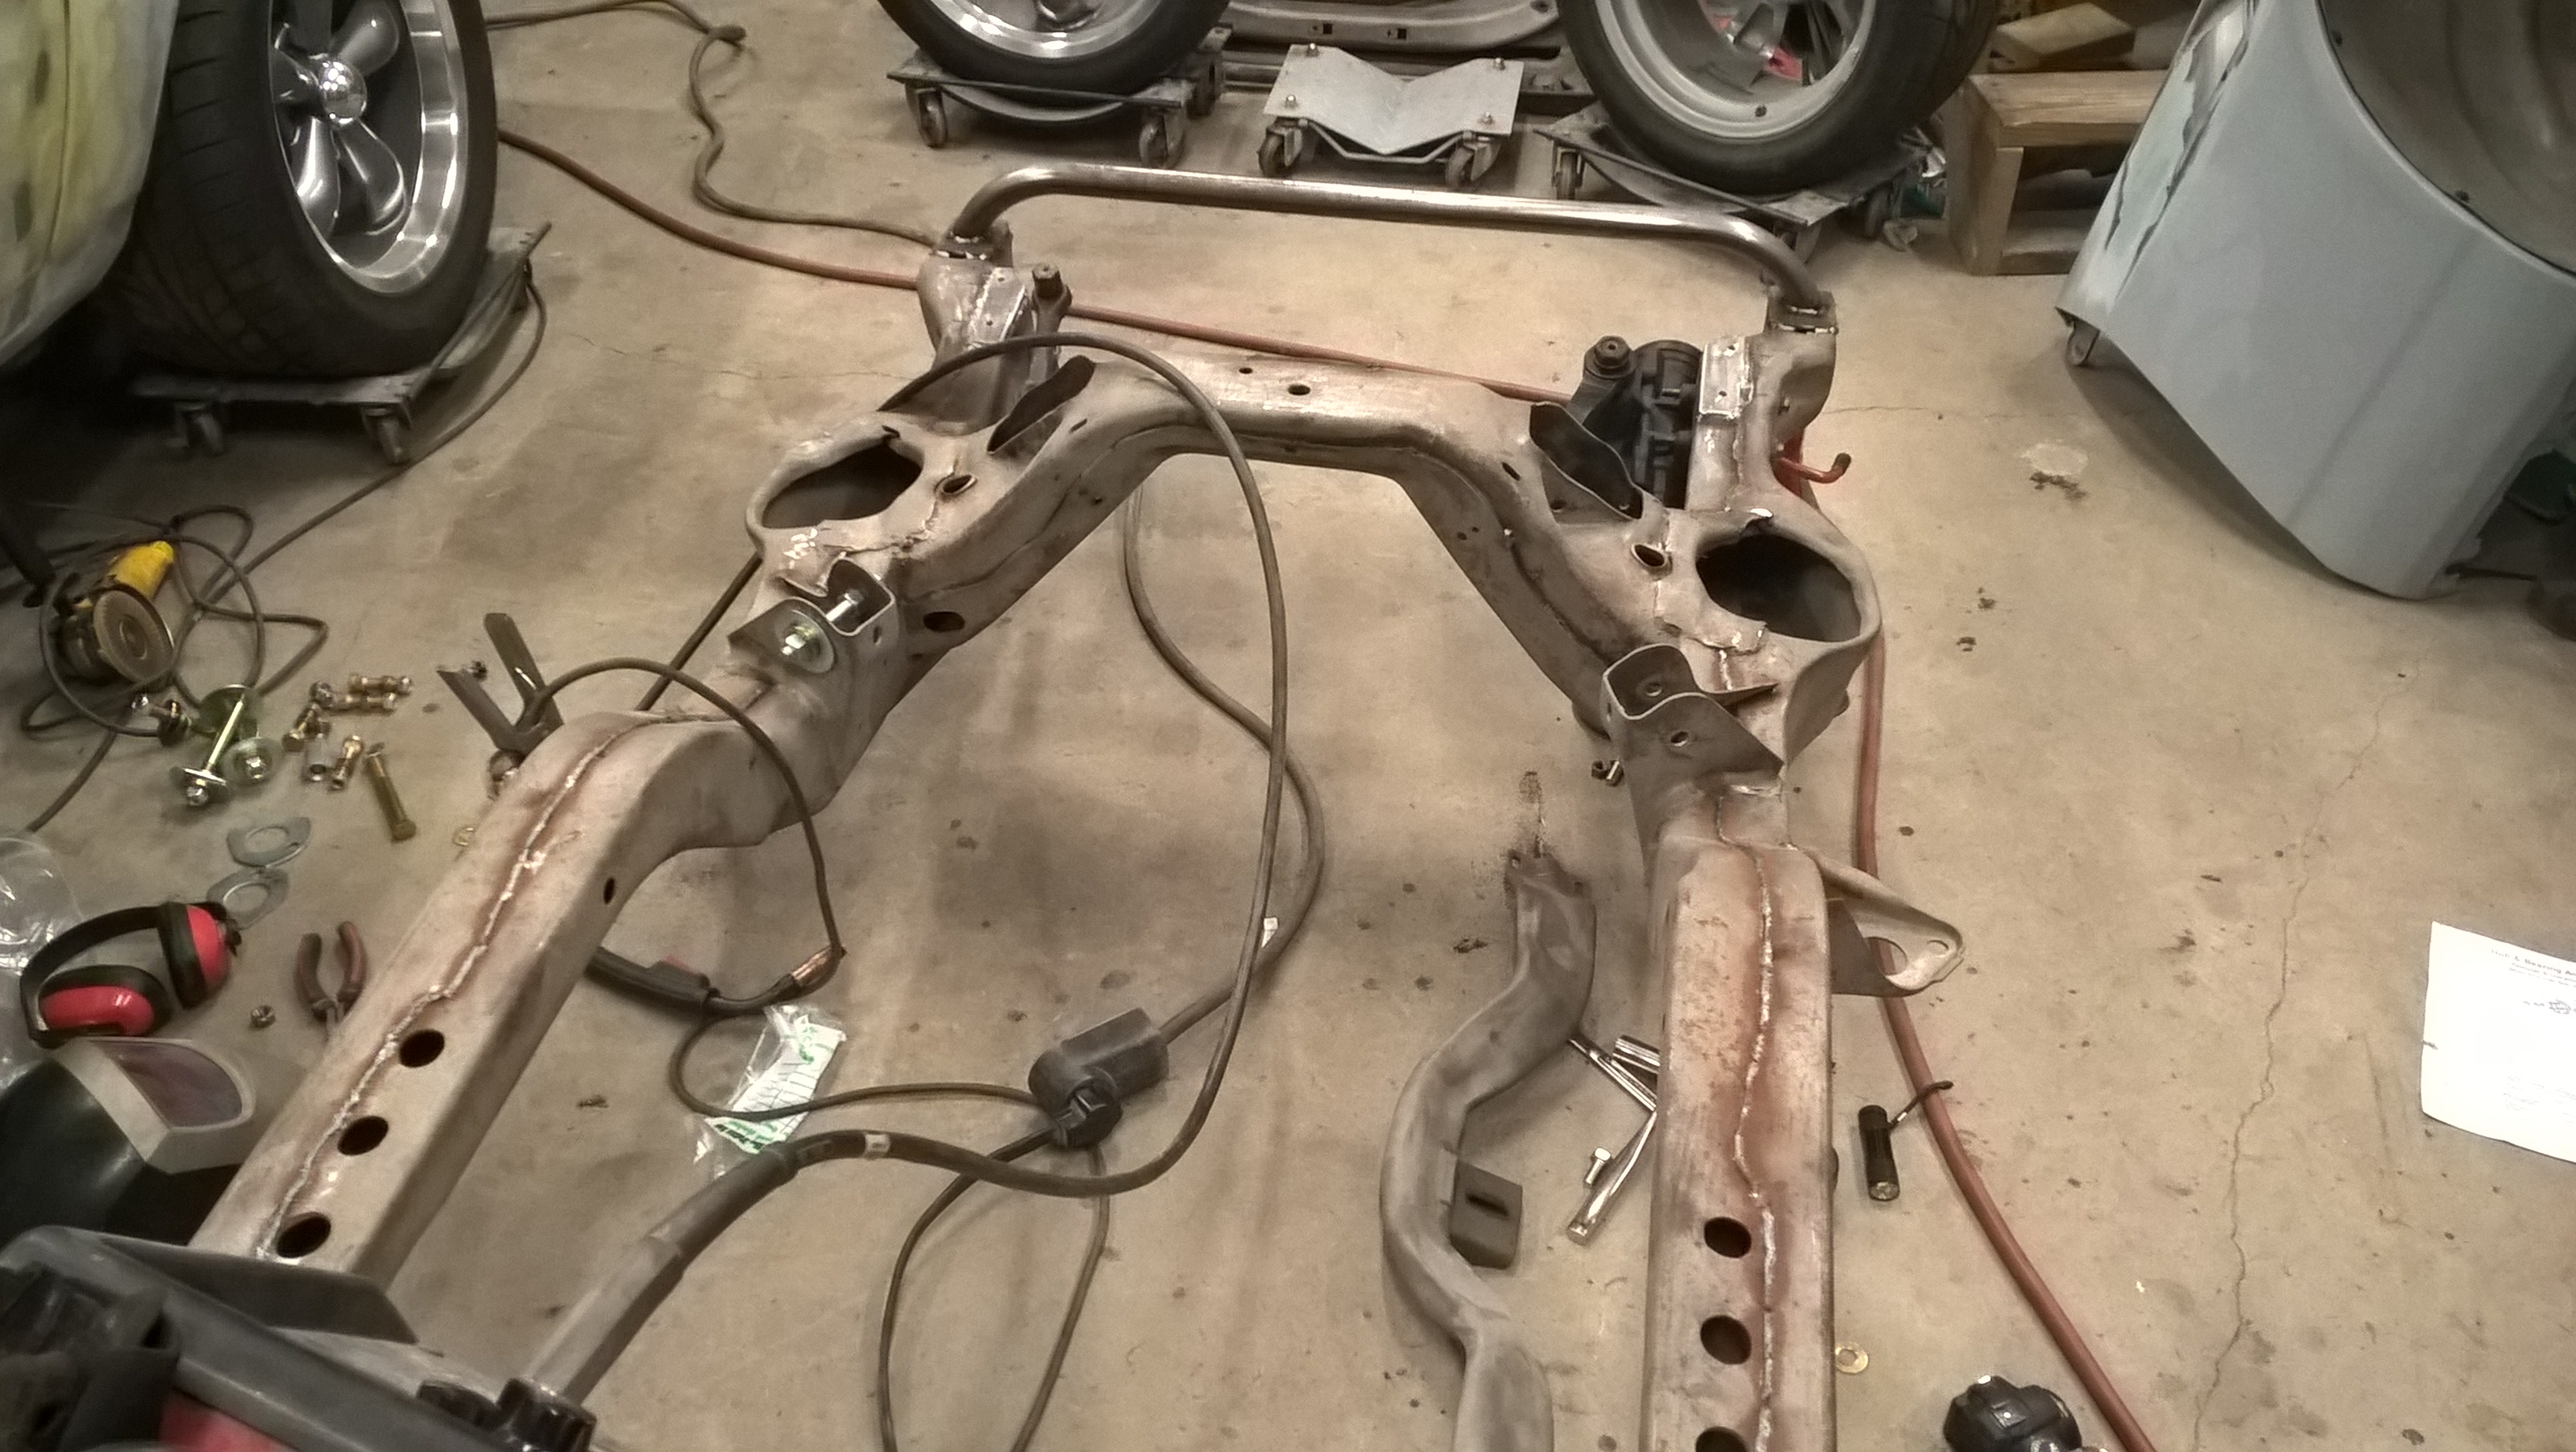
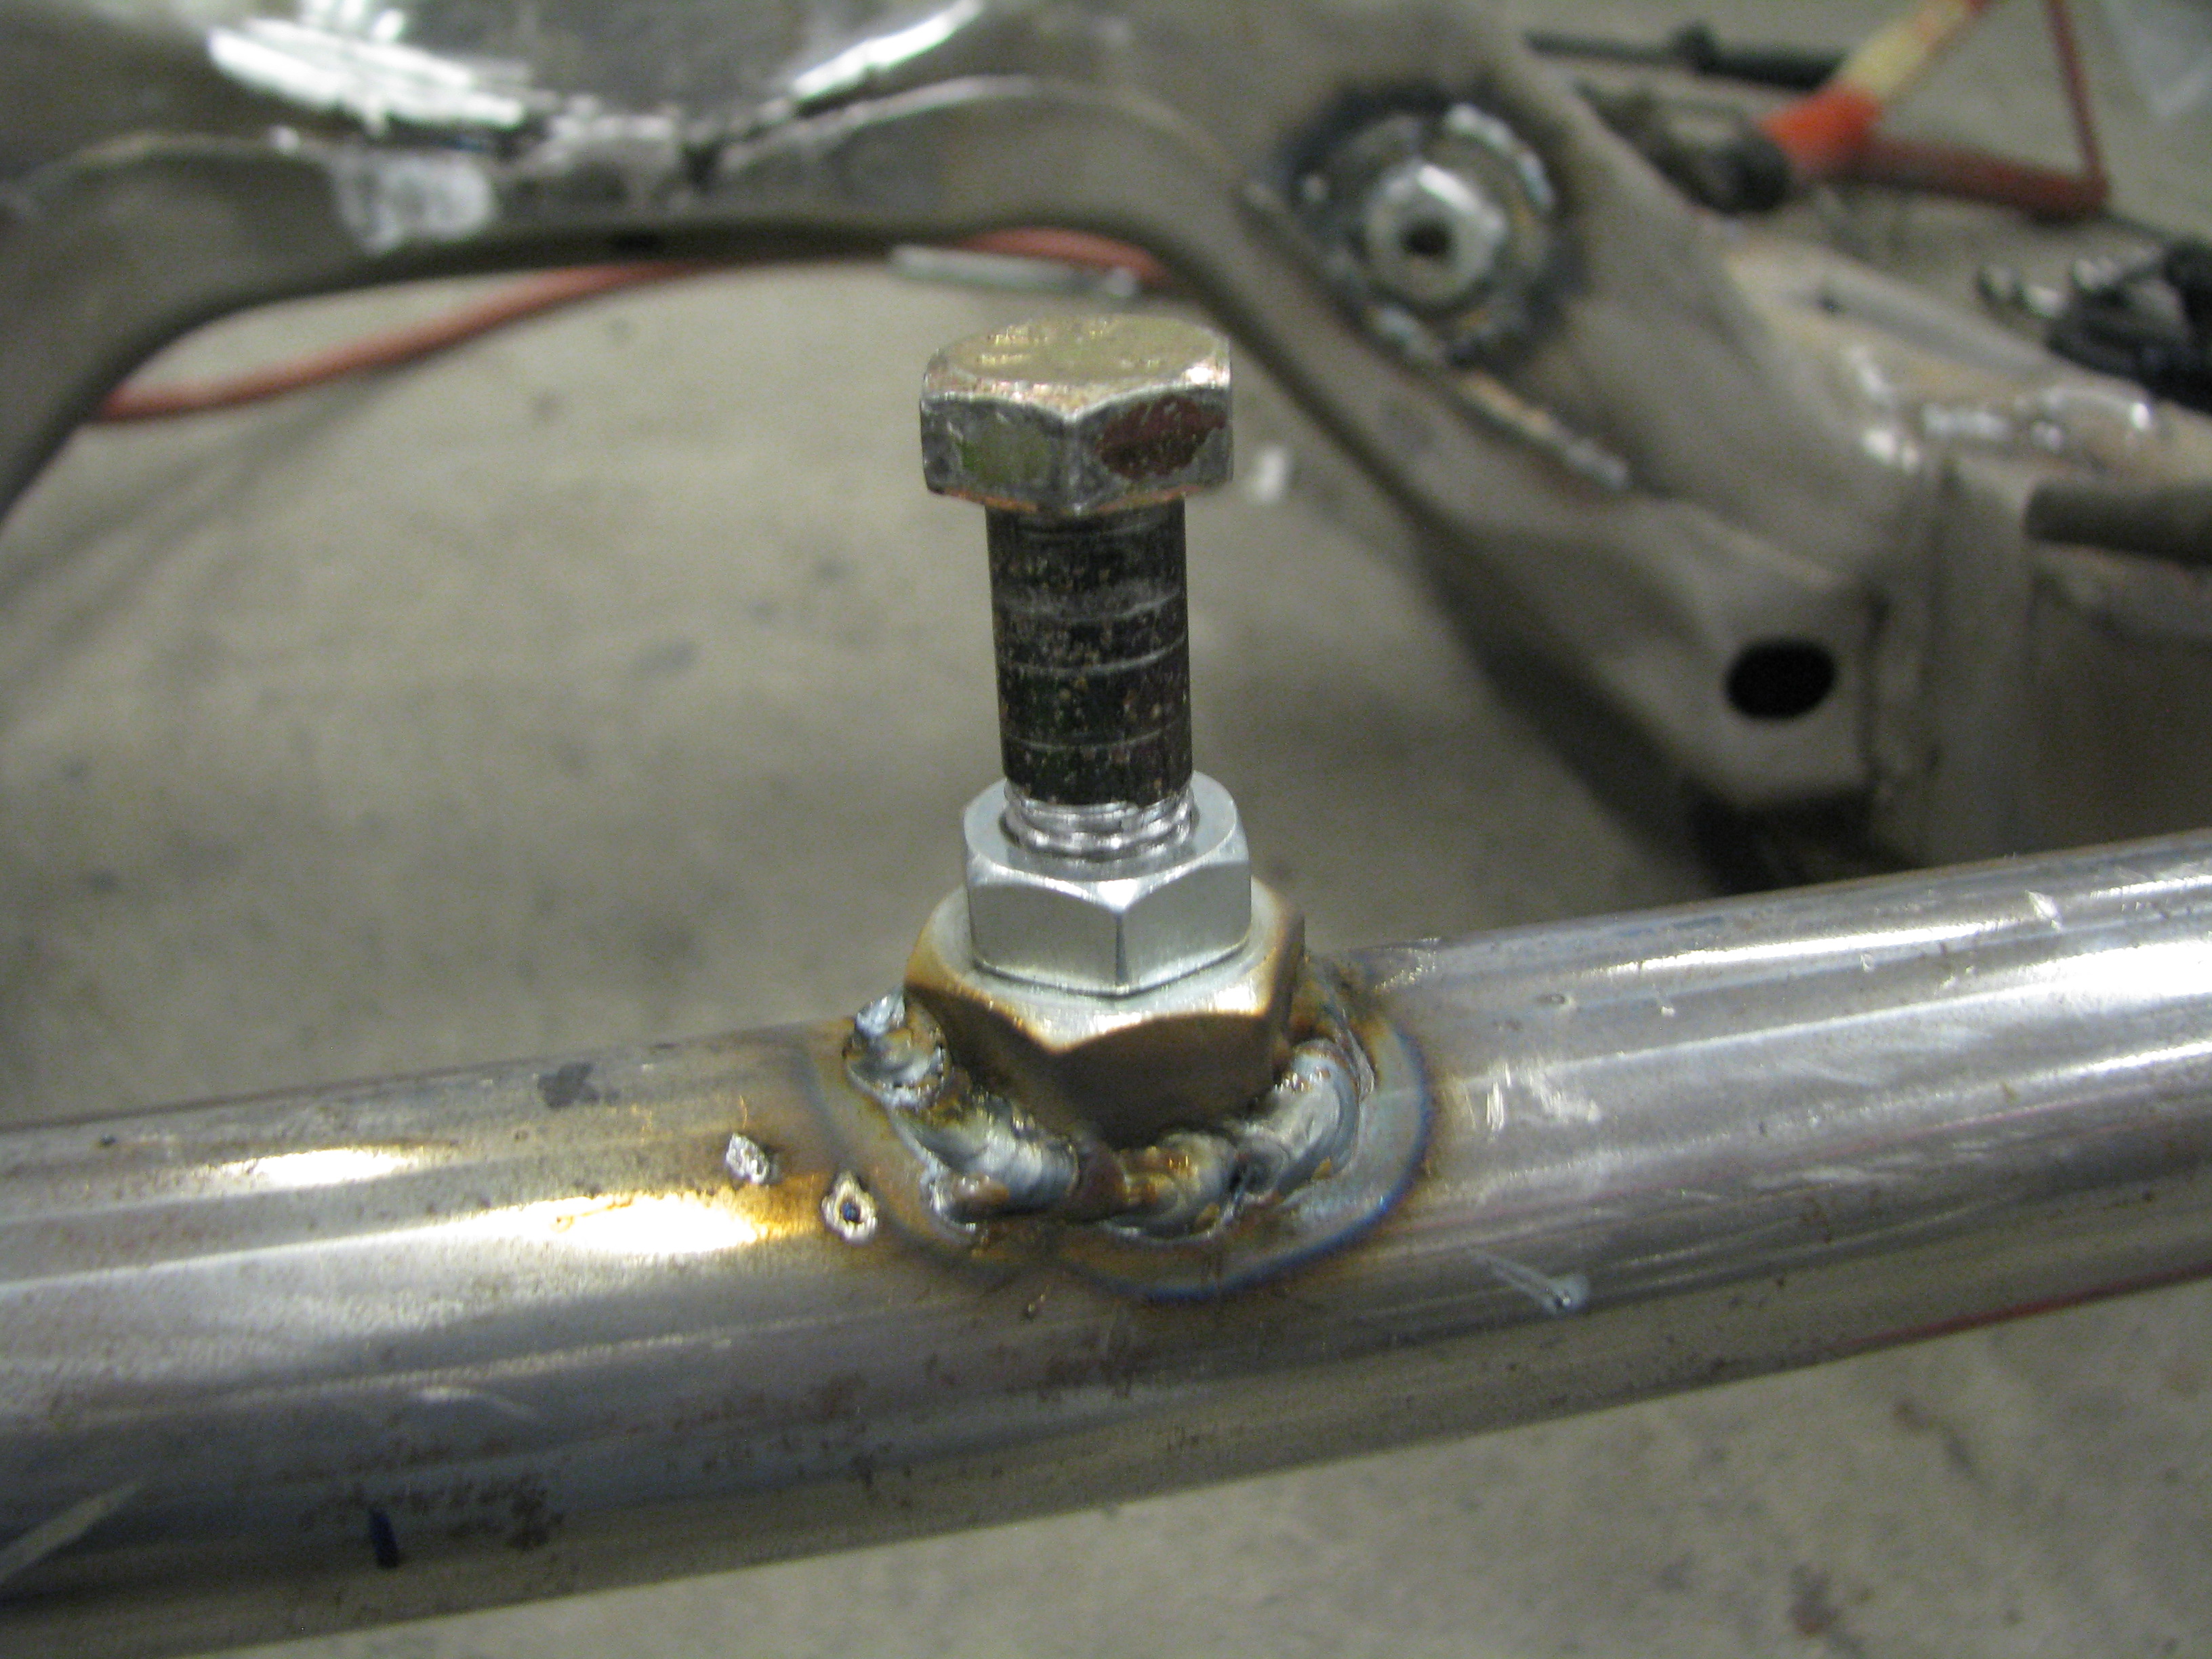
I also scoured through the depths of McMaster for some other mods I had planned. I welded a coupler nut inside the cross bar at the front of the frame horns. I figure I can use the bolt as a jacking point to get the front end in the air. Might work for a tow hook mount, too. I'll find out soon. The only problem with that big bar I welded in is the access to the radiator mounts, so I welded in some cage nuts.


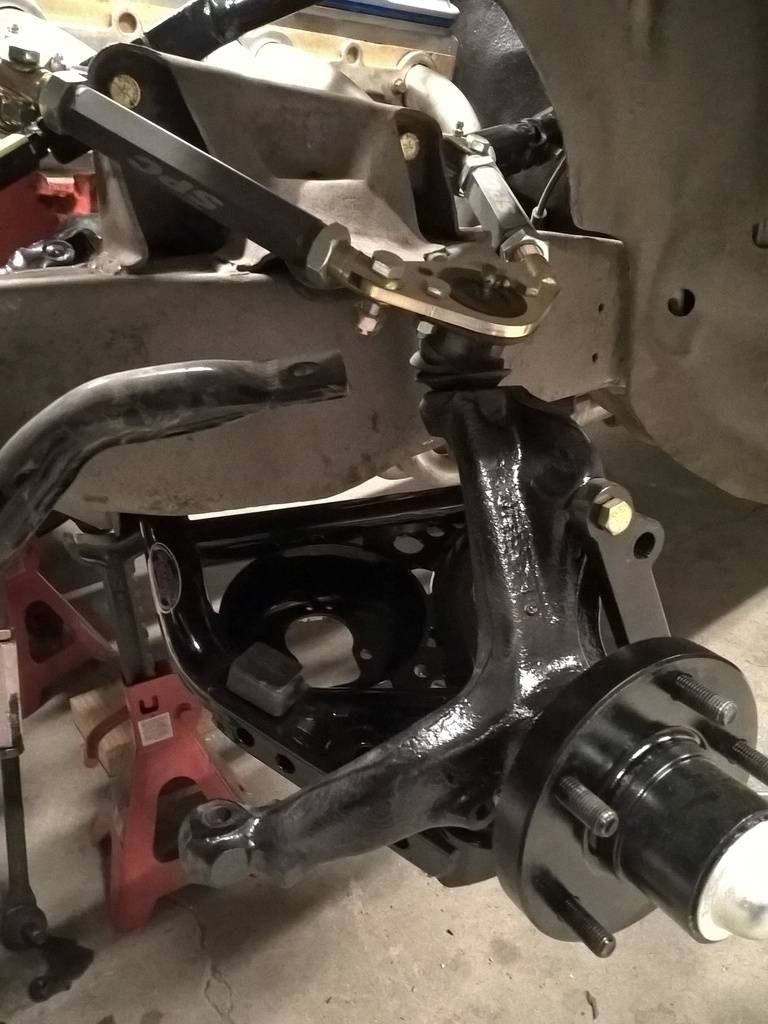
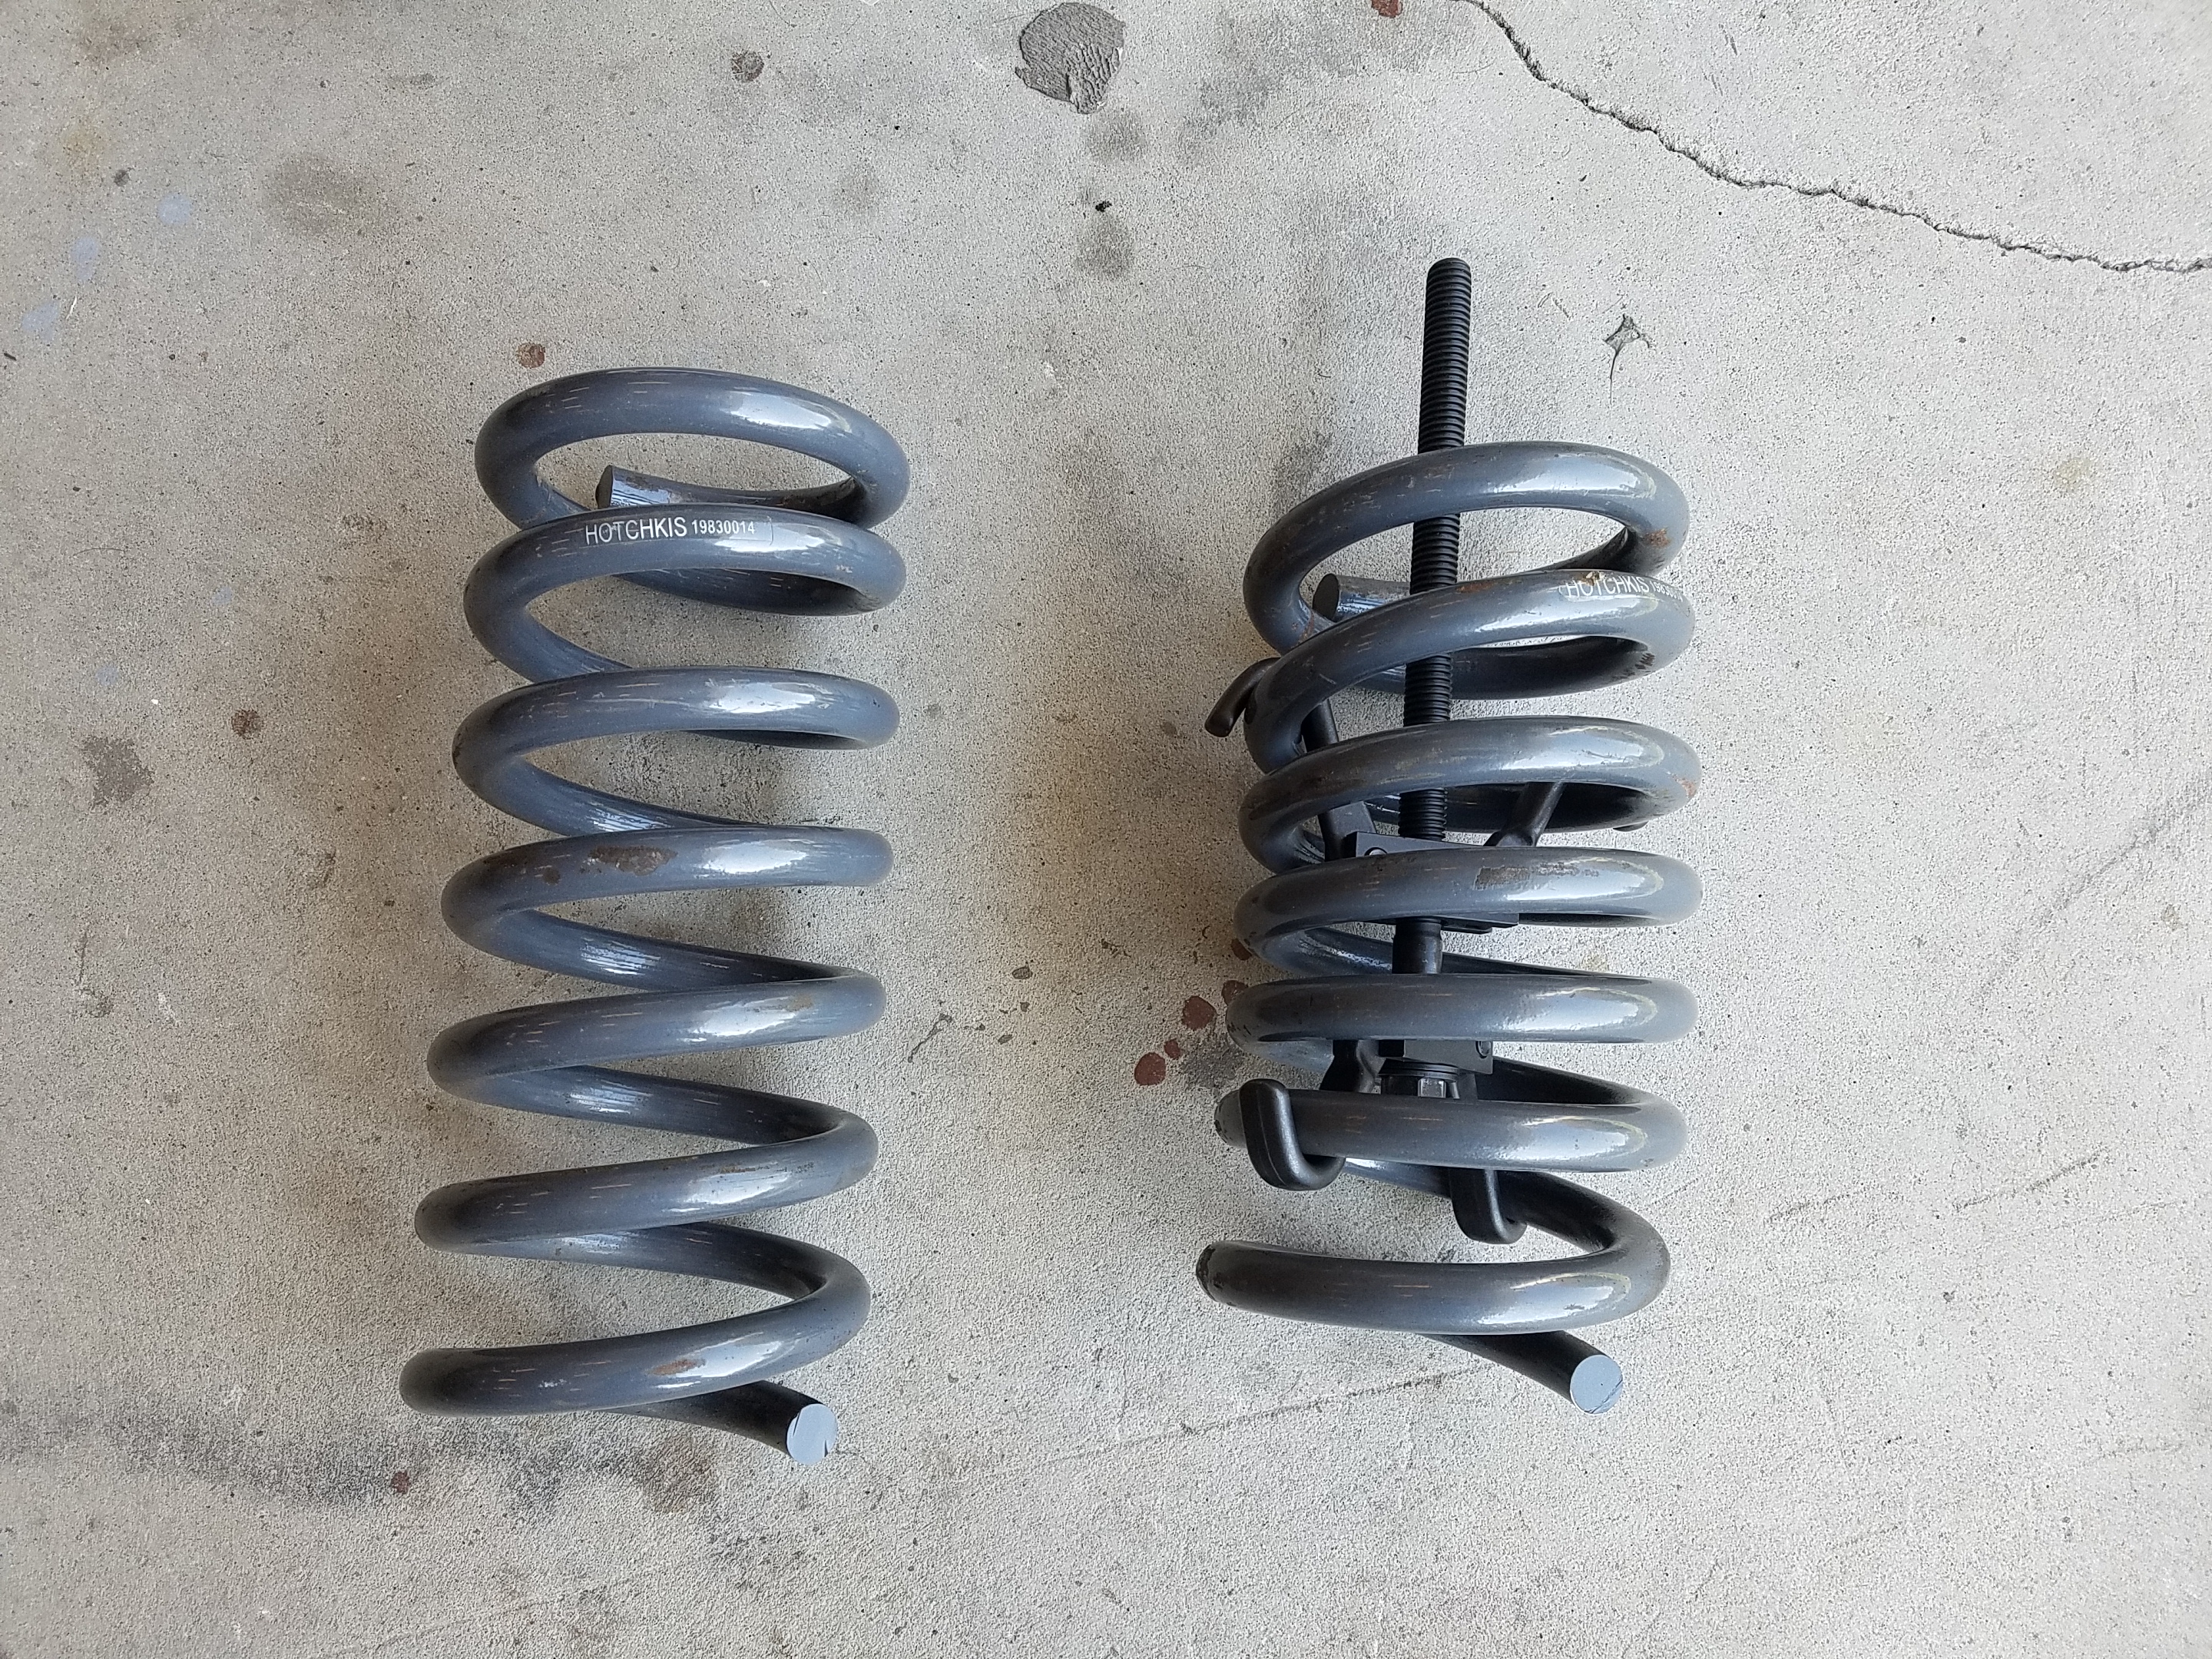
I've got some more stuff to update on Tuesday. That deep spring bucket of the DSE arms made it impossible to install my Hotchkis coils with my compressor tool - even with a coil cut and compressed as far as my compressor would go. So you can probably guess where this is going...
BTW, anybody need some Hotchkis coils?

09-09-2017 #128
Registered User
- Join Date
- Mar 2005
- Location
- Walton, NY
- Posts
- 737
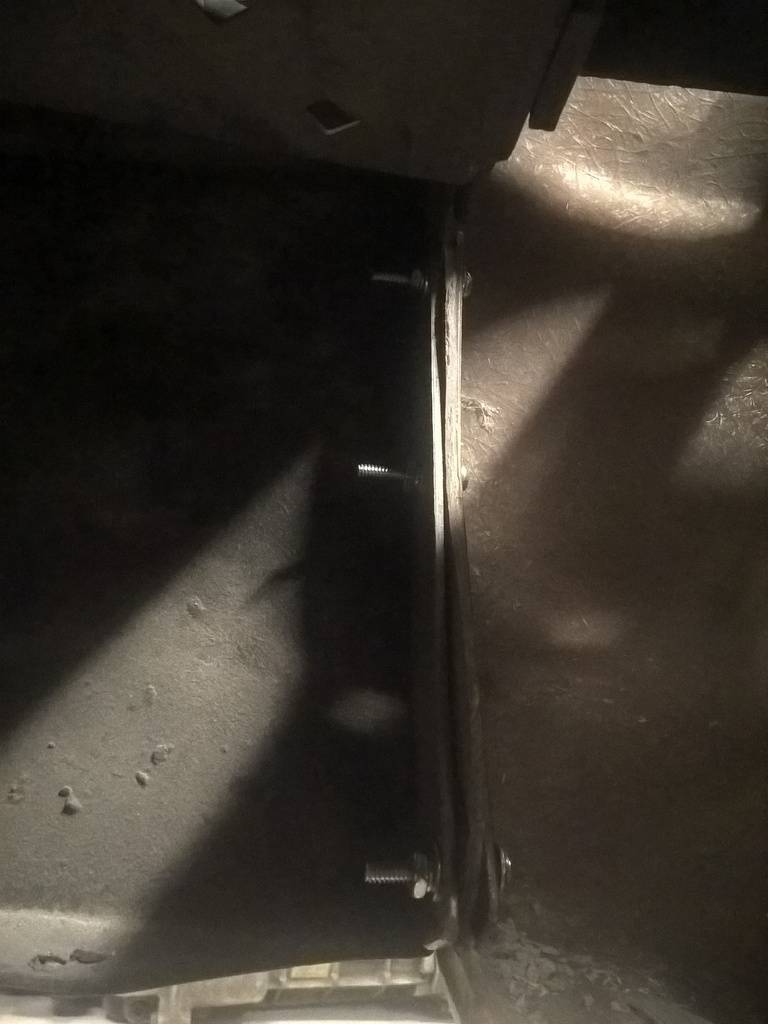
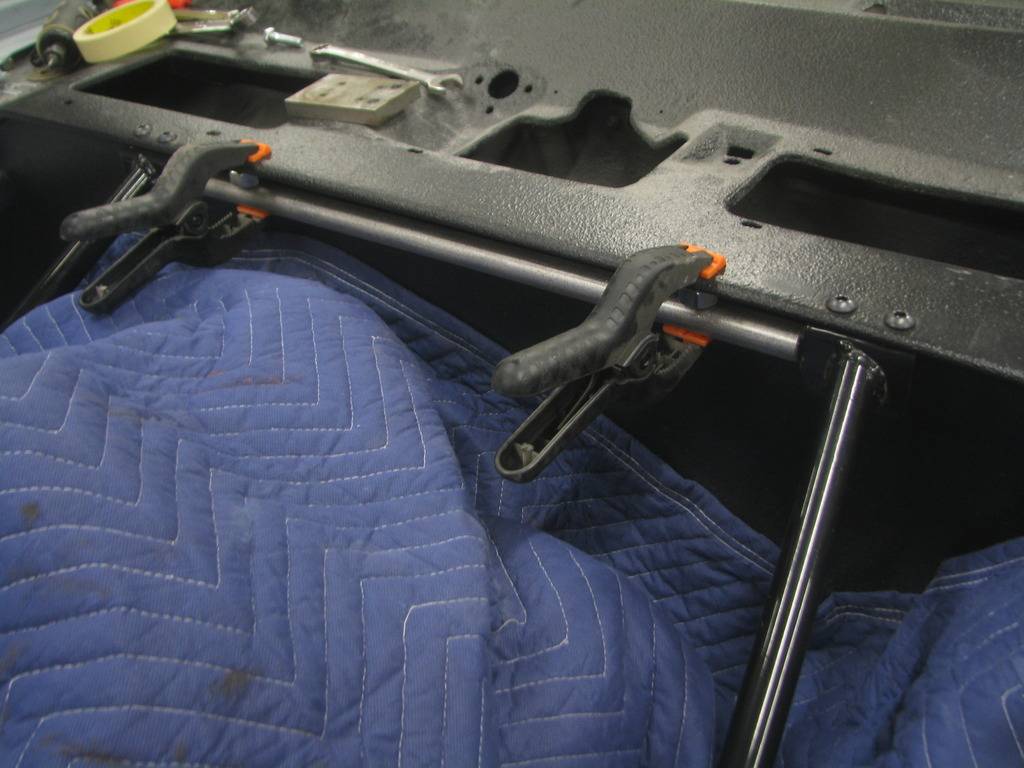
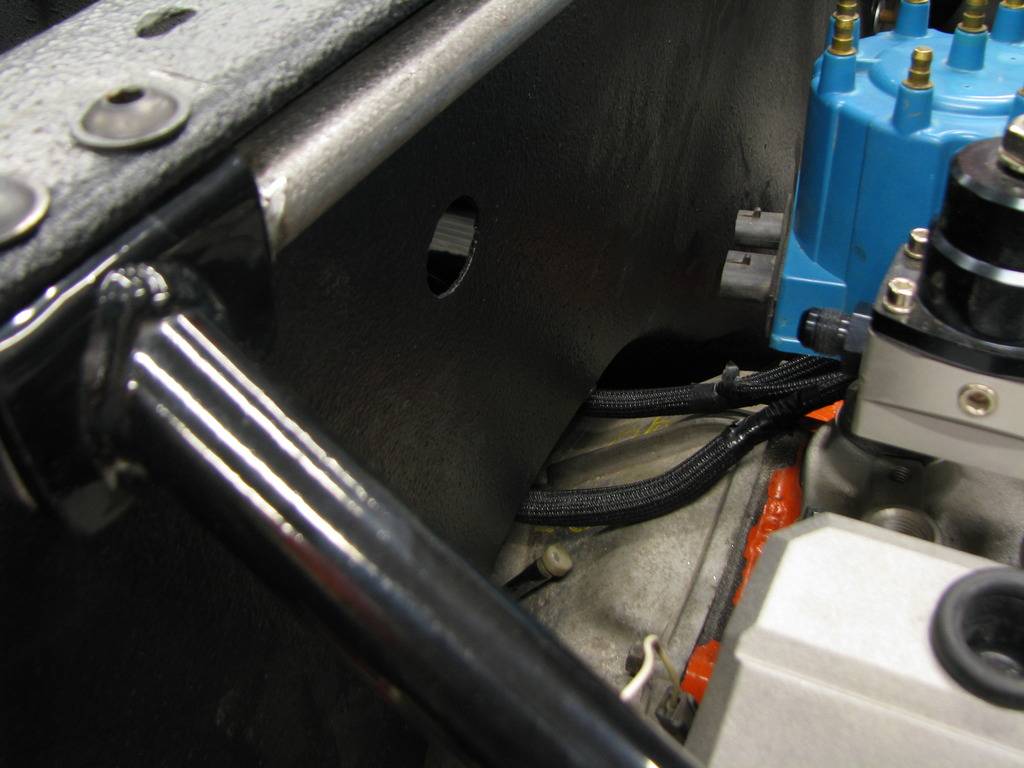
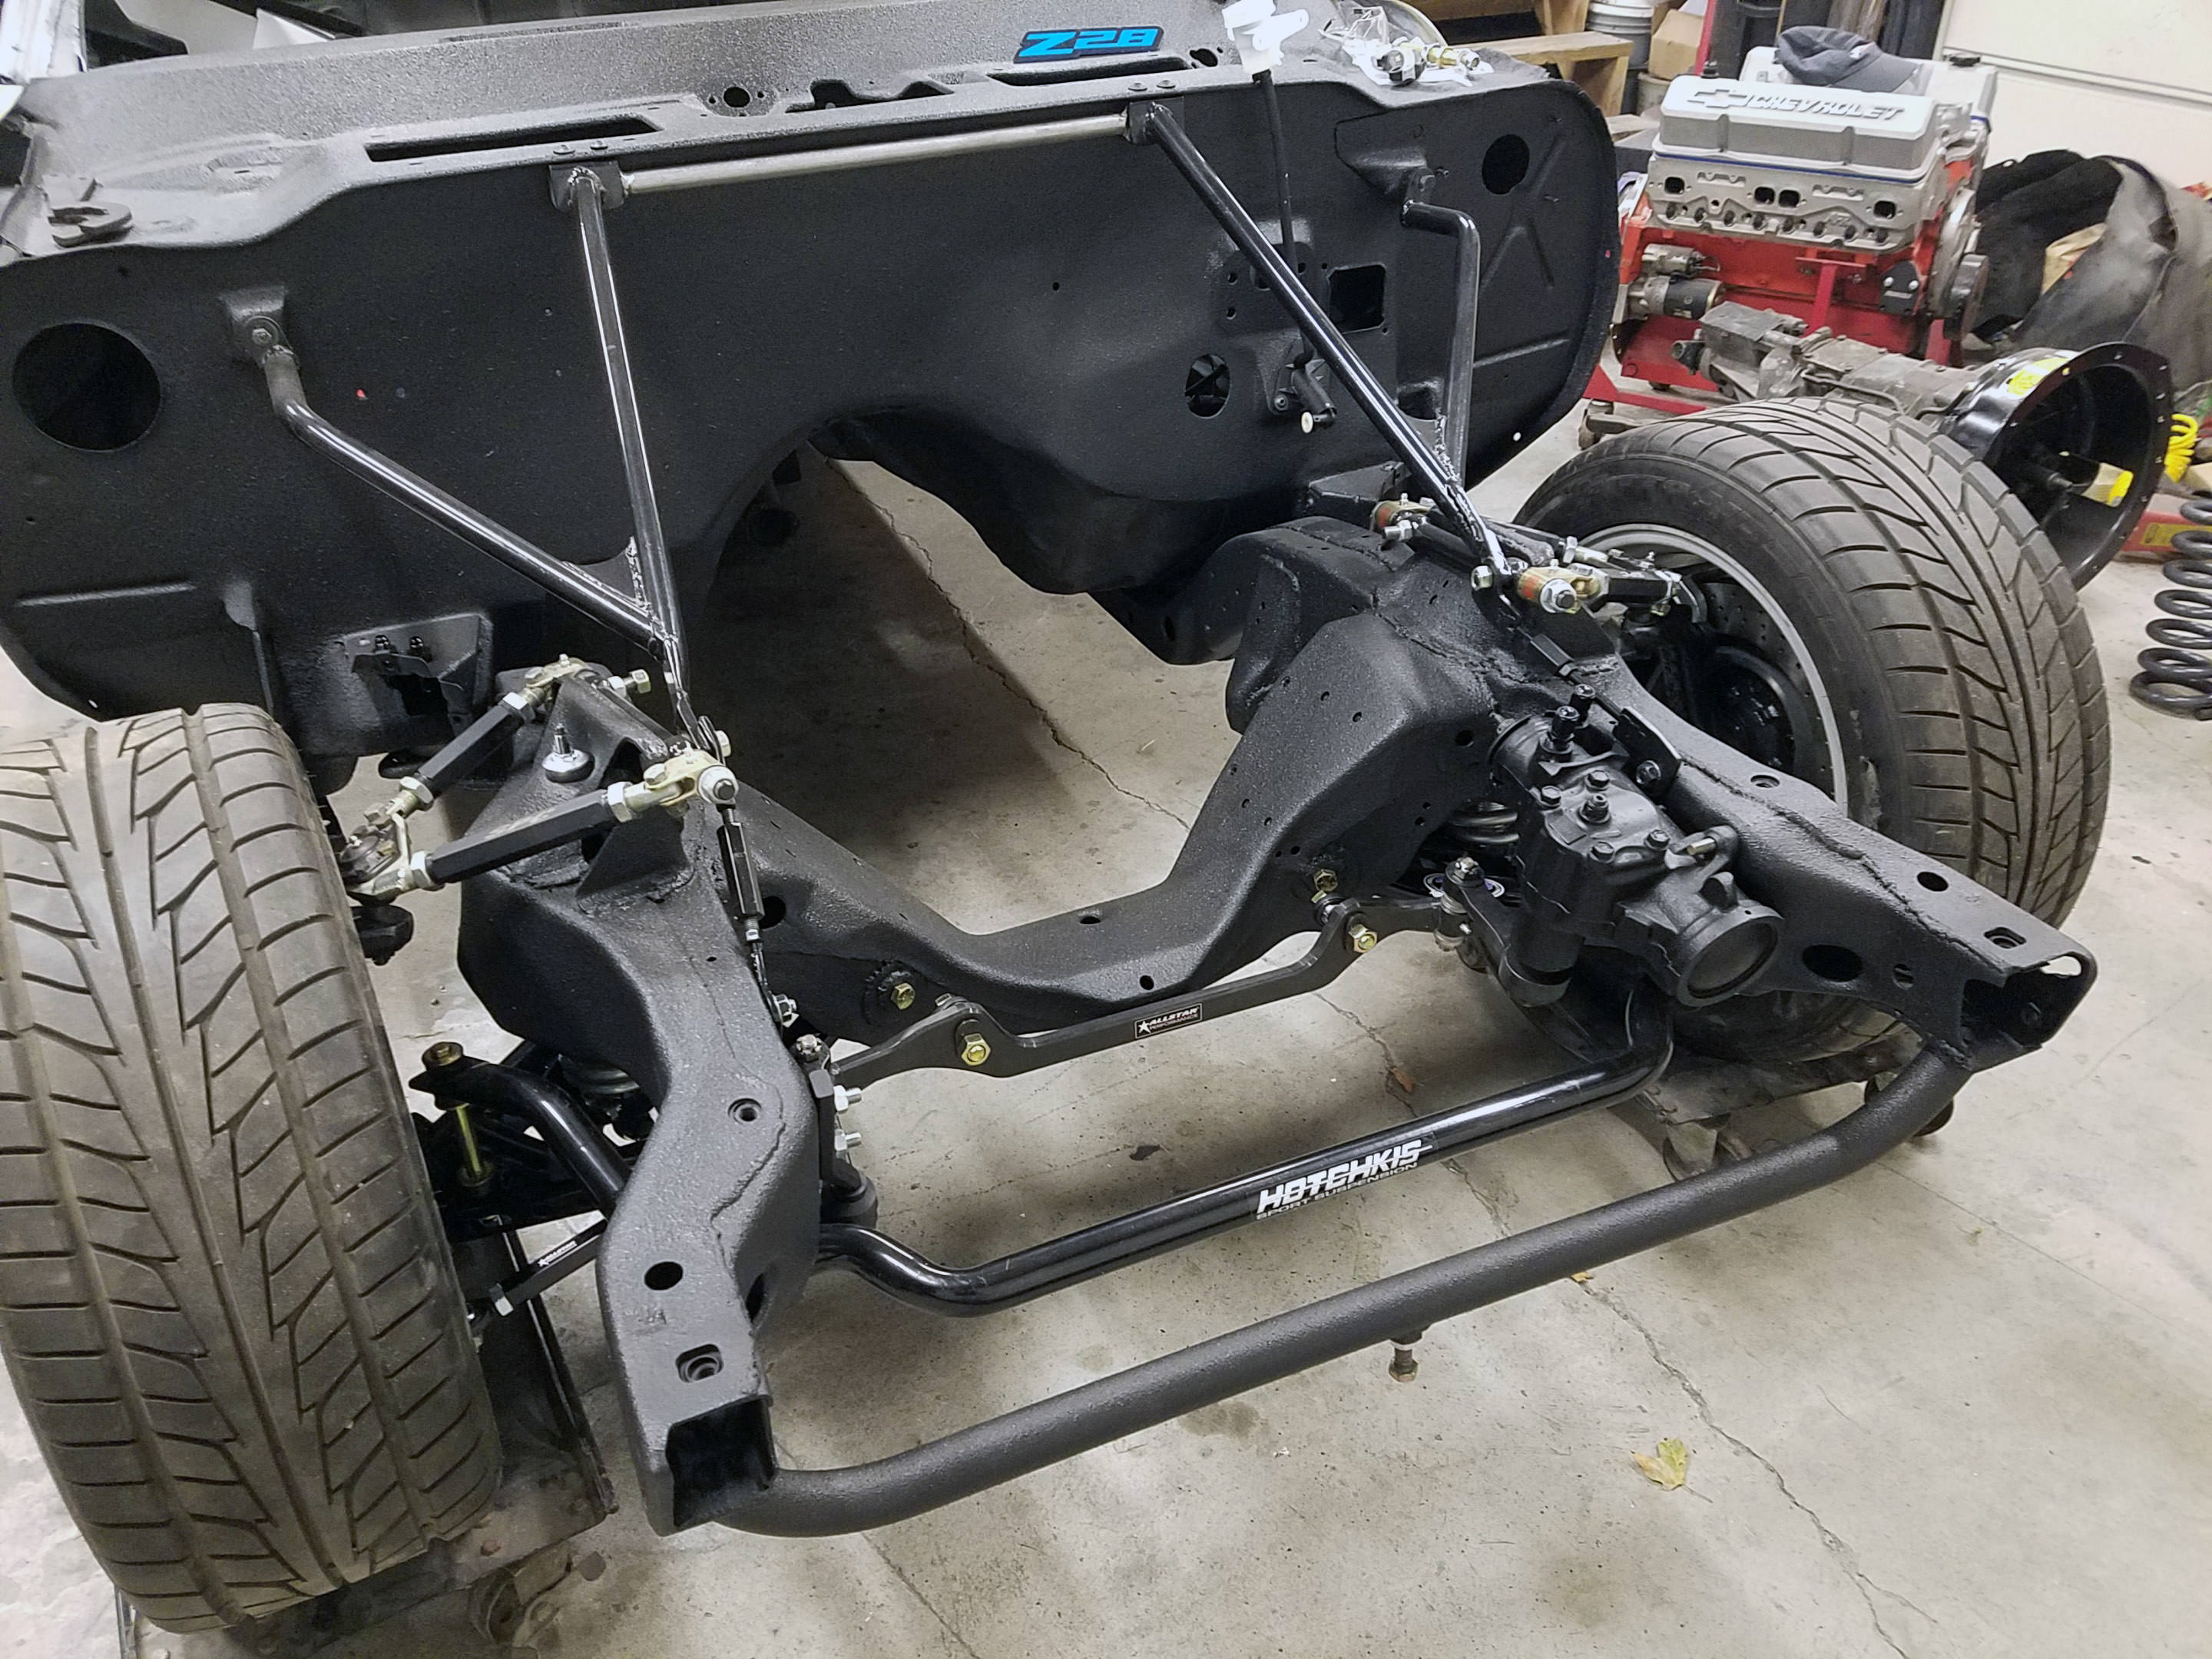
Here's where I am now. I hit the chassis stuff with epoxy and Raptor Liner. Made a couple changes to the firewall after my last mockup too. The Raptor really gives a nice look, and the texture hides some imperfections.
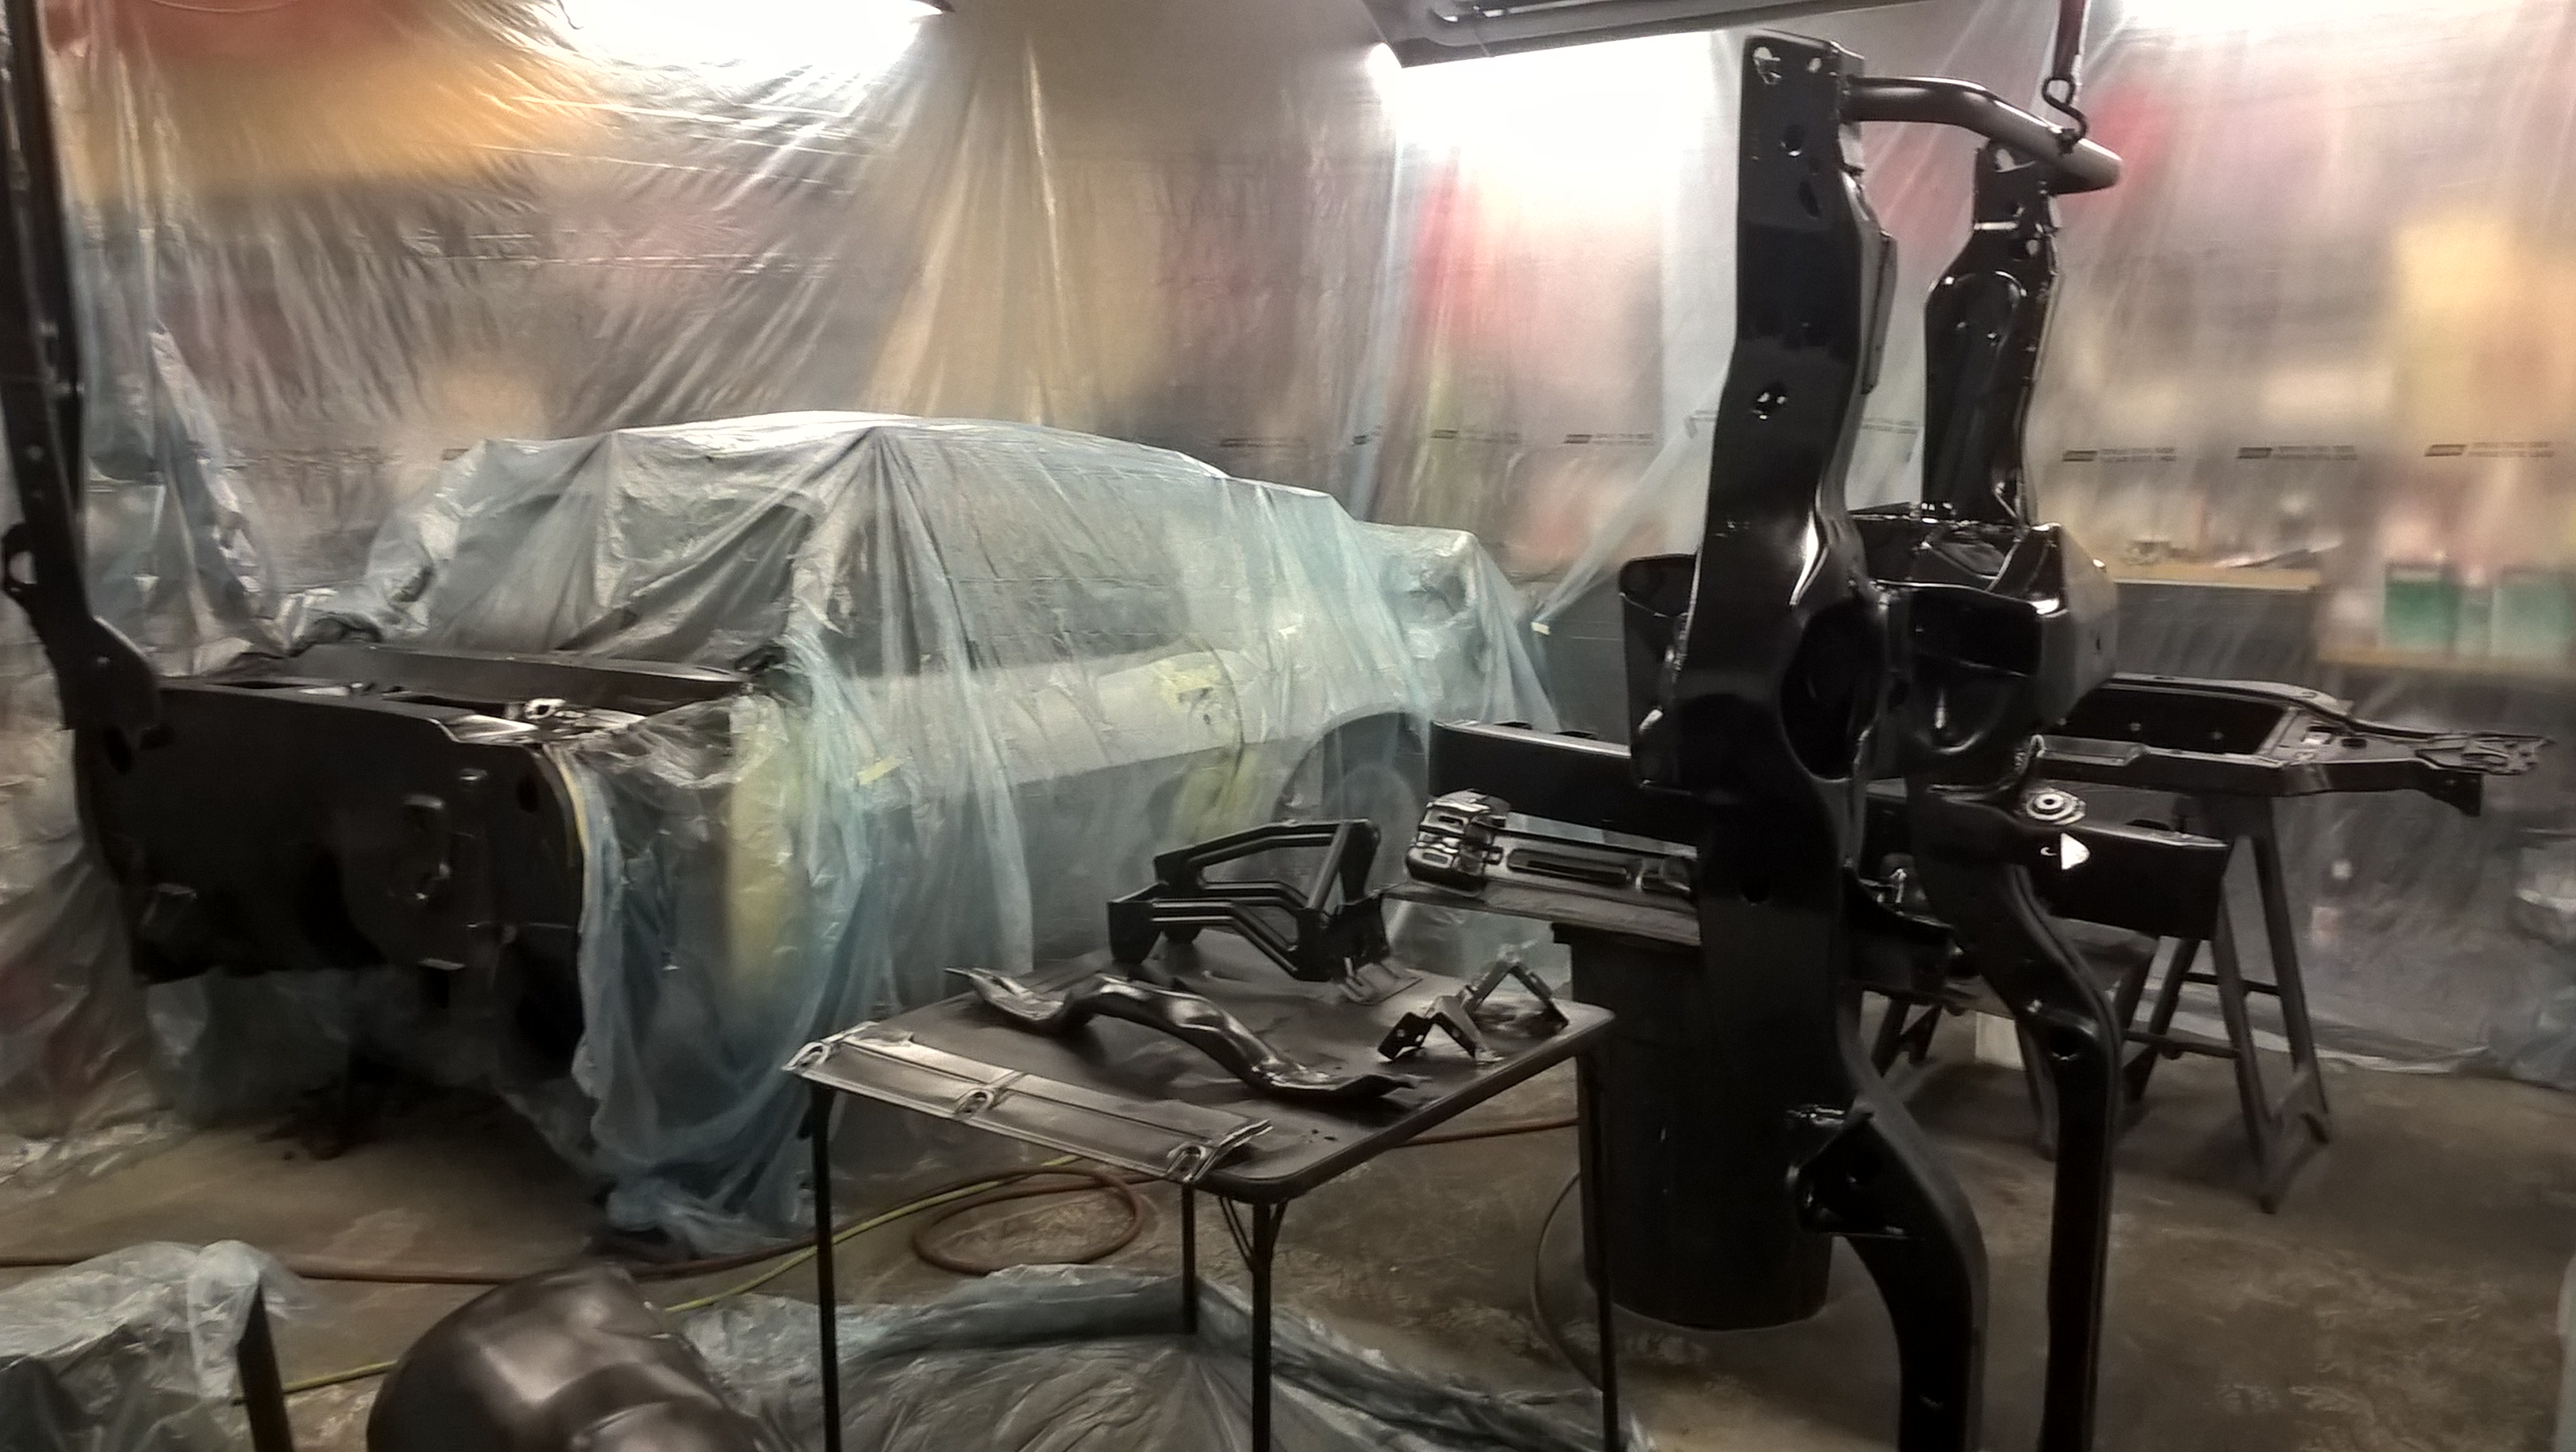
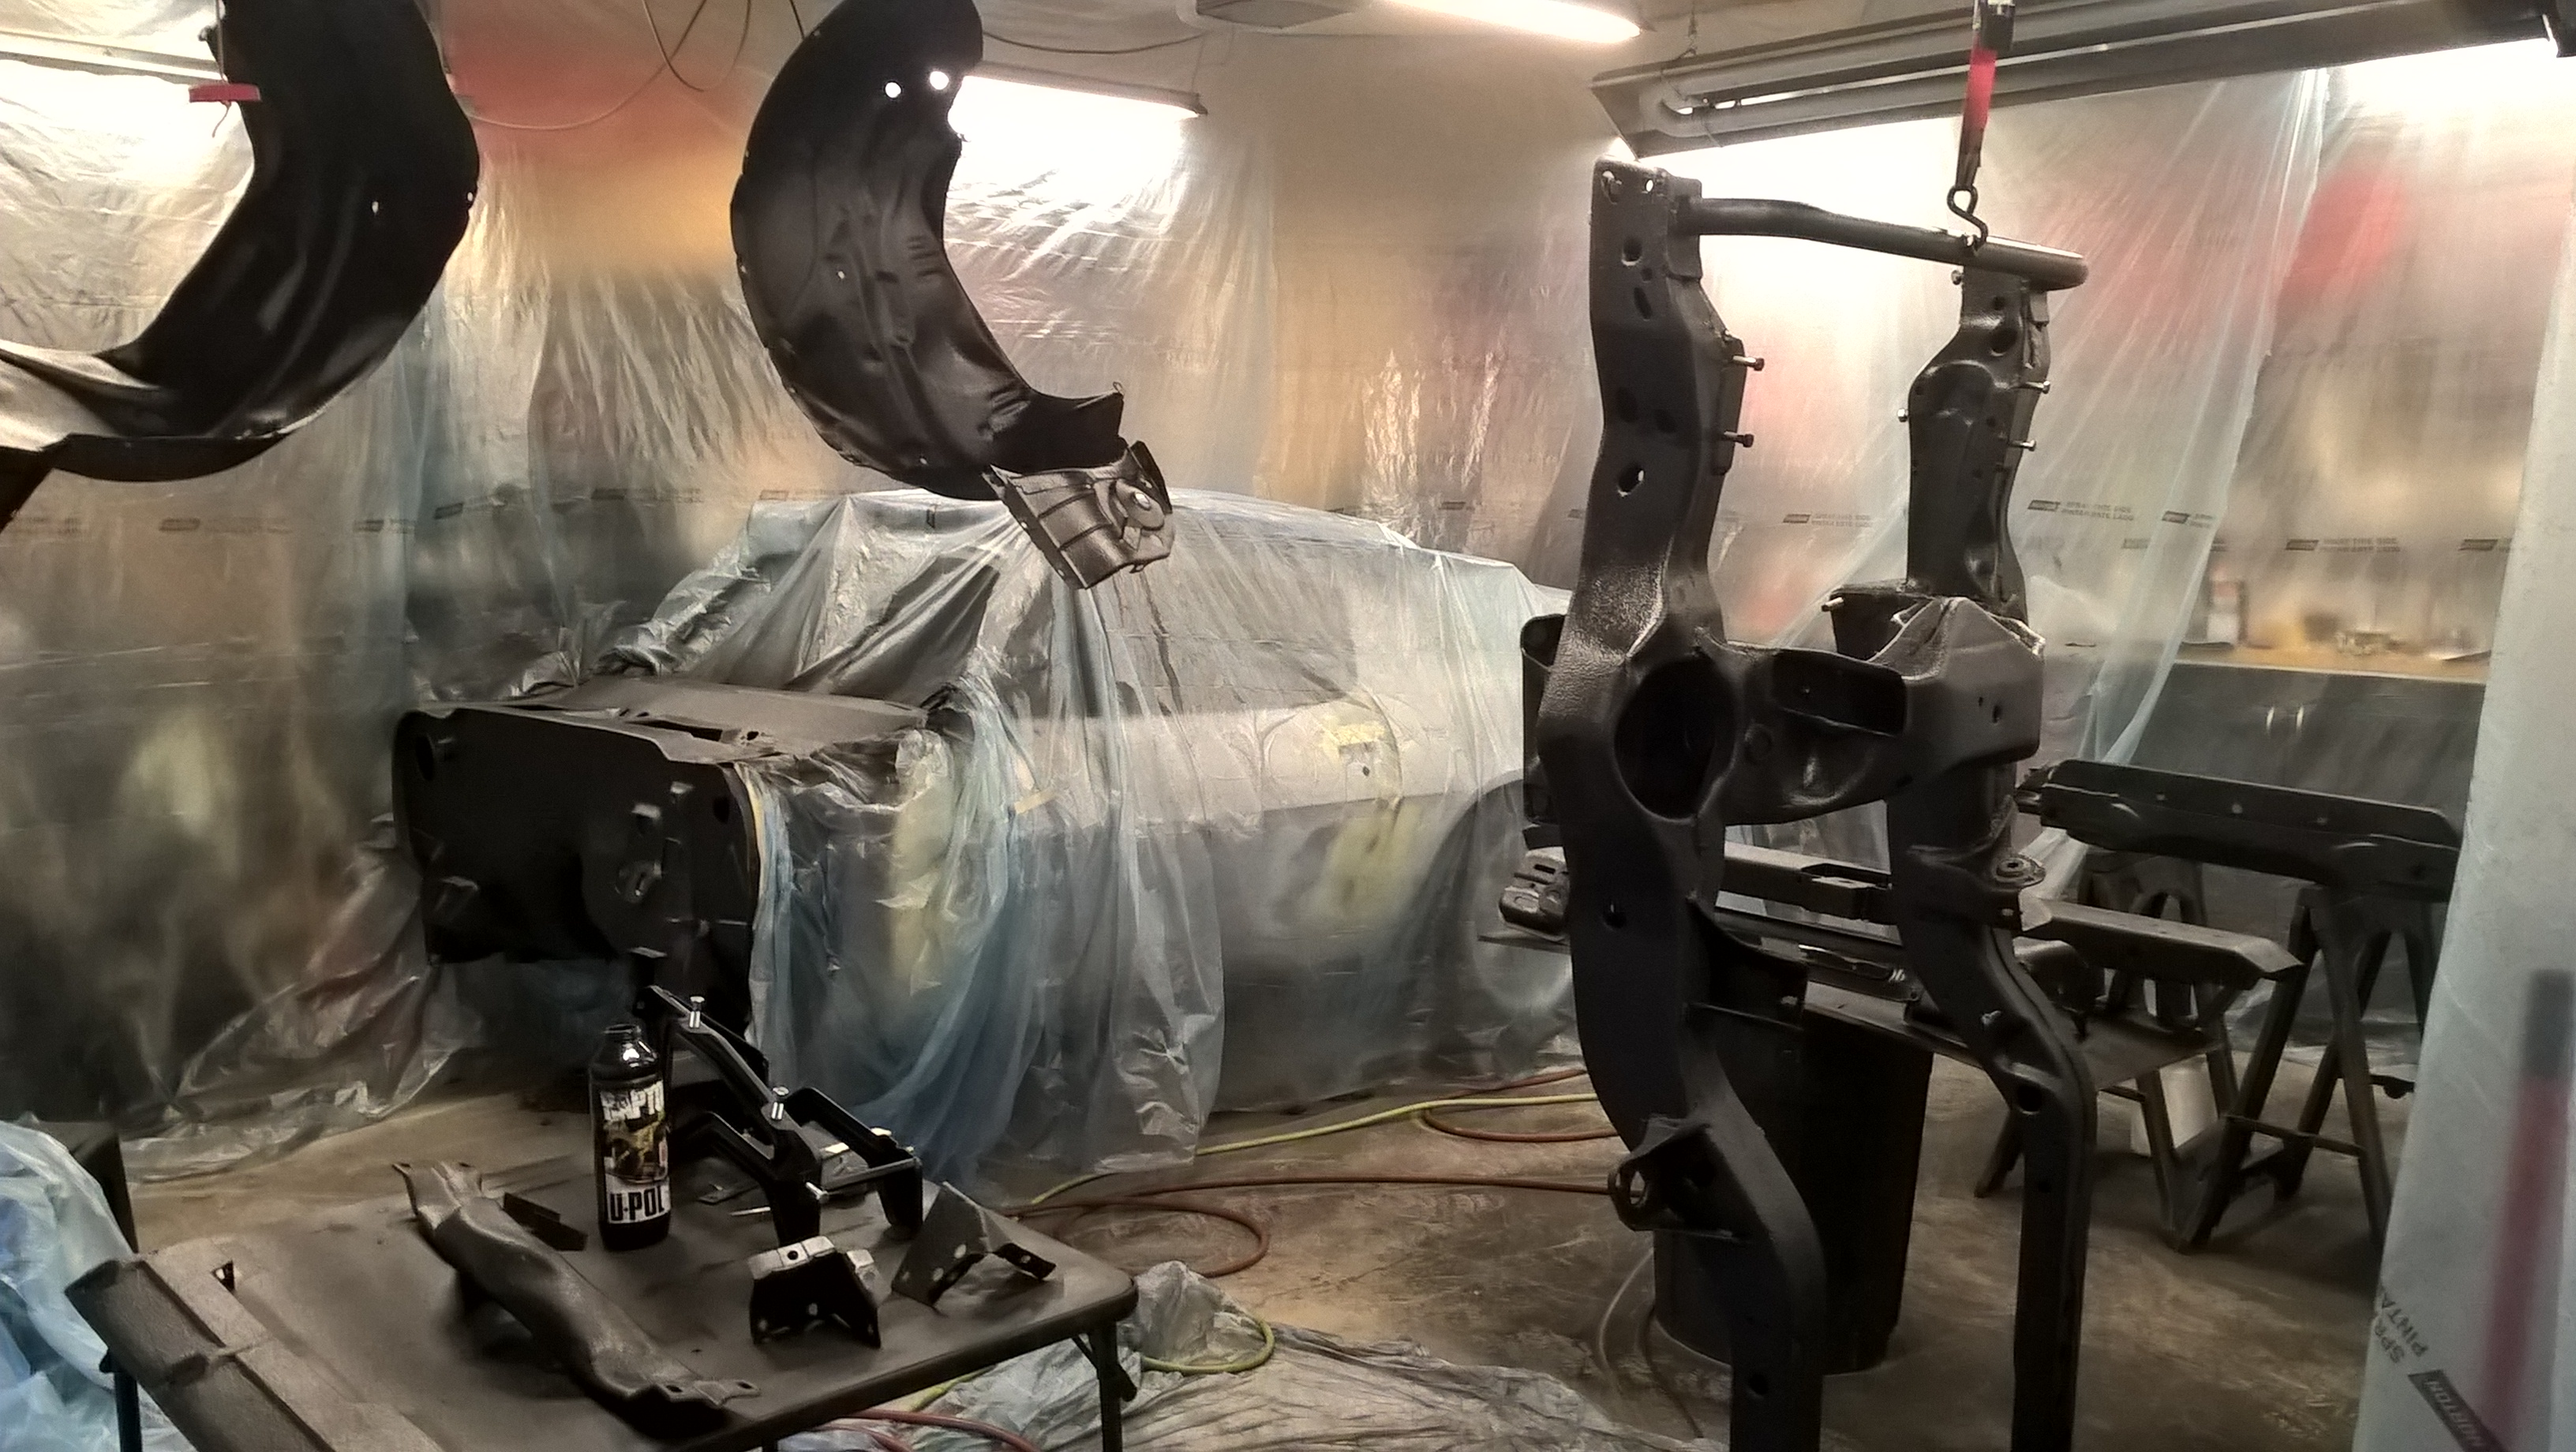

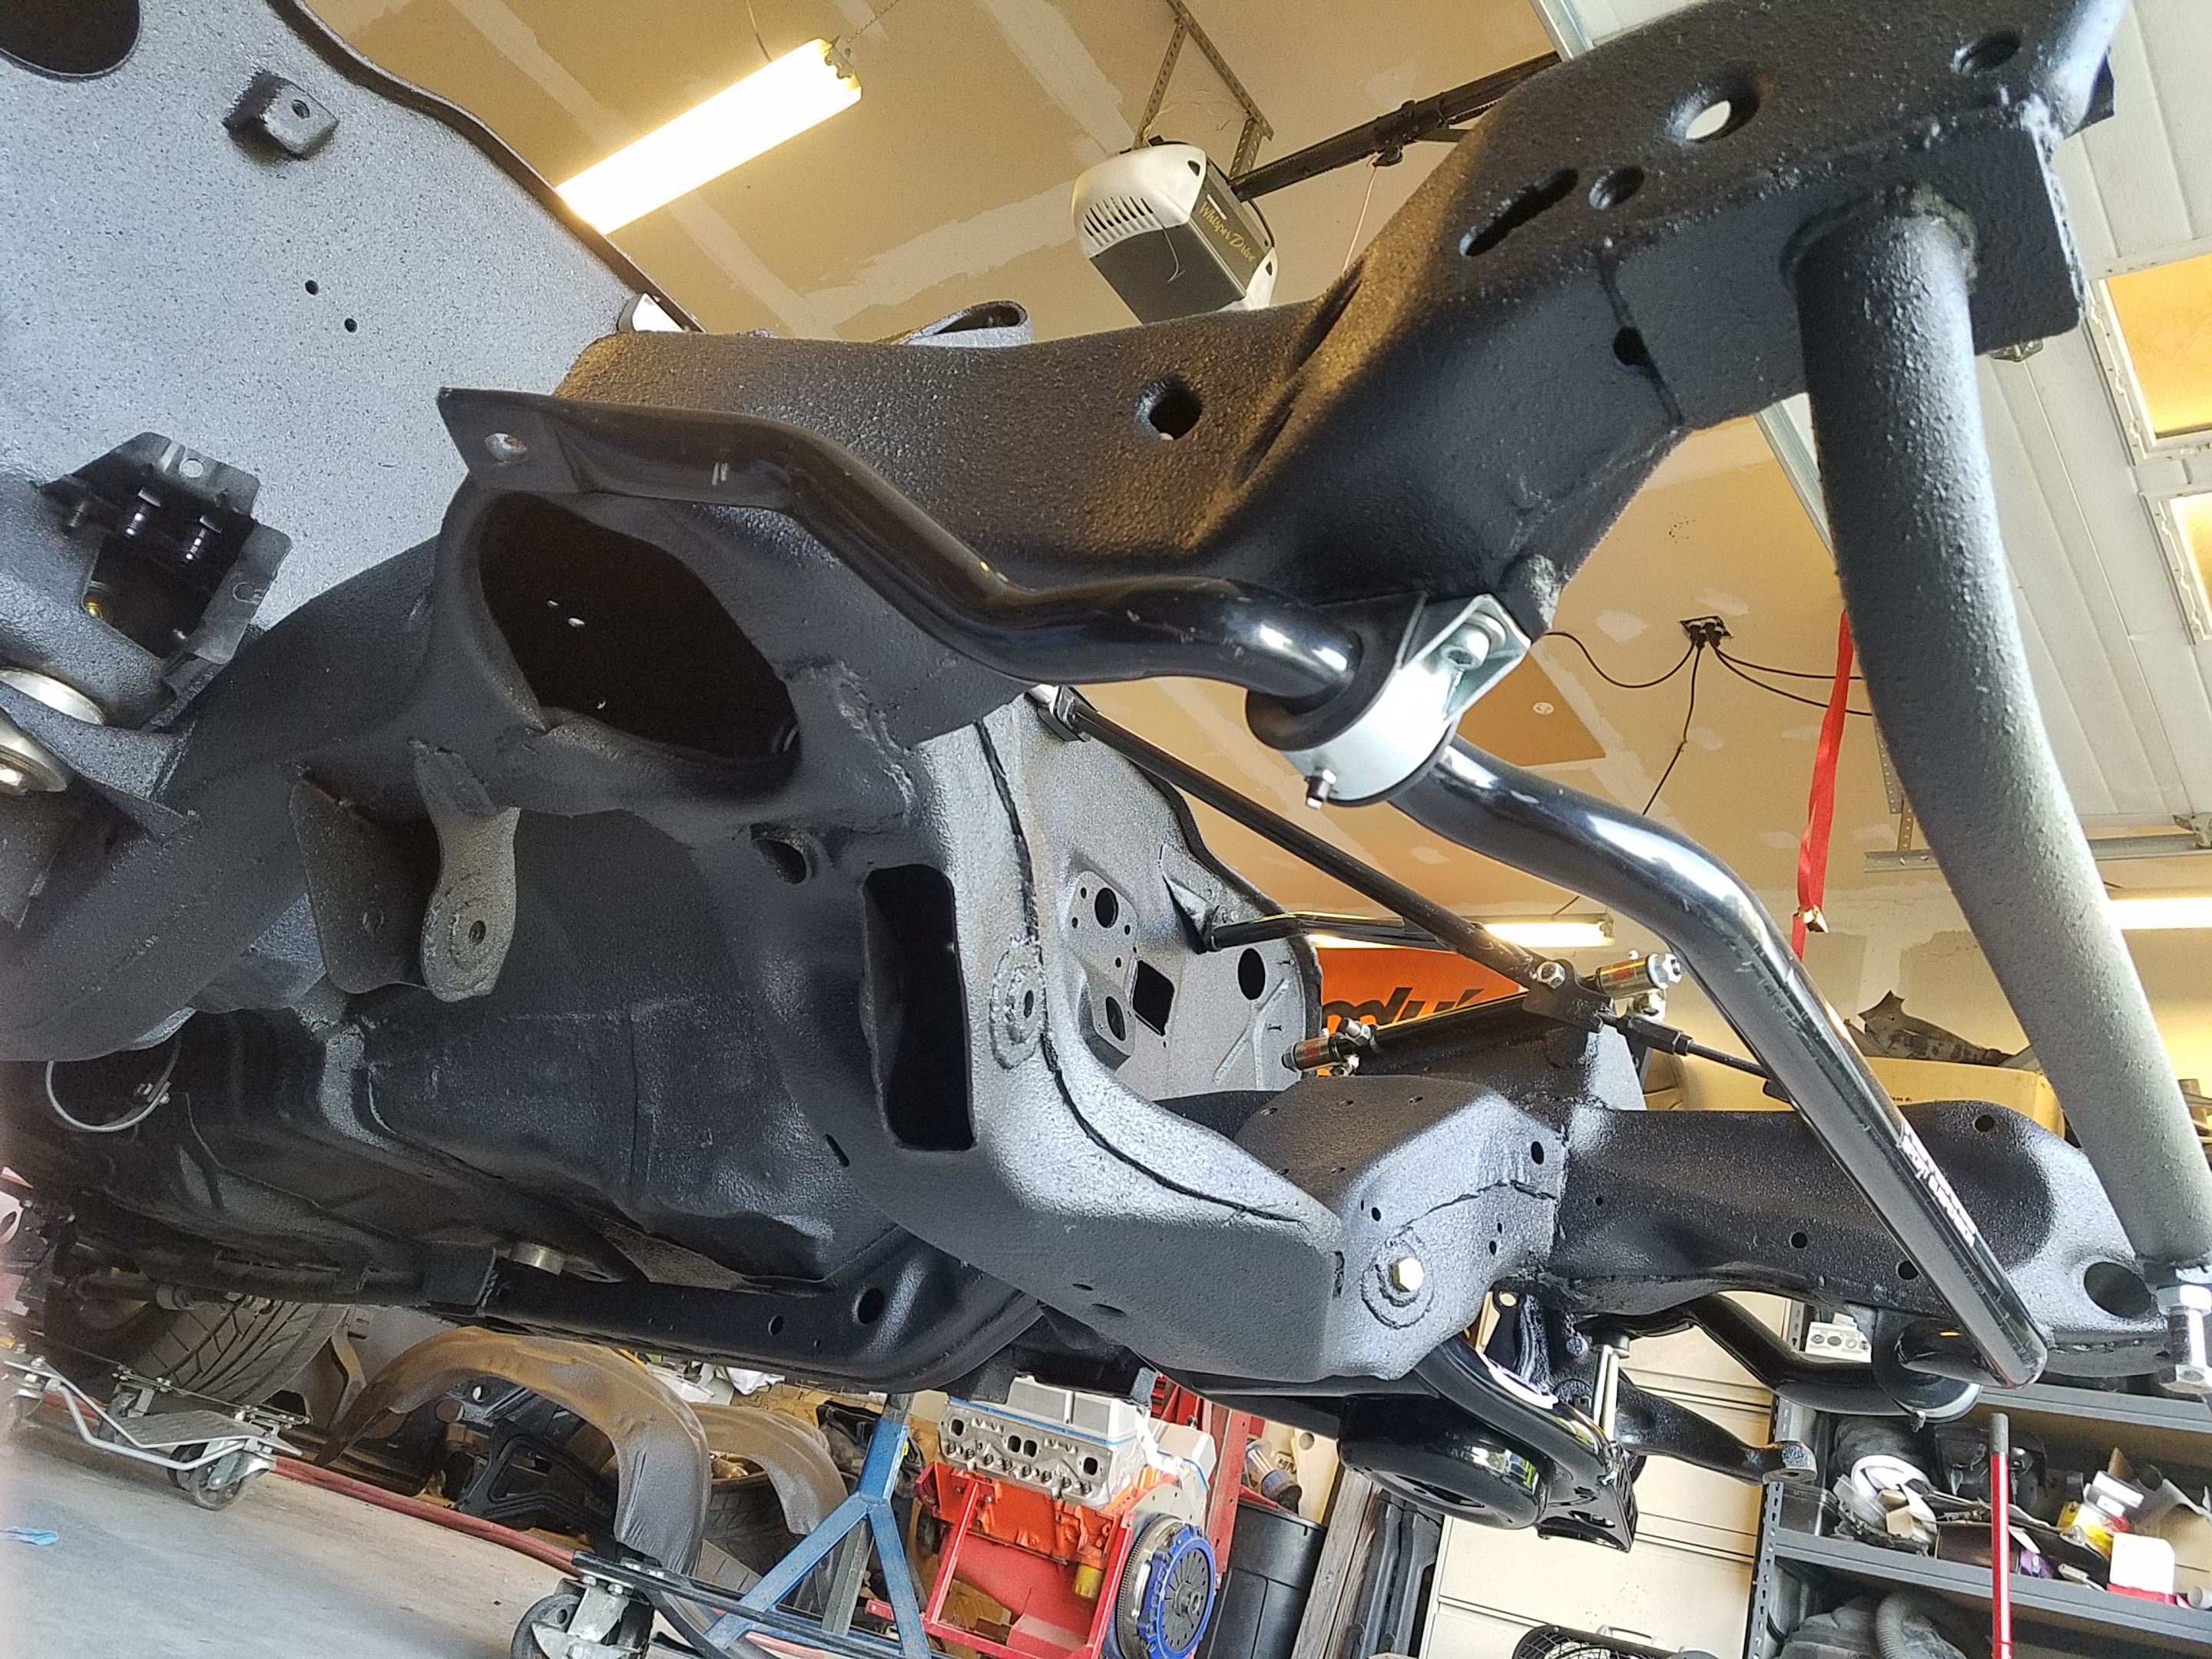
This pic shows how it all works together with the braces to keep it all rock solid with the g-braces. The cantilevered subframe needs a lot of bracing to be stable. The bracing is a tight fit, but it works with the stock PS lines and the AN-6 setup I'll be running.

12-27-2017 #129
Registered User
- Join Date
- Mar 2005
- Location
- Walton, NY
- Posts
- 737
Long time no update. Been working on my Beretta since I kissed the valves off the pistons on a missed shift...oops. But now that car should be about 270hp instead of 200. haha
I do have a bunch of old photos that I never did post for some reason. So here they are.
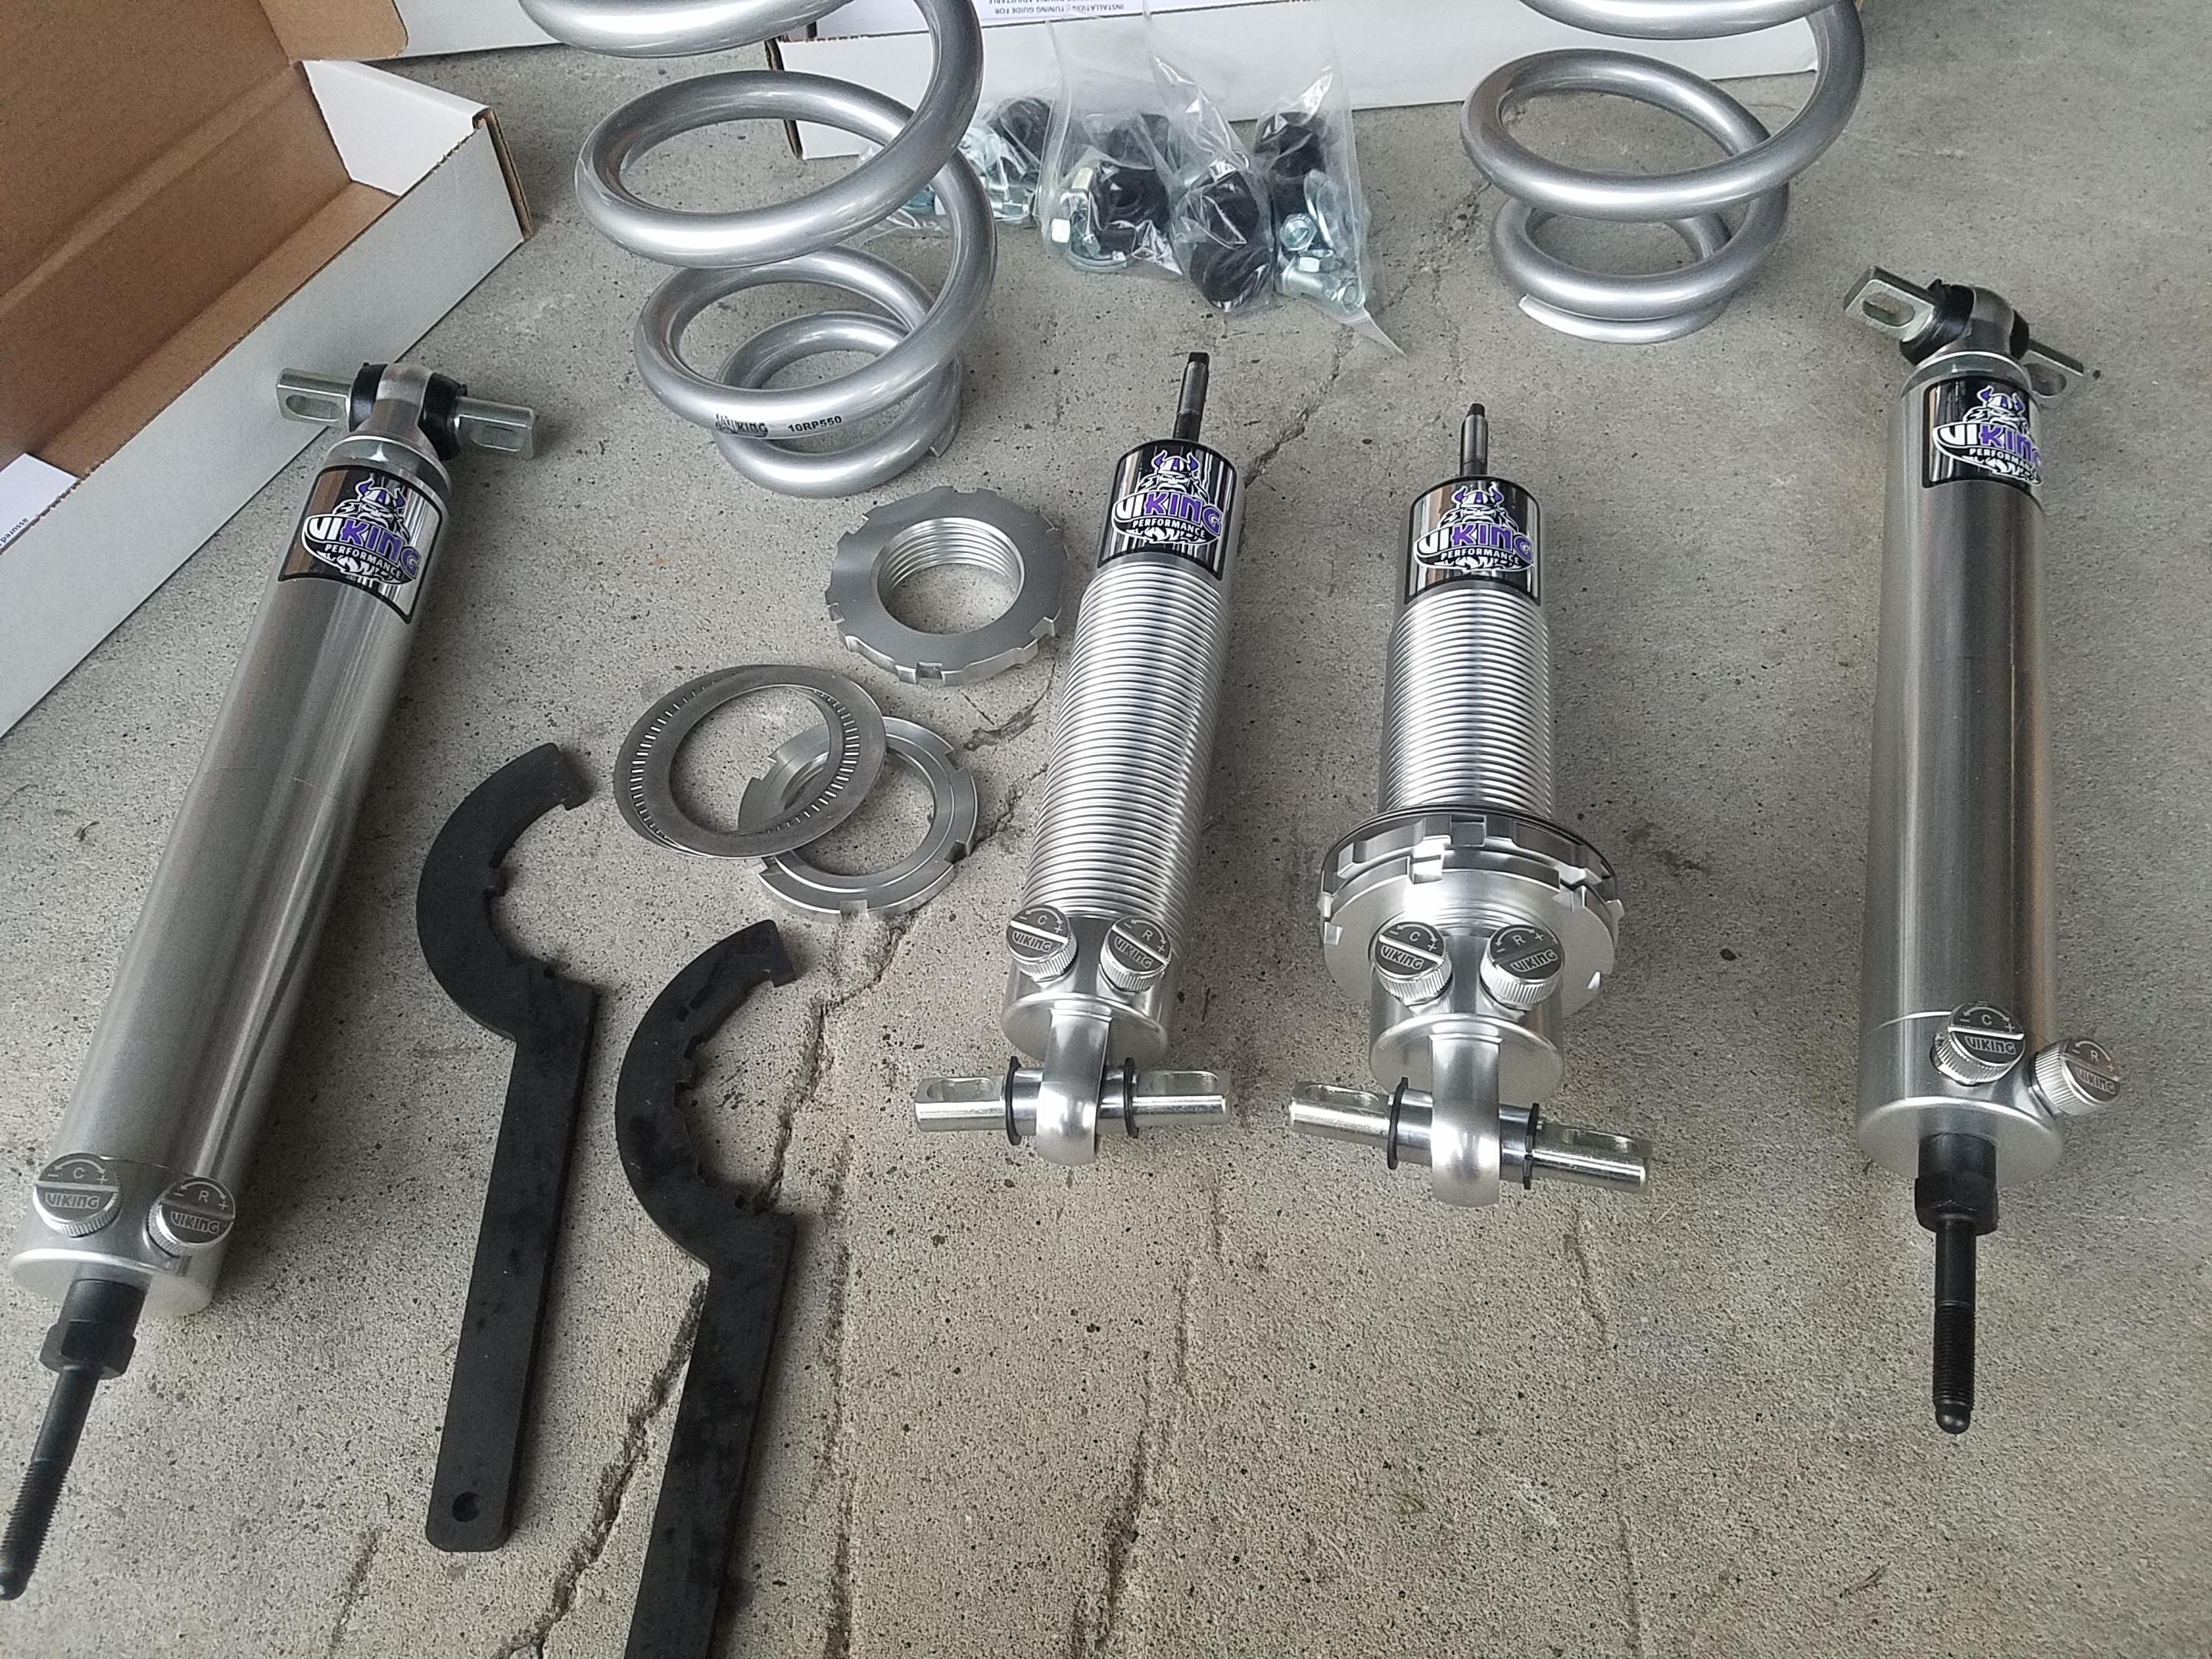
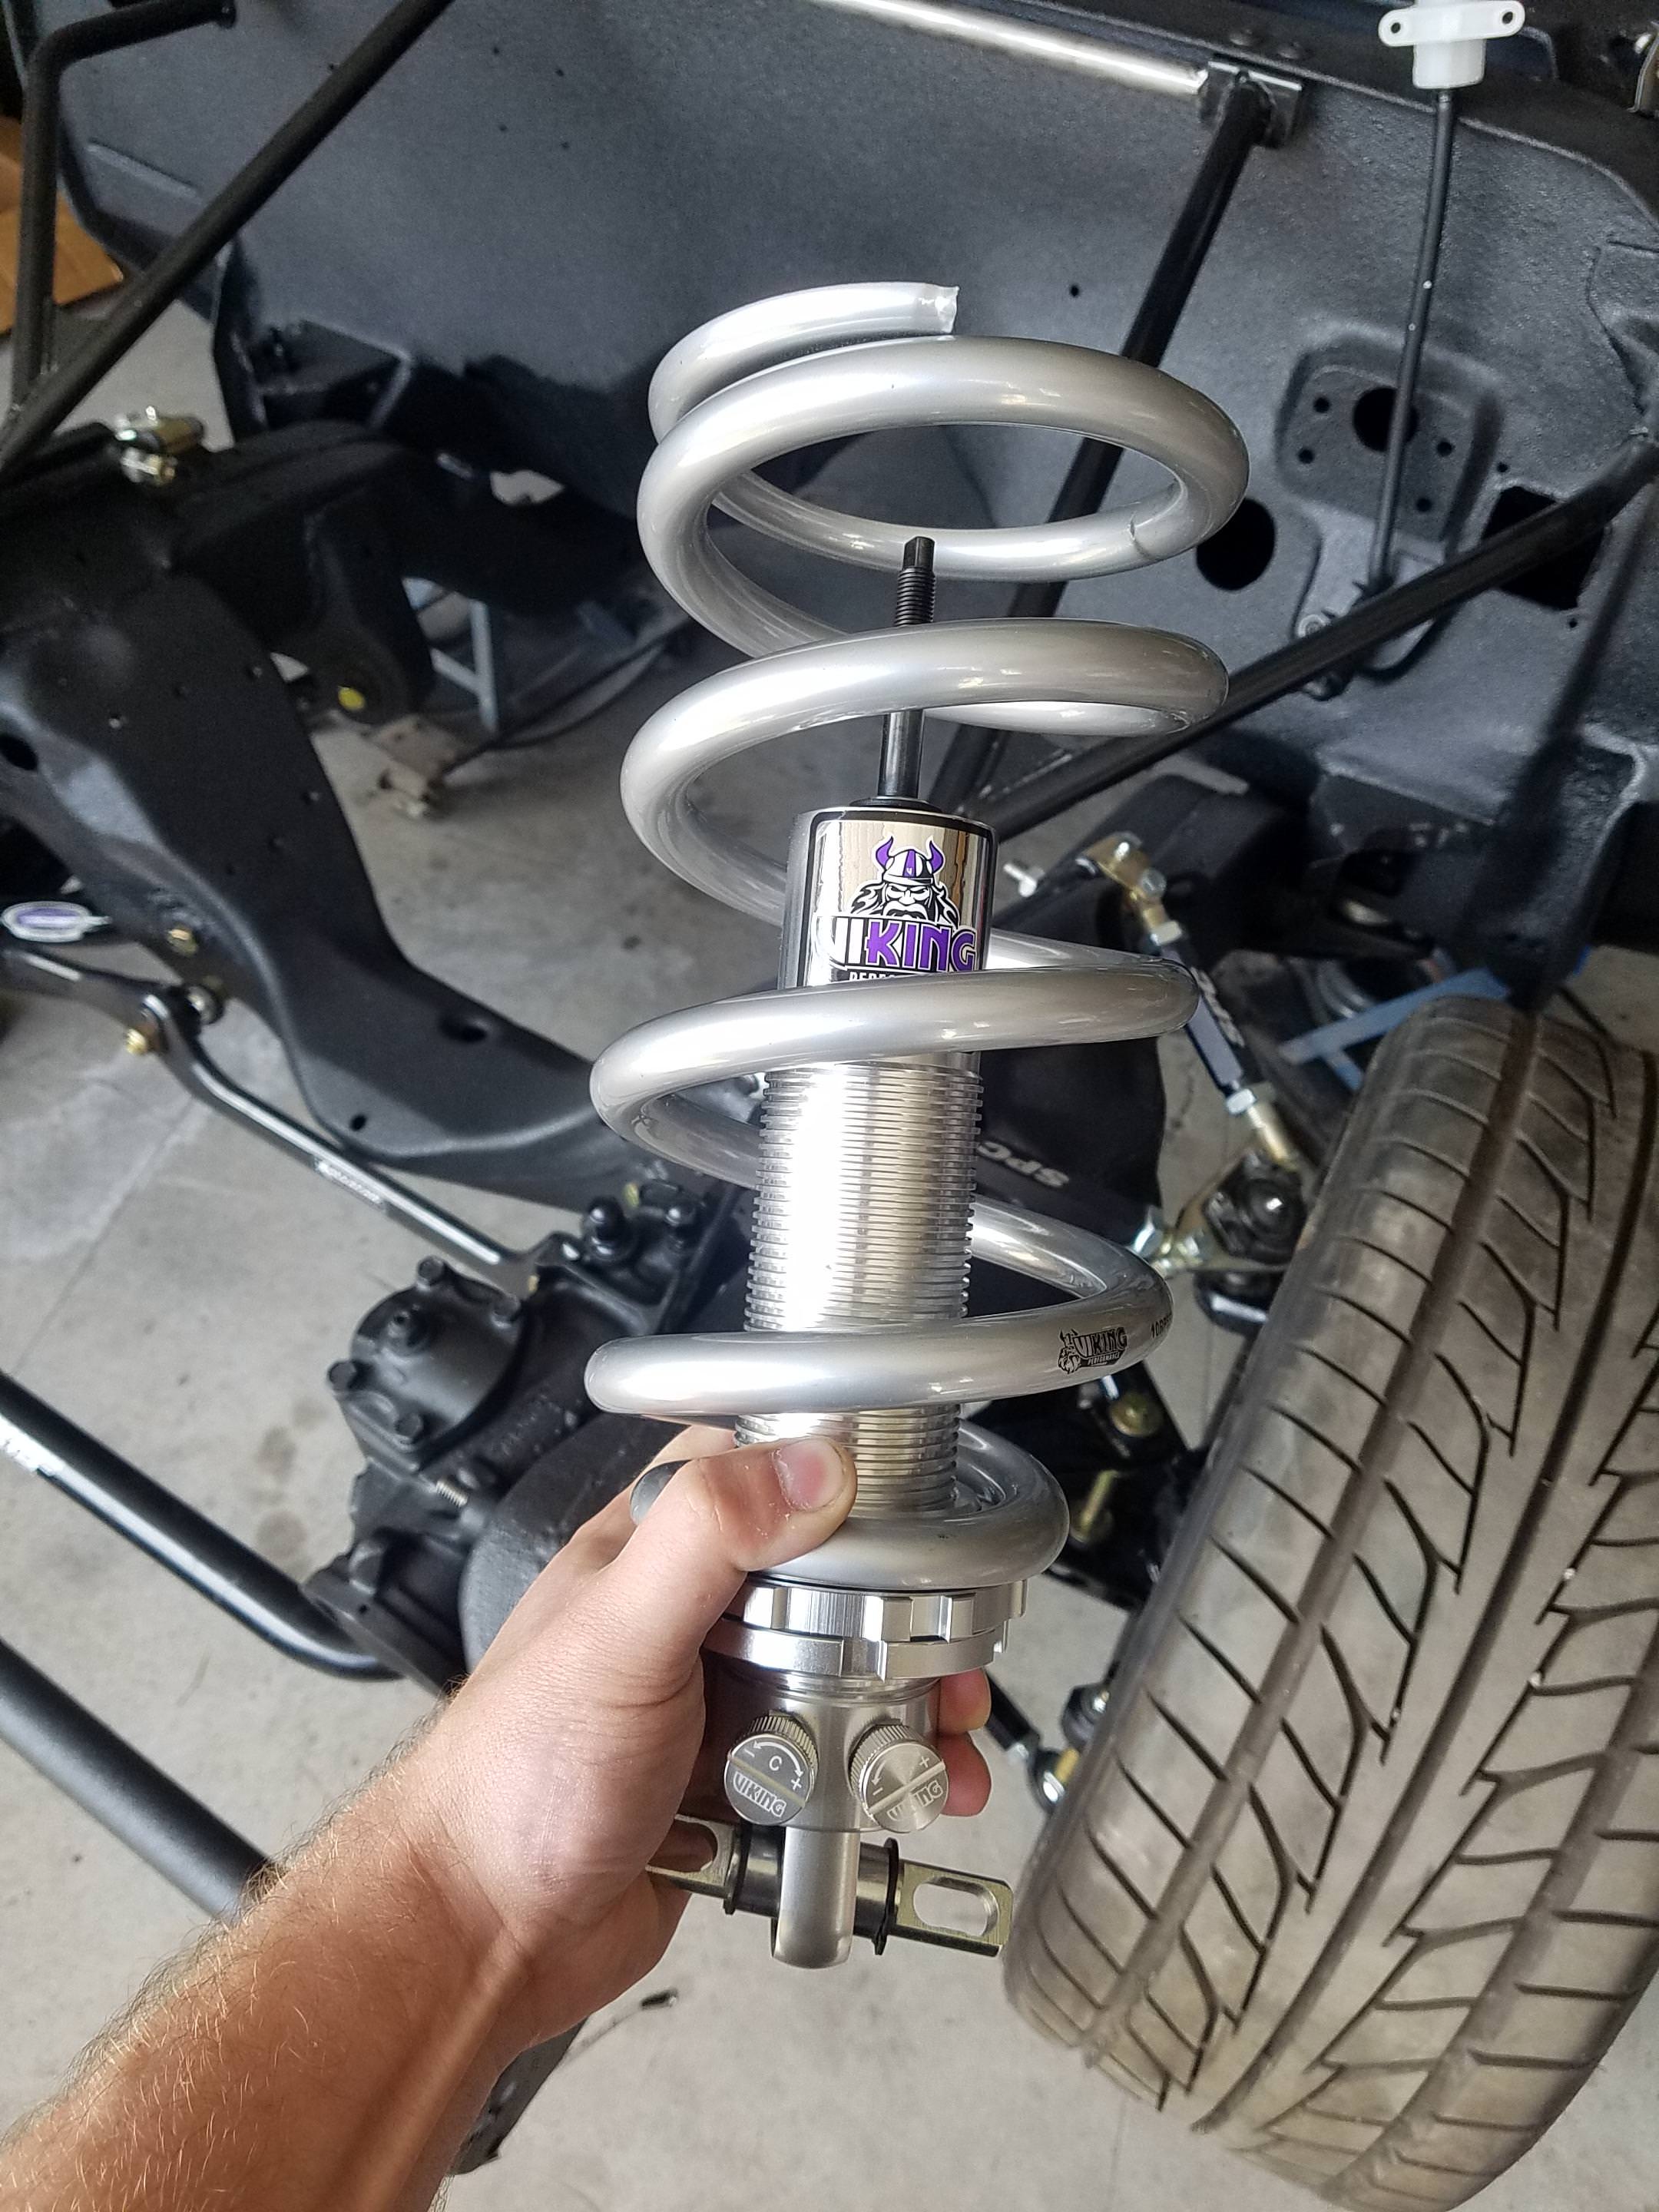
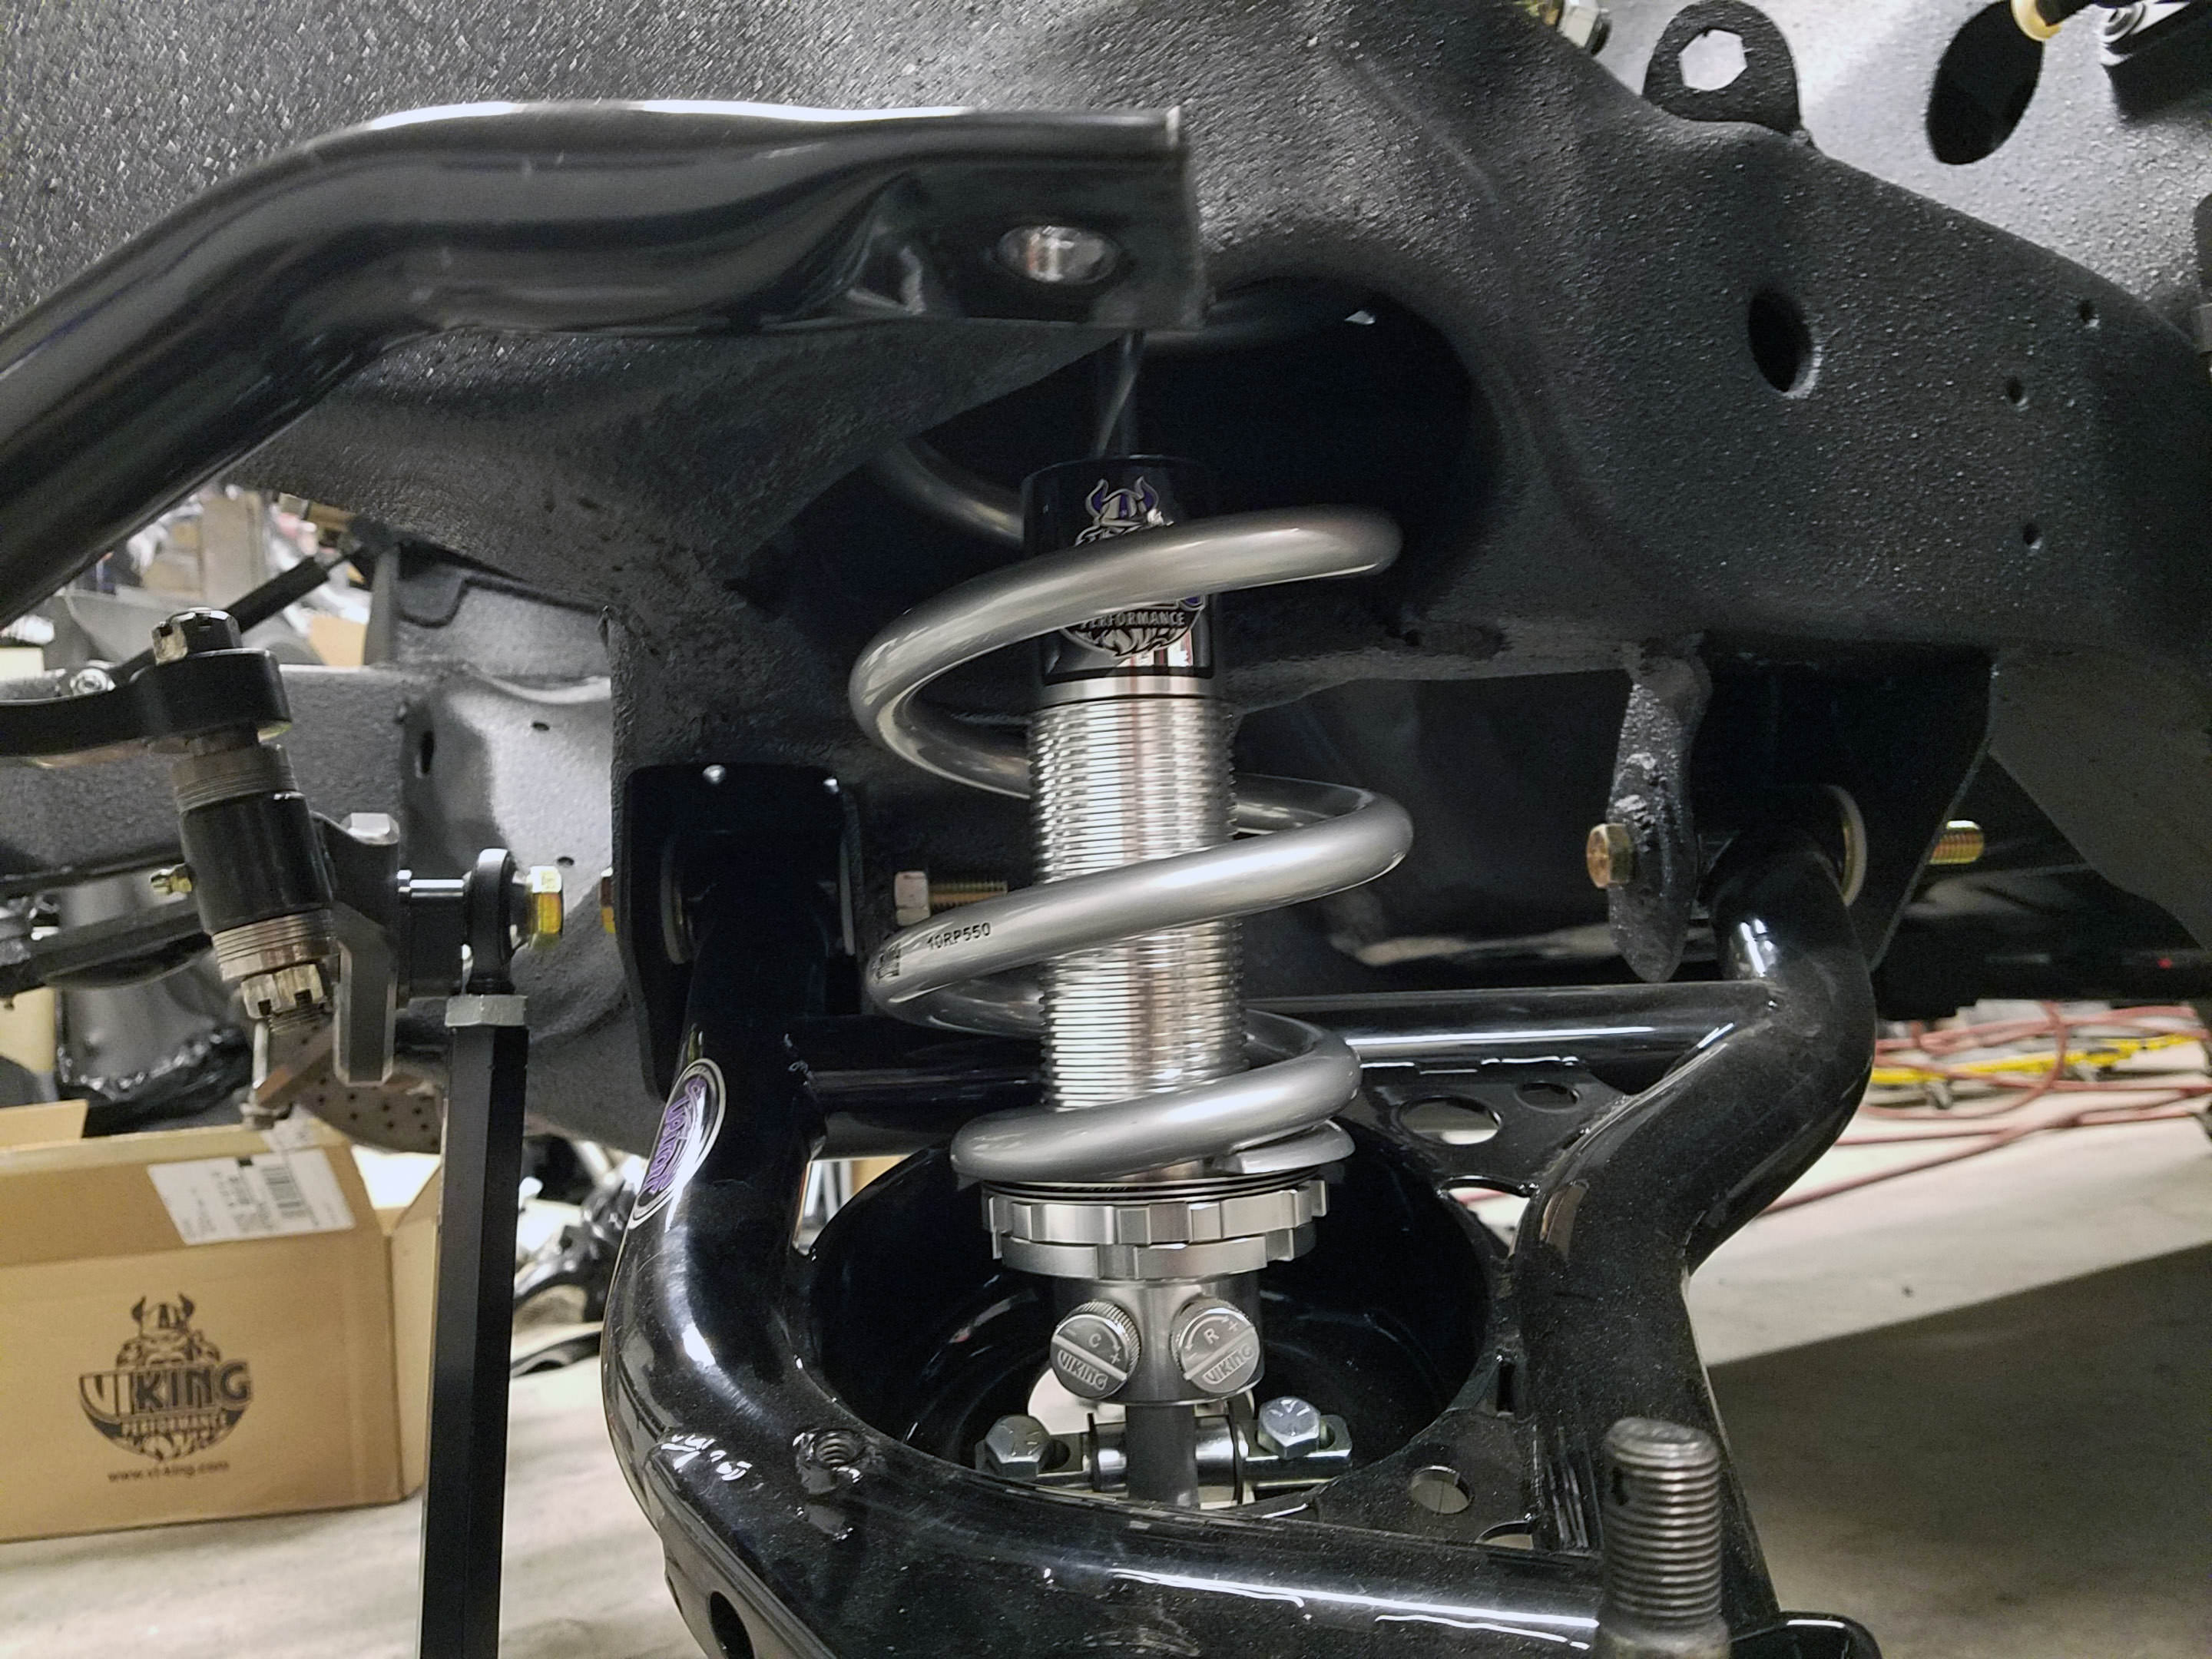
I picked up a set of double adjustable Viking coilovers from UMI. Went with the 550lb springs. My old Hotchkis were 600 (which I still have if anyone is interested) but I can adjust the shocks stiffer when racing with these. (And way lighter for drag racing.)
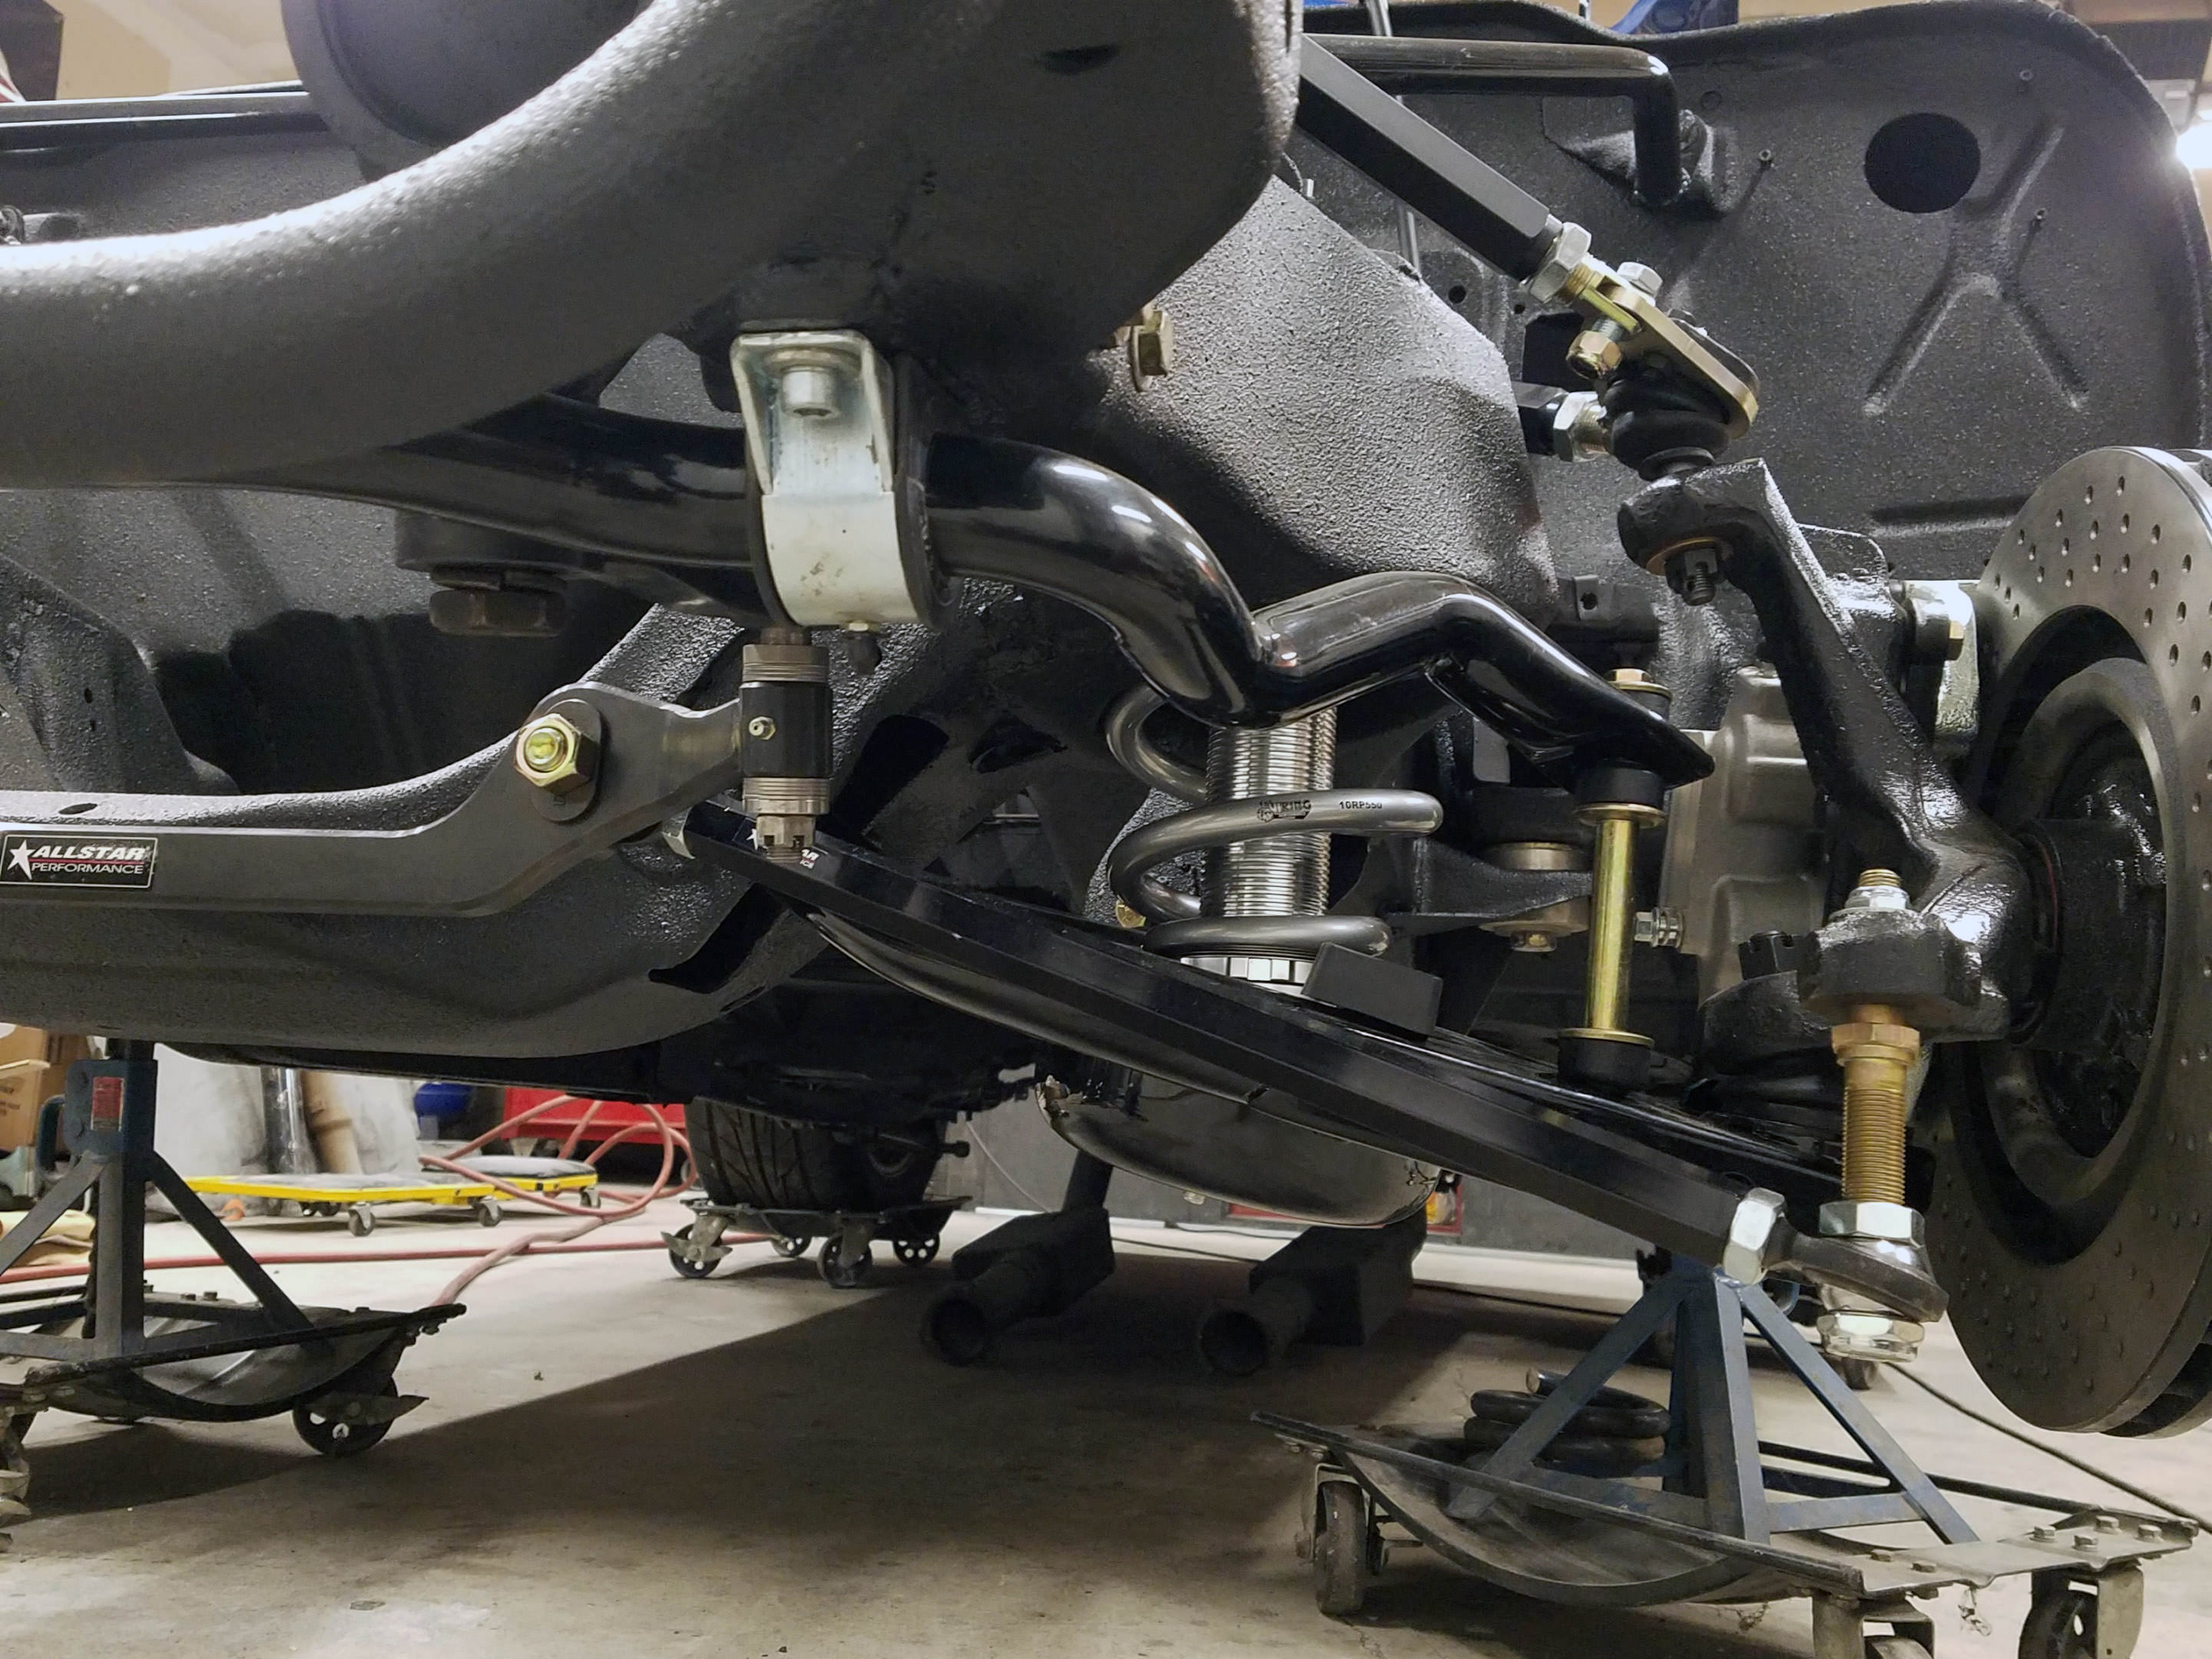
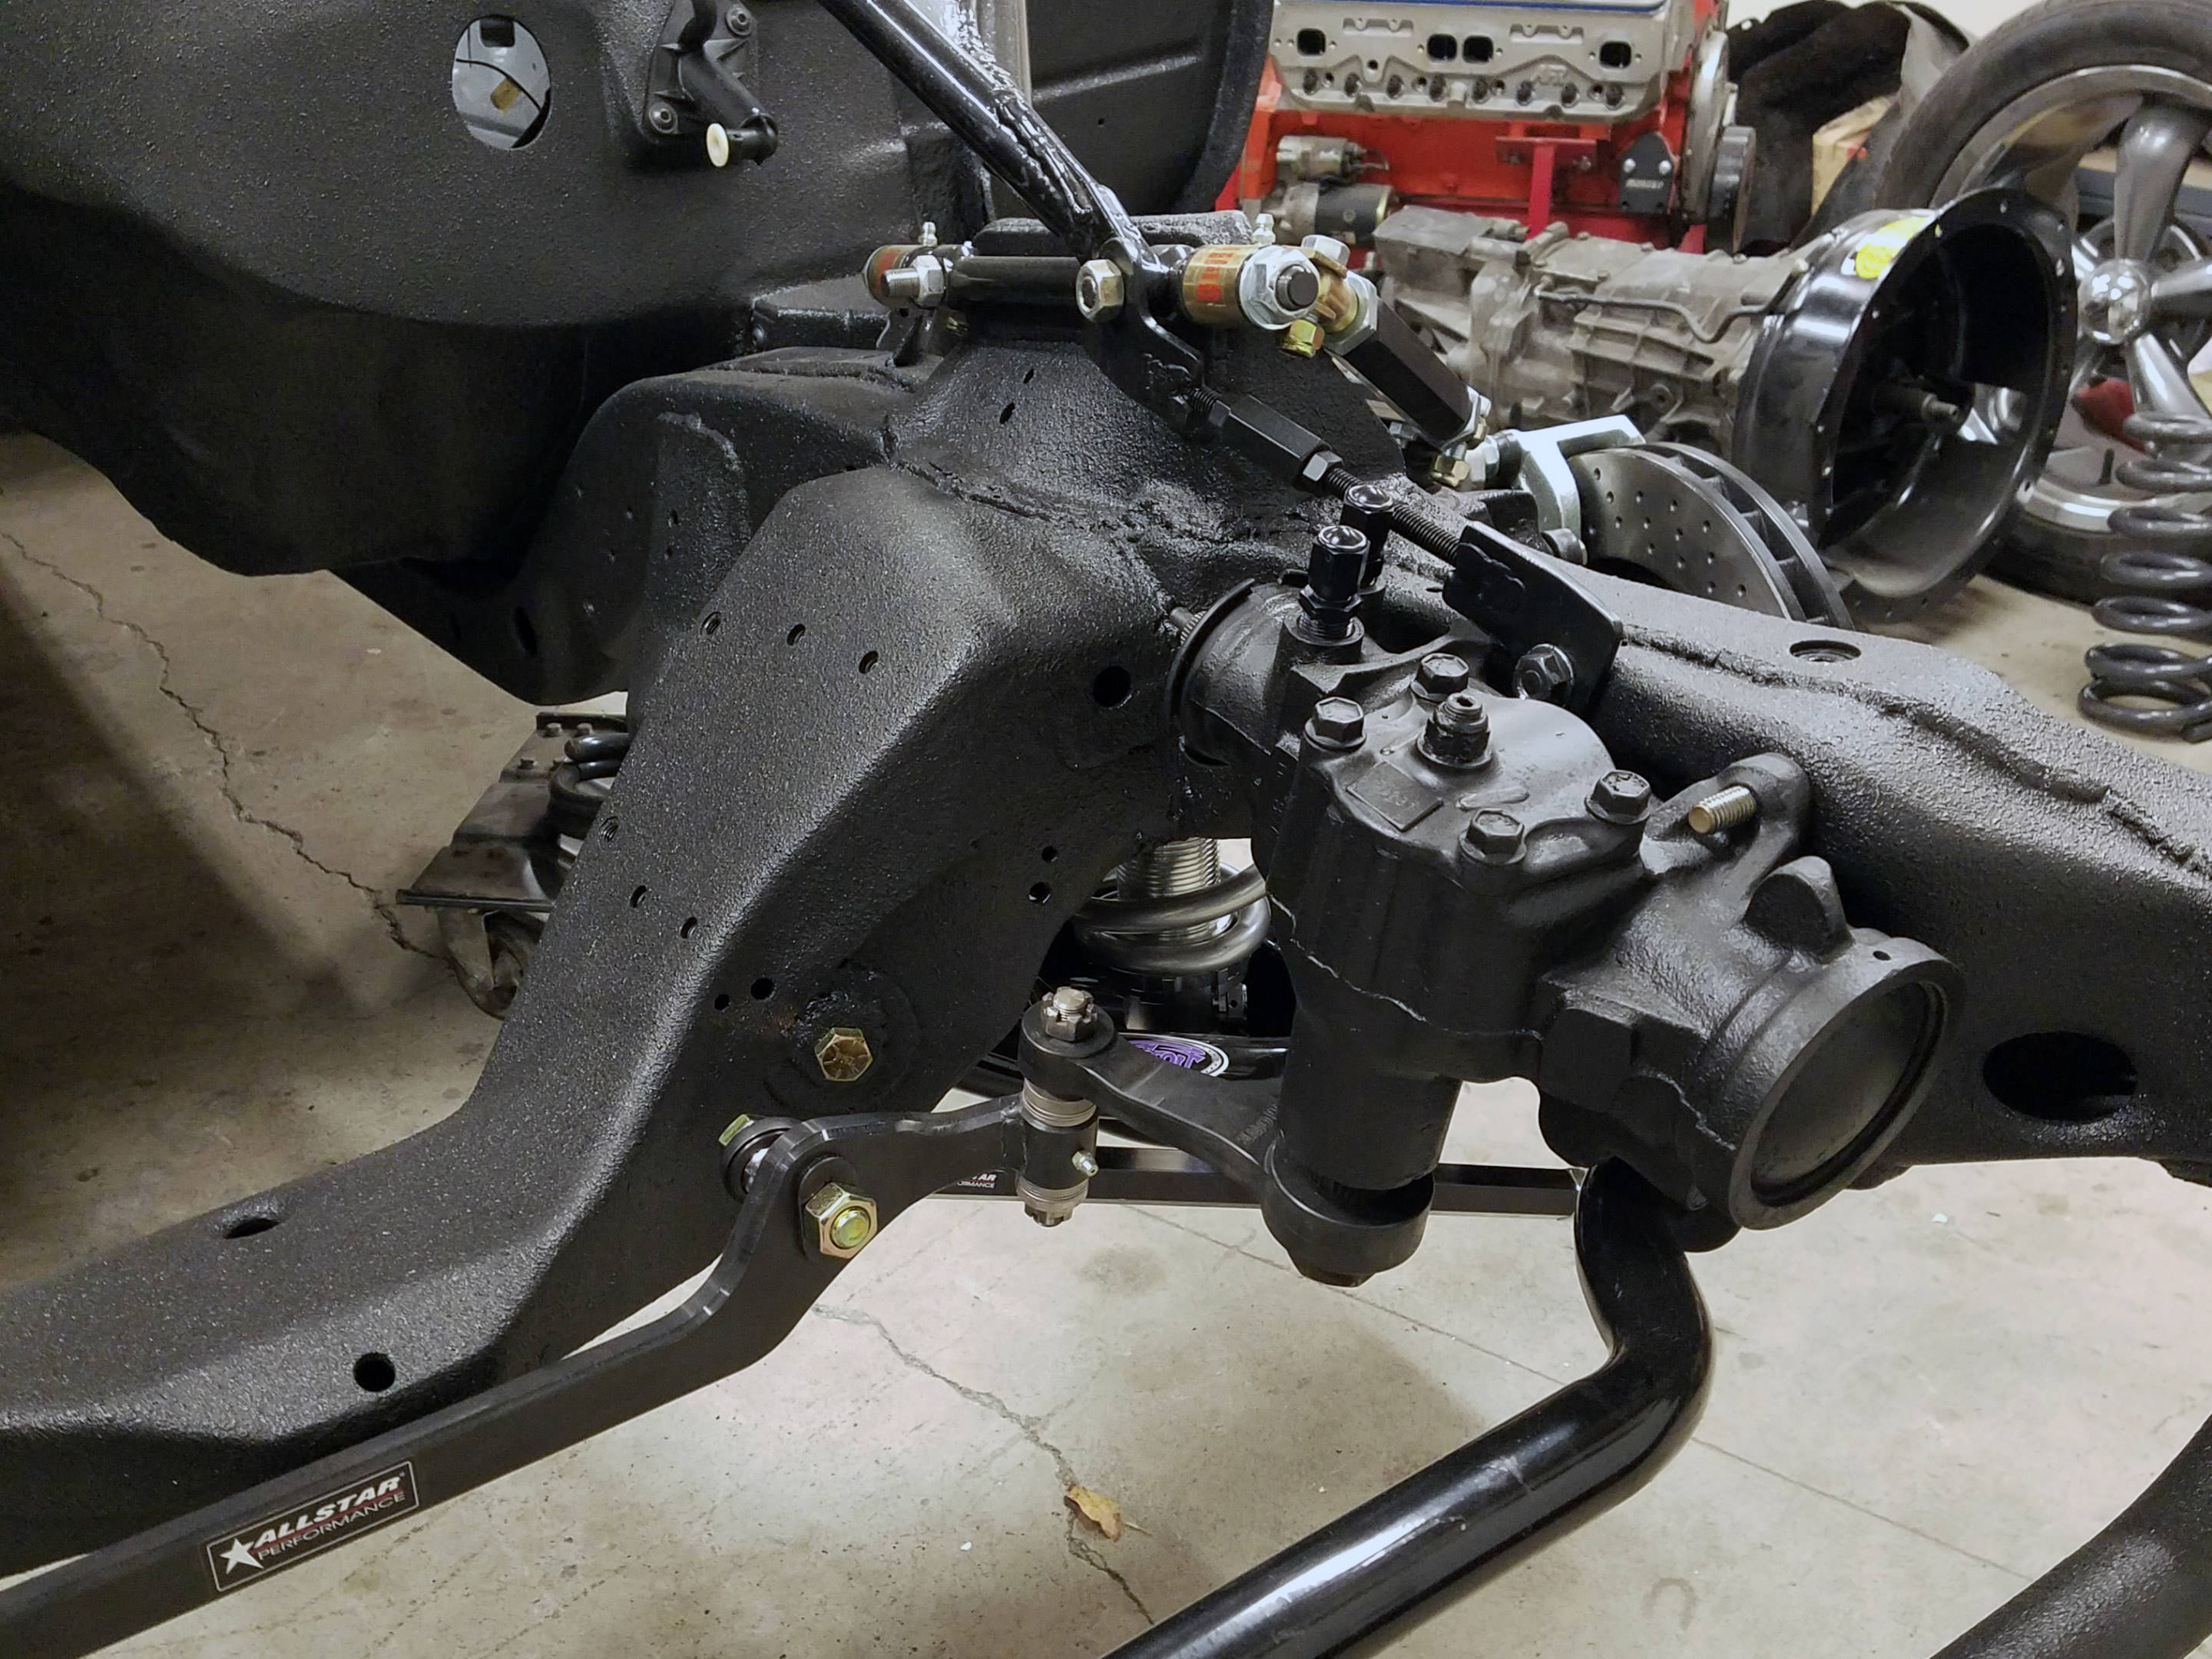
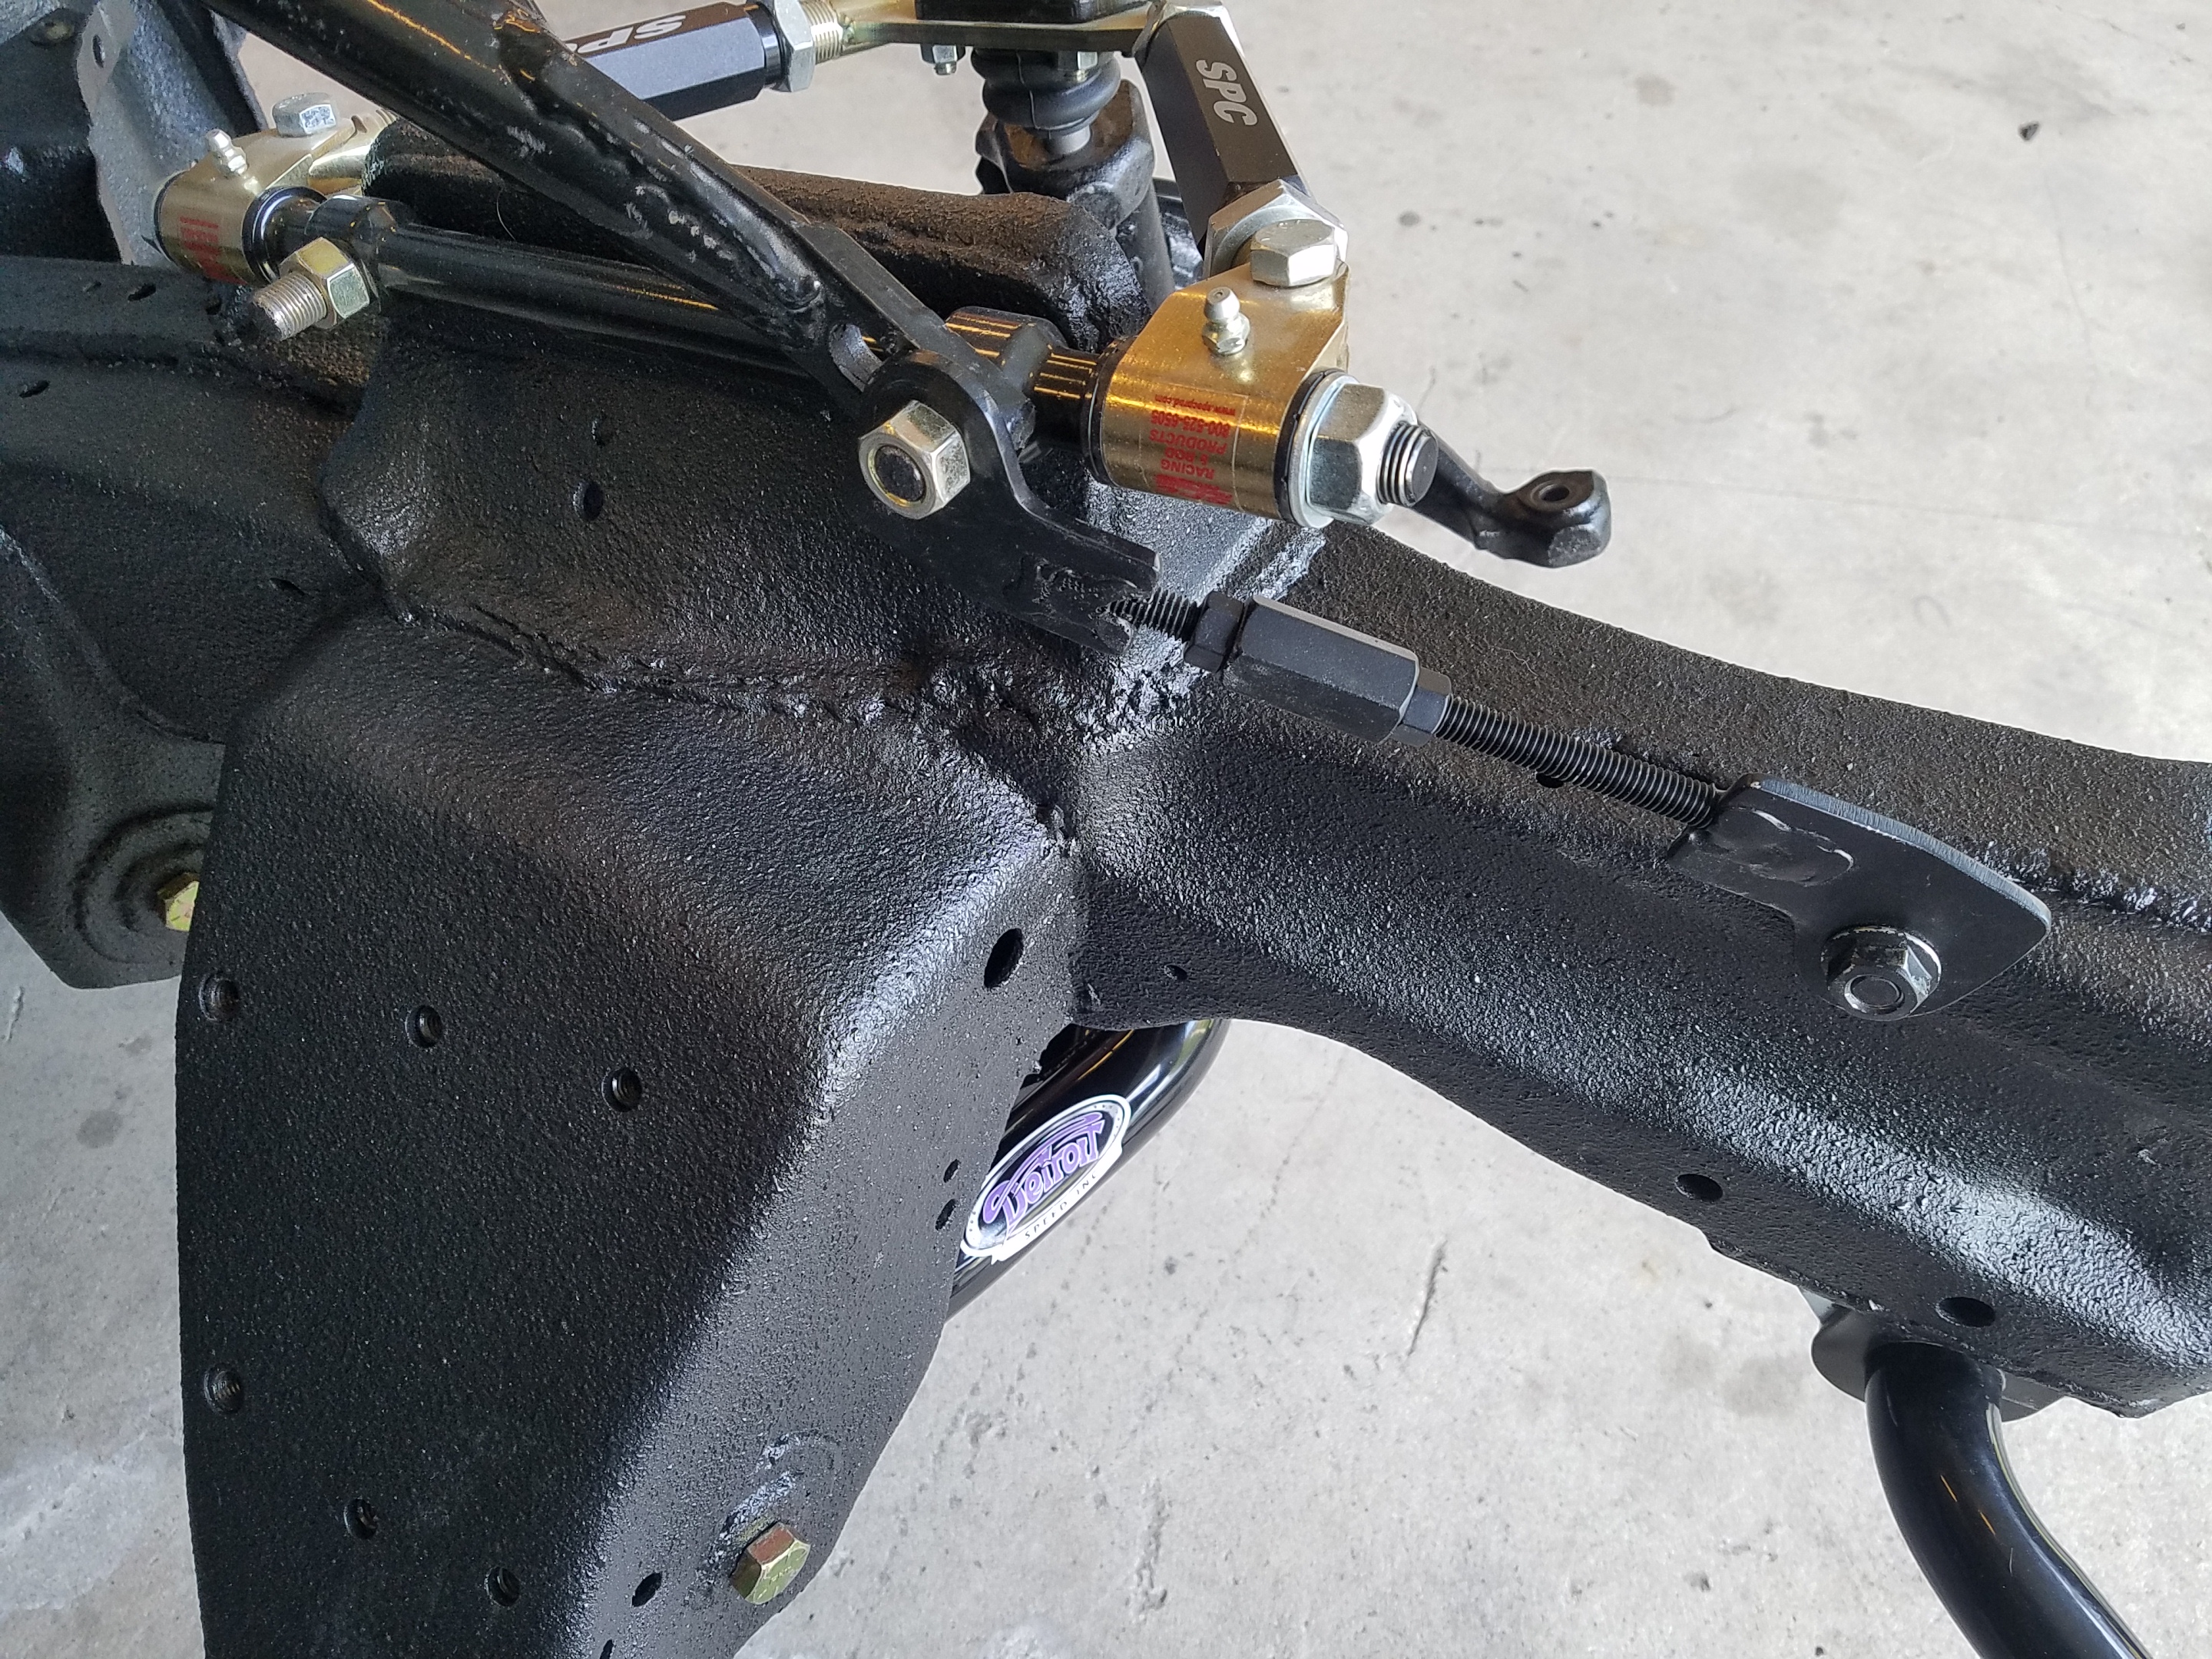
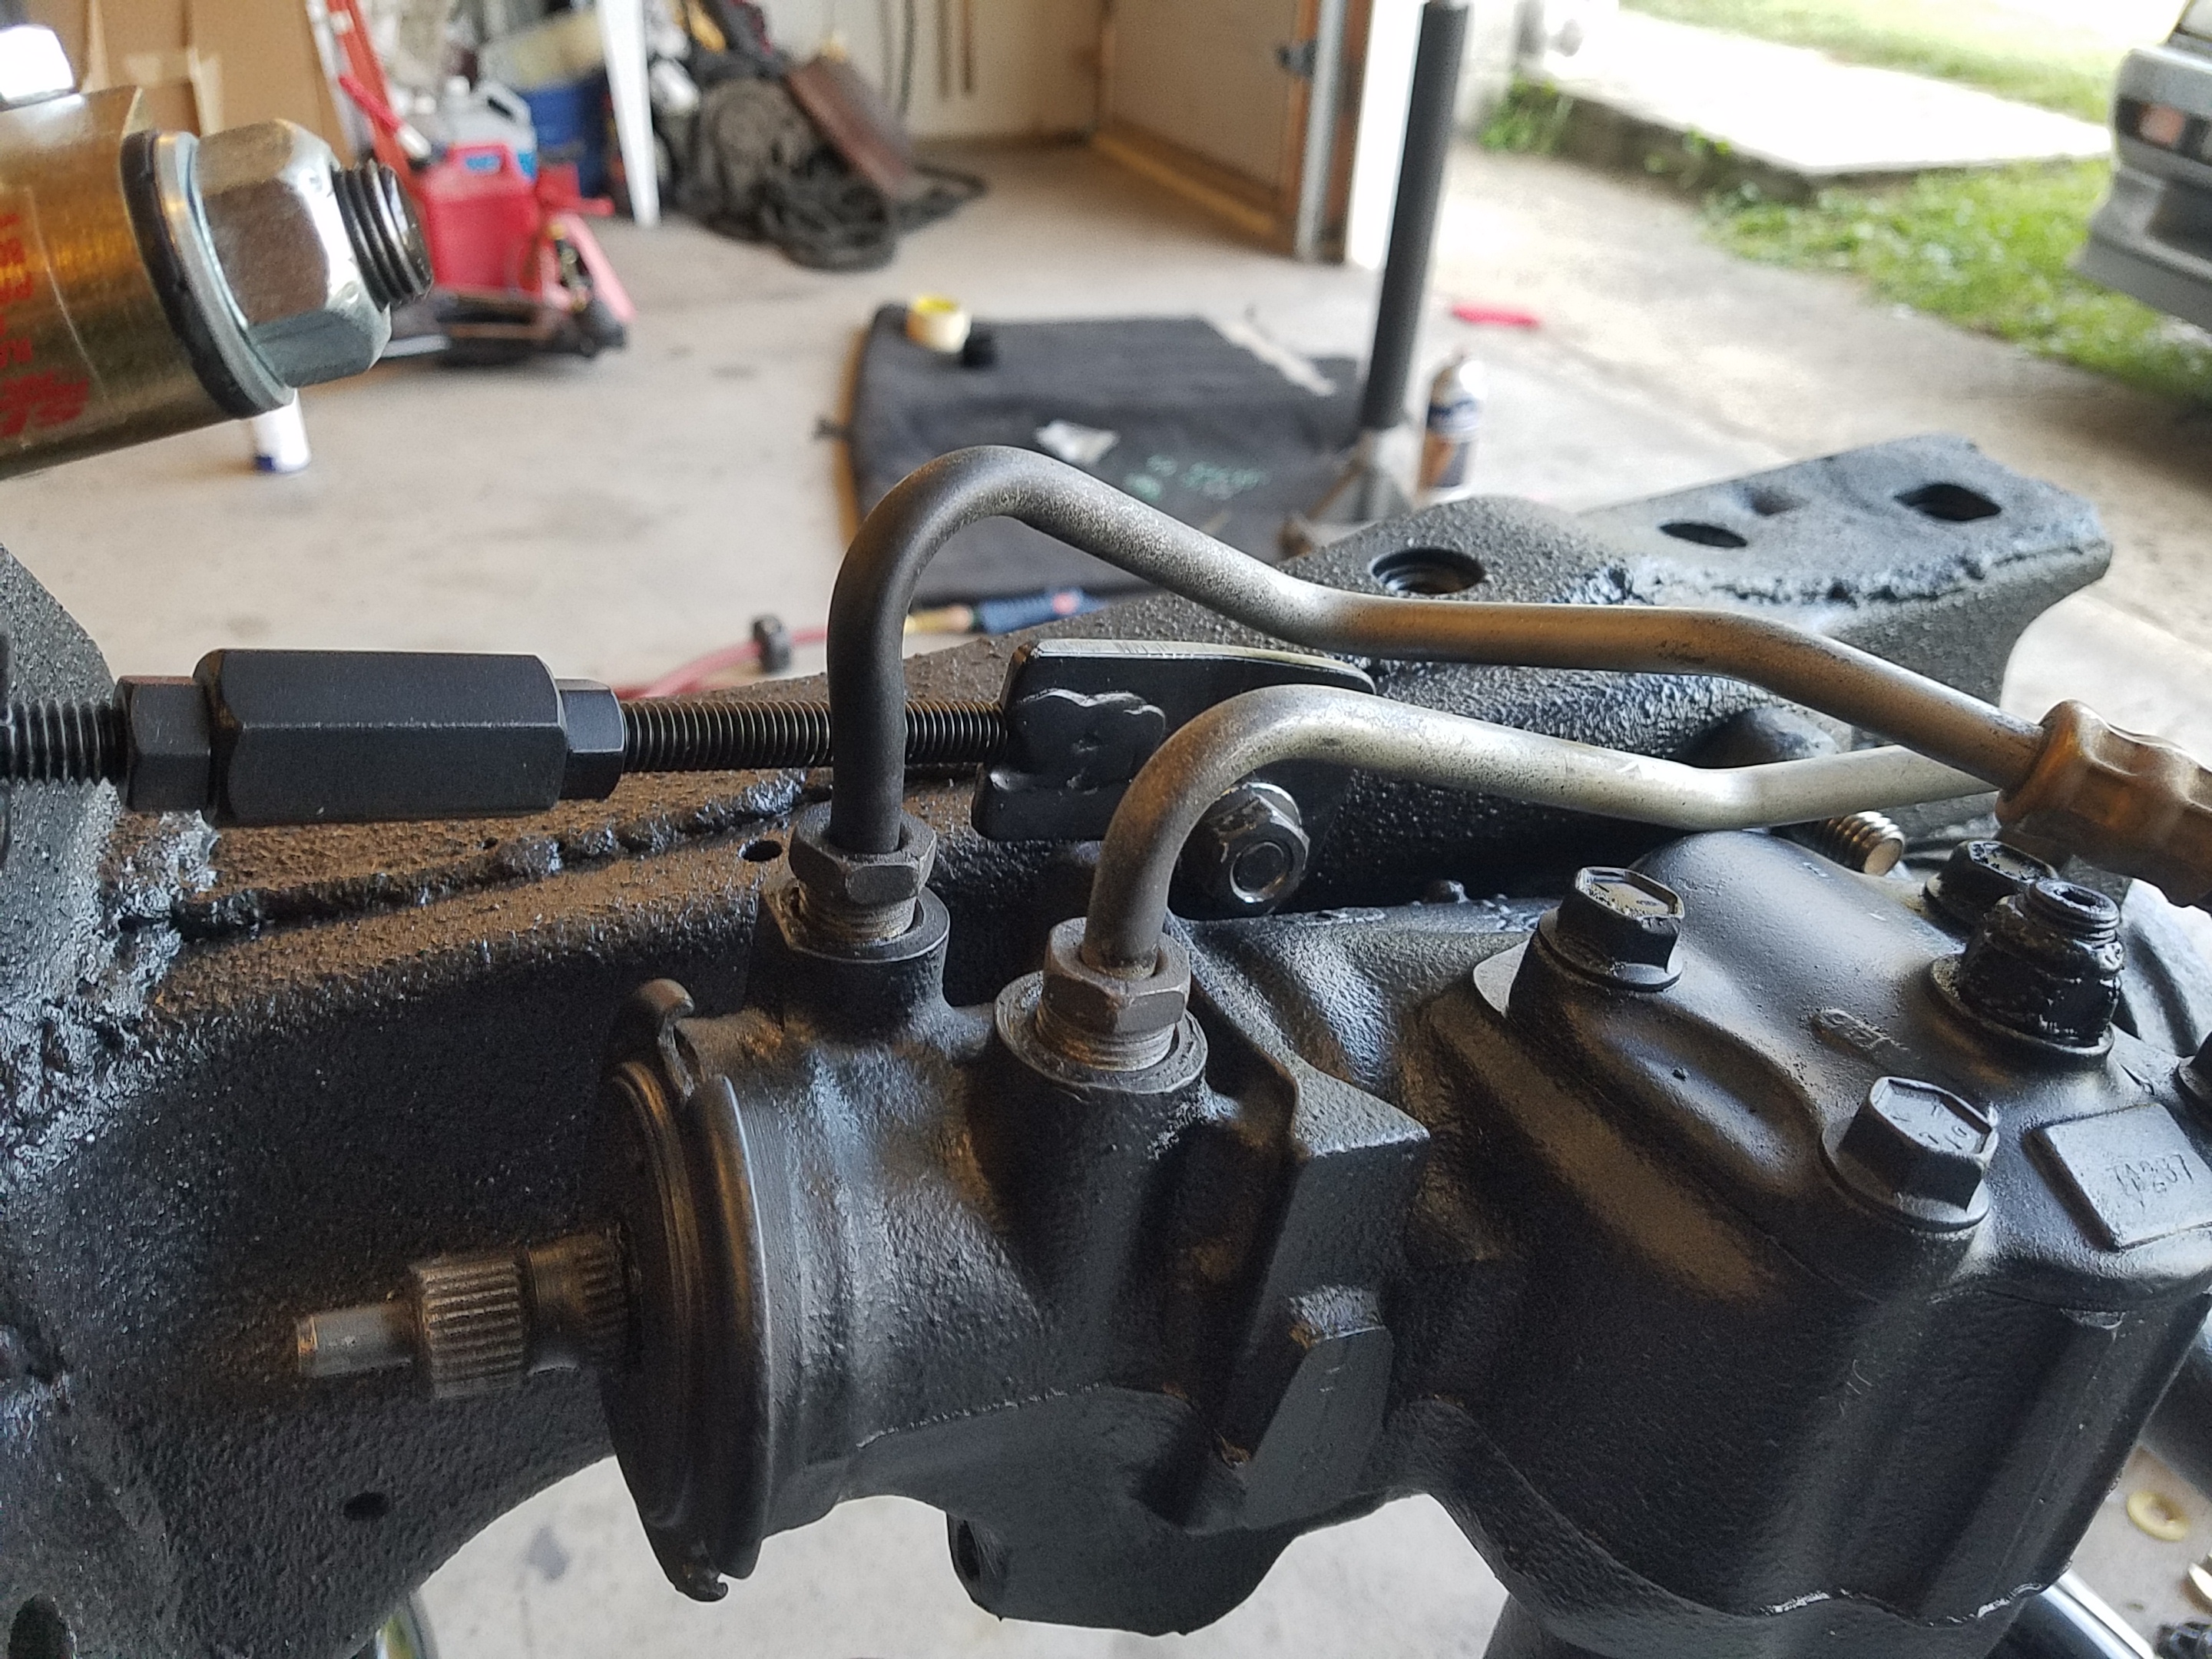
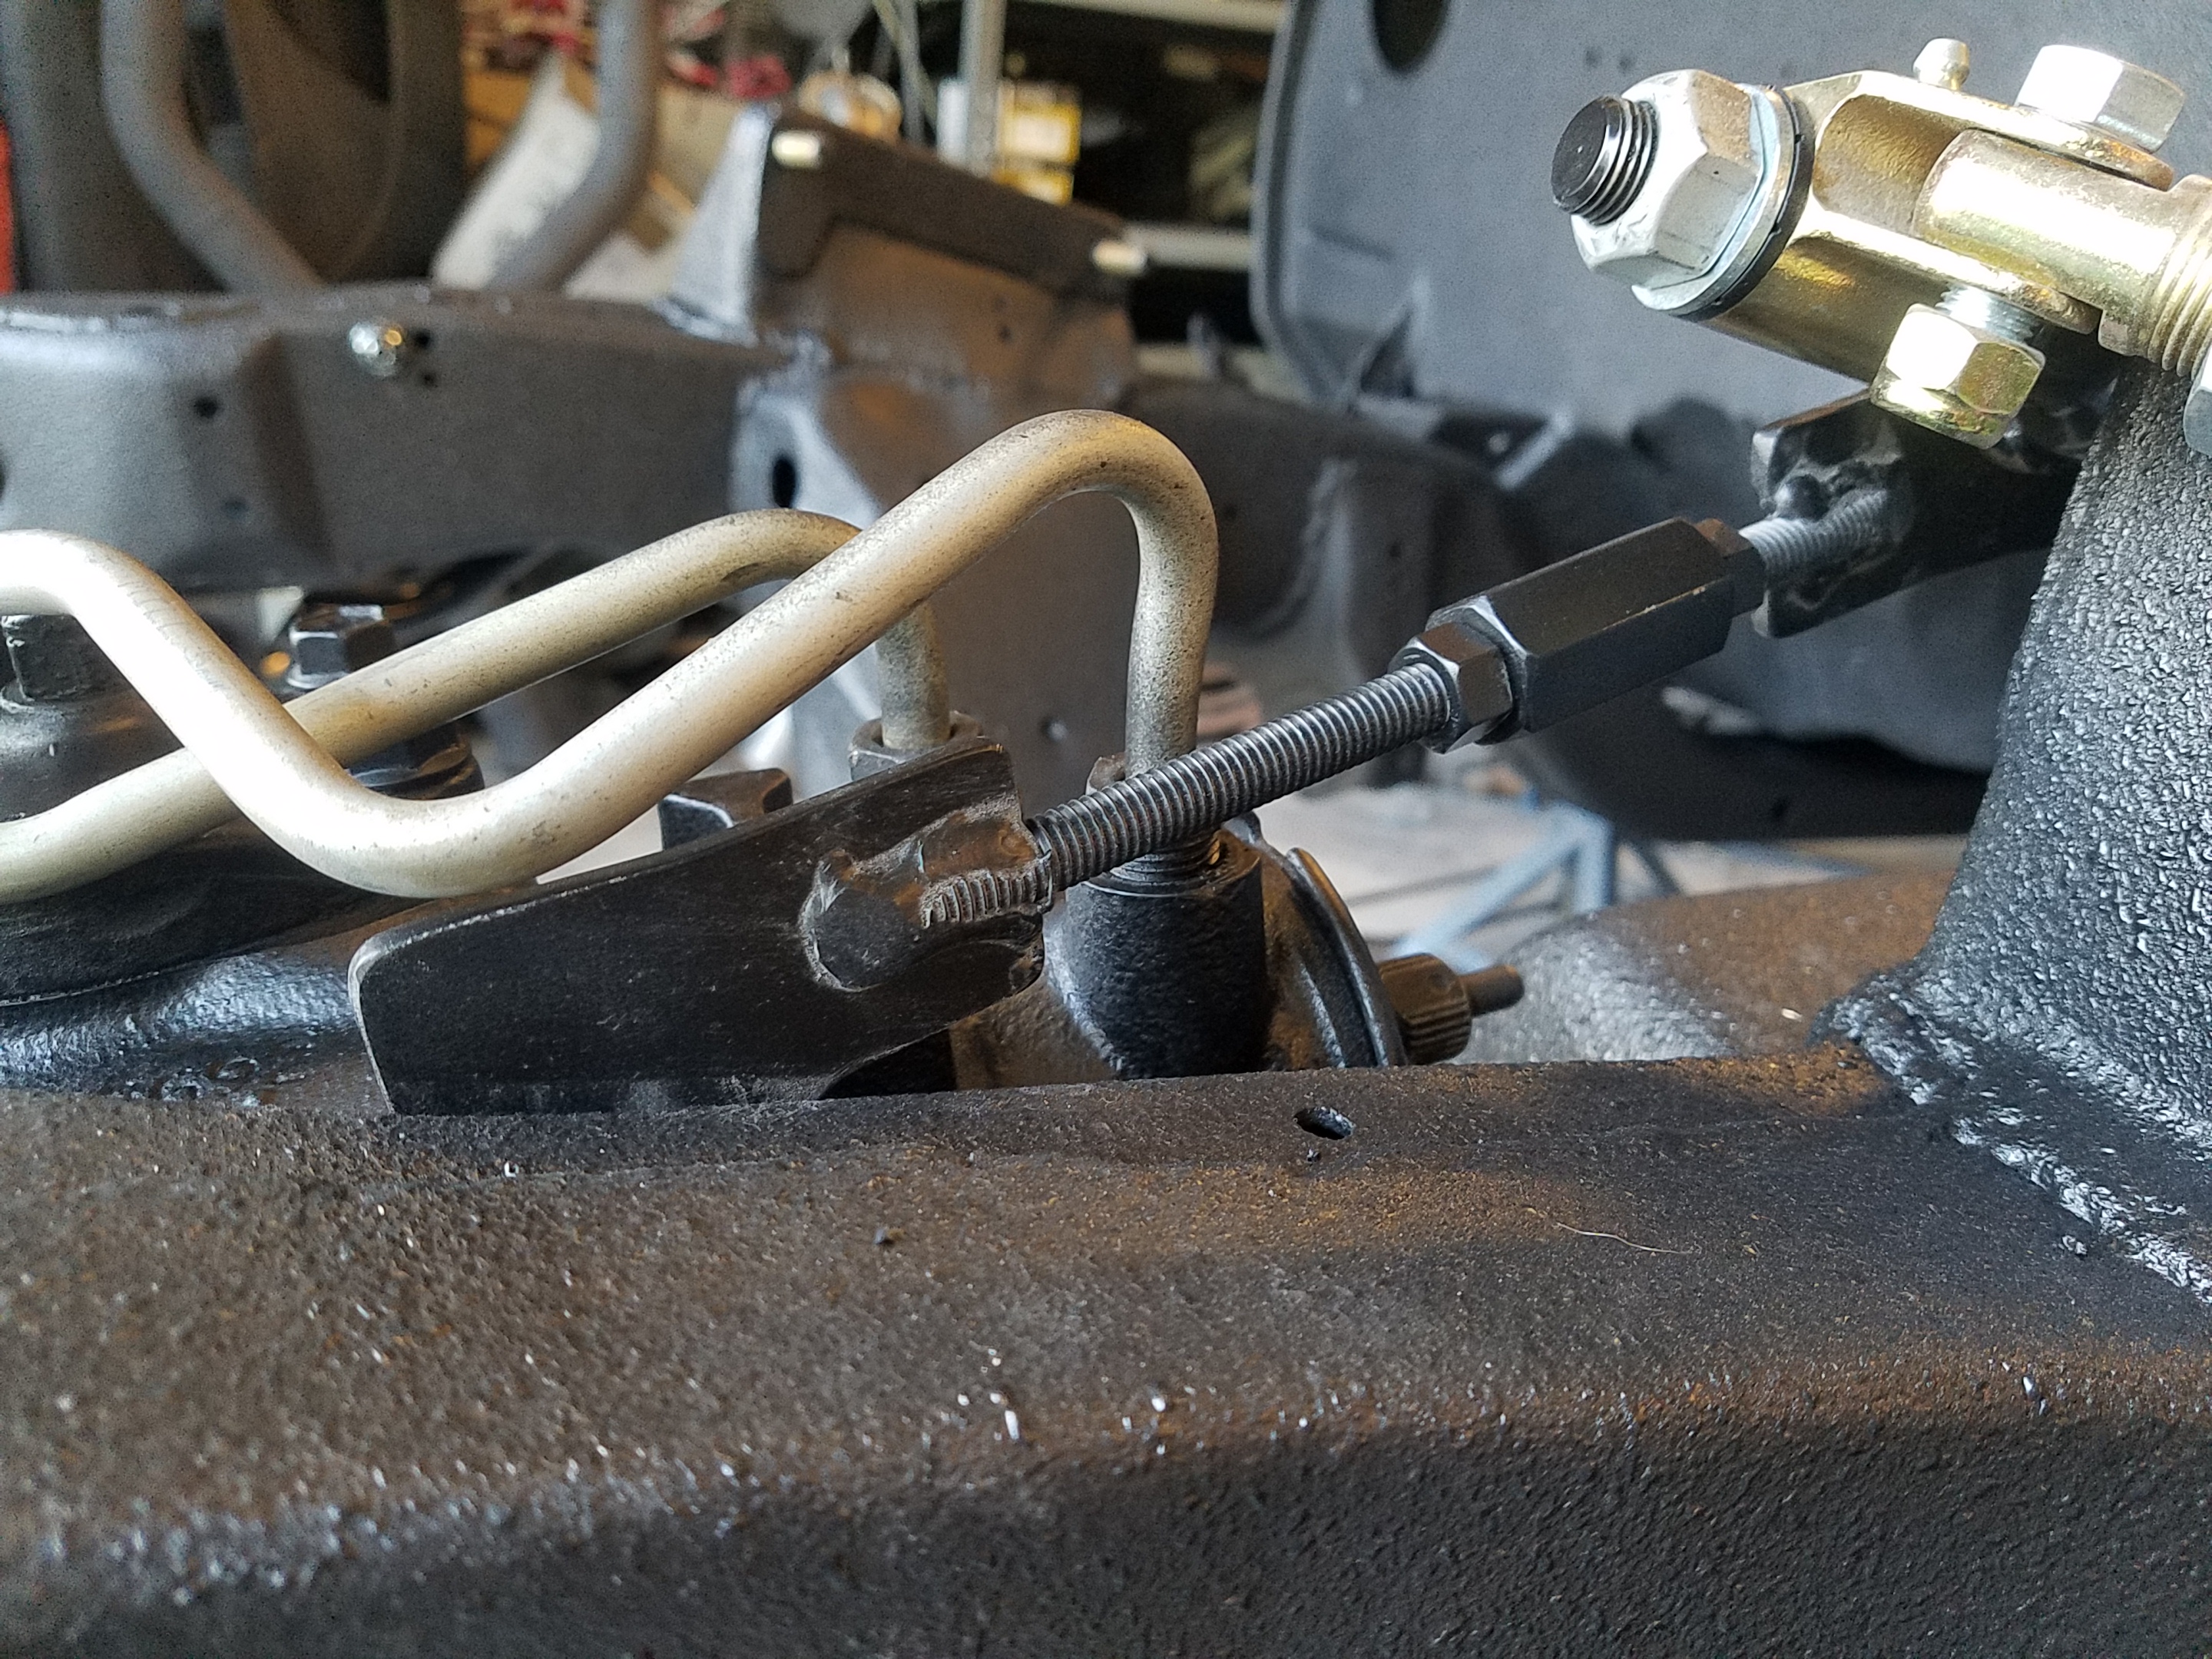
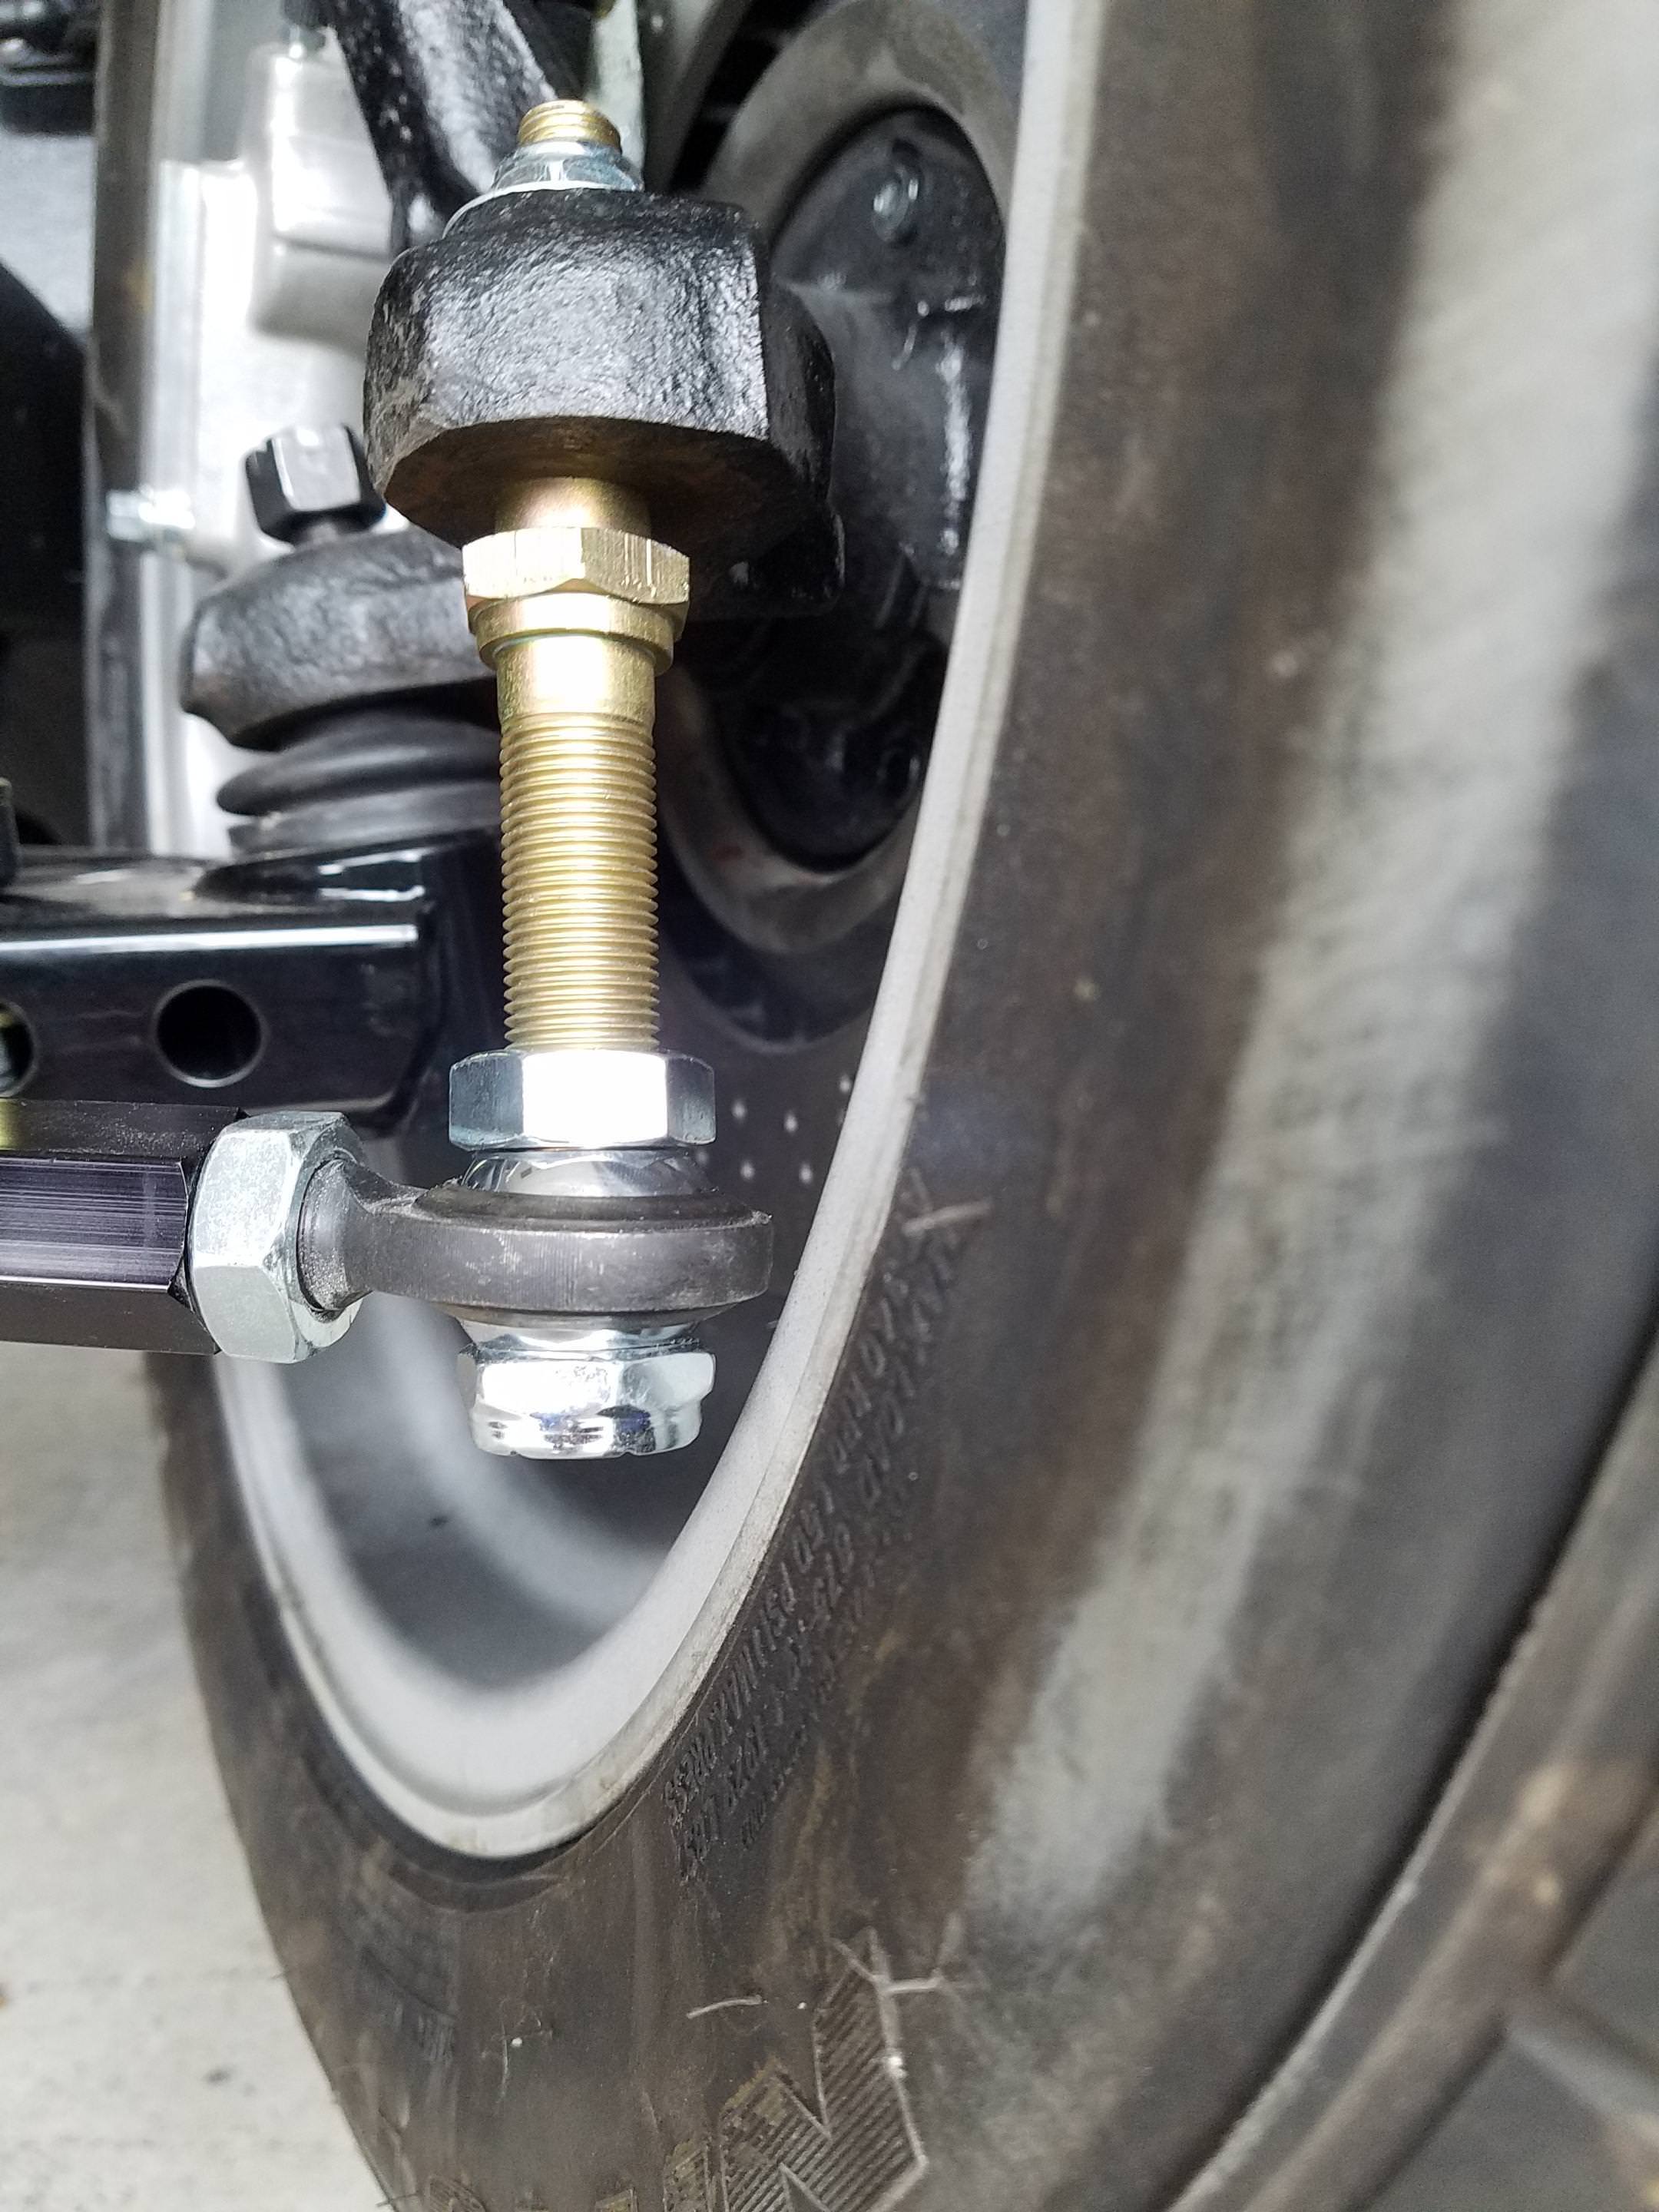
I also did have to change the stock 6" length idler from ProForged to the Howe on "for threaded sleeves" meaning heim-style tie rods. The PF piece is really nice, but caused the tie rod bolt to hit the LCA bolt on the crossmember.
I also got some bumpsteer studs from Speedway for the knuckles. With the locknut barely catching threads they are really close, but I'm sure the correct adjustment will not be at the very bottom.
04-07-2019 #130
Registered User
- Join Date
- Mar 2005
- Location
- Walton, NY
- Posts
- 737
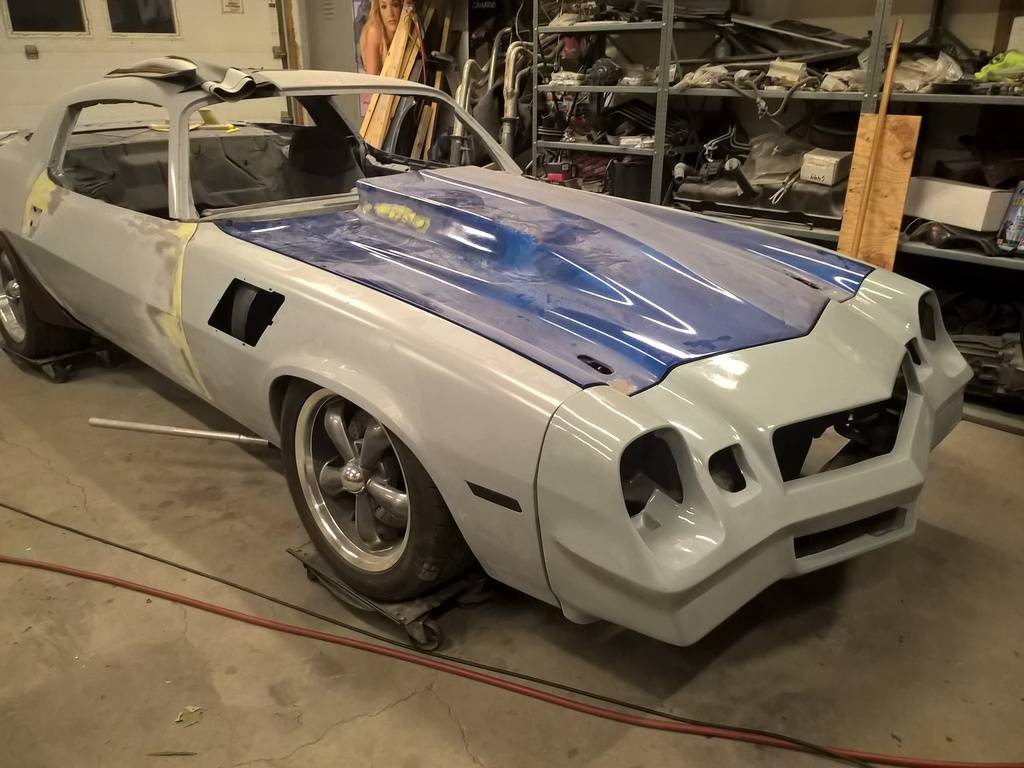
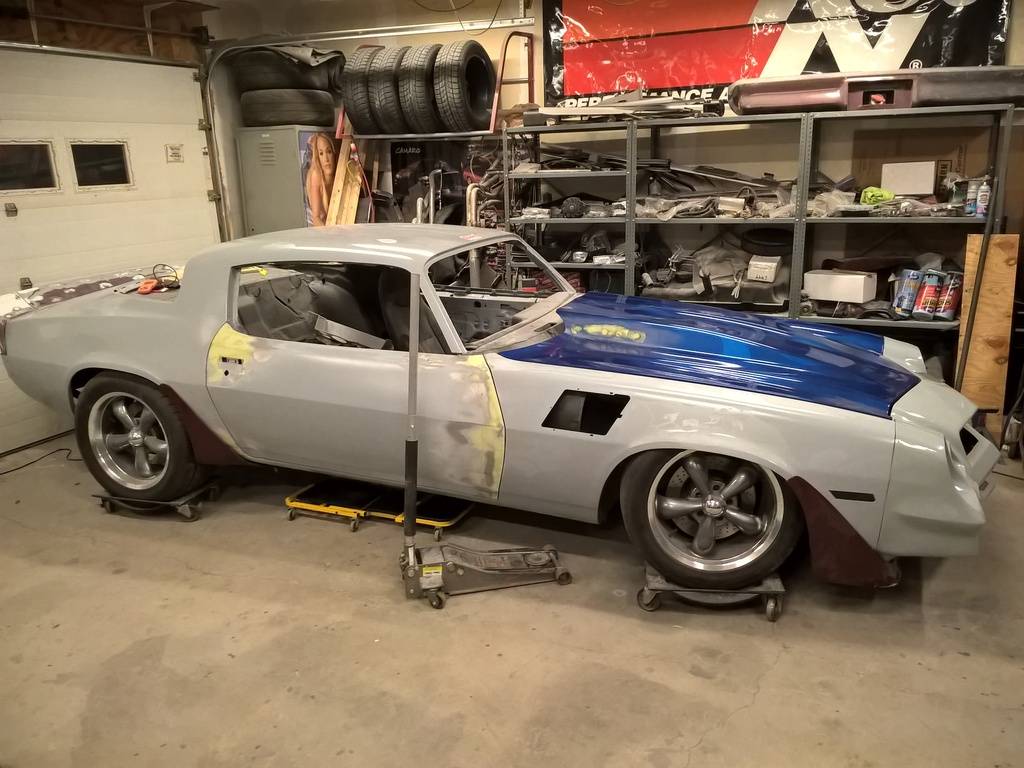
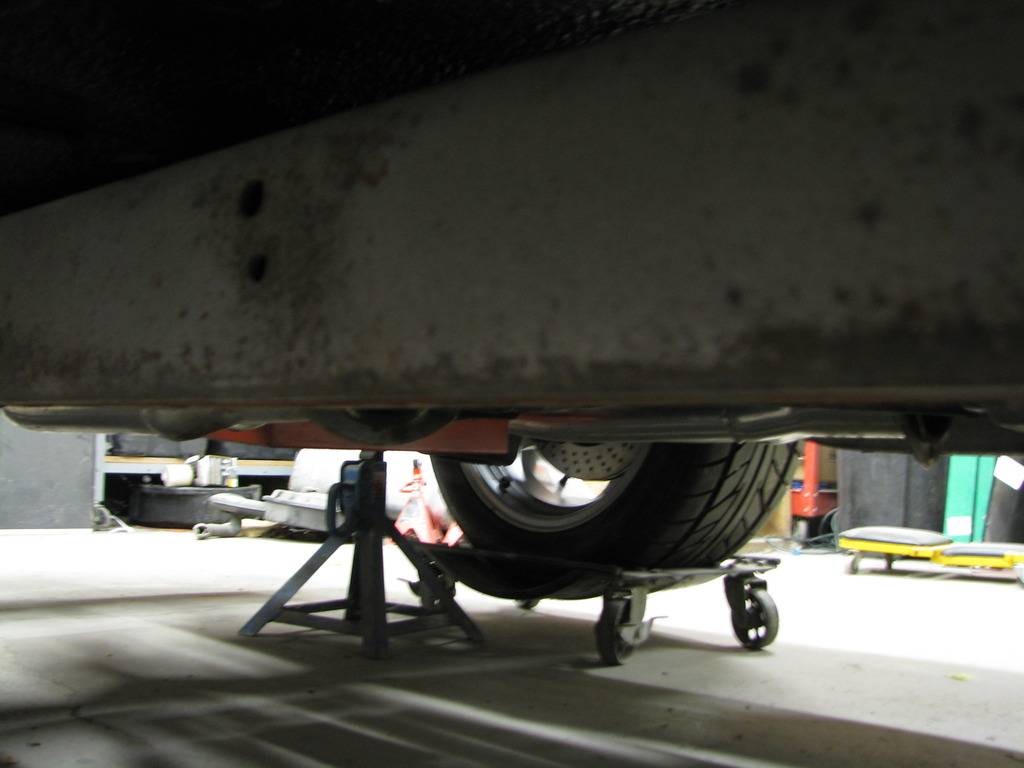
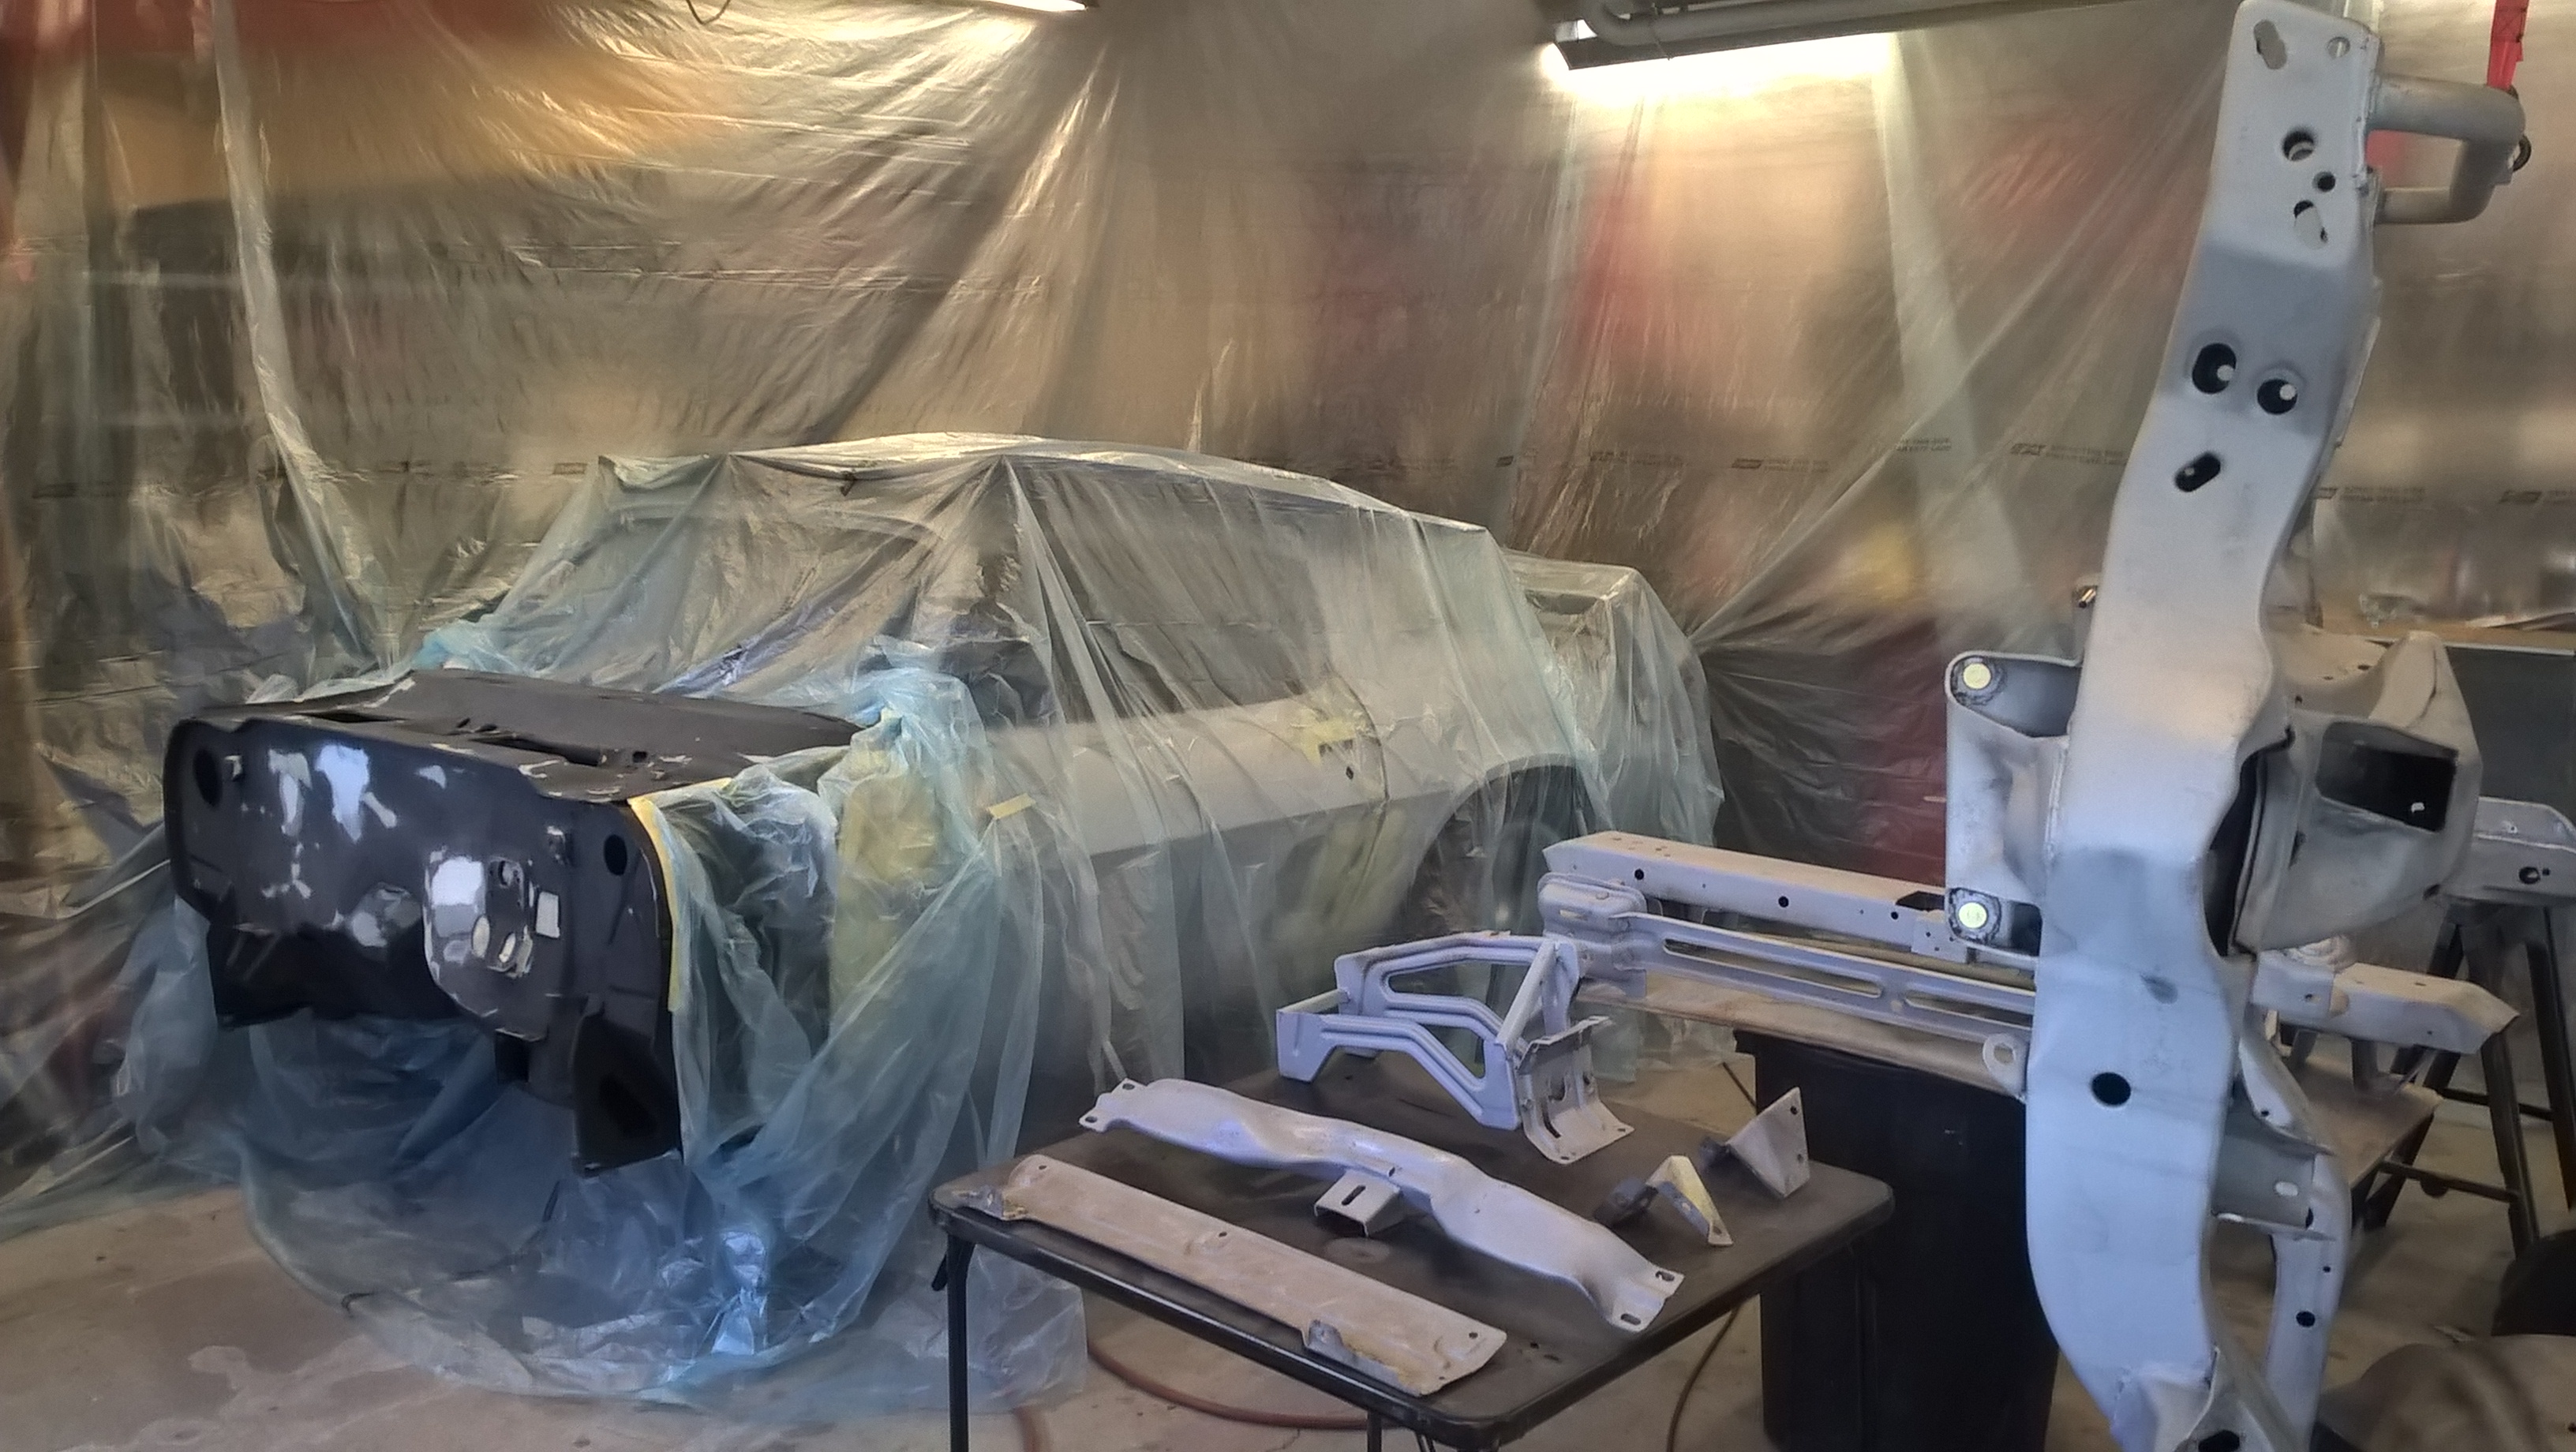
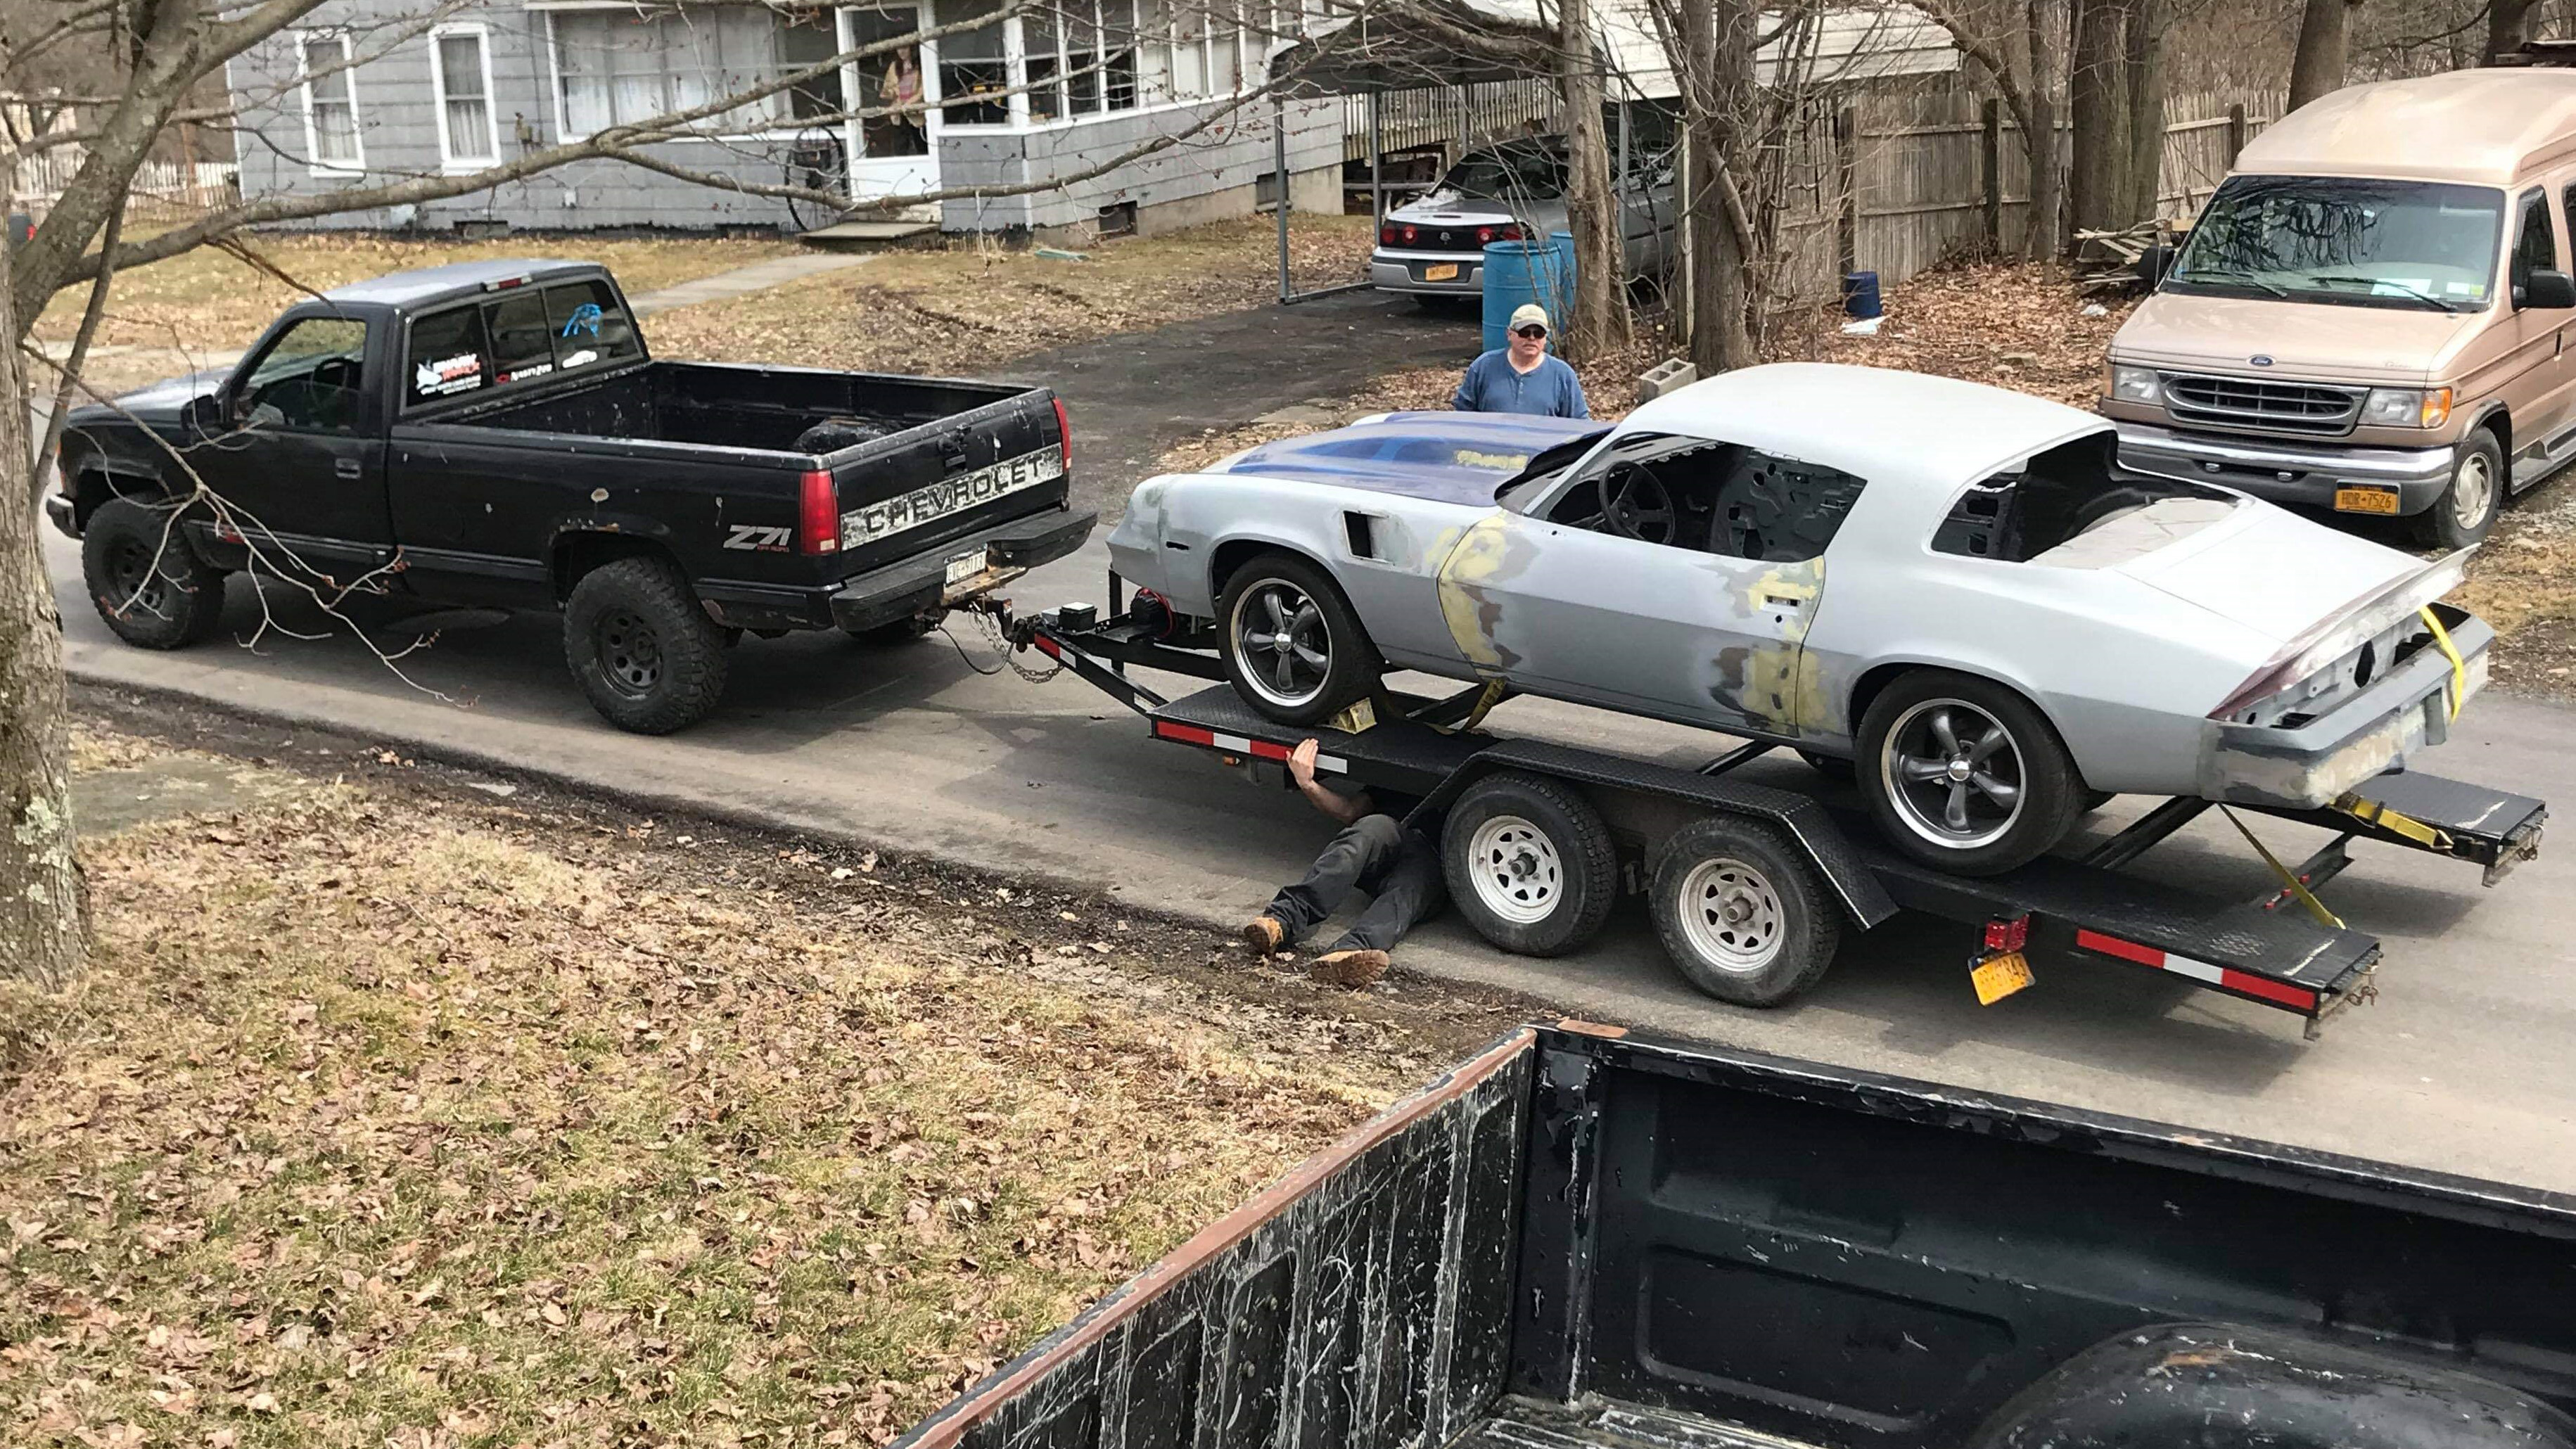
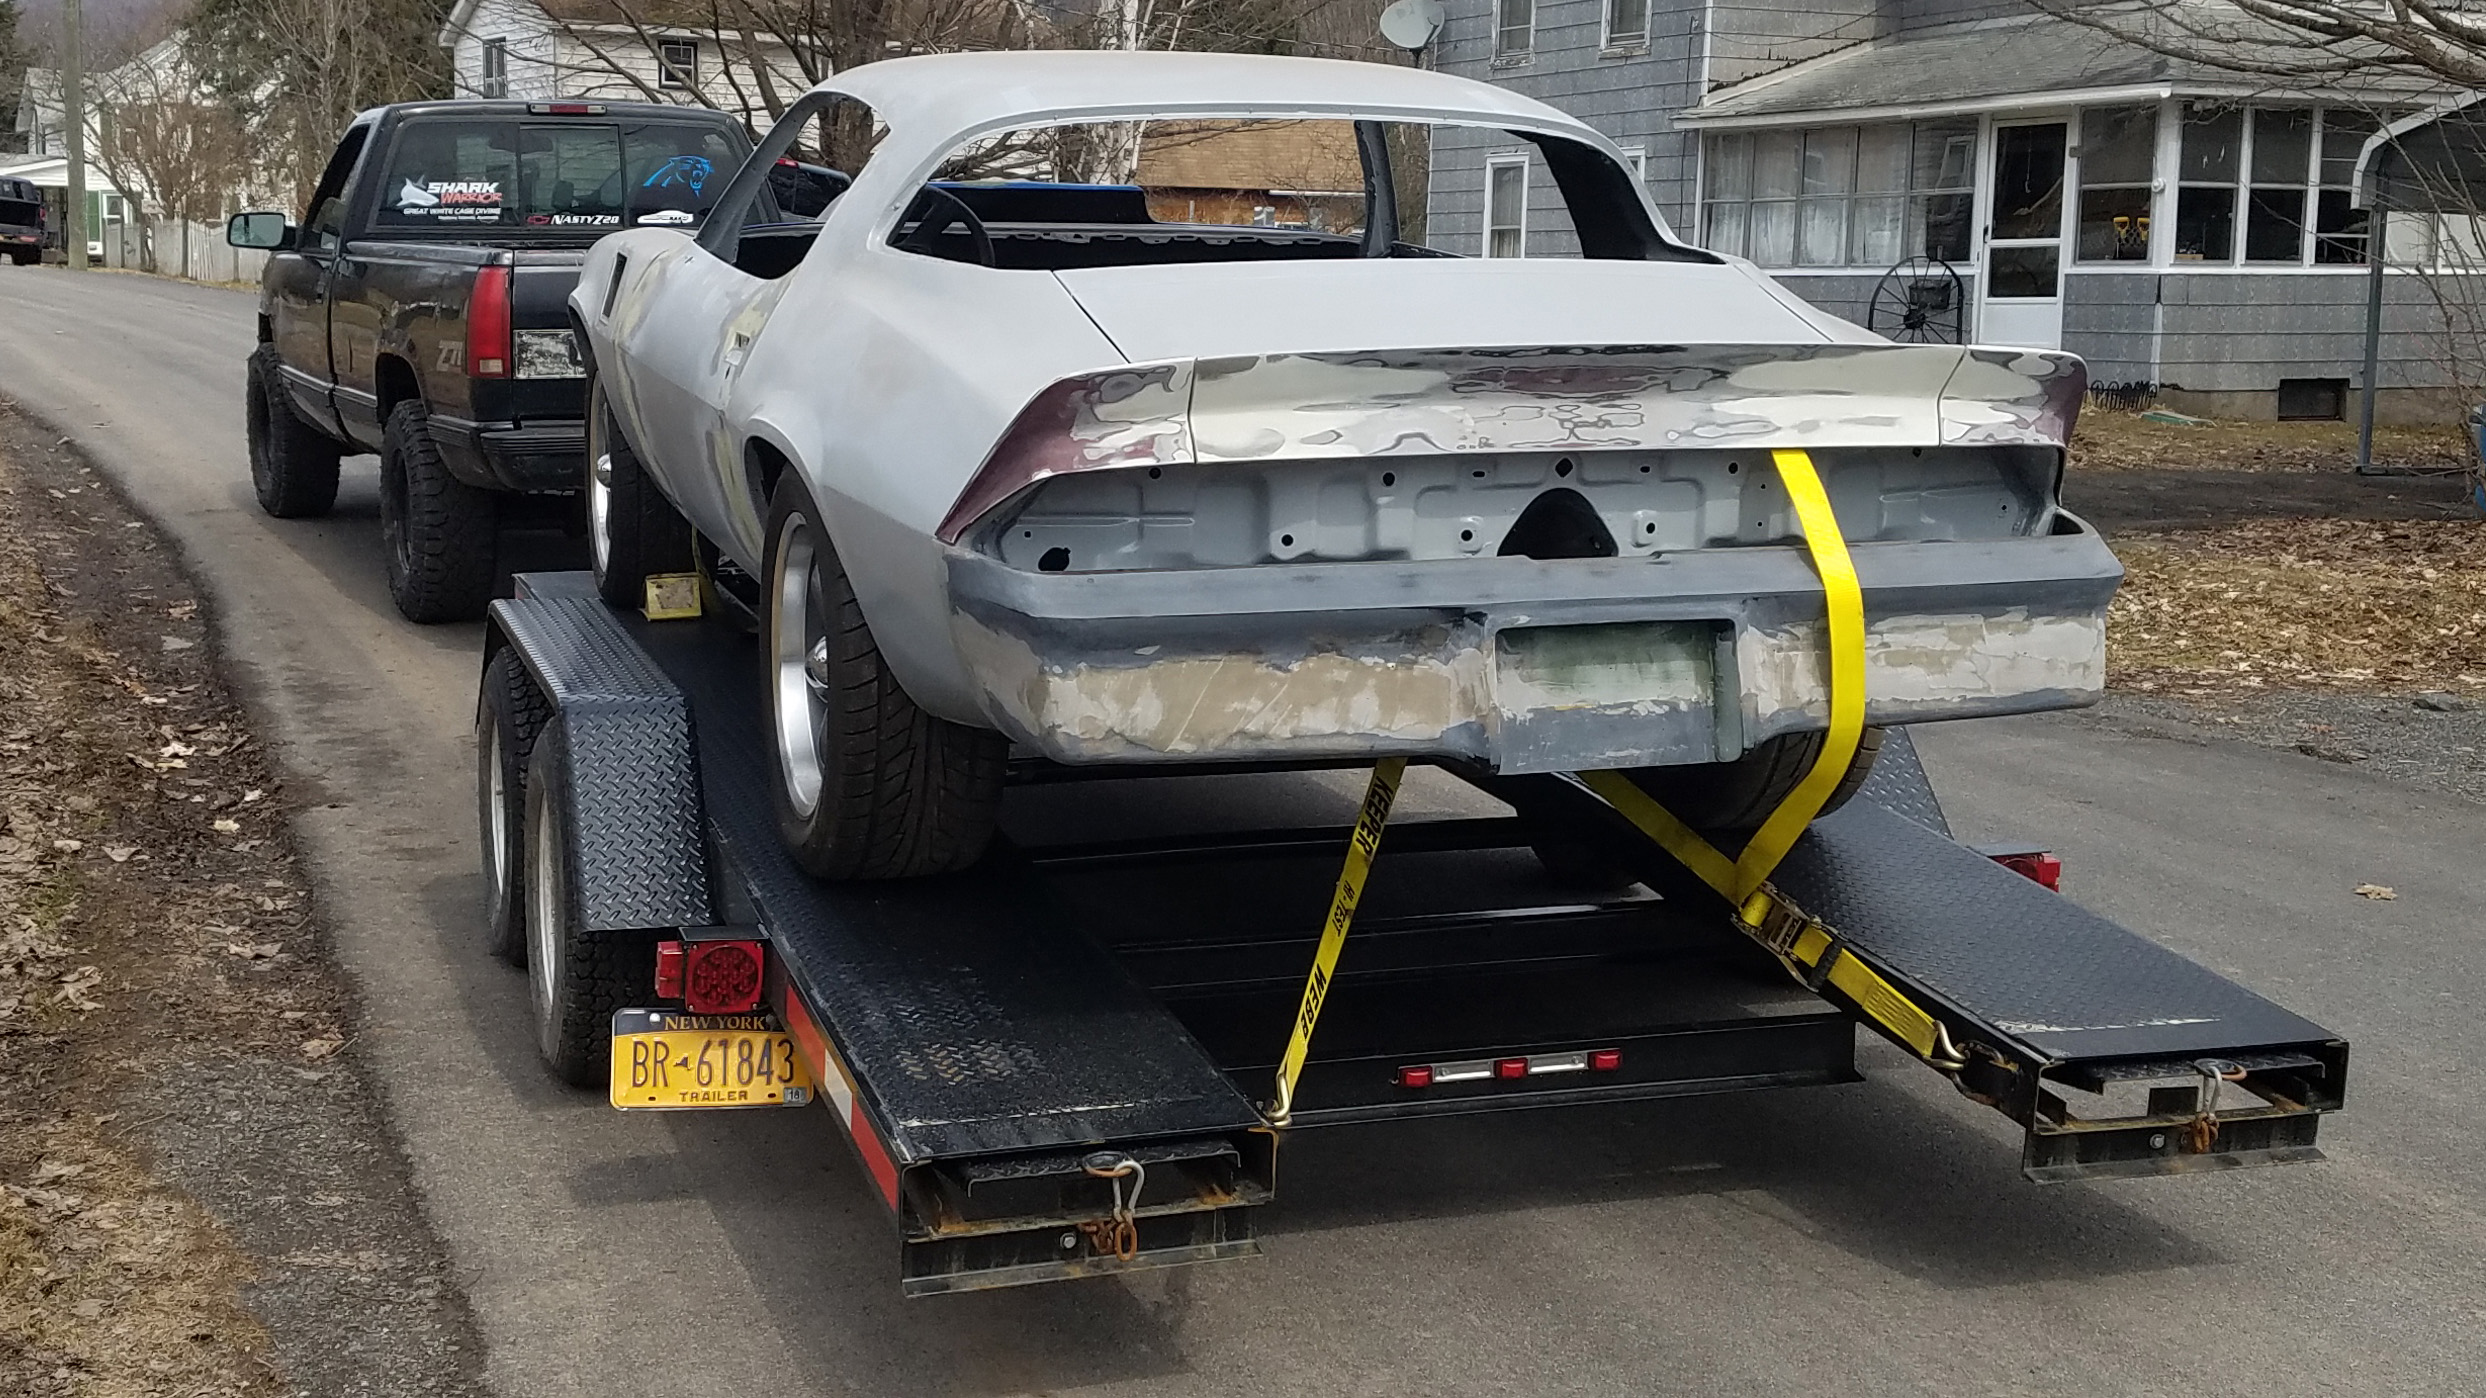
Minor miracle alert! Car went off to paint jail after almost 2 years of waiting for a spot. Nice to see it in some daylight. And get the room back! It's been sitting around almost untouched forever.
Race ramps worked awesome. I love the open center of the trailer too, makes it easy to strap the car down. It may come in handy as a "lift" if I need it, too.


04-08-2019 #131 -Moderator/Sponsor-
- Join Date
- Apr 2001
- Location
- The City of Fountains
- Posts
- 15,975

Hopefully the paint jail won't be too long!
Andrew1970 GTO Version 3.0
1967 Cougar build
GM High-Tech Performance feature
My YouTube Channel Please Subscribe!
Instagram @projectgattago
Dr. EFI
I deliver what EFI promises.
Remote Holley EFI tuning.
Please get in touch if I can be of service.
"You were the gun, your voice was the trigger, your bravery was the barrel, your eyes were the bullets." ~ Her
08-24-2020 #132
Registered User
- Join Date
- Mar 2005
- Location
- Walton, NY
- Posts
- 737
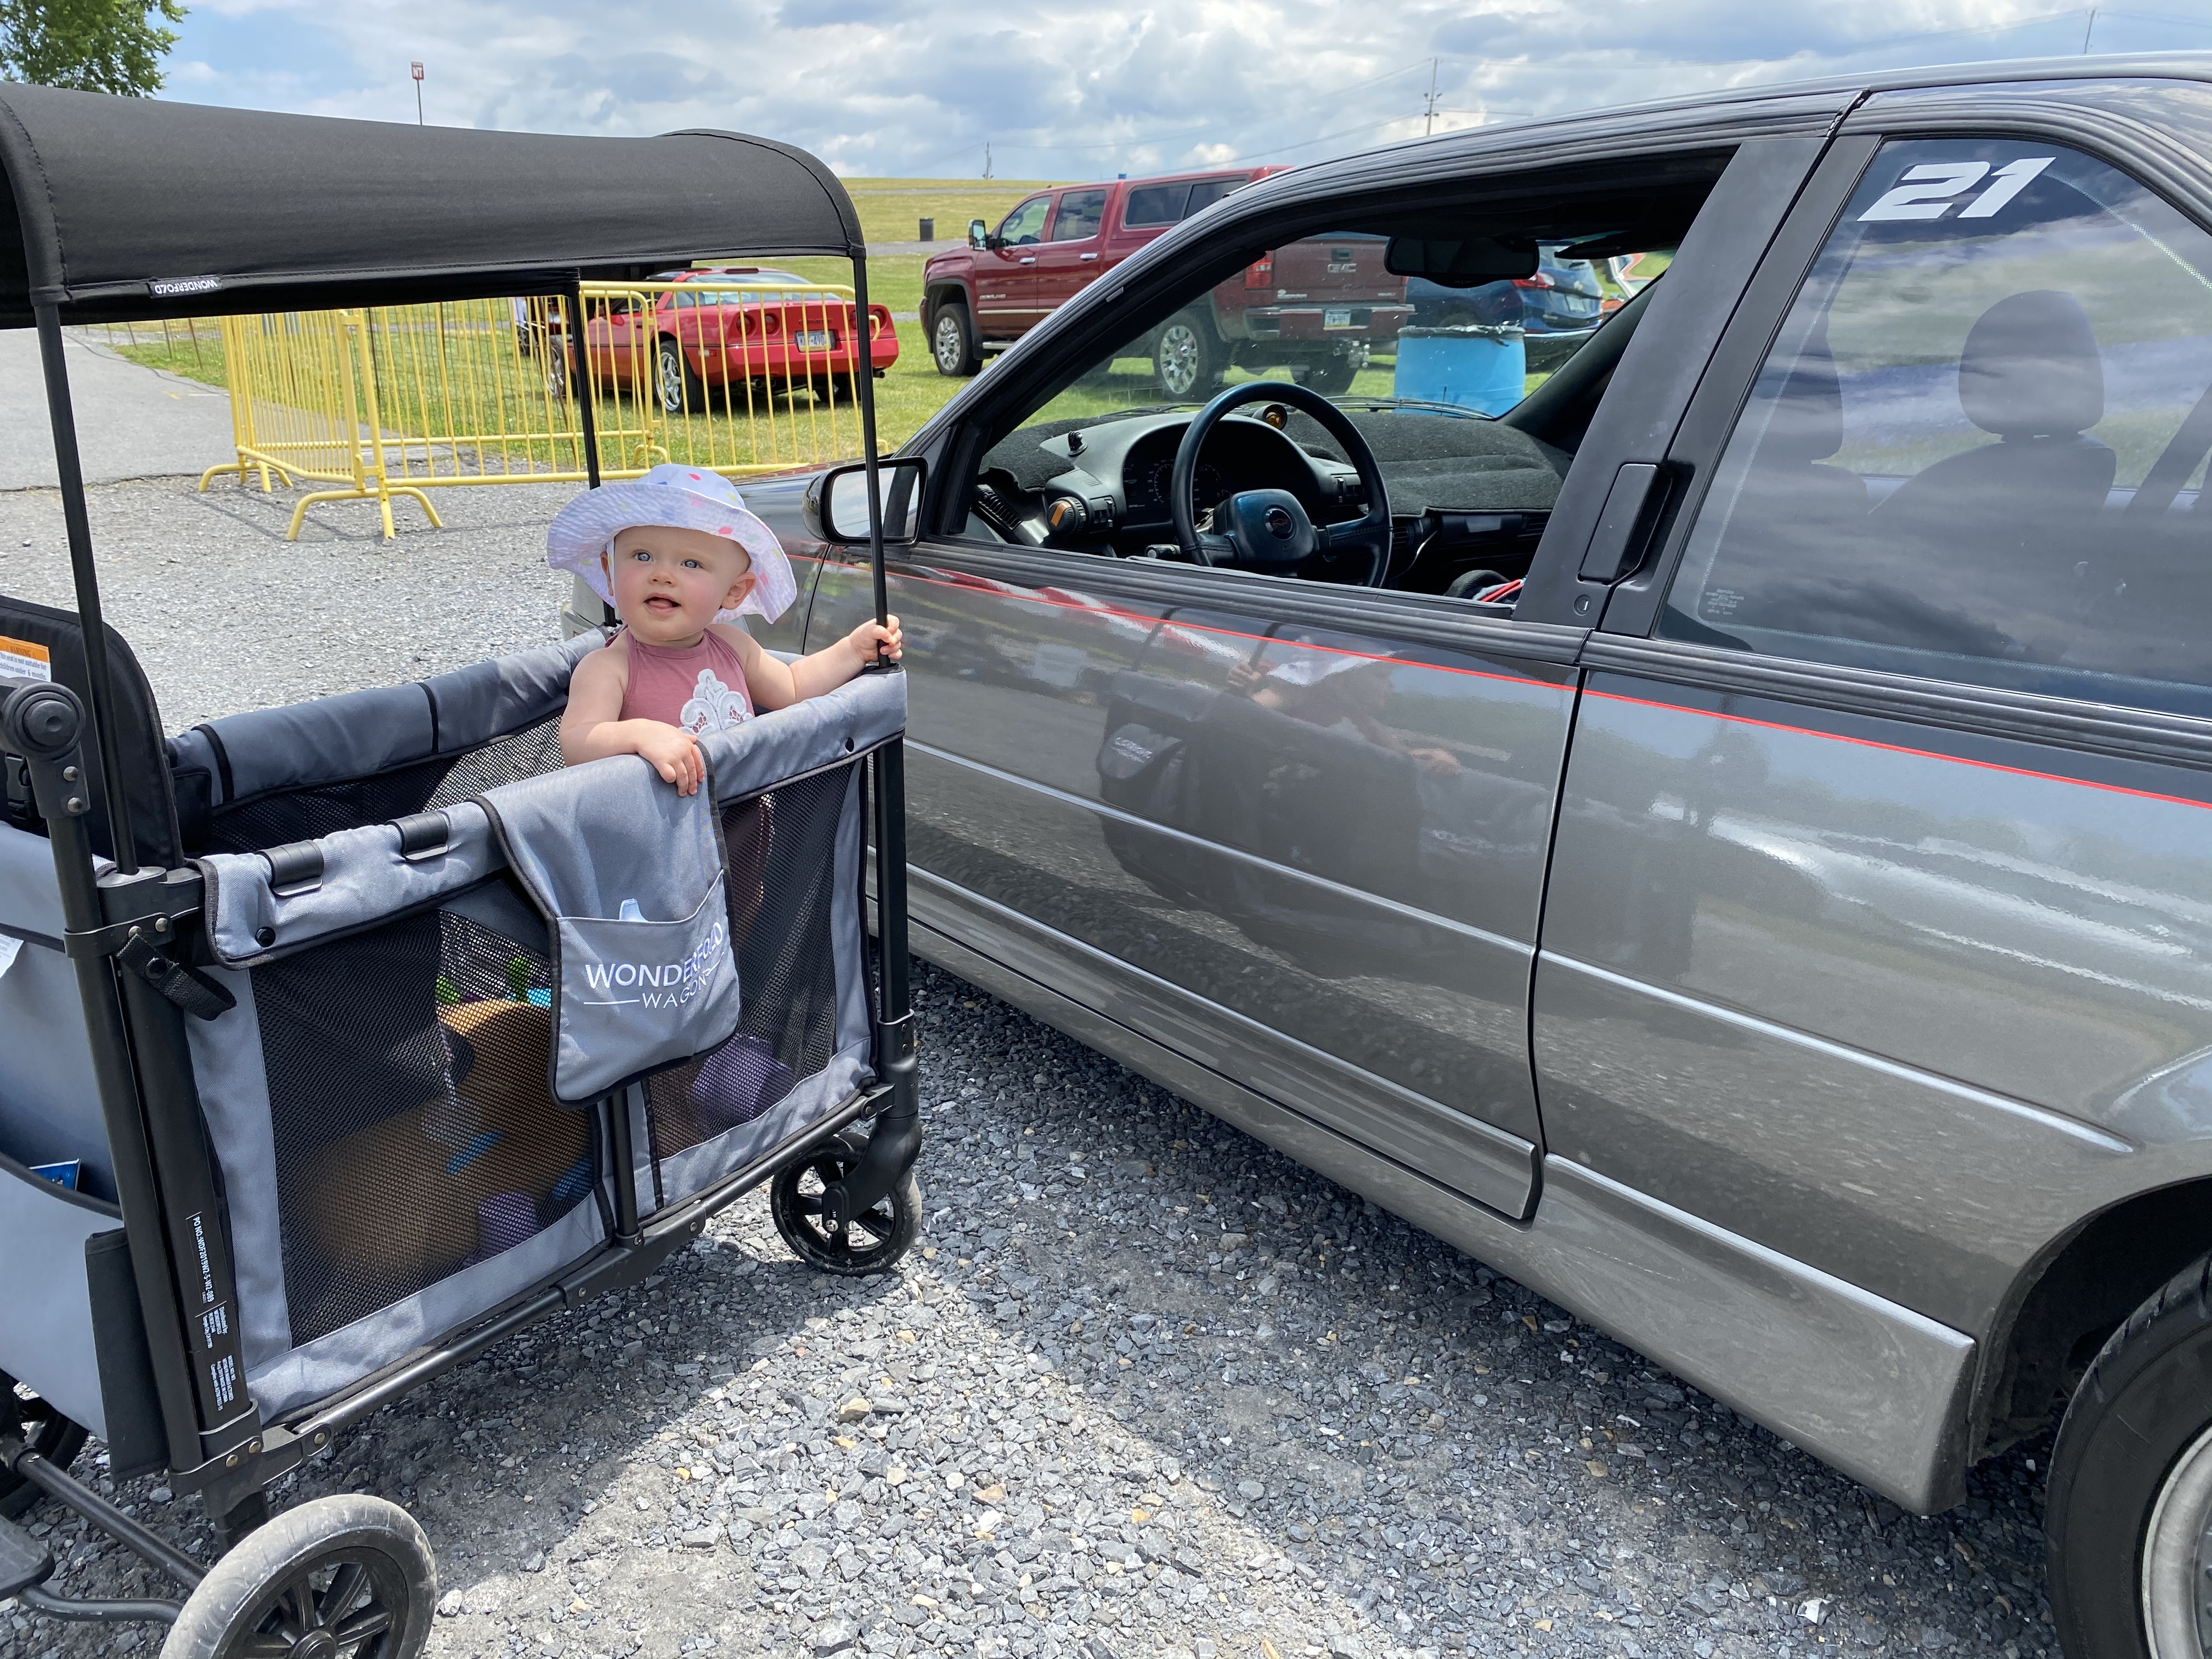
Well, it came back from paint jail with some overspray on it...but zero progress. None. And now I have one of these things, so time is harder to come by. Body work is smelly, dusty and loud...none of them are too babysitting-friendly.
So I dragged it out for some paint quotes at different shops..but DAMN they're pricey! I almost want to flat black it and send it...

08-24-2020 #133
Registered User
- Join Date
- Jul 2020
- Posts
- 26
The baby looks happy. Looks like this built has been keeping you busy in the long run.
09-09-2020 #134
Registered User
- Join Date
- Sep 2020
- Location
- Long Island, NY
- Posts
- 3
Progress
Been following your story and wanted to say great job on keeping at it!
If you havent painted it yet, have you considered dipping it ?
I had done this to my Chevelle about 4 years ago and it came out great
Positives are you can do it in your garage for about $300 and when you are tired of it, just peels off and doesnt harm anything underneath
I am also working on restoring my 81z28 !!
09-09-2020 #135
Registered User
- Join Date
- Sep 2020
- Location
- Long Island, NY
- Posts
- 3
Progress
Been following your story and wanted to say great job on keeping at it!
If you havent painted it yet, have you considered dipping it ?
I had done this to my Chevelle about 4 years ago and it came out great
Positives are you can do it in your garage for about $300 and when you are tired of it, just peels off and doesnt harm anything underneath
I am also working on restoring my 81z28 !!
09-18-2021 #136
Registered User
- Join Date
- Mar 2005
- Location
- Walton, NY
- Posts
- 737
I've "dipped" some chrome trim before and it worked pretty well. I'm so disassembled, though, that it really needs actual paint inside the window channels, etc. I'm going to spray it myself. I did that with my Beretta and it came out ok. Just need more time, and lately I tend to skipping the body work stuff and working on other projects that are more fun. But I will get there.
Been doing a lot on my youtube channel lately. But this is the only Camaro video in a long time...haha
https://youtu.be/A_8OONuQ2m0
01-21-2024 #137
Registered User
- Join Date
- Mar 2005
- Location
- Walton, NY
- Posts
- 737
Been quite a while since I made any progress...been busy with a lot of other stuff.
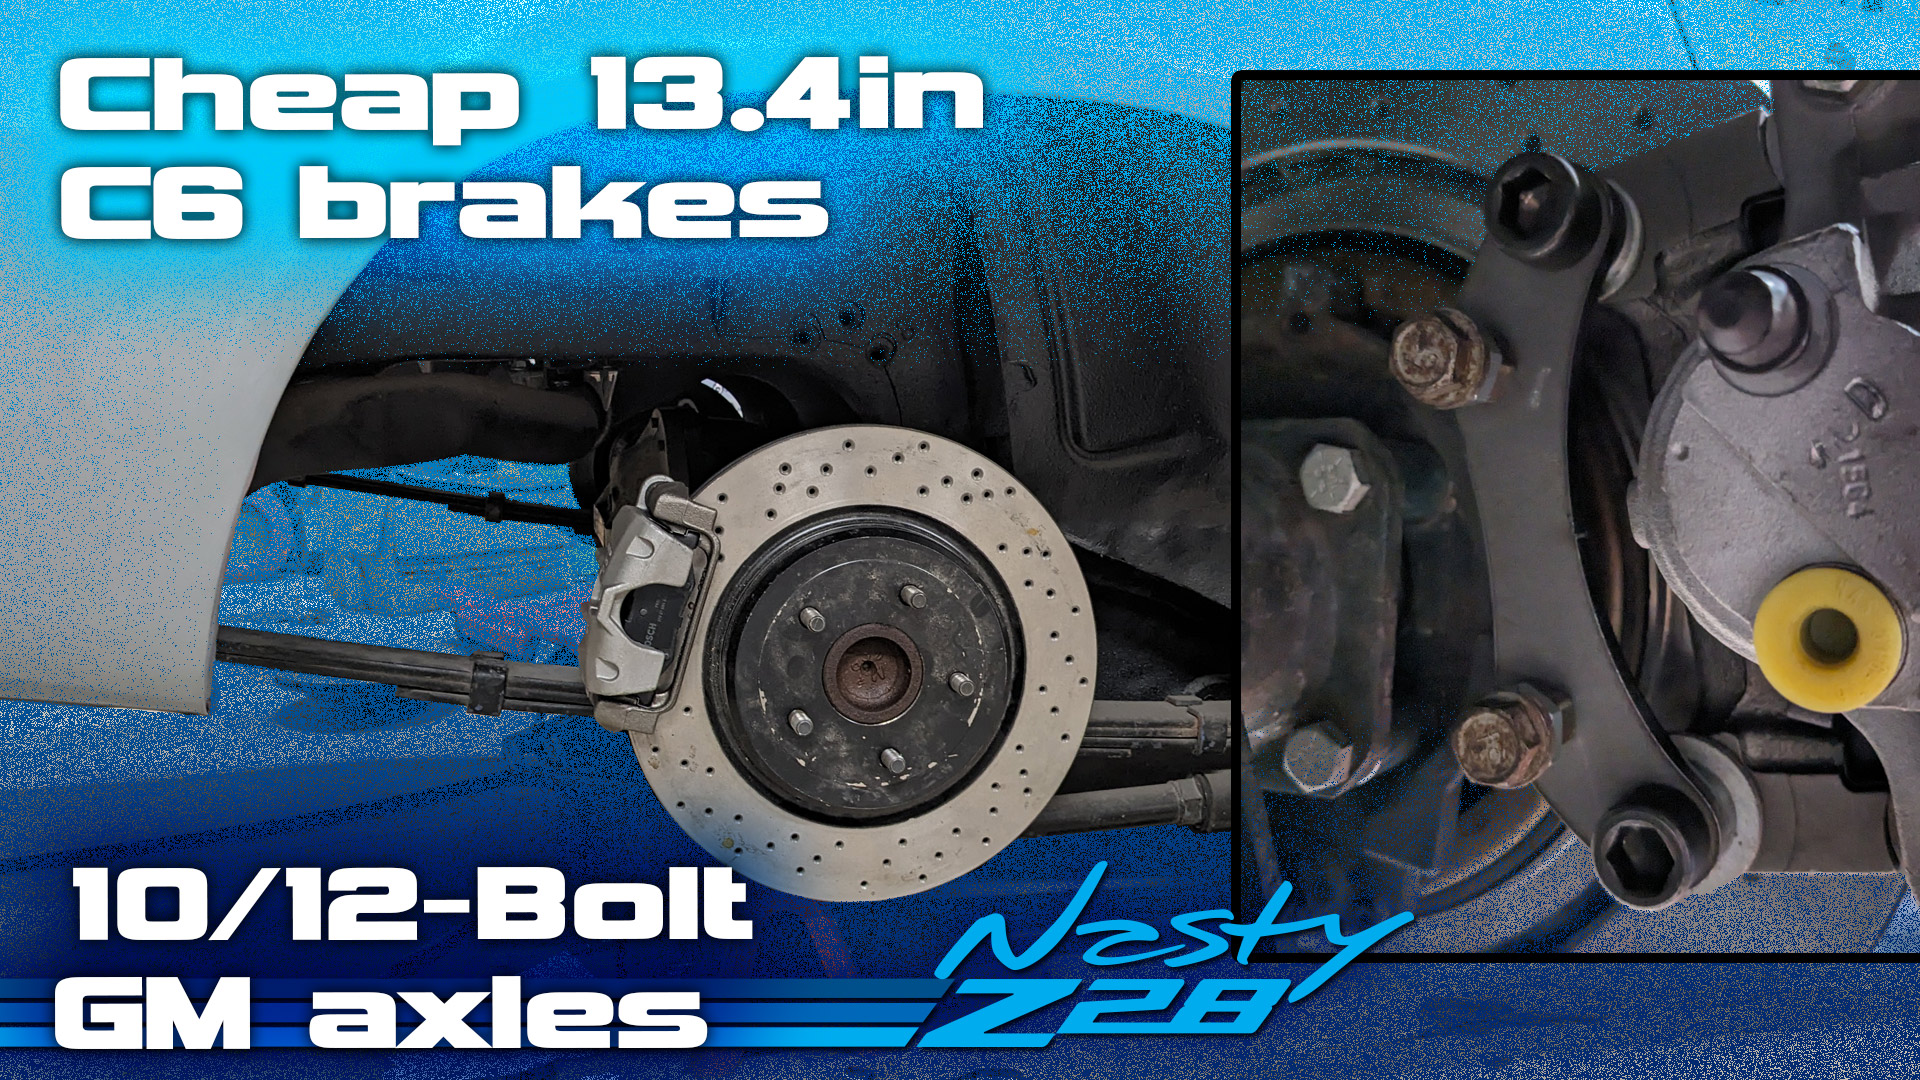
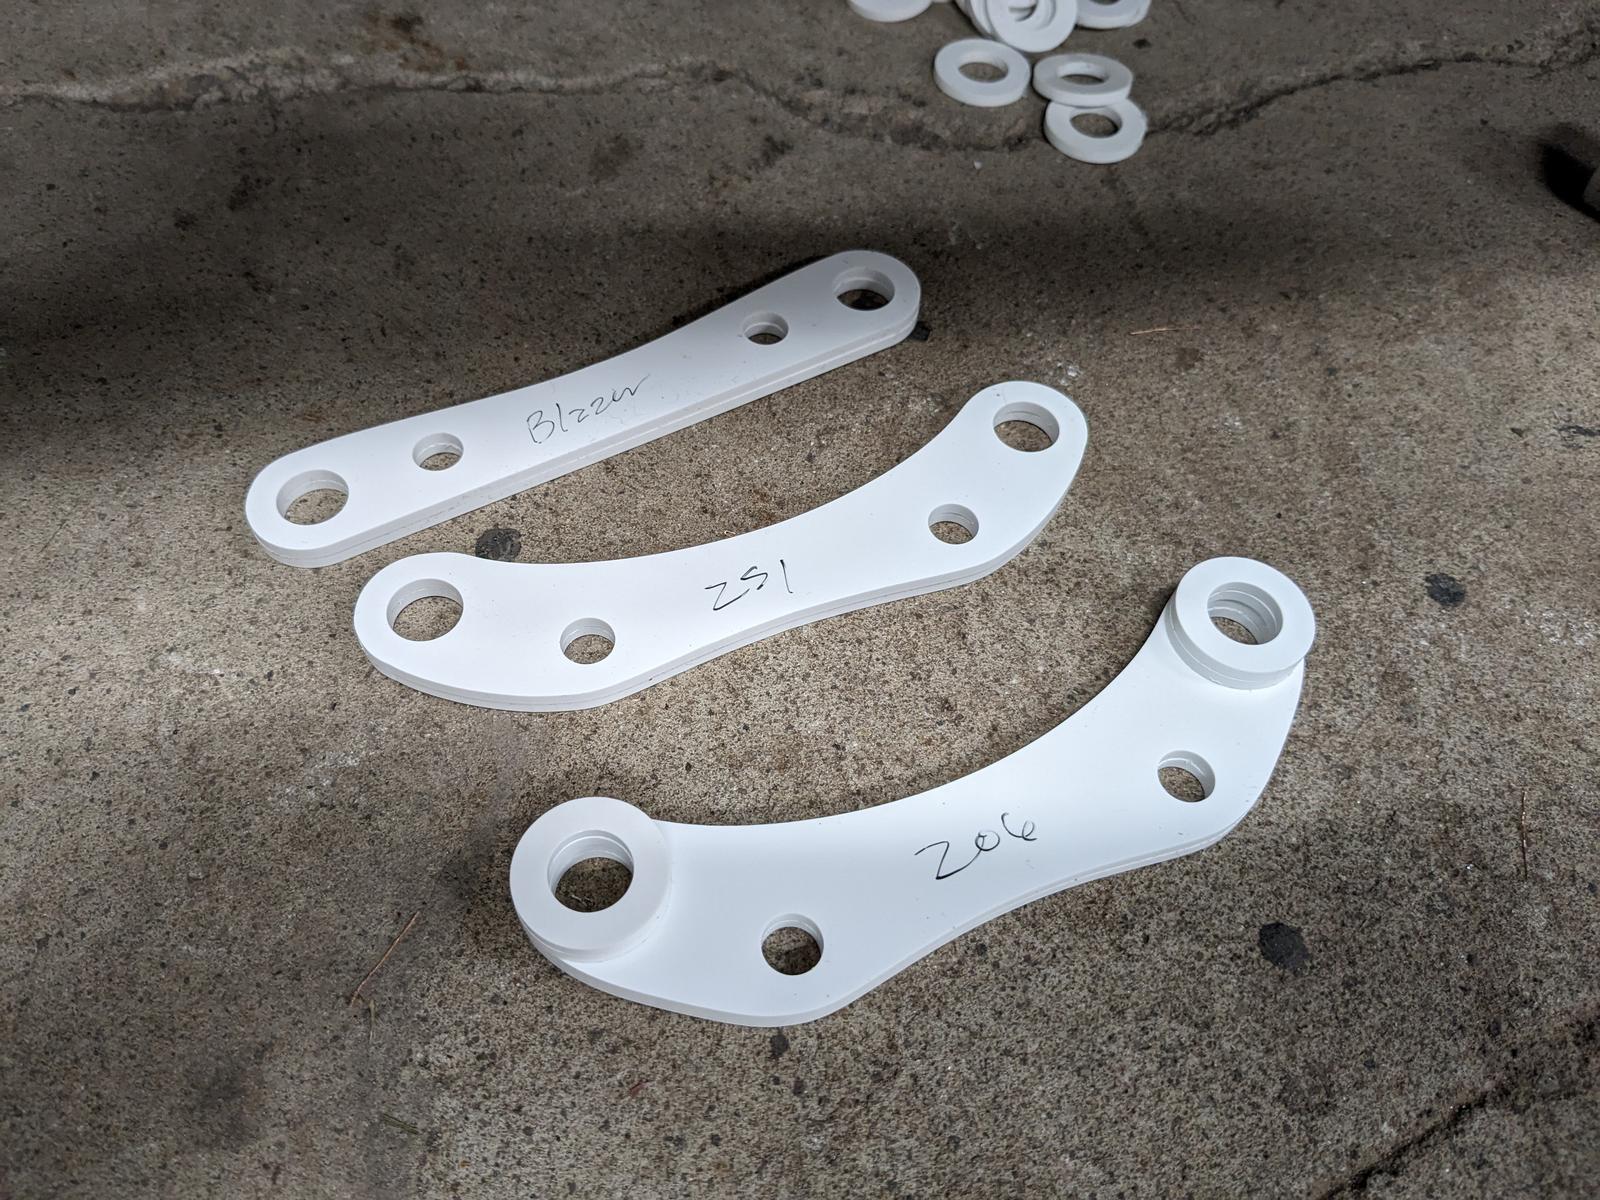
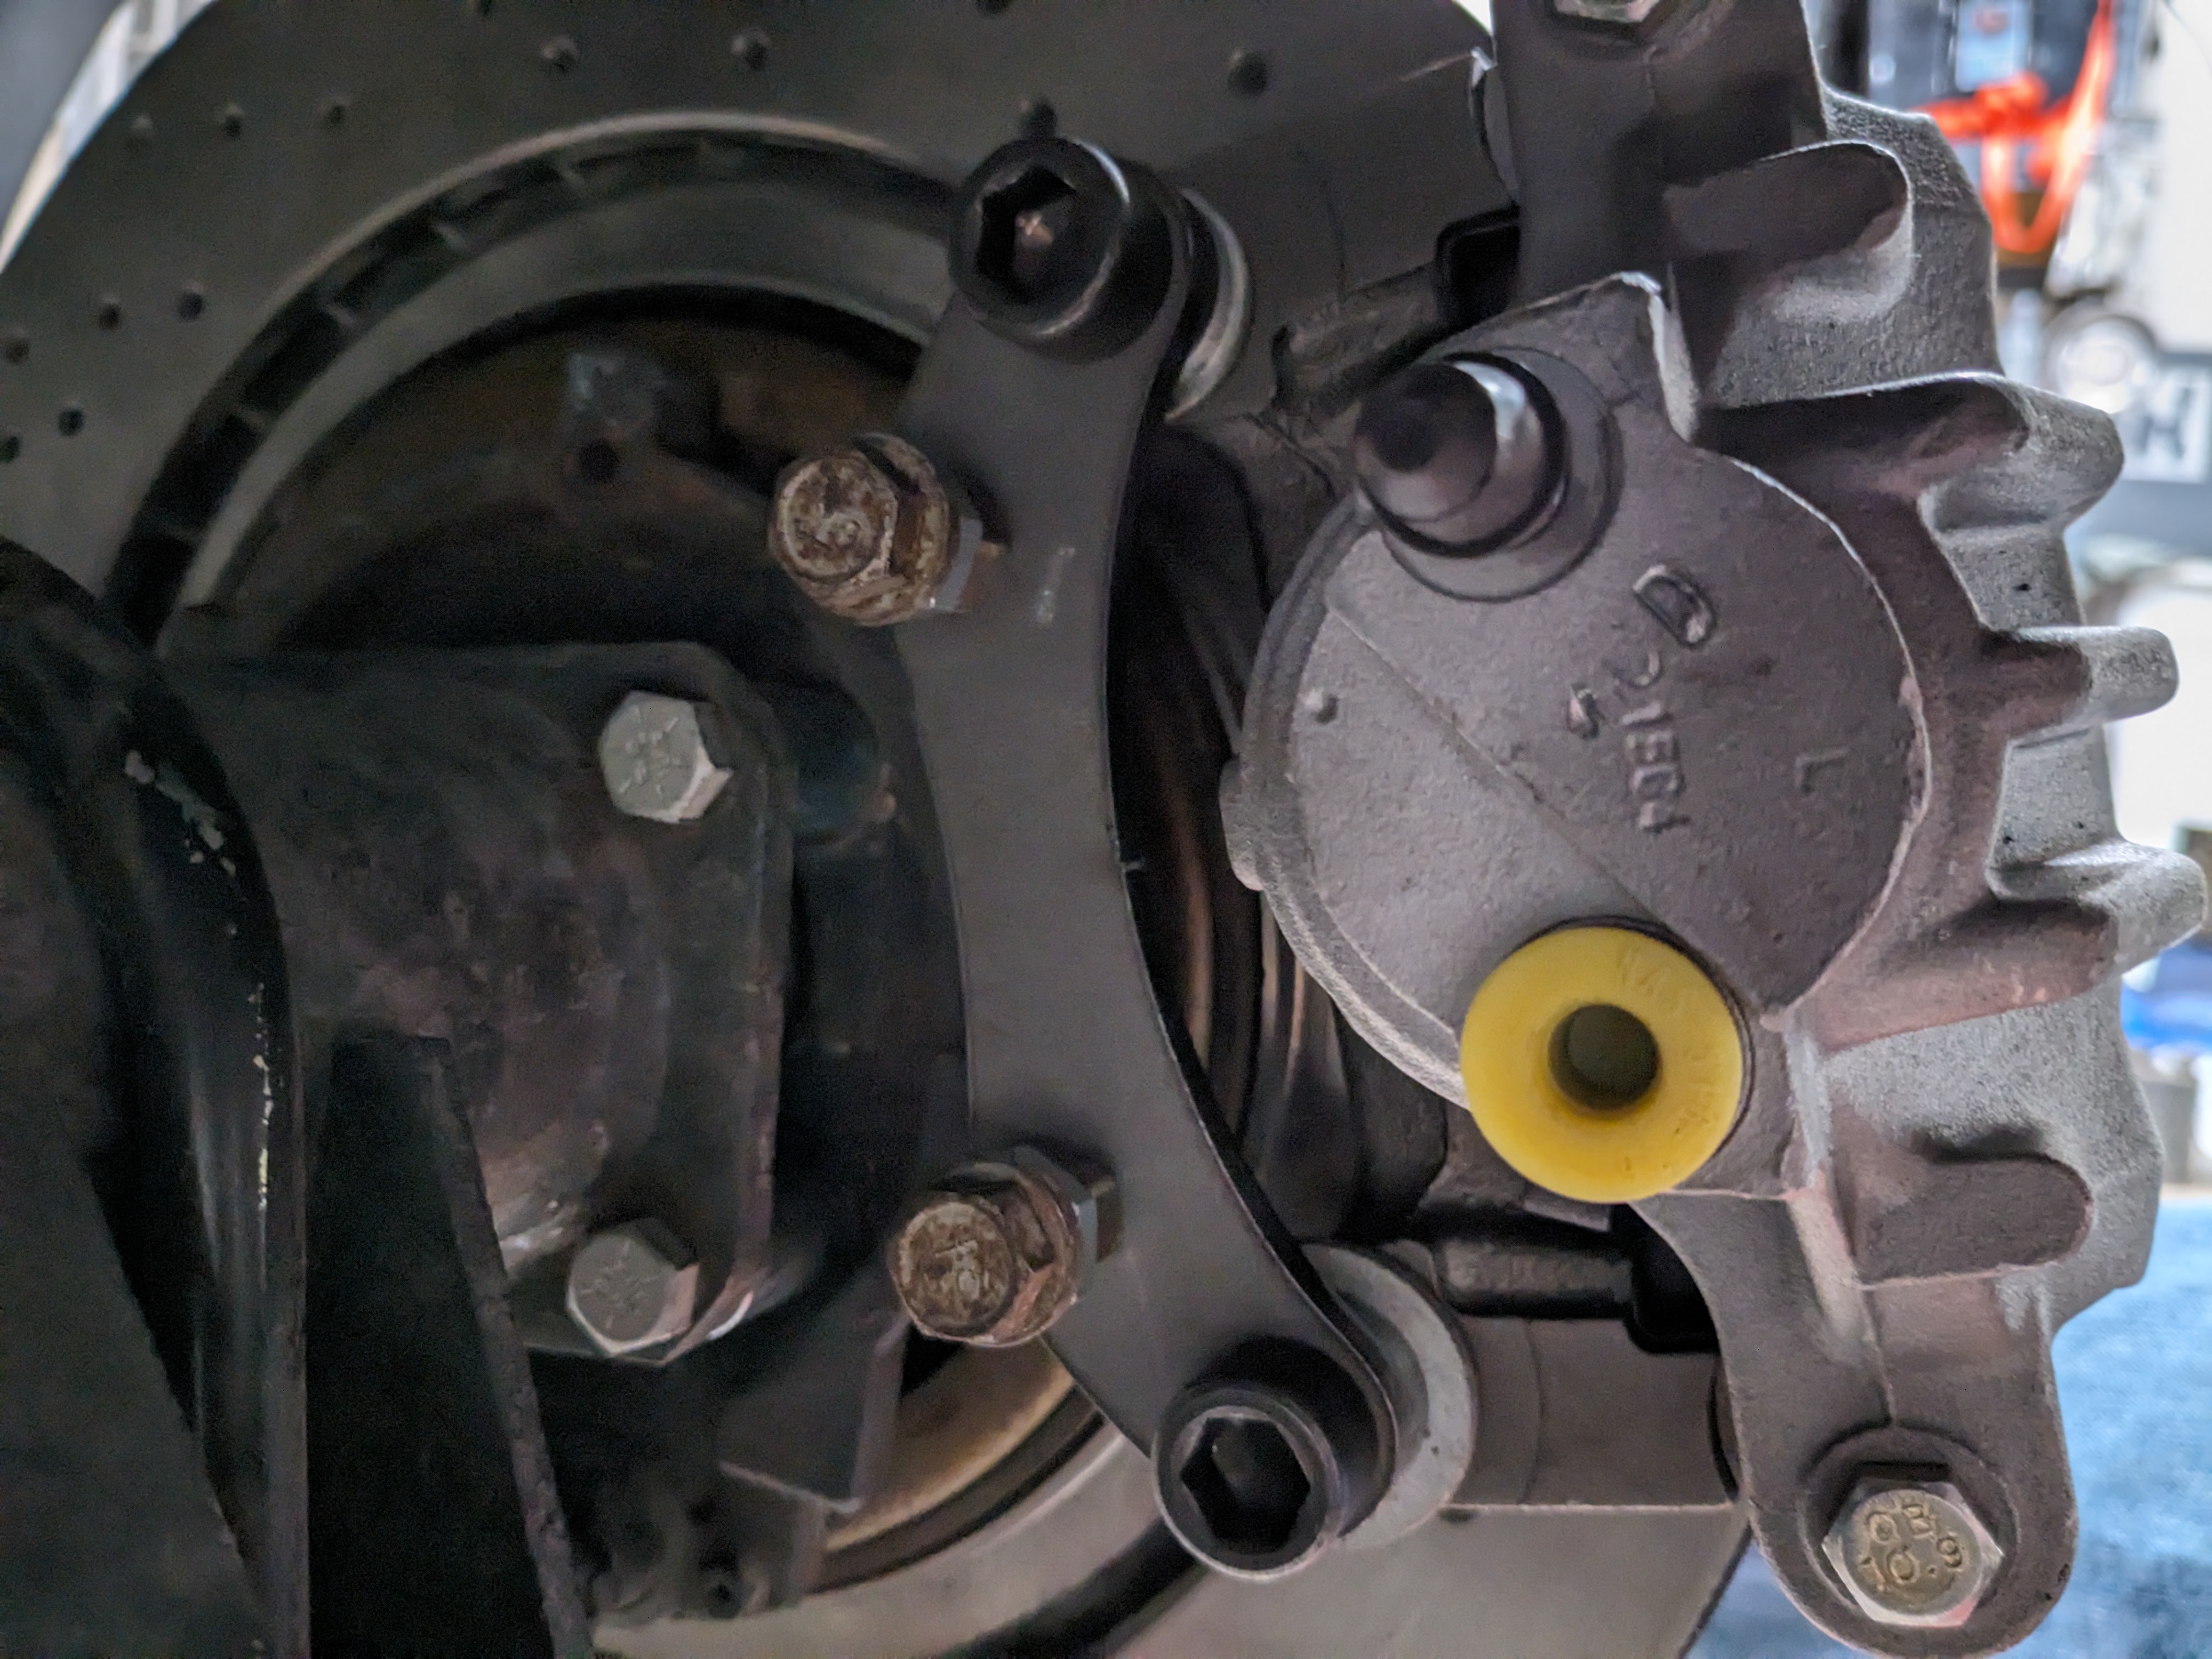
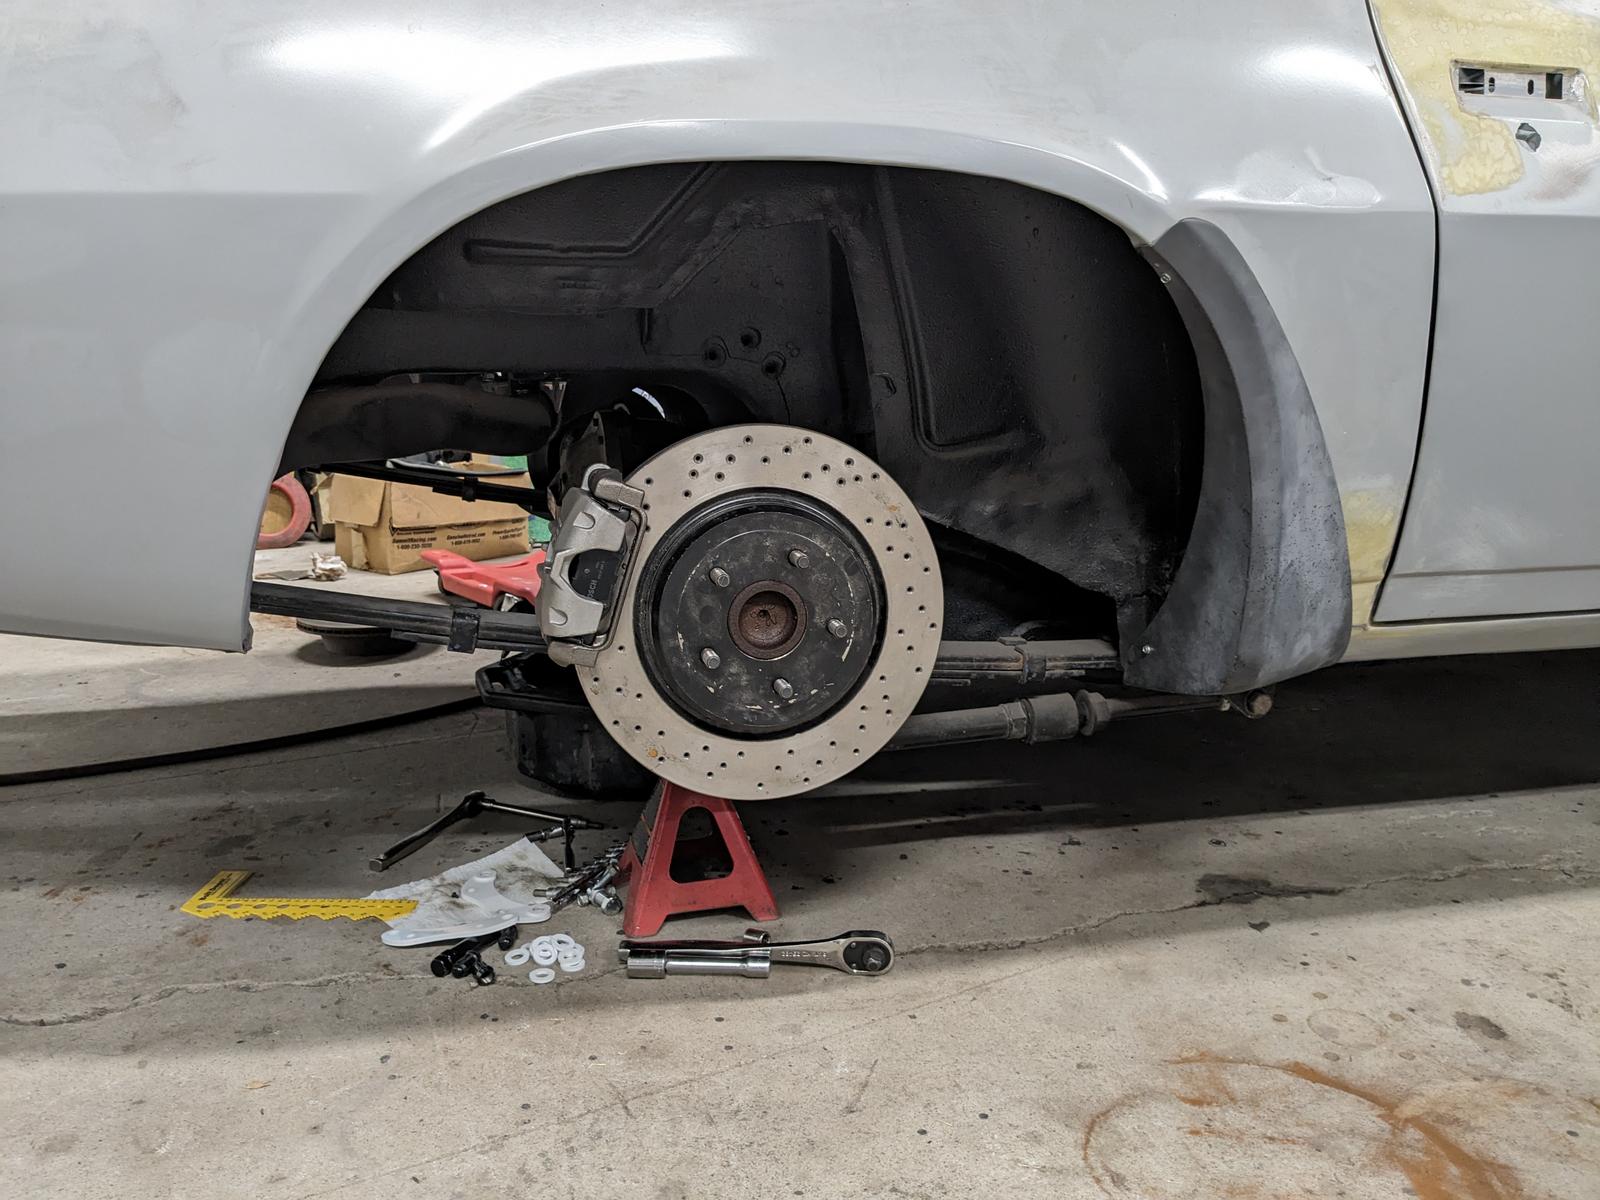
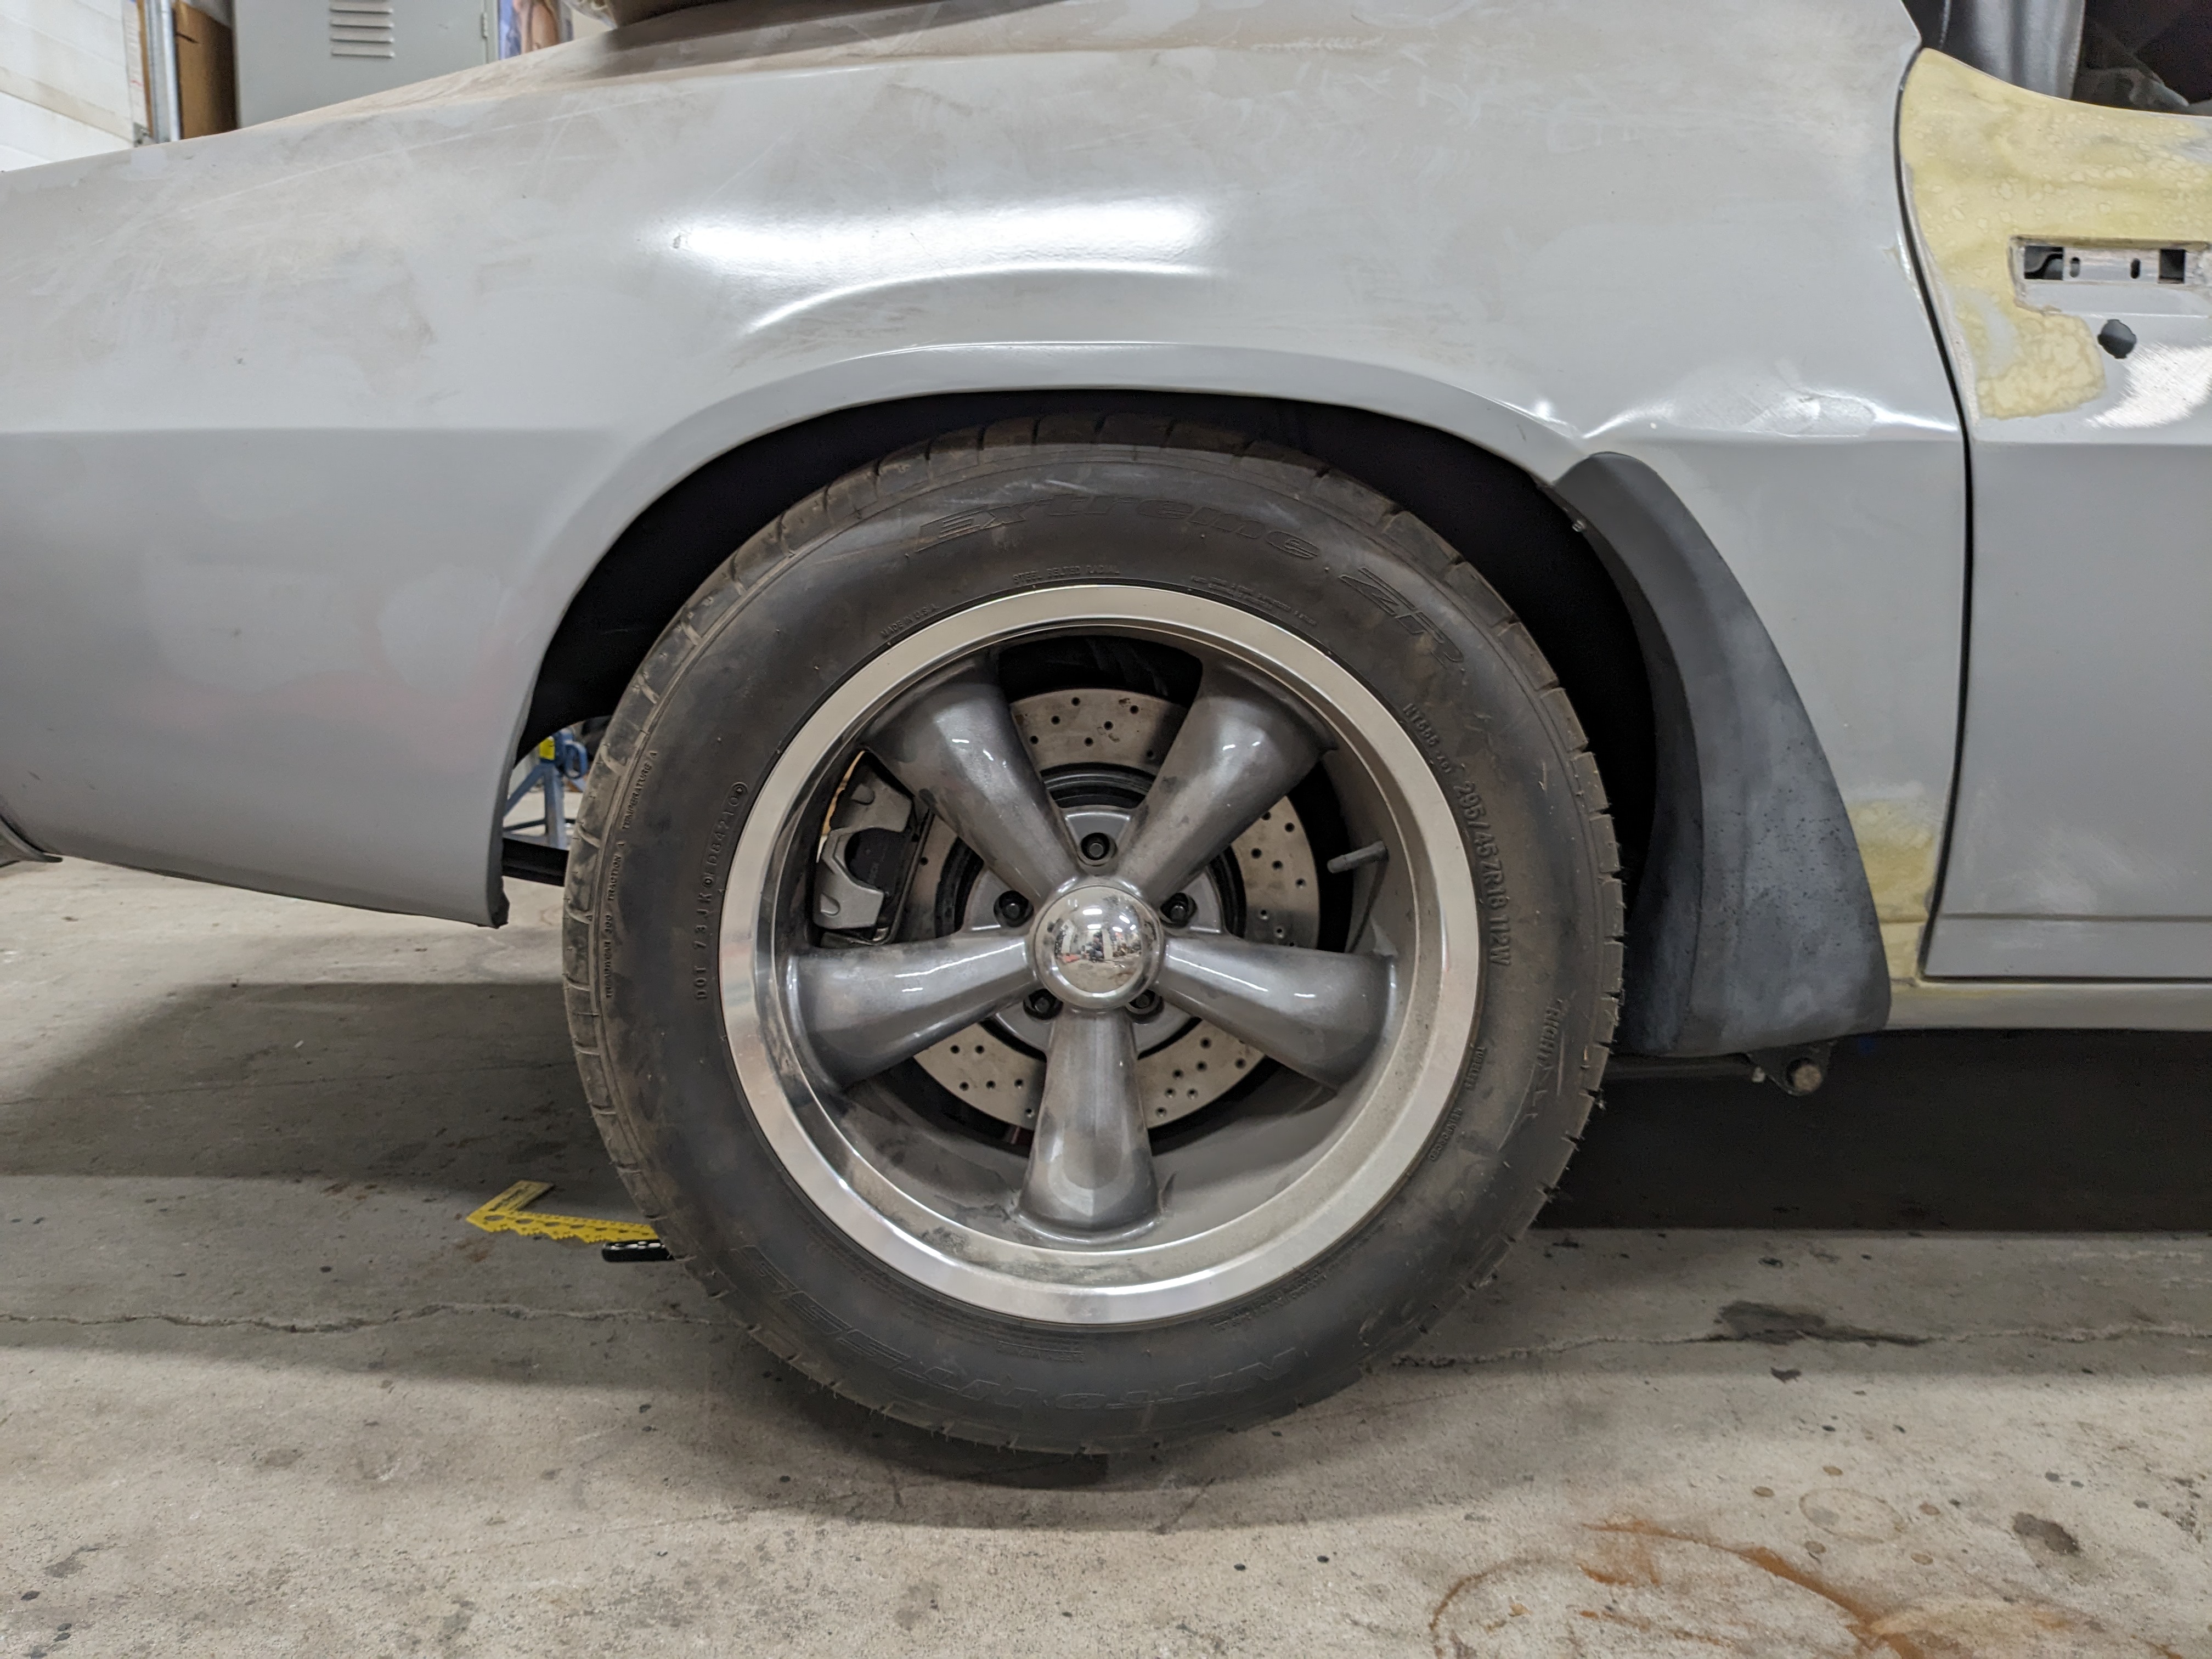
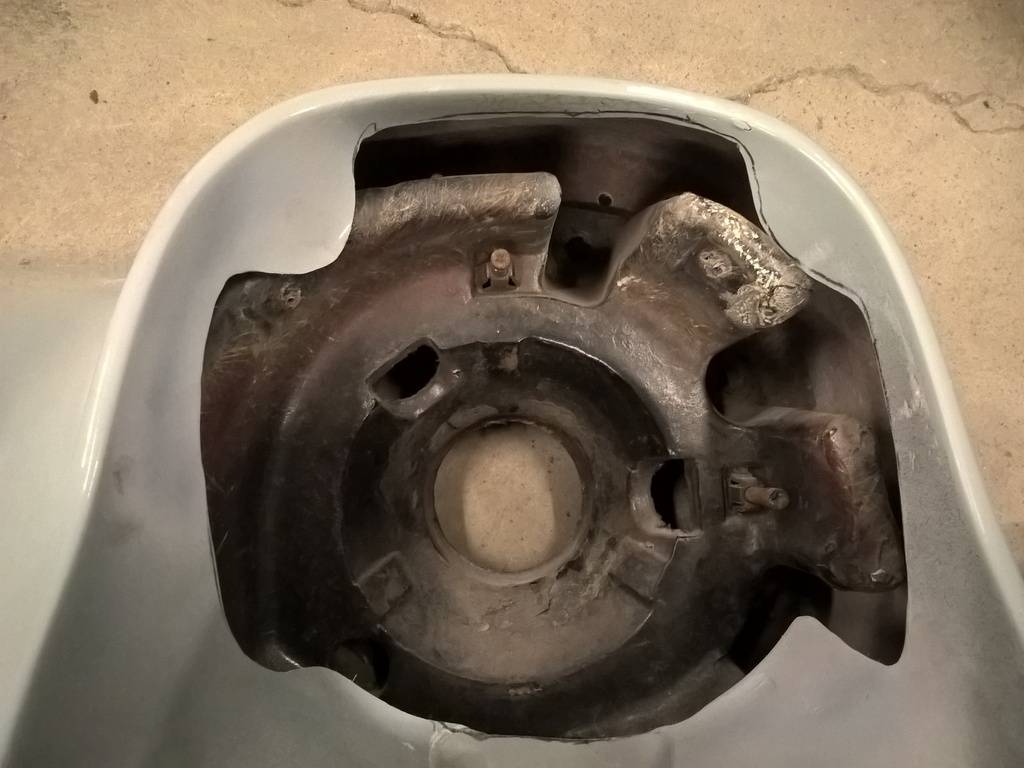
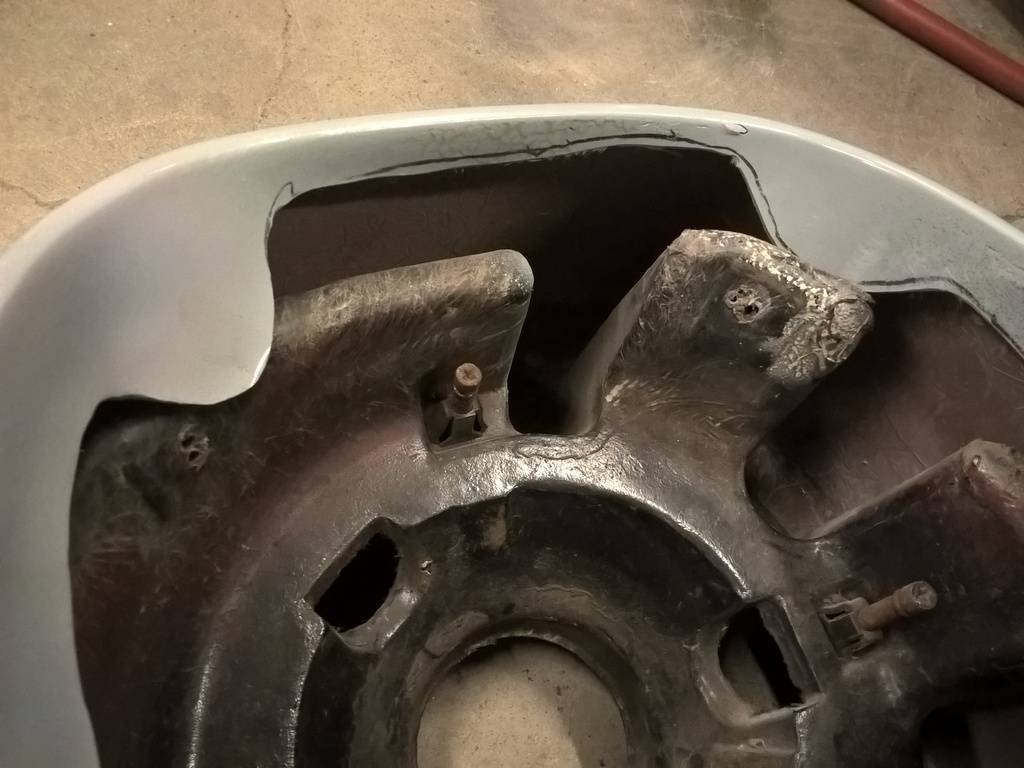
I fabricated a way to put 13.4" Corvette Z06 rotors with regular C6 calipers on the Camaro axle using Blazer backing plates. I also made it easily changeable so I can go back to 11.6" Blazer brakes when I need to run my 15" drag wheels...without needing to pull the axles and swap backing plates. I ended up spending about $300...I'll call that a win.
https://www.youtube.com/watch?v=cD9eC8DCDtU
01-22-2024 #138
 Registered User
- Join Date
- Sep 2009
- Posts
- 2,706
That's a very interesting rear brake setup. Can you tell us more about the parts combination that you used?

1955 Nomad project LC9, 4L80e, C5 brakes, Vision wheels
1968 Camaro 6.2 w/ LSA, TR6060-Magnum hybrid and etc SOLD
1976 T/A LS1 6 Speed, and etc. SOLD
Follow me on Instagram: ryeguy2006a
01-28-2024 #139
Registered User
- Join Date
- Mar 2005
- Location
- Walton, NY
- Posts
- 737
It's all covered in the video, but it's ~2000-2005 Blazer rear backing plates and ebrake components, with 2007 Corvette Z06 13.4 rotors and base Corvette calipers. Fits the Blazer ebrake stuff when spaced correctly, and there are custom brackets to bolt the Corvette calipers to Blazer backing plates. Blazer backing plates allow me to remove the corvette stuff and run 11.6 Blazer rotors and calipers when I need to clear my 15" drag wheels with slicks. Originally Posted by ryeguy2006a


 Reply With Quote