
Results 61 to 80 of 139
-
02-16-2013 #61

 Registered User
- Join Date
- Mar 2005
- Location
- Walton, NY
- Posts
- 737
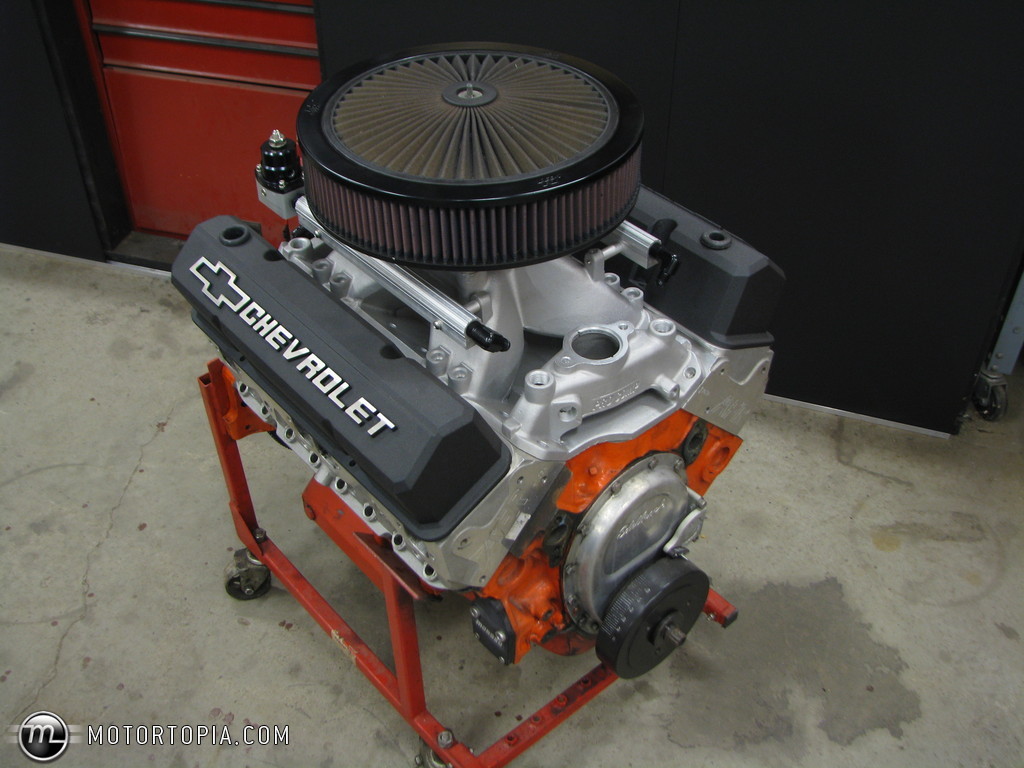
Got my regulator to plumb in the fuel rail. Gonna feed the front and return out the back. From what I read the injectors are a little more consistent if you Y the feed to the front and link the rears of the rails to return.
I don't think I posted any pics of the valve covers Tiff bought me either. I like to just stare at it. This thing is gonna be fun...


-
03-20-2013 #62
 Registered User
- Join Date
- Jul 2008
- Location
- ohio
- Posts
- 1,135

nice engine build.......have you got any power numbers yet? is it in the car? also since you said you like the ls craze because of sbc parts cost less then if you dont mind me asking what do you have in the motor cost wise.....
keep the wheels a spinning and the Beavers a grinning (burt reynolds-smokey and the bandit)
03-21-2013 #63
Registered User
- Join Date
- Mar 2005
- Location
- Walton, NY
- Posts
- 737
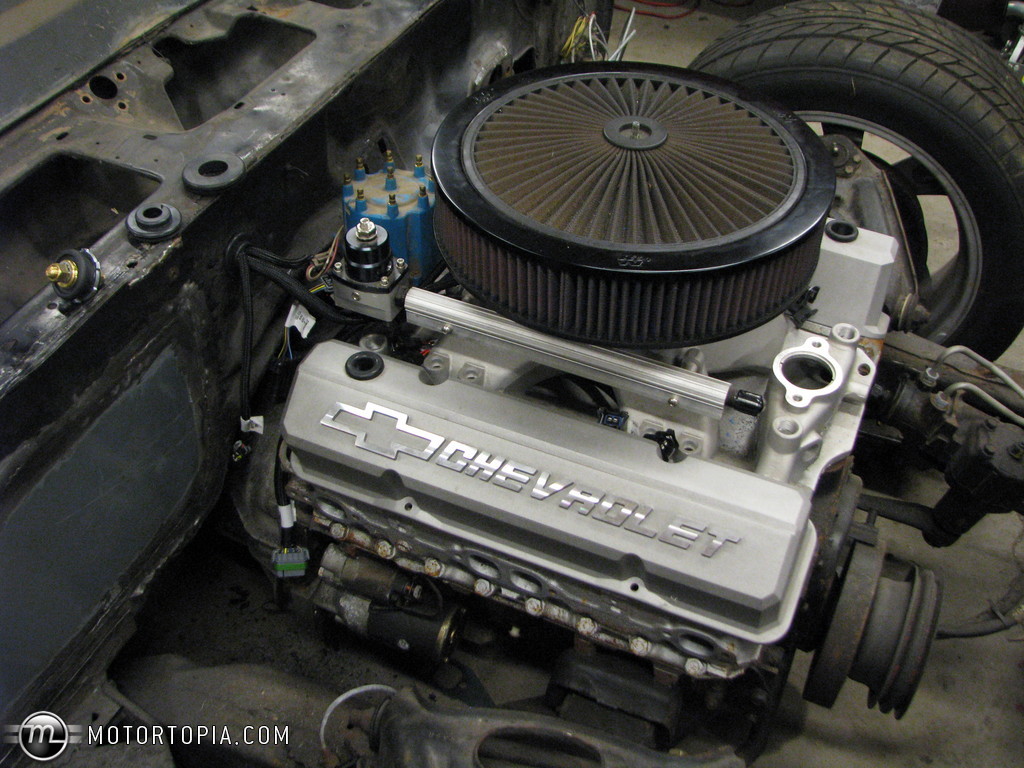
The Beretta is in pieces currently, so it's not in the car yet. I'll get to the Camaro when the Beretta is done this summer. Everything I've seen points to the 500-550hp range. And I'll have 383 running for about $4000. Adding up the parts brand new it would be in the $7500 range with the EFI.
03-21-2013 #64 Registered User
- Join Date
- Jan 2008
- Location
- Charlotte
- Posts
- 1,295
Needs more:
 2005 LeMans Blue Corvette w/ T56 & Z51 & C6Z06 Brakes, Build Thread: https://www.pro-touring.com/showthread.php?64496
2005 GMC Sierra 2500HD LLY / Allison
2014 Chevy SS LS3 / 4 Door
03-25-2013 #65
Registered User
- Join Date
- Mar 2005
- Location
- Walton, NY
- Posts
- 737
More power? I already beat a 13.8@105 or whatever that blue thing ran. With the old engine! haha
02-28-2014 #66
Registered User
- Join Date
- Mar 2005
- Location
- Walton, NY
- Posts
- 737
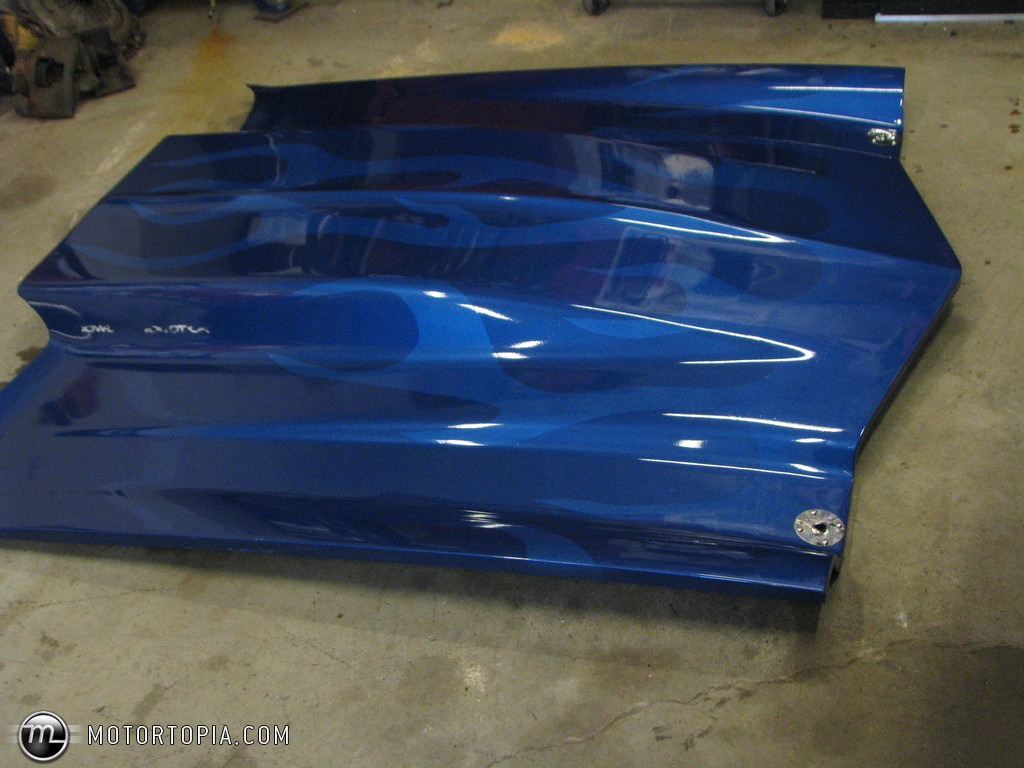
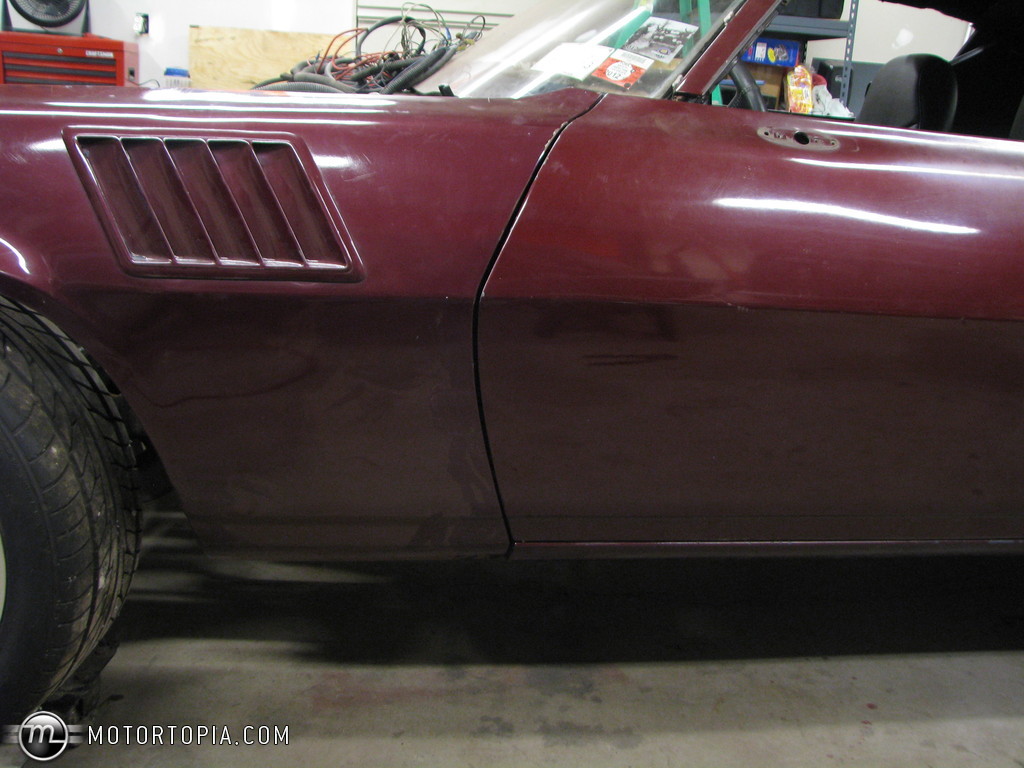
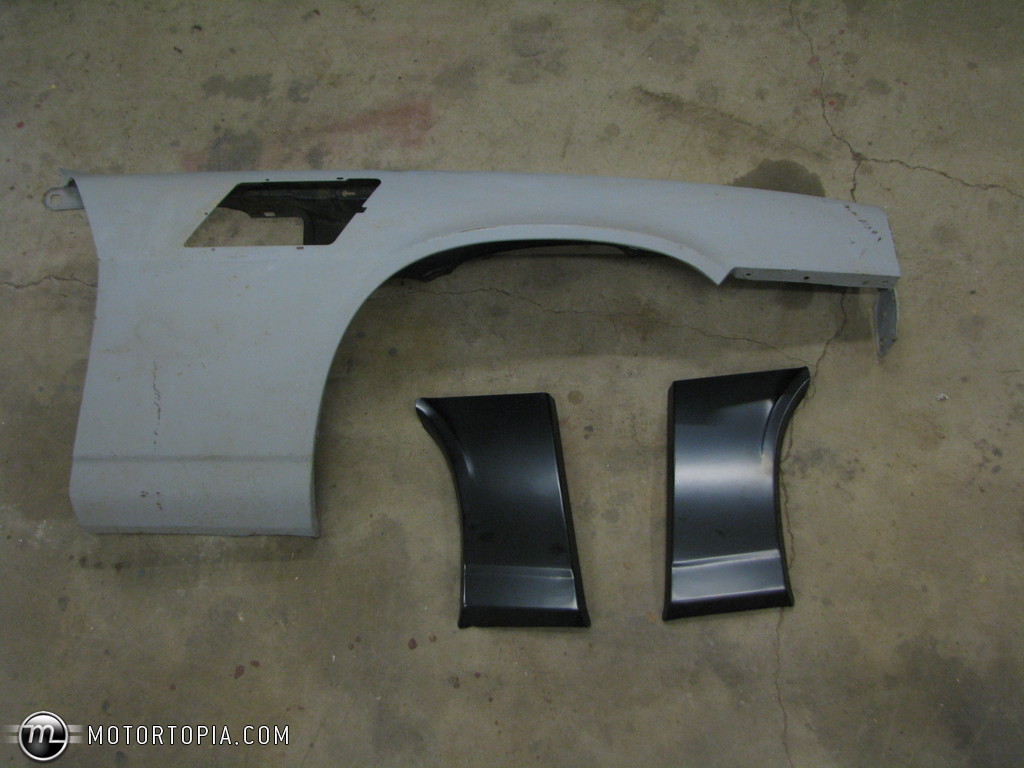
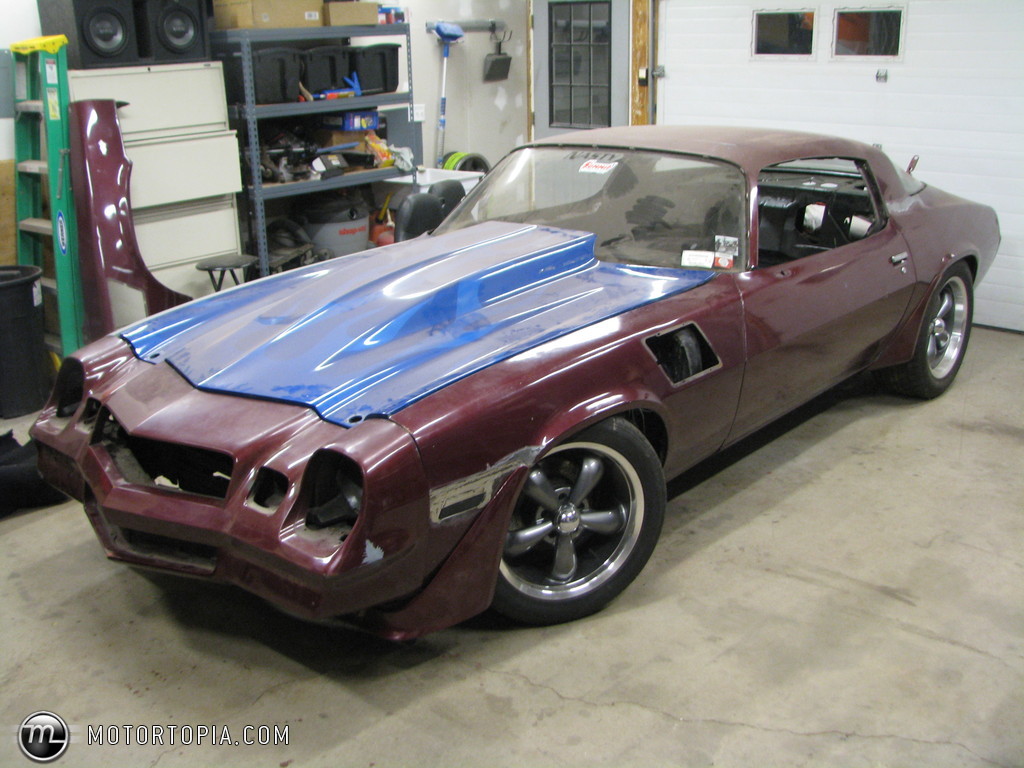
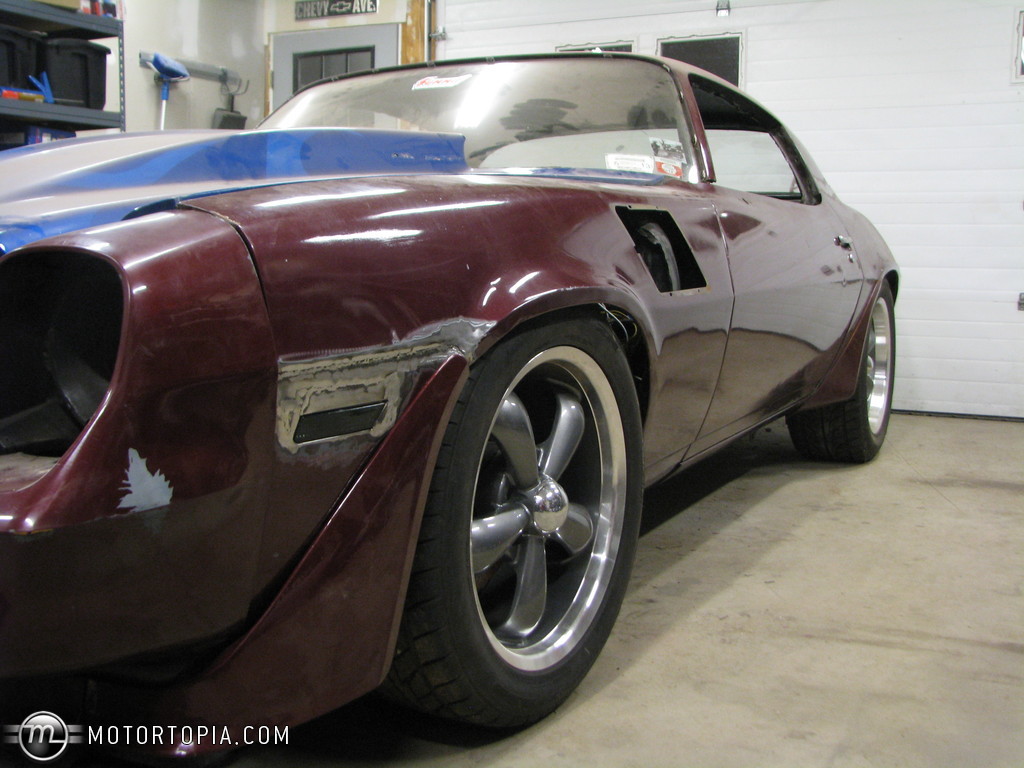
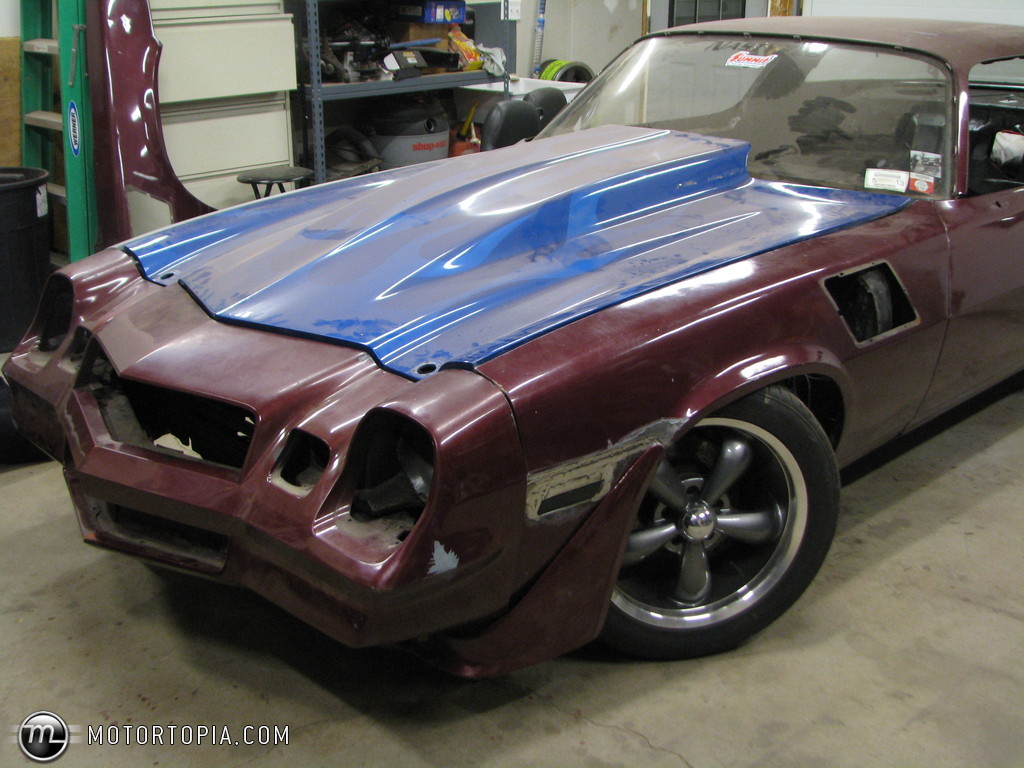
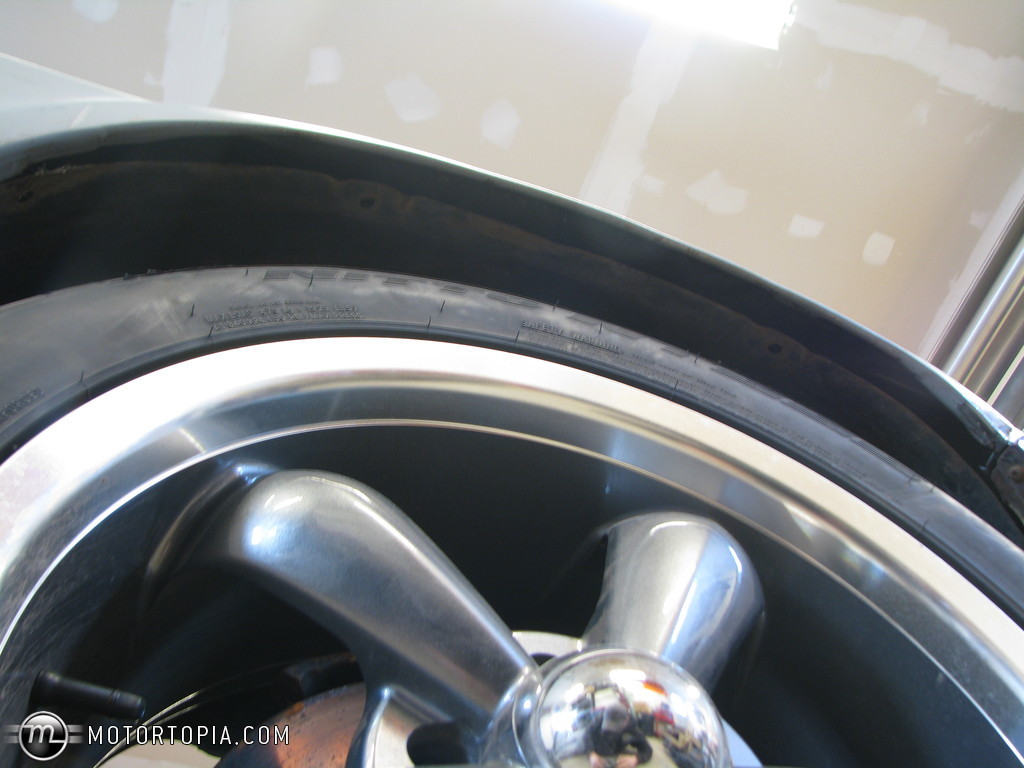
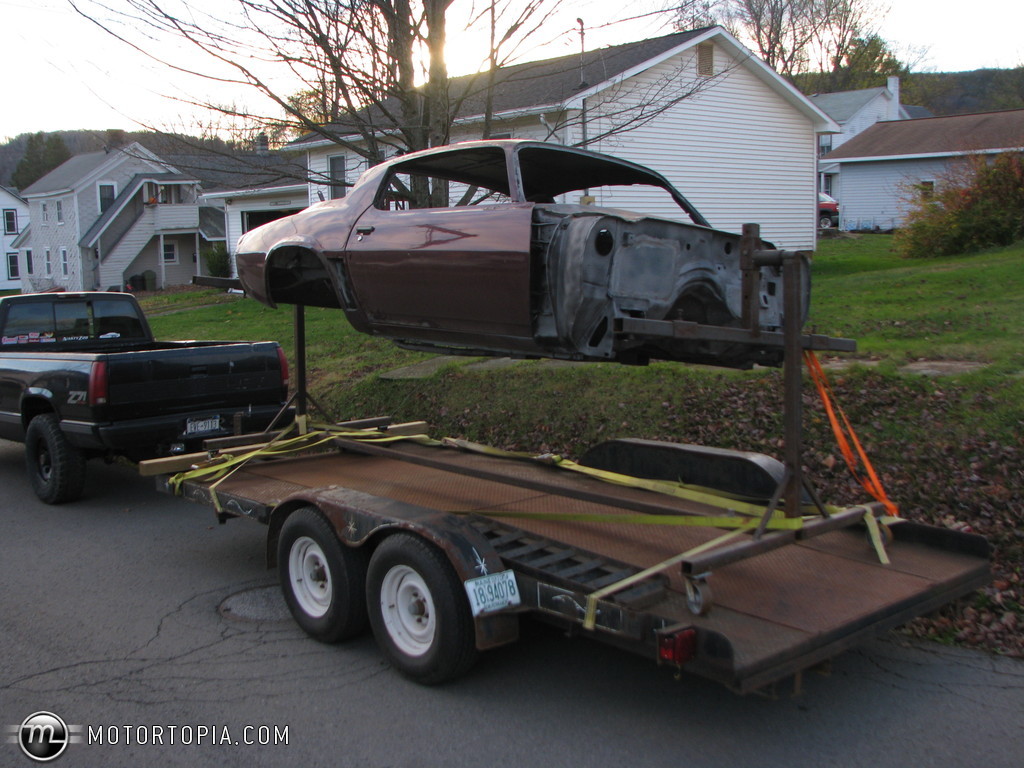
Just recently started some body work on it finally. Picked up a little taller hood to fit the new EFI intake and have room for a nitrous plate. It's an American Sports Car hood that actually has a smoother cowl transition than my old Harwood...I like it better.
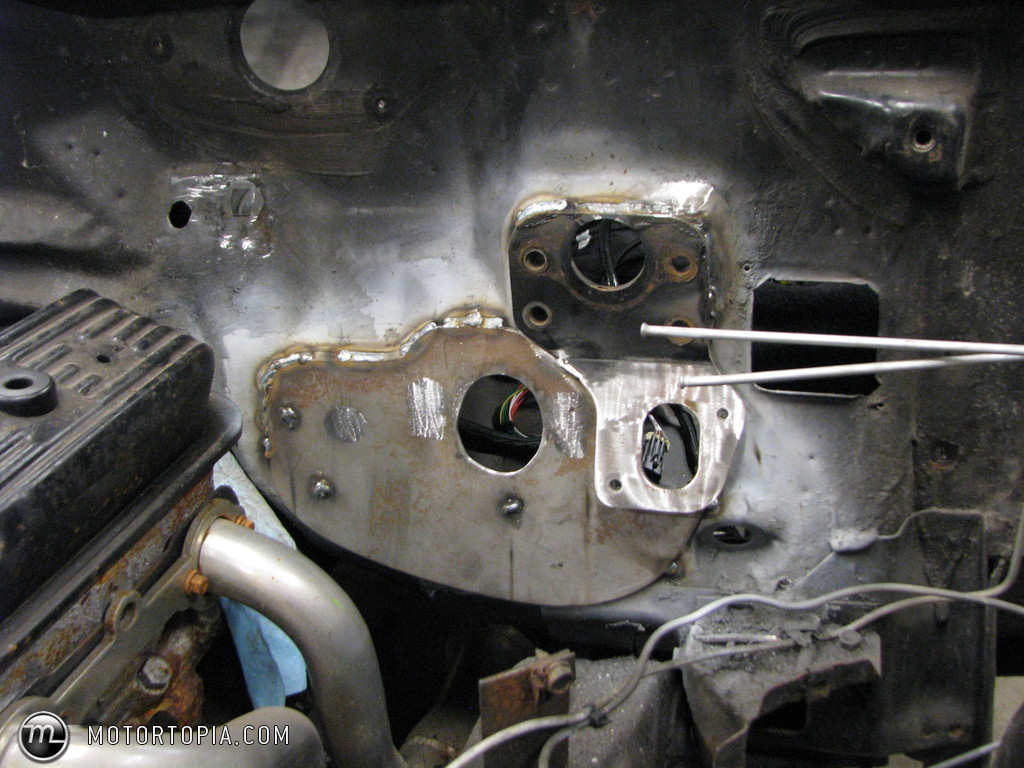
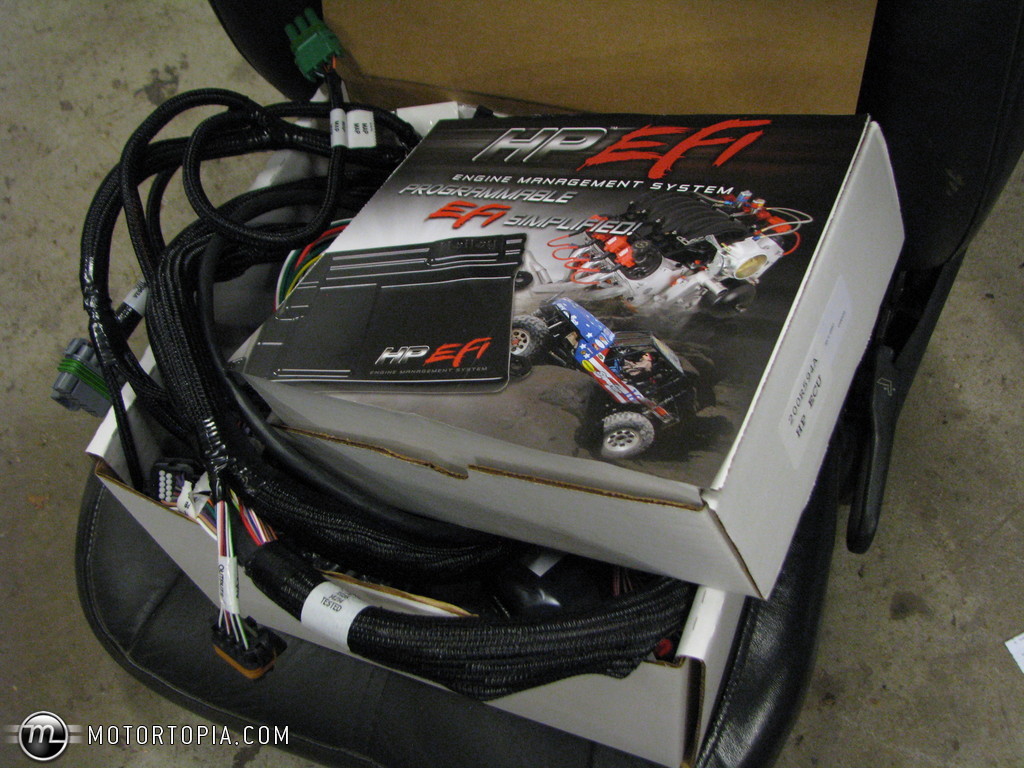
I looked over my used EFI harness and was unhappy to find a lot of hacked wires buried in the loom. I checked it all out with the wiring diagram and I can get it all sorted out with some new connectors and sensors, etc...but I'll still have a kind of outdated Accel system that way. Thinking a jump to the new Holley EFI might be the best way to go.
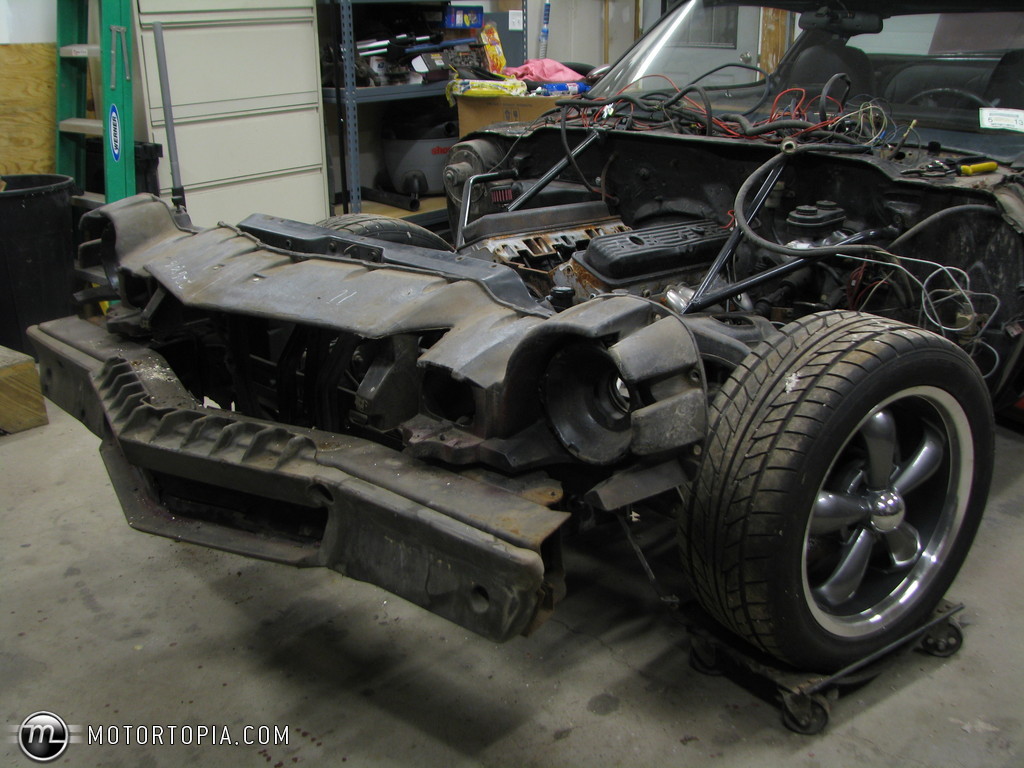
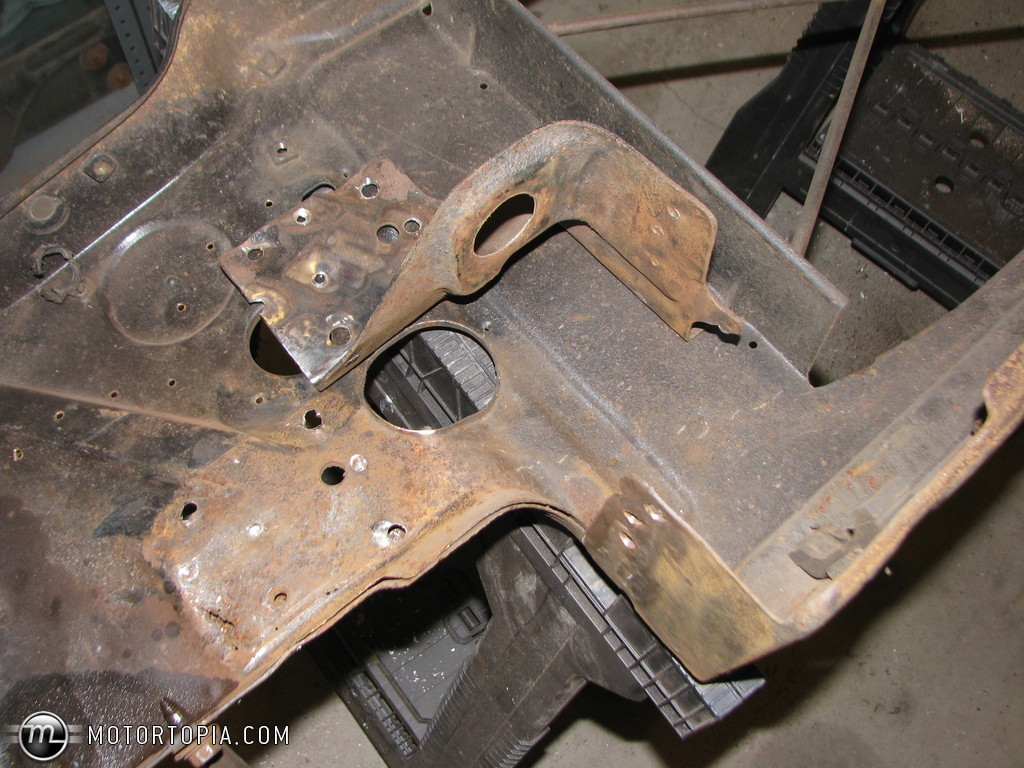
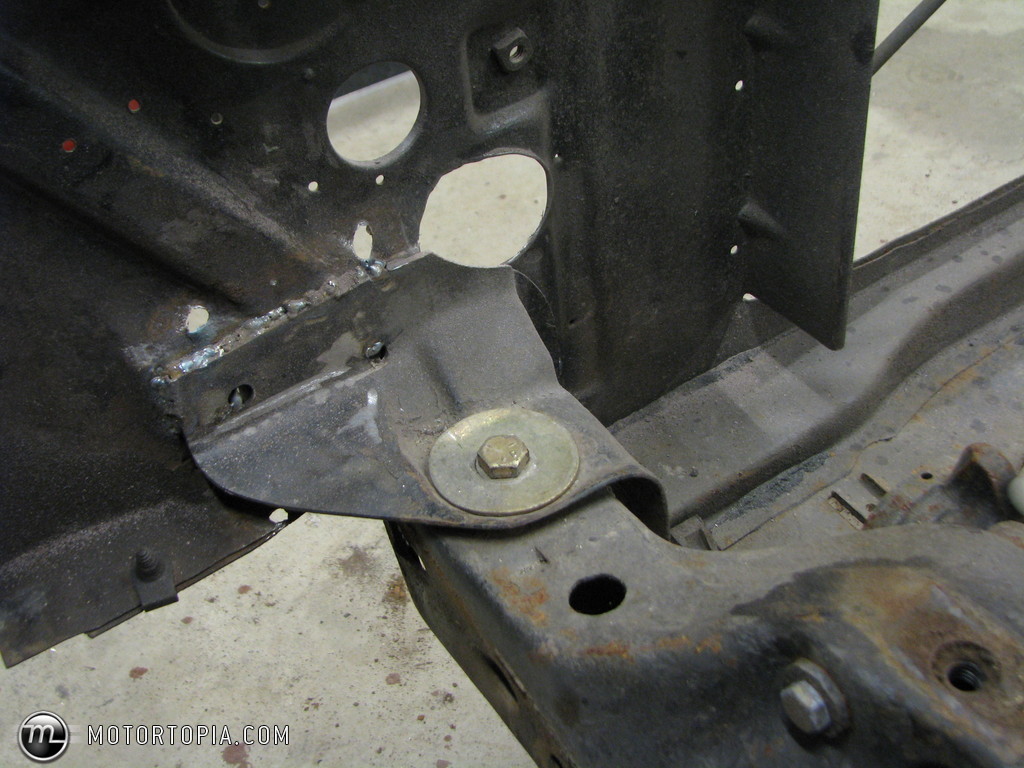
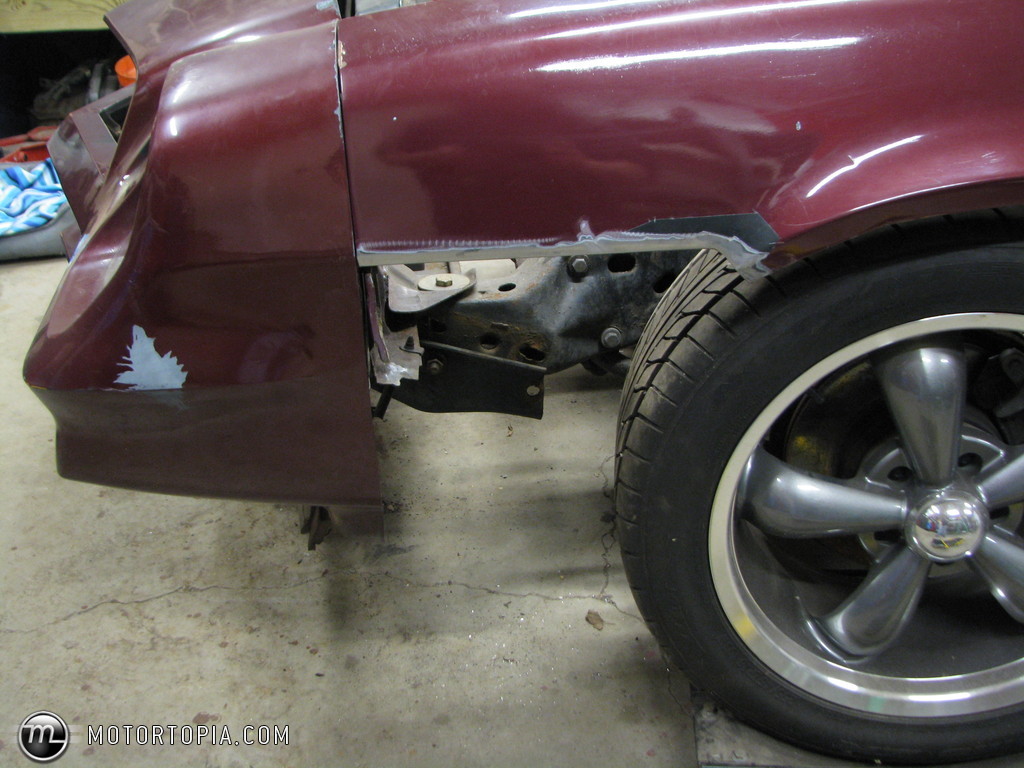
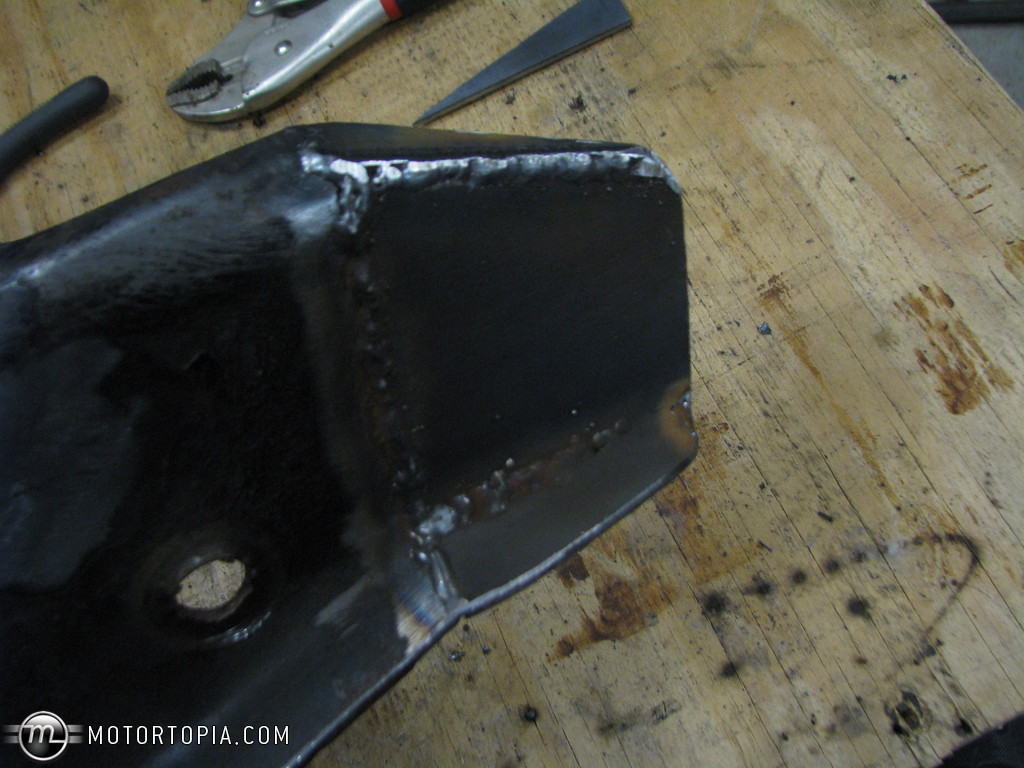
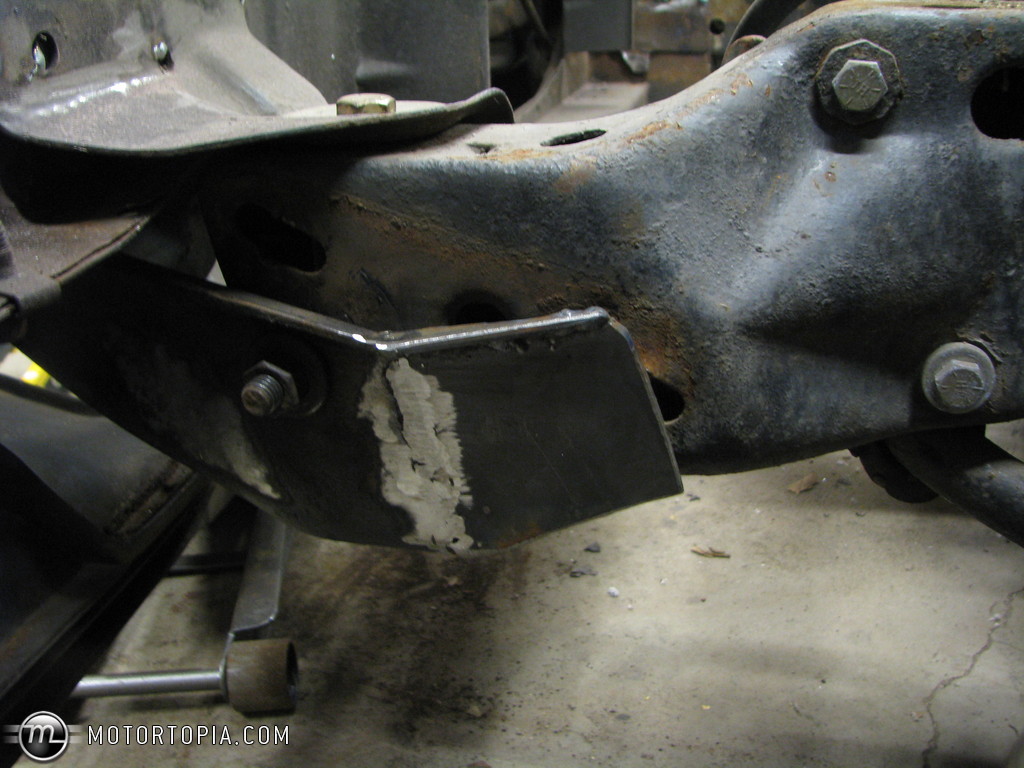
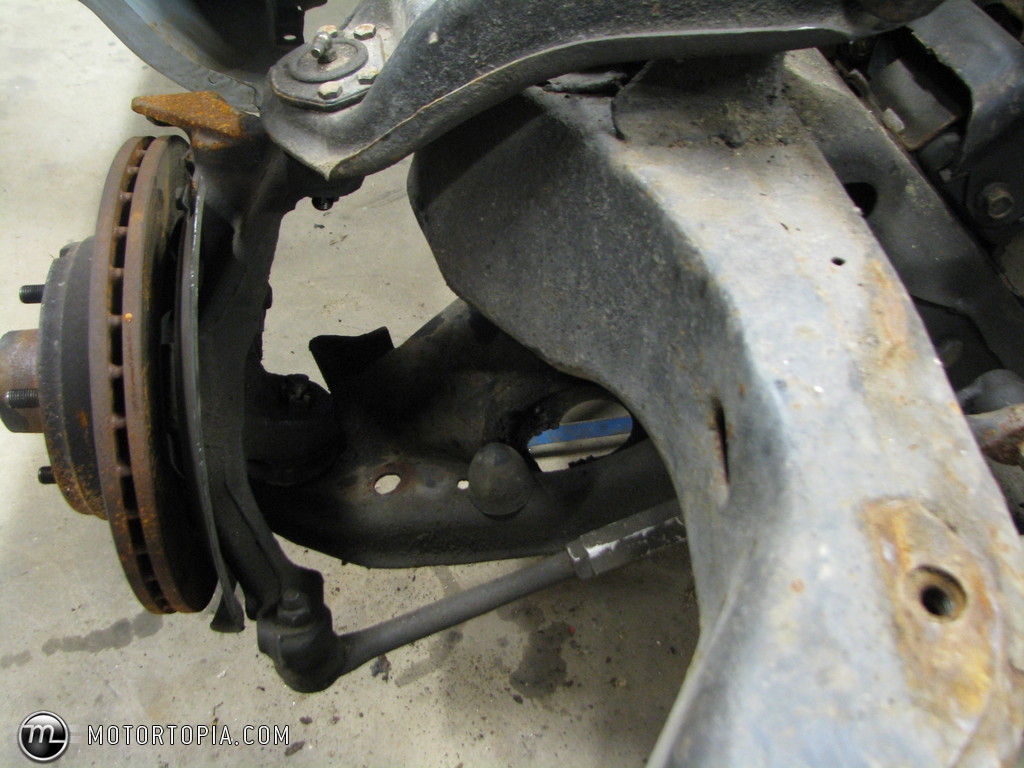
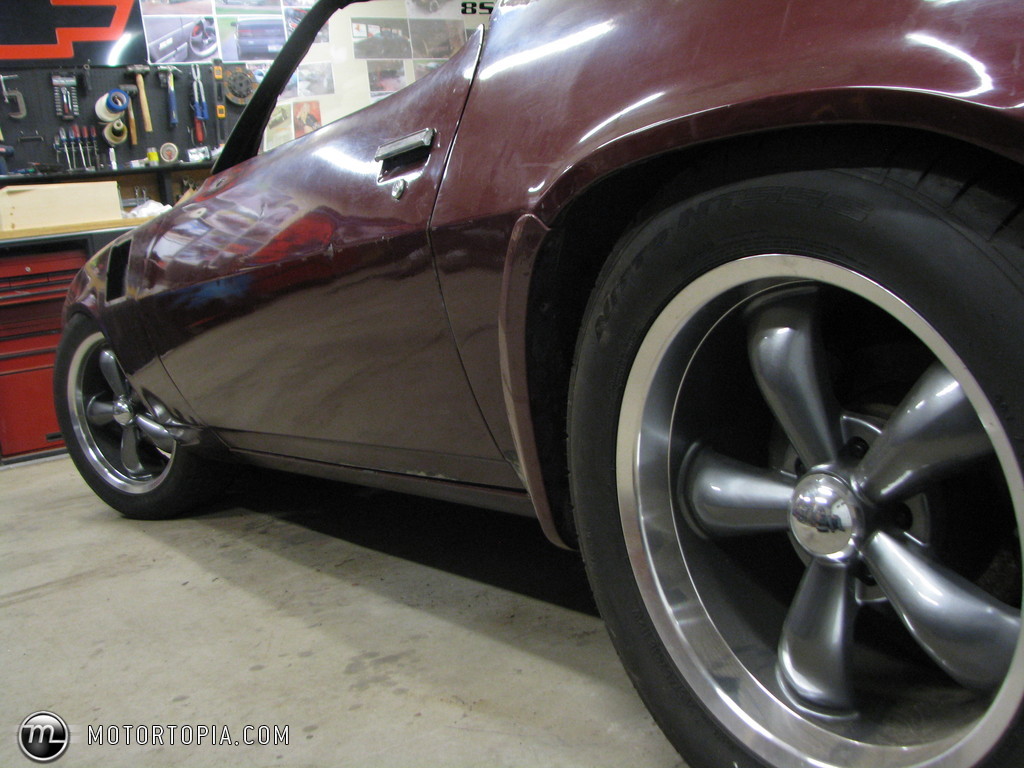
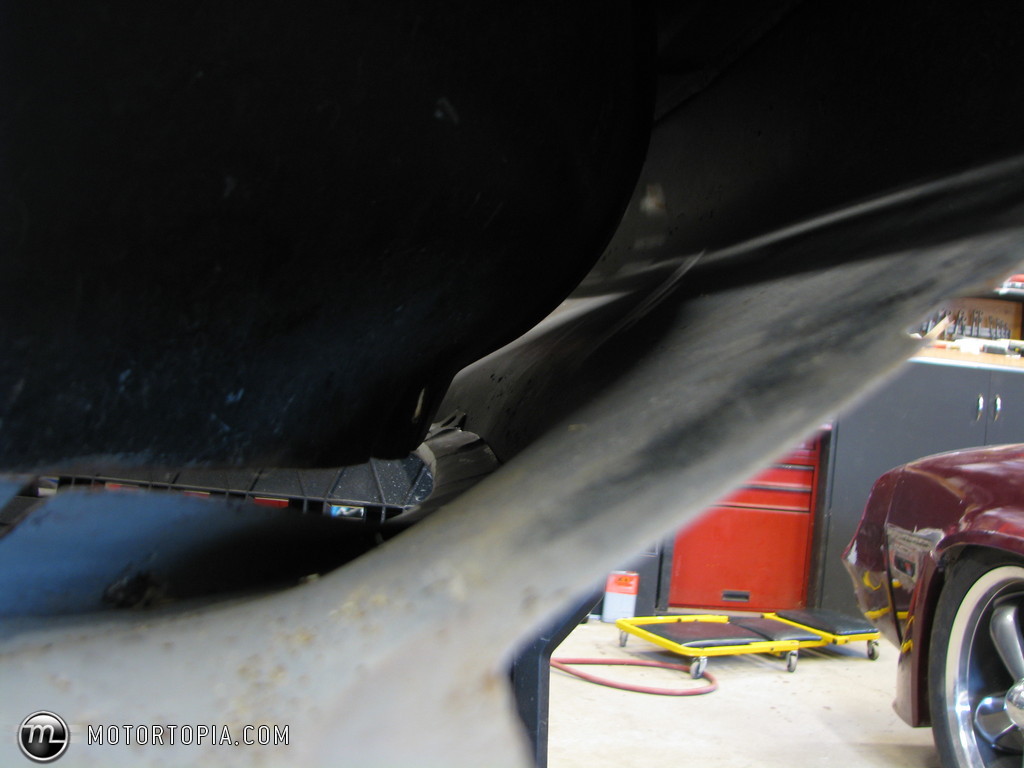
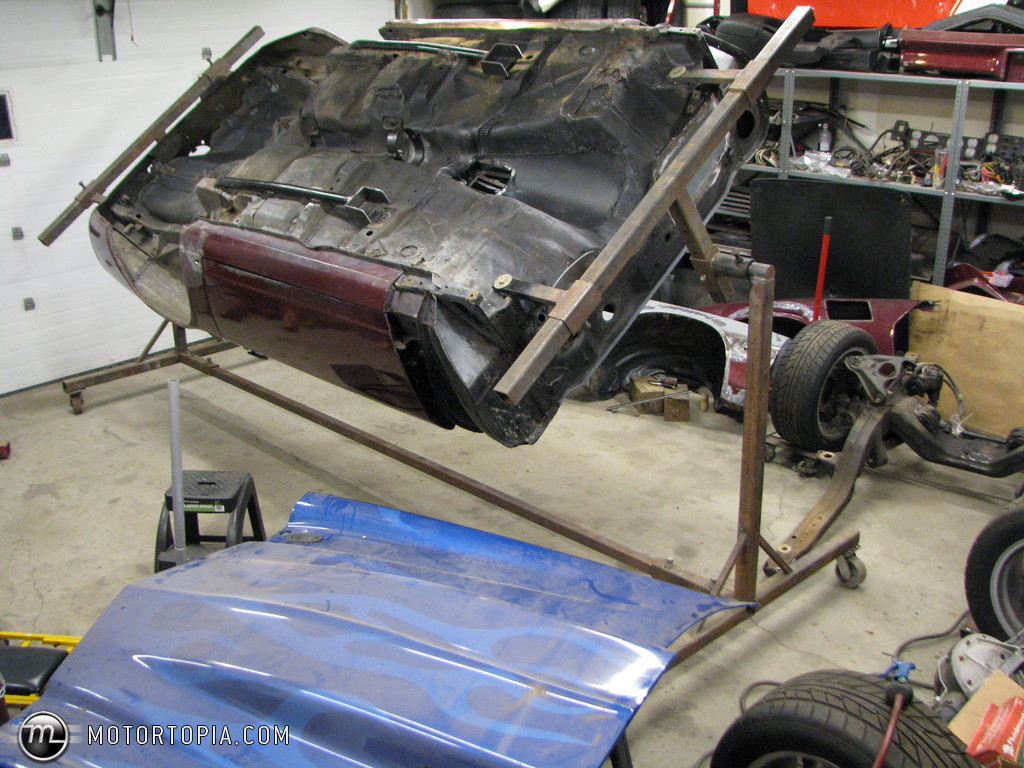
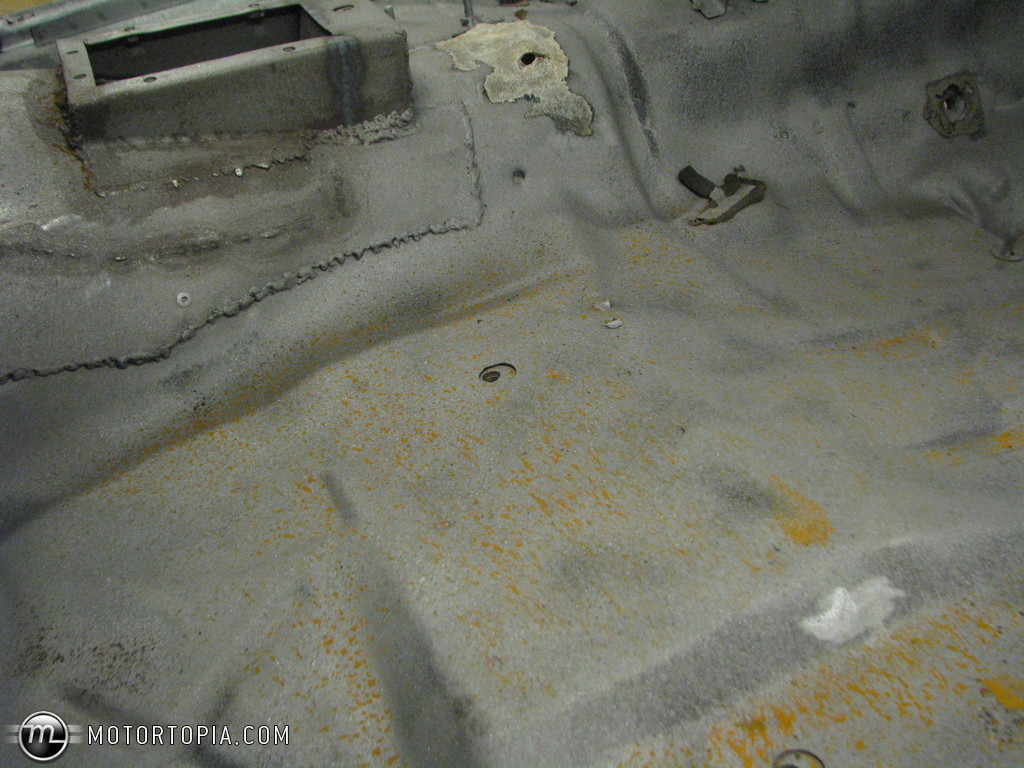
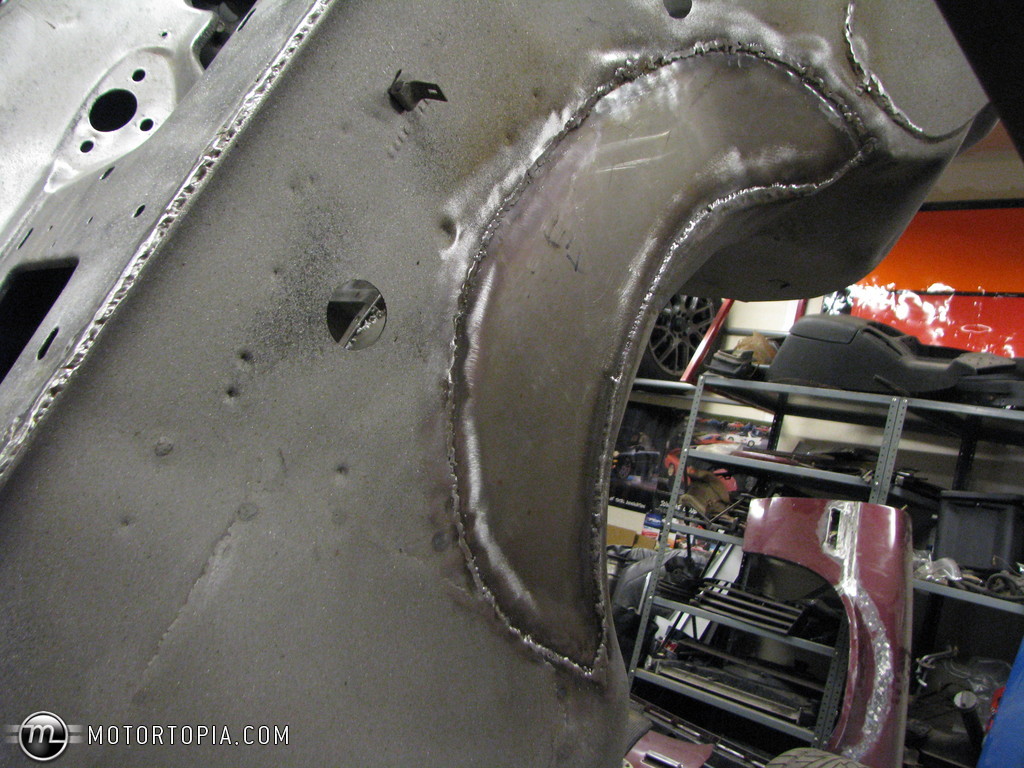
Tore it down and modded the core support and front bumper brackets to fix my alignment issues with the wedged subframe bushings. Now the core support sits 2" lower in relation to the frame than stock, which is roughly 1" less fender/wheel gap. Once everything is final assembled I'll see if I need to cut the Hotchkis springs to tuck tire. I plan on pulling the springs out and building the inner fenders on the bump stops to make sure there is clearance for everything at a low ride height.
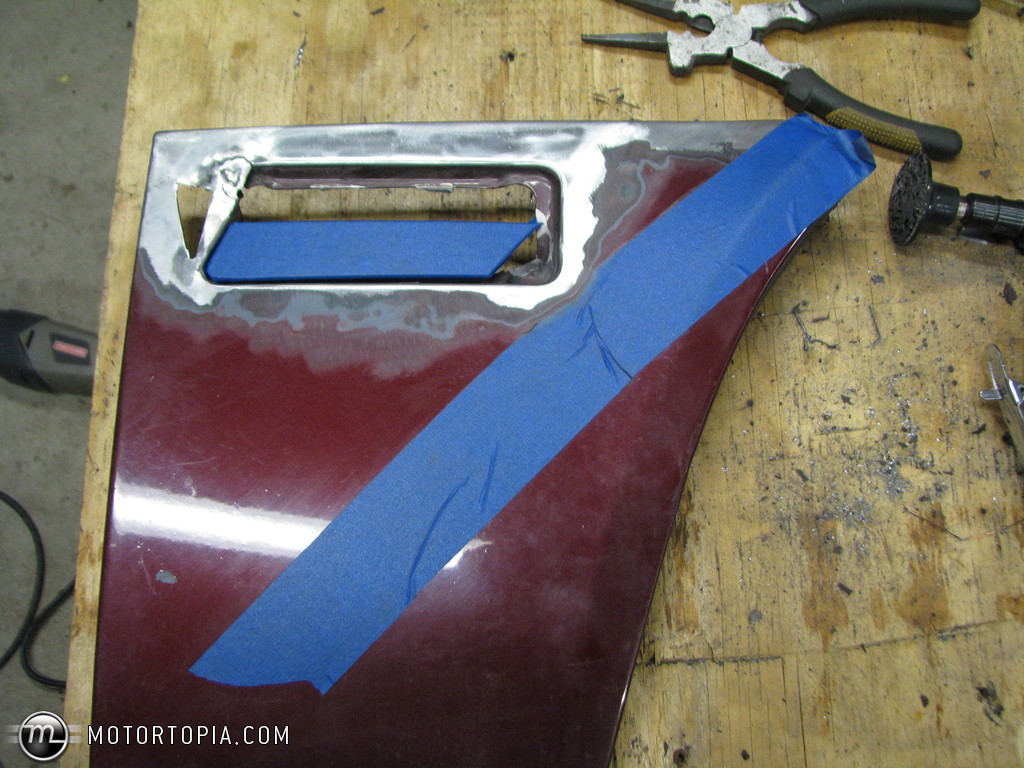
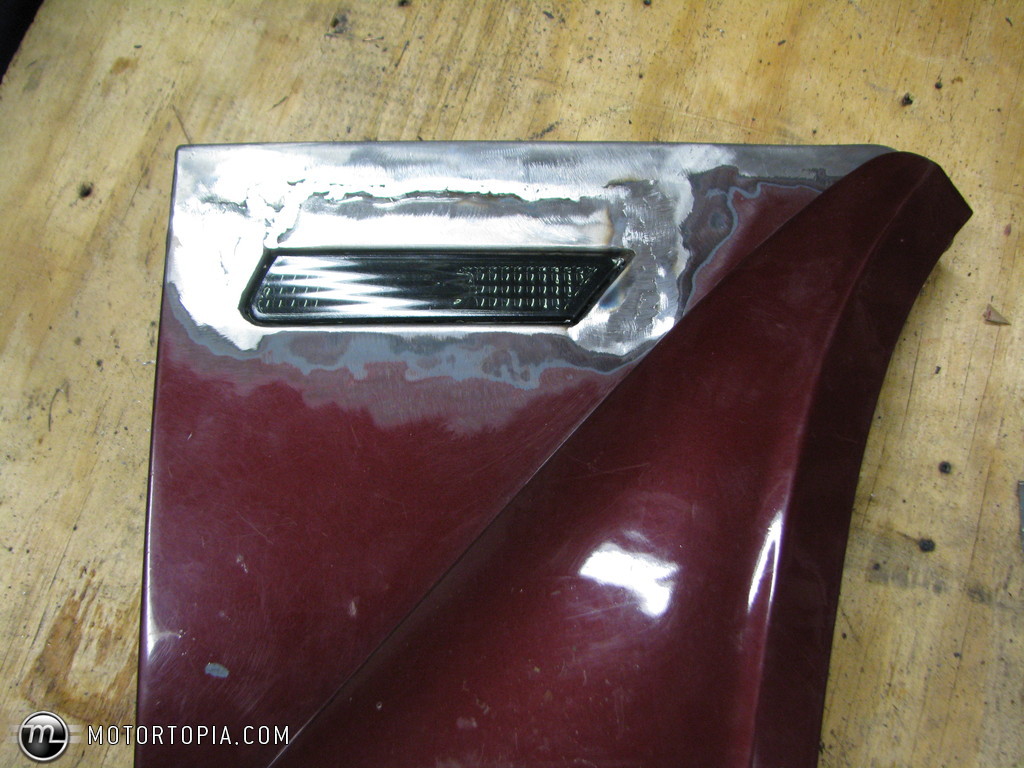
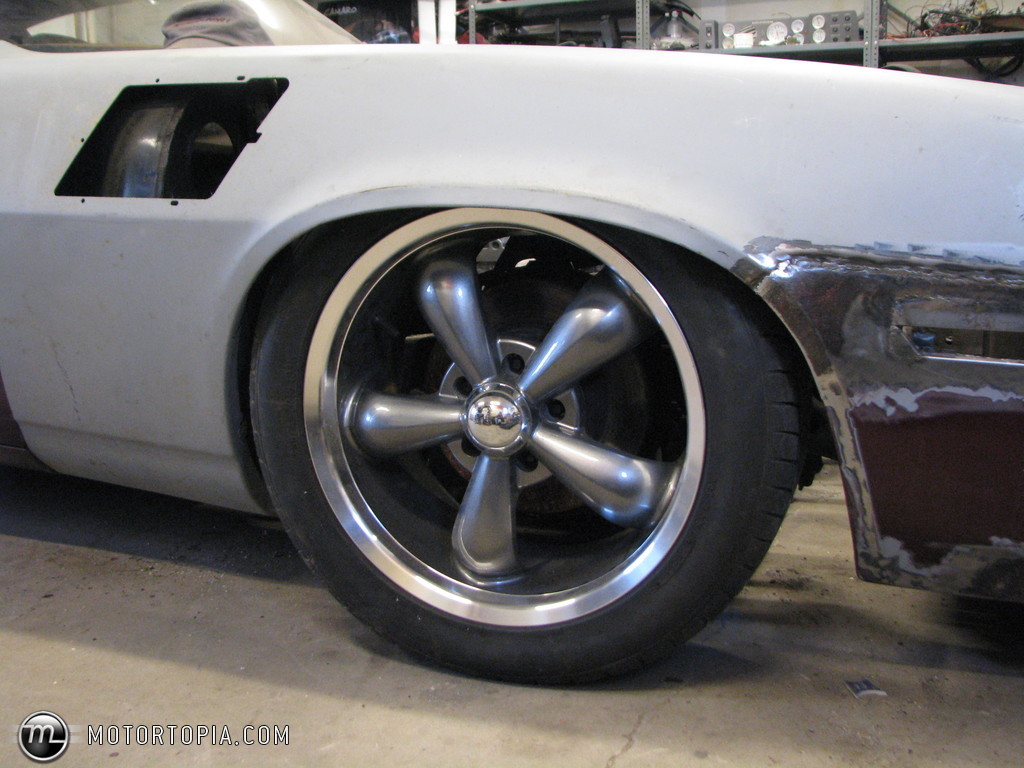
I found two little spots that will need a patch panel. Very happy with the lack of rust to deal with. I fit a 2010 Camaro side marker that matches the lines of the fender flare nicely. I think I'm the first to try it...which is hard to do when building a Camaro!
Much more work to come...


02-28-2014 #67 Registered User
- Join Date
- Dec 2005
- Location
- Birmingham, AL
- Posts
- 3,356
That side marker light does work well with the line of the flare. Nice work.
Stephen
03-17-2014 #68
Registered User
- Join Date
- Mar 2005
- Location
- Walton, NY
- Posts
- 737
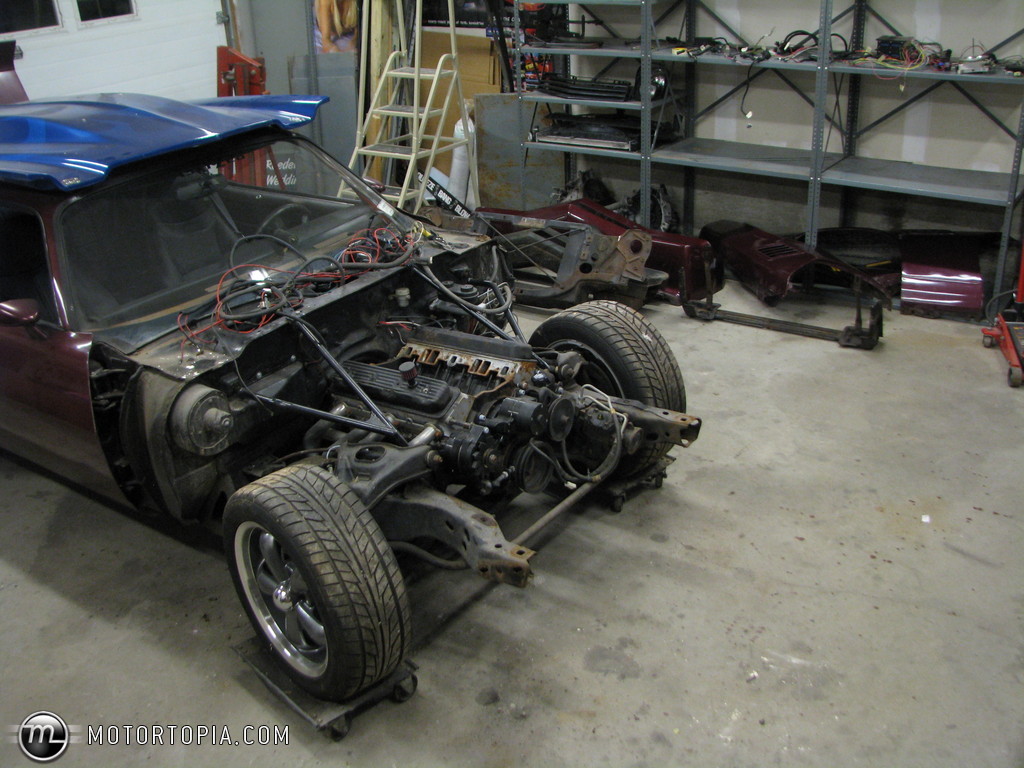
Got all the sheet metal I need. Replacing the POS aftermarket fender with a good OEM one. Found a rotisserie locally that will be ready for me to borrow in a couple months, so I can really do a nice job on the underside. Also going to do a better job on the wiring with weatherpacks and a new bulkhead. Mocked up my final ride height by pulling the springs and adding a block in back. Gives me between 4.5" - 5" of ground clearance at my lowest spots. I think that's probably ok...at least I hope.


03-23-2014 #69
Registered User
- Join Date
- Mar 2005
- Location
- Walton, NY
- Posts
- 737
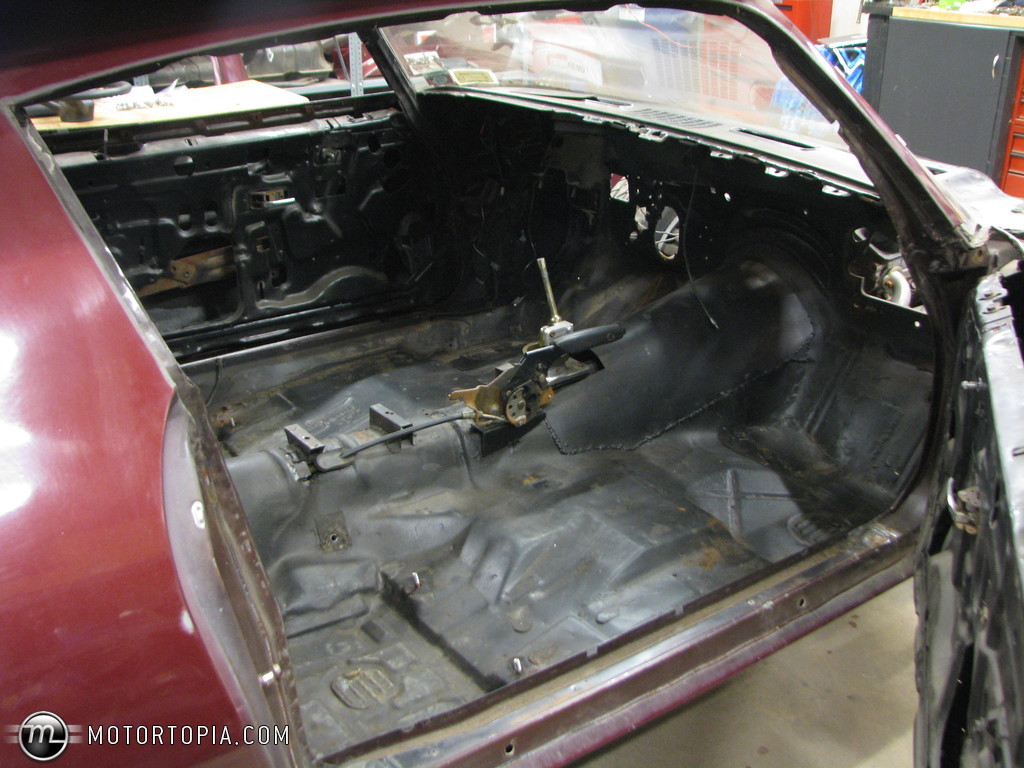
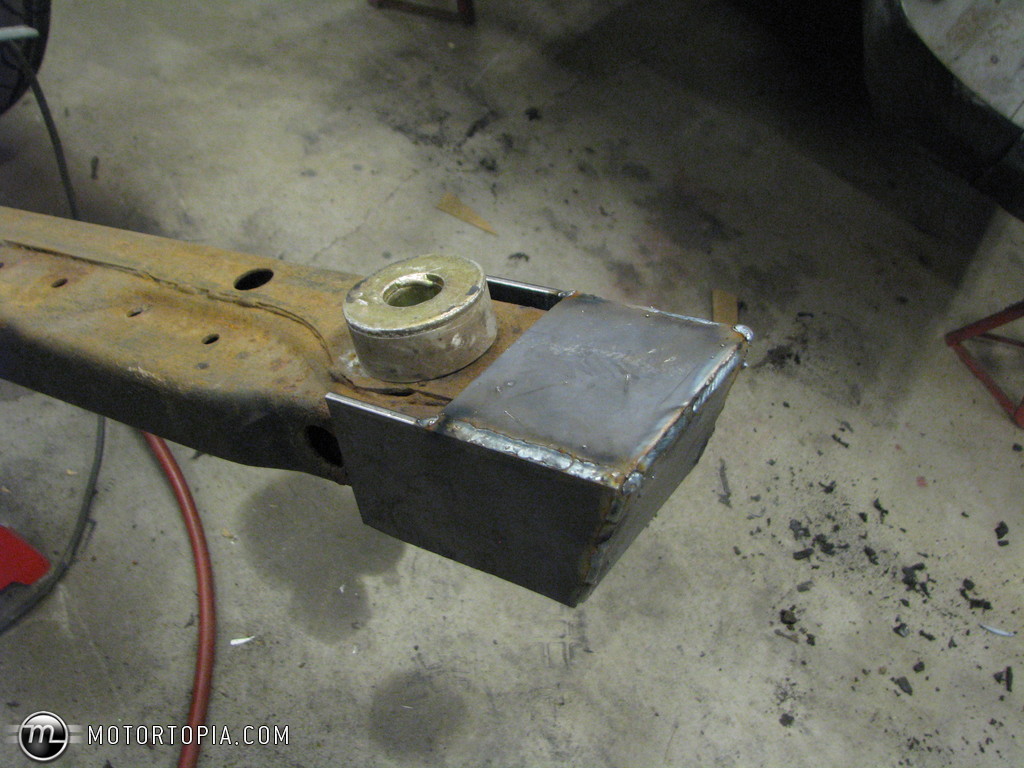
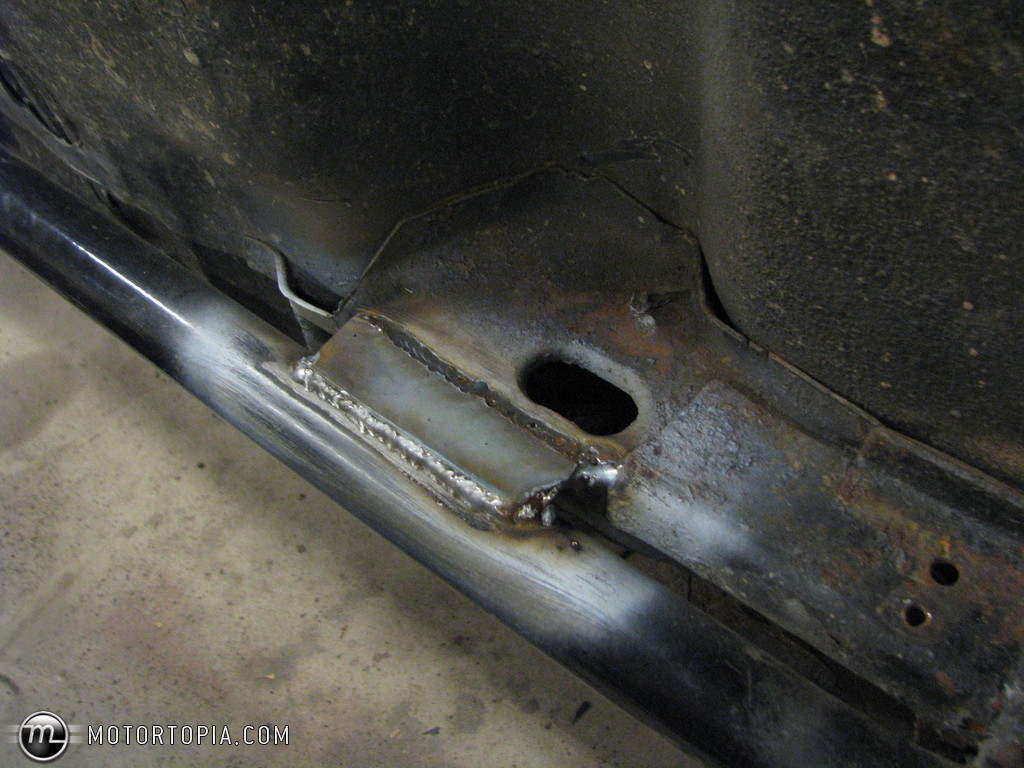
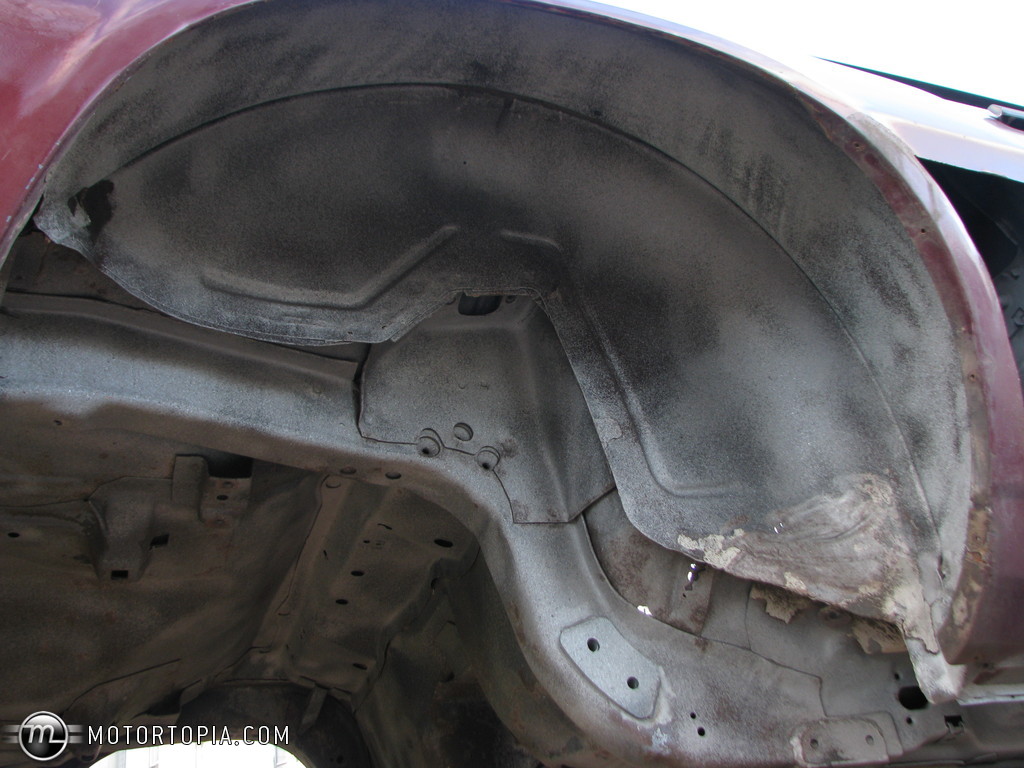
After a little inner fender surgery, the tires clear on the bump stops when straight. Obviously they don't clear at steering lock, but I don't know how you would bottom the car out completely at steering lock... Couple pics here show how much room I added by rolling the lip and slightly tweaking it out in relation to the stock inner fender. Still have to finish closing it in, and adding a rail to the outer so the inner can bolt to it. It might be a little ugly, but isn't visible. Haven't decided if I will weld that part, or maybe use the 3M panel bond to keep from warping anything.
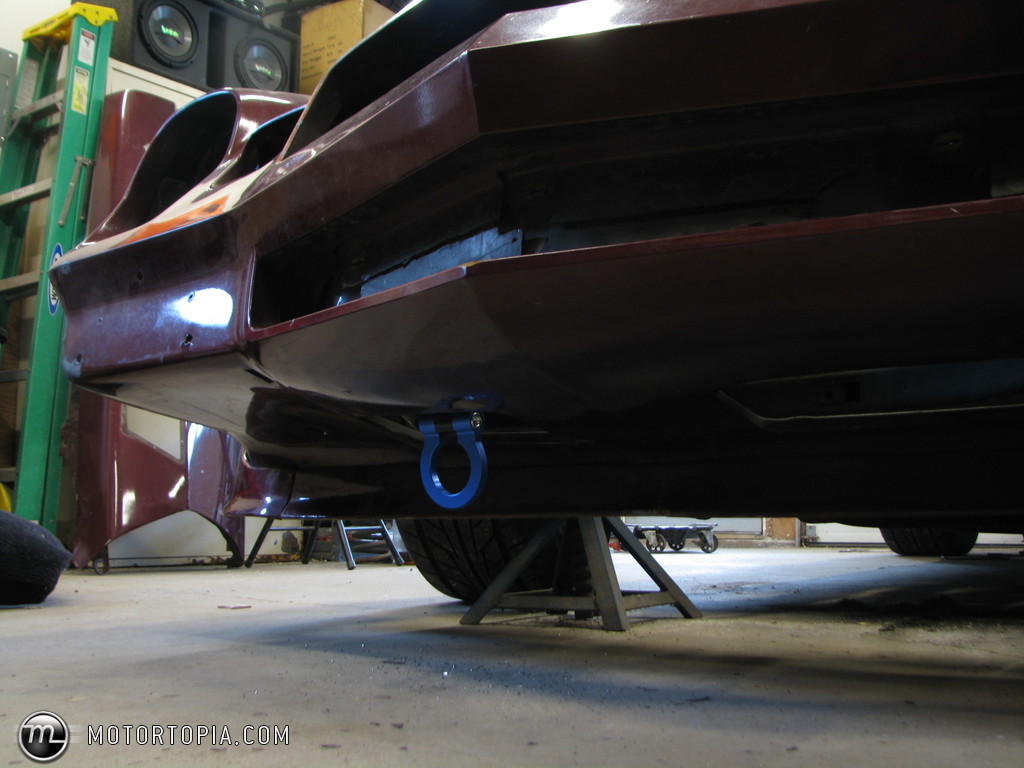
Also installed my Aerocatch hood pins and a removable tow hook to keep from wrecking the front air dam.


08-20-2014 #70
Registered User
- Join Date
- Mar 2005
- Location
- Walton, NY
- Posts
- 737
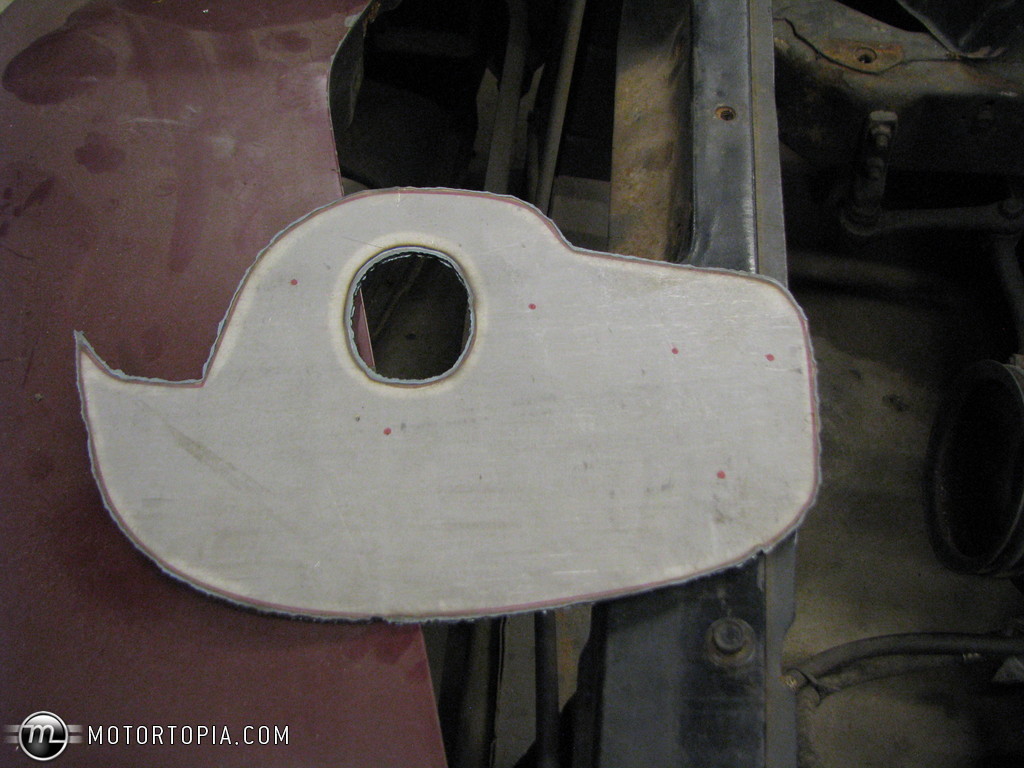
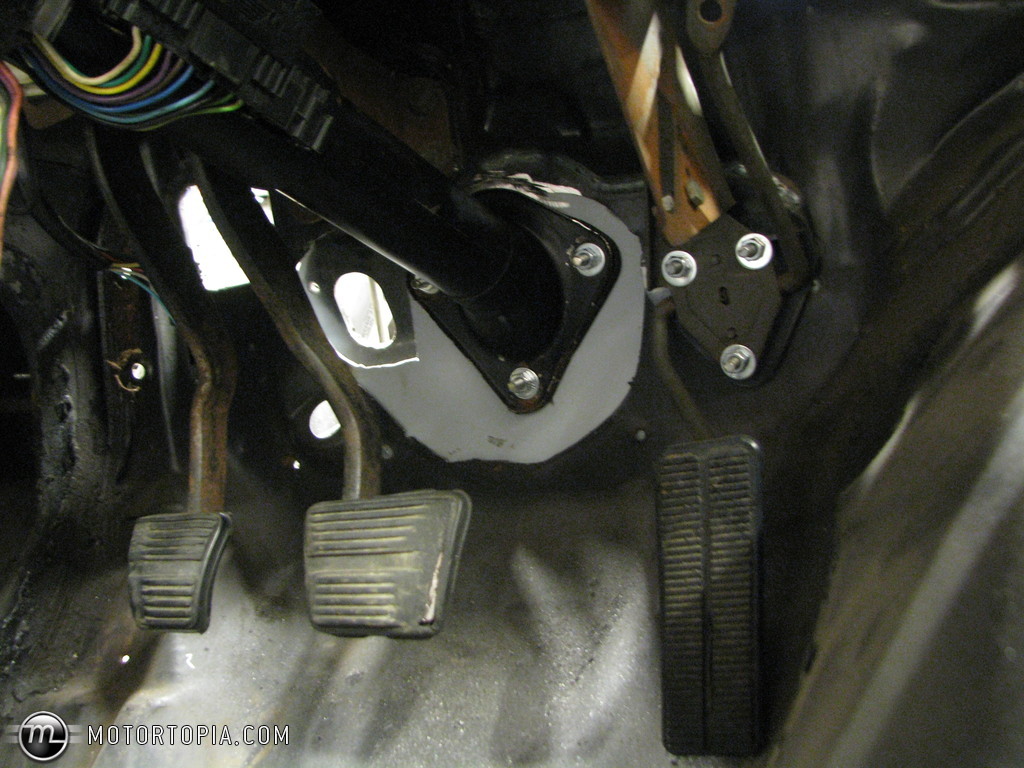
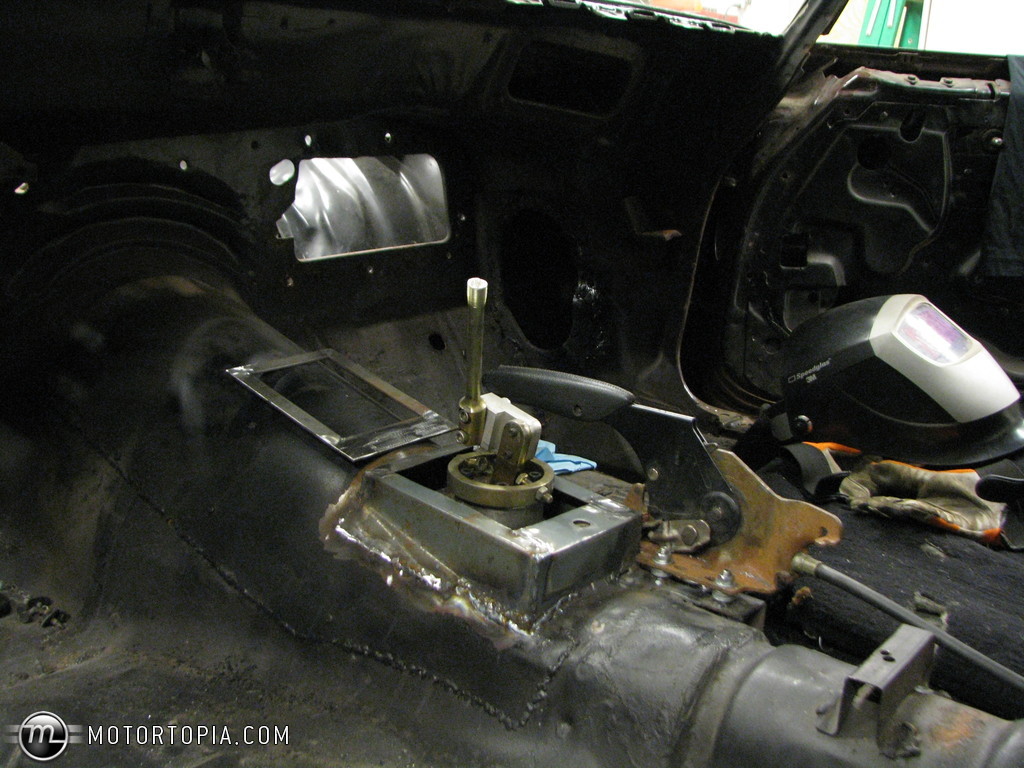
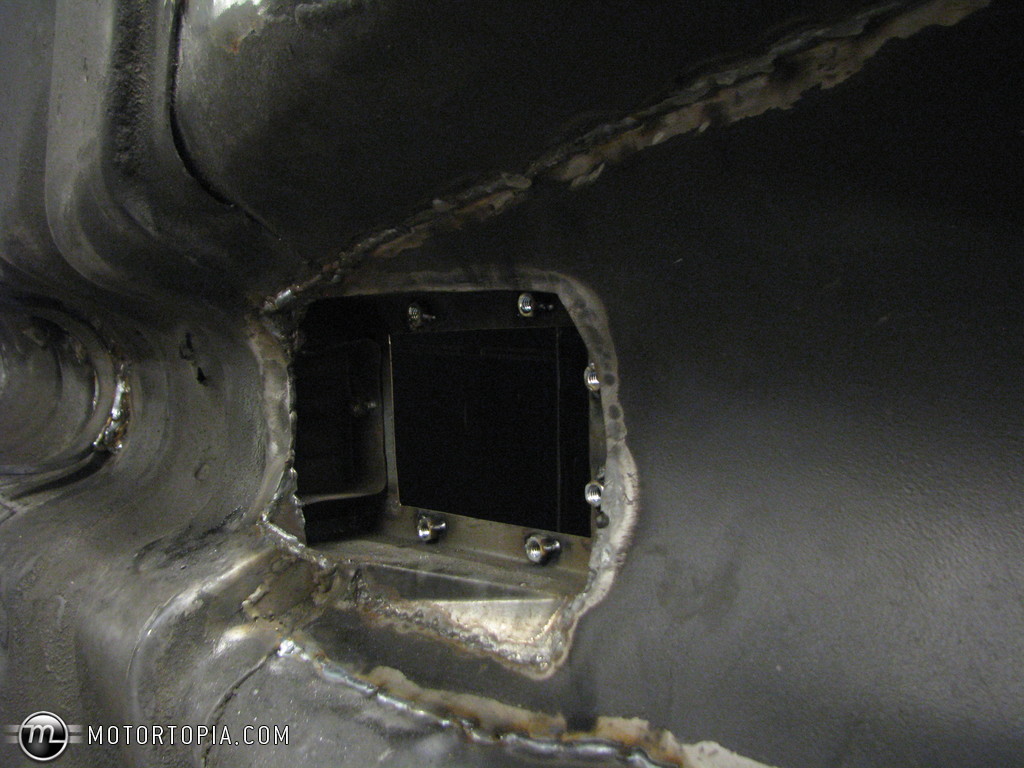
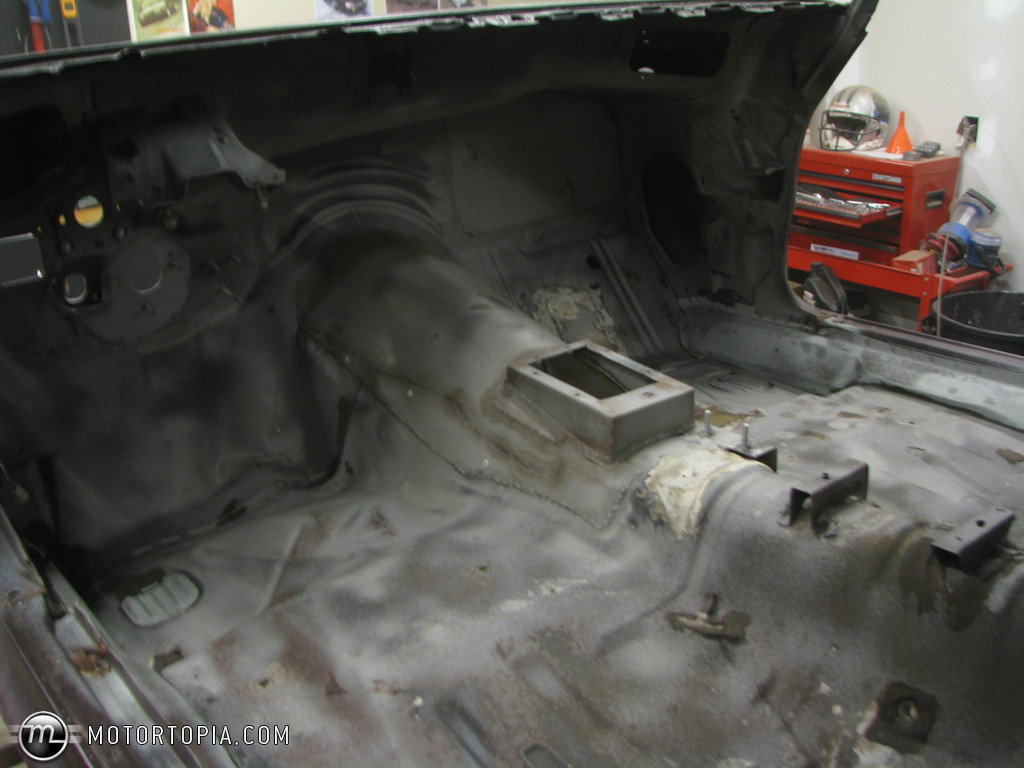
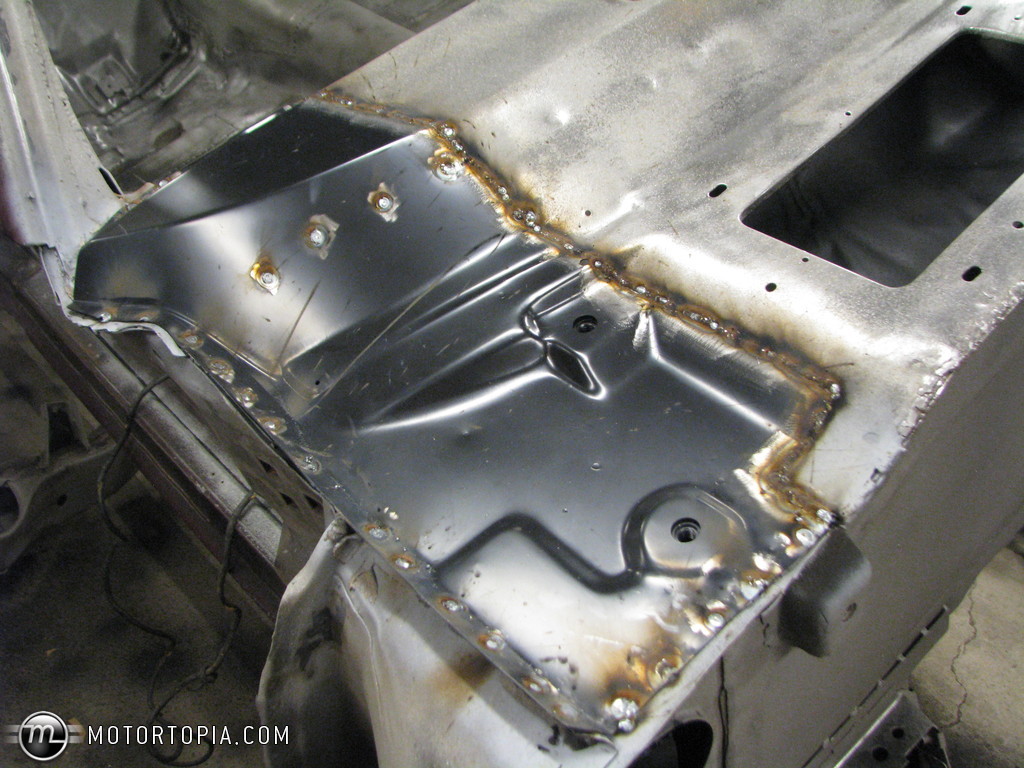
Finally got back on the car recently. In mockup mode now getting some things sorted out. Plasma cut a plate for the firewall and studded for the 3rd-gen column and stock gas pedal. Keeping visible fasteners to a minimum.
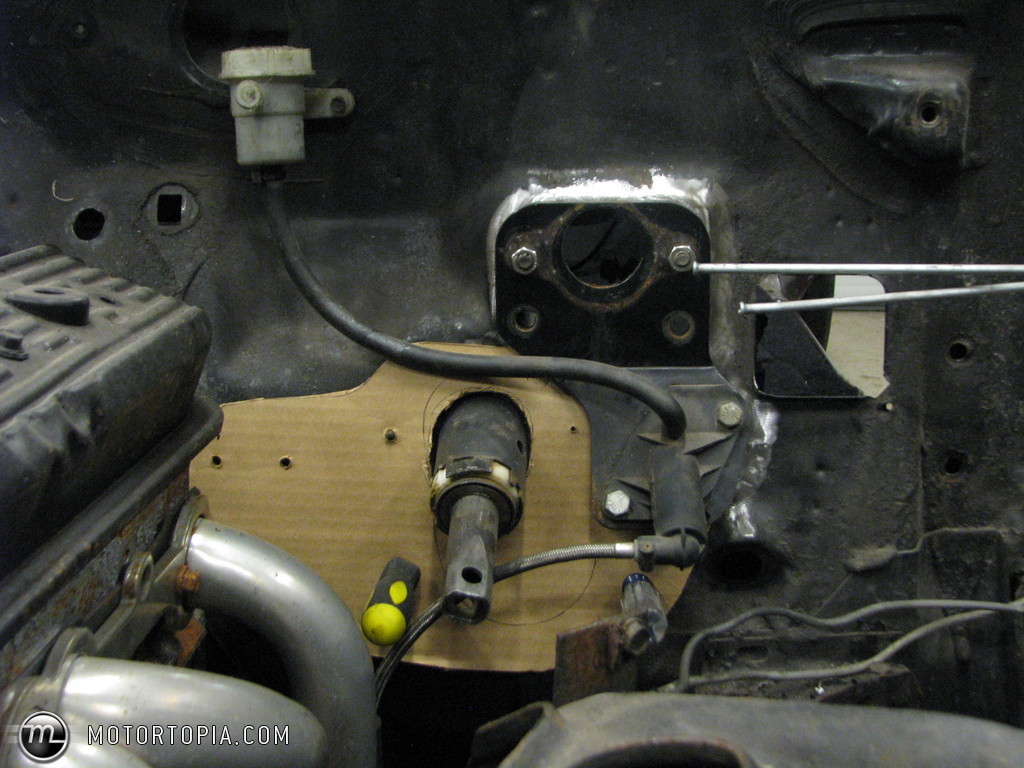
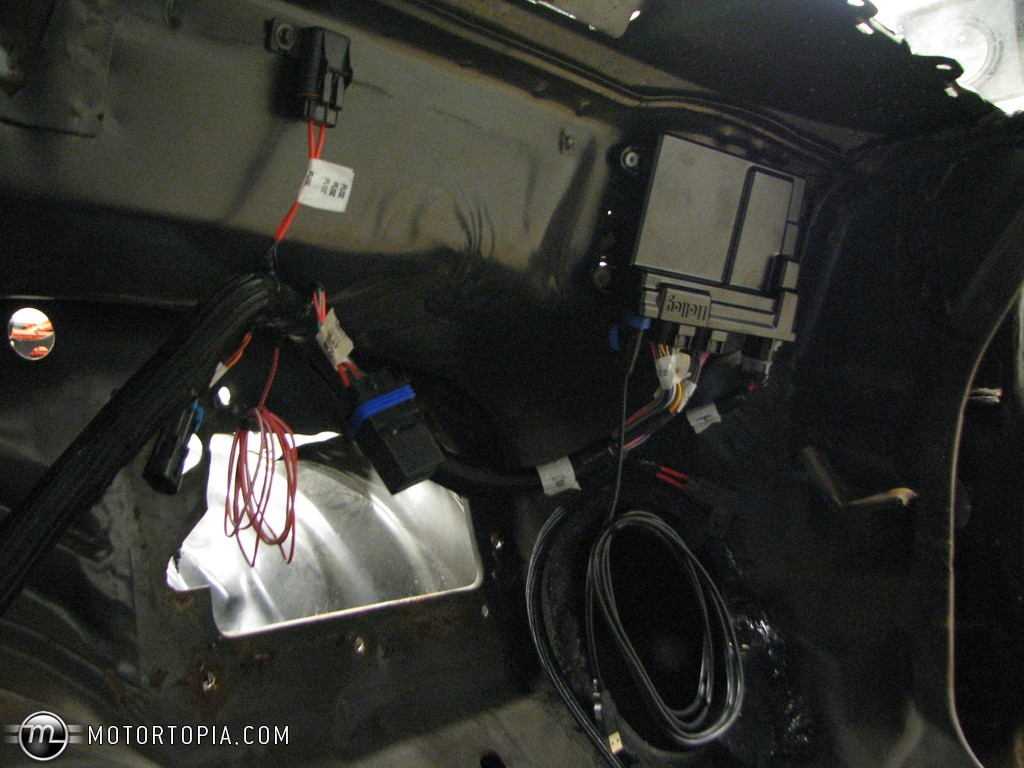
Got my Holley HP from Keith at CustomWorks and getting the wire routing planned.
Also doing a little sheet metal work deleting the heater box and fabbing a better 6spd hump to replace the cobbed hole from when I was like 19.
08-22-2014 #71
Registered User
- Join Date
- Jan 2008
- Location
- Charlotte
- Posts
- 1,295
This looks familiar...
2005 LeMans Blue Corvette w/ T56 & Z51 & C6Z06 Brakes, Build Thread: https://www.pro-touring.com/showthread.php?64496
2005 GMC Sierra 2500HD LLY / Allison
2014 Chevy SS LS3 / 4 Door
09-01-2014 #72
Registered User
- Join Date
- Mar 2005
- Location
- Walton, NY
- Posts
- 737
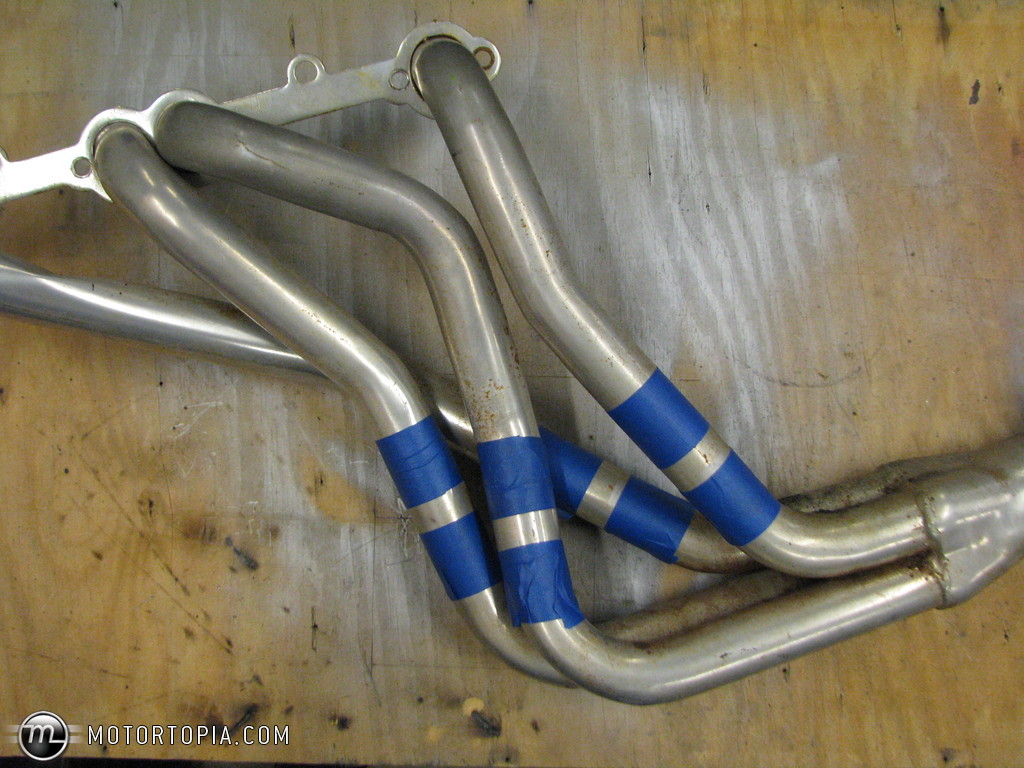
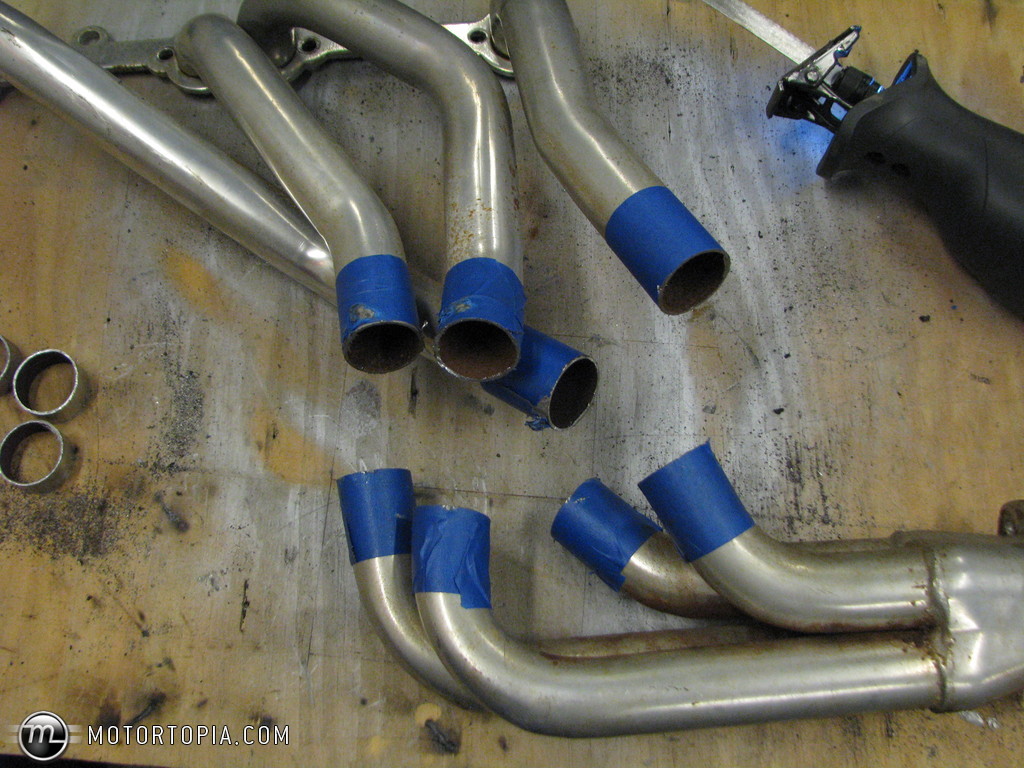
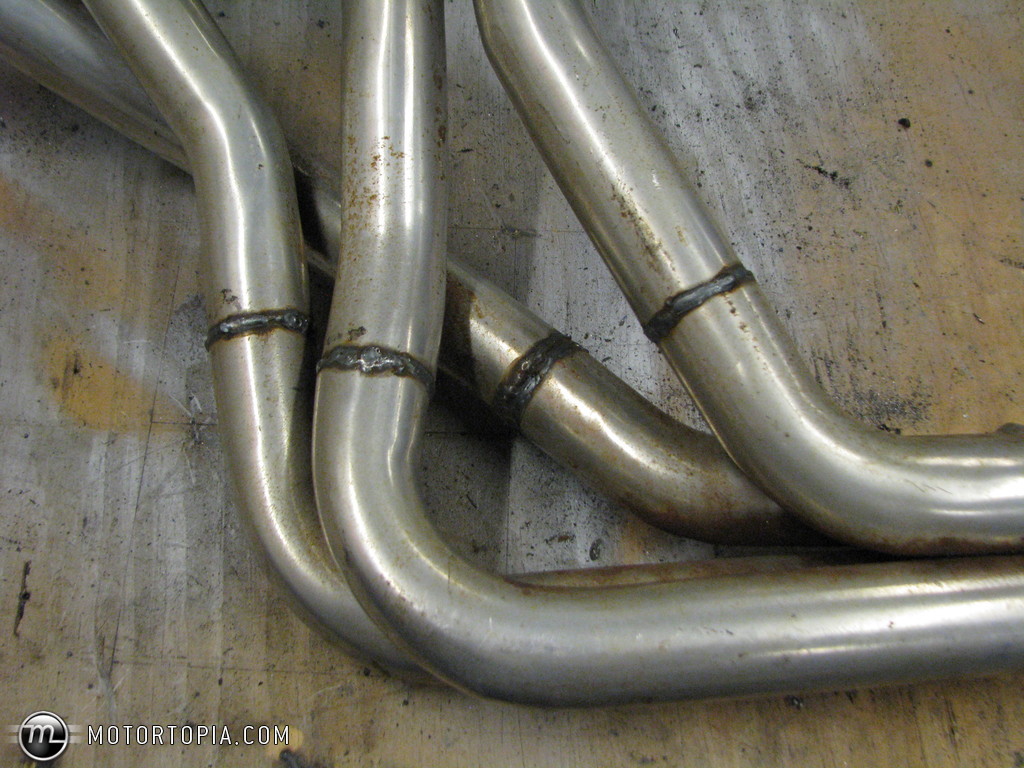
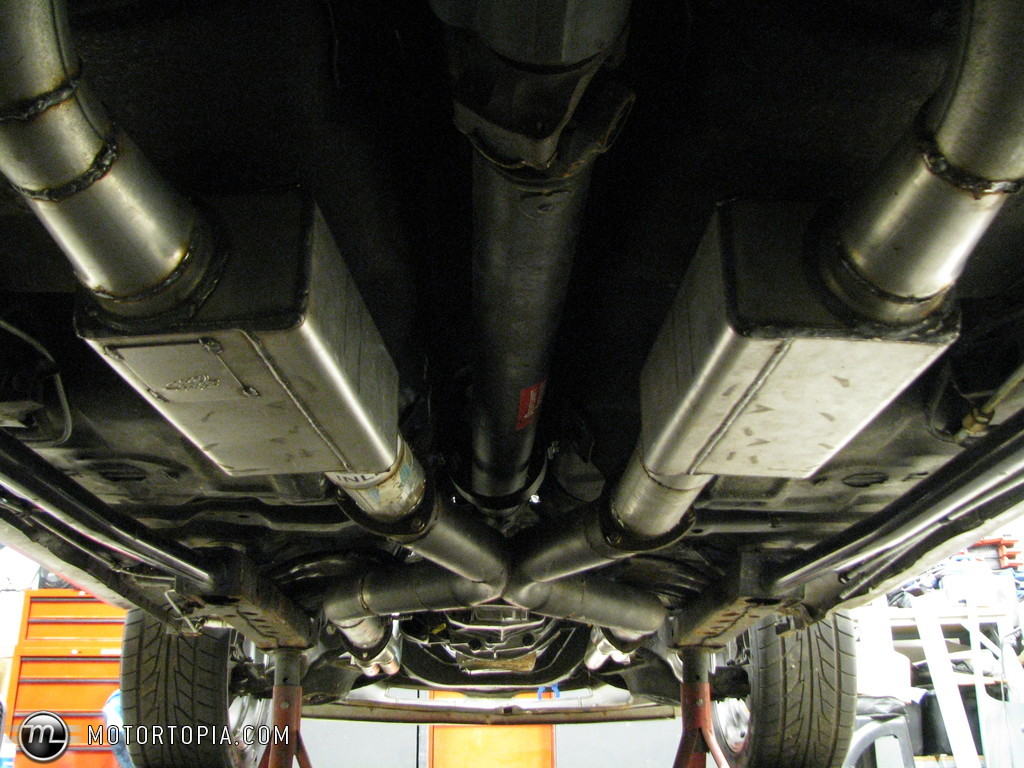
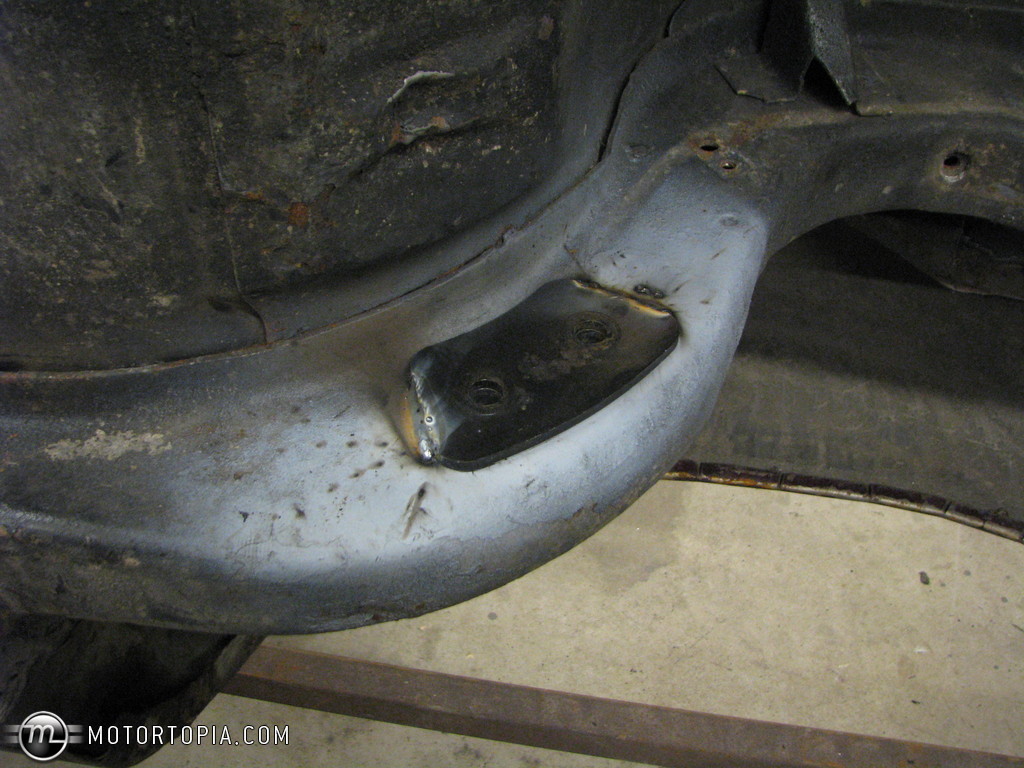
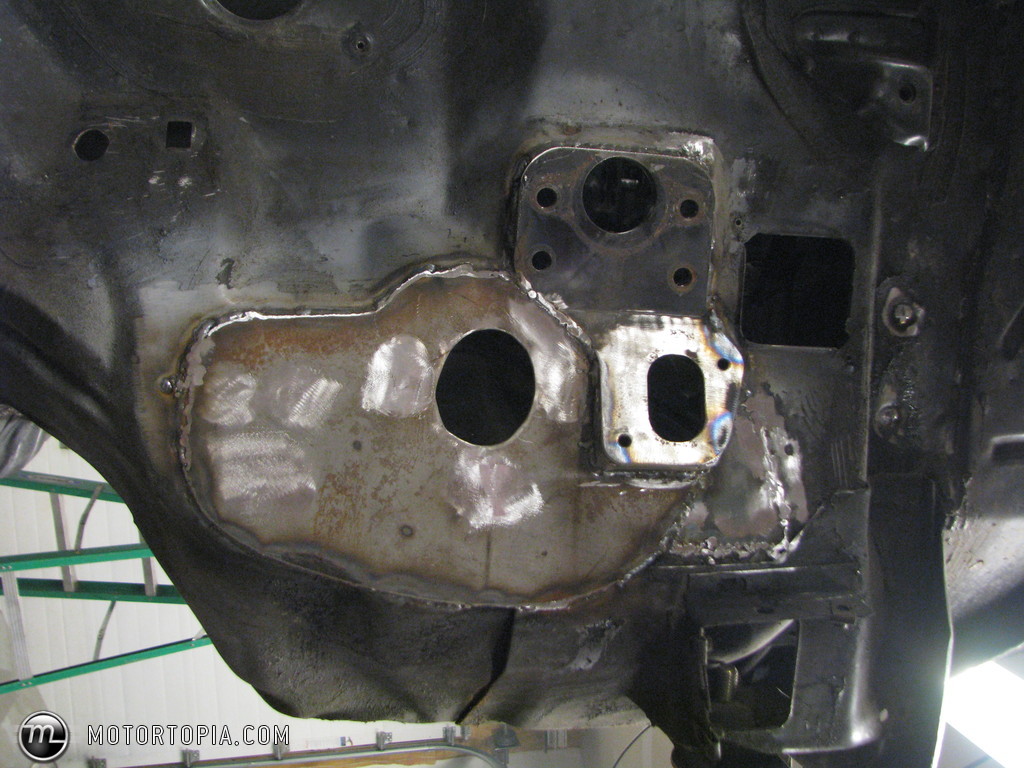
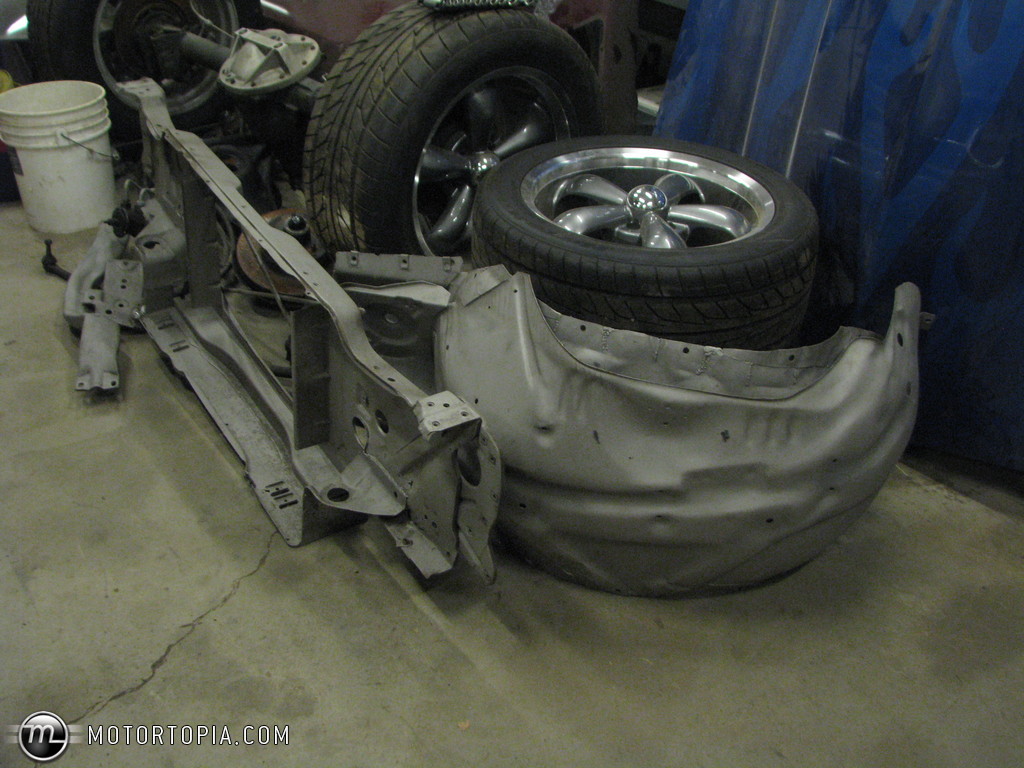
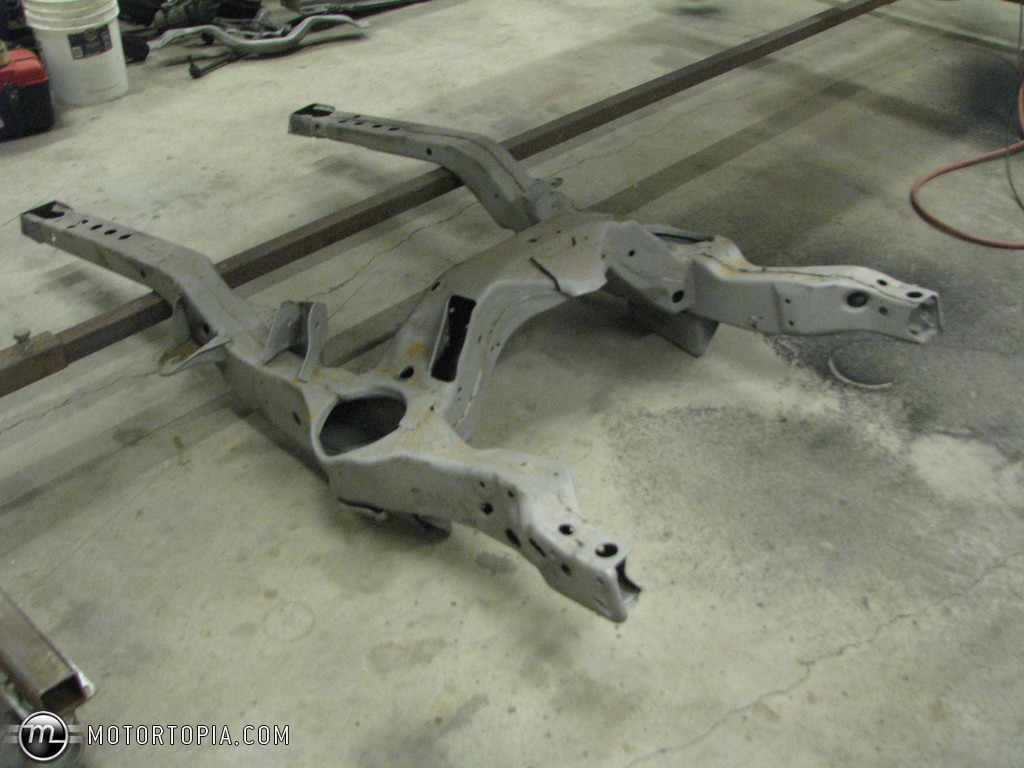
Finished up the exhaust today. Everything tucks up really nice. The bottom bolt on the header flanges hang just below the subframe, but that is it, and I rerouted the over the axle pipes for max suspension clearance. I modified the crossmember and the driver's header to keep everything up high. And those SpinTechs are fairly small so they aren't bad to locate. Should sound nasty too! Next thing will be the rear Hotchkis bar install and then cutting off & modifying the mount where the SFCs connect to the SF so it's removable for the rotisserie.


09-07-2014 #73
Registered User
- Join Date
- Mar 2005
- Location
- Walton, NY
- Posts
- 737
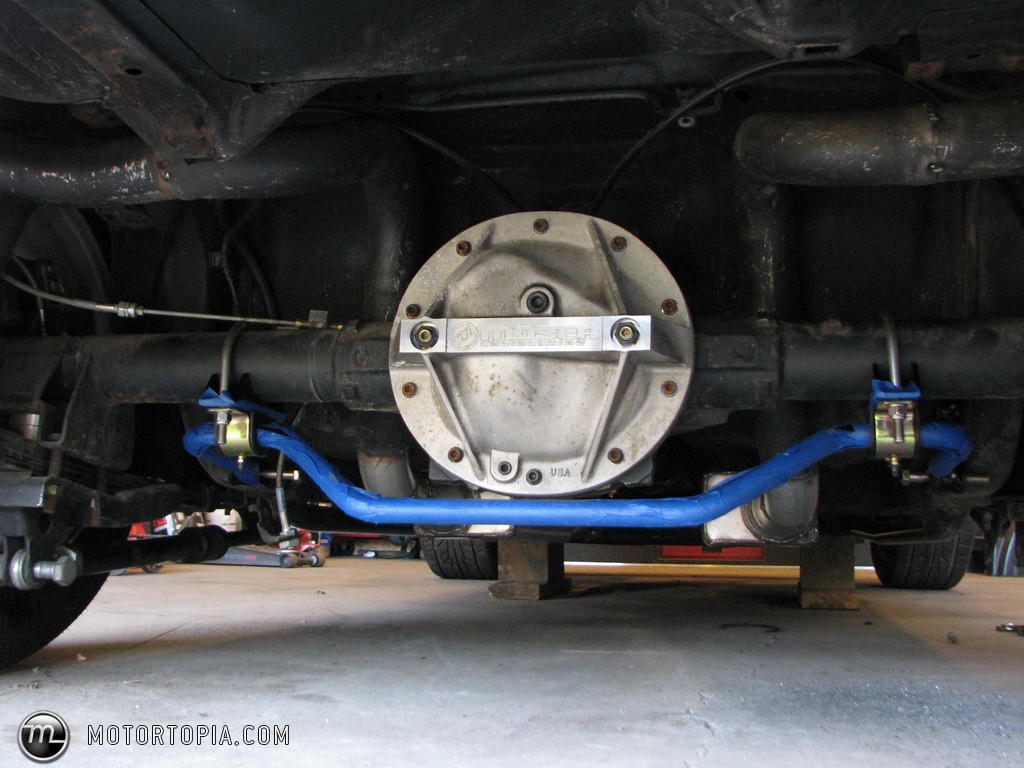
Installed the rear sway bar via the Hotchkis instructions and don't really like how low it hangs. I may lengthen the endlinks by 3/4" or so.
Getting really close to rotisserie time!
09-08-2014 #74
Registered User
- Join Date
- Jan 2008
- Location
- Charlotte
- Posts
- 1,295
I see half your Camaro.... on the shelf!
2005 LeMans Blue Corvette w/ T56 & Z51 & C6Z06 Brakes, Build Thread: https://www.pro-touring.com/showthread.php?64496
2005 GMC Sierra 2500HD LLY / Allison
2014 Chevy SS LS3 / 4 Door
10-09-2014 #75
Registered User
- Join Date
- Mar 2005
- Location
- Walton, NY
- Posts
- 737
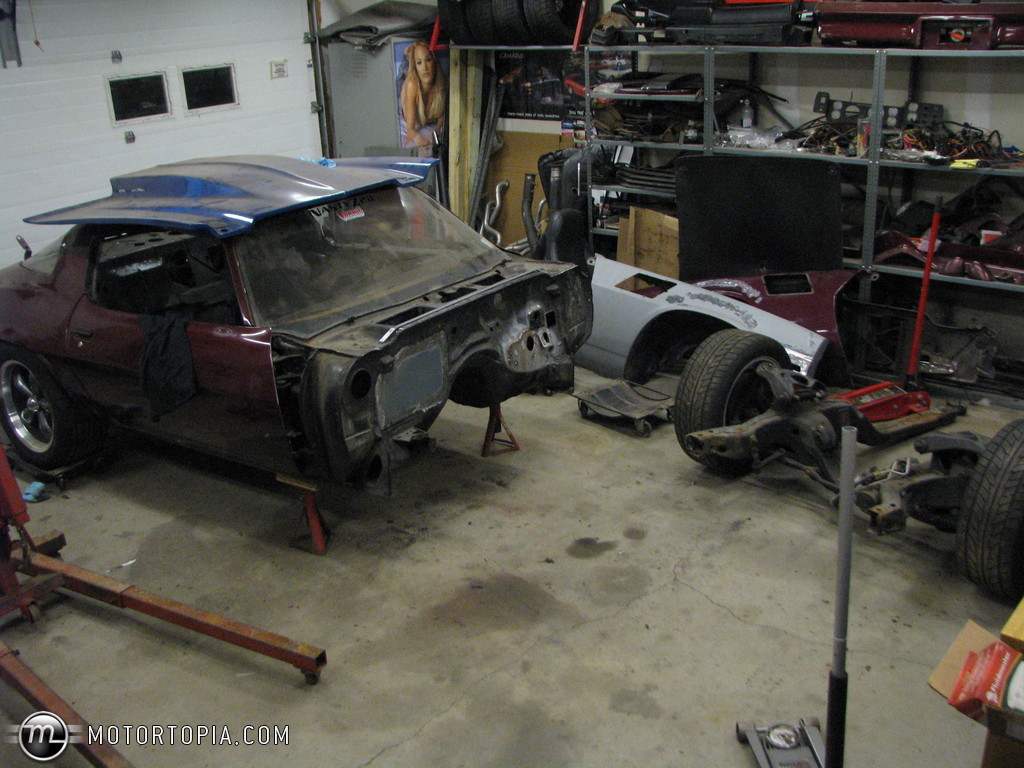
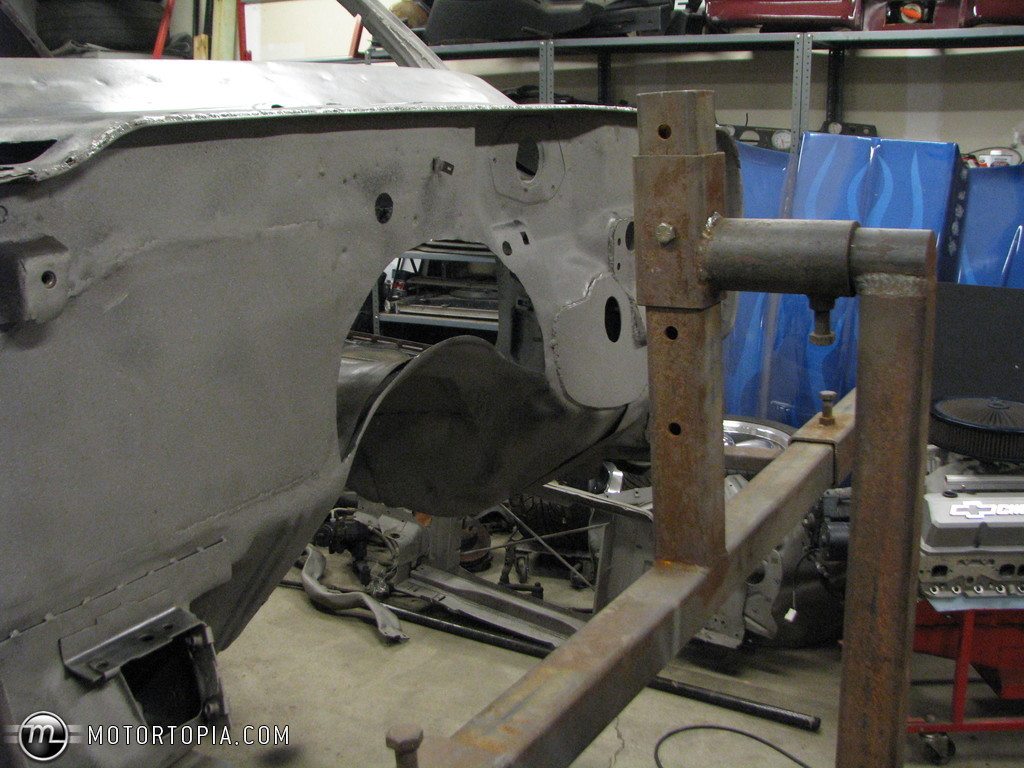
Big update! Been burning more metal with the car on the rotisserie...cleaning up some ugly from the 6spd swap and the rear end through the back seat. haha
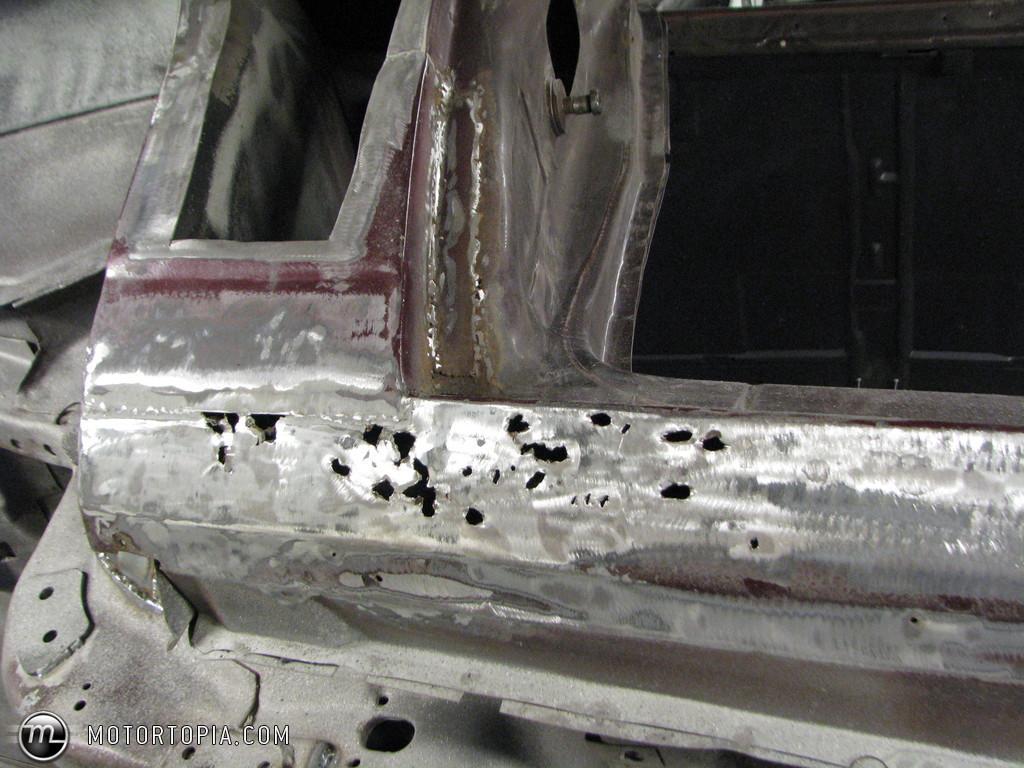
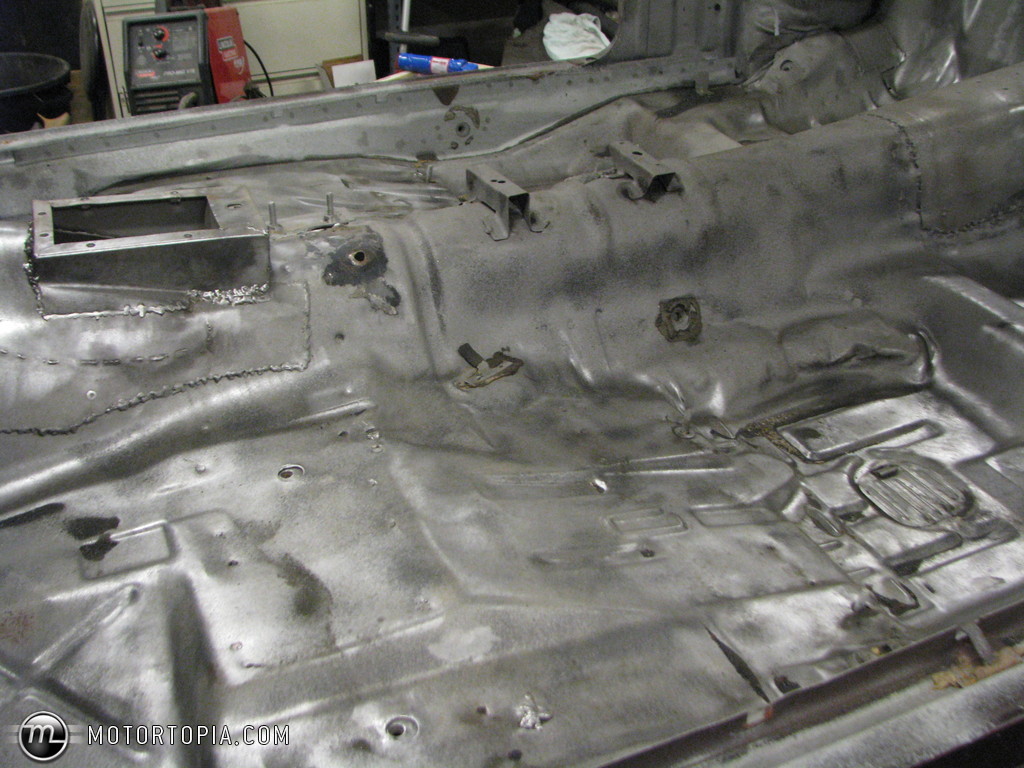
Reworked the Alston SFCs. I was amazed at how much I could flex them when I cut the ends off to remove the subframe. So I built some heavy brackets with a big gusset and put a couple braces on the SFC tubes to the floor bracing to make them stronger. Now it should be just as strong as the Rasmussen/DSE-style connectors without redoing it all. Welded in the Hotchkis plates for the rear sway bar too.

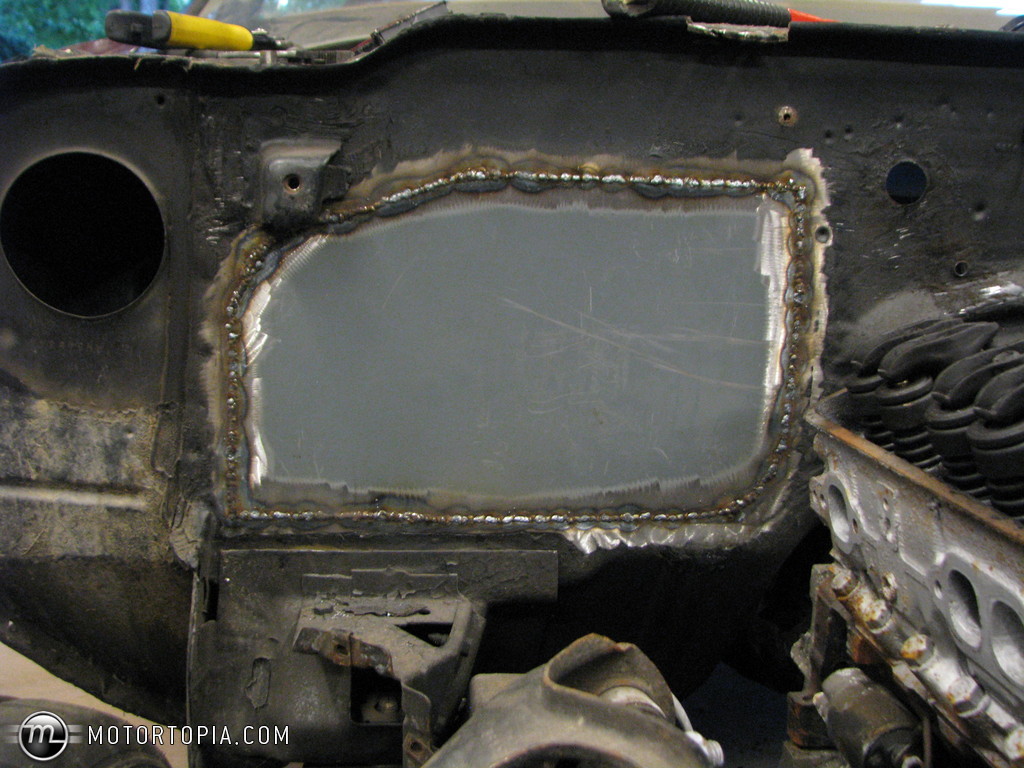
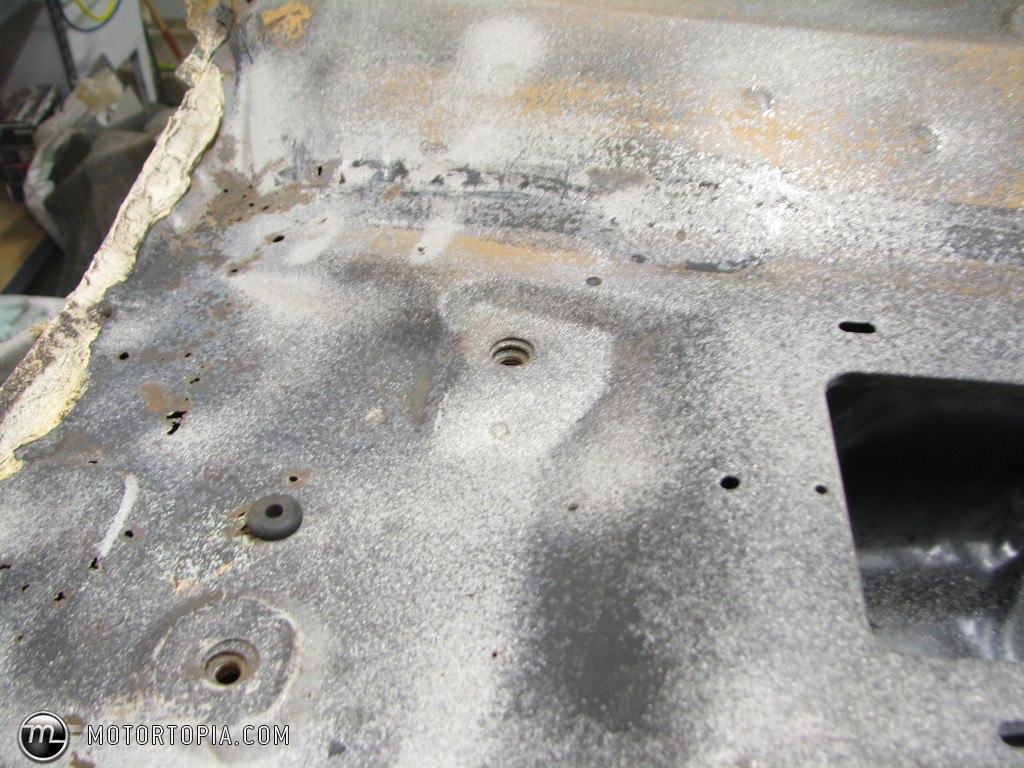
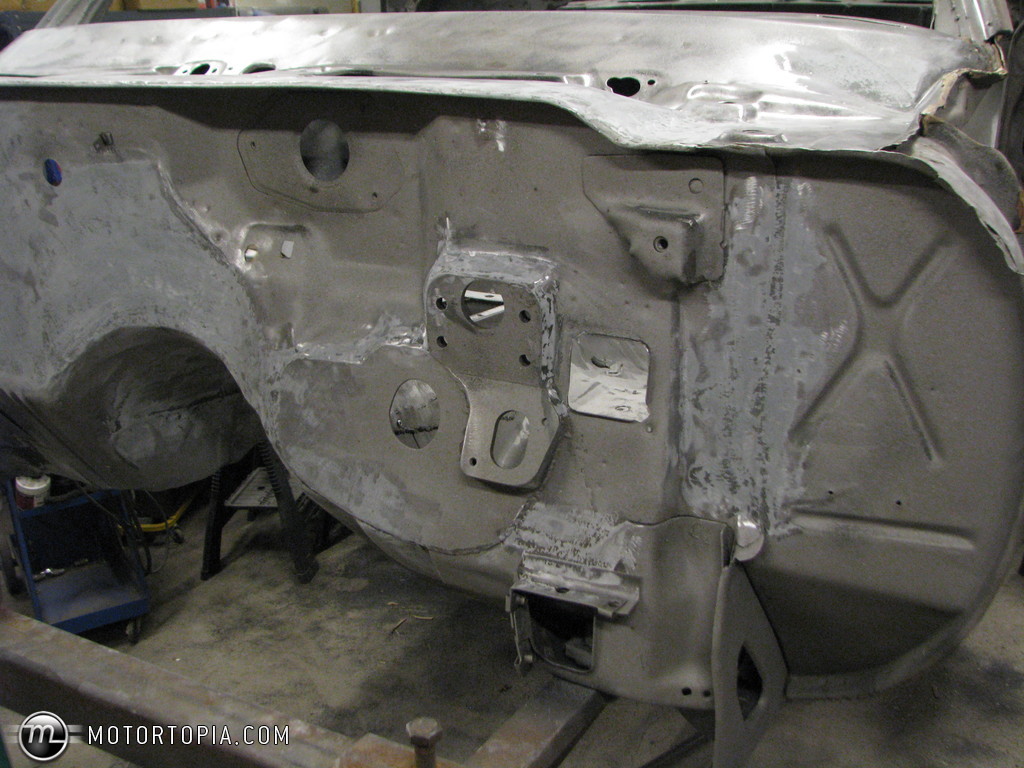
I finished the fab work on the 6spd hump and boxed in the floor bracing I had to cut for the shifter. Probably not an issue anyway given the solid SF bushings, but can't hurt. Also finished fab on the firewall for the clutch master bracket and filling/smoothing, and added an 1/8" band under the cowl seam where there was a lip. Should be a stronger spot to bolt my G-braces to and will look better when I grind & smooth it.

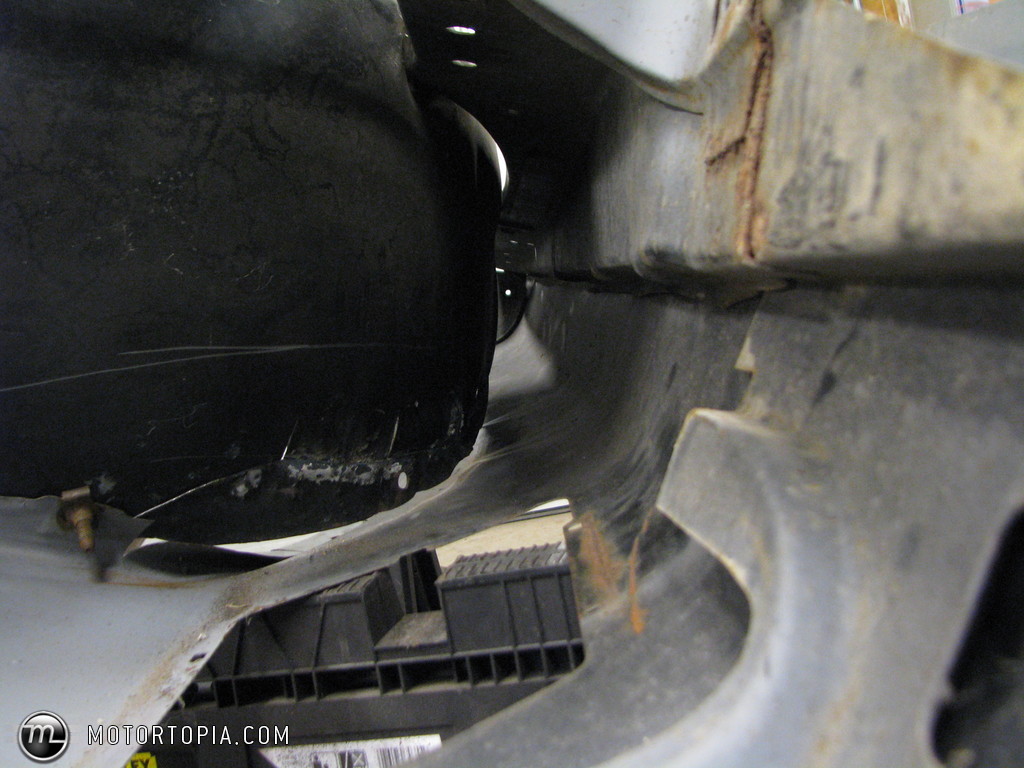
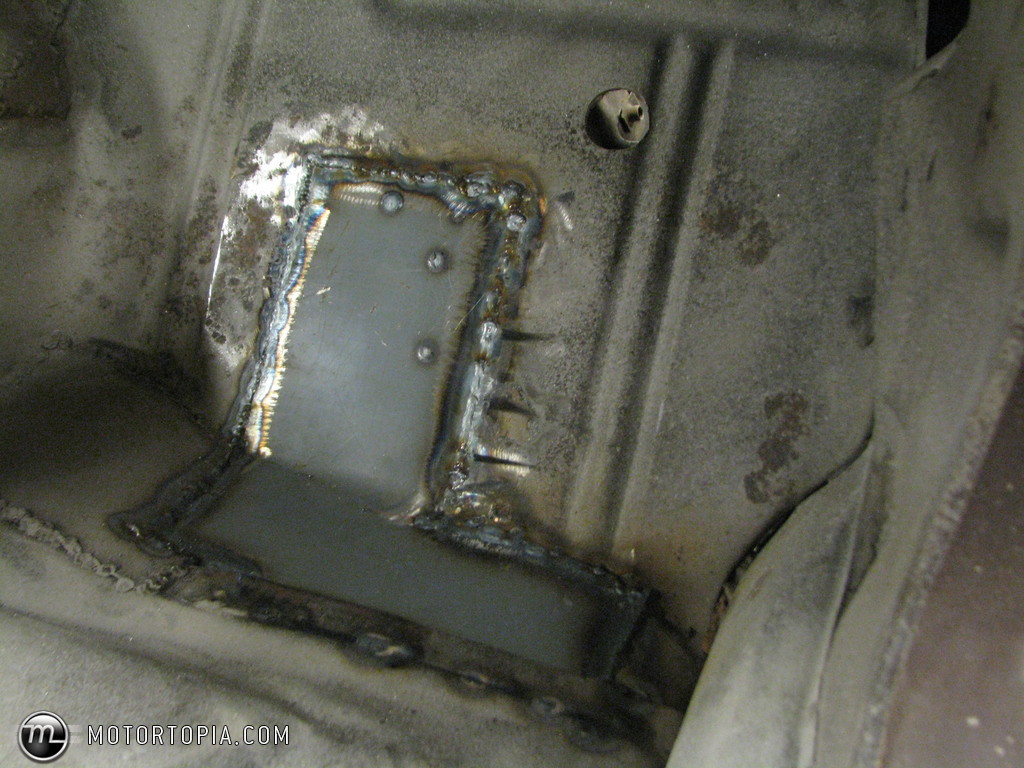
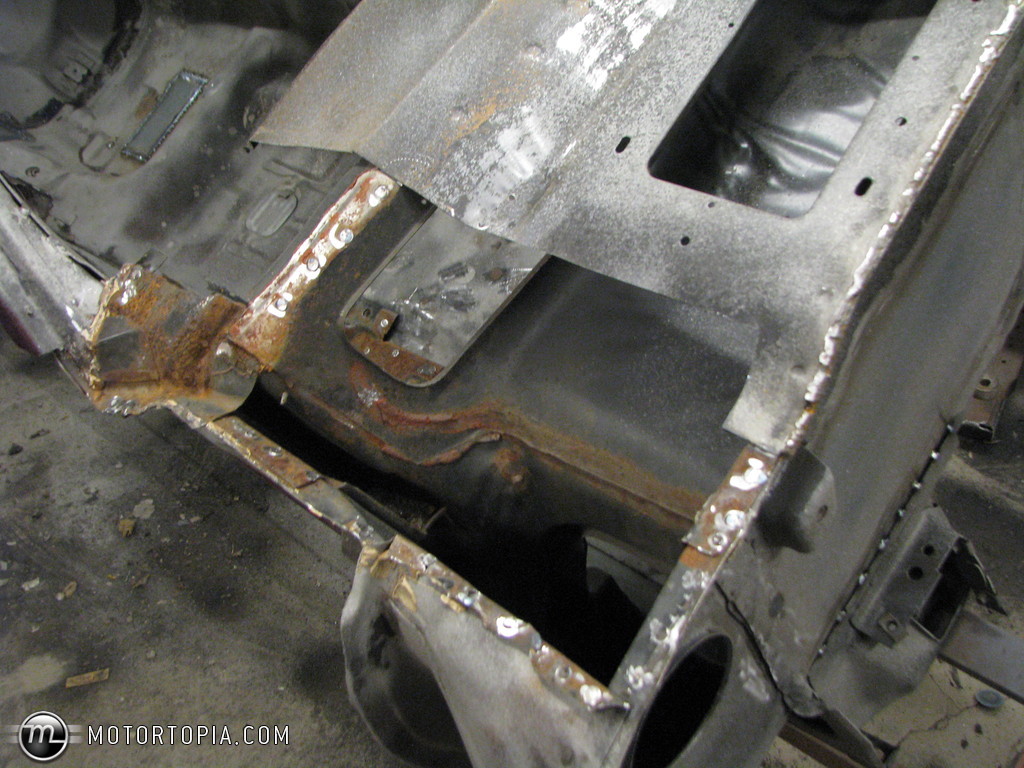
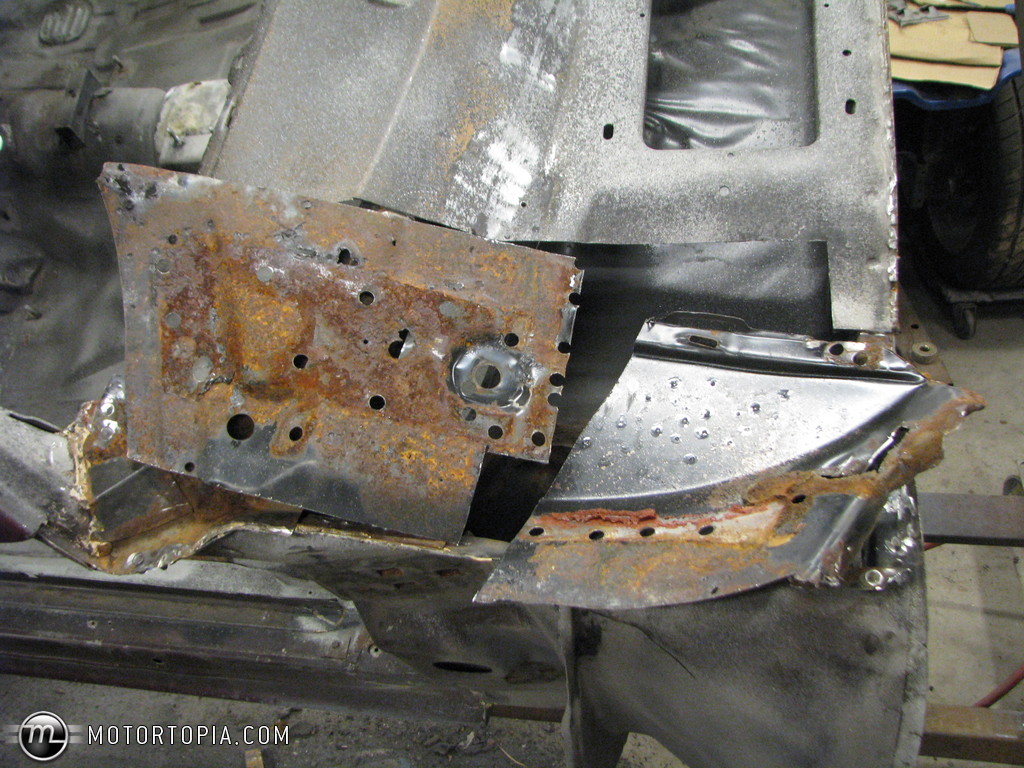
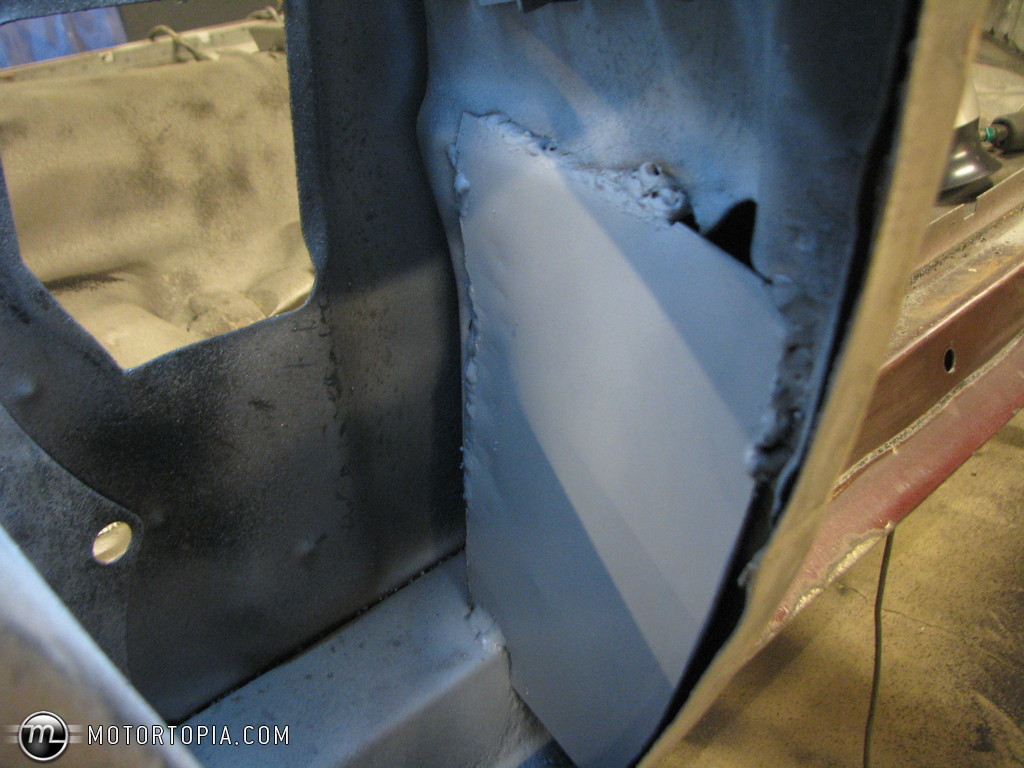
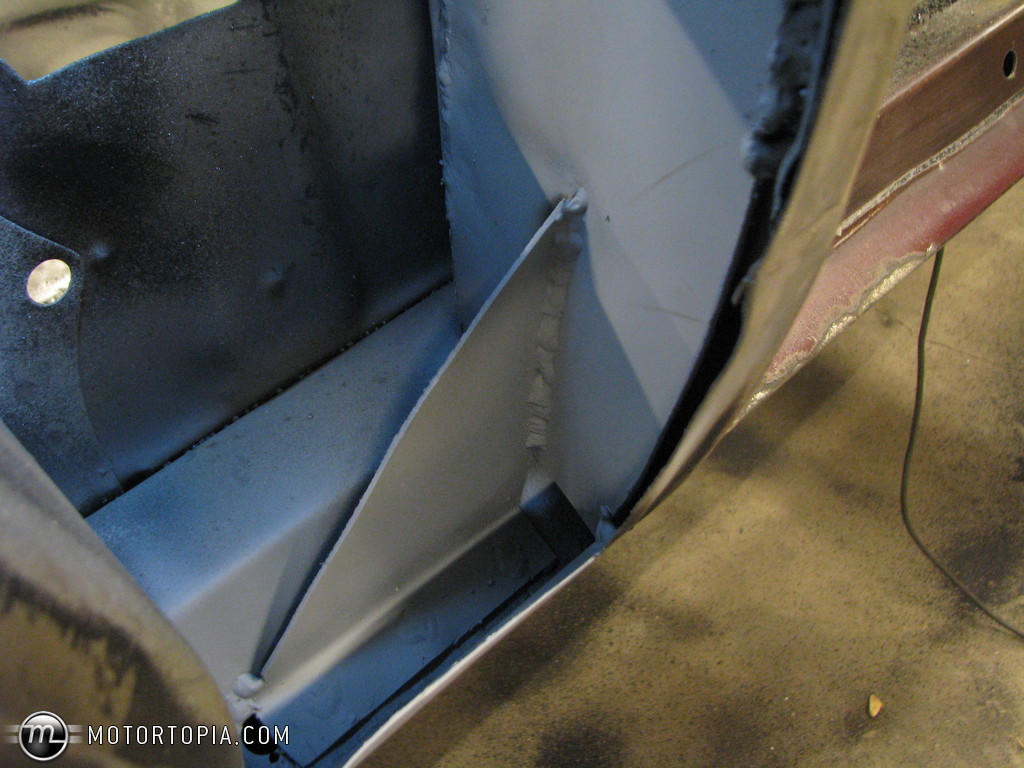
Cut out the metal on the front lower quarter to access the rusted bracing. The pass side was repaired by the previous guy, but they didn't do anything with the bracing. I'm going to get both of those areas blasted when it goes to the blaster next week, and try to re-fab the bracing if I can see how it should have been. I already have the patch panels to close it back up.
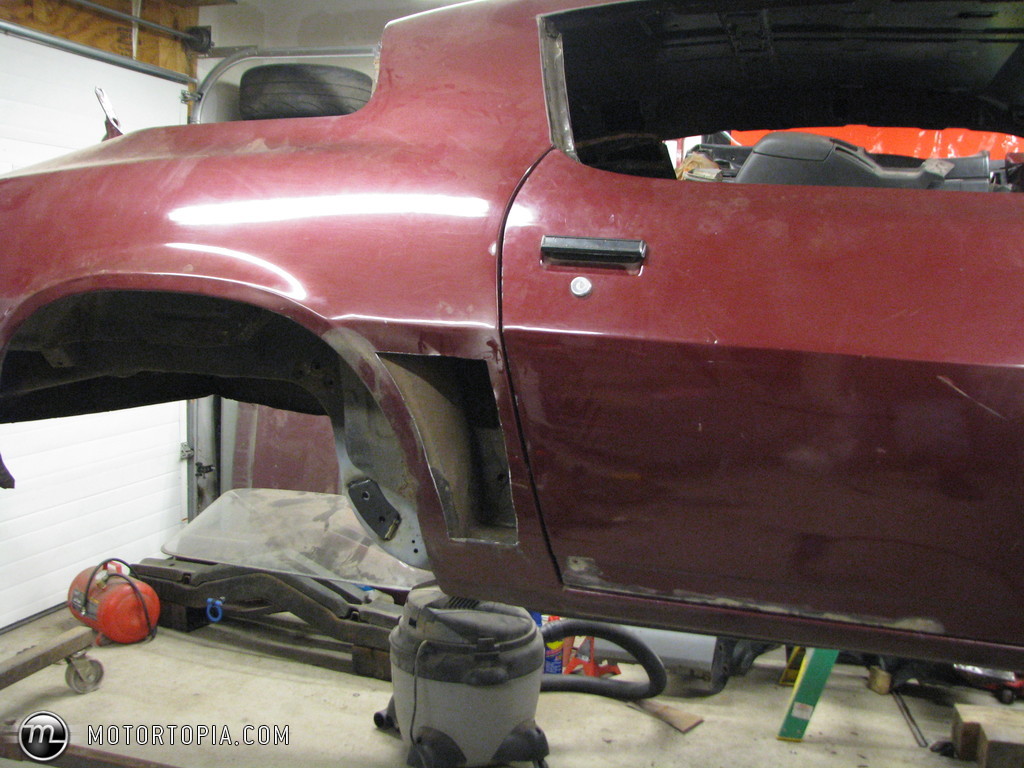
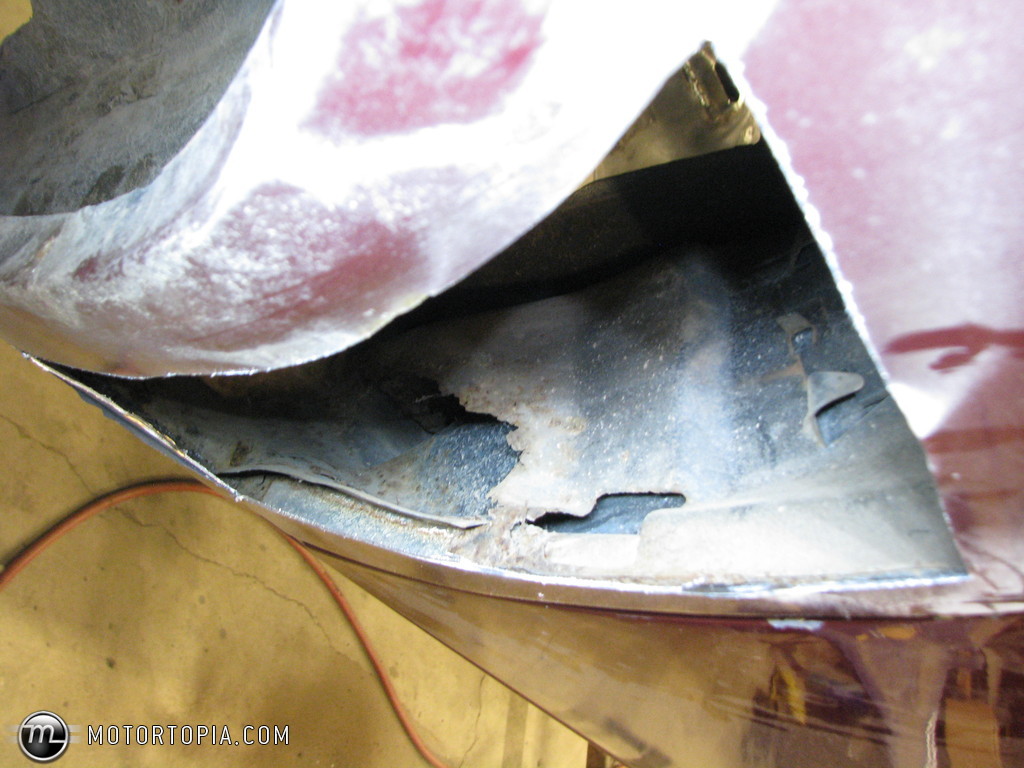
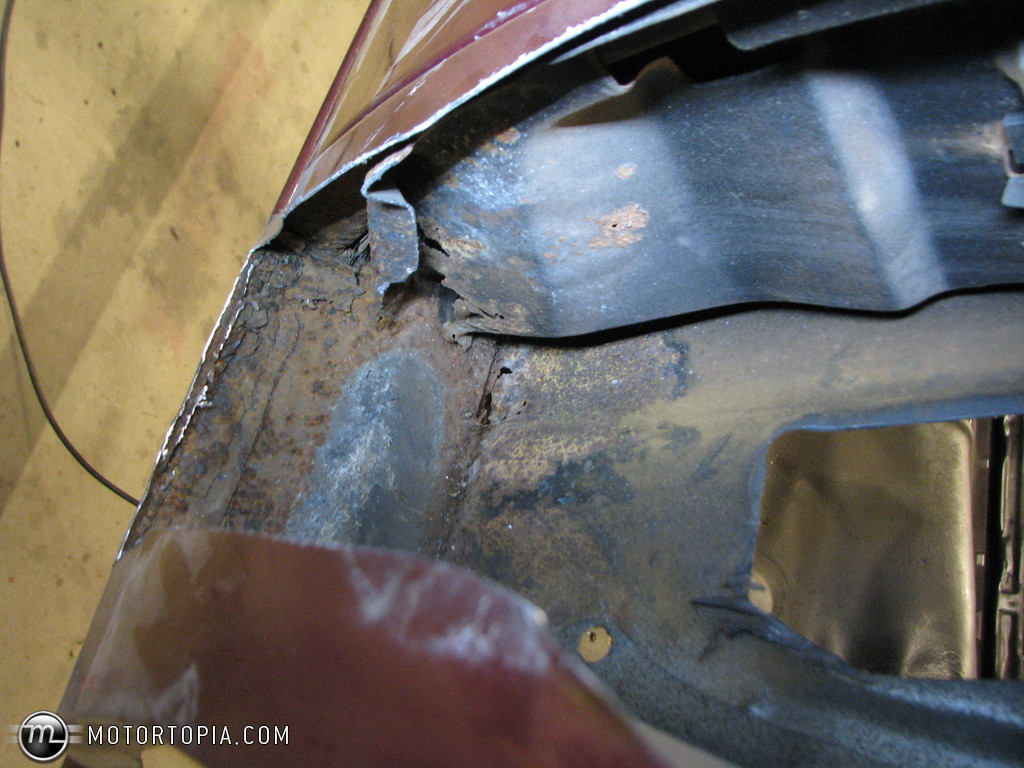
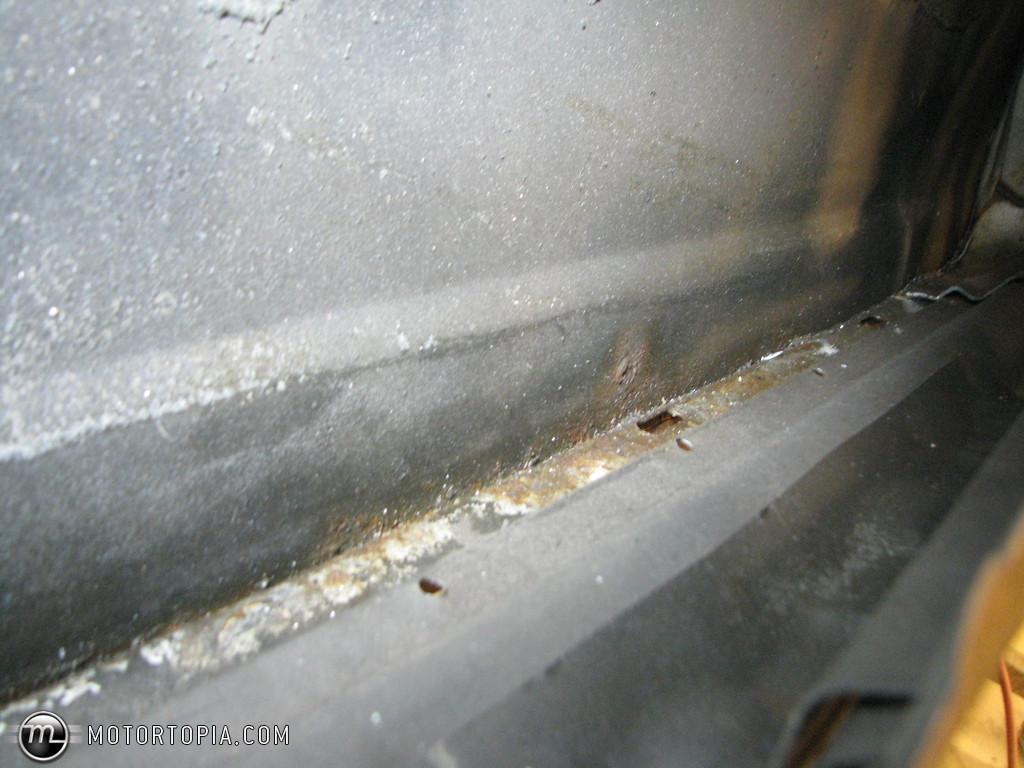
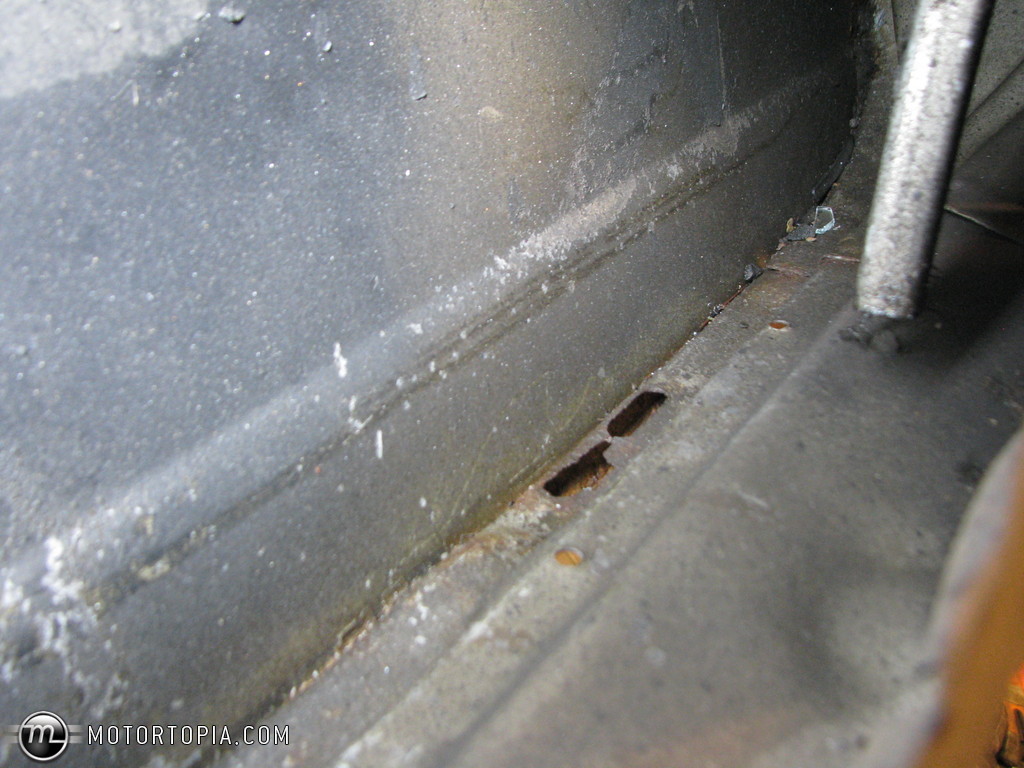
There is also a hint of rust at the bottom of the doors. My body guy says it might not even be worth skinning. Have a look and see what you think. The other rusty spot is the heavy gauge toe box up by the subframe mount. Not sure of the best plan to tackle that. It needs to be structurally solid in that area.

11-09-2014 #76
Registered User
- Join Date
- Mar 2005
- Location
- Walton, NY
- Posts
- 737
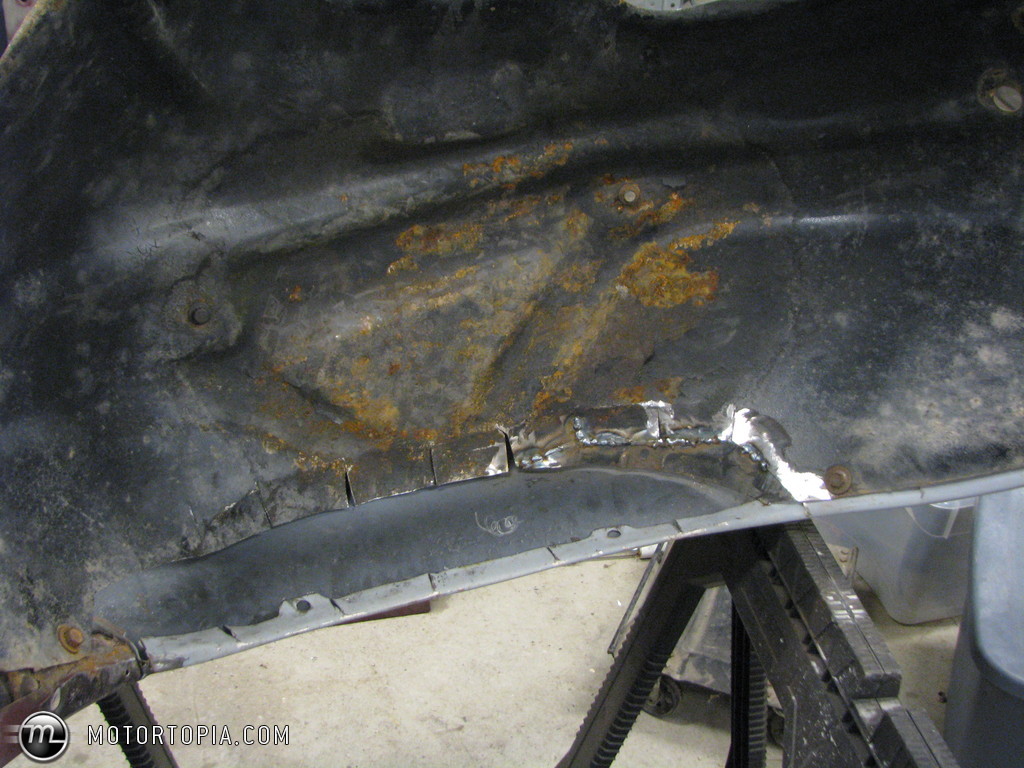
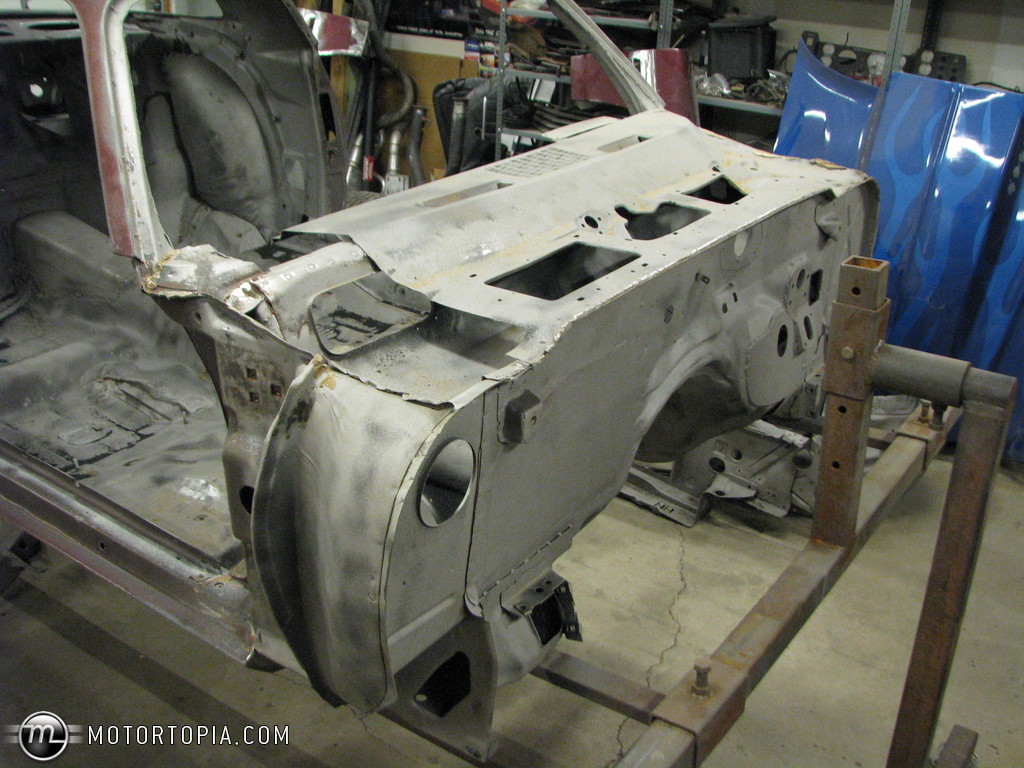
Got the car back from the sand blaster finally and I've gotta admit, I'm disappointed with the job. Looks like they half-assed it. Sent the boss at the blaster some pics and they are gonna take it back and do it right.
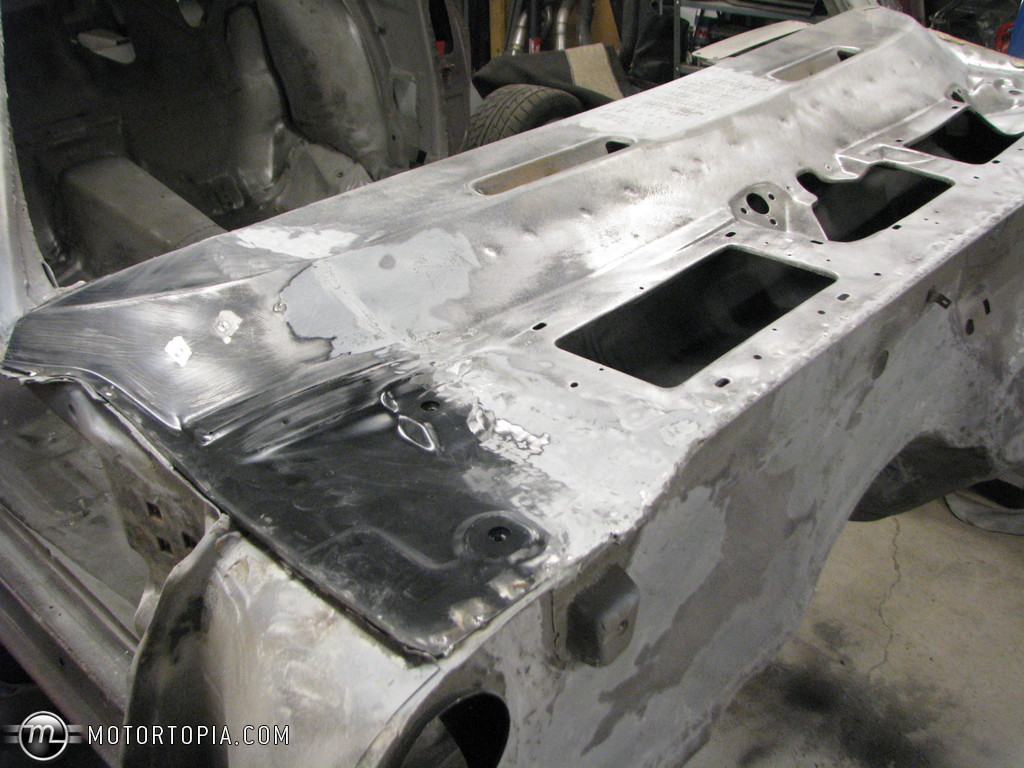
Not much for rust surprises. Got down to the fiberglass patches from the PO in a couple spots so I can fix it right. Did find a new spot on the cowl to cut up though. Didn't see that one coming.

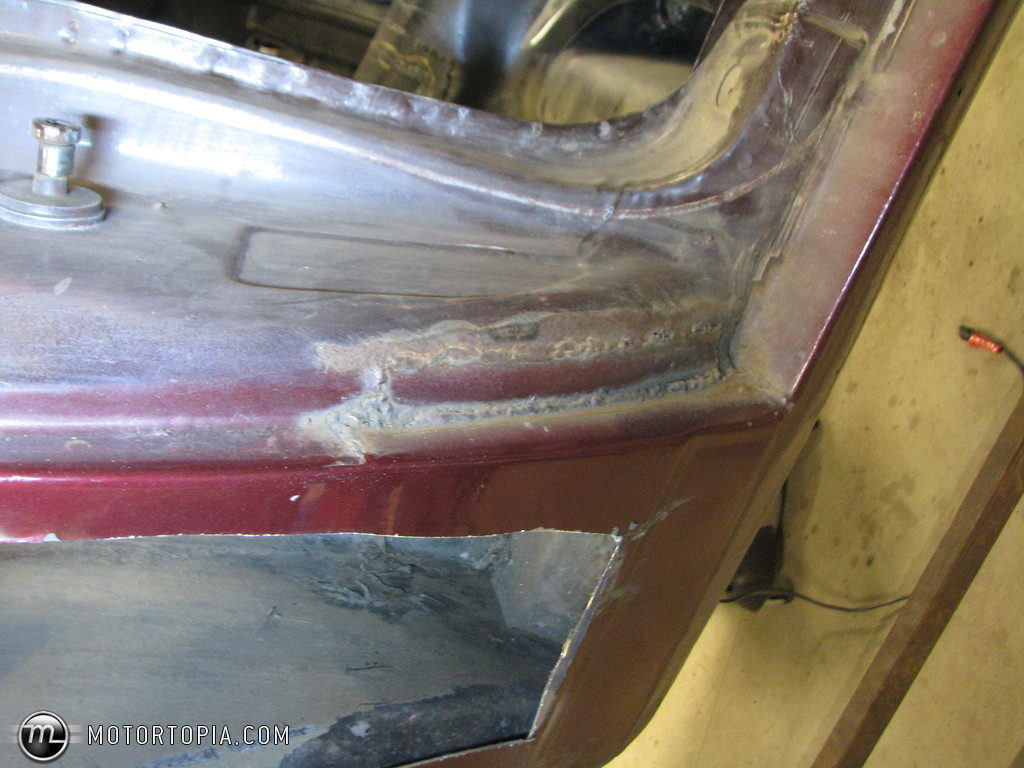
Doing a couple patches first. And cut out all the rust in the inner rocker/door jamb area of the quarter.


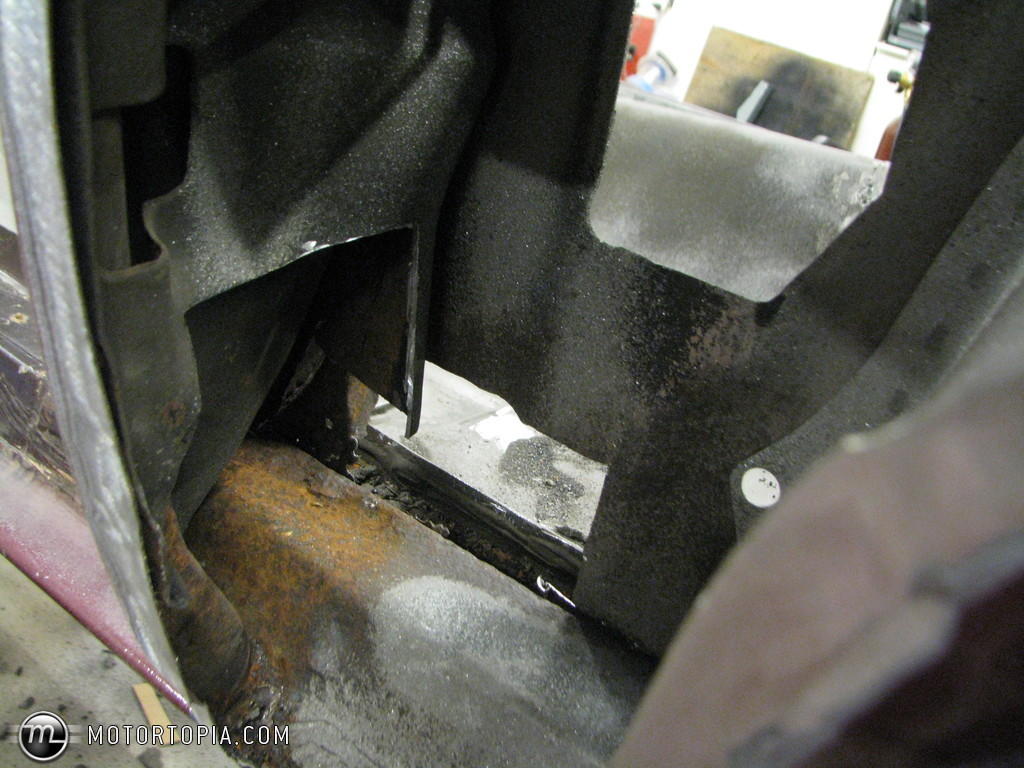
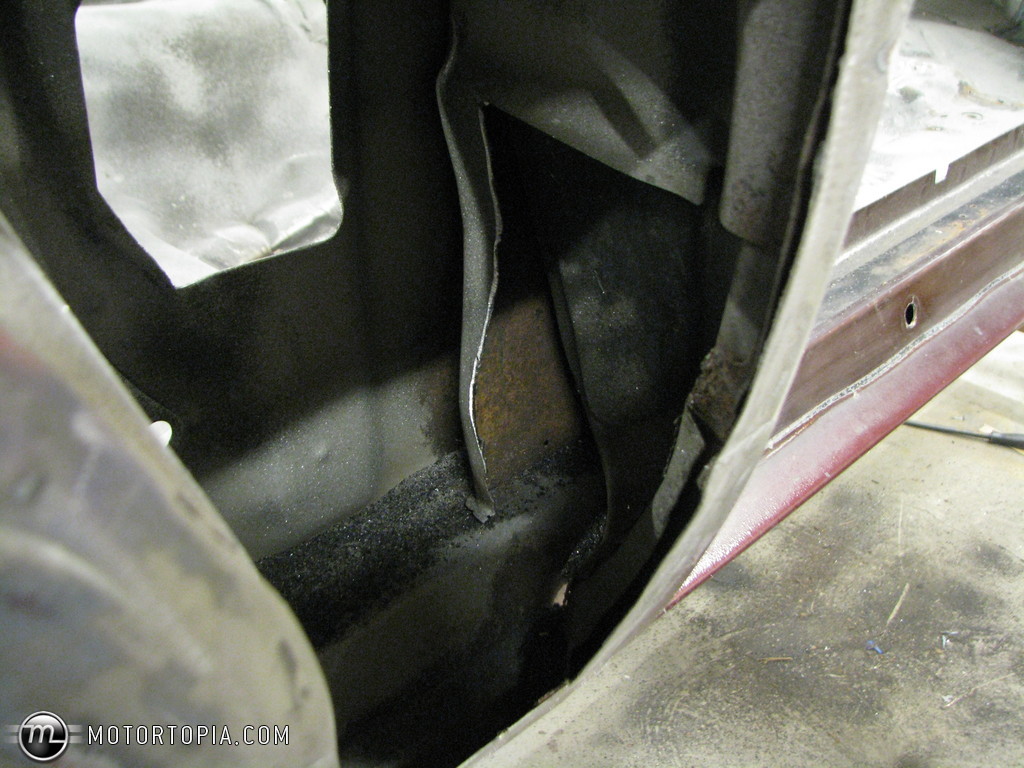
So I knew the PO replaced the exterior sheet metal at the lower quarter...what I did not find out until just now was they wadded the holy rocker full of bondo. So I cut all of that out too.

I also cut out the rusty part of the cowl panel. Borrowed a friend's cheapo HF spot weld cutter and it worked amazing actually. Very impressed. I put a post in the NastyZ swap meet section looking for just that part of the cowl in case someone had to use just the driver side for something. If no luck I'll just buy one and sell off the other half. haha
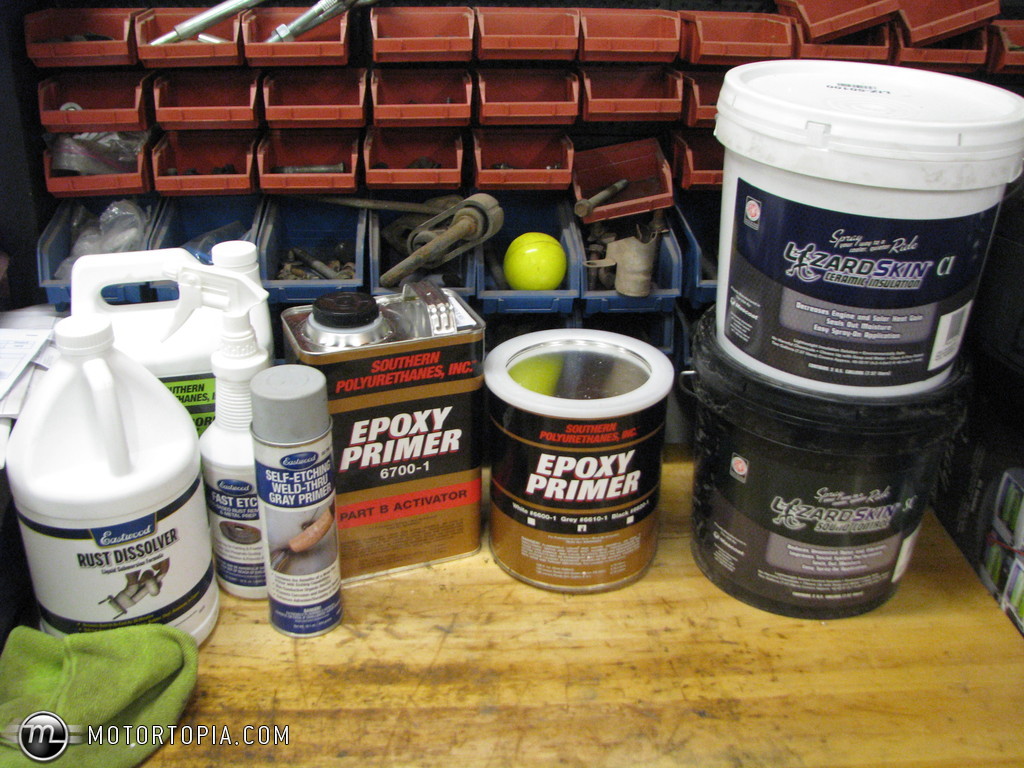
Finally got everything I need to finish up the underbody once I get it back from the re-blast job. I will be taking the car back over this week. I've got SPI primer and Lizardskin heat & sound coating.
11-13-2014 #77
Registered User
- Join Date
- Jan 2008
- Location
- Charlotte
- Posts
- 1,295
Nice steel shelving!
2005 LeMans Blue Corvette w/ T56 & Z51 & C6Z06 Brakes, Build Thread: https://www.pro-touring.com/showthread.php?64496
2005 GMC Sierra 2500HD LLY / Allison
2014 Chevy SS LS3 / 4 Door
11-13-2014 #78 Registered User
- Join Date
- Apr 2009
- Location
- FRANCE
- Posts
- 683

keep up the good work !
Very nice
Gil
12-13-2014 #79
Registered User
- Join Date
- Mar 2005
- Location
- Walton, NY
- Posts
- 737
Haven't updated this in a while...
I took the car back to the blaster and they did a much better job this time. Unfortunately being November in NY...it started to snow about 25 miles from home. I blasted it with air as soon as I got it in the garage and cranked the heat to 80, but I still ended up with some flash rust.

A wire wheel took care of the flash rust in no time.
I burned in some bracing in the quarter areas with 16gauge. It's not pretty, but it doesn't need to be.
I saw Kevin Tetz from TV is building a 79Z and I stole his idea where he cut out the firewall wrinkles. Patched it with some 16ga. Used a flanger and overlapped it from the inside. Simple enough to do and should be plenty strong.
Bought a whole cowl panel to replace this little piece. If I hadn't already welded the whole front edge I would have done the whole thing, but now I have 3/4 of it left to sell if someone has a bad spot on the driver side. haha
And I started the filler work. Just finished the short strand waterproof stuff first. Stuff is a bitch to sand. Next step is the rage gold...I hear it sands much better.

12-14-2014 #80 Registered User
- Join Date
- Nov 2006
- Location
- Ma.
- Posts
- 5,567
Its looking good! Nice job on the headers and exhaust.
Wayne
Car FINALLY home !!!!!! lol
Project FNQUIK https://www.pro-touring.com/showthre...ghlight=FNQUIK

 Reply With Quote


