

Results 1 to 4 of 4
-
07-17-2018 #1
 Registered User
- Join Date
- Jun 2012
- Location
- Chicago burbs
- Posts
- 247

1969 Cutlass Center Console DIY -fiberglass-CAD-3D printing-newbie DIY
I want to share my progress on a console Im trying to make in case anyone wants to see how a newb does things. Once I catch up, Id love some feedback on what will be the 3rd protoype(please be nice I have an idea of what I want, but like, zero artistic capabilities).
Last year I decided that on top of the custom 3-Link conversion and watts link in back, I also wanted to take on a center console. It started with a rough sketch, but since I have no talent, I needed a prototype. While researching all the consoles both custom and OEM, I found the 2017 Camaro and fell in love with the work of art that is the shifter bezel. Of all the consoles I saw-Ferrari, AMG, BMW..etc some GM interior design engineer put some passion into it. I bought one from a company that smoothed and painted them-now I had to design a console around it that would do it justice.
Started by building a wood frame.
Then that started to take shape with some foam panels from Home Derps,
Then, watching SprayWays customs on youtube I got the jist of fiberglassing. I went with West System 105 epoxy resin, mostly because it doesnt reek like bondo type fiberglass, its pricier but has really convenient pumps for mixing. I went with the 205 FAST hardener, and-yeah, its fast. Too fast for a newb like me to wet everything out so my next buy was the slow 206 hardener which gave me a lot more working time.
For the first prototype I used some really cheap fleece from the fabric store. I tried to trace it out and cut it from a single piece. Not sure why I did that-it worked to give a pretty smooth surface without a lot of overlapping fibers, but not sure if its necessary.
Then I sanded and used some standard bondo bodyfiller. The initial idea here was the console would be a high gloss fiberglass with the arm rest and shifter bezel base being wrapped in leather(vinyle/suede/something?). But the bezel base needed an accurate groove to mate the bezel and again, freehanding a groove that wouldnt look miserable isnt my thinig(I tried with expected results, lol).
I do however, have Fusion360 and Autodesk(both free for hobbyist) and among a lot of other stuff, they do photogrammetry. This is basically taking pics 360 degrees around an object and then letting Autodesk stitch them together to make a 3D model.
ProTip:it cant stich reflective/glossy objects, but lay down some turtle wax and let dry to a haze, and then flick some water washable paint(my daughter was nice enough to share) and it gives the software tons of latch points to work with. -lemon squeezy. Below is a video of the results for that. My first attempt was on my G8GT, hadnt thought of the turtle wax thing at that time, so I lightly misted it and doused it with flour. Funny looking and messy for sure, but it got the job done. --nm, I need to upload the vidz to youtube first, I'll try to do that tonight....
Now I had a 3D model of the bezel, but life go tin the way for a few months, so I ended up getting a good enough base carved out of balsa wood in the spare moments I had. It came out neither symmetric or visually appealing, so one of the next steps will be to 3D print a very thin base with the groove and contours and then fiberglass the inside for strength.
Next I'll post up my 2nd iteration and we'll be caught up with where I'm at.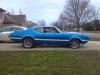
1969 442 6.0L LQ9 T56
Fab9 w/ custom 3 Link conversion
FAYS2 Watts link
Thanks to Mark at SC&C for his honesty and passion for the sport, and Ron Sutton for the wealth of knowledge that has helped shape so many of the cars on this site.
-
07-20-2018 #2
Registered User
- Join Date
- Jun 2012
- Location
- Chicago burbs
- Posts
- 247
Here's is a quick video showing the results of capturing the design in 3D by taking a handful of pics and letting Autodesk do it's thing.
The first video is my first try with my G8GT. These were taken with a standard camera with standard type settings(proof of concept). Just a note, photogrammetry can't stitch together reflective surfaces, so I doused it with some flour which worked for a proof of concept. If I do a car next, I'd probly apply turtle wax and let it dry to a haze, the flick water washable(kids stuff) paint on it to get it really good latch points. I used this technique with the shiny bezel and it worked really well.
Here is the mesh it generates. Sorry for the cell phone recording the computer screen, I don't have a lot of free time so I'm doing my best to share what I have.
And here is the mesh on the shifter bezel. For this on I coated it in turtle wax and water washable paint. I also manually set the ISO and focus, and used a piece of wood as a tripod to steady my over caffeinated hands(made a big difference). This easily loaded into Fusion360, wrapped it in a Tspline(tutorials on Youtube) and then I was able to start interacting with it.
I'm not really sure if anyone is interested in this stuff.I just figured I try to share how I get around my lack of artistic talent and skill.Last edited by jetmech442; 07-20-2018 at 08:54 AM. Reason: properly embedding youtube vids after I read the sticky.
1969 442 6.0L LQ9 T56
Fab9 w/ custom 3 Link conversion
FAYS2 Watts link
Thanks to Mark at SC&C for his honesty and passion for the sport, and Ron Sutton for the wealth of knowledge that has helped shape so many of the cars on this site.
-
07-20-2018 #3

 Registered User
- Join Date
- Feb 2013
- Posts
- 800
That is in no way a lack of skill.
-
07-26-2018 #4
Registered User
- Join Date
- Jun 2012
- Location
- Chicago burbs
- Posts
- 247
Ughhh, I just looked at the thread above from @Deluxjoe-then looked back at my pics, sigh. That's the kind of interior I want, but would find more satisfaction making it myself, buuut would still just like to show up at his shop with a bag full of cash and ask nicely for the same amazingness, lol. Man What a talented dude.
 Originally Posted by JustJohn

Thanks John, I want to make something special and I feel posting on here and seeing others' work is really motivating me. My brain seems to work best with technology and several iterations of prototypes, so its a lot of evolution, lol.
Here's how the second prototype came out. I was thinking of adding a head unit vertically in the console, hidden by the arm cushion,just letting the volume knob stick out(sorry for the rough drawing). The height is good, and the shifter knob is the right height now and is a comfortable throw.
In place of the buttons in the stock bezel, I wanted to customize. So an engine start stop from a GTR went in the first hole
,and the second will actuate the exhaust cutouts. My exhaust cutouts already have a long throw switch that is wired nicely, so I wanted to keep that. So I decided to design a switch that would fit in the bezel and actuate the existing switch. Fusion360 makes this real easy as I already had a 3D model and you can design in the same work space.
I designed probly 4 different switches until I found one that looked right. I also made a basic model of the current switch, and was able to ensure that the new switch would rotate enough to activate the current one, as well as have enough space to fit my finger underneath it, all while not interfering with the bezel.
If anyone is interested, I can take a quick video showing how the switch moves in Fusion.
I showed the concept to my old navy buddy and he commented how 'merica that switch was and I totally agreed, so it is now henceforth my " 'Merica cutout switch"! Coincidental a few weeks later, my little 6 year old girl was learning how to draw bald eagles and flags and frogs and other stuff from a youtube channel and she was really good at them. So I asked her to draw me a bald eagle and a flag. I took those drawings and you can just insert them into the background of the CAD, and create actual geometry from them just by tracing the pics.
This might be my favorite part of the car now since my little girl designed it for me! Once it was all finished up, Fusion will export the file to be 3D printed. I just uploaded to Shapeways.com, paid $22 and waited a week and then the switch was at my door. While I waited, I played around with the rendering tool in Fusion and captured some shots(it was ridiculously easy-took me about 20 minutes start to finish).
The console prior to fiberglassing looks like this:
And functionally, not anything close to complete, looks like this:
I'm real interested in what you think, likes/dislikes, directions whatever, I'm planning on starting the 3rd prototype in late august before it starts to get cold and makes fiberglassing more difficult. I would like to add in the ebrake I got from a 98 TA-maybe in the space I currently have the stereo planned. And make the side of it not so flat and plain looking, maybe some curves or bevels like deluxjoe has. I dunno, I'll post up a sketch of what I'm trying to get to and see if anyone has some suggestions.
1969 442 6.0L LQ9 T56
Fab9 w/ custom 3 Link conversion
FAYS2 Watts link
Thanks to Mark at SC&C for his honesty and passion for the sport, and Ron Sutton for the wealth of knowledge that has helped shape so many of the cars on this site.

 Reply With Quote


