

Results 21 to 40 of 51
-
12-01-2017 #21
 Registered User
- Join Date
- Feb 2006
- Location
- Columbia Co. NY
- Posts
- 282
Wow!!! Awesome build. Love the ingenuity. Following with interest.
-
12-01-2017 #22
 Registered User
- Join Date
- May 2013
- Location
- Texas
- Posts
- 297

Subscribed!
-
12-04-2017 #23
 Registered User
- Join Date
- May 2017
- Posts
- 43
Thank you for the kind word's.
this past weekend I didn't get as much time in on the truck as I would have liked but it's all good. I leave for the PRI show in the morning so no progress for a week or so for me. Anyways this is all I got done
mocked up the rear mount tank just to get an Idea of where she landed....talk about 10 lbs of shhh in a 2 lbs bag
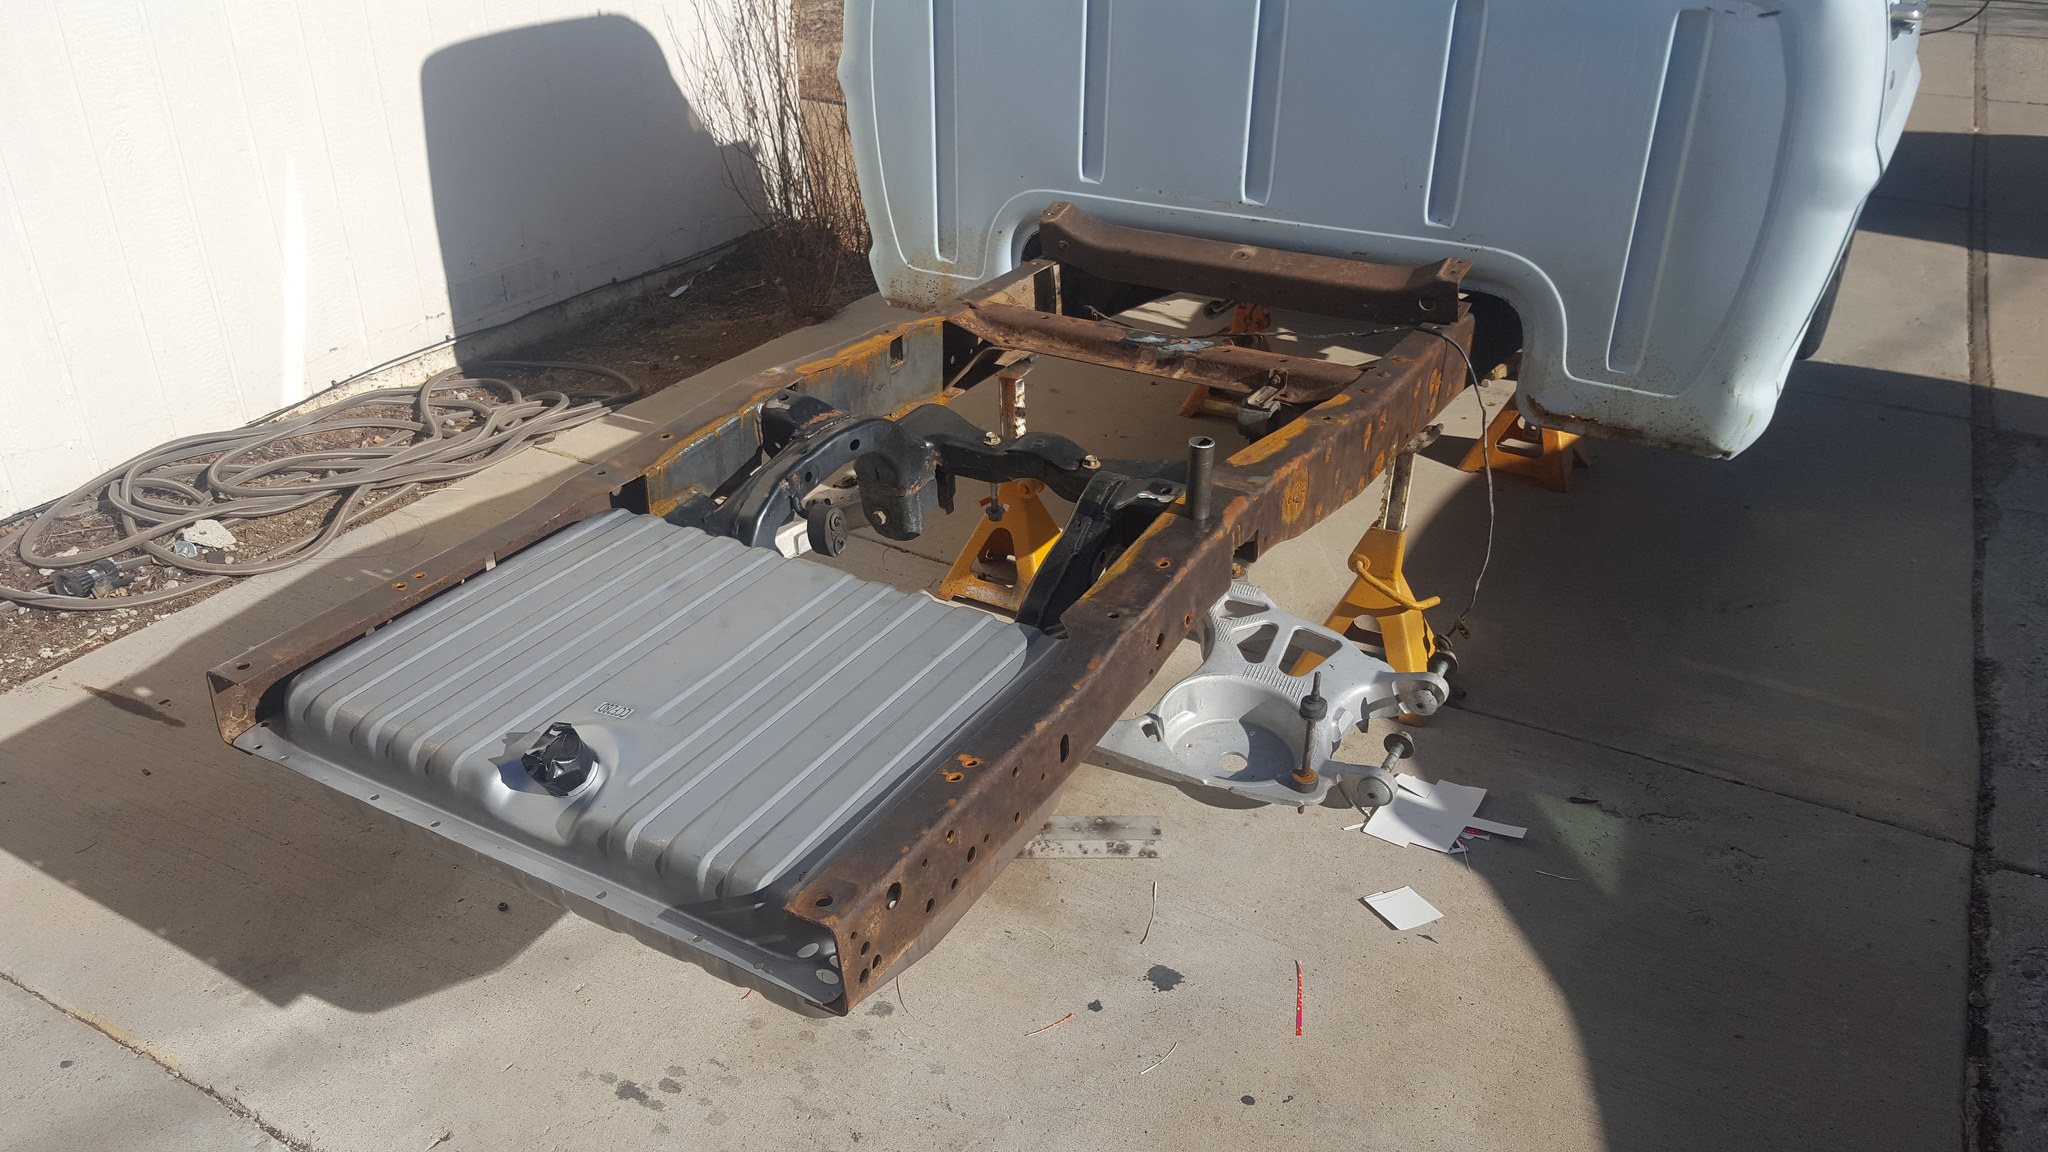 20171202_121341 by 1SAWB, on Flickr
In this pic you can see that I actually had to notch the rear subframe to gain 3/4 of an inch or so for the tank
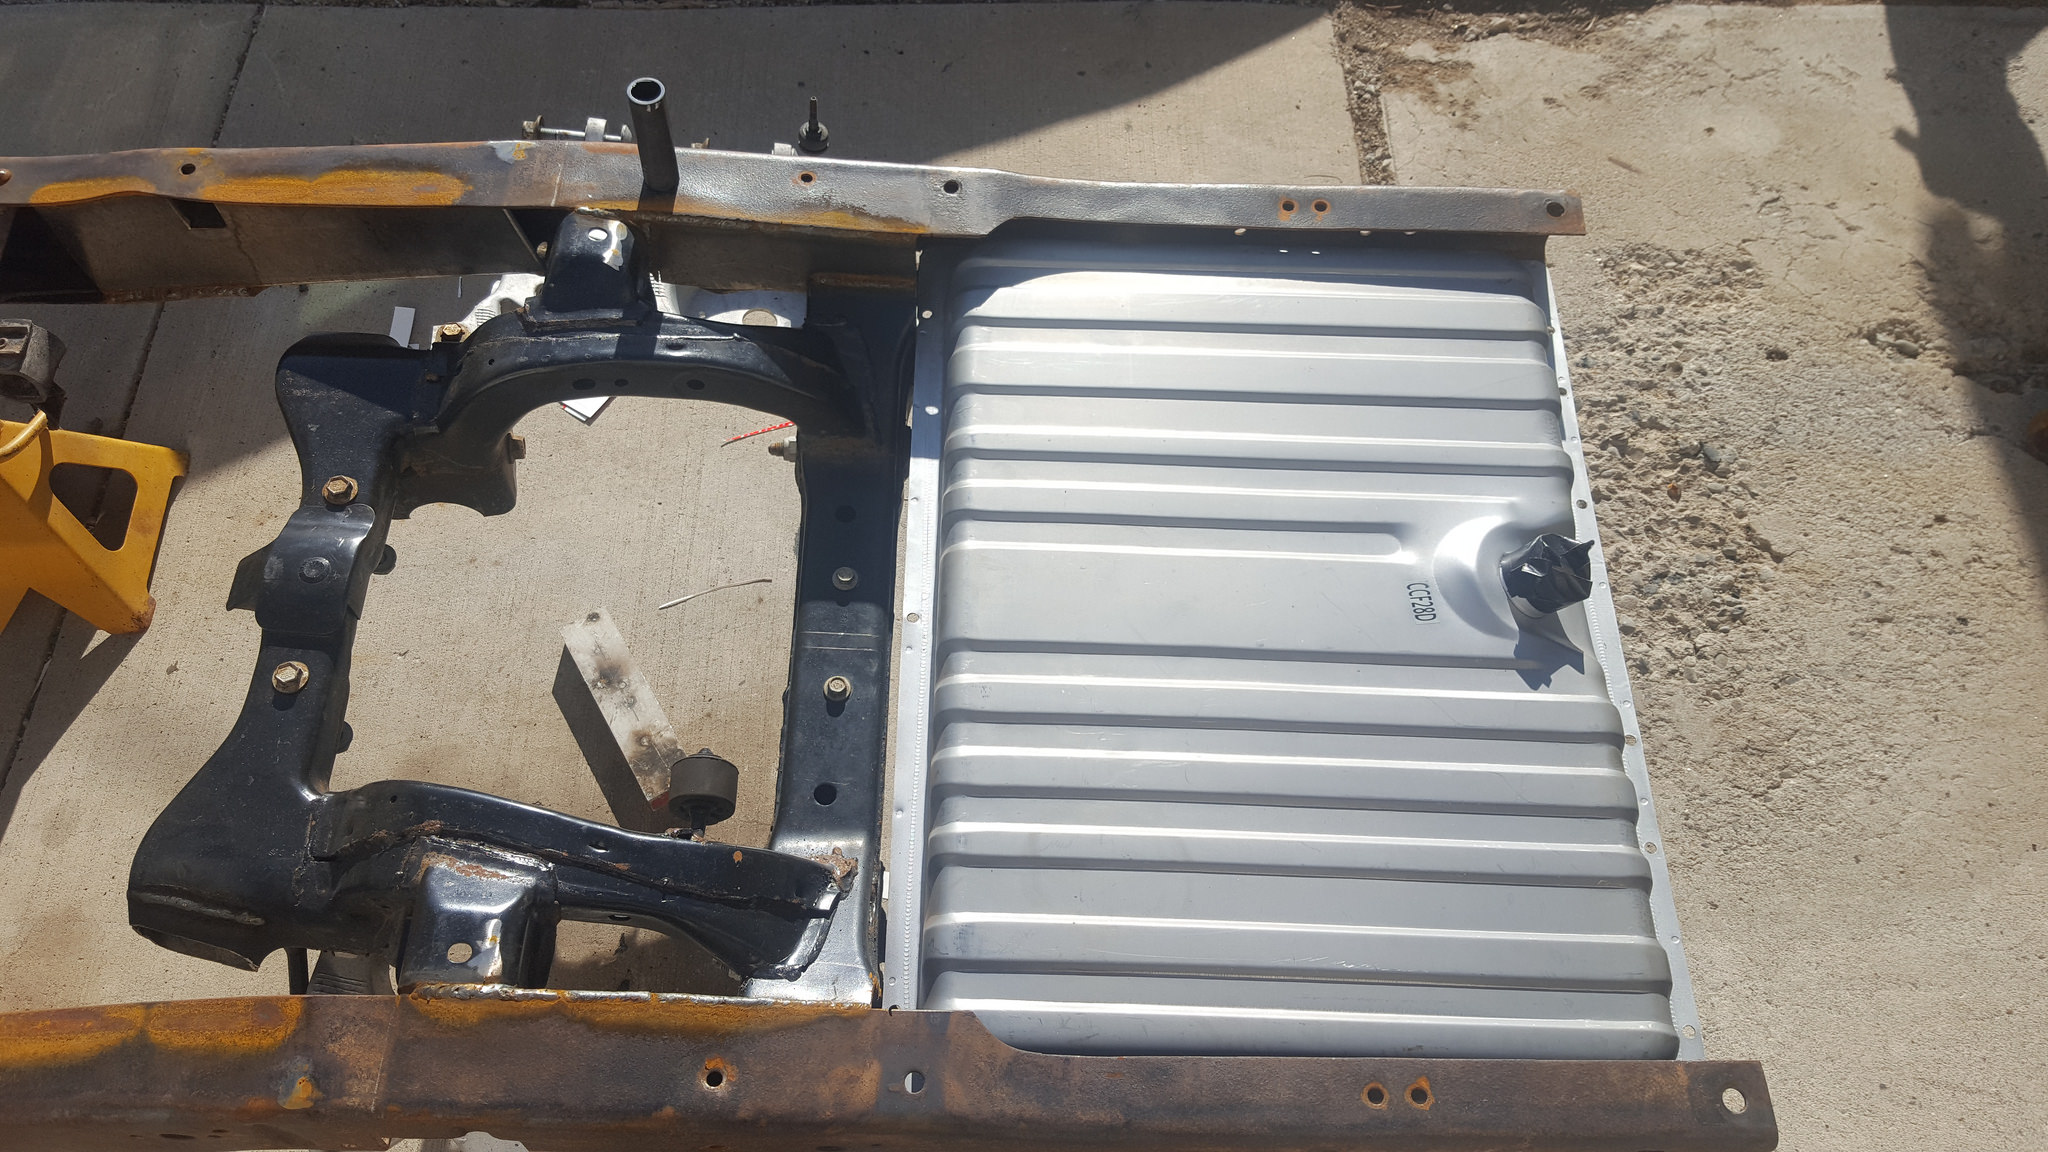 20171202_121351 by 1SAWB, on Flickr
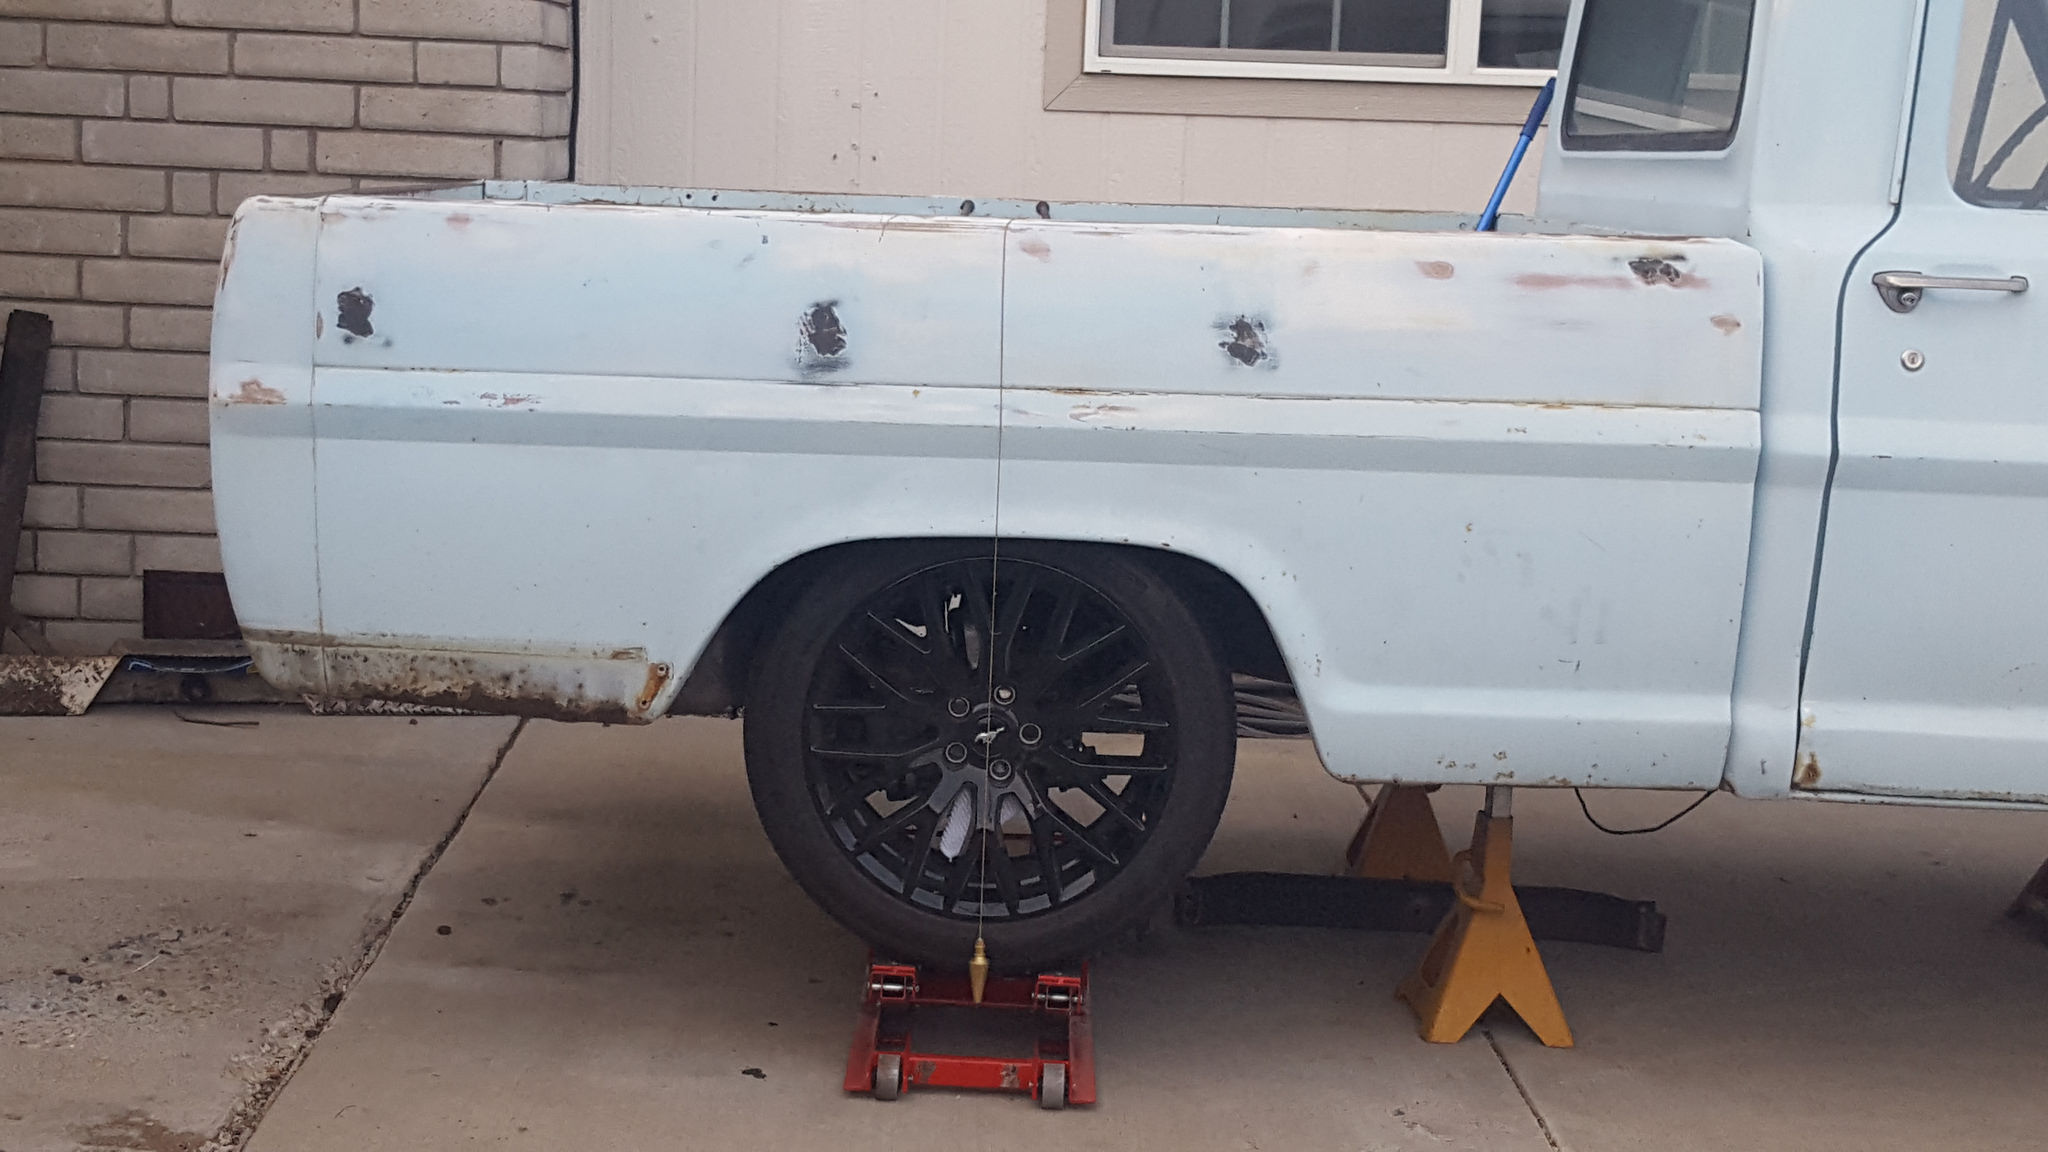
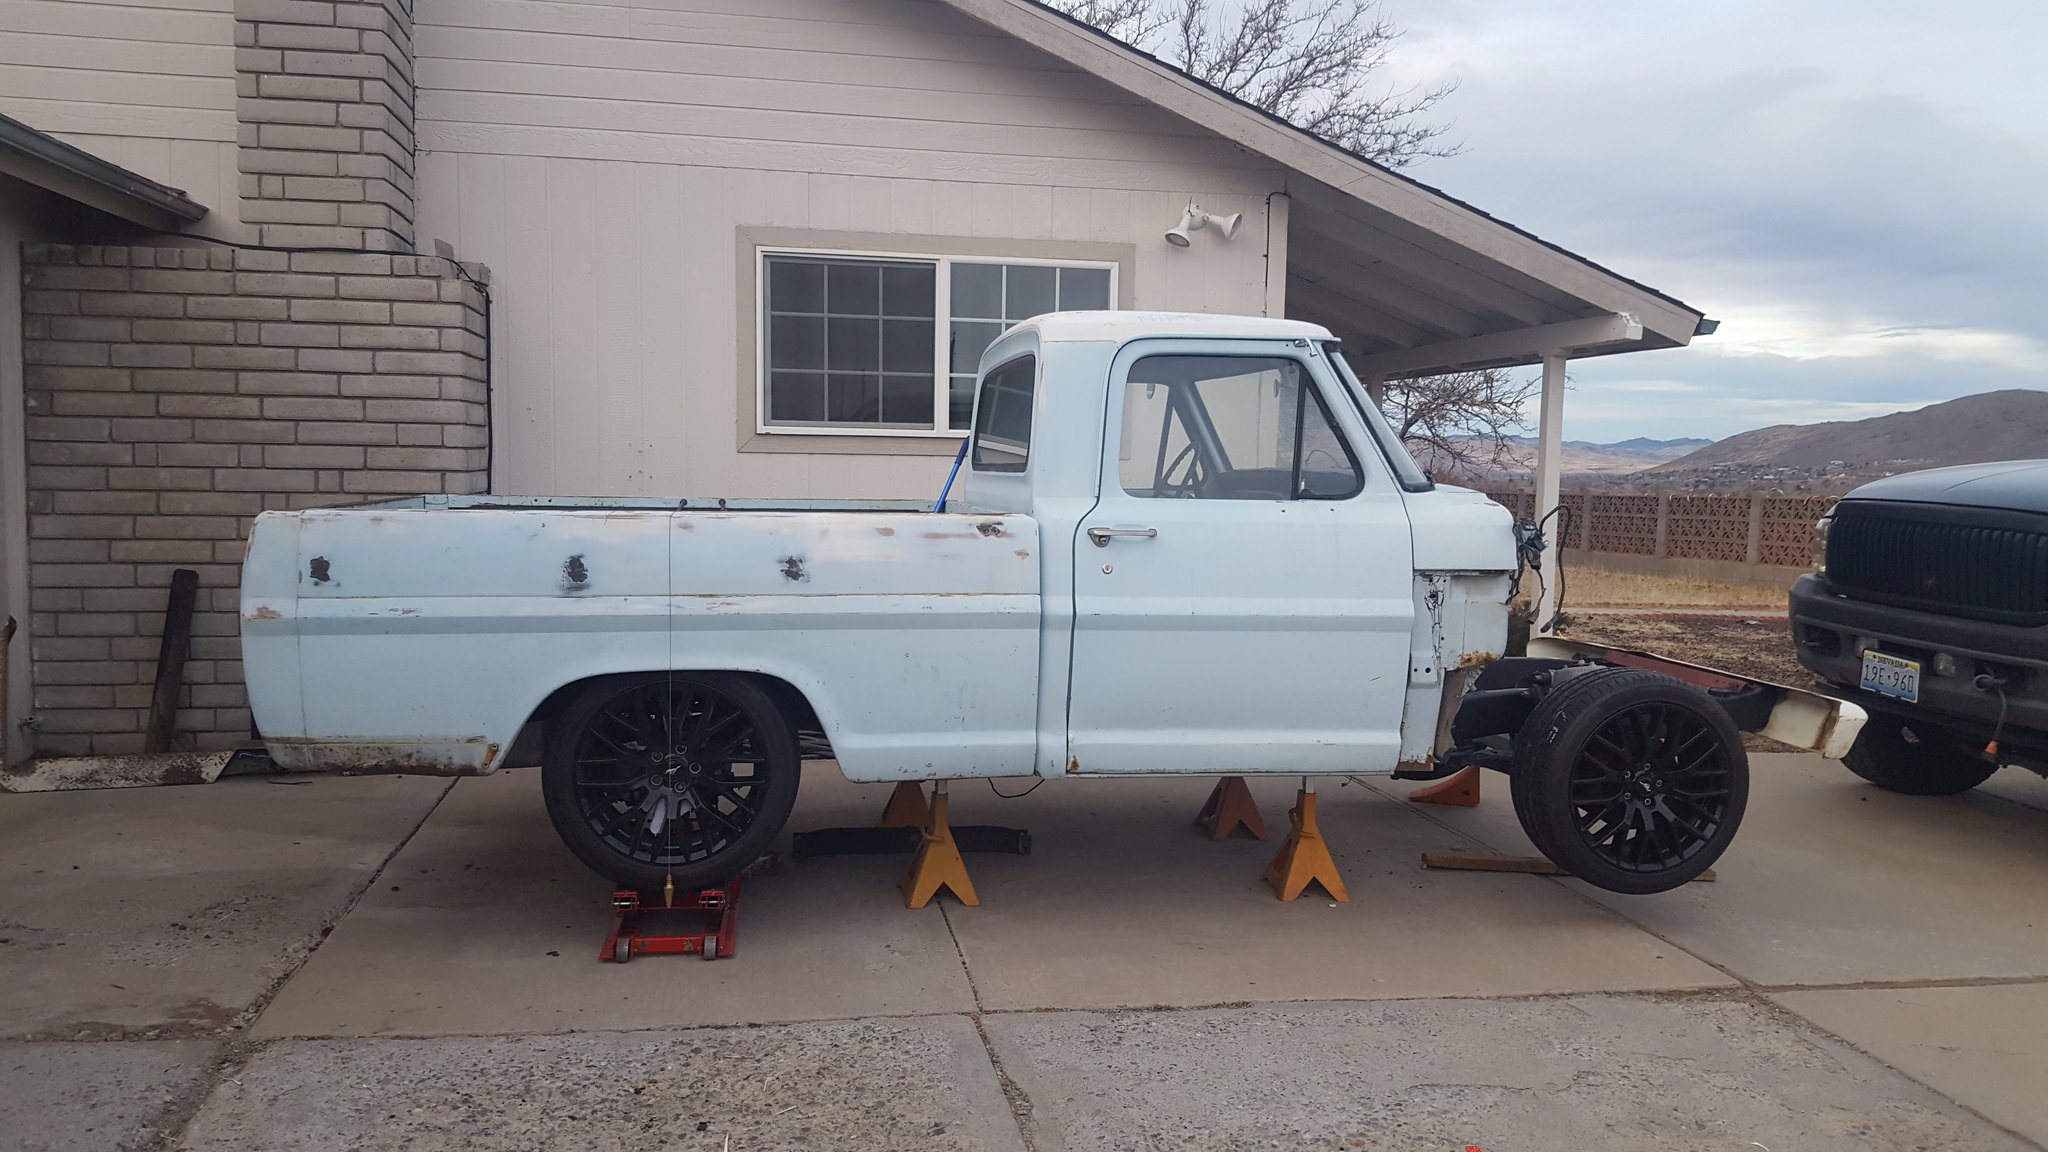
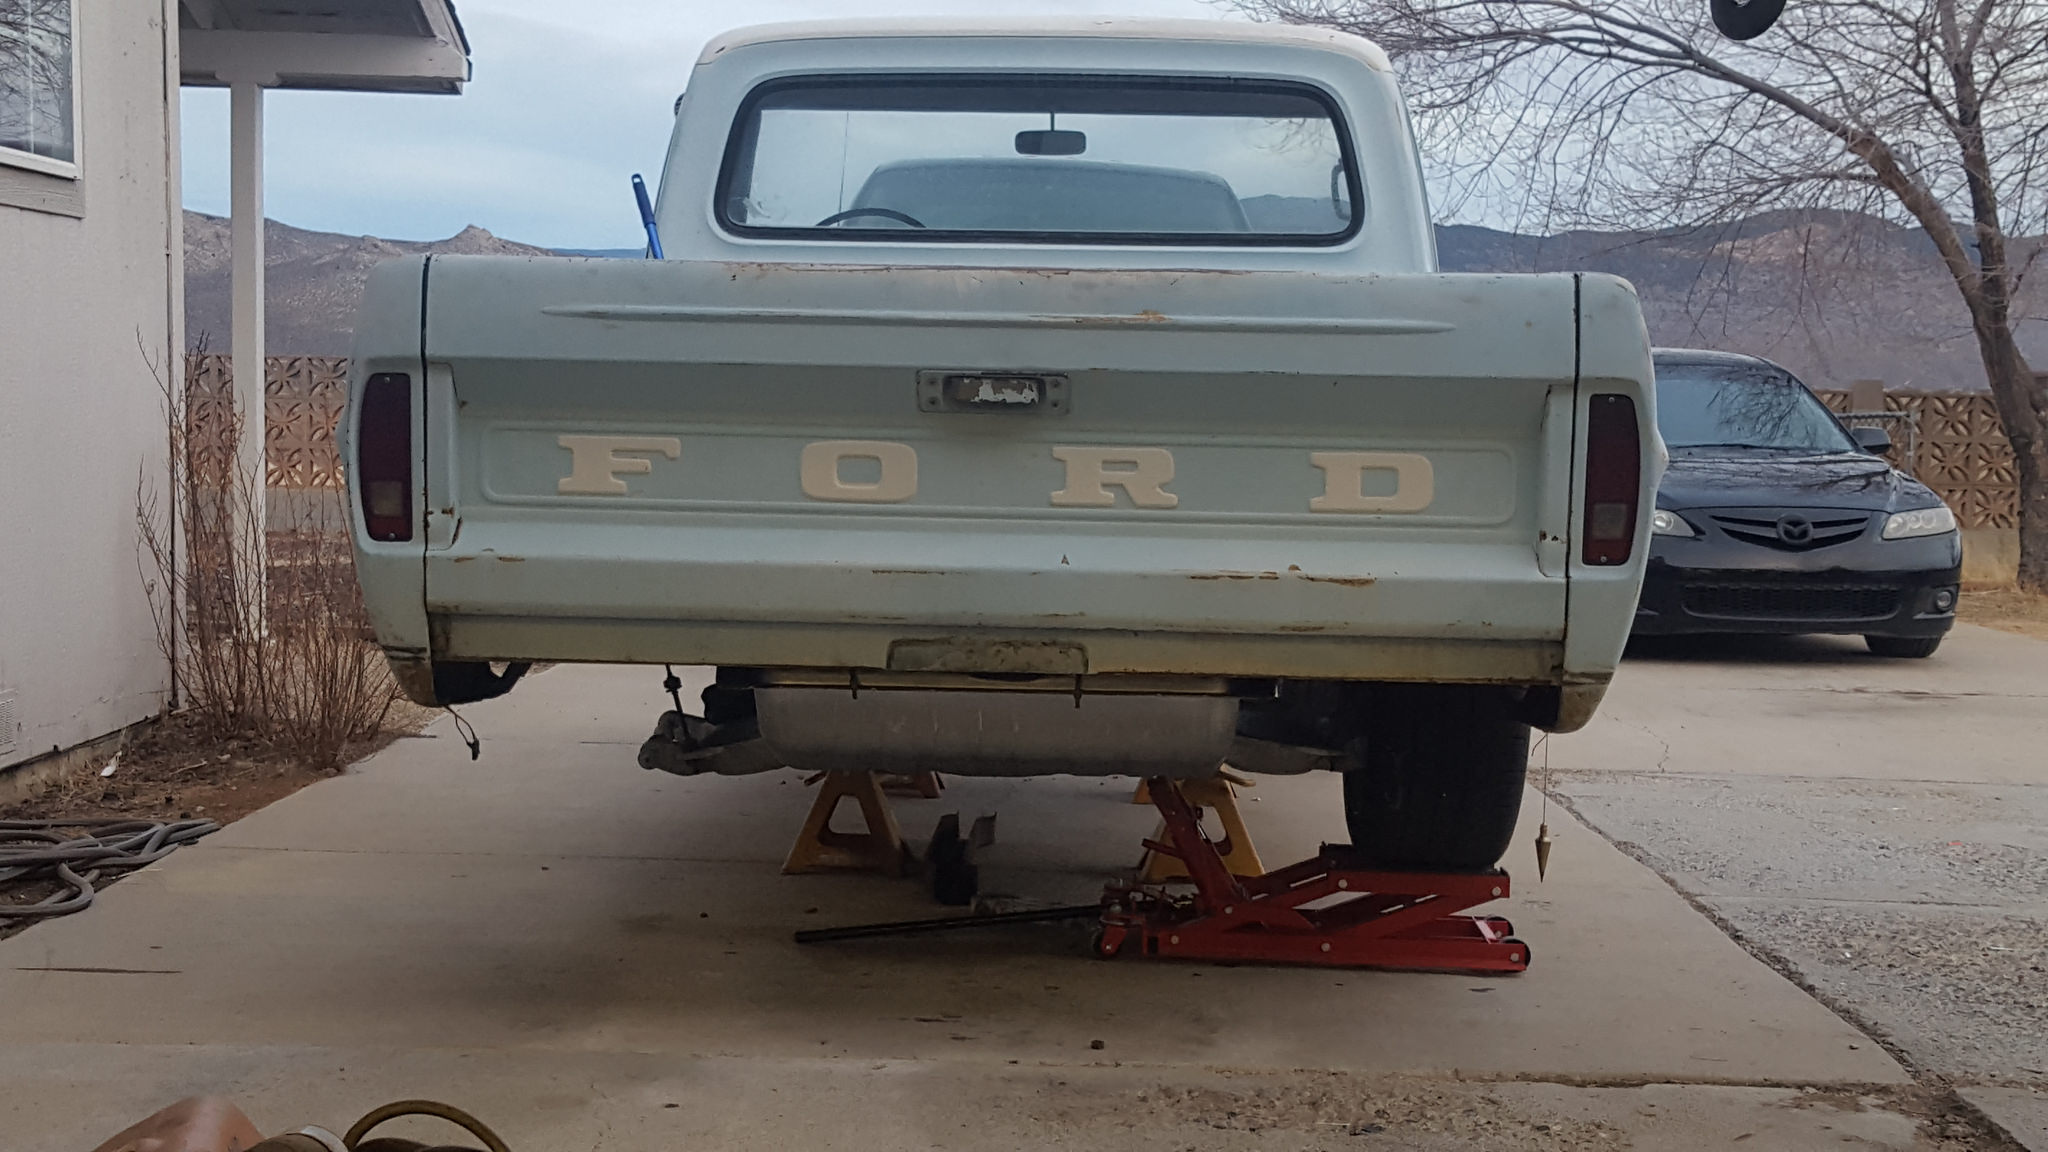
once I was somewhat happy I put the bed back on to see what was next on the chopping block. back when I was originally measuring out where the "new" axle centerline will be I also measured the bed and mocked up the wheel in the wheel well and marked center. as you can see with the plumb bob its dead on
 20171202_162611 by 1SAWB, on Flickr
 20171202_162557 by 1SAWB, on Flickr
a little butt view for your pleasure
 20171202_162658 by 1SAWB, on Flickr
-
12-04-2017 #24
Registered User
- Join Date
- May 2017
- Posts
- 43
while messing around on my phone I found a short video of the evil 6 cylinder that was in the truck. don't mind that exhaust leak and belt squeal ....lol
 20160319_141821 by 1SAWB, on Flickr
-
12-04-2017 #25
Registered User
- Join Date
- May 2017
- Posts
- 43
few misc pics
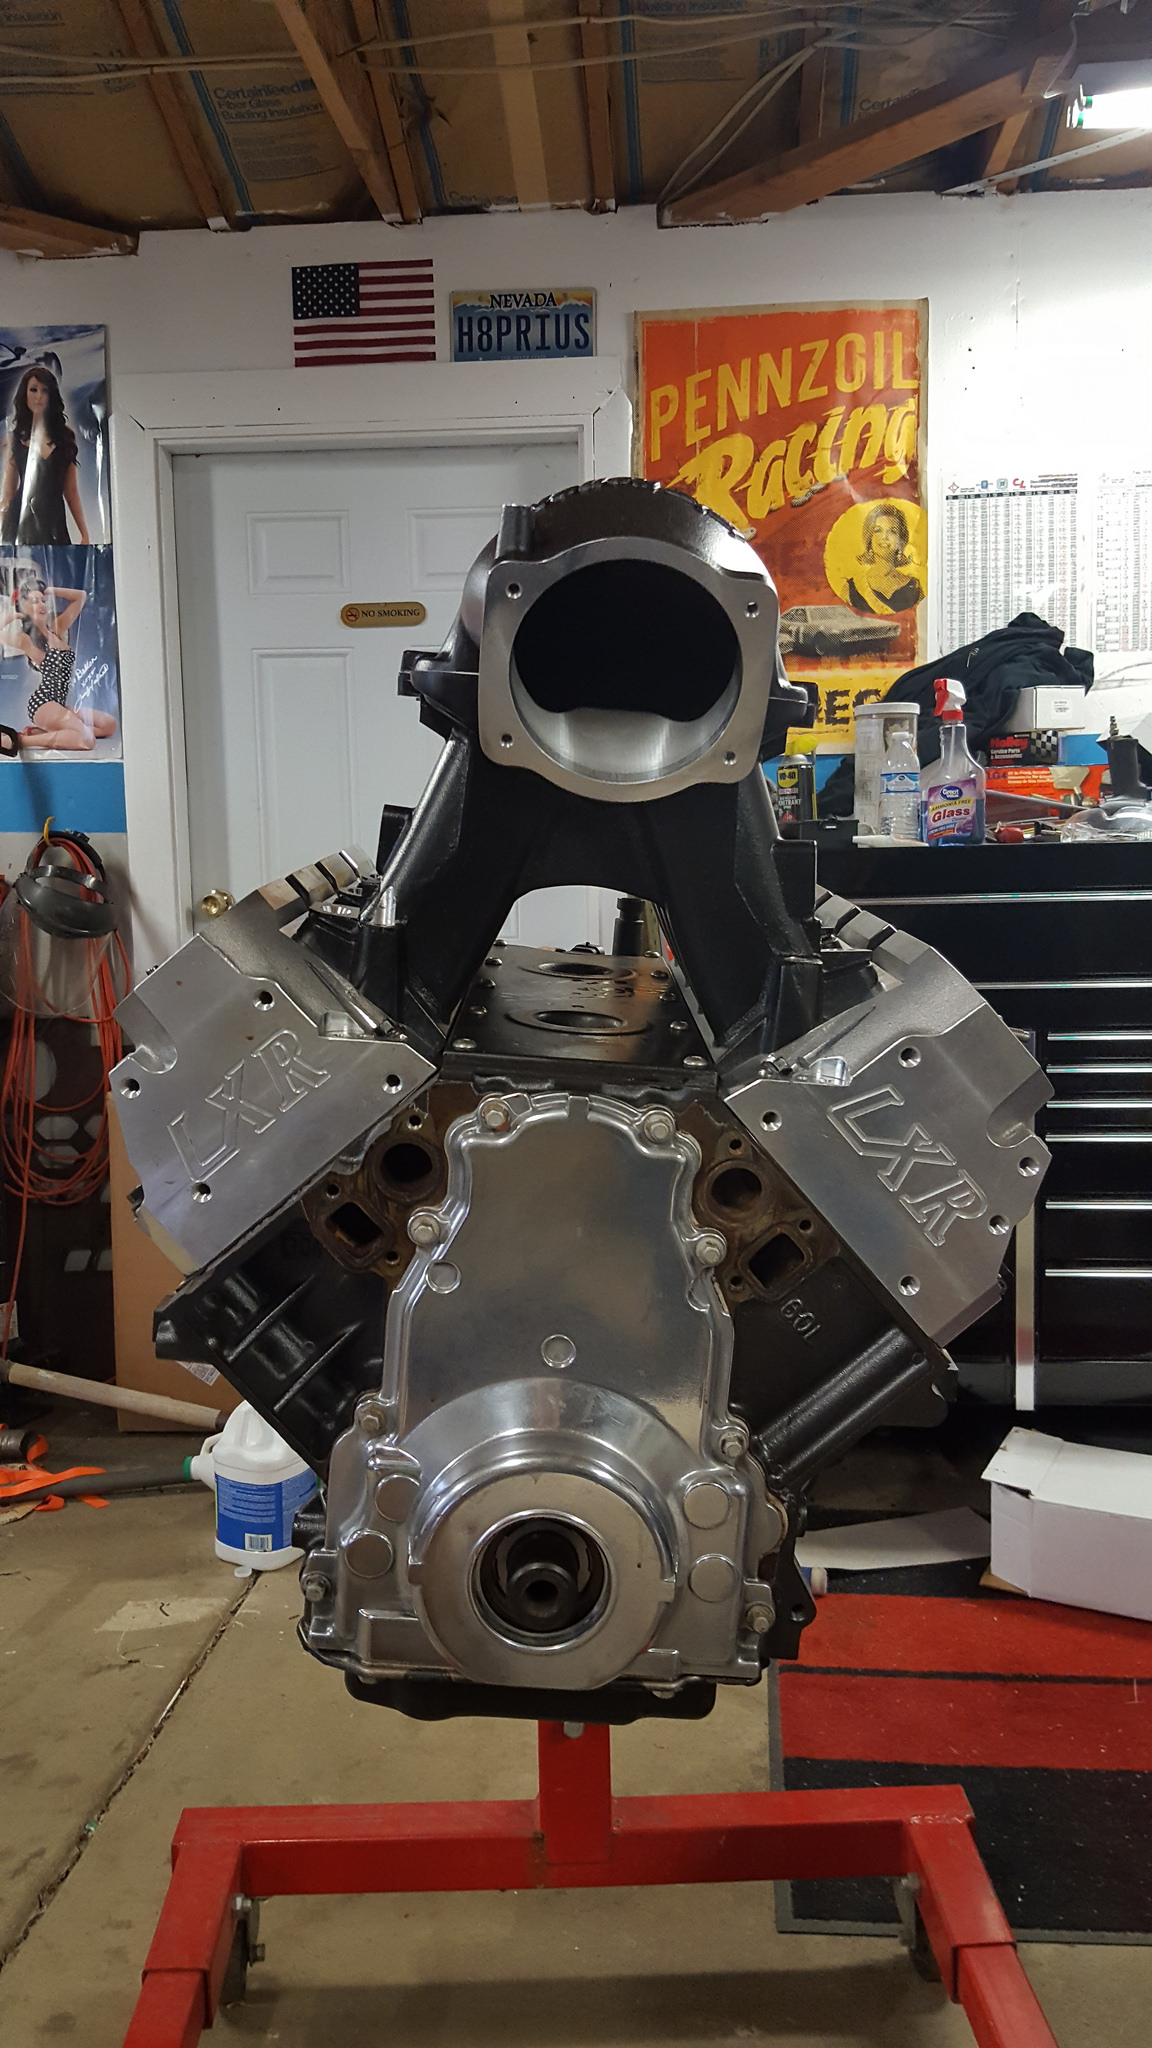
The LS that's going into it in in the future, most of the spec are listed in the beginning of this thread
 20170803_180433 by 1SAWB, on Flickr
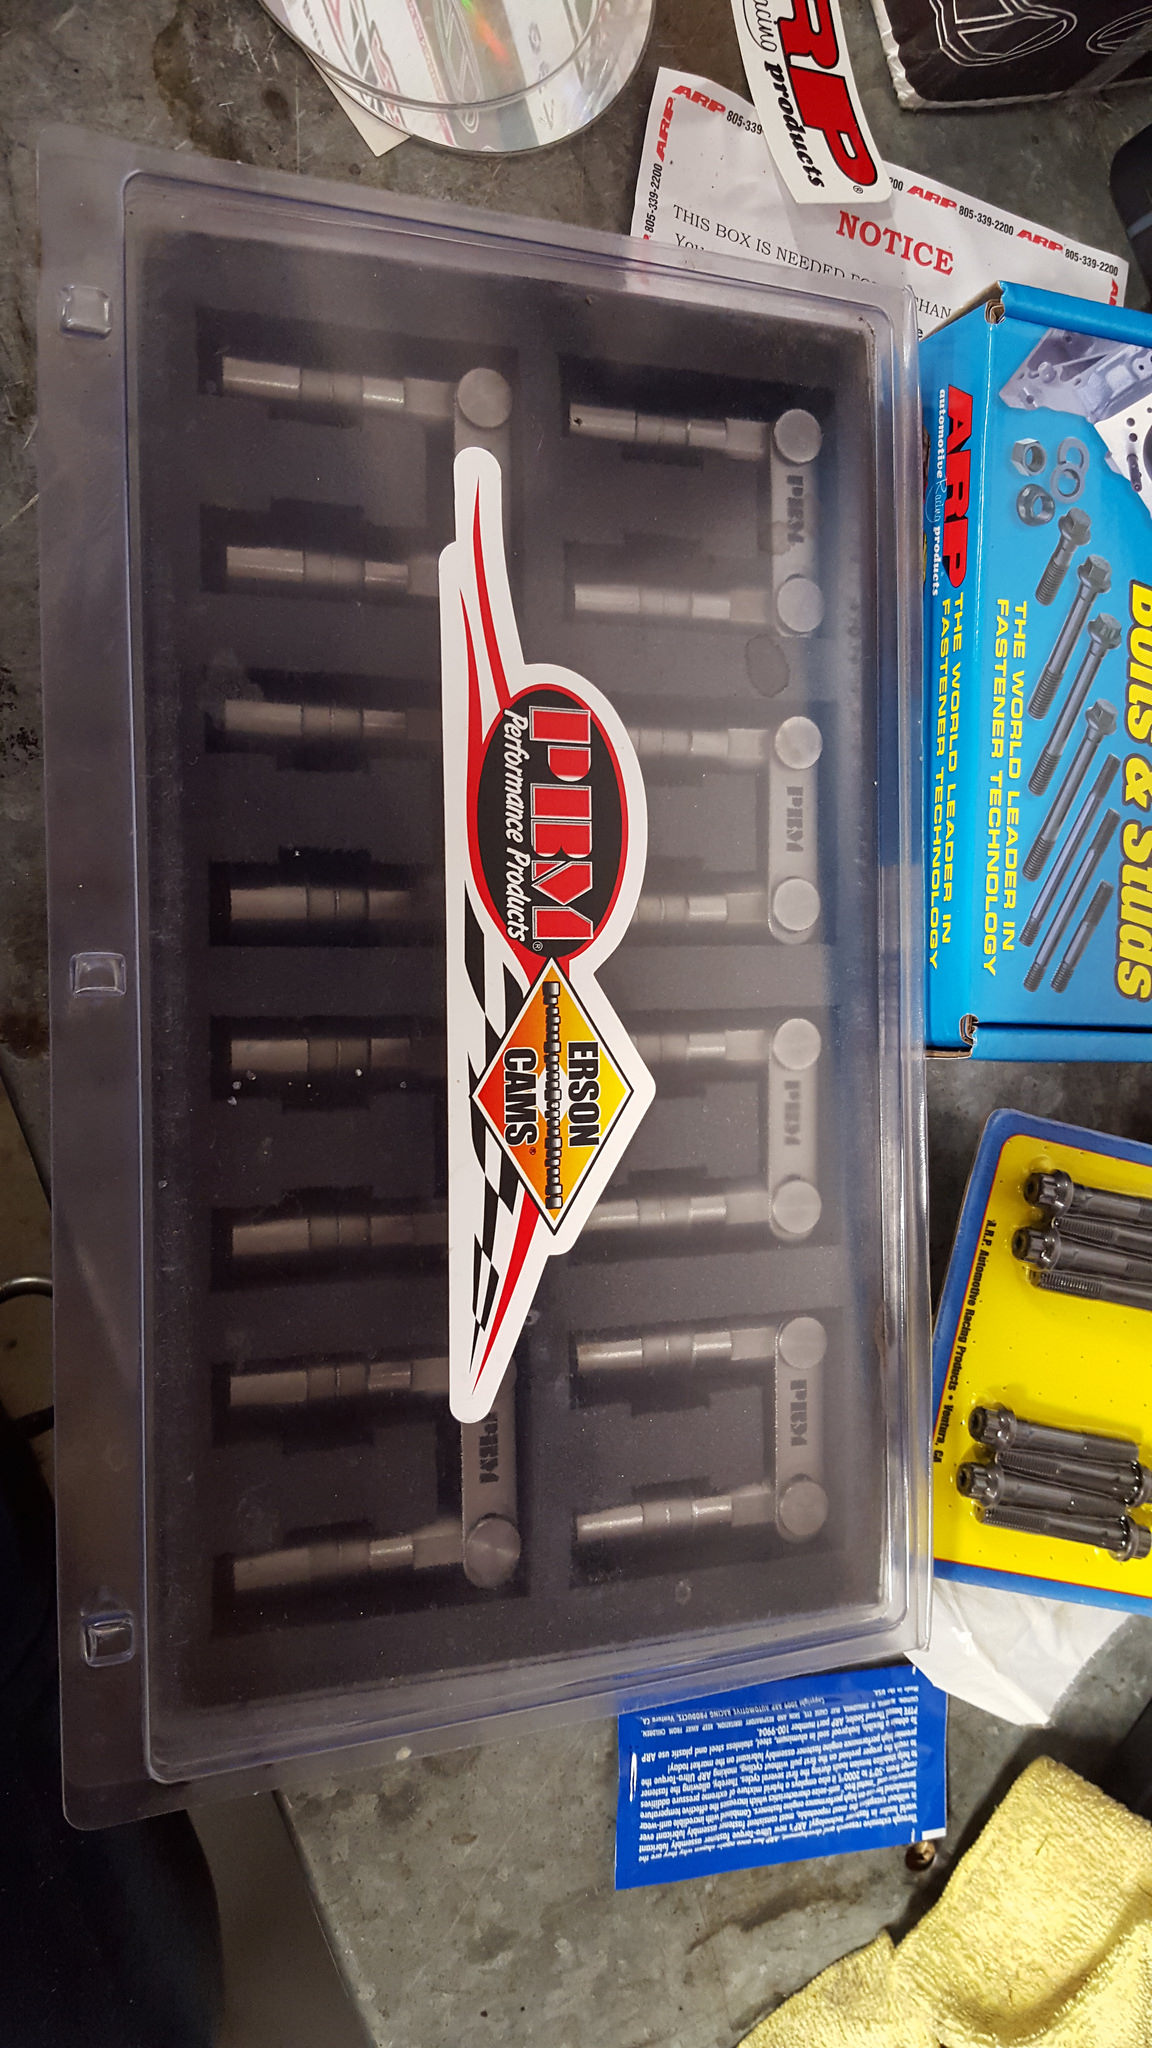
Morel tie bar lifters...I really Hate the factory plastic lifter trays. the ARP stuff can be seen in the back ground
 20160124_150946 by 1SAWB, on Flickr
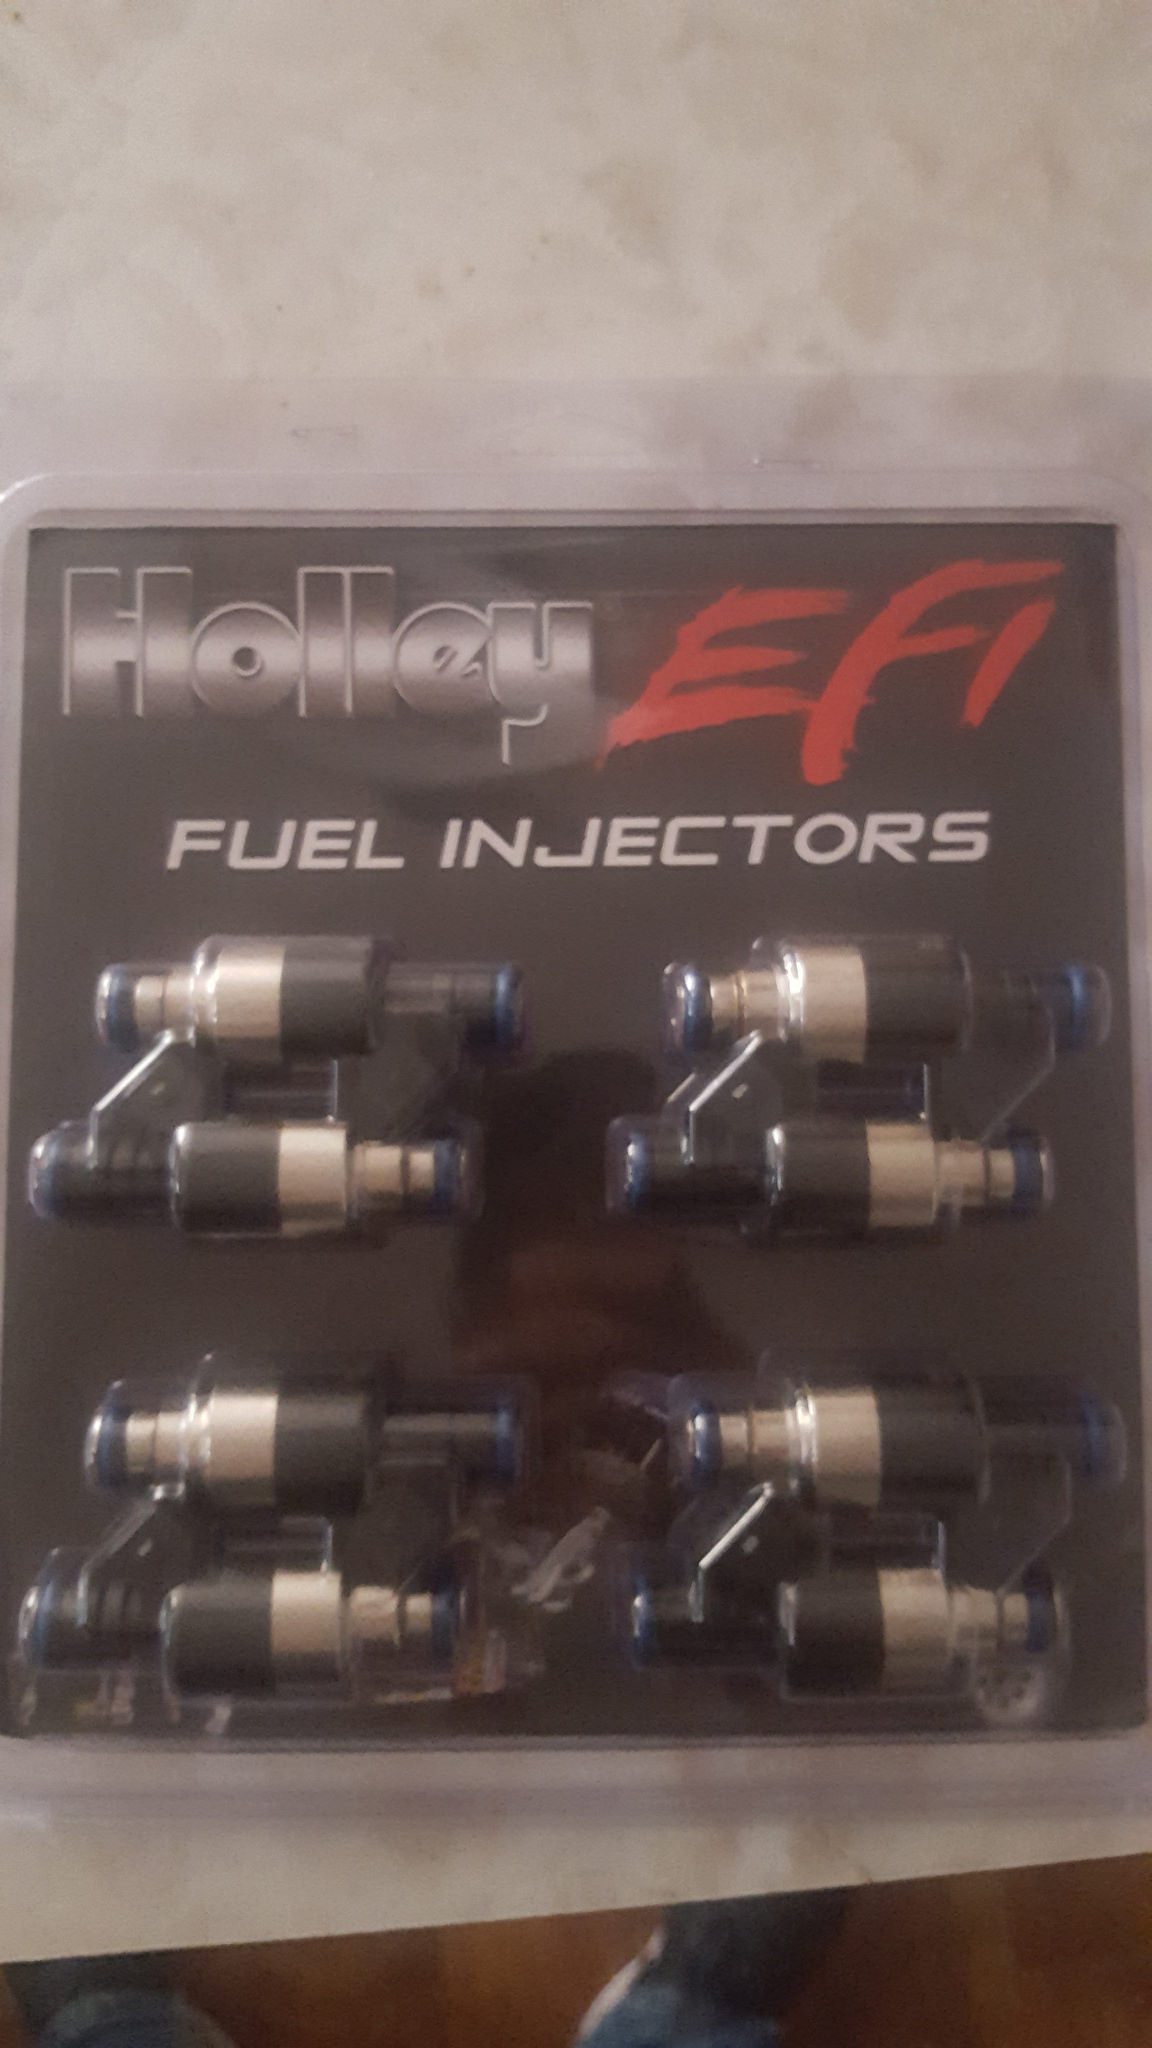
The 120 injectors
 20170727_164230 by 1SAWB, on Flickr
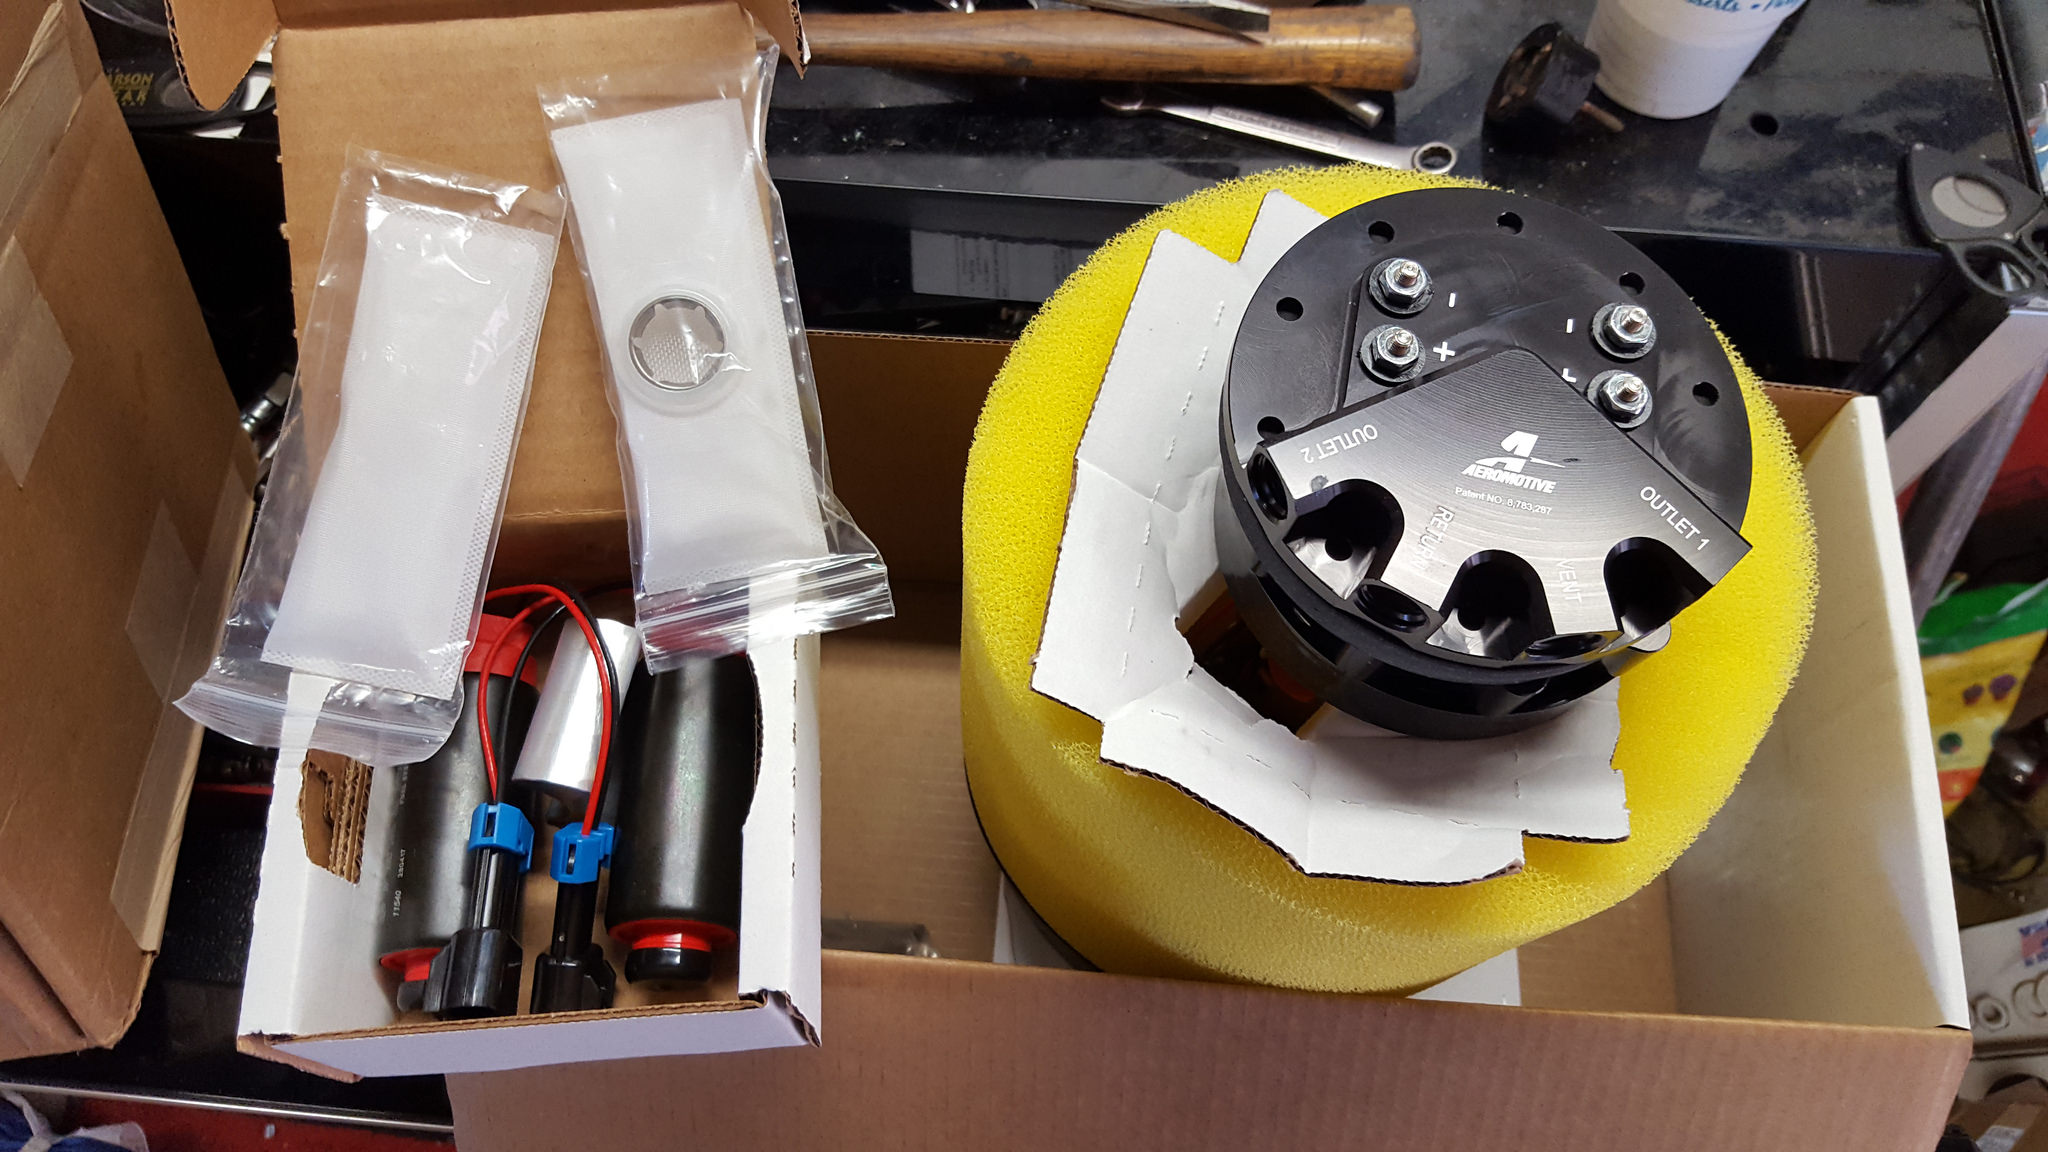
Aeromotive Phantom intank dual 340 LPH pumps
 20170724_164604 by 1SAWB, on Flickr
-
12-04-2017 #26
Registered User
- Join Date
- May 2017
- Posts
- 43
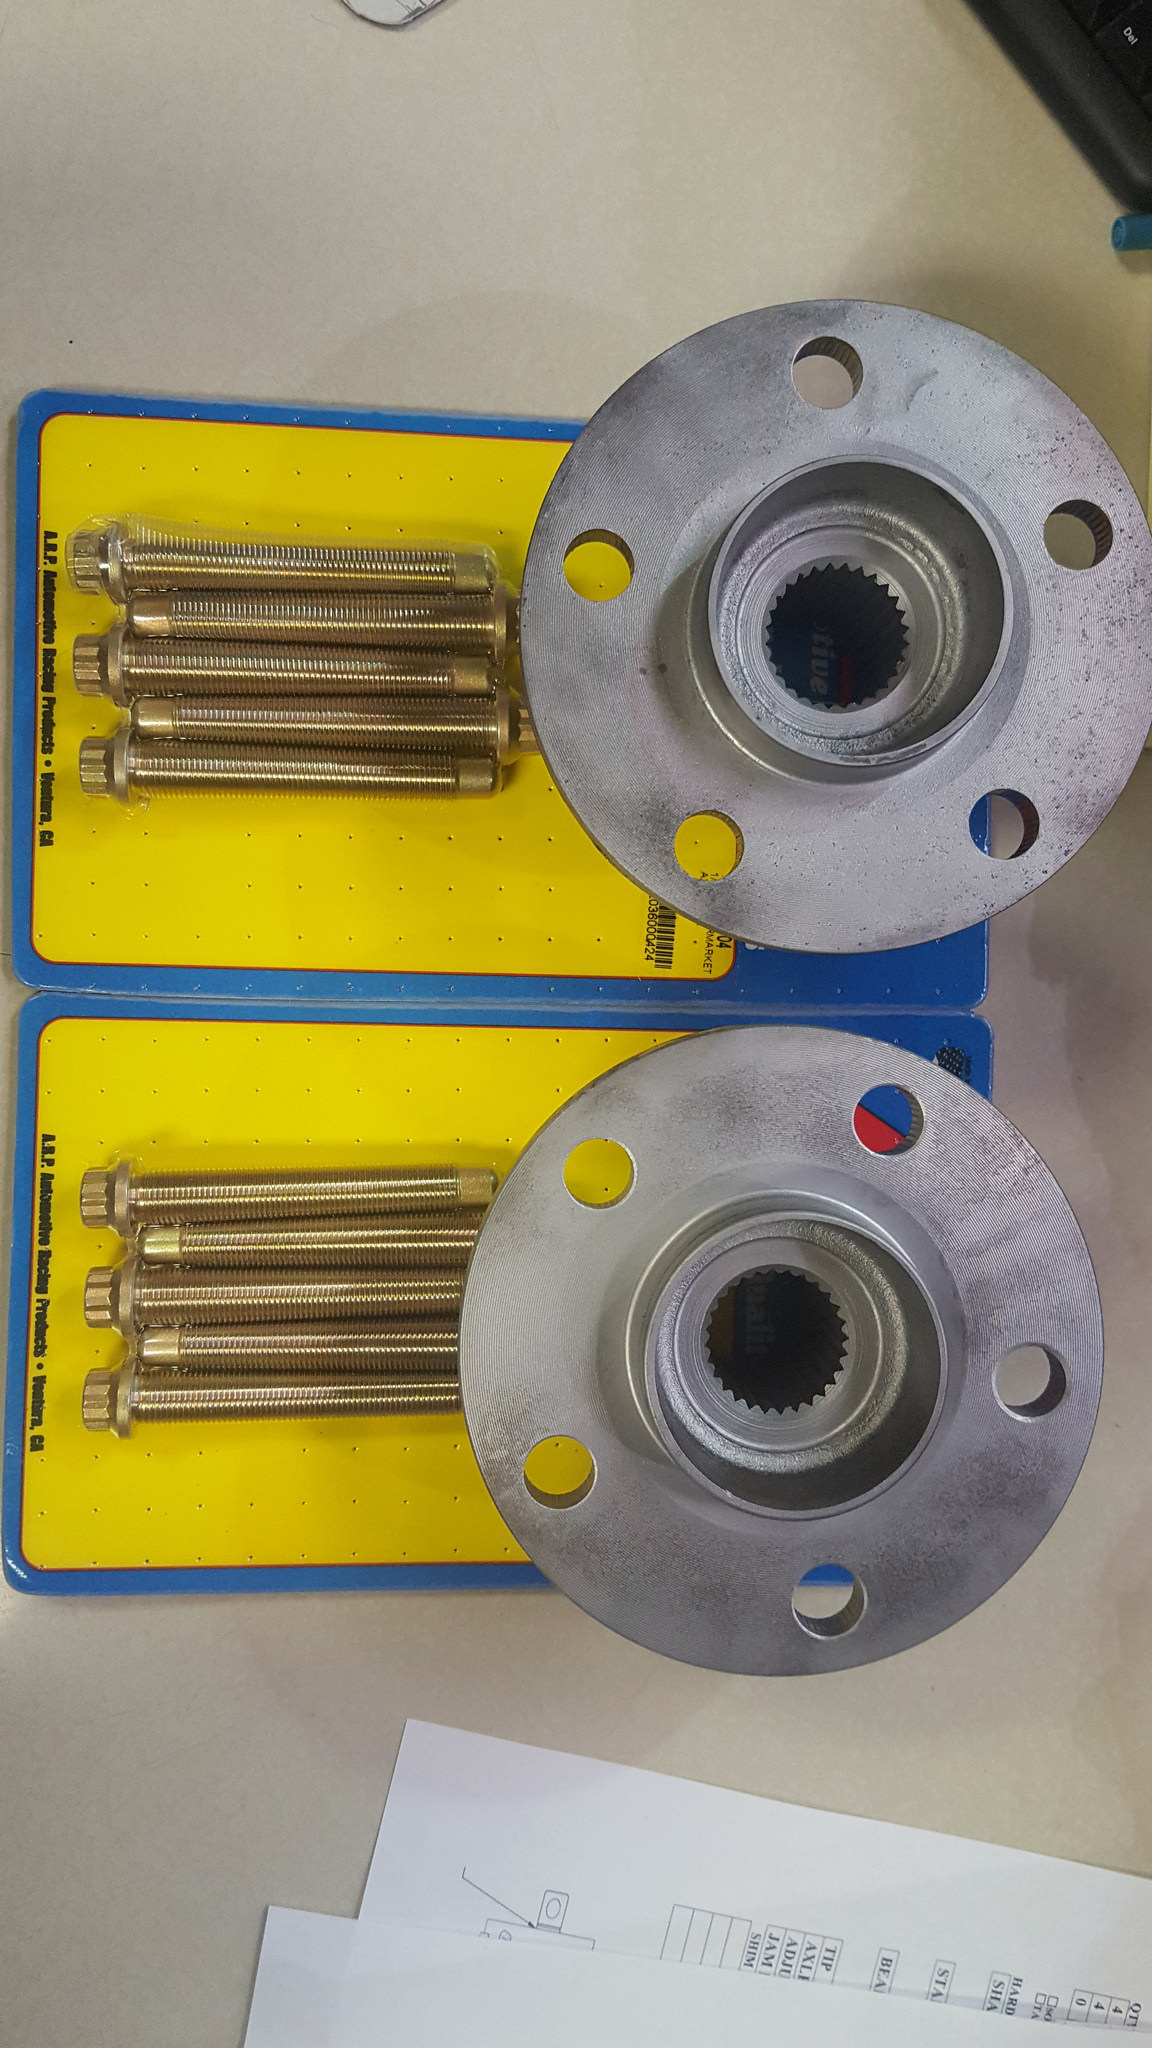
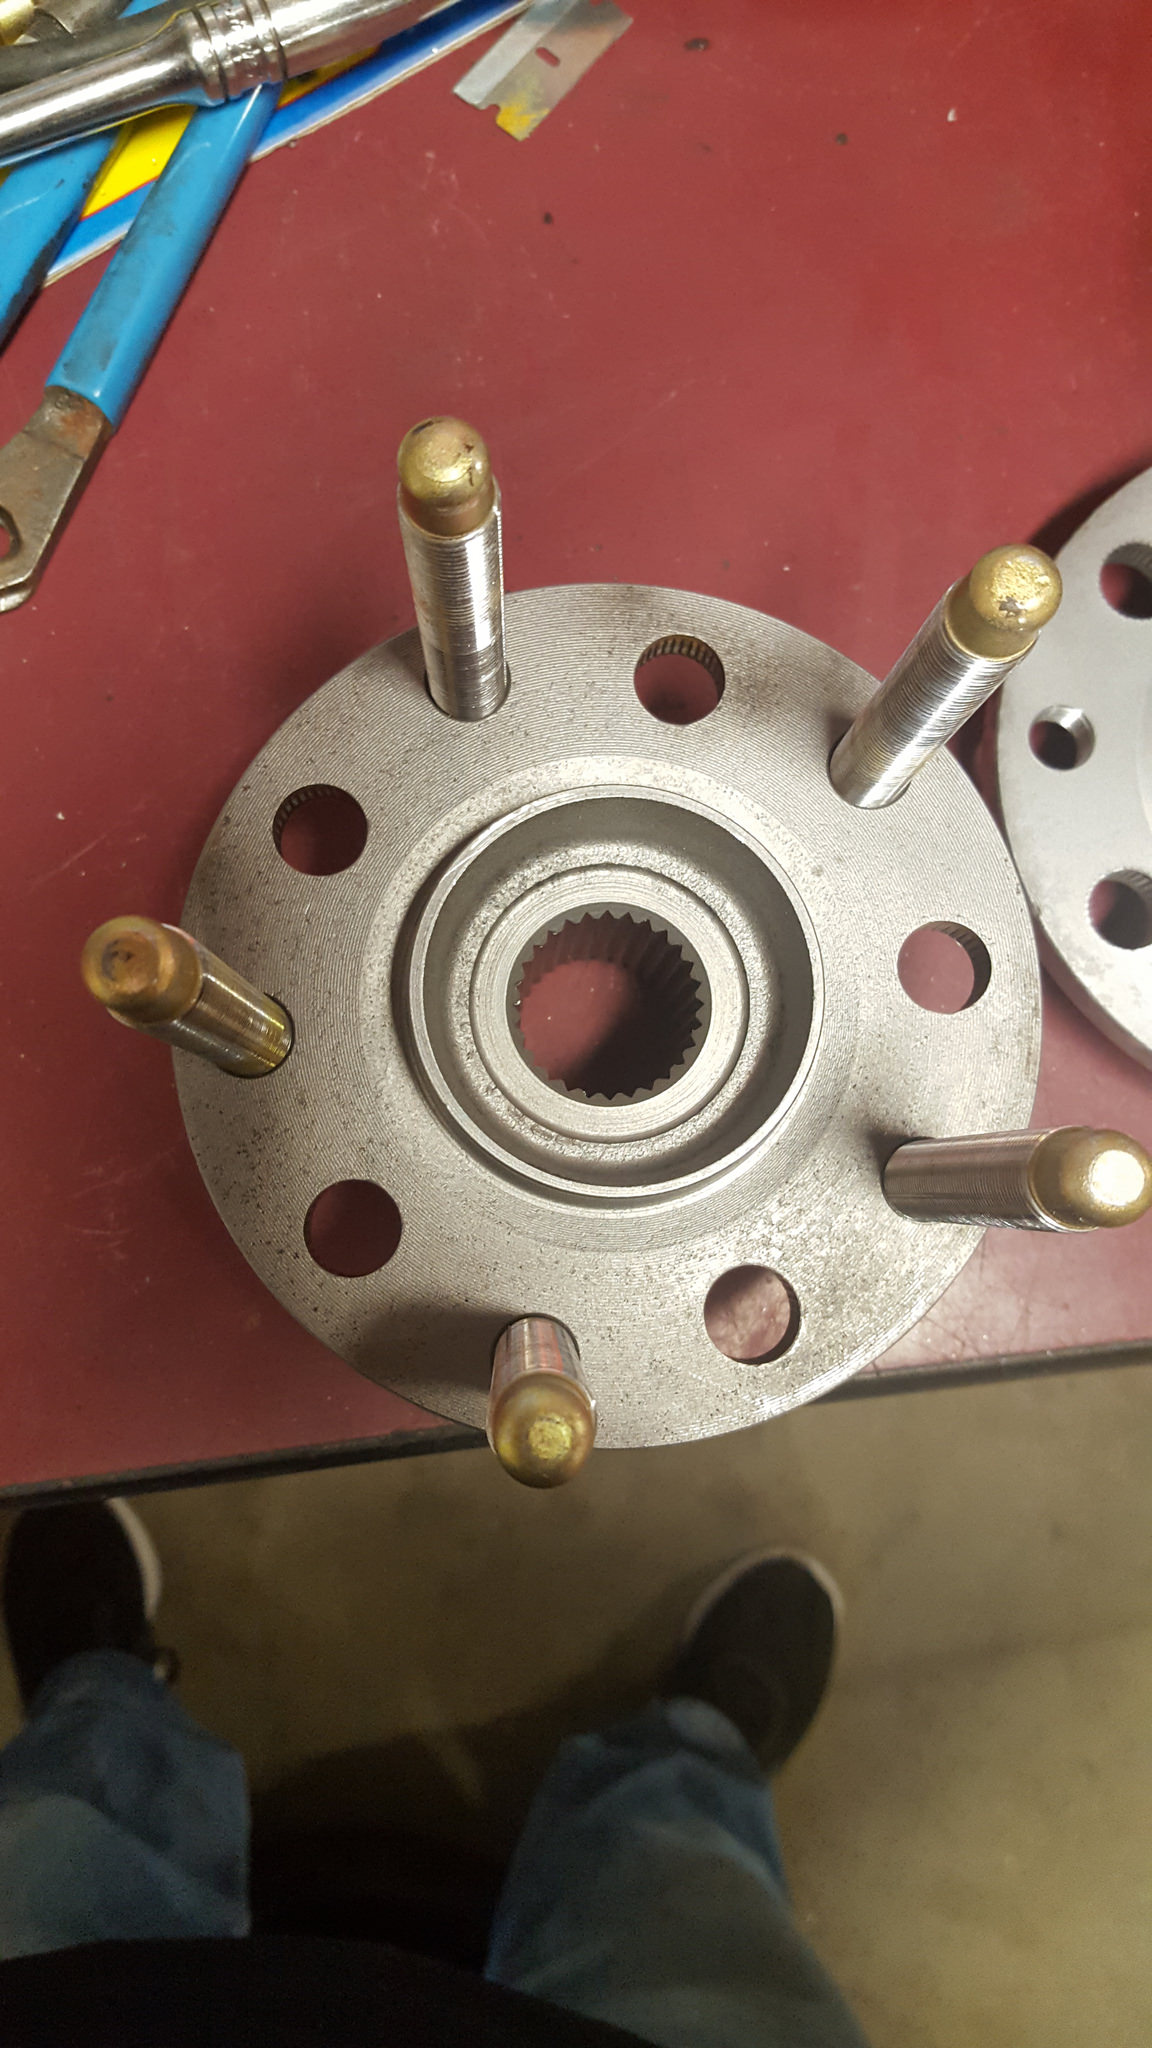
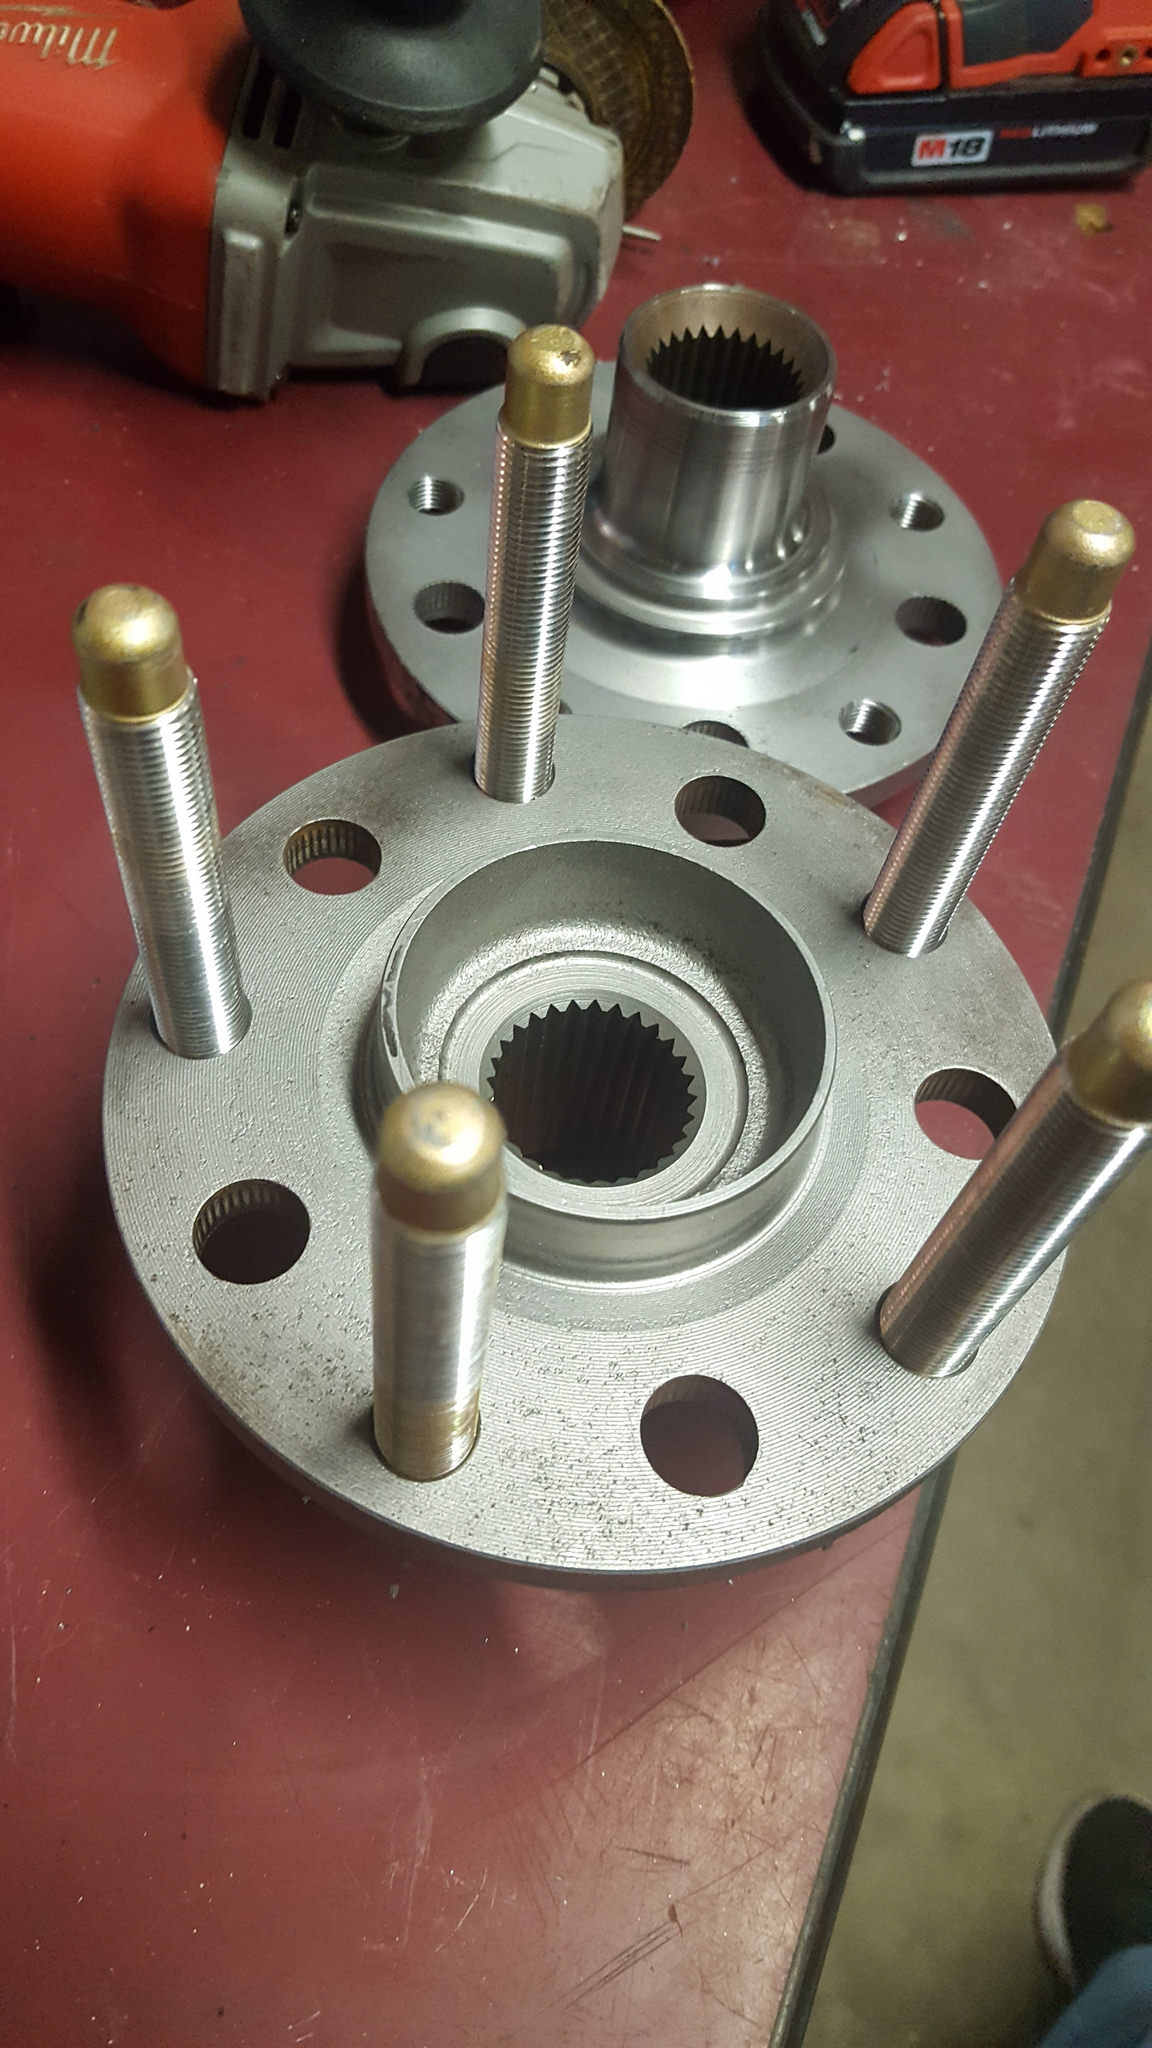
rear wheel hubs cleaned, blasted and ready for new bolt pattern and screw in studs
 2017-12-01_09-11-29 by 1SAWB, on Flickr
-
12-08-2017 #27
 Starting The Transformation
- Join Date
- Aug 2014
- Posts
- 104
Awesome build!
-
12-08-2017 #28
Registered User
- Join Date
- May 2017
- Posts
- 43
Thank you
I'm out in Indianapolis at the PRI show. My Turbo was delivered...unfortunately I didn't have room to take it in my bag.....lol , so I'll have to ship it back with our booth and products. Didnt even open the box yet.....it's killing me
-
12-20-2017 #29
Registered User
- Join Date
- May 2017
- Posts
- 43
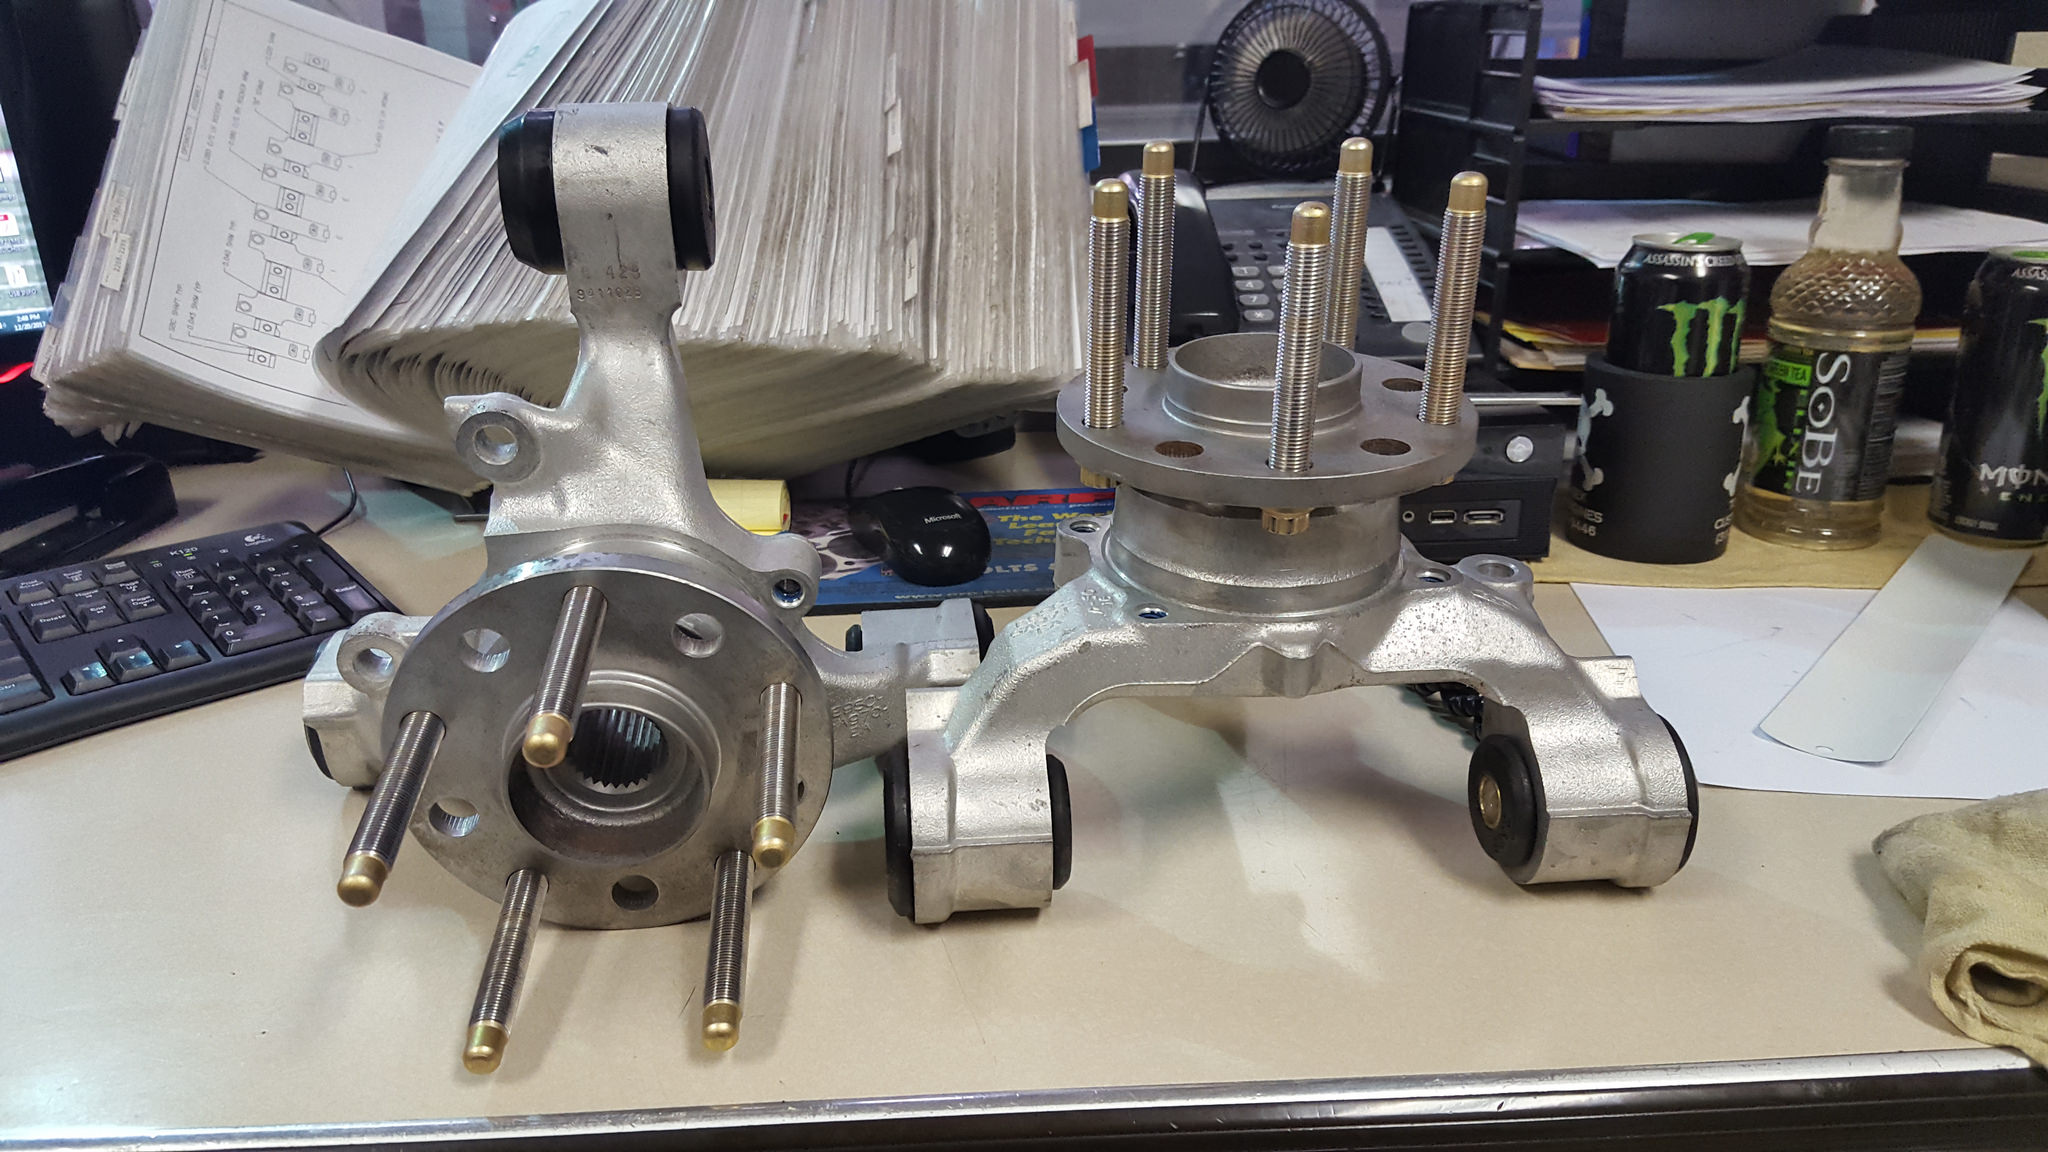
Been hectic lately with PRI, Boys coming home from college for the holidays and just life in general. I did manage to make it out in the garage to remove the bushings from the rear knuckles and install the studs in the hubs. today at lunch I plan on installing the new bushings and hubs in the knuckles
 20171216_160309 by 1SAWB, on Flickr
 20171216_160303 by 1SAWB, on Flickr
also our booth crate made it back from PRI so my turbo made it home
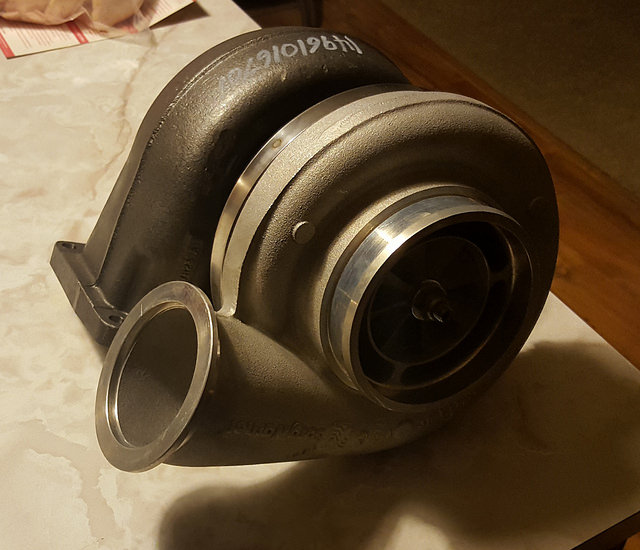 20171218_201711 by 1SAWB, on Flickr
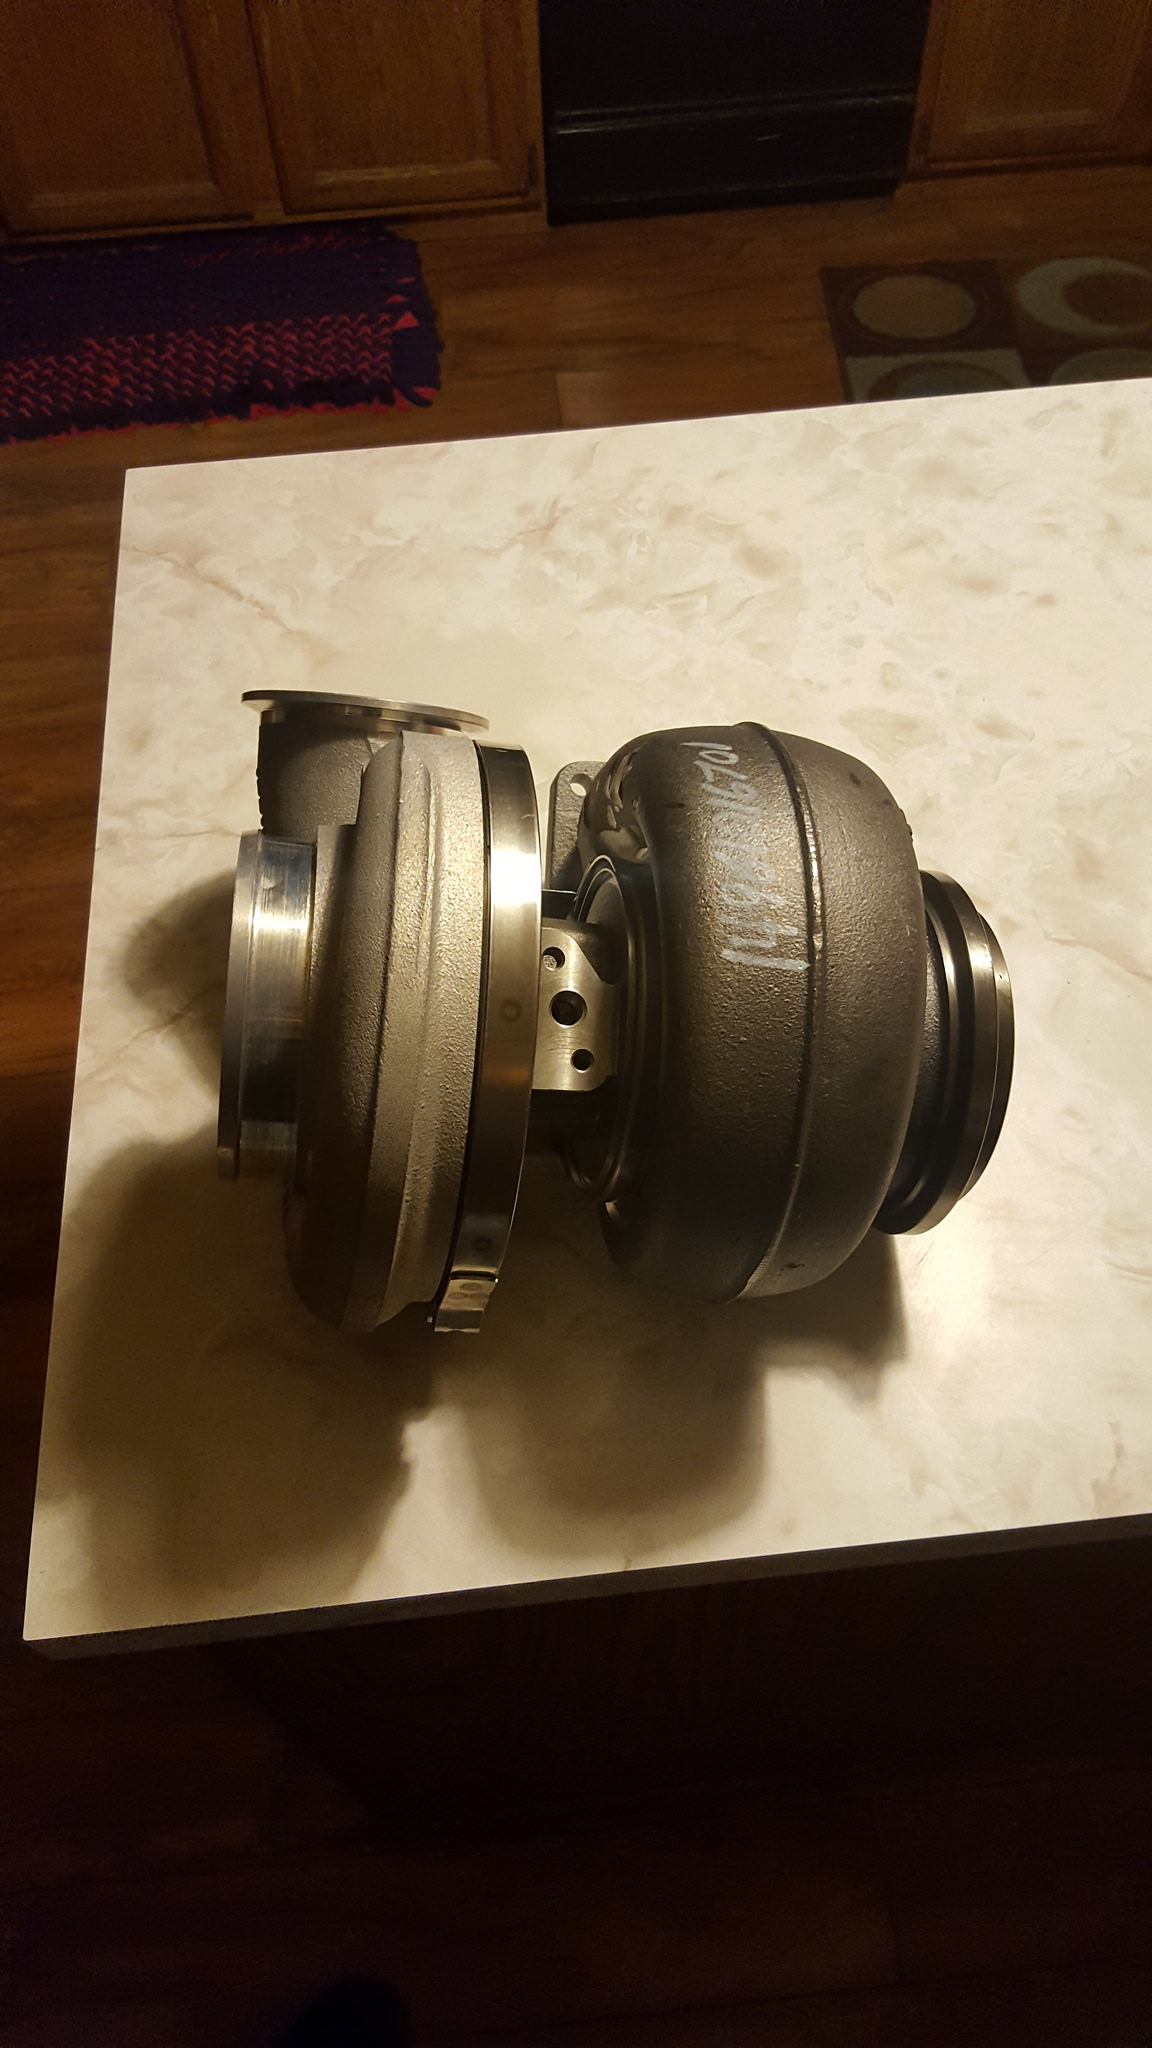 20171218_201557 by 1SAWB, on Flickr
it's freaking huge !!! cant wait
12-21-2017 #30
Registered User
- Join Date
- May 2017
- Posts
- 43
well lunch got burnt up pretty quick. those damn bushings where not fun to install. finally got it and the hubs pressed back in and only went over by 2 minutes...lol
 20171220_144822 by 1SAWB, on Flickr
The snow was flying today so its very cold but I just couldn't resist putting one of the knuckles on and seeing how she looked
 20171220_164200 by 1SAWB, on Flickr
I put a wheel on too.....to damn cold to take a pic. I didn't have my jacket on ........ lol
12-21-2017 #31
Registered User
- Join Date
- Jun 2017
- Location
- Edgewater Co.
- Posts
- 150
Yeah, we're having one of those days here in Denver today, 26 degrees today, was 65 yesterday... Originally Posted by 1SAWB

Joe
01-09-2018 #32
Registered User
- Join Date
- May 2017
- Posts
- 43
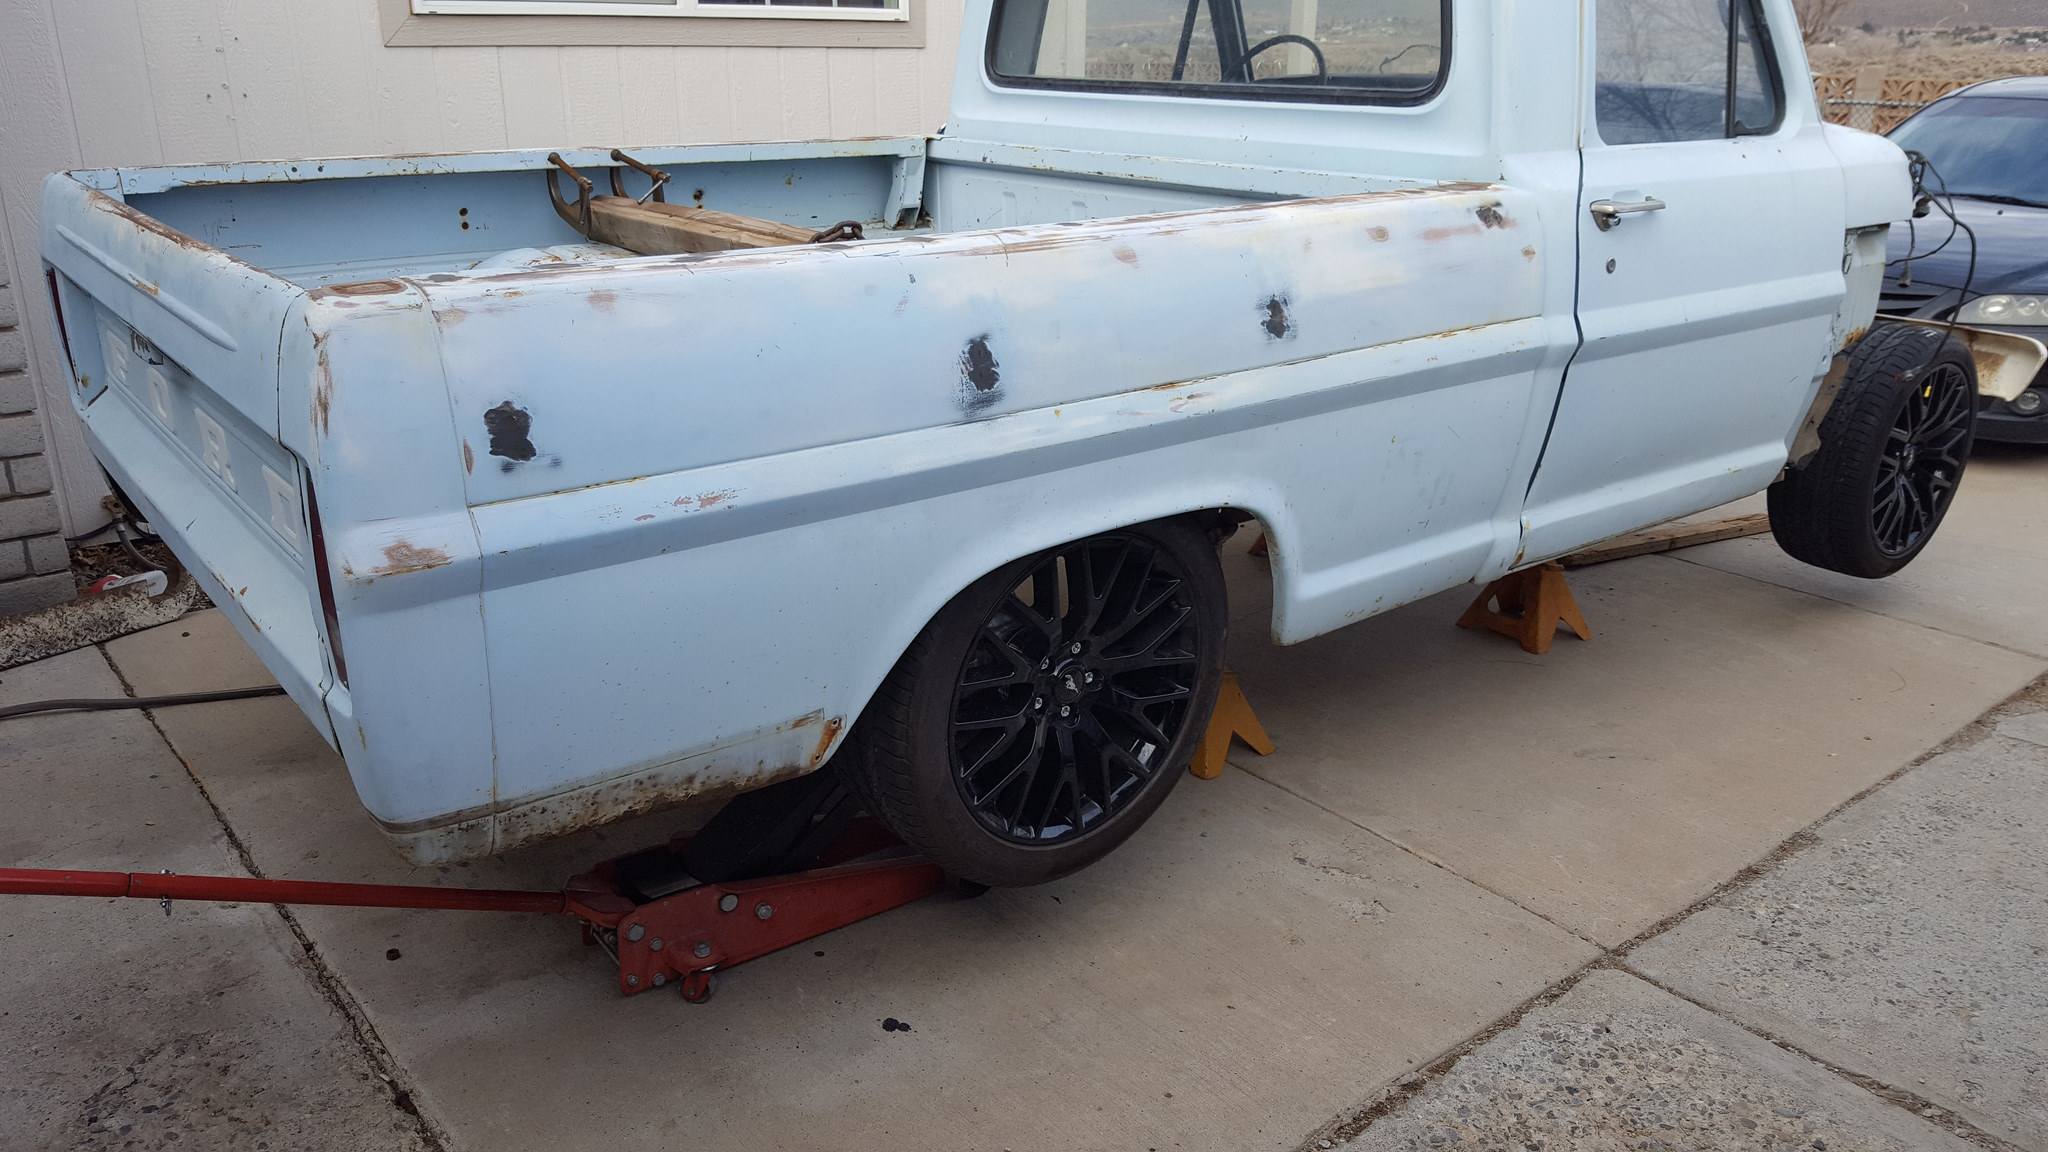
I couldn't help myself in NOT mocking up the rear tires and wheels to see what they look like
 20171223_153714 by 1SAWB, on Flickr
 20171223_153751 by 1SAWB, on Flickr
unfortunately I needed to cut the inner fender wells on the rear to gain much needed clearance for the upper control arm. I mathed out that I would need 4 inches to gain the room needed. in the pics the upper control arm is actually hitting and wouldn't allow any more up travel.
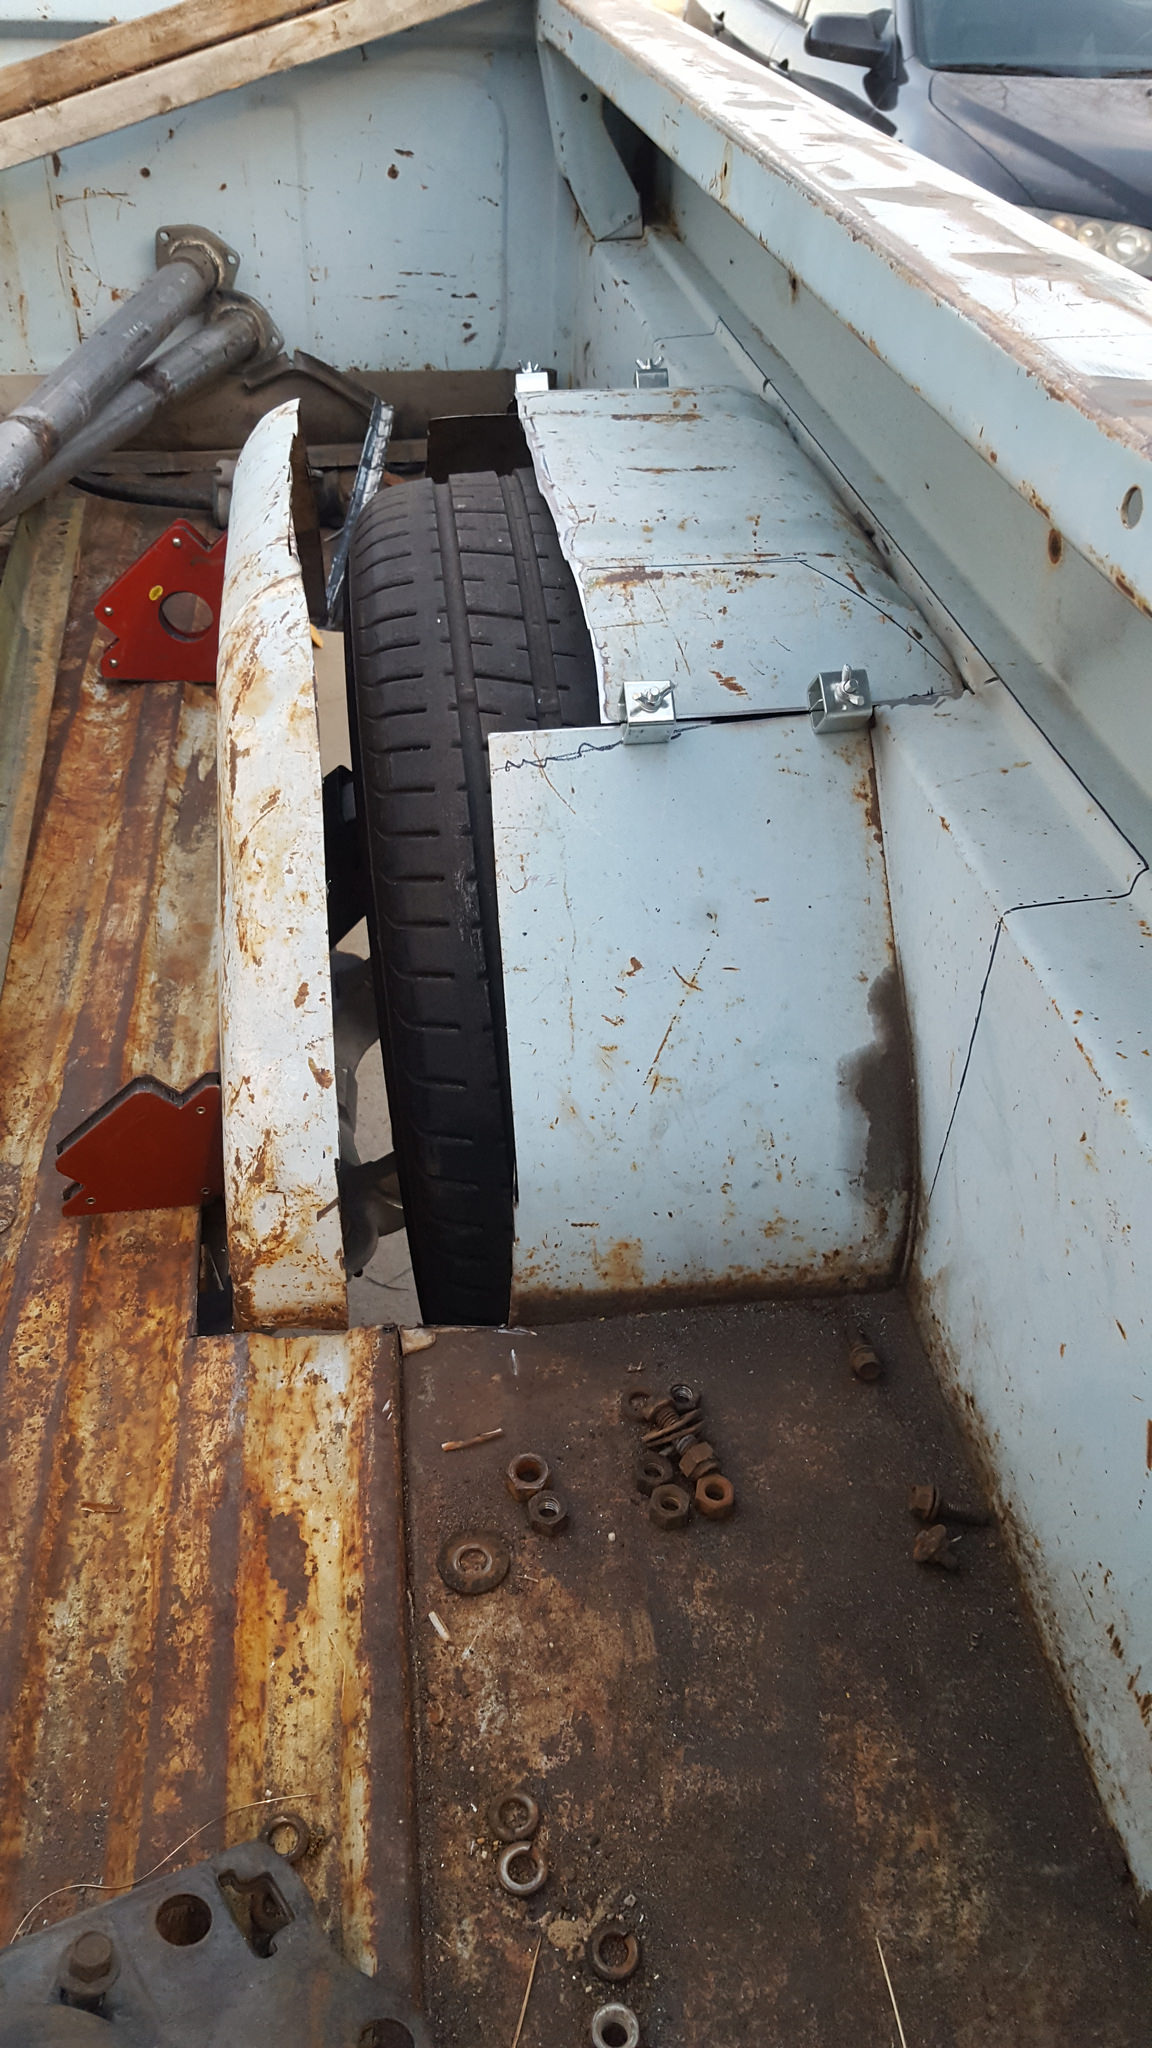
I sat back in a chair smoking a cigar, staring at how I wanted to do this and this is what I came up with
 20171227_163517 by 1SAWB, on Flickr
I cut the inner side of the fender well straight and then the bed floor, removed 4 inches that's needed. I then cut the top portion off and moved it toward the bed side to gain some up travel
 20171227_163528 by 1SAWB, on Flickr
01-09-2018 #33
Registered User
- Join Date
- May 2017
- Posts
- 43
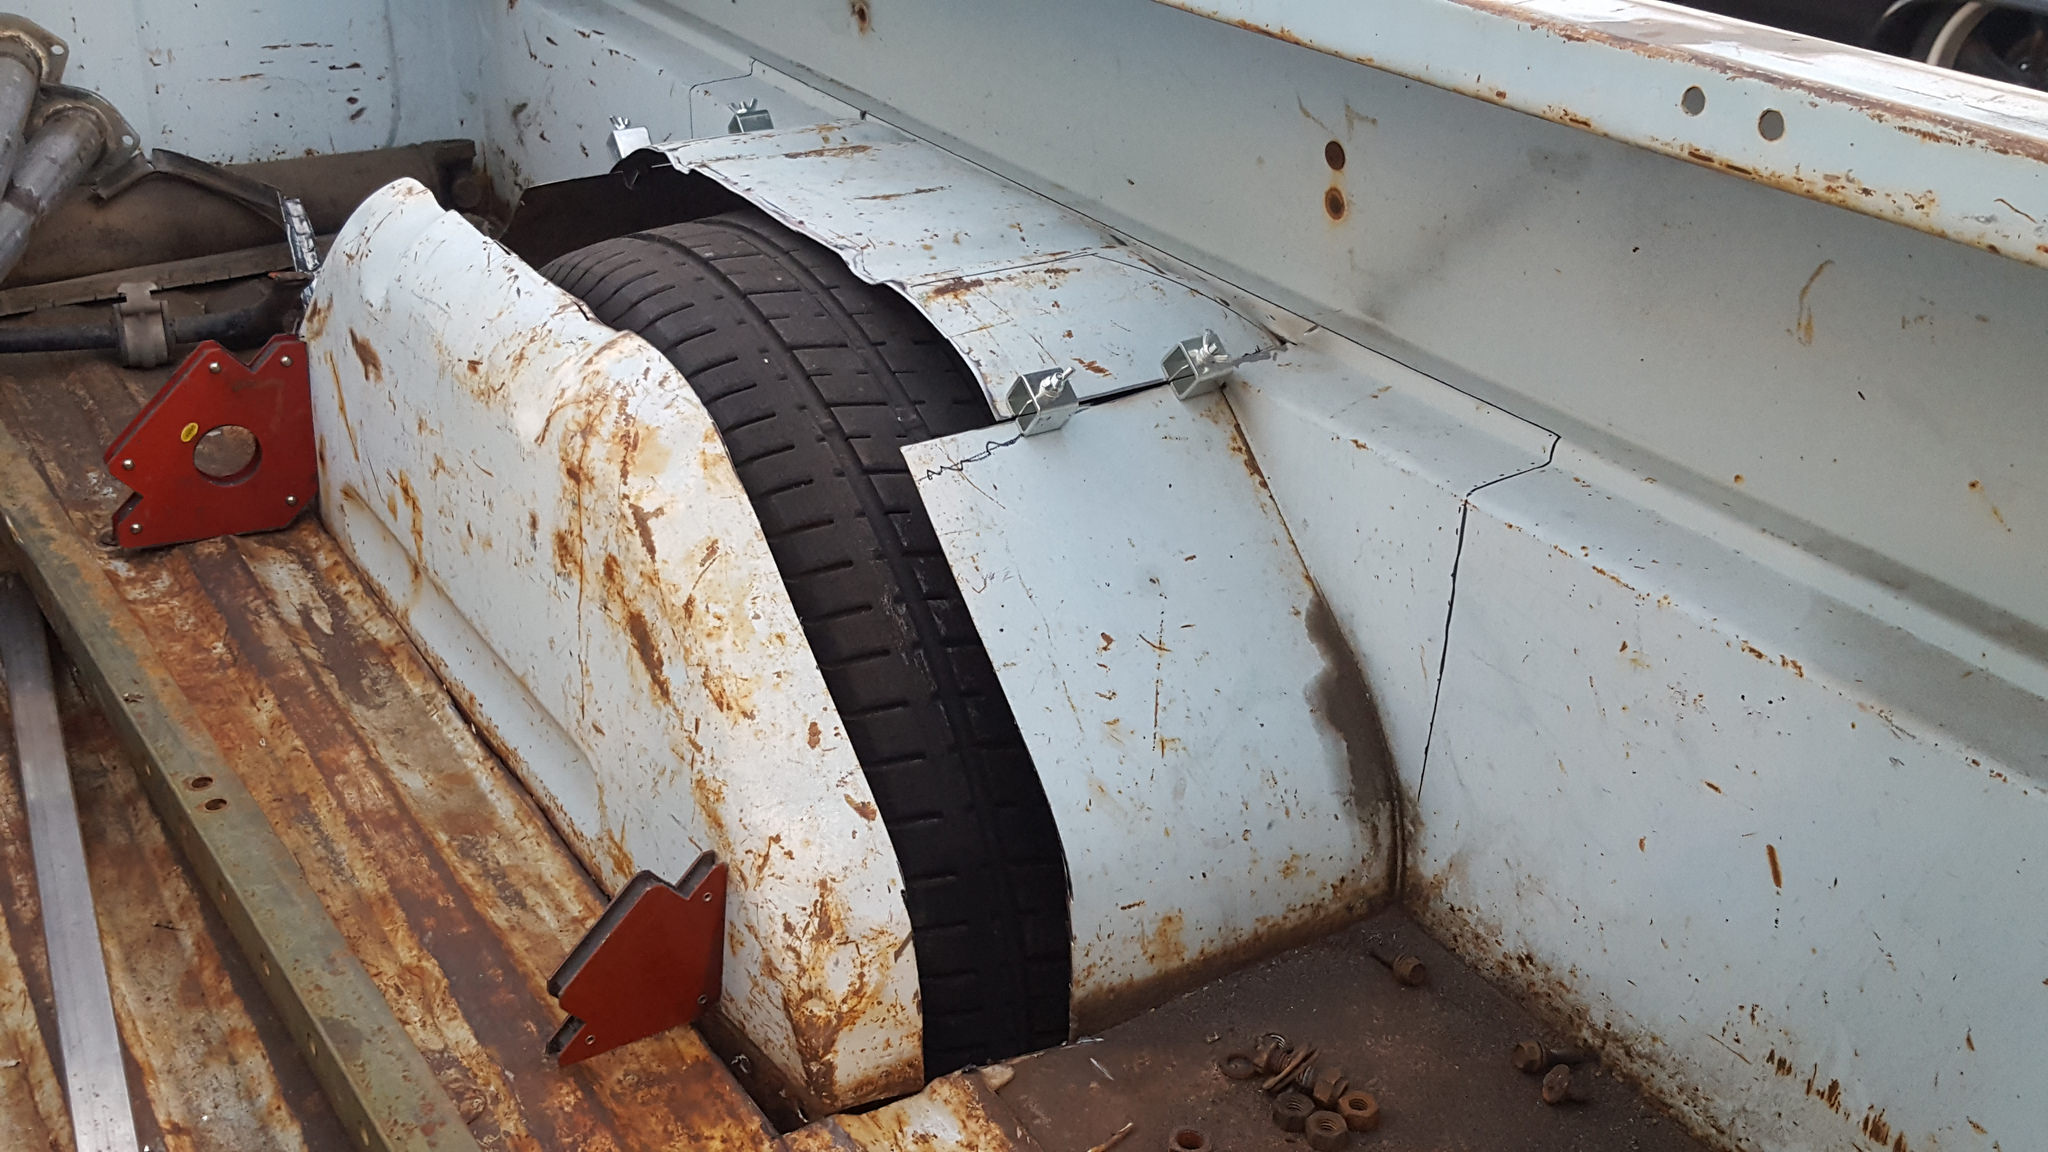
once I had it all cut up I re mocked the tire up and I like it much better
 20171227_155024 by 1SAWB, on Flickr
I gained a fair amount of much needed up travel. I like the stance so much I'm now thinking air ride
once I had all this done the flu came over and started kicking my butt so im out for a bit
I also scored a complete virgin long bed to cut up and use the inner fender wells. that should be here any day now
01-10-2018 #34
Registered User
- Join Date
- Feb 2011
- Location
- Indpls, IN
- Posts
- 613
Looking Good!
02-01-2018 #35
Registered User
- Join Date
- May 2017
- Posts
- 43
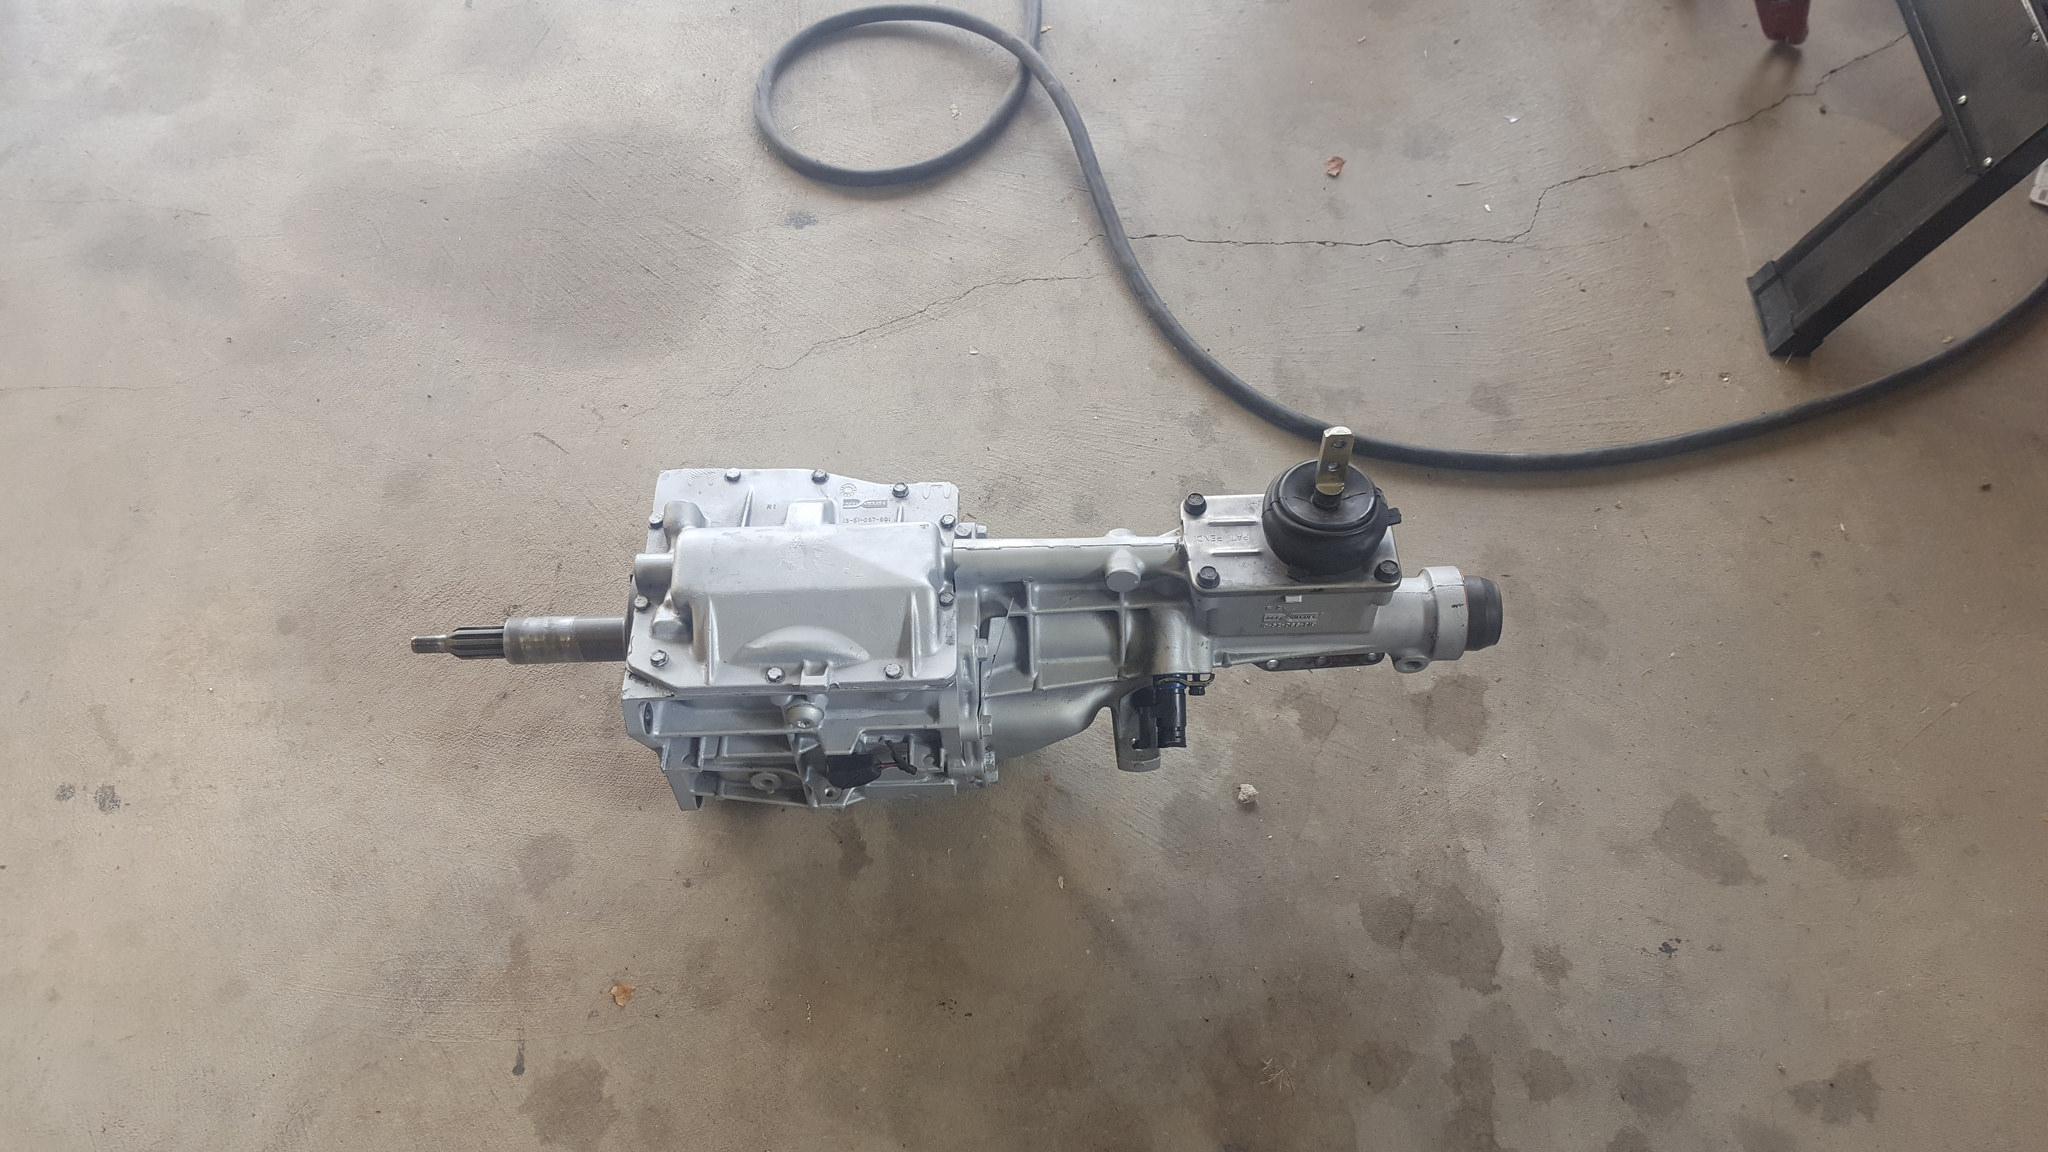
Got some work put in after the whole flu thing kicking my butt. I did end up going air bags front and rear. rears are D2600's and I did the Shockwaves in the front. i sat down and really rethought this build and i felt like i was putting the cart before the horse on some things so I made some decisions to keep this moving forward. from day one on this build i wanted to keep the 6 cylinder that i had built and have less then 1 mile on. i got side tracked by the LS and started funneling money towards it. I have a ton of parts for the LS but still a ways off. i made the move back to my original plan of the 6 cylinder first then the LS. that way i can still be out driving it and playing ......................also make me hungry for the LS even more. so i sent some parts back that i had ordered and bought the front Shockwaves. during my "Down time" i came across a rebuild T5 online for sale. i messaged the guy and come to find out it was an ex employee. He just wanted off of it so i bought it for a whopping $80.00 and delivered to me house
 20171229_125902 by 1SAWB, on Flickr
02-01-2018 #36
Registered User
- Join Date
- May 2017
- Posts
- 43
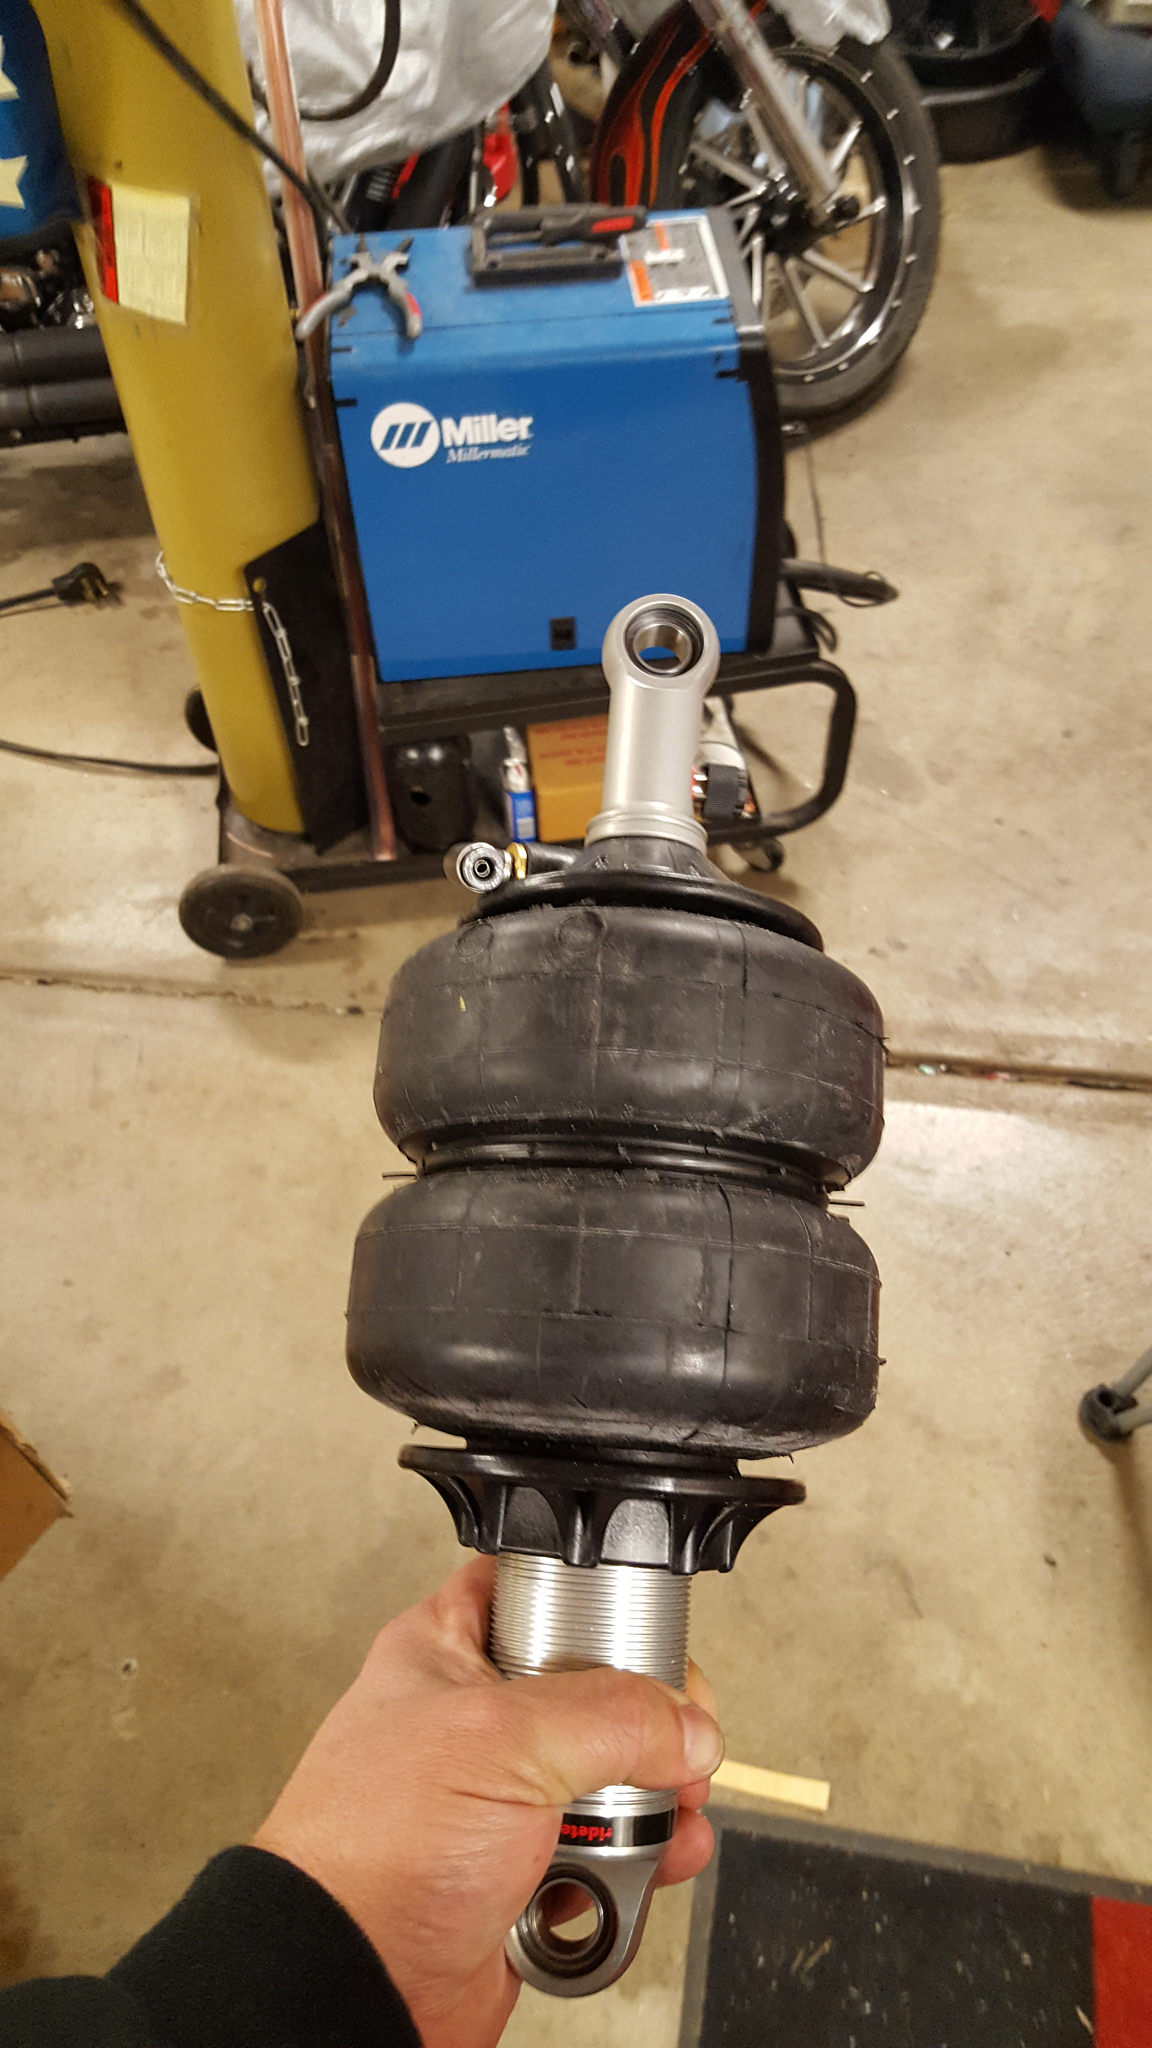
The front shockwaves came in and like a kid a Christmas I tore into it to start drooling
 20180124_212213 by 1SAWB, on Flickr
kinda bummed that I got the new style plastic end and not the old Billet. i'm just not a plastic kinda guy
02-01-2018 #37
Registered User
- Join Date
- May 2017
- Posts
- 43
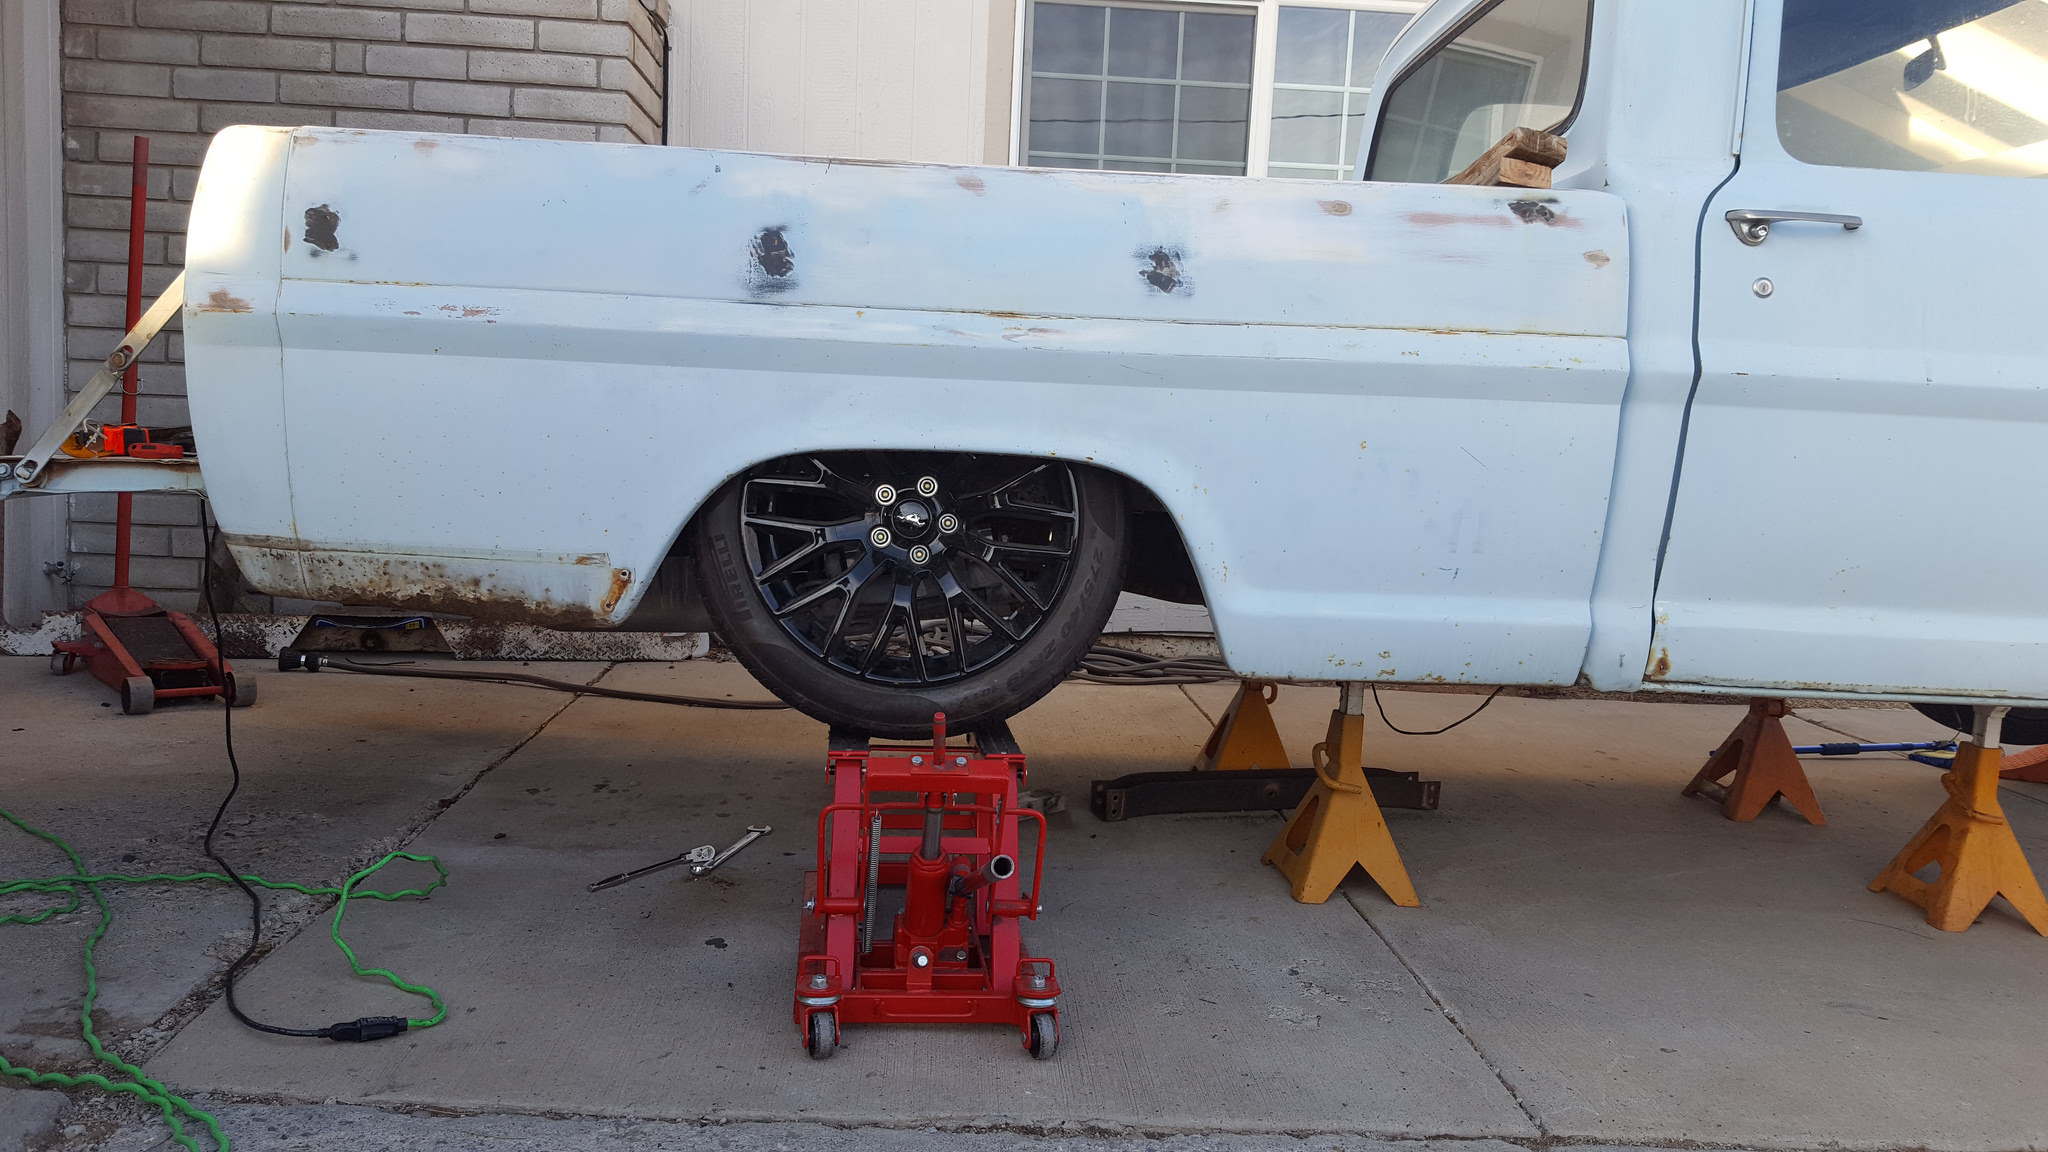
last weekend I got the rear bag's in and played with them.
Here is all the way up
 20180127_170257 by 1SAWB, on Flickr
This will be ride height
 20180127_170145 by 1SAWB, on Flickr
And aired out
 20180127_170221 by 1SAWB, on Flickr
02-01-2018 #38
Registered User
- Join Date
- May 2017
- Posts
- 43
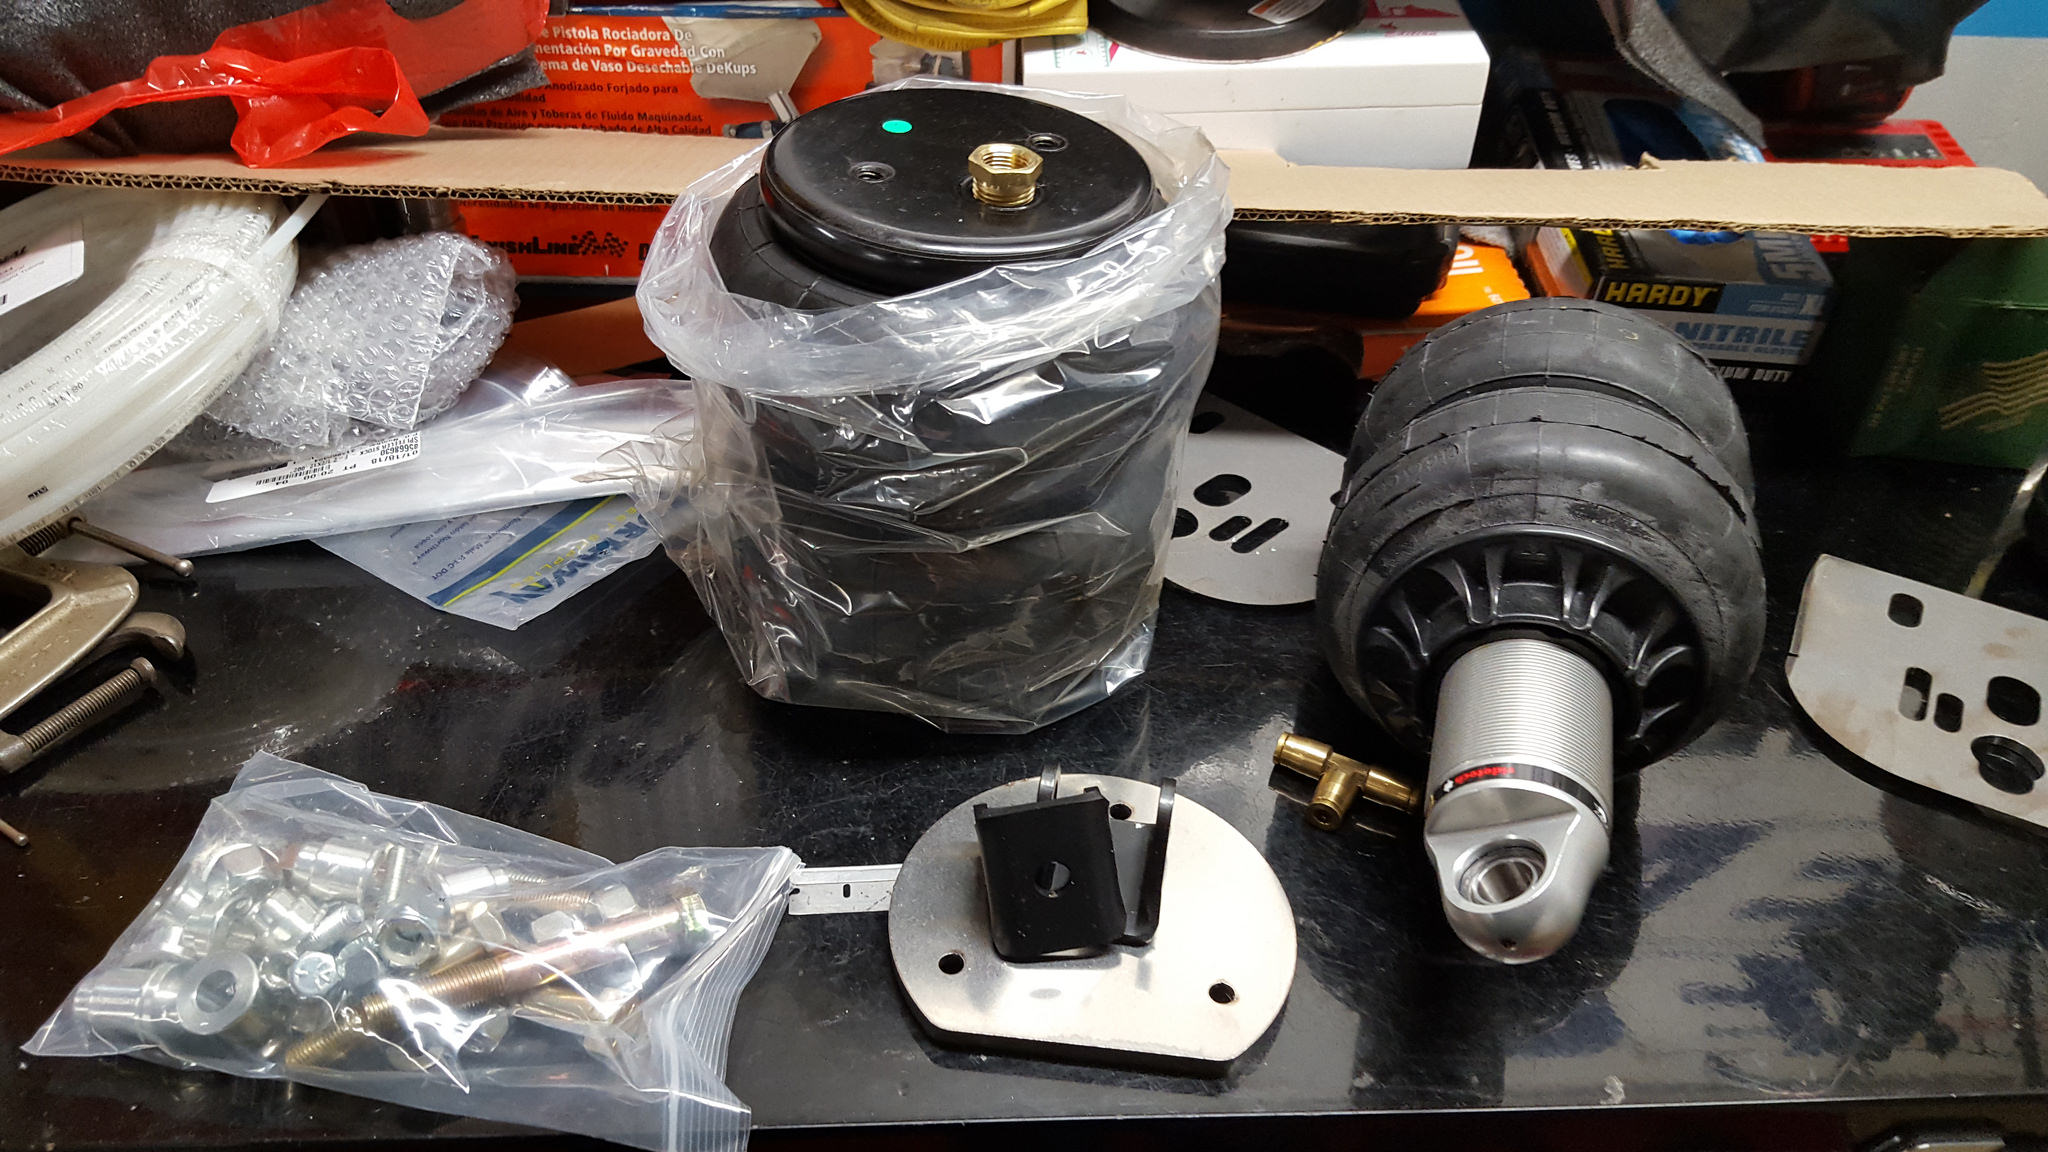
Here is a pic of the front and rear air bags on my tool box
 20180124_212441 by 1SAWB, on Flickr
still not sure why ridetech doesn't plate the upper mount. mine are off getting Black Zinc plated right now then i can do the front
i Was chatting with one of the Engine Builder's i deal with about an engine oil cooler he offer's for the Sprint car guy's. they badass dual pass cooler's perfect for engine oil cooler and i'll use the other for Tranny when the LS goes in
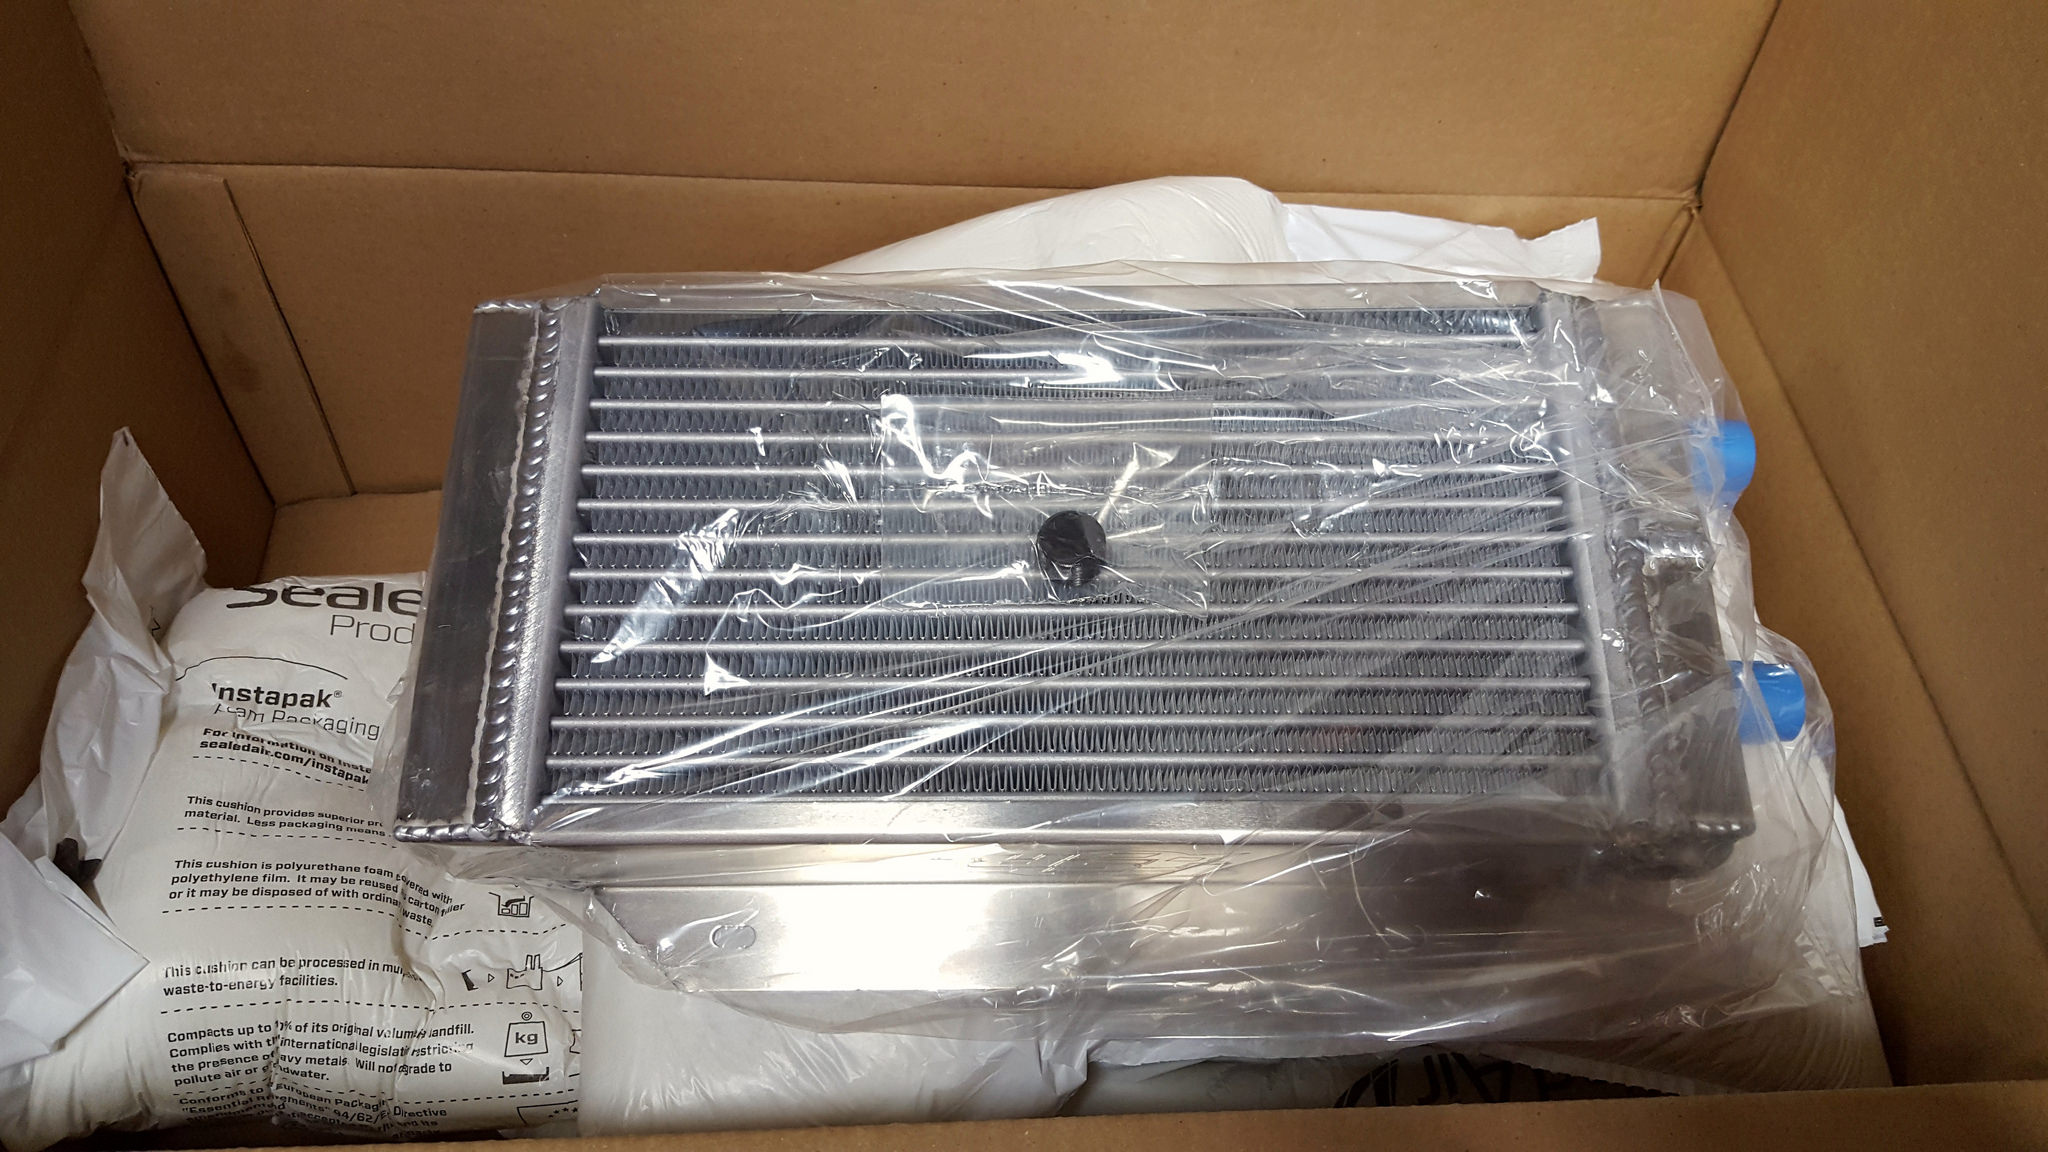 2018-02-01_07-55-46 by 1SAWB, on Flickr
02-06-2018 #39
Registered User
- Join Date
- May 2017
- Posts
- 43
Well......the front shockwave bags are in and very unhappy with them......pics to follow if Flickr ever allows them to upload
02-07-2018 #40
Registered User
- Join Date
- May 2017
- Posts
- 43
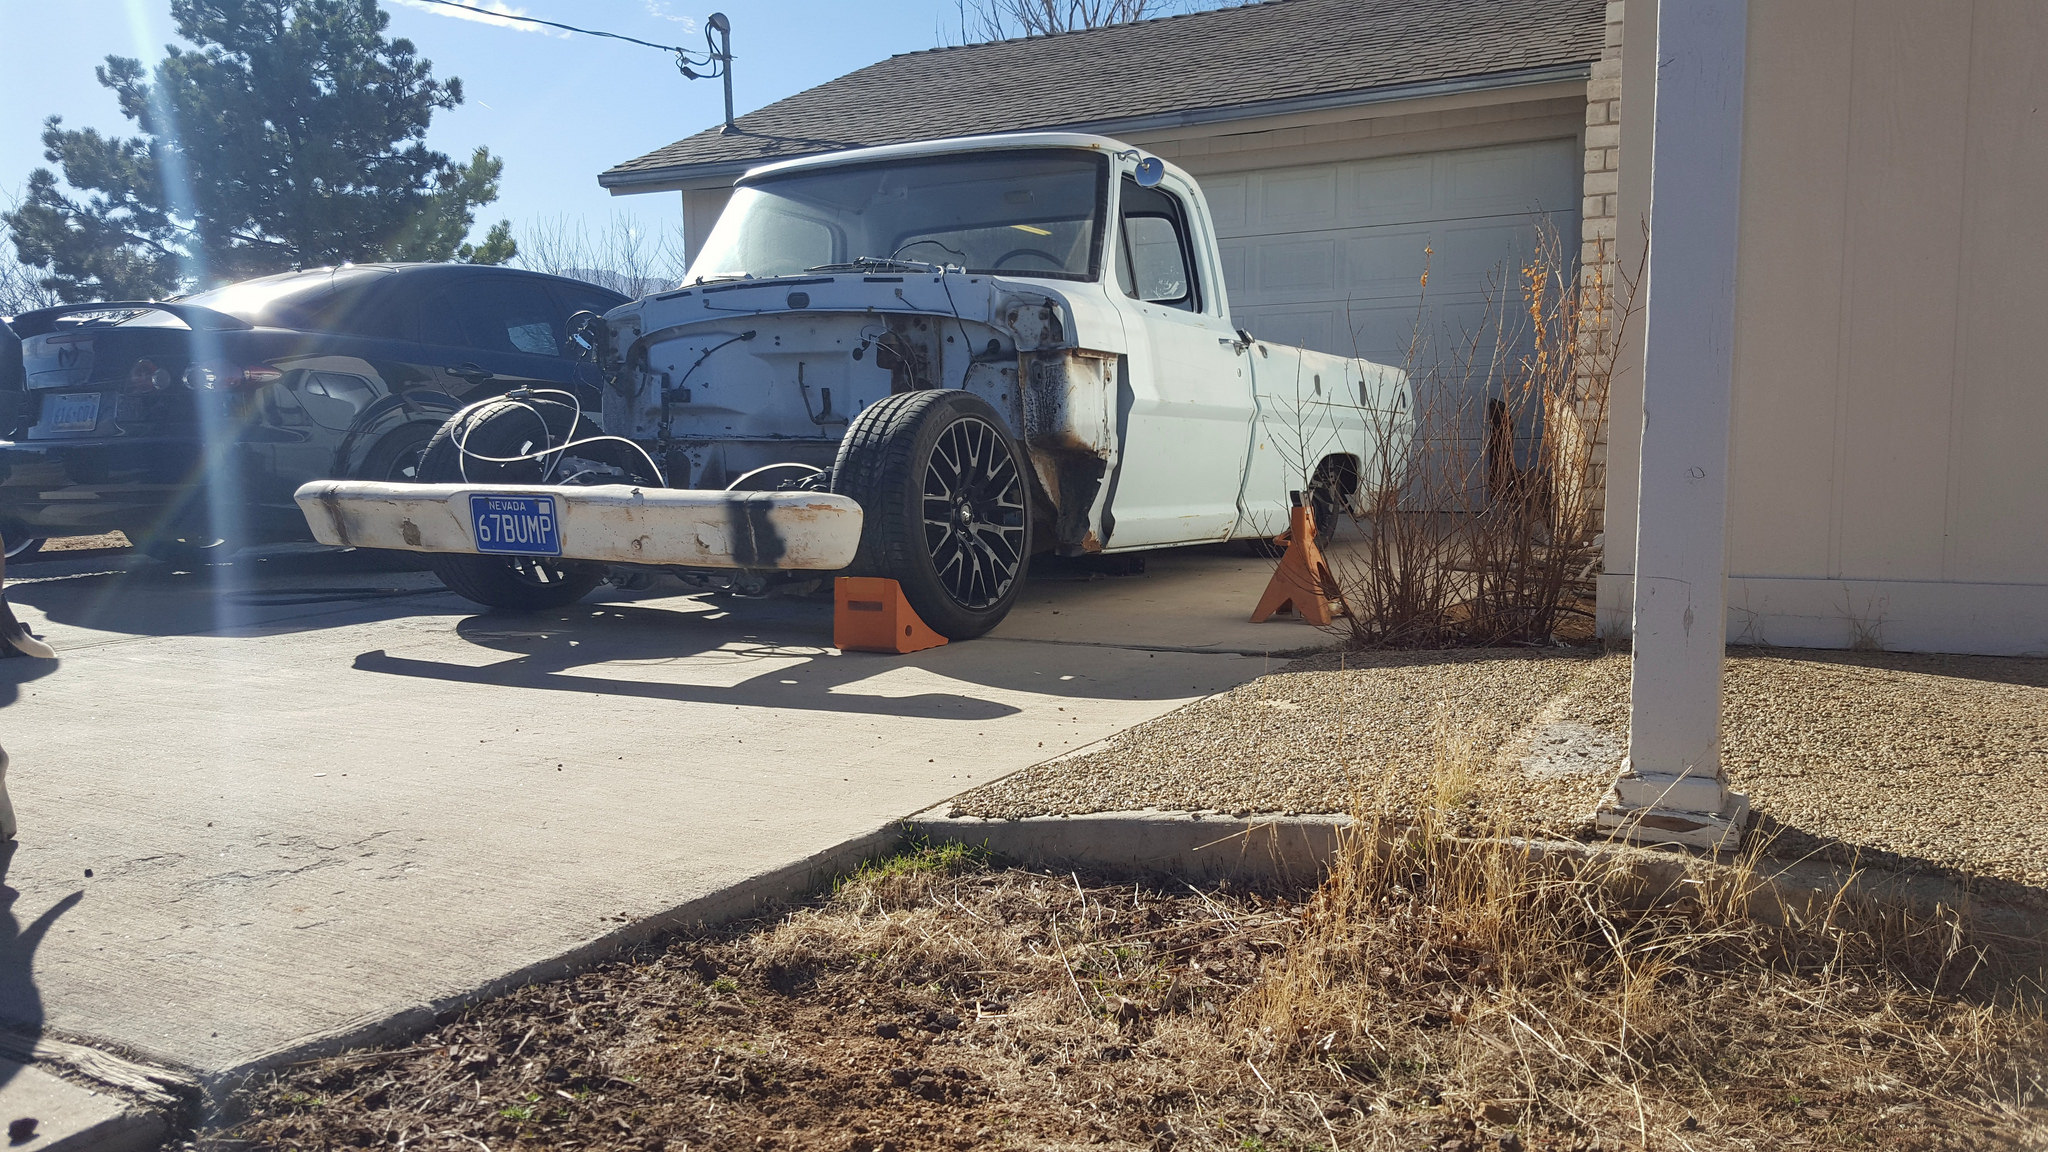
Ok so the weather broke a bit and life slowed down long enough for me to install the ridetech Shockwaves in the front of the truck on Super bowl Sunday. Took longer to get the old "strut" out then it did to install the Shockwaves. first impression when I opened the box was that they are just badass !! I knew on the front side that I would need to cut the sway bar end link stud off to gain clearance on the bag so I took care of that prior to install, quick cut off wheel job and done no biggie. As the install progressed i found that i really didn't care for the all aluminum spacer's, especially where the bolt made contact when I torque it I could actually see material come off of it. The other thing that was disheartening was the top plate was just plain steel. with its location it will rust badly being exposed to elements and basiclly in a cup on top of the aluminum cradle . I sent mine out to get powder coated. the other thing i wish i had paid attention to was that same top plate does not have drain holes in them. with it bolting directly to where the factory strut was it creates a cup for dirt, Water and debris to collect. If I had noticed this prior to powder coating i would have simply drilled a hole then coated.
Once the bag's where installed I couldn't wait to see how it sat. I threw together some airlines and a ball valve. added some air, jacked it back up, removed the jack stands and let her down.
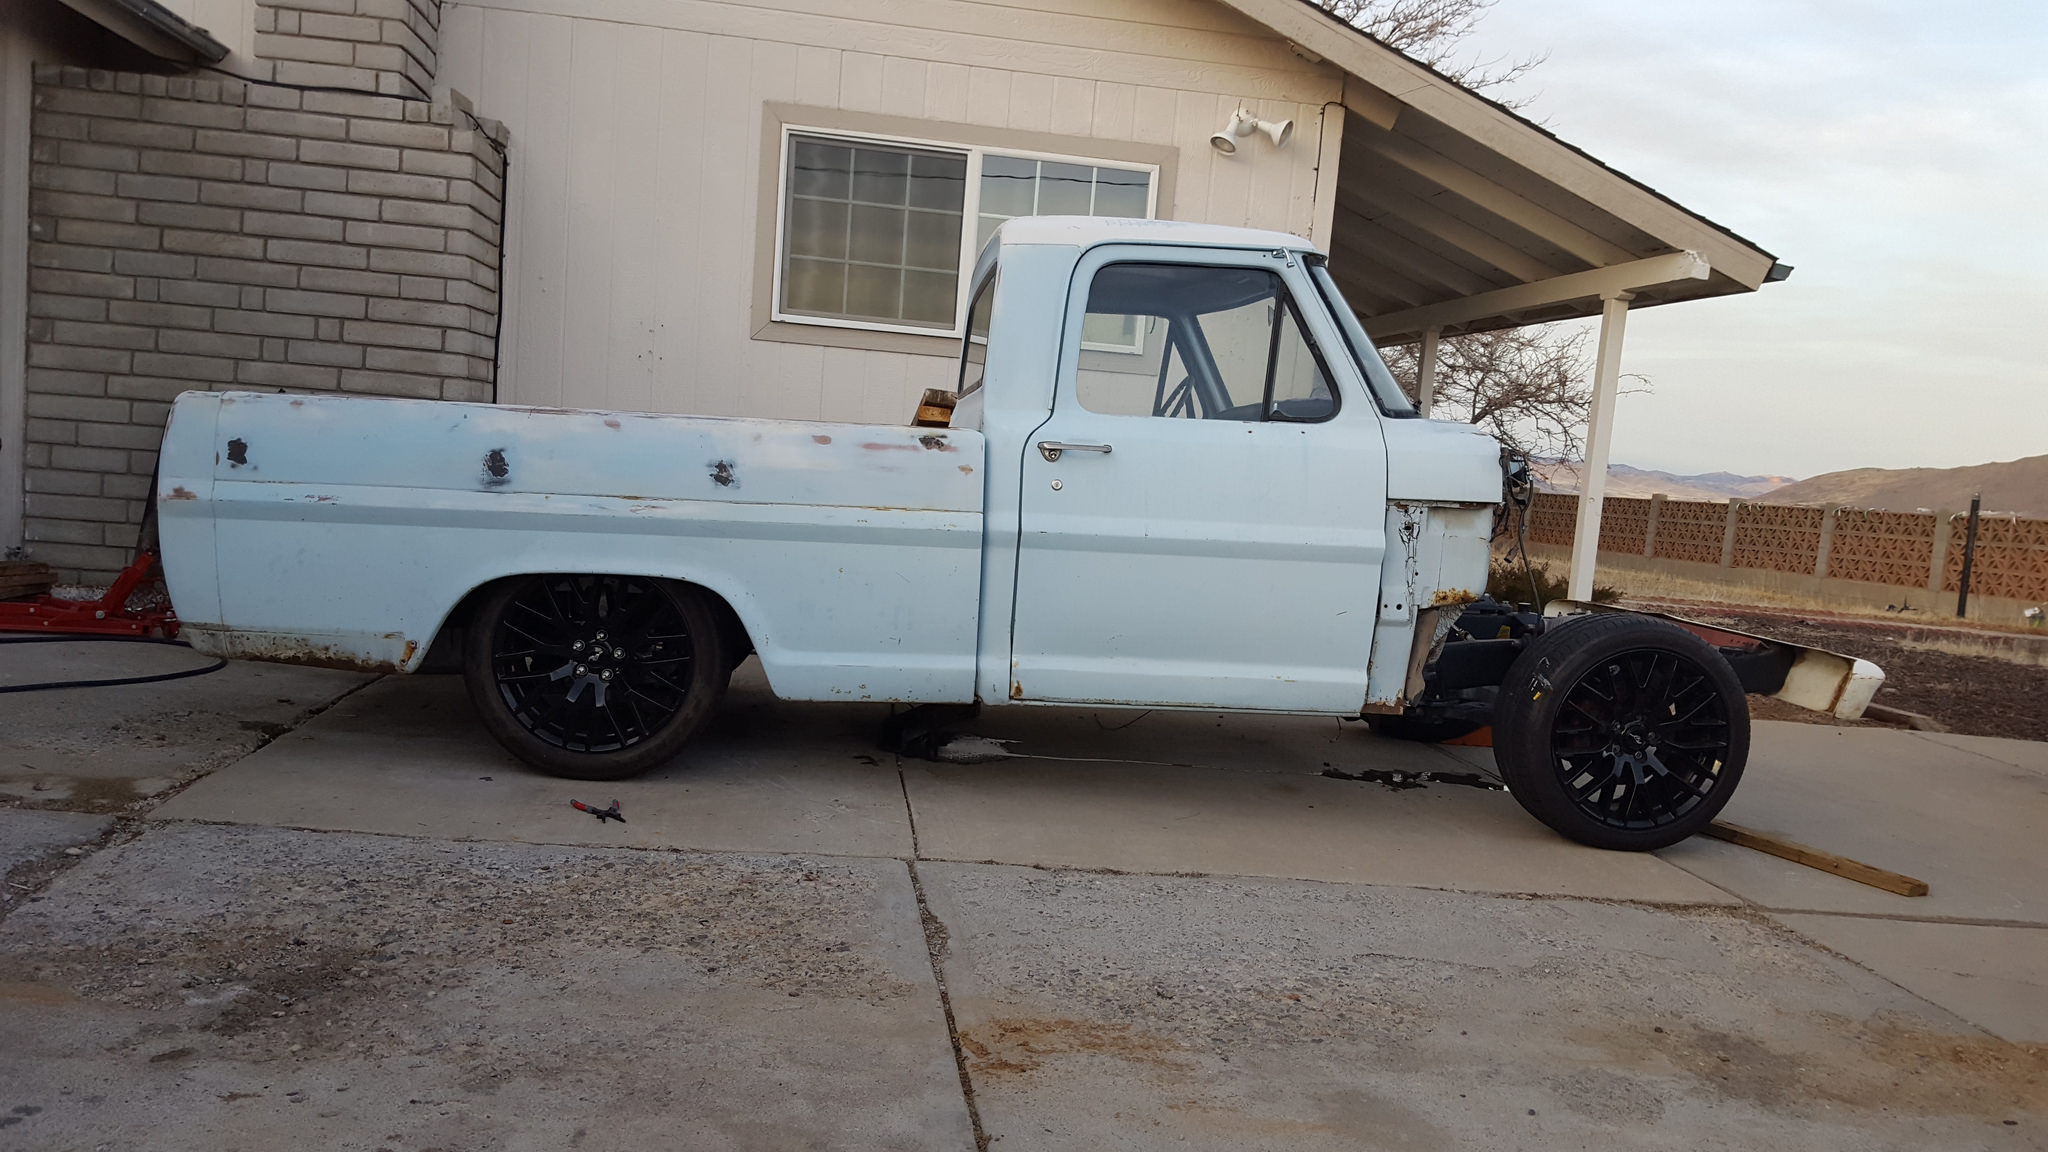
This is what we got
 2018-02-06_11-18-55 by 1SAWB, on Flickr
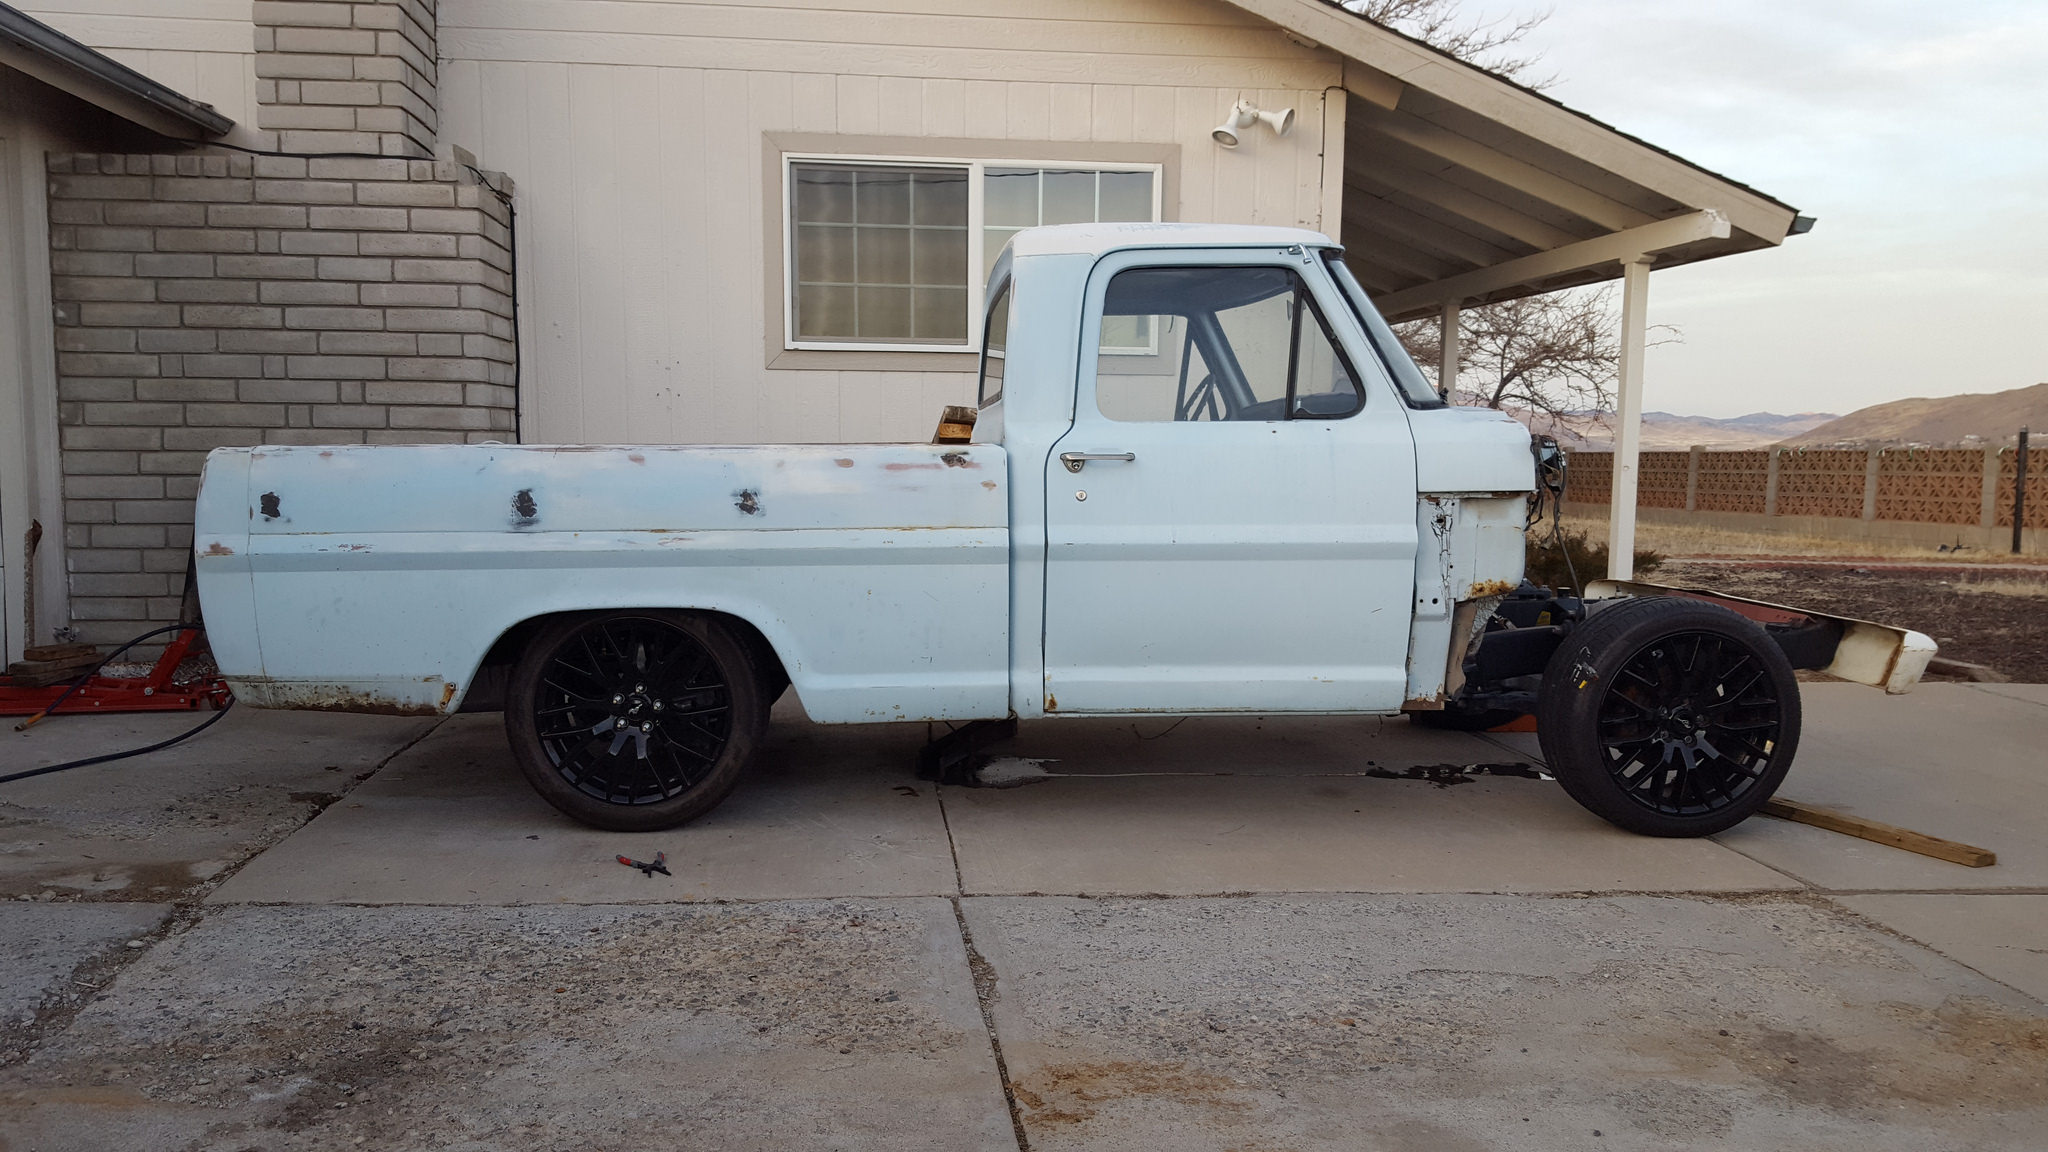
Let all the air out and she looks like this
 2018-02-06_04-52-17 by 1SAWB, on Flickr
now at this point i was like a kid at Christmas. i added air........let the air out....added air .......called the family out to check out how it looked
Then I found that the sway bar end link hits the bag so hard when all the way down that it actually pushed the deflated bag in at least 3/8 on an inch
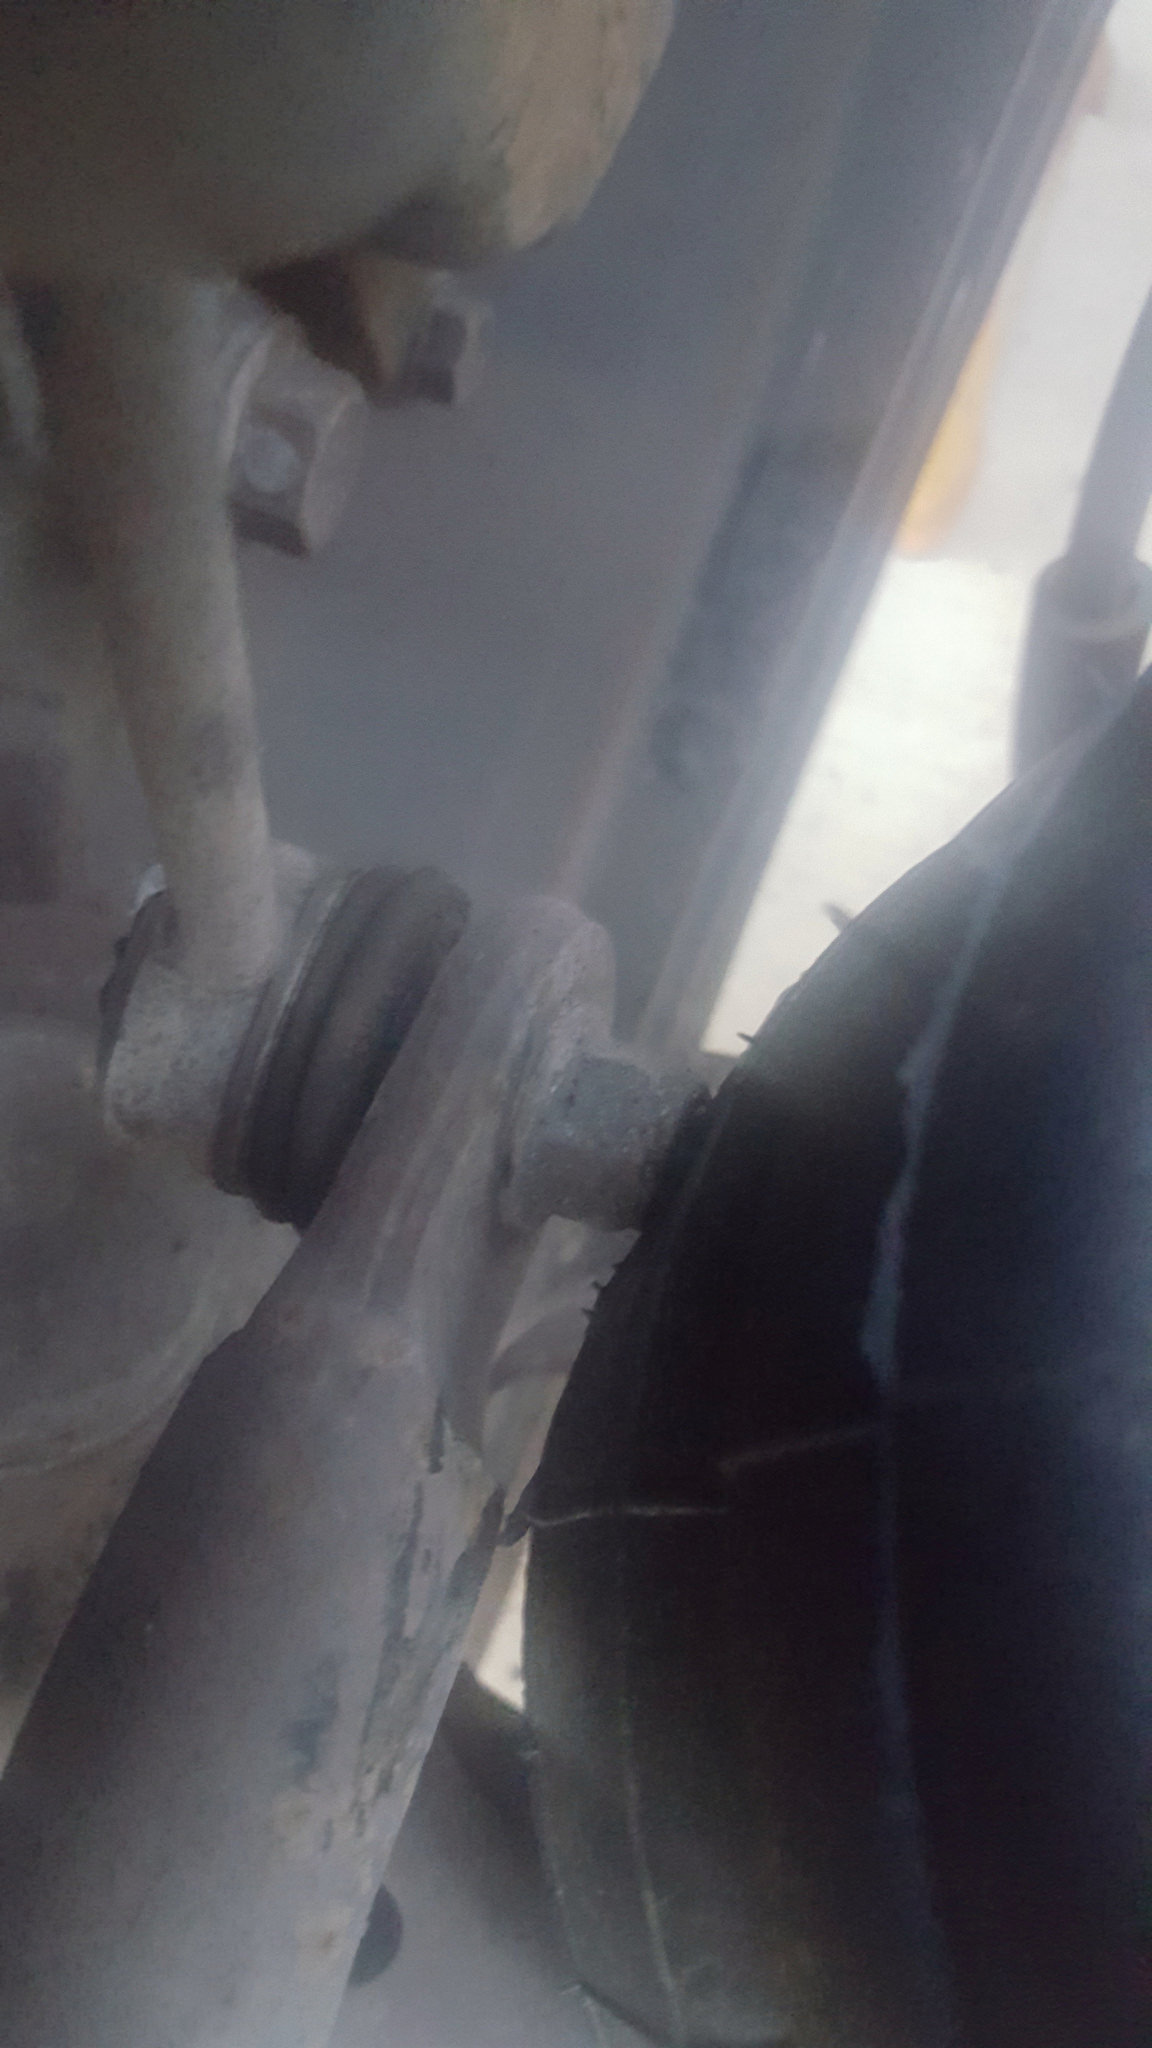 2018-02-07_07-13-49 by 1SAWB, on Flickr
trimming the nut would fix it but i worry about weakening the thread itself and having future issues.
with this disappointment I went back in the house wondering why i had spent almost $1000.00 for these and why I didn't just build my own. the real down fall to all of this is i read up on multipal builds, watched videos on install's and never saw this. i went back and looked at the ones i had saved and looked specifically at the sway bar end links and every single one of them hit....not one person said a word about it.
I do have a couple idea's rolling around in my skull full of mush on how I might cure this issue...but im going to stew on it for a bit and go to the rear of the truck and finish that first
I do have to say i love the look and i'm OK with the ride height
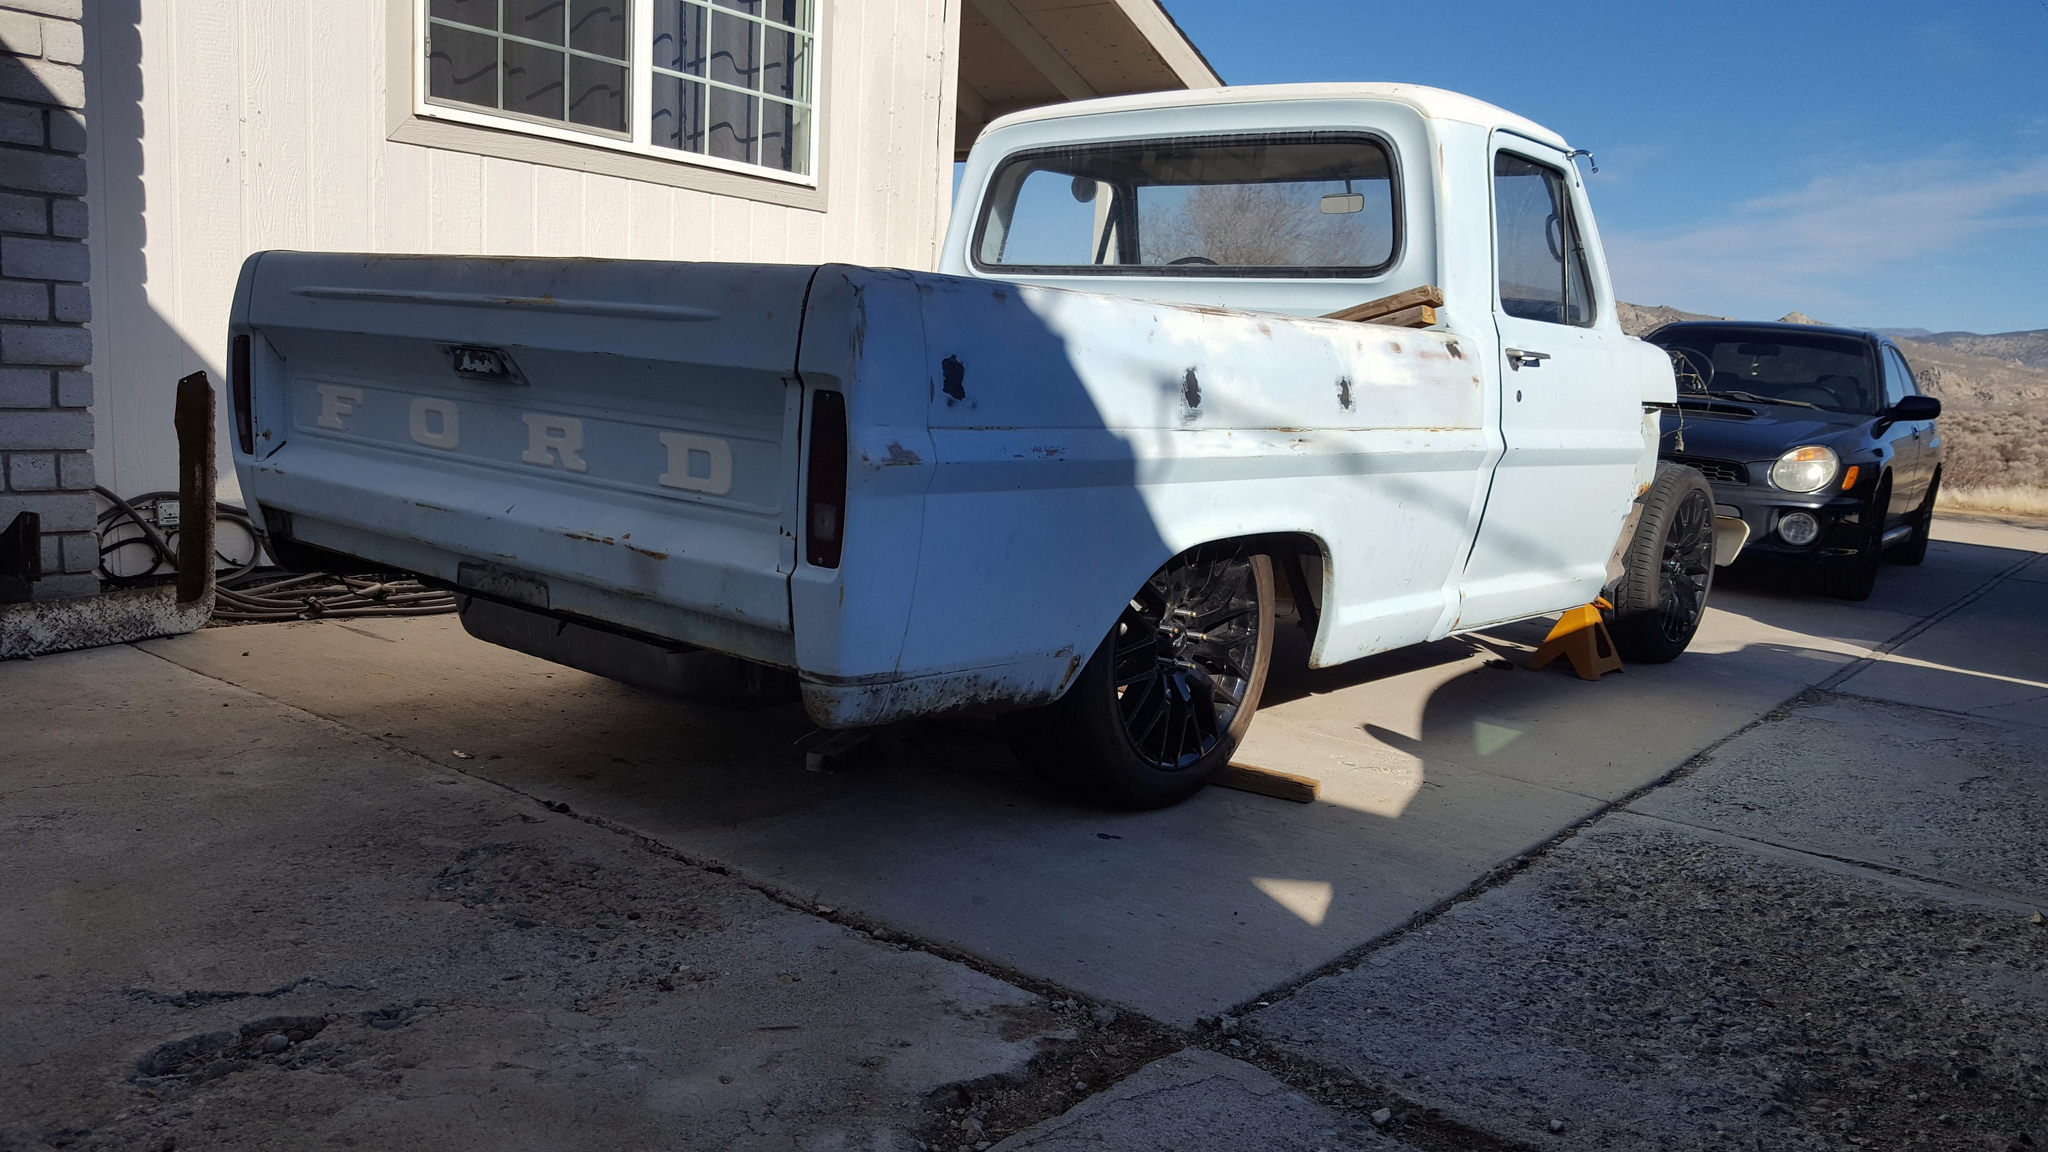 2018-02-06_04-52-37 by 1SAWB, on Flickr

 Reply With Quote


