

Results 101 to 120 of 163
-
09-29-2016 #101
 Registered User
- Join Date
- Aug 2012
- Location
- san diego
- Posts
- 179

Did a bunch of little stuff today. Got headers on and starter installed. Ran my positive cables from alternator to starter and starter to cutoff switch. Made a cutoff switch label plate from scrap handicap sign. Welded xpipe and installed. Trimmed some more around the dash and the dash itself to see how that fit and where to put my dash bar.
Then i got the mail and all my weather pack connectors and harness tape came in. So i will be spending some late nights wiring this beast up over the next few days. Have to figure out how to wire everything in place and have the trans tunnel be removable also. Lots of connectors in store for me. Im goong to get some vodka and start drawing it out on paper.
-
09-30-2016 #102
 Registered User
- Join Date
- Feb 2014
- Location
- San Diego, CA.
- Posts
- 19
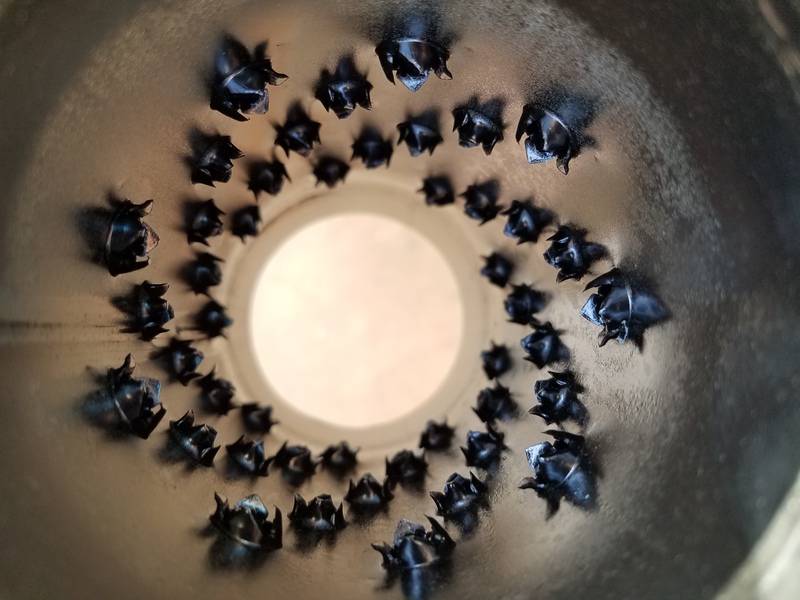
The muffler you have in the pic on page 5. Is that the $9.99 ones from Schoenfeld? If so, can i get picture of the inside of them?
Thanks
-
10-03-2016 #103
Registered User
- Join Date
- Jun 2014
- Posts
- 160
Do you want to sell amy of your old front end parts?
-
10-06-2016 #104
Registered User
- Join Date
- Aug 2012
- Location
- san diego
- Posts
- 179
The only thing im not sure if im going to use is my front bumper. If i dont end up using it i will let you know. Originally Posted by 2ndroundko

- - - Updated - - -
Yup thats the one. Heres an inside shot. Originally Posted by Domer
-
10-06-2016 #105
Registered User
- Join Date
- Aug 2012
- Location
- san diego
- Posts
- 179
Got my fuse block in wired it up and tried to fire up the truck and.....no dice. Crank and no fire. I completely redid the harness so i need to recheck all my connectiojs once again and try it once more.
Also i think the dash could use some paint. What do you guys think? I have gloss dark grey, metallic blue and flat black sitting around. Truck will be royal blue eventually.
-
10-06-2016 #106
Registered User
- Join Date
- Dec 2015
- Location
- Ruhr-Area, NRW, Germany
- Posts
- 313

Love the firewall! Don't paint that over :D

1985 Dodge Power Ram W250 3/4t 360/518/241
2005 Dodge Ram 1500 SRT-10 505/T56/D60 small upgrades
-
10-06-2016 #107
Registered User
- Join Date
- Aug 2012
- Location
- san diego
- Posts
- 179
I was JUST pricing aluminum sheet to make a new firewall.... Originally Posted by kingcrunch
-
10-09-2016 #108
Registered User
- Join Date
- Feb 2014
- Location
- San Diego, CA.
- Posts
- 19
Interesting theory on the exhaust.. wonder how they work?? you need to get yours started so we can hear them. ;)
-
10-09-2016 #109
Registered User
- Join Date
- Aug 2012
- Location
- san diego
- Posts
- 179
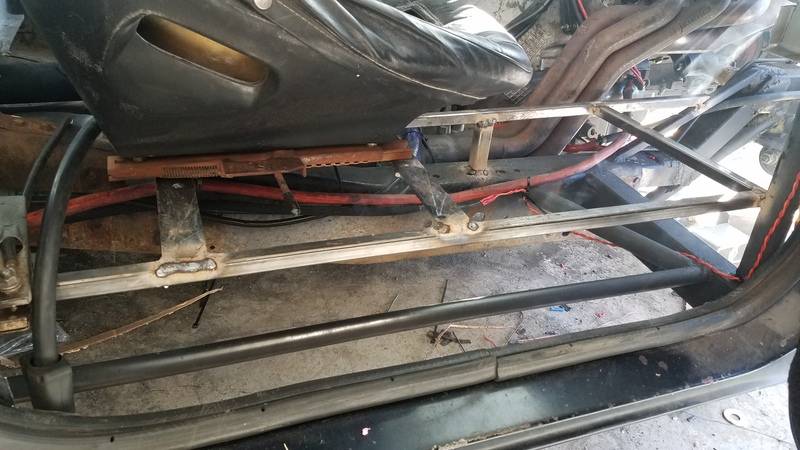
Got a little work done today. Got the subfloor framed in nd the passenger seat mounted.
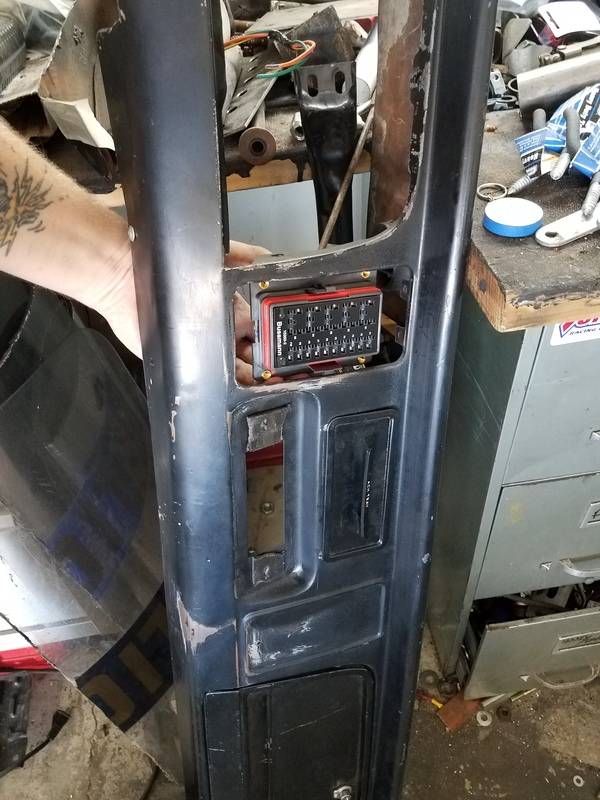
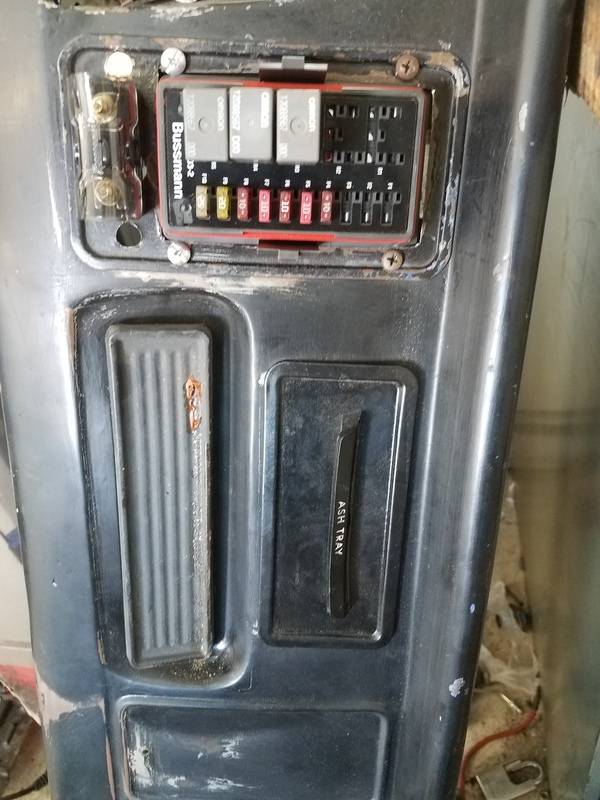
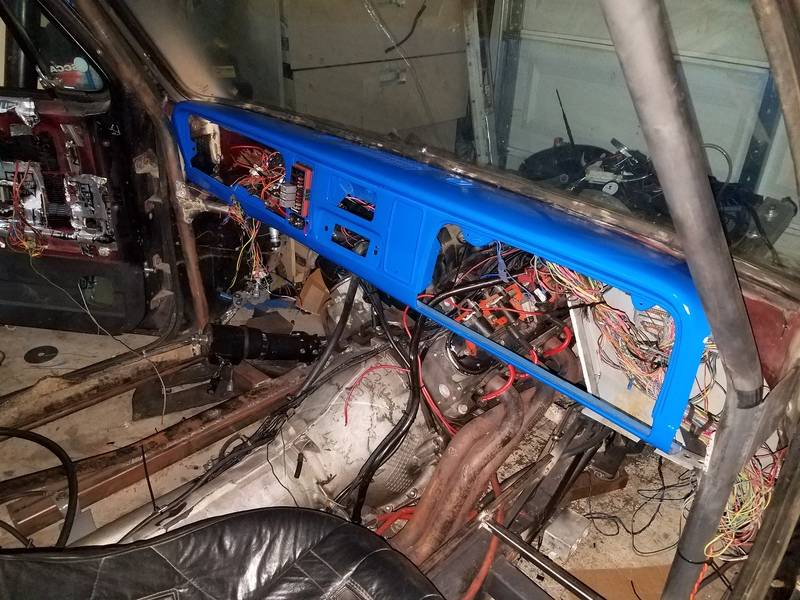
Got the dash painted
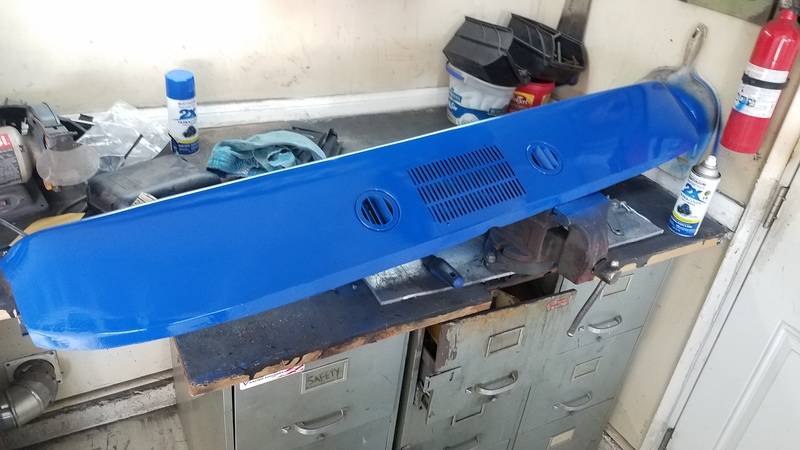
And installed.....mostly
Fuse block in its new home. Almost done needs a little bit more wiring.
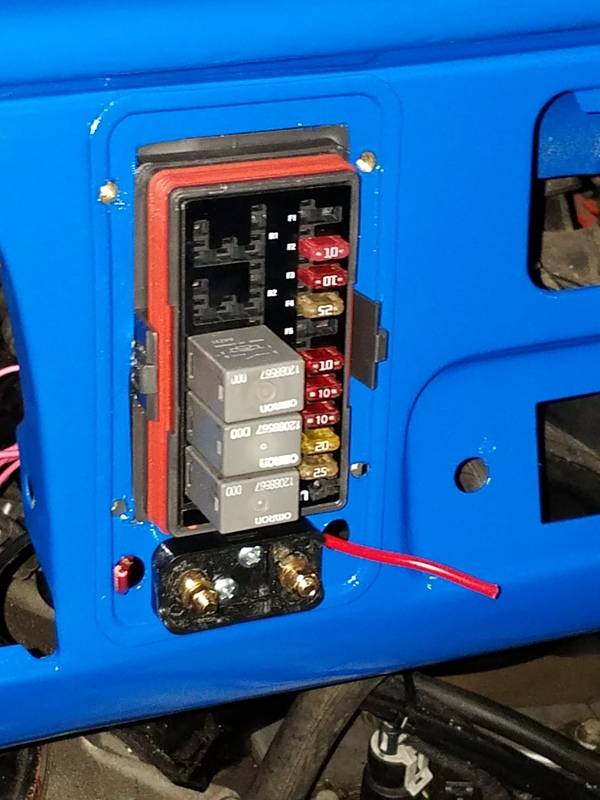
Still need to run a few more wires so i can scan the truck and see why its not firing. Seems to always happen after i rewire the harness. Go fast and miss a wire or three but ill fix it.
-
10-21-2016 #110
 Registered User
- Join Date
- Sep 2004
- Location
- Santee, CA (San Diego County)
- Posts
- 297
I love the FORD blue!
Alcino Manuel Azevedo
76 Mustang II Cobra II
Featured in April 2006 Popular Hot Rodding
-
10-21-2016 #111
Registered User
- Join Date
- Aug 2012
- Location
- san diego
- Posts
- 179
Ha. Its royal blue from rustoleum. Nice and deep color and sprays on well. I like this paint. As a spray can painter this is awesome stuff.
-
10-21-2016 #112
Registered User
- Join Date
- Aug 2012
- Location
- san diego
- Posts
- 179
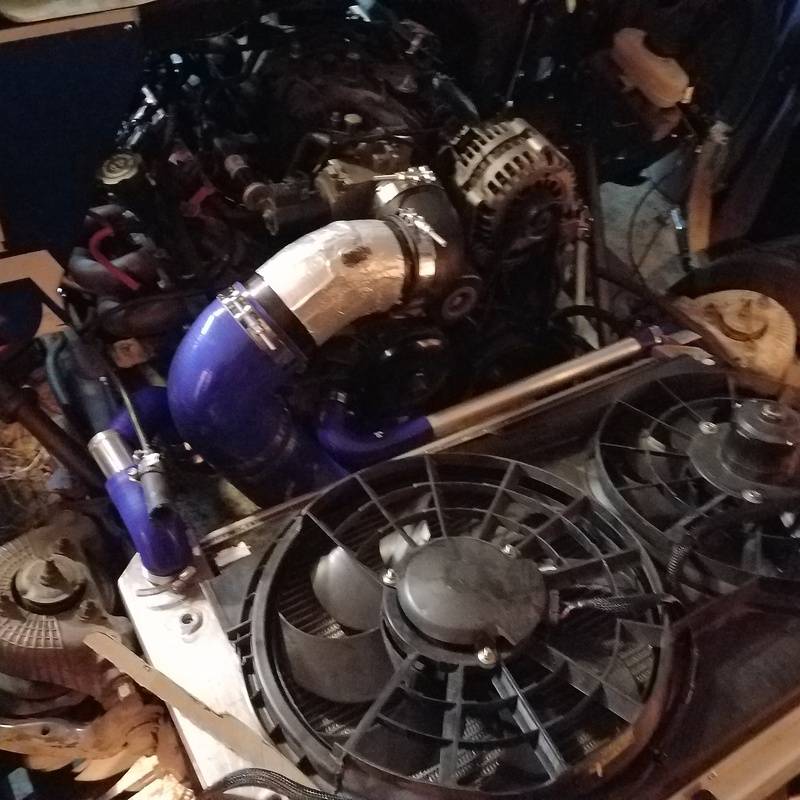
So small steps. Took a do not enter sign from my stash and build my radiator ducting. Mounted the intake and started working out the radiator mounts.
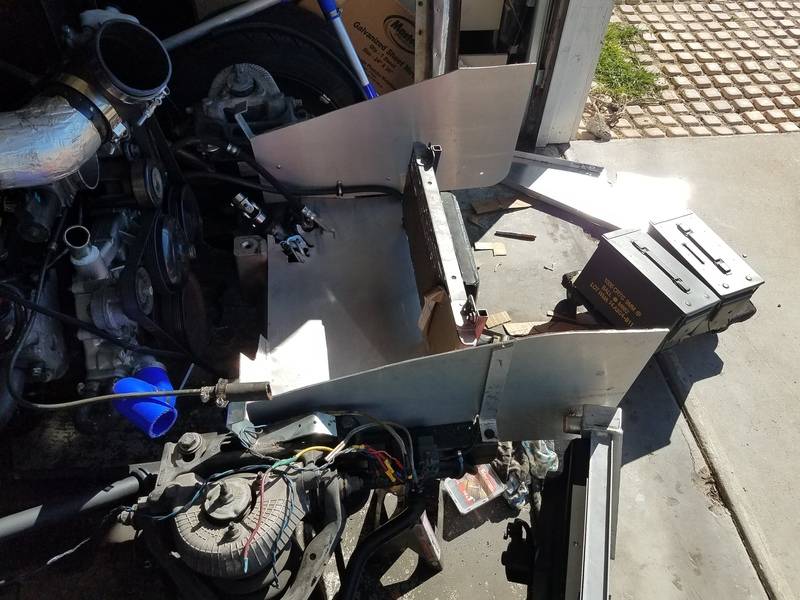
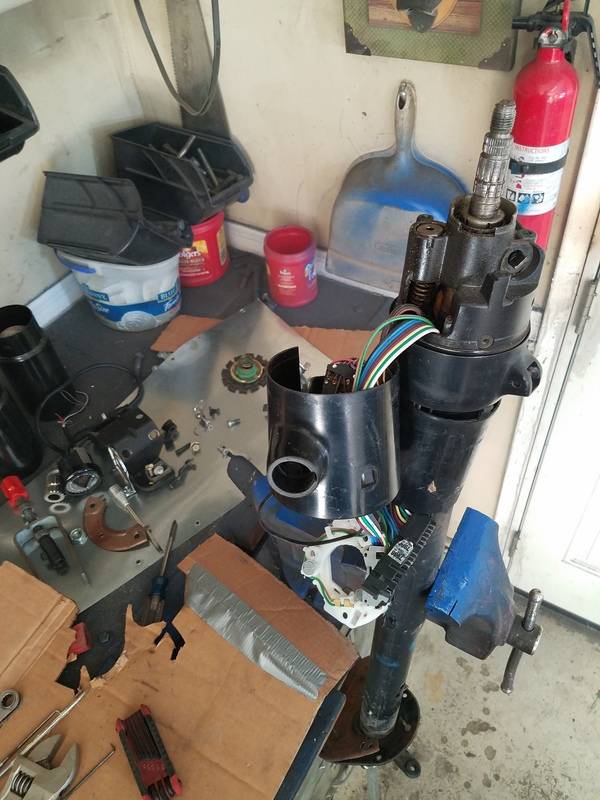
Took my steering column apart and rebuilt it. Bearings had no grease at all and i needed to take out the column shift parts.
Made a few brackets to mount my brake pedal assembly to the left to clear the firewall and new gas pedal placement. Seems to be pretty stout wirh it reinforced off the cage.
Next up is to frame out the firewall so the aluminum skin has something to attach to. Then i can build the floors. Im using 3/4" square tubing to frame everything out with .032 aluminum sheet for firewall and floor. SCCA minimum and VERY light. Bracing will be key for this project.
-
10-30-2016 #113
Registered User
- Join Date
- Aug 2012
- Location
- san diego
- Posts
- 179
Making little progress here and there. Got the firewall trimmed up and mostly installed. Got the pass side done and sprayed the surrounding area blue to see if i like it better than the black. Definitely pops and looks better than ghetto black.
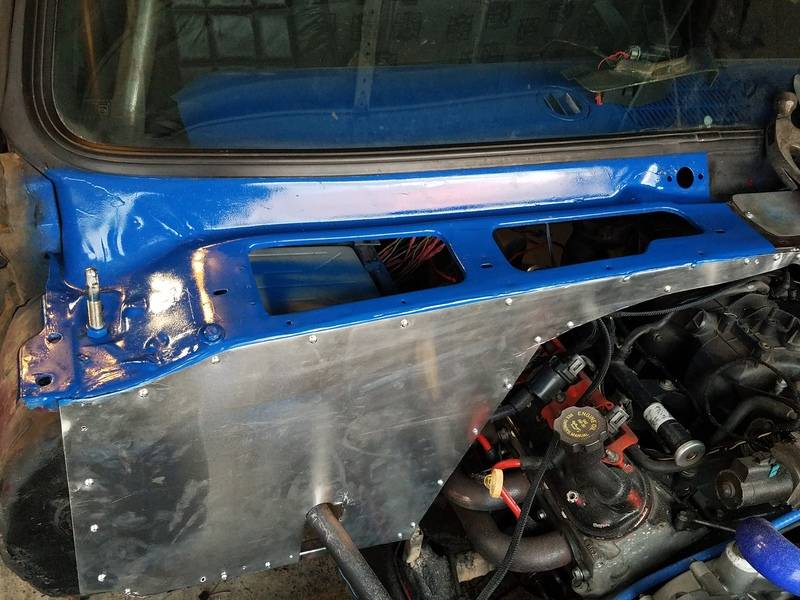
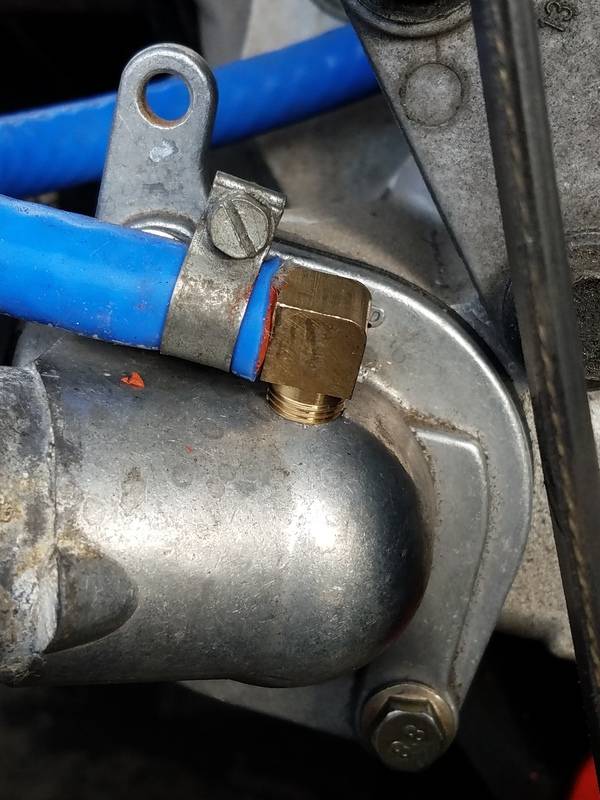
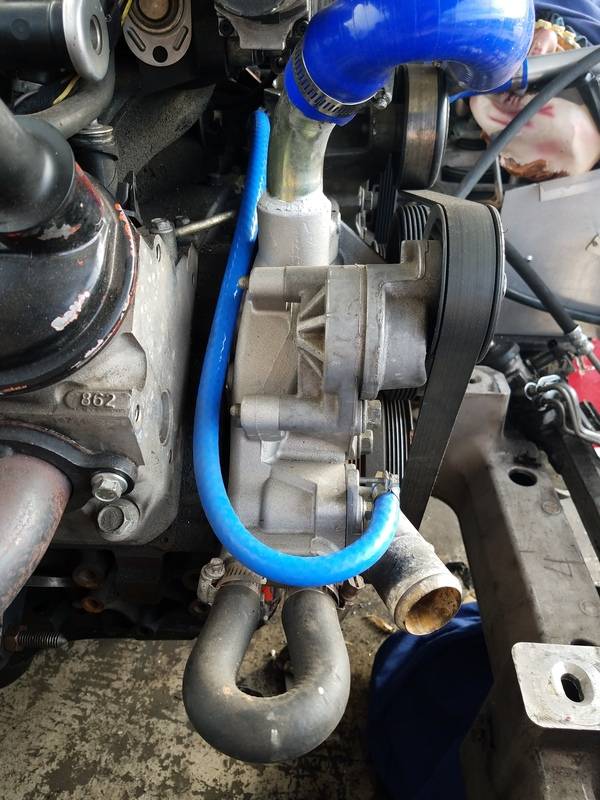
Found a nice littl 90* brass fitting that was 1/8" npt i threaded into my thermostat housing for my steam line. Didnt want to tap the water pump in case it ever fails on the side of the road i can just bolt a new one in without making a new hole and tapping it.
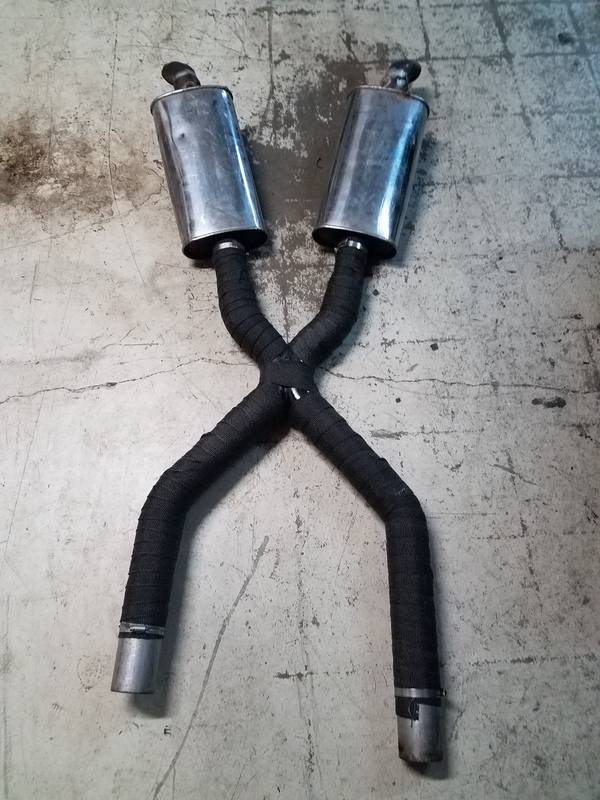
Worked on the exhaust a little bit. I know this truck wil be crazy hot as my floor pans and firewall will be the thinnest allowable by the rules. So i wrapped the pipes with header wrap to try and cut down on some heat. I will save for getting my headers ceramic coated at a later date. I can hold my hand on the pipe while its idling and its barely warm. Awesome stuff.
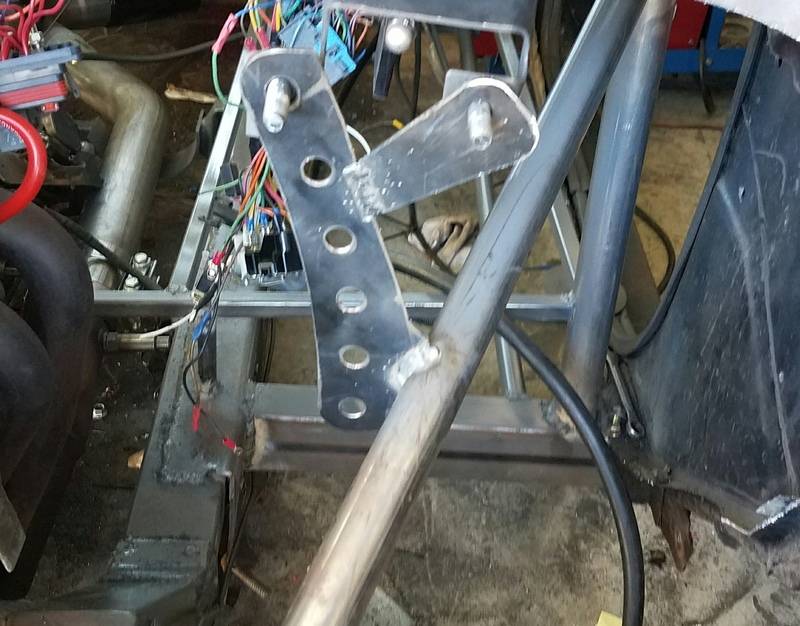
Where my 3rd link meets the frame there was not much in reinforcement. The two plate sit in a groove in a crossmember between frame rails. I added a piece of 2x3 standing on its end between the plates and i feel this will help a ton once i tie that into the cage. Since my misalignment spacers are 2" the metal slid right in there.
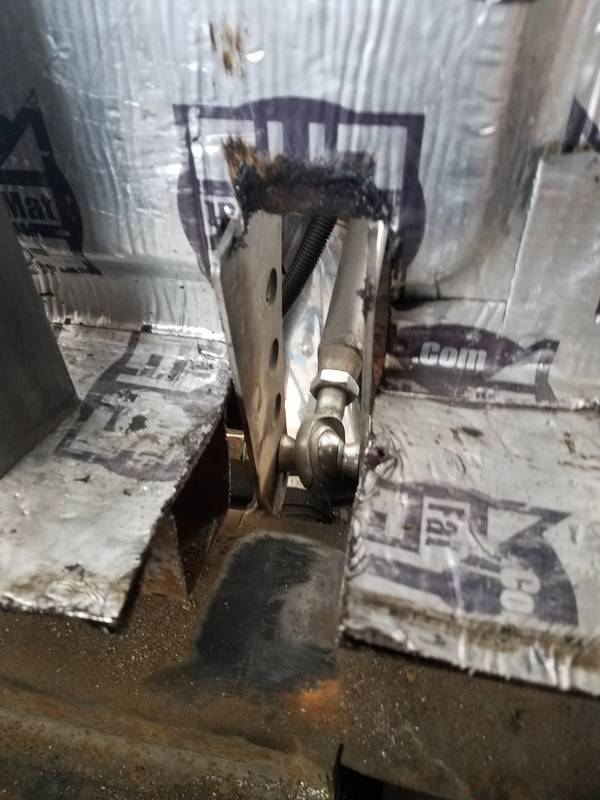
Didnt take a picture with it in. Got done and cleaned up and forgot. I also made my radiator mounts so i can now start filling my fluids and hopefully this week pull this truck put of the garage and turn it around so i can start fabbing the front sheetmetal. Also good time for some pictures.
10-30-2016 #114
 -Moderator/Sponsor-
- Join Date
- Apr 2001
- Location
- The City of Fountains
- Posts
- 15,977
I don't think the steam line into the thermostat housing is going to work. You can go into the water pump on the side closest to the thermostat, or you can T off that heater hose.
Andrew1970 GTO Version 3.0
1967 Cougar build
GM High-Tech Performance feature
My YouTube Channel Please Subscribe!
Instagram @projectgattago
Dr. EFI
I deliver what EFI promises.
Remote Holley EFI tuning.
Please get in touch if I can be of service.
"You were the gun, your voice was the trigger, your bravery was the barrel, your eyes were the bullets." ~ Her
10-31-2016 #115
Registered User
- Join Date
- Aug 2012
- Location
- san diego
- Posts
- 179
Why wont it work? Its in the same body of water as it would be in the top of the radiator. Bubbles go in and rise to my fill point in the upper hose.
11-05-2016 #116
Registered User
- Join Date
- Aug 2012
- Location
- san diego
- Posts
- 179
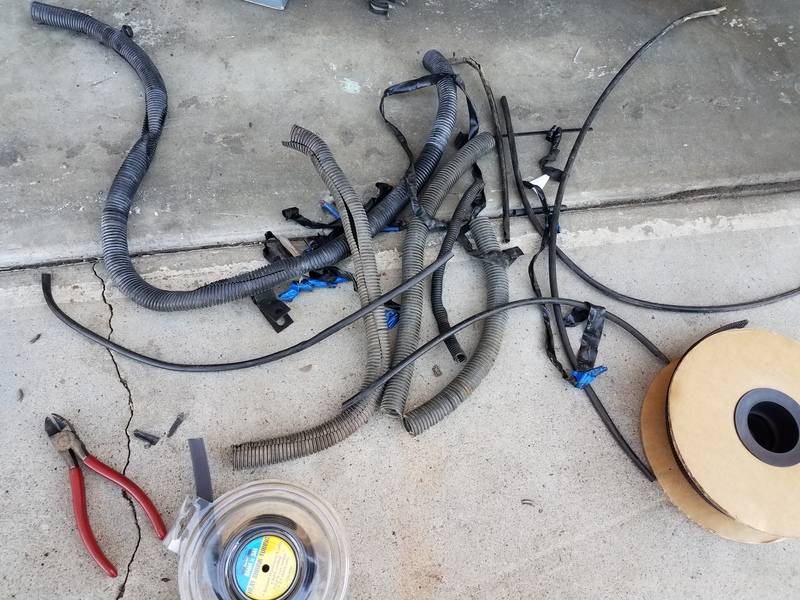
Started working on some of my light harnesses today. Stripped all of the rotted old sheathing and loom of and twisted the wires together with my drill. Took some 1/2" flex loom and wrapped it and sealed the ends with heat shrink. Looks tons better!!


Played around with where i want the rear fender to sit. Im thinking i will level it with the bottom of the cab? I keep thinking i need to cut it in half and take out some of the length of the fender so there isnt so much gap around the tire. 8" looks to be the amount i would need to cut. Still thinking about that one.
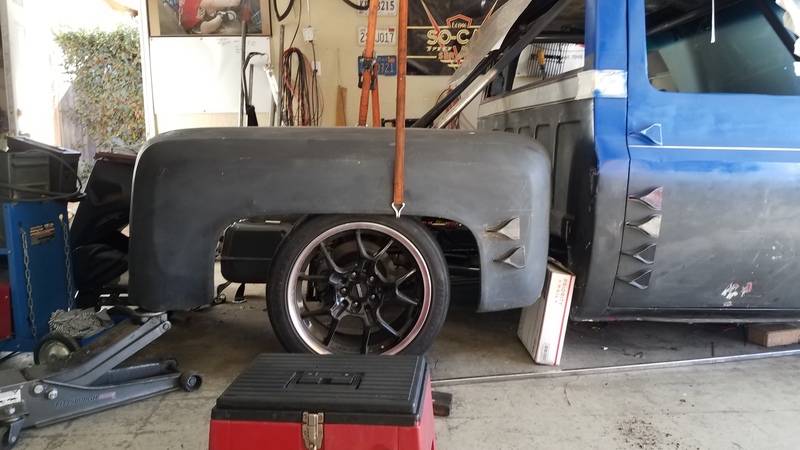
Obviously i will have to fab some sort of bed side around the fender to close thay gap back there.
11-05-2016 #117
Registered User
- Join Date
- Sep 2011
- Location
- Southern Ontario
- Posts
- 640

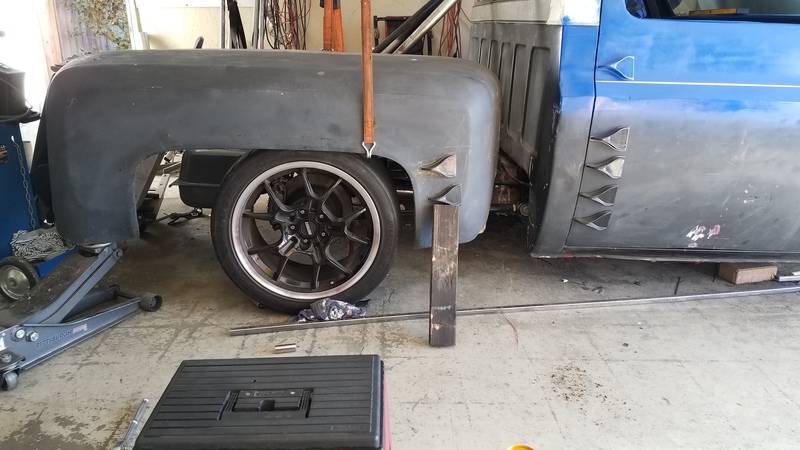
Hard to see because I'm looking on my phone, but isn't there a character line on the body and rear fenders you want to line up?
11-05-2016 #118
Registered User
- Join Date
- Aug 2012
- Location
- san diego
- Posts
- 179
On the cab there is a body line right below where the door handle would be. I was kinda using this as a reference for the cab. On the fender the top is kinda flat, and it steps out at a 45, and then another 45 a few inches later to be vertical. I have where i think it looks ok height wise....mbut i keep looking at the fender lines and the cab line and wondering if i will wish i had lined those up later. Originally Posted by Peter Mc Mahon
12-03-2016 #119
Registered User
- Join Date
- Aug 2012
- Location
- san diego
- Posts
- 179
Hevent been updating here lately. Got a lot of stuff done. Still have a long way to go.
Got a trans tunnel fabbed up and a plate to mount the quicksilver shifter and 4th gen fbody e brake handle. I am going to cover it up with a 4th gen fbody center console.
https://postimg.org/image/px83hmw0l/
https://postimg.org/image/5xcx405qd/
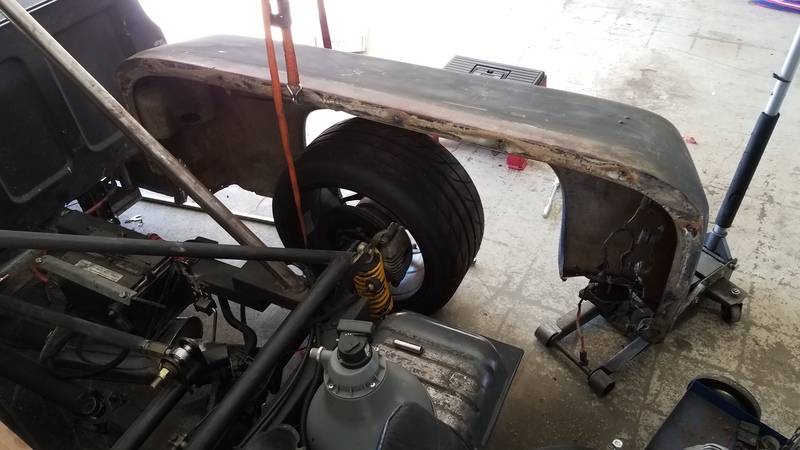
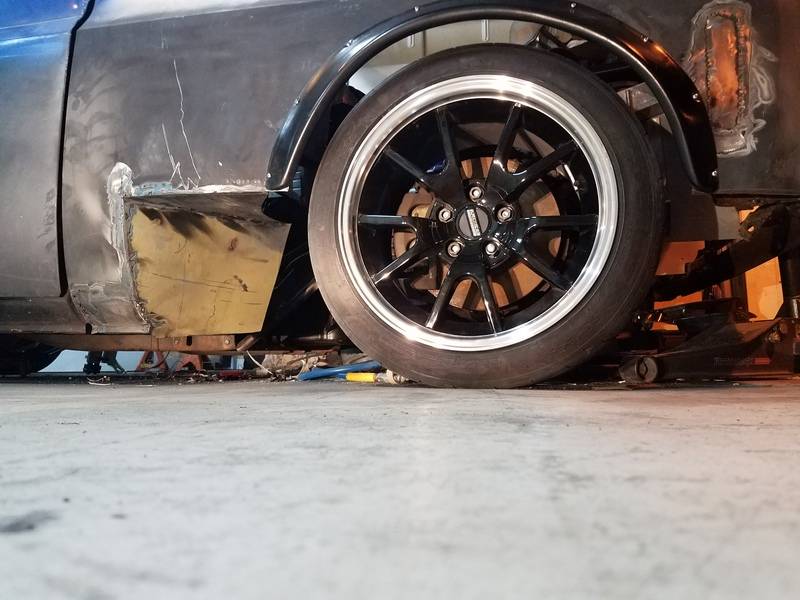
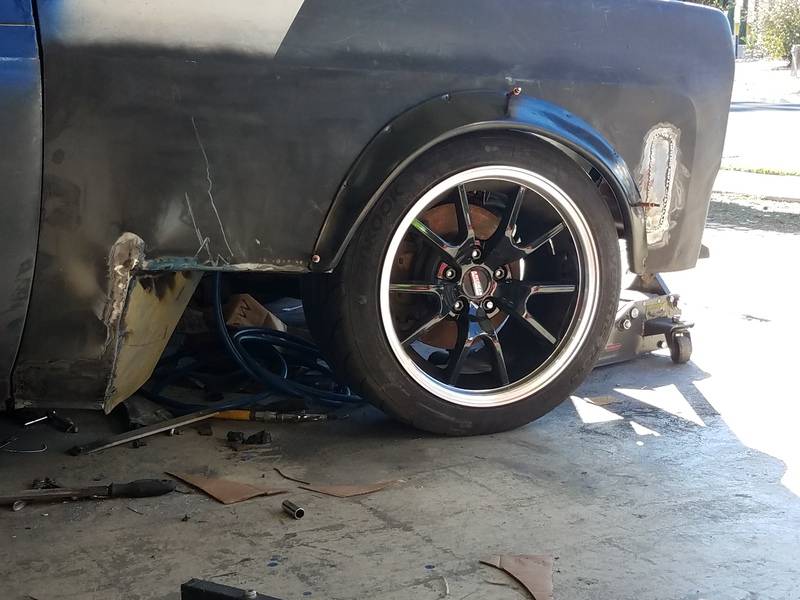
Got a little bit of rust repair done on passenger fender and cut the wheel openings down some so the fit around the tire better. The outer lip of the tire was even with the fender so flares were ordered and the fender was trimmed out to gain clearance. Heres a shot with the flares clekod in place. Still need to patch one more spot and shave the marker.
https://postimg.org/image/d0oh1cp8l/
Bought a small bead roller and made a vise mounted sheet metal brake and decided to give a shot at making my floors from .032 aluminum. Came out ok i think. Pretty strong and together weigh about a pound. Still need a few more pieces to finish it off but im out of the steel i was using for the support. Need to make some seat risers next to get the seats off the floor a bit.
https://postimg.org/image/ybdy2ku11/
Heres a shot of the truck head on with the pass side ducting mostly finished. Needs a few more screws and some ducting tape to seal it all up. All ducting was made from street signs and are attached very solidly
12-04-2016 #120
Registered User
- Join Date
- Aug 2012
- Location
- san diego
- Posts
- 179
So in a kind of time attack theme i modded my fenders so they would evacuate some air from under the hood area. Looks ok. Needs the air dam and splitter to really tie it all together.

 Reply With Quote


