Results 241 to 260 of 808
-
12-23-2017 #241
 Registered User
- Join Date
- Mar 2012
- Posts
- 288

Along for the ride. Nice project man... I still wish I picked up that Vette for my wife.
I love the Dakota Digital set ups. I use them in everything now.
2ng Gen Camaros
Only gen CJ7's
I have a couple of extra speedo GPS modules, weather, etc. I'd sell em cheap.
I also love that they are completely adaptable. I didn't know what the fuel sender I grabbed off my bench for the fuel cell I built for the CJ7... so I programmed the guages by filling the tank.
-
01-02-2018 #242
 Registered User
- Join Date
- Sep 2009
- Posts
- 2,709
Thanks Grendel, I appreciate the compliments. I sent you a message about the BIM modules.
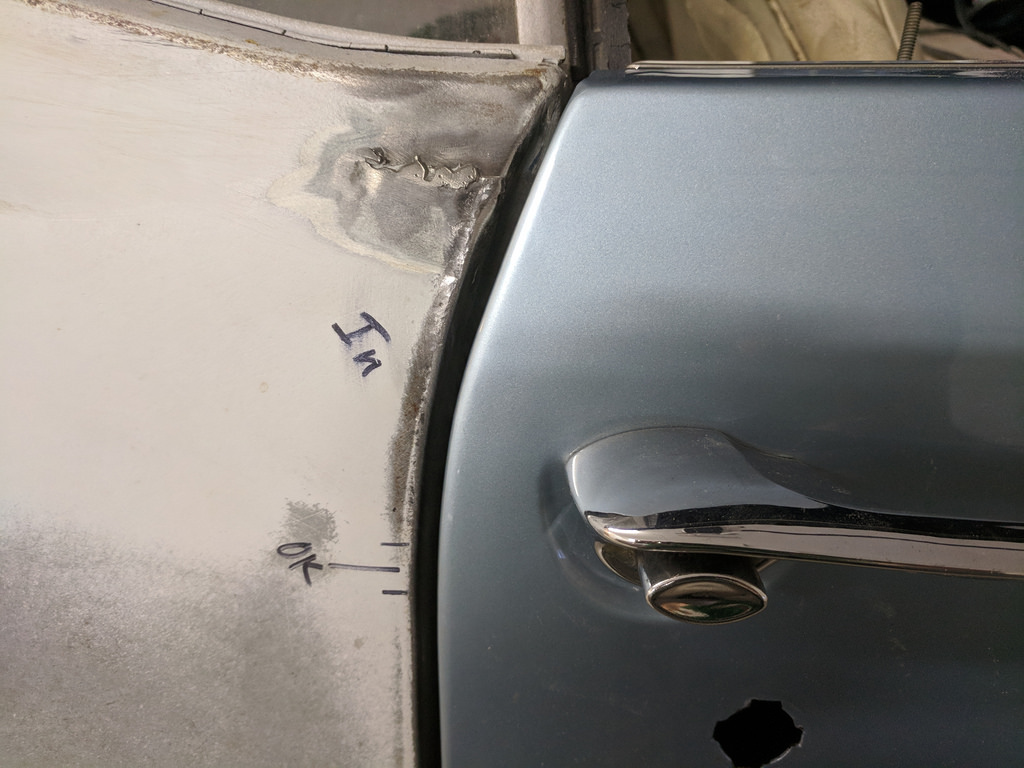
Thought I would post up an update. Not a very visual update, but more of a personal learning update. One thing that I have avoided has always been bodywork and all that goes along with it. I have never had any training or real opportunity to watch someone until recently. I have a buddy who has done bodywork for a long time and he stopped over recently to talk and was looking at my car. I told him the issue that I was having with the body line on the passenger fender not lining up with the door by about 1/4", but the top of the fender sits almost flush. He made a couple suggestions and then left. I kept thinking on it and finally had the motivation to do something. After looking at the fender for a good 45 mins decided to loosen some bolts and make some tweaks. To my surprise, I successfully fixed the body line! It may not sound like a big deal to some, but for me it was a pretty big milestone. I feel a little foolish, because I should have just gone out a long time ago and just started to tweak things and I'm sure I could have gotten it.
Now that it is where I am happy, I can finalize the rocker panel install. I have been holding off on welding up the outer wheel house to until the rocker panel was going to fit properly. Now the quarter panel, door, fender and rocker can all live happily together. My next update should be a final weld on the passenger side panels.
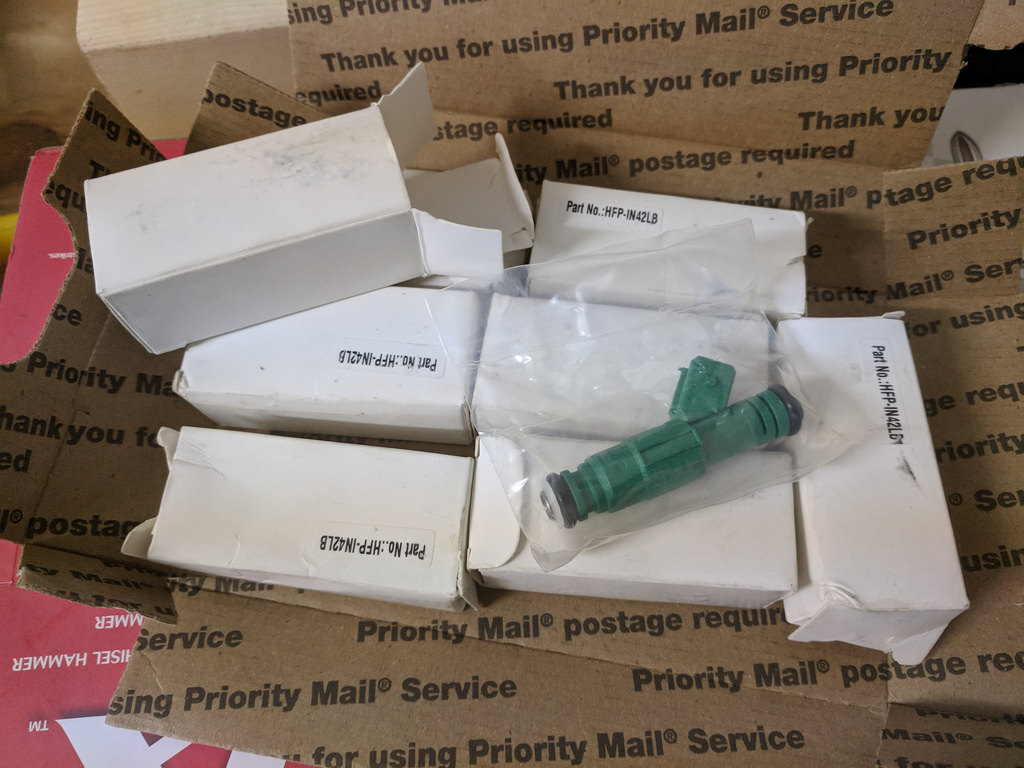
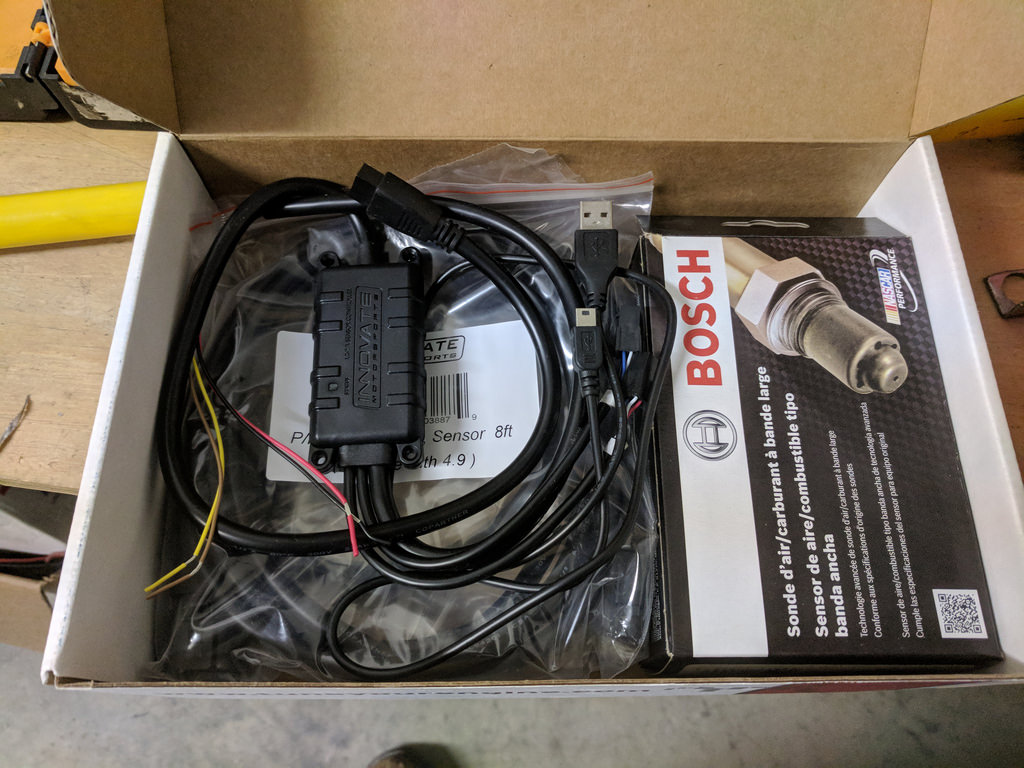
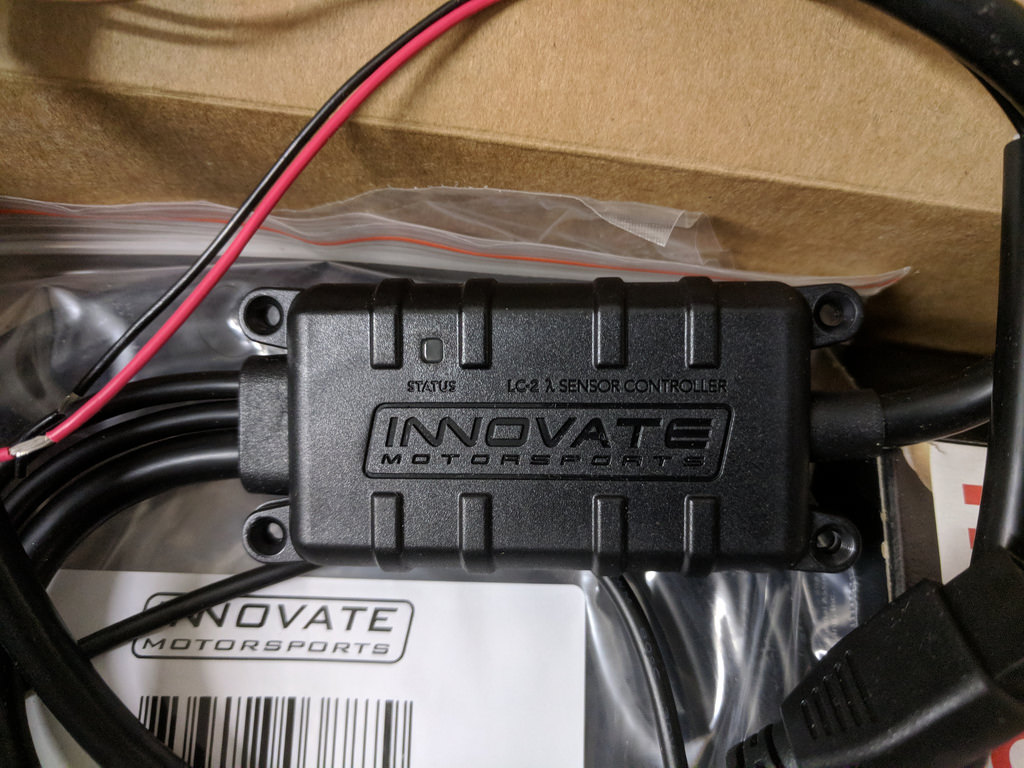
I also bought a few parts that I don't NEED, but I wanted. I found a great deal on some brand new 42 lb. green giant injectors that flow around 50 lbs @ 58 psi. If I ever go turbo in the future, these should get me by until I get over 7-8 lbs of boost. On that same note, I picked up a brand new LC2 from Innovate that a member on TAC gave me a deal too good to pass up. For now, I am going to use the wideband to dial in my MAF and VE tables. I have always wanted to mess around with more in-depth tuning and this is the tool to use.
Happy New Year!
Ryan
1955 Nomad project LC9, 4L80e, C5 brakes, Vision wheels
1968 Camaro 6.2 w/ LSA, TR6060-Magnum hybrid and etc SOLD
1976 T/A LS1 6 Speed, and etc. SOLD
Follow me on Instagram: ryeguy2006a
-
01-03-2018 #243
 Registered User
- Join Date
- Aug 2007
- Location
- Jonesboro, Arkansas
- Posts
- 2,506
The bondo around the back window... I'm going to suggest something and you can see if you want to do it or not... Originally Posted by ryeguy2006a

I would take out all the bondo around the window, make sure there is no rust anywhere around those corners, not even a little bit. Then I would prime those areas with a good epoxy primer. I would put the primer on with a brush! Then I would paint the corners with something like Imron or some other polyurethane paint. Again with a brush. I did this with mine and I feel a little more confident that hopefully rust won't come back. These cars are notorious for rusting out in these areas because water seems to collect in them. I used a brush because I wanted both the primer and paint to be pretty thick without spraying everything else. You can paint outside the repaired areas because before painting the car you can sand them smooth. I even let the primer and Imron "pool" in the very corners of these areas. After this has cured, then start doing your body work on top of the primer and paint. Just try not to sand through when sanding your body filler. Like I said, this is only a suggestion, but I know without a doubt if all the rust isn't removed, it will come back. That's one thing you don't want to see down the line after the car is painted.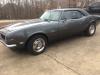
Carl Wilson
1968 Camaro - T-56 6 speed - 383 Stroker, 2014 Mustang GT seats. FiTech EFI, Tanks Inc. Tank with Deutschwerks fuel pump.
-
01-08-2018 #244
Registered User
- Join Date
- Sep 2009
- Posts
- 2,709
Hi Carl, thank you for the tips. I will have to go back and address this. I had a friend who has something similar to say about it. I guess you live and learn. I would rather have someone point it out now and re-do it than two years from now it starts bubbling. Originally Posted by minendrews68
1955 Nomad project LC9, 4L80e, C5 brakes, Vision wheels
1968 Camaro 6.2 w/ LSA, TR6060-Magnum hybrid and etc SOLD
1976 T/A LS1 6 Speed, and etc. SOLD
Follow me on Instagram: ryeguy2006a
-
01-08-2018 #245
Registered User
- Join Date
- Sep 2009
- Posts
- 2,709
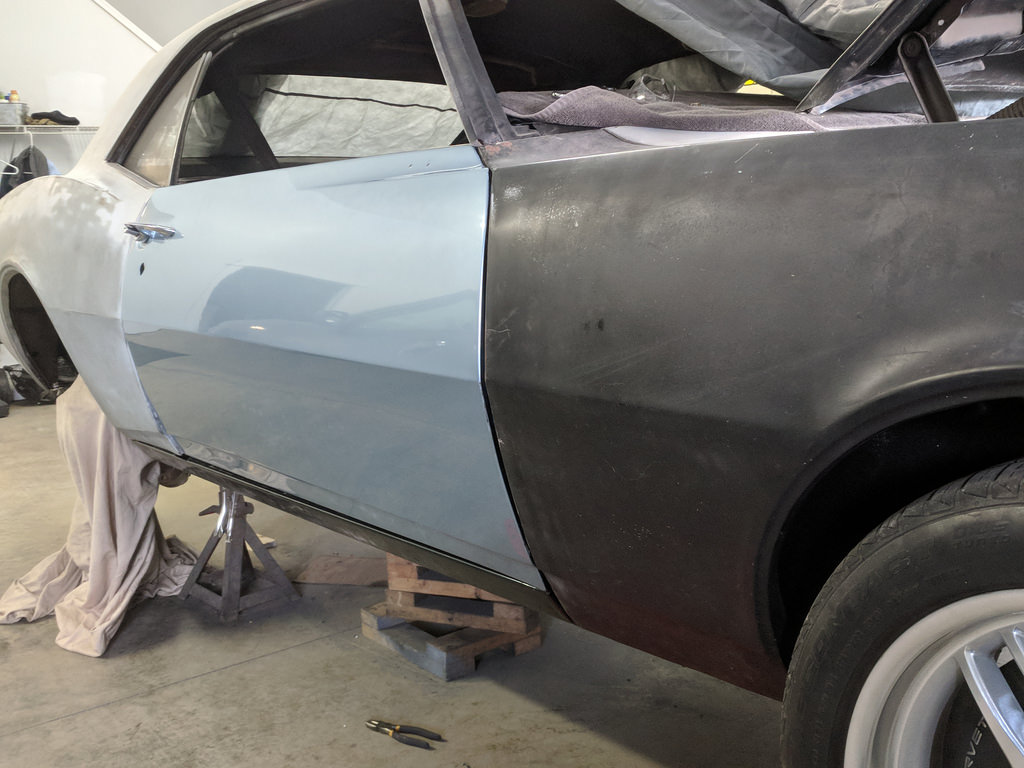
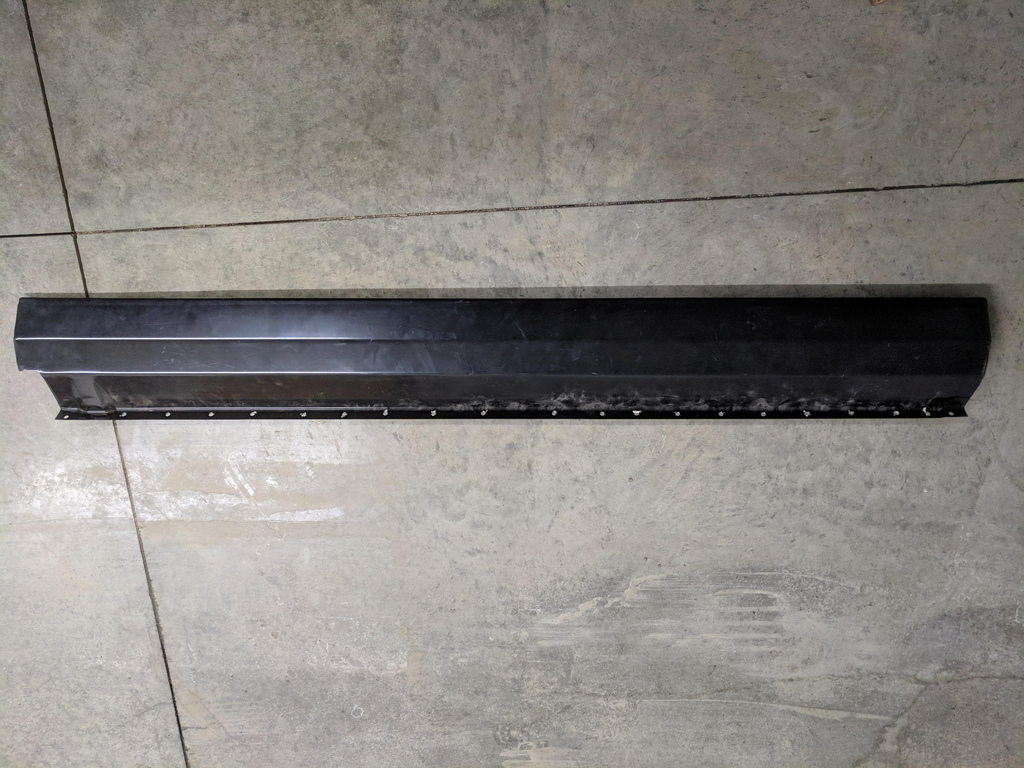
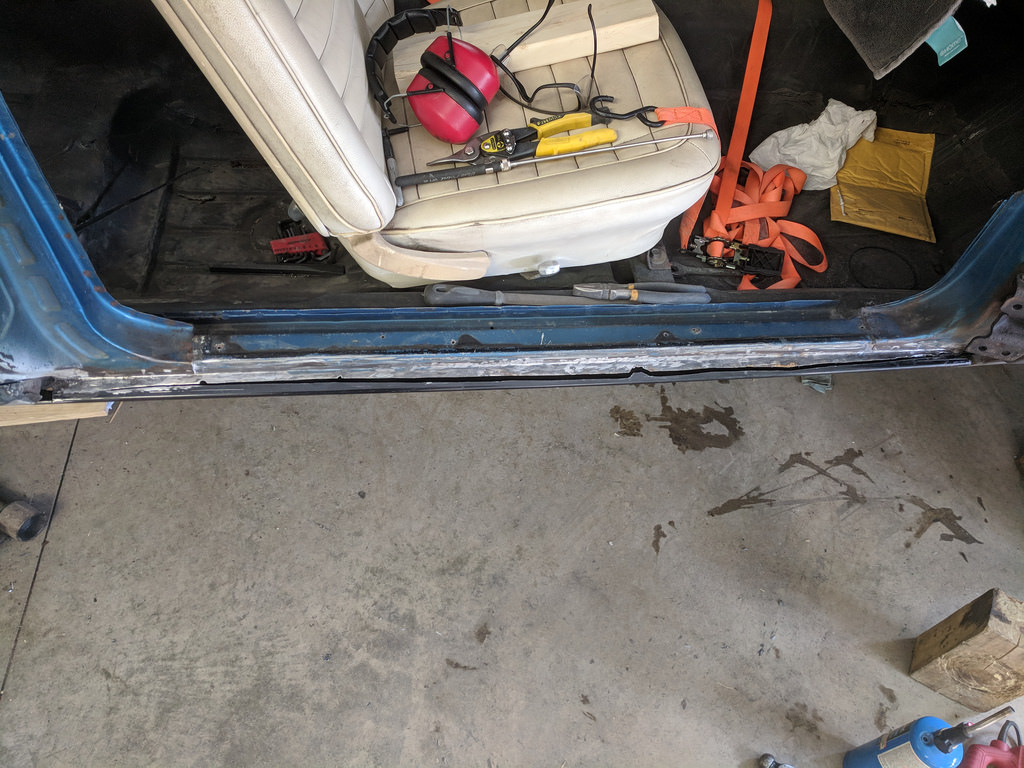
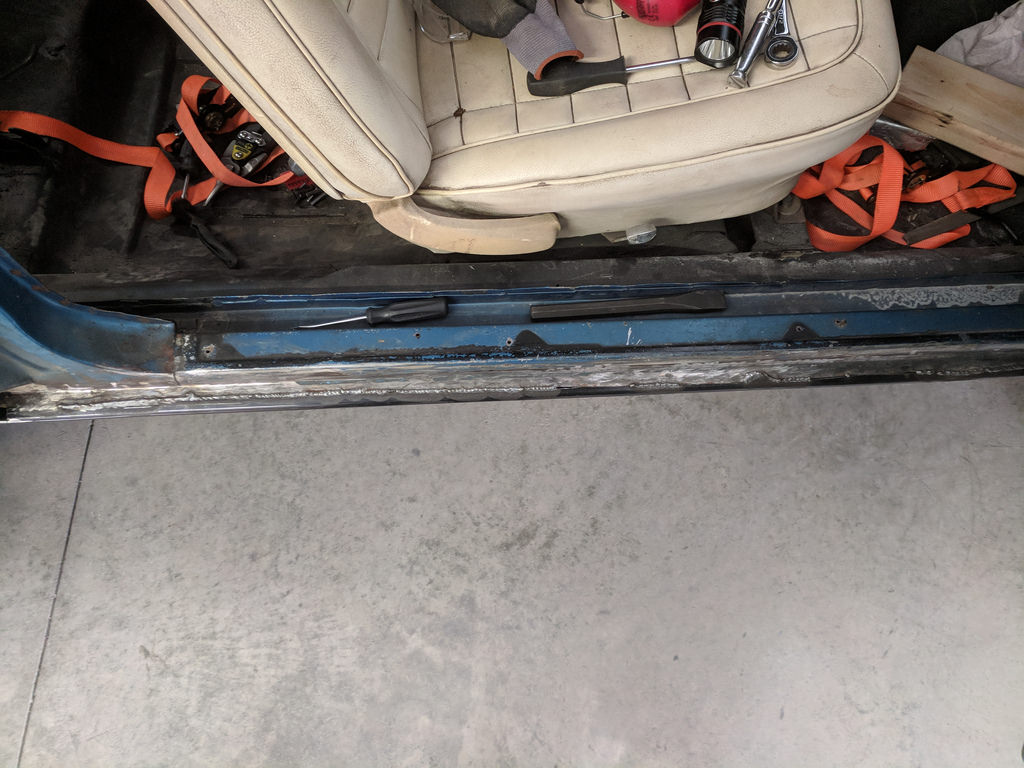
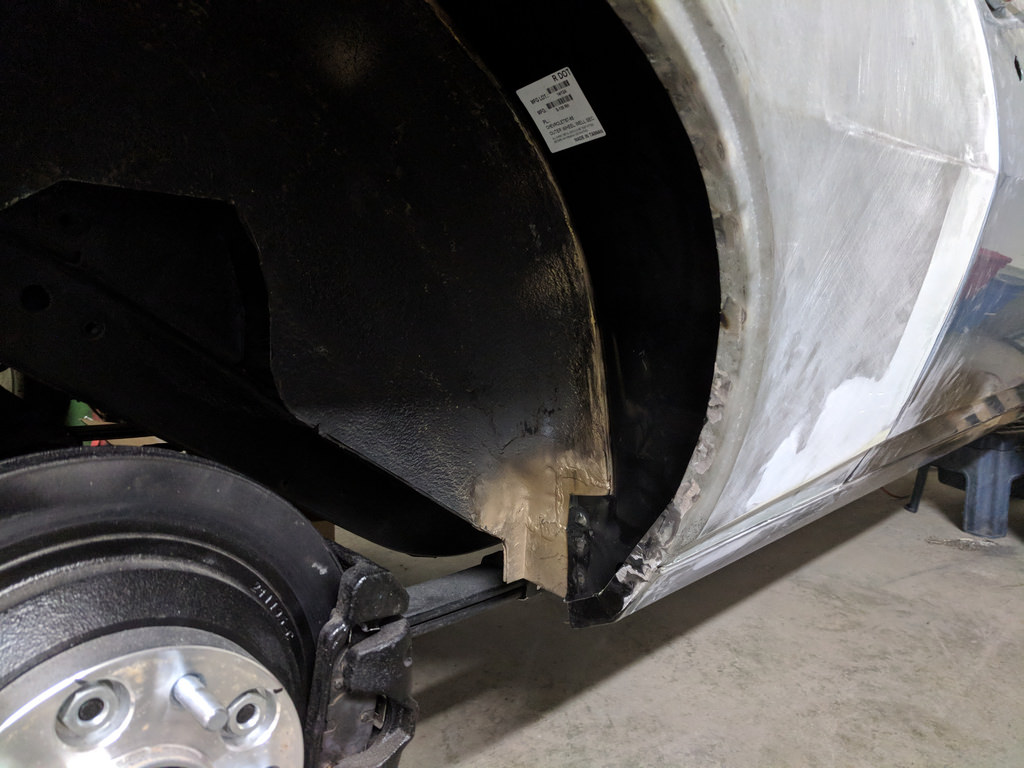
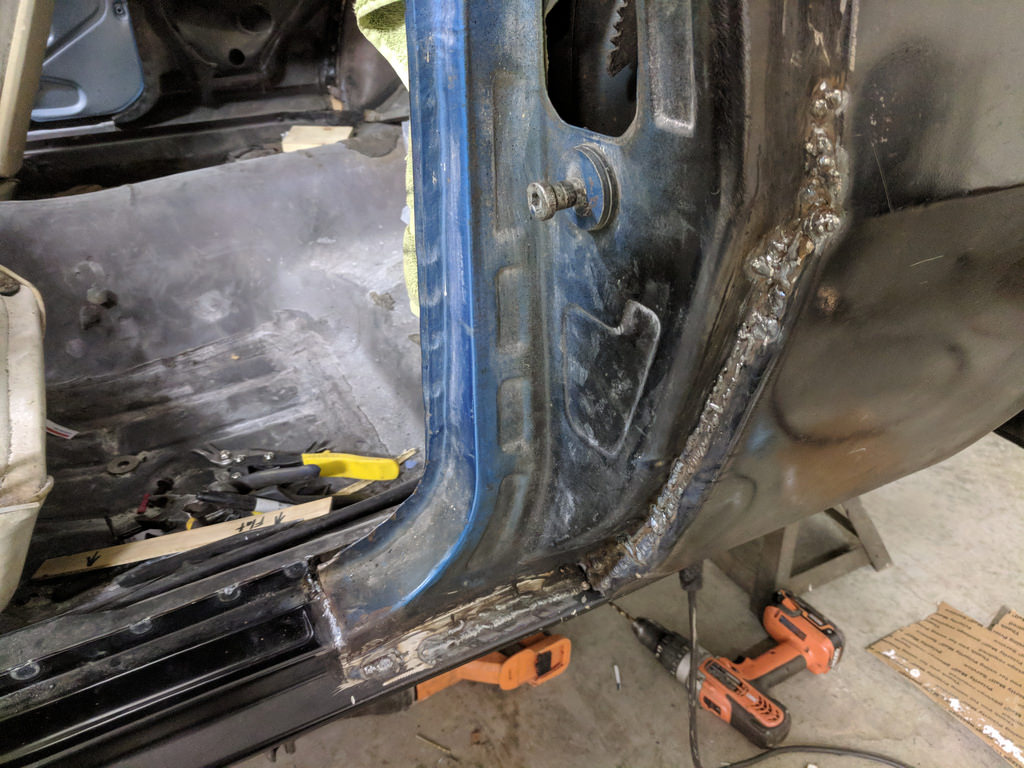
Very exciting update for me this weekend. I finally finished all of the major body panel replacement! Started with a brand new reproduction panel Friday night. I opted to save the original rocker top and door jamb area as it was original and solid. Plus it saves the original look when you open the door.
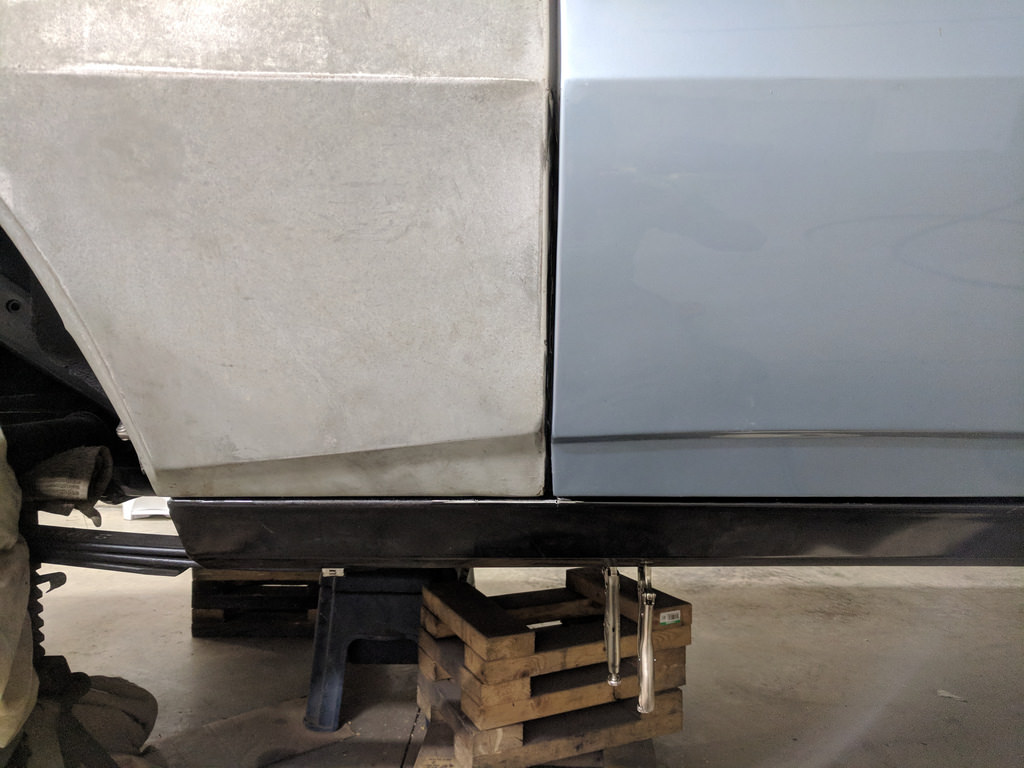
Once I test fit several times and half a dozen vice-grips later, I started my rosette welds along the bottom side of the rocker. Then I started to fit the rocker flush to the outside of the door. I am very happy with the final product. The body gaps are looking really good to me.
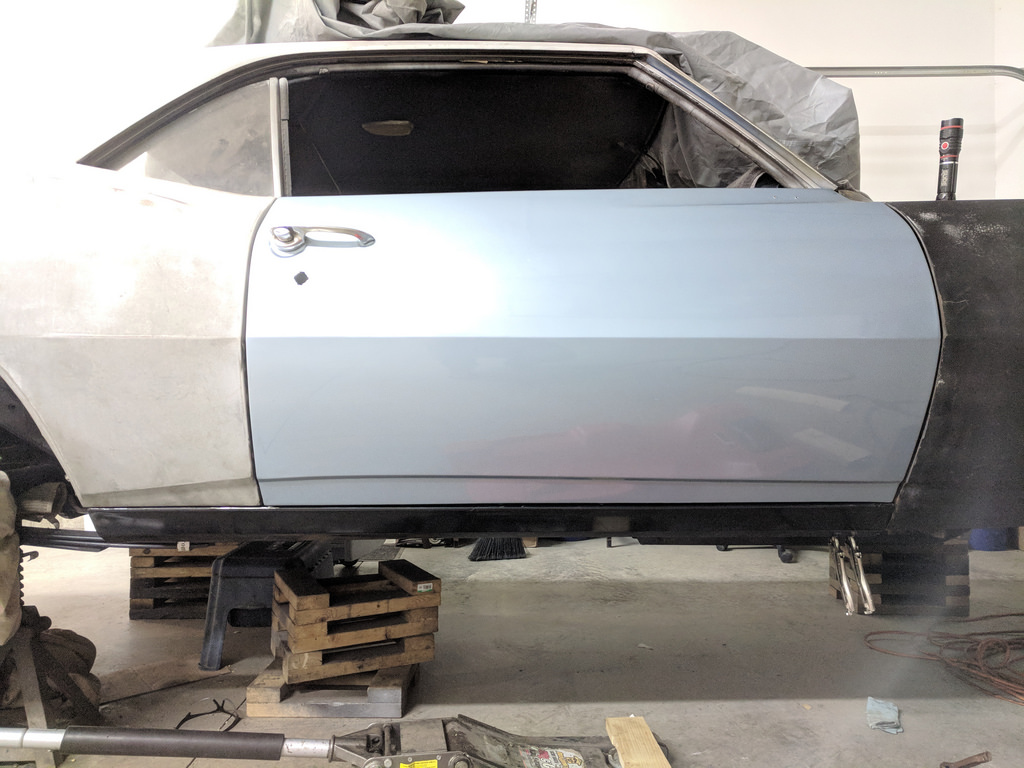
Now that the rocker panel is set, I decided to final weld in the outer wheel house I installed a month or so ago.

At this point I called it quits for the night, but was pumped because I happened to have the following morning to myself and I could get a significant portion of the welding done on the rocker.
After giving my dad a hand in the morning, I started by getting the rocker panel into place. I overlapped the rocker panel then used a jig saw to cut the outline of the existing rocker panel. This worked perfectly as it gave me a very solid edge to butt weld the panels together. I could also tweak it to get the body lines right where I wanted. I had to pull the door off to get the last bit of it cut straight. Luckily for me my dad came back over to help me put the door back on so I could use it fit the rocker depth. I didn't get a picture of it, but I used a ratchet strap to help pull it tight up against the body while I welded it in place. Worked incredibly well.
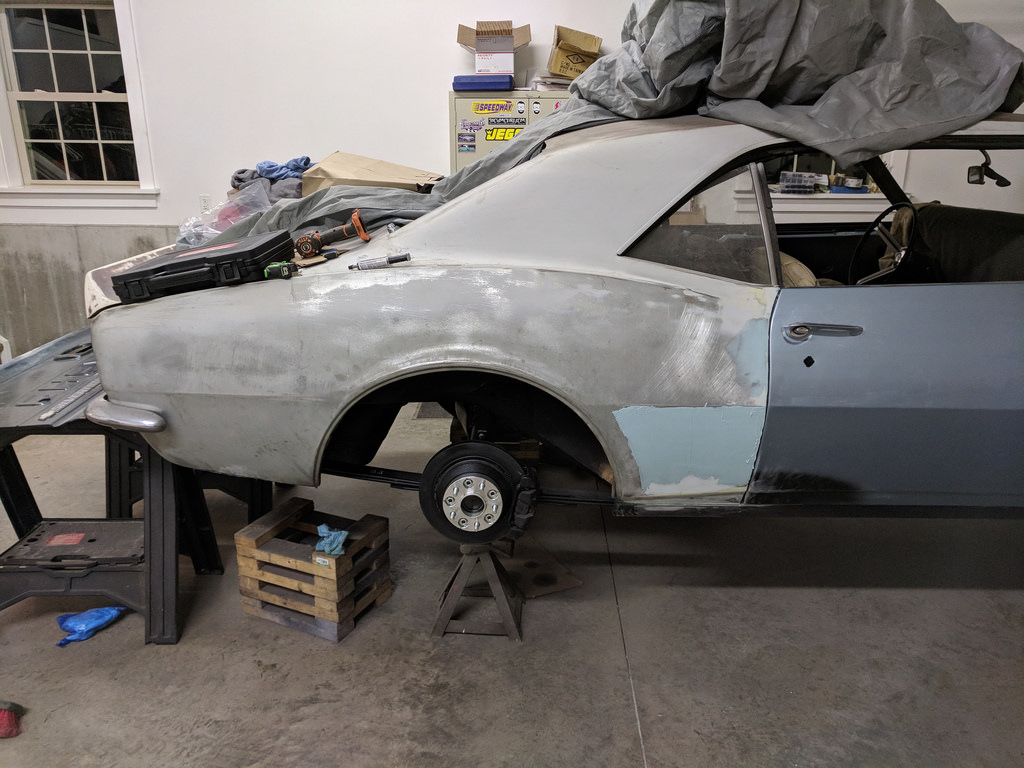
I still need to finish welding a few ~2" sections of the rocker, but I will finish that when the I pull the doors off for final. I'm very happy with the fitment of all of the body panels now and it's really starting to come together. I still think the door needs to come up just a touch in the front and it will help everything line up, but it's close enough for me to start thinking about getting the body prepped for paint.
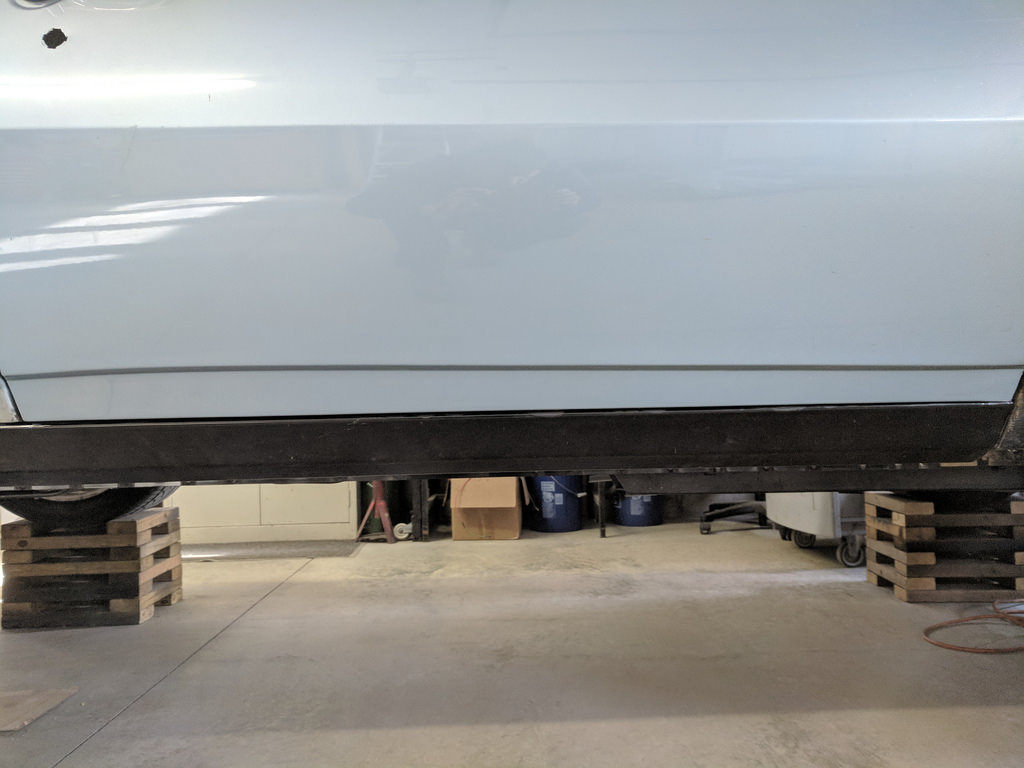
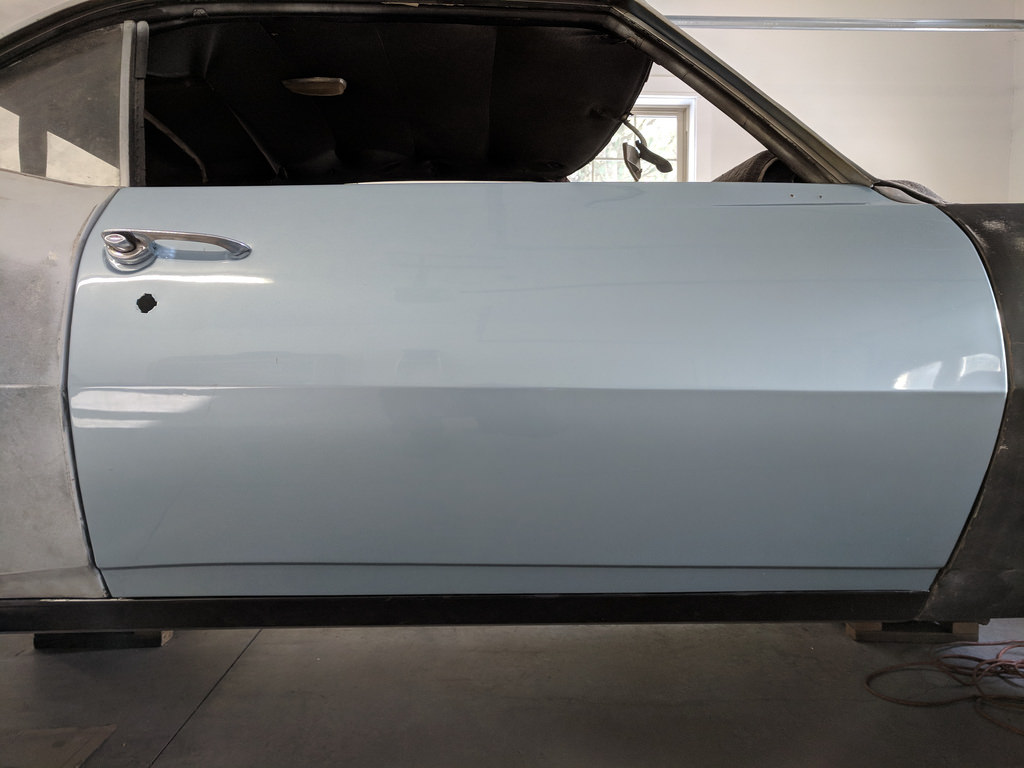
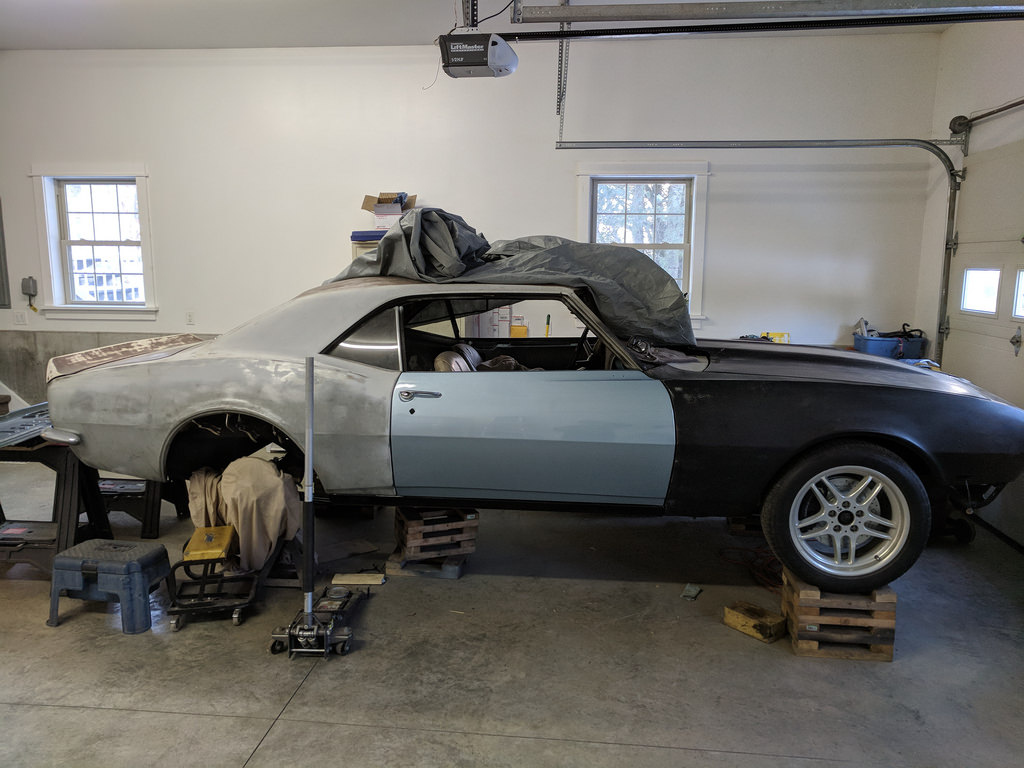
Wheels back on feels good! I put insurance and registered the car a while back and if there wasn't salt and snow on the road, I would have taken her for a spin! I'm getting to anxious now.
Cheers,
Ryan
1955 Nomad project LC9, 4L80e, C5 brakes, Vision wheels
1968 Camaro 6.2 w/ LSA, TR6060-Magnum hybrid and etc SOLD
1976 T/A LS1 6 Speed, and etc. SOLD
Follow me on Instagram: ryeguy2006a
-
01-16-2018 #246
Registered User
- Join Date
- Sep 2009
- Posts
- 2,709
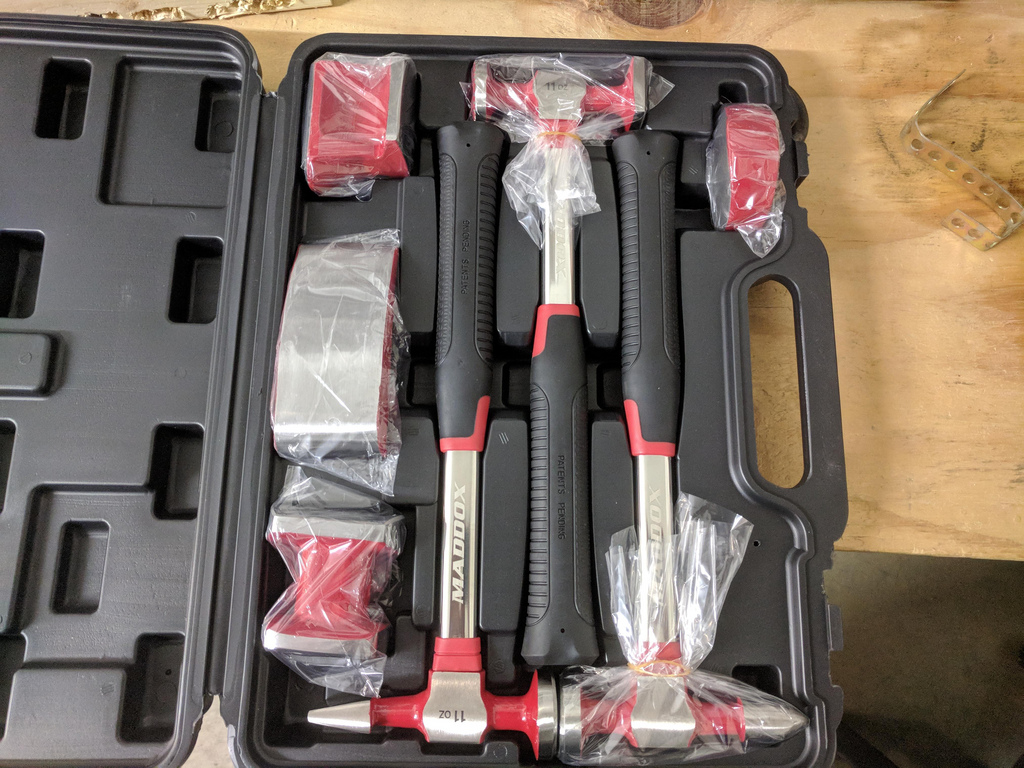
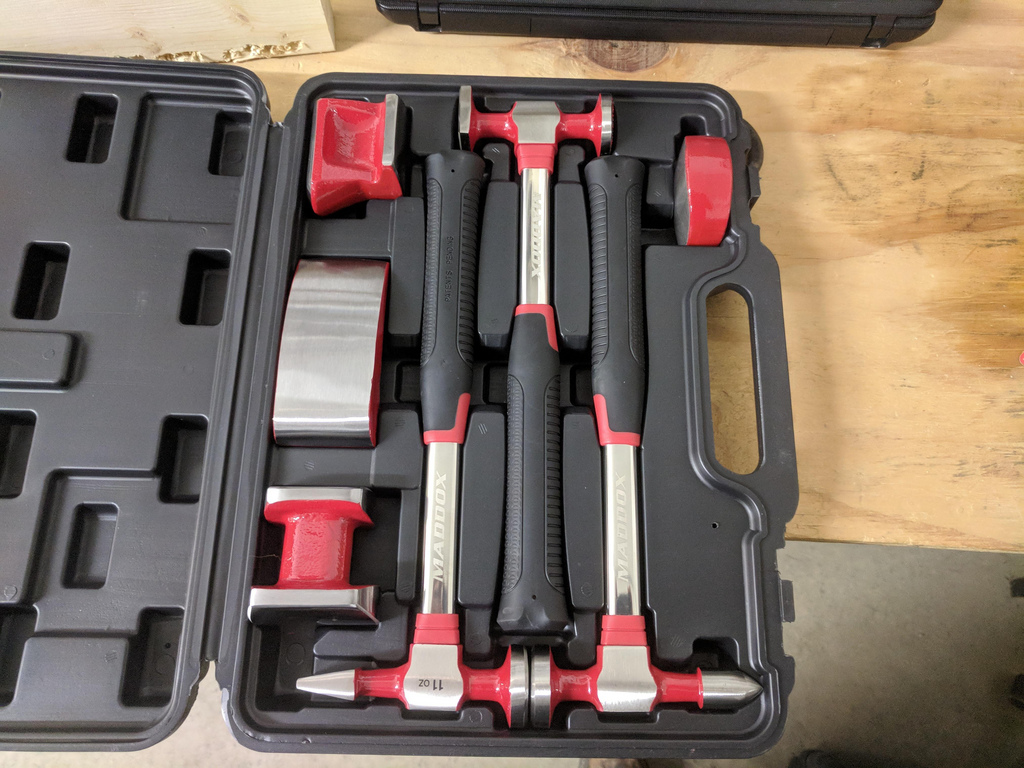
I'm still moving forward slowly with getting the quarter panels and body lines gapped to my liking. I'm having a difficult time staying on track with the body work because it is something I would prefer not doing. It is outside of my comfort zone, but I keep reminding myself to keep pushing forward. One of the things that I did to help with the body work that I am attempting to do is buying some tools. For the amount of body work that I do, I couldn't really justify buying several hundred dollars worth of body hammers and dolly's. I found a 20% coupon for Harbor Freight and picked up this set. I am by no means a qualified judge of body working tools, but I was pretty impressed with the quality of this set. all of the hammers and dolly's were machined very smoothly and seemed solid. Pretty good starter set for less than $30 bucks.
I'm working on getting things straightened out and I am starting from the top and working down. Once I get started, I think it will move along pretty quickly. Should have updates soon.
Also have a few parts to update. I had a buddy who gave me a truck compress and bracket to try with my Holley mounts, but unfortunately they won't even come close to working. It basically won't fit on any angle. I think the only way that it may possibly work is pushing it out to the outer pulley, but then the ribs would be different as it's a 4 rib pulley on that compressor. Cool thing about the truck compressors is that they are a fixed valve compressor so they can work well with the vintage air units.

Also, here are the injectors and wide-band I picked up recently.
I have a set of LS1 coil harnesses and 1 coil pack that should be delivered today for my car. I had a few coil packs that were cracked and I kept the coils from the built LS1 I had a year or so ago. I should get those swapped out soon. I have a brand new set of MSD plug wires and new brackets for the coils. Should look great.
Cheers,
Ryan
1955 Nomad project LC9, 4L80e, C5 brakes, Vision wheels
1968 Camaro 6.2 w/ LSA, TR6060-Magnum hybrid and etc SOLD
1976 T/A LS1 6 Speed, and etc. SOLD
Follow me on Instagram: ryeguy2006a
-
01-18-2018 #247
Registered User
- Join Date
- May 2015
- Location
- Island Lake, IL
- Posts
- 815
I just noticed the Dakota gauges. Awesome Ryan!
-
01-19-2018 #248
Registered User
- Join Date
- Jul 2016
- Posts
- 341
Very nice!!
-
01-19-2018 #249
Registered User
- Join Date
- Sep 2009
- Posts
- 2,709
Thanks, I can't wait to play around with the Dakota gauges. I am trying to forget about the wiring, engine and other fun stuff to try and focus on getting the body work done. I'm in the process now of getting my whiteboard back up in my garage so that I can get a game plan for prepping the body for epoxy. I think it will help keep me inline.
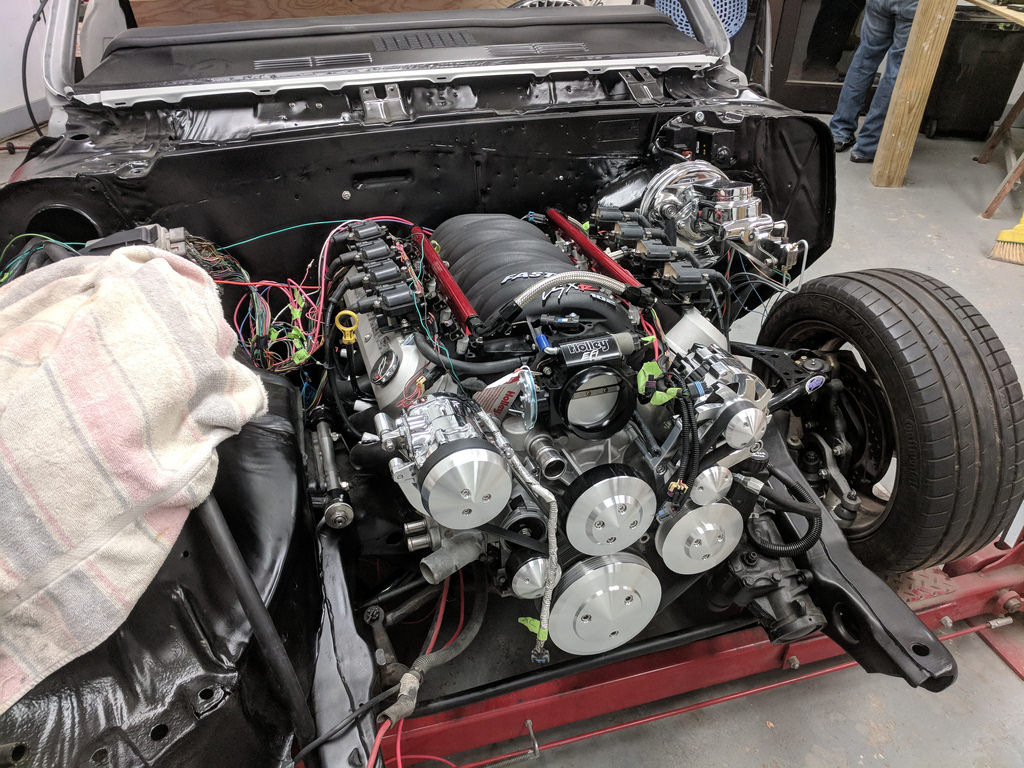
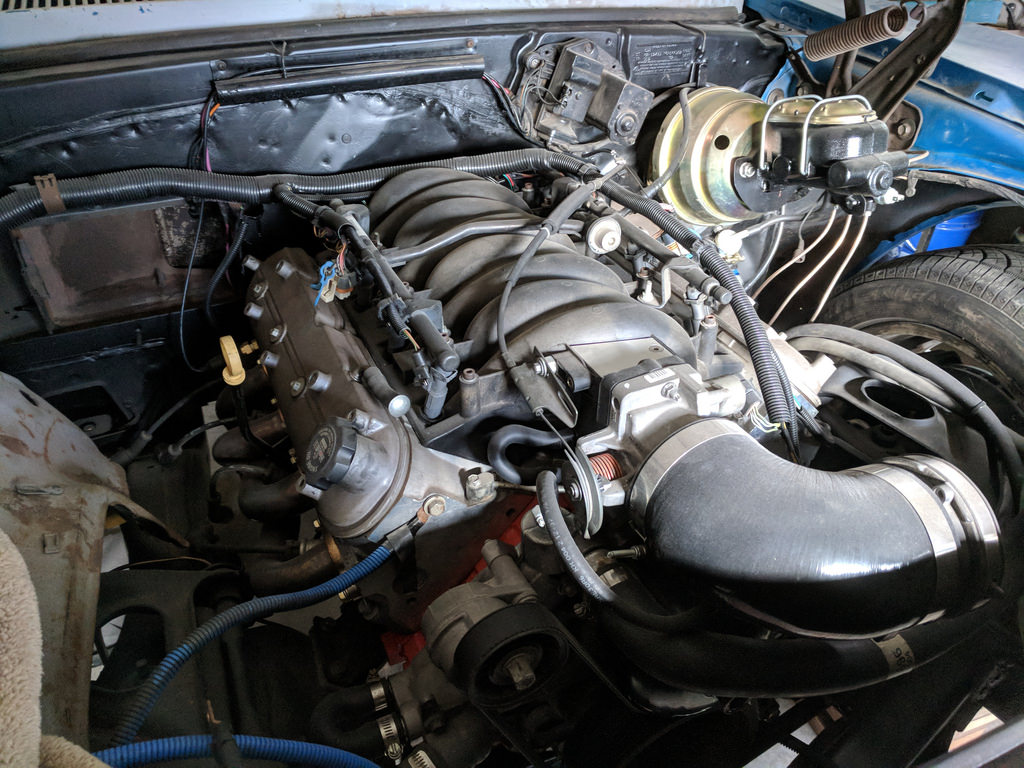
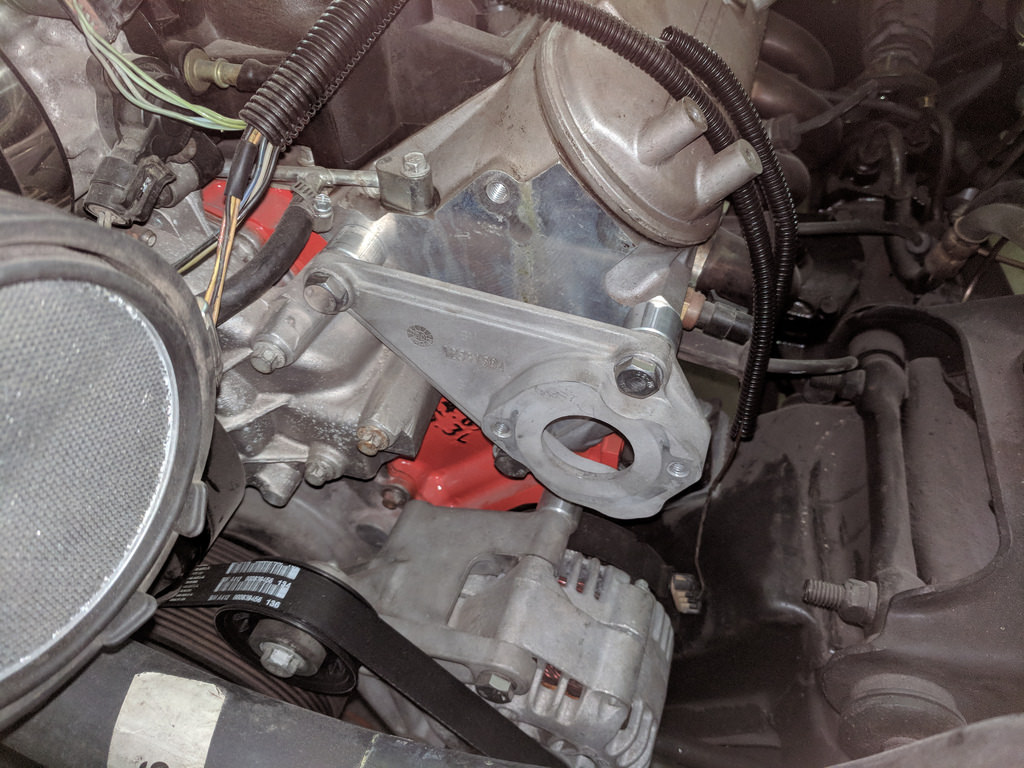
On a side note, I thought I would share with some side work I am doing. My buddy is doing a full restoration on his client's 1967 El Camino which received a built LS1/T56 combo. He has sub-contracted me to assist with the LS wiring and integration of the harness. I took a picture of the motor before I drooled all over it. I am also working through how to get the Vintage Air and ECU to work together to control the A/C so that it functions like a new car would. With fan control, RPM based clutch cut off, and etc. Fun project.
1955 Nomad project LC9, 4L80e, C5 brakes, Vision wheels
1968 Camaro 6.2 w/ LSA, TR6060-Magnum hybrid and etc SOLD
1976 T/A LS1 6 Speed, and etc. SOLD
Follow me on Instagram: ryeguy2006a
-
01-19-2018 #250
 Registered User
- Join Date
- Aug 2015
- Location
- charlotte
- Posts
- 924
that's some nice parts right there!
-
01-22-2018 #251
Registered User
- Join Date
- Sep 2009
- Posts
- 2,709
I made some good progress this weekend. I am continuing to plug away at getting the body work done and decided to focus on finishing up the passenger side quarter/rocker. I started by finishing up the final welds on the rocker where it was butt welded. Then ground flush with a flap disk.
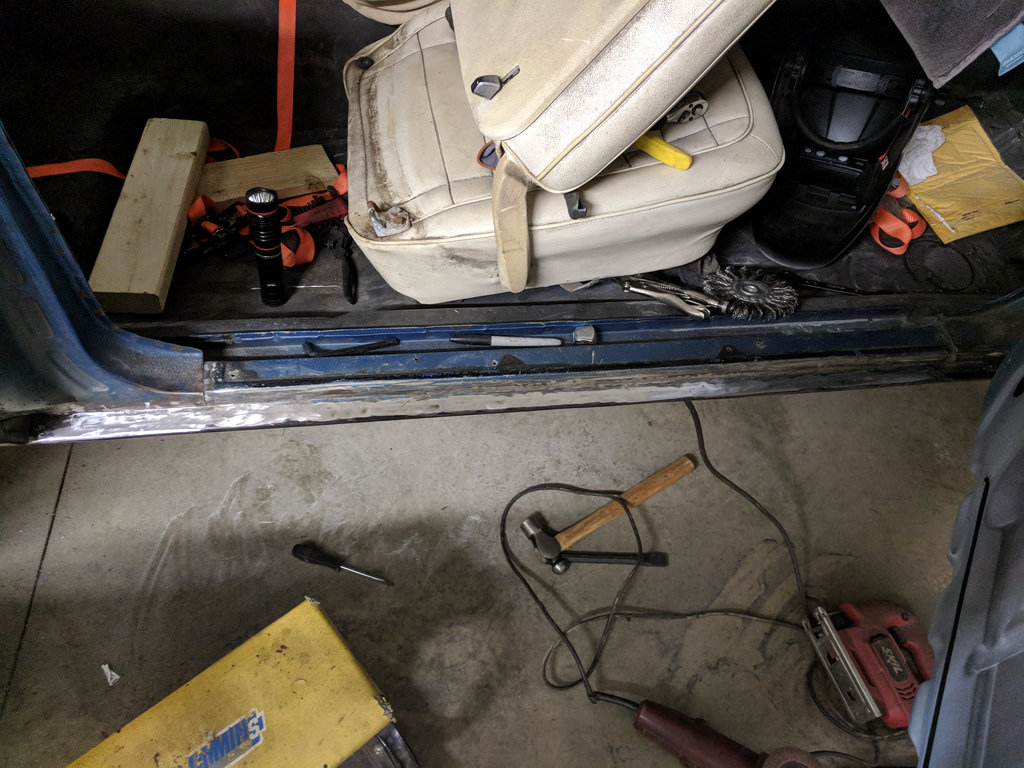
Love flap disks.
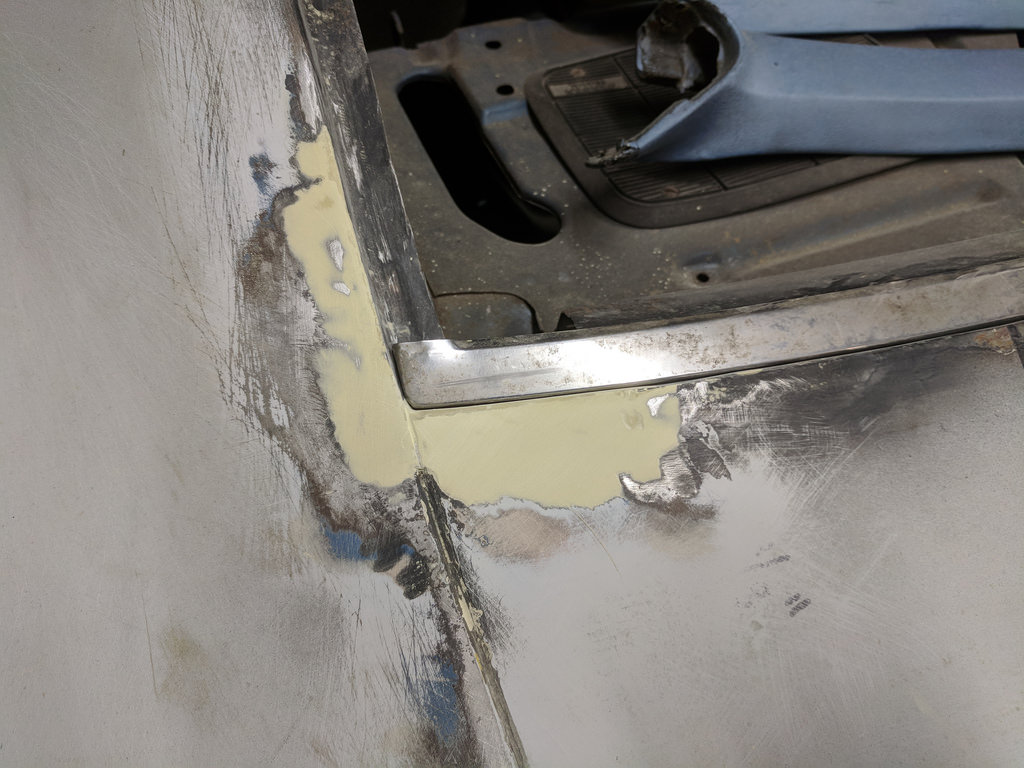
I was busy fitting the quarter panel, and didn't take any before or during pictures. Here it is prepped for some filler.
I also needed to make a small patch here to fill in the gap. One thing I would suggest to anyone is to make your cardboard templates as detailed as you can. It will help save time when making the piece out of metal. Once it's ground flush it will look great.
I talked with a buddy who does body work for high end cars. I told him what I was doing and he recommended some of the fiberglass filler to press into the door jamb where I made the repairs. This stuff is pretty nasty looking, but seemed to do a good job of filling where I needed it to. It made me nervous at first because it took quite a while to dry, but eventually did. I must not have used enough hardener. Overall, I am very happy with the shape and contours of the quarter panel. I got to use some new tools and techniques so I was pretty happy with myself.
Just need to tighten up the body gap in the middle of the door and it will be spot on in my opinion.
I will just need a small skim coat to get the quarter flush to the door.
That was all the progress on my Camaro. This past Saturday I road up to a truck stop called Beaver Betty's (not a joke) with my dad to meet a guy who he was swapping parts with. A few years ago, against my suggestion, he bought a built 700r4 from Monster transmission for his 71 Chevelle with 496 BBC. He ran it for the past few years, but has since changed his mind and would like to get a 5 or 6 speed. He ran across a guy on a Facebook marketplace who was selling a Tremec TR3550 and looking to go automatic. When he first called me, I told him are you nuts, that's a stock Mustang Transmission? But upon further research I was thinking of the TR3650, and the TR3550 is the early model of TKO's rated for around 375 lb ft. Not ideal for a stroked BBC. But he ended up giving the guy a call, they worked out a deal where that guy would give him cash on top of my dad's auto. Well long story short after they exchanged a few part numbers, instead of the trans being the low model it came back to the TKO 600 which is rated for 600 lb. ft.+. What are the odds of two guys swapping for exactly the same parts that each other wanted. Nice score dad!
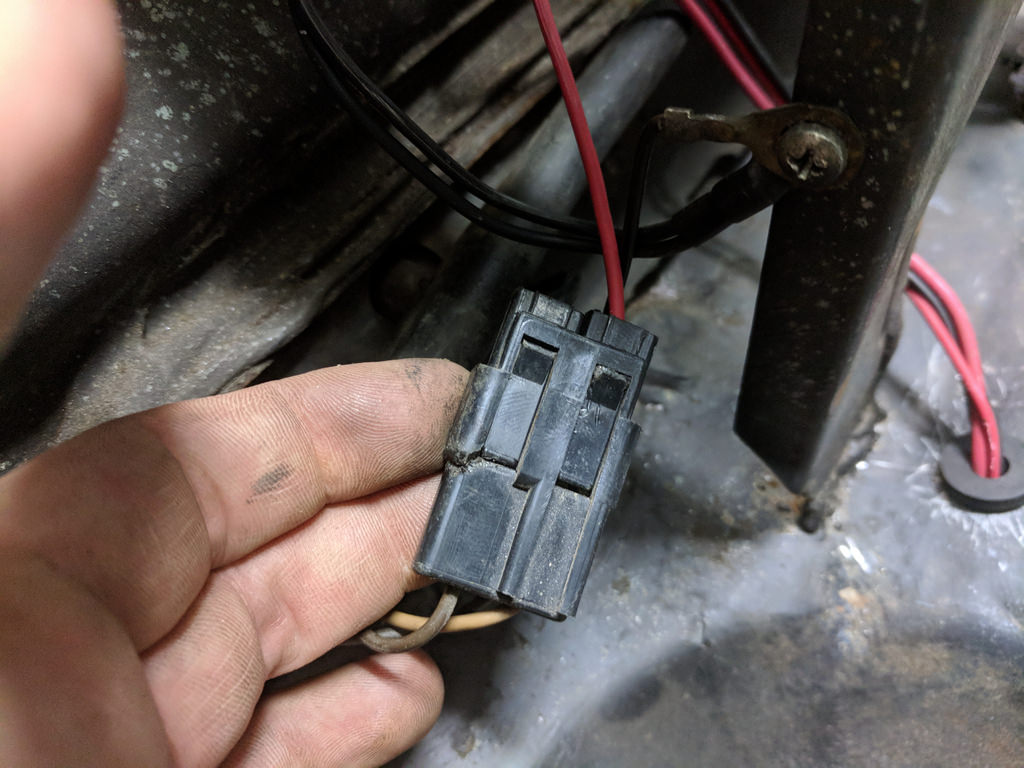
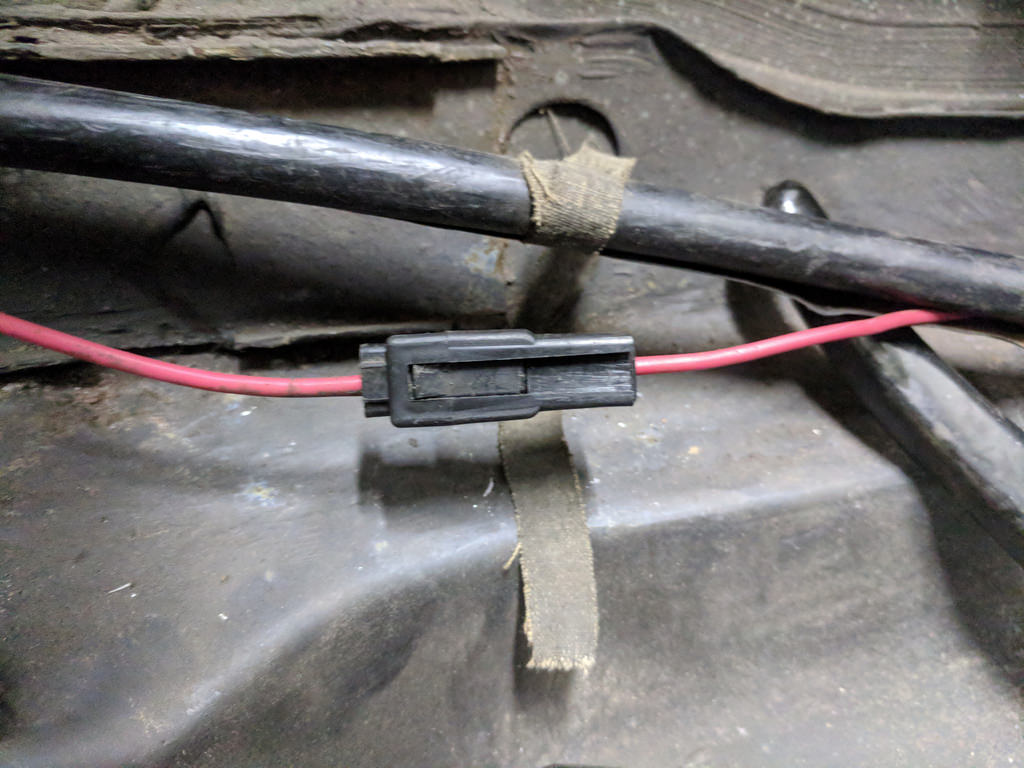
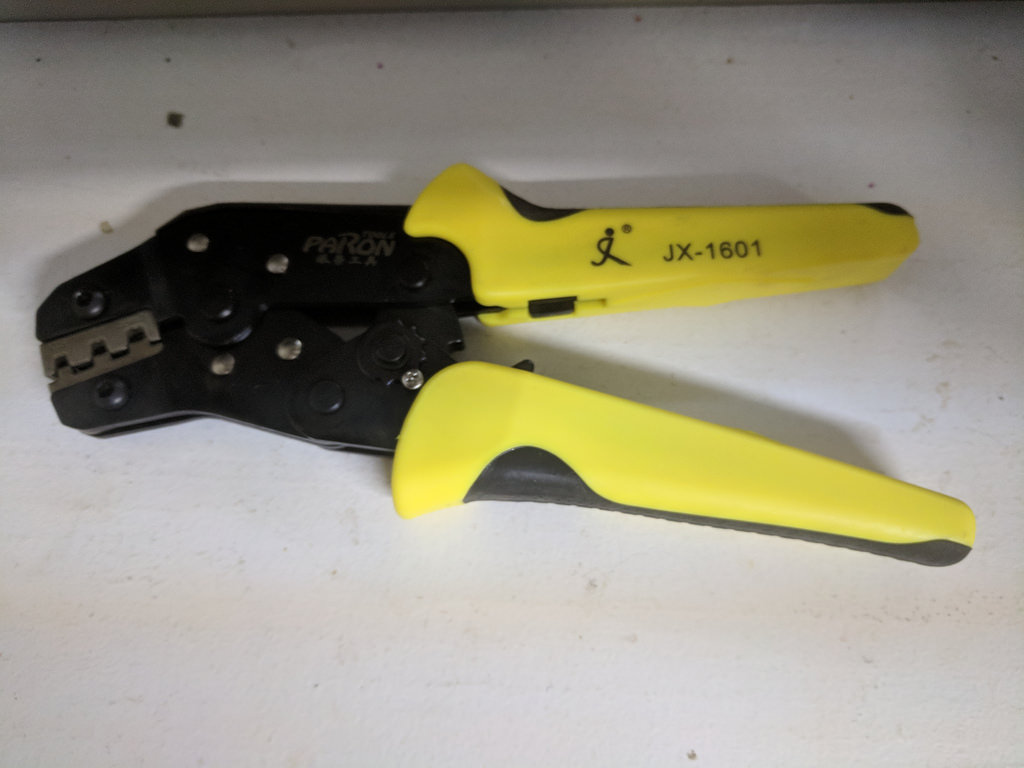
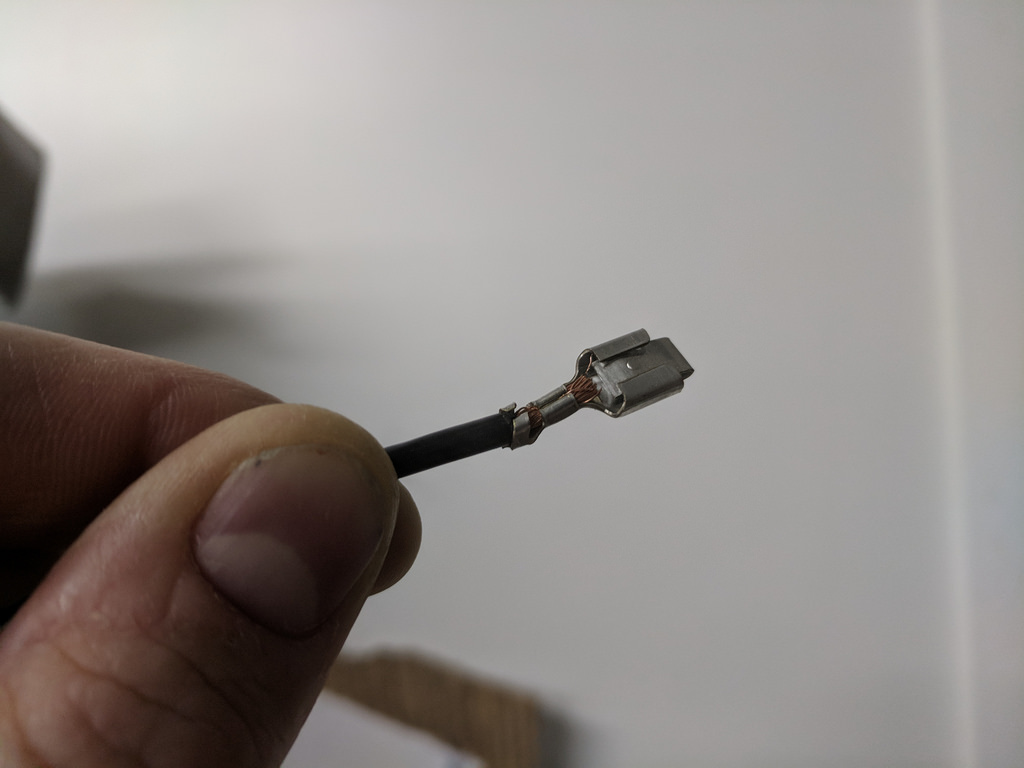
Another tool update, I have been doing some research and trying to find a good ratcheting crimper that will work for the Packard 56 terminals. I found this one on ebay for $11 bucks and thought it was worth a try. It will do the open barrel terminals, but the Packard 56 are very thick and it won't work with them. Back to the drawing board. I am just not at a point where I can spend $100+ on a crimper for a few connections. My search continues, but for the smaller stuff it does a pretty good job. I tried pulling on that connection pretty hard and it didn't budge.
1955 Nomad project LC9, 4L80e, C5 brakes, Vision wheels
1968 Camaro 6.2 w/ LSA, TR6060-Magnum hybrid and etc SOLD
1976 T/A LS1 6 Speed, and etc. SOLD
Follow me on Instagram: ryeguy2006a
-
01-29-2018 #252
Registered User
- Join Date
- Sep 2009
- Posts
- 2,709
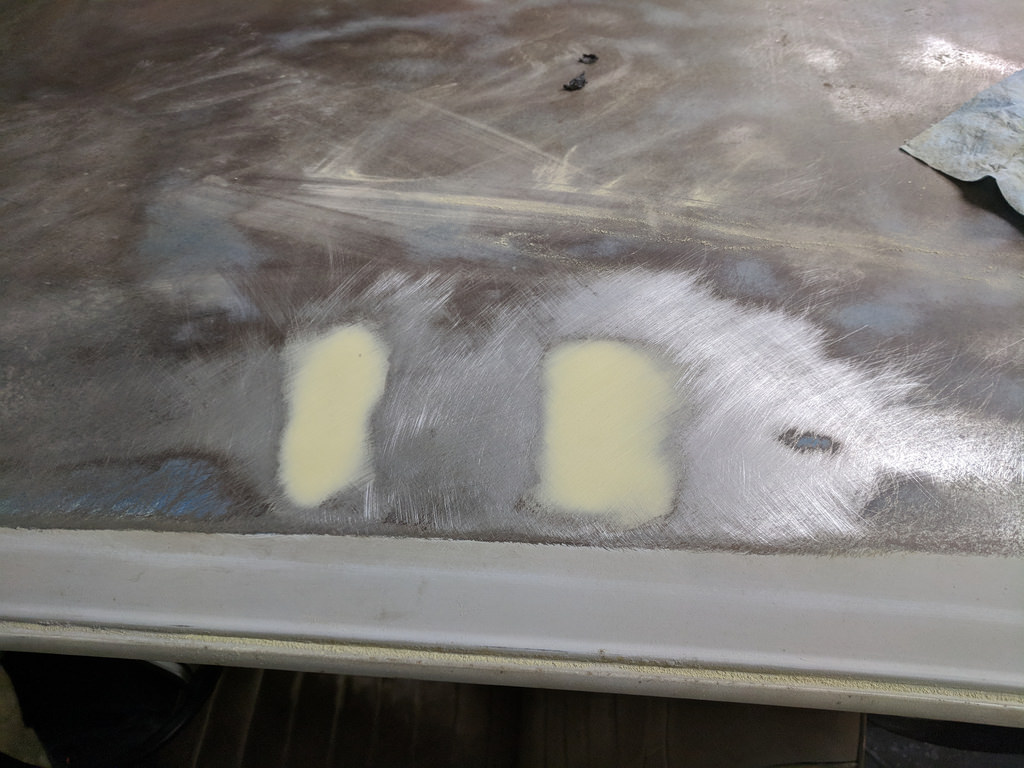
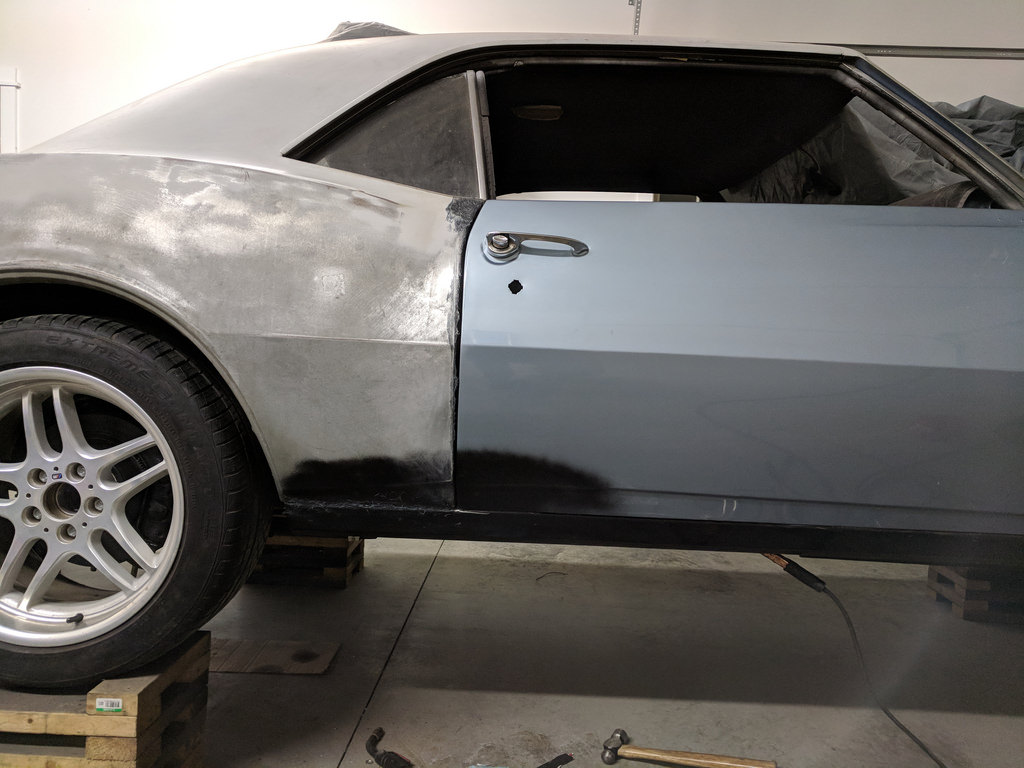
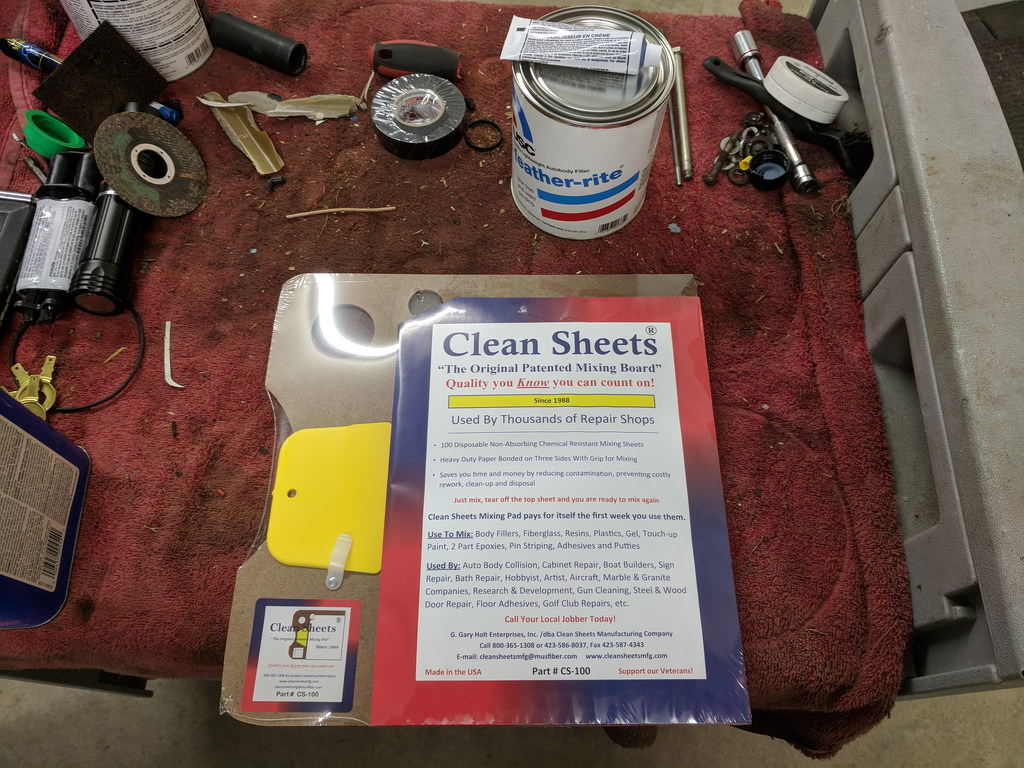
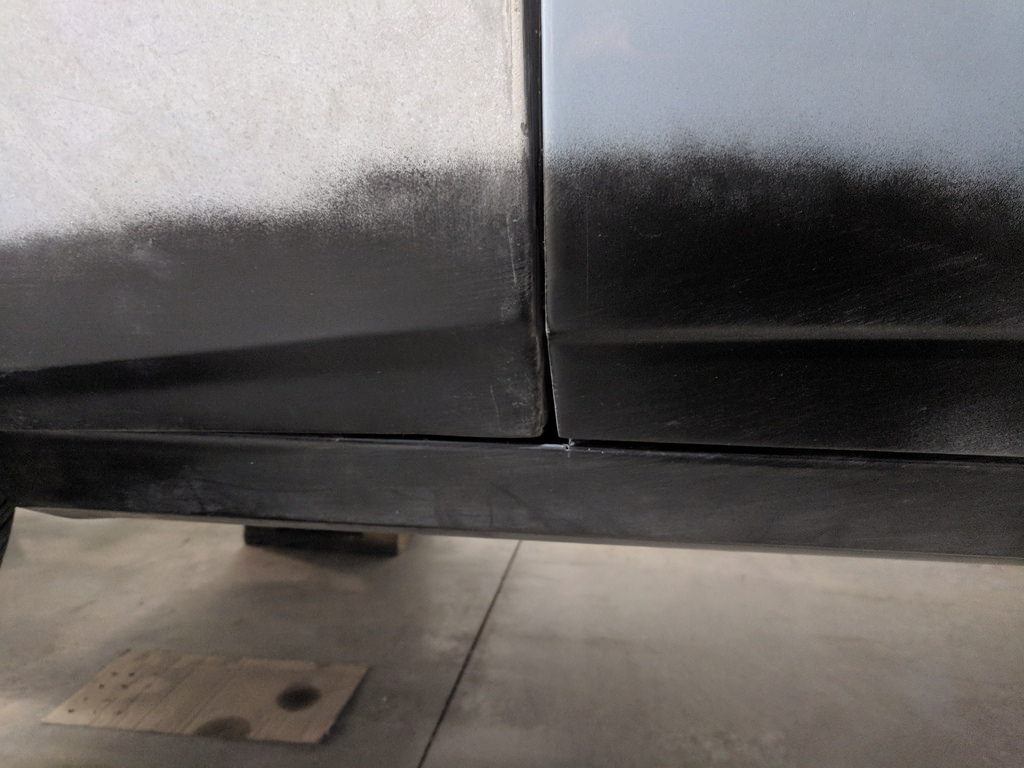
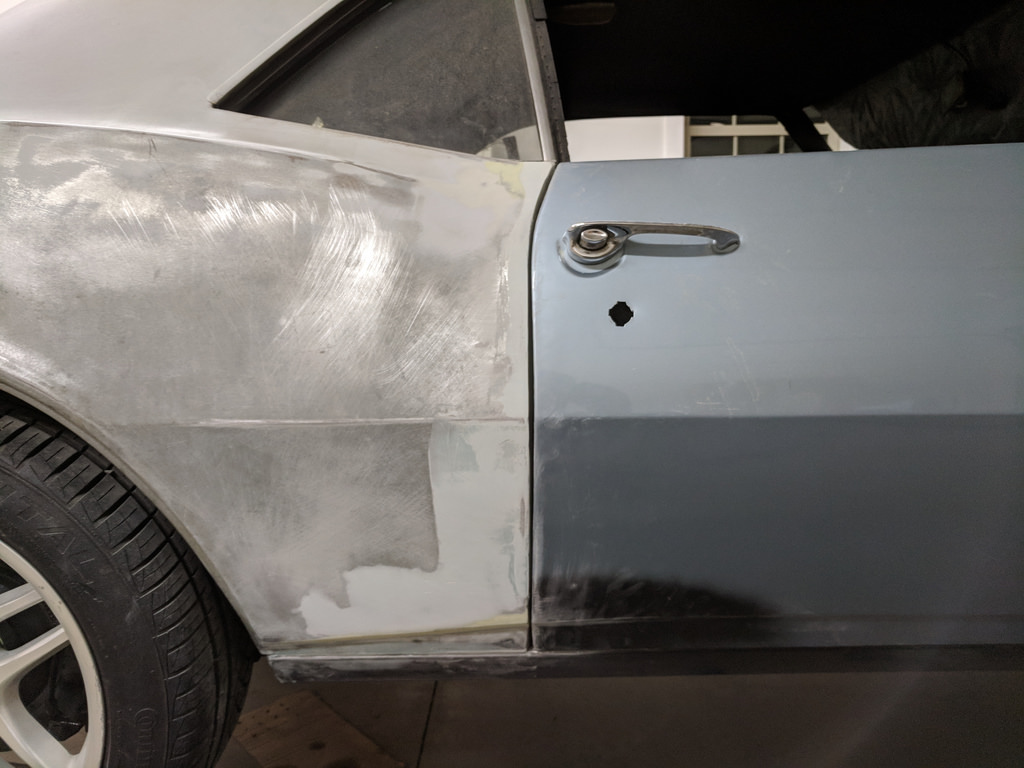
I stopped by the local auto paint store after work on Friday and grabbed some better body filler and one of the tearable mixing boards that I have wanted for a while. I started working on the body line issue I was having. The body lines were right where I wanted them with the center door line and the top of the door, but the lower lines were off by a good margin.
I wasn't very happy with this. Unfortunately, I am too far along with this quarter panel to think about getting a better stamping...
Please keep in mind I have never really done any bodywork to speak of so this is my first go. I was surprised after the first bit of filler how it was starting to take shape. I used some 36 grit paper to rough in my shape.
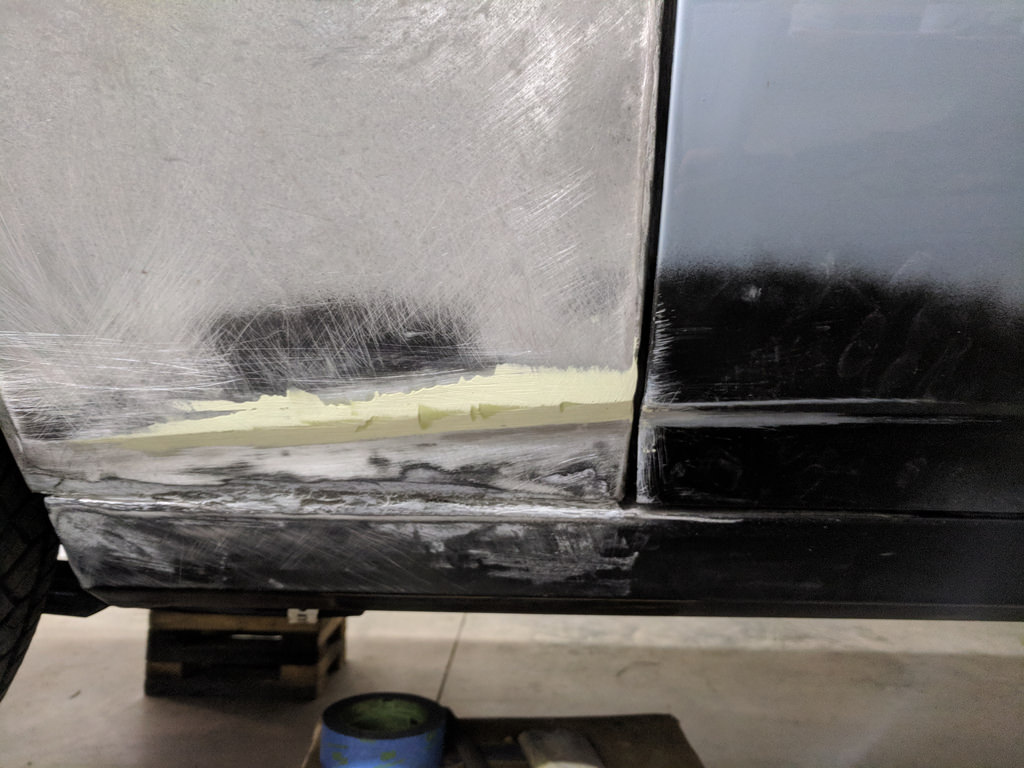
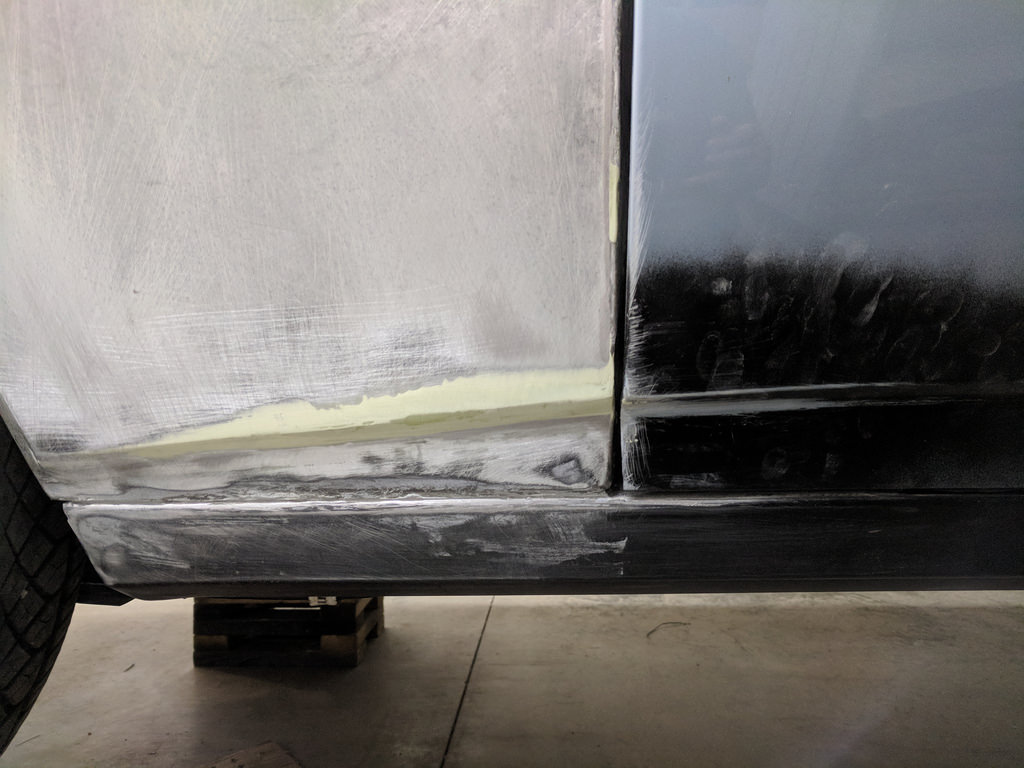
Not to bad for a few rounds of filling and sanding.
It didn't take much filler at all and the line must have been more of an optical illusion as it didn't need much filler. It completely changed the look though.
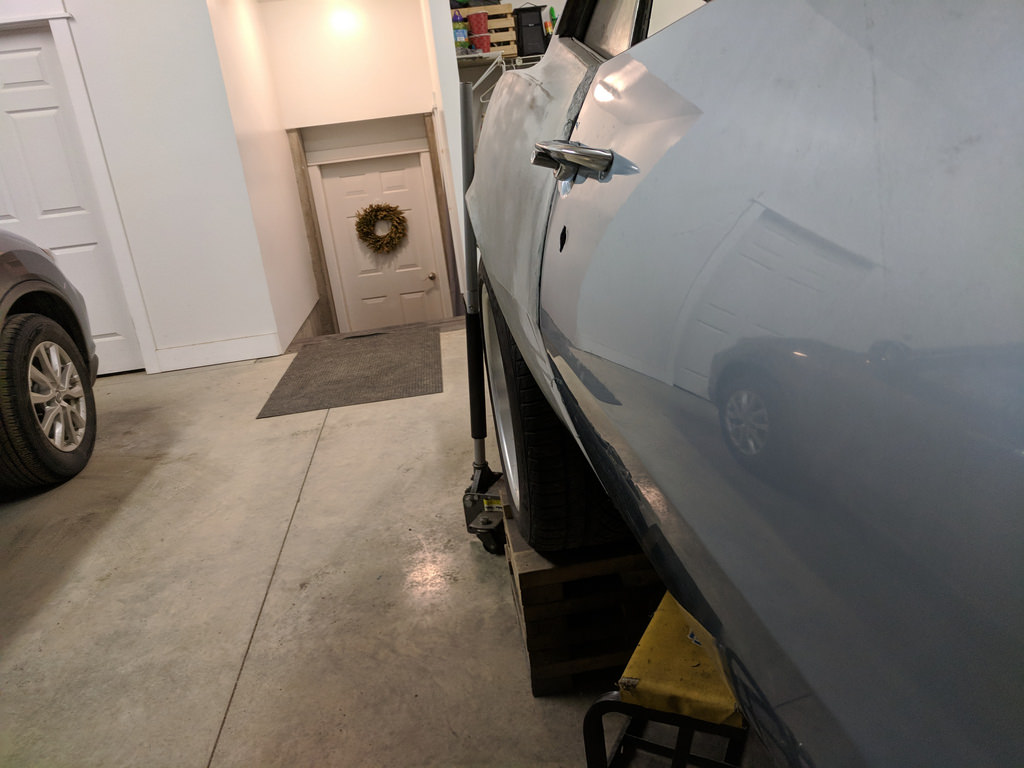
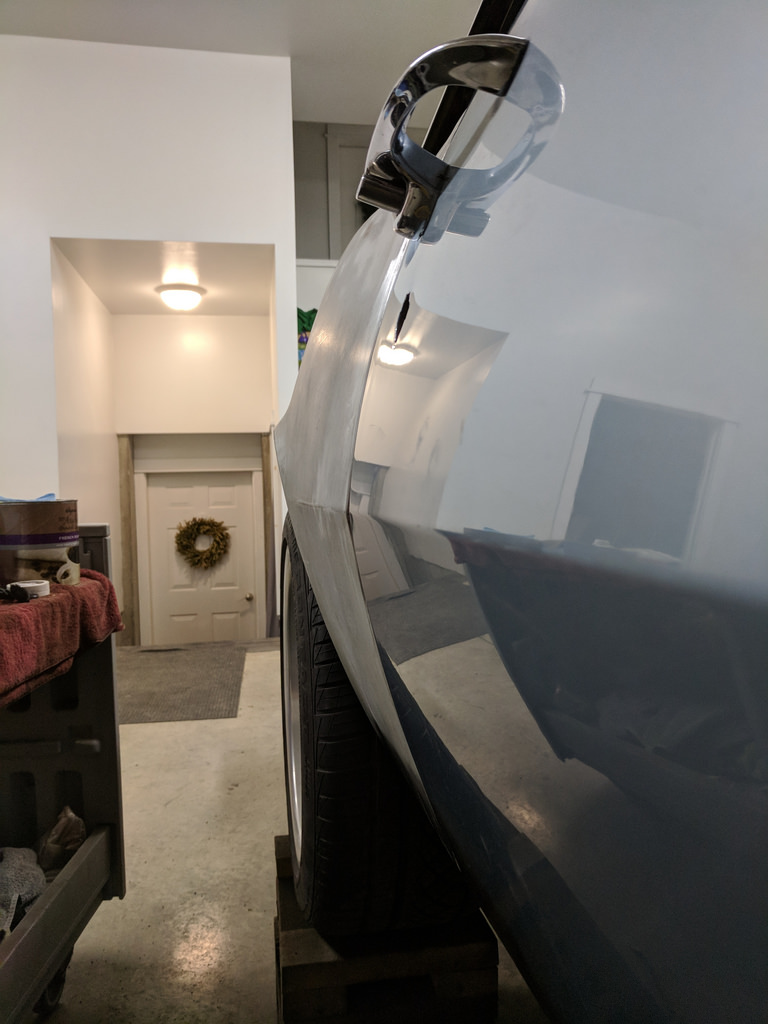
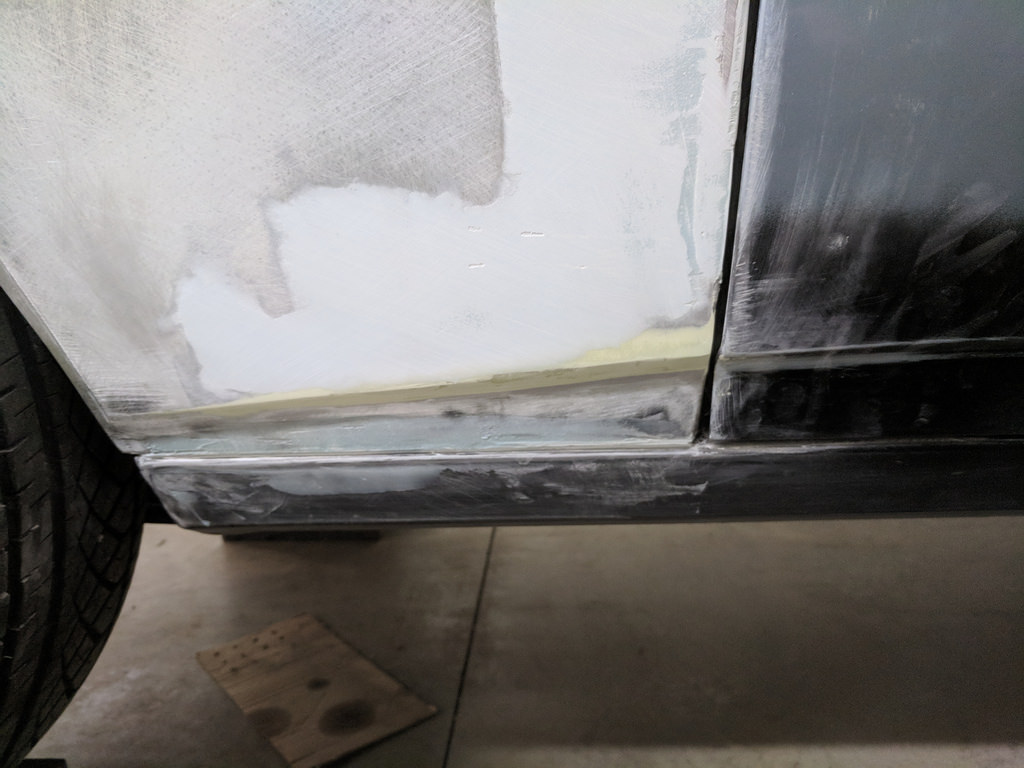
I was simultaneously working on the door gaps and depth. I'm very happy with the way that it's all coming together. Door gap are a little tight just above the center body line, and need to be tightened in the center. Another round of sanding and filling should take care of that.
I also started to strip the passenger fender to prep for a little filler work and noticed that the edge of the fender appears to be just pushed in slightly through the center. I am going to attempt to pull the fender off and use a dolly to move the edge of the fender close to flush. It will also be a good time to pull the inner fender to paint, drill holes for the RS headlights, and re-do the mount for my ECU.
1955 Nomad project LC9, 4L80e, C5 brakes, Vision wheels
1968 Camaro 6.2 w/ LSA, TR6060-Magnum hybrid and etc SOLD
1976 T/A LS1 6 Speed, and etc. SOLD
Follow me on Instagram: ryeguy2006a
-
02-12-2018 #253
Registered User
- Join Date
- Sep 2009
- Posts
- 2,709
It's been a couple weeks, but I do have enough progress to make another update. I have been working on the car for an hour or two here and made some significant progress on the passenger side quarter panel. I didn't get any picture during as I got busy and forgot. but the entire quarter panel is now fully welded. I ground down the spot welds with my flap disk and trimmed the inner fender to match the quarter panel. It came out really nice.

I added the final round of filler to close the gap on the quarter and fill a couple high spots on the lower quarter. I ordered some of the rolls of sticky 80 grit paper and will attach that and get it really close before the final sand before the icing and high build primers.
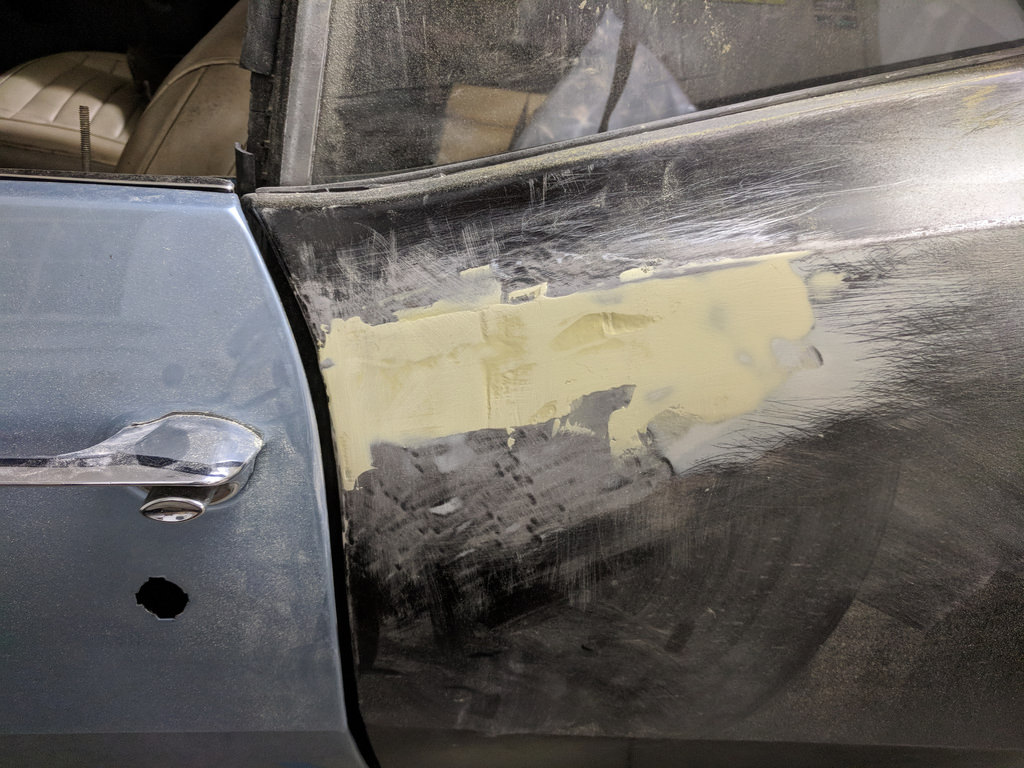
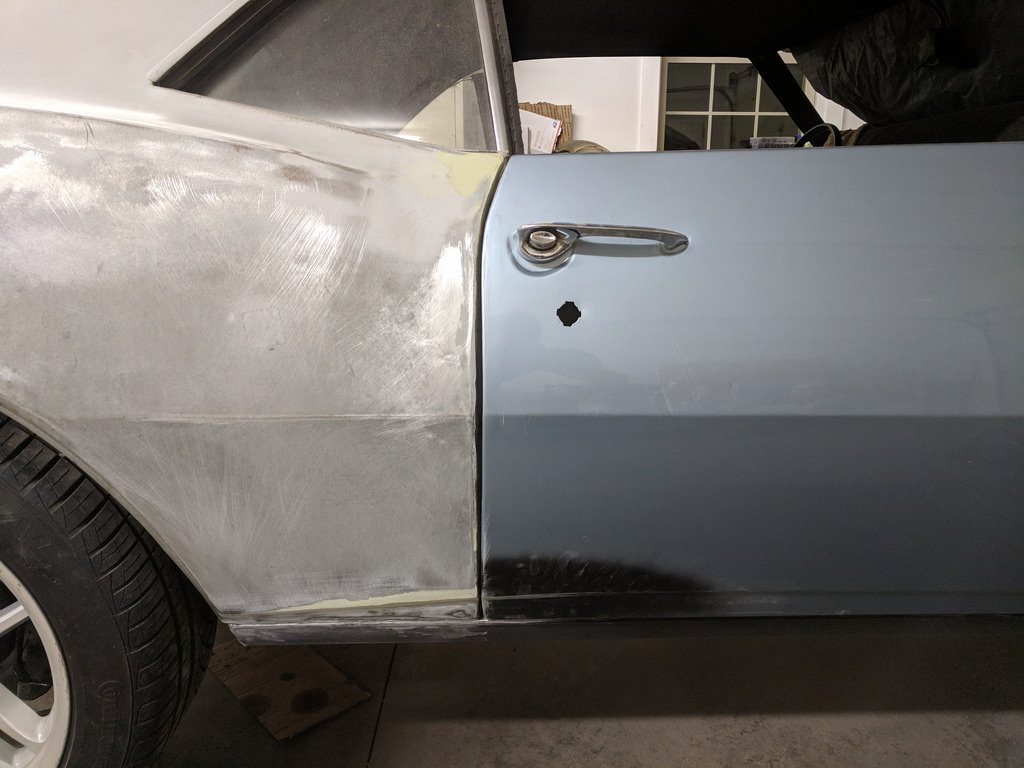
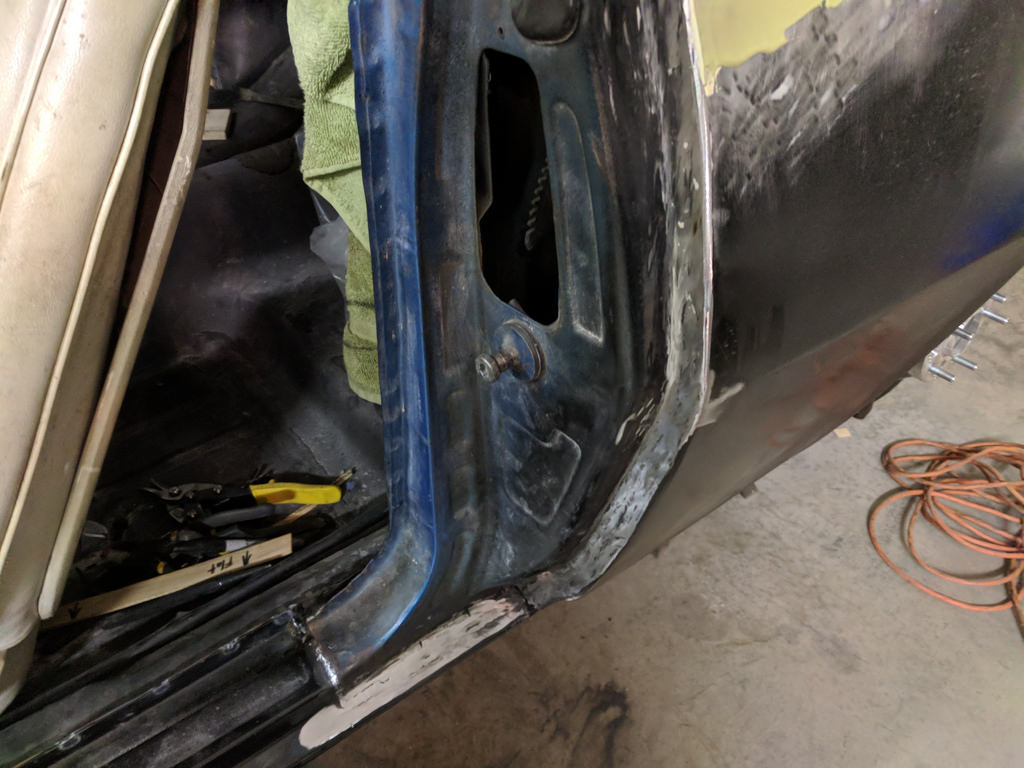
Now that the passenger side is fully welded with all the panel gaps set, I wanted to turn the car around and focus on the driver's side. The panel gaps weren't terrible when I started, but I got them to fit much better. I started with the gaps here.
[url=https://flic.kr/p/23c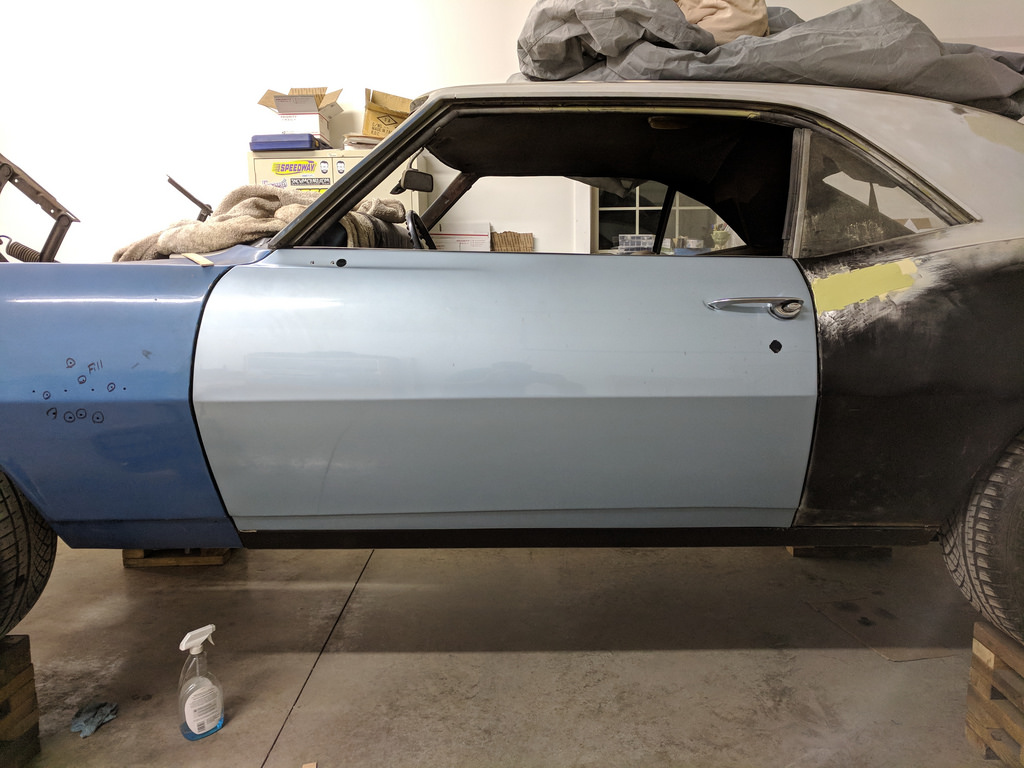
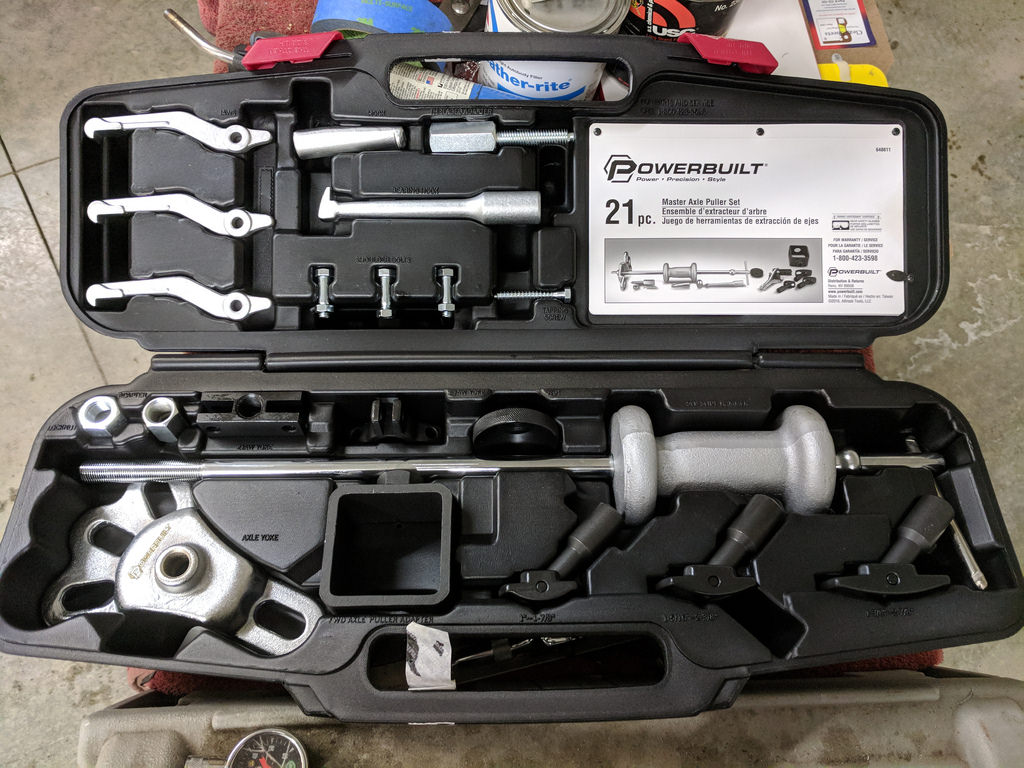
One thing that you will notice from this picture is that the body lines and gaps are not that great on the fender. The lower body line is not lining up at all and what you can't really see is the fender isn't sitting flush with the face of the door skin. I was a little frustrated and after talking with some people I decided to massage the fender and I have learned a lot about body panel fitment. It really amazes me how much a hammer, dolly and a piece of wood can transform how the panels can fit. I rented a slide hammer kit with a hook from AutoZone and it worked incredibly well.
I forgot to take a picture after I set all the door gaps and and have the door right where I want it. Now that I'm happy with the fitment of the fender and door, I am going to work on getting the quarter panel fit and fully welded up.
Next was another thing that I didn't really need to do, but I had a set of 7 LS1 coils, two brackets and brand new MSD plugs that came with that built LS1 motor I picked up a few years ago. I sold the truck coils I had and picked up a set of LS1 coil harnesses and someone selling 2 almost new coils on eBay. I removed the truck coils and am in the process of swapping over to the LS1 coils, but I really like how the motor looks now without the coils... I am very tempted to get some relocation brackets, wires and relocate the coils. After I shave the valve covers that is.
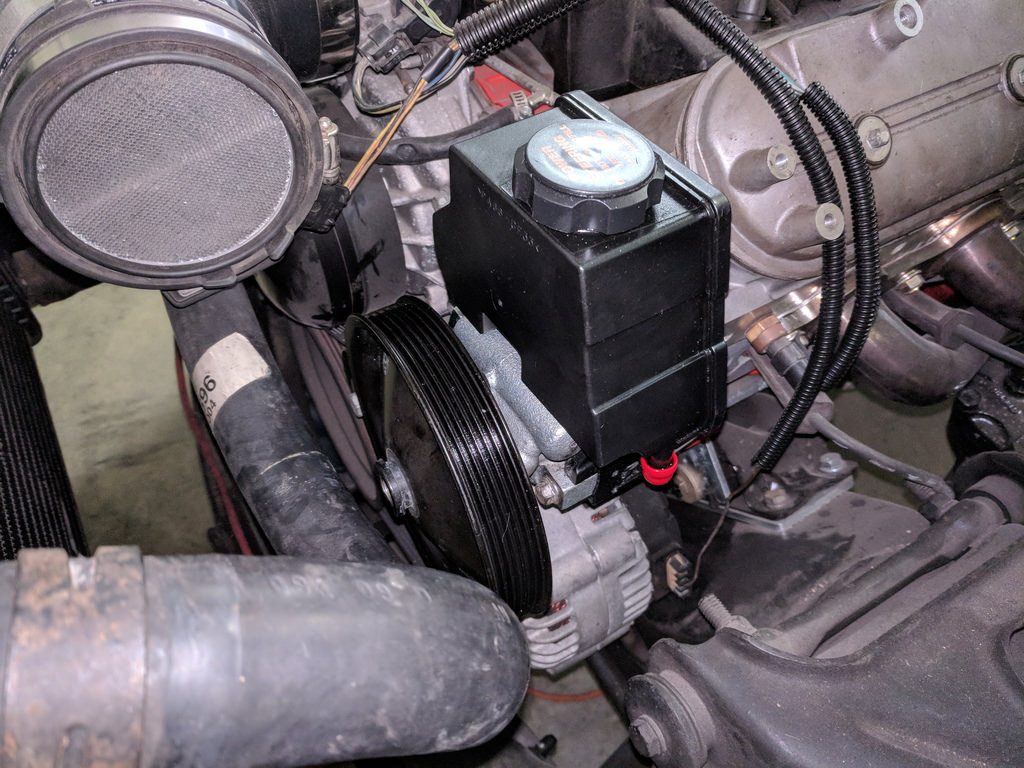
I really get side-tracked easily... Anyway I finally found a good deal on a good used LS1 power steering pump, Thanks gnx7. I got the pump and it looks almost new! I still need to pick up a power steering line and hook it all up. I can't wait to put the lines on so I can get rid of the plastic bag that I have around both of the lines coming off of the steering box now!
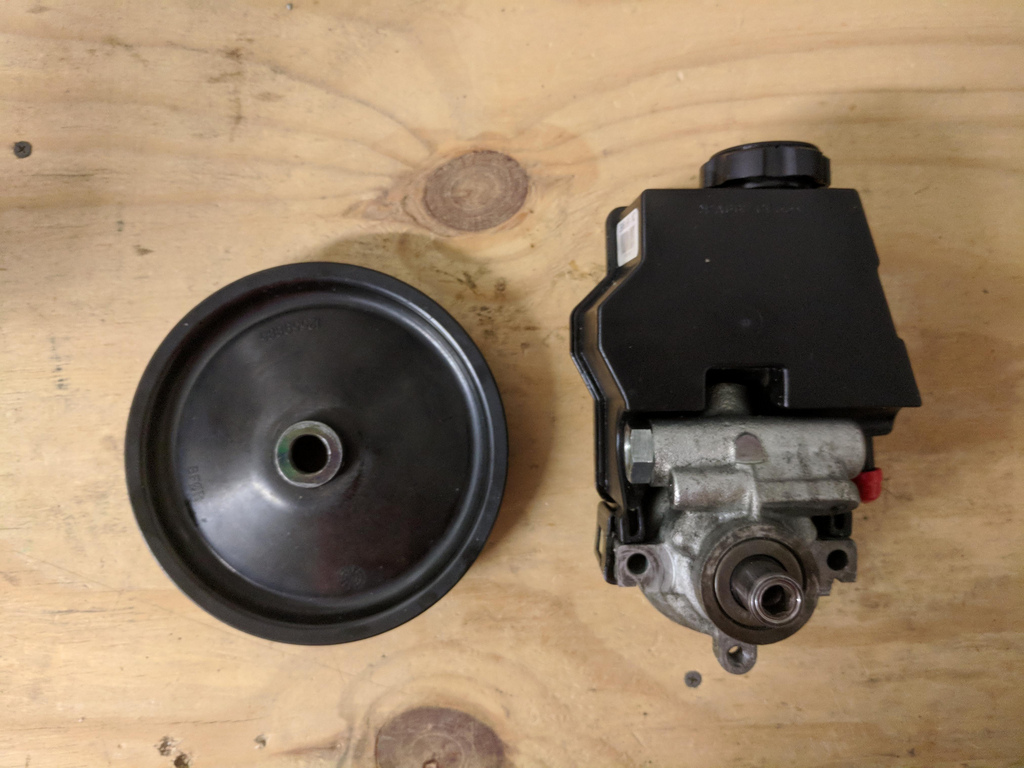
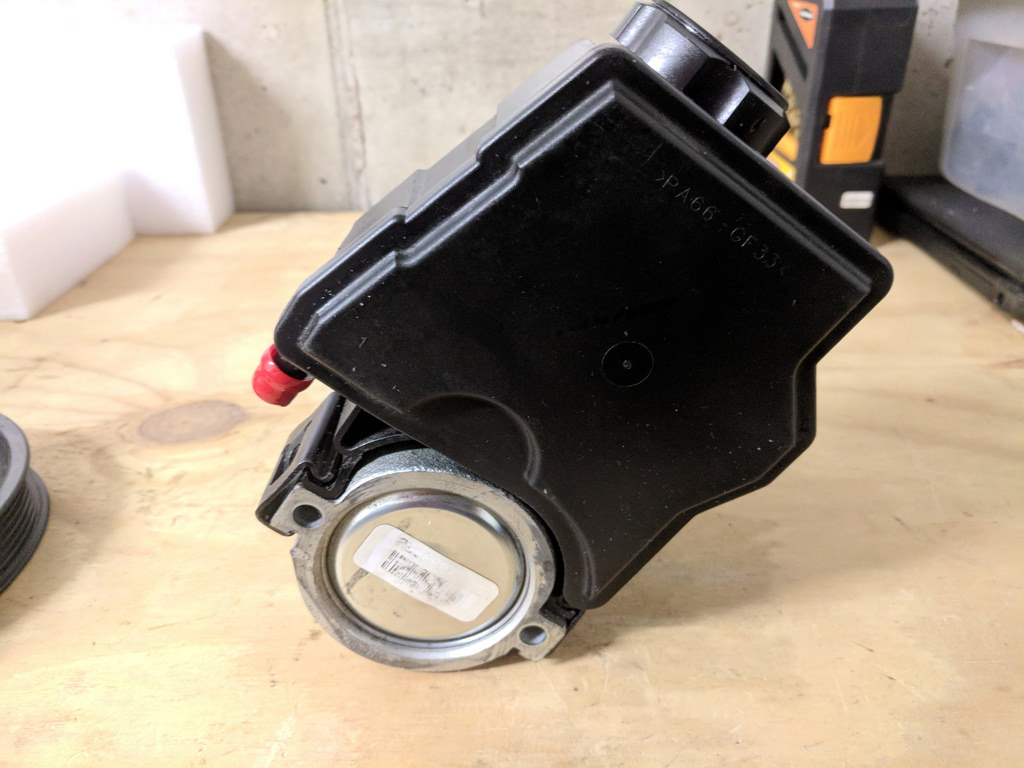
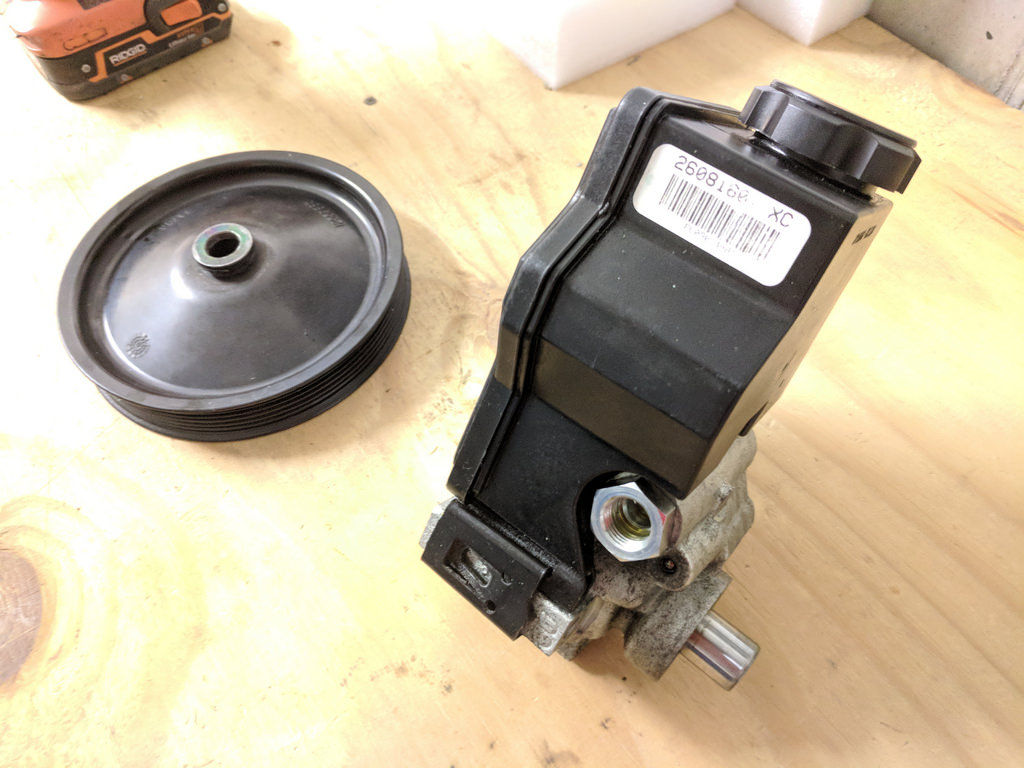
I bolted it on and used the spacers that I bought a while ago to match the truck pulley. Everything fits really well, just need to pick up some slightly longer bolts and I will bolt it down for good.
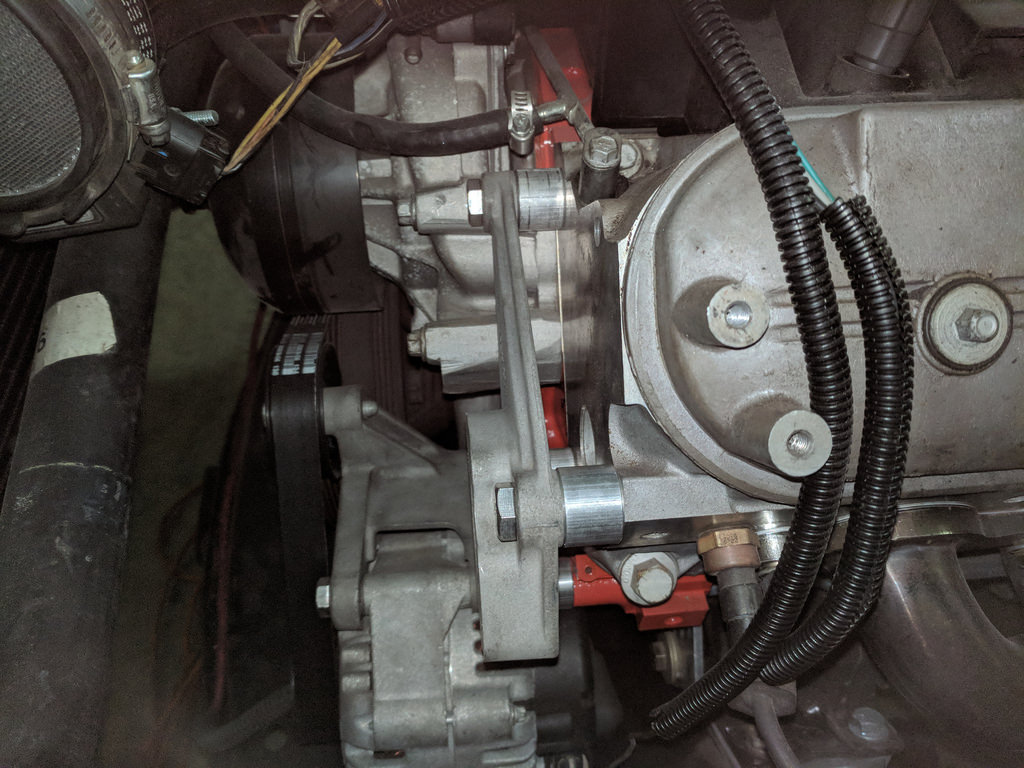
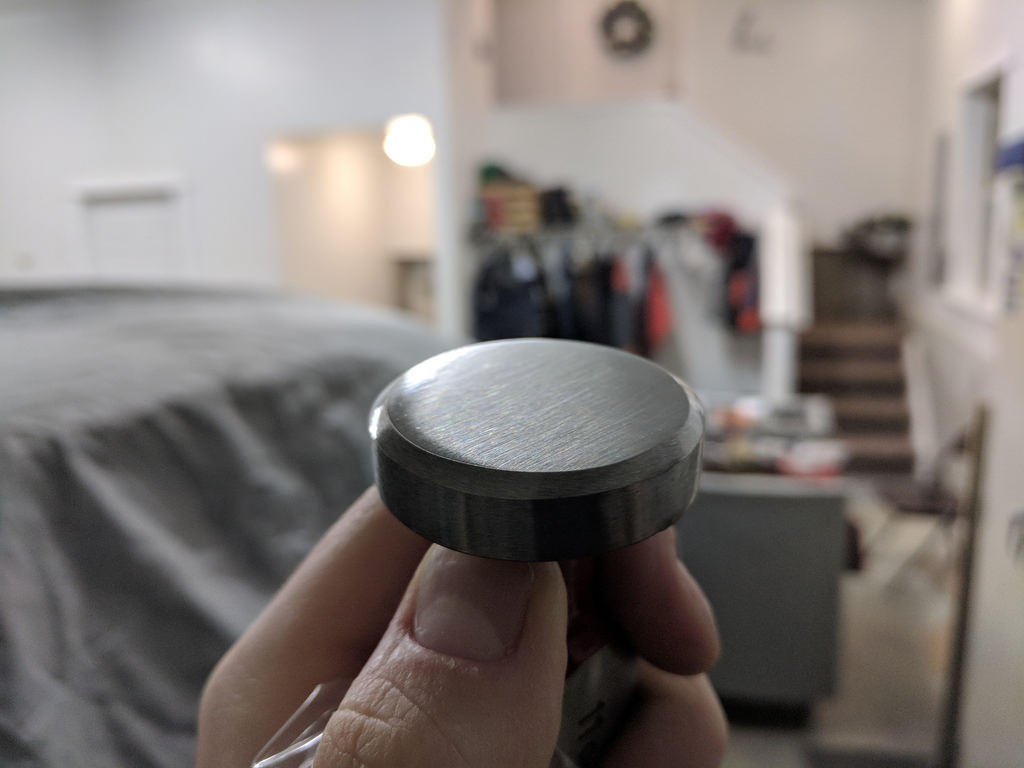
The pulley still needs to be pressed on, but before I do that I'm considering buying one of the aluminum pulley's with the slots in them for easy removal.
Thanks,
Ryan
1955 Nomad project LC9, 4L80e, C5 brakes, Vision wheels
1968 Camaro 6.2 w/ LSA, TR6060-Magnum hybrid and etc SOLD
1976 T/A LS1 6 Speed, and etc. SOLD
Follow me on Instagram: ryeguy2006a
-
02-16-2018 #254
Registered User
- Join Date
- Sep 2009
- Posts
- 2,709
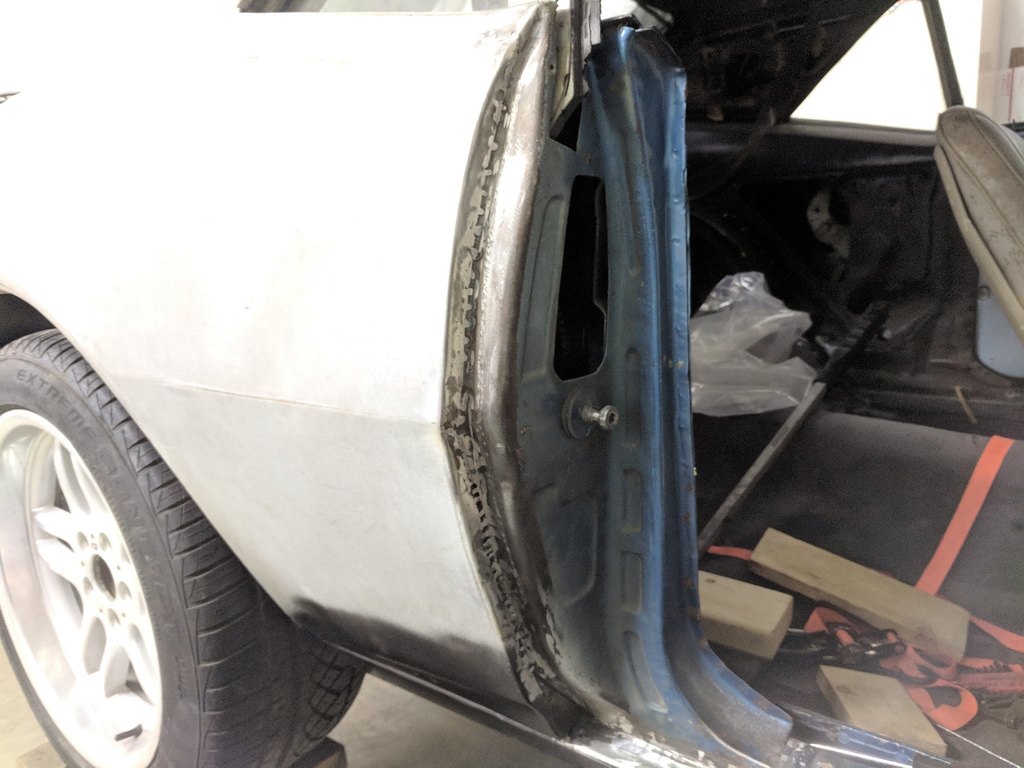
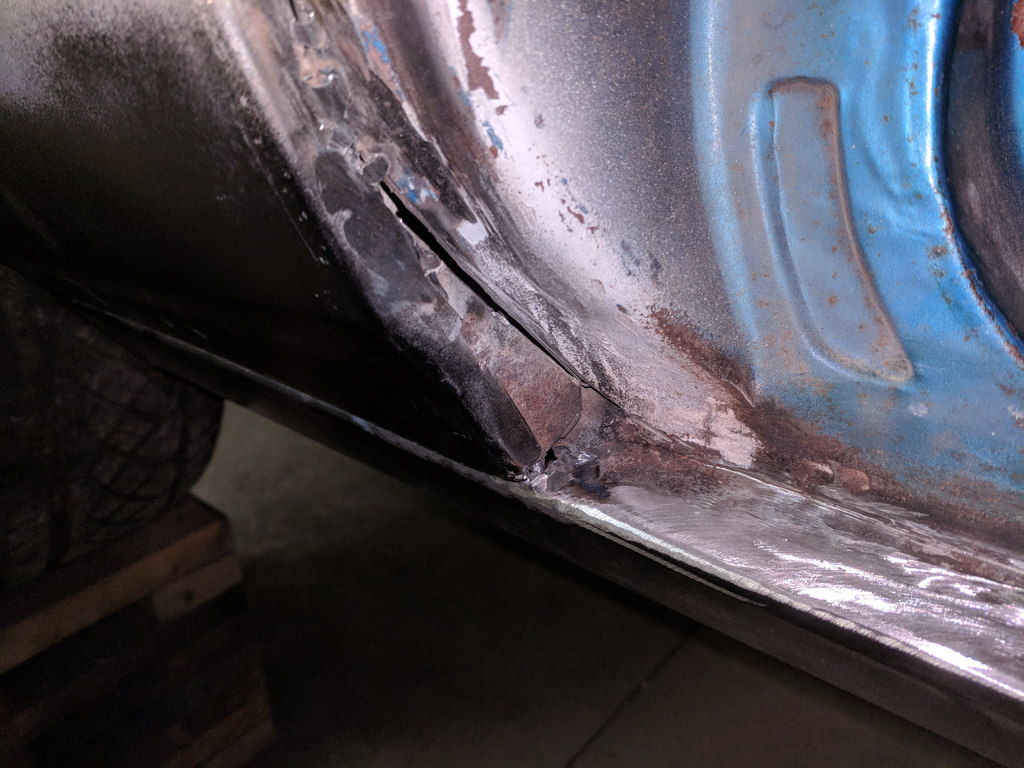
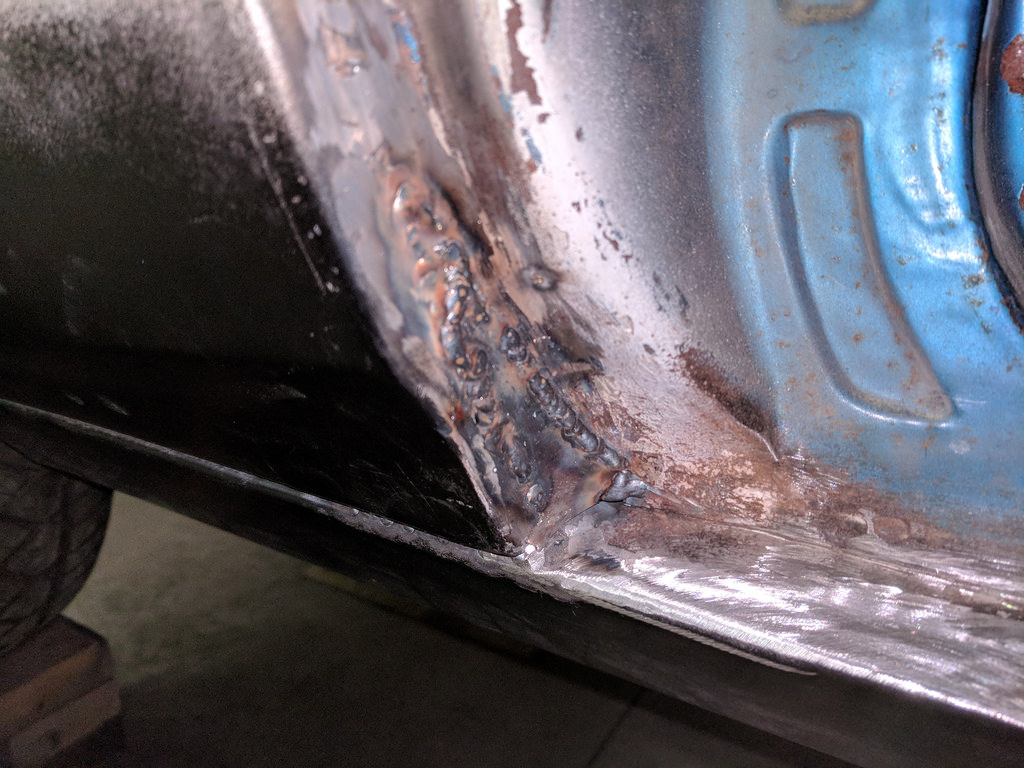
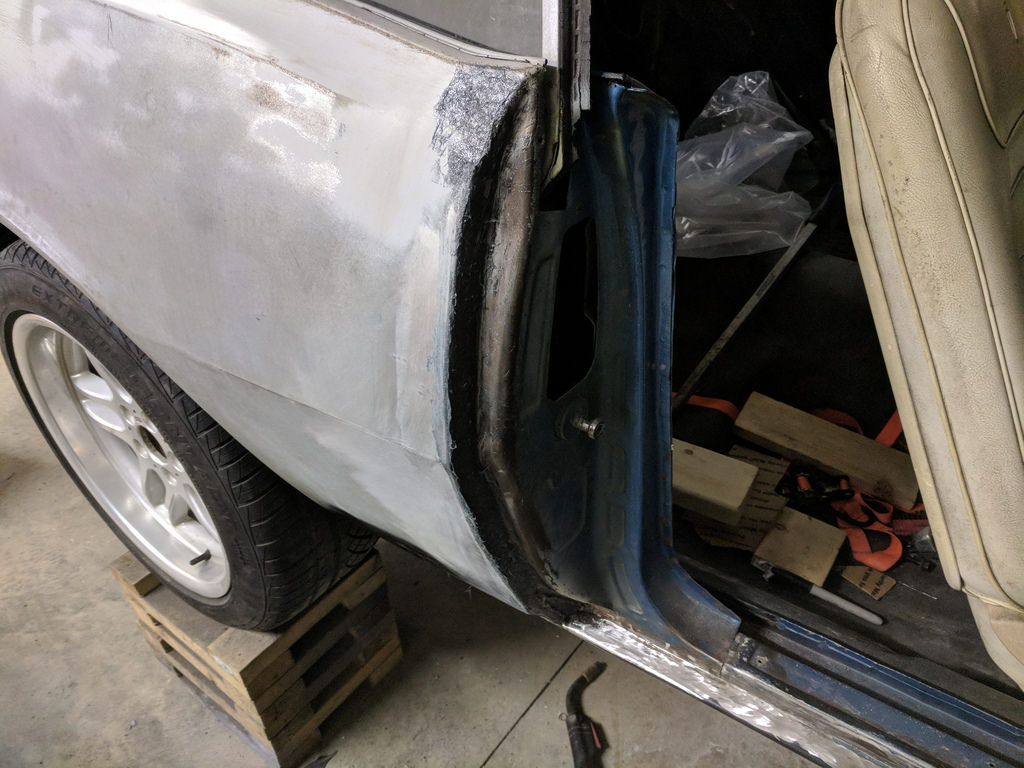
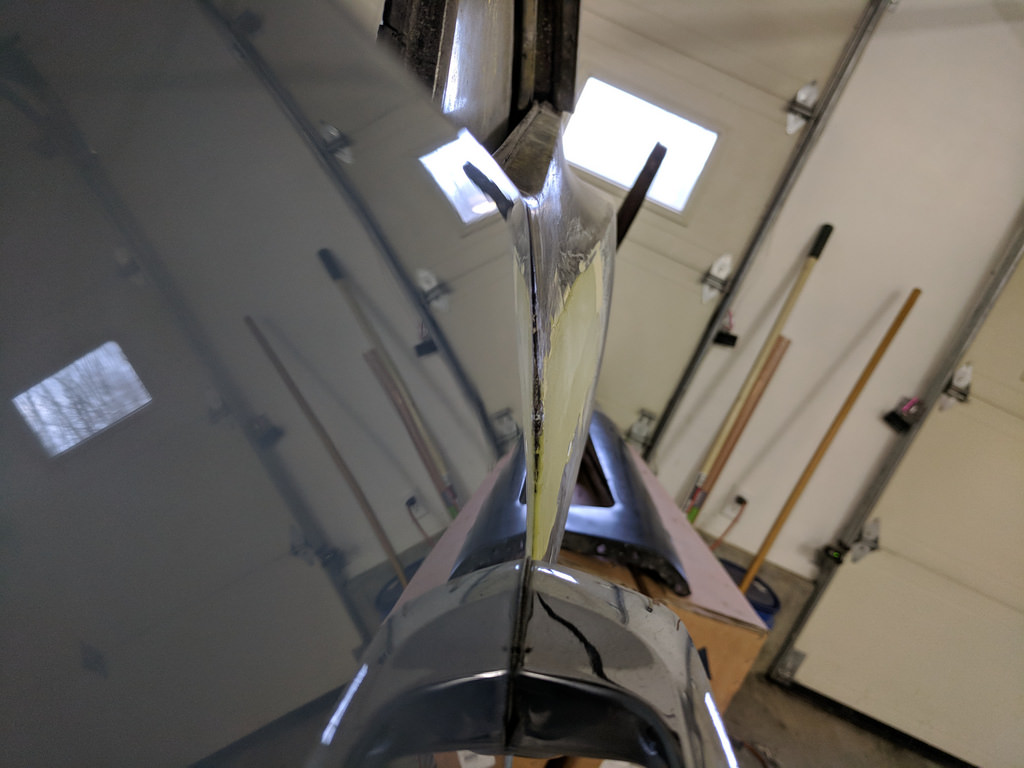
Well, the wife went to bed early last night so I decided to put in some time in the garage. I turned the car around so I could finish welding on the quarter panels and trunk extension panels. That way I can be done with welding and get the body work started on this quarter. If you remember I had to split the quarter skin to fit it to the door and get the outer wheel house in for replacement. Now I need to close that gap. It looks ugly, but I took a lot of time to make sure that the panels were flush before welding so that will come out very smooth with the flap disk.
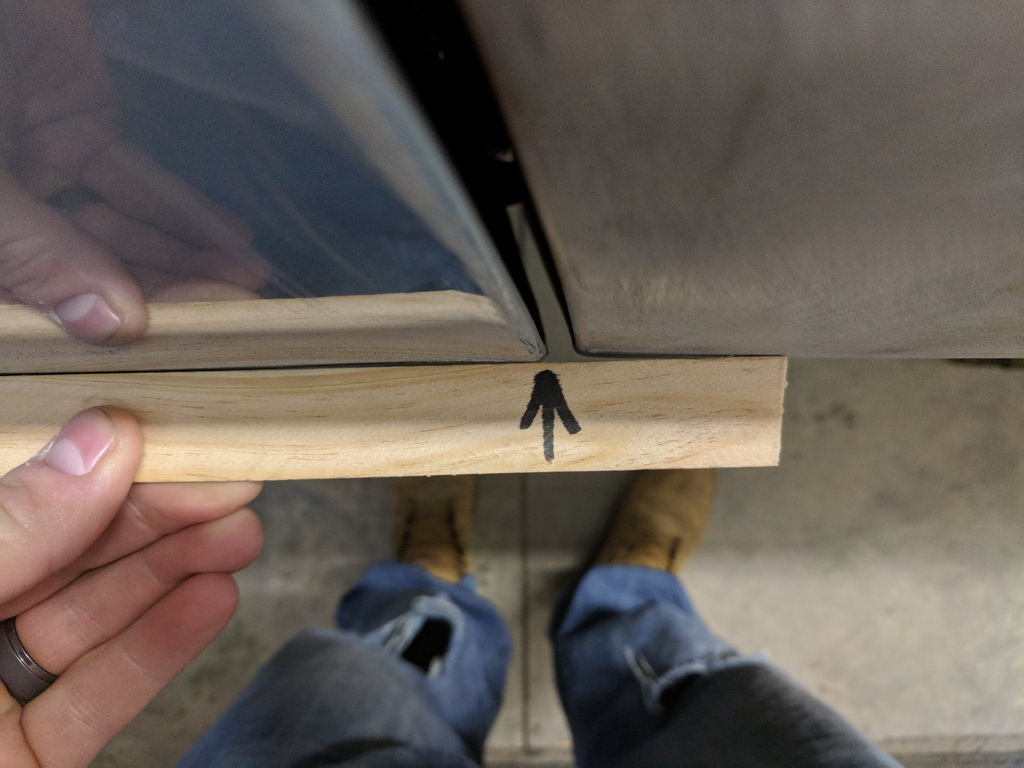
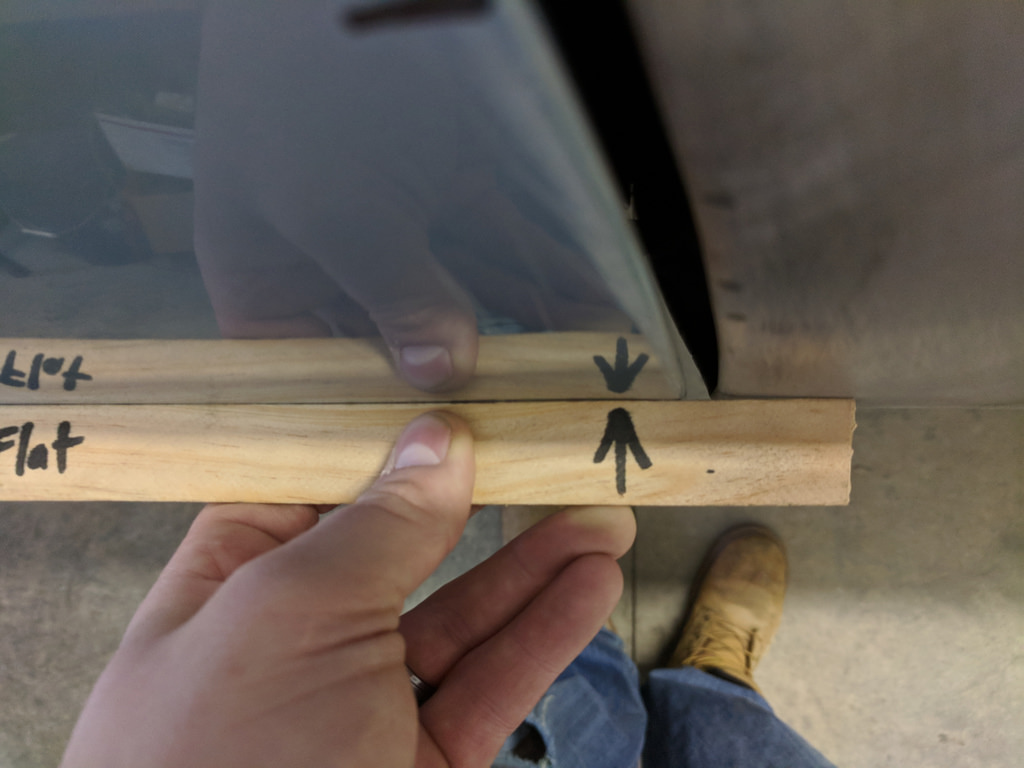
I had to make another cut to get the quarter to sit flush at the top part of the door. I also found out that the top part of the quarter panel was actually bent down as you can see in the picture where it is sticking out at the leading edge. It wouldn't sit flat to the top of the door and I found out that's why. couple of taps with the hammer got it all back in shape.
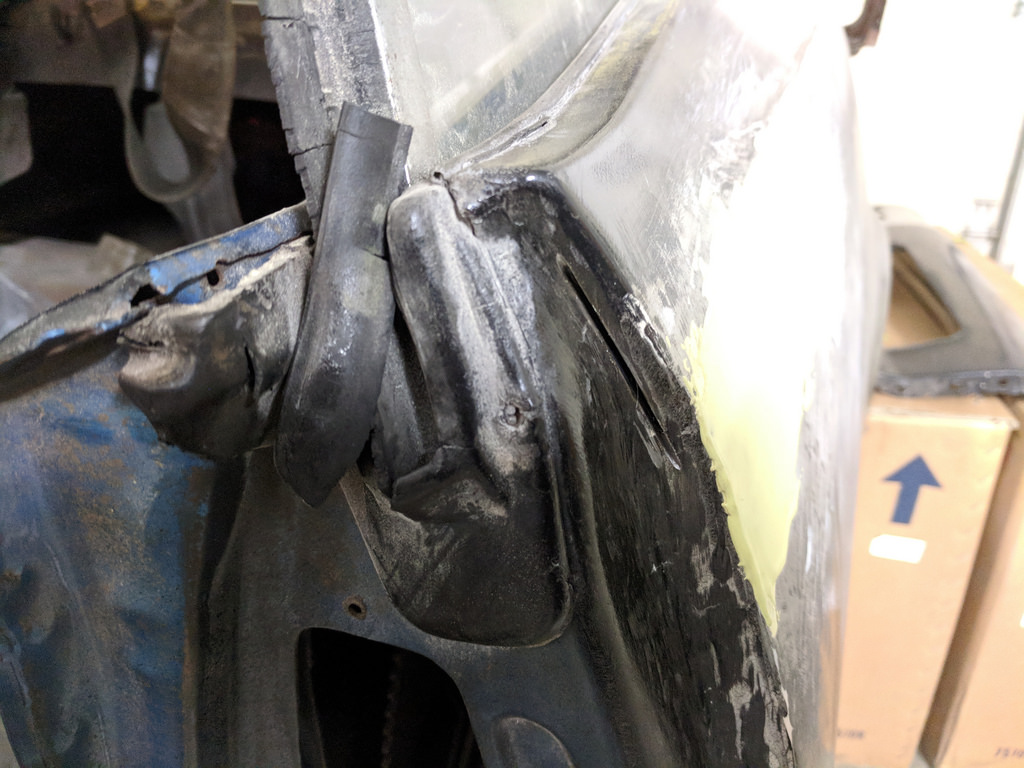
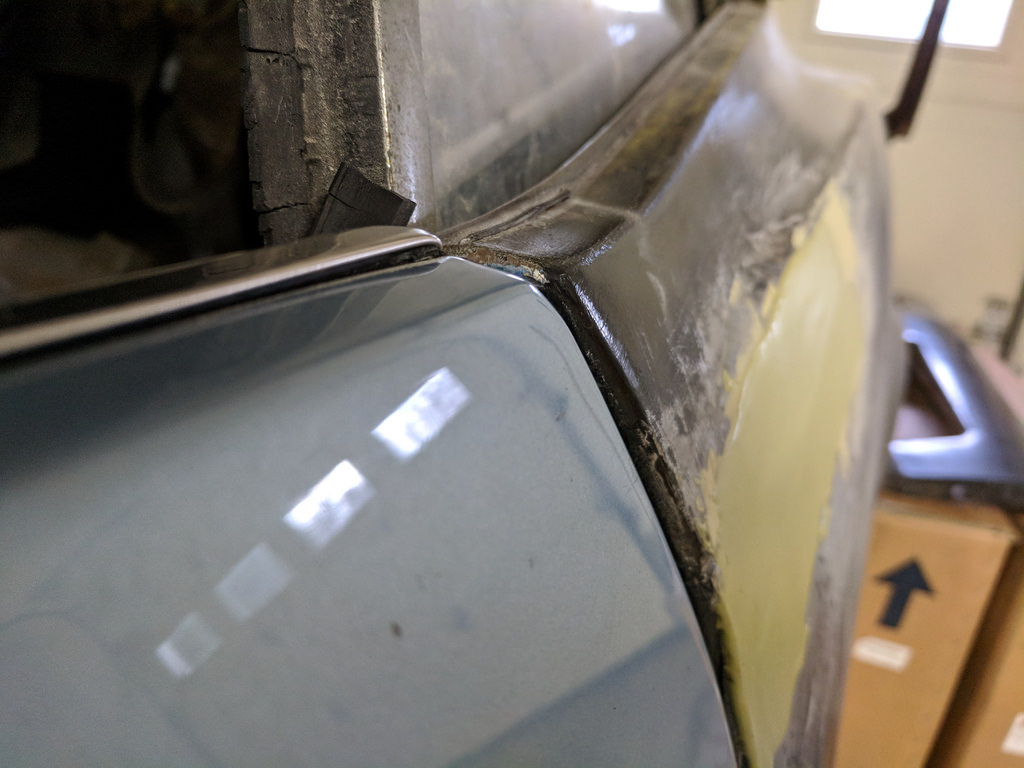
The top edge is flush just the way I wanted. Disregard the body filler, as I put it there too thick when I had some extra filler.
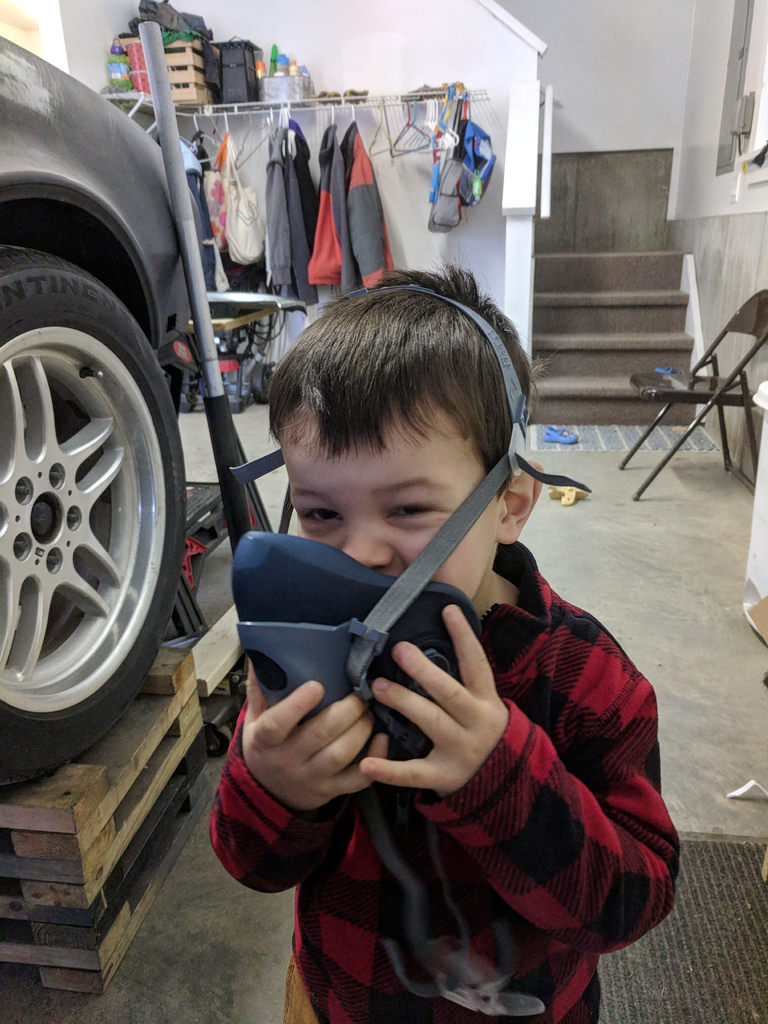
I've also been keeping an eye out for some deals, and I found a new professional paint mask on eBay for $34 bucks! Another thing I learned from my other project.. ALWAYS WEAR A MASK!!
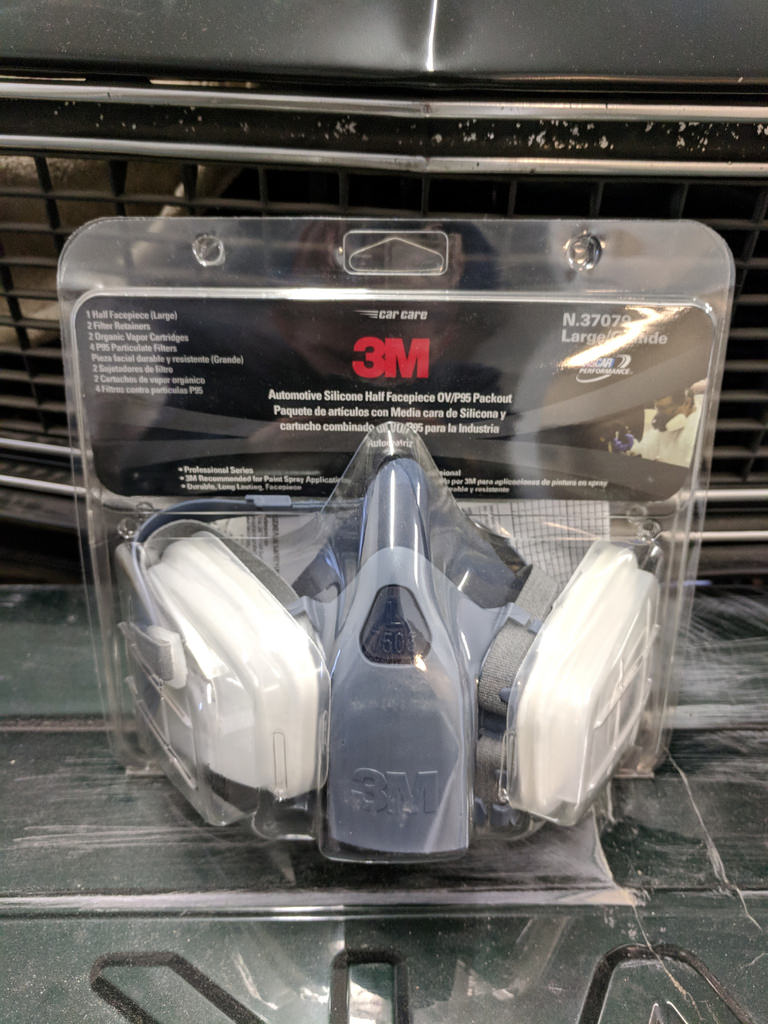
My little guy was curious what this mask was and he asked to try it on. Haha
Hoping to get some more work done tonight.
Thanks,
Ryan
1955 Nomad project LC9, 4L80e, C5 brakes, Vision wheels
1968 Camaro 6.2 w/ LSA, TR6060-Magnum hybrid and etc SOLD
1976 T/A LS1 6 Speed, and etc. SOLD
Follow me on Instagram: ryeguy2006a
-
02-16-2018 #255
 Registered User
- Join Date
- Nov 2006
- Location
- Ma.
- Posts
- 5,567
It's coming along nice Ryan.
Wayne
Car FINALLY home !!!!!! lol
Project FNQUIK https://www.pro-touring.com/showthre...ghlight=FNQUIK
-
02-17-2018 #256
Registered User
- Join Date
- Aug 2007
- Location
- Jonesboro, Arkansas
- Posts
- 2,506
Hey Ryan,
What did you use to fill the gaps between the fender and quarter panel?
Carl Wilson
1968 Camaro - T-56 6 speed - 383 Stroker, 2014 Mustang GT seats. FiTech EFI, Tanks Inc. Tank with Deutschwerks fuel pump.
-
02-19-2018 #257
Registered User
- Join Date
- Sep 2009
- Posts
- 2,709
Carl, I used a small bit of the fiberglass filler topped with a smoother type filler on the passenger side quarter panel. The fender gap is no filler just shims, patience and persuasion with a hammer and dolly. Originally Posted by minendrews68
1955 Nomad project LC9, 4L80e, C5 brakes, Vision wheels
1968 Camaro 6.2 w/ LSA, TR6060-Magnum hybrid and etc SOLD
1976 T/A LS1 6 Speed, and etc. SOLD
Follow me on Instagram: ryeguy2006a
-
02-19-2018 #258
 Registered User
- Join Date
- Apr 2004
- Location
- Cedar Rapids, IA
- Posts
- 999
I love watching door gaping.
Some times I'm fast sometimes I'm half-fast
-
02-21-2018 #259
Registered User
- Join Date
- Sep 2009
- Posts
- 2,709
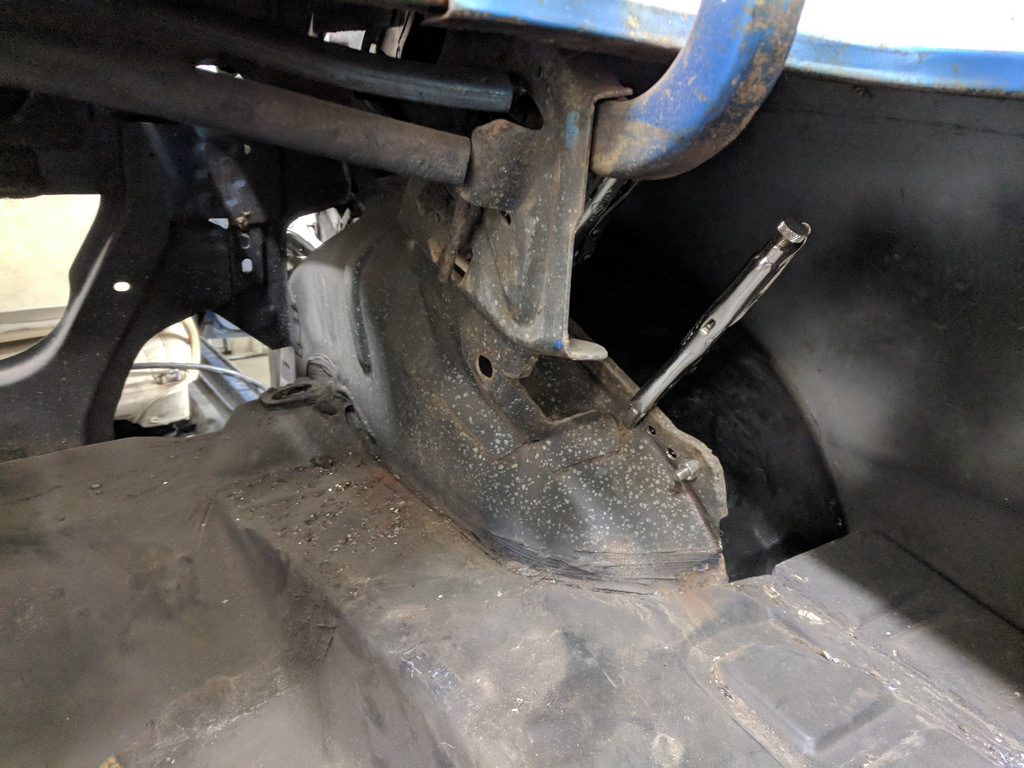
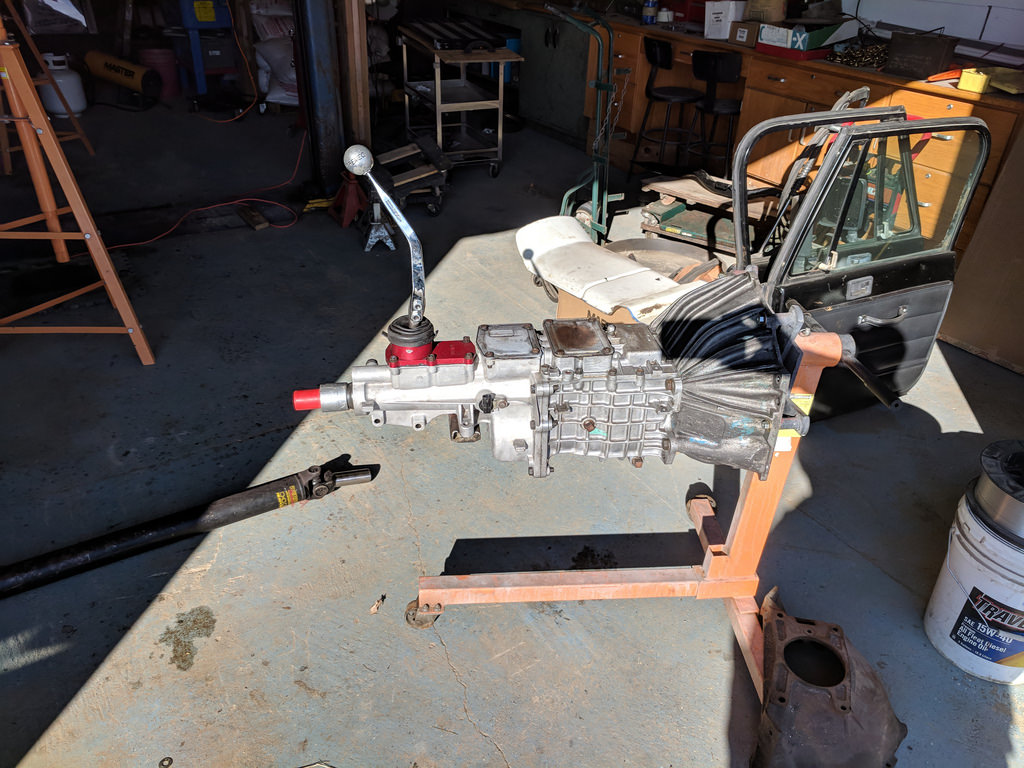
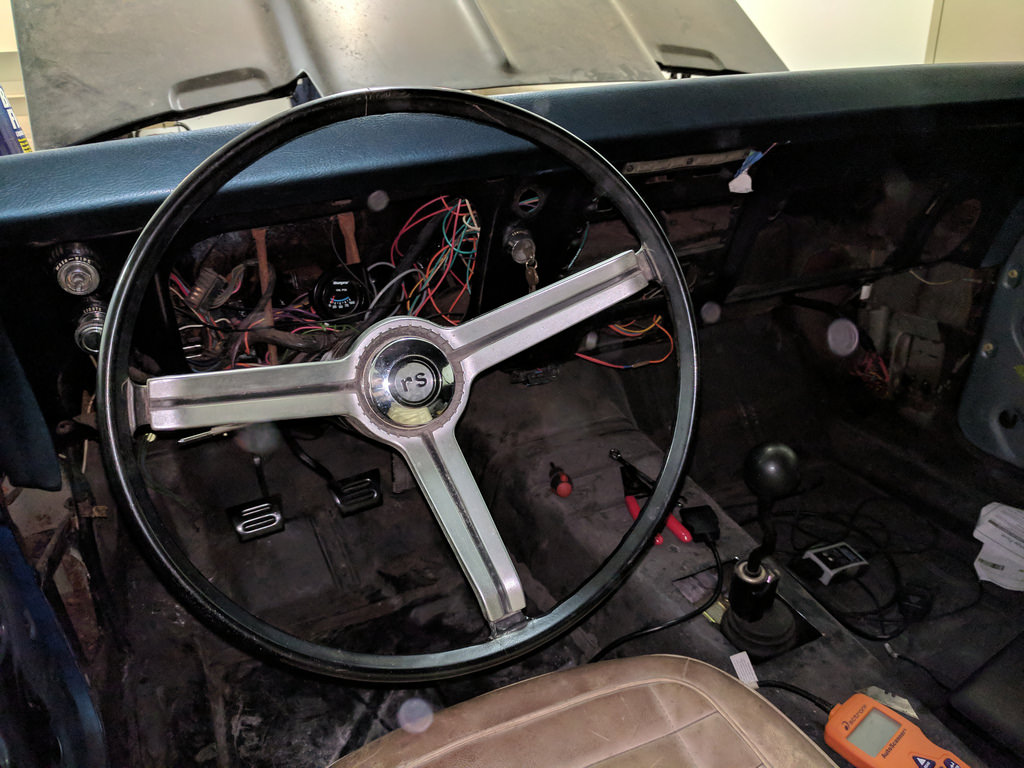
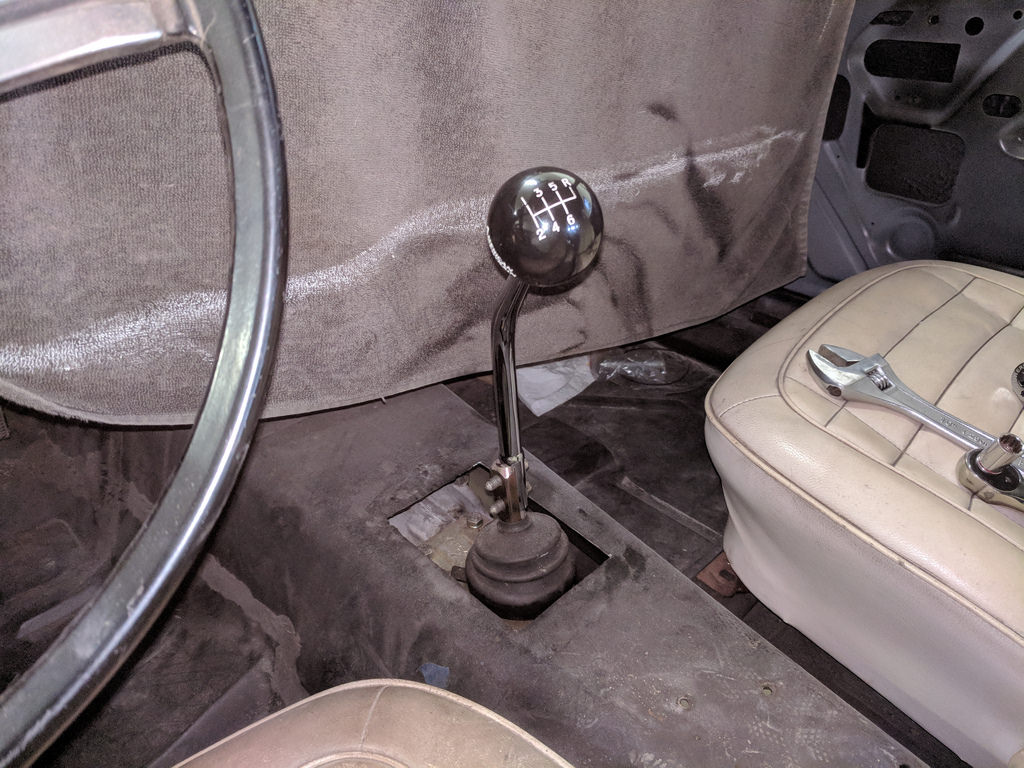
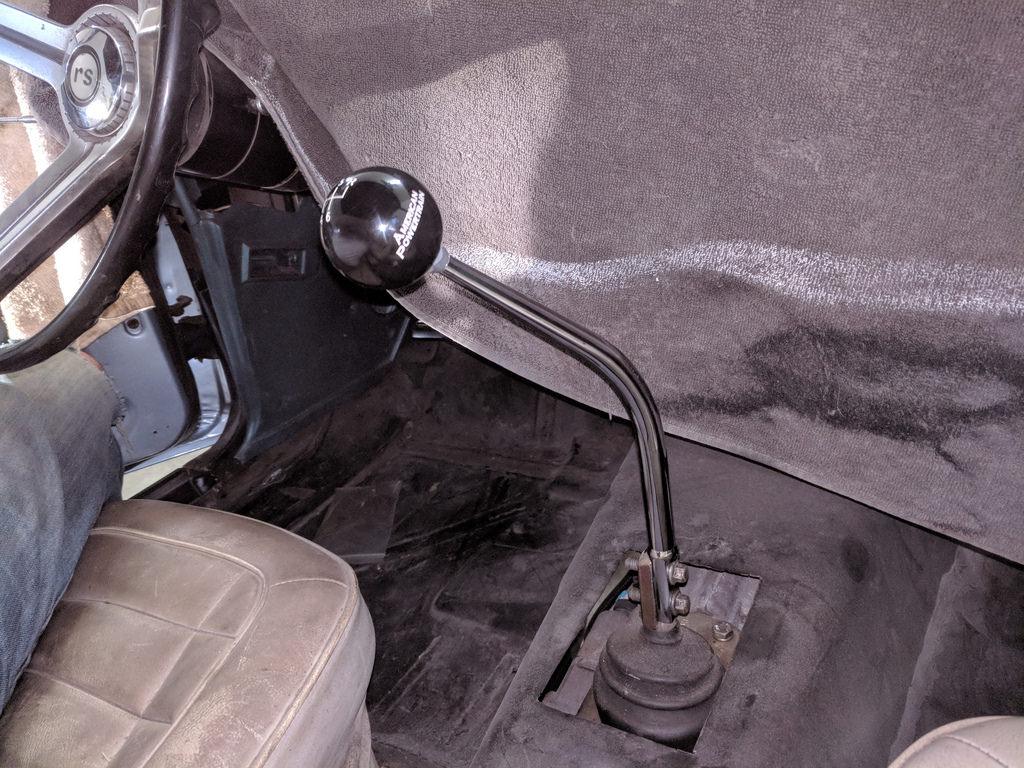
I know it's not a huge update, but it's funny how sometimes the little things make the car feel more complete. I have been keeping my eyes out for a good deal on a shift lever that is more appropriate for a 1968 Camaro. I found a guy who was selling the shift lever that came off of a Magnum T56 from American Powertrain, and he threw in the shifter ball too. I had to put it on as soon as I got it opened up. I love the way that the new shifter feels, it's a little longer throw which I think gives it a more period correct feel.
Before with the stock Fbody shift lever:
With new shift lever:
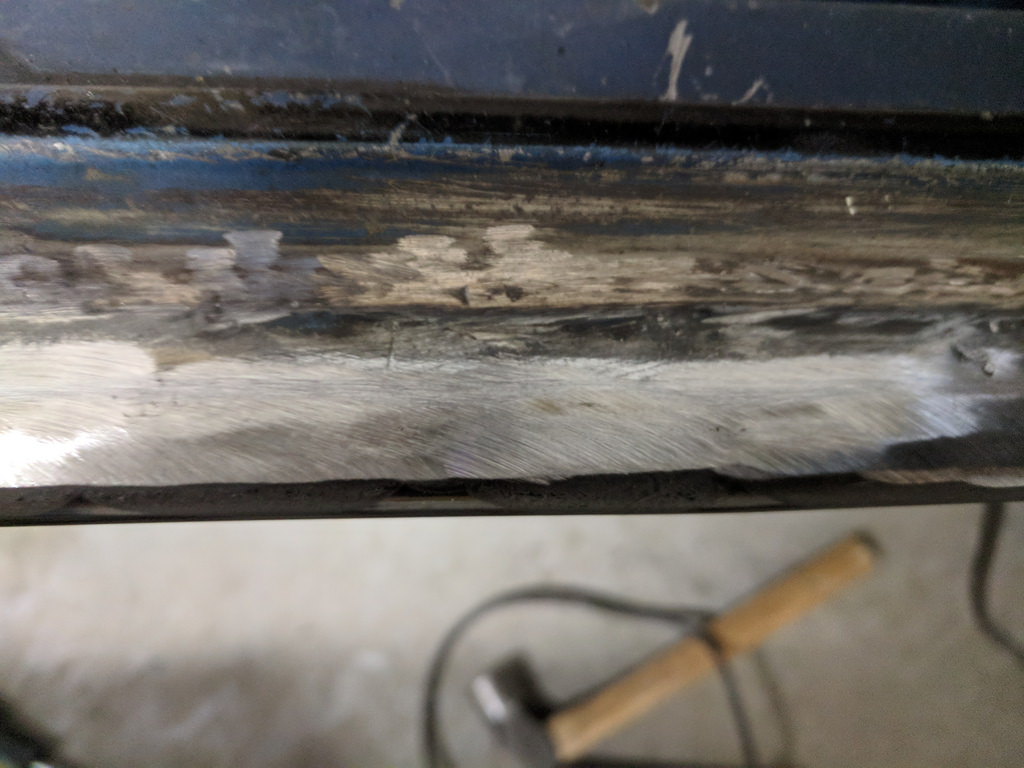
I also managed to get about 45 mins in with the grinder and knocked down the welds with my flap disk. It turned out really well. I will just hit it with a skim coat and it will look like new.
Cheers,
Ryan
1955 Nomad project LC9, 4L80e, C5 brakes, Vision wheels
1968 Camaro 6.2 w/ LSA, TR6060-Magnum hybrid and etc SOLD
1976 T/A LS1 6 Speed, and etc. SOLD
Follow me on Instagram: ryeguy2006a
02-21-2018 #260
Registered User
- Join Date
- Sep 2015
- Posts
- 13
Looking good and nice progress

 Reply With Quote